Alexa Echo + ESP 8266 = Smart Power Plug
by ductin in Circuits > Arduino
18643 Views, 53 Favorites, 0 Comments
Alexa Echo + ESP 8266 = Smart Power Plug
This instructable use ALEXA ECHO direct control ESP8266.
My server just support authorization ESP8266 to Amazon server.
My server do not backup your data.
Vote for me :D Thank you!
Requirements
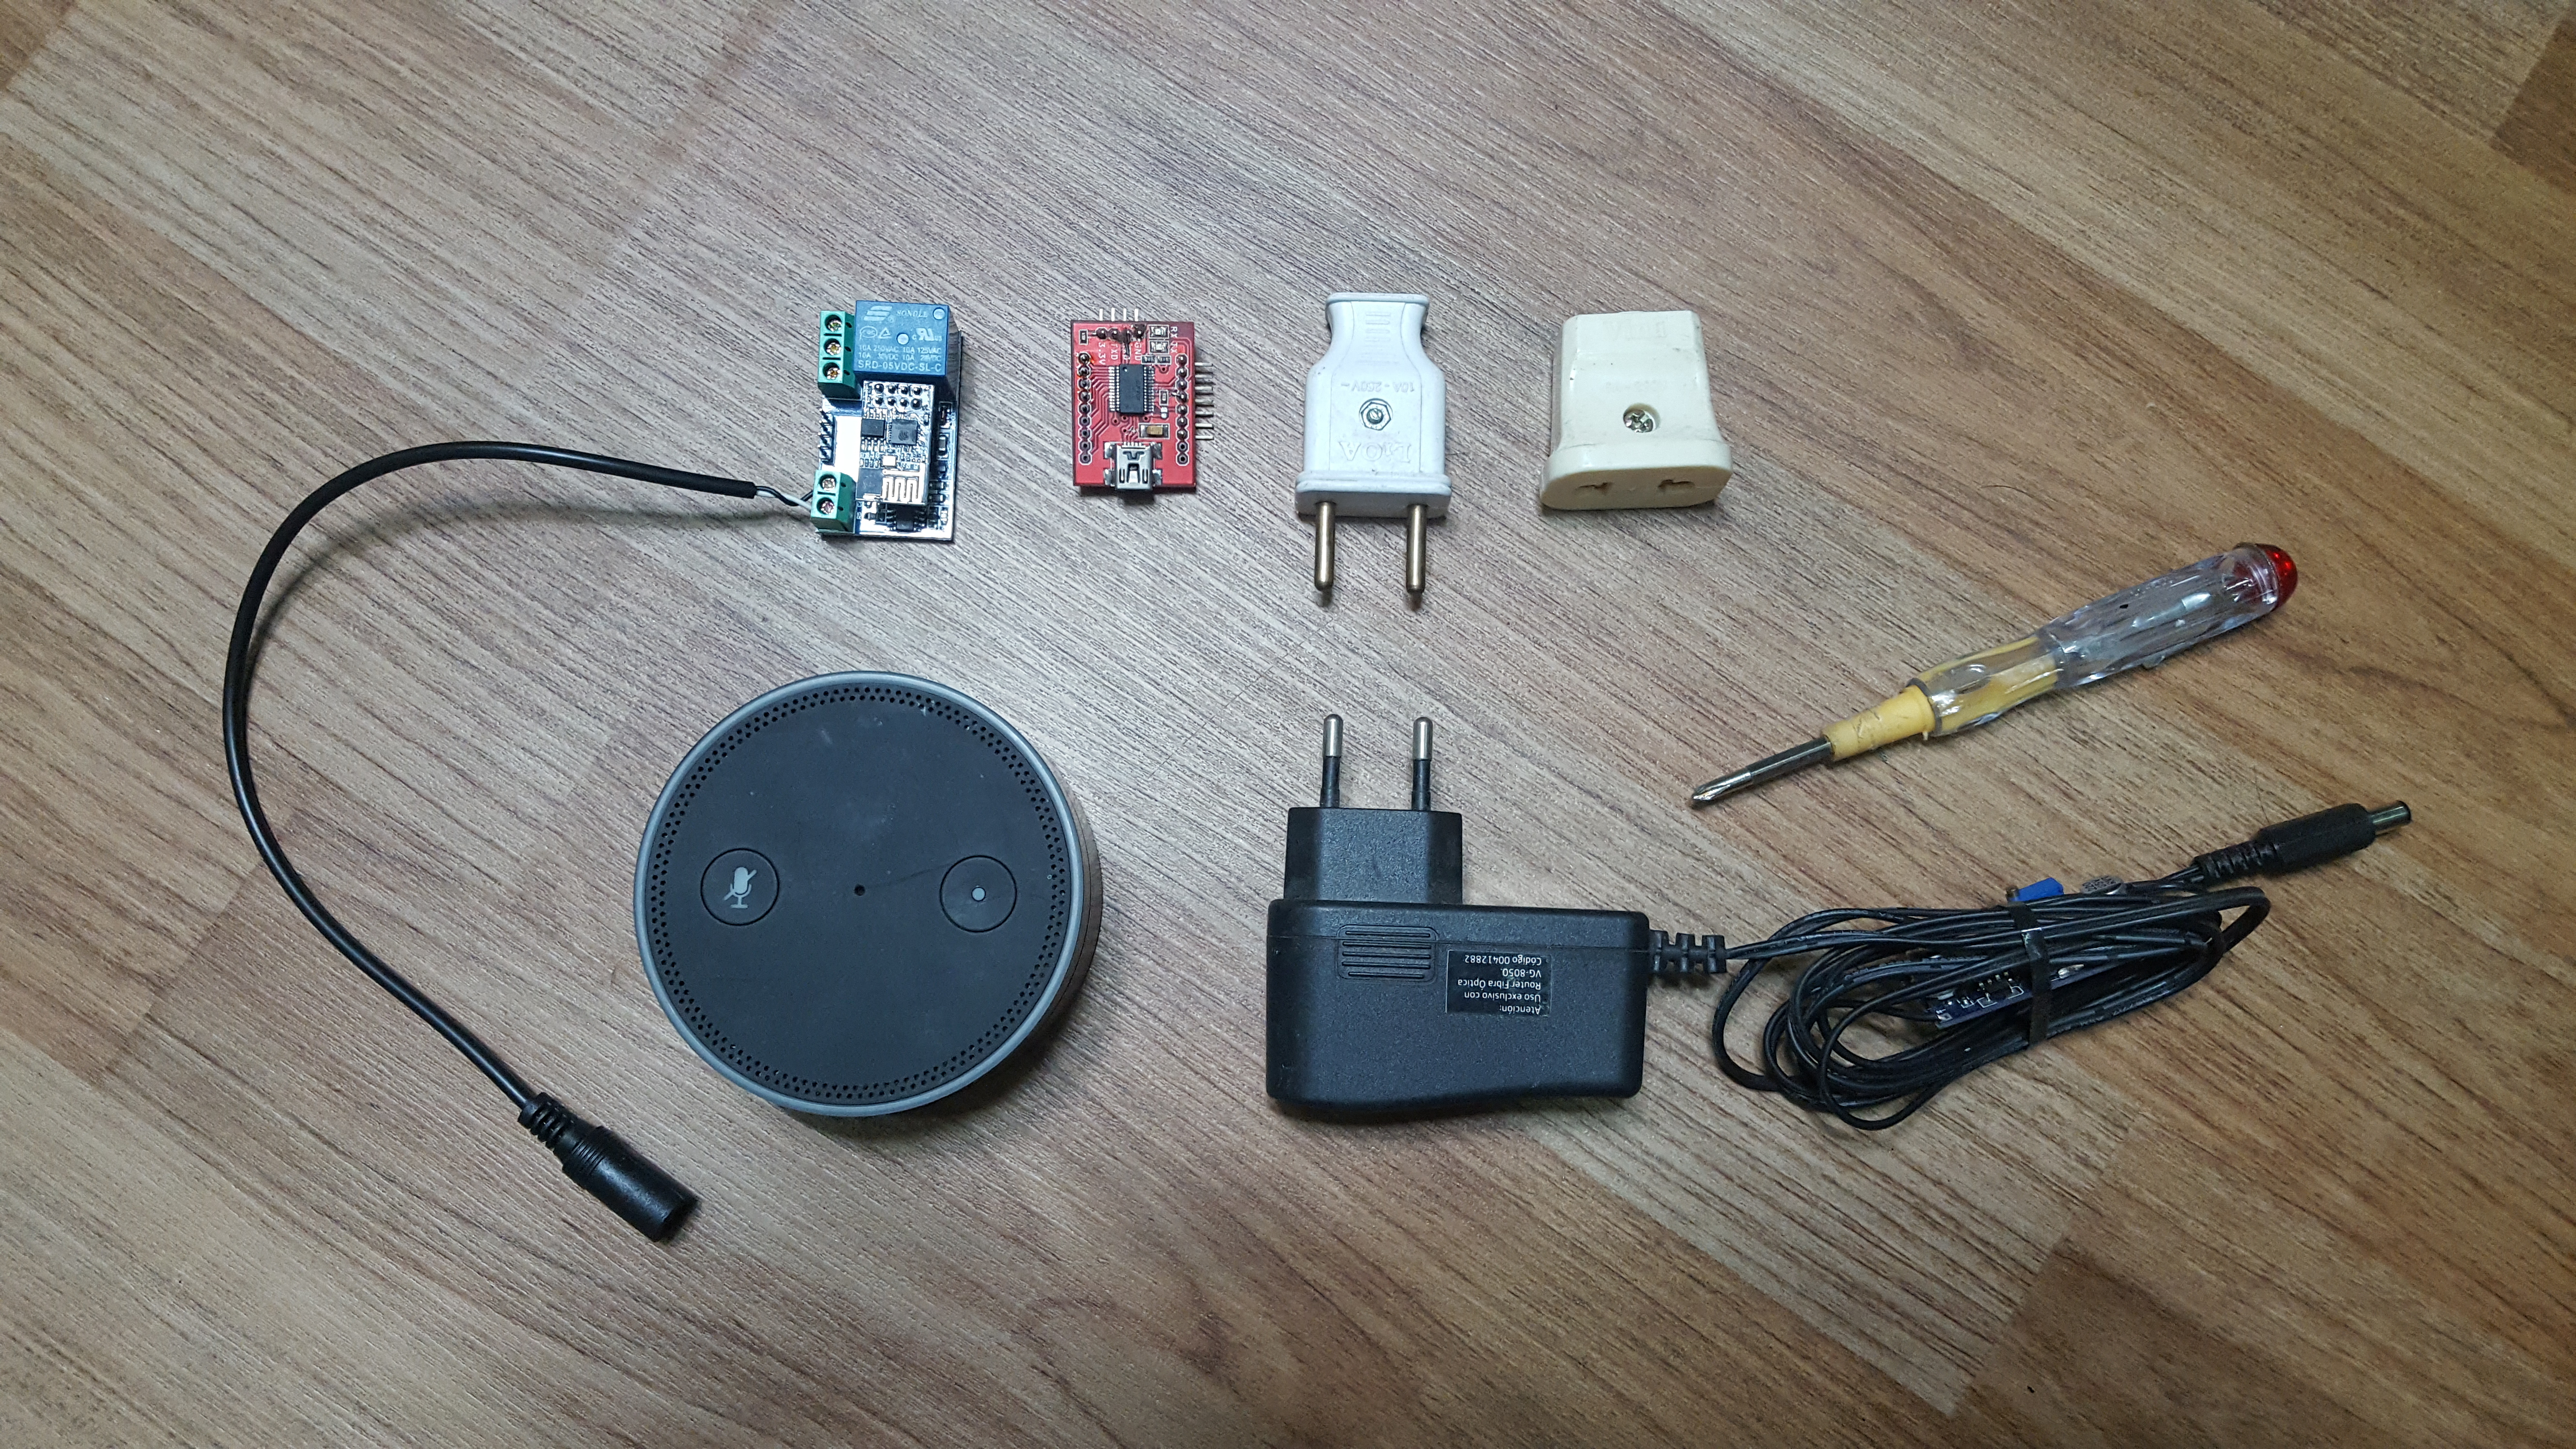
HARDWARE
-
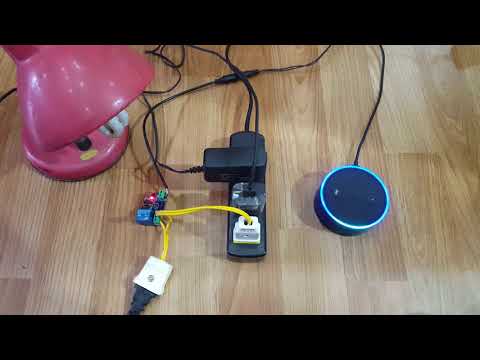
ESP8266 WiFi 5V 1 Channel Relay Delay Module
https://www.amazon.com/WHDTS-ESP8266-Channel-Trans... -
FTDI USB to serial module (not required if use nodemcu)
https://www.amazon.com/Qunqi-FT232RL-Serial-Adapter-Arduino/dp/B014Y1IMNM - Amazon Echo
- Male and female power plug
SOFTWARE
Flash New Frimware
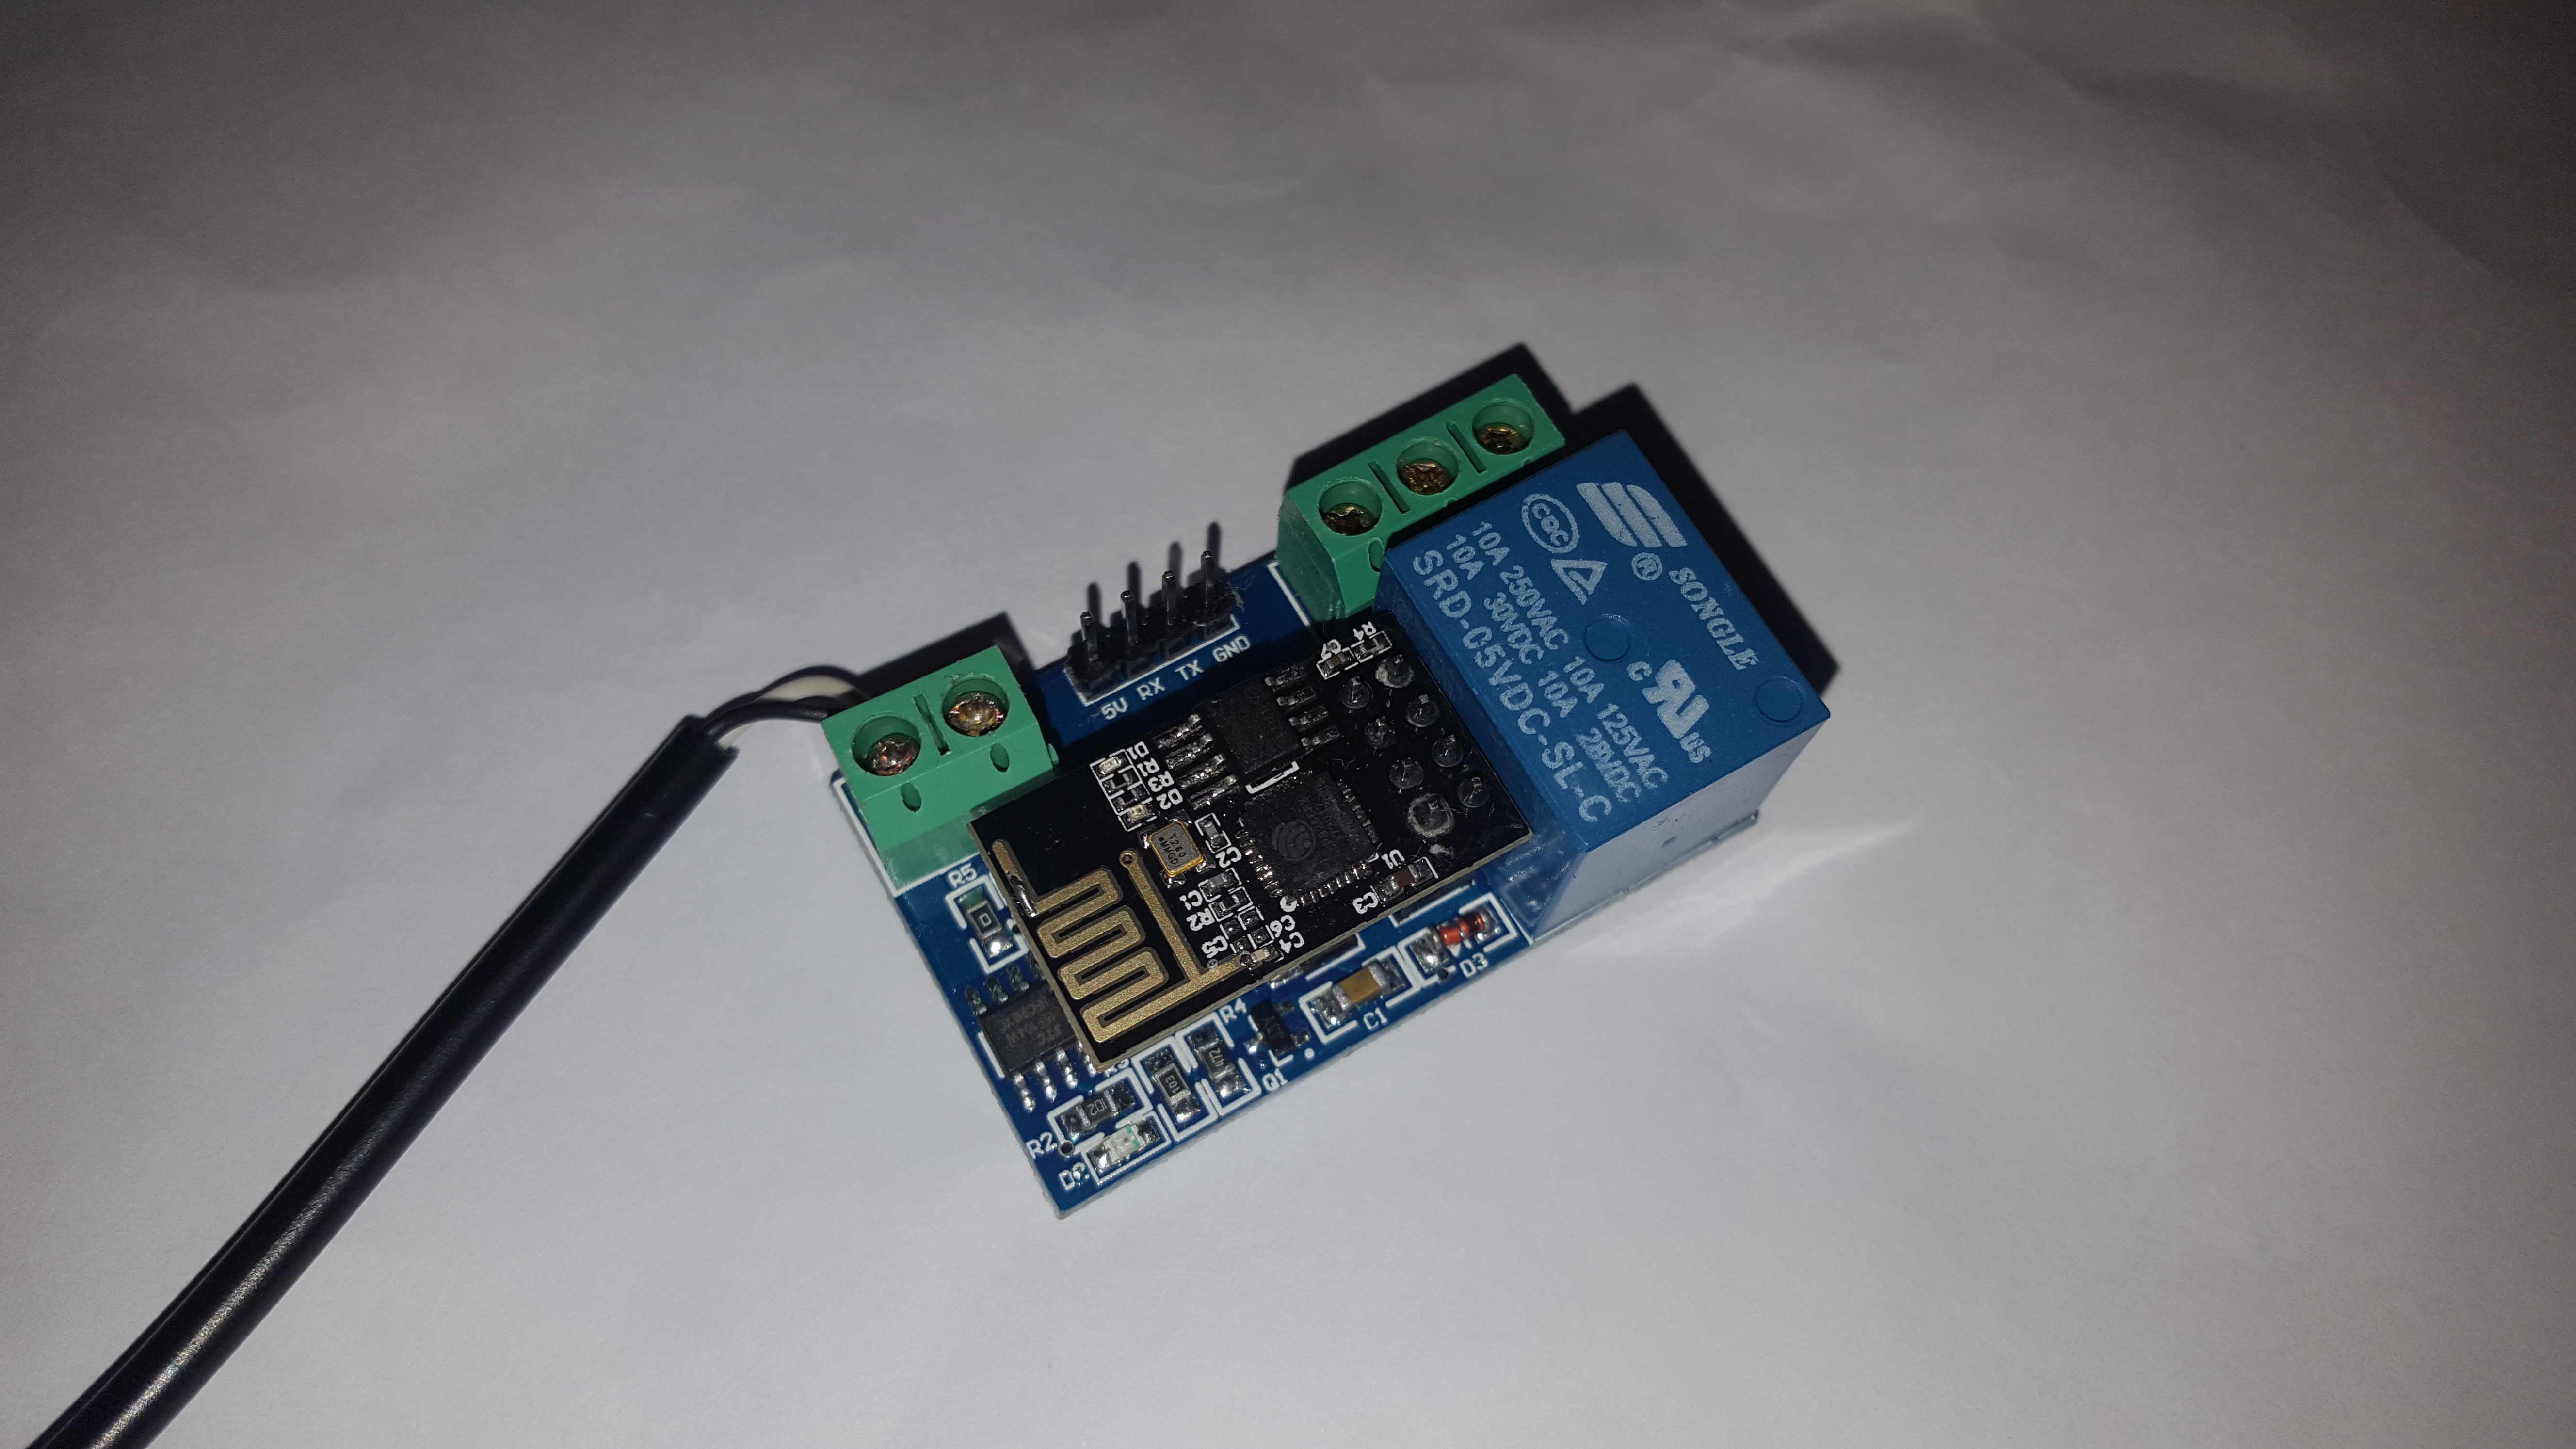
1. Unplug ESP8266 from module

2.Connect module to USB to Uart module:

GND -------- | GND TX | -------- RX
------- | IO2 EN | -------- 3V3
GND ------- | IO0 RST | -------- BUTTON -------- GND
TX ------- | RX 3V3 | -------- 3V3
==================================================
BEFORE FLASH, PRESS BUTTON TO RESET
(IO0 alway connect to GND -> ESP8266 goto flash mode after reset)
==================================================
3.Flash my firmware
- Download my sketch:
- Open in Arduino IDE, and change:
- wifi_ssid: your wifi name
- wifi_password: your wifi password
- control_password: your secret password
- friendlyName: your device name
- ip/gateway/subnet: ESP8266 IP static for NAT
- In Arduino IDE. Select Tool:
- Board: Node MCU 0.9 ()
- Upload Speed: 230400
- Port: Select your USB to Uart port
- Hit Upload icon (before hit, press reset button in step 2)
4.Connect ESP to module again

5.Connect power plug
Config NAT & DDNS
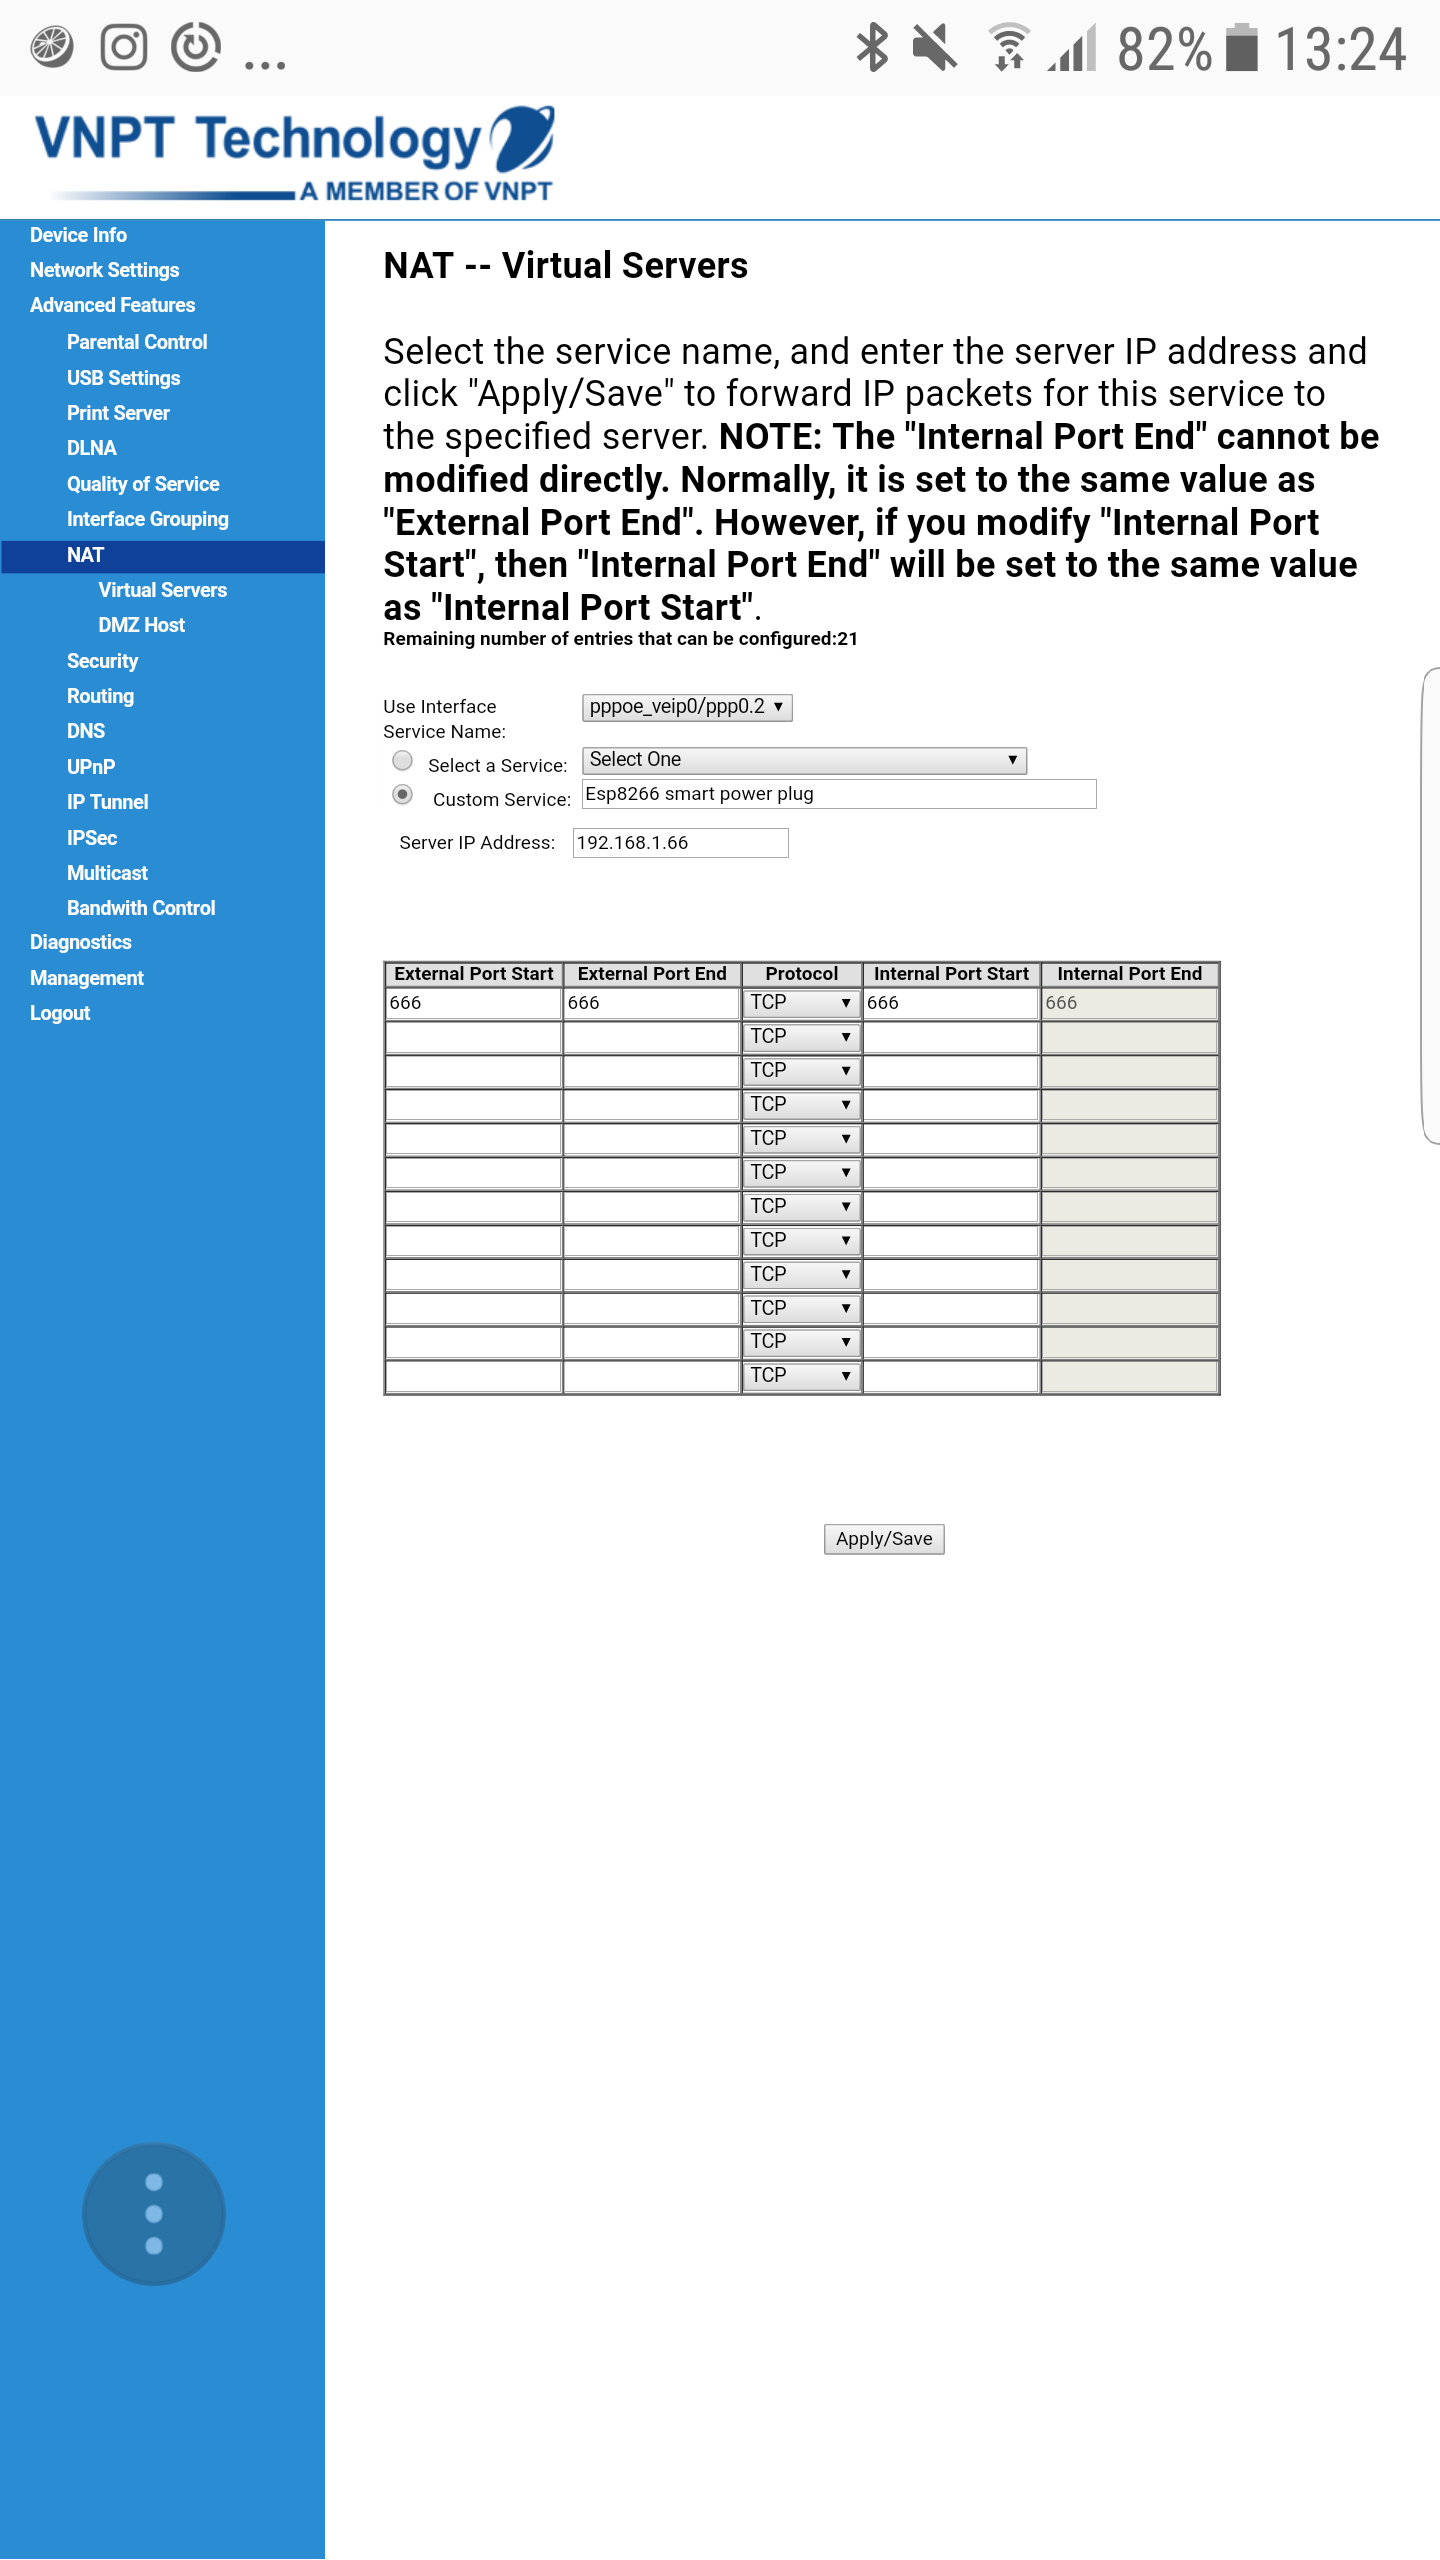
We need open port (default 666) to control from Amazon server to our ESP8266.
I just illustrated with my router. You can find out how to open your router port on the internet and open TCP port 666 to the configured ip in step 2
https://m.wikihow.com/Open-Ports
if you do not have a fixed ip. You must use a dynamic domain name. You can find many free DDNS service providers.
Control by ALEXA ECHO
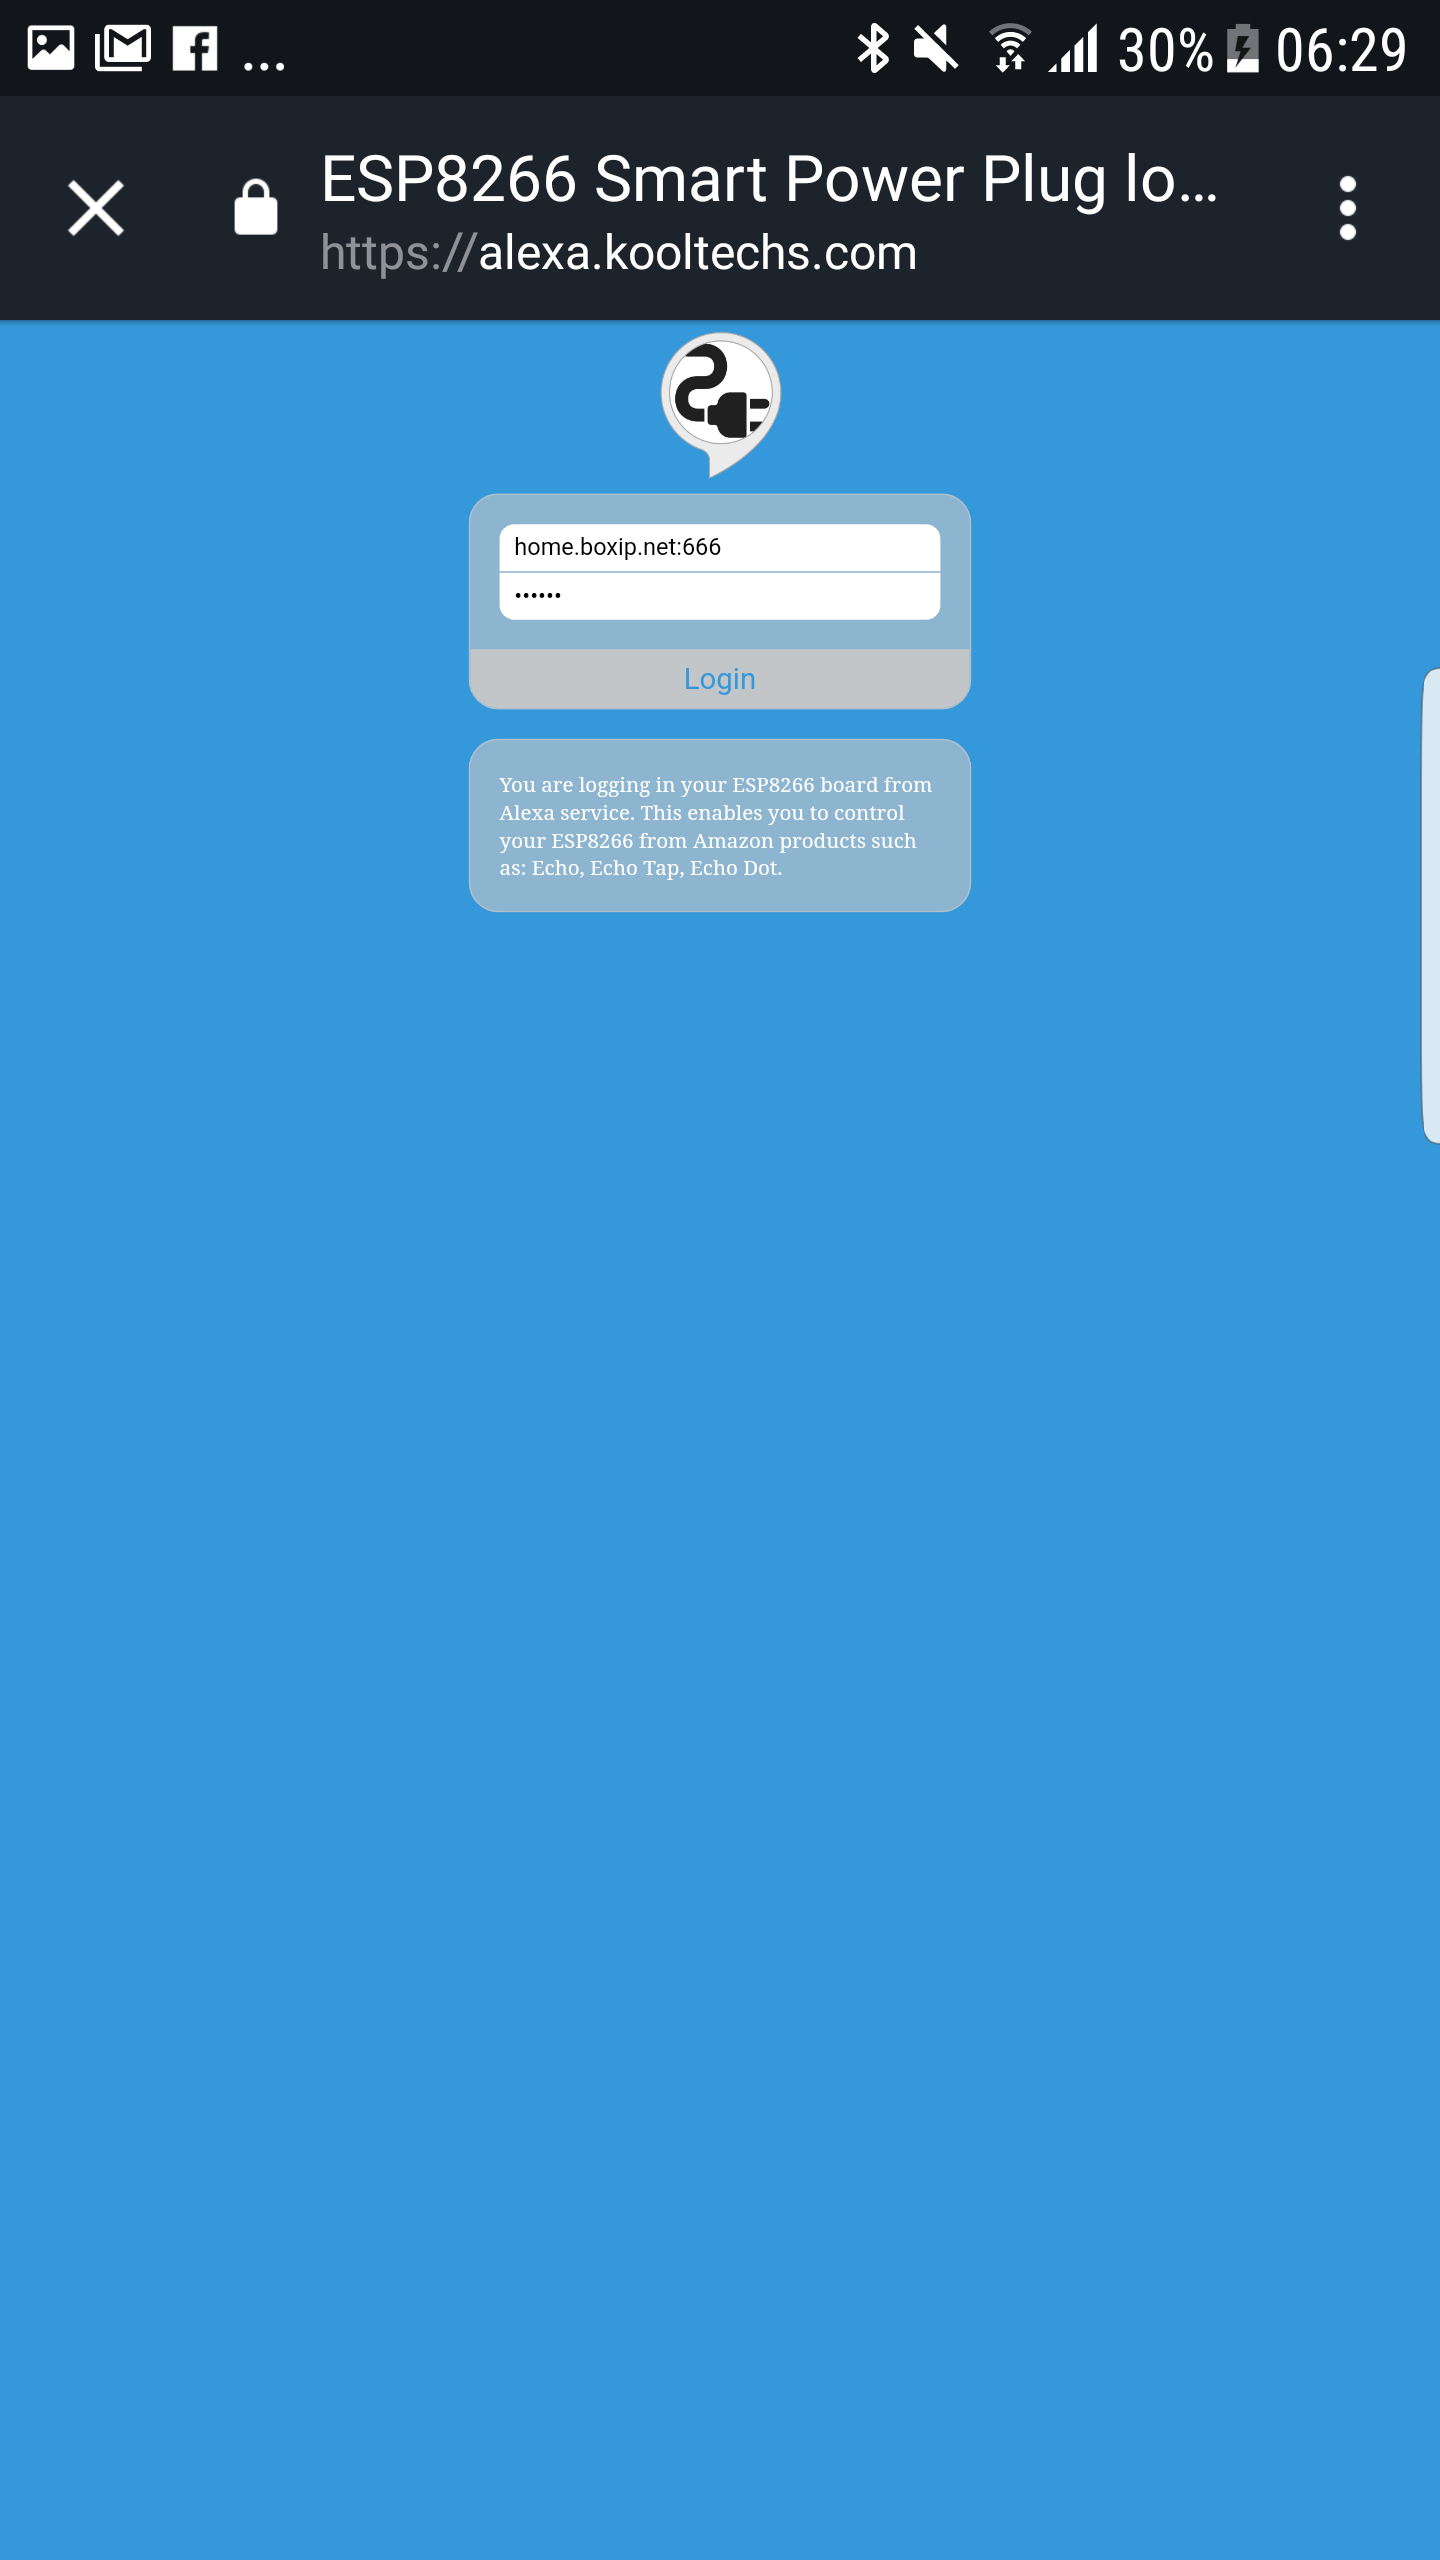
1.Enable my skill named "ESP8266 Smart Power Plug
- Alexa app > Select menu > Skill
- Search Skill named "ESP8266 Smart Power Plug"
- Click to Skill
- Click ENABLE
- Login with your Static IP or DDNS domains (include your port - default 666)
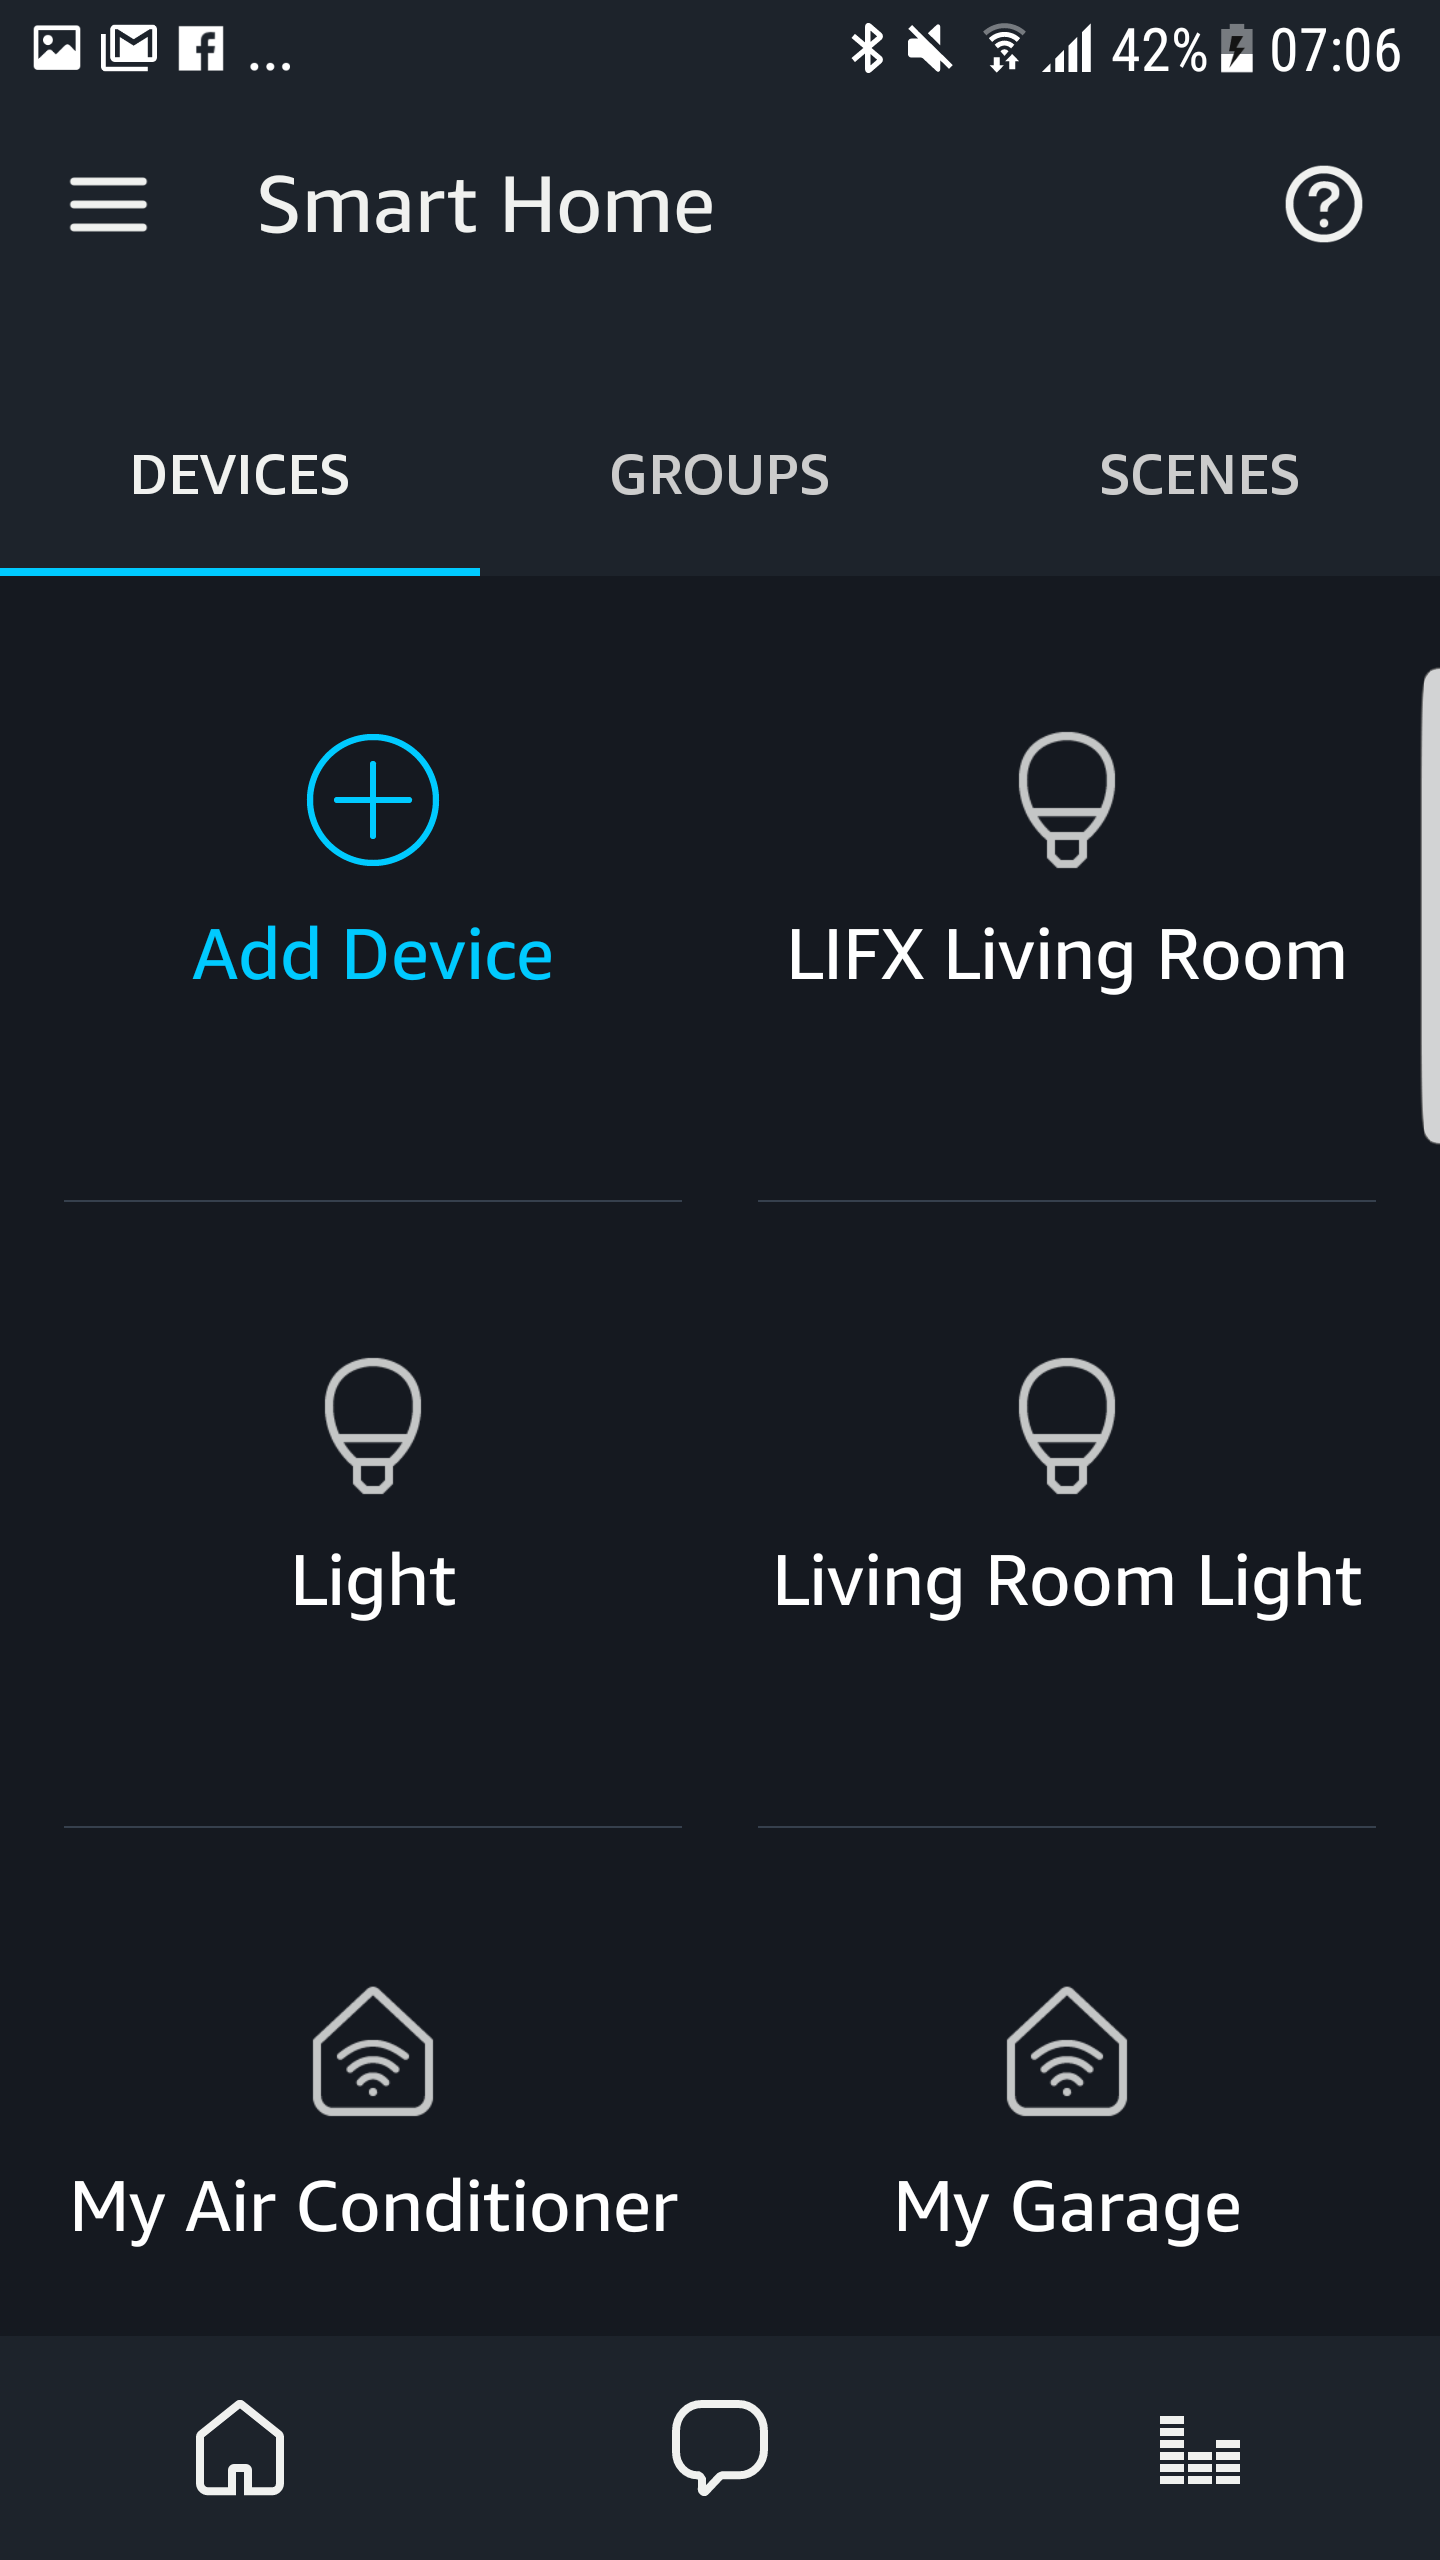
2.Discover device
Alexa app > Select menu > SmartHome
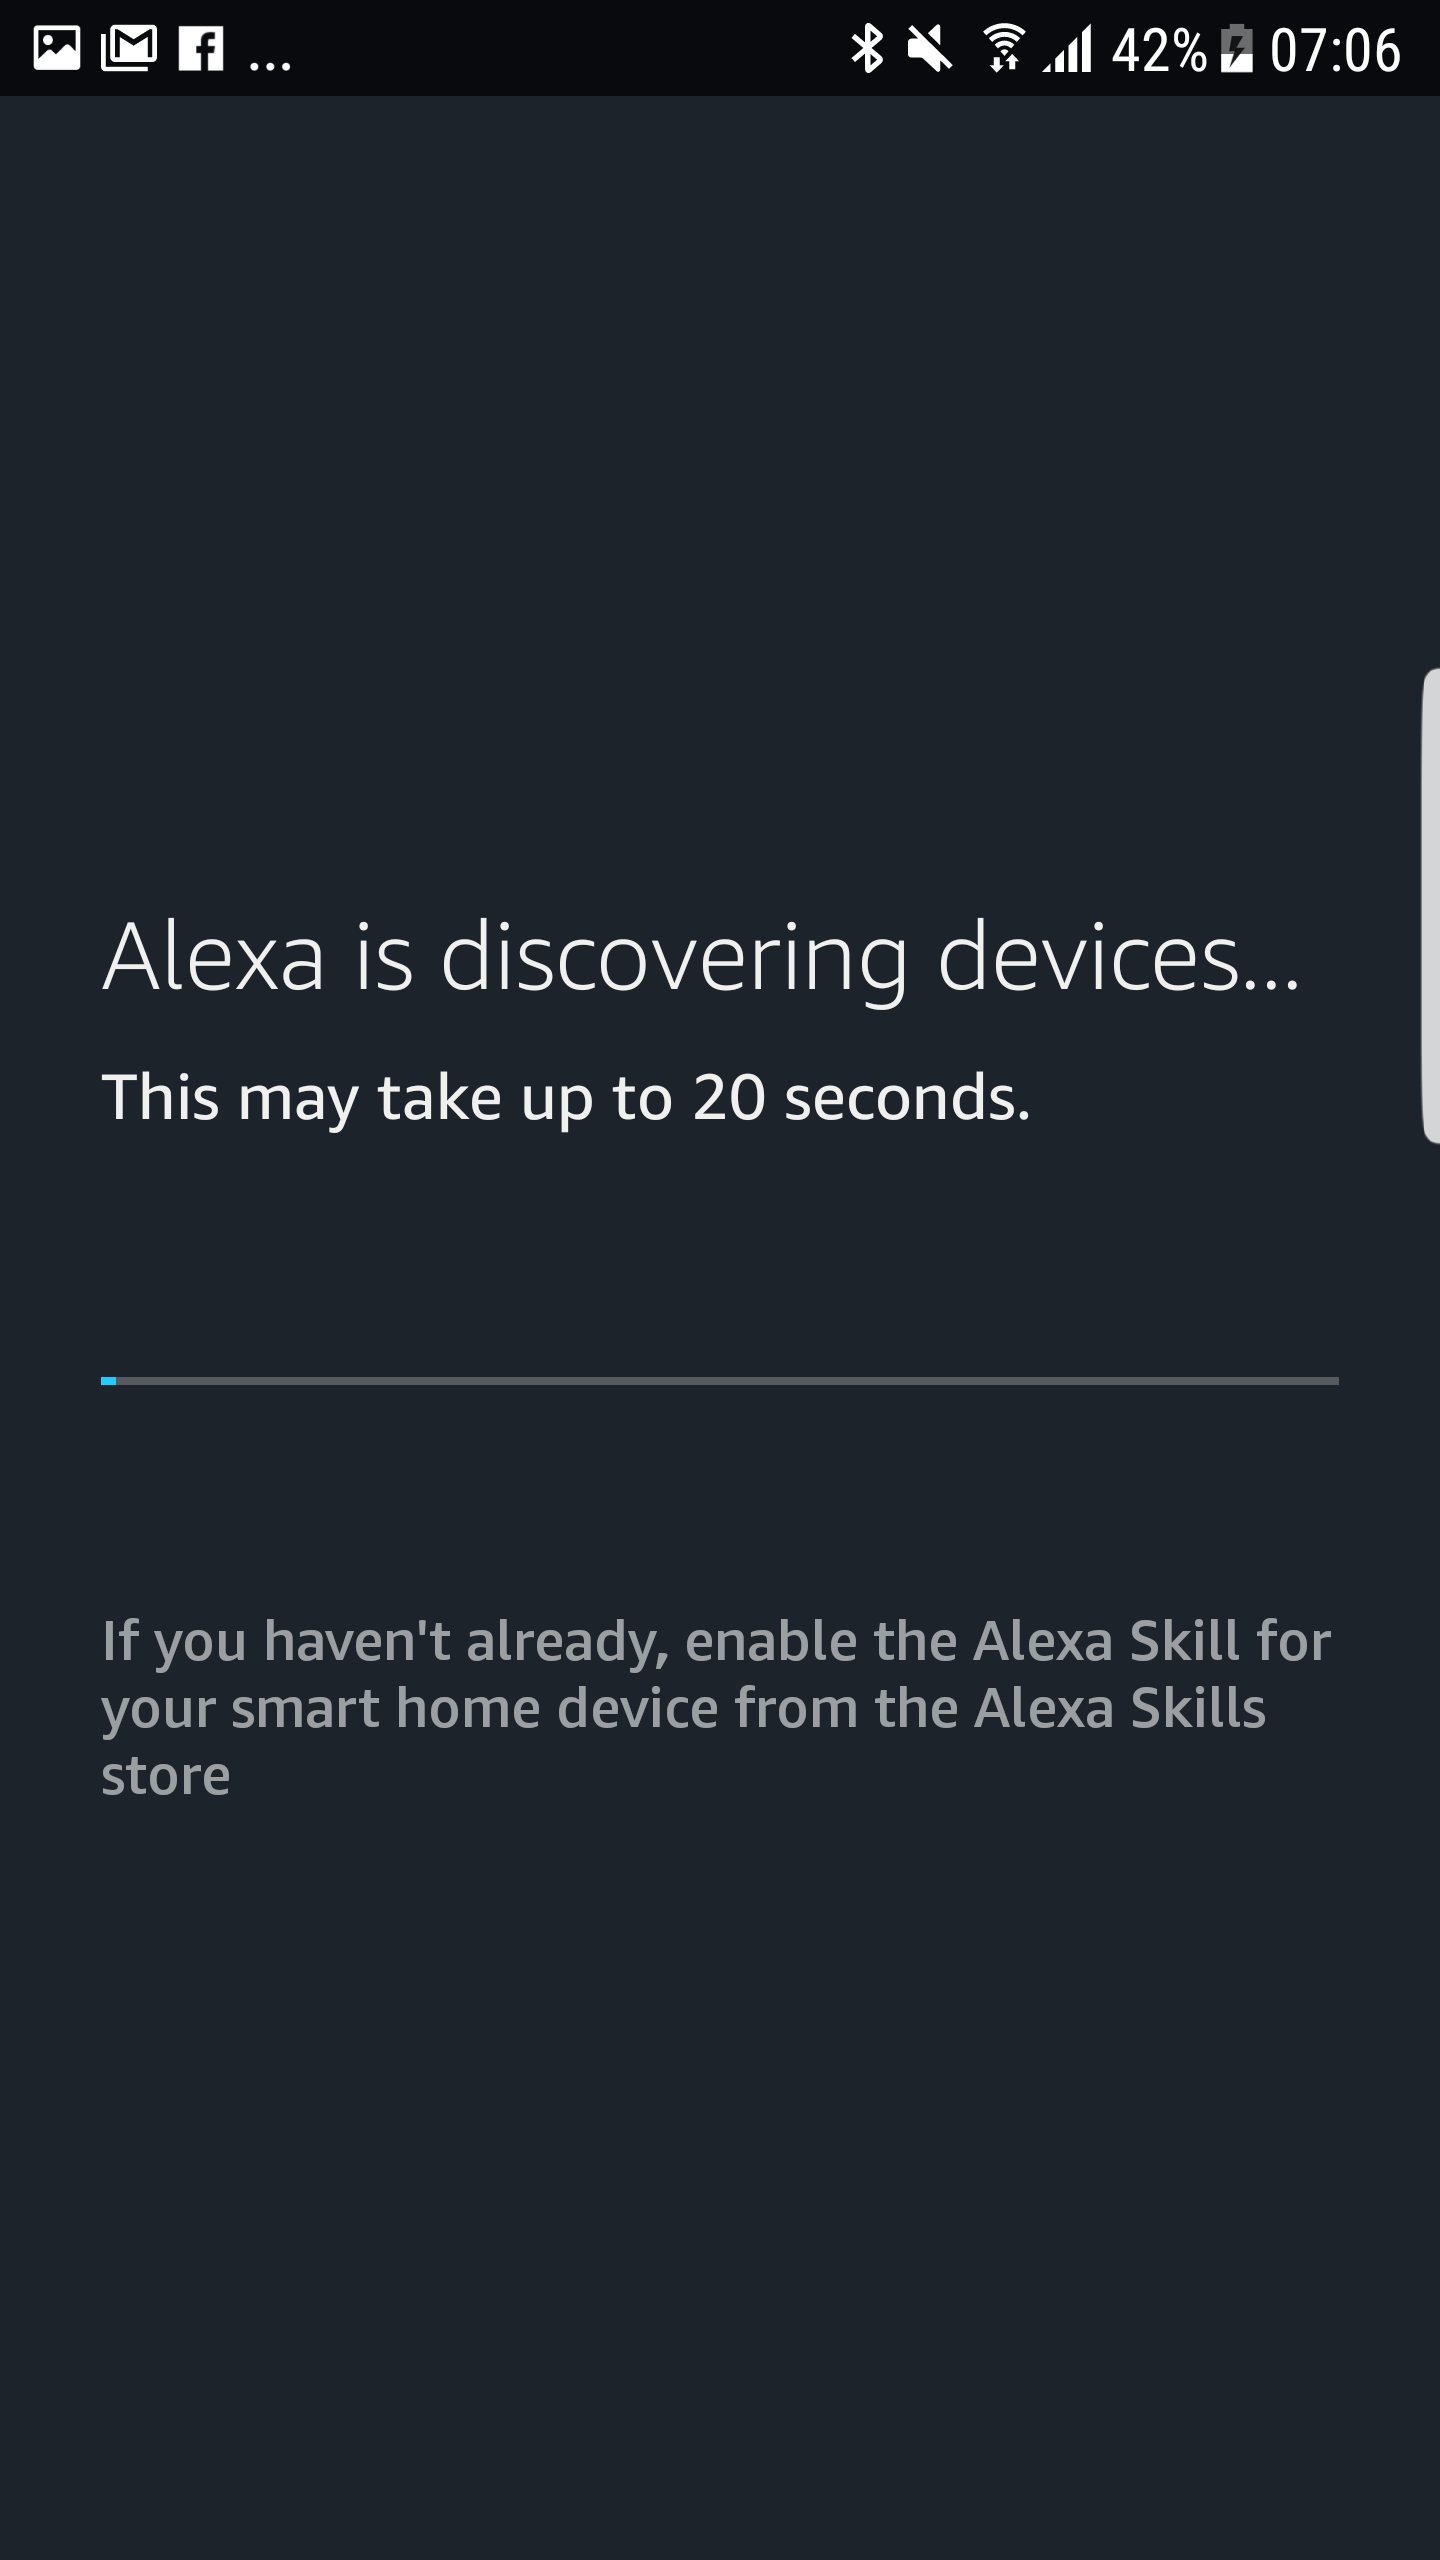
- Click Add device and wait 20 seconds
- Now you can see ESP8266
3.Control:
"Alexa, turn on/off <your ESP named in step 2>"