Alcohol Vending Machine
by jorgevalladares354 in Design > Digital Graphics
409 Views, 1 Favorites, 0 Comments
Alcohol Vending Machine
Welcome to a new project, this is an interesting project and I hope that you enjoy it. Continue with the steps, coming with the material that we are going to using to do this.
Materials
-3D Printer
-The app Fusion 360
-The aptitude to do this
Draw the First Part
.png)
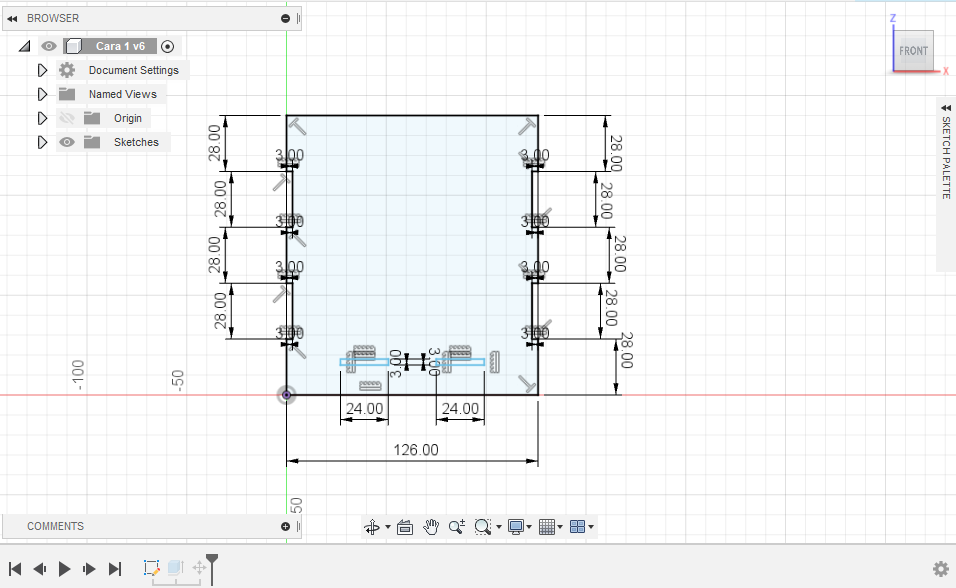
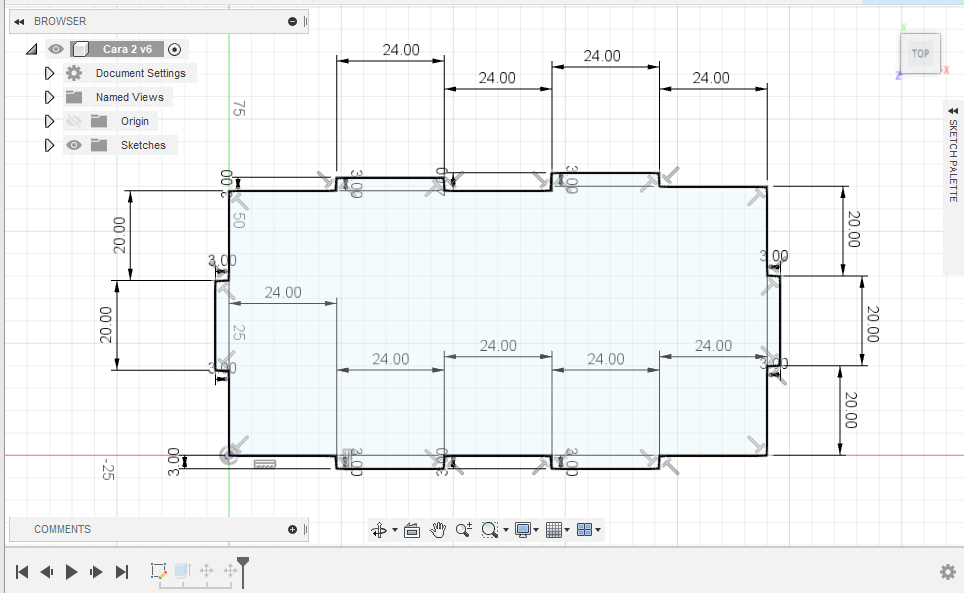
In Fusion360, in the Y with X-axis, start to draw a pice with 126 in below and 140 high and there in down in the middle draw two small rectangles of 24x3. In the end, the result is like a puzzle piece
Extrude the Piece
.png)
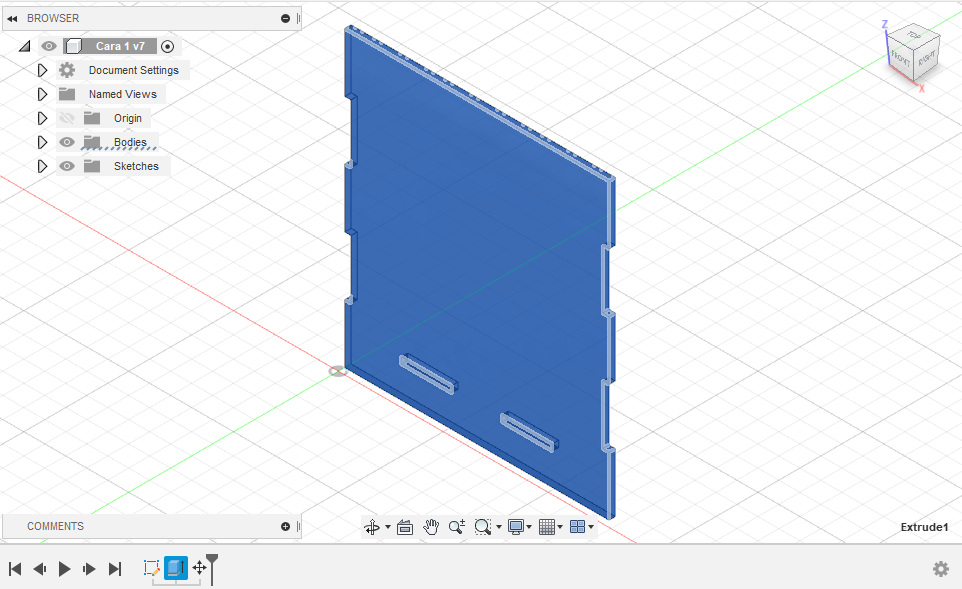
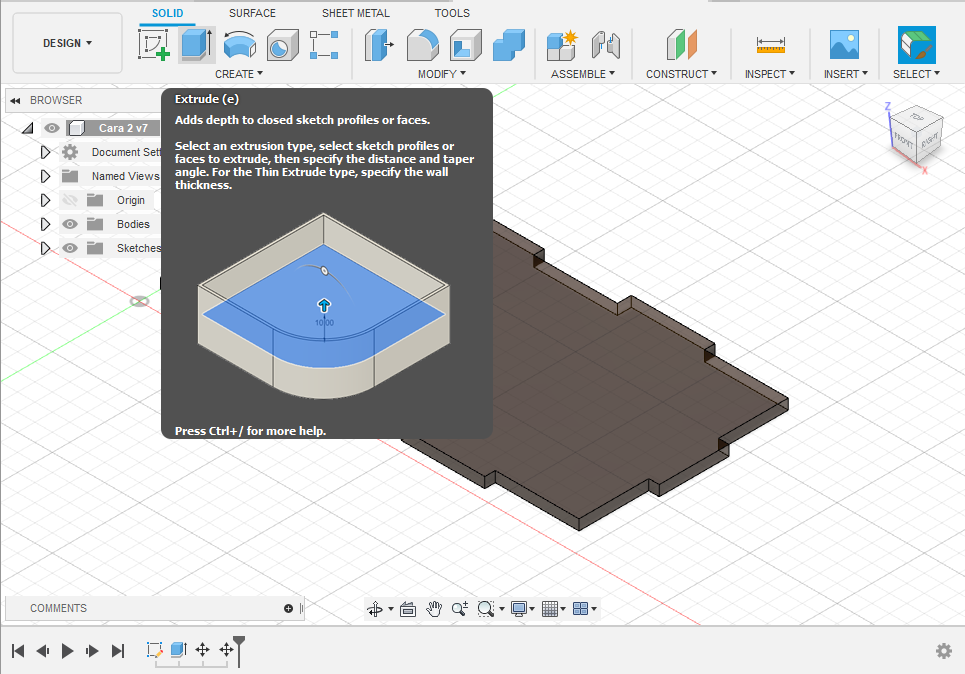
Then with help of the tool extrude, give the thickness of 3 to the piece, and that we are going to do for all the pieces.
Color in the Piece
.png)
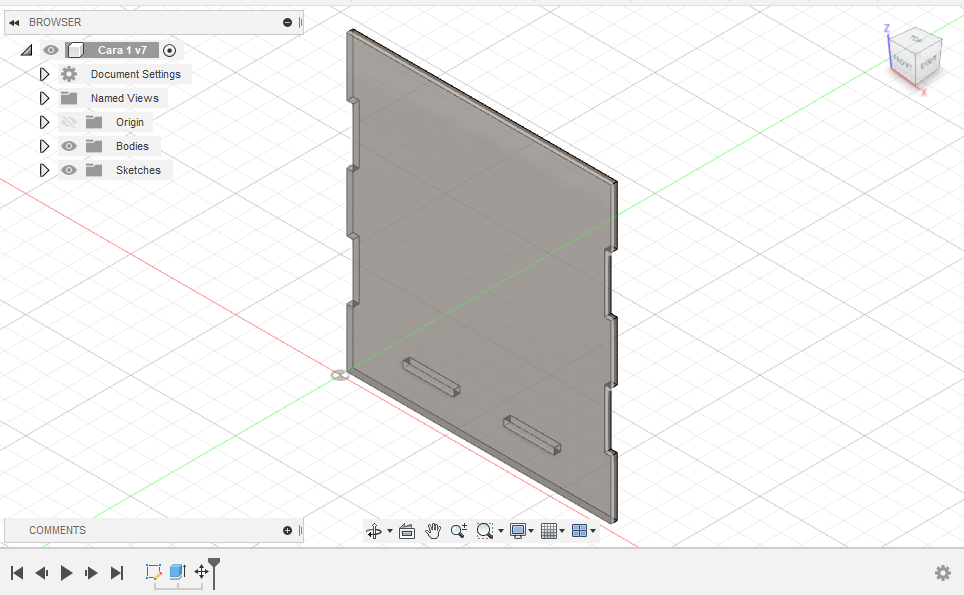
When we want to put color, we need to change the appearance of the object and for that, we need to do double click in the piece and then right-click, there appear the menu of option to do the object the circle with rainbow color is the one that we are going to use. There we found different styles of texture or type of material to use, apart from the color.
Draw the Second Part
.png)
In the X-axis with Z, star to draw the piece, that has the side of 120 x 60. And there in the horizontal part, we have 2 protruding tops and in the vertical part only one. And finally, extrude the piece like the other one.
Extrude the Piece Other Option
.png)
If we can't found the tool of extruding in the menu bar that we have, another option like in the previous step is to do double-click y the piece, then right-click to see again the option and there appear too the tool extrude and just click there and do the respective extruding of the piece with a thickness of 3.
Draw the Third Part
.png)
In this part, we are going to use the Y and Z arches, because this part is lateral of the machine because at the time to assemble the part this part appears in the part of we draw and is easier to move around this. And we don't do a lot of movement.
Draw the Last Part
.png)
.png)
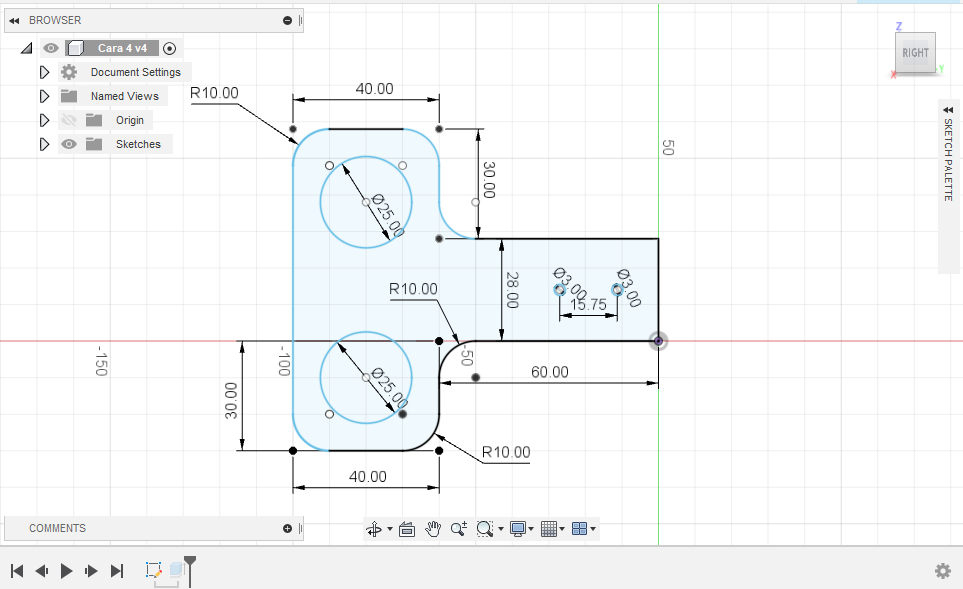
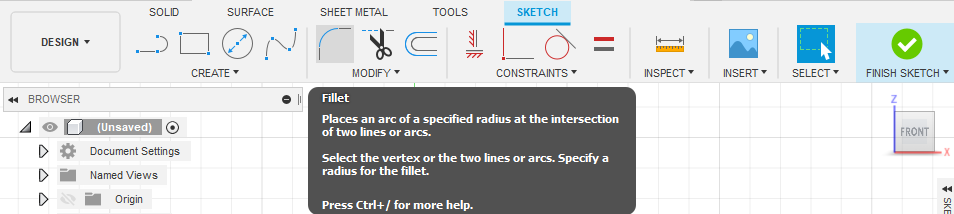
The last piece that we are going to use is the piece that is going to serve to support the alcohol vending machine, in one of the lateral, for we are going to draw this in the axis y with x of the lateral for having a good position at the time to insert the piece in the finish assemble. Oh in this piece we are going to use a special tool that will help us to give curves in the laterals of the piece, the tool name is FILLET, and we just click the two lines of union and put how many of radio is necessary in this case is 10 for all f the corners.
Duplicate the Document
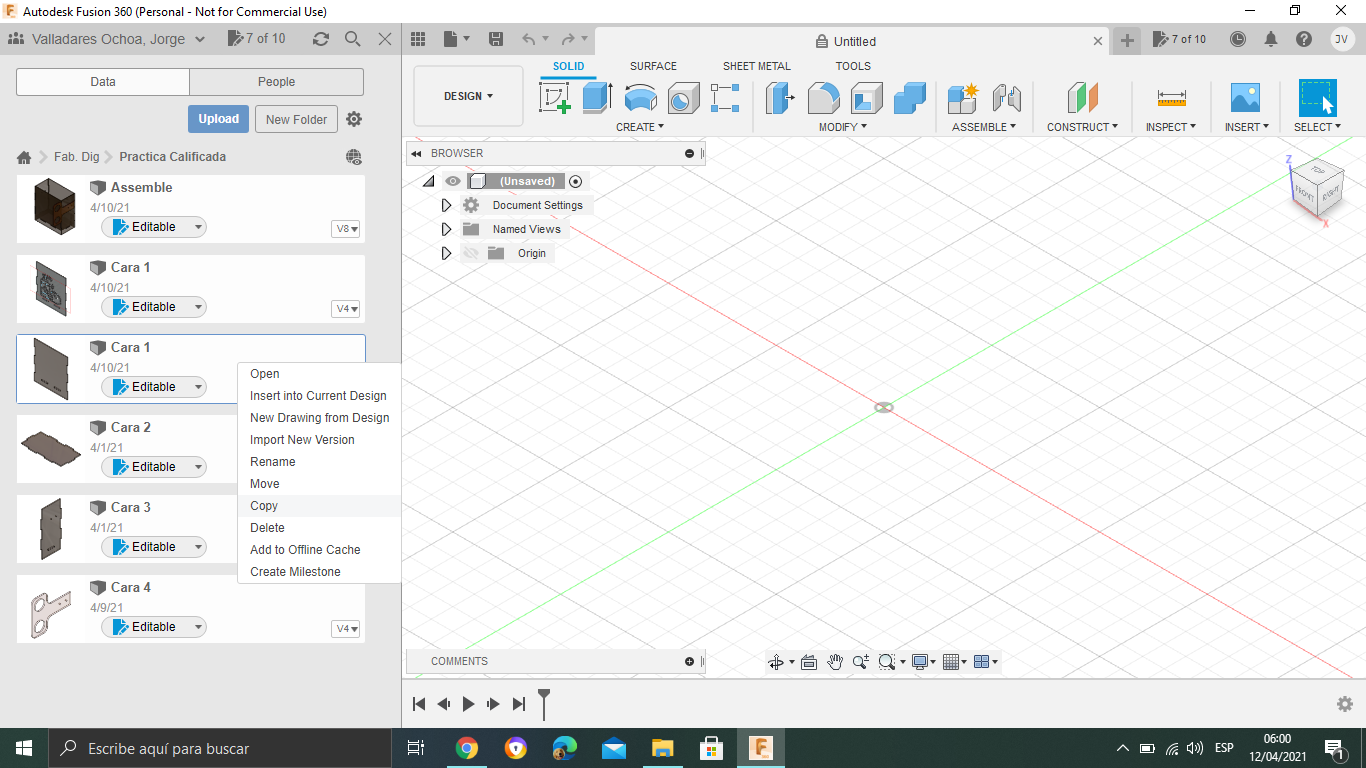
In this step we are going to do an easy thing that is duplicate one e of the piece that we make, the piece "Cara 1" for that we just doing right click and select the option of copy and there are going to appear a window of where we want to put the new copy if your work is in a carpet, the system automatically put the piece the and if you want you can change the name or just with the same name. Here is not necessarily do the change of names.
Insert the Image in Format .PNG
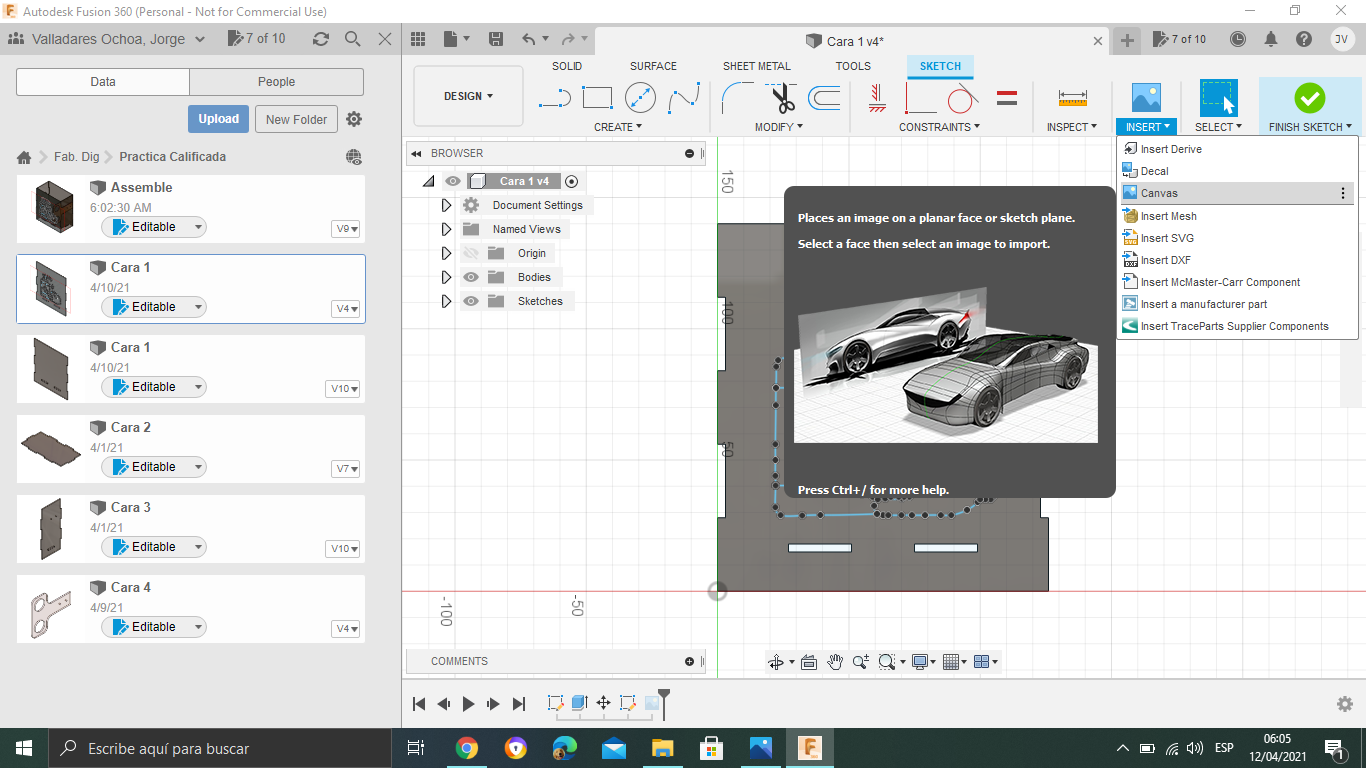

Well in the piece that we generate with the copy we need to insert an image to put our design in the box and don't show just a simple alcohol vending machine. For that, we start to make and new sketch and we go to the right corner in the option that has an image and we display the options and there we have the option to insert an image in Canvas, the system asked where is the image that we want to put, and we choose the option to search in the archive of the computer and select in what carpet we save the image and confirm that is that we want.
Finish to doing this are going to appear in you screen in what axis we want to put the image and we select in the same of that we do the piece and automatically the image is going to appear inside of the piece, and we can start drawing on top of the image with the tool SPLINE fit point spline.
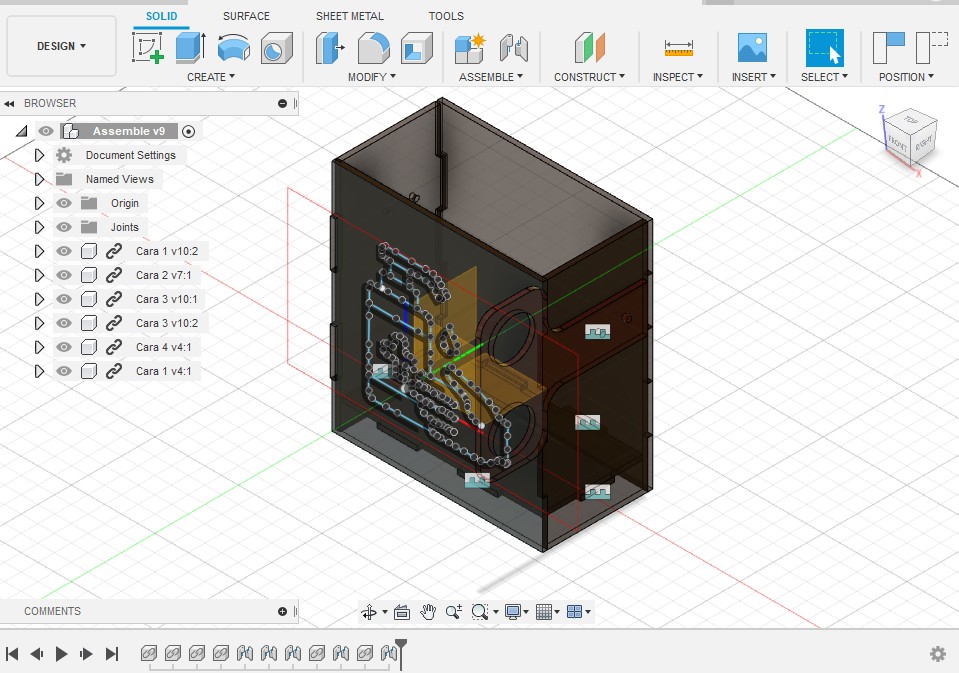
Union All the Piece in One
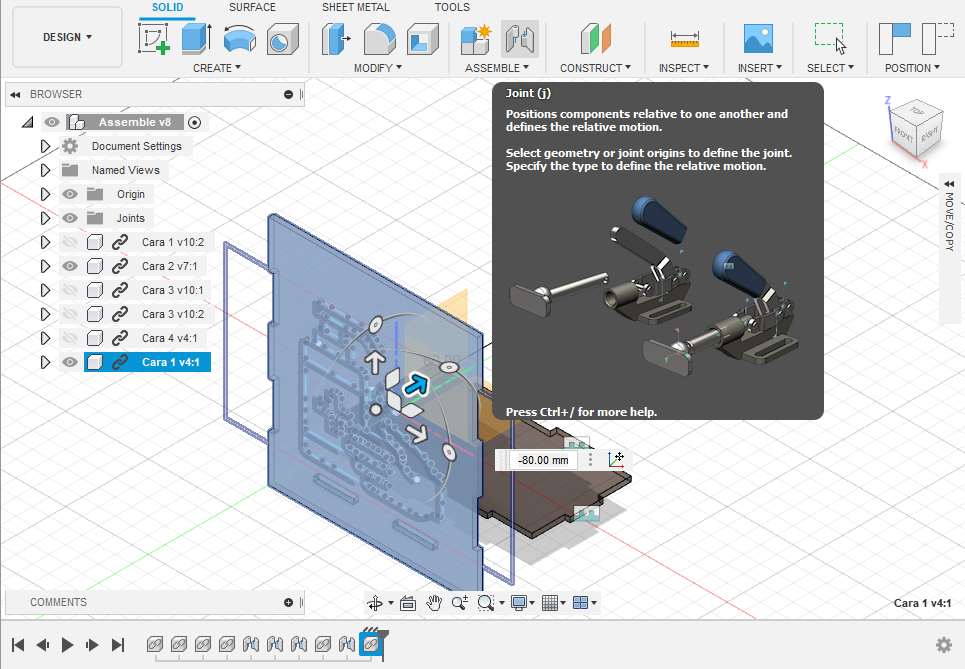
For that, we need to make a new project and safe that first, then before that we can go to our carpet when we save all the rest of pieces finished and bring them to this new project that we made, but BECAREFULL, the pieces appears in the same place that we drew in the last pages, and if we pass one by one, we need to move and accommodate all of them in the correct order that we want. And with the tool ASSEMBLE, we can confirm and close the connection between the two pieces. that we connect.
Save the Sketch As a File of Dxf
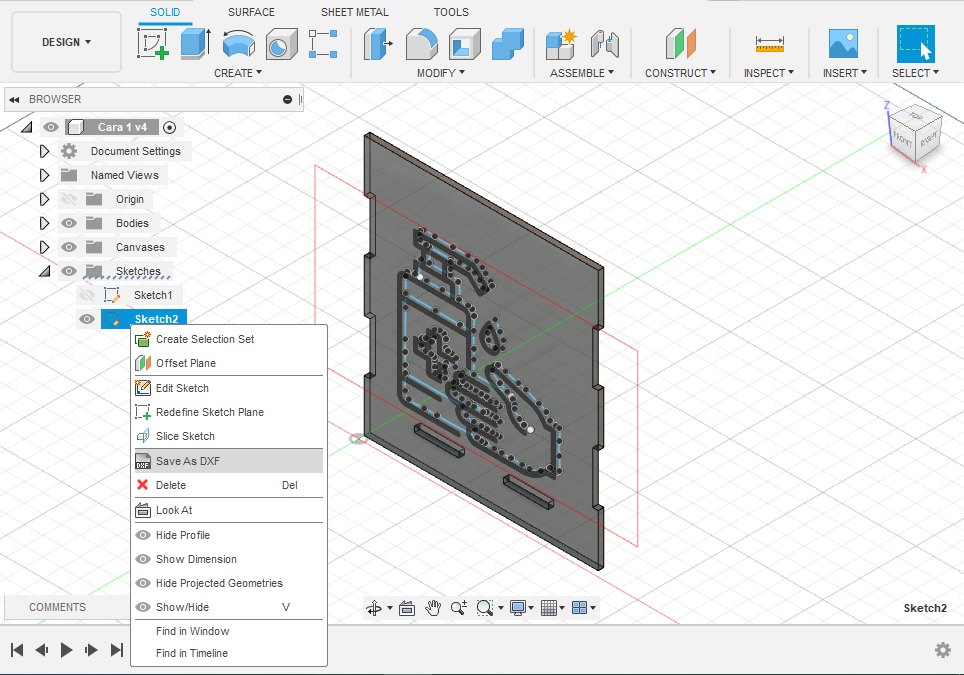

When We finished drawing the image that we export previously, in this document individually, as the image shows there, we are going to sketch and display what we have there, and in the union that we do right-click in sketch 2 and see the option to export the project to Dxf. Click here, put a name that we want to save this, and select where. Because this document that we save it will be useful for the next step that we are going to see.
Oh and apart from the document we need the app how to serve to realize and configure the cut the out project. There we have a direct link to the app https://megalaser.com.ar/descargas/ is the first option V8.0.
Import and Edit the Setting of Parameters
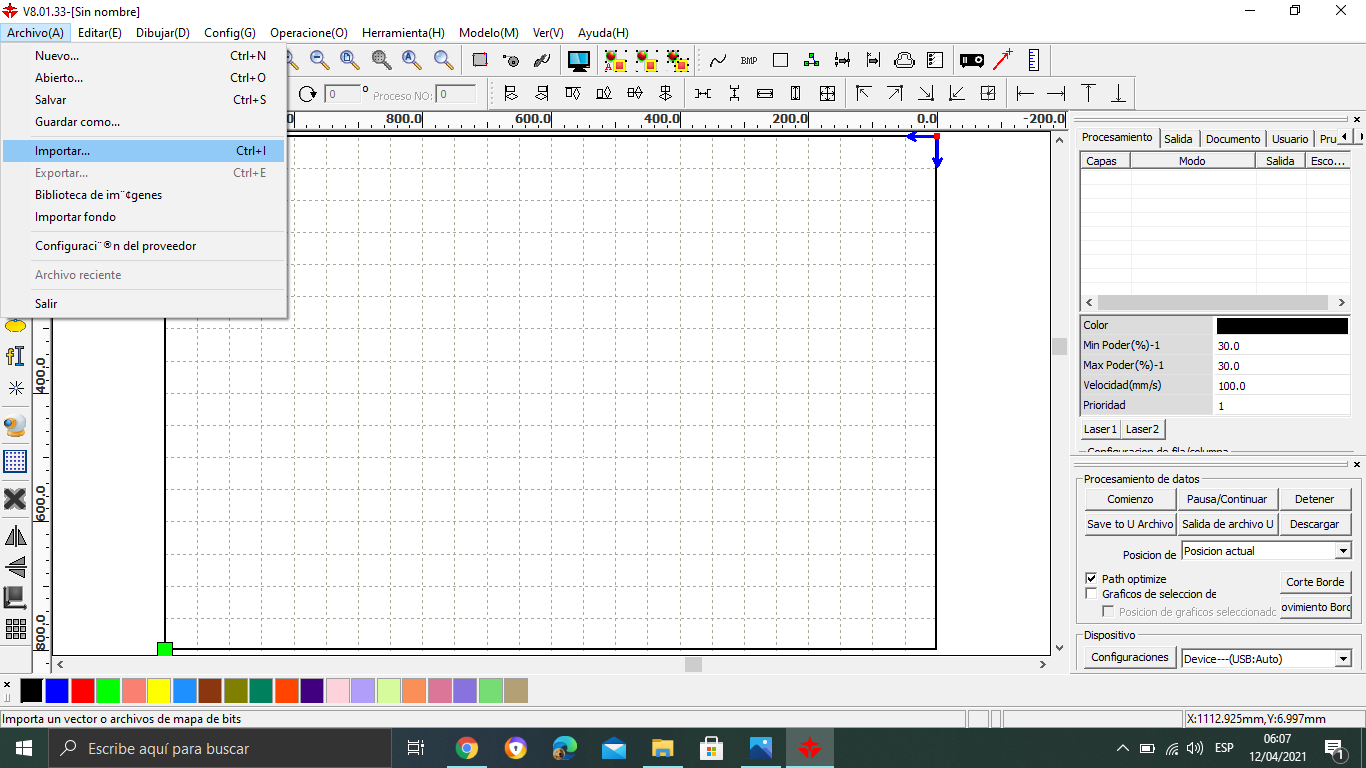
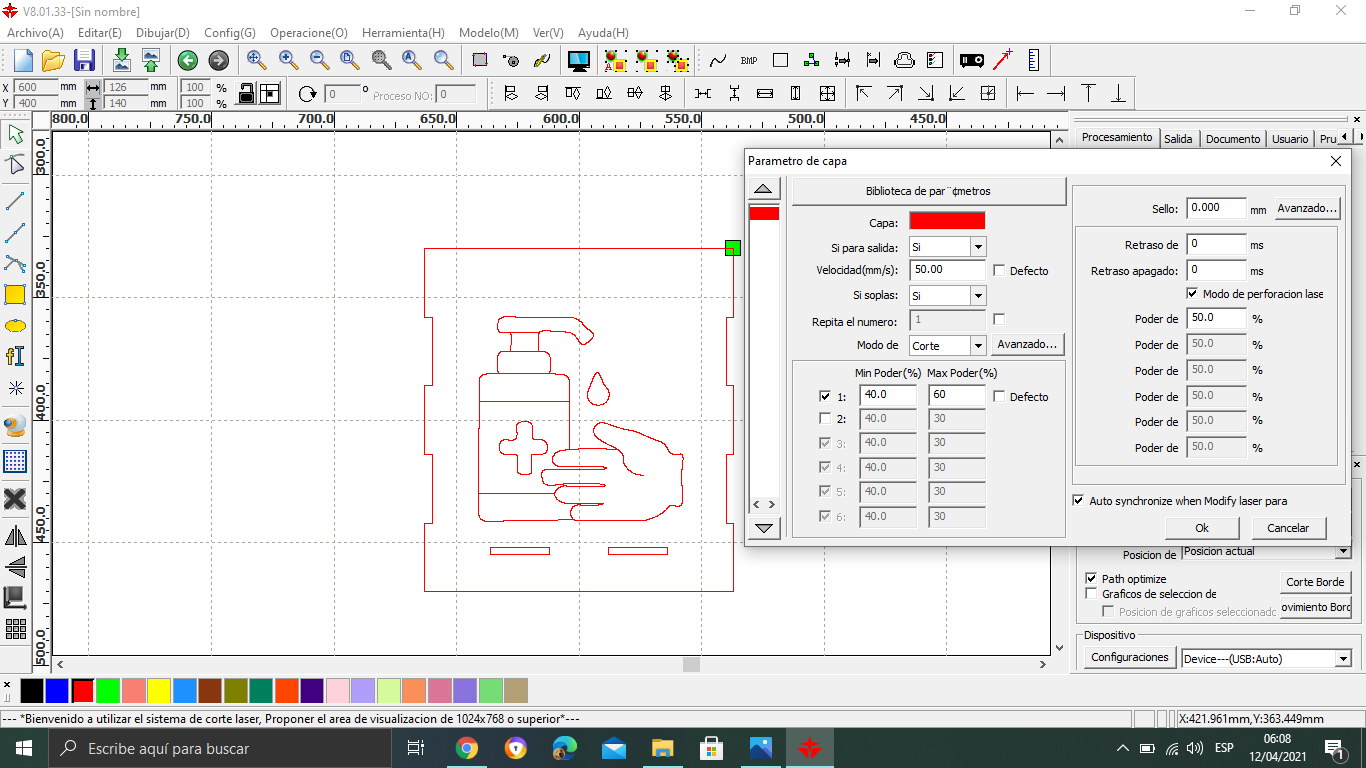
Finished doing the other step on this is just open the new application and insert the document that we make previously from the fusion360 in Dxf. The option is on the left corner and we search the carpet that we save the archive, and with a click automatically is opened there is all is okay, is going to open as we can see in the image and we just doing some setting in the option of cut and affirm down that the color that we want to use is red because the app detect that is an archive that we want to cut but for being sure we just confirm with the color. And change the number of speed and we leave in 50, and the min and max of power of cut in 40-60 in that order, just in the first one of the second we just quit.
Check the Simulation
_LI.jpg)
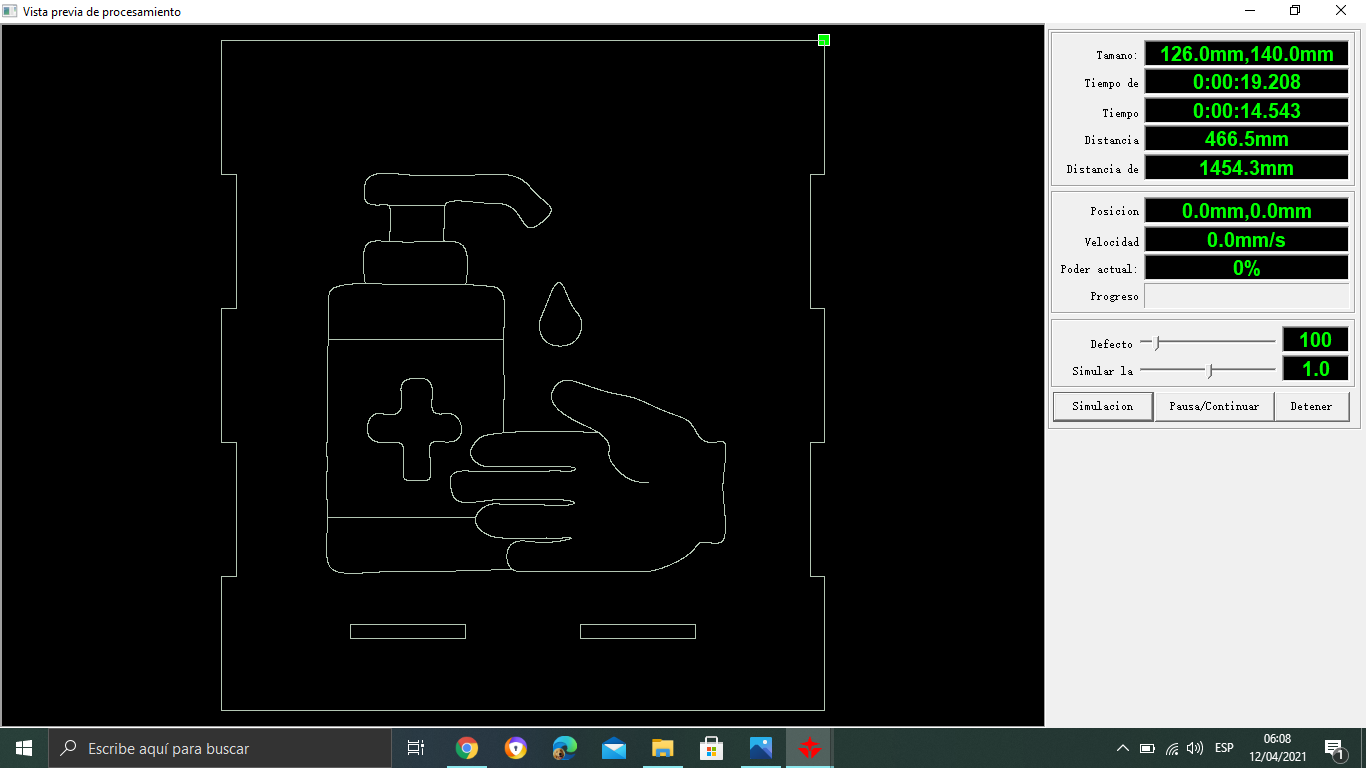
To end in this part, we check how is the simulation that we made, that just click on the screen that we have up, the name is a preview. They open a new window, and there click in simulation and see how the machine is going to the cut in the piece, and in how much speed.
Finished doing this just close the window of preview, and if we want we just save the archive of this program if we want, I think is not necessary because we have the archive Dxf and at the moment that we need just insert it again and do the configuration.
Outro of the Video
And that will be that, we have our alcohol vending machine, ready to use or to start to make in the 3D printer, thank to arrive until the last part of the instructable don't forget to give me a like, and forget to follow me to see more projects thank and take care. Keep calm and take it easy.