Alcohol Gel Dispenser - PC1
by JAZZEL_ZAPATA in Workshop > Laser Cutting
86 Views, 1 Favorites, 0 Comments
Alcohol Gel Dispenser - PC1
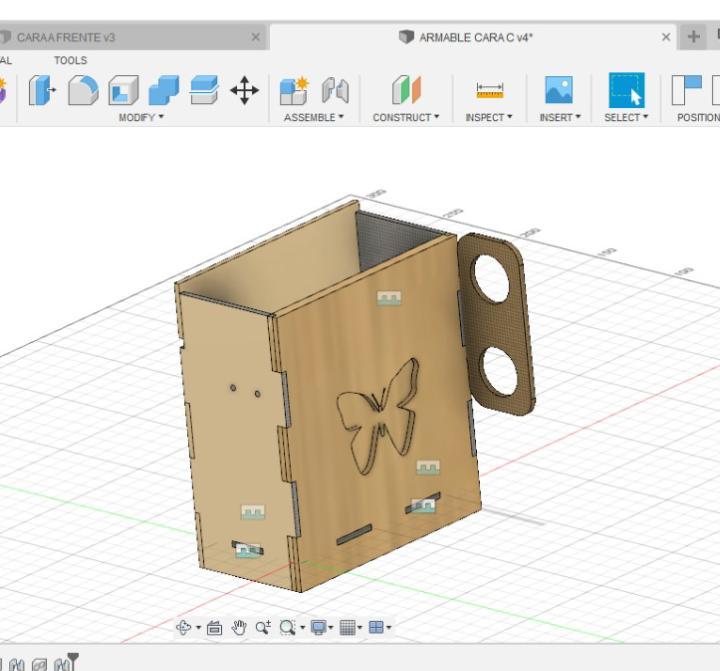

Hi everyone. Welcome to our beloved site I hope that you are very well specially in this pandemic. We are going through difficult times, so we need to protect our lives. We need to wash our hands to fight the virus, but sometimes we need a place to put and organize the alcohol gel. That's why today I´m going to show you how to make an alcohol gel dispenser in a very easy way.
Supplies
.jpeg)
.jpeg)


.jpeg)
- Computer
- Autodesk
- Fusion 360
- Wi-fi Conection
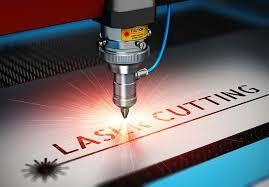
- Cutting Laser Machine
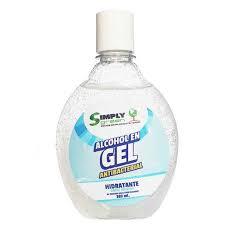
- Gel Alcohol
CREATIVITY
EXTRA TIP FOR STUDENTS
This advice will serve you well if you are a student like me:
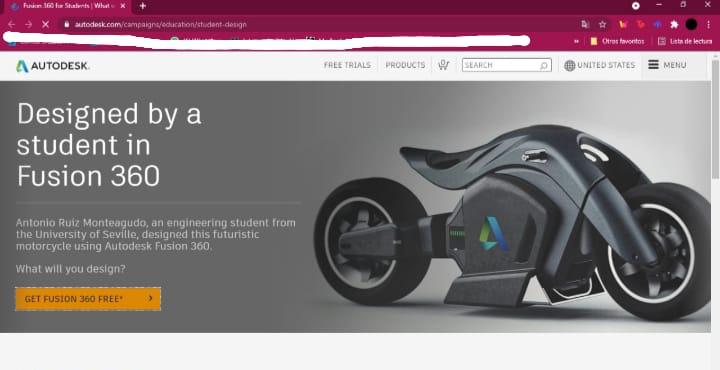
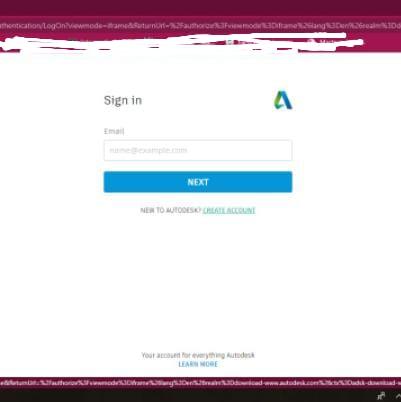
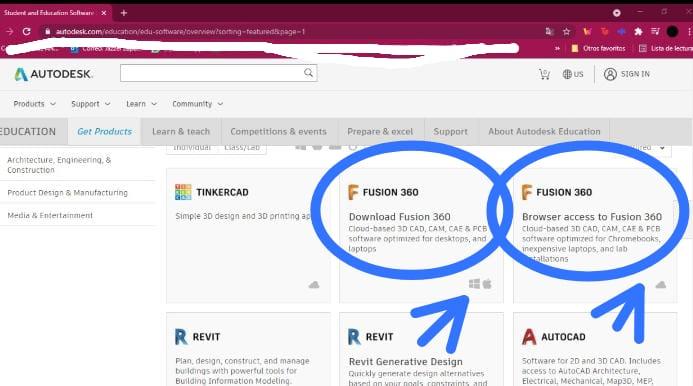
First you must search in the browser the word "Autodesk Fusion 360 free for Students", then you must click on the first search result that will take you to the official page, then click on get Fusion 360 free, then you can register and fill out a form to then be verified by the page. Once you get the permission you will see many applications and you will have to search for Fusion 360, click on download, install the program and you are ready for action!
Side A
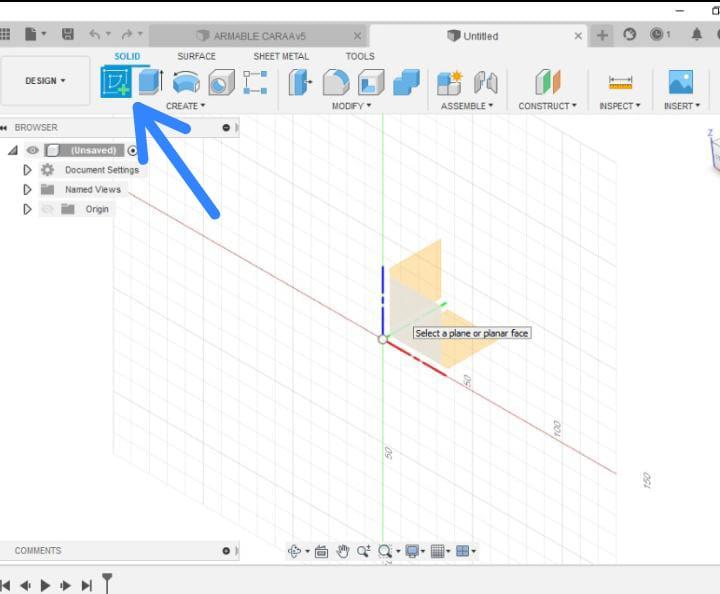
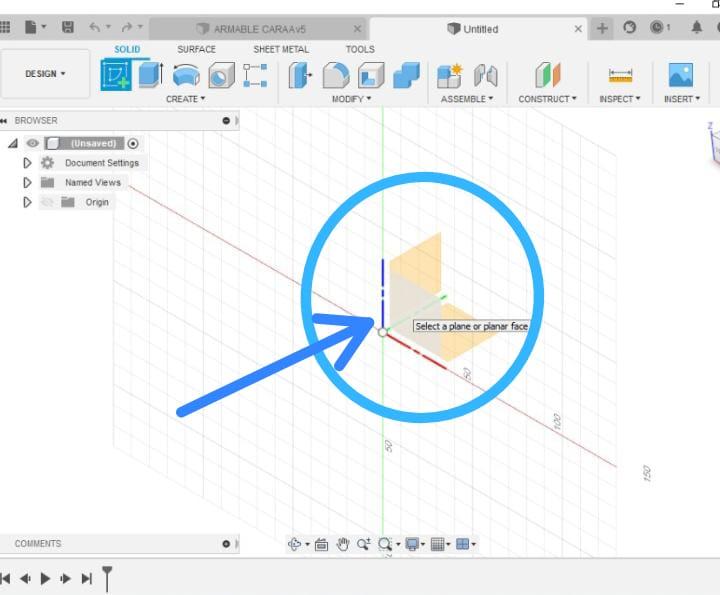
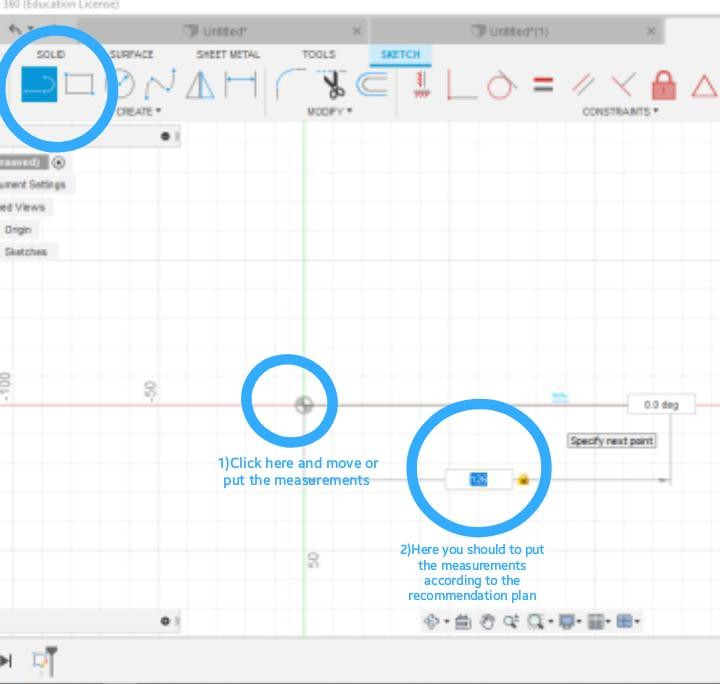
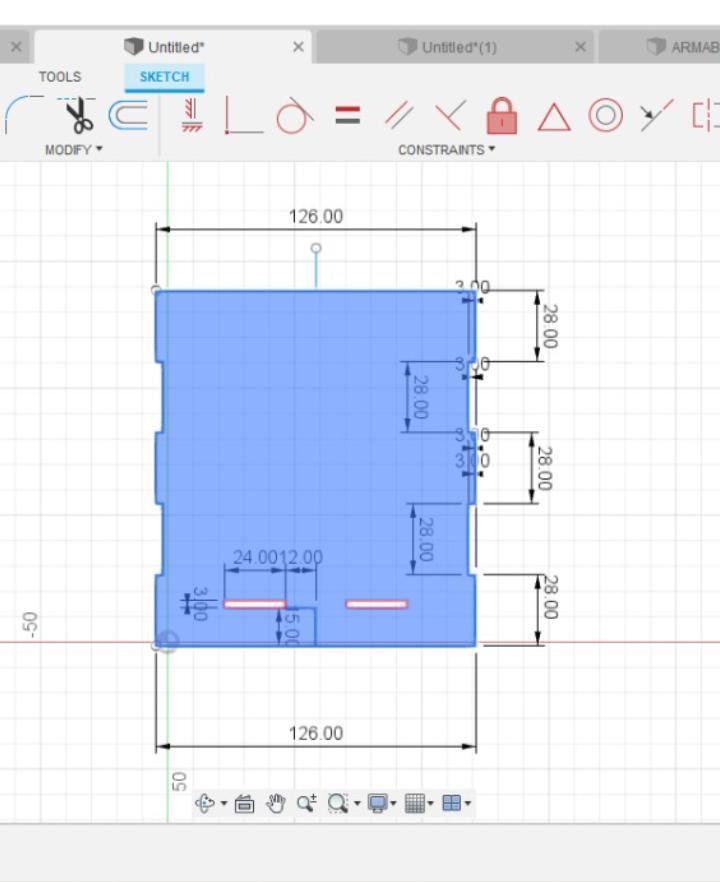
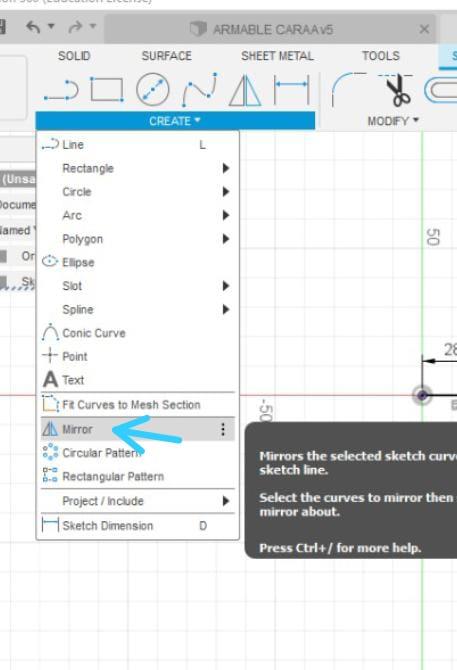
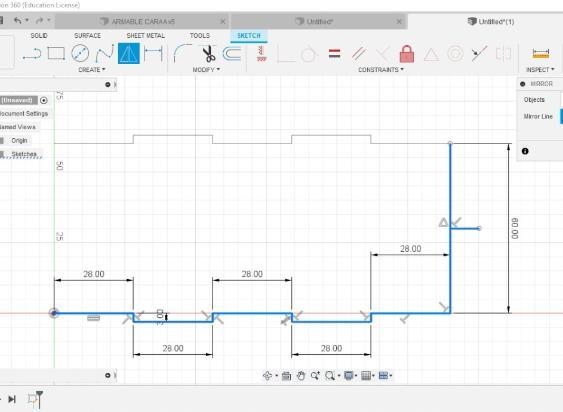
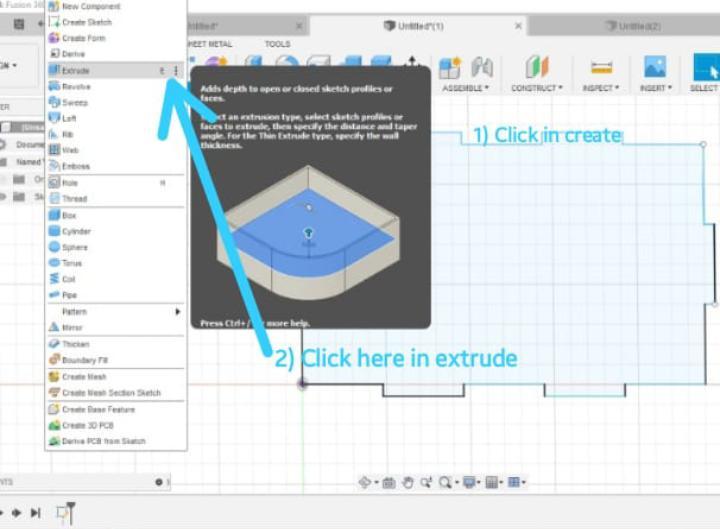
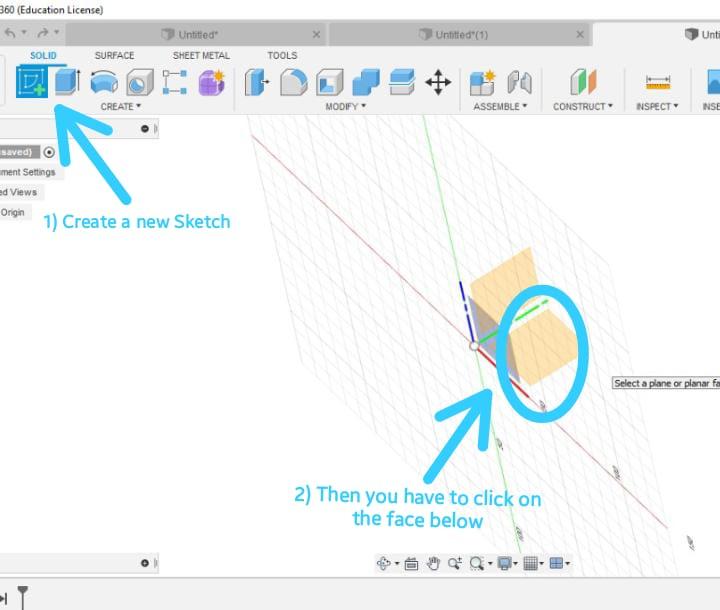
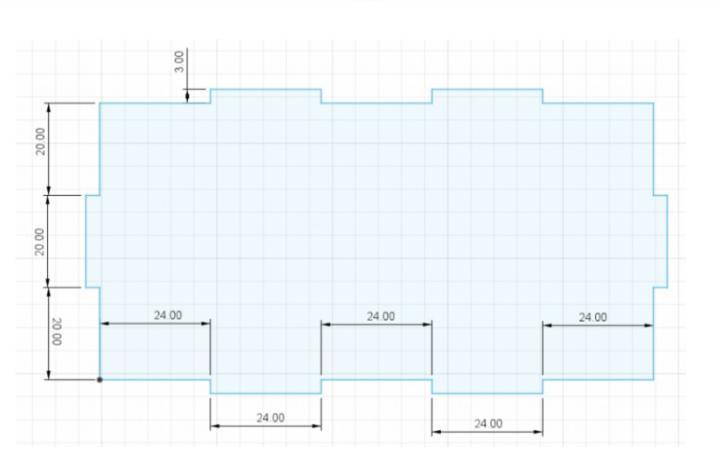
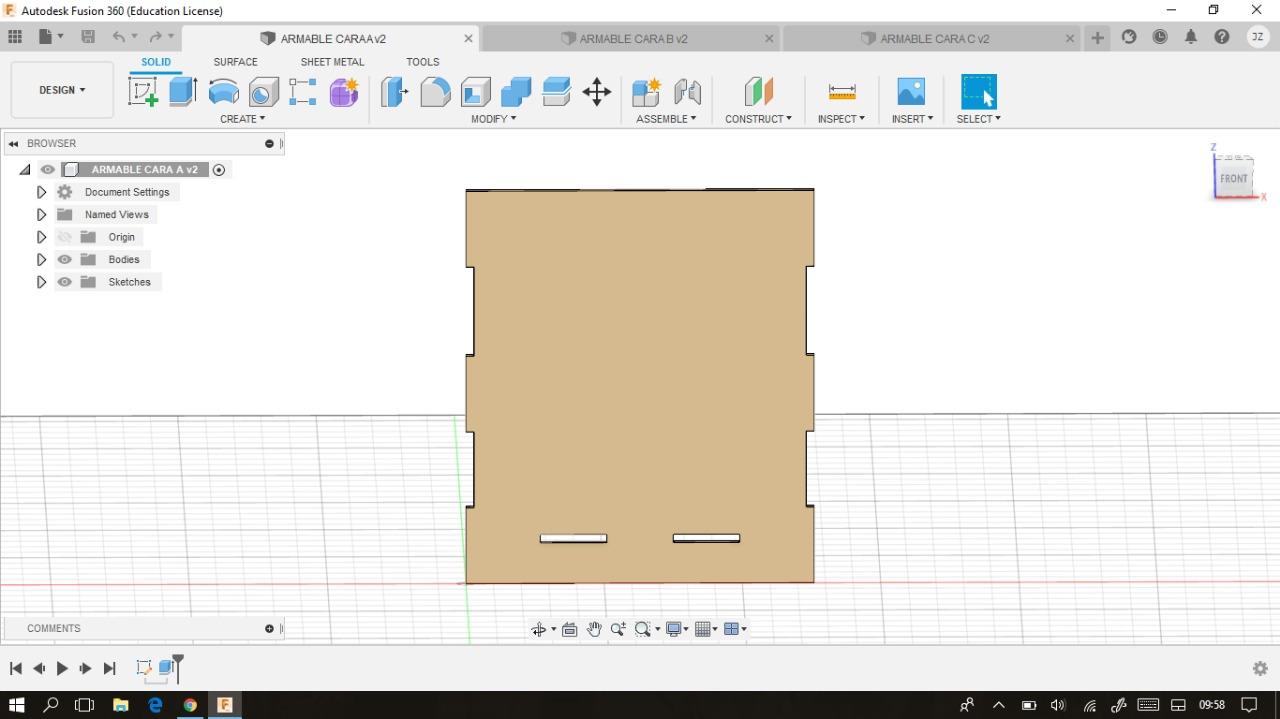
First we have to open the program, go to the new folder where we will save our parts. To start with the first face, you must click on the option create and create sketch that is located at the top of the workspace, then you have to choose a face in this case would be to select the face that is blue and red. The next step is to draw the measurements of the element with the line tool (I will put the measurements together with the other reference images). To make it faster you should draw until the middle, make a line in the middle of the bigger line and click on create and mirror and that's it, just click on the parts you want to duplicate.
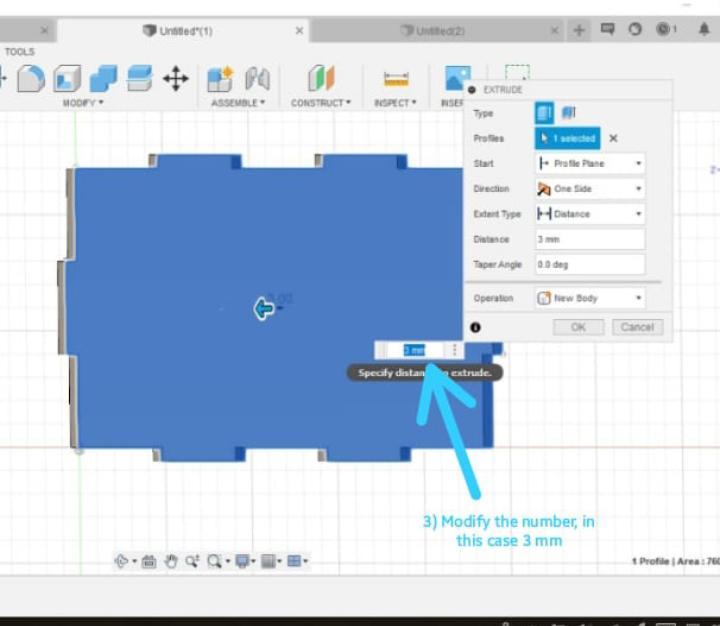
To finish you have to finalize the sketch, then click on create and then on extrude a number will apear, in this case we will put 3 mm, in this part you define the thickness of the material.
Internal Parts
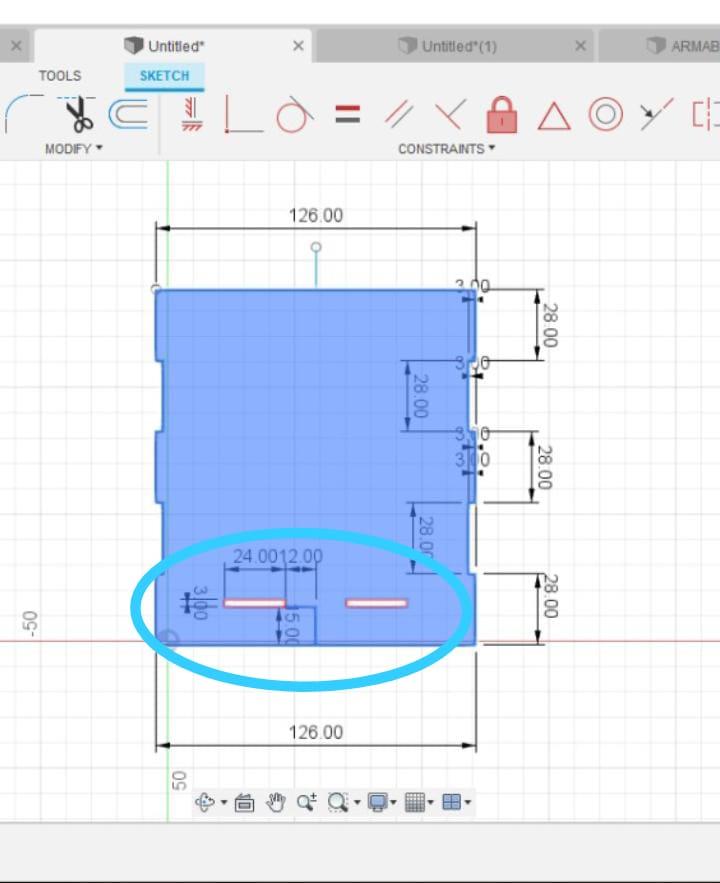
For the internal parts you must make a guide line in the middle of a part of the piece, then follow with another line on the side, everything goes according to the recommended measures, when you finish making your rectangle you can use the mirror tool to reflect the same rectangle at the other end.
Side B
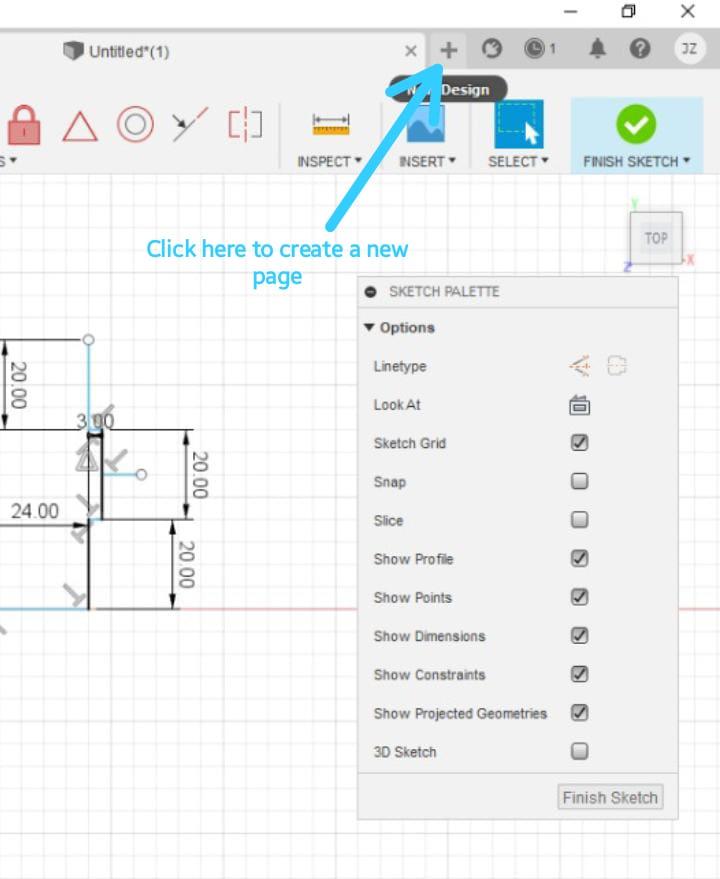
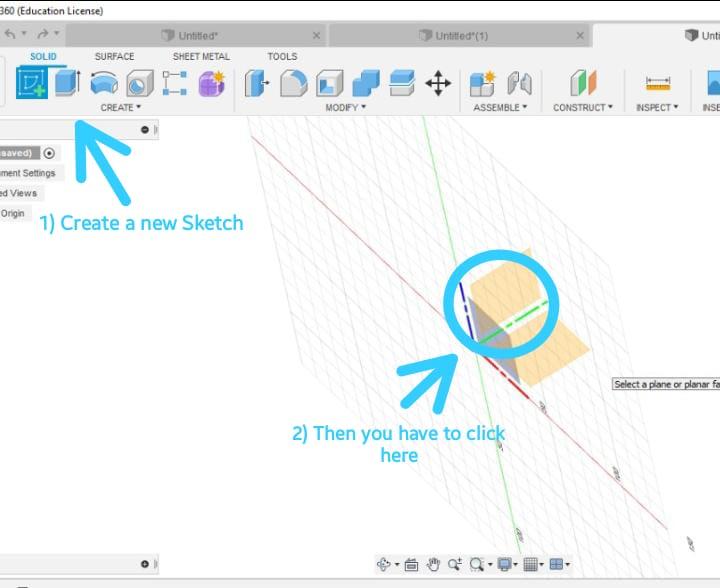
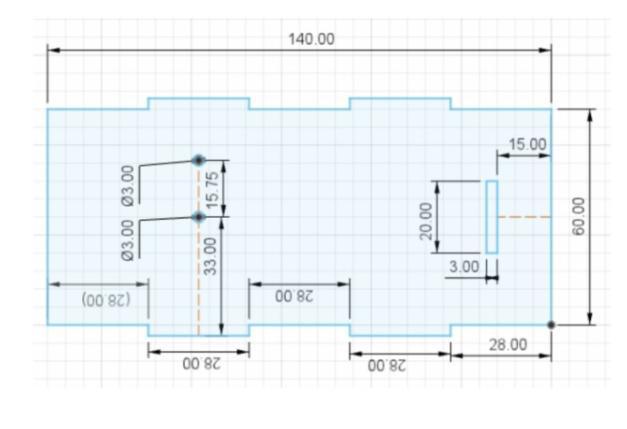
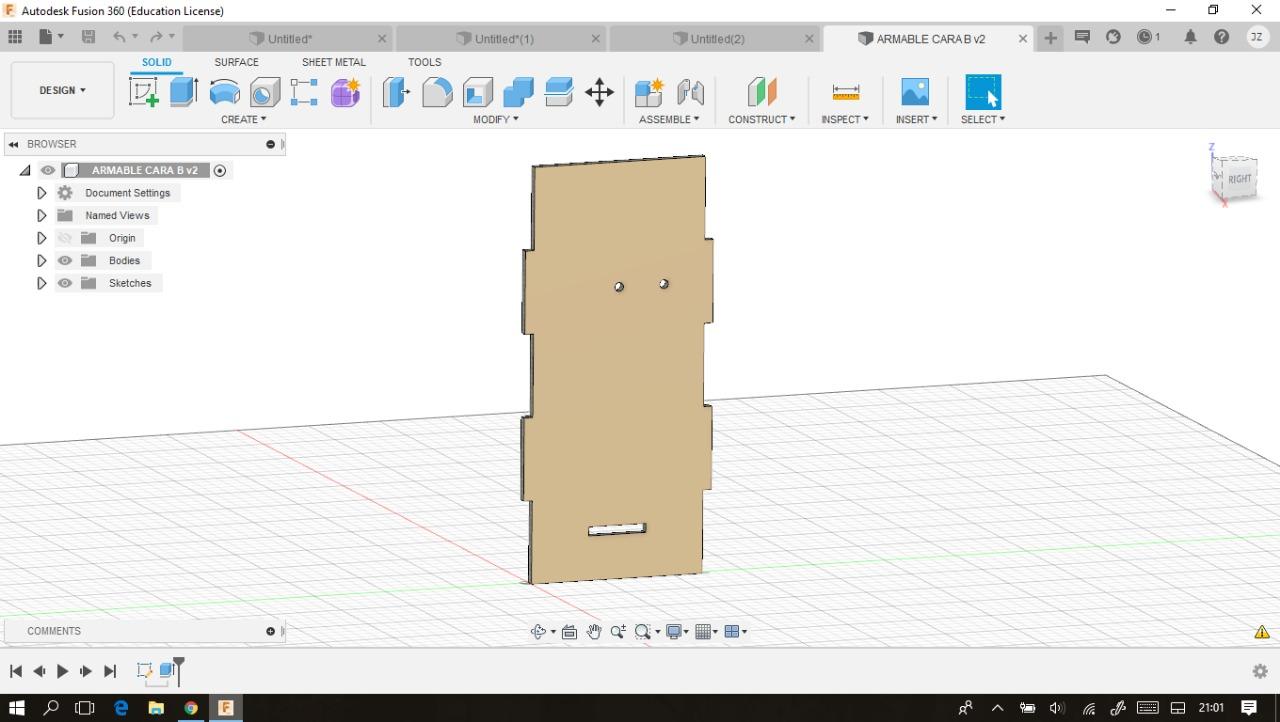
Now that we have finished the first piece, you should save the work and we will continue with the second side. It may seem a difficult process, but don't worry, little by little you will get used to it.
Well let's continue, now we will open a new page, you will click on create sketch, but this time you will select the side face that would be between the blue and green lines, now we go to the line tool and according to the measurements of the image we start drawing again, in this part you can draw the bottom part and use the mirror tool to save time and then again make the guide line in the center to make the inner parts of the face. Finally you must save this piece with a name that you can identify in the folder created earlier in the first steps and Don't forget extrude 3 mm of your piece.
Side C
You're still here? Wow, keep it up, you're doing well, it won't be long now.
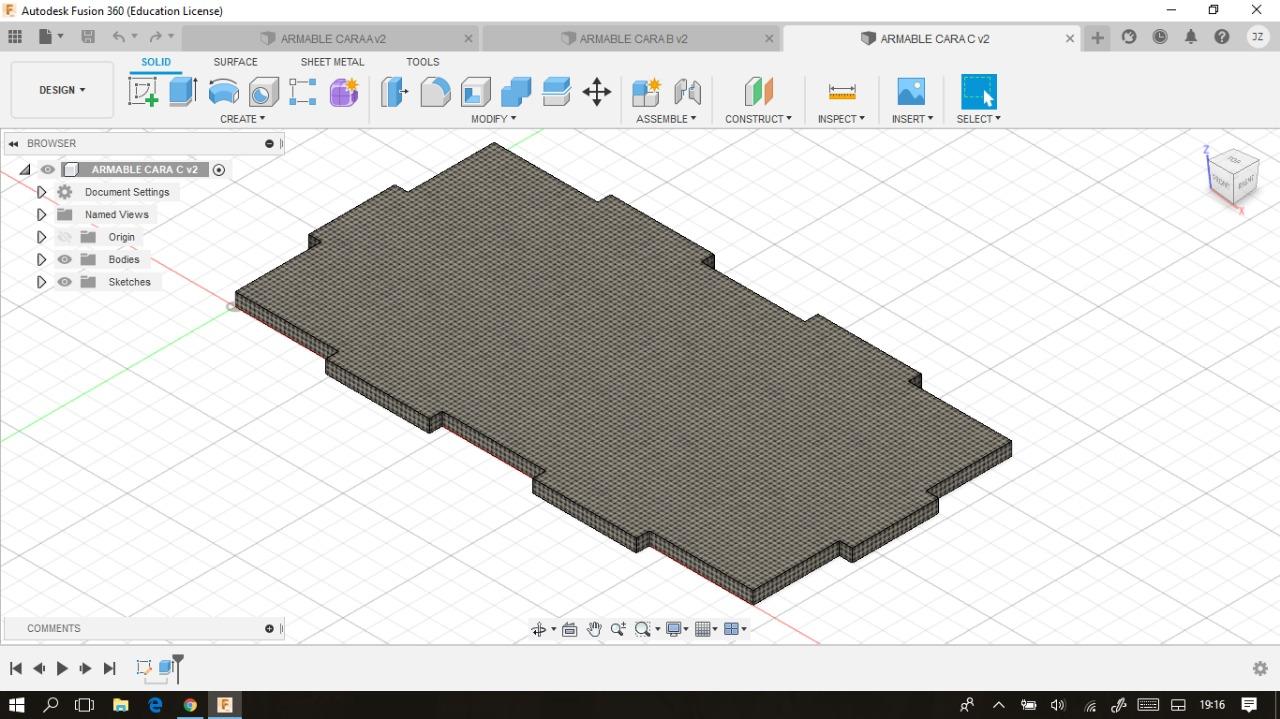
This is already the last face, so we will follow the first steps again, we create a new sketch and this time we click on the bottom part that would be the base, and according to the measurements we can start drawing, the good thing about this last piece is that it seems to me the easiest to do, obviously you can use the techniques like using the mirror tool. Don't forget to save your work and extrude for the end!
Extra Piece
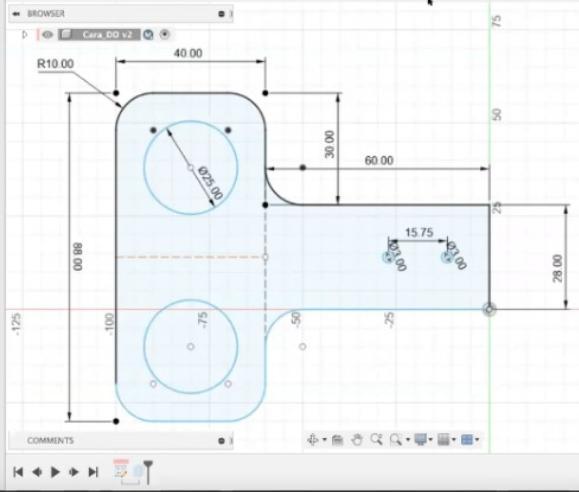
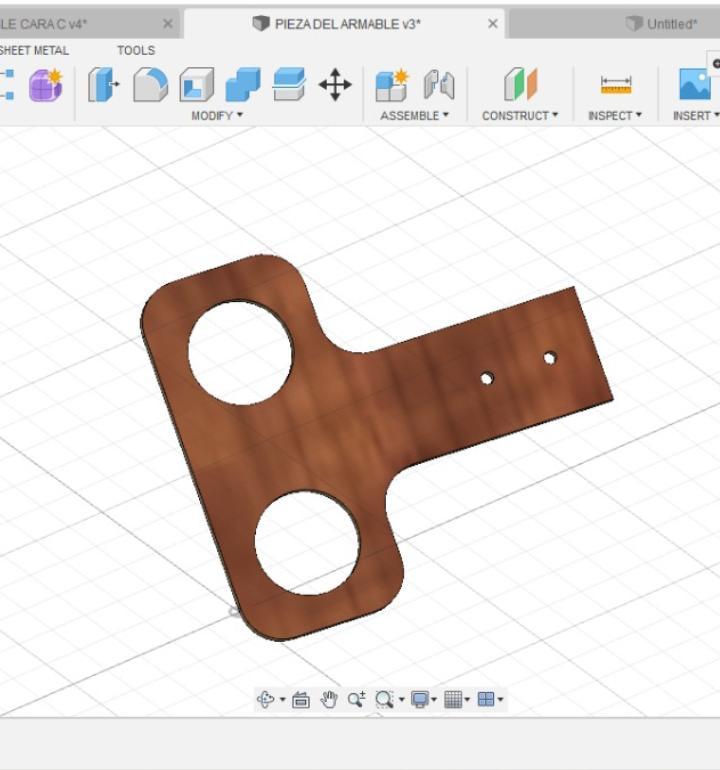
For this extra piece you must apply the same steps to create a new sketch, select the lateral plane (between the green and blue lines), click on line and start drawing according to the measures of the plane, for the curves just change the tool to arc and finish drawing the piece, then click on extrude which is 3 mm and customize it.
Appearance of Your Pieces
.jpeg)
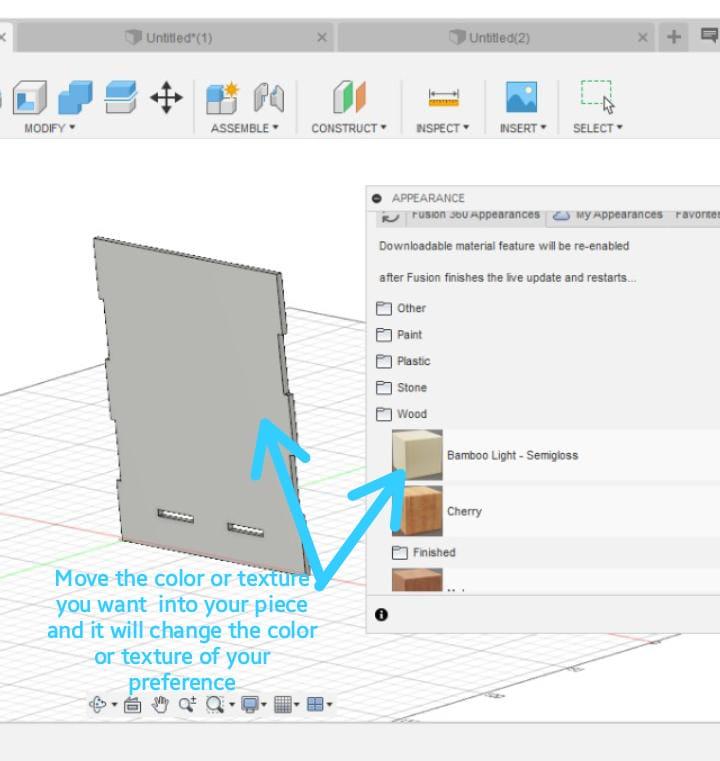
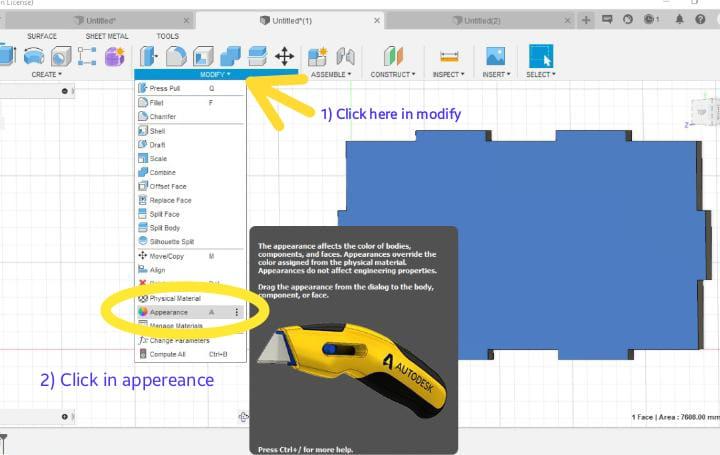
Now to give it a nice look first you have to go to the modify tool and to appearance, then you will see a table with the different materials of different colors and textures, to add them you have to drag the texture to the object and it will automatically change the color of your preference.
Assemble
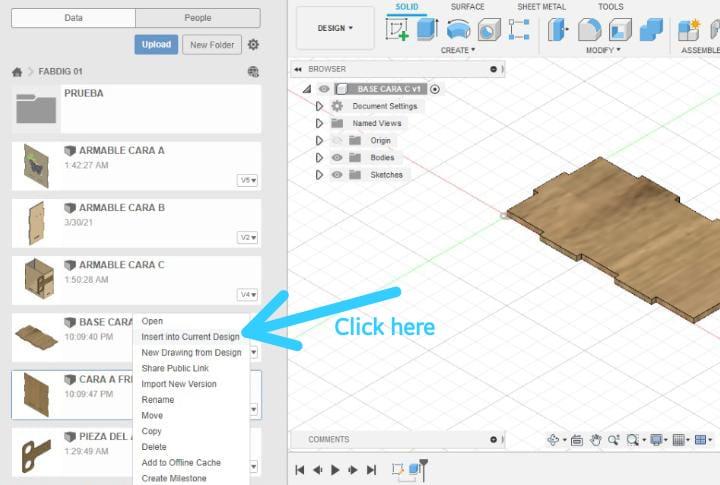
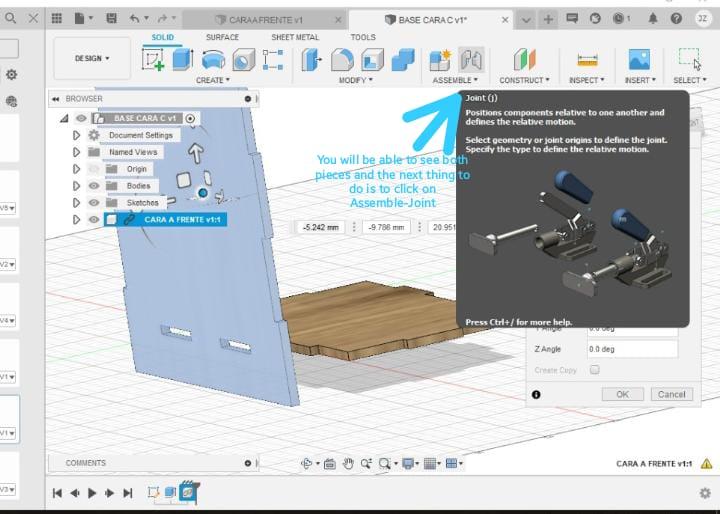
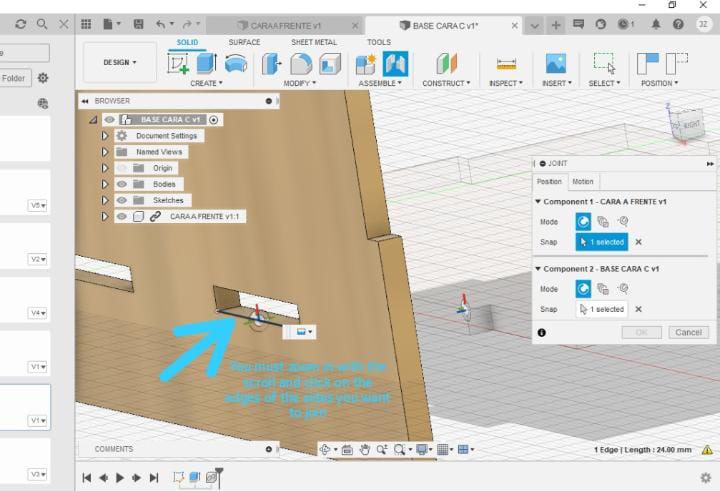
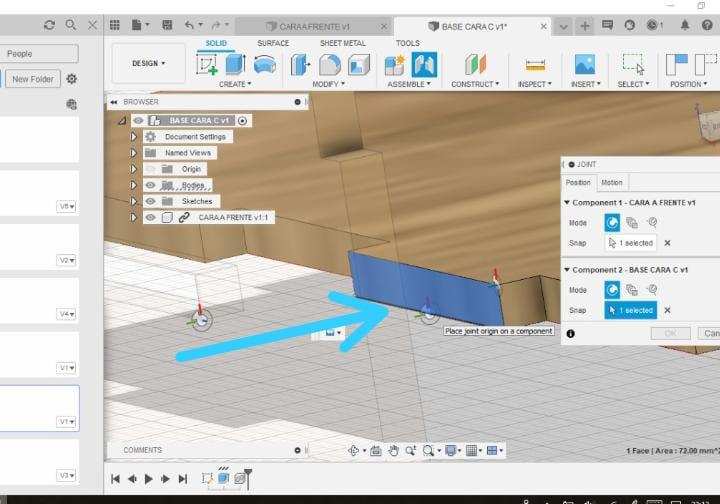
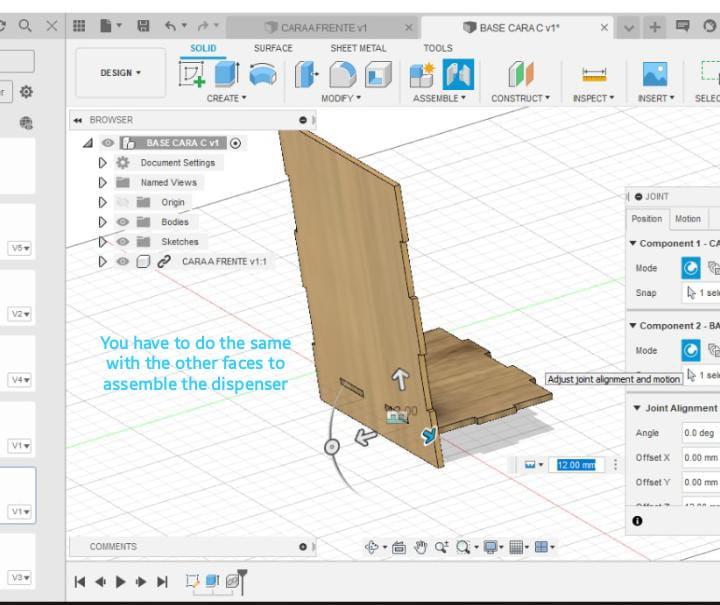
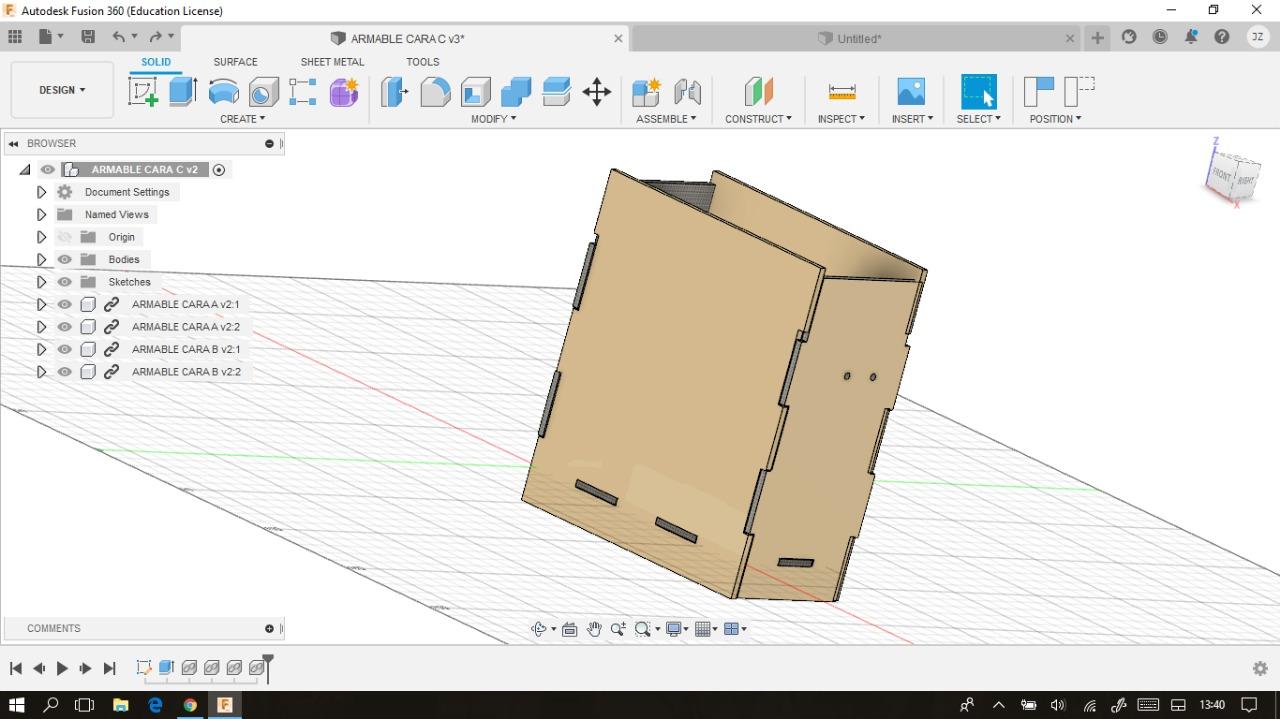
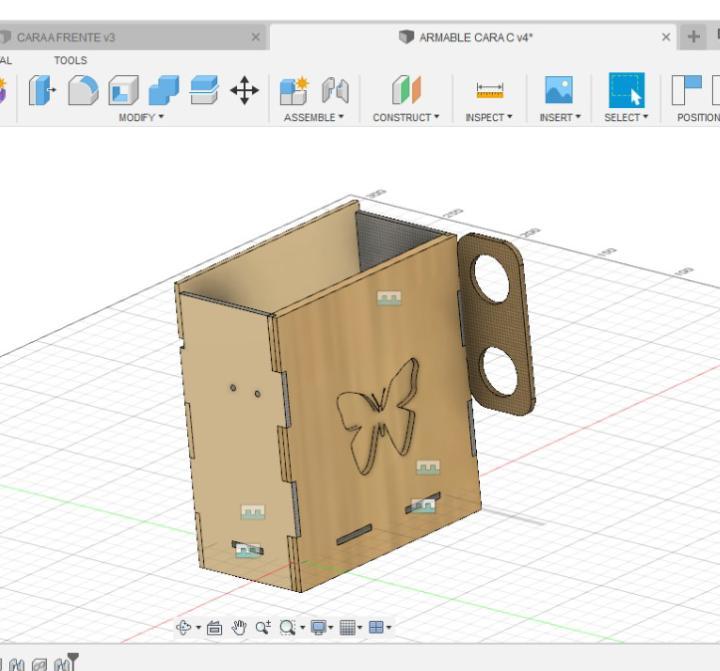
Now that we have finished the pieces we have to join them and for that we will go to any of the pieces, then right click on the window of the other pieces and you will get several tools, we have to click on insert into the current design. Now you can see both pieces on the same page, click on assemble then joint, just click on the edges of both pieces at the points to assemble.
CUSTOMIZE YOUR DISPENSER
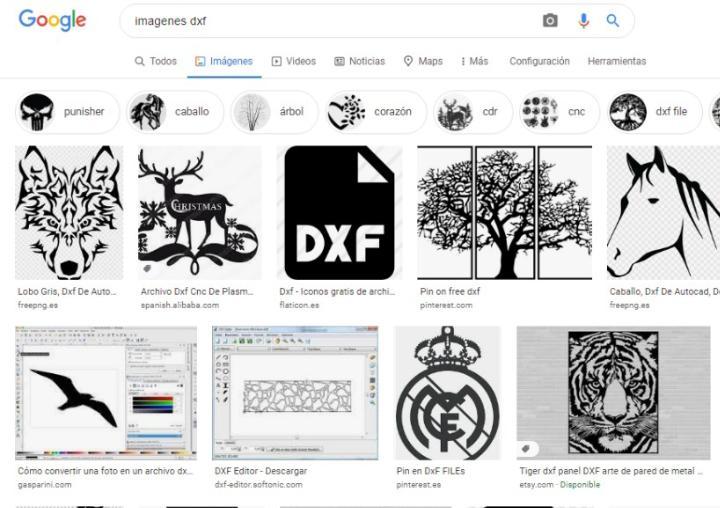
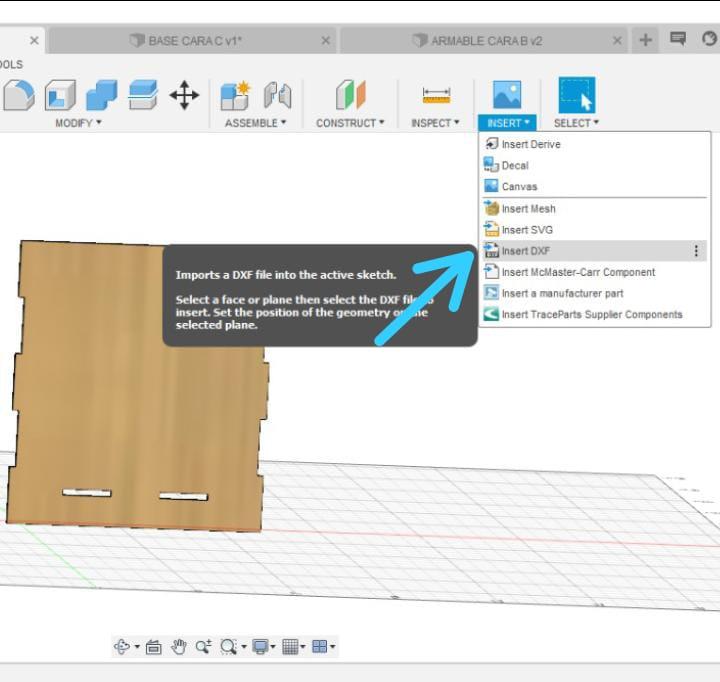
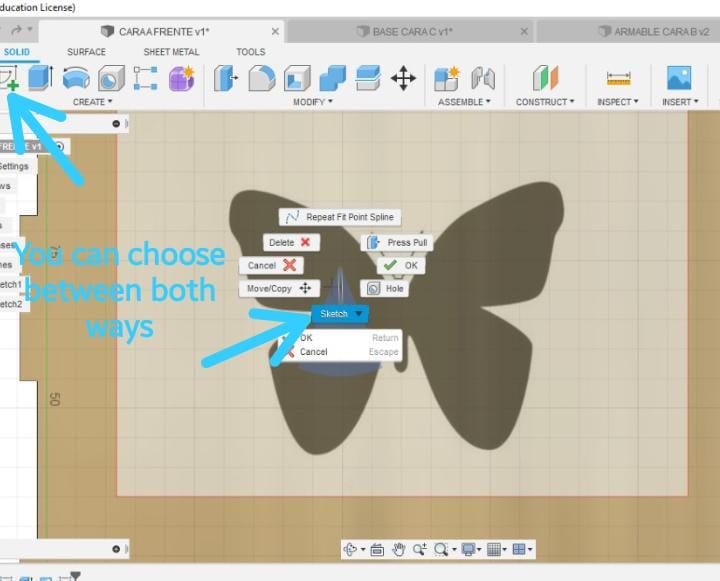
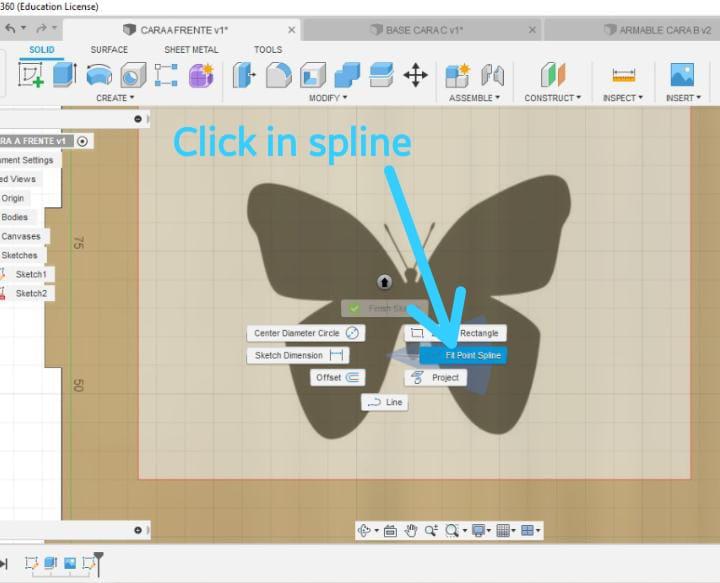
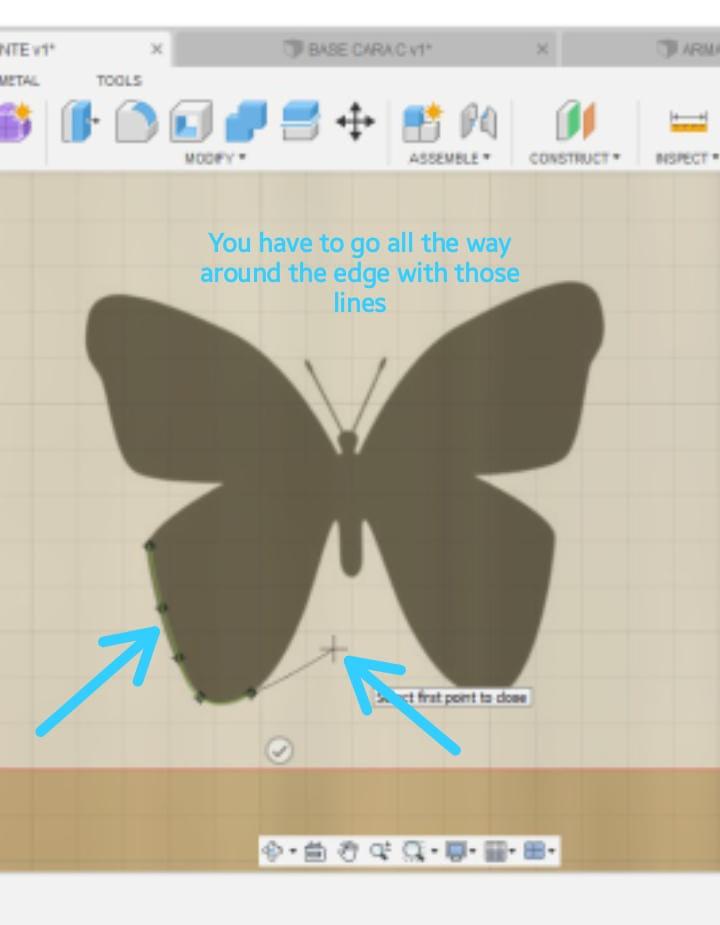
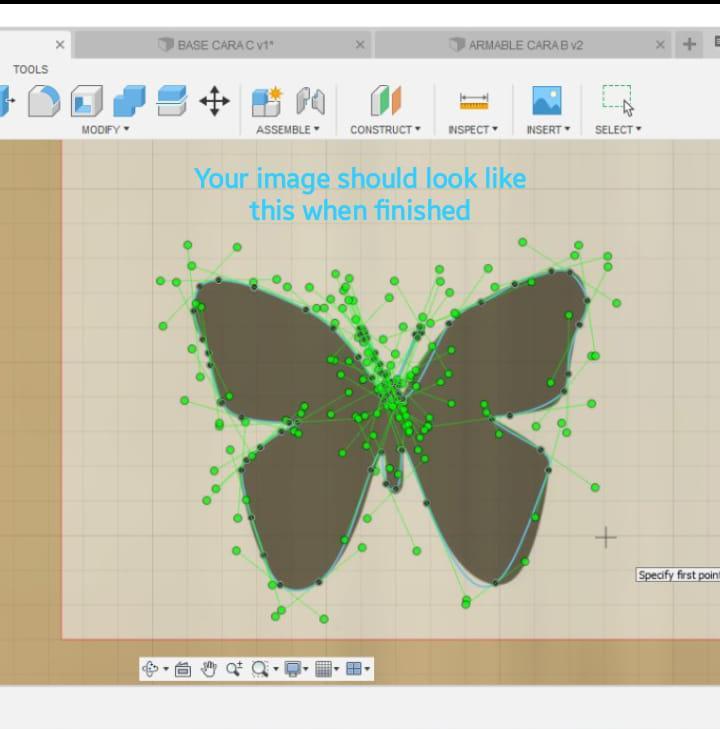
First you have to find in the Google search engine images in dxf format, download the image of your choice. Then you go to Fusion 360 on side A, then click on insert and the insert canvas tool will appear. Look for your image, insert it in the piece, adjust it and click ok, then create sketch and next to it look for the spline tool with which we will start to surround the entire edge of our image.Click ok and that's all you have to do is export all your pieces.
That´s All
When you export your files they are ready to be cut by the laser cutter, well this was all, I hope you found it as interesting and fun as I did.
See you next time!