Air Monitoring System Using NodeMCU and IOT Thingspeak
by Soorajece in Circuits > Arduino
4581 Views, 2 Favorites, 0 Comments
Air Monitoring System Using NodeMCU and IOT Thingspeak

ThingSpeak is an Open-Source IoT application and API to store and retrieve data from Hardware devices and Sensors. It uses HTTP Protocol over the Internet or LAN for its communication. The MATLAB analytics is included to analyze and visualize the data received from your Hardware or Sensor Devices.
We can create channels for each and every sensor data. These channels can be set as private channels or you can share the data publically through Public channels. The commercial features include additional features. But we will be using the free version as we doing it for educational purpose.
(If you want to learn more about the ThingSpeak in general, and/or The Project, visit https://www.instructables.com/
Features:
- Collect data in private channels.
- Share Data with Public Channels
- REST API and MQTT APIS
- MATLAB® Analytics and Visualizations.
- Worldwide Community
In this tutorial, using an MQ3 Alcohol sensor to plot its value on ThingSpeak using NodeMCU. In this program the NodeMCU to read and store the sensor data into a variable and then upload it to ThingSpeak using its channel name and API key. The NodeMCU should be connected to the internet via Wi-Fi. We will see how to create ThingSpeak Channels and configure it on NodeMCU.
Components Required

Hardware Required:
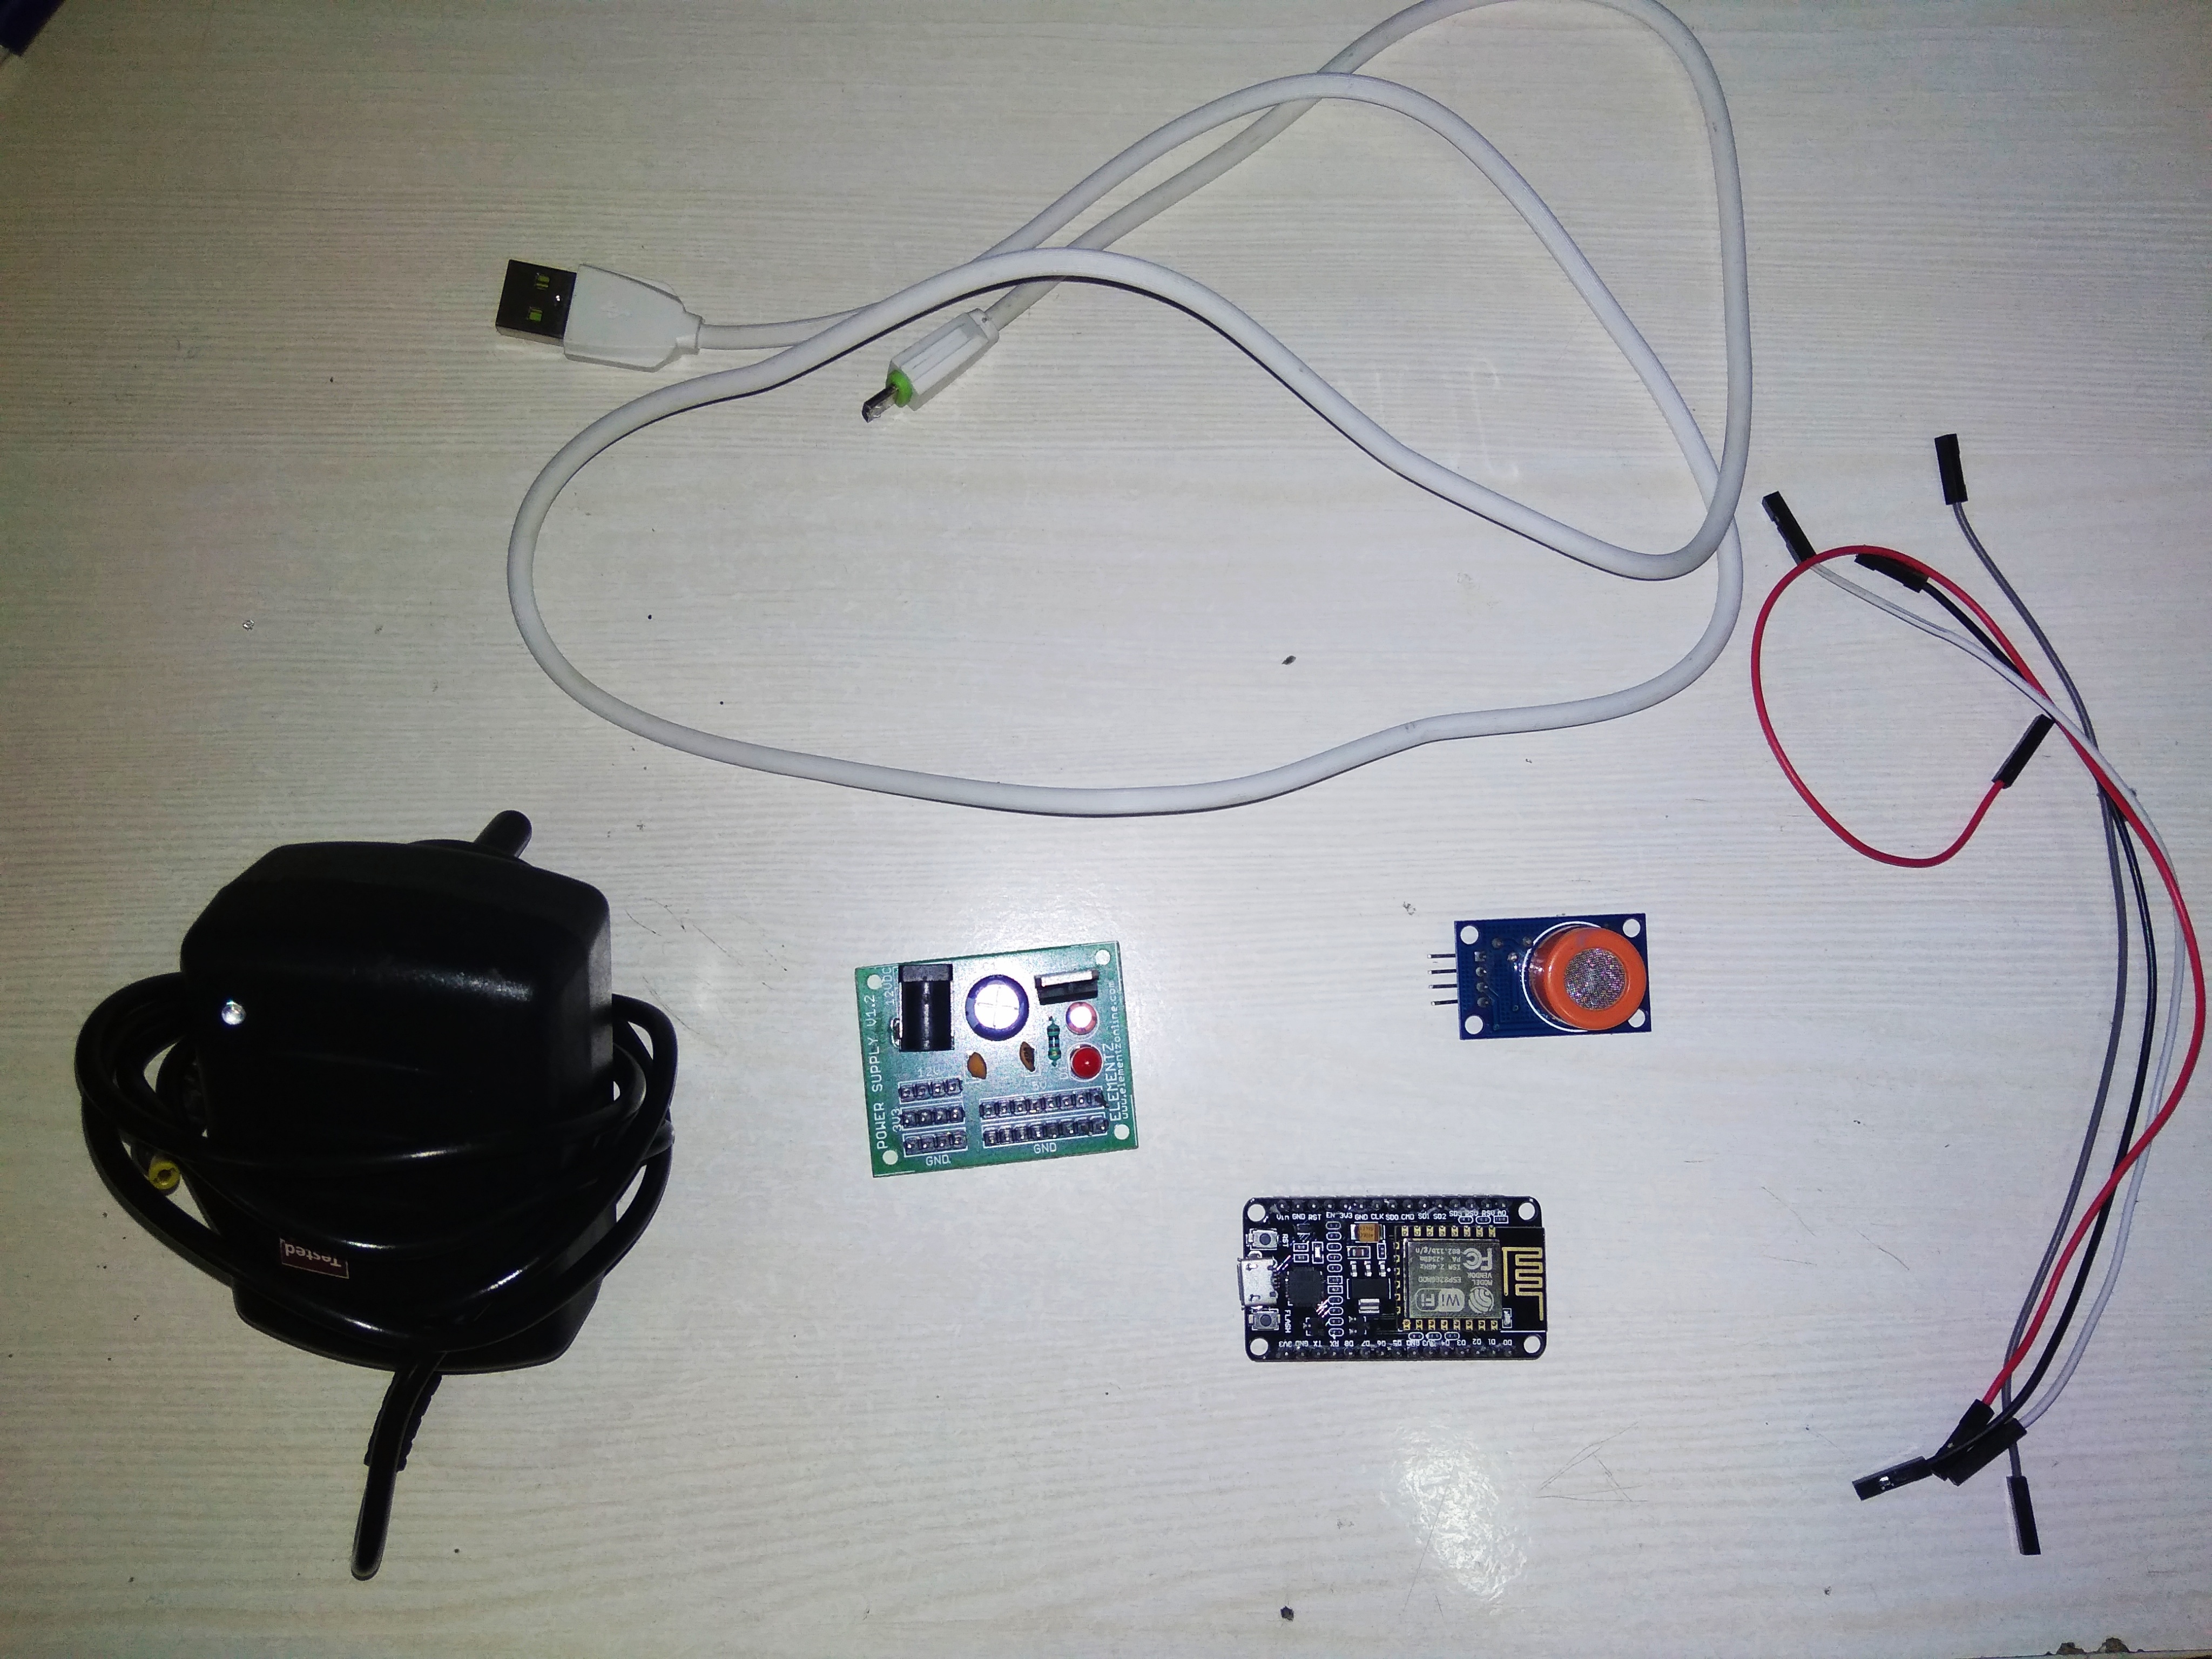
- NodeMCU
- MQ-3 Alcohol Sensor
- 5V Power Supply
- Jumper Wires
- Breadboard (Optional)
NodeMCU LUA WiFi Internet ESP8266 Development Board: NodeMCU Dev Kit/board consist of ESP8266 wifi enabled chip. The ESP8266 is a low-cost Wi-Fi chip developed by Espressif Systems with TCP/IP protocol. For more information about ESP8266, you can refer ESP8266 WiFi Module.
MQ-3 Alcohol Sensorr:This module is made using Alcohol Gas Sensor MQ3. It is a low cost semiconductor sensor which can detect the presence of alcohol gases at concentrations from 0.05 mg/L to 10 mg/L. The sensitive material used for this sensor is SnO2, whose conductivity is lower in clean air. It’s conductivity increases as the concentration of alcohol gases increases. It has high sensitivity to alcohol and has a good resistance to disturbances due to smoke, vapor and gasoline. This module provides both digital and analog outputs. MQ3 alcohol sensor module can be easily interfaced with Microcontrollers, Arduino Boards, Raspberry Pi etc.or more information about MQ3, you can refer Alcohol Sensor Module – MQ3.
5V Power Supply: In most of our electronic products or projects we need a power supply for converting mains AC voltage to a regulated DC voltage
Jumper Wires: Jumper wires are simply wires that have connector pins at each end, allowing them to be used to connect two points to each other without soldering. Female to female connector is used in this project.
Breadboard:A breadboard is a solderless device for temporary prototype with electronics and test circuit designs. Most electronic components in electronic circuits can be interconnected by inserting their leads or terminals into the holes and then making connections through wires where appropriate.
Connecting Components

Description
There 4 leads are +5V, AOUT, DOUT, and GND.
The +5V and GND leads establishes power for the alcohol sensor. The other 2 leads are AOUT (analog output) and DOUT (digital output). How the sensor works is the terminal AOUT gives an analog voltage output in proportion to the amount of alcohol the sensor detects. The more alcohol it detects, the greater the analog voltage it will output. Conversely, the less alcohol it detects, the less analog voltage it will output. If the analog voltage reaches a certain threshold, it will send the digital pin DOUT high. Once this DOUT pin goes high, the arduino will detect this and will trigger the LED to turn on, signaling that the alcohol threshold has been reached and is now over the limit. How you can change this threshold level is by adjusting the potentiometer to either raise or lower the level.
The connections are pretty basic.
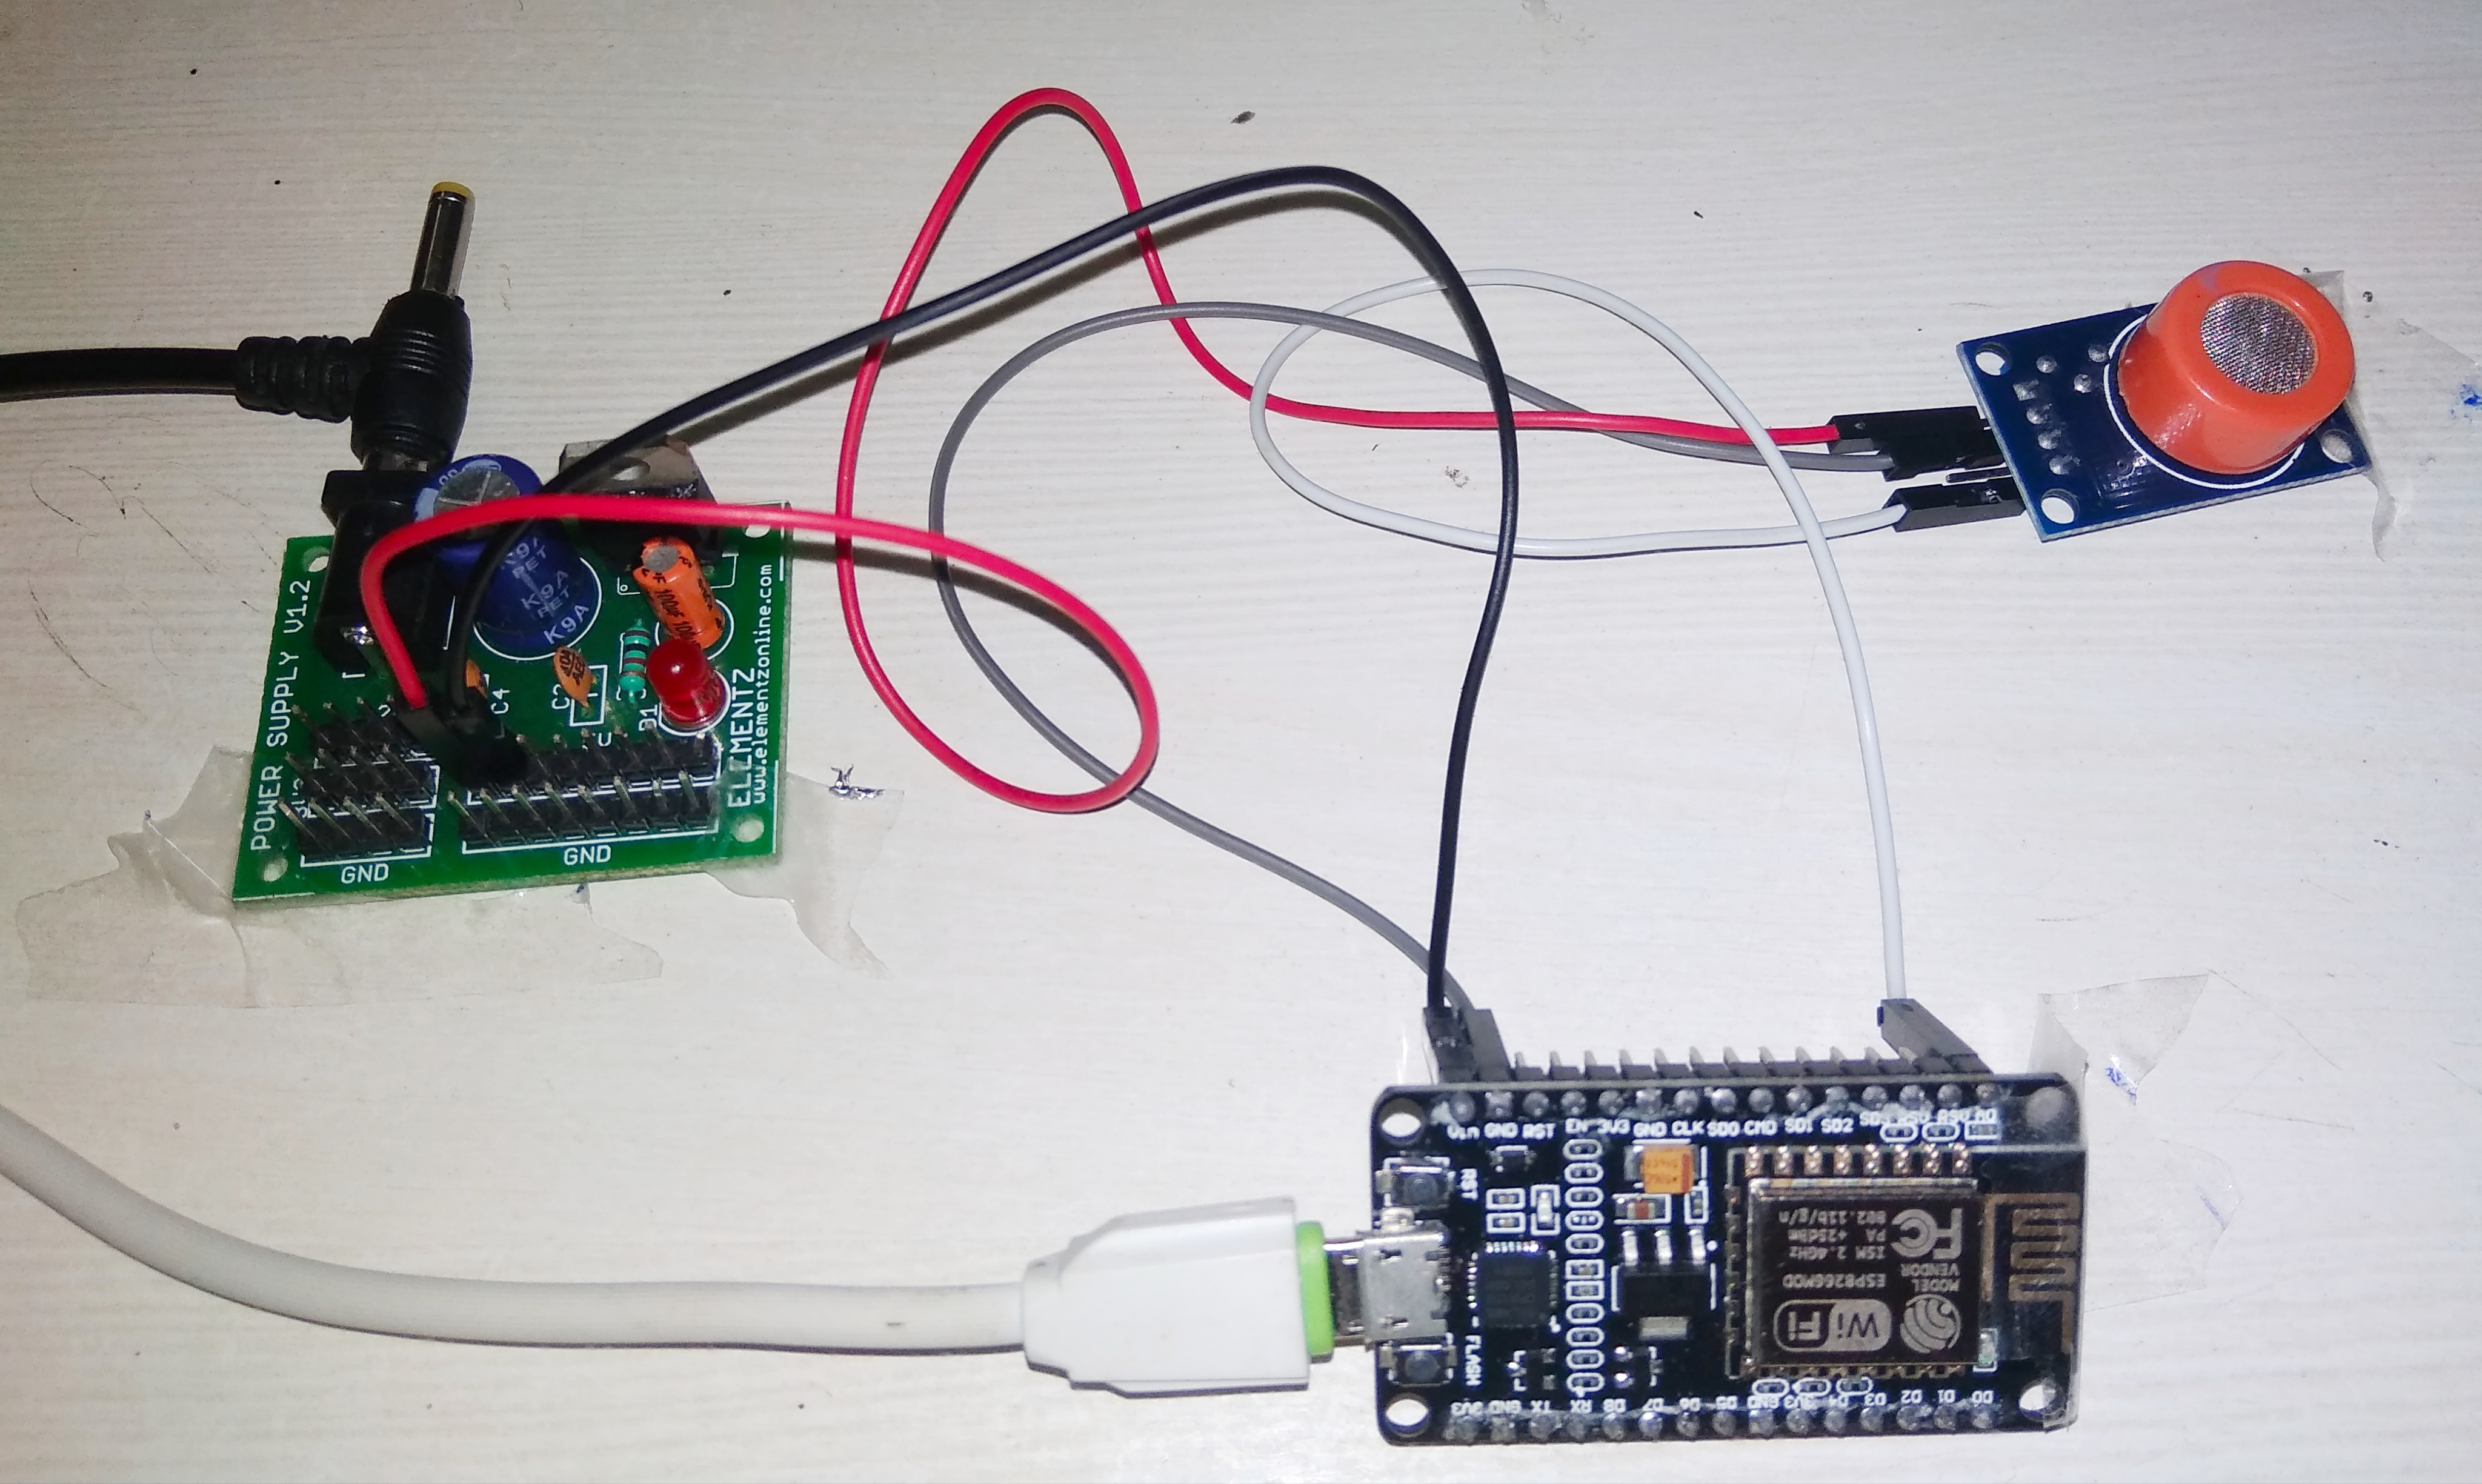
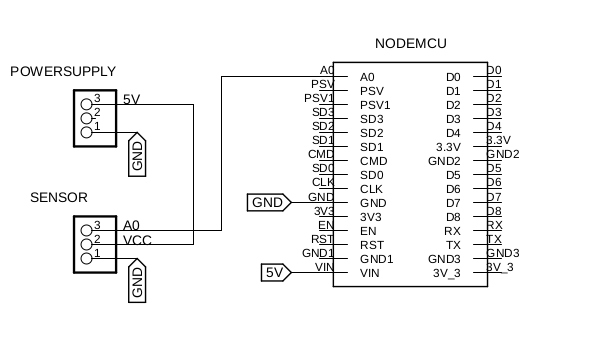
To connect the sensor, there are 3 leads. The +5V terminal of the sensor connects into the 5V terminal of the power supply board. The GND terminal of the sensor connects into the GND terminal of the NodeMCU. This establishes power for the sensor. The other connection is the analog output of the sensor. It is connect to analog pin A0 of the NodeMCU.
Procedure
Step 1: Go to https://thingspeak.com/ and create your ThingSpeak Account if you don’t have. Login to Your Account.
Step 2: Create a Channel by clicking ’New Channel
Step 3: Enter the channel details.
Name: Any Name
Description: Optional
Field 1: Sensor reading – This will be displayed on the analytics graph. If you need more than 1 Channels you can create for additional Sensor Data.
Save this setting.
Step 4: Now you can see the channels. Click on the ‘API Keys’ tab. Here you will get the Channel ID and API Keys. Note this down.
Step 5: Open Arduino IDE and Install the ThingSpeak Library. To do this go to Sketch>Include Library>Manage Libraries. Search for ThingSpeak and install the library. ThingSpeak Communication Library for Arduino, ESP8266 and ESP32 https://thingspeak.com
Step 6: Need to modify the code .In the below code you need to change your Network SSID, Password and your ThingSpeak Channel and API Keys.
The Code

Download the code attached here and upload it on your board, and wire everything as shown in previous diagram.
Download code :https://github.com/soorajece1993/Air-Monitoring-System-Using-NodeMCU-and-IOT-Thingspeak.git
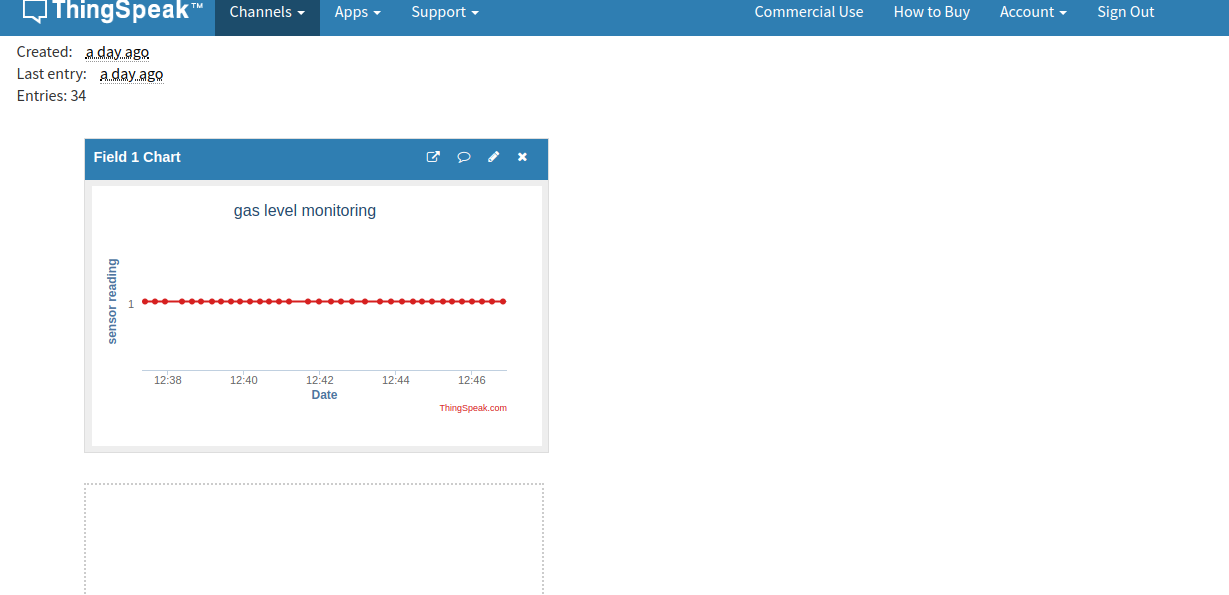
The output will be like above image in ThingSpeak.
Hope this made it easier for you. Be sure to subscribe if you liked this article and found it useful, and if you have any questions or need help with anything, just leave a comment below…
Thanks to elemetnzonline.com..