Affordable Housing - Modular Cargo Container Home
by KakapoKiwi in Design > Digital Graphics
1863 Views, 18 Favorites, 0 Comments
Affordable Housing - Modular Cargo Container Home
Hi! I'm Kasch Marquardt, a freshman in High School. I have decided to make an affordable housing unit out of shipping containers that can be arranged in a multitude of ways. With both a housing crisis and environmental crisis in California today, I believe this challenge can make a difference by spawning new ideas about how to incorporate affordability and sustainability into one. By using used shipping containers to build a home, we can cut down on waste while also using a cost-friendly method of homebuilding to make homes accessible to all.
Supplies
The only supplies I needed were a computer and Autodesk Fusion 360®.
Step 1: Make the Container

I started out this challenge with the main material of the housing development, a shipping container.
To make this, I scaled down the original dimensions of the shipping container from feet to millimeters and doubled it to make a 40mm x 16mm x 19mm rectangle. From here, I put indentations into the sides of the rectangle using the line tool and cut tool. These indentations were 1.2mm wide total, 0.5mm long diagonal indents along with .6mm wide inside length. To make this process go quicker, every time I cut out an indentation, I would select the faces using the rectangular pattern tool and input 18 after selecting the correct axis along the rectangle. For the side, however, I only input 10 for the number of mirrored indents.
After I made the indentations, I cut them to 1mm far from the edge. Next, I copied this method for all of the sides. Finally, I finished the container's appearance by filling in the indentations made at the edge by using the sketch rectangle and extrude tools.
Step 2: Finish and Duplicate the Cargo Container
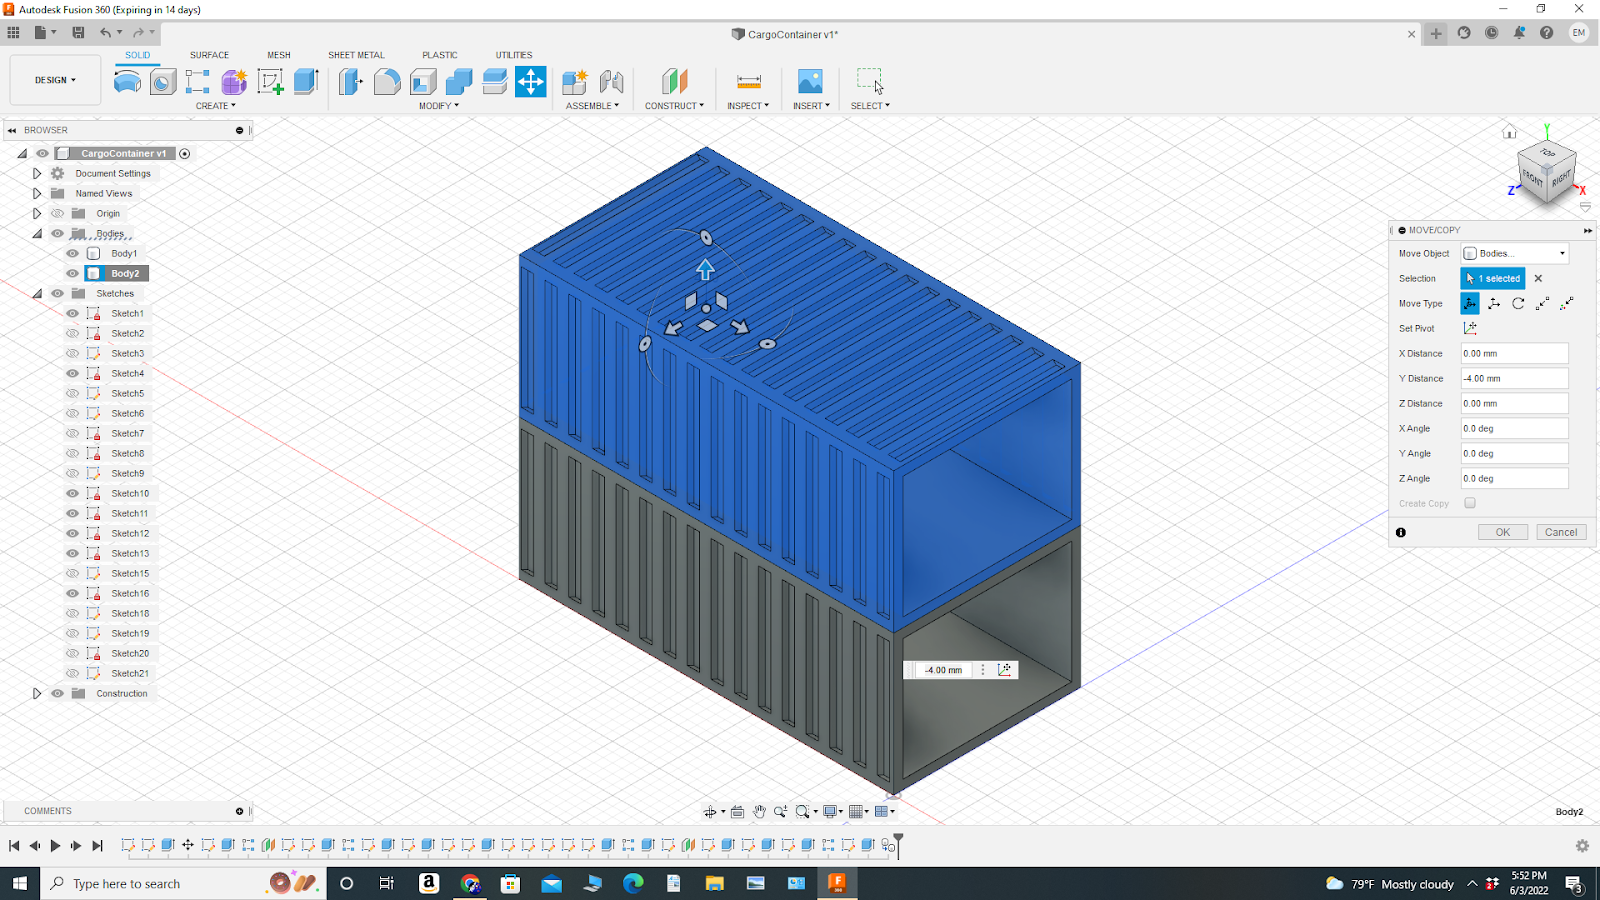
To finish the cargo container, I had to cut it. I used the sketch rectangle tool to draw a rectangle offset 1mm from the edge. Next, I used the extrude tool to cut the rectangle through my shipping container, creating living space.
After the container was finished, I had to duplicate it to add more area to the home. I did this by selecting the body of the cargo container, right-clicking it, and subsequently pressing "Copy". After this, I clicked on "Paste" and moved the second container to the spot I wanted to.
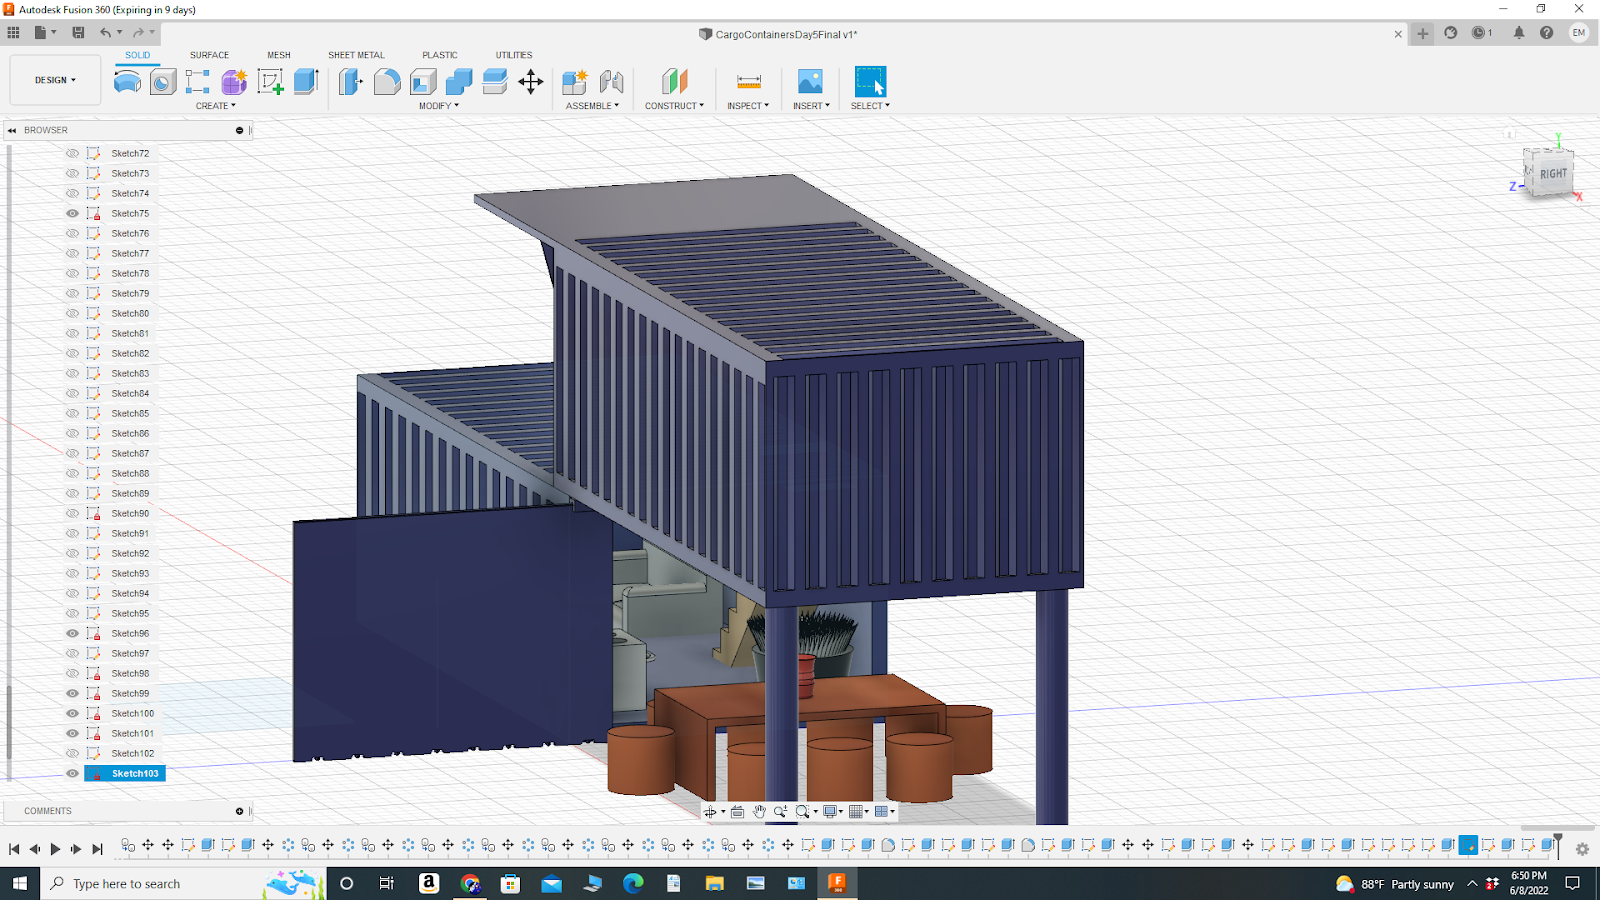
Step 3: Configure the Home
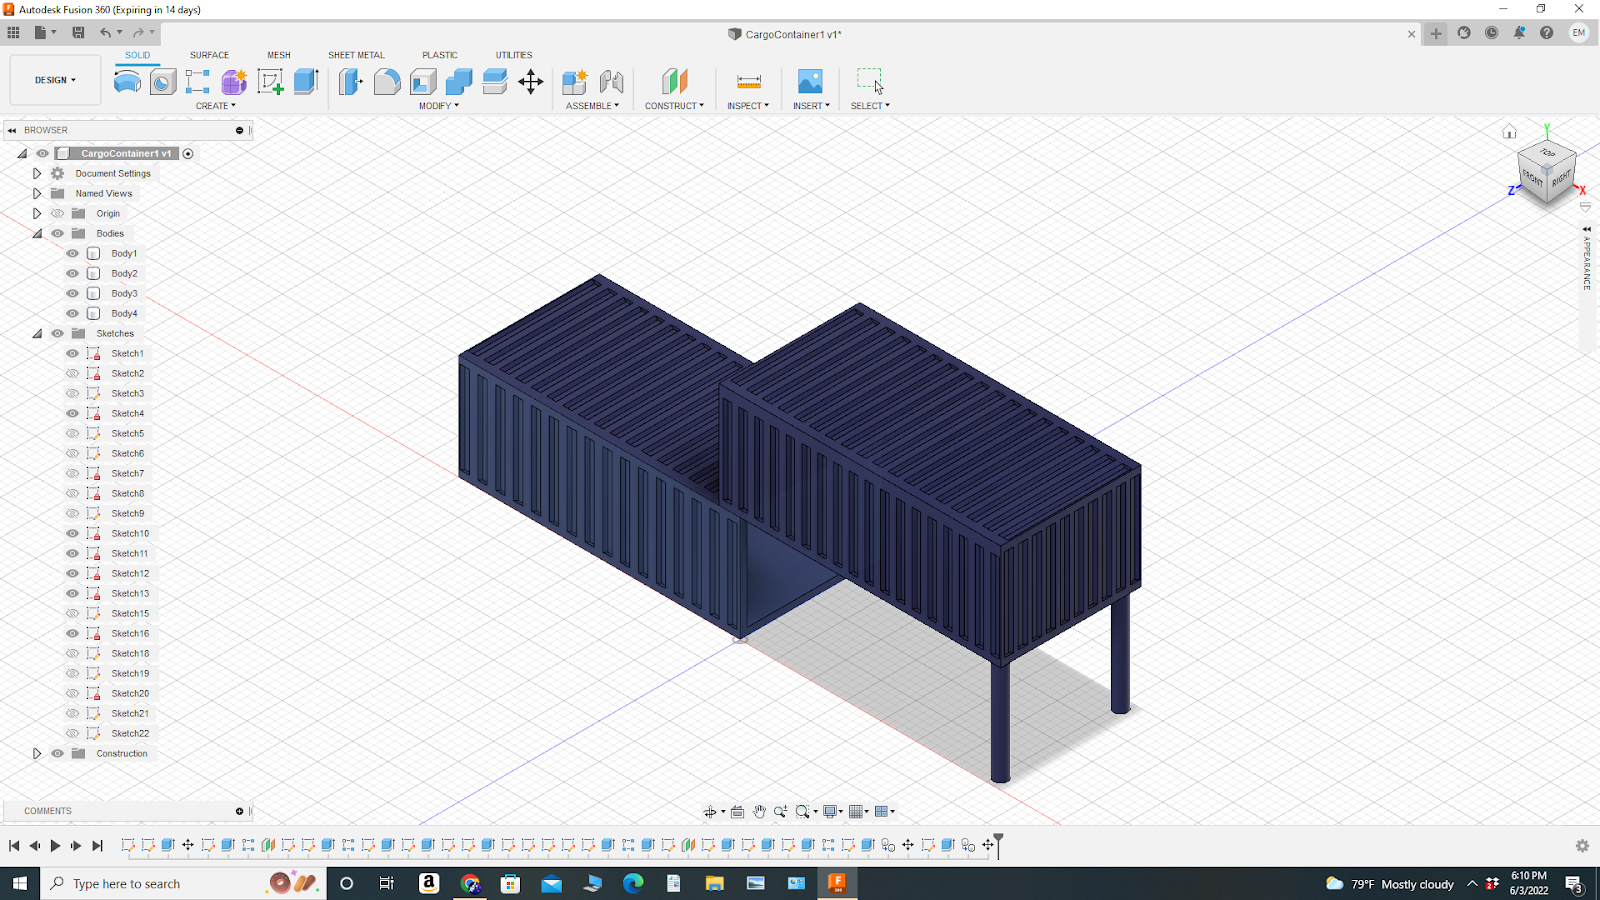
In my mind, my goal for this project was to create an attractive-looking two-story home out of shipping containers. This step started to realize my vision.
The first thing I did to begin configuring this home was to drag the duplicated shipping container 3mm (or 1.5ft scaled) onto the original one and then make two equidistant support beams on the other side, each with a 2mm (or 1ft scaled) diameter.
Lastly, configuring the homes, I colored both shipping containers with a metallic blue paint and then changed the physical material to steel. This is where the vision starts to realize itself.
Step 4: Make Staircase
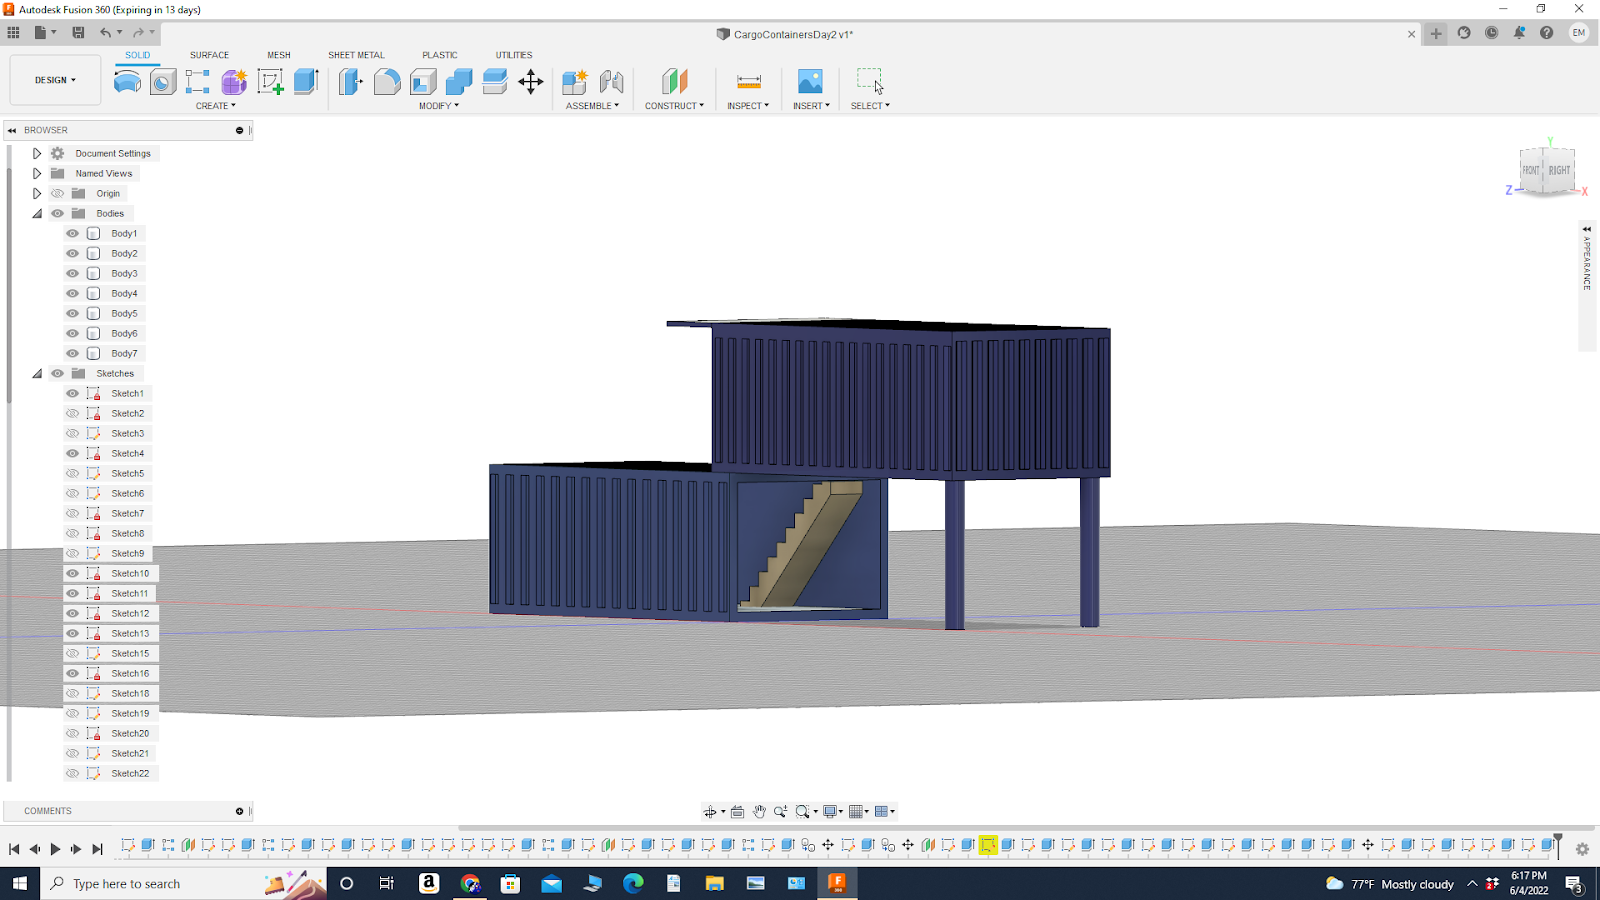
The next step in my design was to make the staircase connecting the two floors.
First, I sketched a rectangle that was 4mm wide and 1.5mm long (2ft x 9in) and subsequently extruded that rectangle 1.5mm for a scaled 9in height. After this, I repeated this step 9 more times, each increasing 1.5mm of height as I went.
After making the steps, It was time to change the appearance of them. I used oak wood for the staircase, and then used the sketch line and extrude tools to cut out the bottom of the steps since they would be fastened to the wall.
Finally, to finish off the staircase, I dragged it into place by using the move tool and arrows. I positioned it so that it would lead to the second cargo container. To make it accessible, I also cut a hole in the cargo container large enough so that someone could come through.
Step 5: Make the Door/Awning
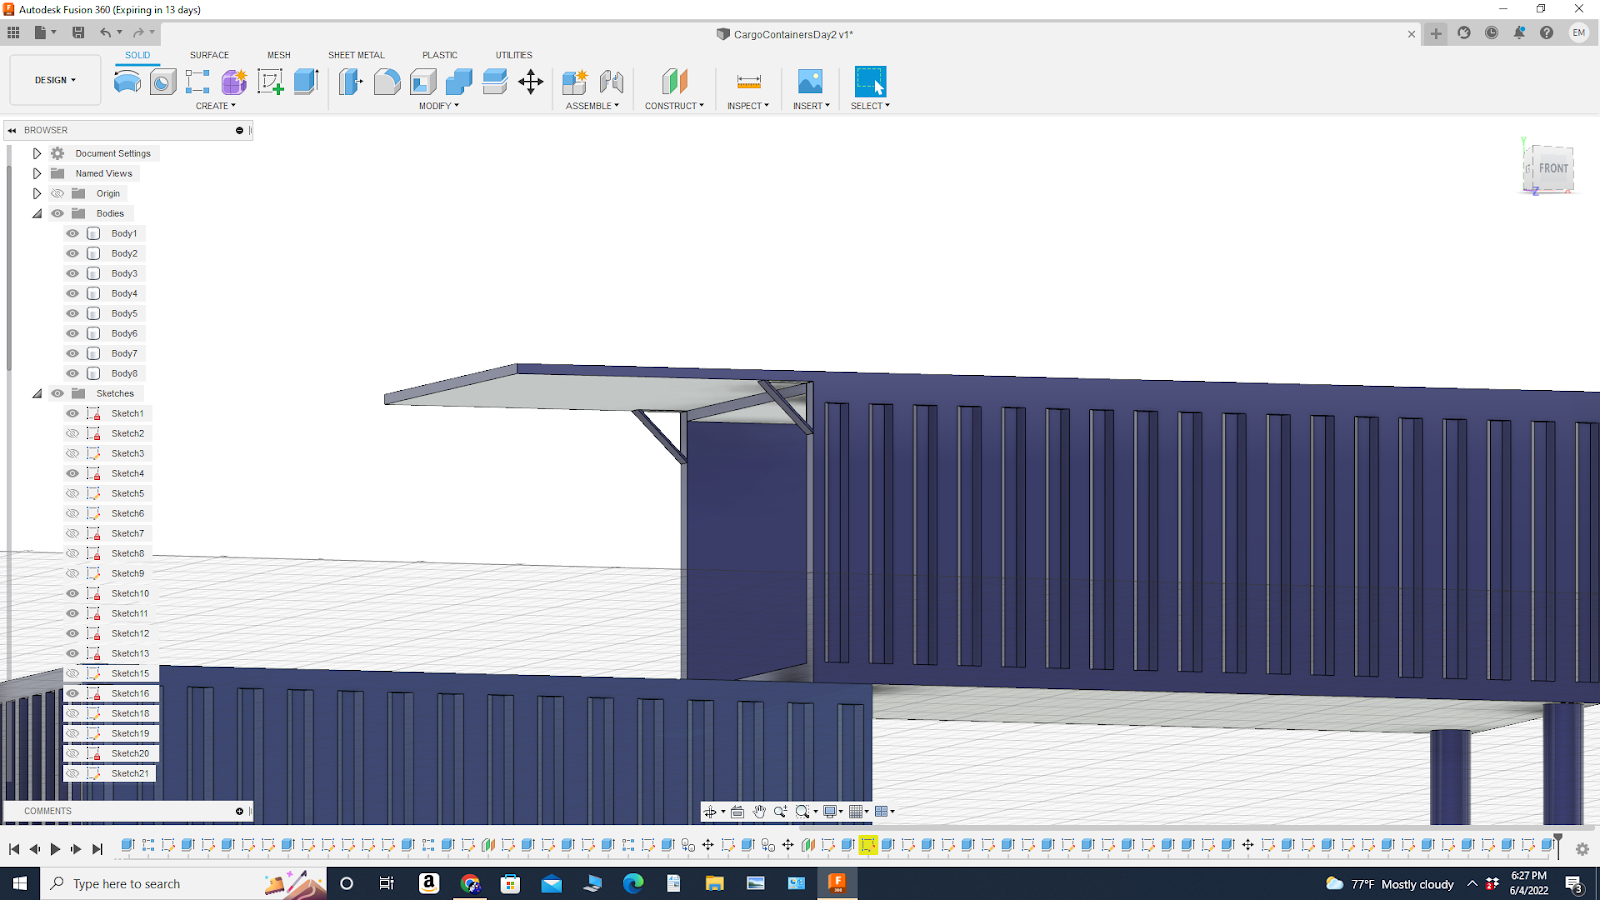
After making the hole in the cargo container, I realized it would be necessary to close the hole in the upper container. After seeing this, I decided to make a sketch of a rectangle 0.5mm by 19mm. After sketching the rectangle, I extruded it to 16mm so in the case it needed to be closed, it is able to be. To make this possible, I also added stands that could hold the door open or collapse it when necessary. This component not only acts as a door, but also as an awning.
Step 6: Make the Second (Sliding) Door
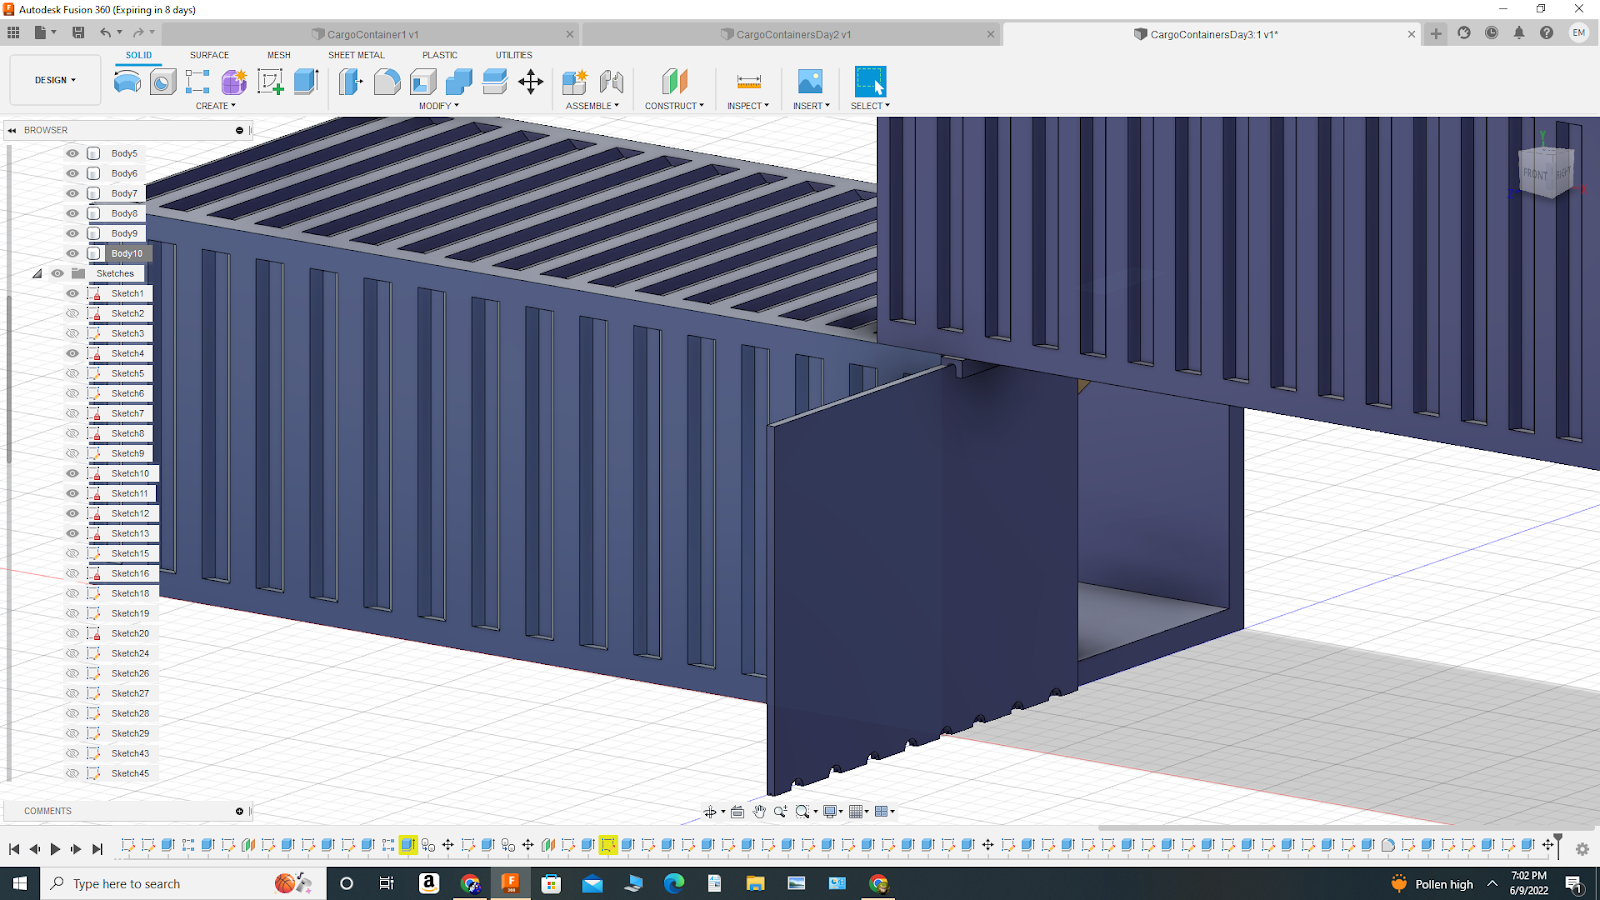
To make this crucial part of the design, I started by making a 1mm rectangle connected to the cargo container using the sketch tool, and then cut another, 0.4mm rectangle out in the middle of that one (extruded from the bottom. Afterwards, I filleted the two top angles to make a holder for the door to be inserted into.
As this piece was 0.4mm wide, I subsequently constructed another, 0.37mm x 14.6mm rectangle to fit inside it. After this, I needed the door to slide so I created wheels and a turn-able axle to allow the door to slide. To do this, first I had to cut semicircular holes in the original rectangle, then make 8 slots for wheels to fit into and then add the axle which goes through all wheels.
After making the components, I used the move tool to slide the door into the holder.
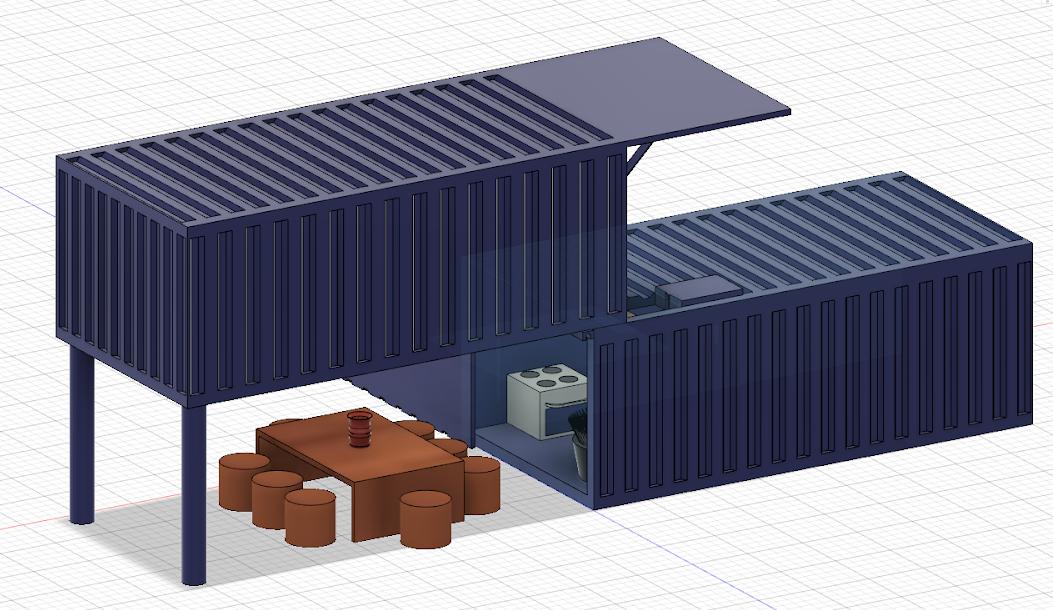
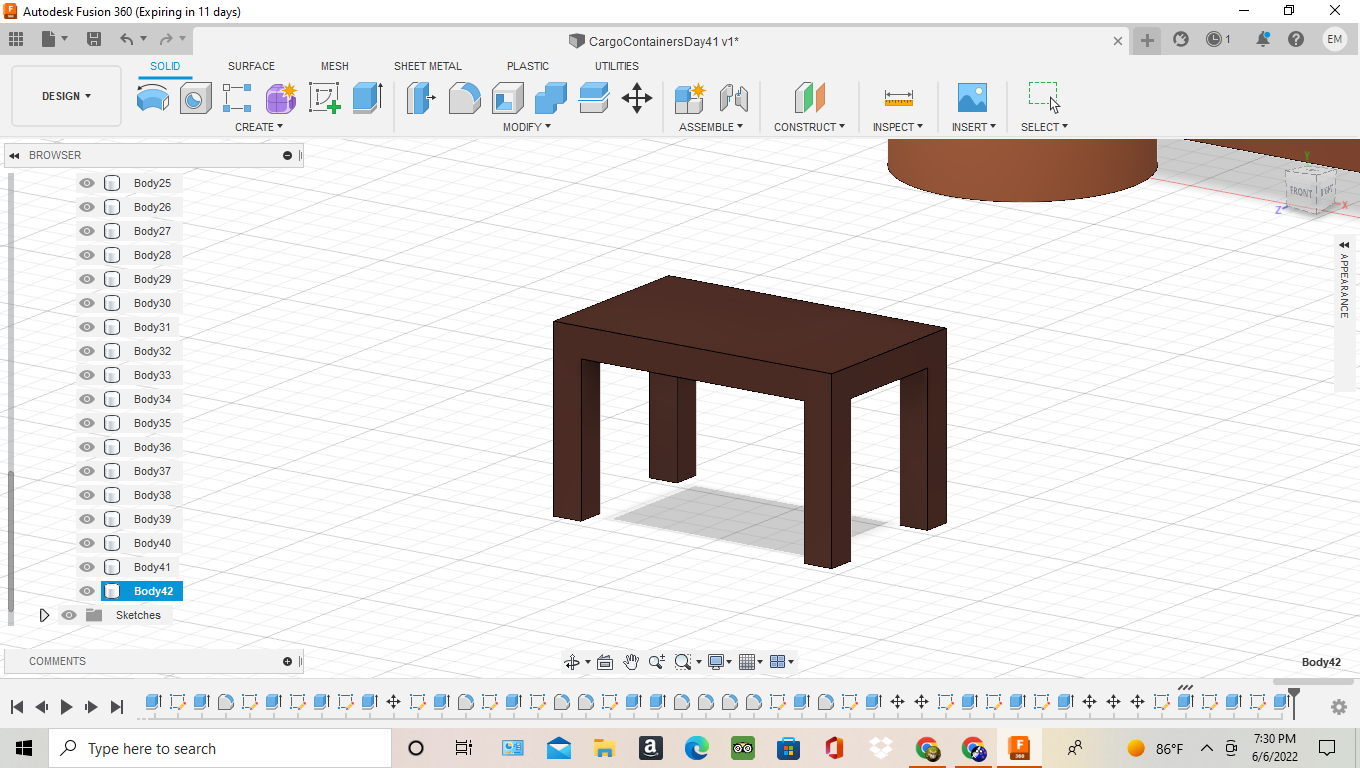
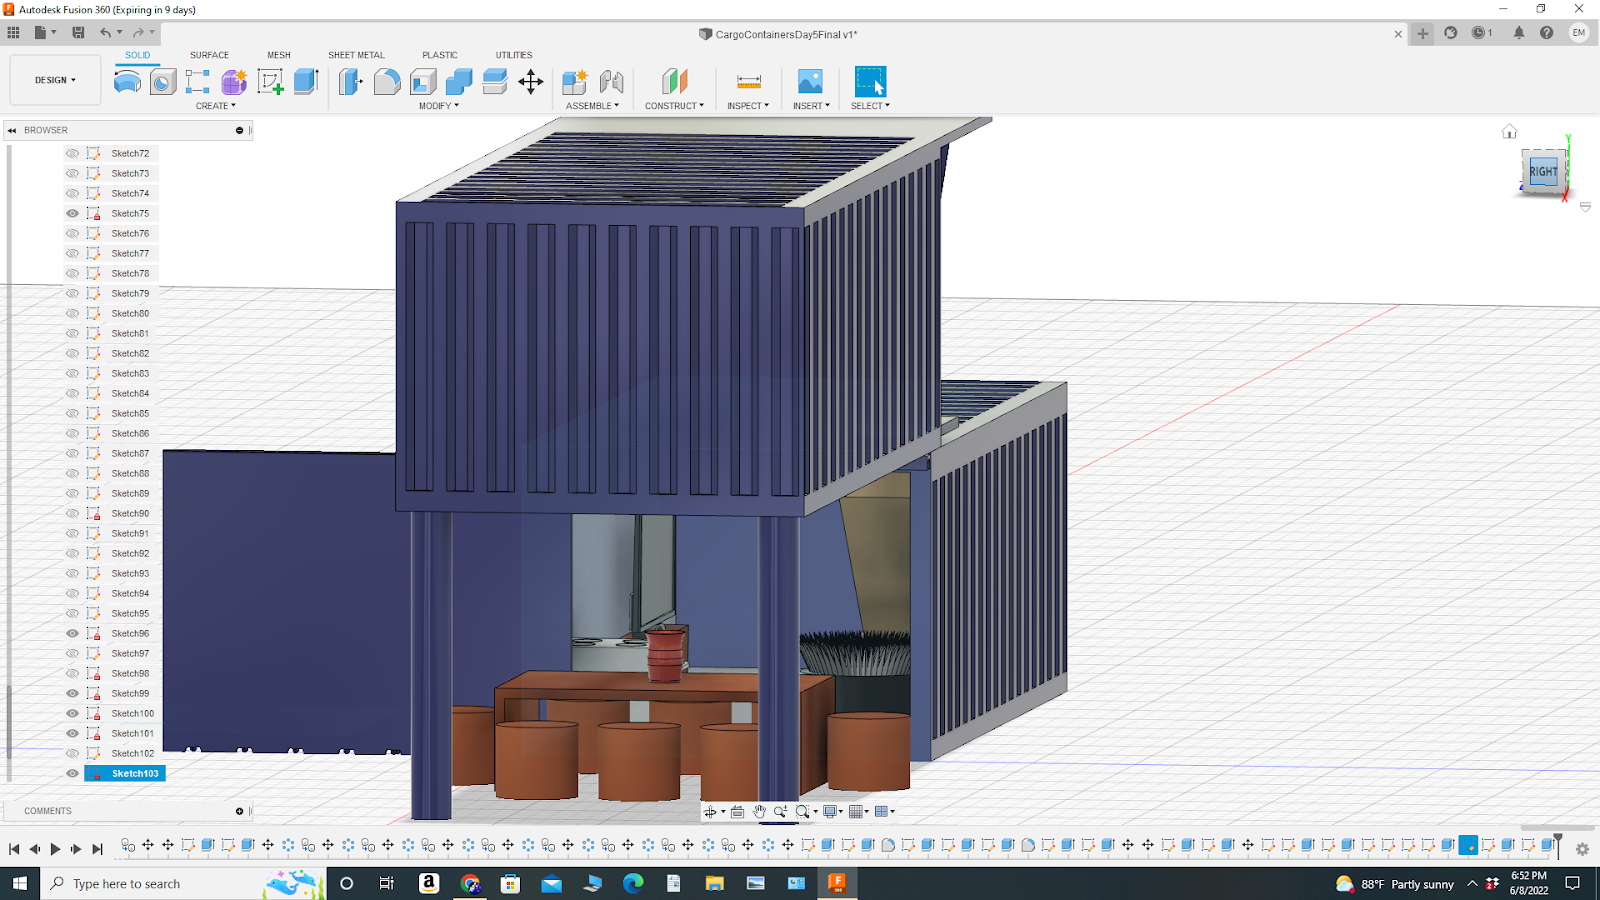
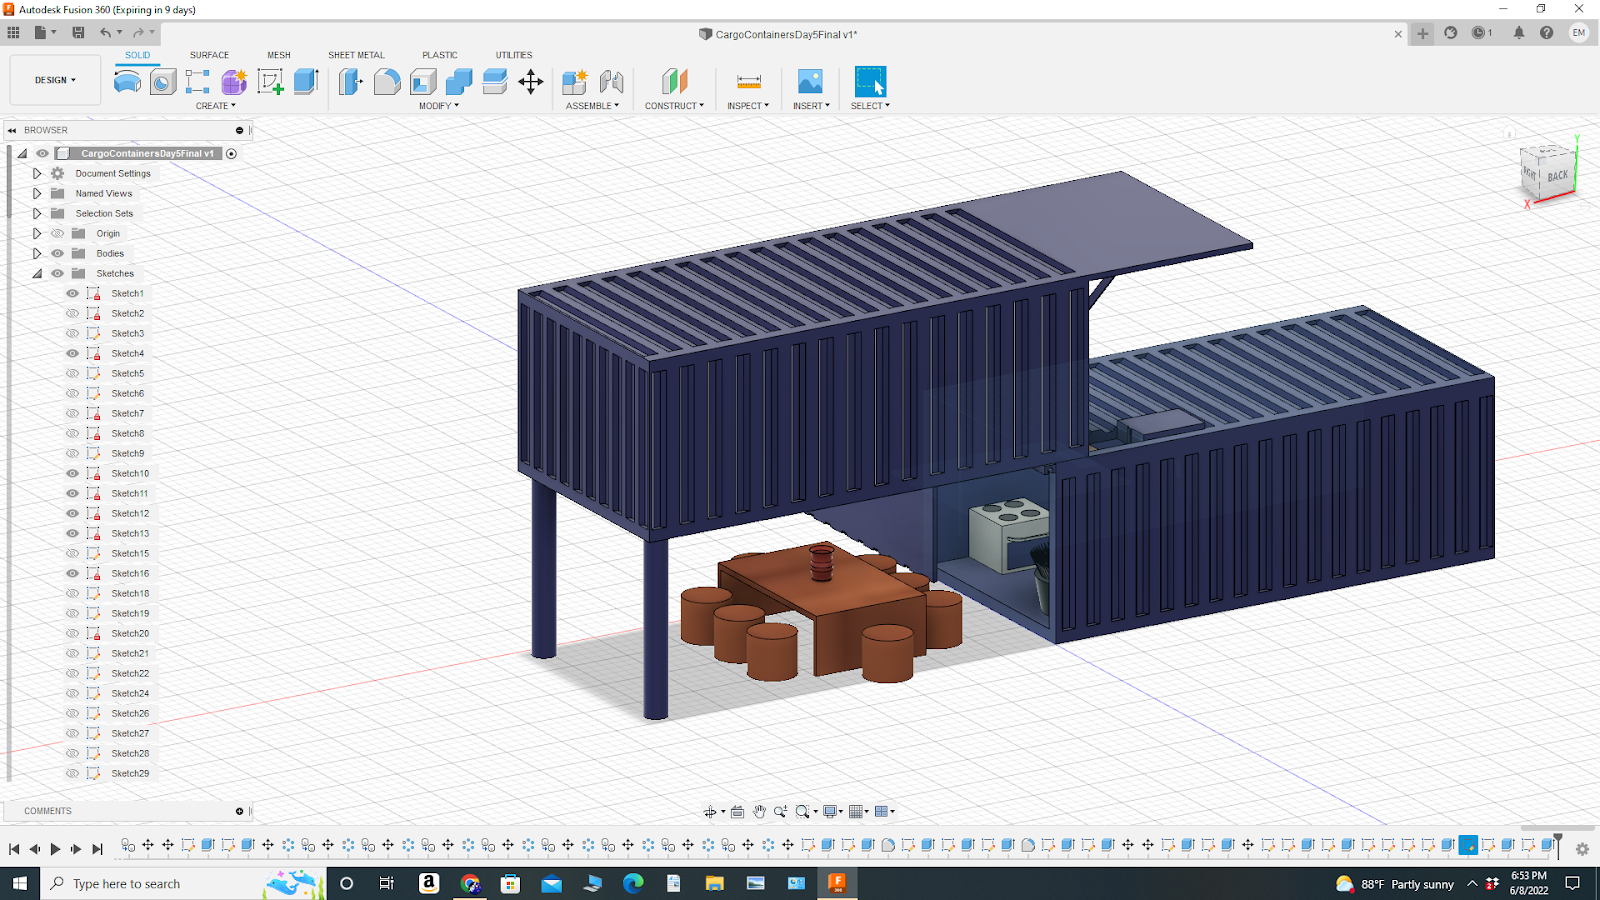
Step 7: Make the Outdoor Table
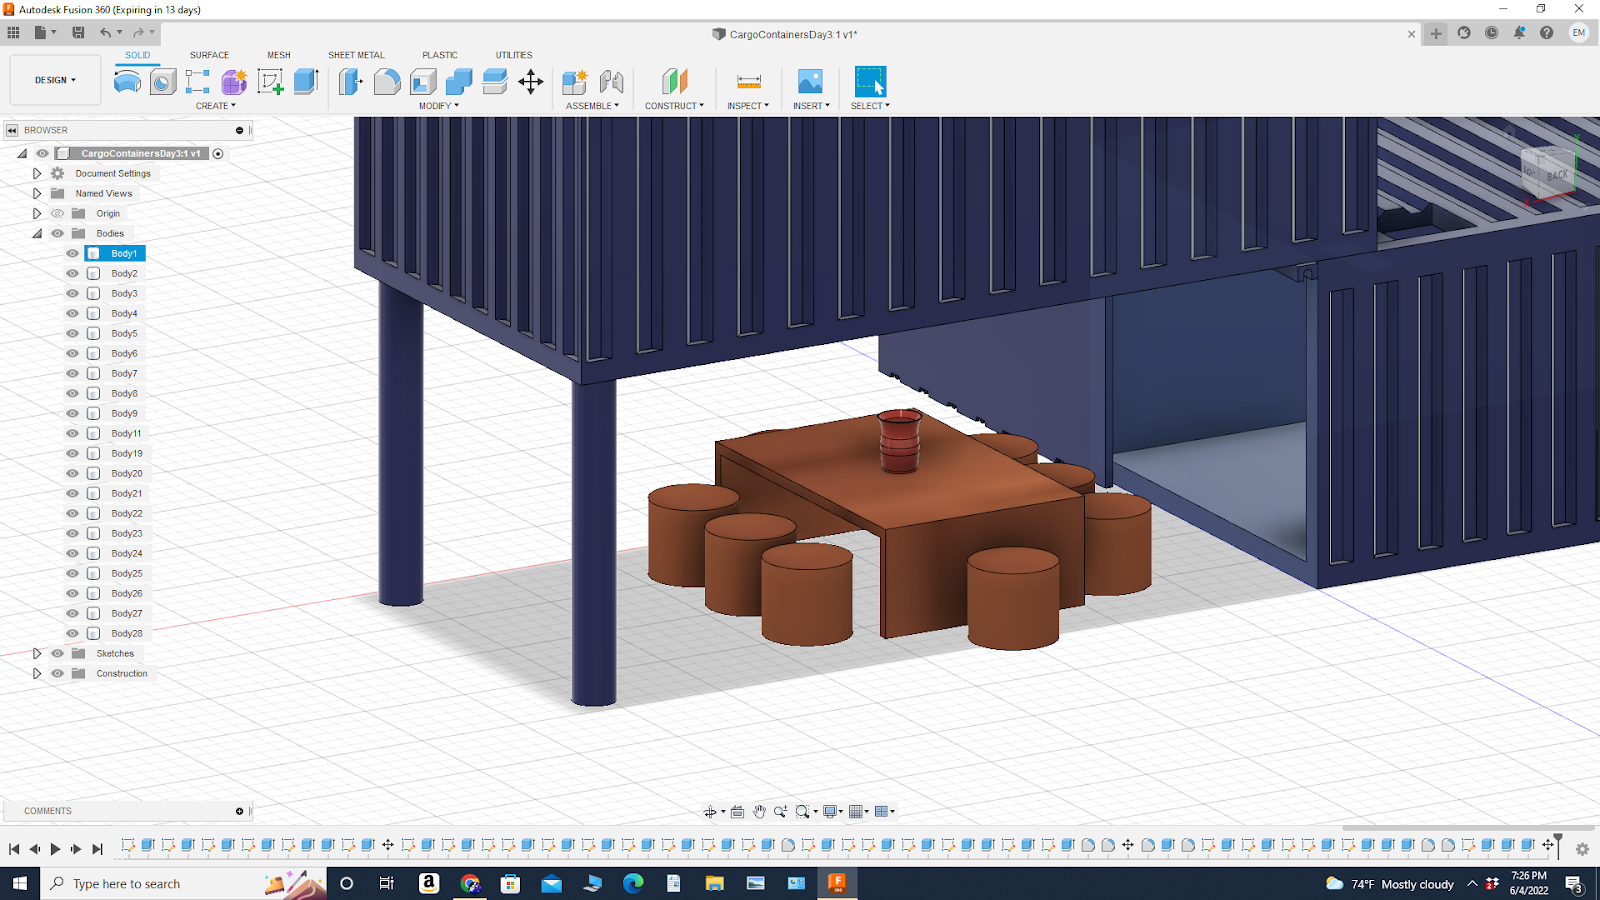
After all of the structural components were finished, I had to start furnishing the house. The first step in this process was to add some liveliness to the outdoor patio naturally shaded by the second cargo container.
To create this piece of furniture, I started by creating a 10mm by 15mm rectangle with the sketch tool and extruding it to 5mm. After the base piece was made, I cut out a 14mm section from the middle to create a modern-looking table.
After creating this table, I decided that I needed to create the stools. I started by making three 4mm-diameter stools on each side and one at each end. After this, I extruded these stools to 3.5mm high.
After creating this dining set, I decided to change the appearance of these pieces to cherry wood, creating great, solid wood chairs.
After making this key component of my design, I felt that the solid look of the wood was a bit boring, so I created a quick vase by creating a circle with a 1.5mm diameter and extruding it with a taper angle of 10. I then stopped this after extruding 1.5mm to start extruding that surface circle but extruding it with a -10 scale factor for another 1.5mm. Finally, I created the rim of the vase by extruding the top of that circle with a taper angle of 20. To polish off the vase, I filleted all of the angles to create a smooth look. As the last touch, I also colored the vase with a glossy red paint.
Step 8: Make the Sofa
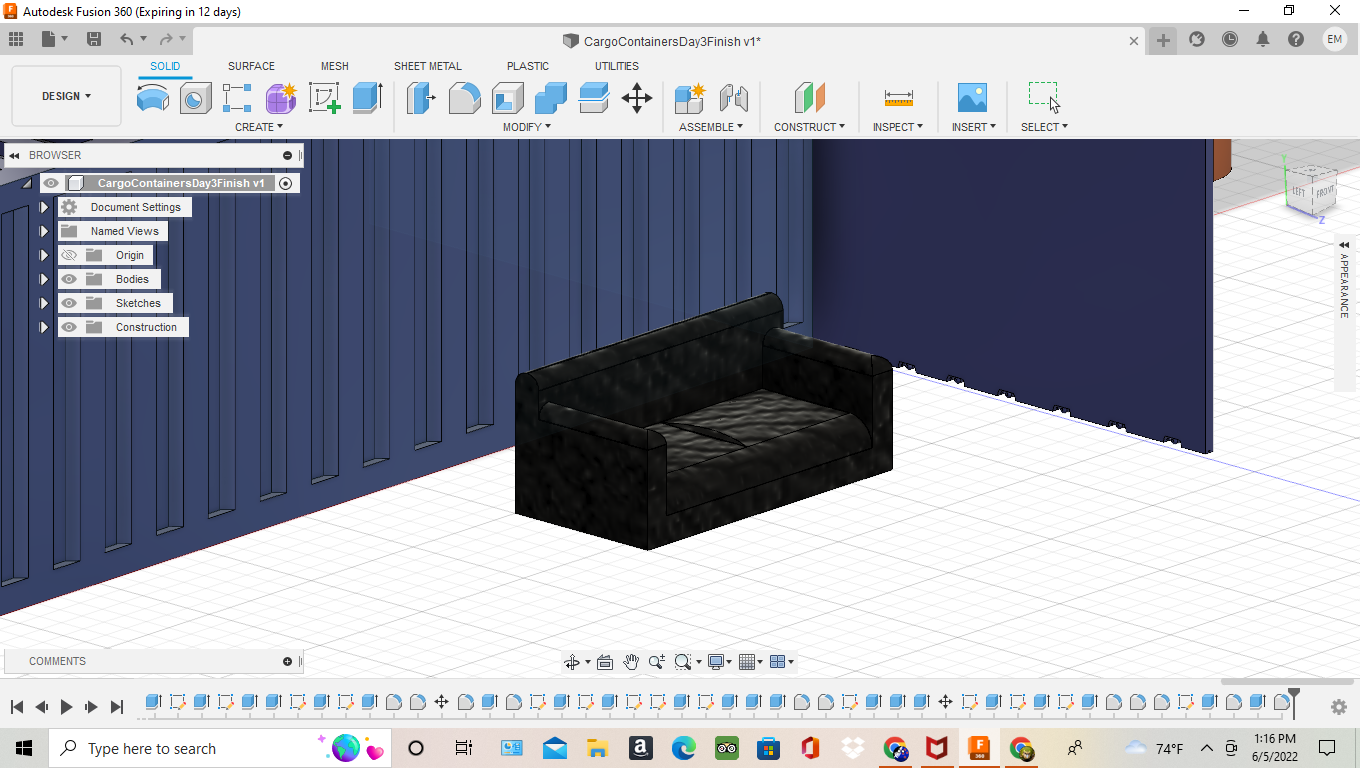
To start making the sofa, I sketched a rectangle 12mm x 6mm. After sketching, I extruded the rectangle 2.5mm and then added three more rectangles on top of the main one. One of these was to act as the backing of the sofa, and it measured 1mm x 12mm, while the other two were the sides, which measured 1mm x 5mm, right to up against the backing of the sofa.
Now that the main shapes of the sofa are complete, to polish the edges, I filleted all the sides except for the very back of the couch, and even made two separate rectangles in the middle of the main seating space to represent two cushions. However, when making the sofa, I went by looks and filleted accordingly, increasing creative freedom.
Finally, I used the sofa as an opportunity to change the appearance to a black leather fabric, finishing the look.
Step 9: Make the Bed
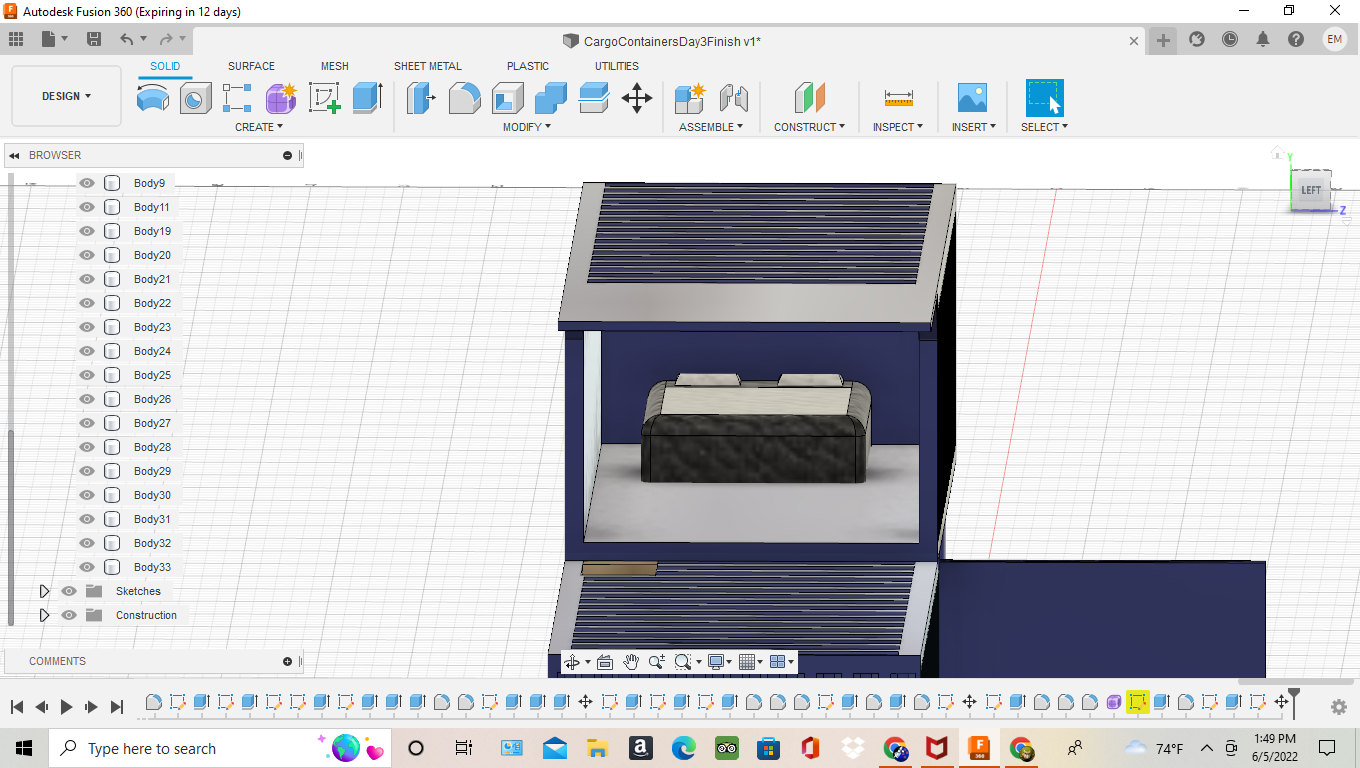
As possibly the most necessary item in the house, this bed was crucial to make. Making a king bed, I started off by sketching a 14mm by 11mm rectangle and extruding it 3.5mm. Then, I subsequently filleted all the top sides by 0.5mm and then the sides by 0.15mm. After making the component, I colored it black to match the theme of this house.
Next, after making the bed, I made the sheet. I did this by making a rectangle 10mm by 6mm, extruding it .01mm, and changing the body's appearance to white fabric.
Finally, the pillows. I made these by sketching a rectangle 3.5mm by 2mm and extruding it 0.6mm. After this, I filleted the two 3.5mm sides by 1.25 to create a concave look. Then, I duplicated that pillow and moved the bodies to the upstairs portion of the cargo container house.
Step 10: Make the Toilet
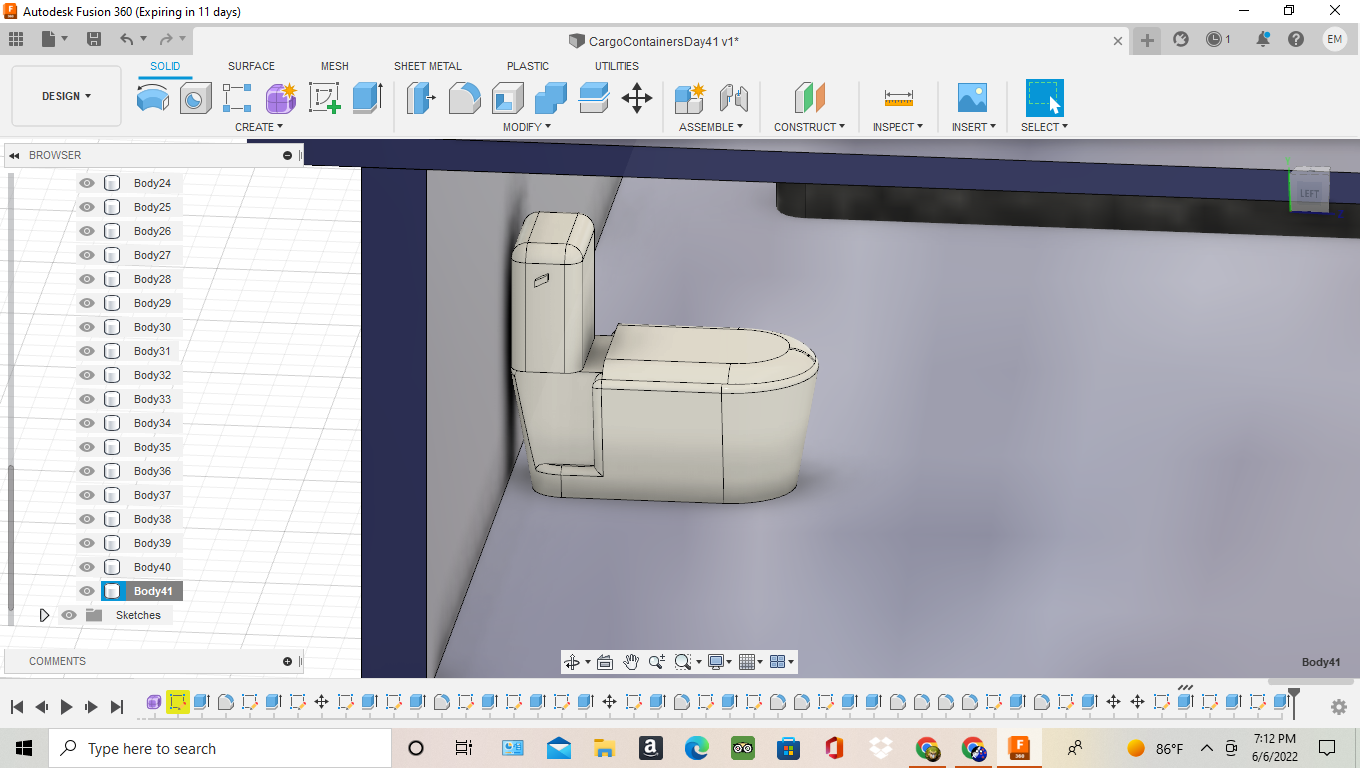
Despite being a fairly complex piece to create, the shape mostly just involves lots of filleting. I started creating this important component by making a 3mm by 1.8mm rectangle and extruding it 1.5mm with a taper angle of 7. I then filleted the front two sides by 1.75mm to create a concave face. After this, I filleted the top sides by 0.1mm to remove the sharp edges. Then, I created cuts in the back of the toilet that measured 0.5mm by 1.5mm. I subsequently cut these shapes out of the toilet by extruding them in 1mm. Next, I filleted all of the exposed sharp angles from this cut by 0.1mm, finishing the main body of the toilet.
To make the storage tank, I made a 1mm by 2mm rectangle and extruded it 2mm. Subsequently, I filleted all of the exposed sides by 0.5mm to create a streamlined look. To create the flusher lever, I made a small, diagonal rectangle with the line tool measuring 0.225mm by 0.1mm. I extruded that 0.1mm.
Lastly, to finish the toilet, I made a seat cover which I started by extruding the already present top of the toilet by 0.2mm and filleting that newly extruded portion by 1mm.
After making the piece, I had only one thing left, to change the toilet's appearance to white ceramic.
Step 11: Half Bath
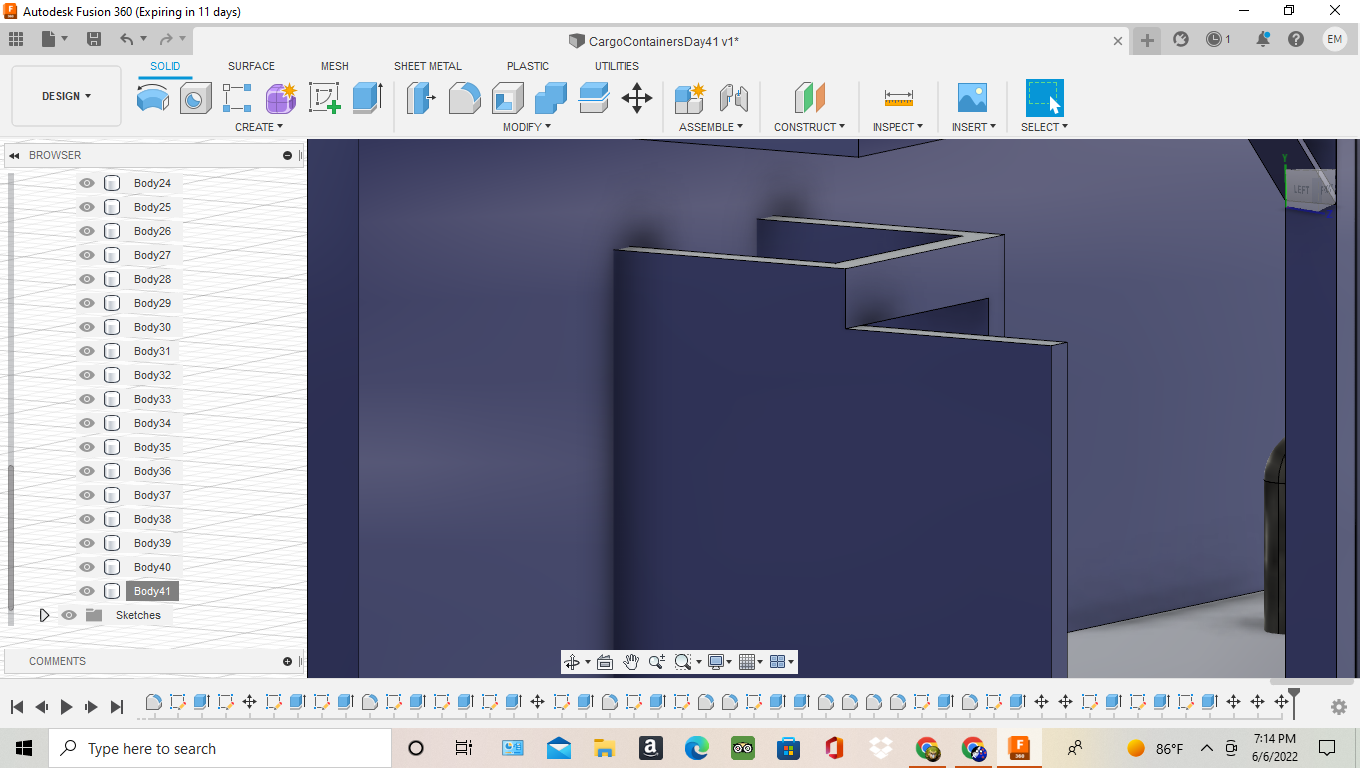
To make the half bath and offer privacy, I started by moving my toilet to the second cargo container in front of the bed. I started by creating a new body and creating three rectangles, each 5mm long and 0.5mm wide. I subsequently created the hinged door by making a hole in one of the walls and replacing it with a same-sized rectangle attached to the other side. I then cut out part of the material connecting the door and the wall, and to signify a hinge, I made a 0.1mm thick patch on both of these components connected in the middle by a 0.2-diameter cylinder.
Step 12: Bedside Tables
Possibly the simplest step of the whole operation, to make these bedside tables I sketched a 5mm by 3mm rectangle and extruded it 3mm. I subsequently cut out a 4mm wide and 2.5mm tall section out of one of the sides of the table going through the component. Afterward, I sketched a 2.5mm tall and 2mm wide section on the other side of the table and also cut that out, revealing four legs.
Lastly, I changed the table's appearance to mahogany and copied it, subsequently moving the components to the opposite sides of the bed on the second floor.
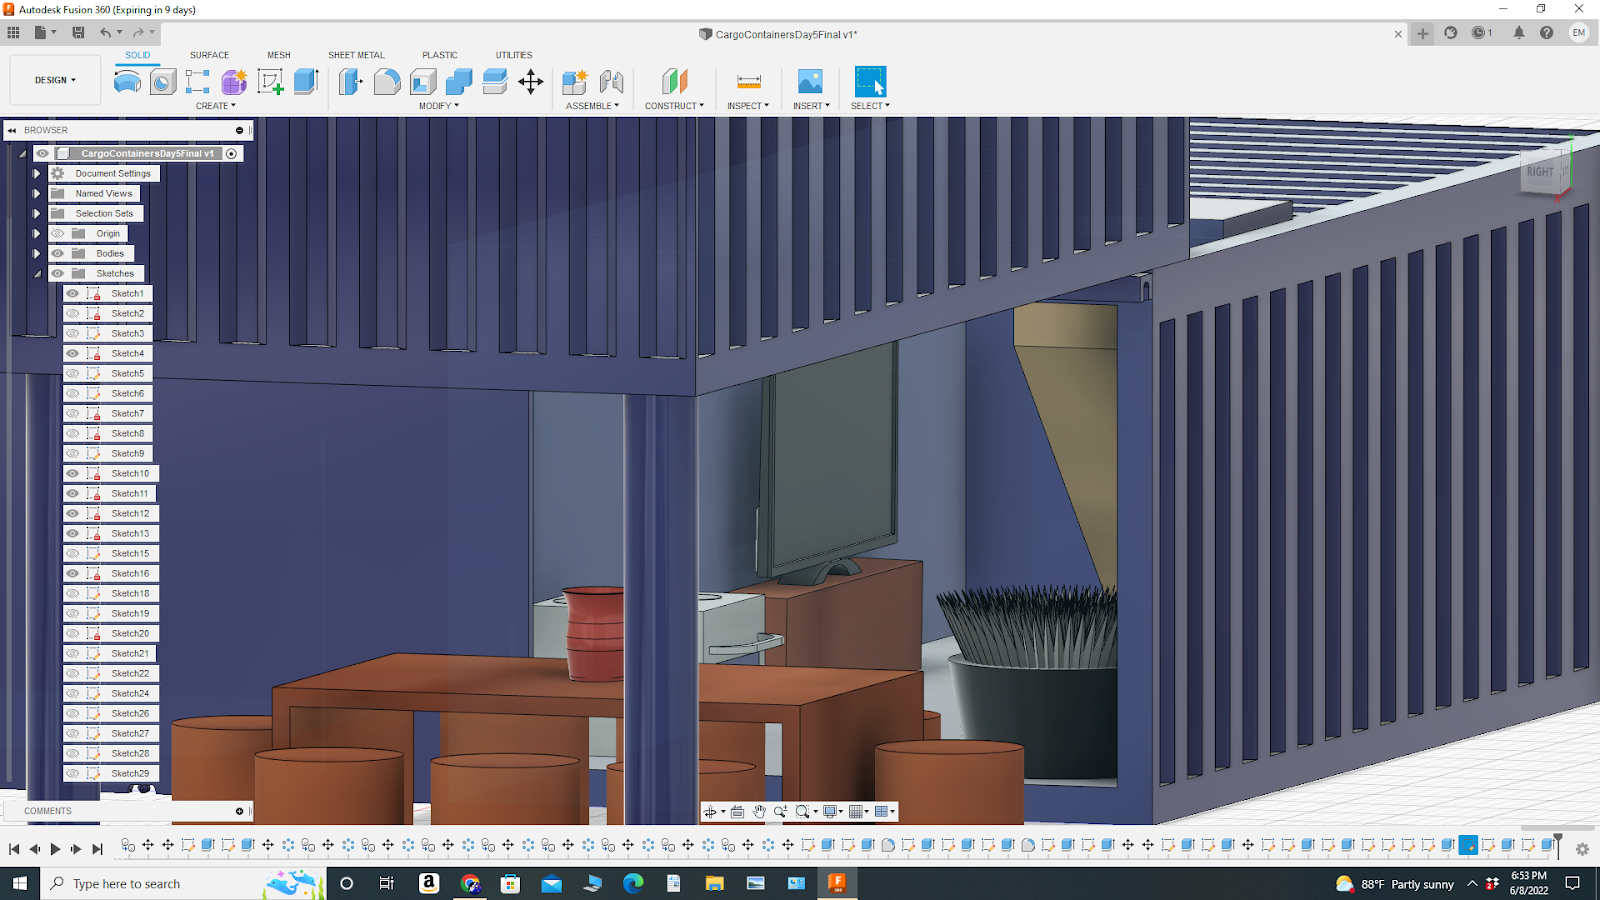
Step 13: Plant
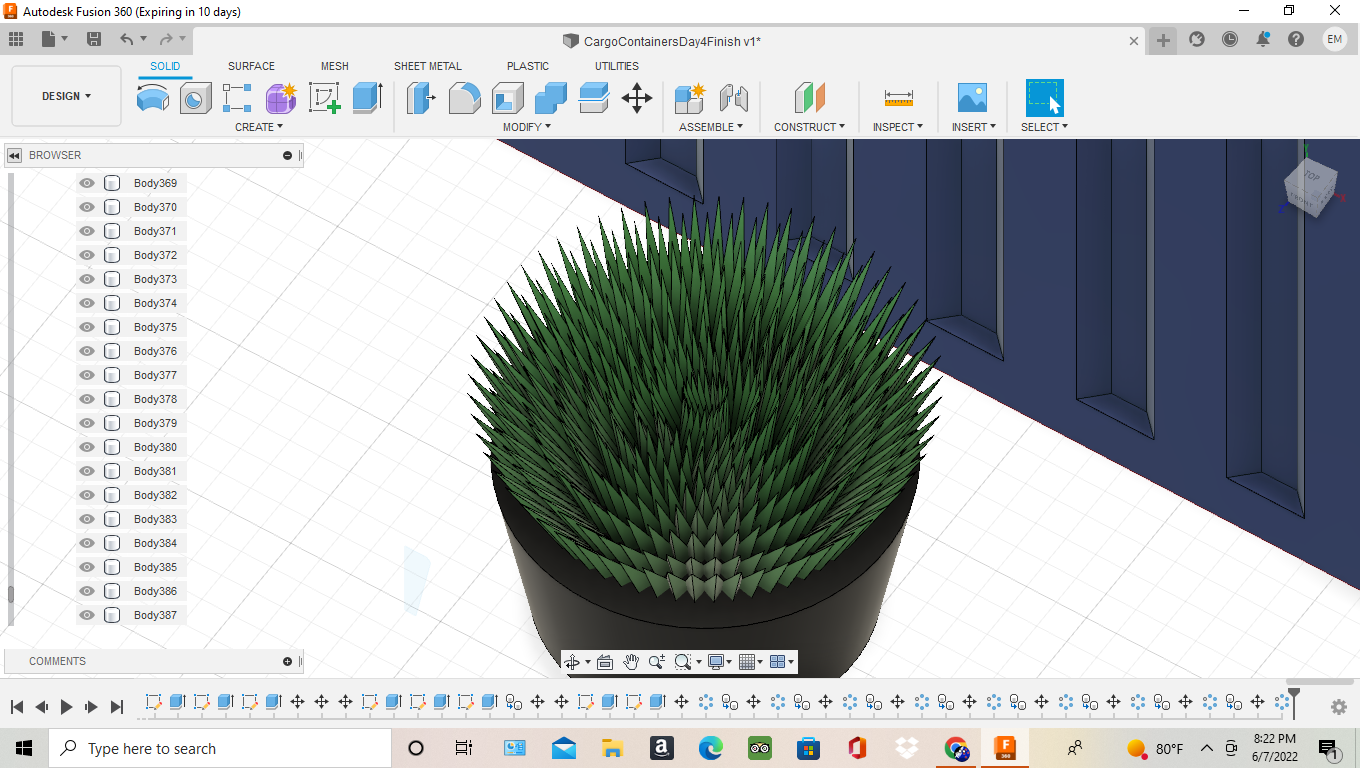
Possibly the most time-consuming item of the affordable housing unit, this plant awakened my creativity as well as provided some fresh air to the family living in the home.
To make this plant, I started by sketching a 5mm-diameter circle and extruding it 3mm with a taper angle of 7. After this, I changed the pot's appearance to matte black.
After making the pot, I started making the plant. First, I made an isosceles triangle with the line tool, measuring 0.4mm by 0.36mm by 0.36mm. Afterward, I extruded this shape 2mm with a taper angle of -3. I then rotated this angle 30 degrees to the side. I colored this leaf with green paint, and then used the circular pattern feature to duplicate these leaves around the pot. I started with 70 leaves on the first rotation, but as I got further in, every time the leaf count decreased by 5, the angle was rotated 5 degrees to the center, and the leaves were moved in 0.15mm until the circular pattern reached the very middle.
Step 14: TV
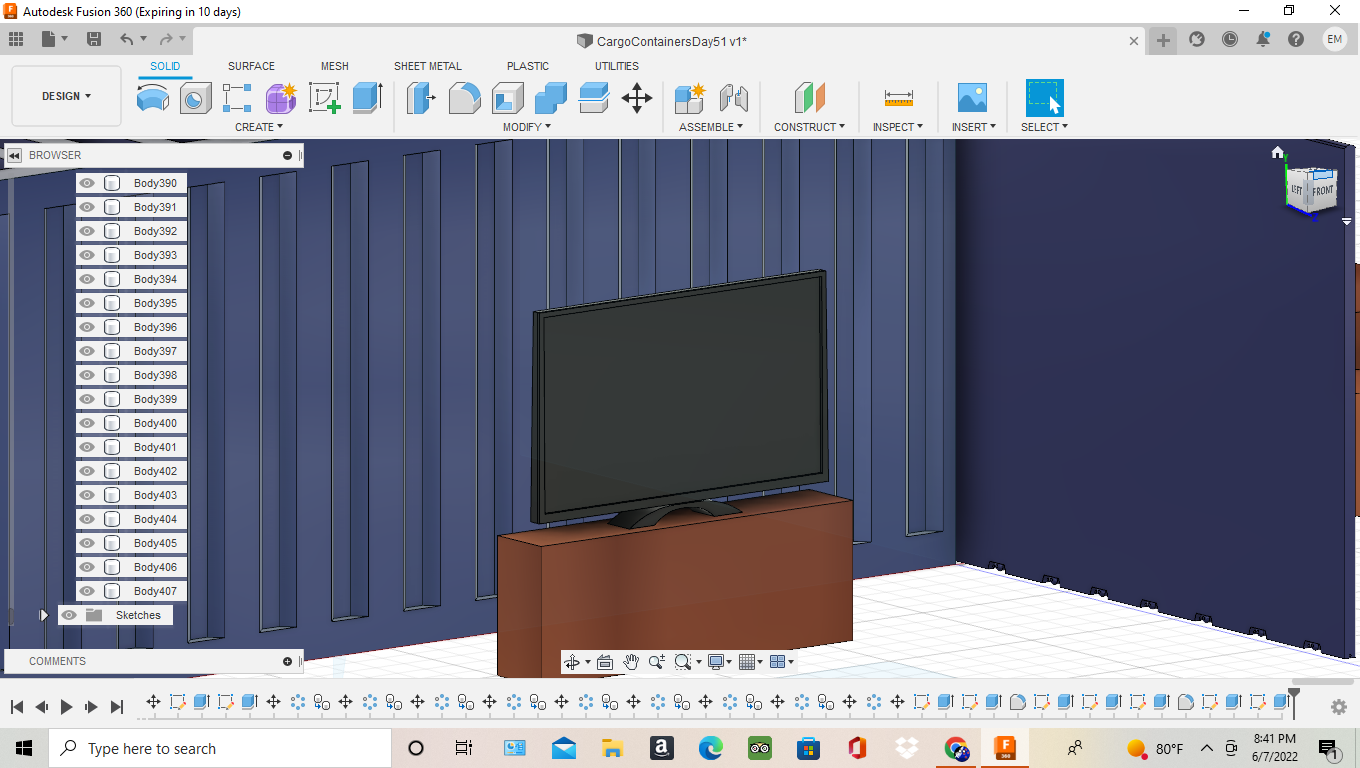
To make the television for the house, I started by making a stand that measures 11mm by 2mm and extruded it 4mm before changing its appearance to mahogany wood.
I started making my TV by extruding a 4mm by 1mm rectangle by 0.75mm as a new body and then filleting the two 1mm sides by 1.6mm. After this, create a 2.1mm by 1mm rectangle in the same spot as the previous one (from the center point), fillet it by 1mm, and then extrude it 0.65mm to create the base.
To create the screen and back of the TV, create a 0.25mm wide and 10mm long back rectangle, and extrude it 1.75mm to act as the box which includes all of the wiring. Next, make a rectangle in front of that one which is 0.2mm thick and 11mm long. This will be the screen. Extrude that rectangle 6mm. After this, clean up the back of the TV by filleting the wire box sides by 0.7mm. To finish the TV by making the frame, make a rectangle on the screen that measures 5.6mm by 9.8mm. Now, extrude what was outside of the sketched rectangle by 0.1mm to create a frame. Lastly, color the whole component with black paint.
Step 15: Stove/Oven
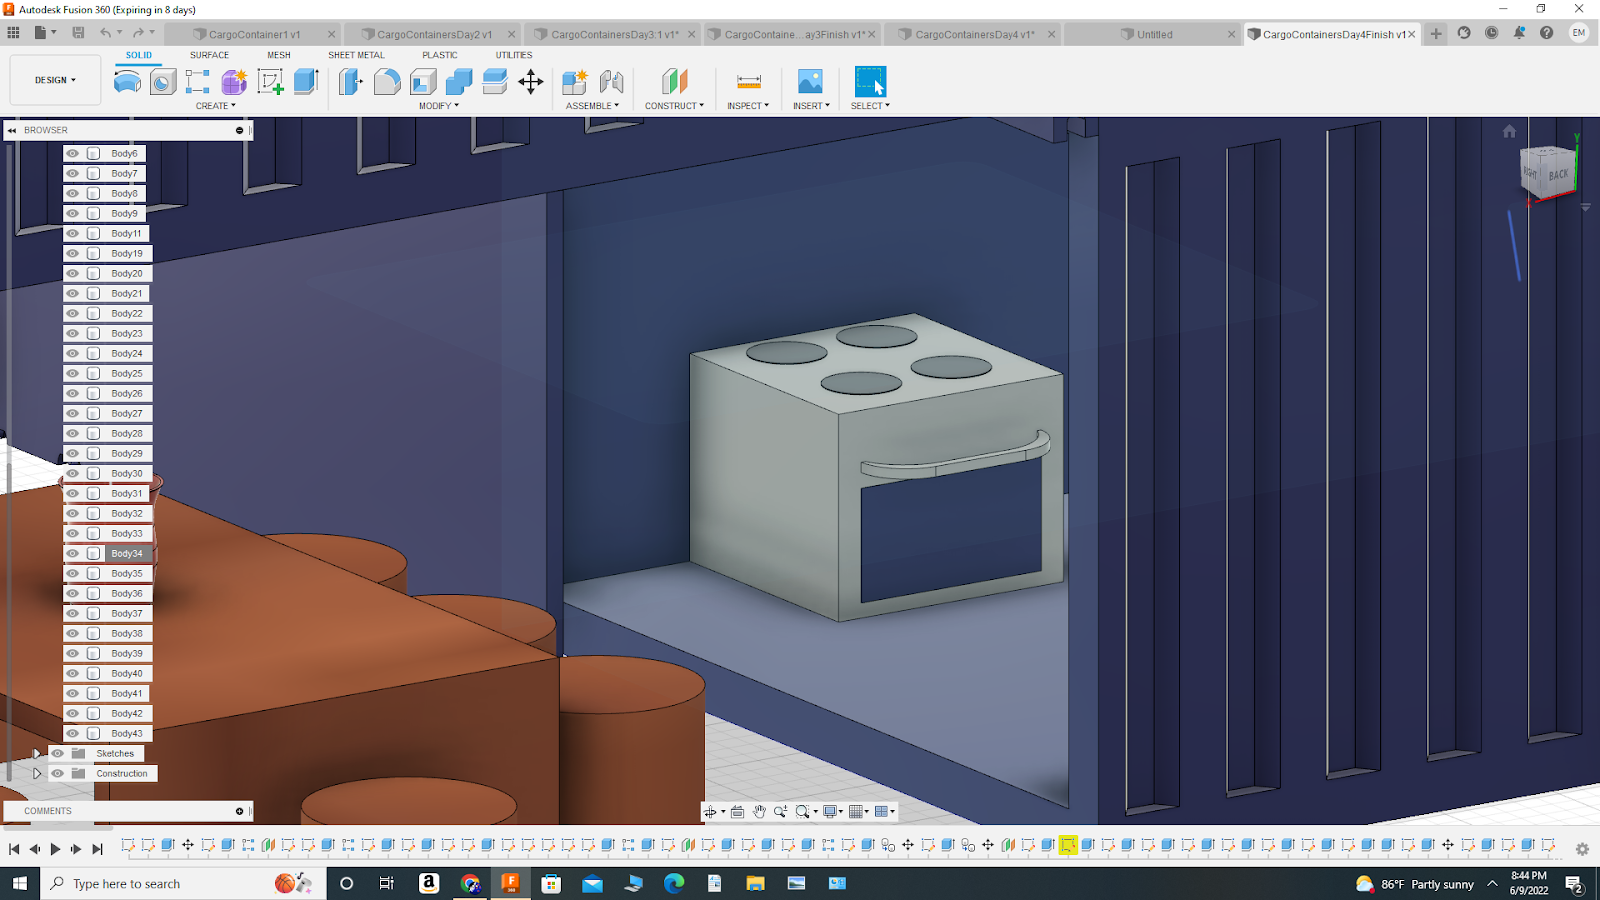
The house would be incomplete without a cooking appliance. To make the stove/oven combo, make a 5mm by 5mm square and extrude it 4mm. Afterwards, change the appearance to stainless steel. Next, to make the stovetops, I sketched four equidistant circles and extruded them 0.1mm as a new body and colored them black.
To make the oven, start with the handle by making a 4mm by 1mm rectangle and filleting the edges by 0.5. Next, make another rectangle that is 3mm by .75mm and fillet the edges of that triangle by 0.5 also. Finally, for the oven, make a new body and sketch a rectangle that is 4mm by 2.25mm underneath the newly made handle. Then, extrude this 0.05mm and color it with black paint.
Step 16: Outdoor Shower
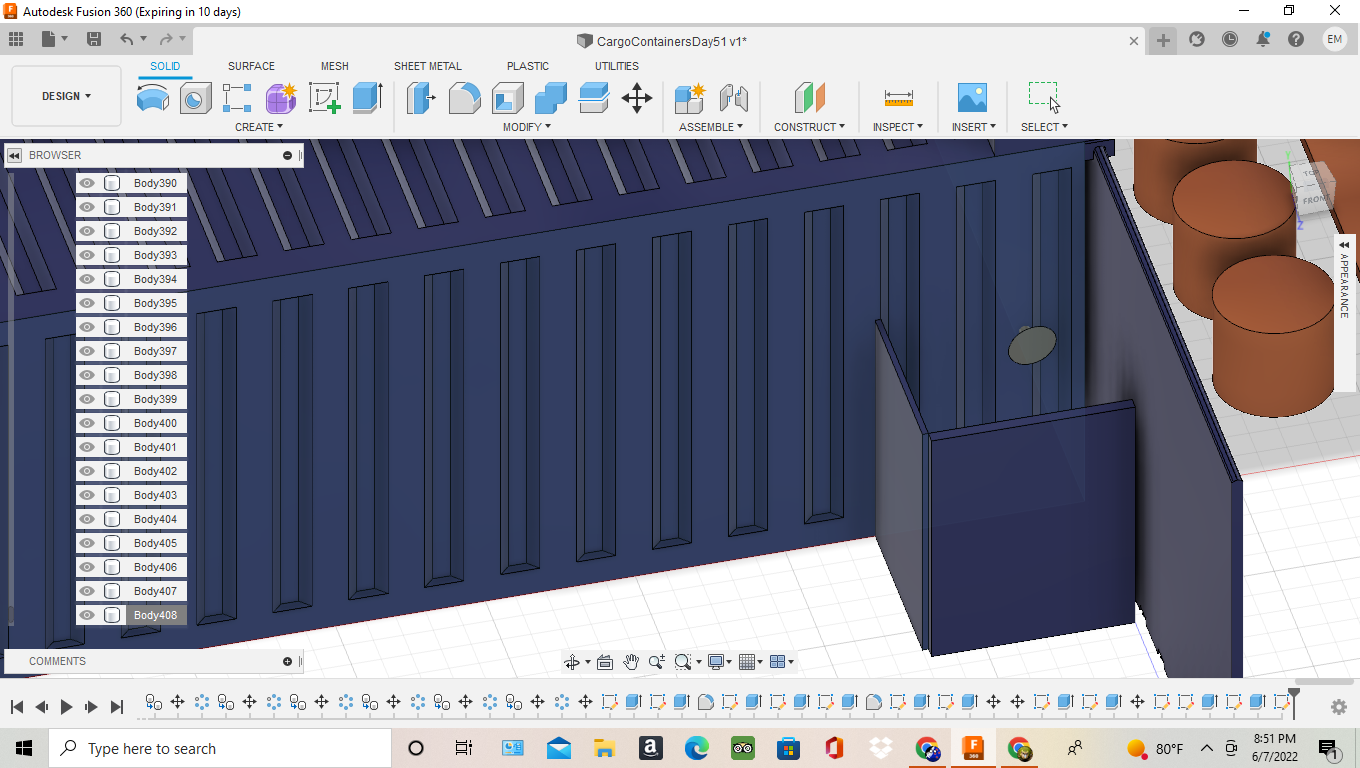
The outdoor shower can be made very easily. First, make a 0.25mm diameter, 0.5mm long cylinder and angle it towards the ground by 30 degrees. Then, construct a circle on top of the cylinder that has a taper angle of 50 and extrude it 0.5mm. Finally, create the walls which are 0.25mm wide and 5mm long on all sides. I used the same method to make the door as I did for the bathroom
Final Building
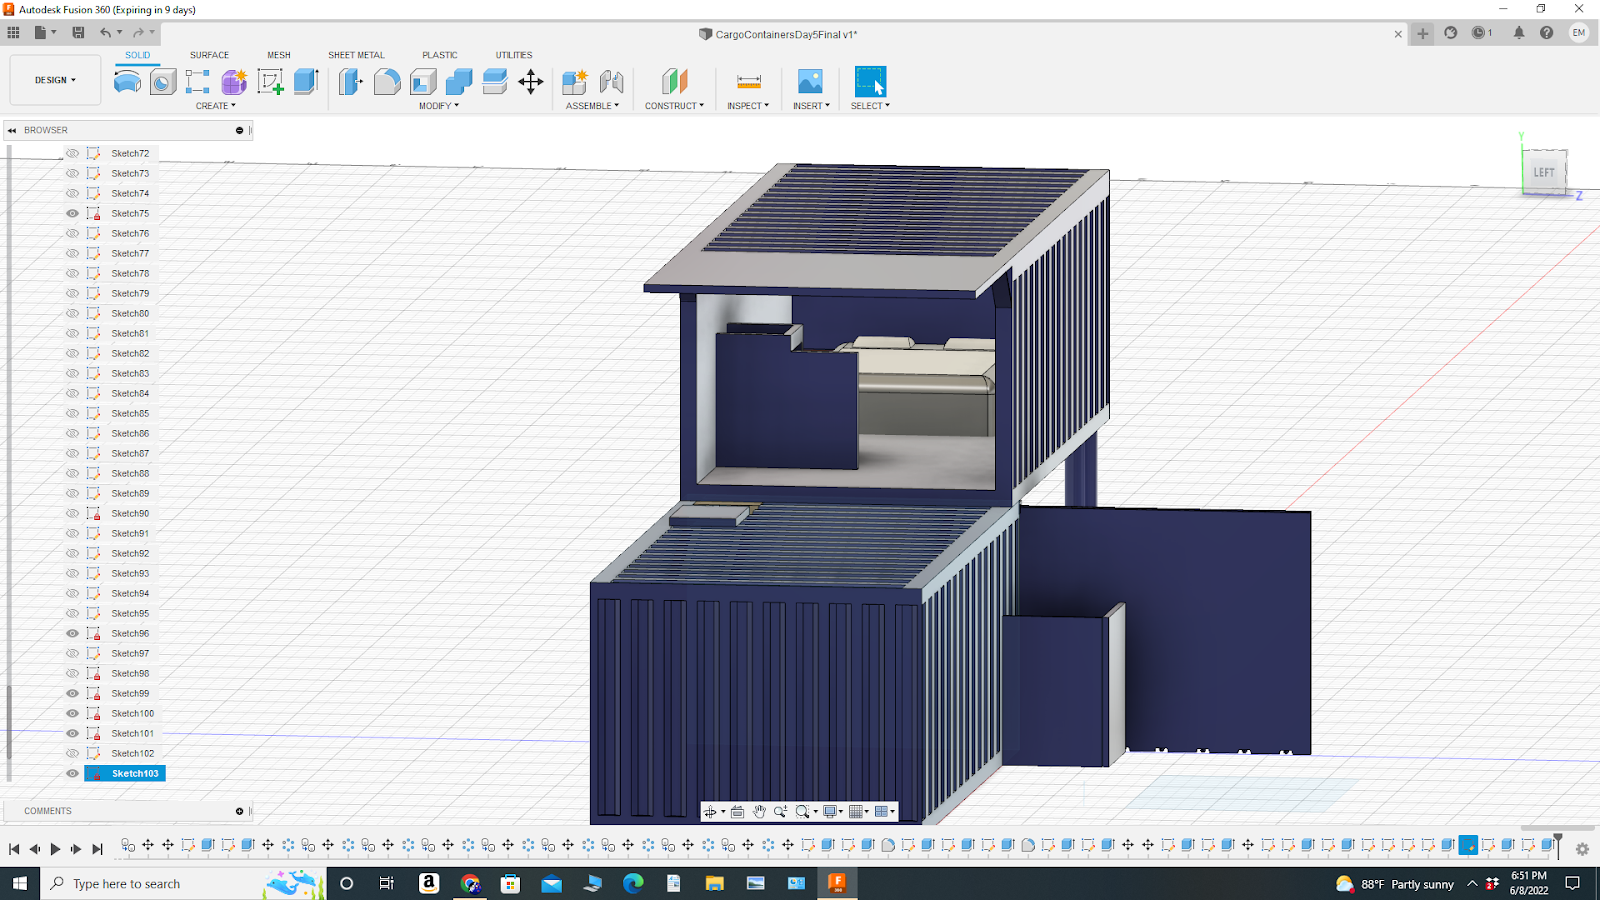
My affordable housing unit has the potential to help many people by providing housing at a cheap rate while also using sustainable and easily repurposable materials. In the end, I really like how this project looks and am proud that I was able to make it on Fusion 360! This challenge got me to improve my Fusion skills while also using my critical thinking and mathematics to create a home, which I would love to see be made tangible! I hope you enjoy my design!