Advanced Constraints
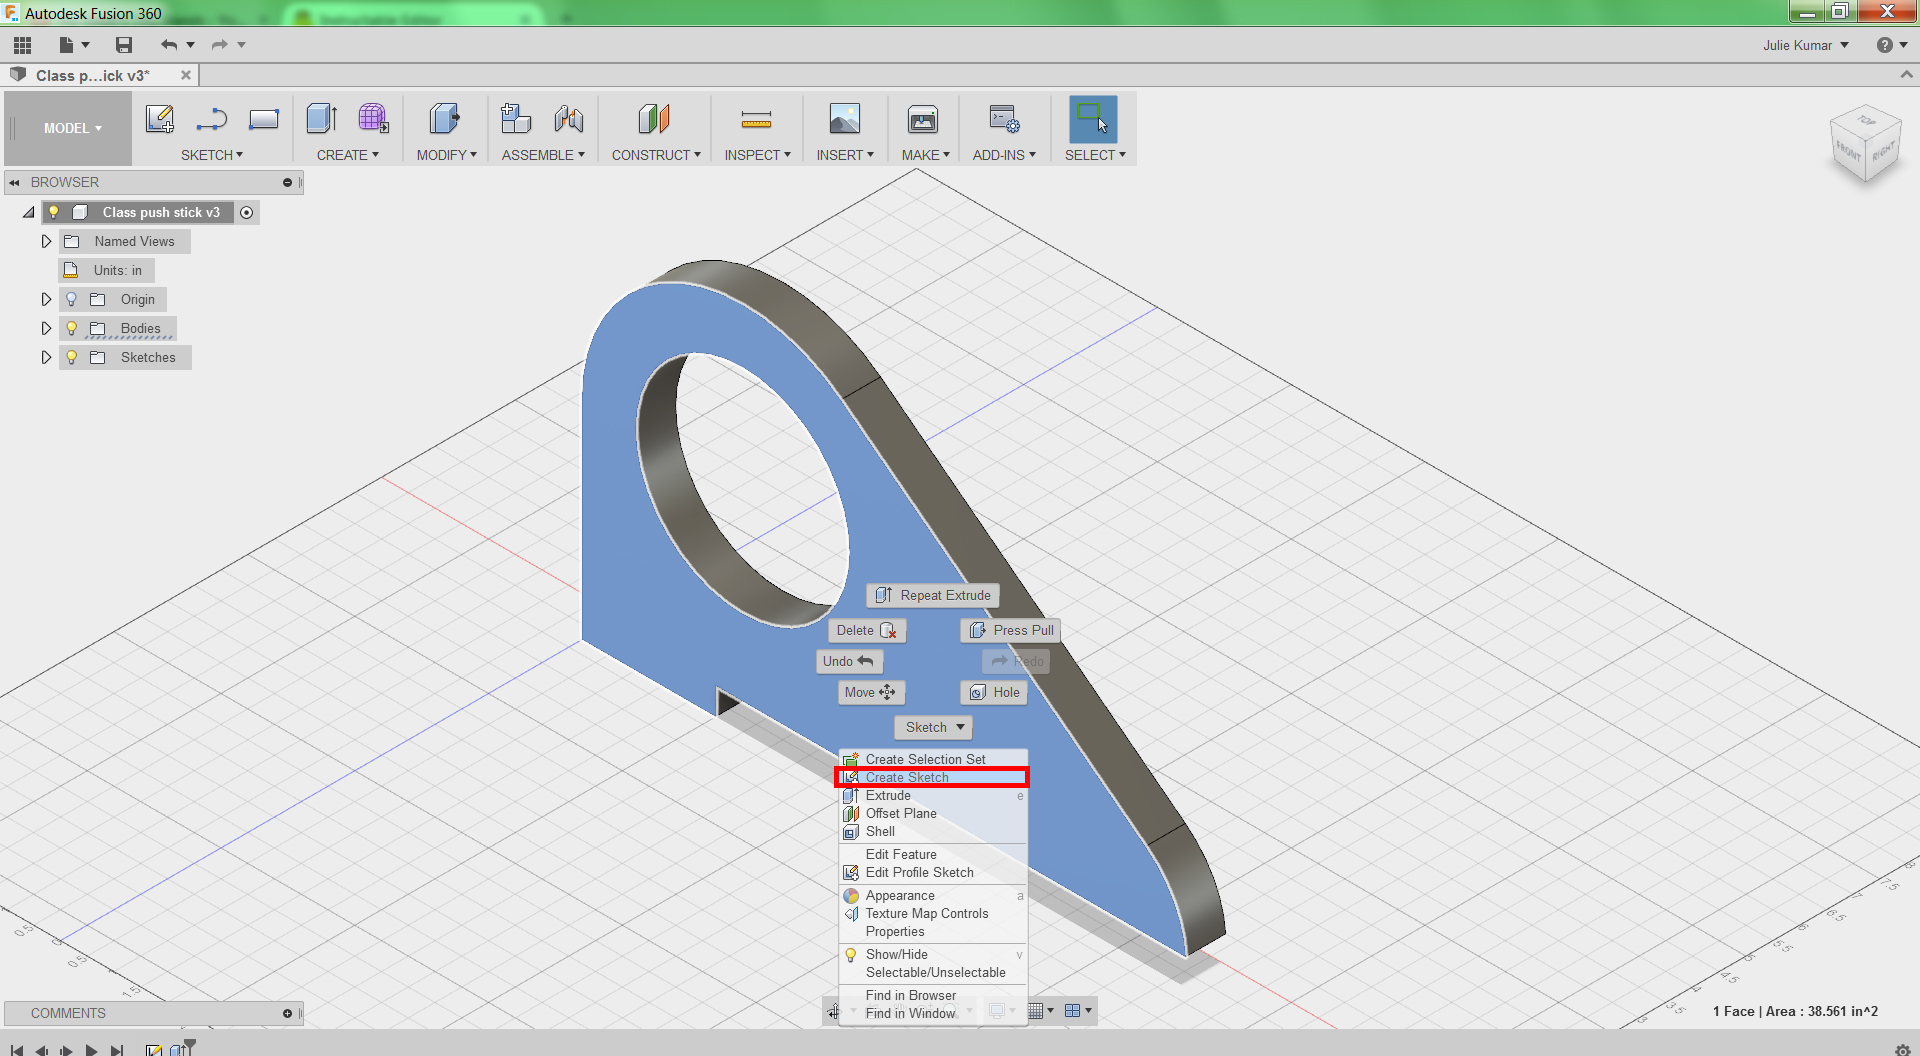
Now you will create a pocket feature--an arrow that shows you which direction to use the push stick. This will give you more modeling and CAM practice.
1) Right click the side of the solid model and choose Create Sketch.
2) In the ribbon, choose Sketch>Rectangle>2-Point Rectangle.
Alternatively, use hotkey R.
3) Draw a rectangle to the right of the open circle. This will be the base of the arrow.
As you draw the rectangle, enter dimensions 0.75 for the height and 2.5 for the width. You can dimension objects as you draw them--just like you did when you created the circle. Or, you can roughly draw the rectangle, use hotkey D, and create dimensions after the fact.
Note that vertical and horizontal constraints have automatically been applied to the rectangle: you can tell by matching the icons next to each edge with the constraint icons in the Sketch Palette.
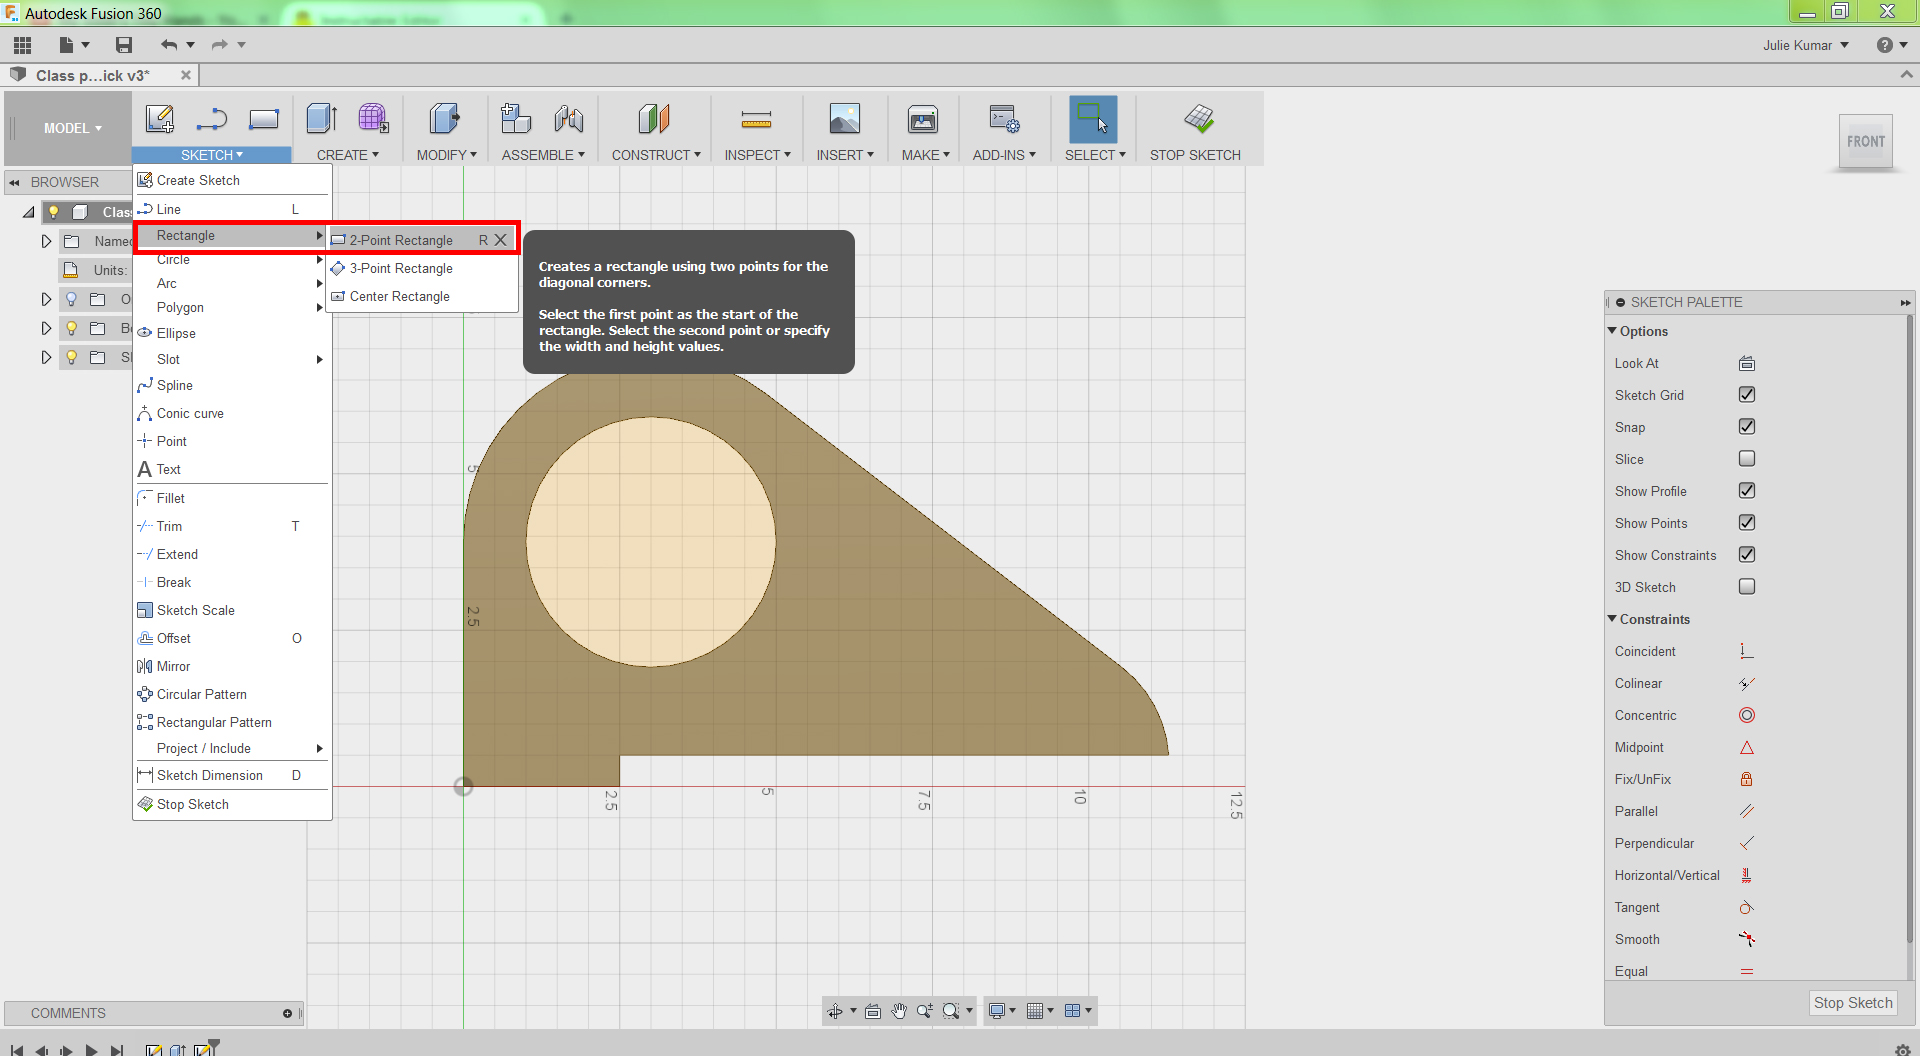
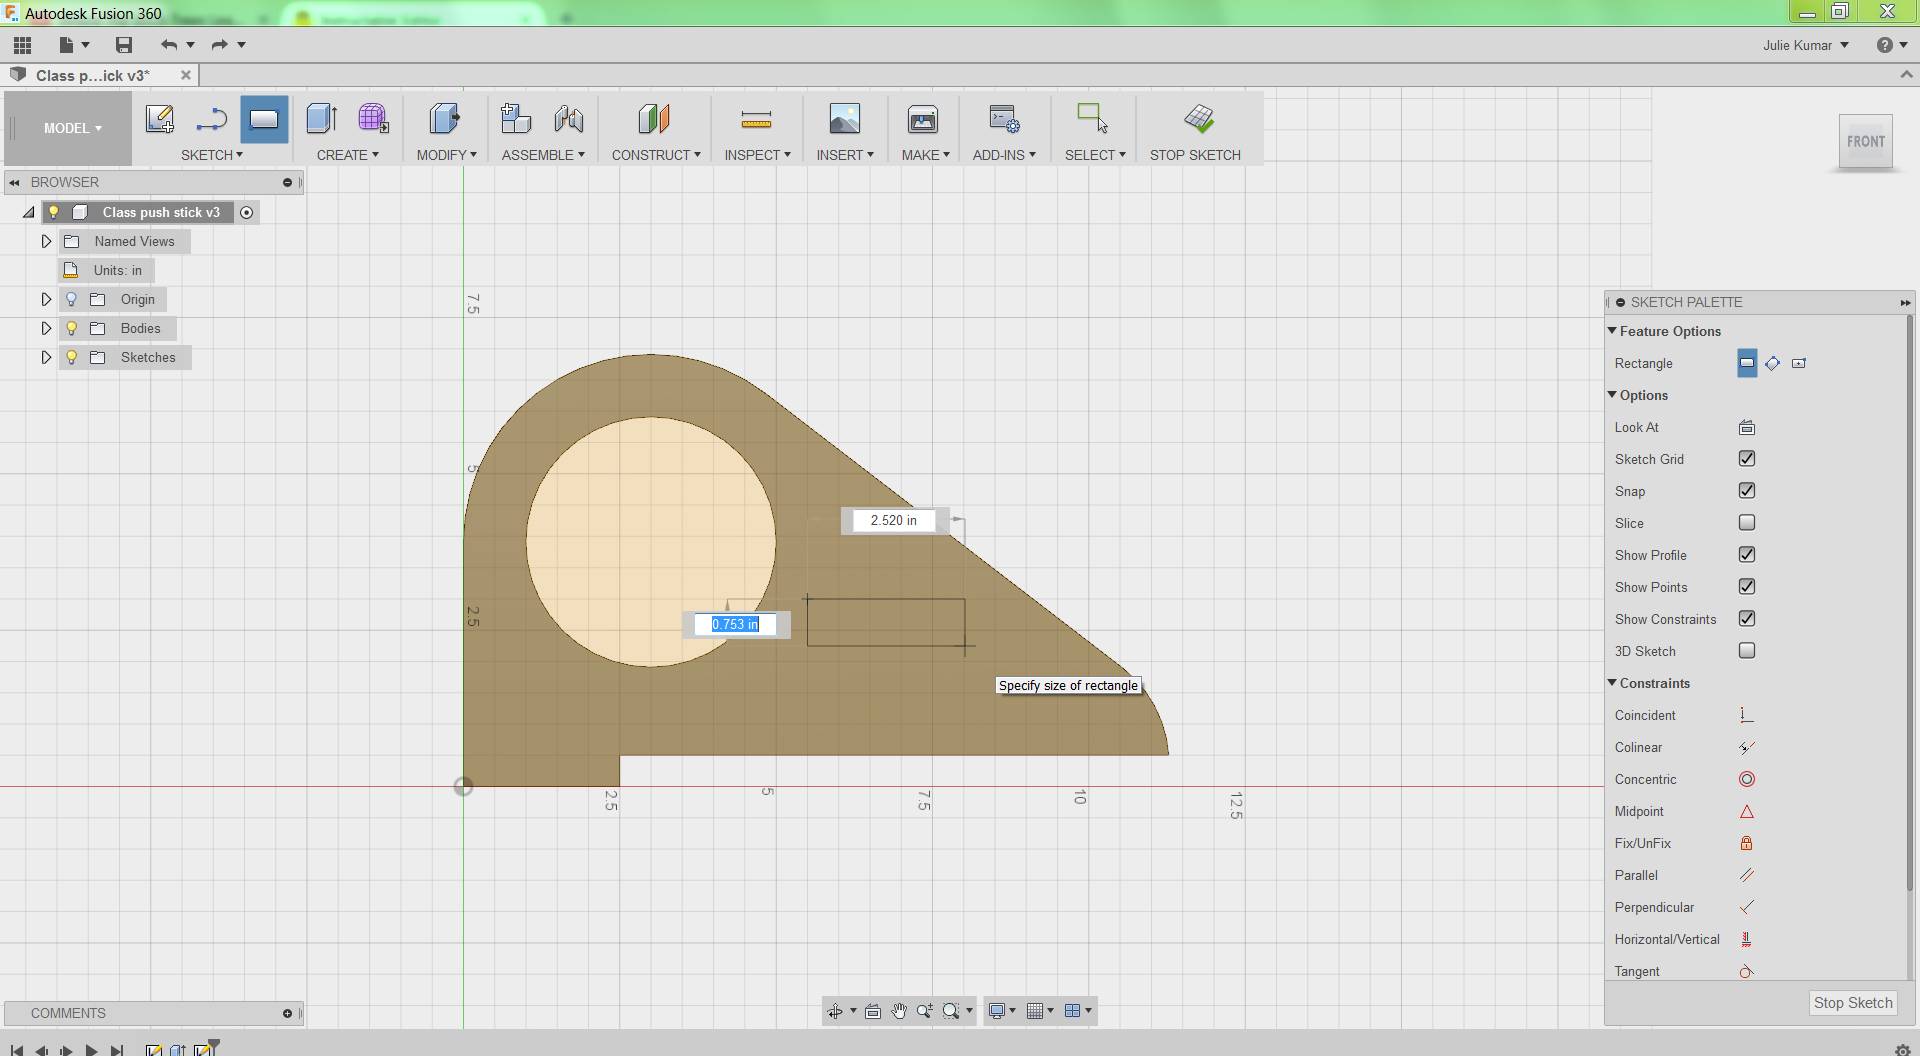
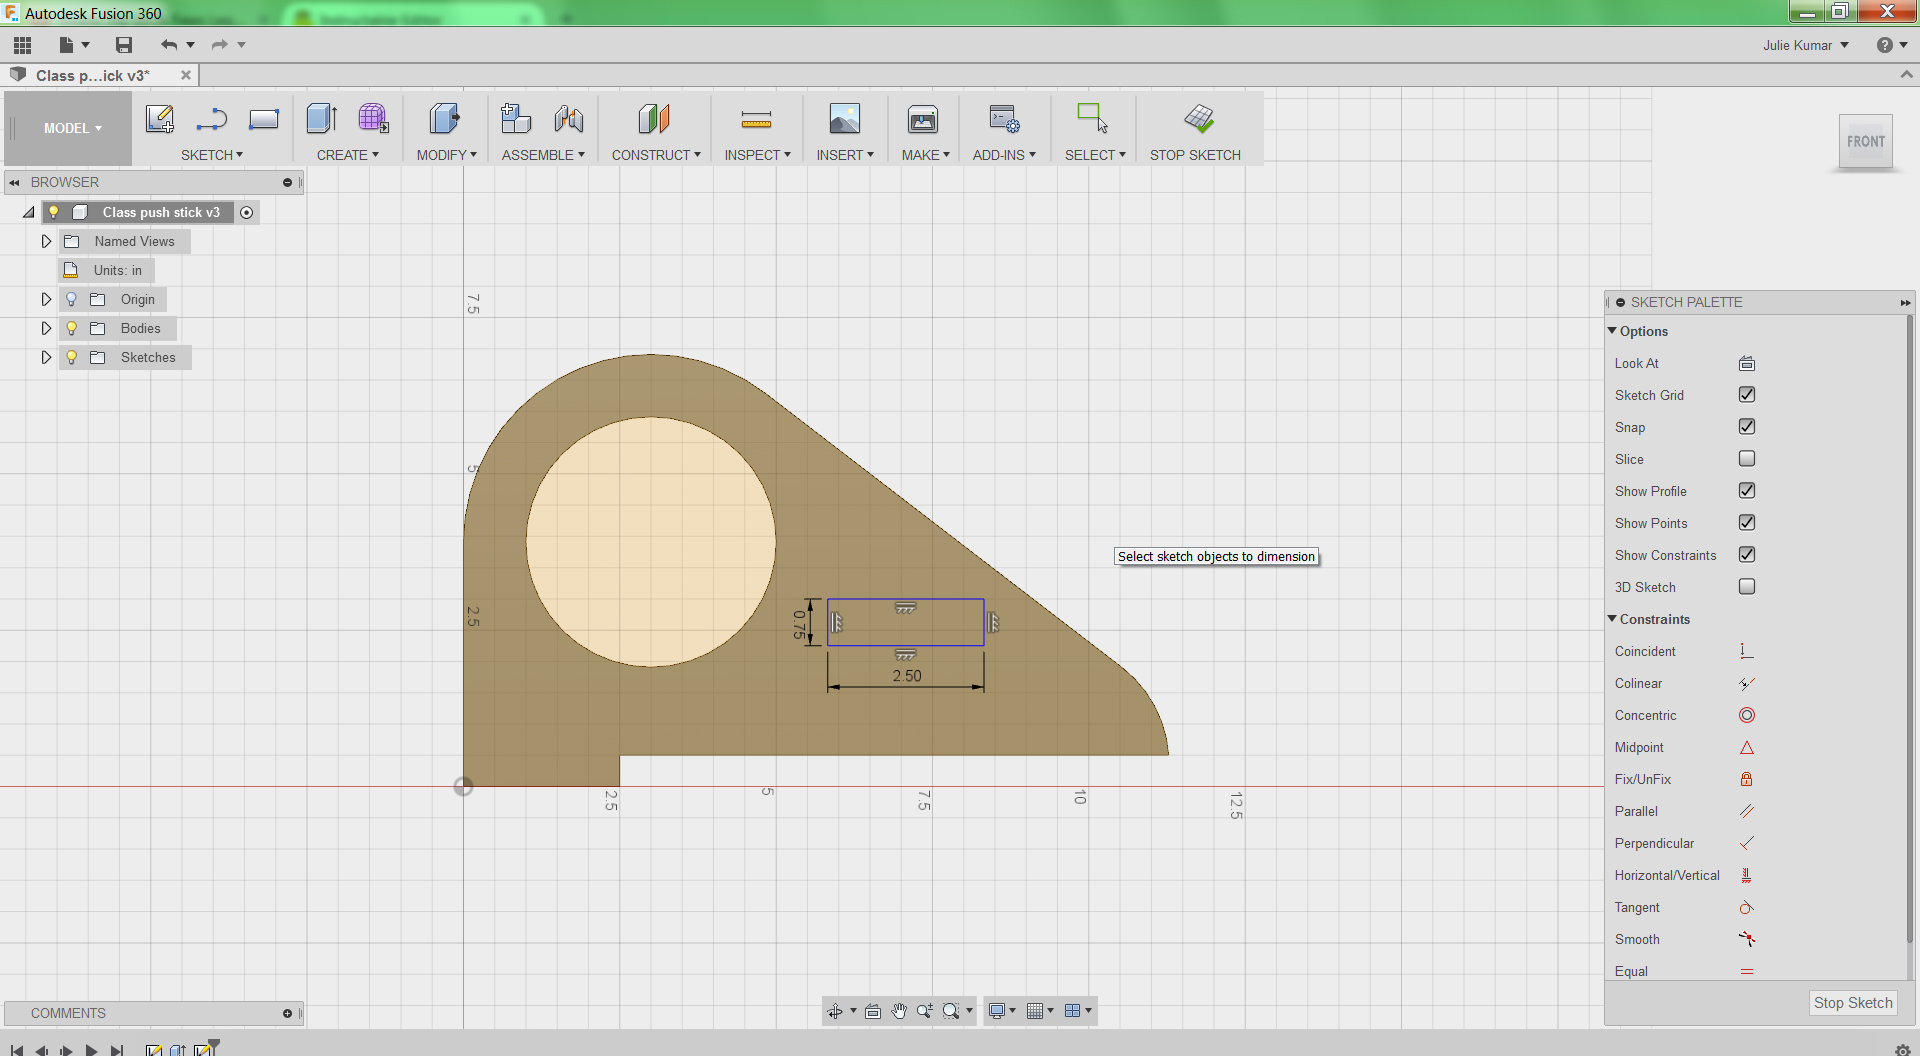
Sketch Arrow Part I
4) Use hotkey L to activate the line tool.
5) Off to the side, draw a closed triangle. You will move it into place as the head of the arrow later.
6) Use hotkey D to activate the dimension tool.
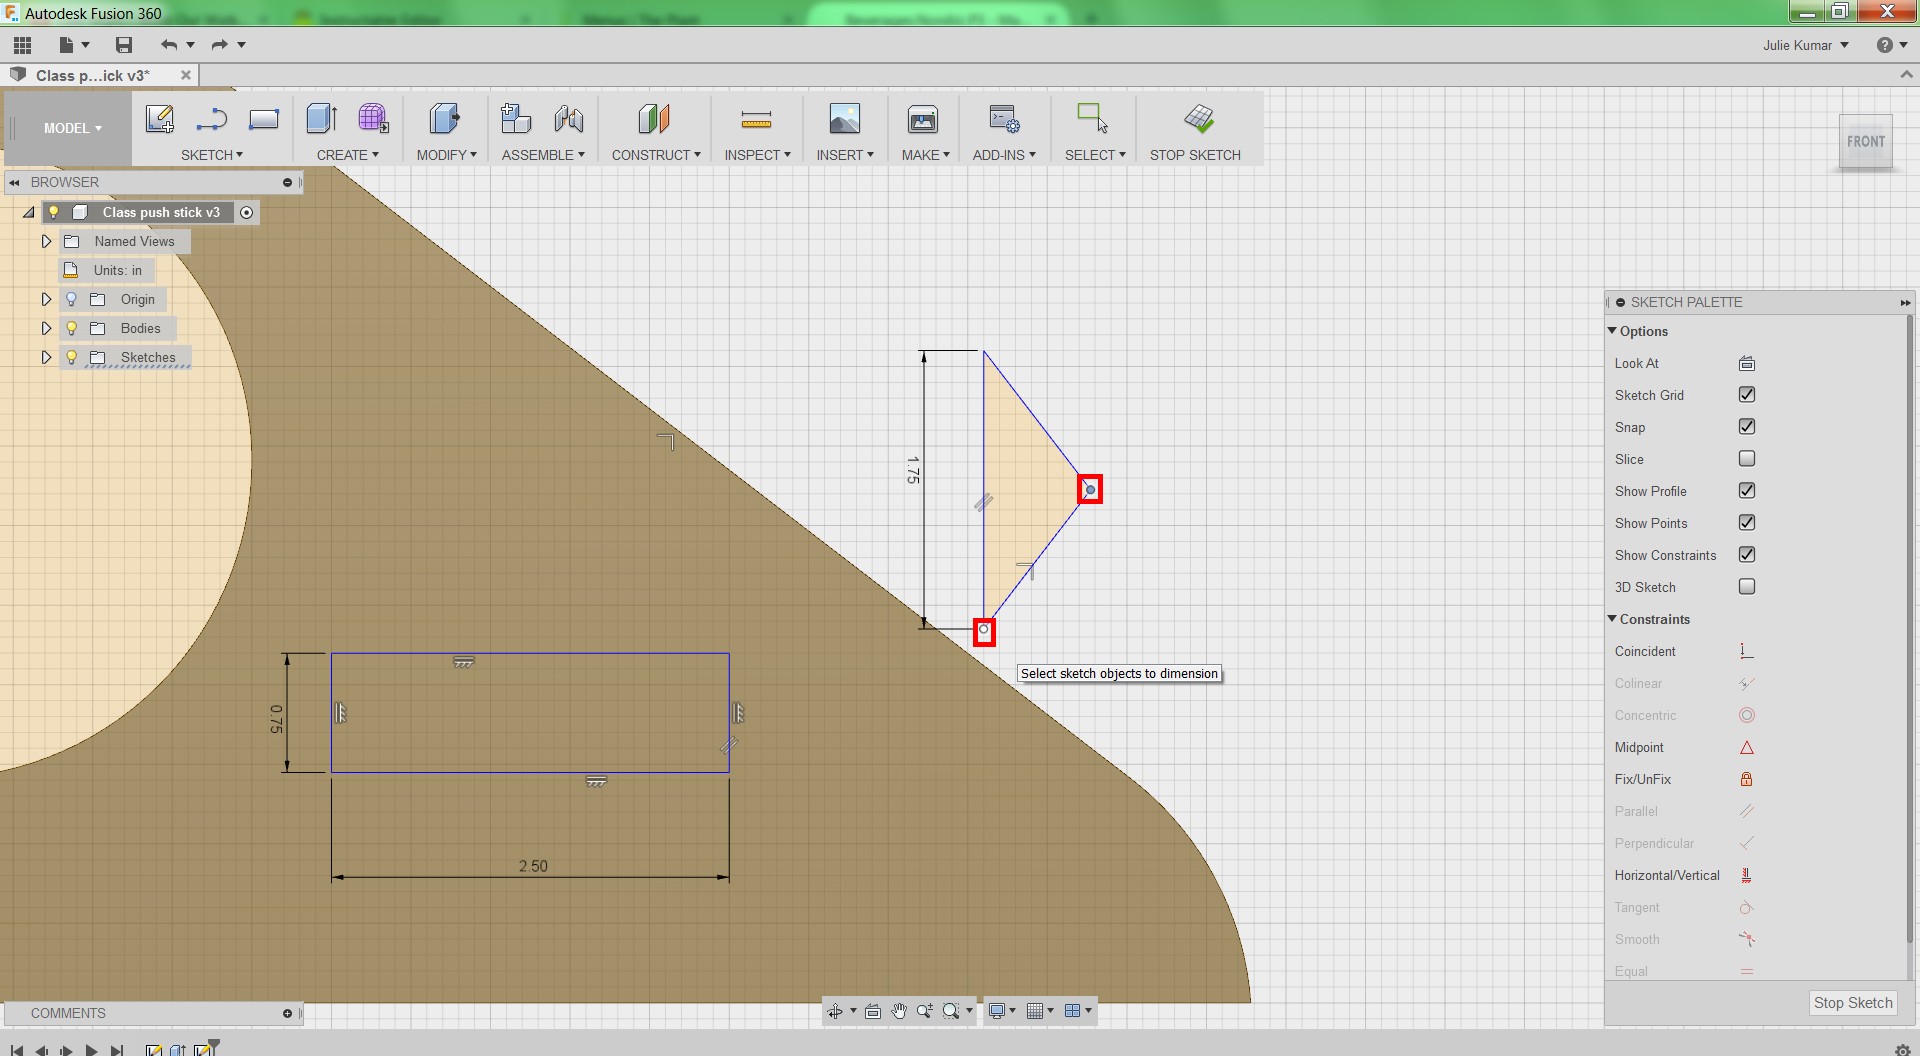
7) Dimension the vertical side to 1.75.
8) Click the points on the far right and the bottom of the triangle to create a new dimension.
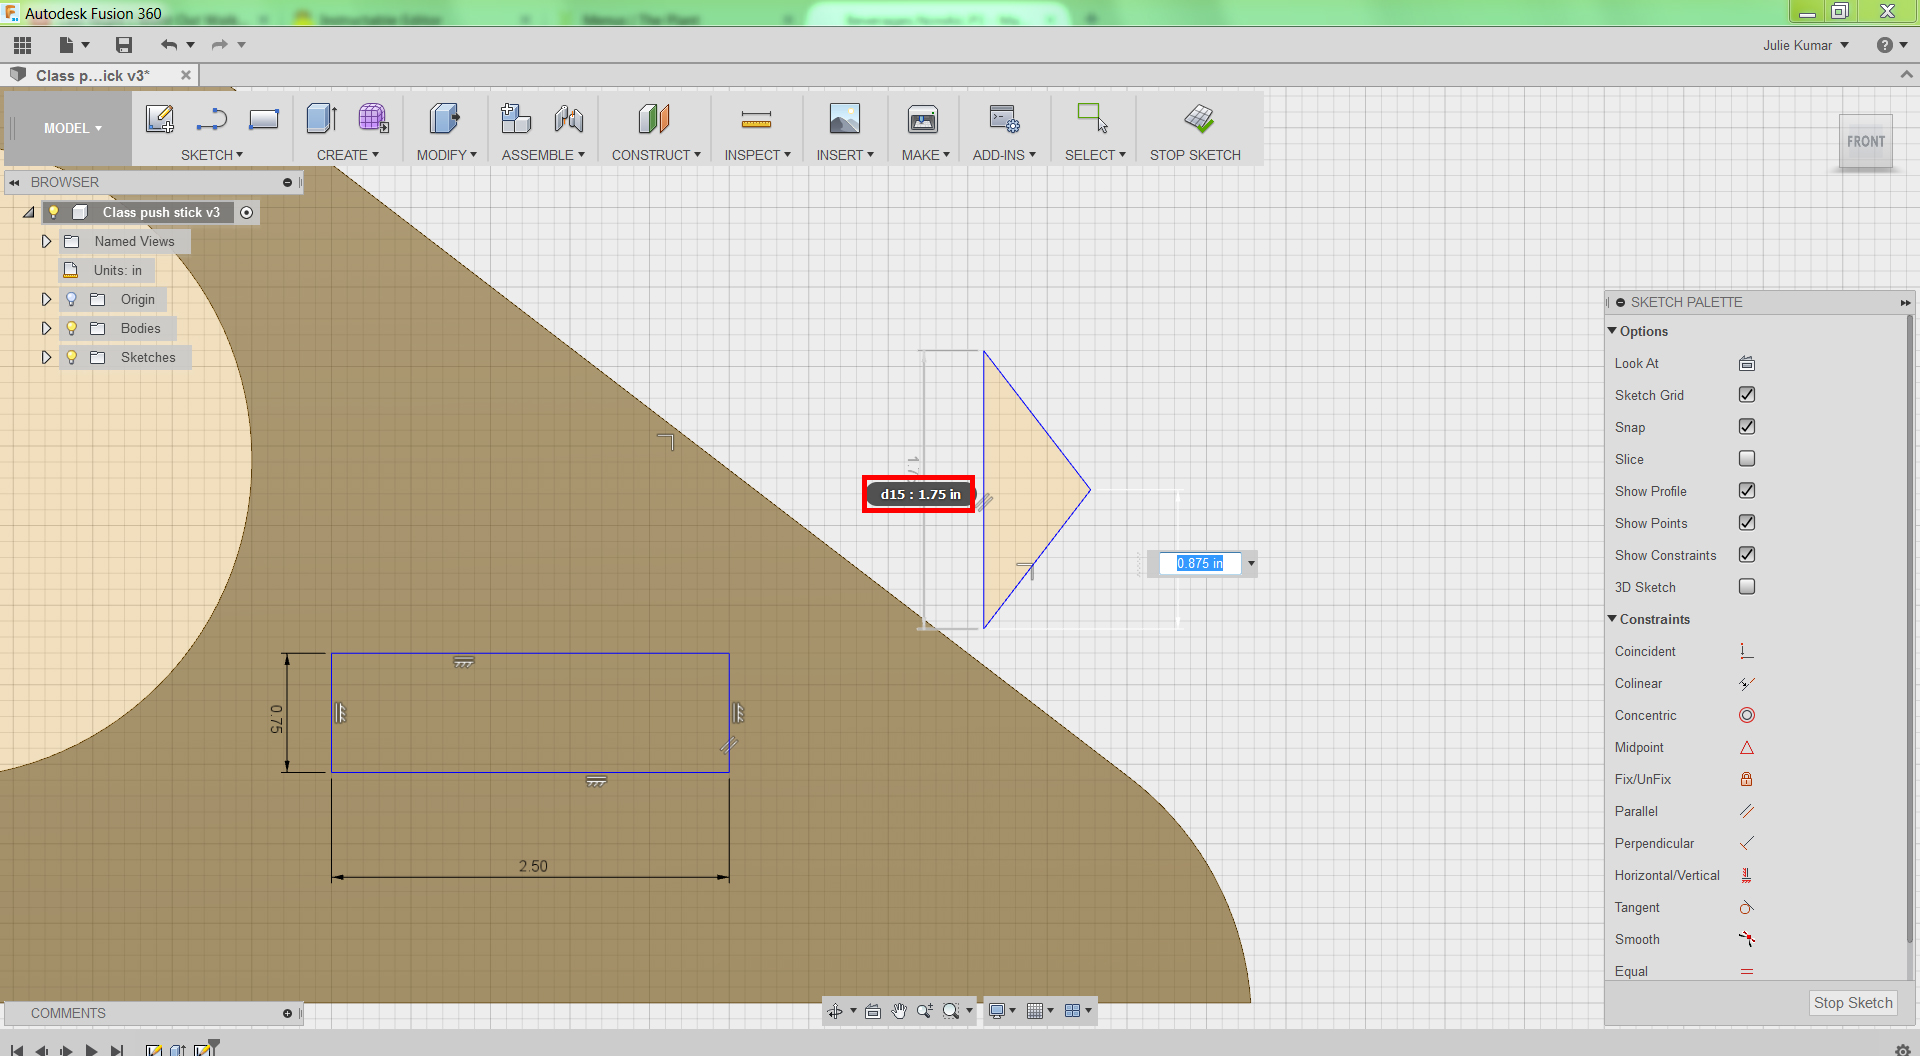
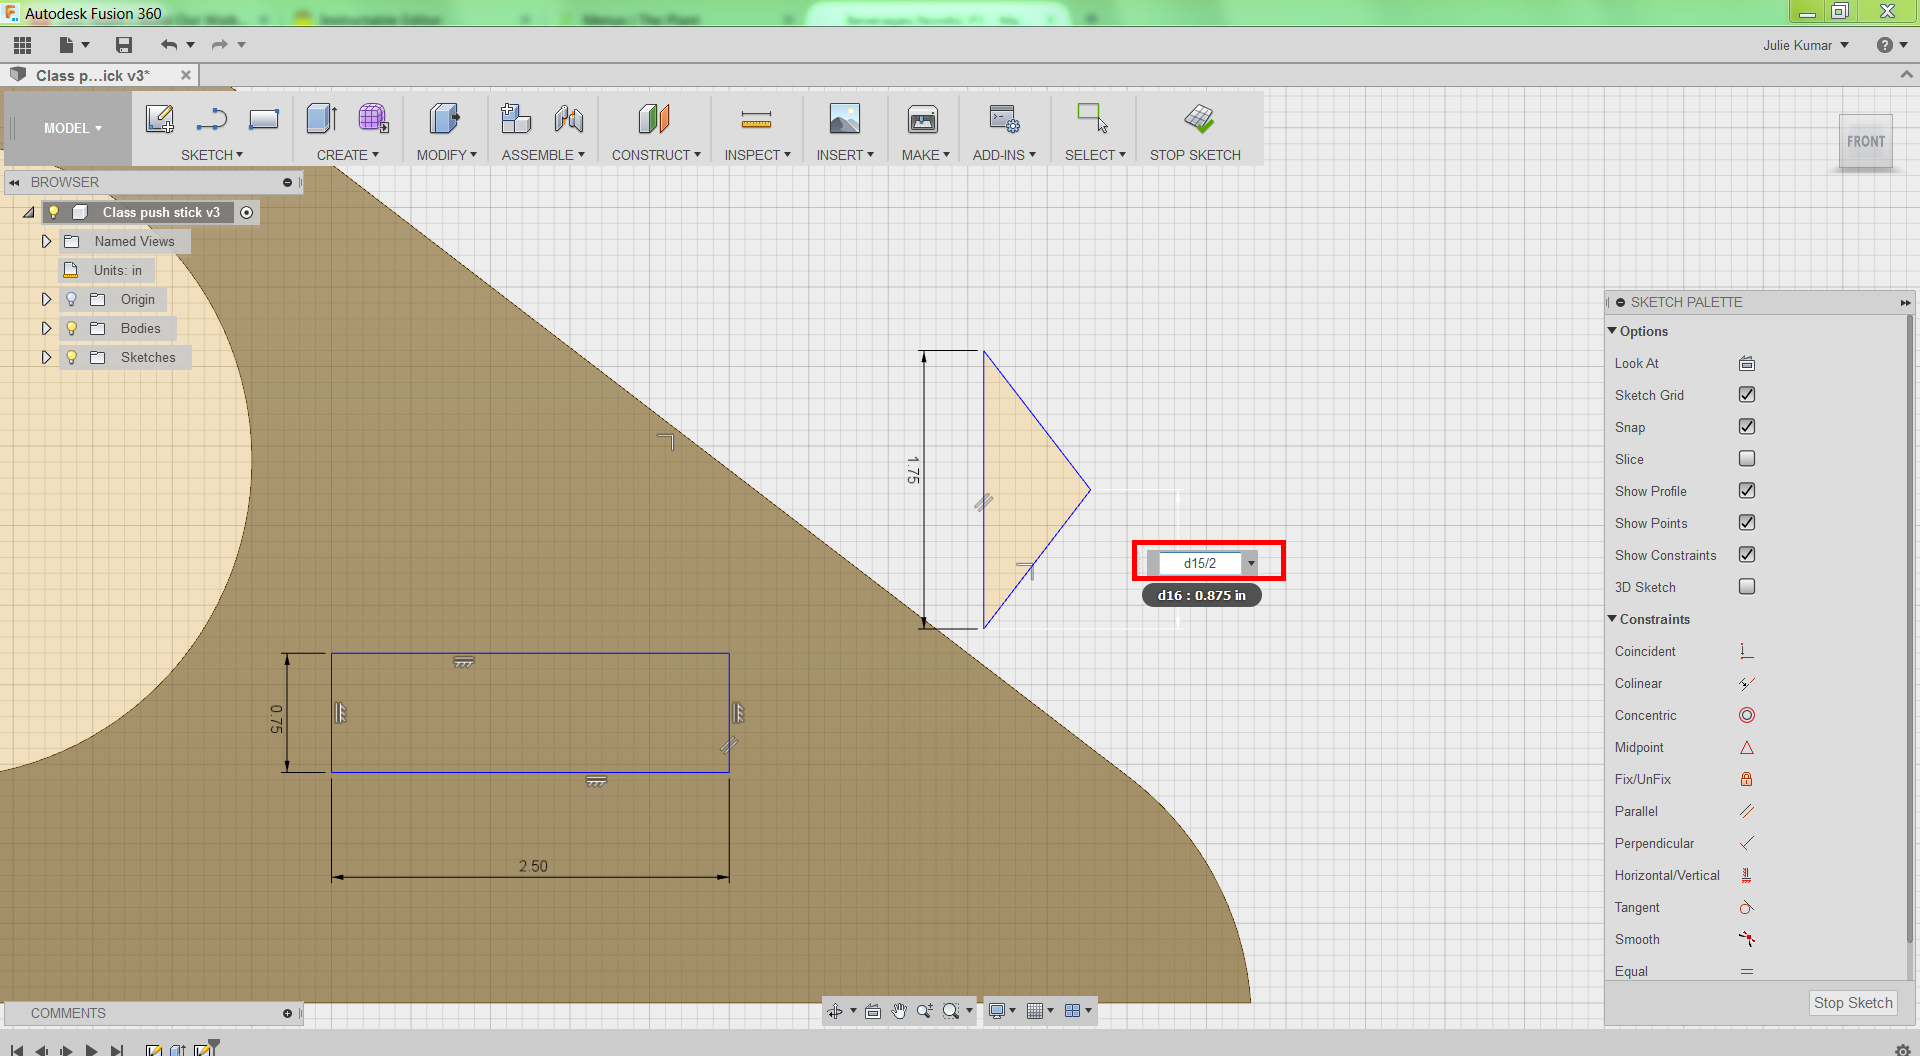
9) Rather than entering a number here, when the cursor is active in the dimension box, click on the 1.75" dimension you just created. A numbered dimension should appear in the dimension box--in my case, d15. Now, type "/2" after that dimension to divide it in two. Hit enter.
You just created a function. This means that anytime you change d15--the back of the arrow head--the front of the head will proportionately scale. It's a great practice to use functions as much as possible to make your designs more easily editable.
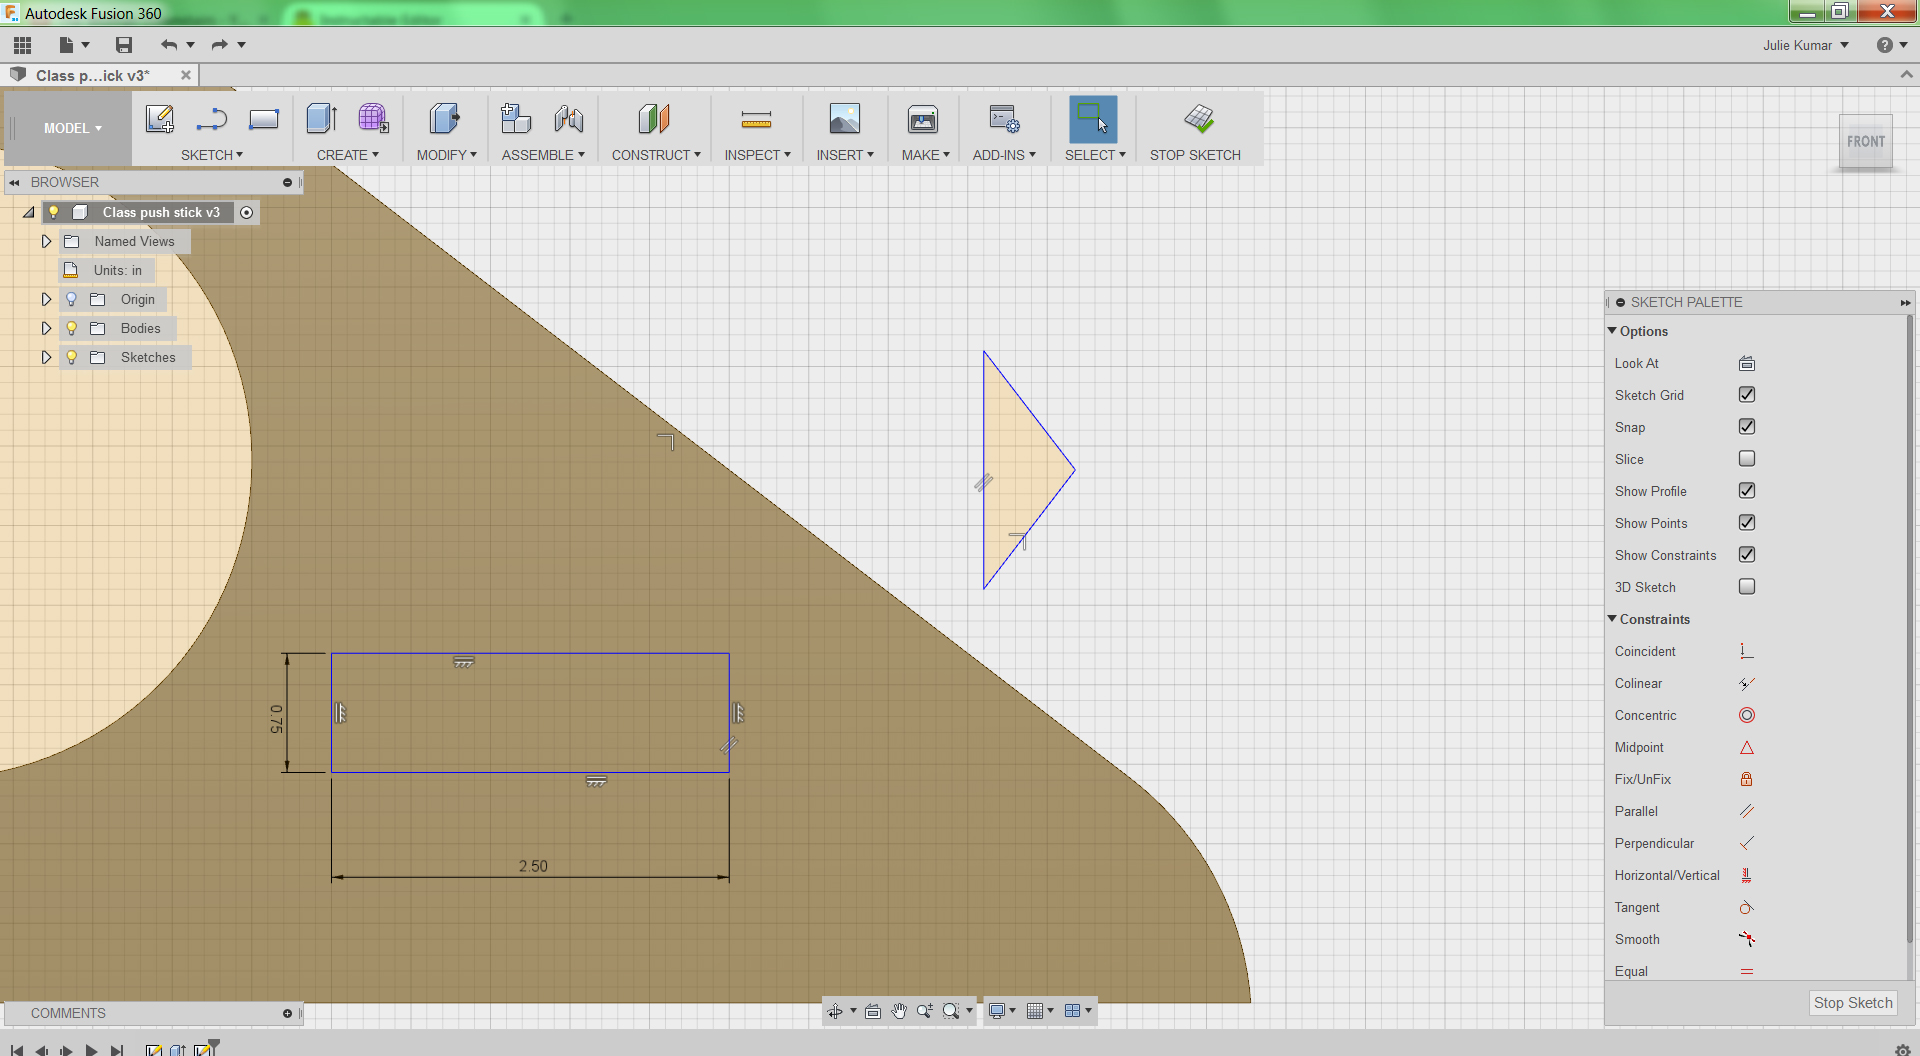
Sketch Arrow Part II
10) Drag the triangle near the right side of the rectangle.
11) Use hotkey D to activate the dimension tool.
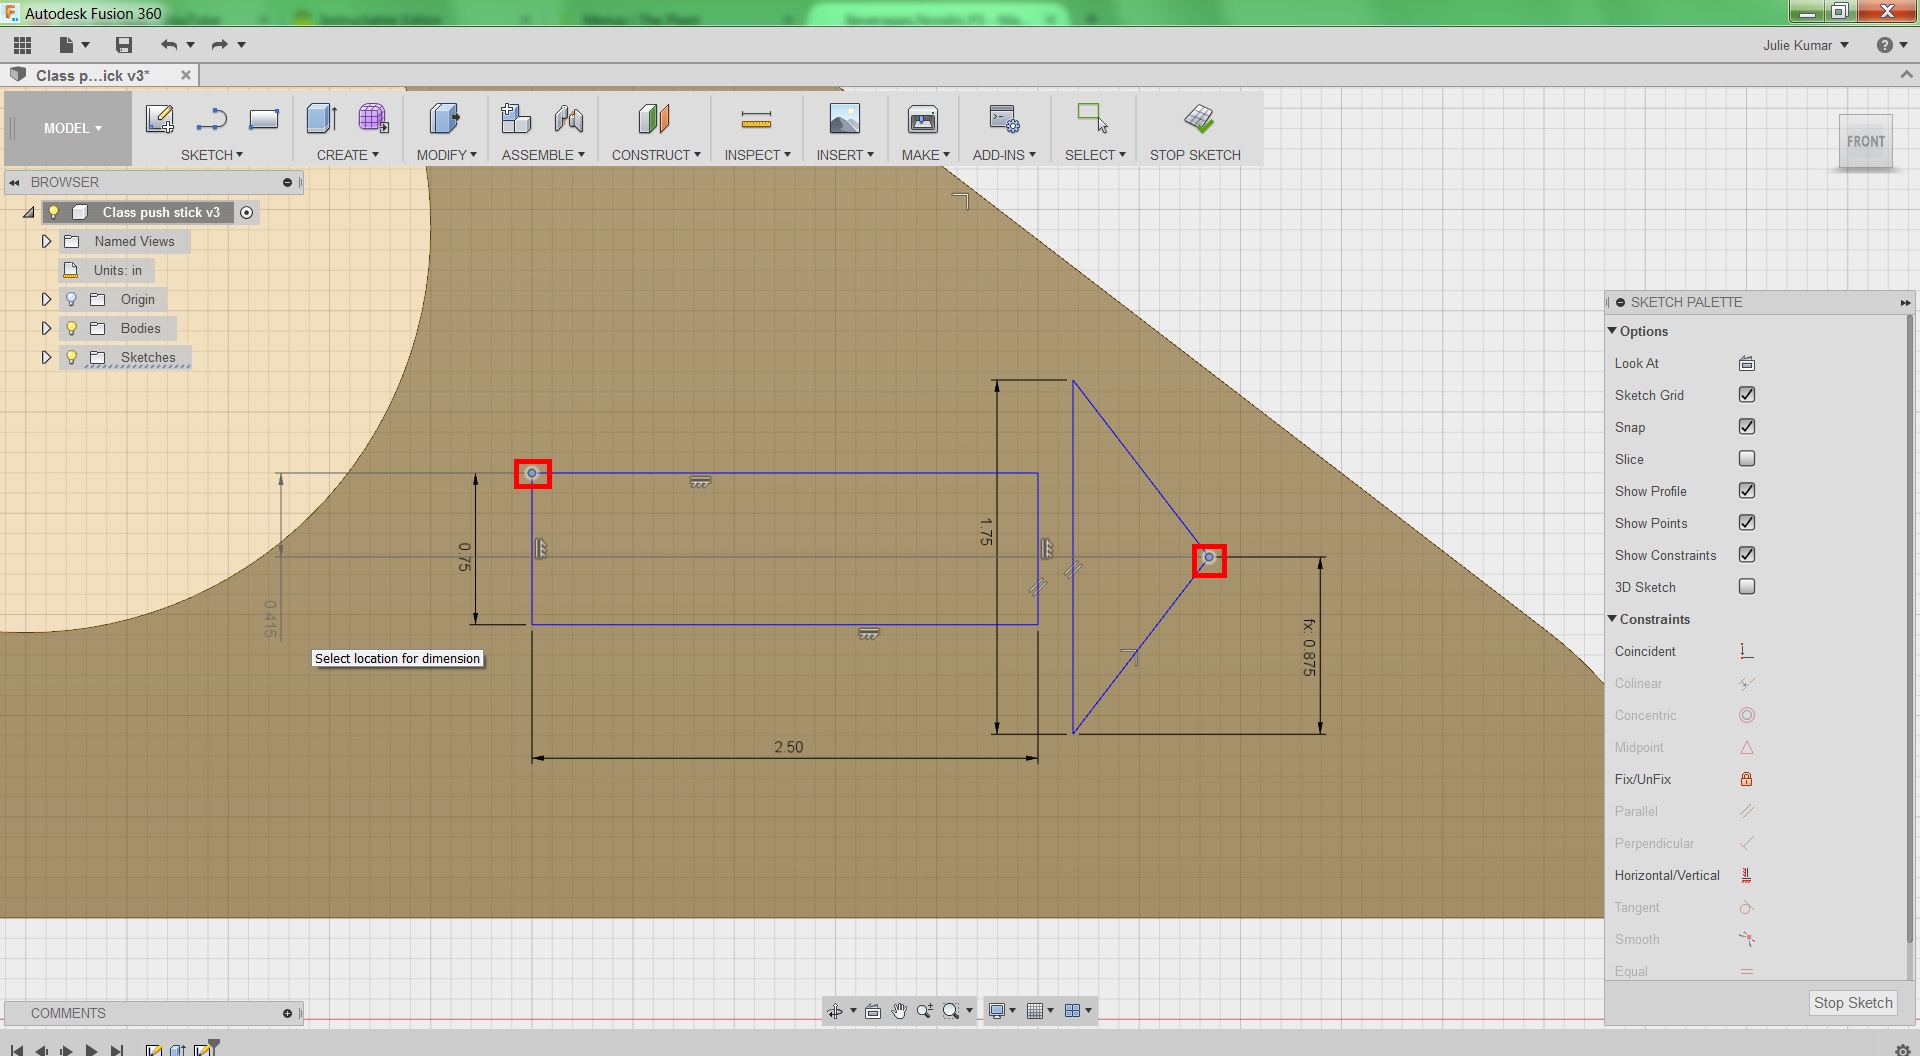
12) Click the far right vertex of the triangle and the top left corner of the rectangle, then move the cursor to the left and click to create a dimension.
This dimension should be vertical--the dimension arrows will point up and down.
13) Again, rather than typing a number, click the dimension for the height of the rectangle, 0.75"--for me, d9--and type "/2" to divide it by two. Hit Enter.
The text for the dimension should be "fx: 0.375." This will ensure that the triangle is vertically aligned with the rectangle.
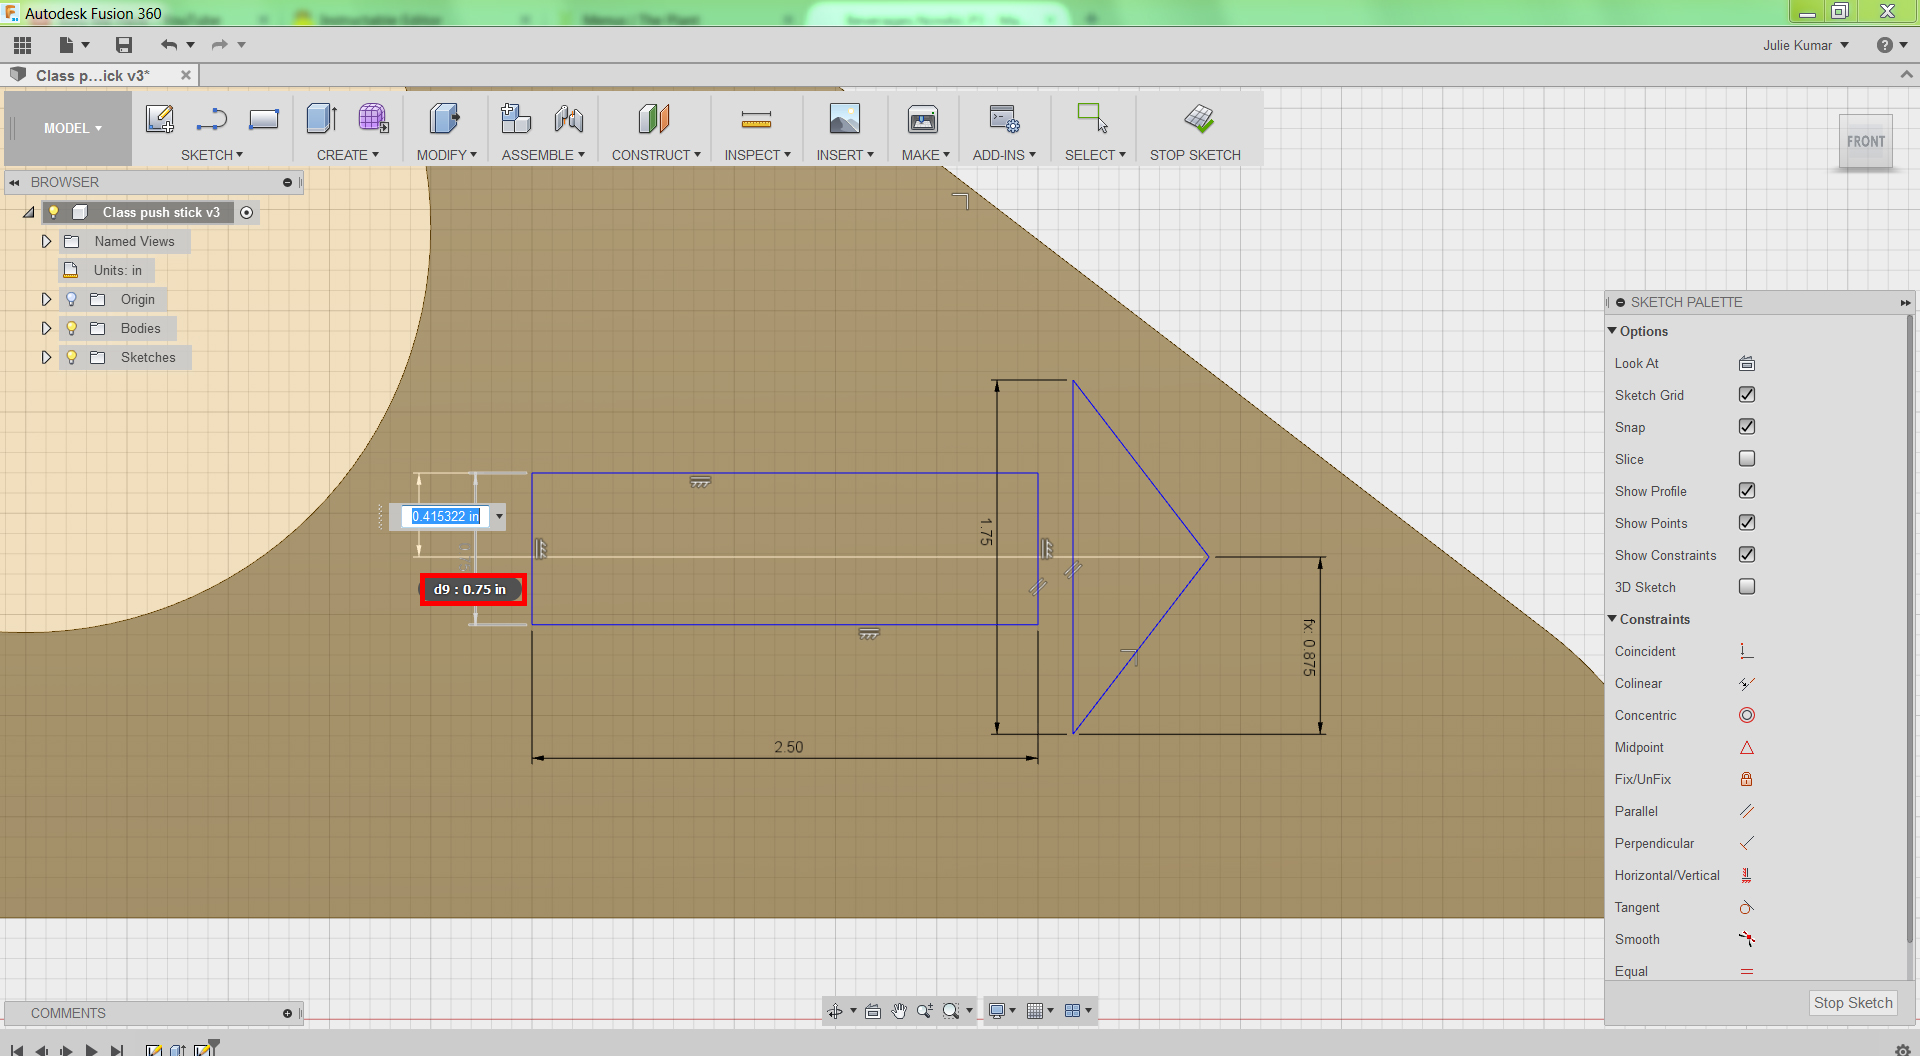
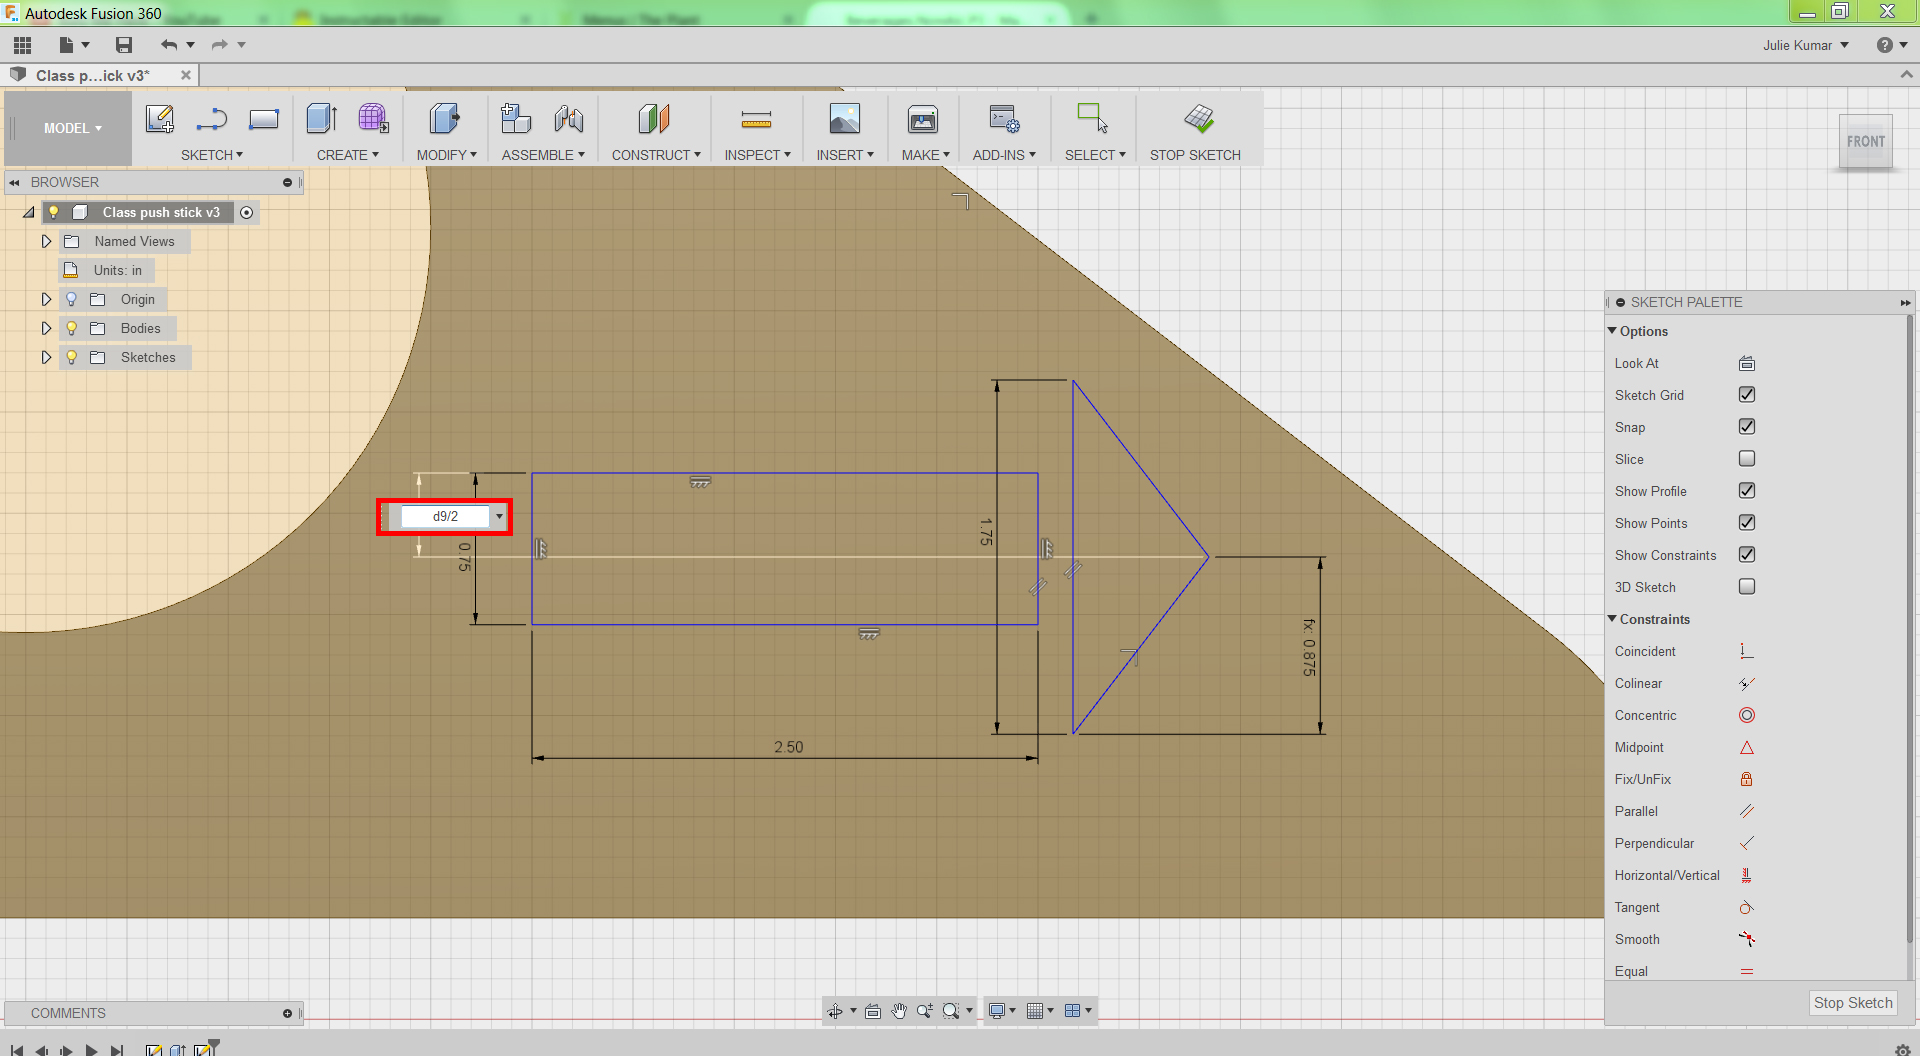
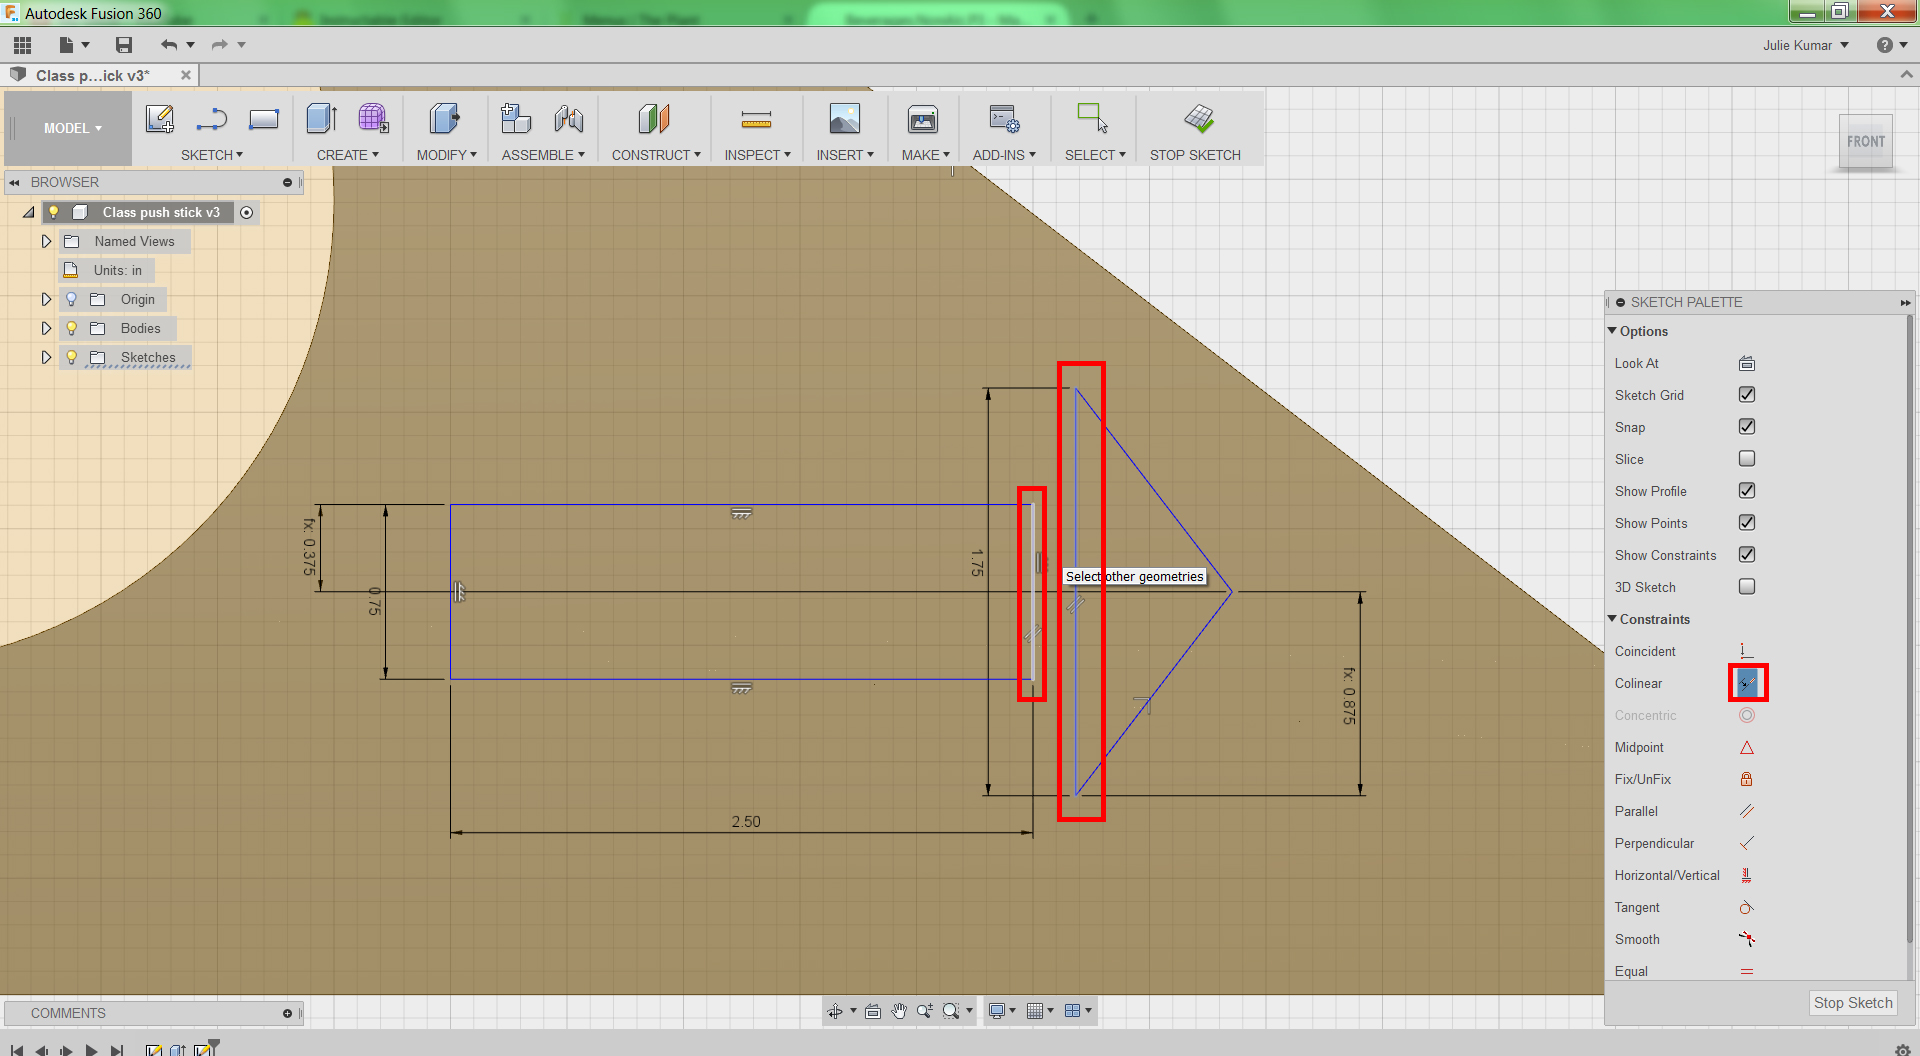
14) Select the Colinear constraint in the Sketch Palette on the left side. This constraint aligns two features on the same line.
15) Click the right side of the rectangle and the left side of the triangle to make them colinear.
This will ensure that the triangle is horizontally aligned with the rectangle.
16) Right click and choose OK to deactivate the colinear tool.
17) Drag the arrow to the exact location where you want it, ideally evenly spaced between the circle and the right edge of the push stick.
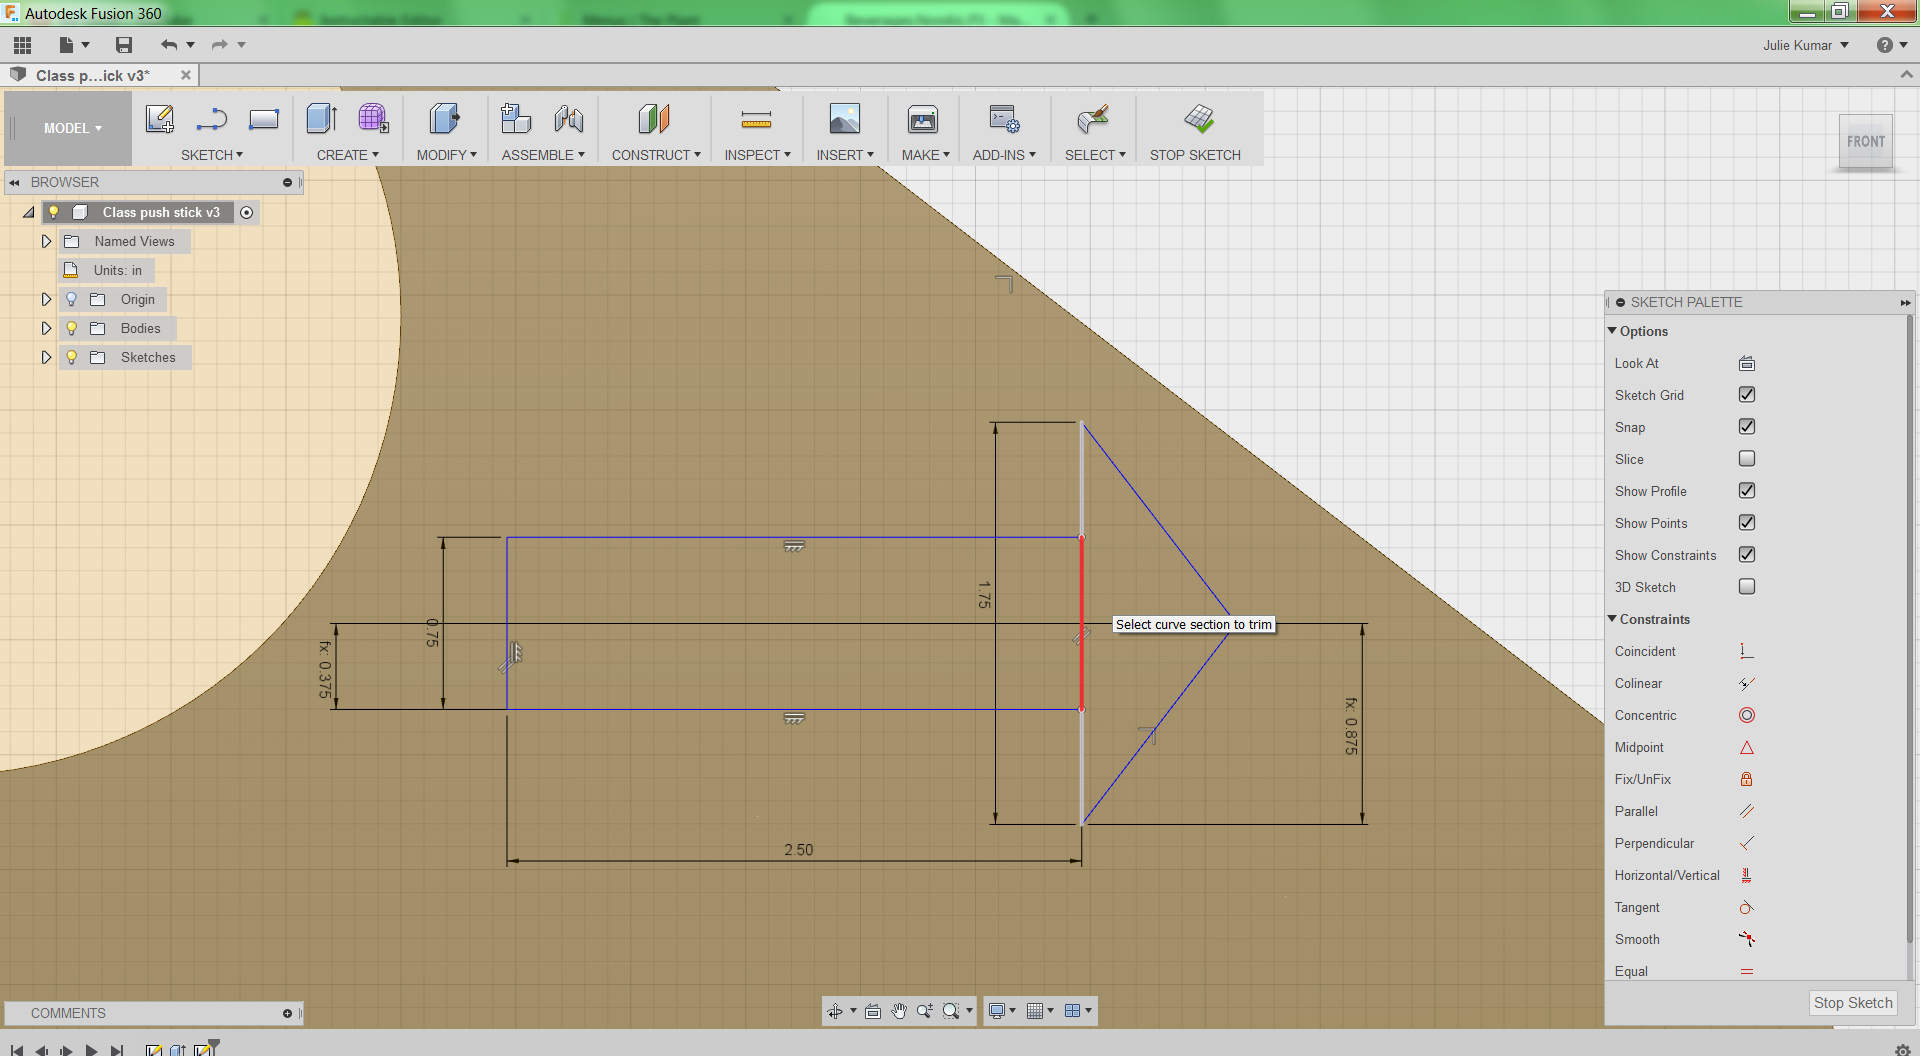
18) Use hotkey T to activate the trim tool.
19) Click twice to remove the lines between the rectangle and triangle.
Don't worry if you delete constraints in this process.
20) In the ribbon, click Stop Sketch to exit the edit Sketch state.
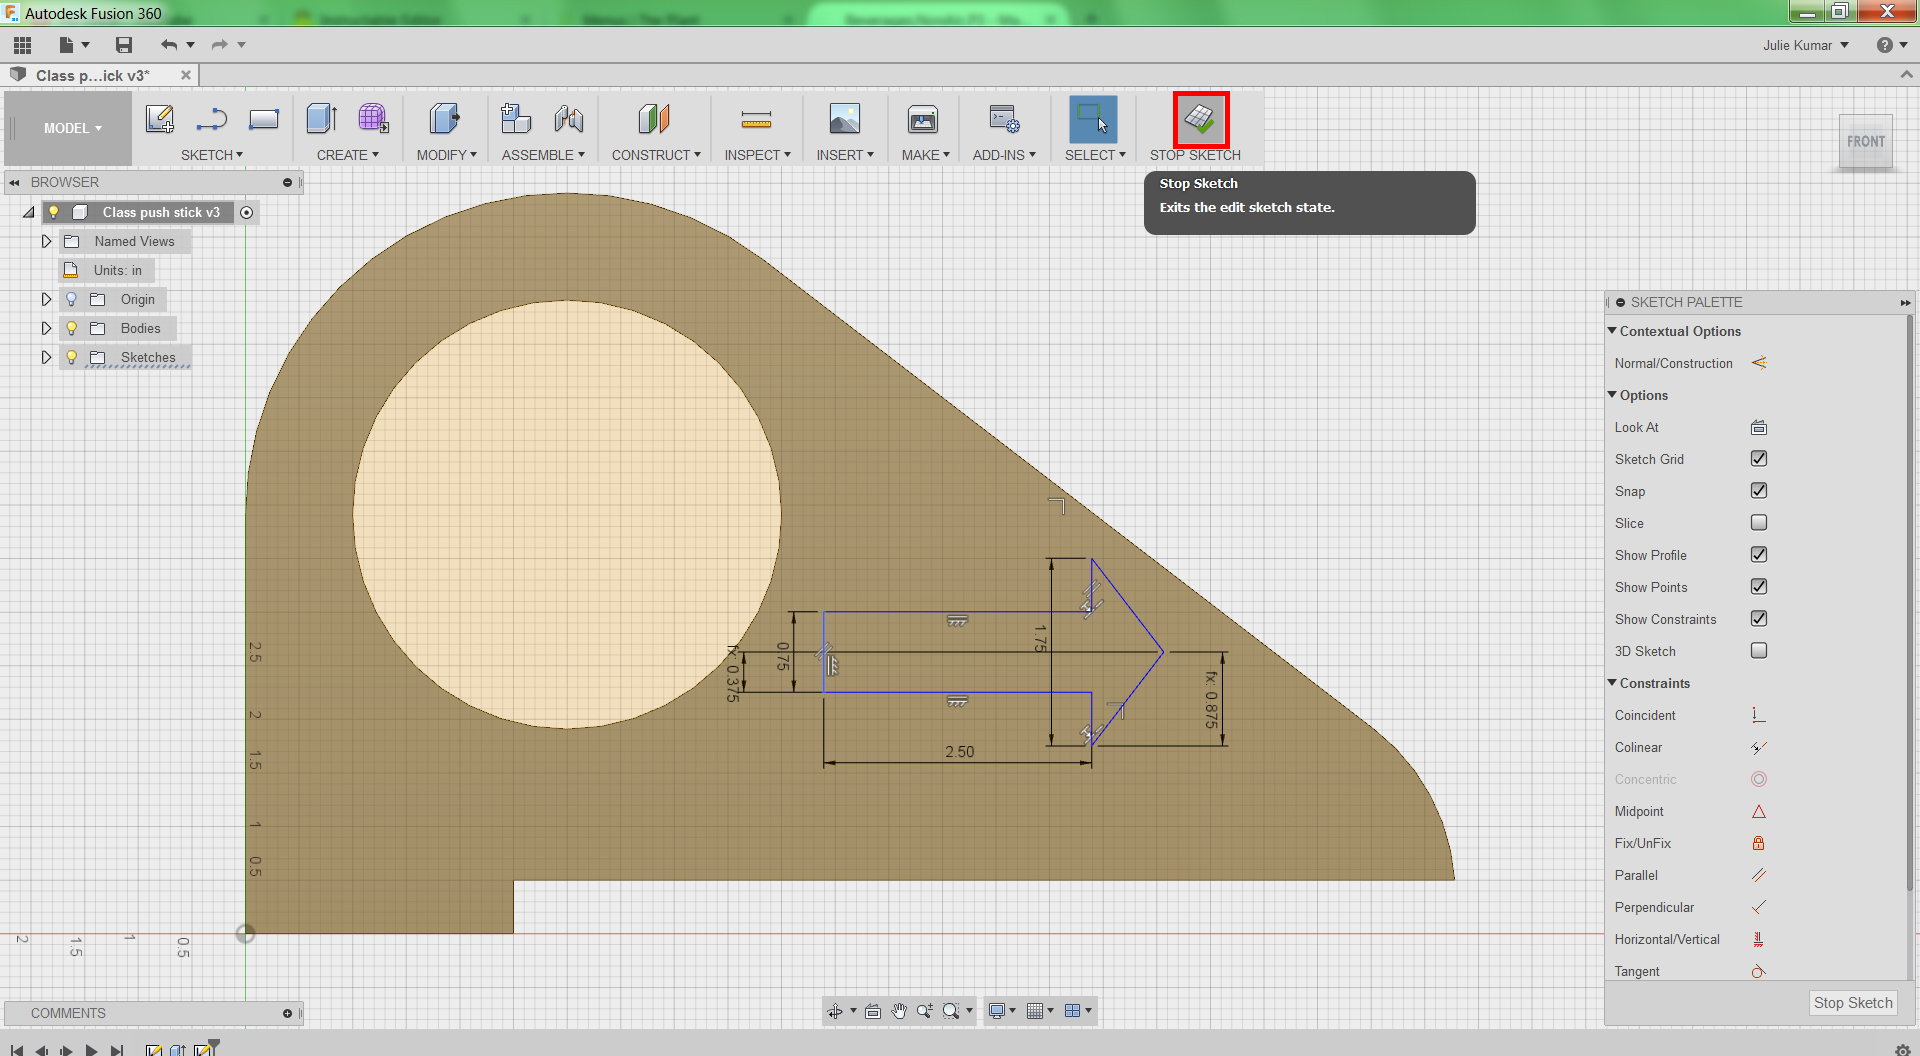
Second Extrusion
21) Click the home icon by the View Cube for an isometric view.
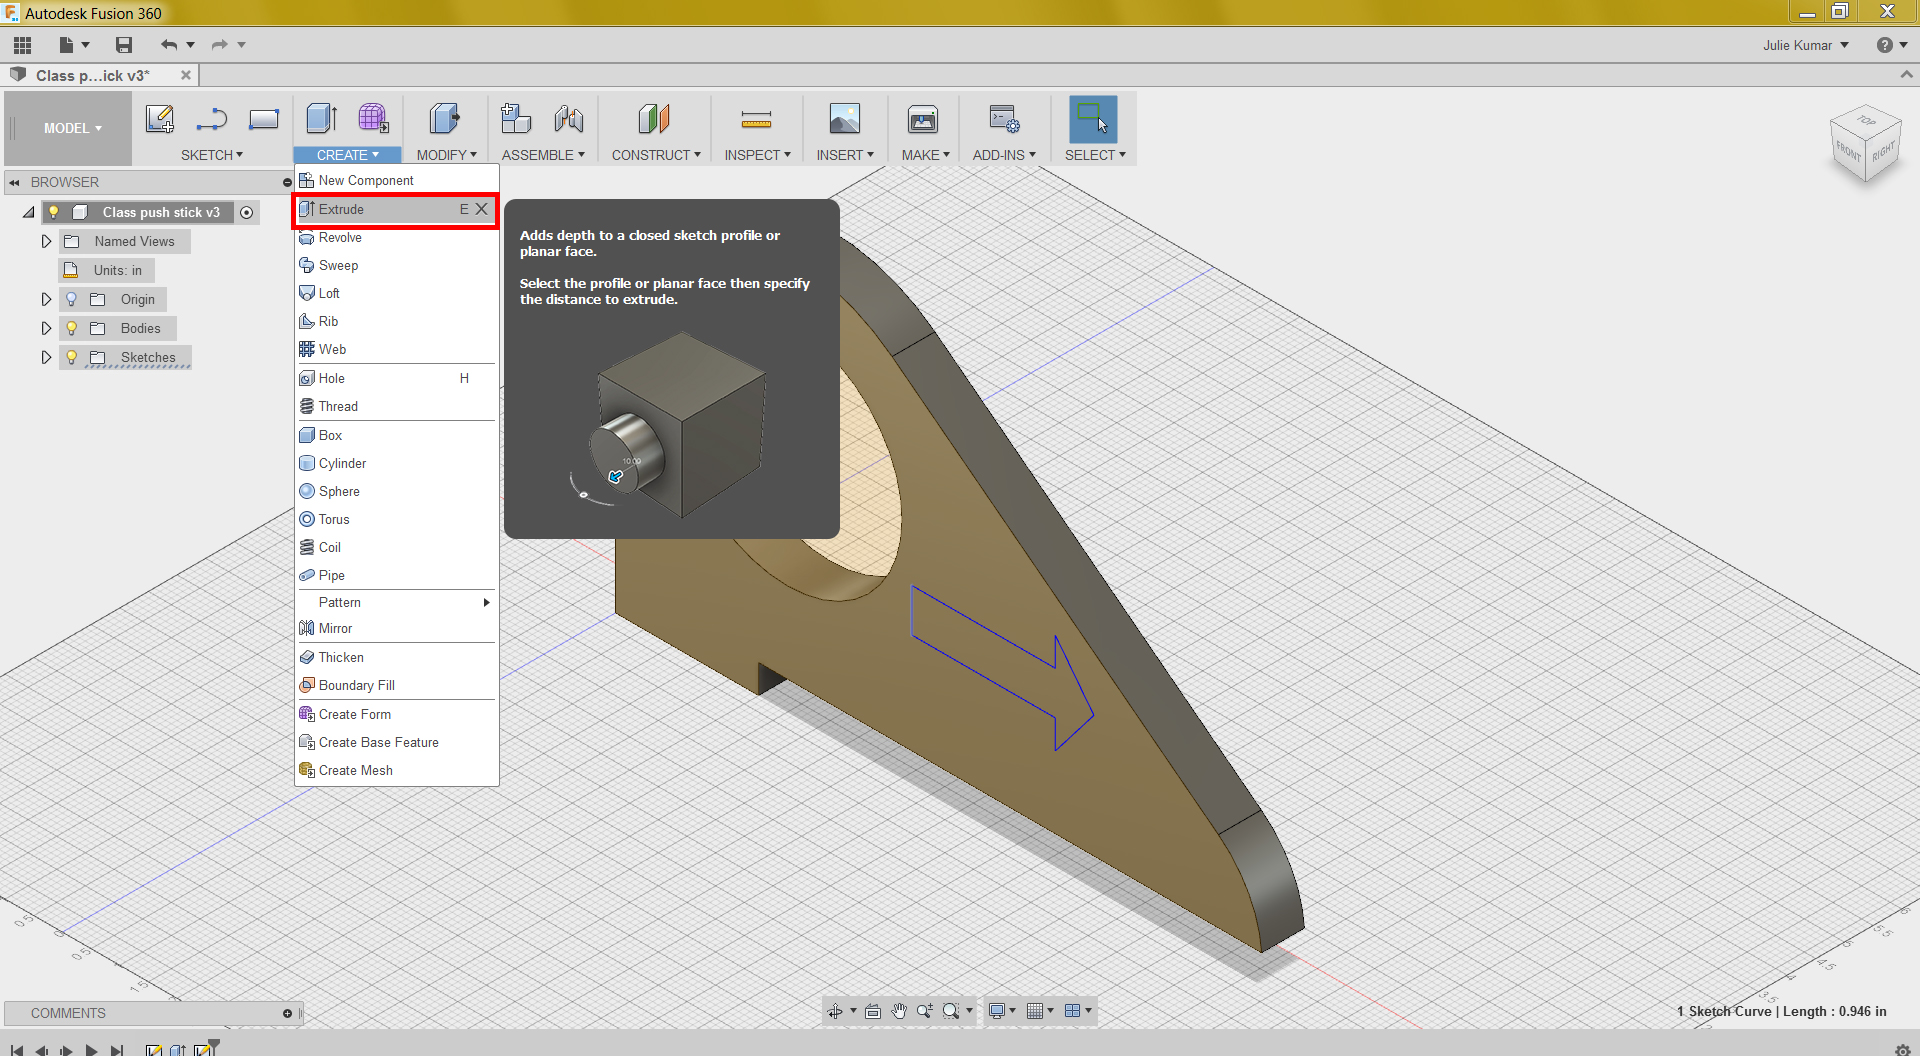
22) In the ribbon, choose Create>Extrude.
Alternatively, use hotkey E.
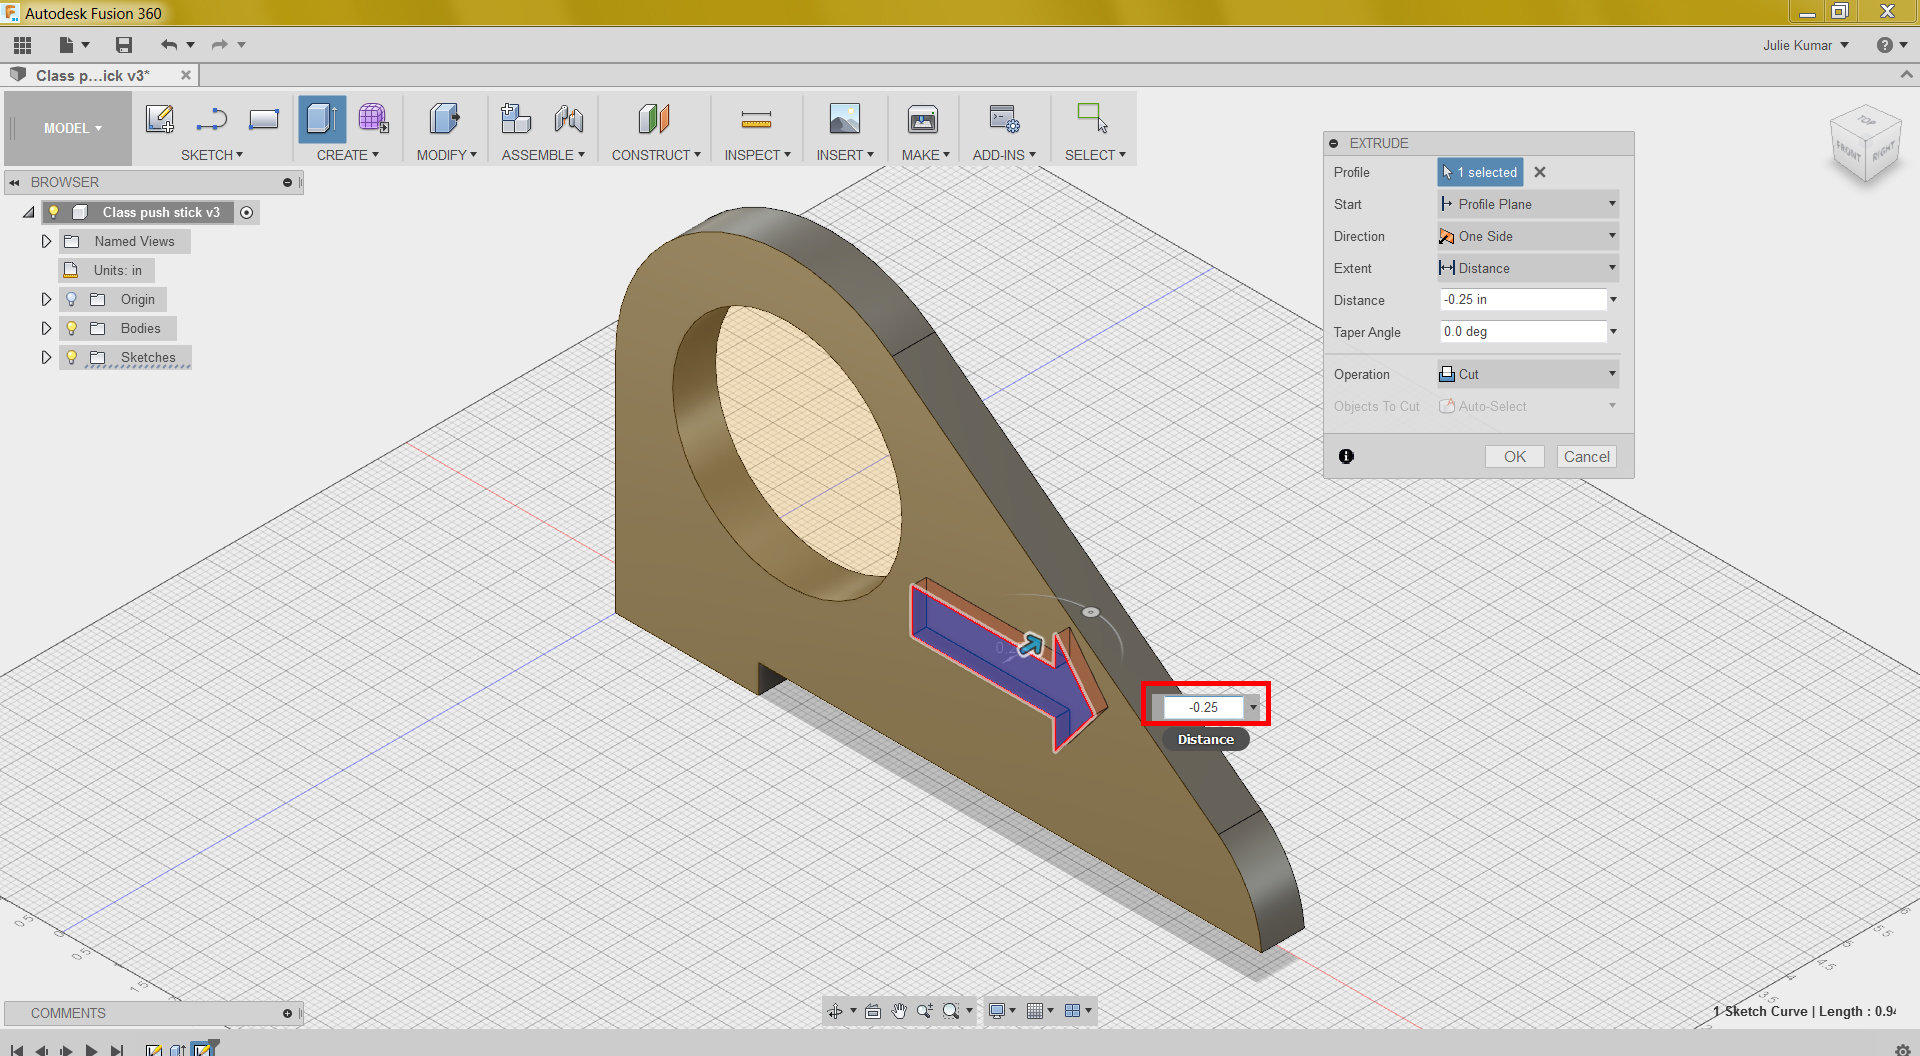
23) Click the inside of the arrow, and type -0.25 for the extrusion distance.
Notice in the Extrude window that the Operation has turned into Cut, because you entered a negative value. You can use the extrude tool not only to add material, but also to cut it out, join two objects, or create new models from intersections.
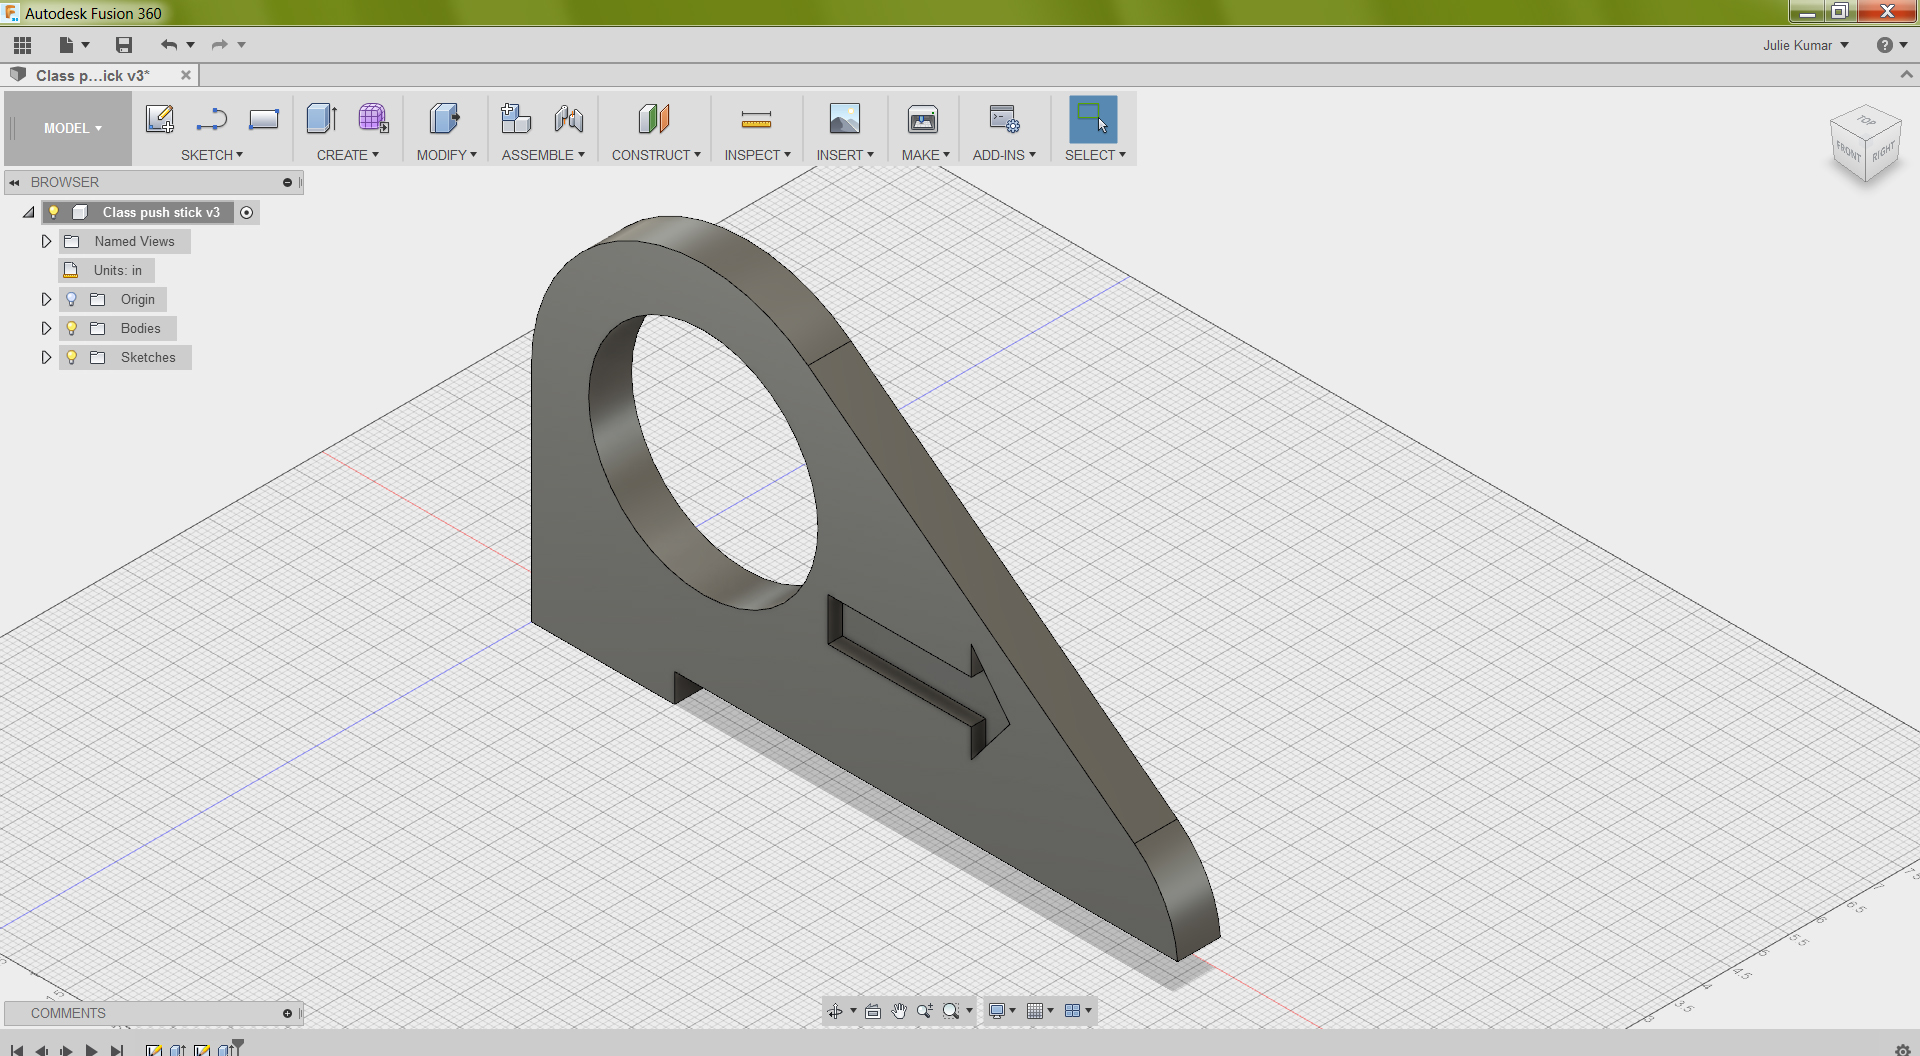
24) Hit Enter to create the extrusion.
The geometry you just created is called a pocket because it is bounded by a contour and has a flat bottom.
25) Save.
Congratulations! You have extruded your first sketch into a solid body! Share a screen-capture of your model below.
