Adobe Lightroom
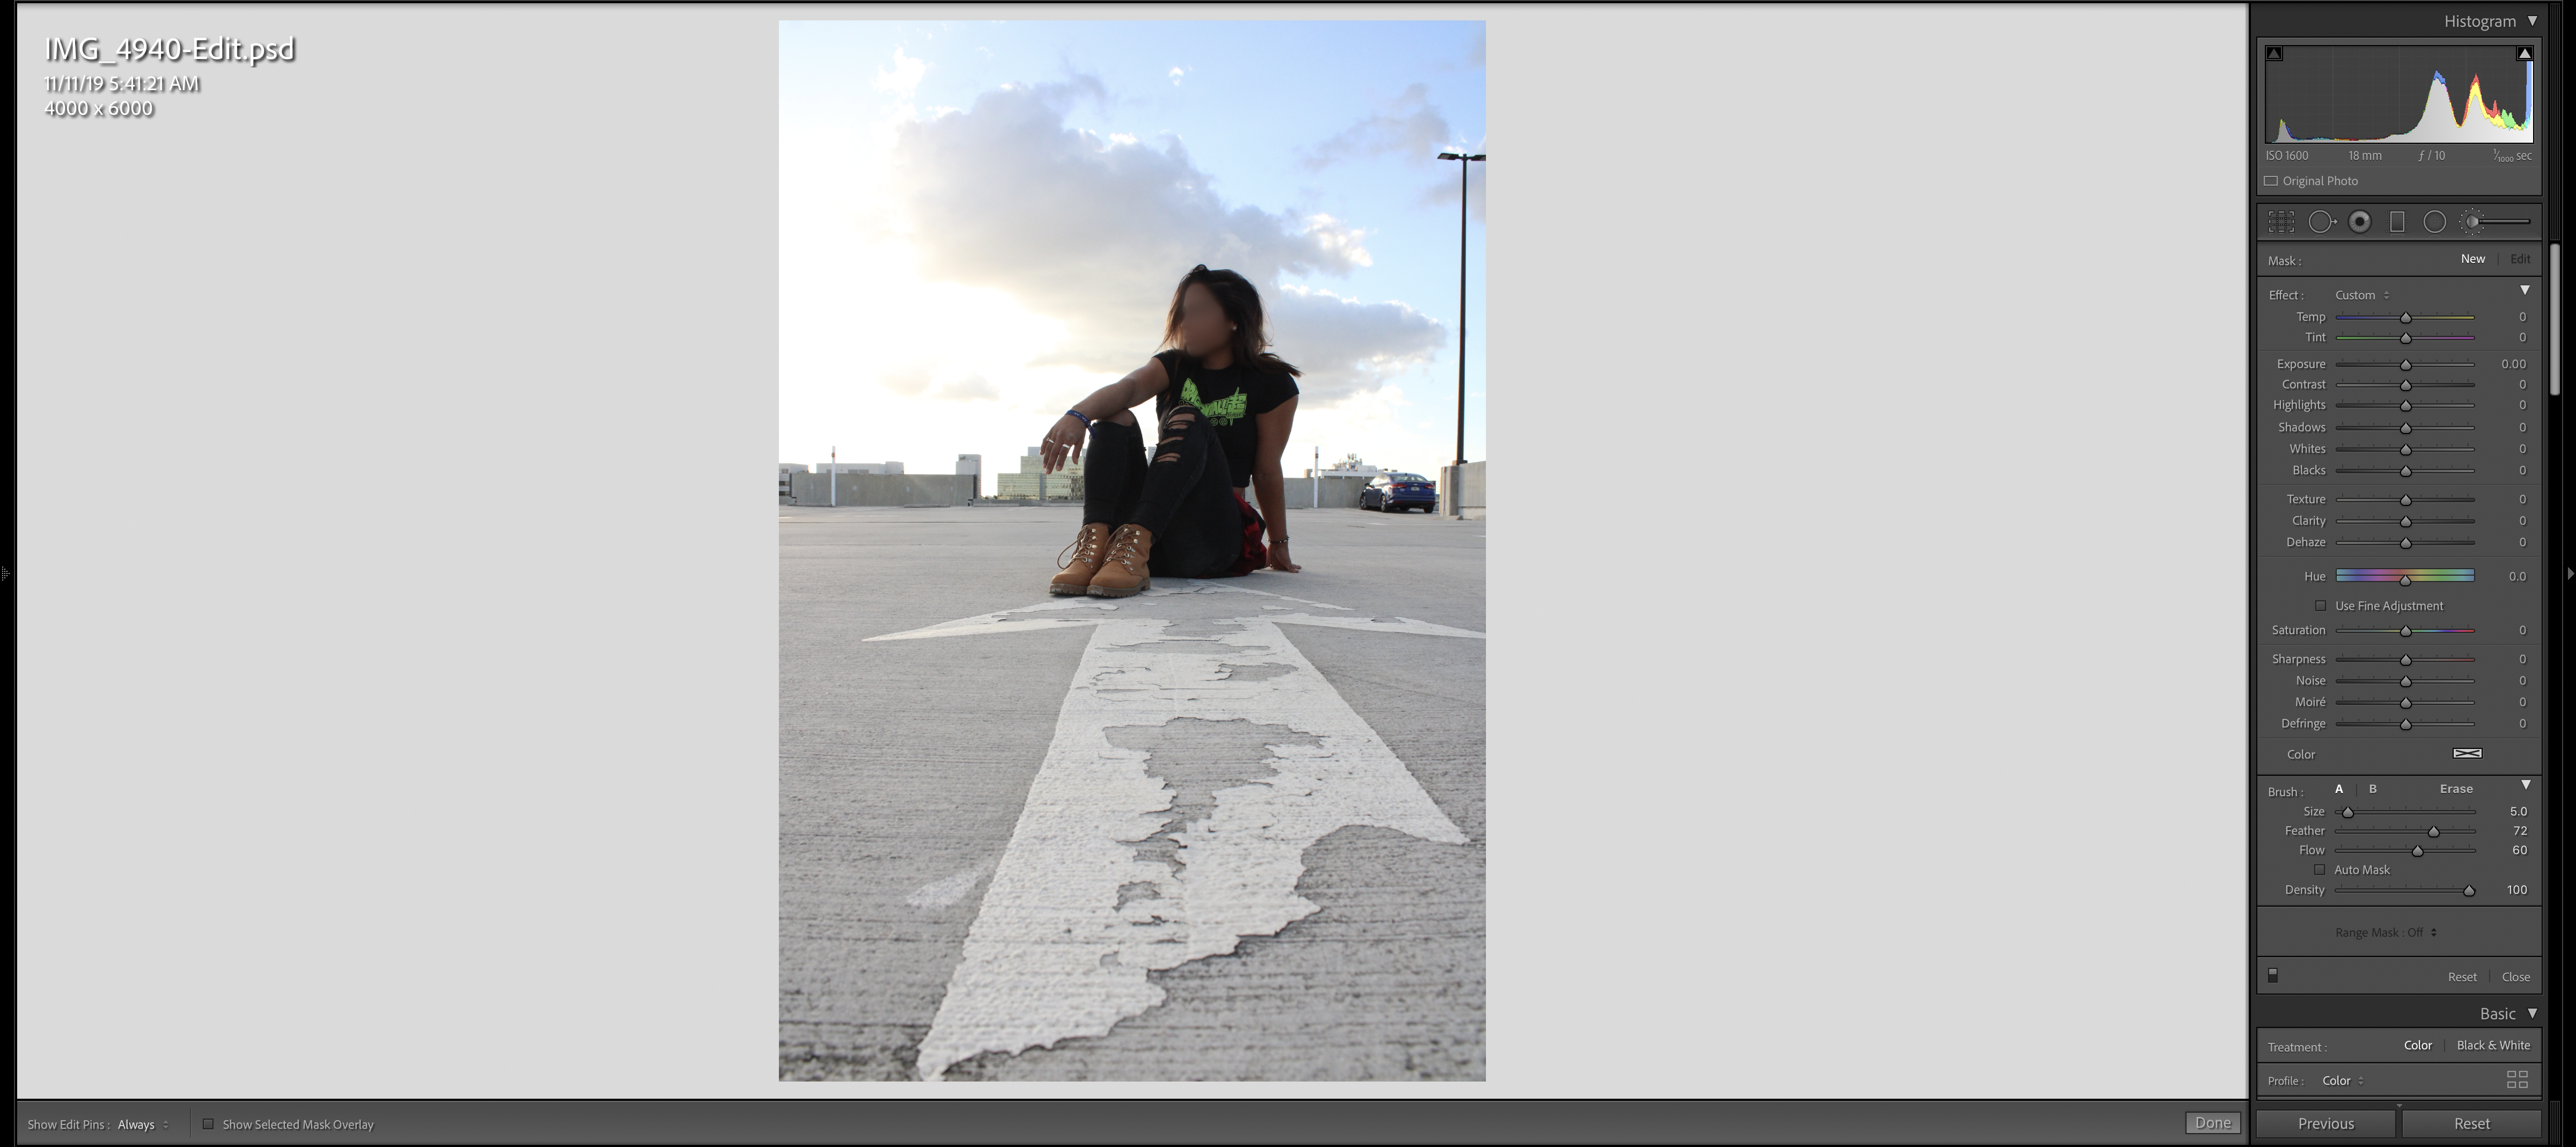
Settings can change depending on the image
Supplies
Image to work on and Adobe Lightroom classic
Background
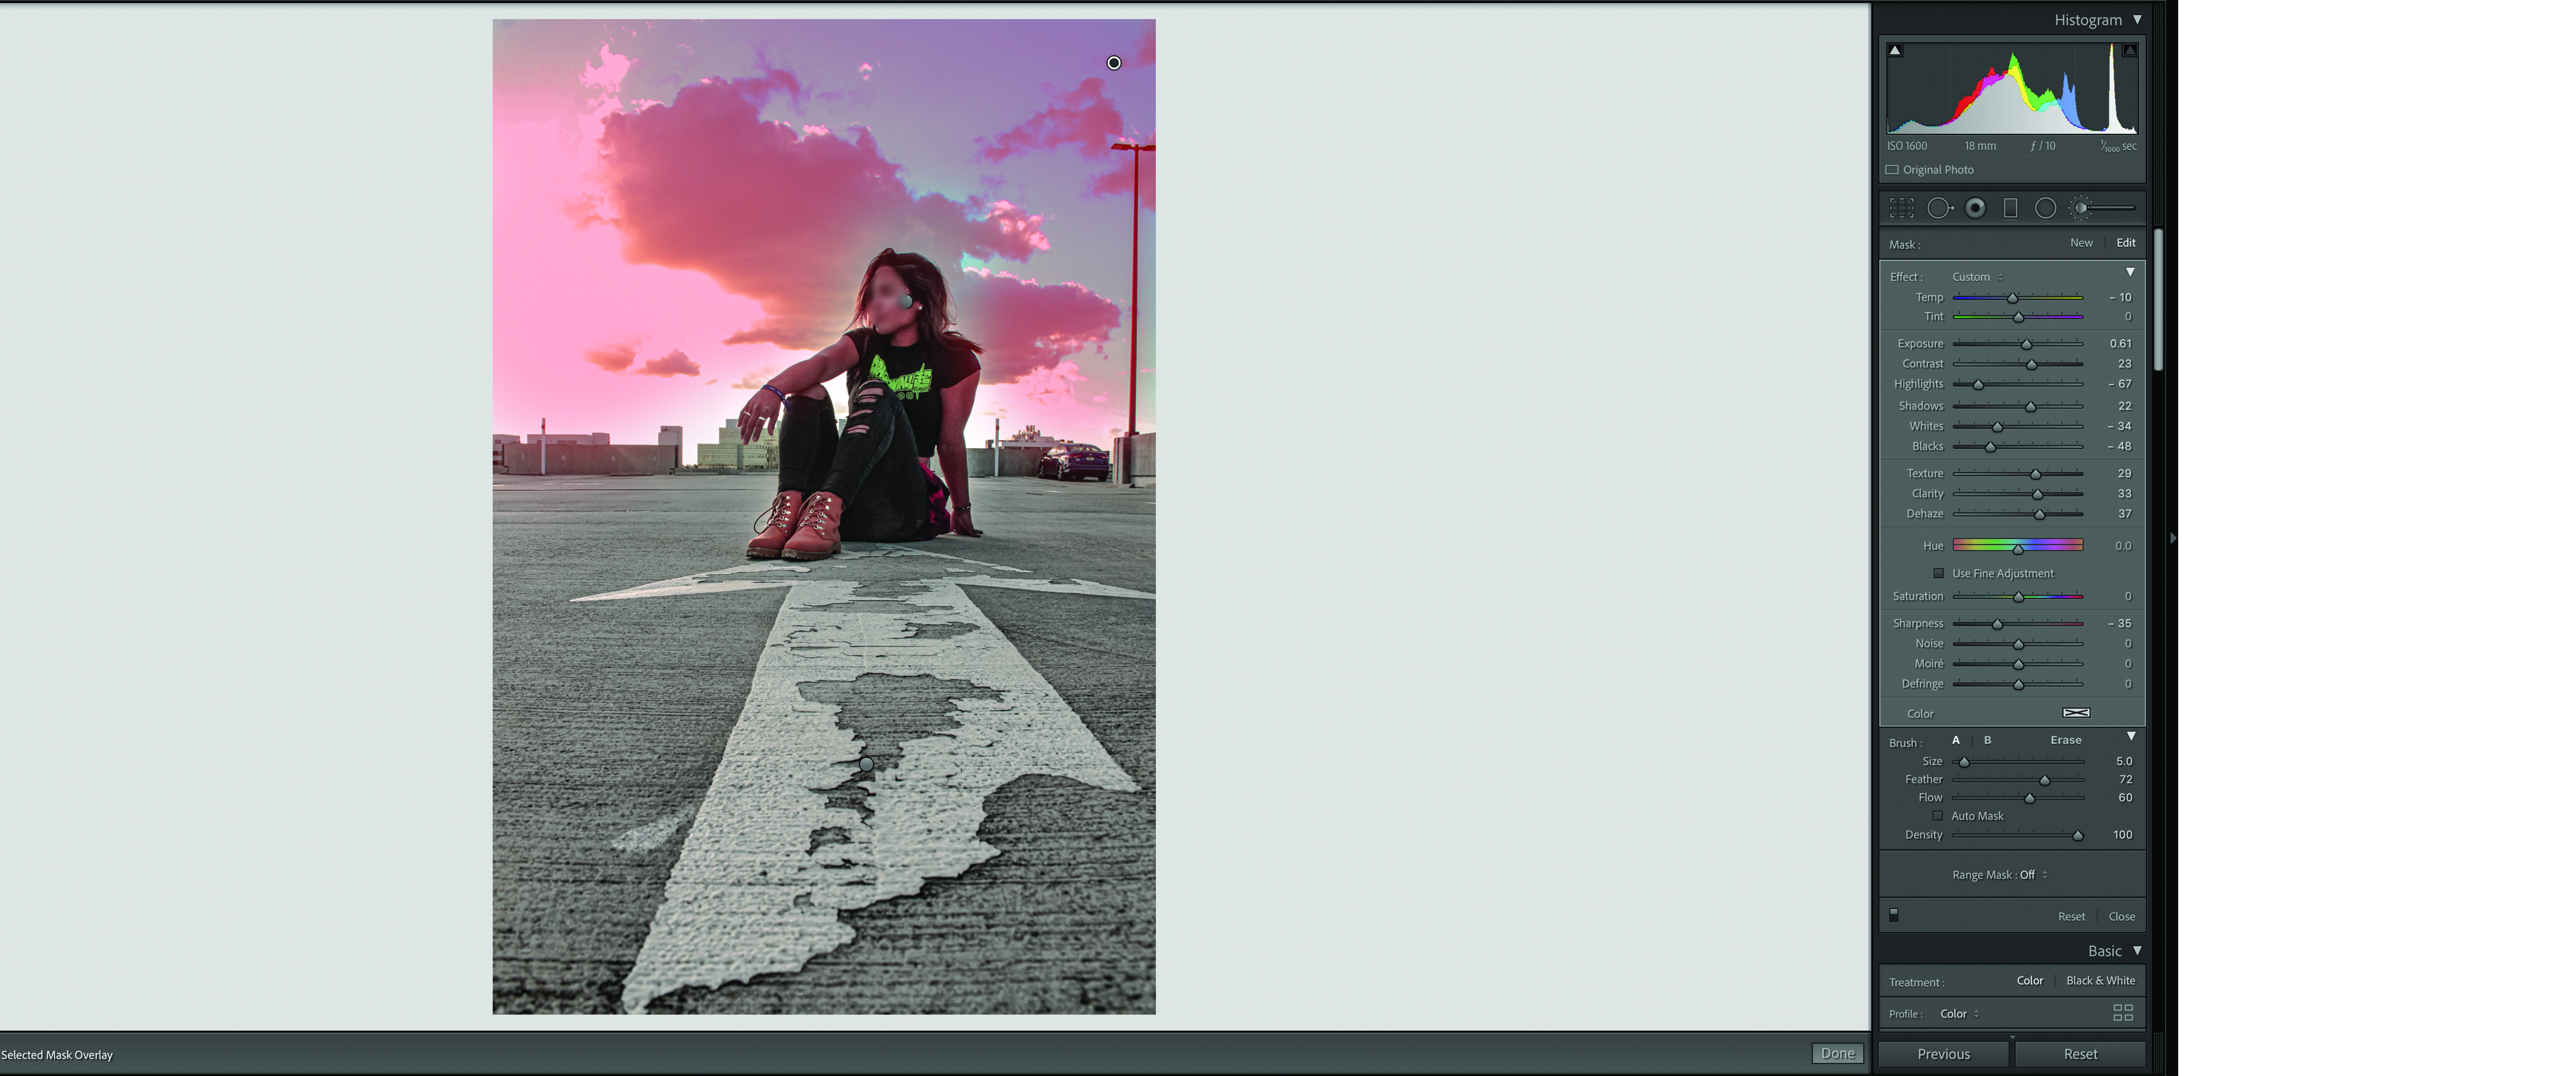
By using the masking tool, you will mask the entire background (sky) has its highlighted in red.
Sky Edit
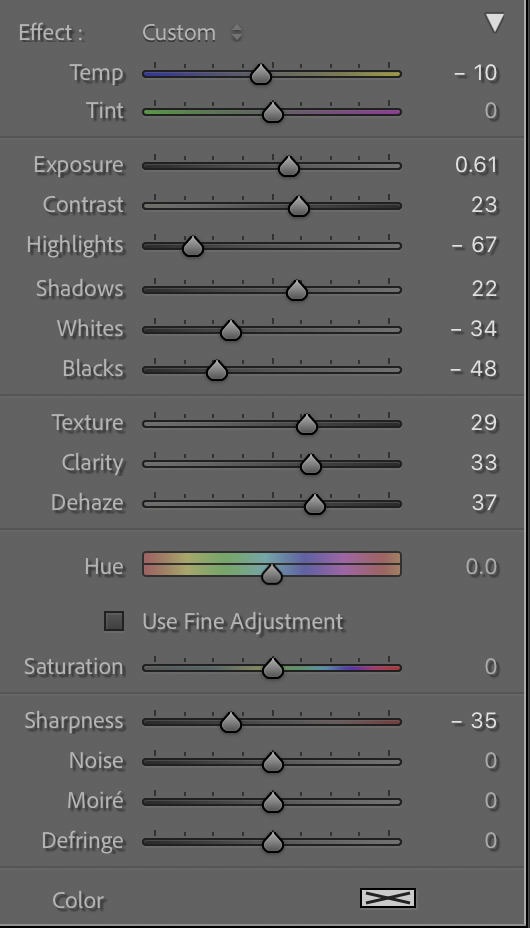
modify settings to adjust the sky color and brightness as well as the sharpness. could follow the same settings as shown or modify as you may please.
Mask the Floor
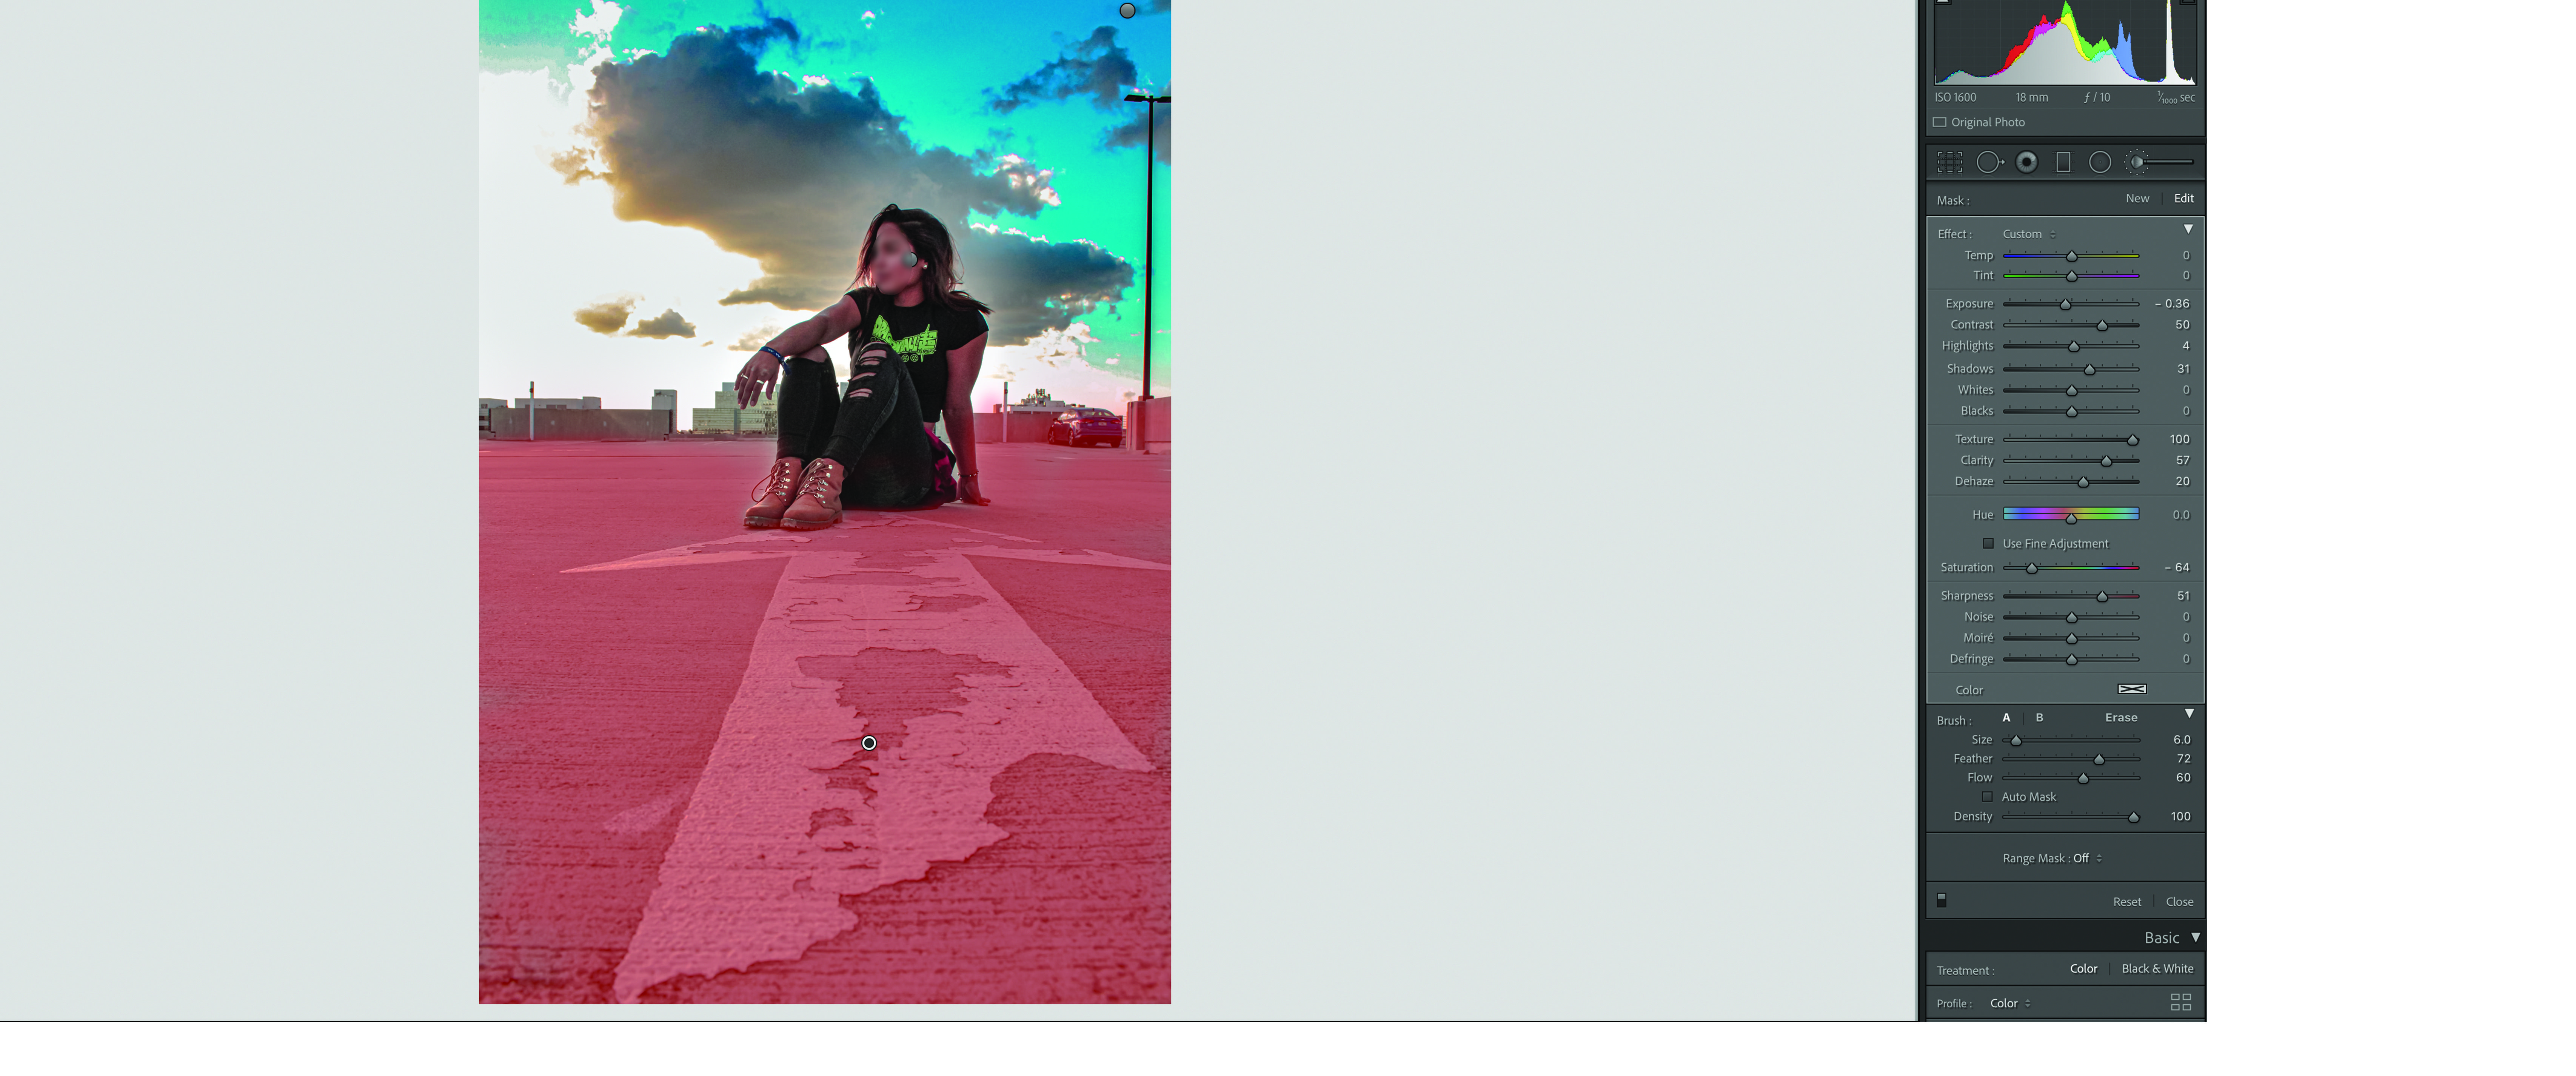
Using the masking tool as before, you will use it this time to mask the floor and part of the background that was not selected before. as shown in red in the image.
Modifying the Setting of the Floor
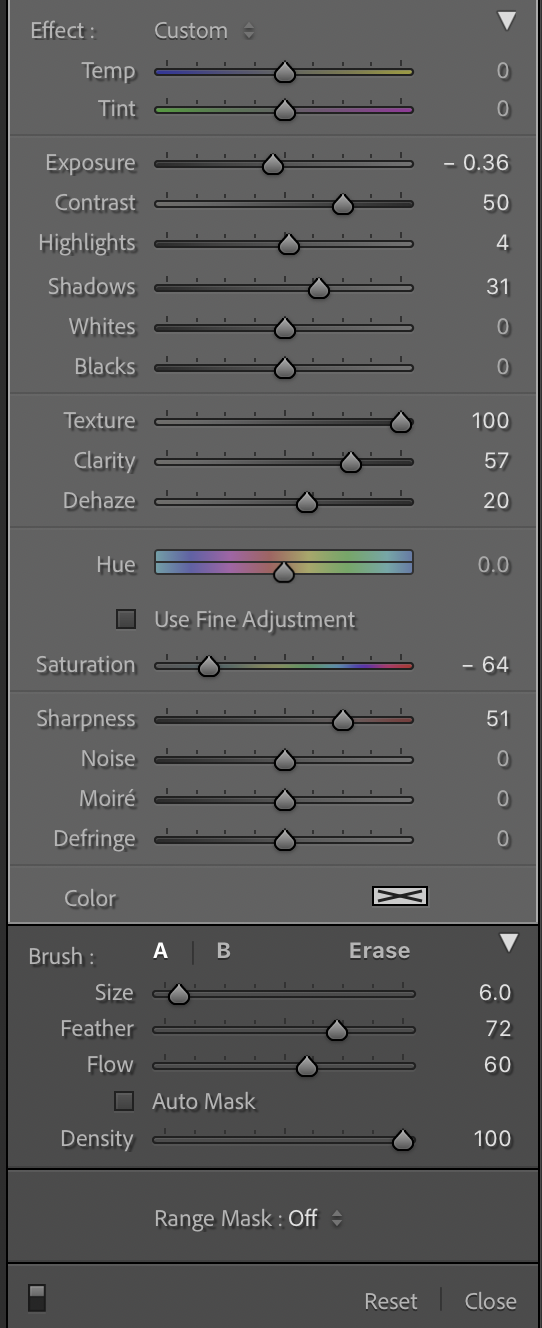
modifying the settings of the floor you will make the ground a bit darker and with more texture opposite of the sky.
may use the same settings as shown above or modify image in. your own preference.
Masking Subject
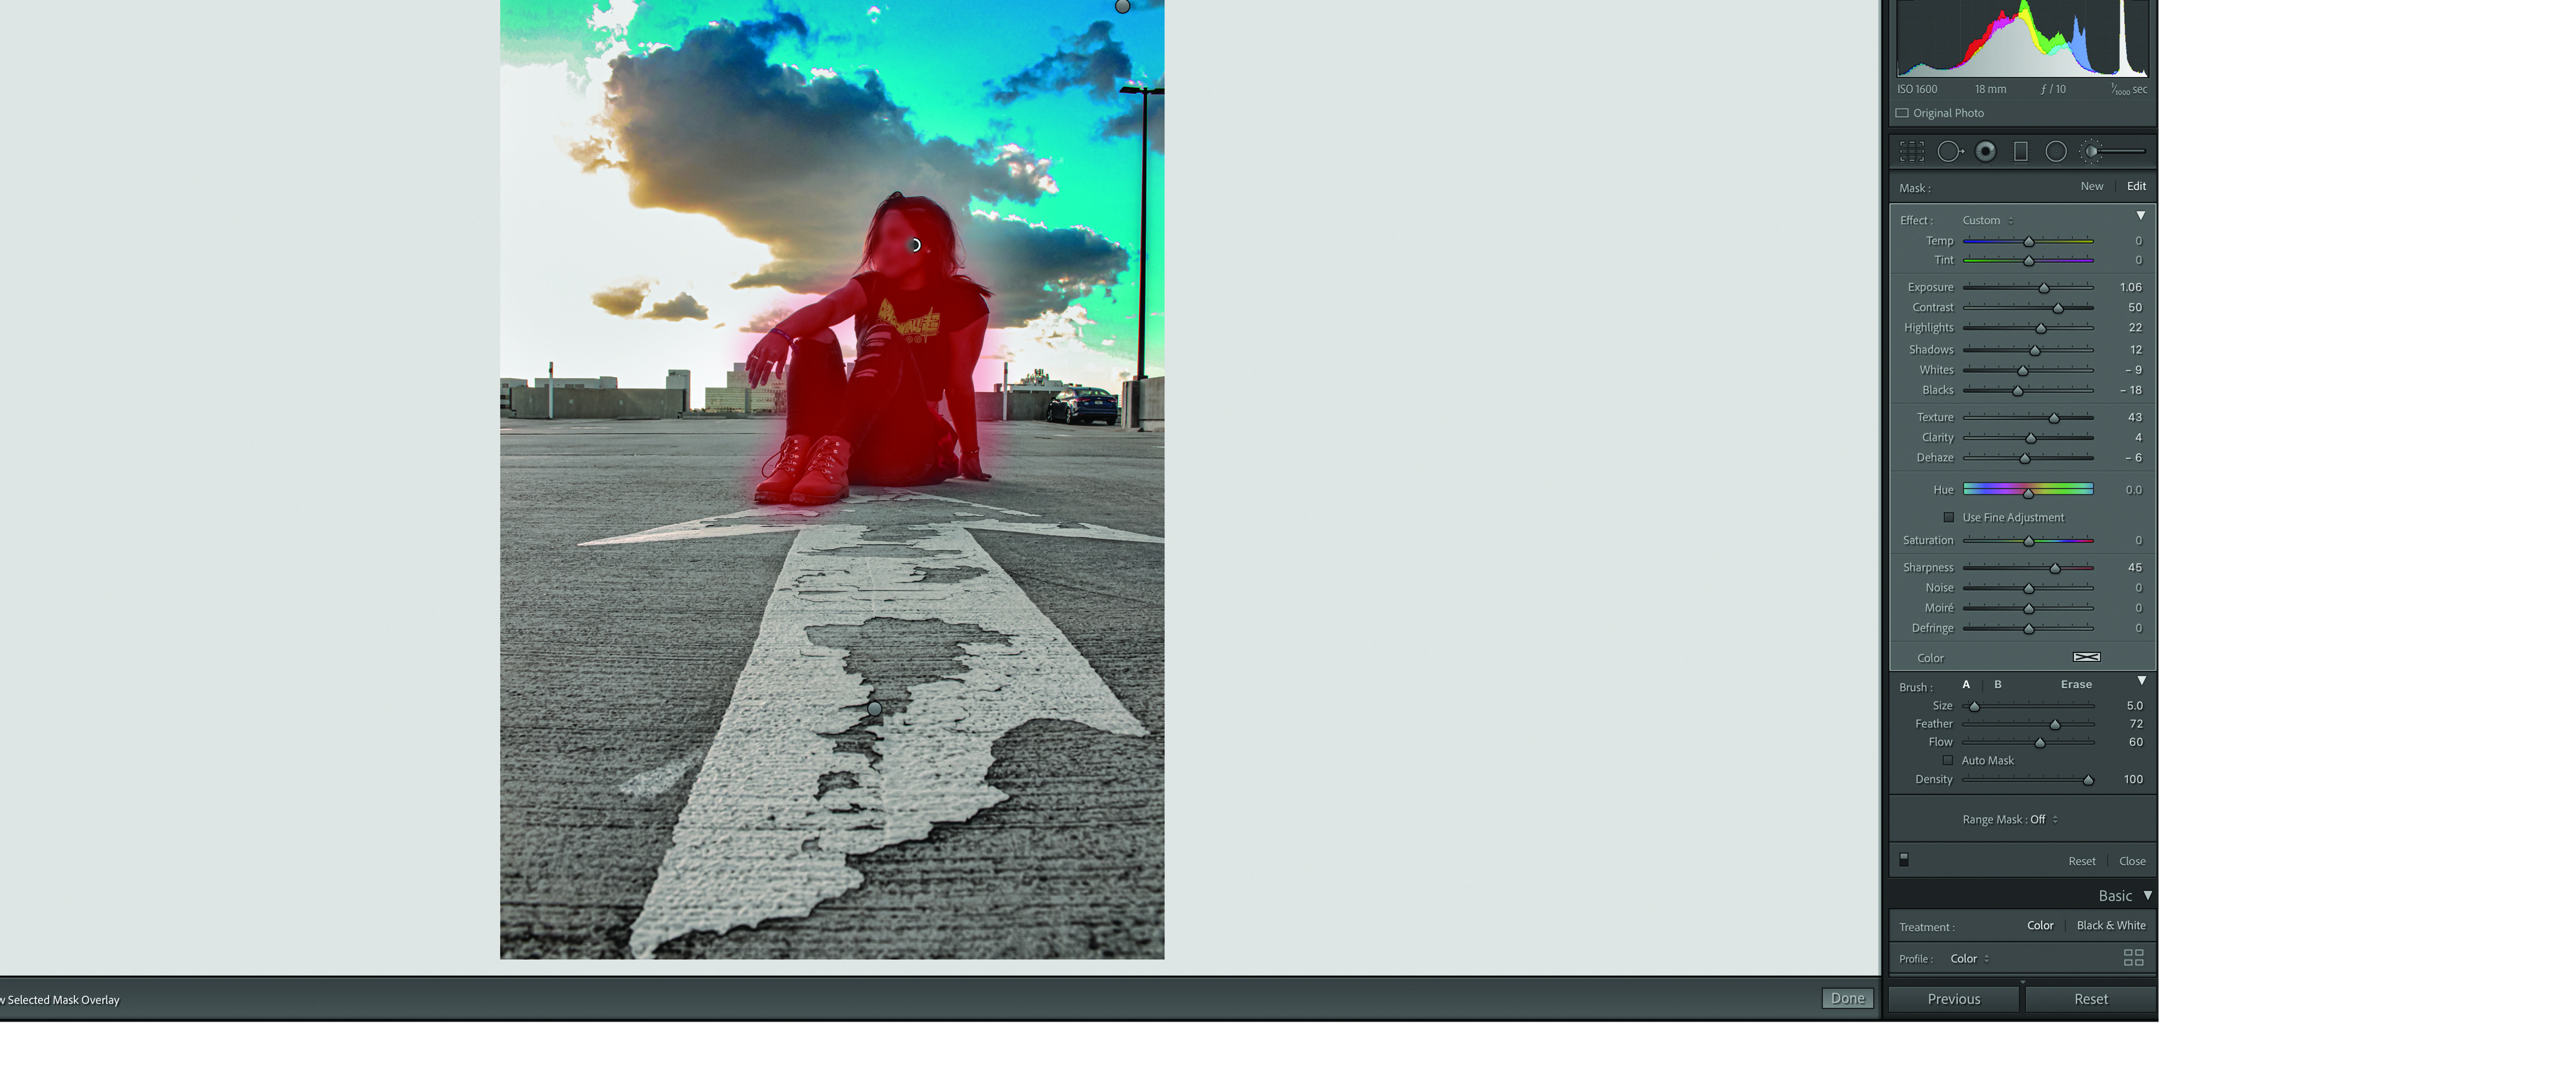
repeating the same step from before you will be masking the subject. as shown highlighted red.
Subject Settings
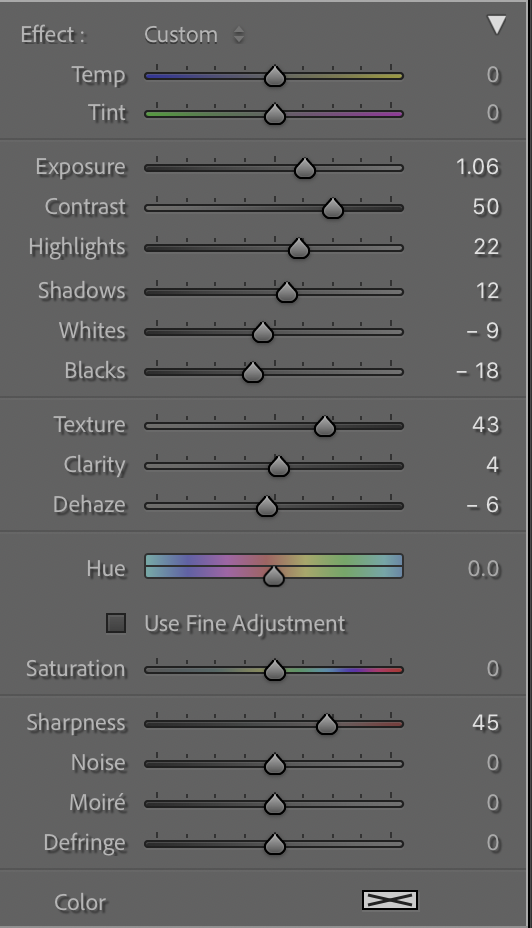
you will be modifying the settings of the subject to pop out more than the whole image. the subject will be a bit darker from the sky but lighter from the ground. could use same settings as shown or your own preference.
Whole Image
once you edited the image in separate parts you will now edit it as a whole so I can all be one cohesive image.
Modifying the Settings to Whole Image
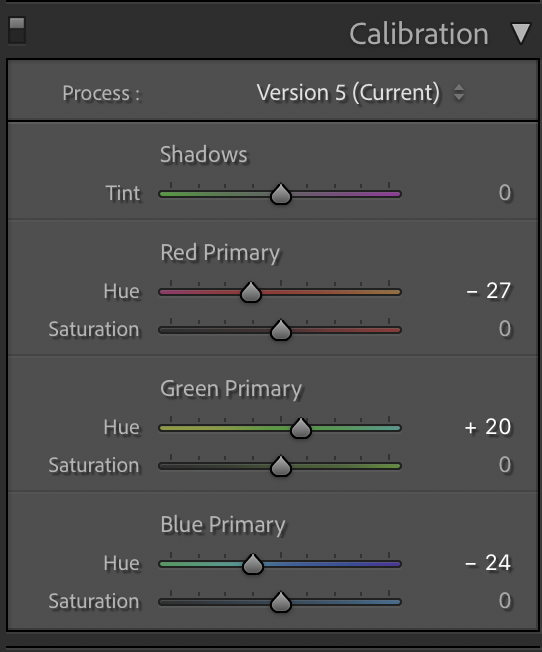
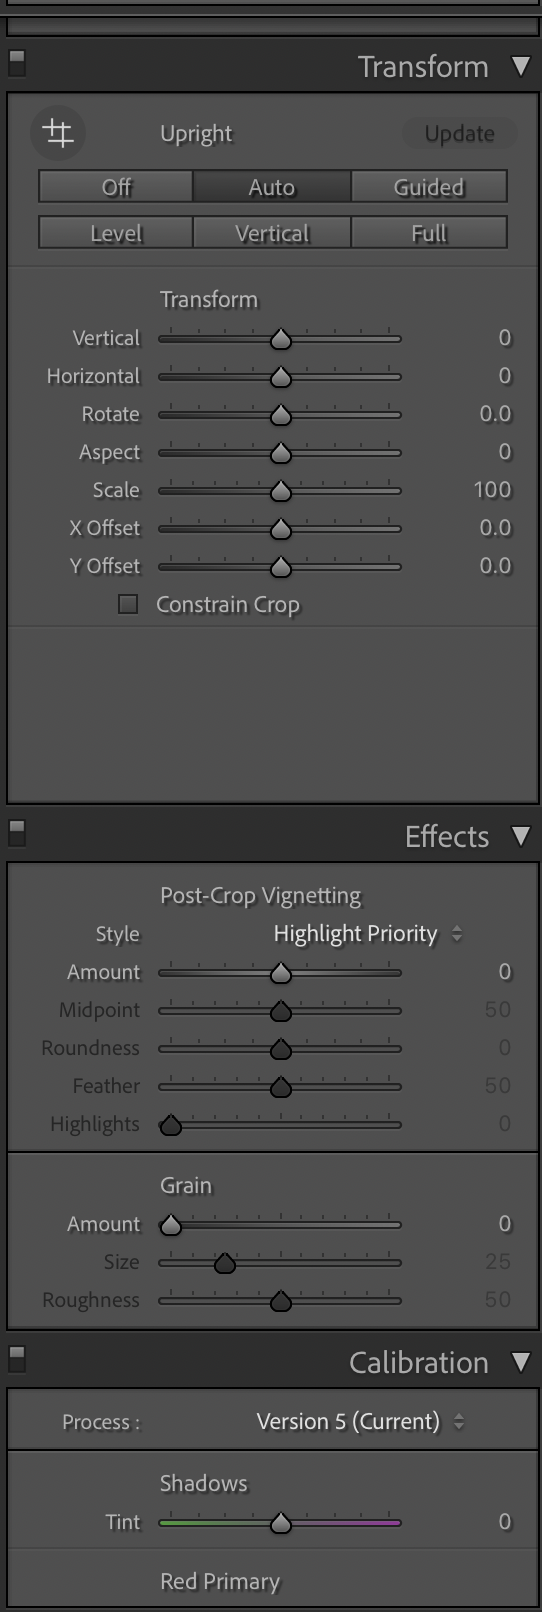
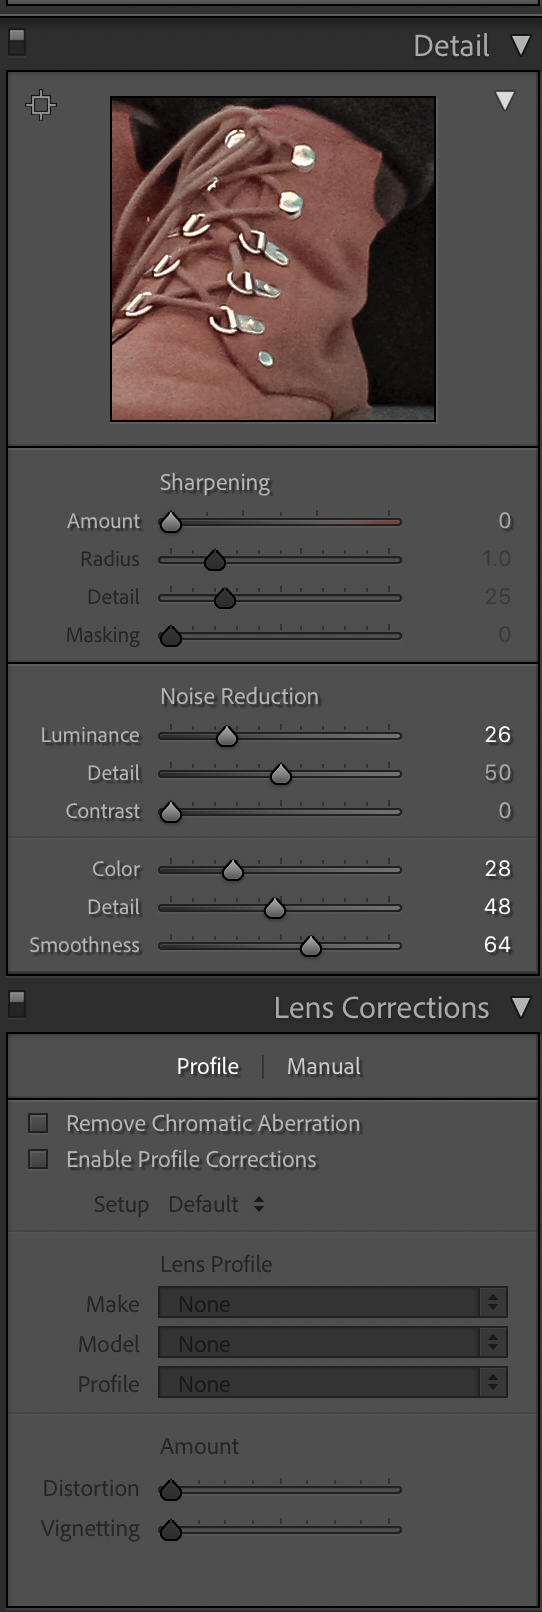
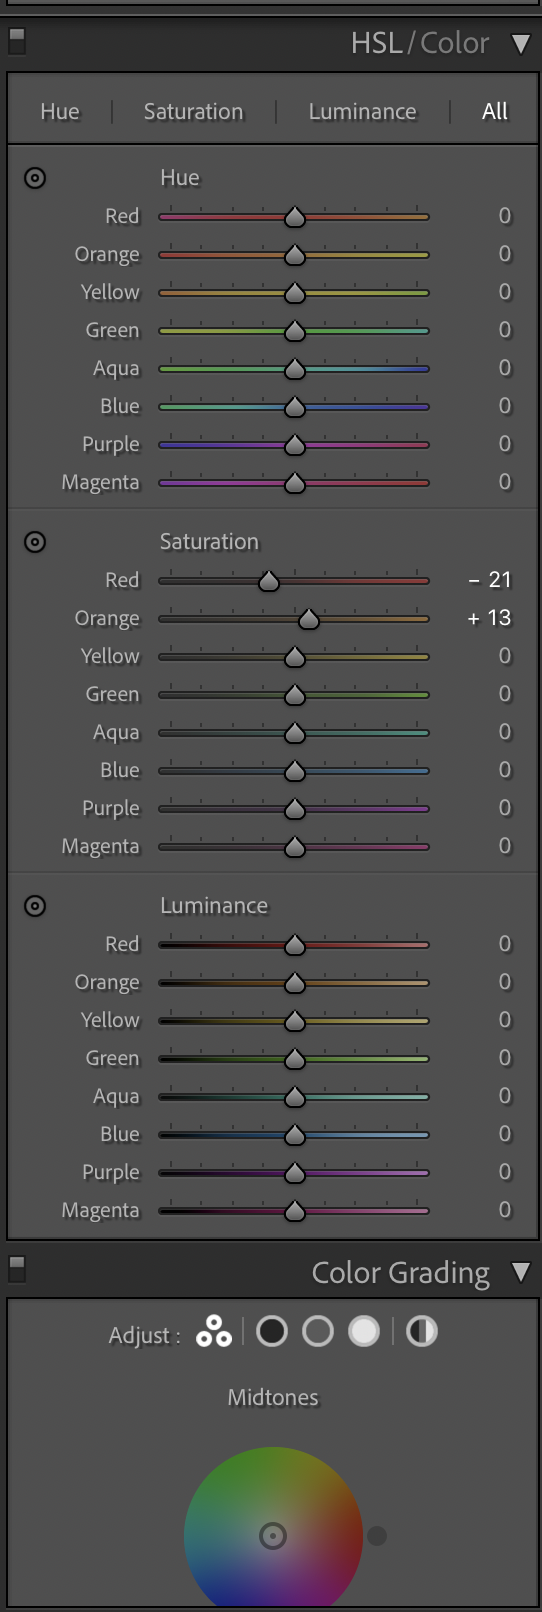
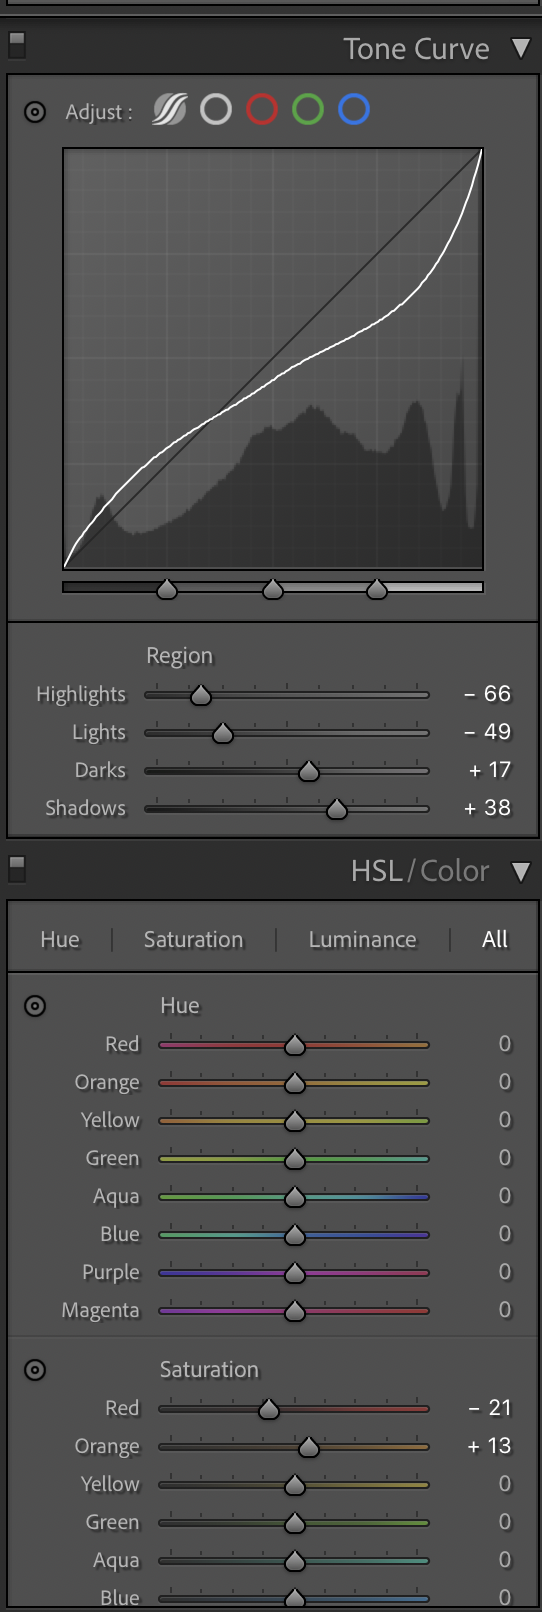
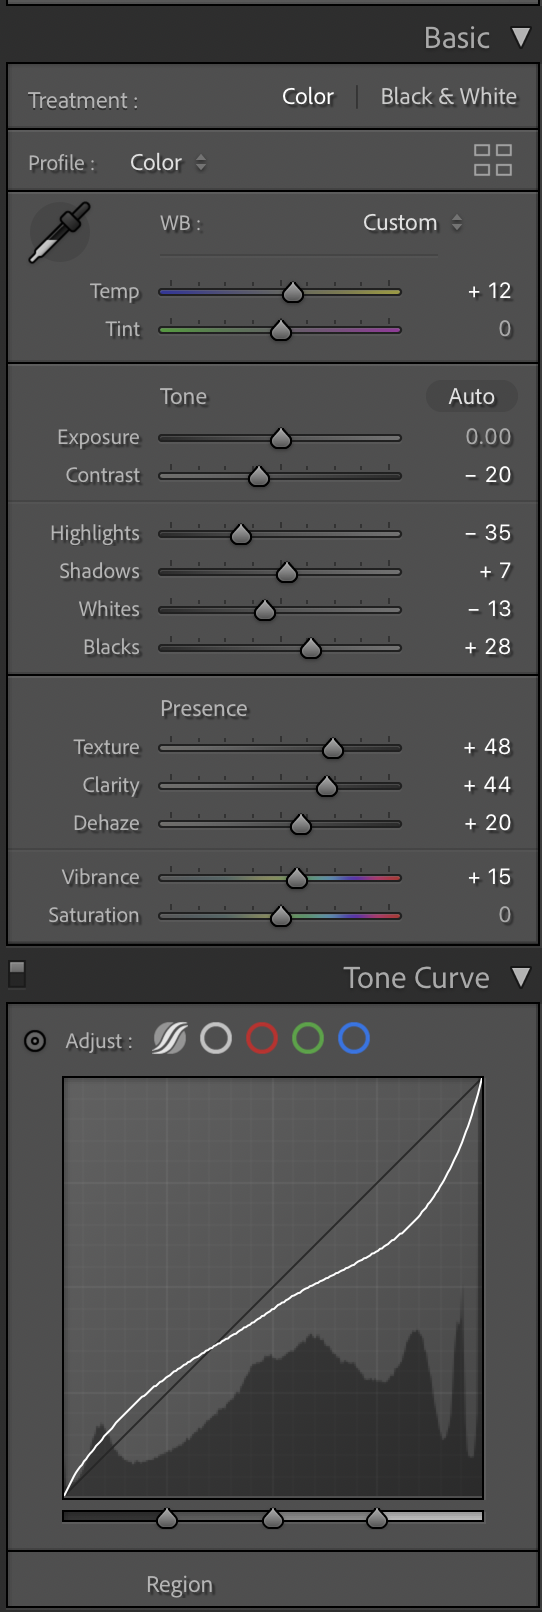
you will be changing the setting so all the colors can look more natural bringing down highlights and highering shadows. removing a bit of the red and leveling up the orange. the process will also remove excessive noise by highering a bit of the luminance. you can follow the settings as shown or modify to your preference.
Looking at the Difference
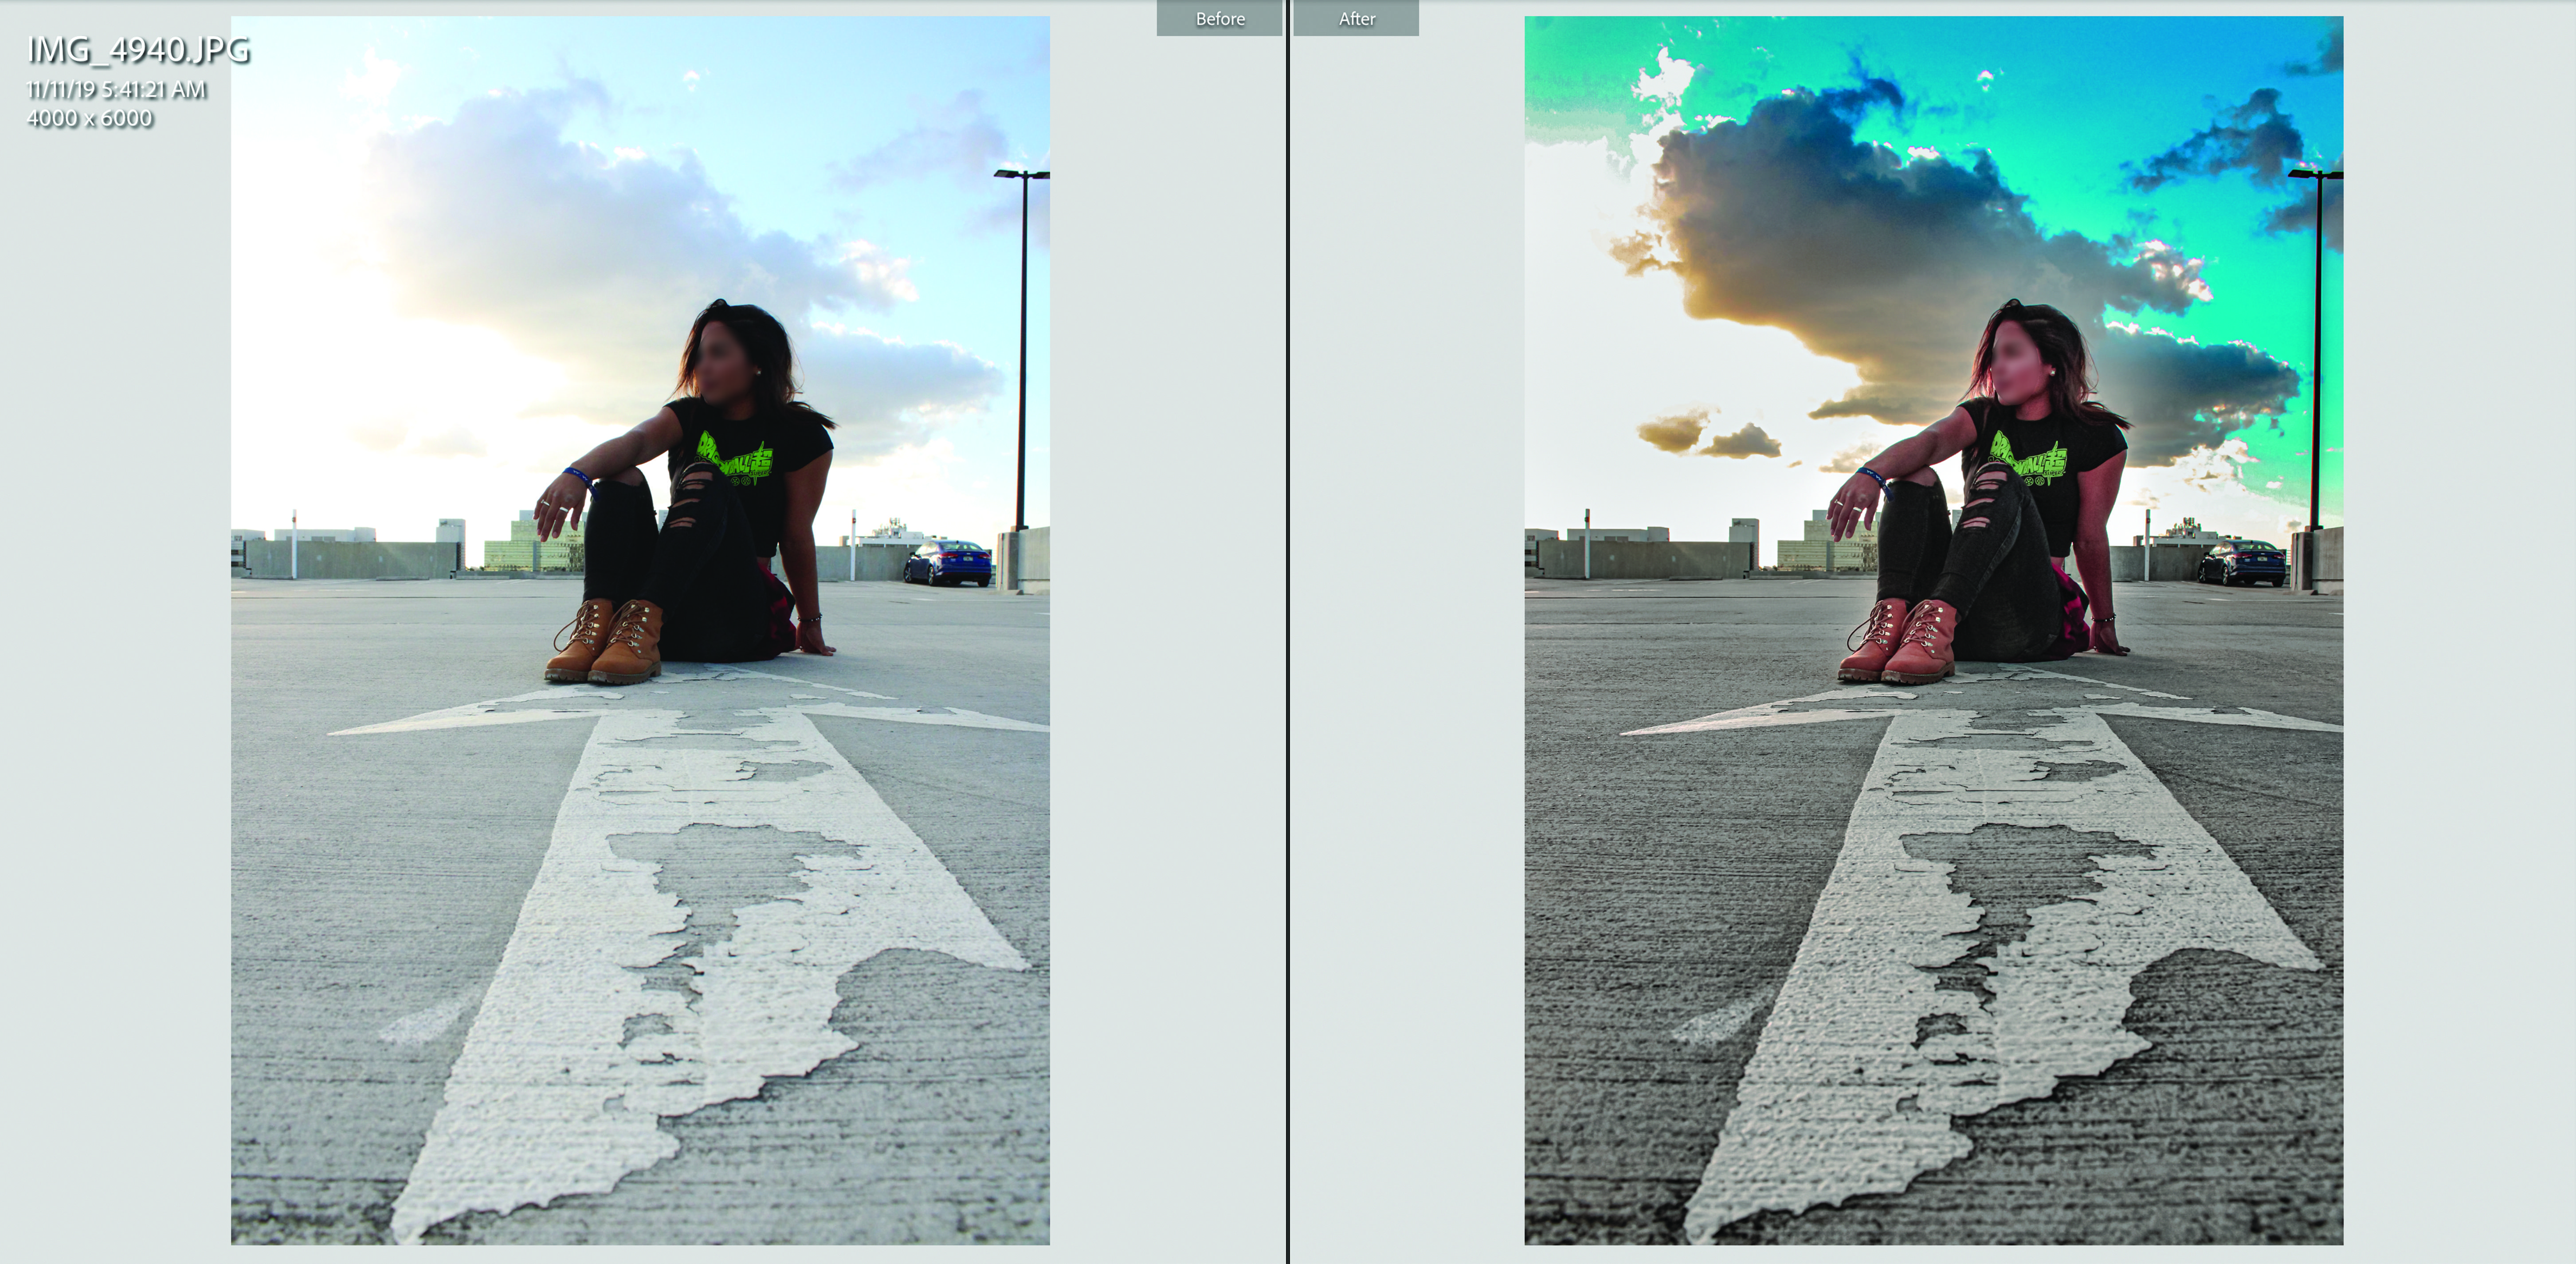
once you complete all the steps you click on the before and after at the bottom left of the screen to see with what you started and with what you ended with. you can always go back and adjust any settings you like.