Adjustable Wrist Immobilization Brace Without 3D Scanner
by arifsadia24 in Living > Health
286 Views, 2 Favorites, 0 Comments
Adjustable Wrist Immobilization Brace Without 3D Scanner

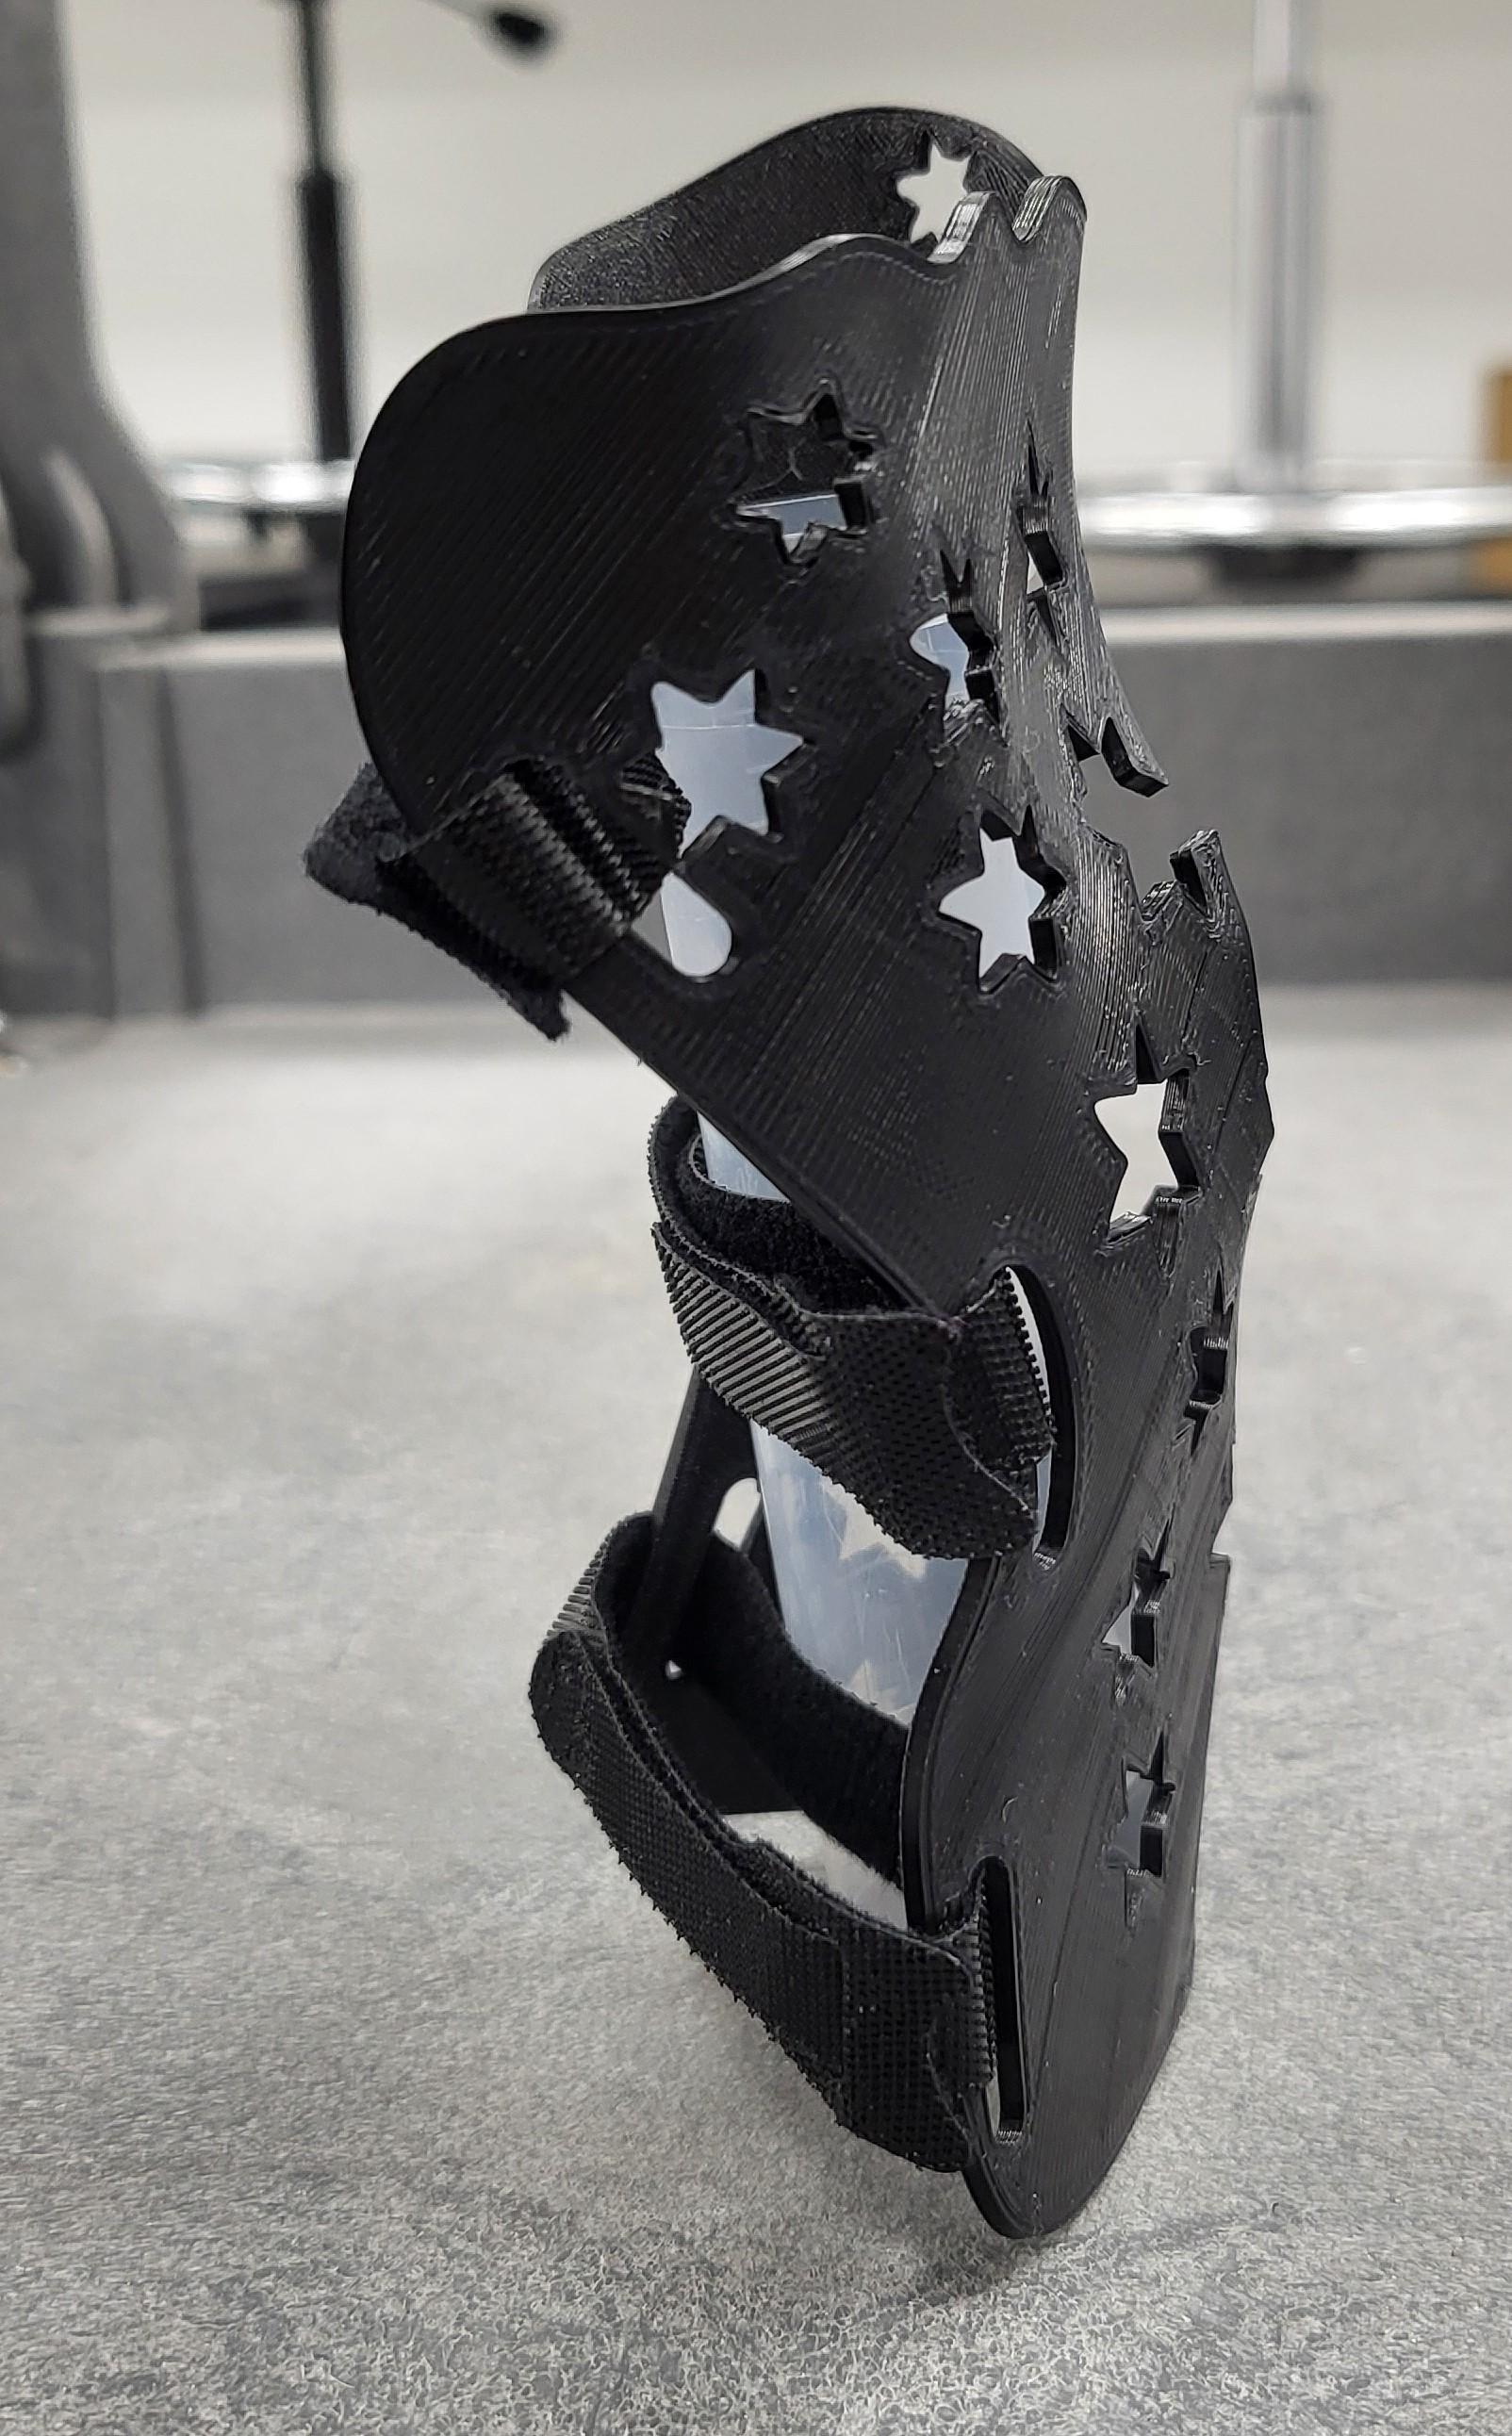
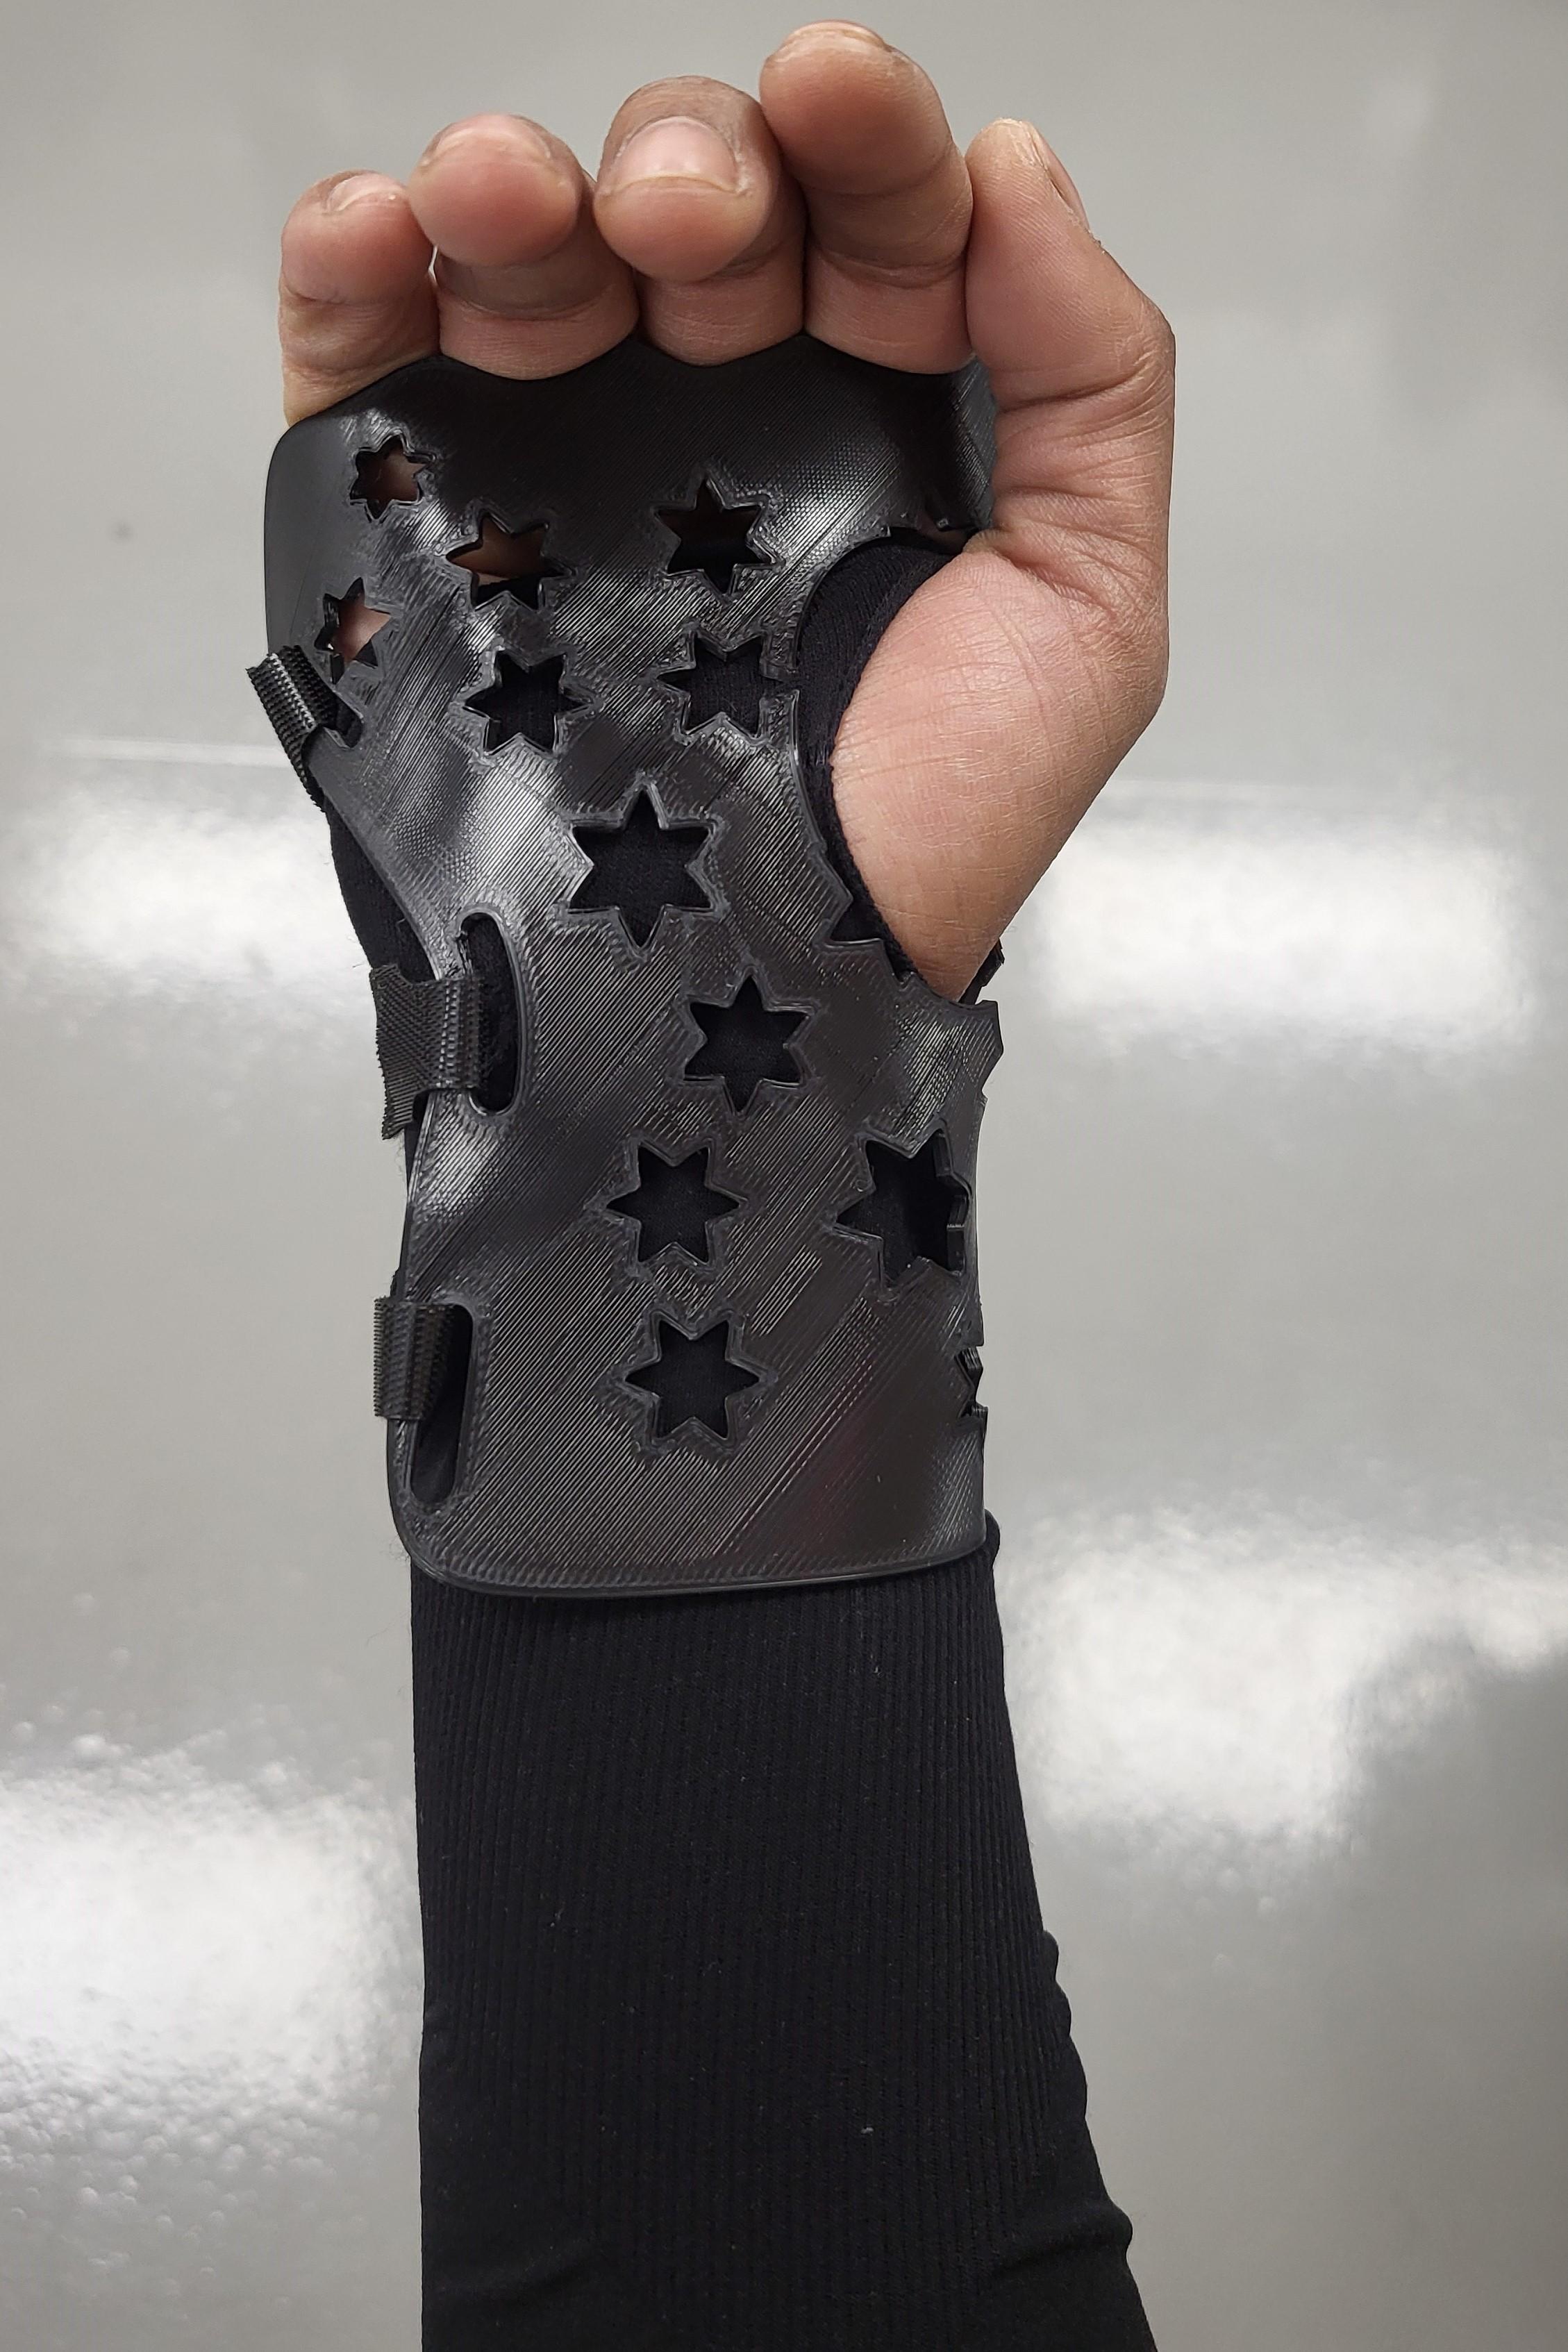
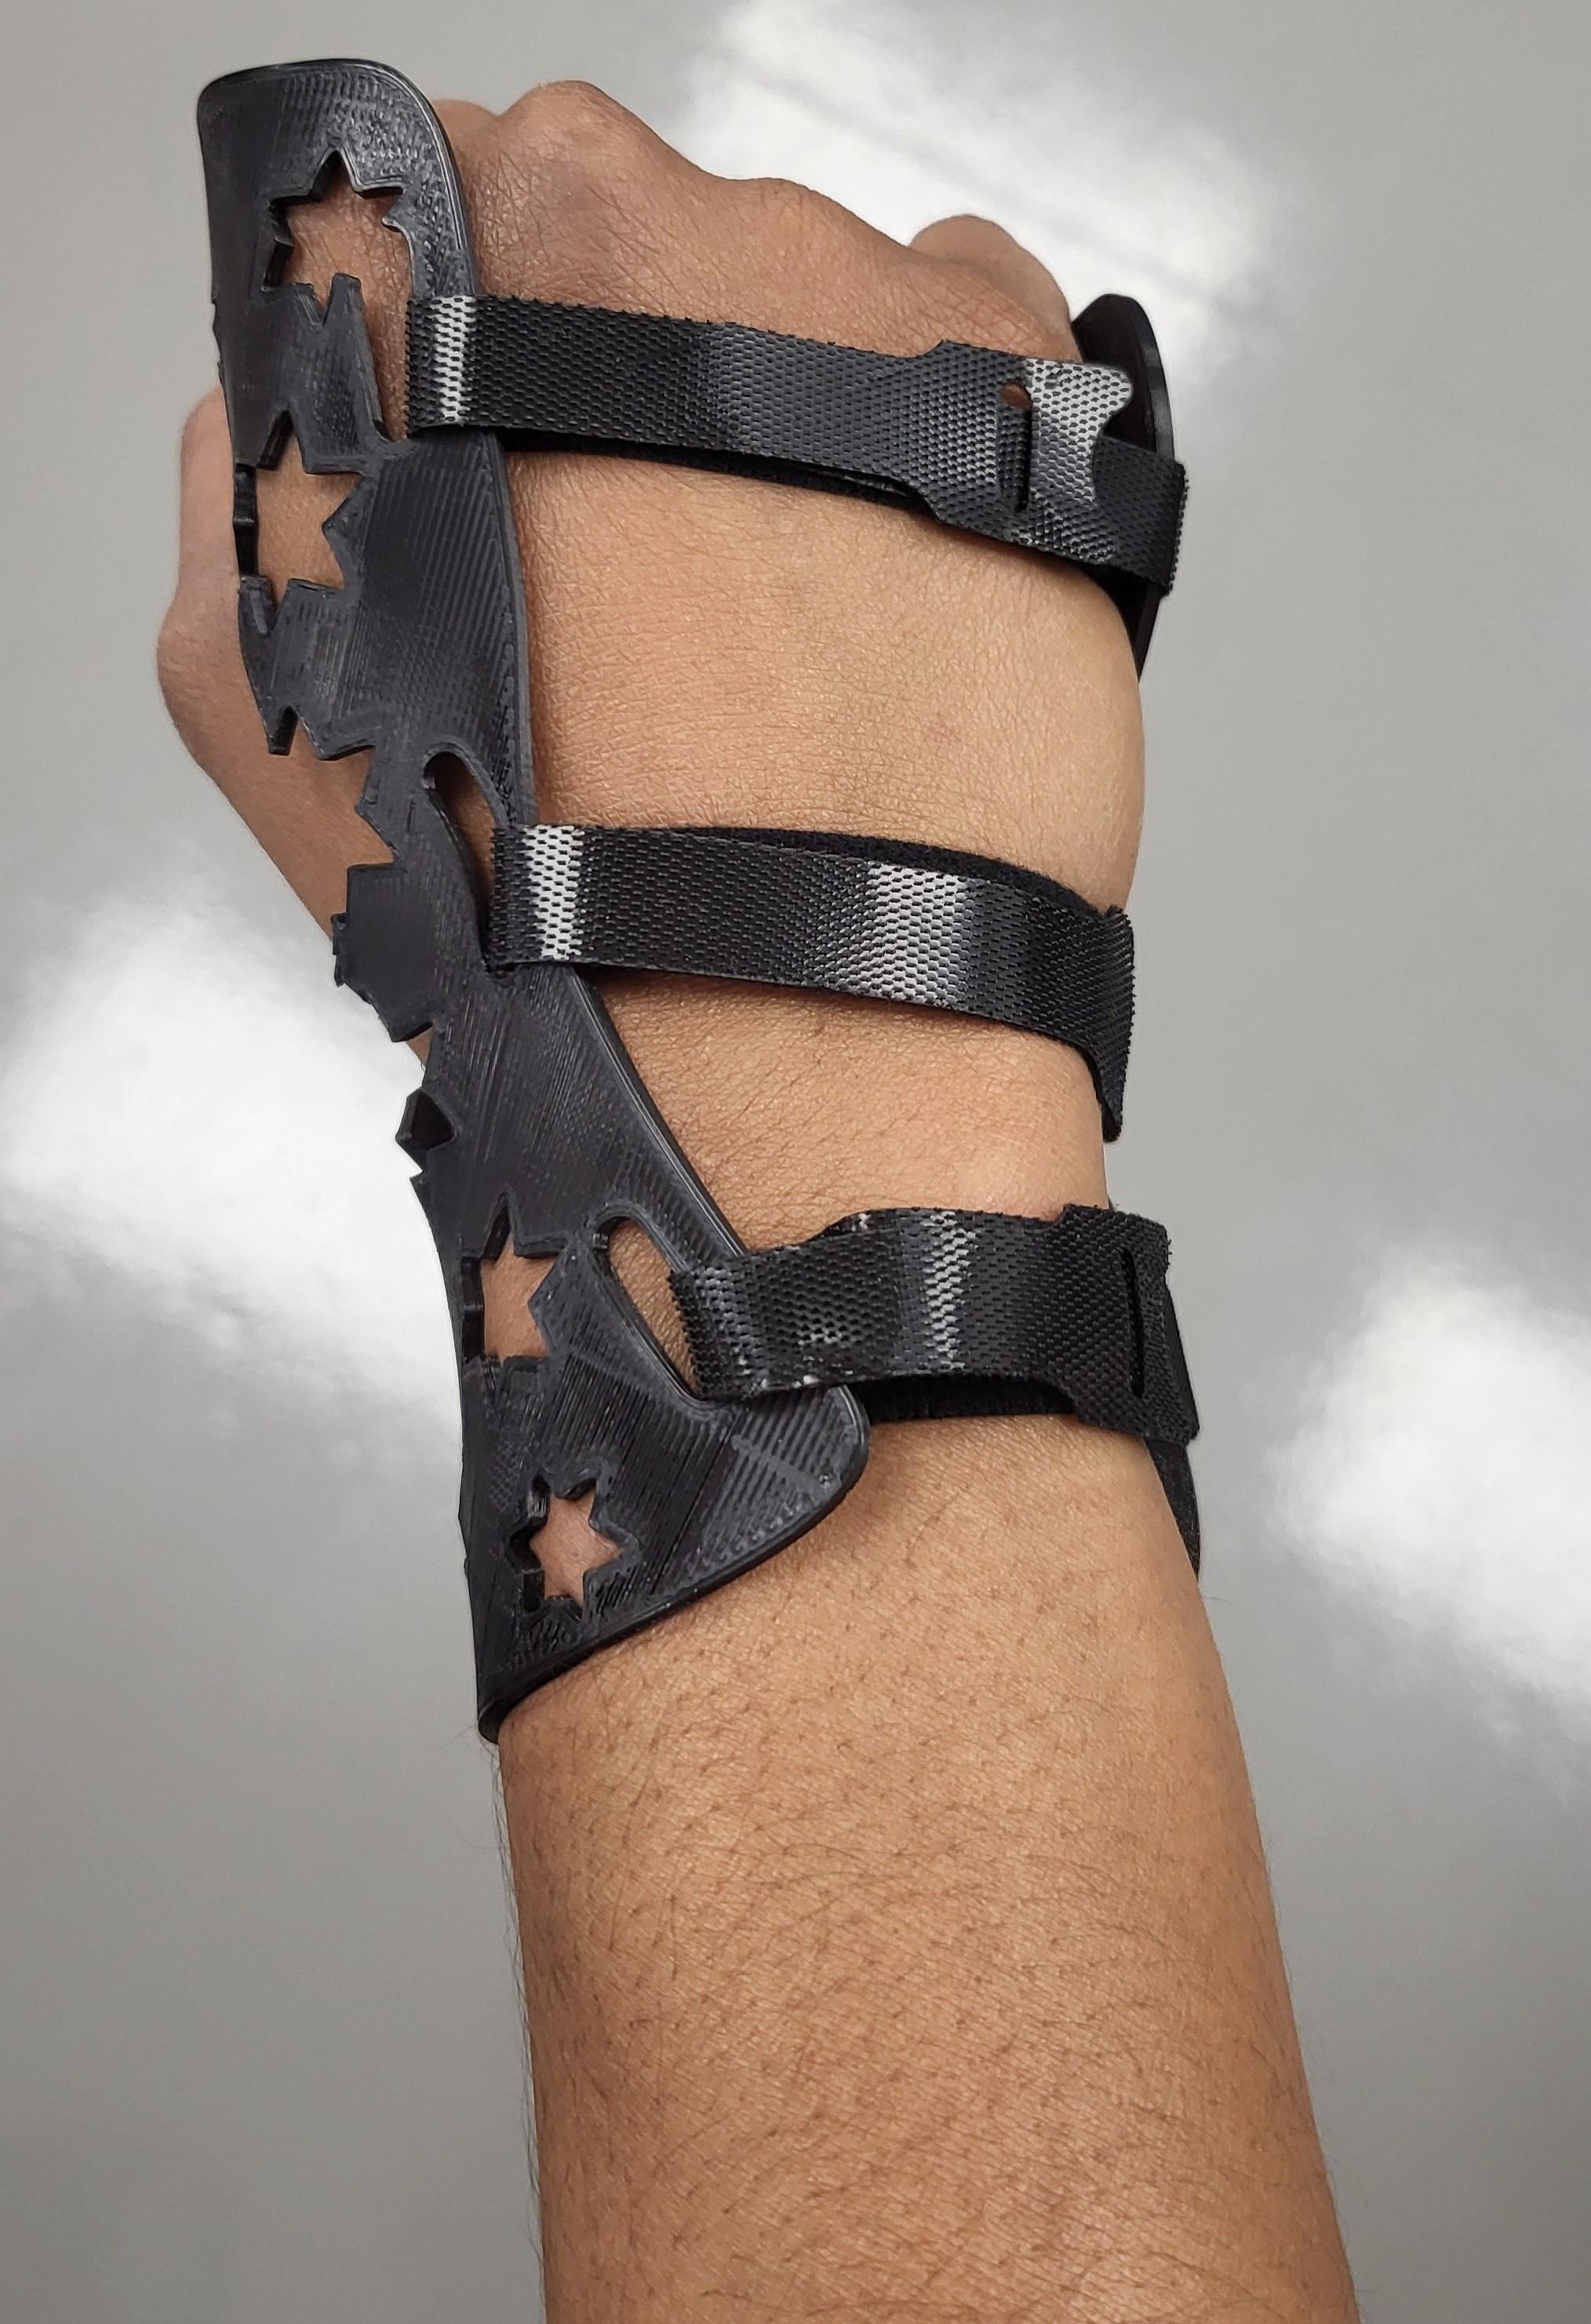

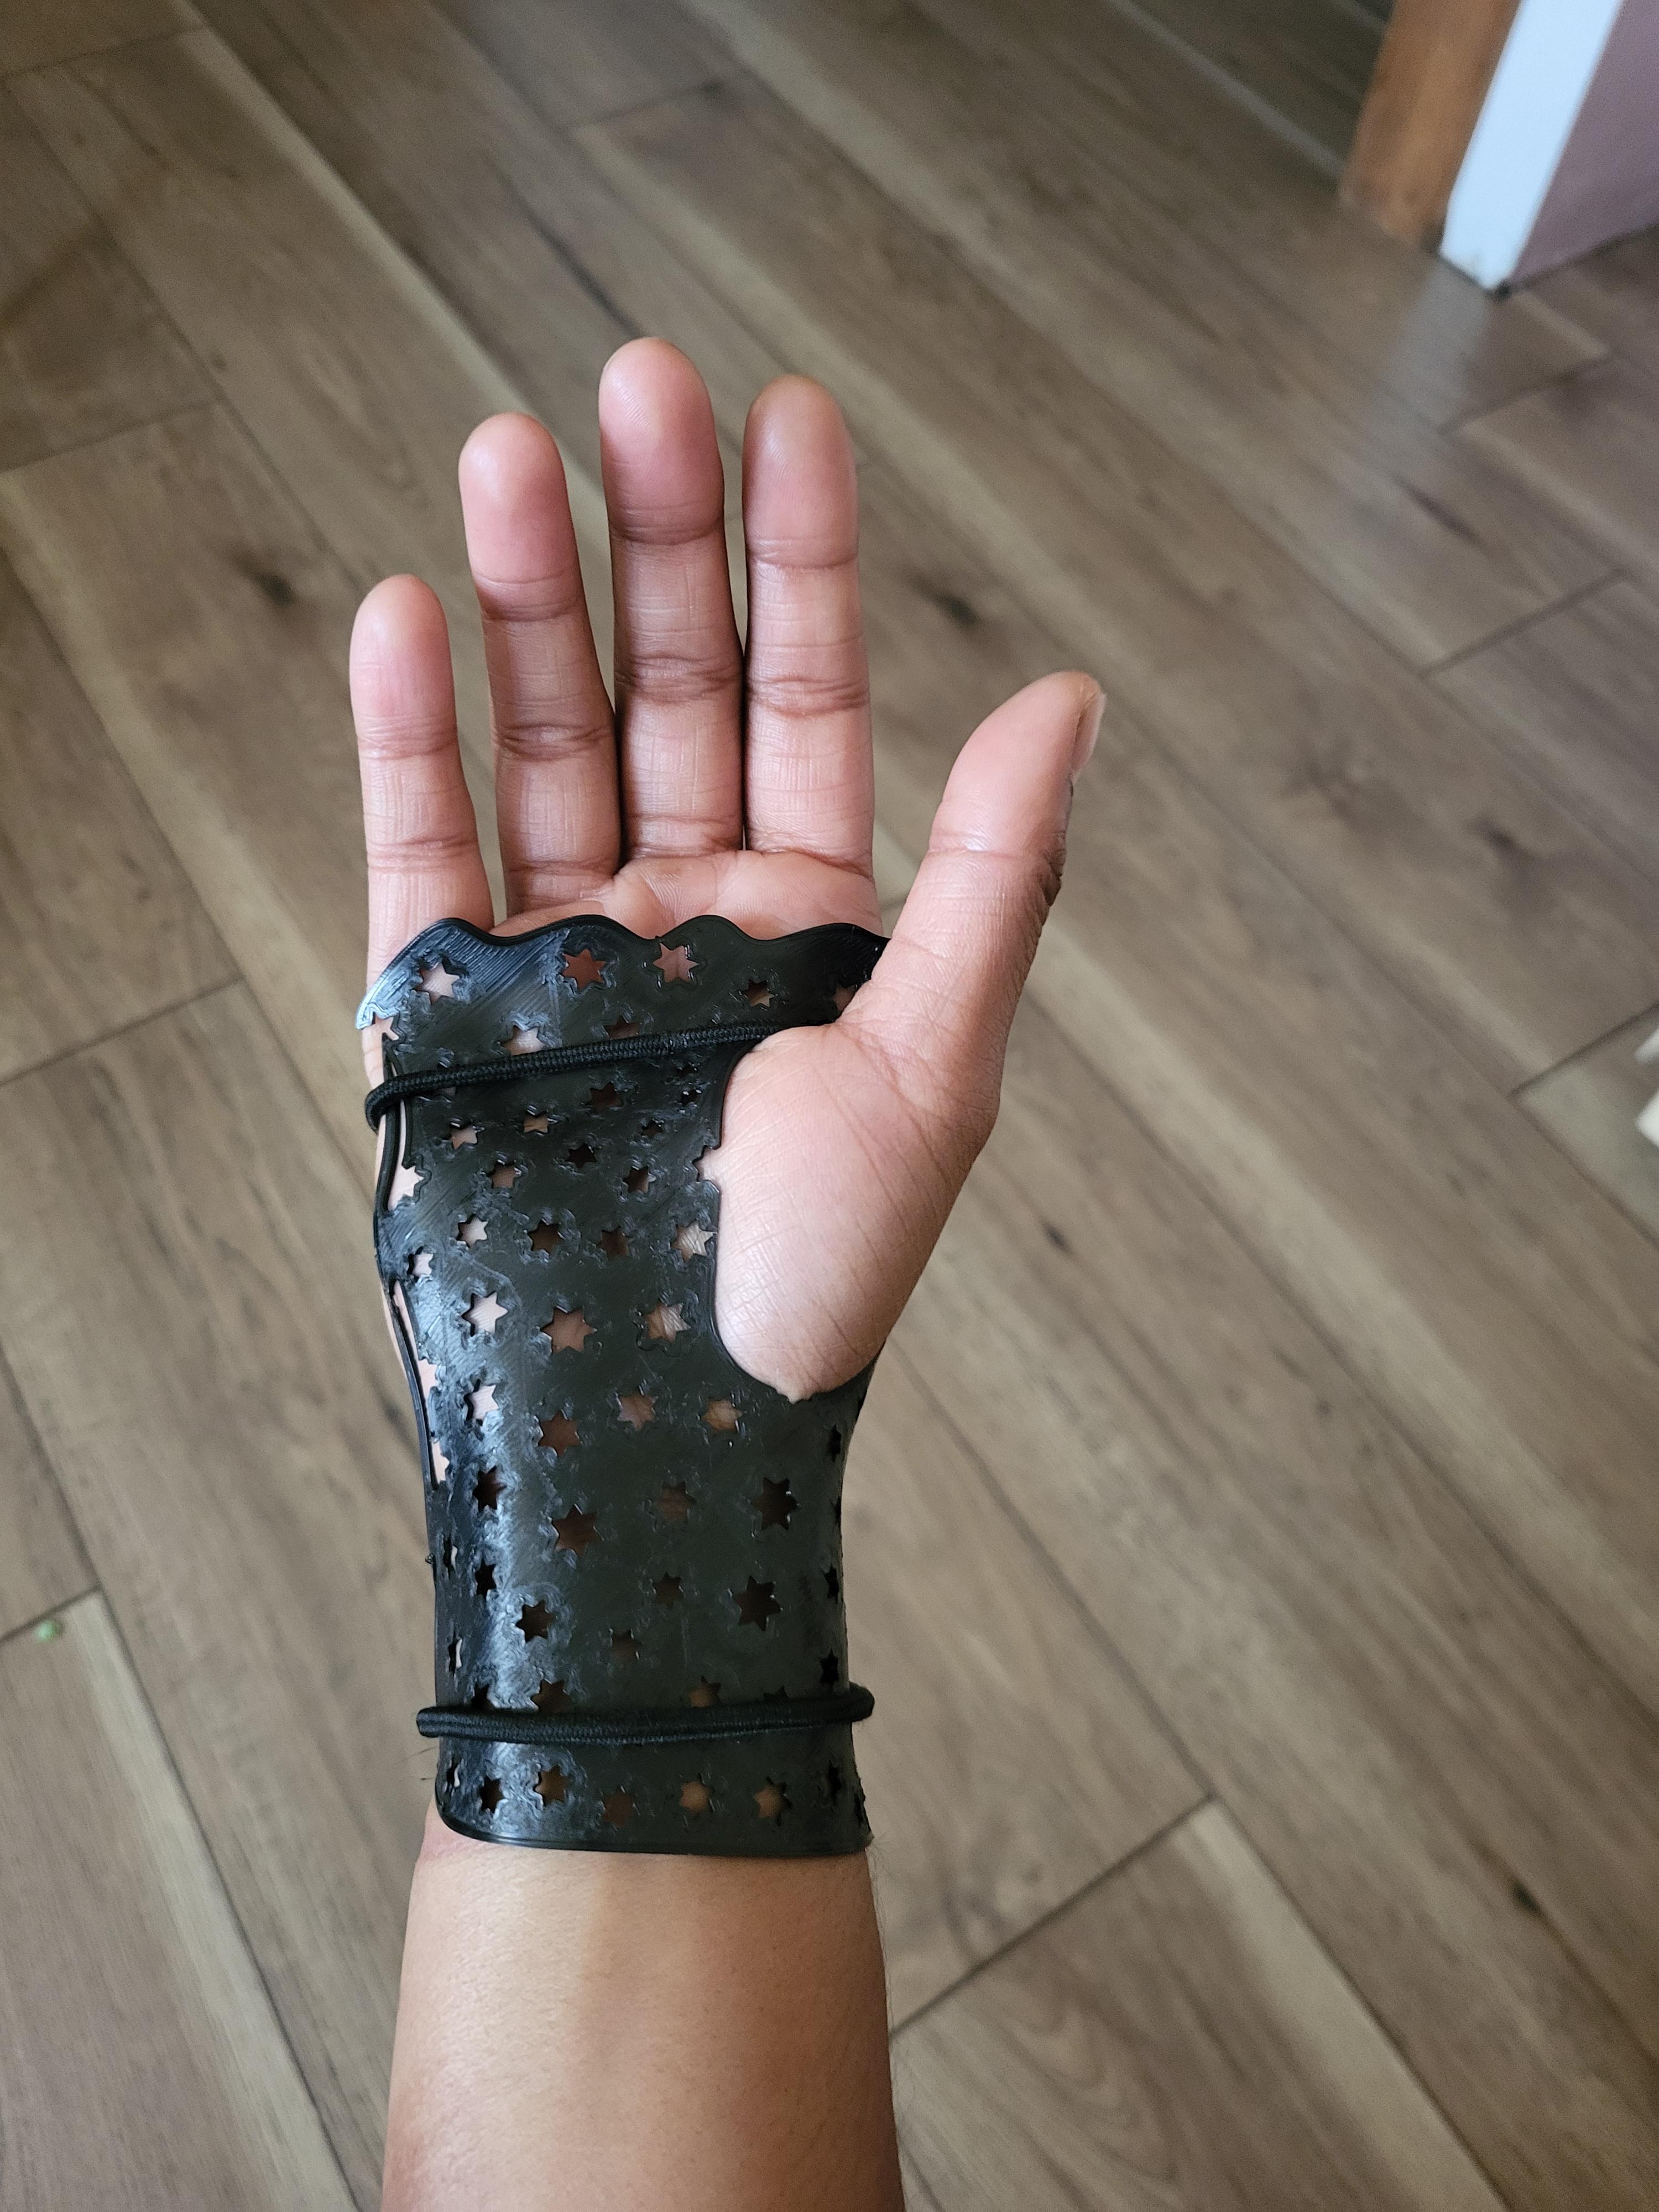
I made a wrist immobilization brace with volar stability for wrist injuries or ailments. This brace is reusable and adjustable for maximum efficiency and comfort.
This is an easy resource to have with out any 3D scanning devices. Manual measurements, thorough dexterity usage, and quick reactions are required for ultimate accuracy in product design.
I hand drew the initial sketch of the build panned out, as it will print flat then be molded to the hand whilst flexible from the heat. The sketch was then carefully drawn into Fusion and exported to print through Ultimaker Cura on my Elegoo Neptune 3.
Disclaimer: I am not a doctor and this is a draft design. This is just a useful resource for a beginner designing biomechanics, a helpful template to build off of or innovate, and a learning experience for my future goals.
Supplies
.jpg)

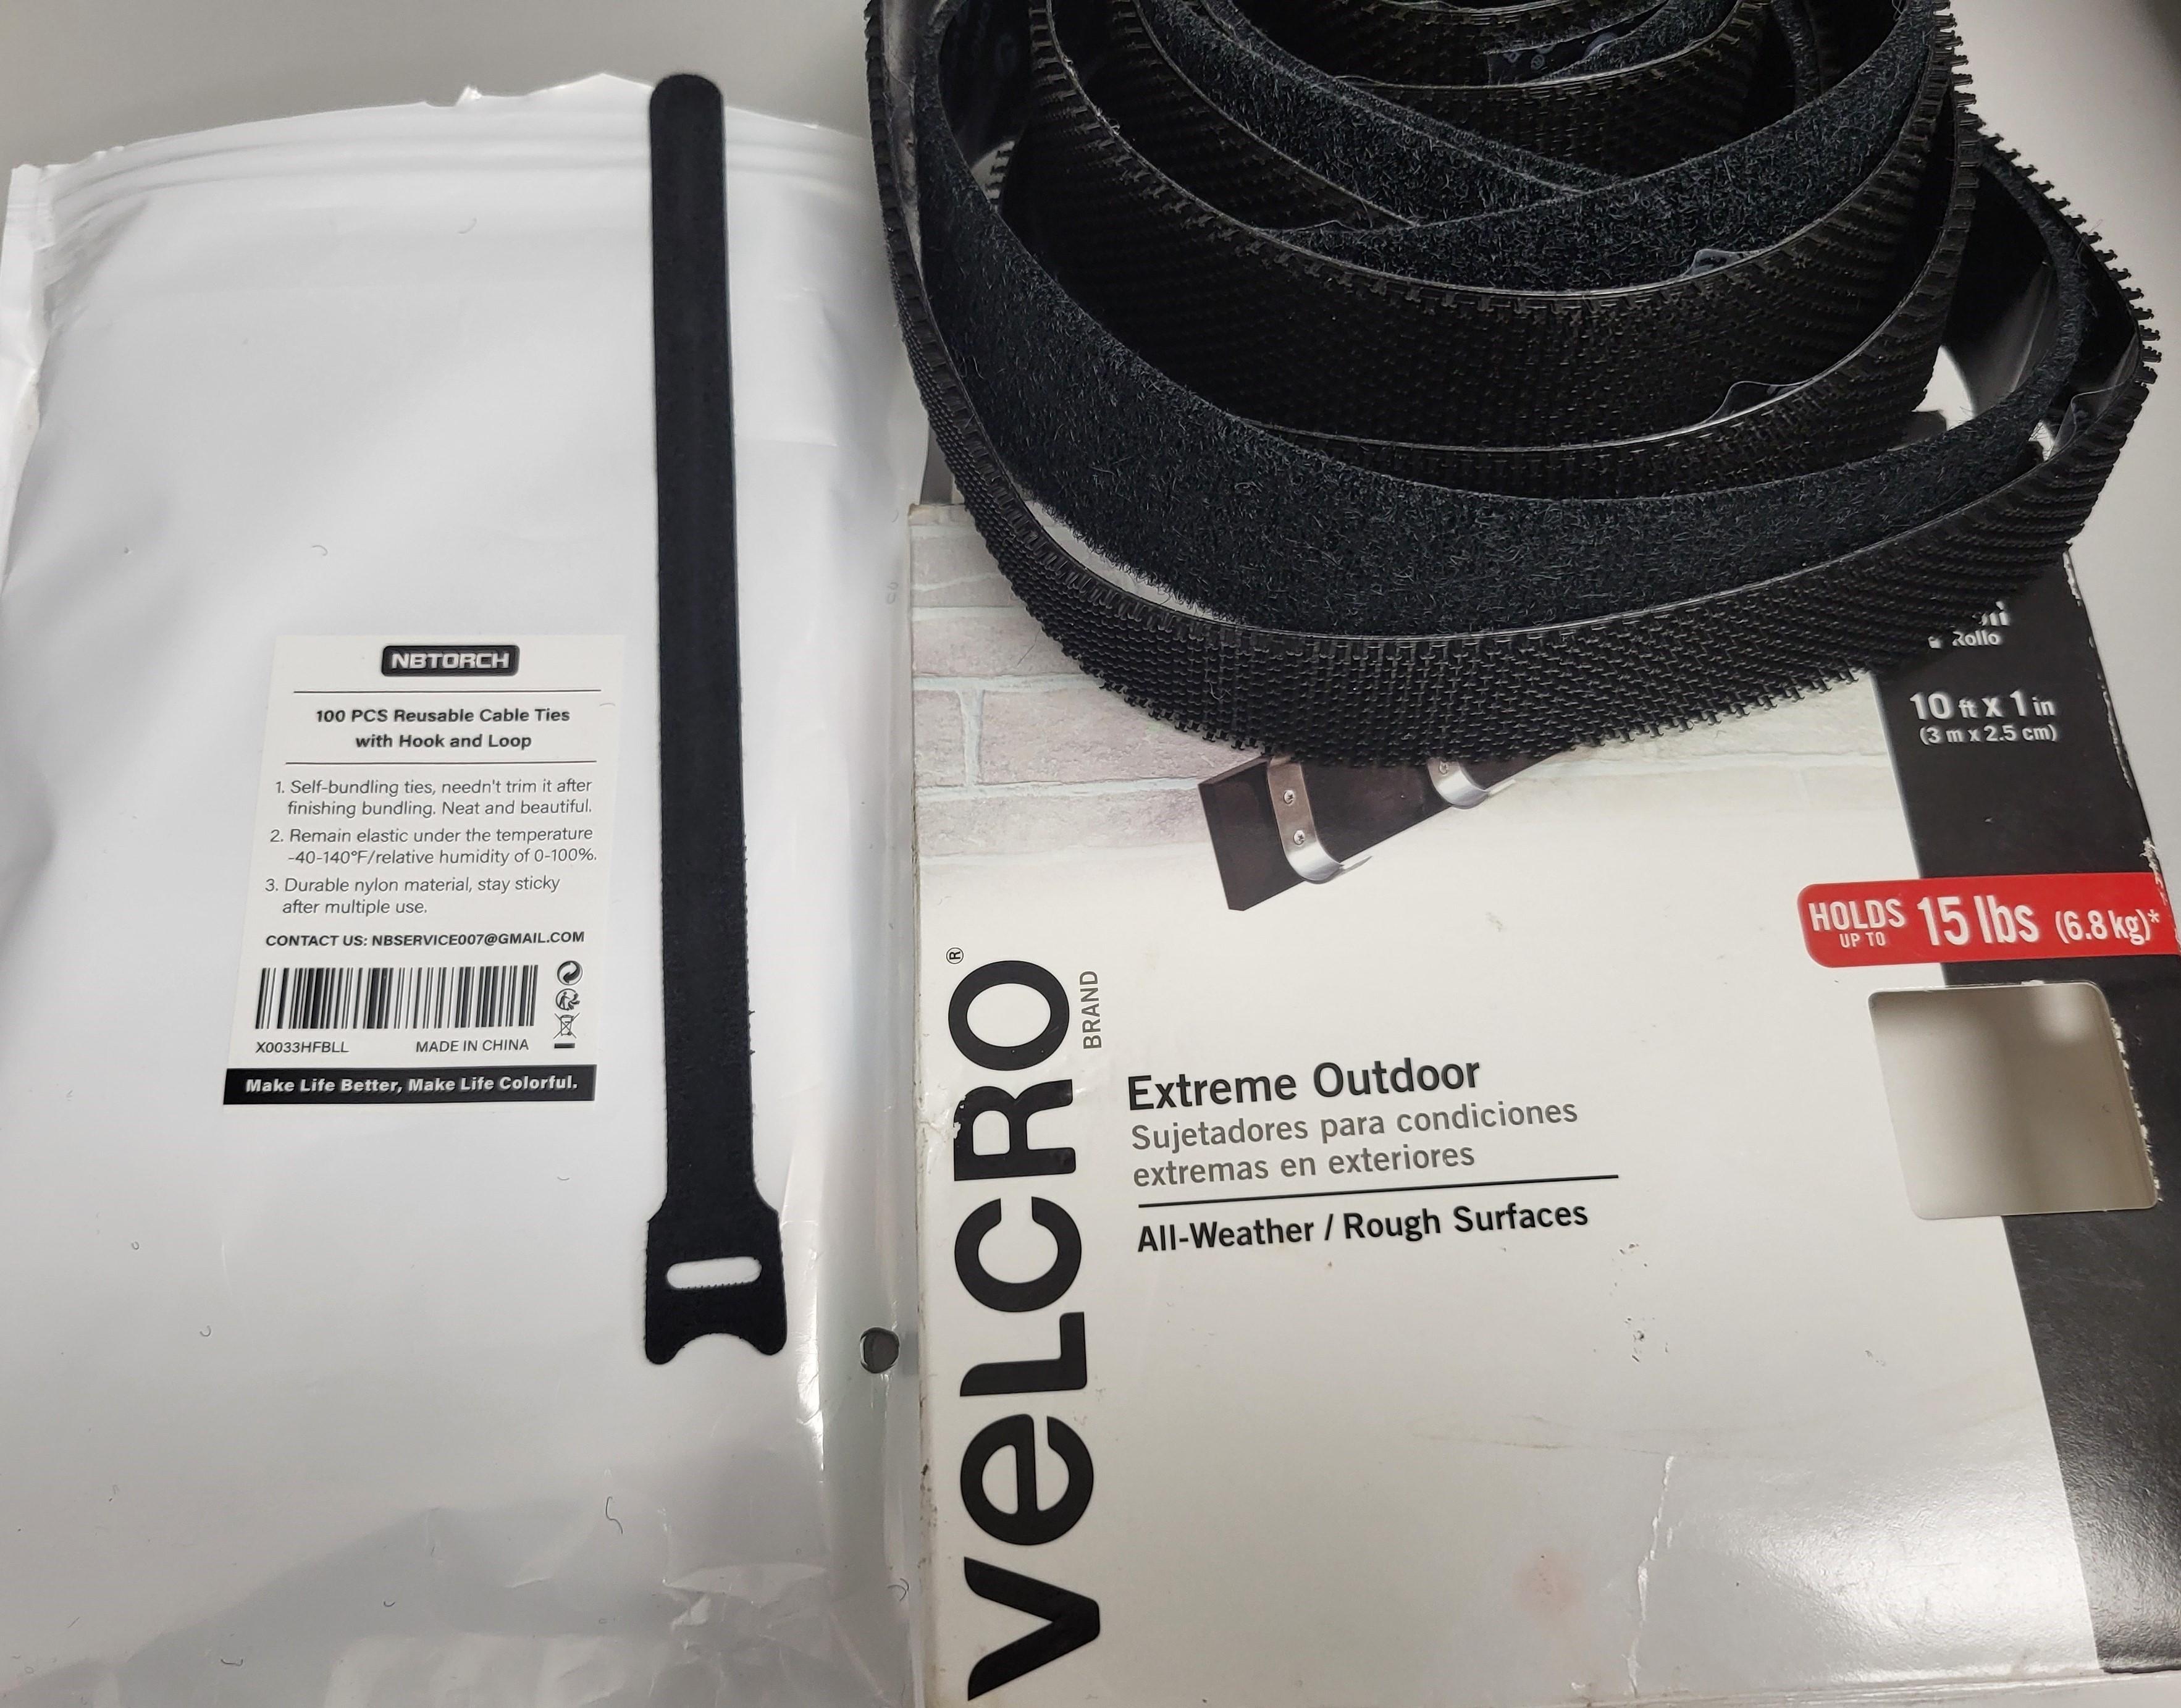
- PLA Filament
- Velcro
- Fusion 360
- Cura
- 3D Printer
Sketch Design
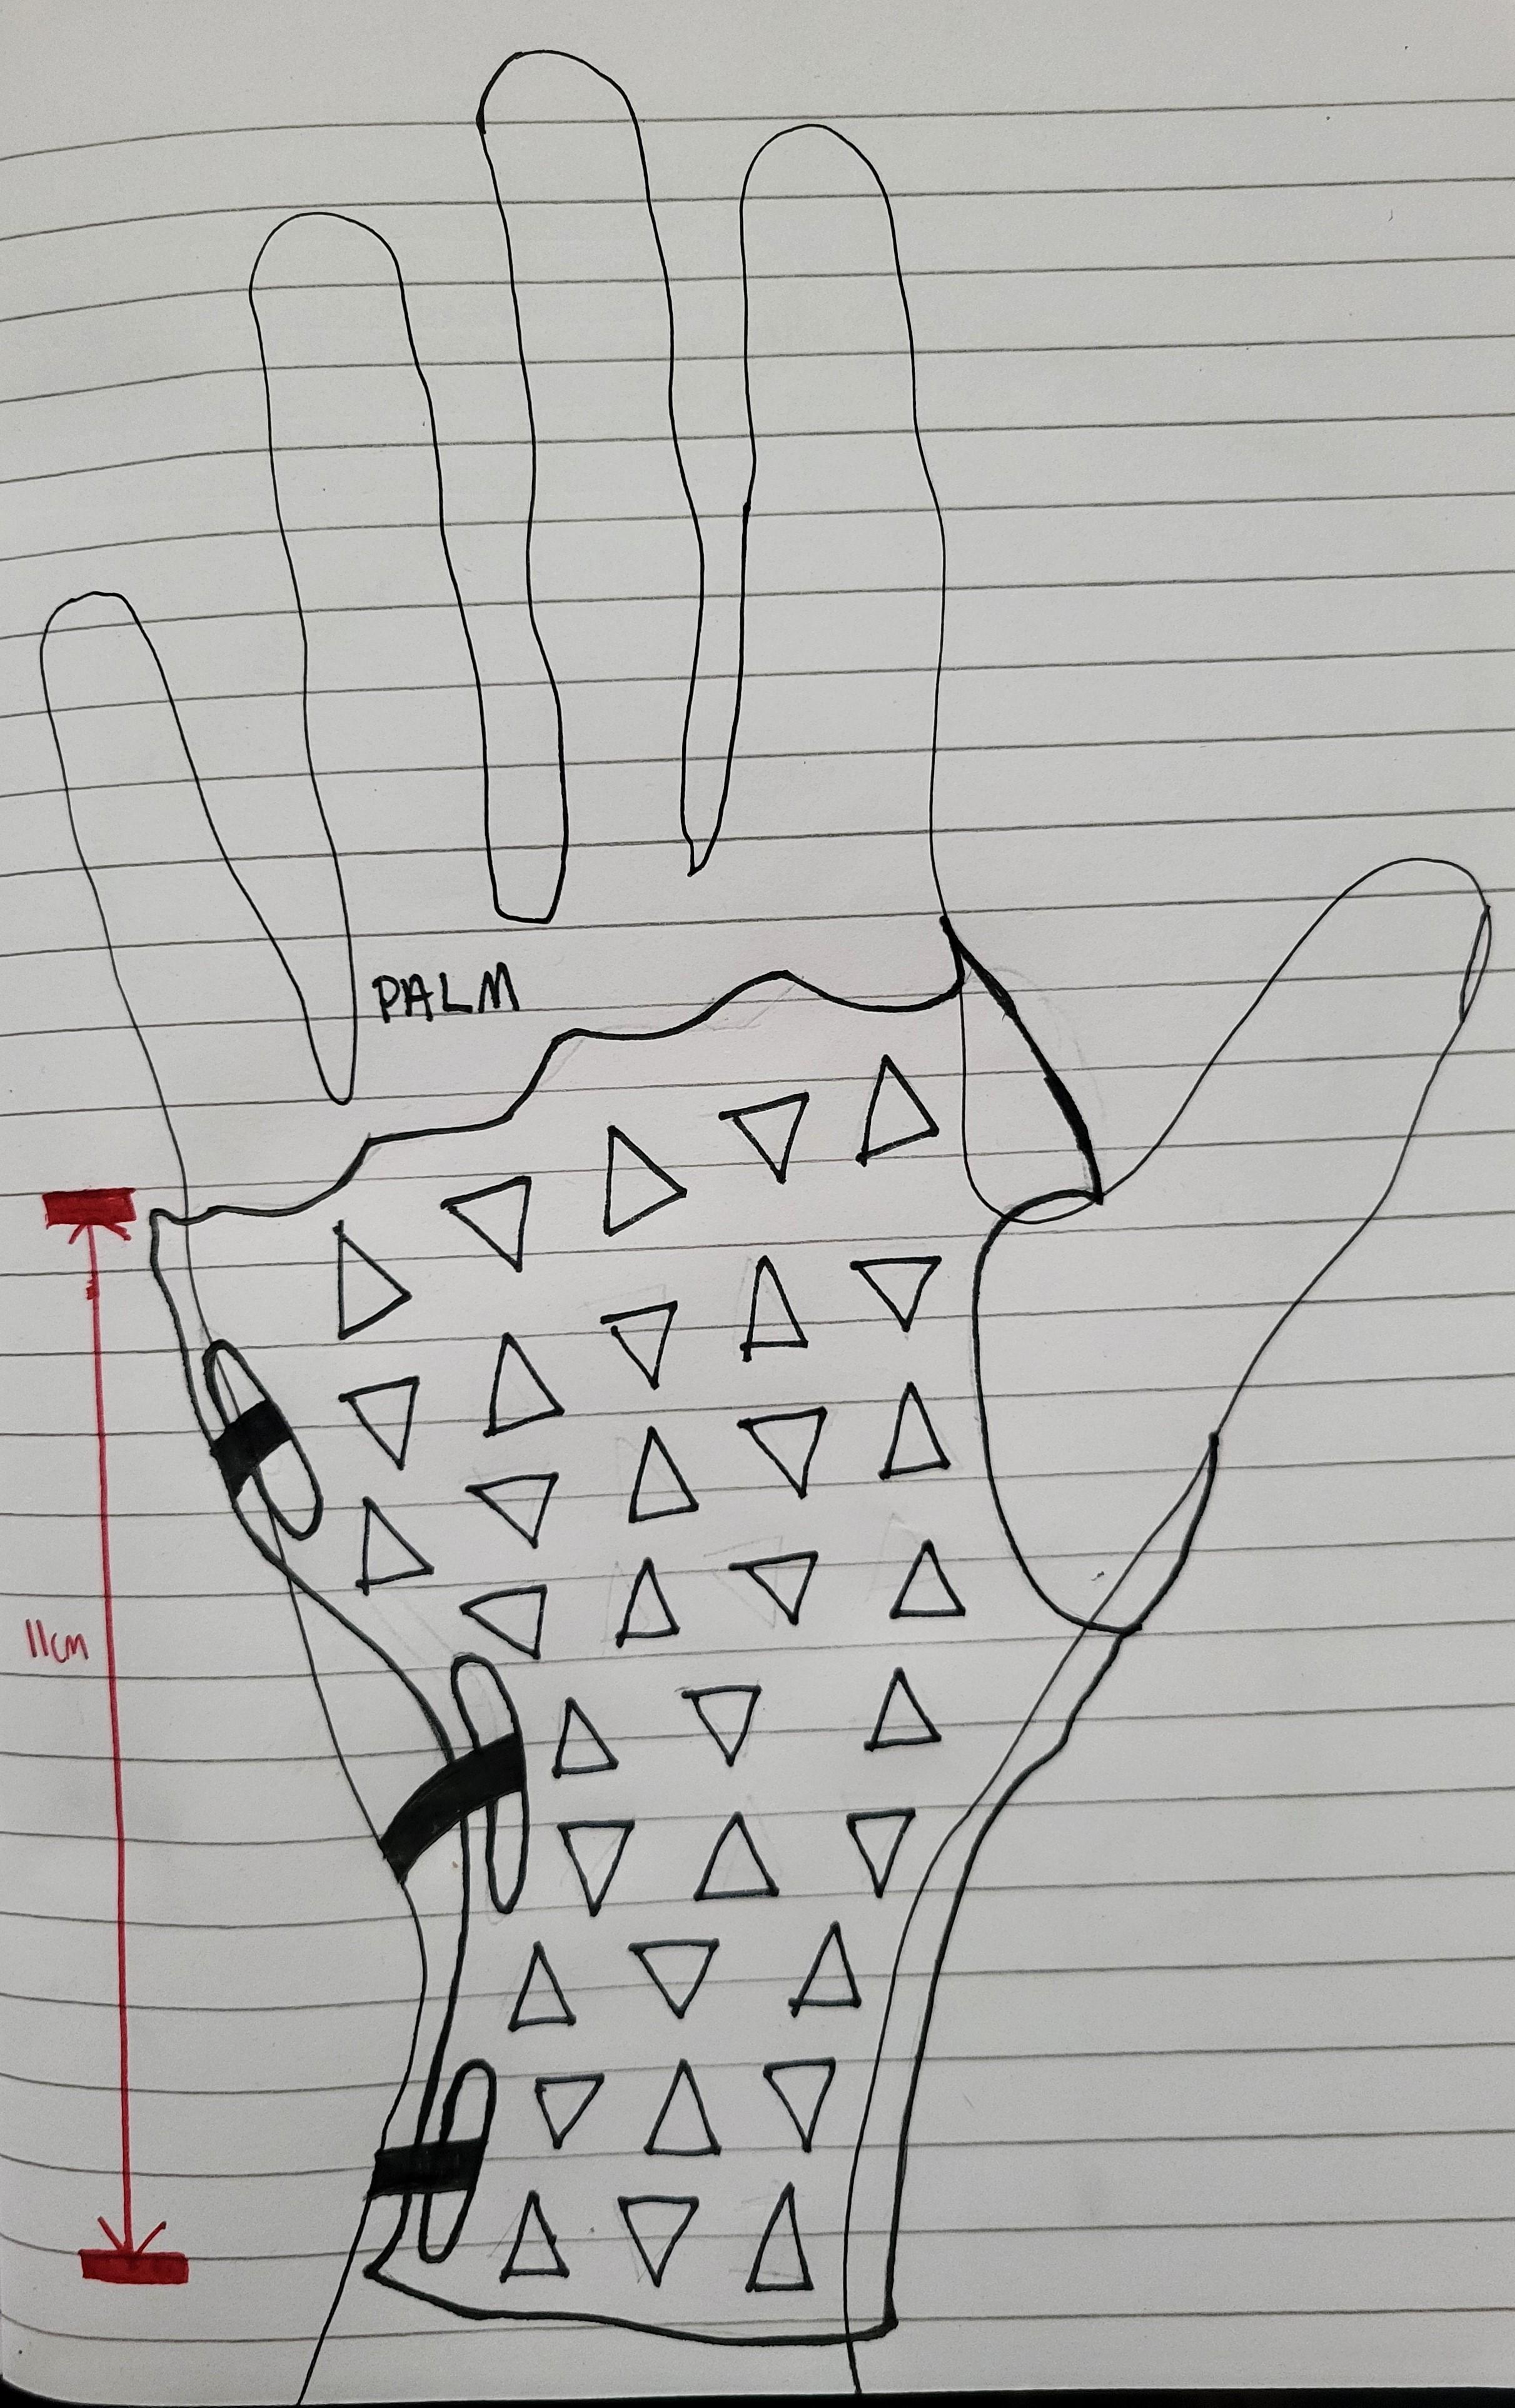
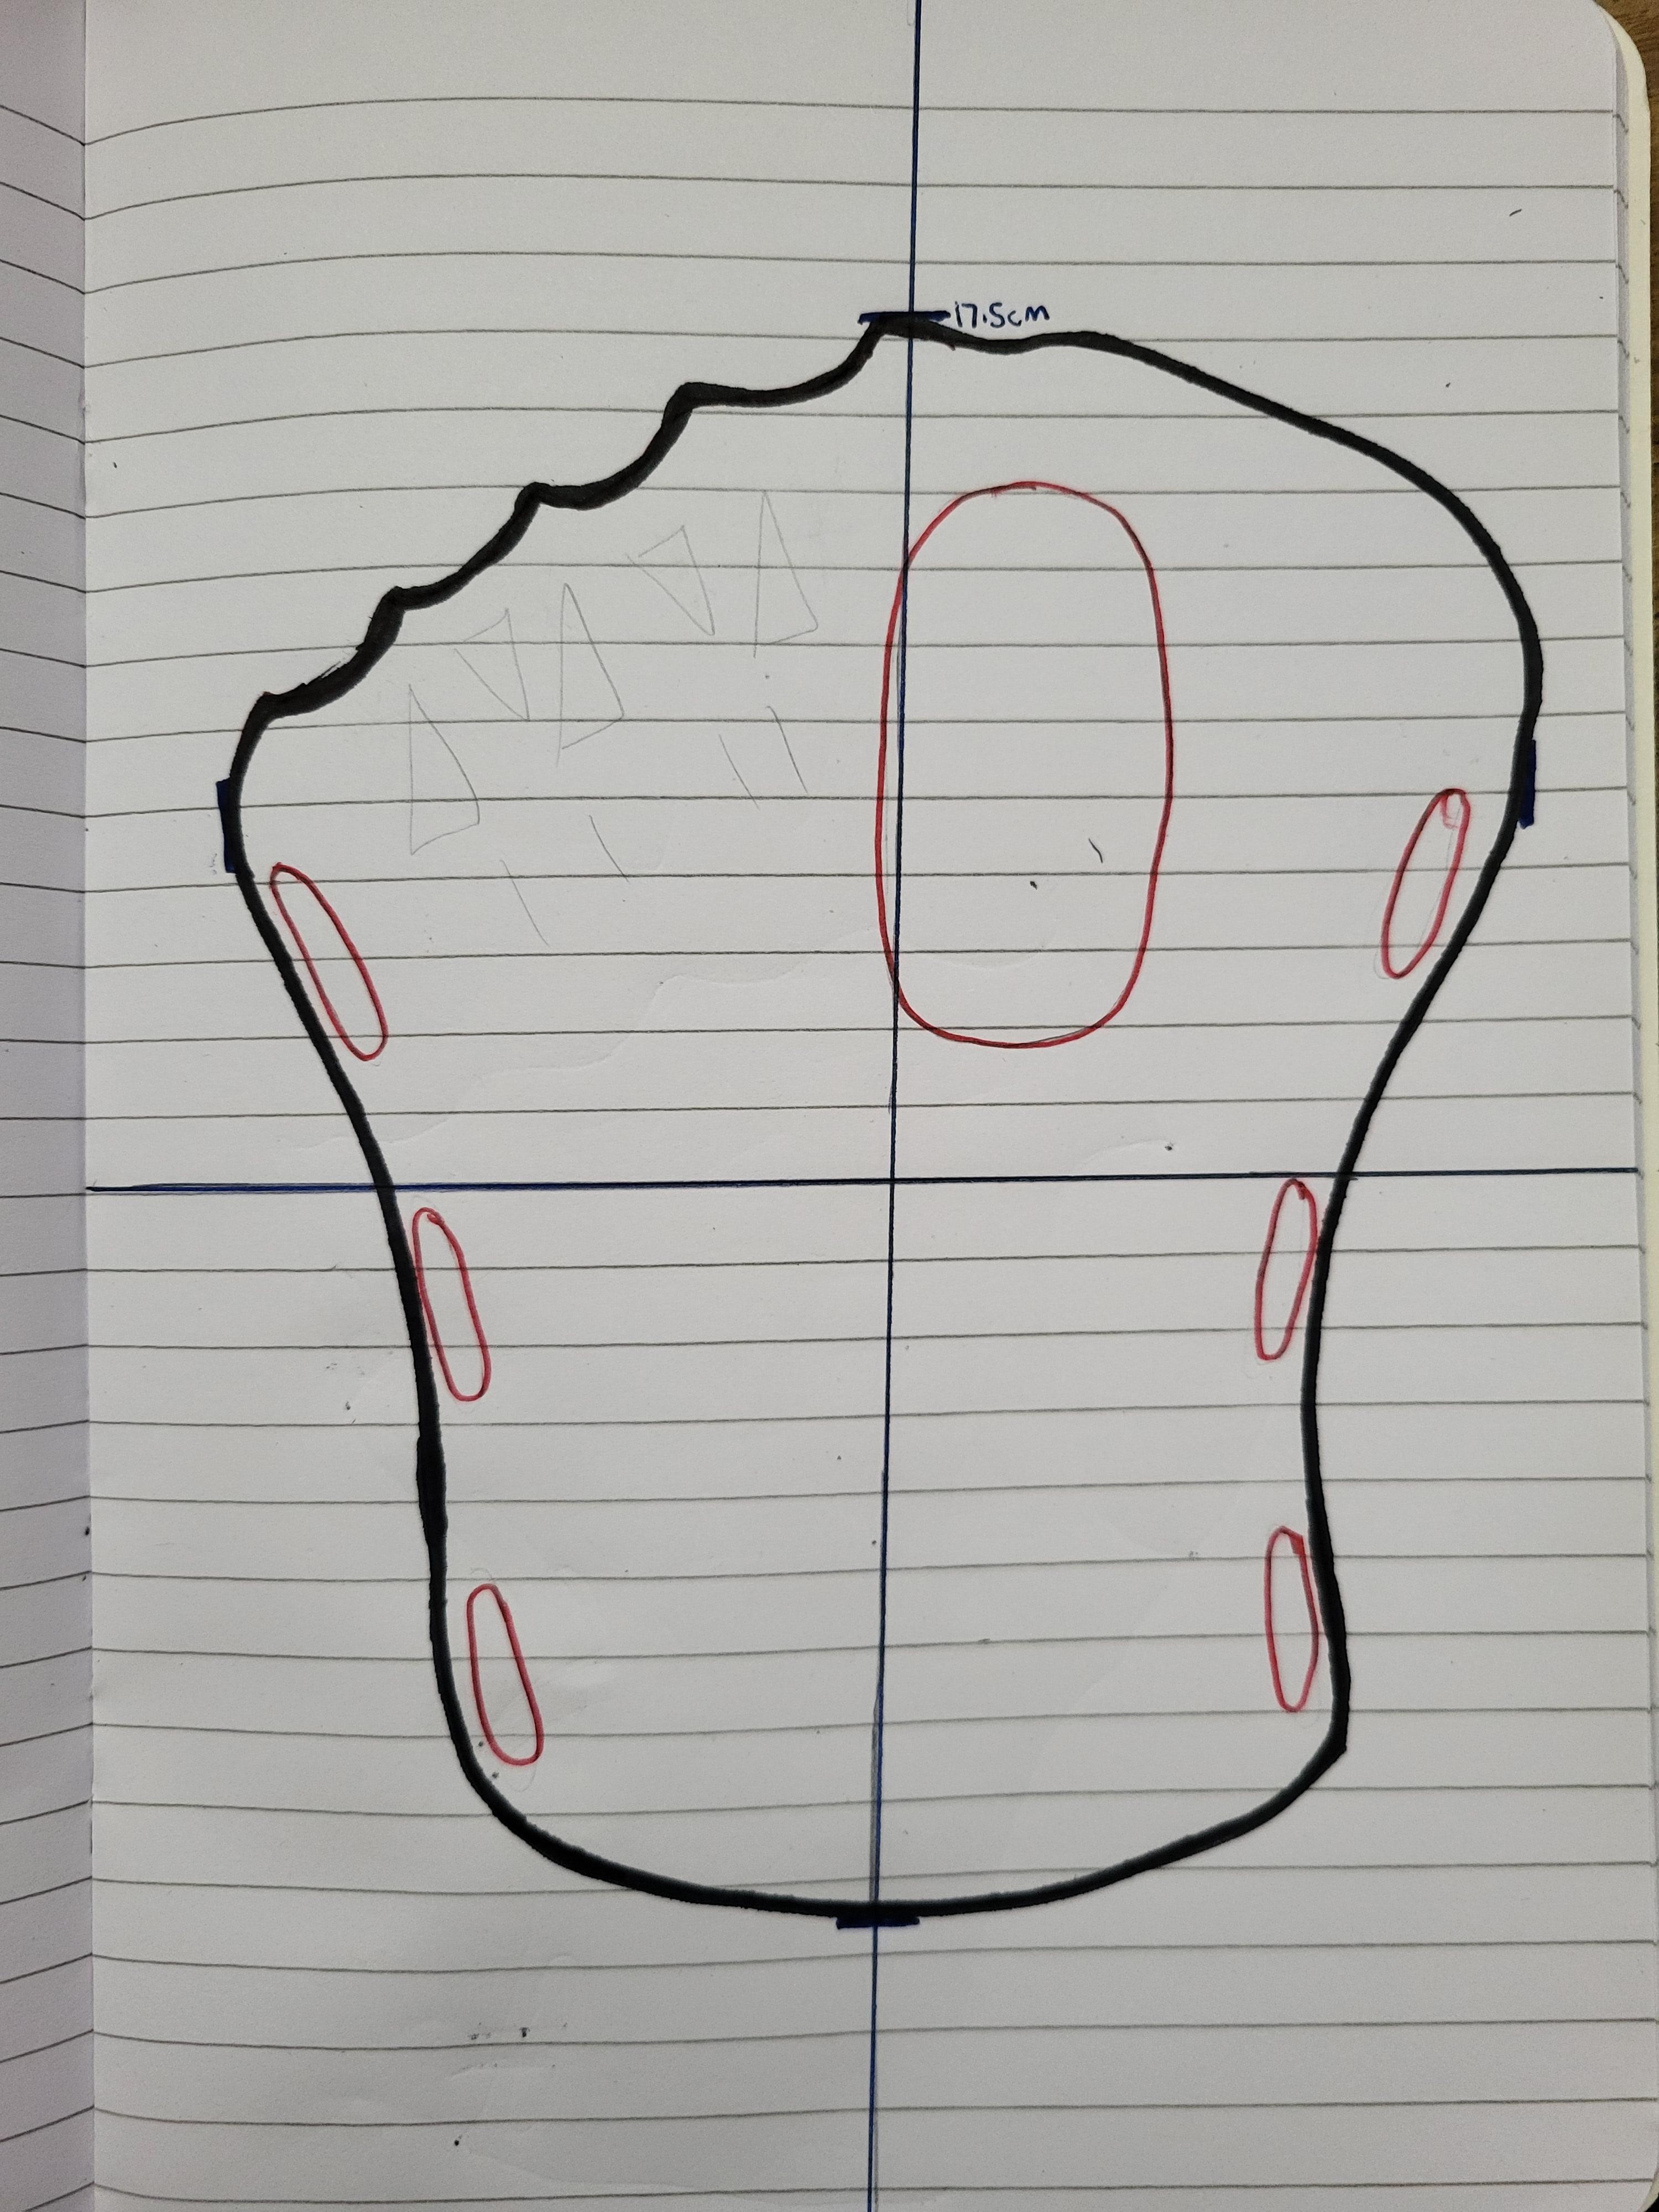
- On paper , draw sketch of design flat on paper using dimensions of your hand (length, width)
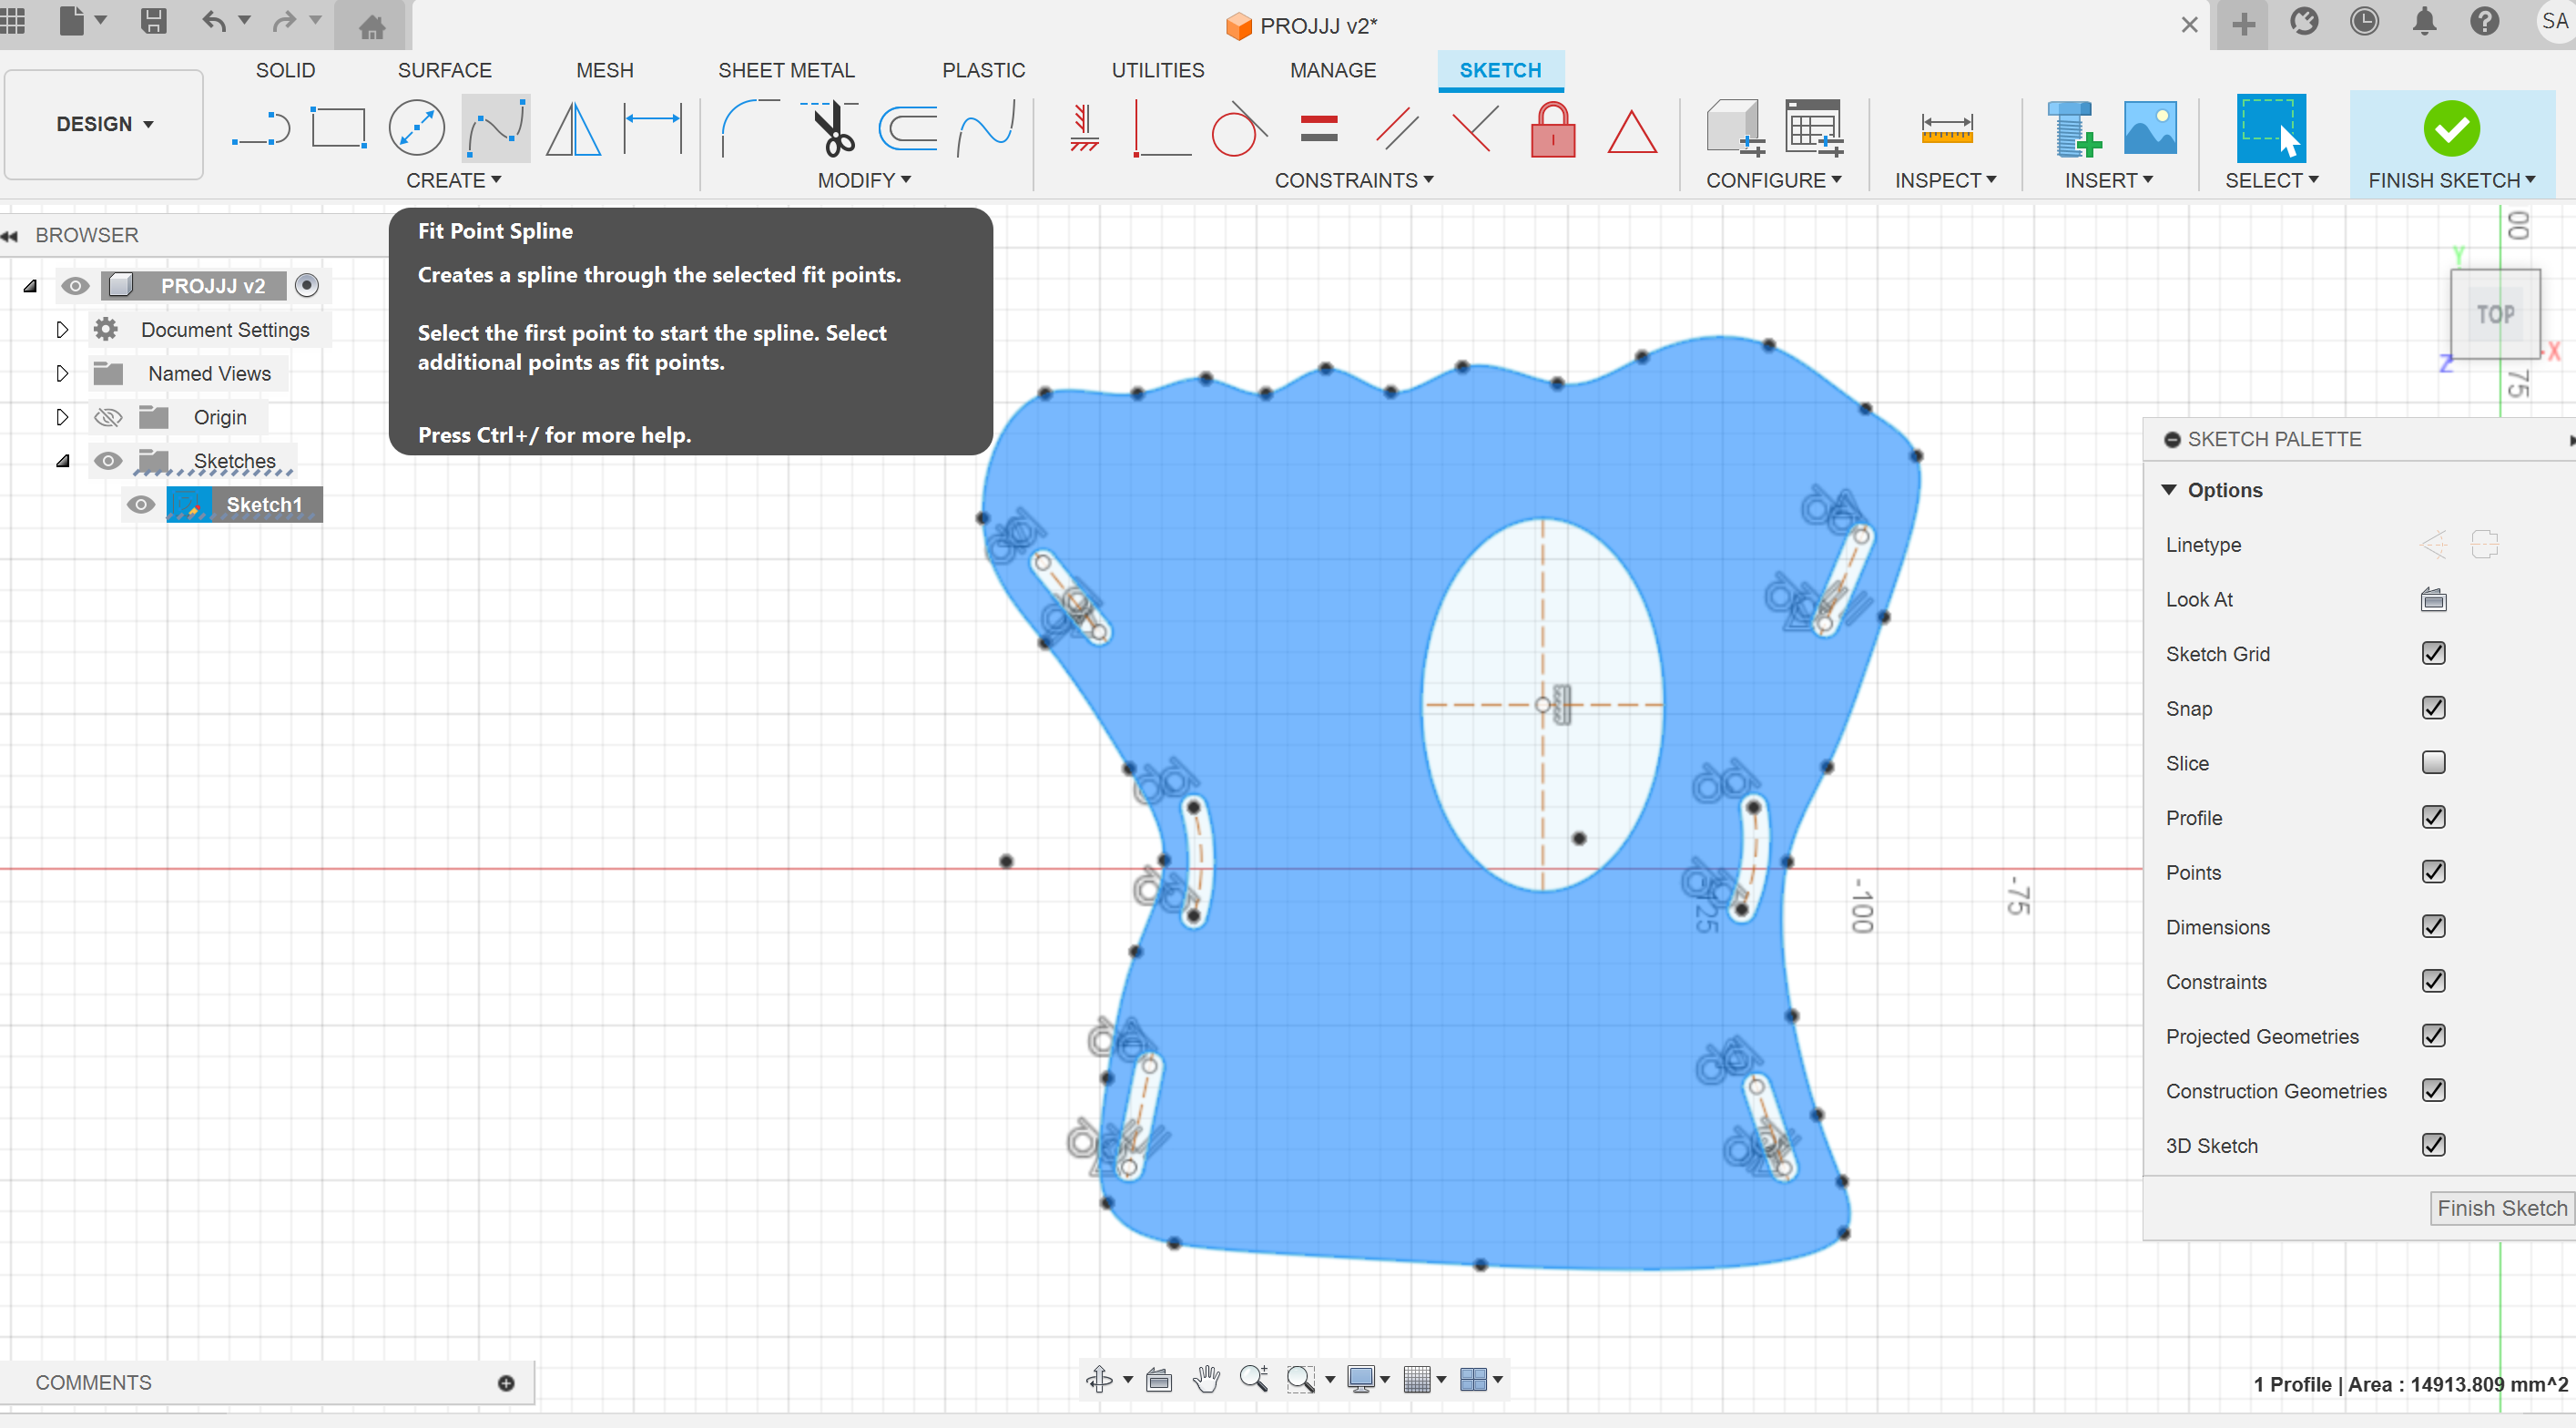
- In Fusion, create sketch using Fit Point Spline to create custom shape
- Start a new project and use the sketch menu to choose Fit Point Spline.
- Create outline of body by connecting the curved lines using grid for comparison with drawing (ignore slots and holes in this picture)
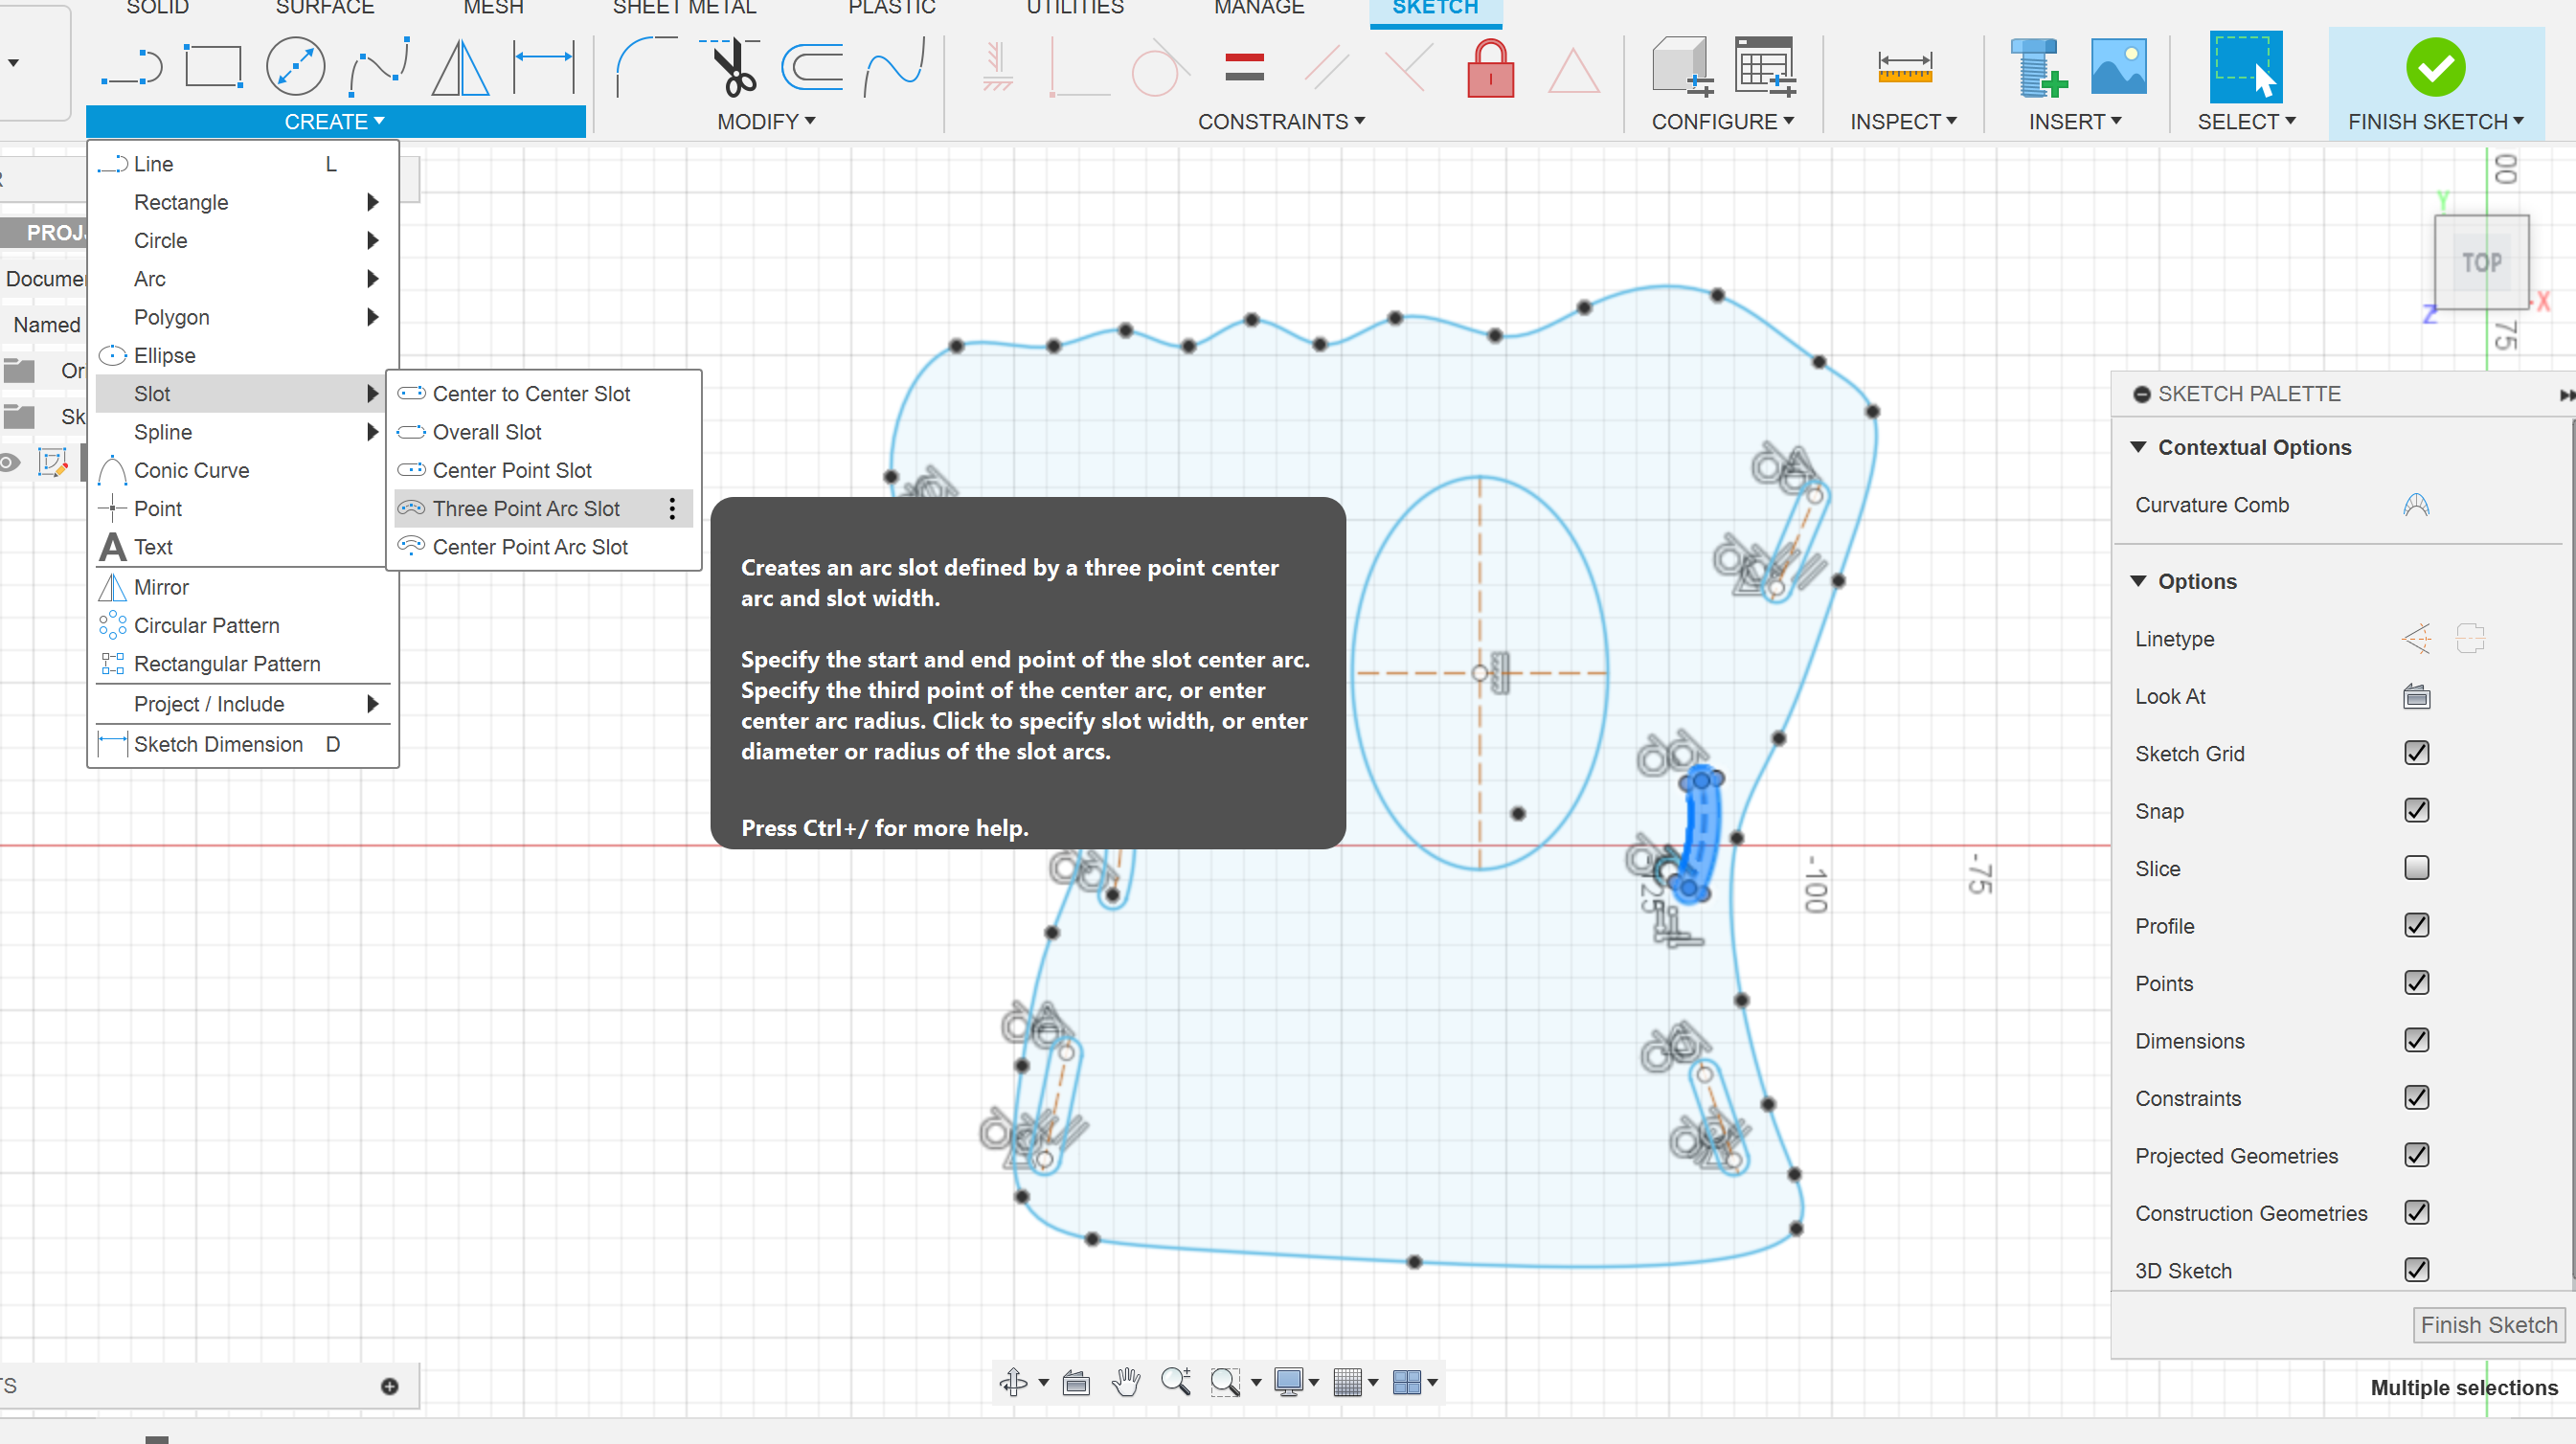
Add Slots and Thumb Hole
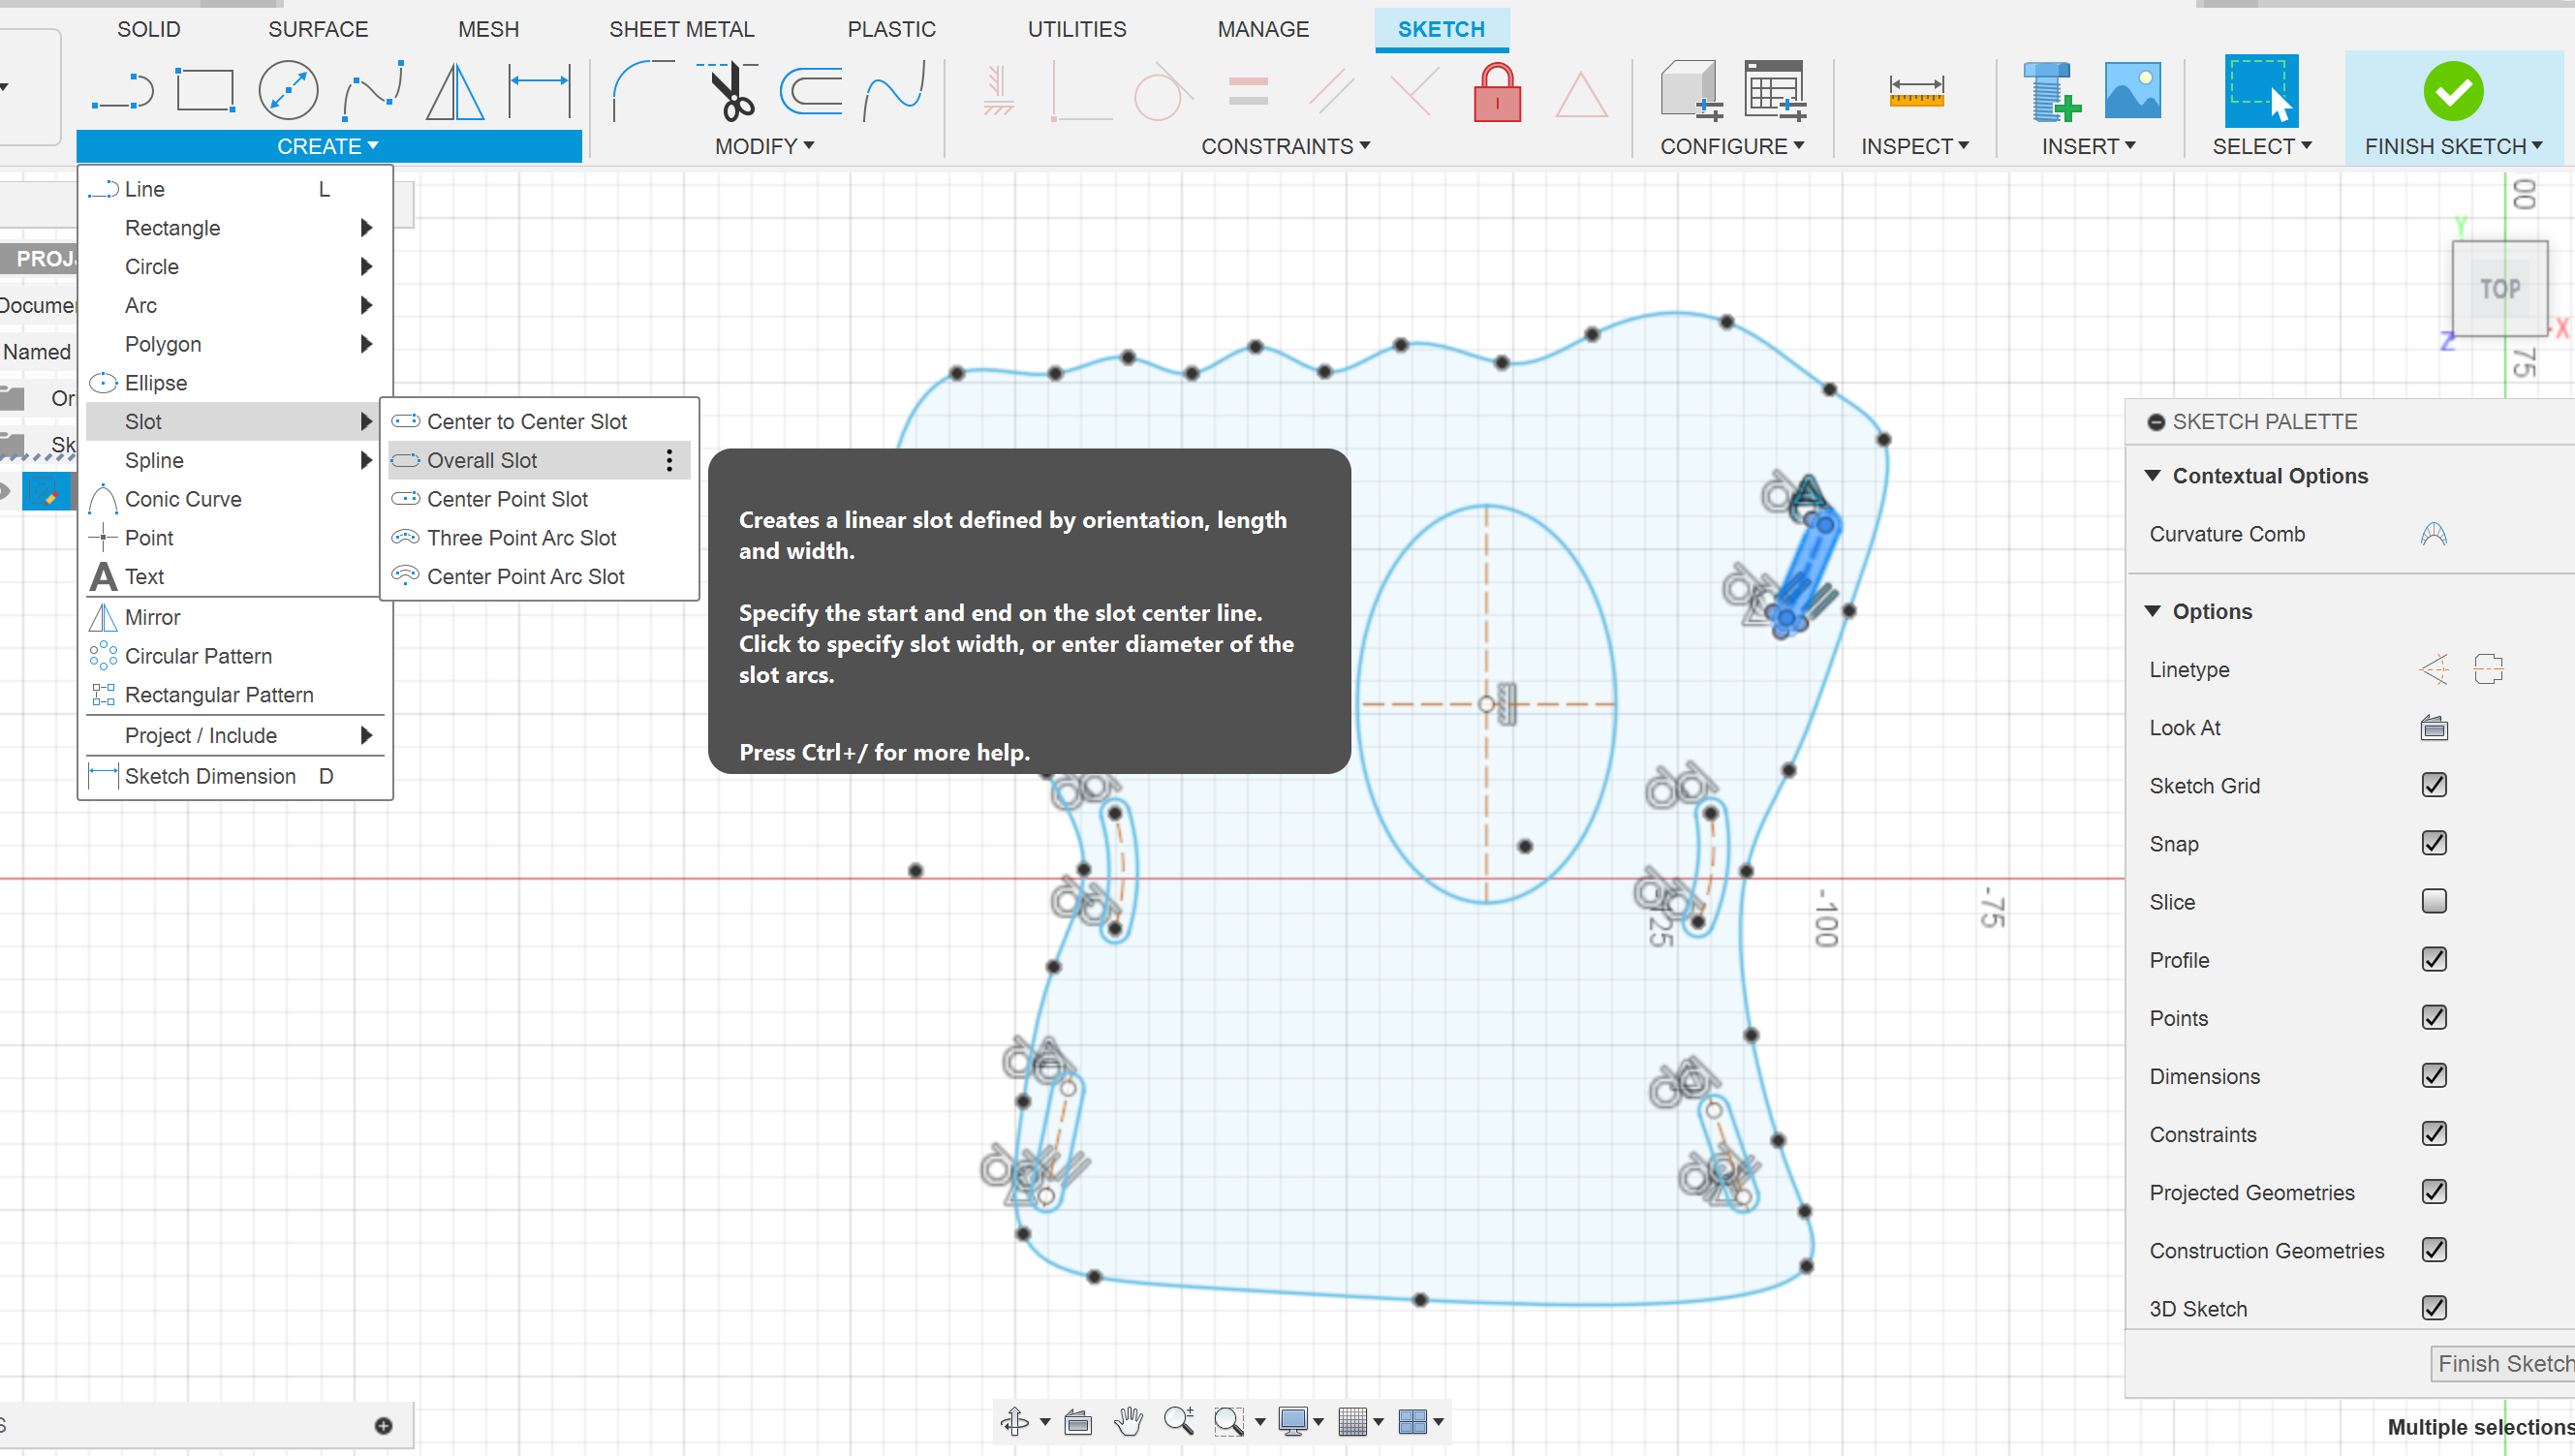
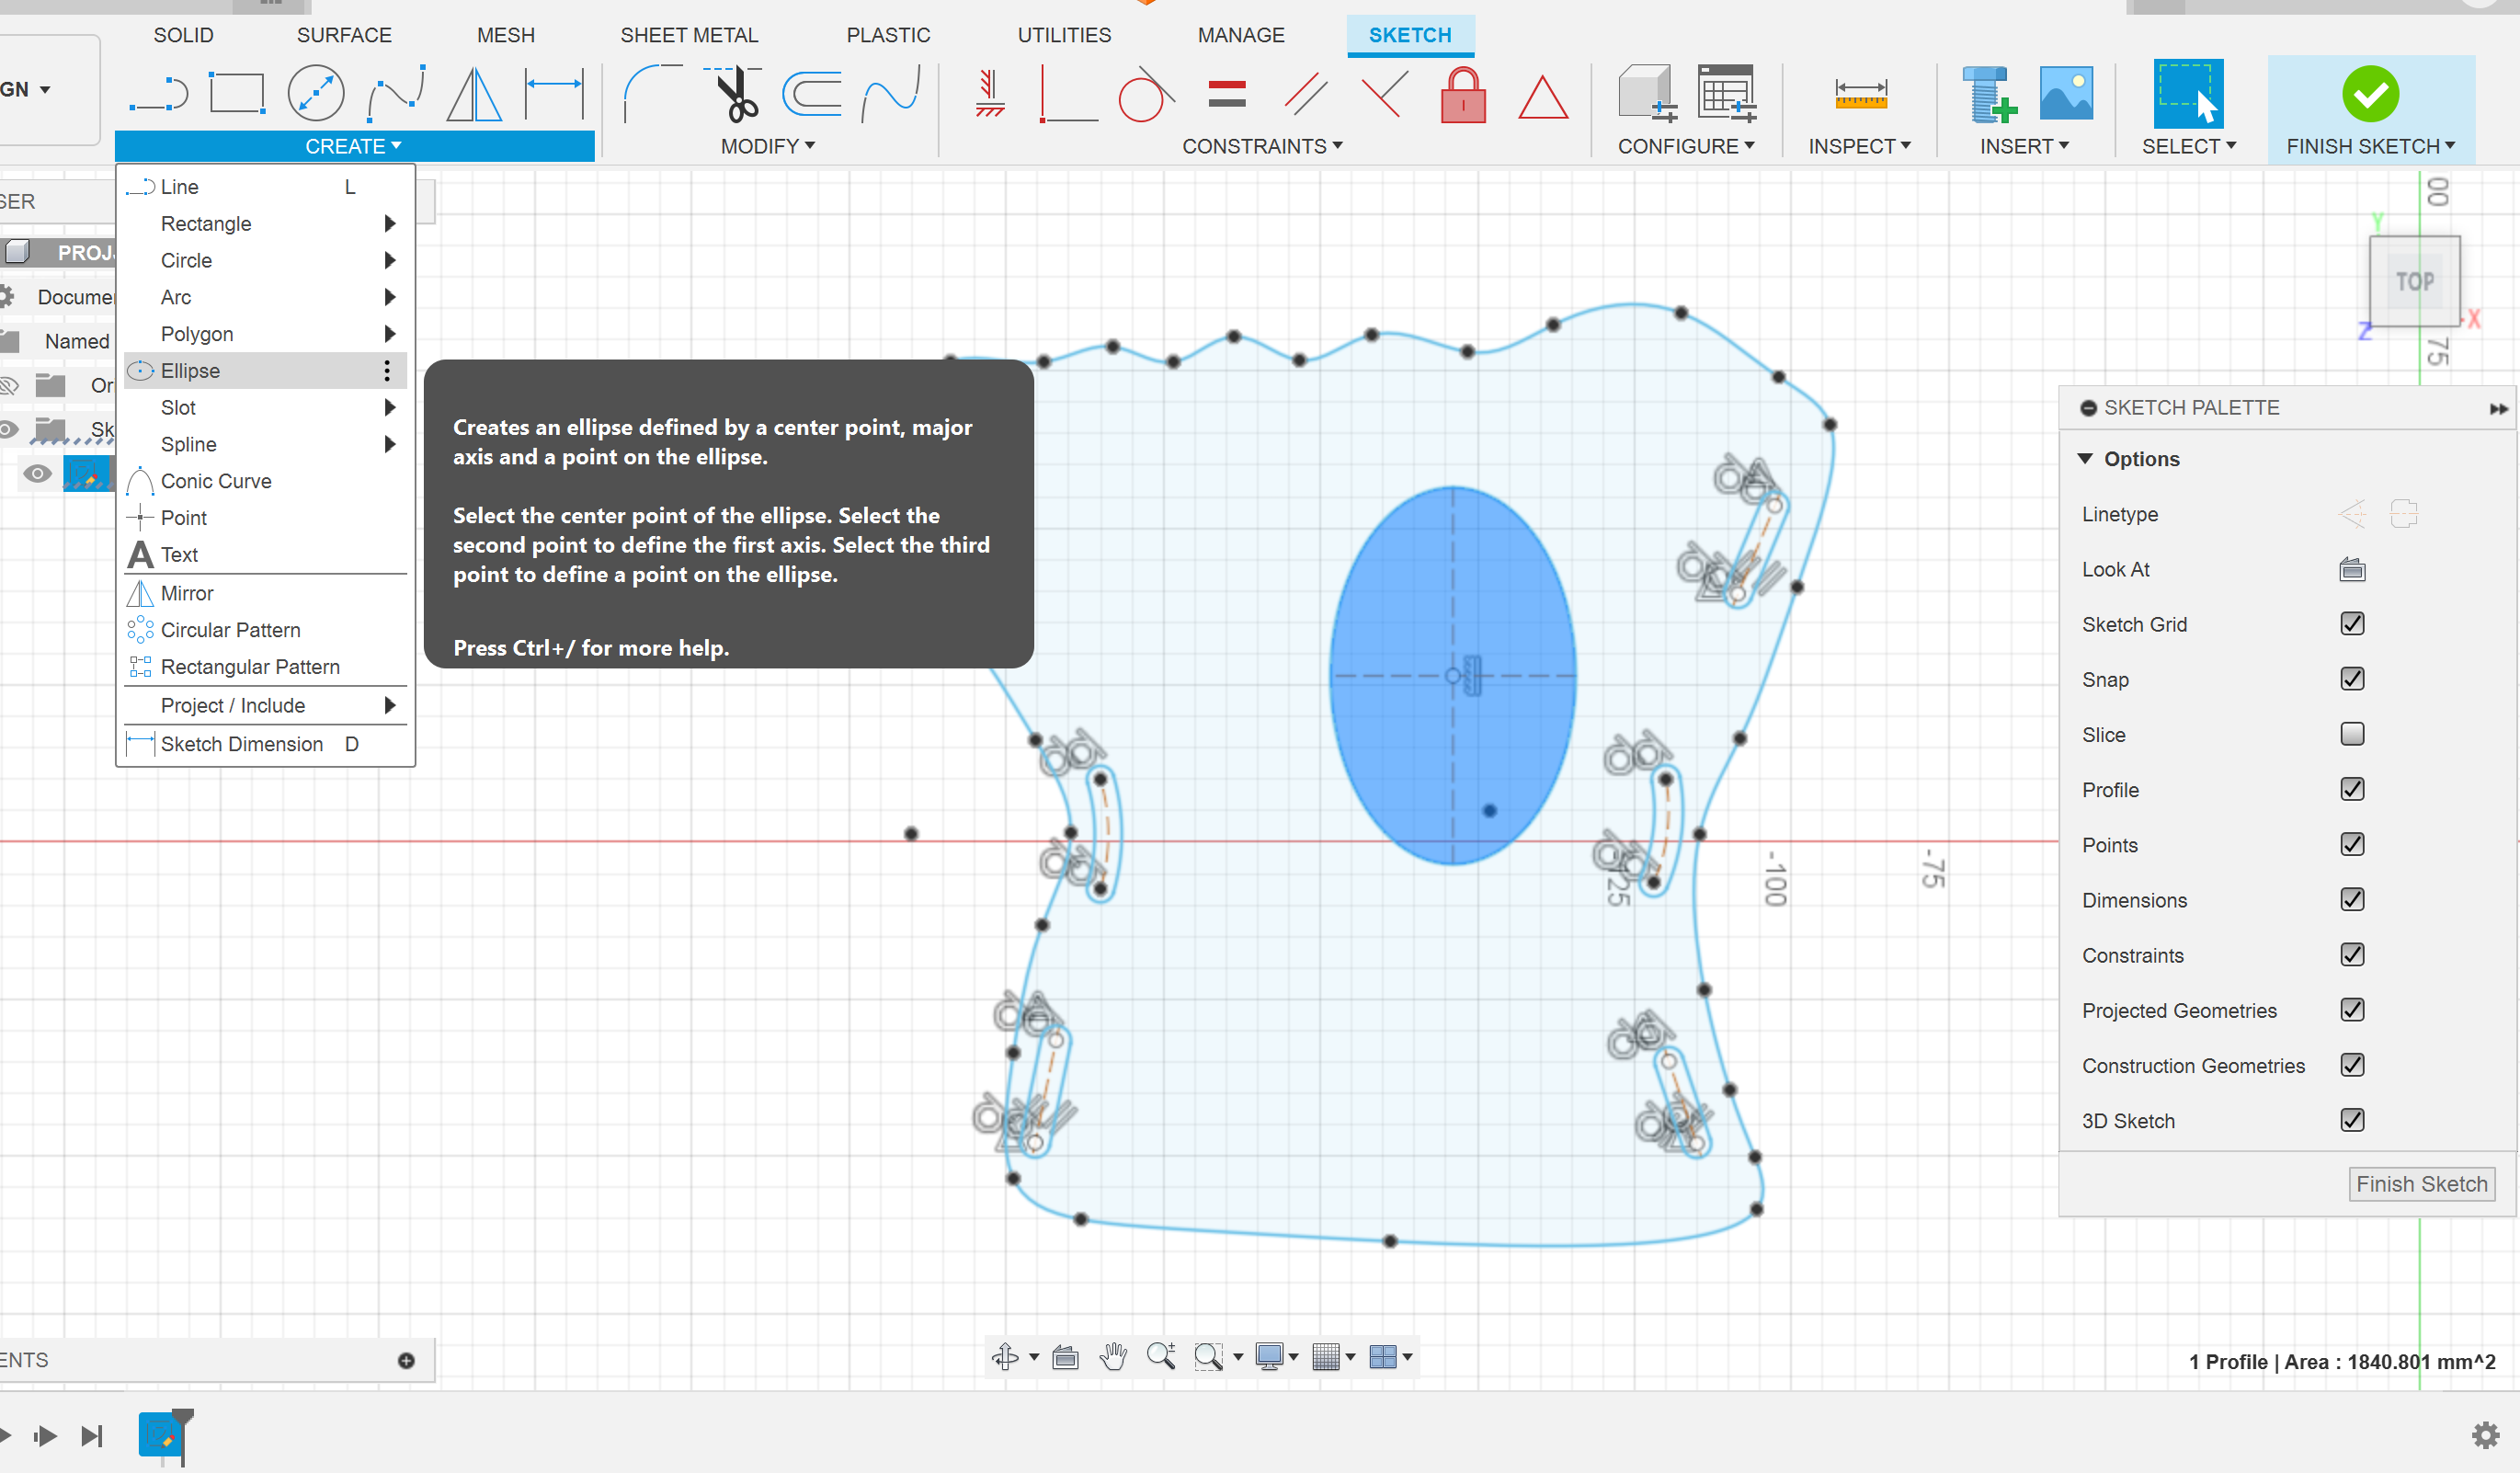
- In Sketch menu, choose to add slots
- Add Overall Slot to straight edges (in first picture)
- Add Three Point Arc Slot for curved edges (In second picture)
- In sketch menu, choose eclipse
- Add eclipse for thumb hole ( in third picture)
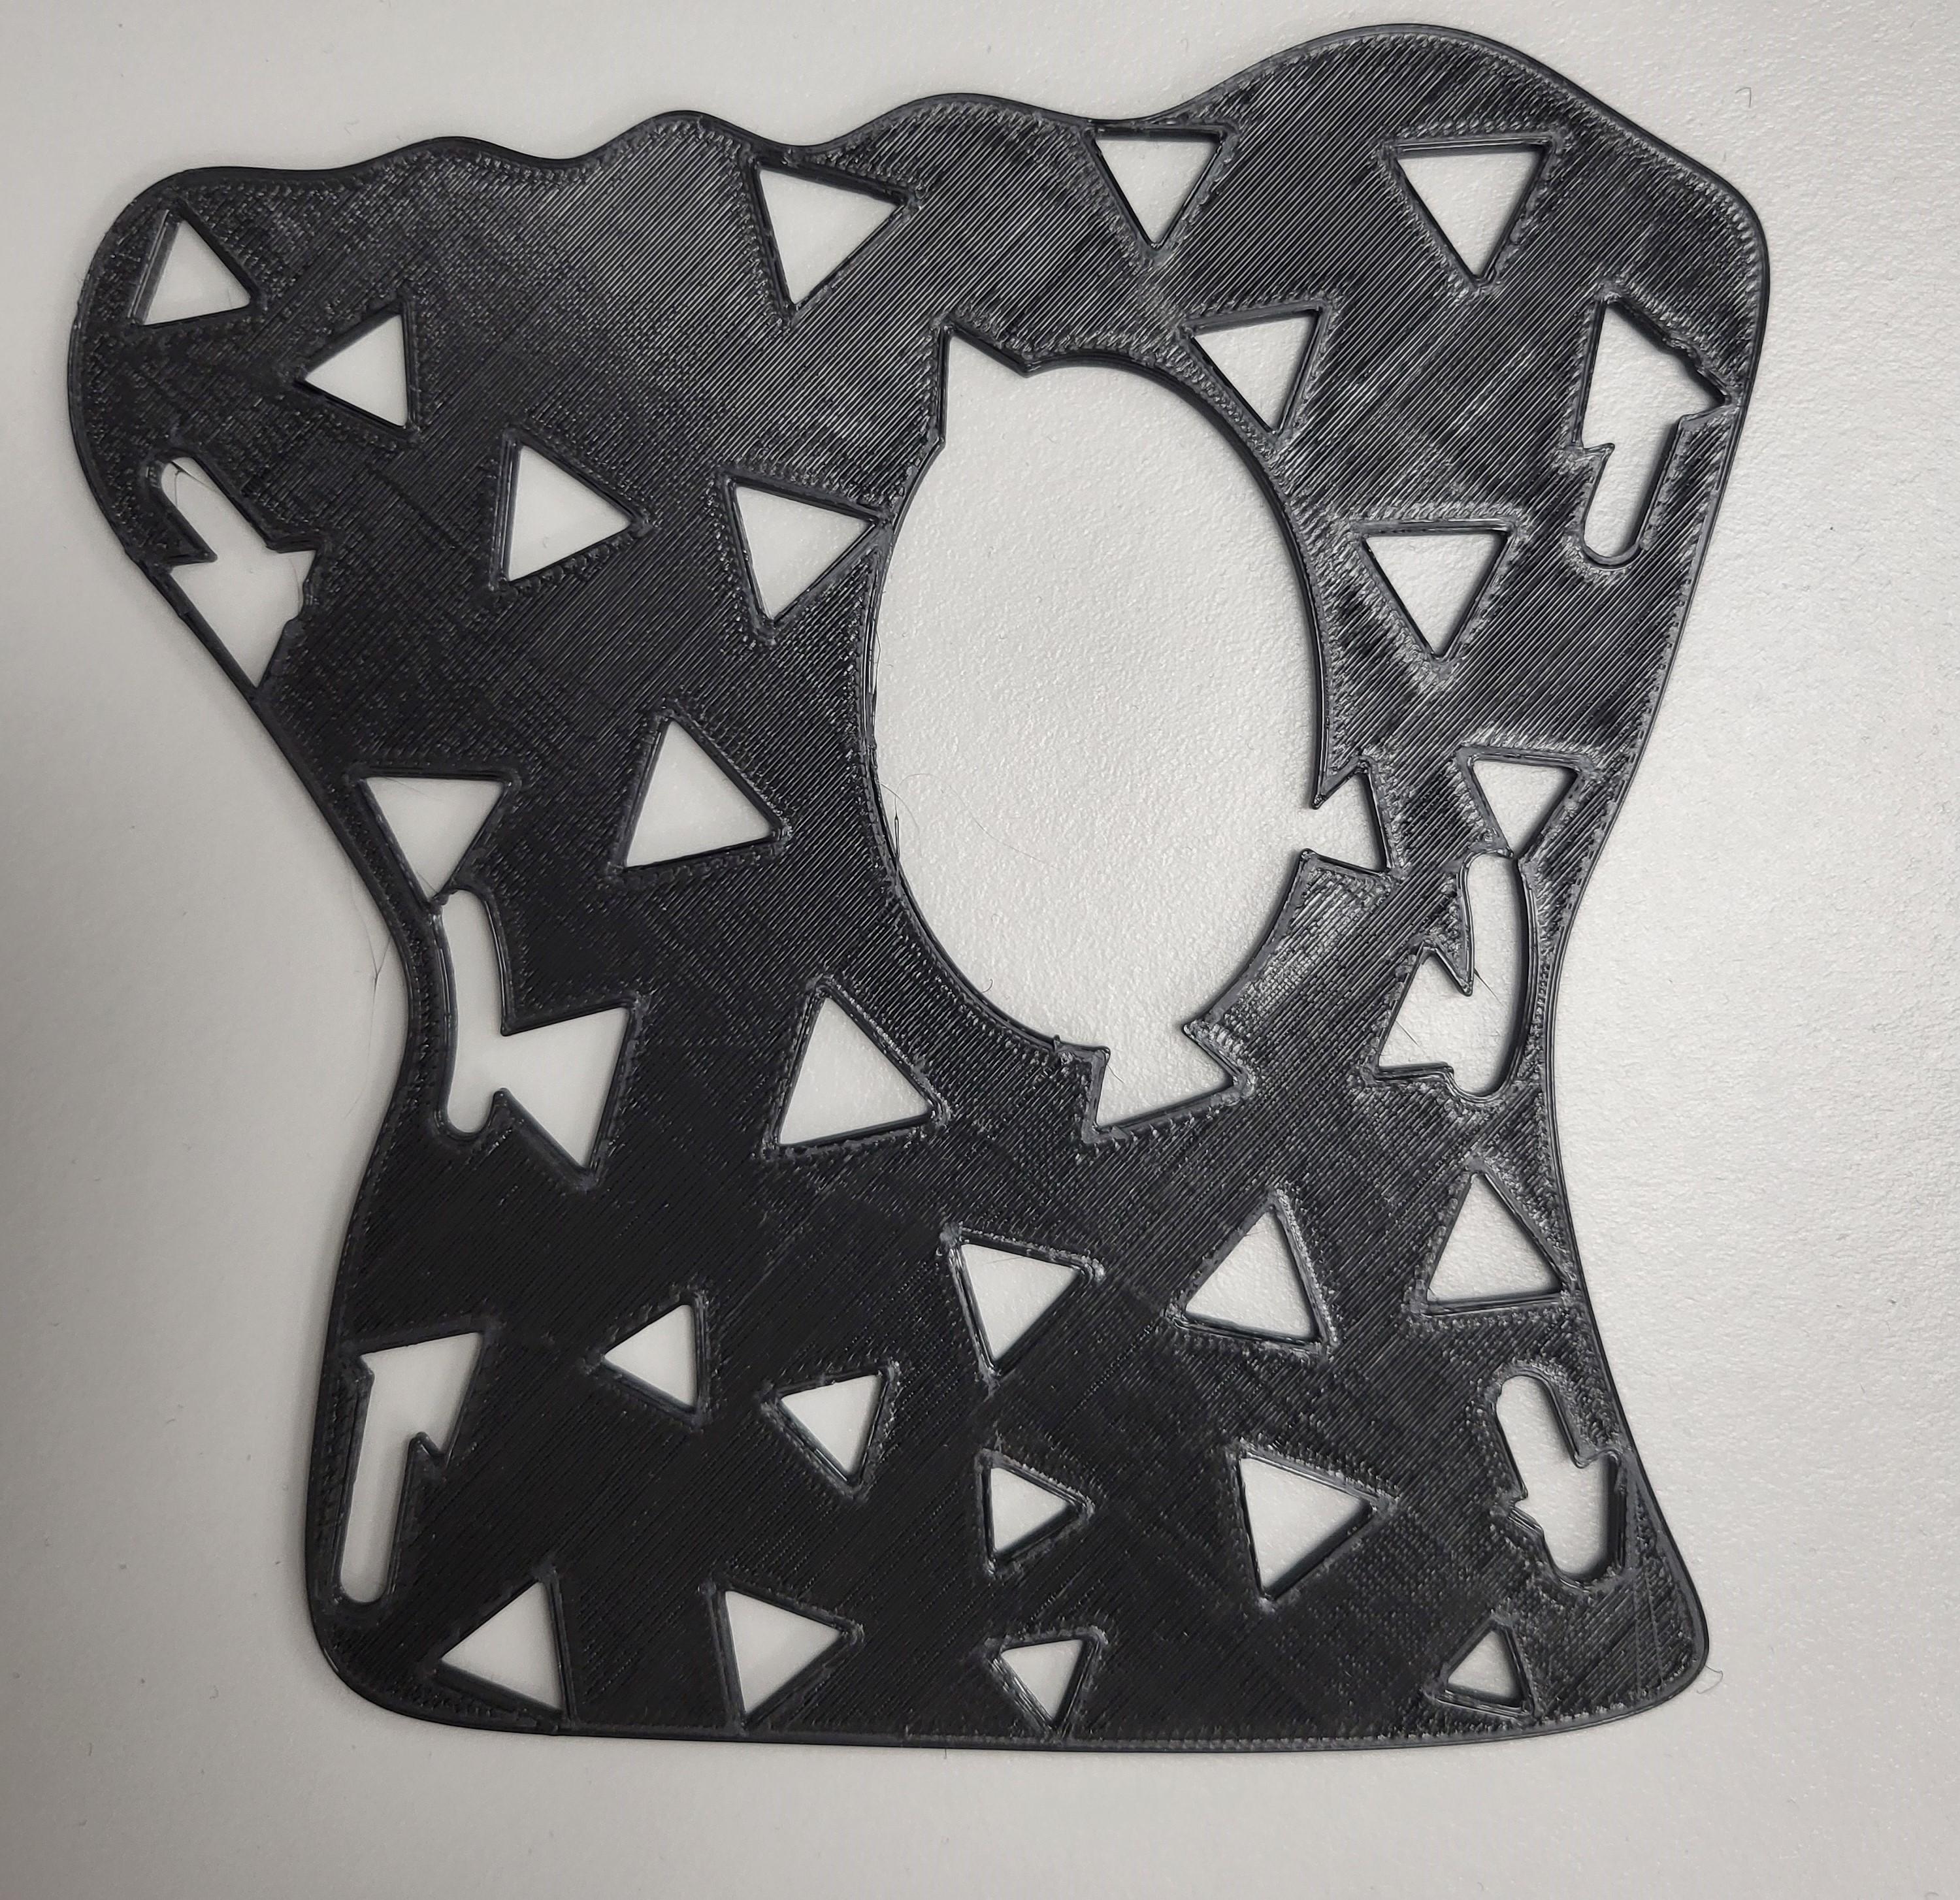
Add Voronoi Pattern
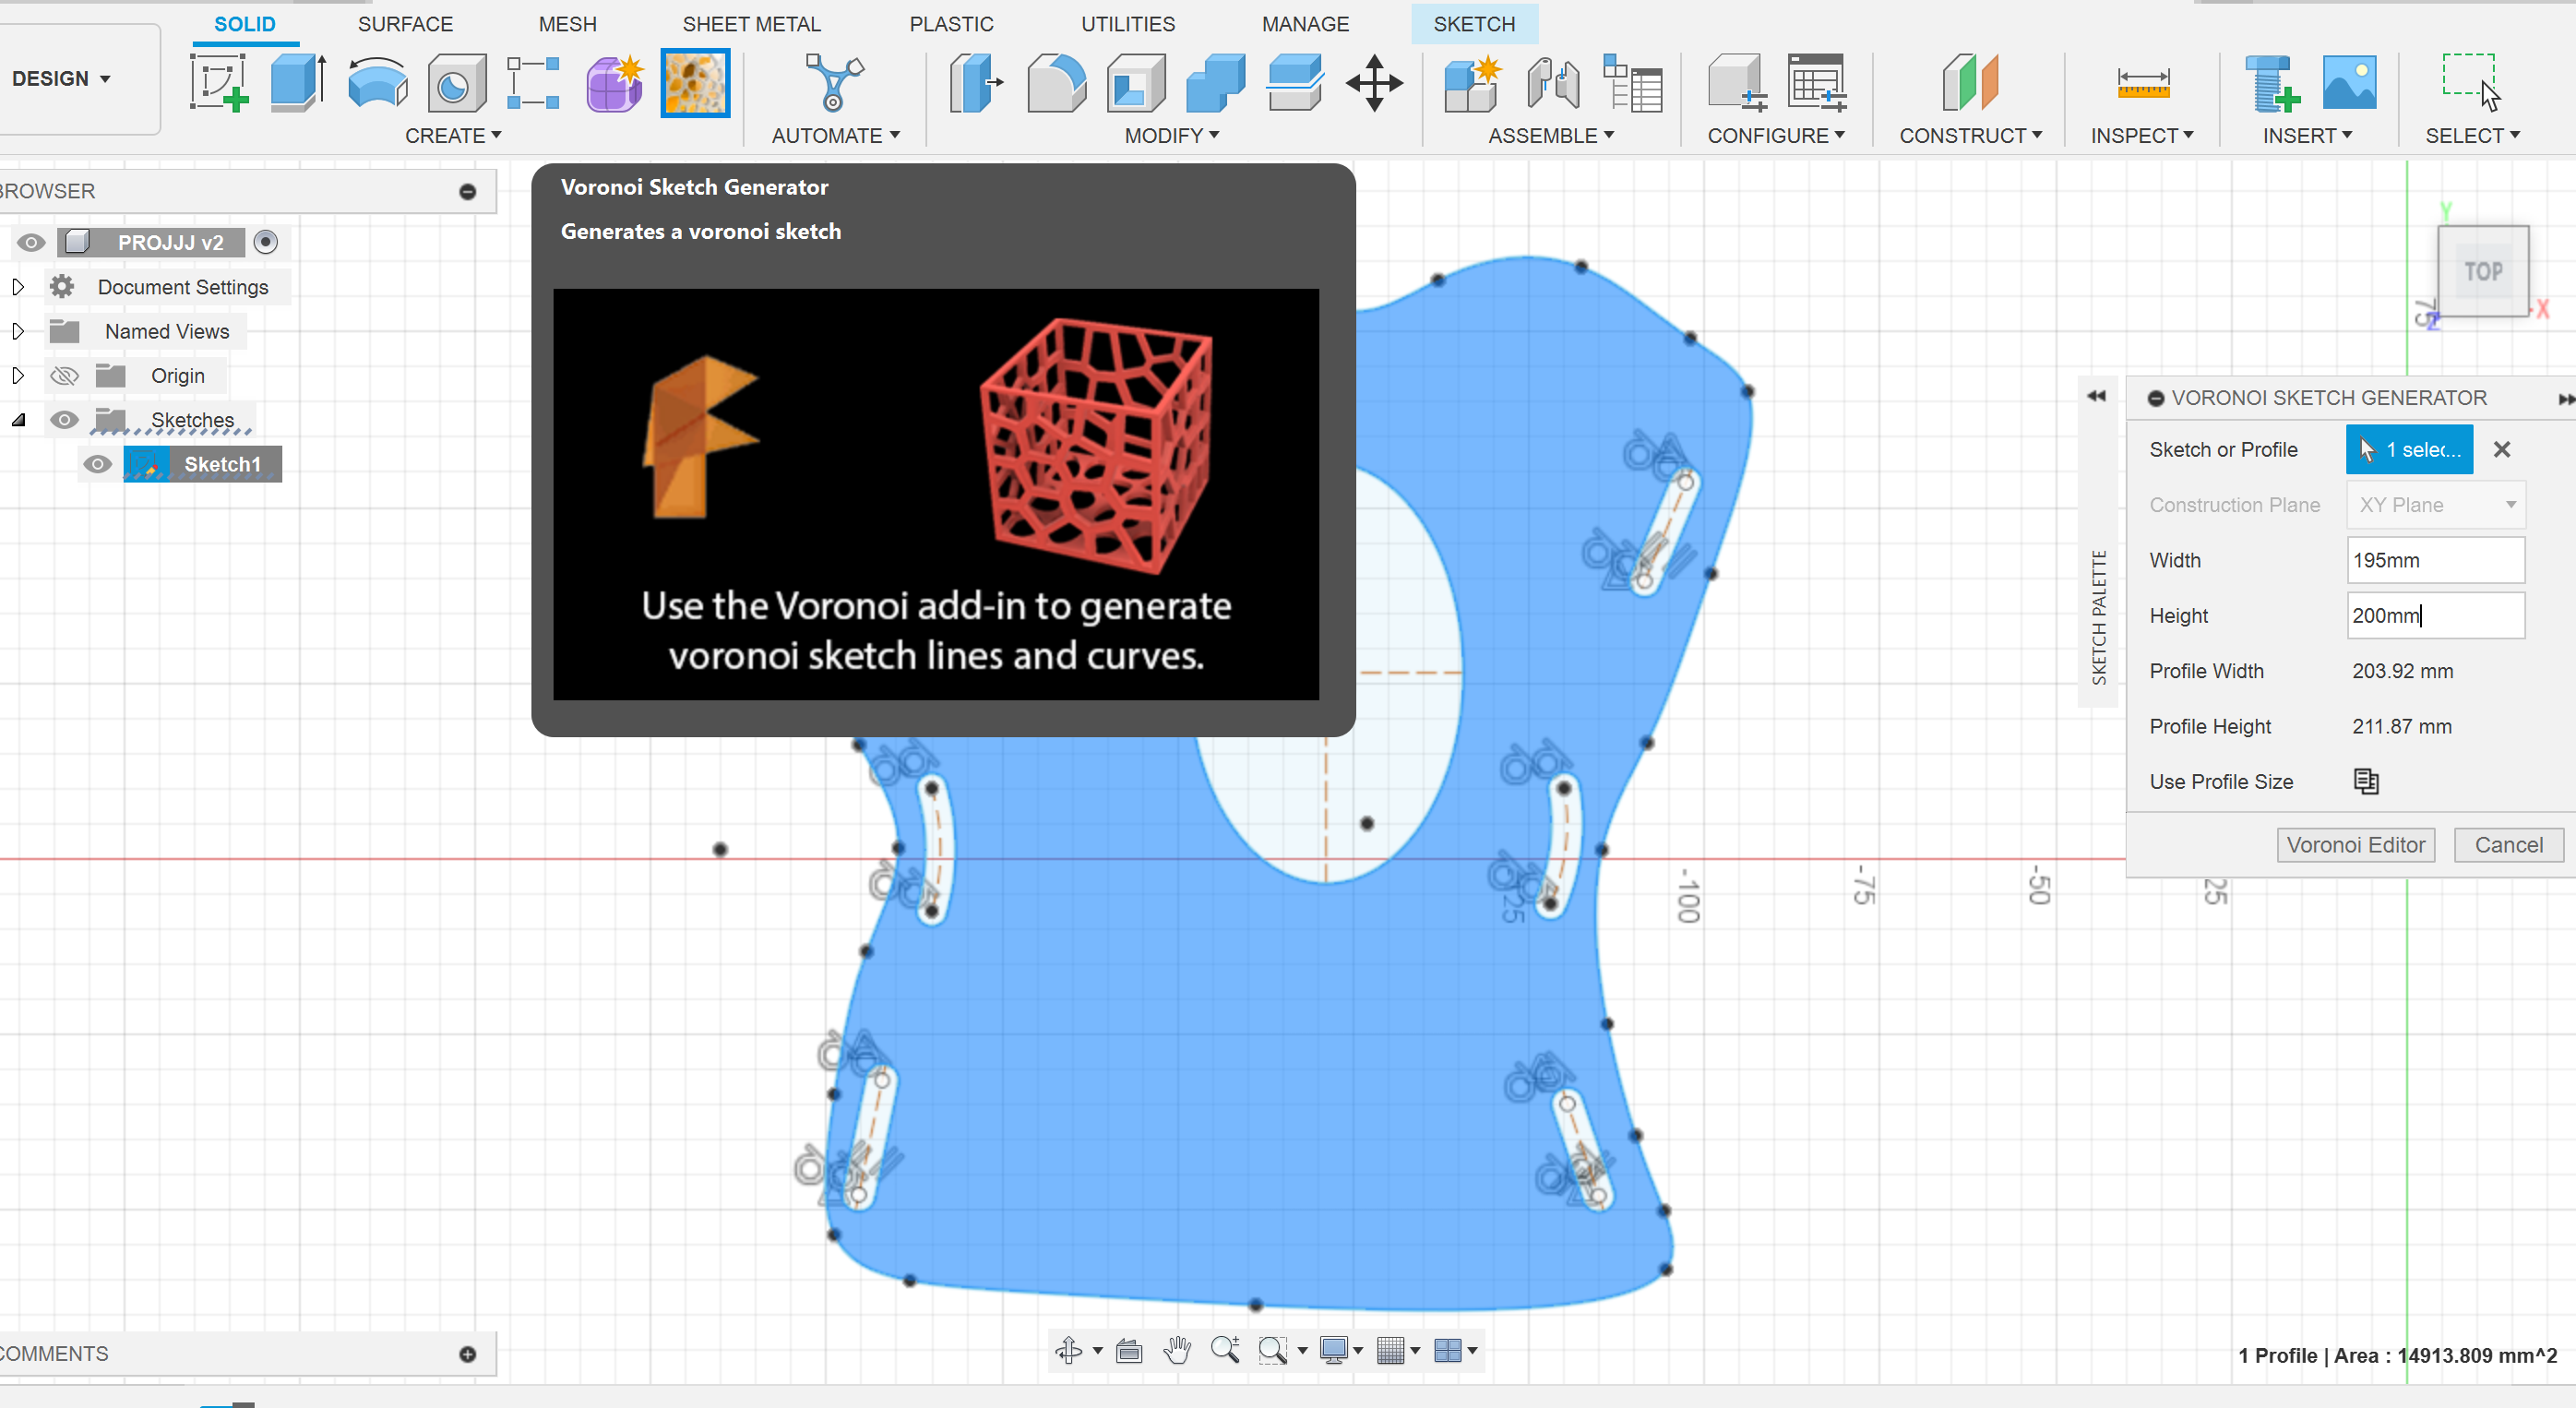
- Download Voronoi Extension for AutoDesk and apply to design. (Fusion 360 does not come with this feature, it is a free add-in. It is buggy, but with practice, it is more useable)
- In Fusion, the Voronoi option will be under the sketch menu. The body that the stamp will apply to must be in sketch mode. A new window will open with the options for cell shape, size, and pattern variations. A preview of the object will be shown, and then the pattern can be applied. The dimensions I chose are slight smaller tham my body by about 150mm, so that I can have room around the inner perimiter of the cast. (The Voronoi extension does not recognize the slots and holes in the body, and will create the pattern over them.)
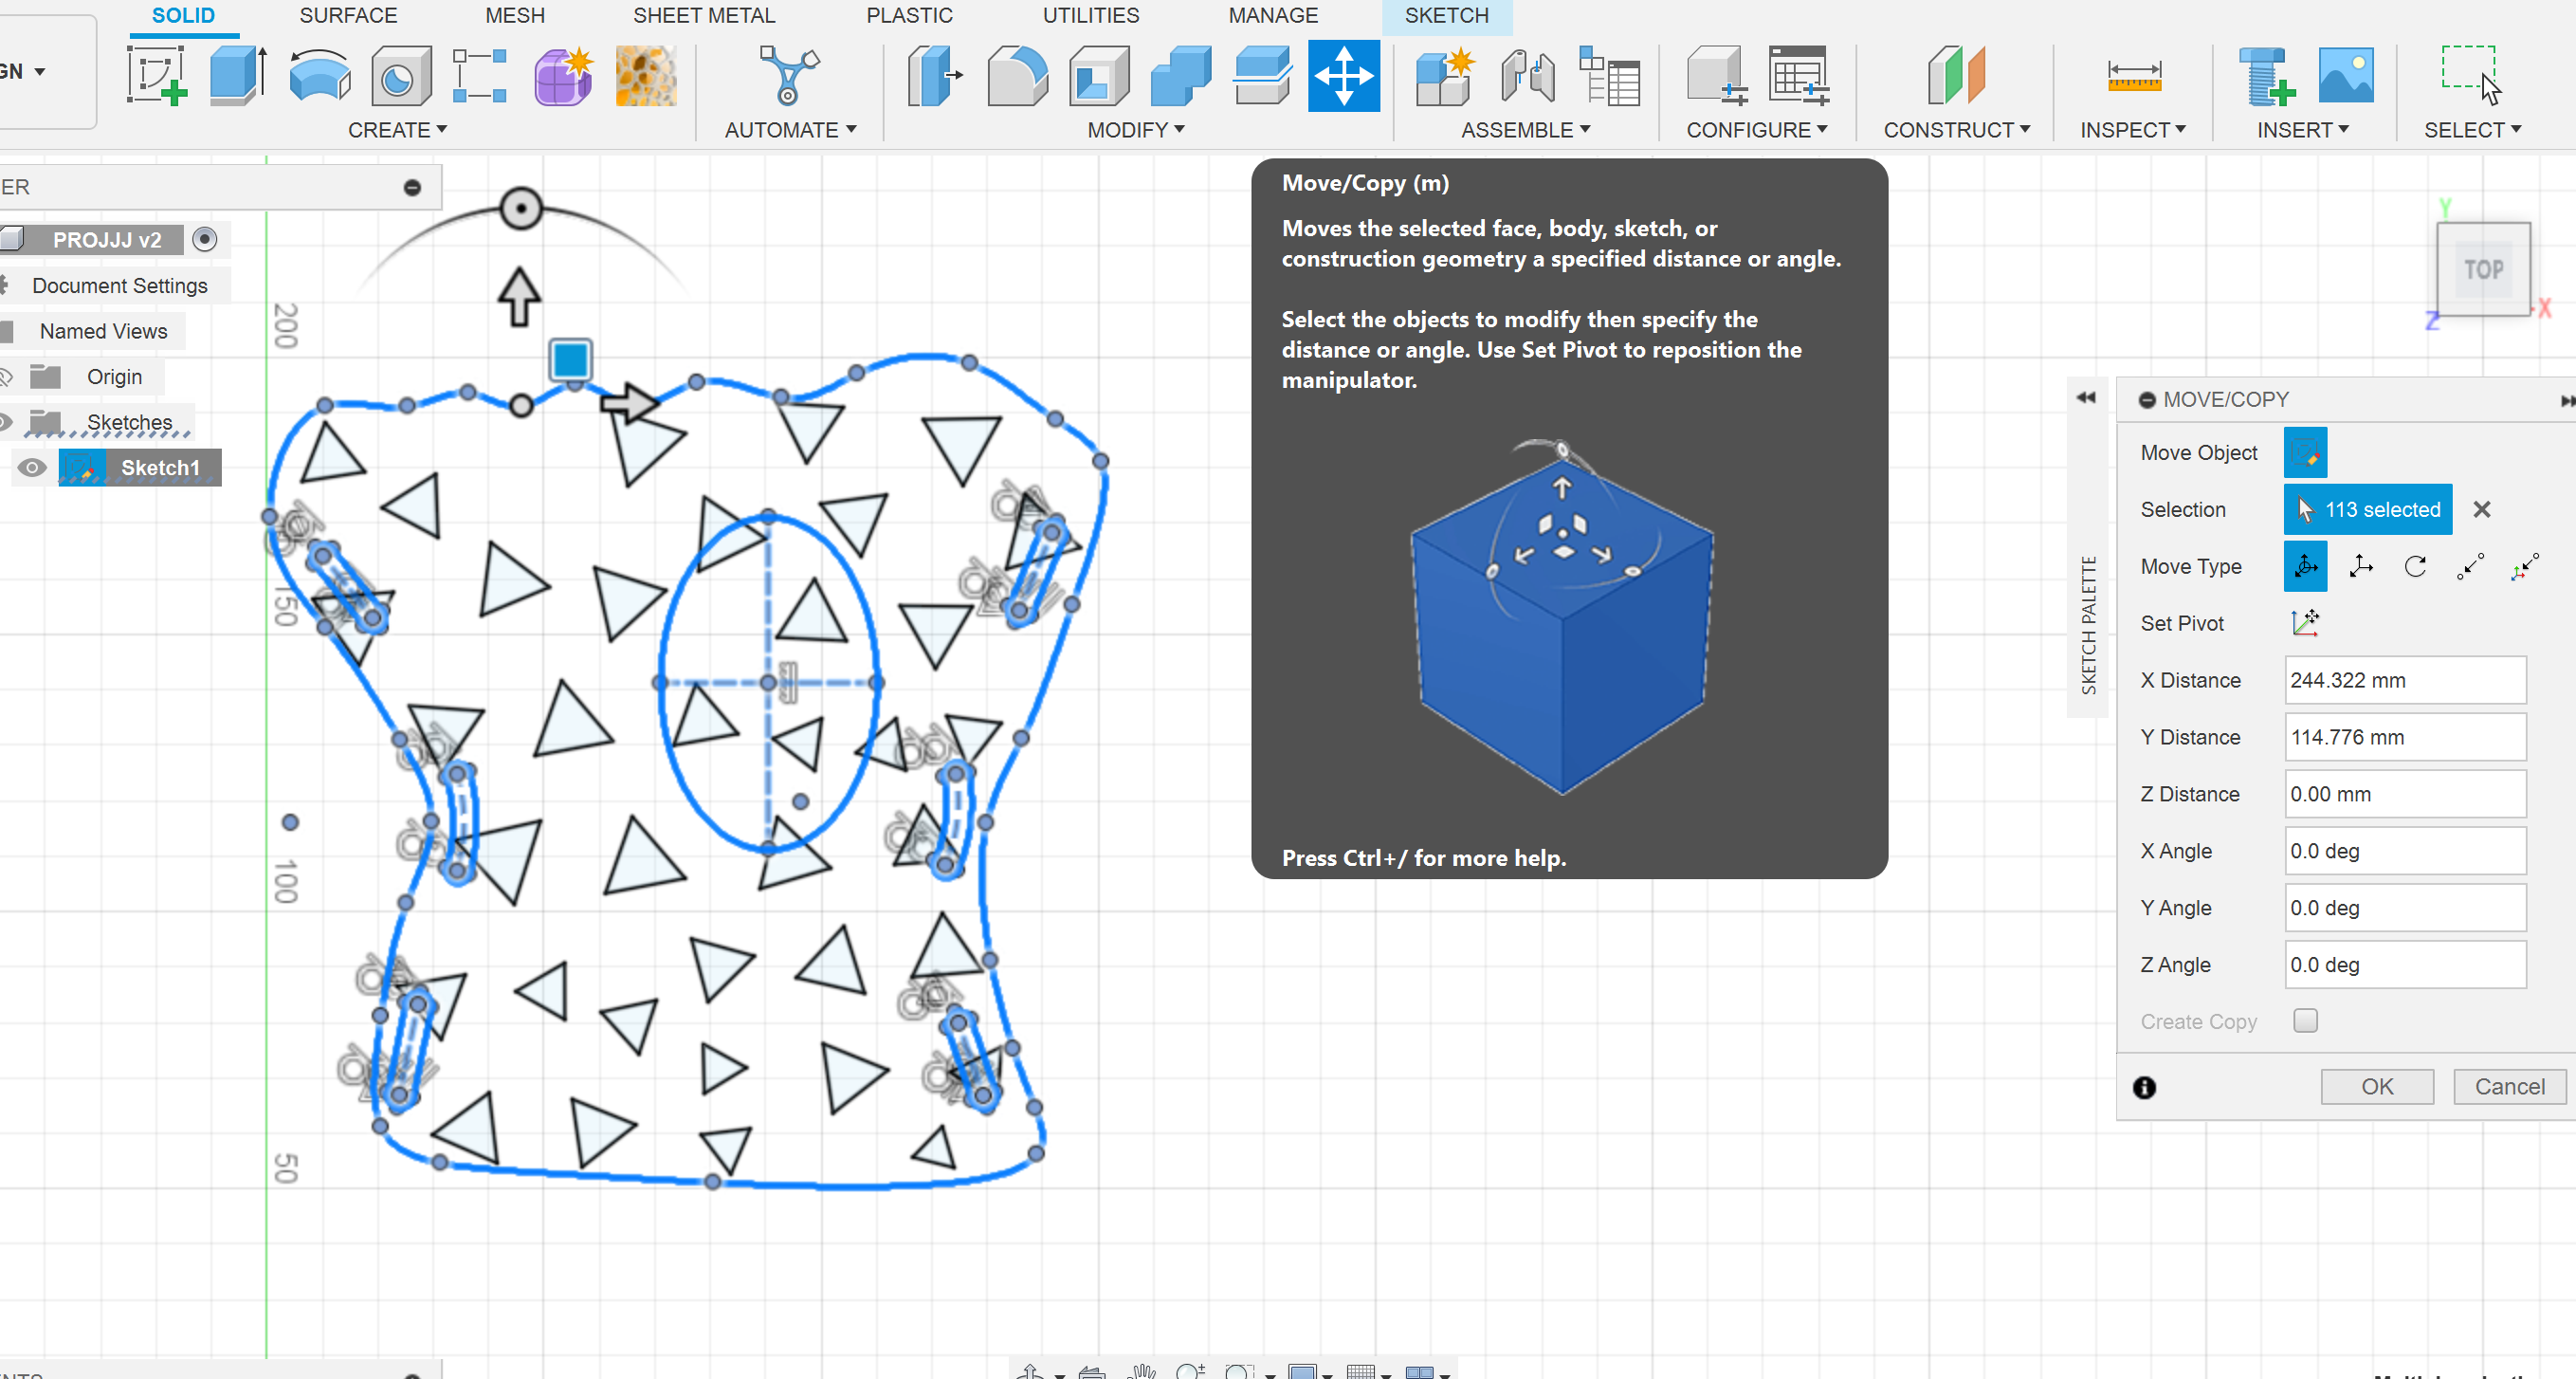
- The error with this function is that it applies the Voronoi pattern out of the created body. Use Move function to drag the and position over Voronoi pattern. With in the move function options, make sure to choose body, in order to select the cast to move, and move it over the Voronoi pattern as accurately as possible.
Voronoi extension used:
https://apps.autodesk.com/FUSION/en/Detail/Index?id=1006119760063675415&appLang=en&os=Mac
Extrude and Export
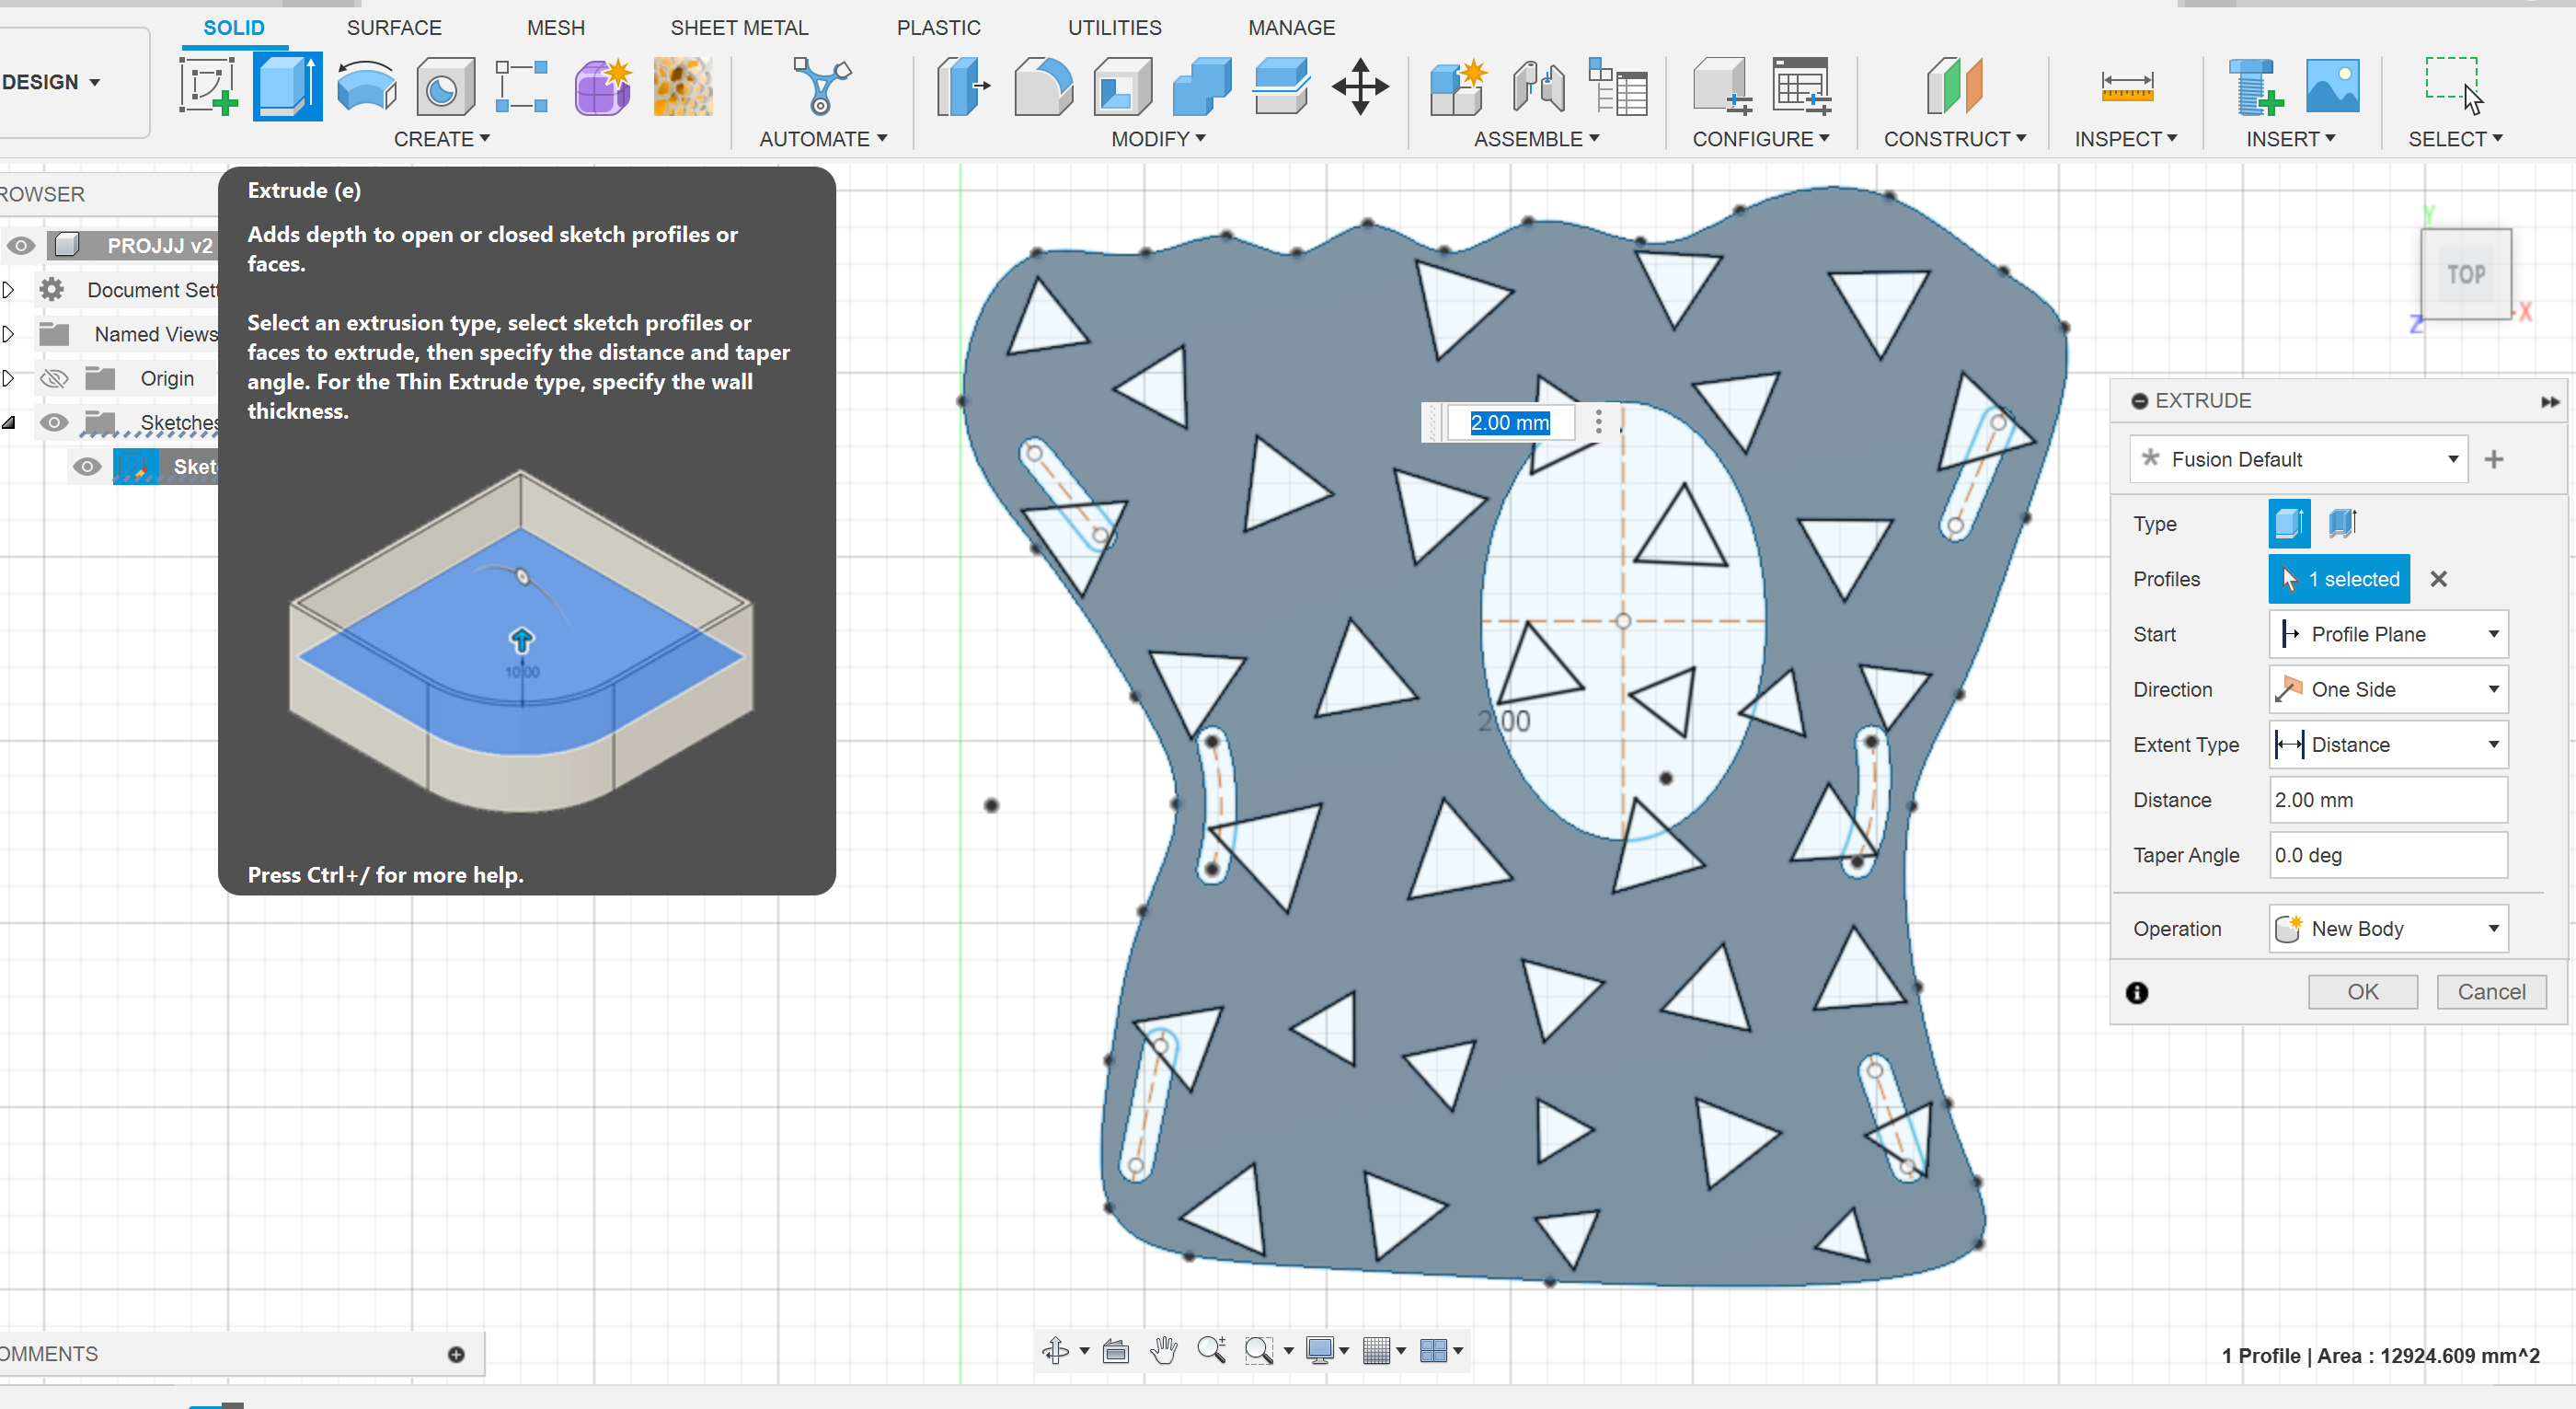
- Still in sketch mode, select the body and select the extrude option.
- In the extrude window set the distance of 2.0 mm (on XZ plane, with positive x-value offset), and any other preferences needed.
- The body will now be extruded to a 3D object with the slots, holes, and pattern cut out.
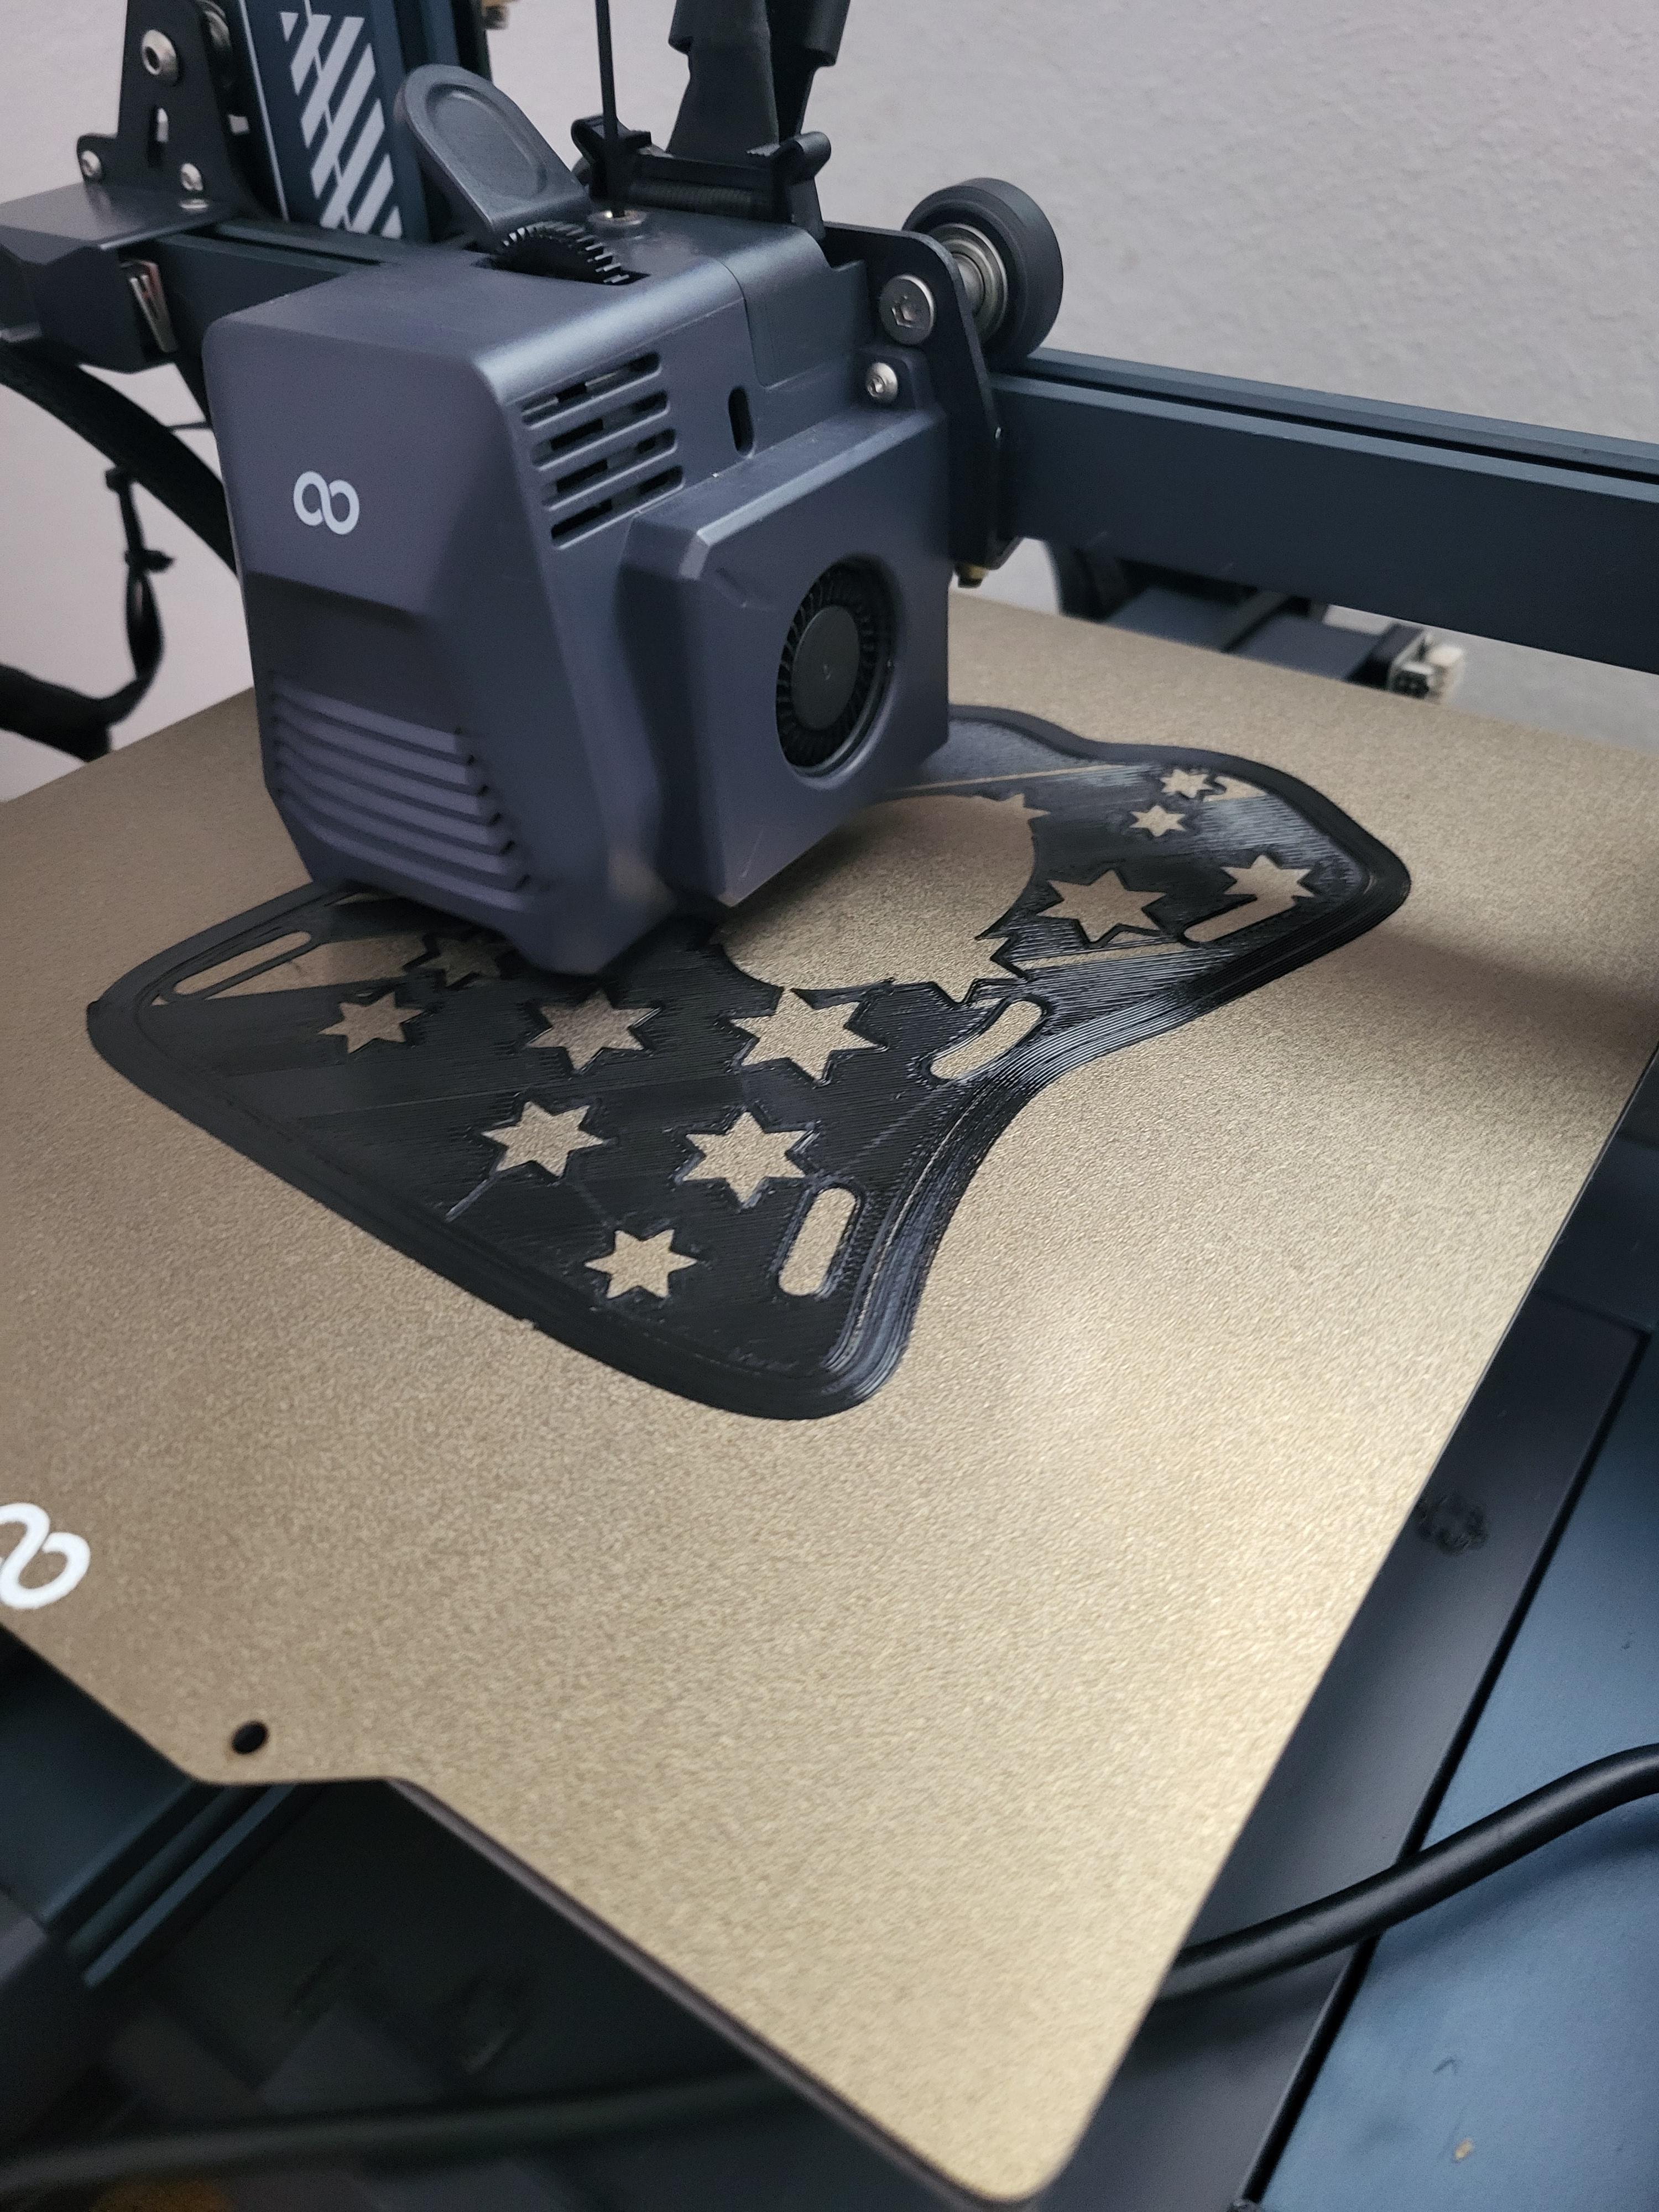
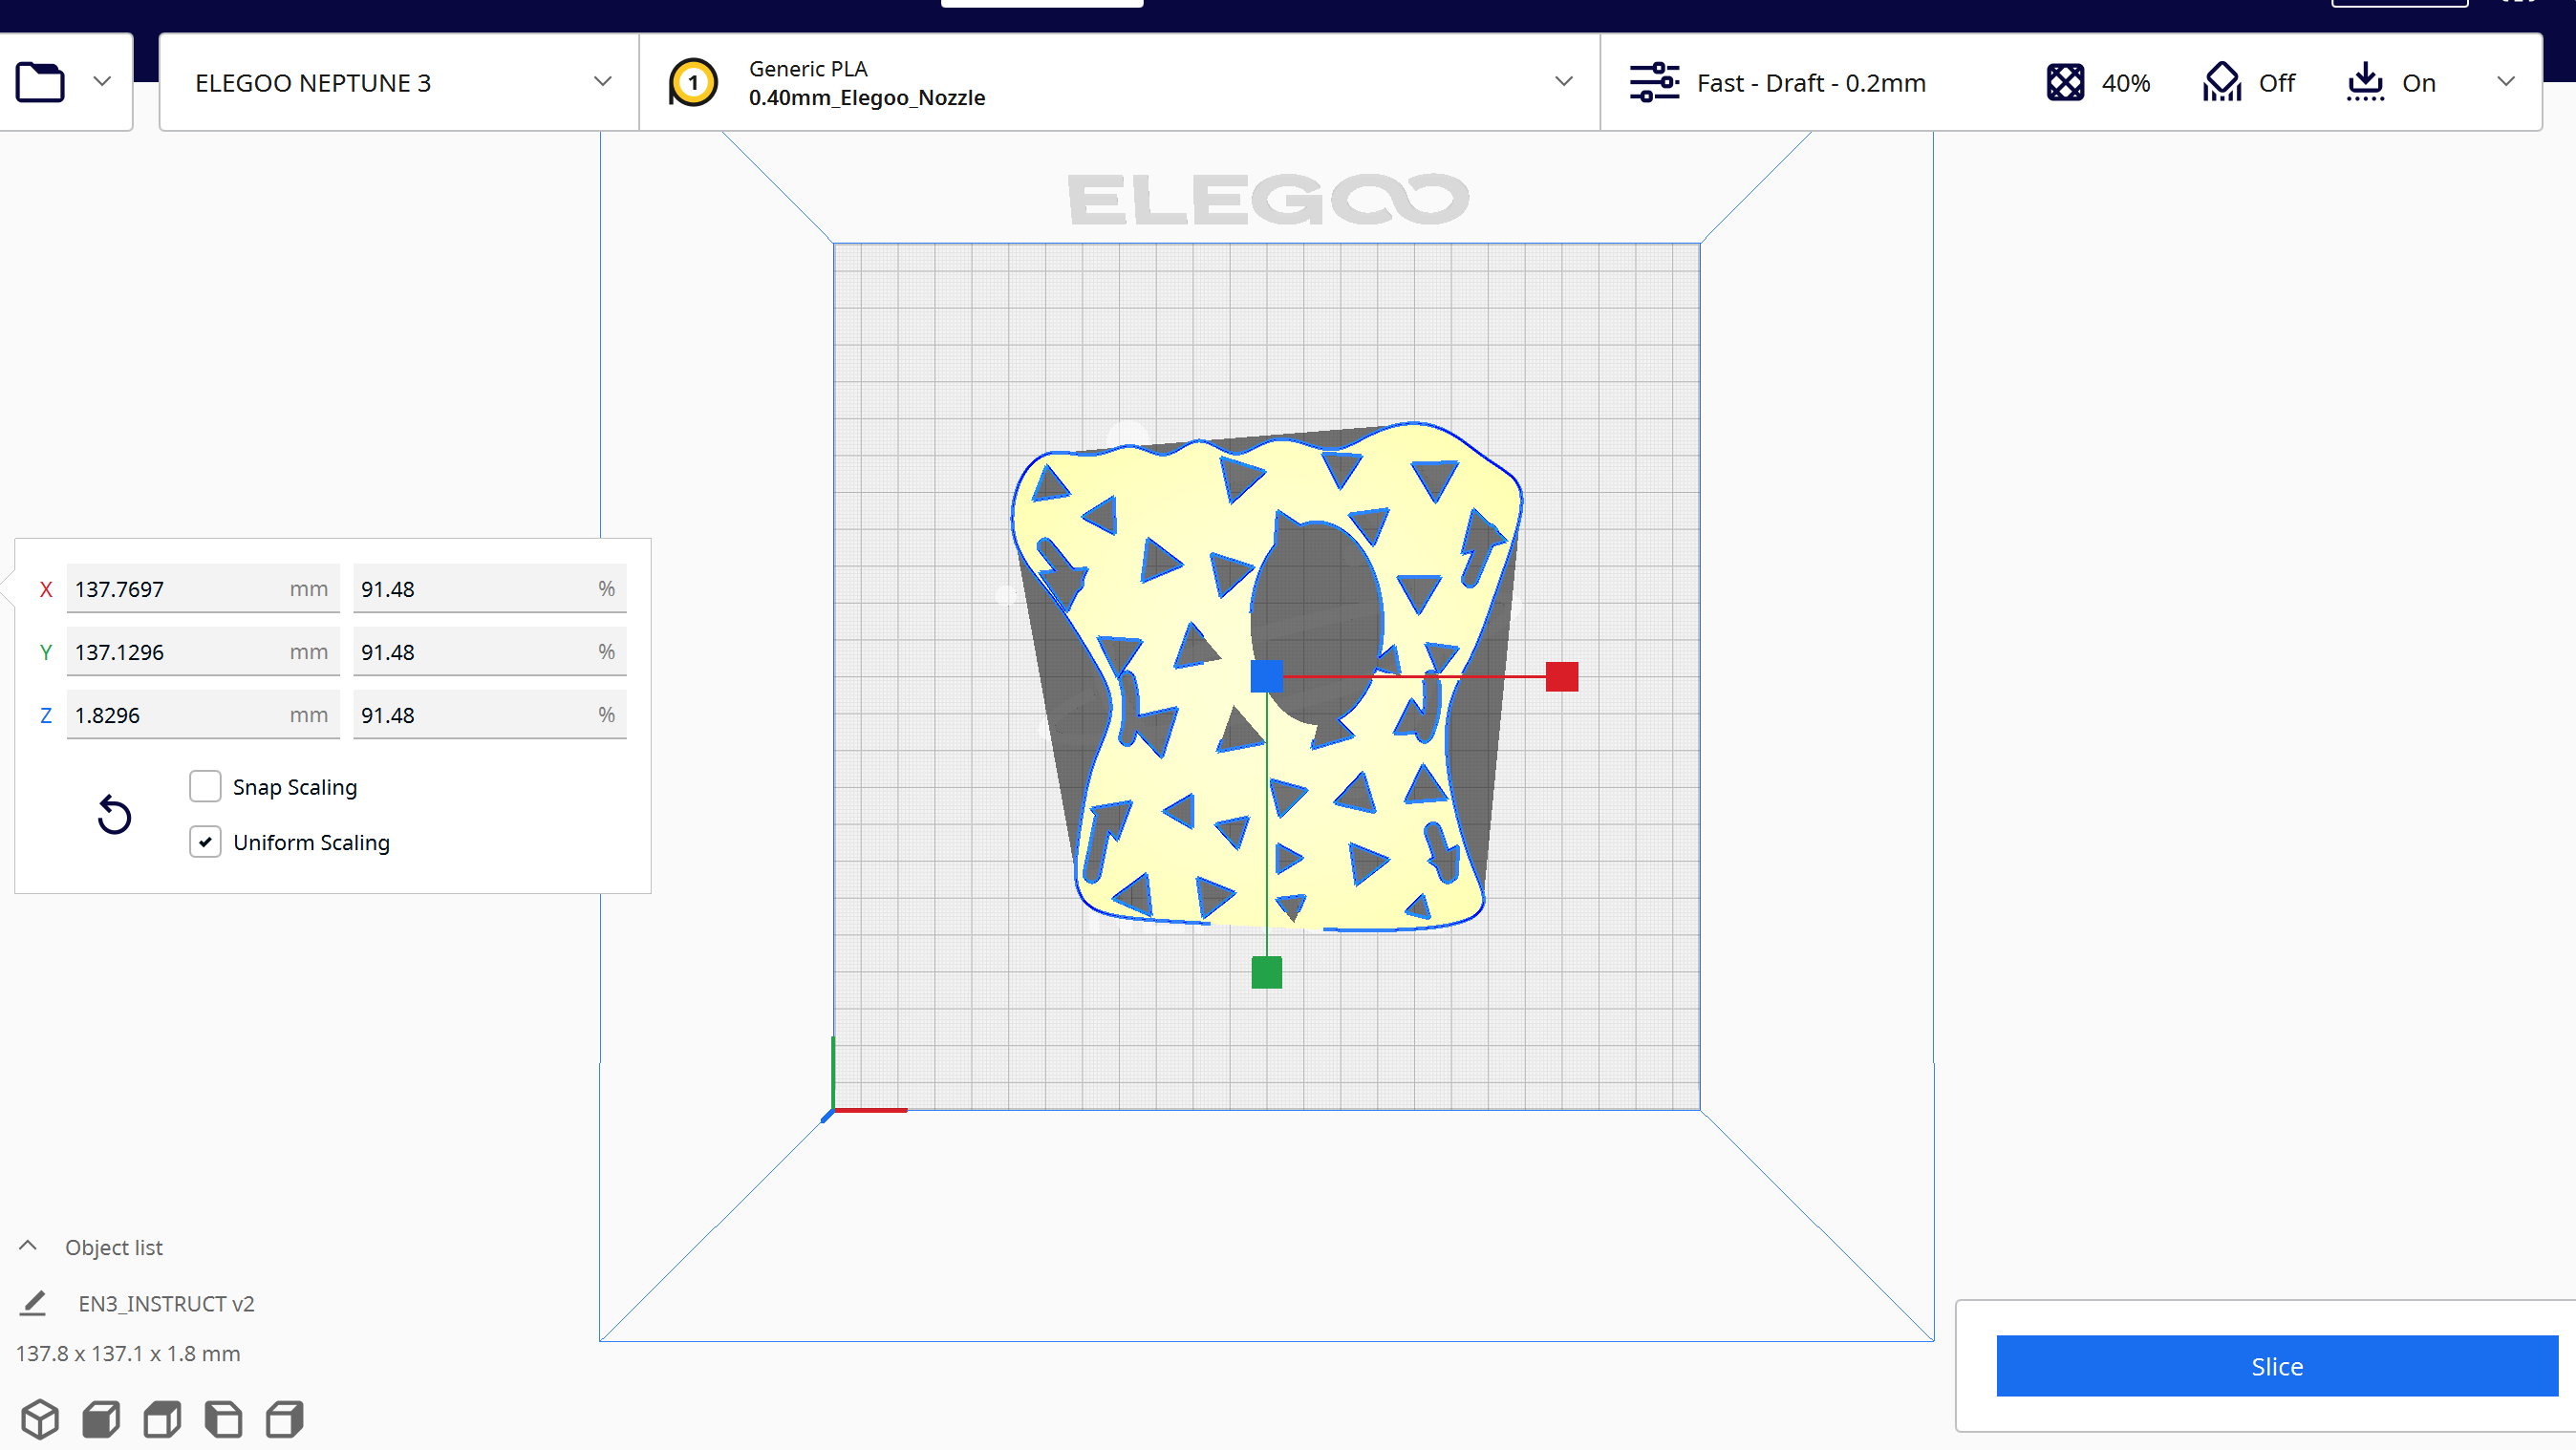
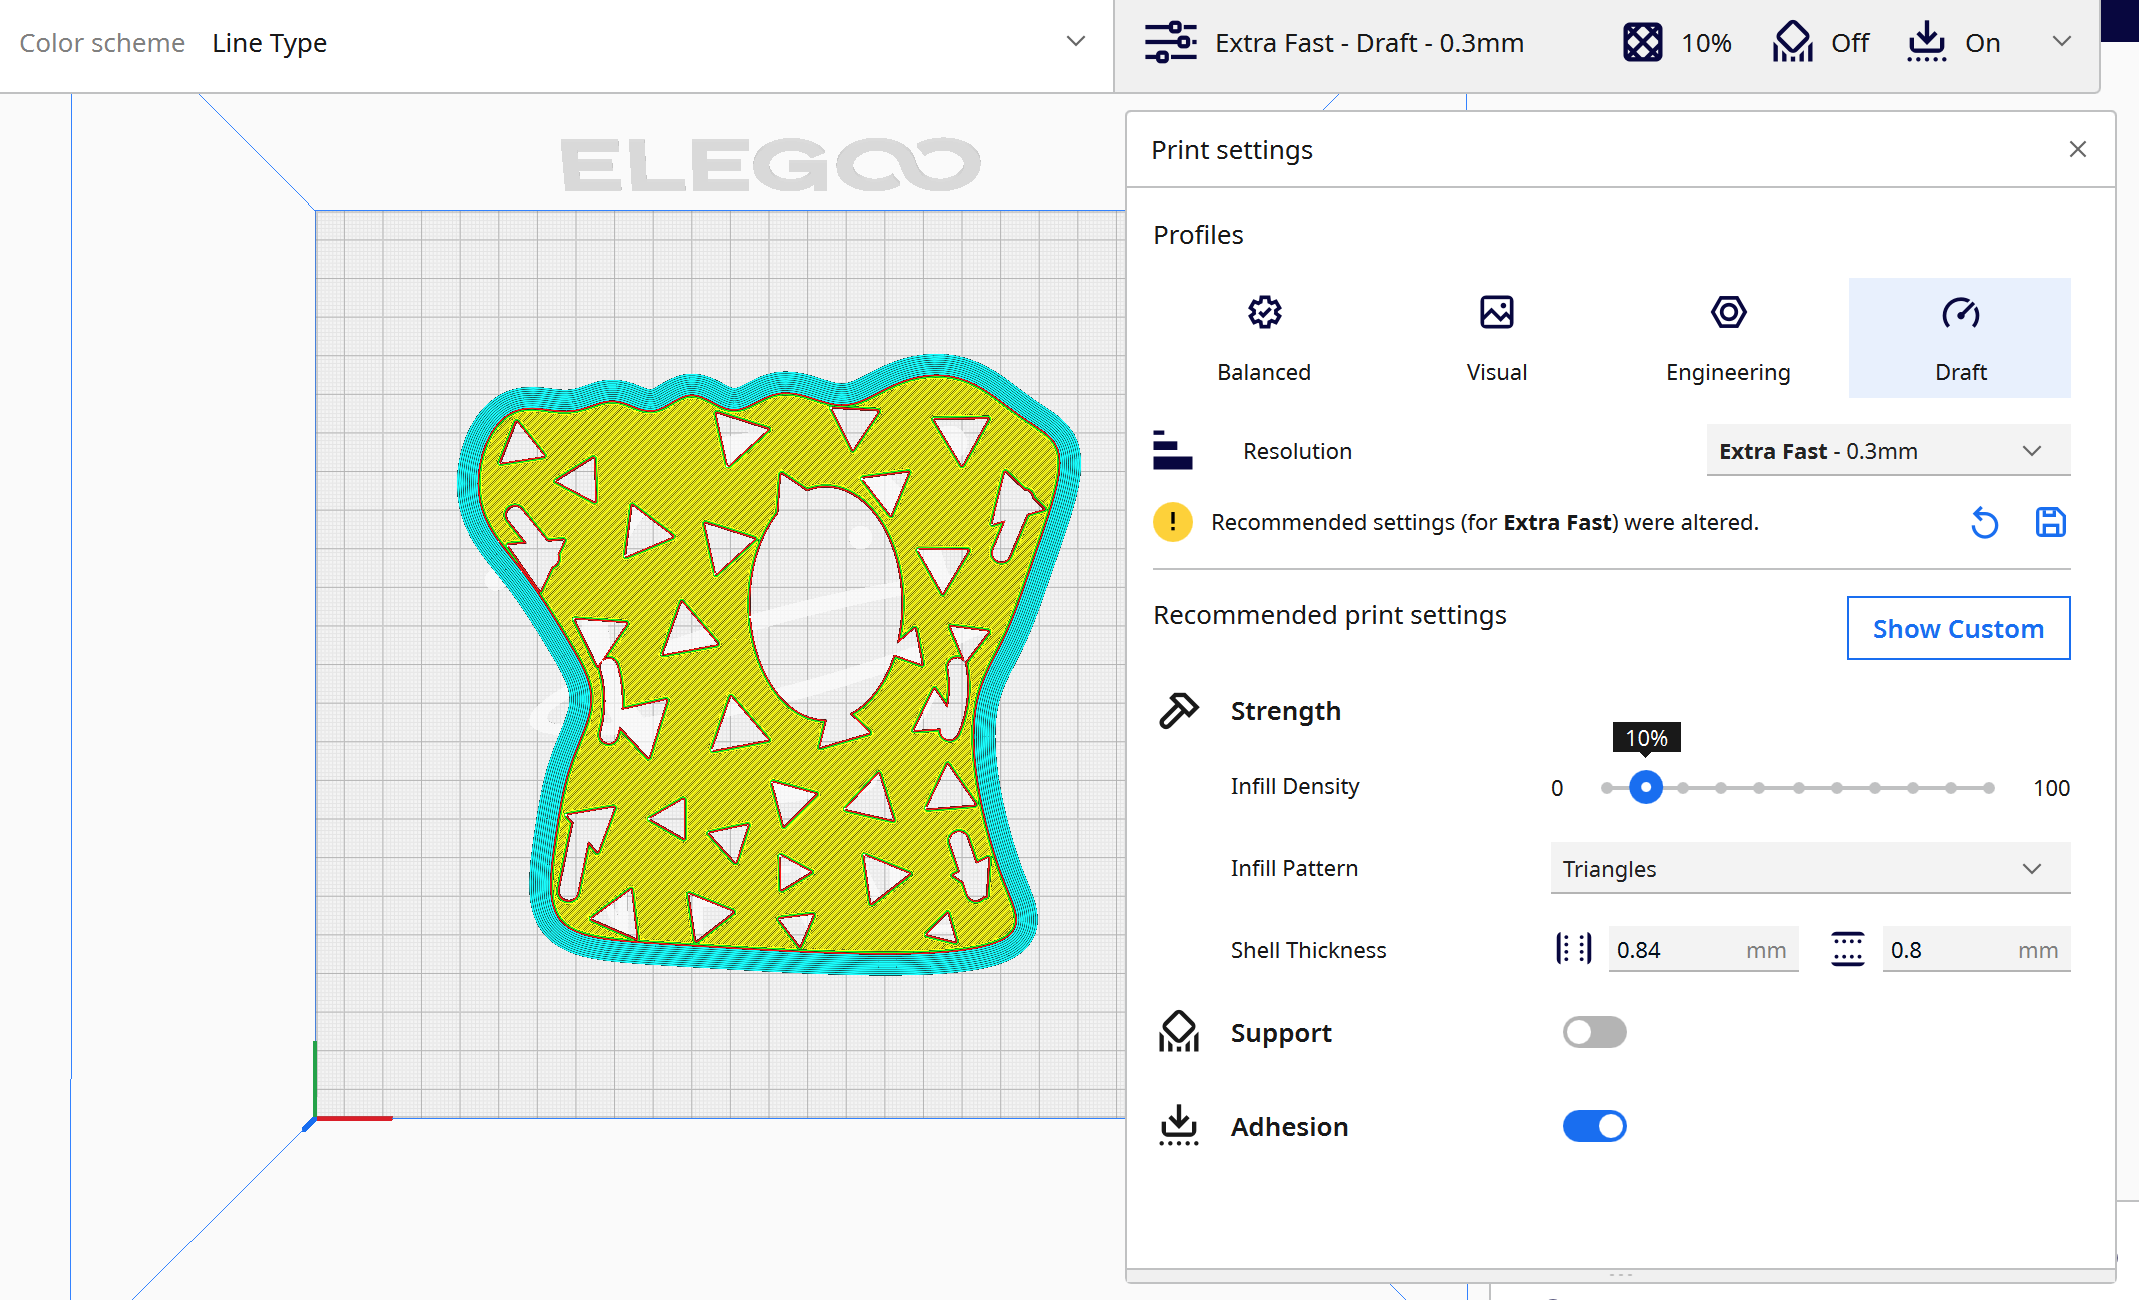
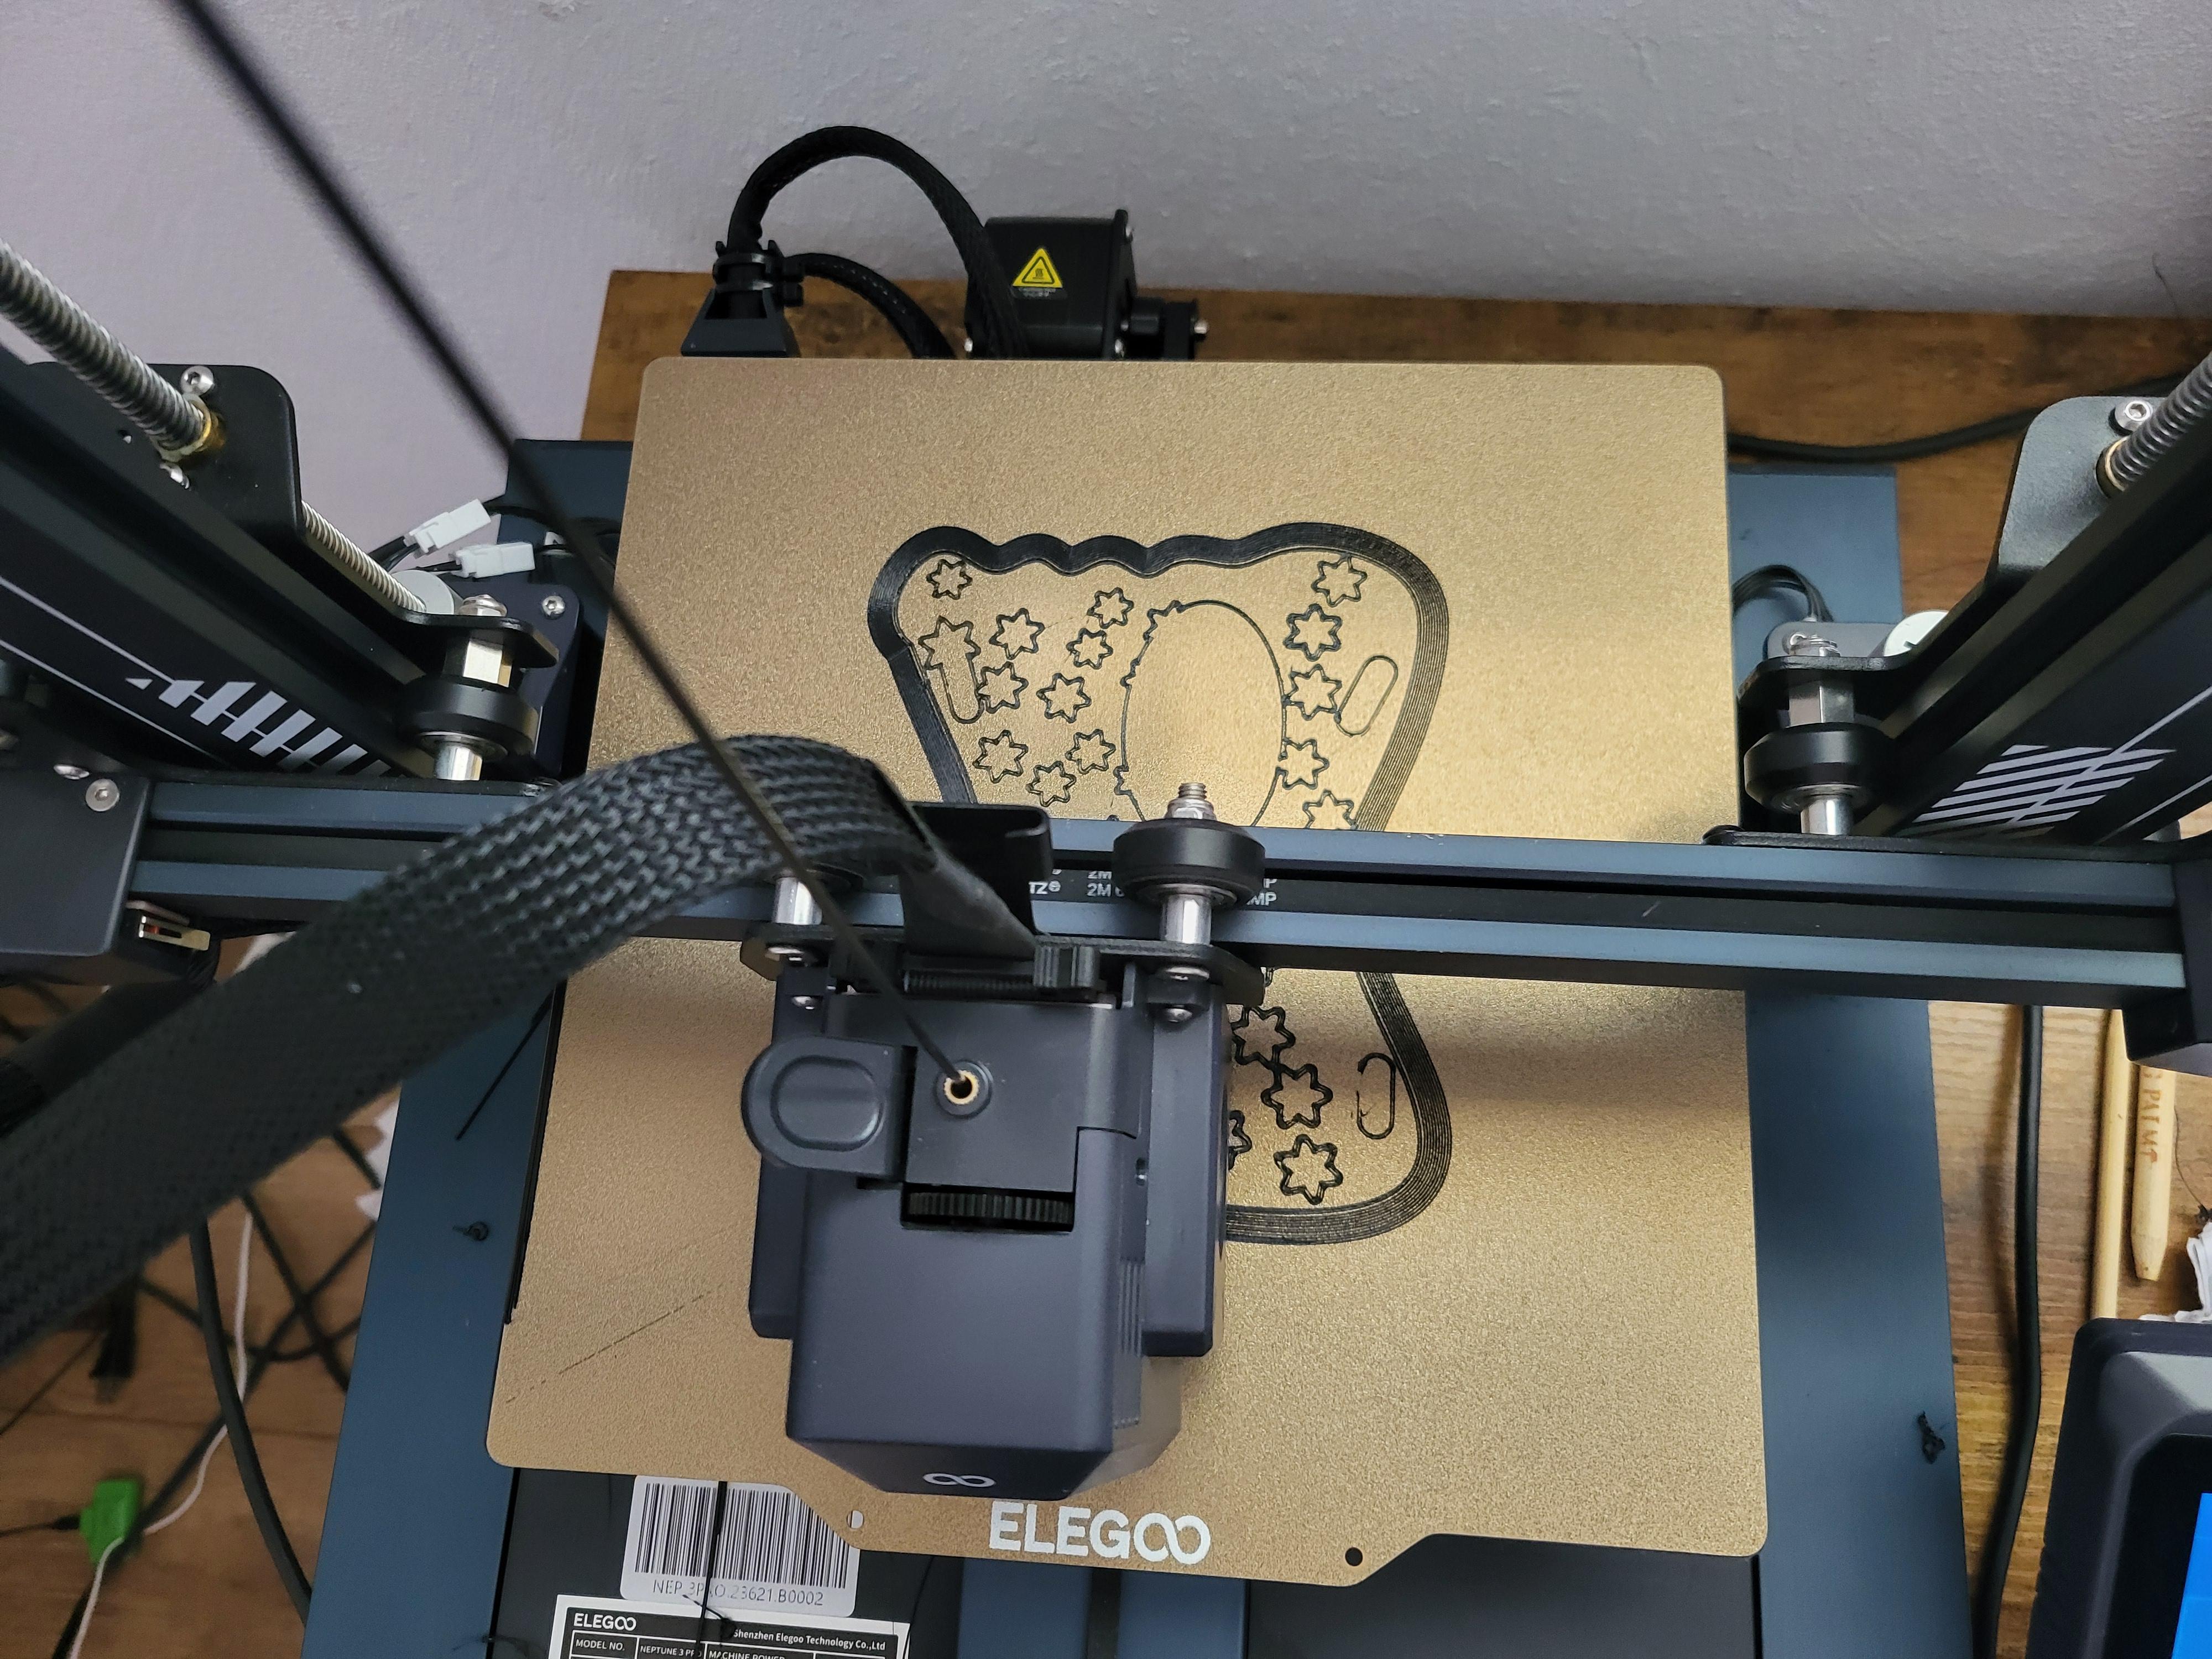
Print Job
.jpg)
.jpg)
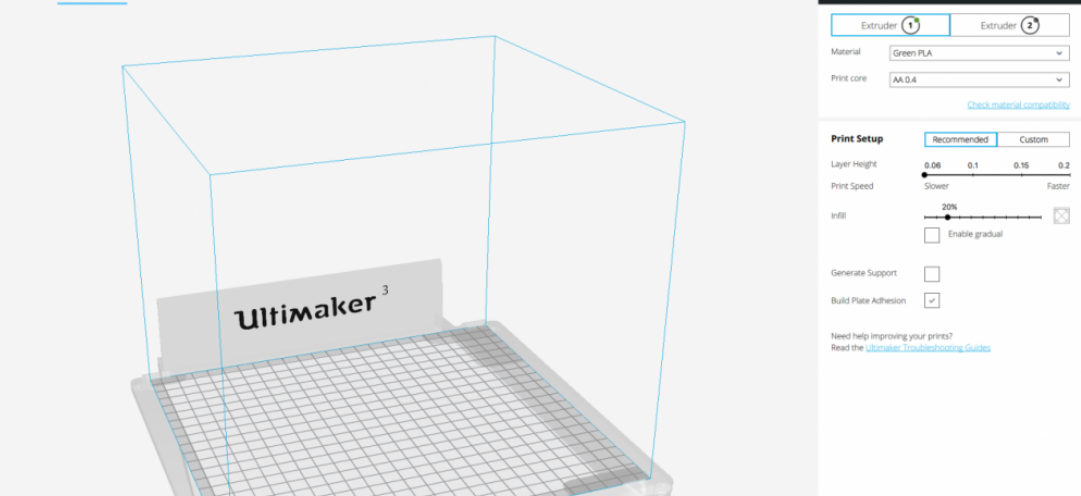
- Within Fusion, go to file, export, and choose to save to your computer as an .STL file (there are multiple file types to choose from if needed)
- Open the file in Cura (this is what I use to print on the Elegoo)
- Set the dimensions for the print job. In this specific picture, I chose the extra fast draft option. If you choose a normal paced draft it may take about 4 hours at the least. a 2mm thickness takes a while.
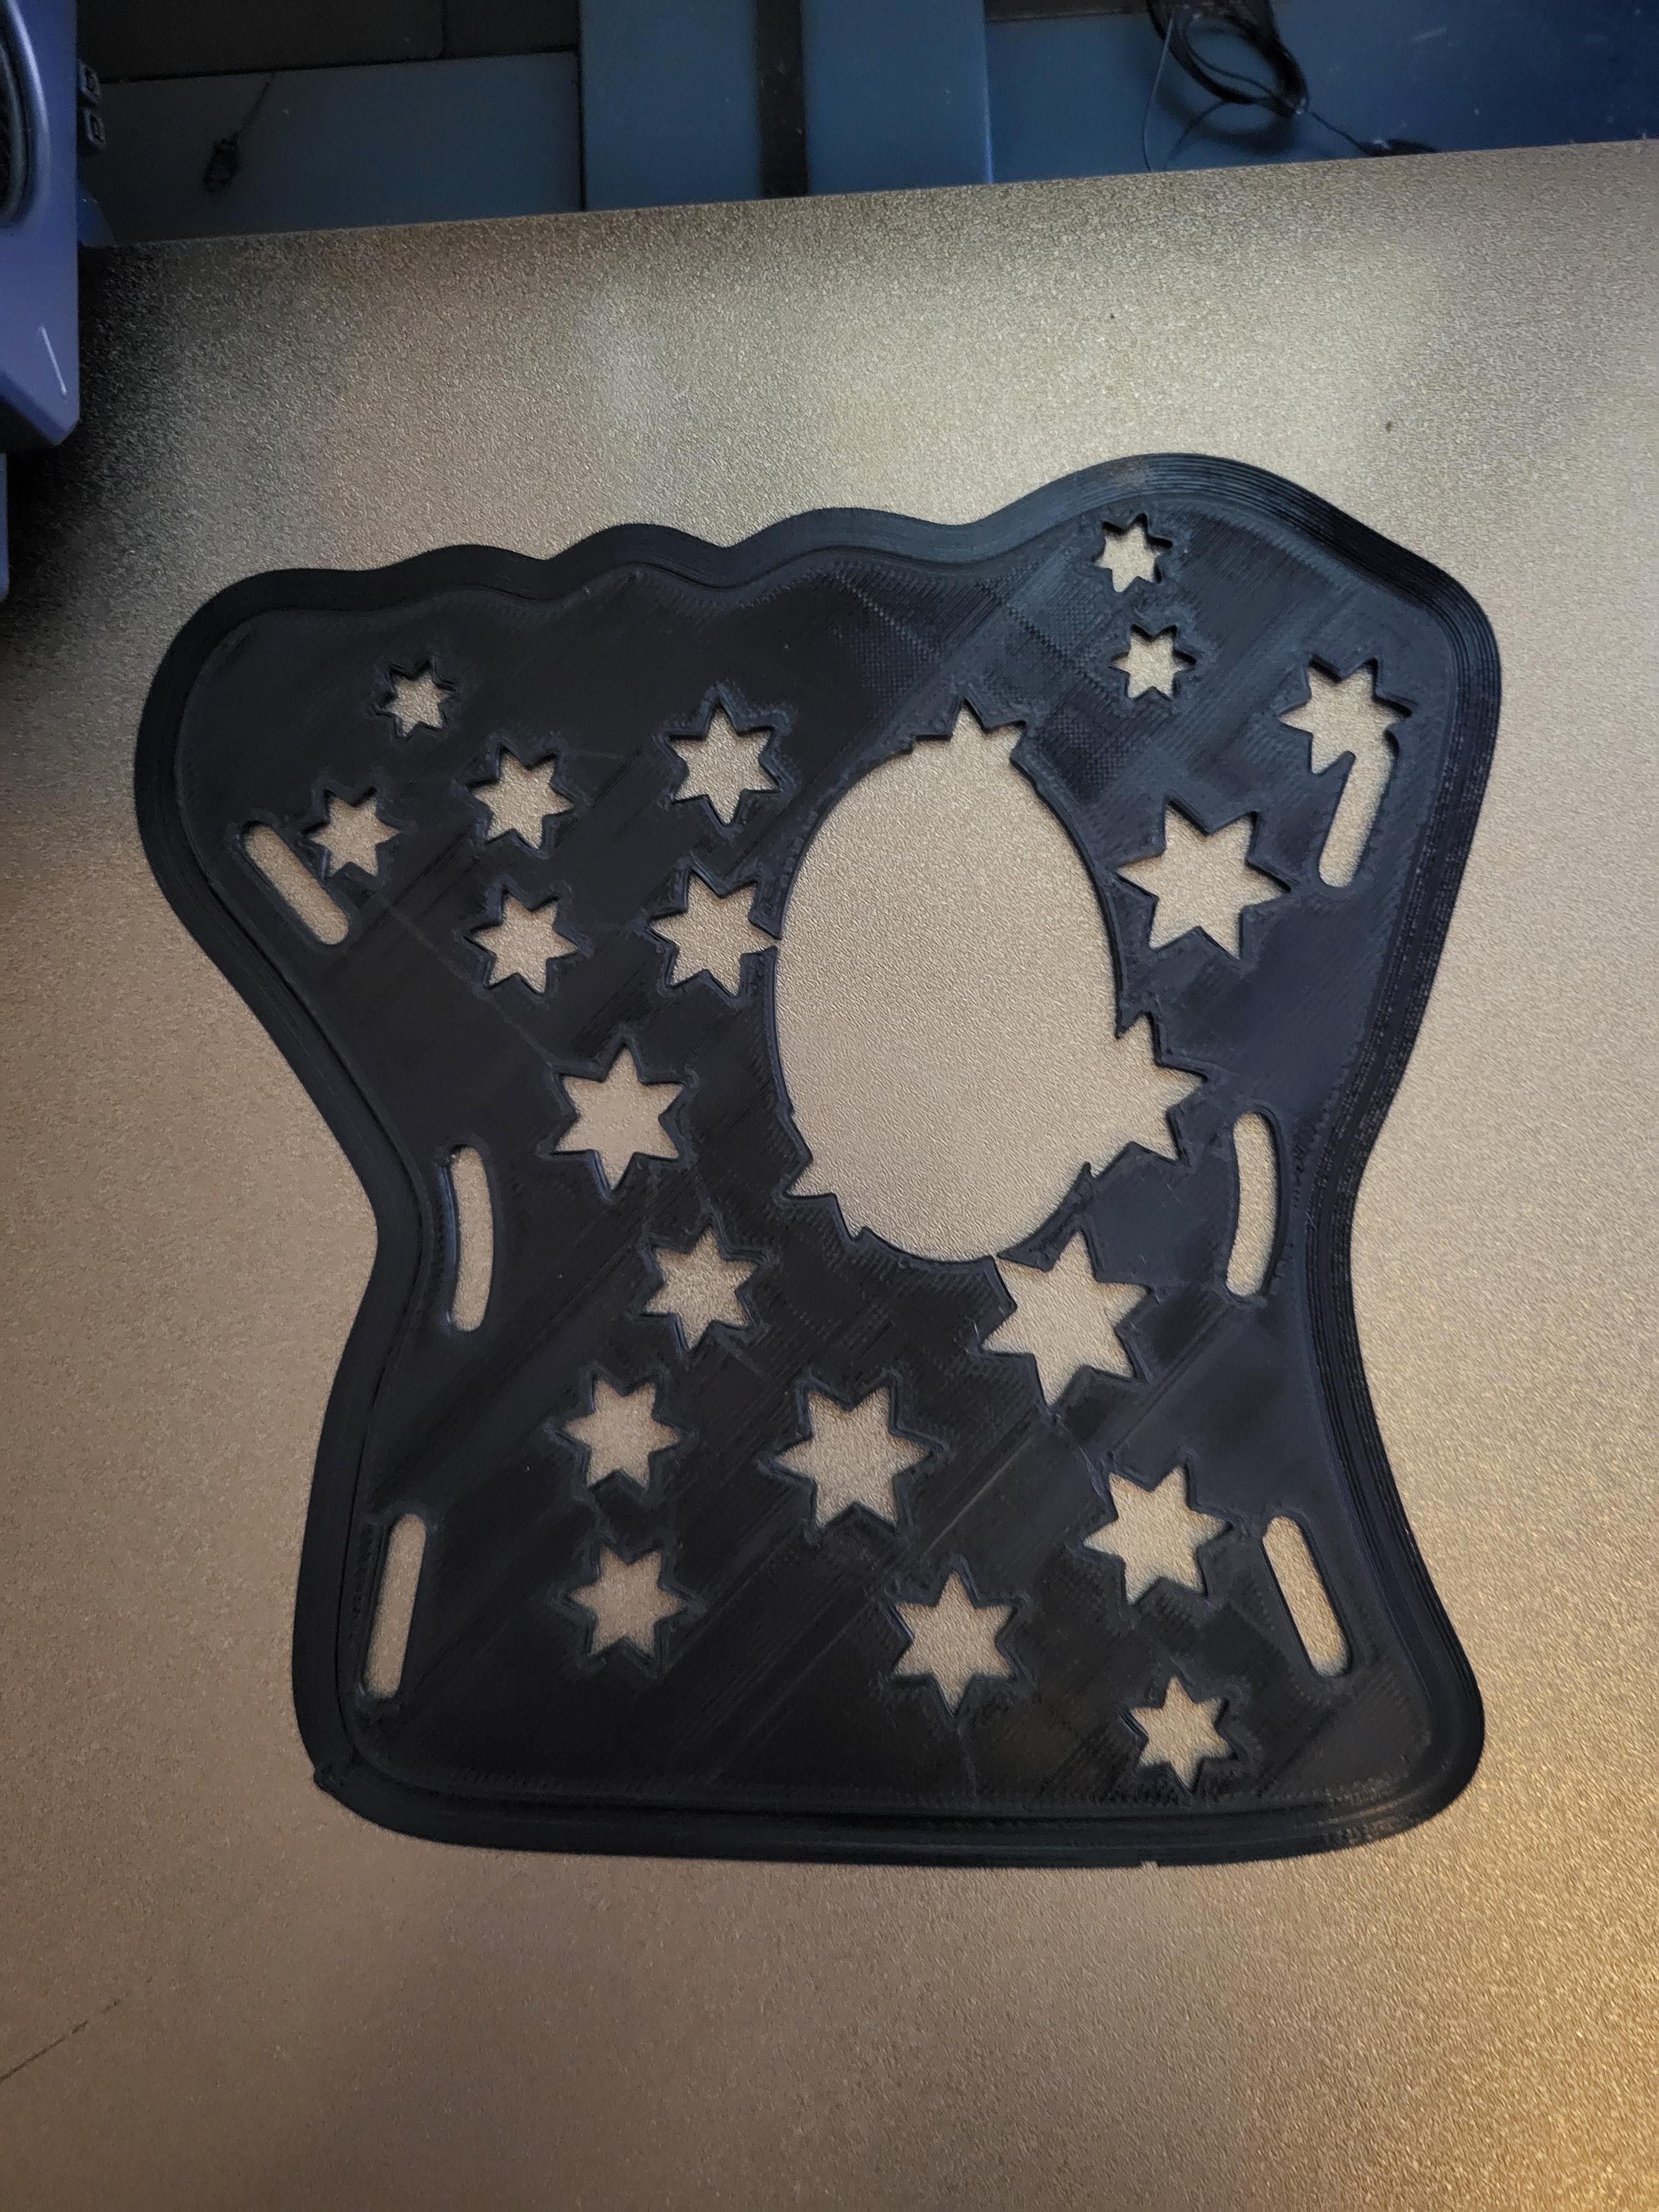
- The product will be printed flat
Mold
.jpg)
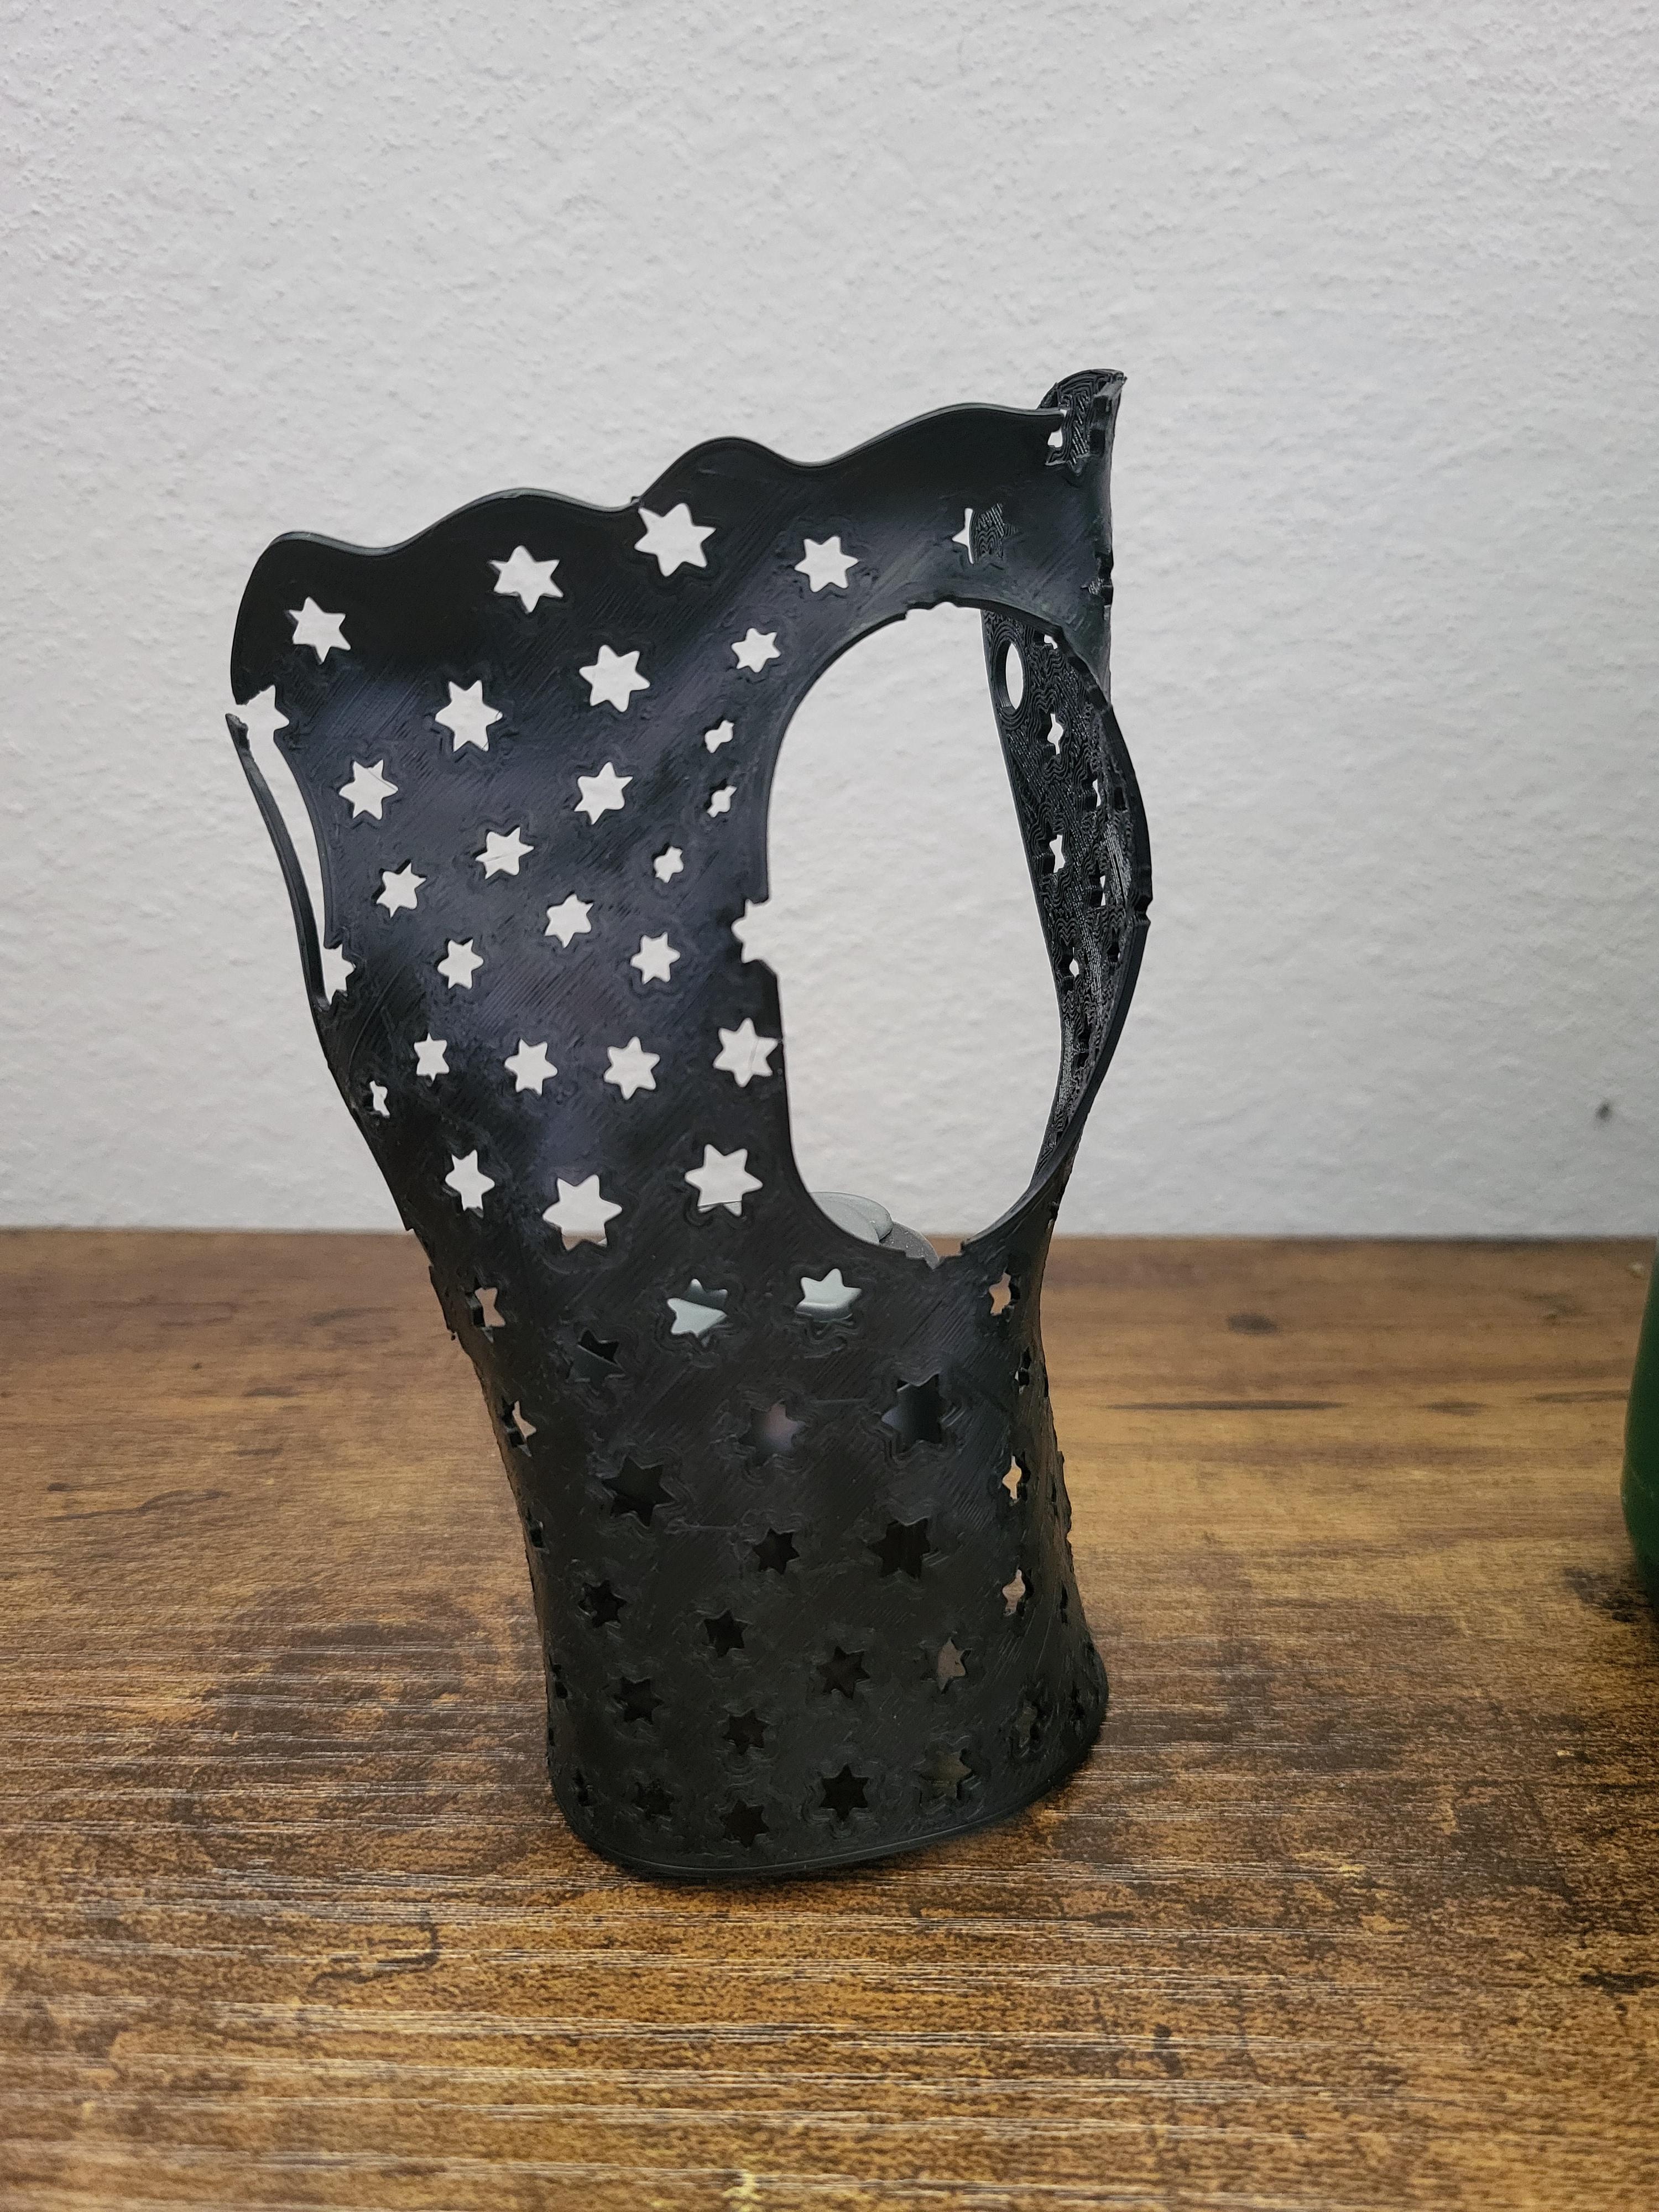
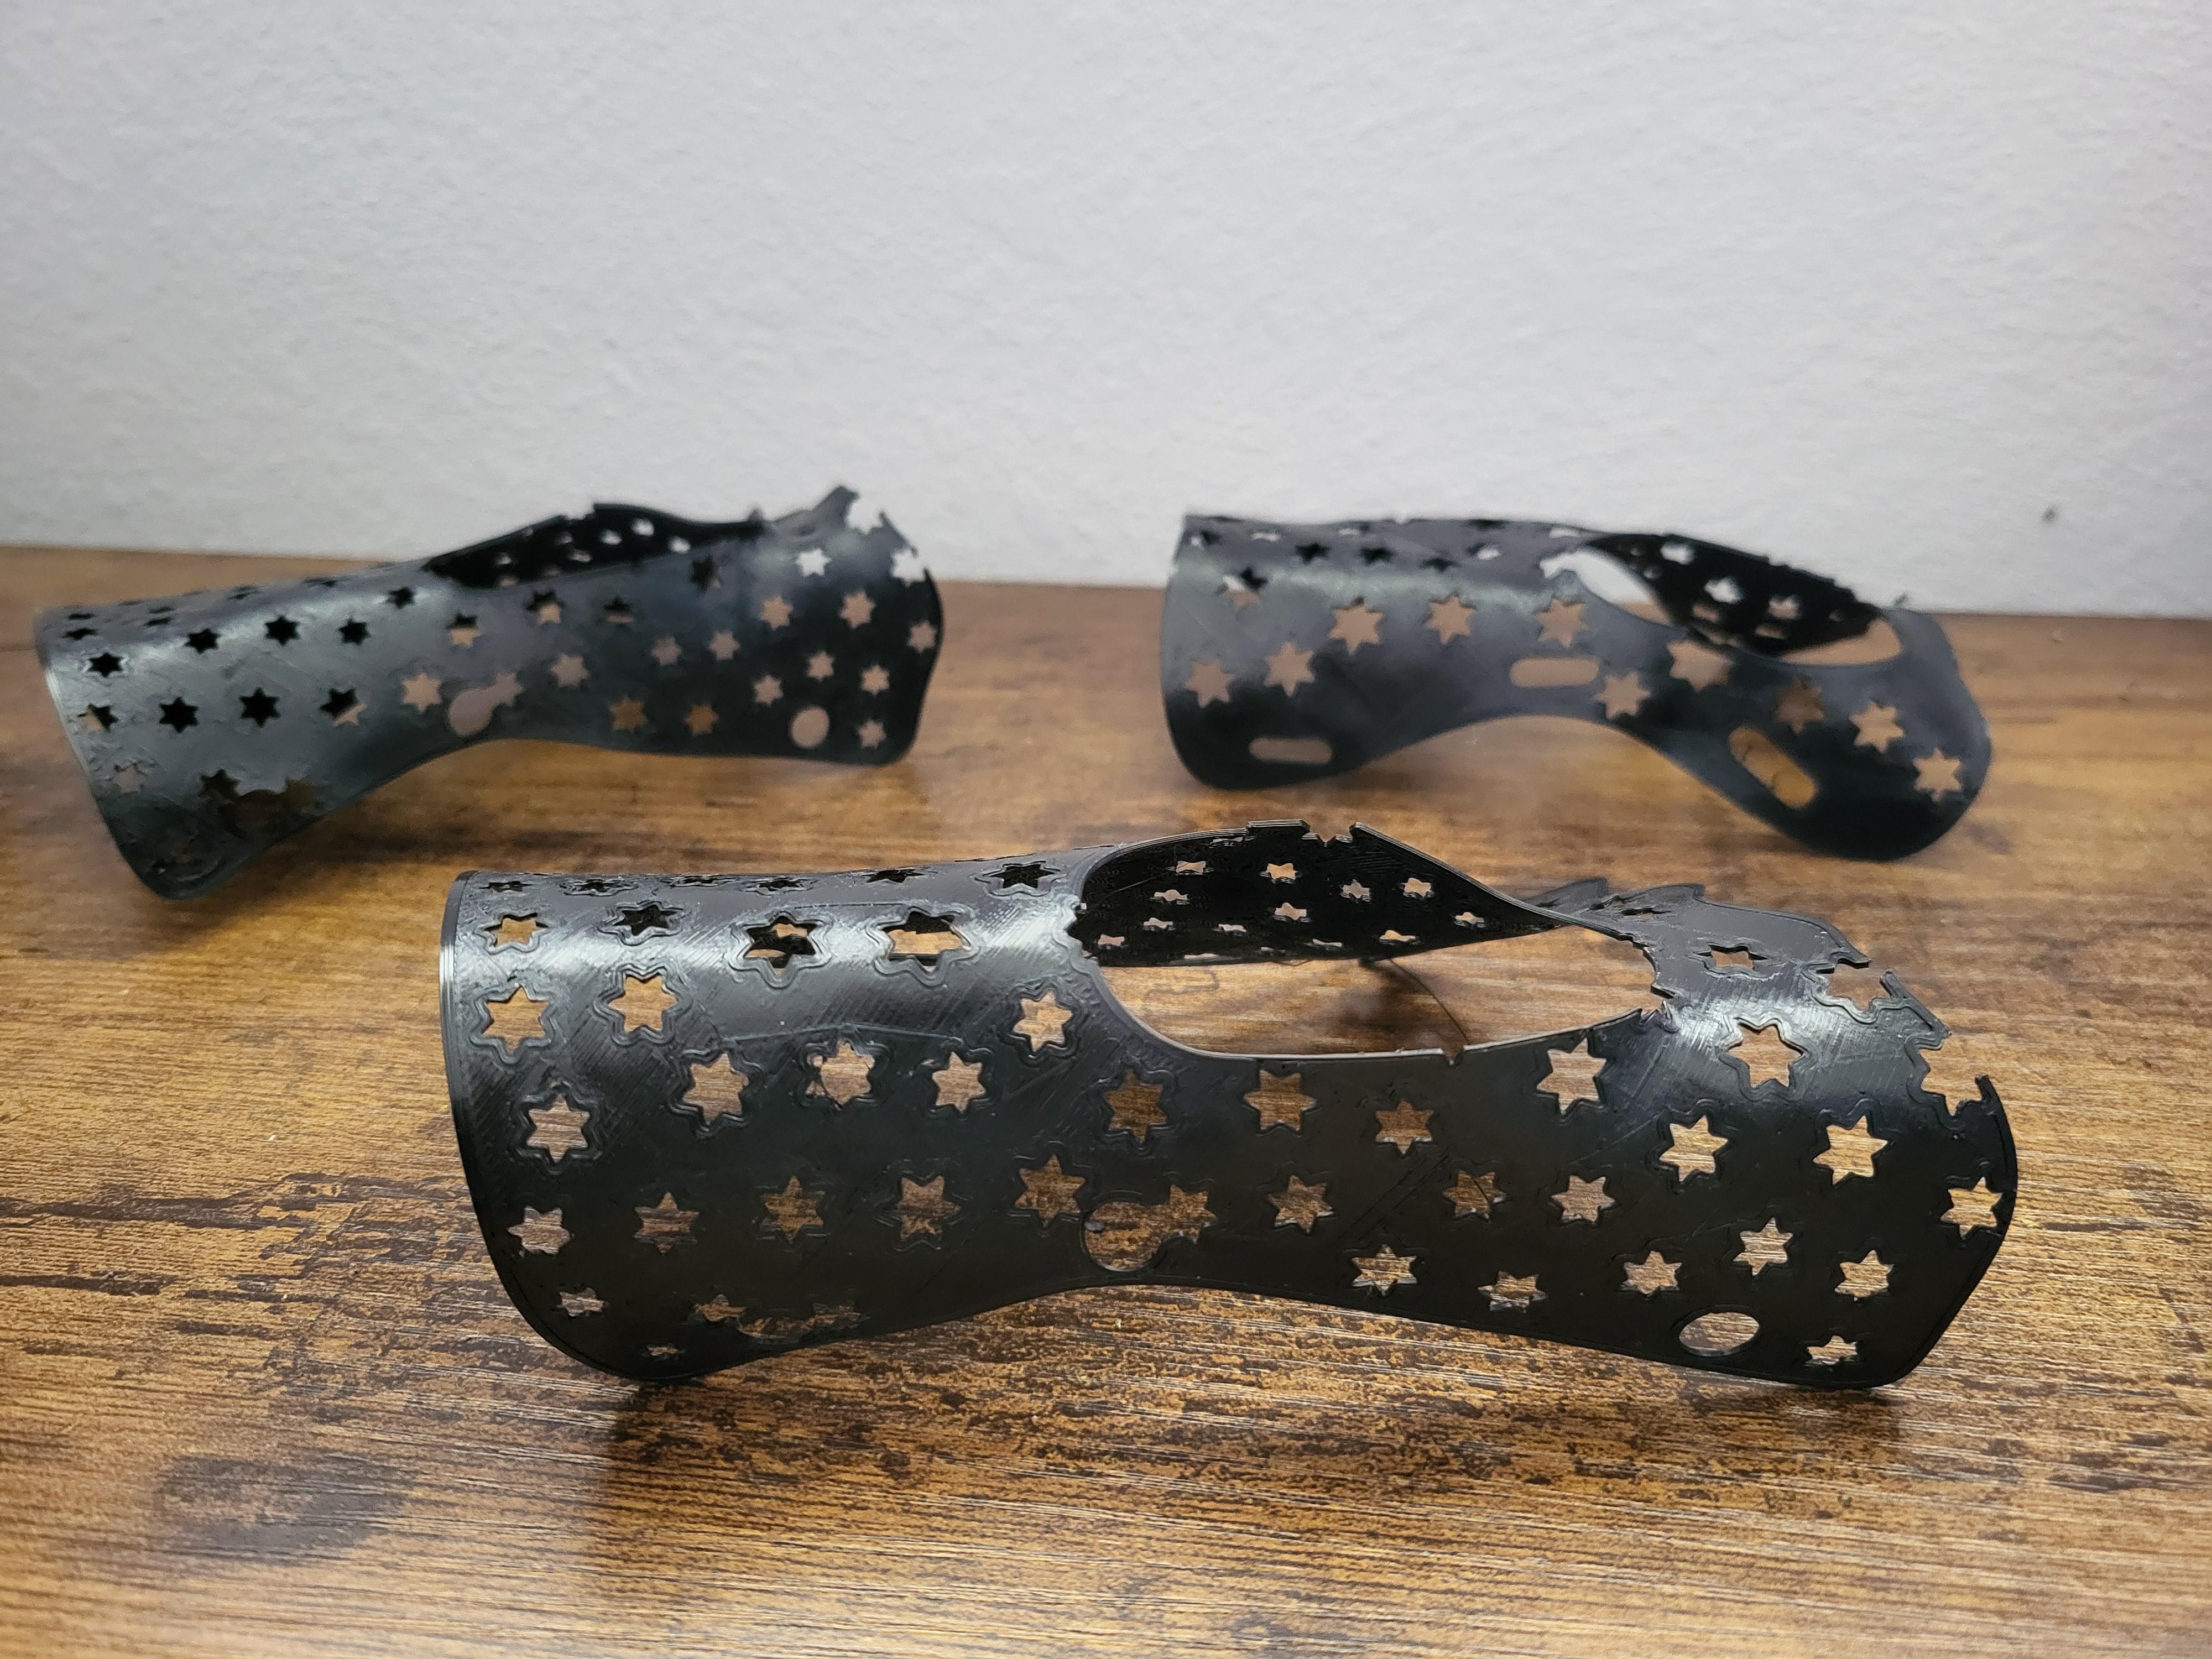
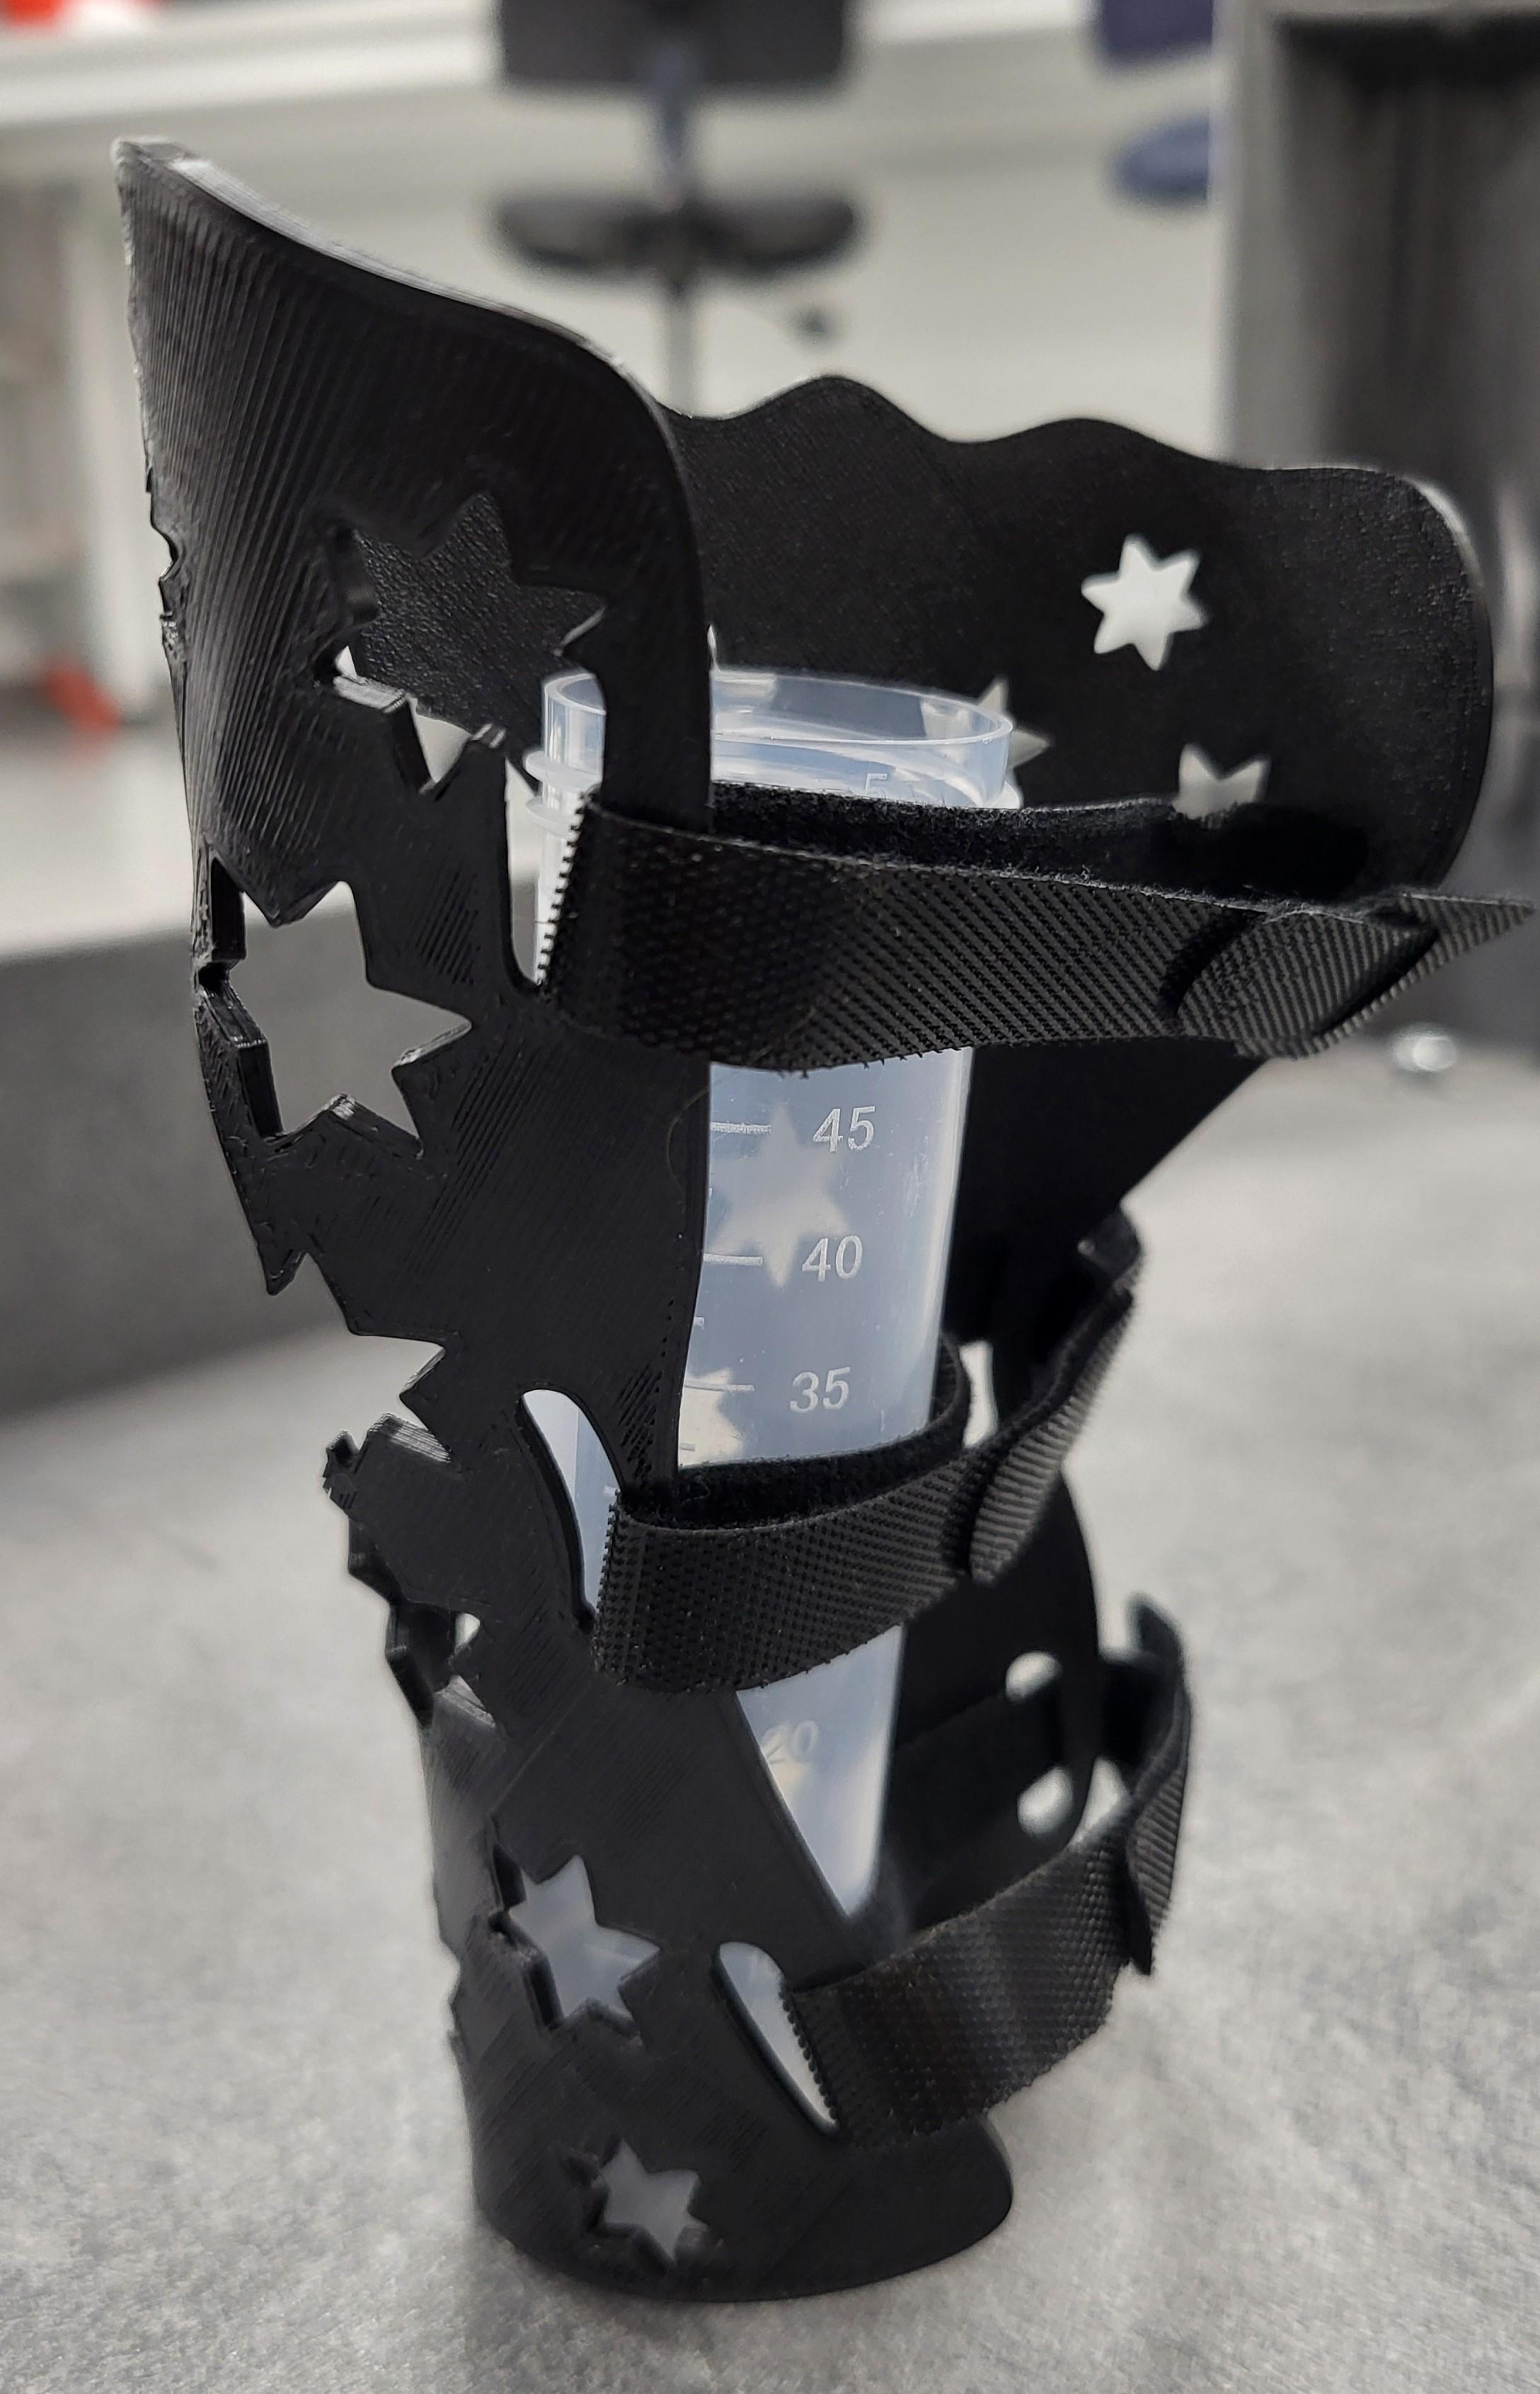
The molding process is a very quick process, and the molding needs to be done as fast as possible. This material hardens quickly by room temperature.
- Mold process 1: I molded this brace by removing it off the build plate immediately and forming it to my wrist. Once by myself and once with assistance. The form was better when I used assistance of someone forming it to one side of my arm, while I held the other.
- Mold Process 2: If you are unable to get to your finished product right away and it is cold and hardened, place the object in 100 degree Fahrenheit degree water until it becomes flexible. Then wear some protection like a sleeve or one layer of paper towel and mold it to your arm. This method can be dangerous if you are not careful.
- Mold Process 3: Use a heat gun to make the object flexible and quickly mold to the arm.
Final Product
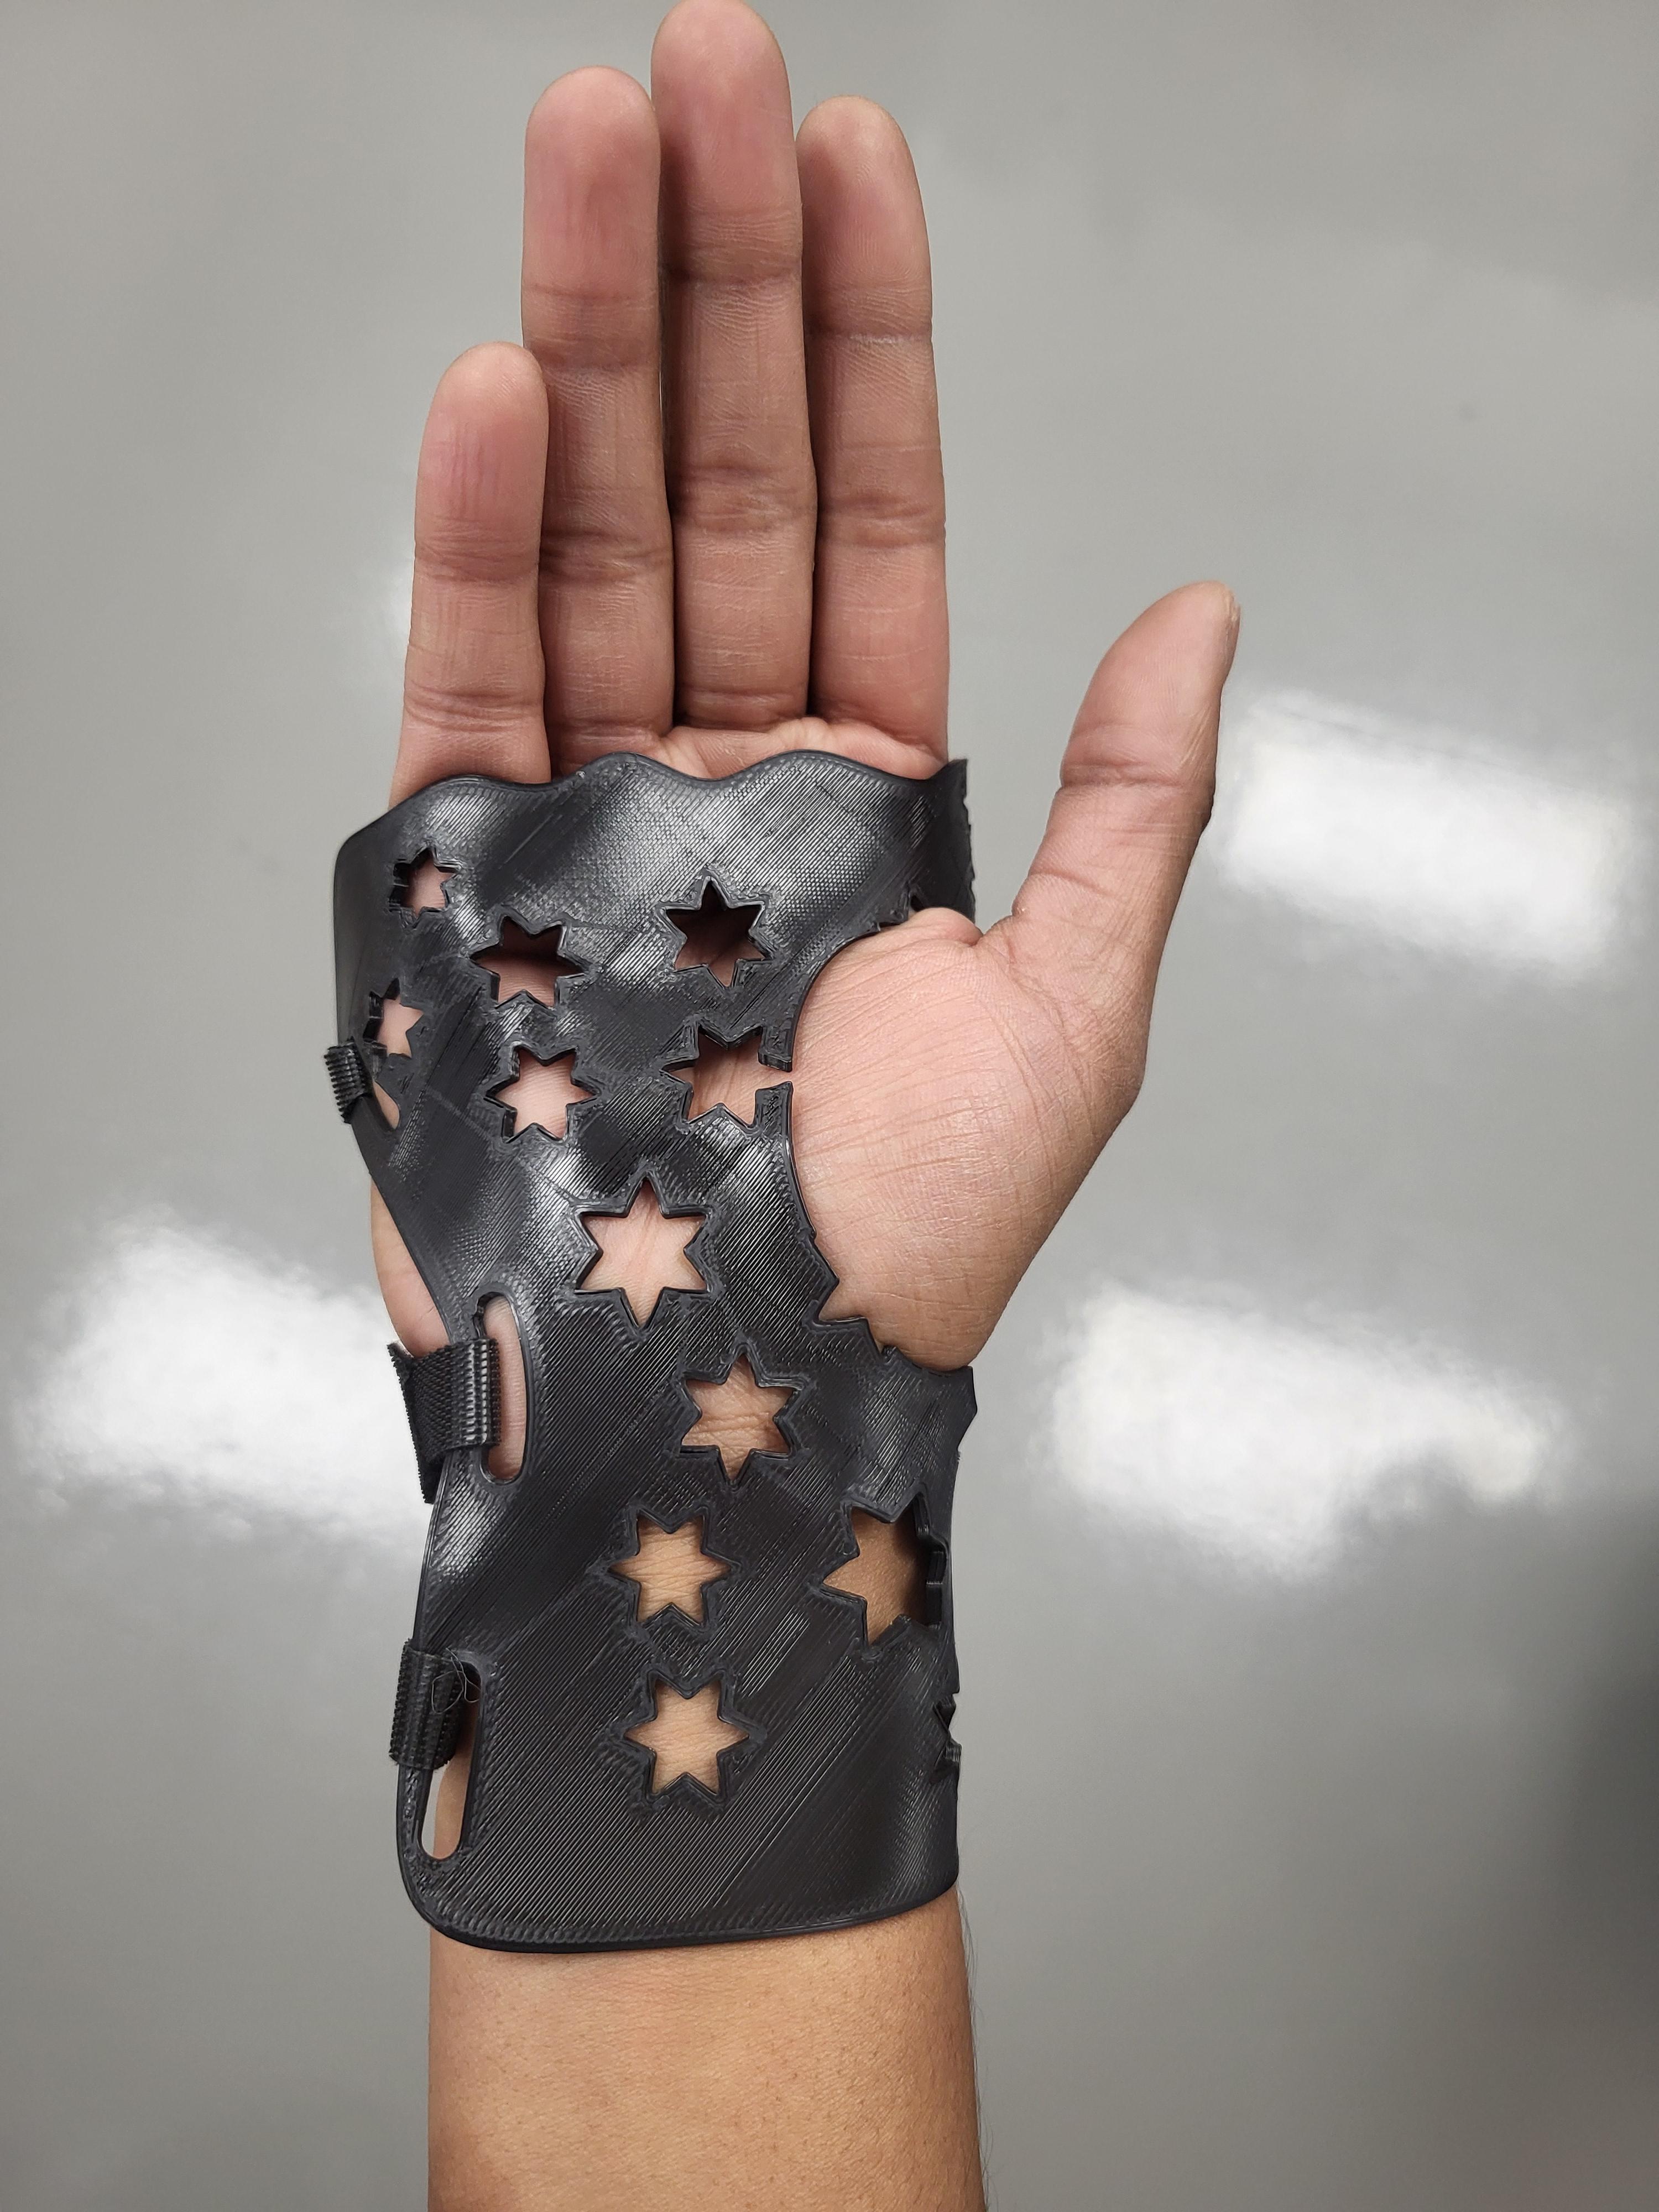

- Place the Velcro straps with in the slots created in the design.
This can be worn with mesh and padding underneath, and the padding should be worn when the cast is heat formed so it can mold to the correct thickness added by the padding.
If the brace does not fit correctly due to swelling, limb growth, etc... re-mold using the instructions above.