Adjustable Screw Money Clip
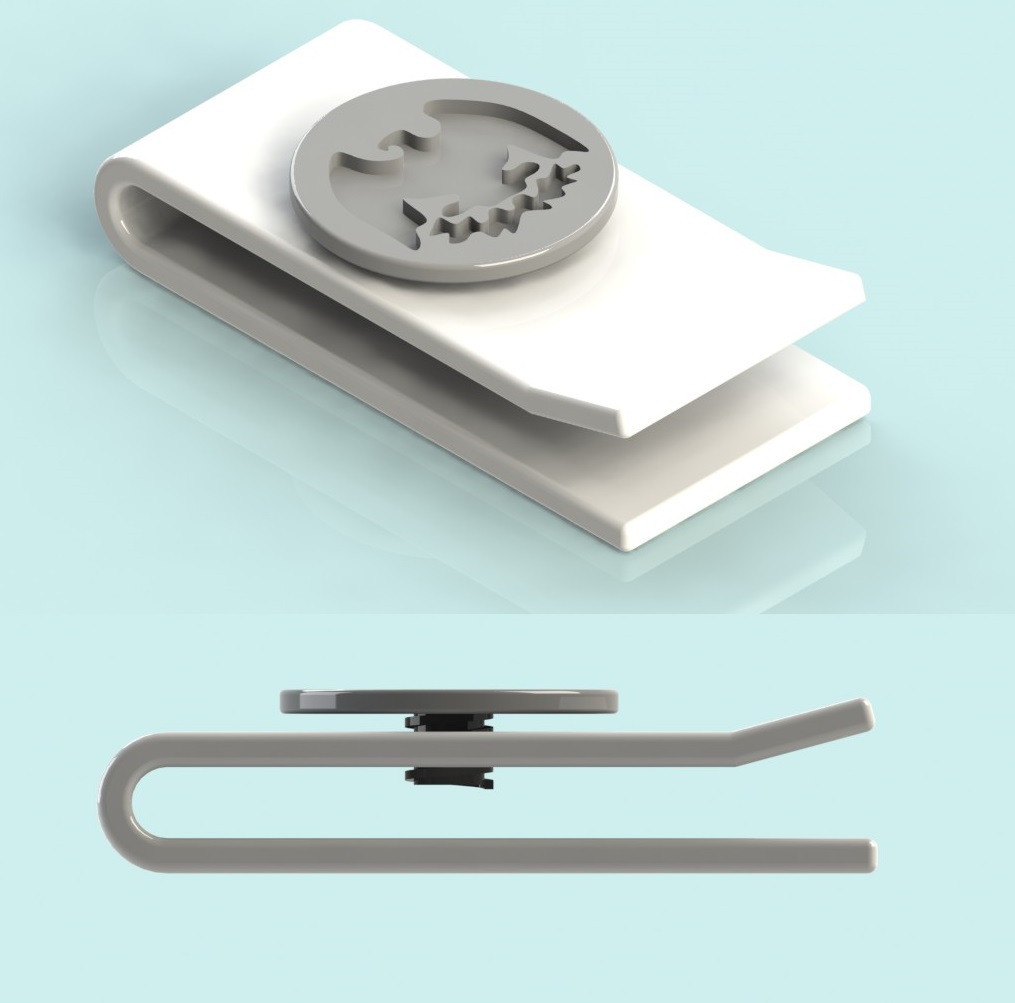
This money clip can be adjusted for how much cash you have by turning the quarter in the middle. This screw clamps your money and keeps it tightly in place. This was CADed in SolidWorks and the tutorial assumes that you have a basic knowledge of the program.
Extruding the Clip
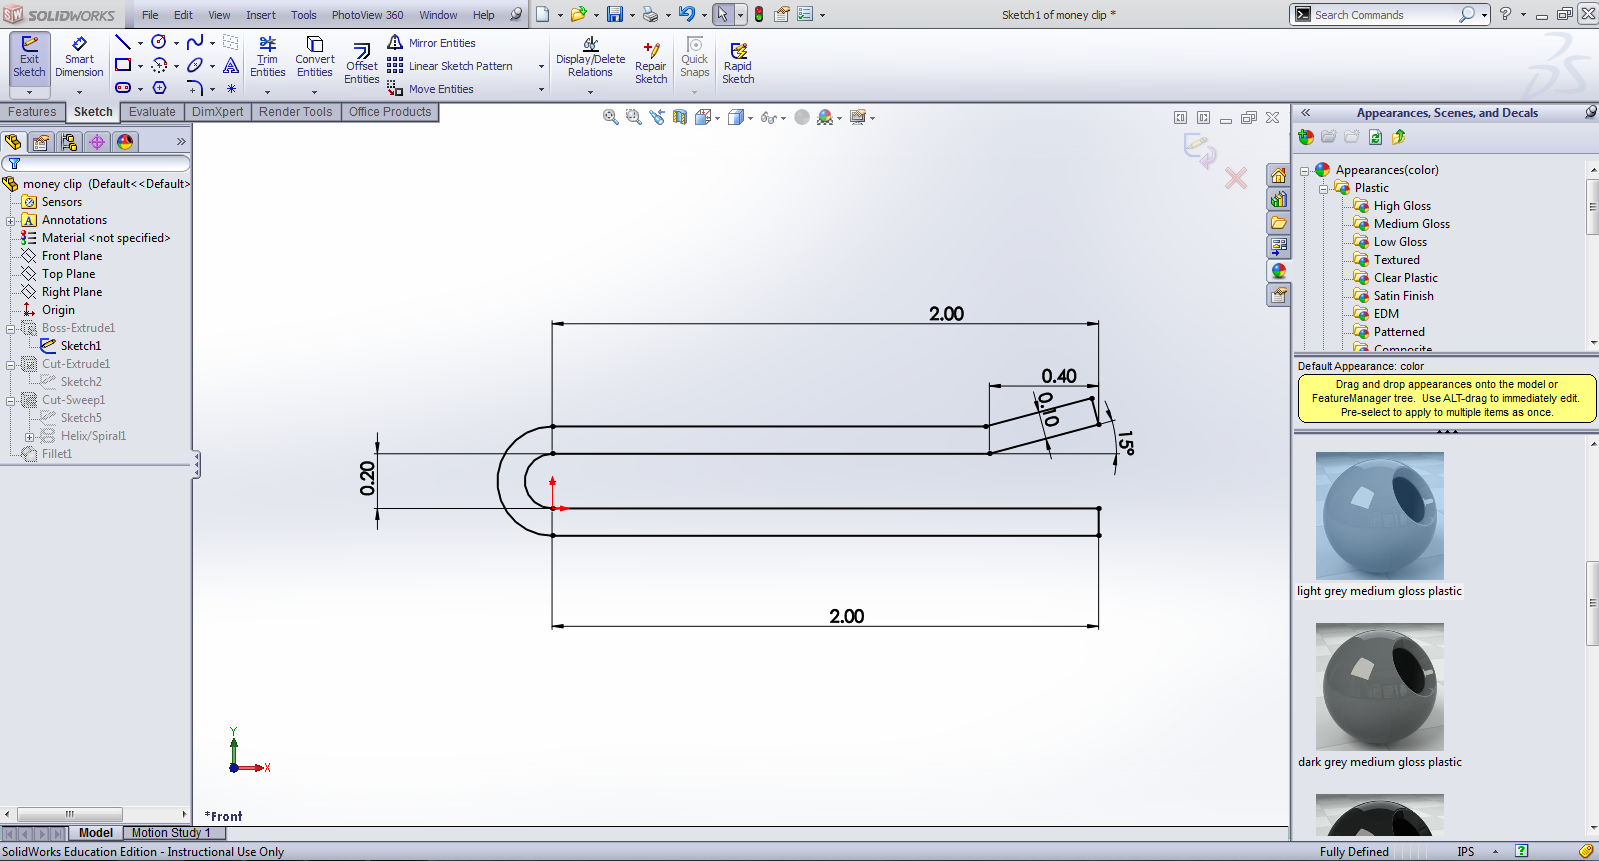
I first dimensioned the side of the money clip and used the offset features button to make it into a full body. I then extruded the piece so that it was 3D.
Creating the Hole for the Screw
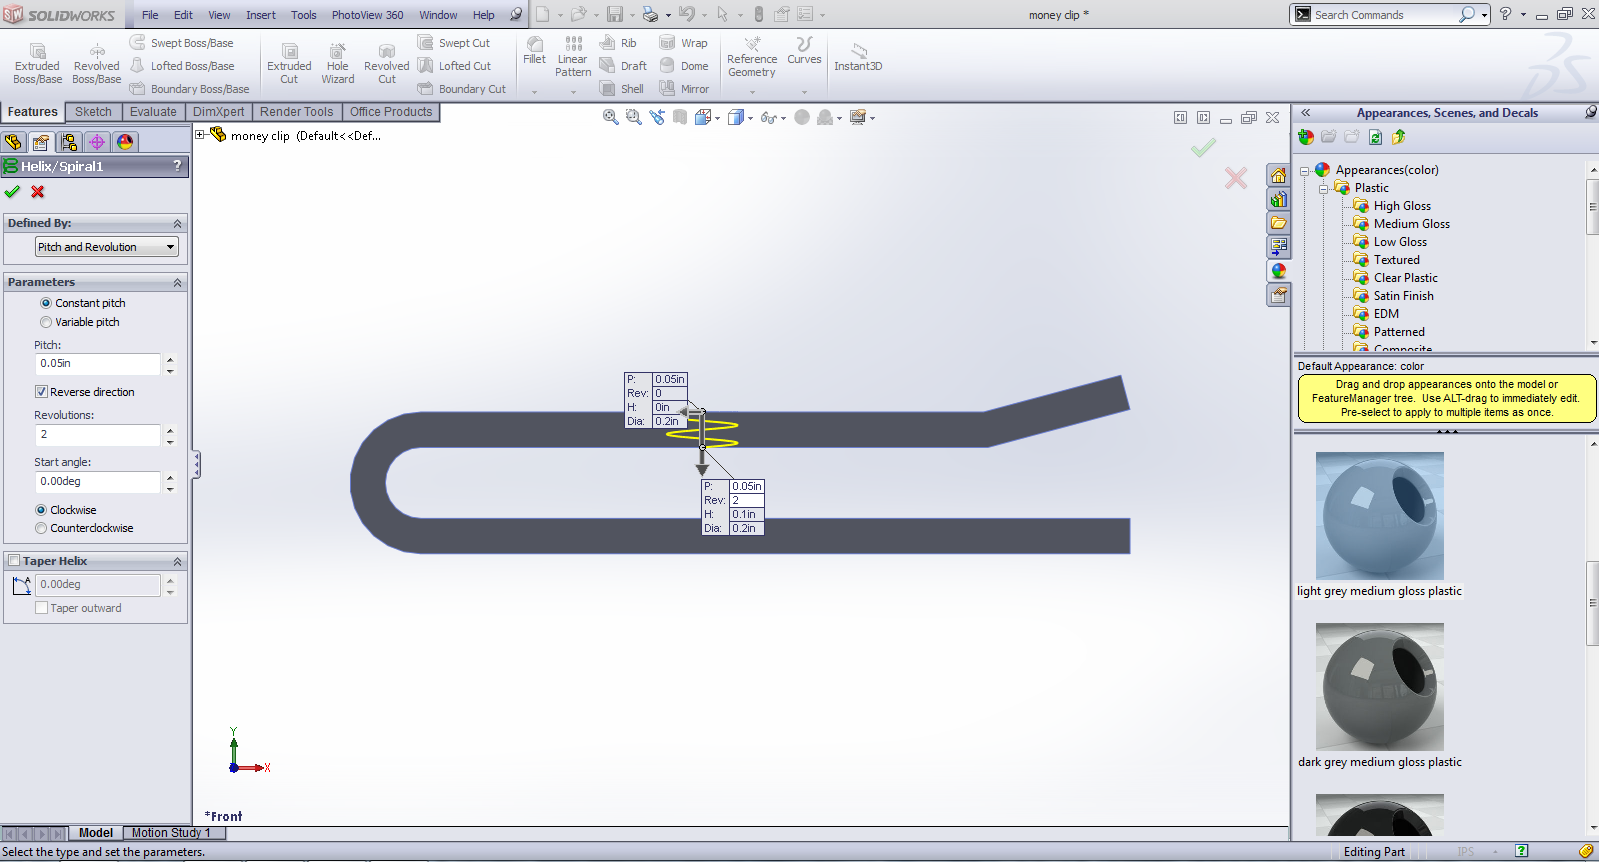
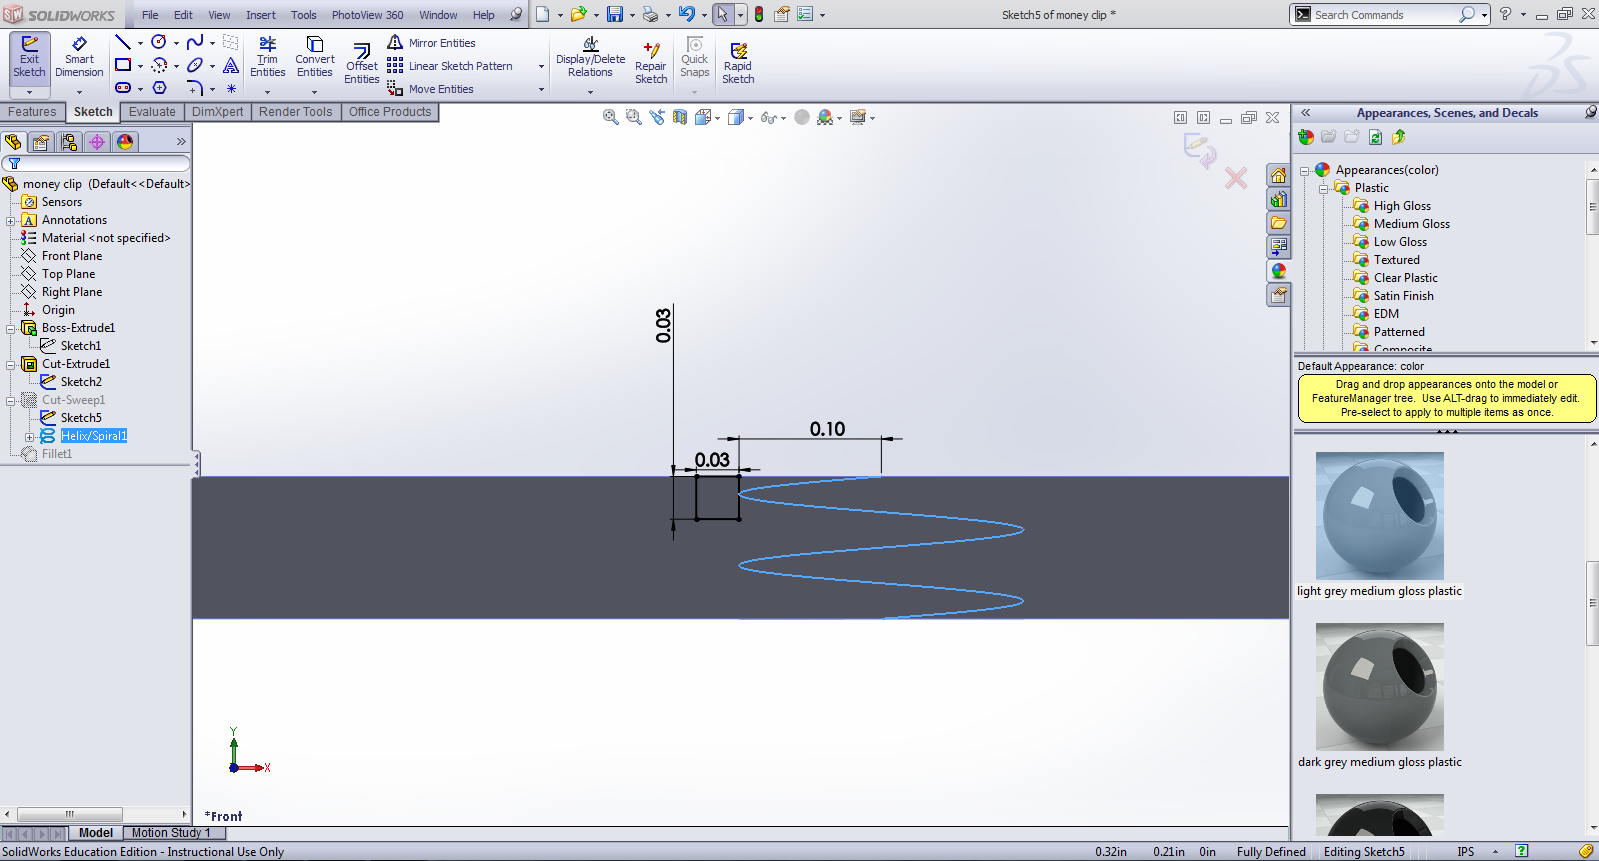
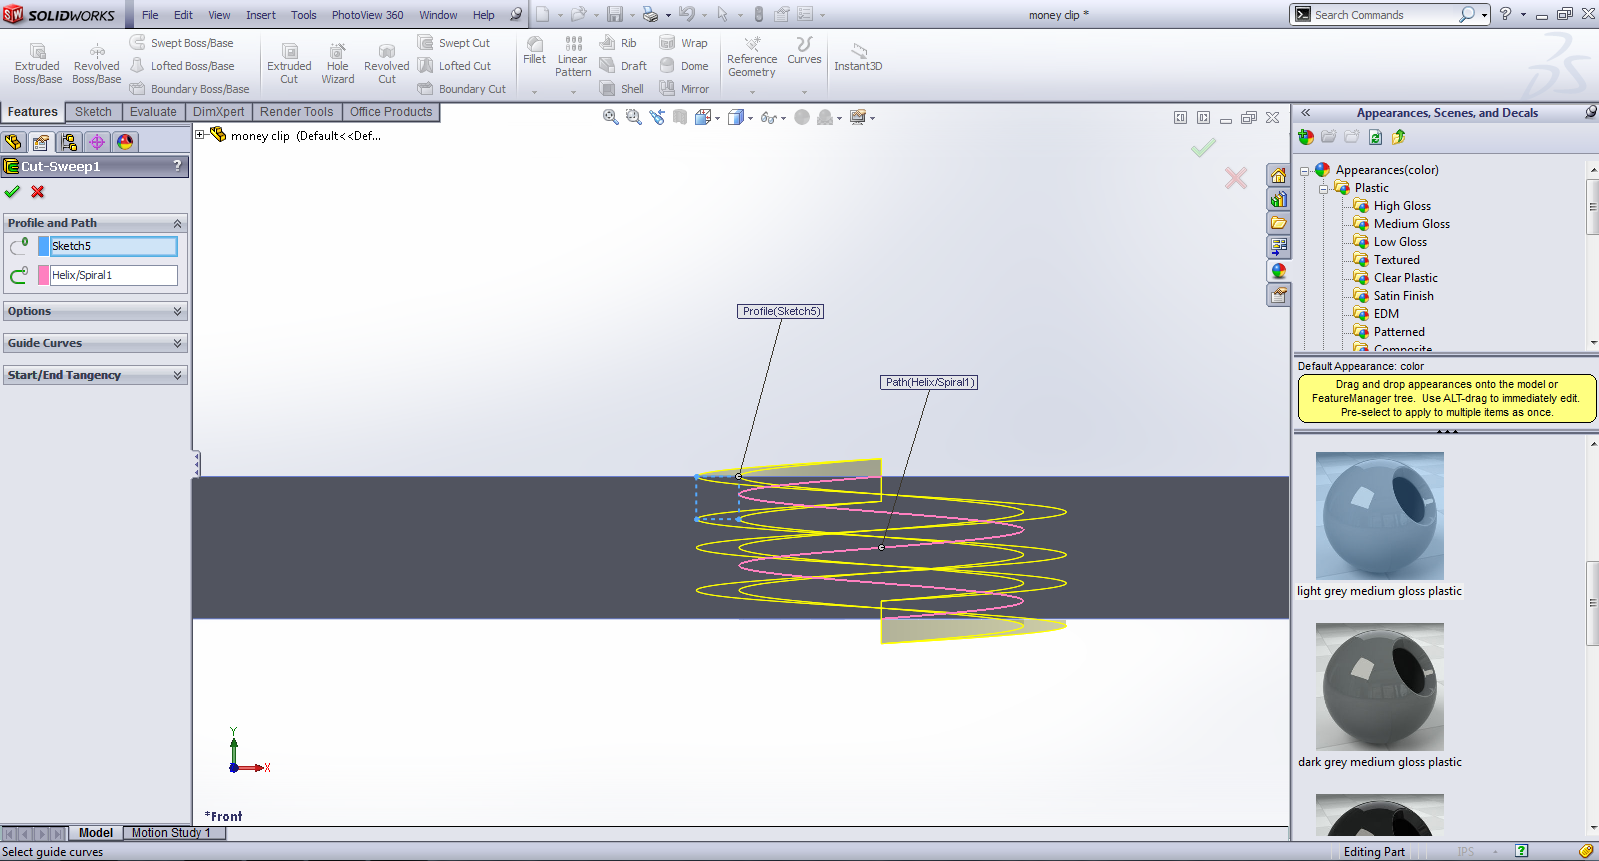
After cutting a hole in the top of the piece, I created a spiral down this hole. I then created a sketch on the side view of this spiral of a rectangle. I used the swept cut feature to cut the sketch I had just made into the hole, guided by the lines of the spiral.
Creating the Screw
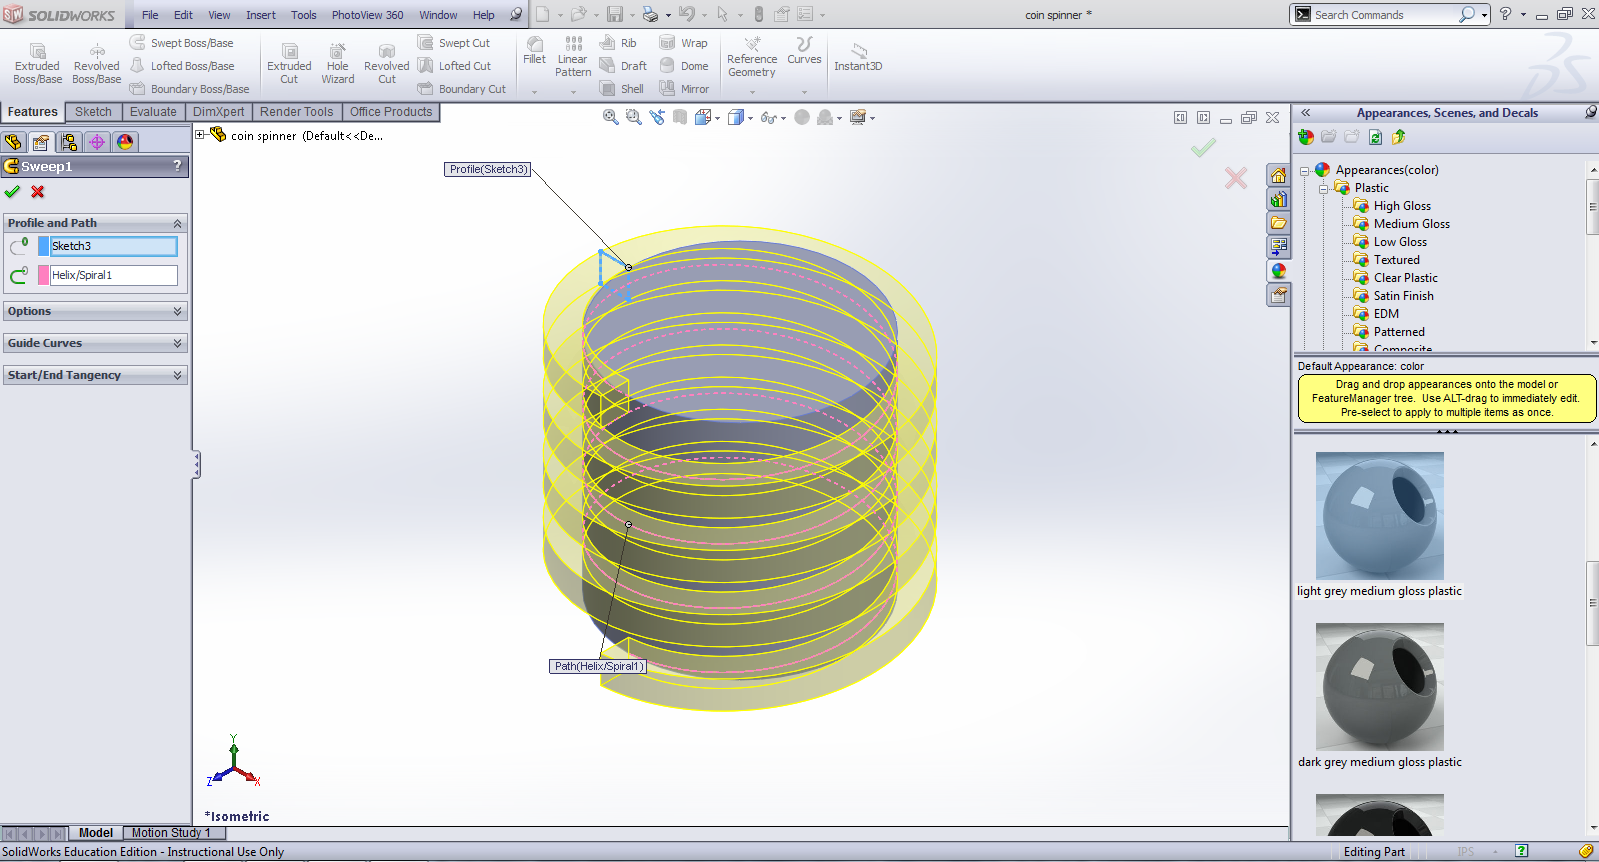
Next, I wanted to create a "screw" with an pattern that would allow it to fit into the hole I had just created. After extruding a circle, I then created a spiral down it. I created a sketch of a rectangle on the side view of the spiral (this rectangle was a bit smaller than the one that I had cut, to allow these parts to fit together). I then used the swept boss feature to sweep the sketch I had just made around the spiral.
Creating the Coin
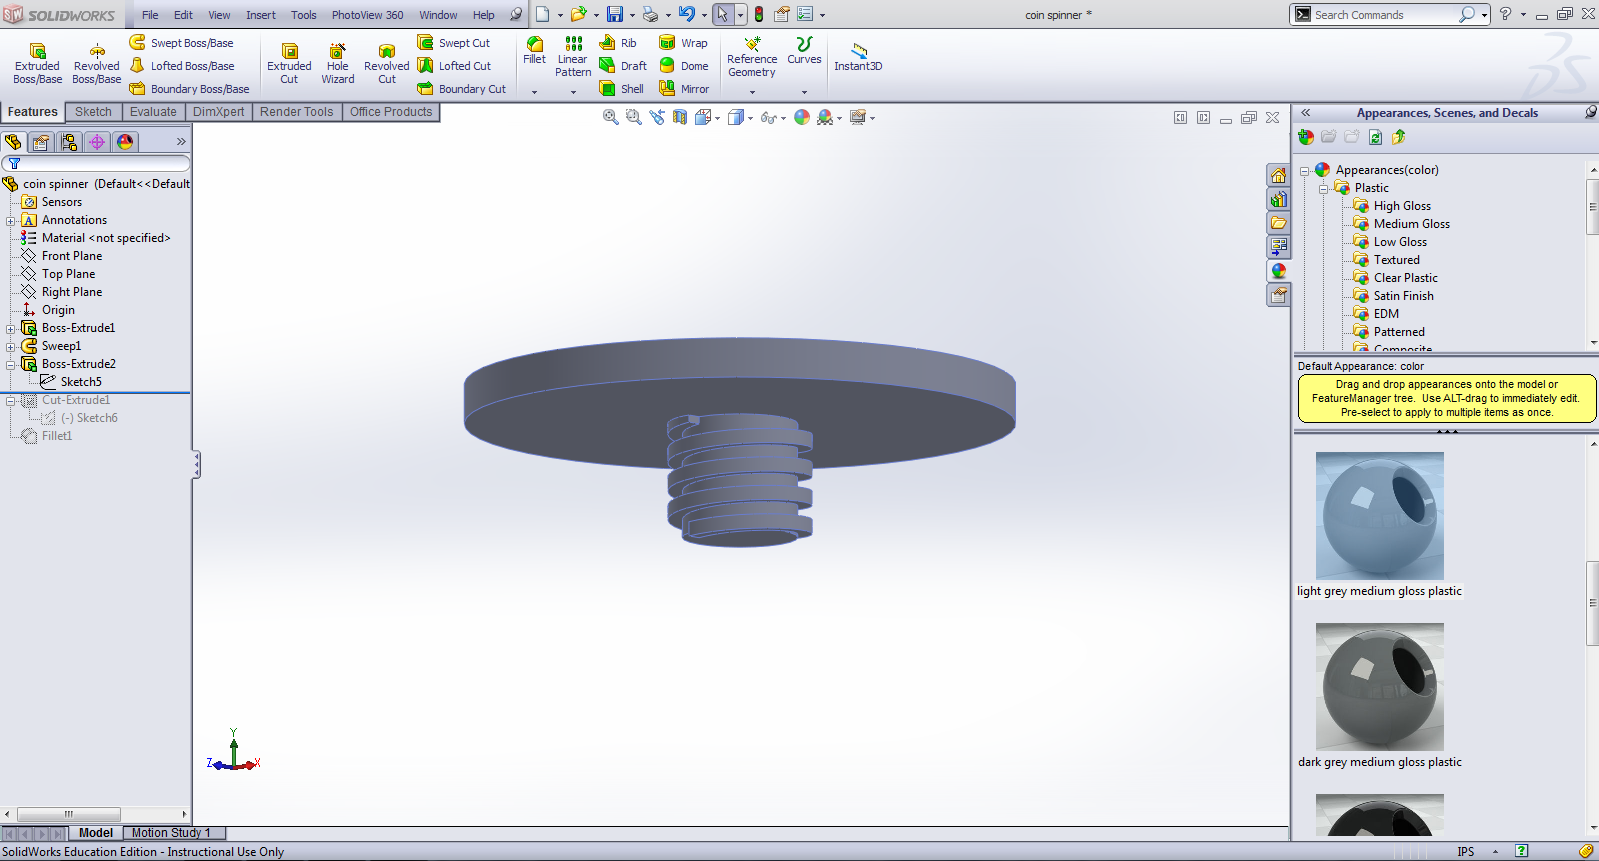
I then extruded a piece the size of a quarter on top of the screw. I got the dimensions from http://www.usmint.gov/faqs/circulating_coins/?action=faq_circulating_coin.
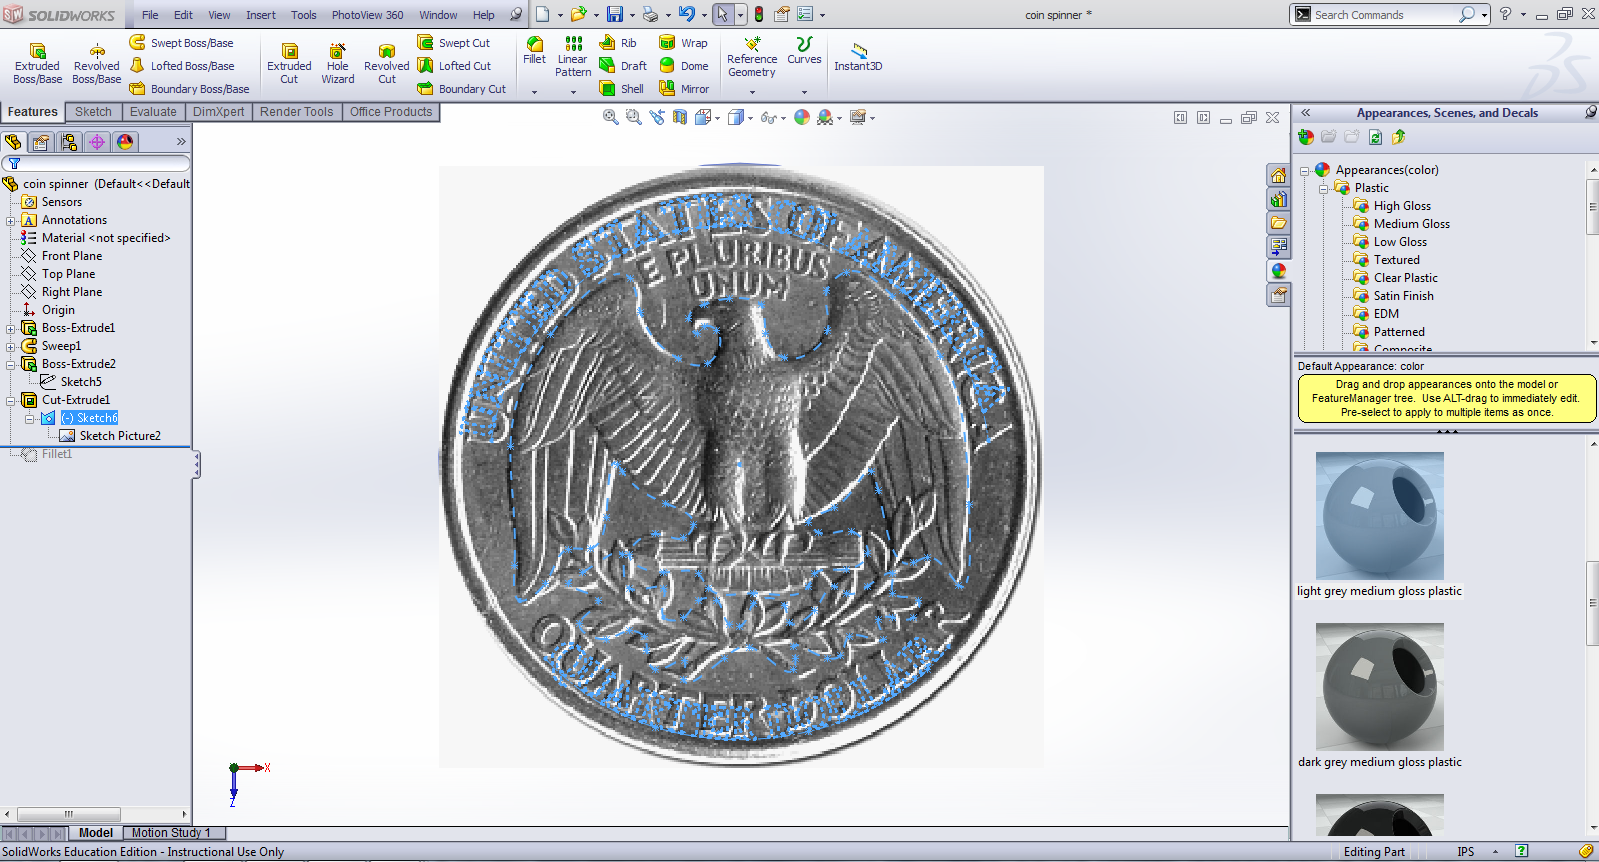
I t took an image offline of a coin and imported it into SolidWorks. I then traced it using splines and inserted text using the text tool. I extrude cut the image into the coin. For some reason or another, it would not let me extrude cut the text (because of open contours, although it usually doesn't mind them with text).
I t took an image offline of a coin and imported it into SolidWorks. I then traced it using splines and inserted text using the text tool. I extrude cut the image into the coin. For some reason or another, it would not let me extrude cut the text (because of open contours, although it usually doesn't mind them with text).
Creating the Assembly
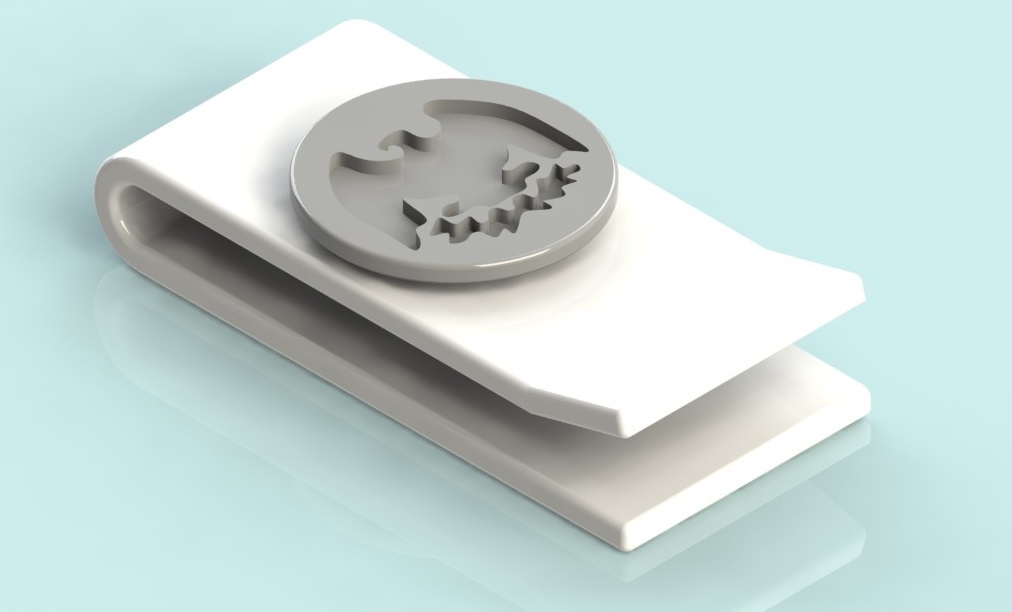
I then created an assembly of the two parts. I added some materials and colors and took a few beautiful renders. And that's it!