Adding an Intro/Outro to an Audio Clip in DaVinci Resolve 18
by SlightlySquiffy in Craft > Digital Graphics
340 Views, 0 Favorites, 0 Comments
Adding an Intro/Outro to an Audio Clip in DaVinci Resolve 18
![Screenshot 2023-10-26 at 1.03.53 PM.png](/proxy/?url=https://content.instructables.com/F7M/98WA/LO772ODJ/F7M98WALO772ODJ.png&filename=Screenshot 2023-10-26 at 1.03.53 PM.png)
Here's a basic Davinci Resolve 18 Tutorial for putting together 3 siple audio clips. Enjoy!
Supplies
DaVinci Resolve 18
Intro Audio File
Main Audio File
Outro Audio File
Make a New Project
![Screenshot 2023-10-26 at 12.28.01 PM.png](/proxy/?url=https://content.instructables.com/FS5/BFCP/LO772LVU/FS5BFCPLO772LVU.png&filename=Screenshot 2023-10-26 at 12.28.01 PM.png)
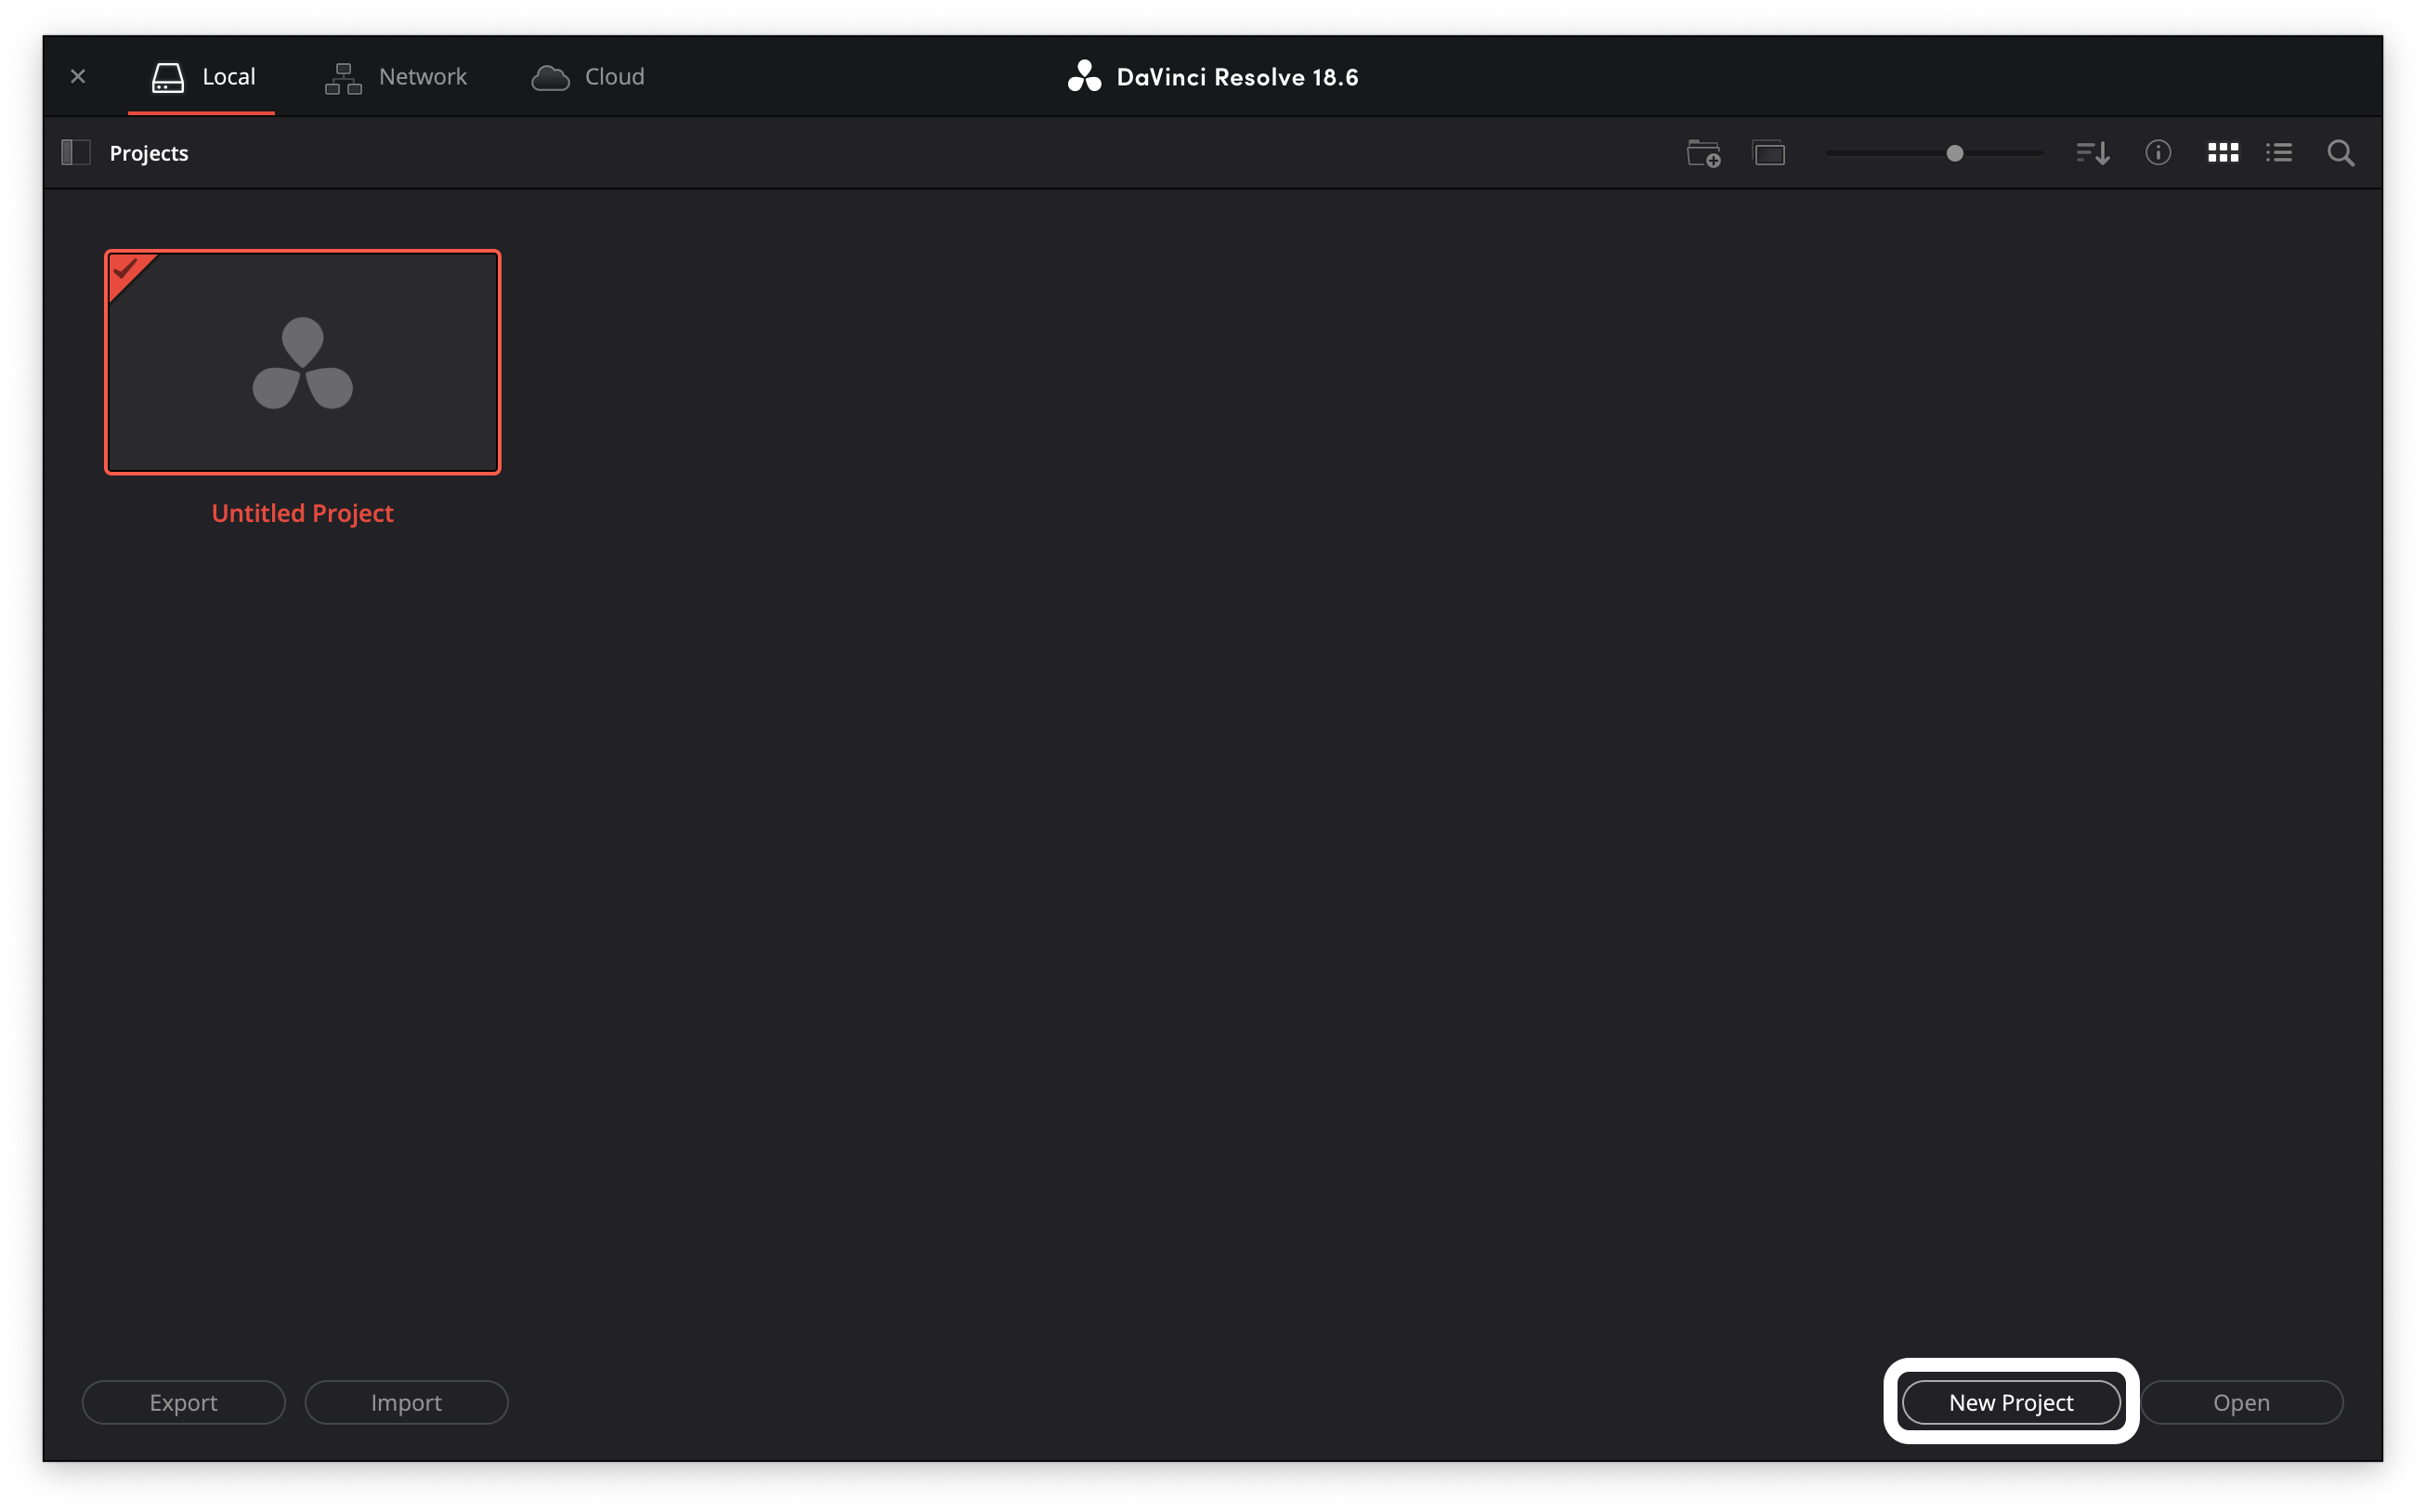
On the start screen of resolve, create a new project and name it.
Import Audio Files
![Screenshot 2023-10-26 at 12.32.12 PM.png](/proxy/?url=https://content.instructables.com/FW4/SIXO/LO772MPJ/FW4SIXOLO772MPJ.png&filename=Screenshot 2023-10-26 at 12.32.12 PM.png)
![Screenshot 2023-10-26 at 12.38.41 PM.png](/proxy/?url=https://content.instructables.com/F30/1FLV/LO772MPK/F301FLVLO772MPK.png&filename=Screenshot 2023-10-26 at 12.38.41 PM.png)
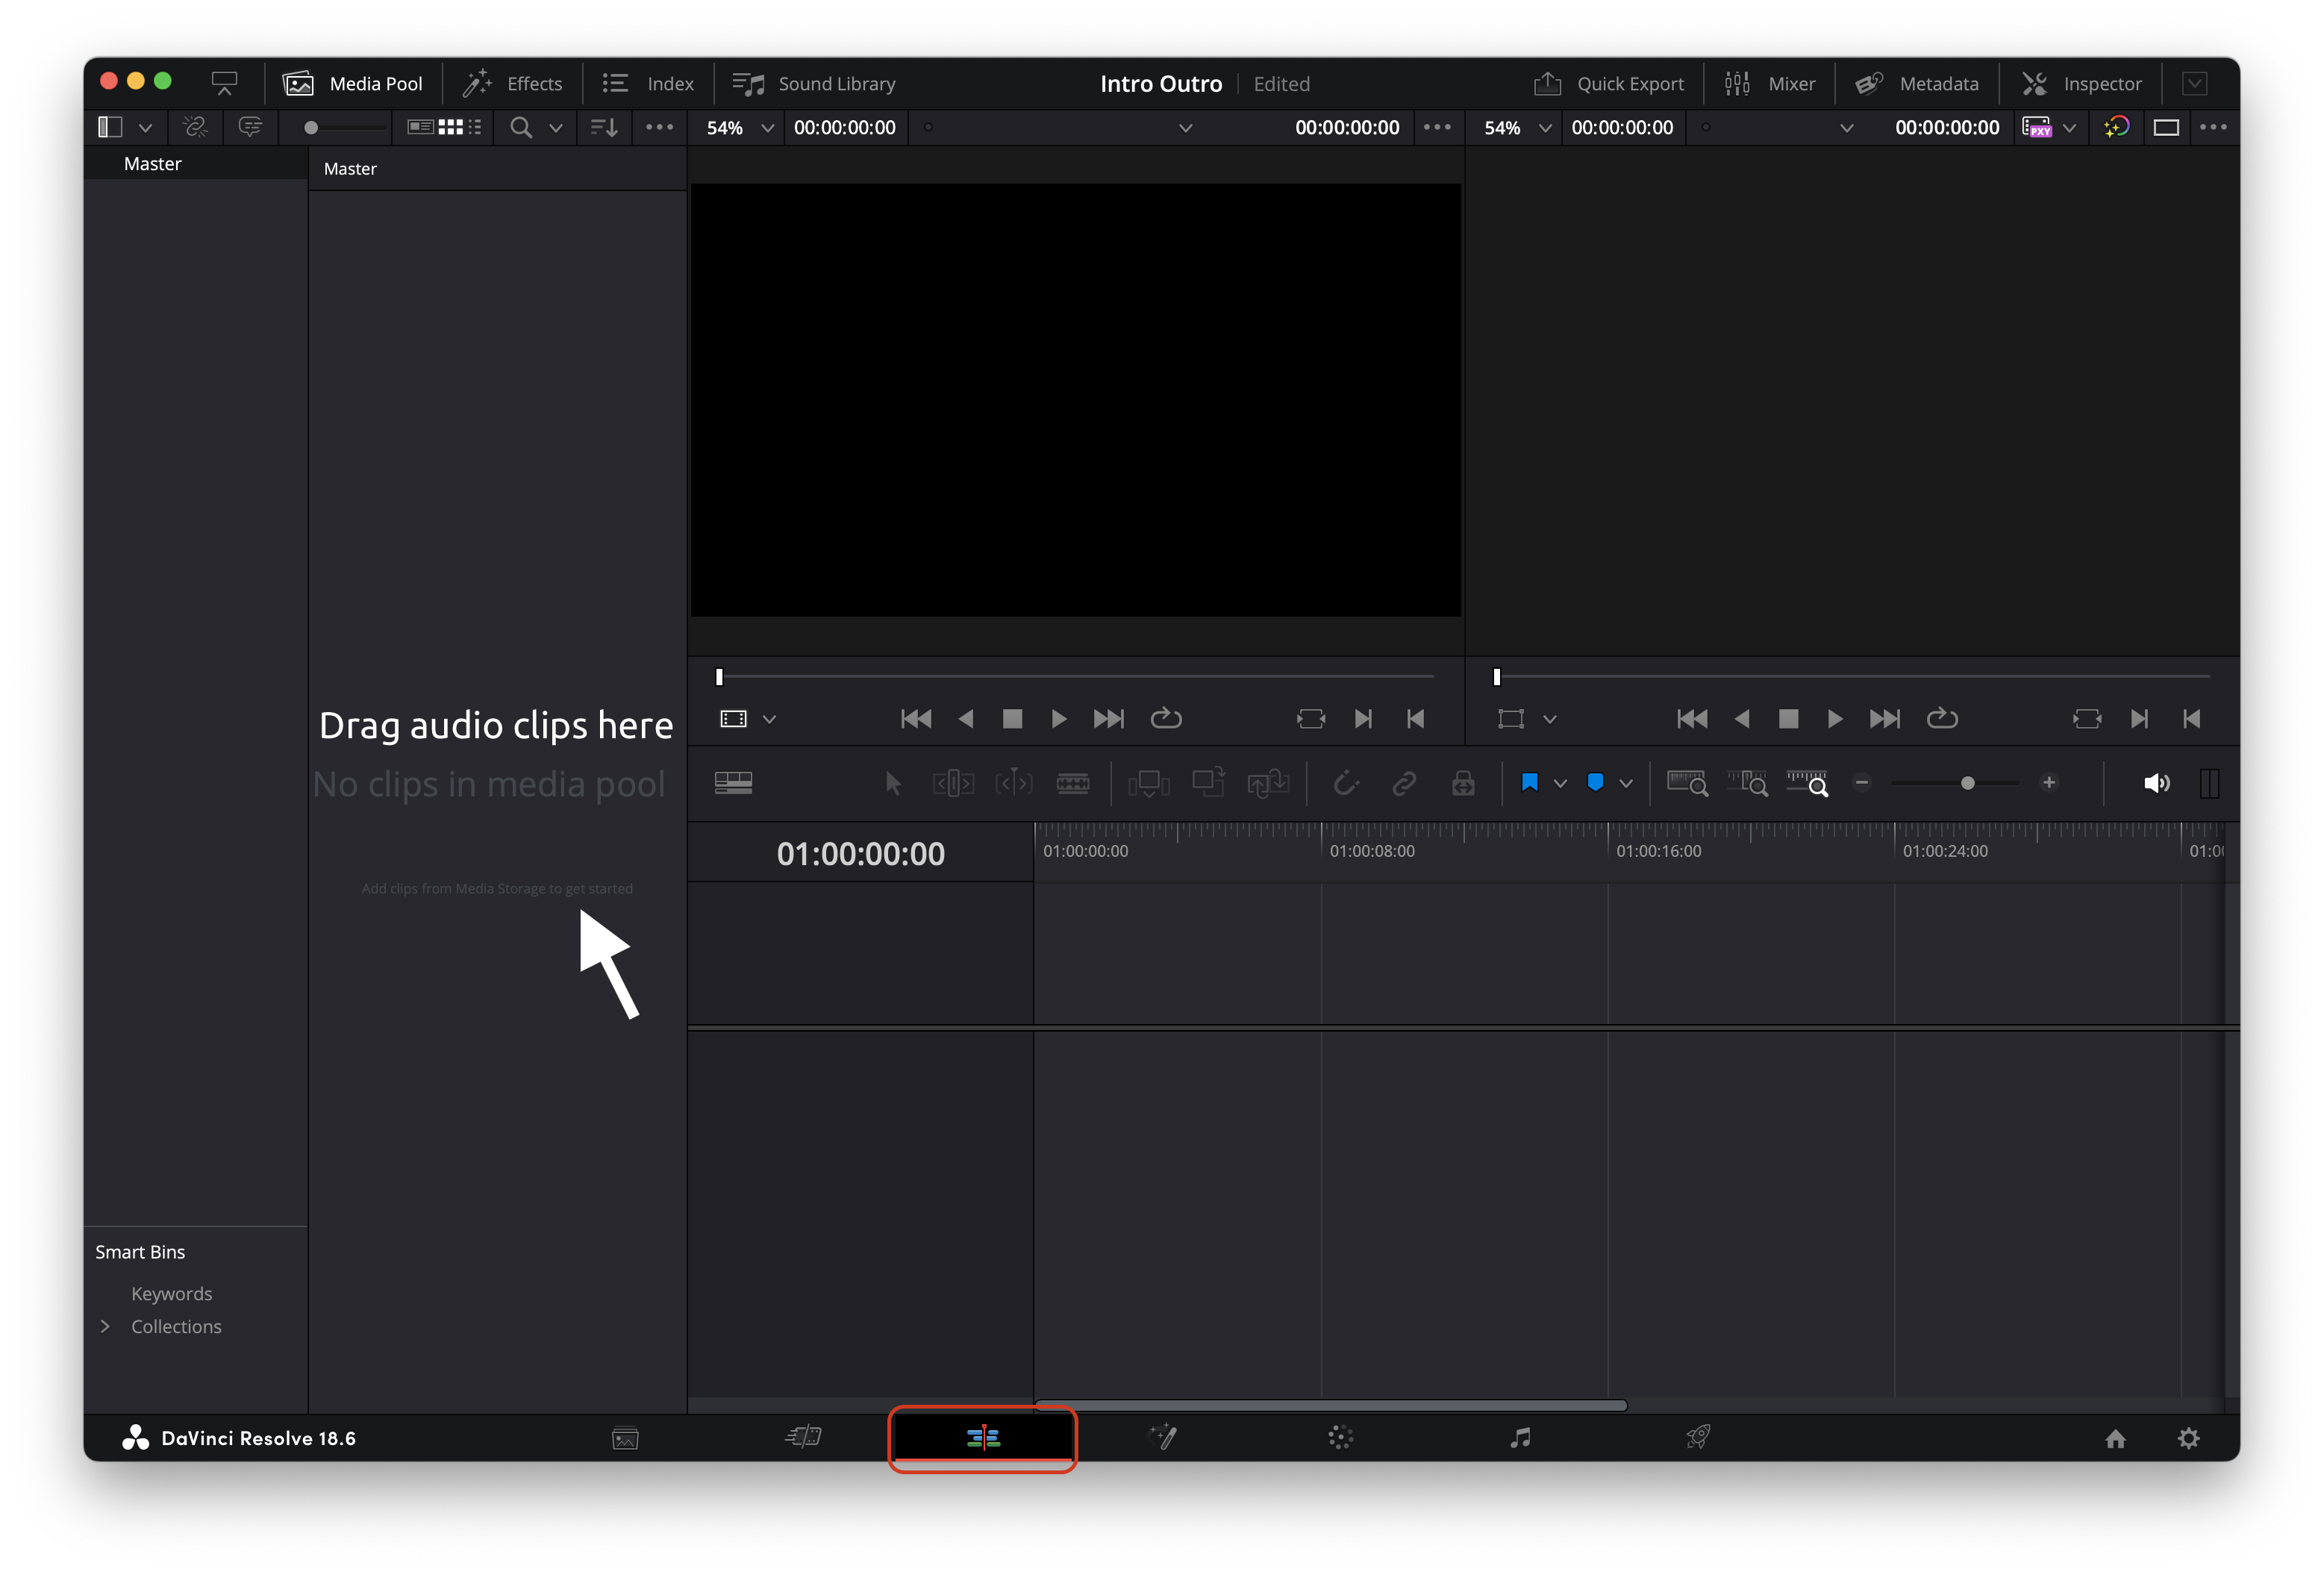
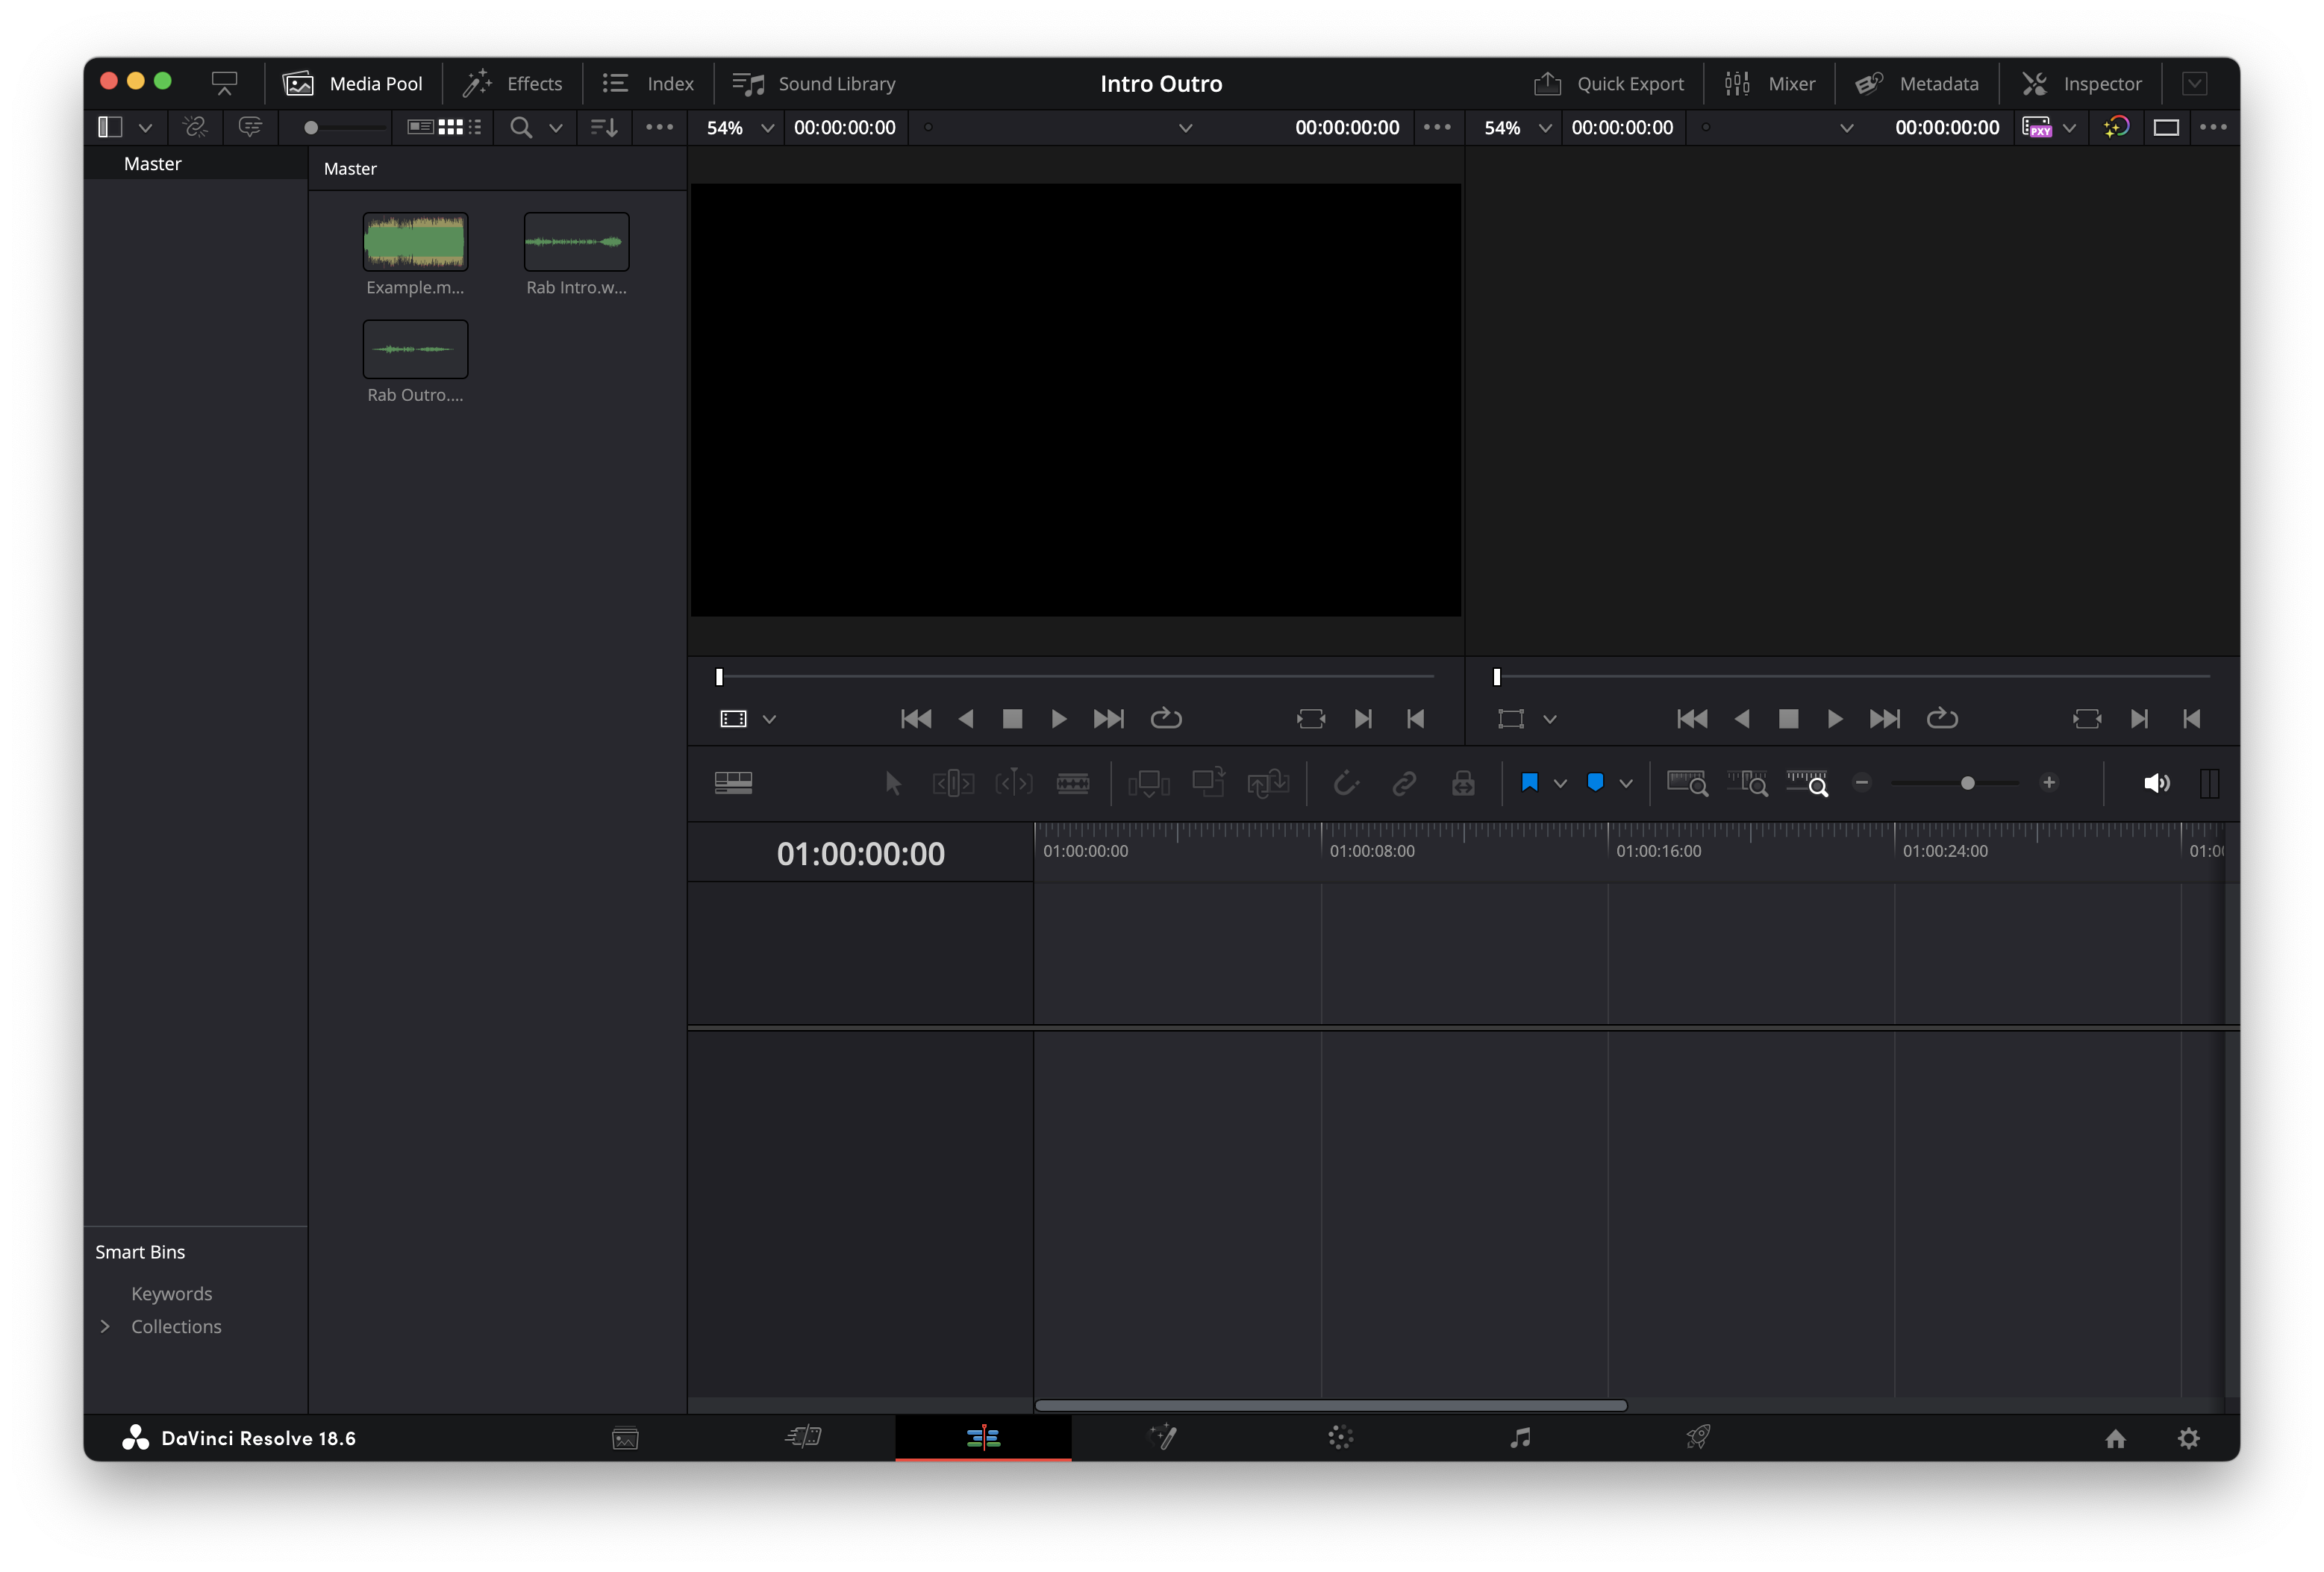
Head over to the "Edit" tab in the bottom bar, then drag in your adio files into the media pool
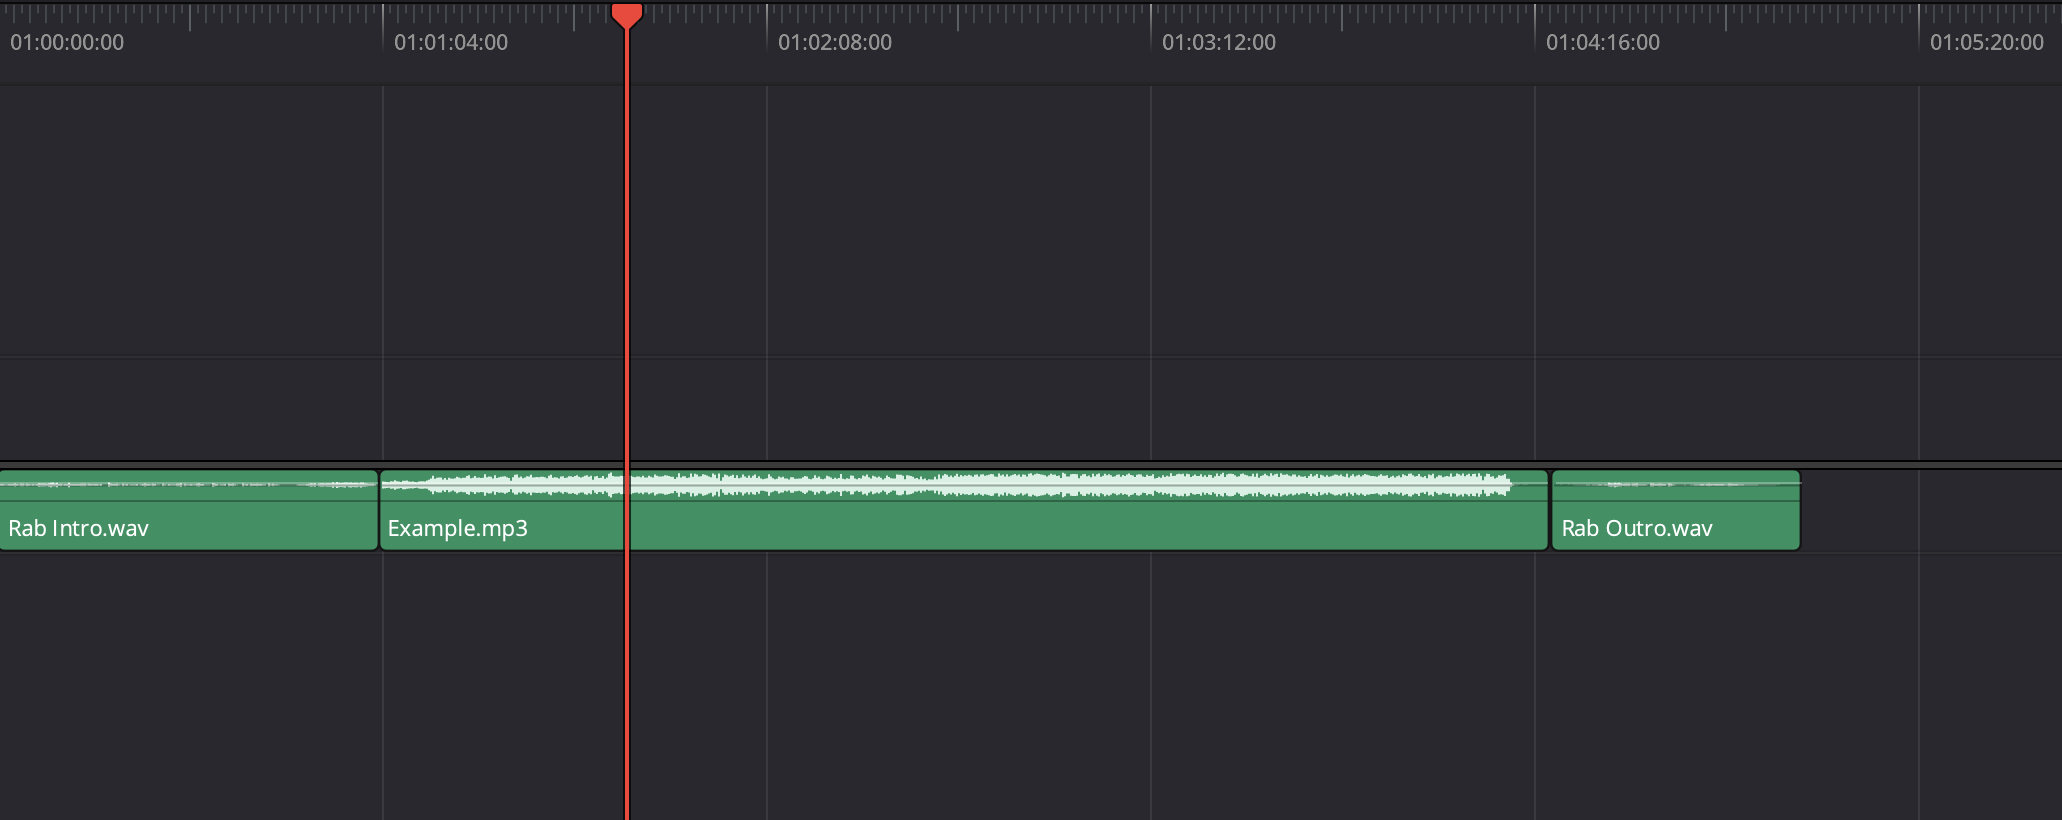
Add Your Clips to the Timeline
![Screenshot 2023-10-26 at 12.45.14 PM.png](/proxy/?url=https://content.instructables.com/FGB/7NIW/LO772MUK/FGB7NIWLO772MUK.png&filename=Screenshot 2023-10-26 at 12.45.14 PM.png)
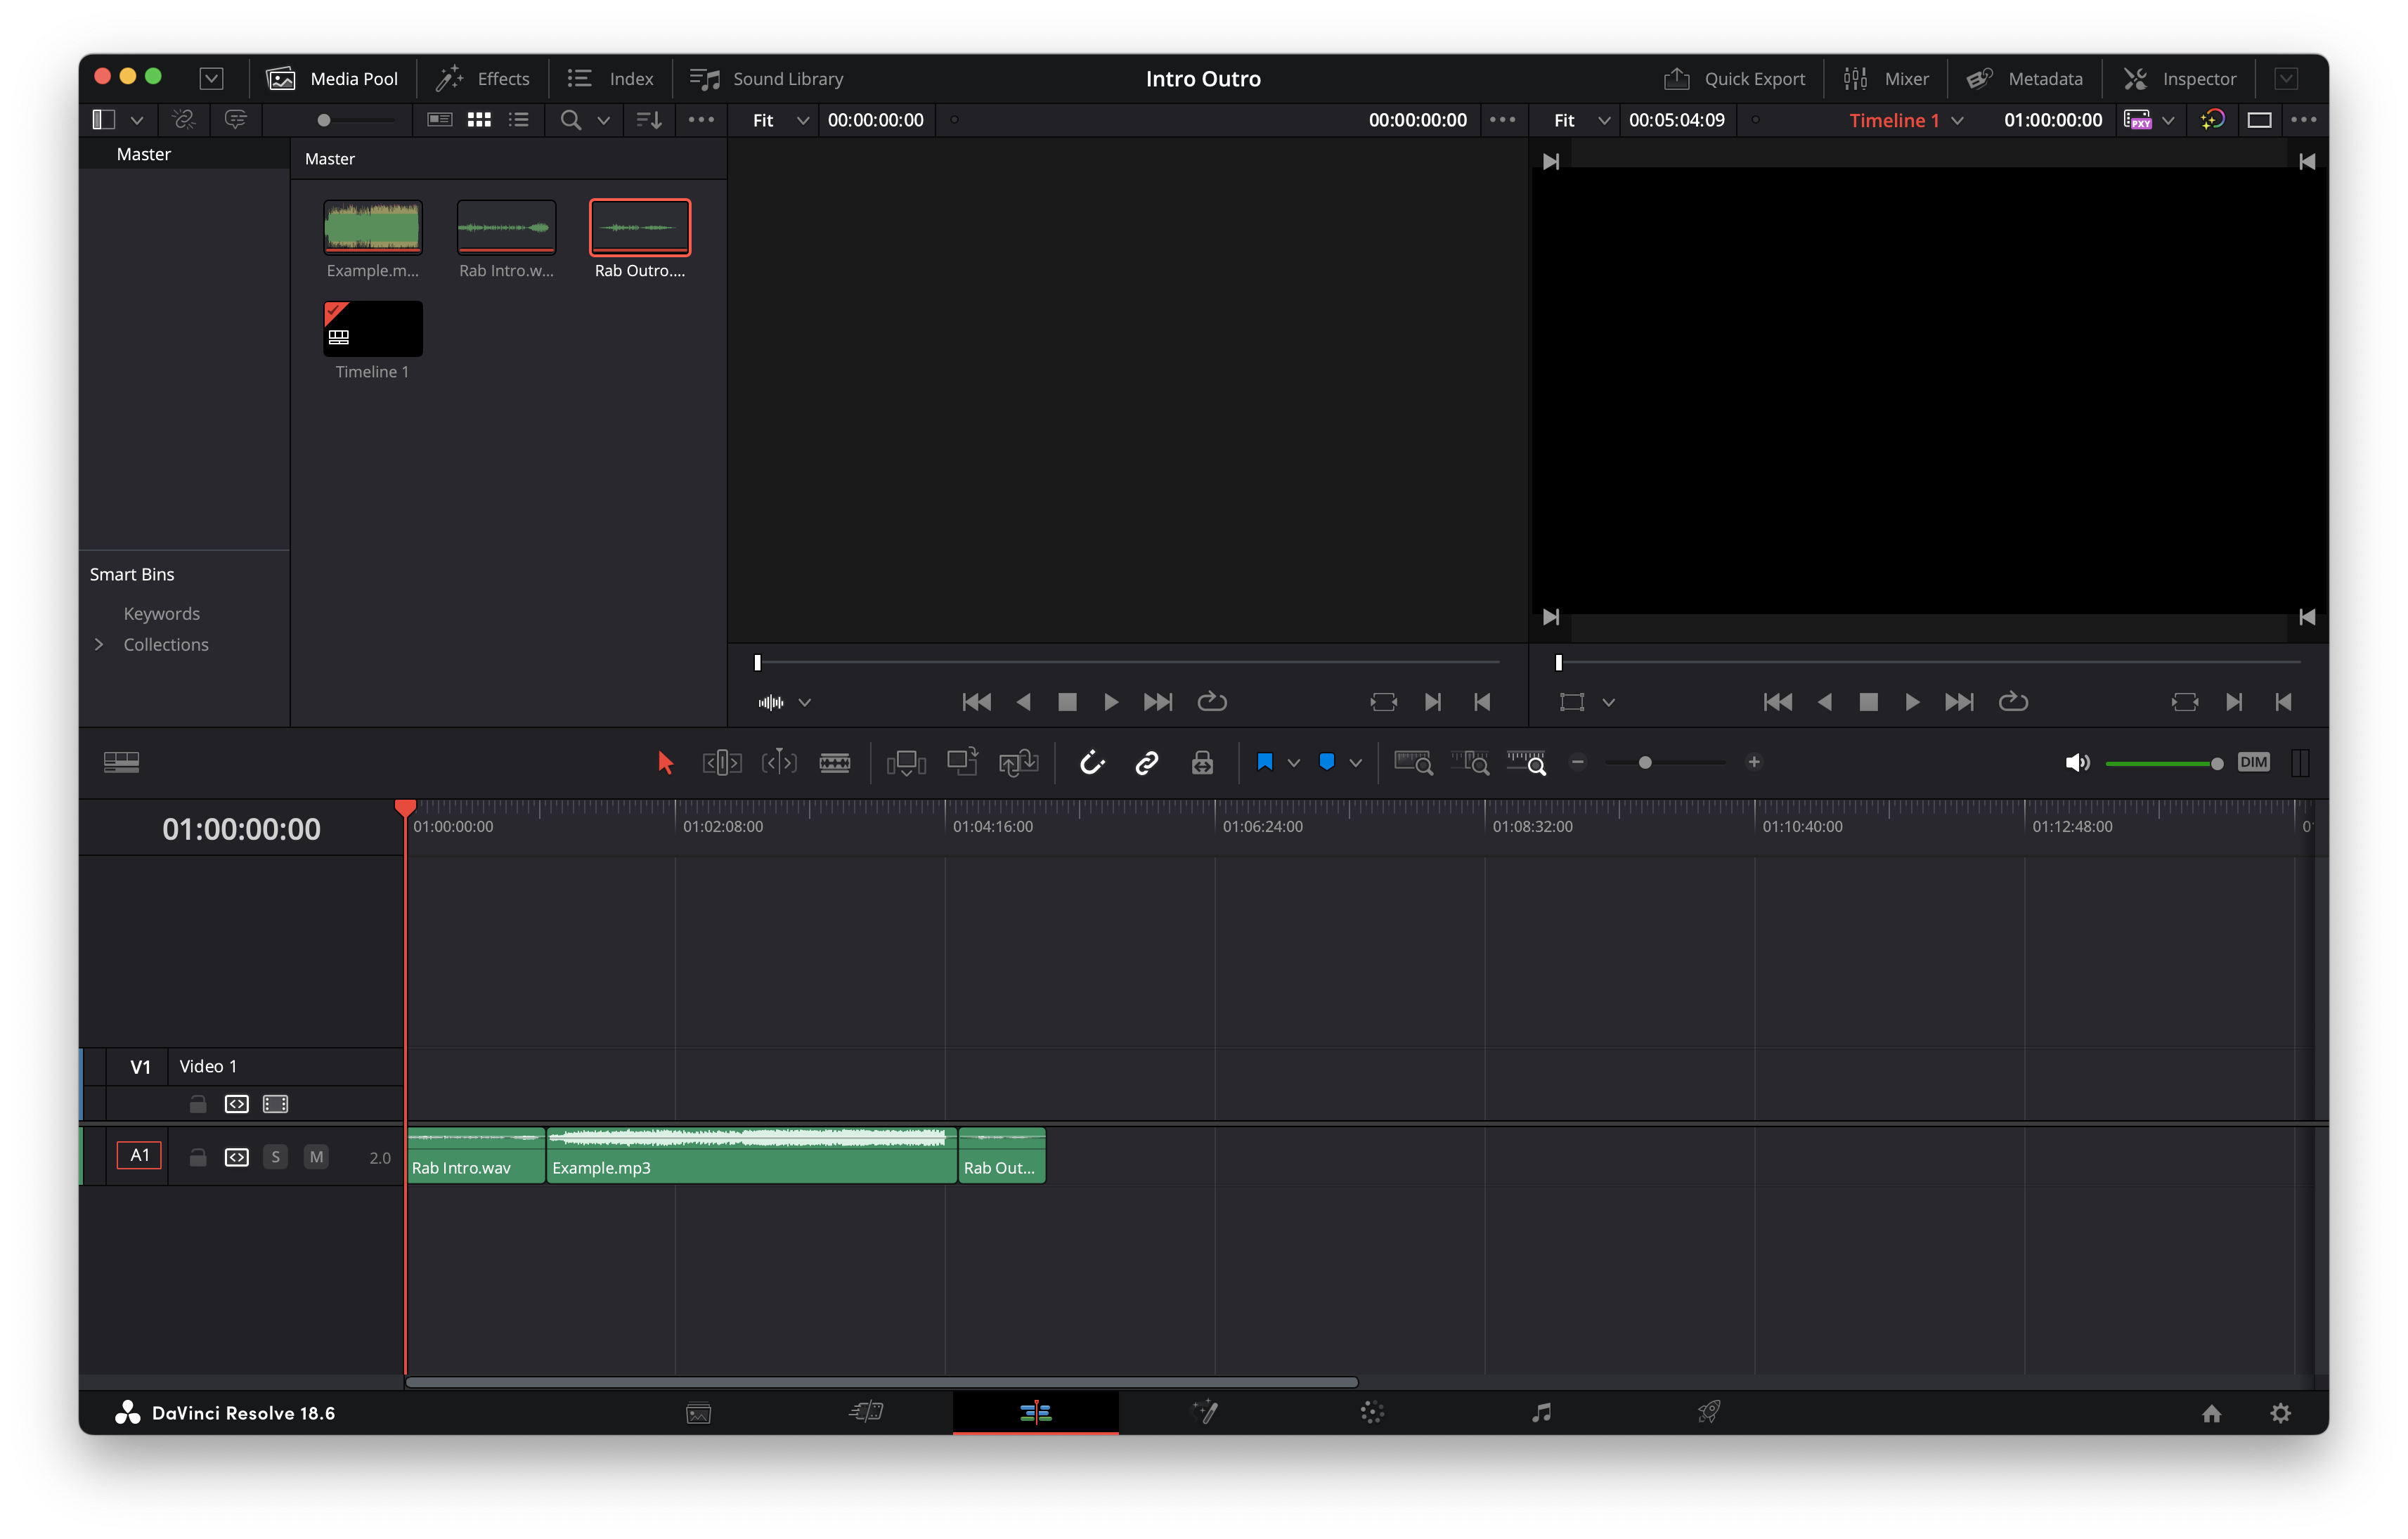
Once you've imported our audio, drag the clips down into the timeline in the order of:
Intro, Middle, Outro
Listen!
![Screenshot 2023-10-26 at 12.47.33 PM.png](/proxy/?url=https://content.instructables.com/FRP/CEBK/LO772MZ2/FRPCEBKLO772MZ2.png&filename=Screenshot 2023-10-26 at 12.47.33 PM.png)
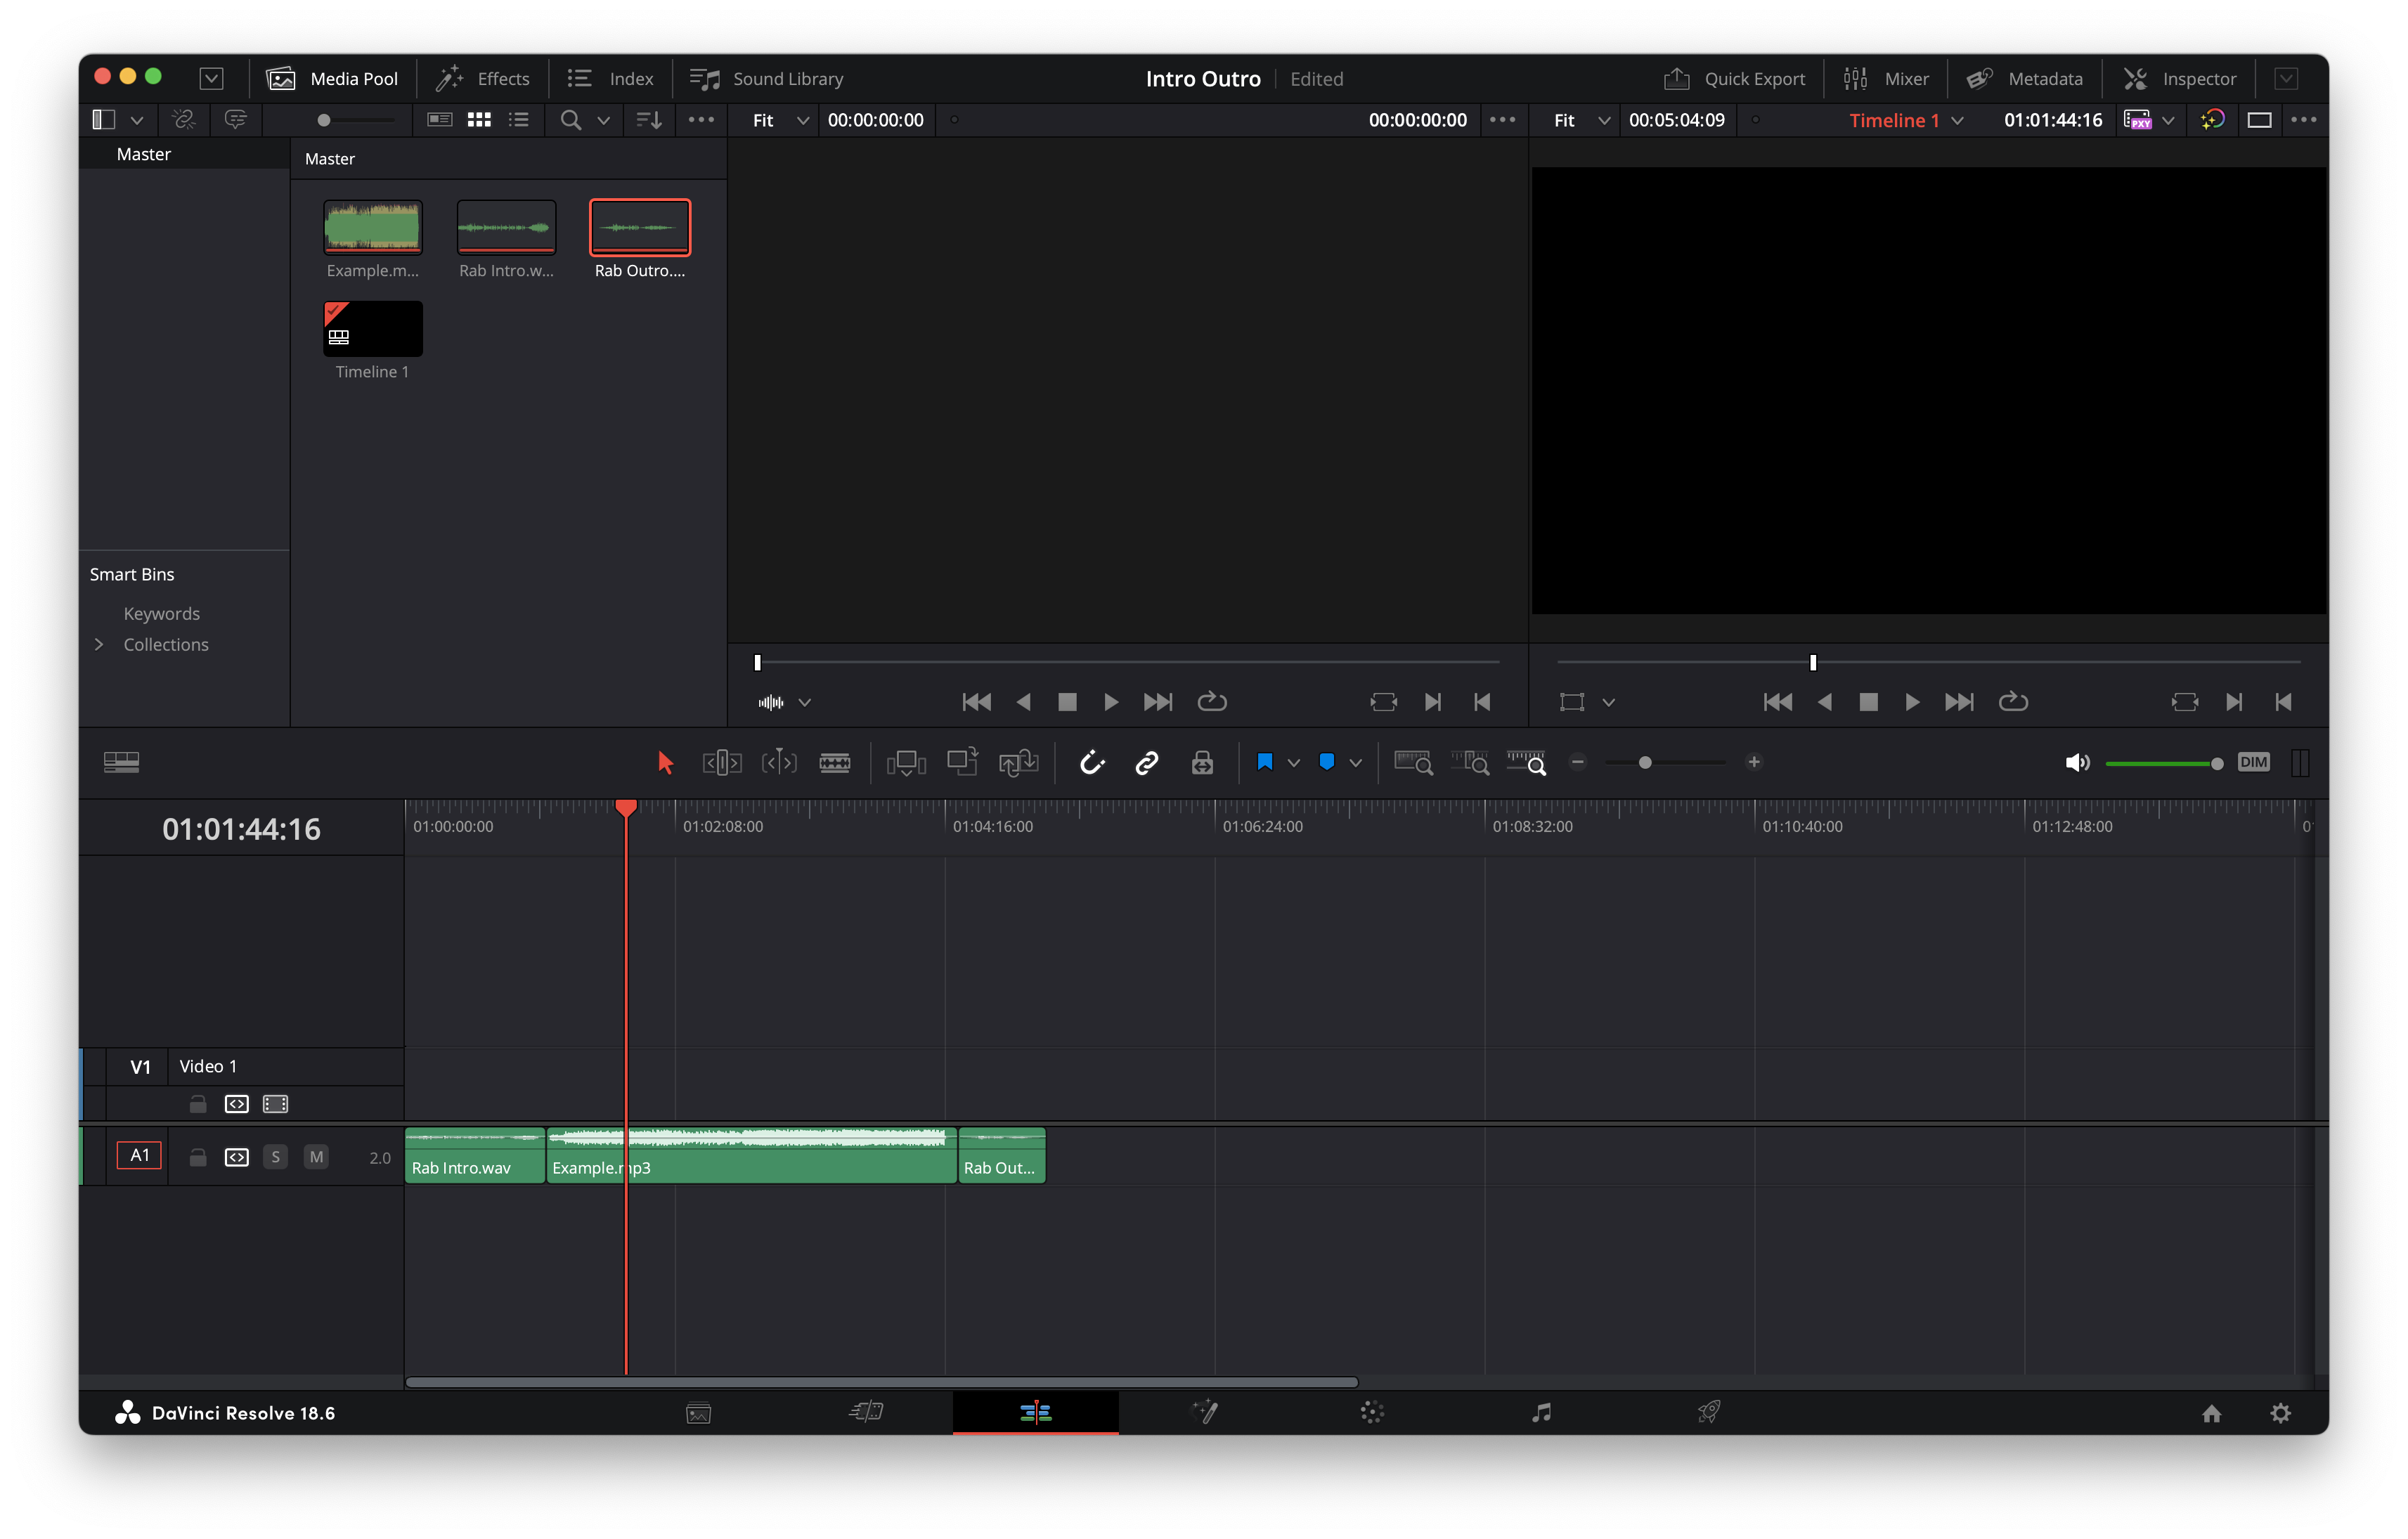
Make sure everyting sounds good and there aren't any gaps or oddities
Edit (As Needed)
![Screenshot 2023-10-26 at 12.50.31 PM.png](/proxy/?url=https://content.instructables.com/F8E/AM8Q/LO772NGP/F8EAM8QLO772NGP.png&filename=Screenshot 2023-10-26 at 12.50.31 PM.png)
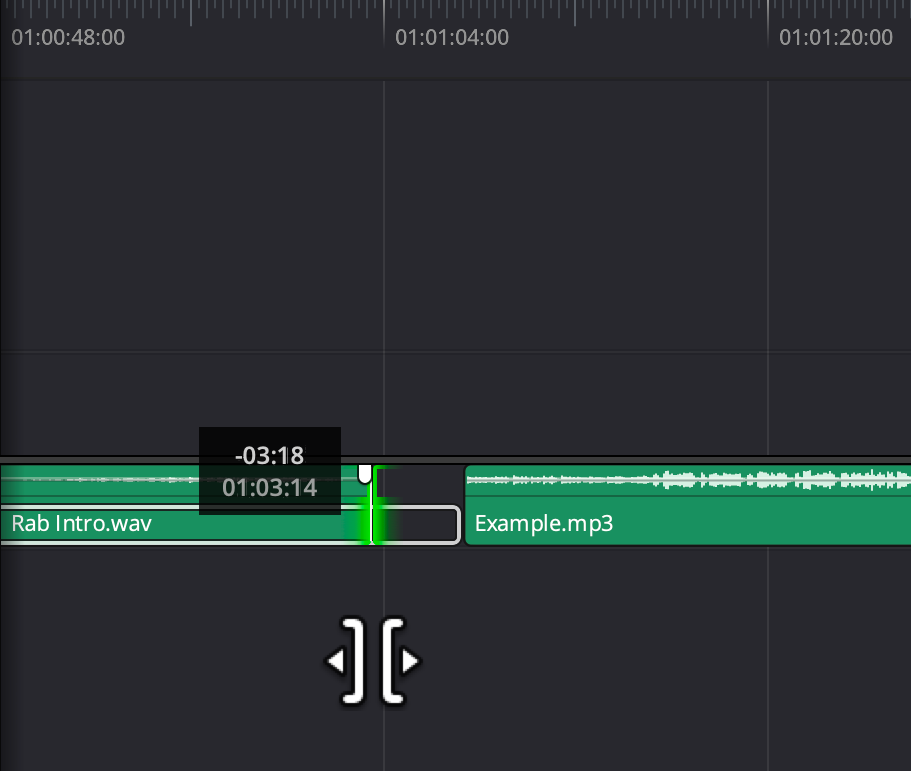
You may end up with little gaps in the recorded audio, so you may want to remove those. Place your cursor at the end of a clip and drag to trim it.
Export
![Screenshot 2023-10-26 at 12.53.21 PM.png](/proxy/?url=https://content.instructables.com/FBZ/IR5N/LO772NX8/FBZIR5NLO772NX8.png&filename=Screenshot 2023-10-26 at 12.53.21 PM.png)
![Screenshot 2023-10-26 at 12.57.14 PM.png](/proxy/?url=https://content.instructables.com/FNR/GL20/LO772NXV/FNRGL20LO772NXV.png&filename=Screenshot 2023-10-26 at 12.57.14 PM.png)
![Screenshot 2023-10-26 at 12.59.21 PM.png](/proxy/?url=https://content.instructables.com/F12/DRKM/LO772O8I/F12DRKMLO772O8I.png&filename=Screenshot 2023-10-26 at 12.59.21 PM.png)
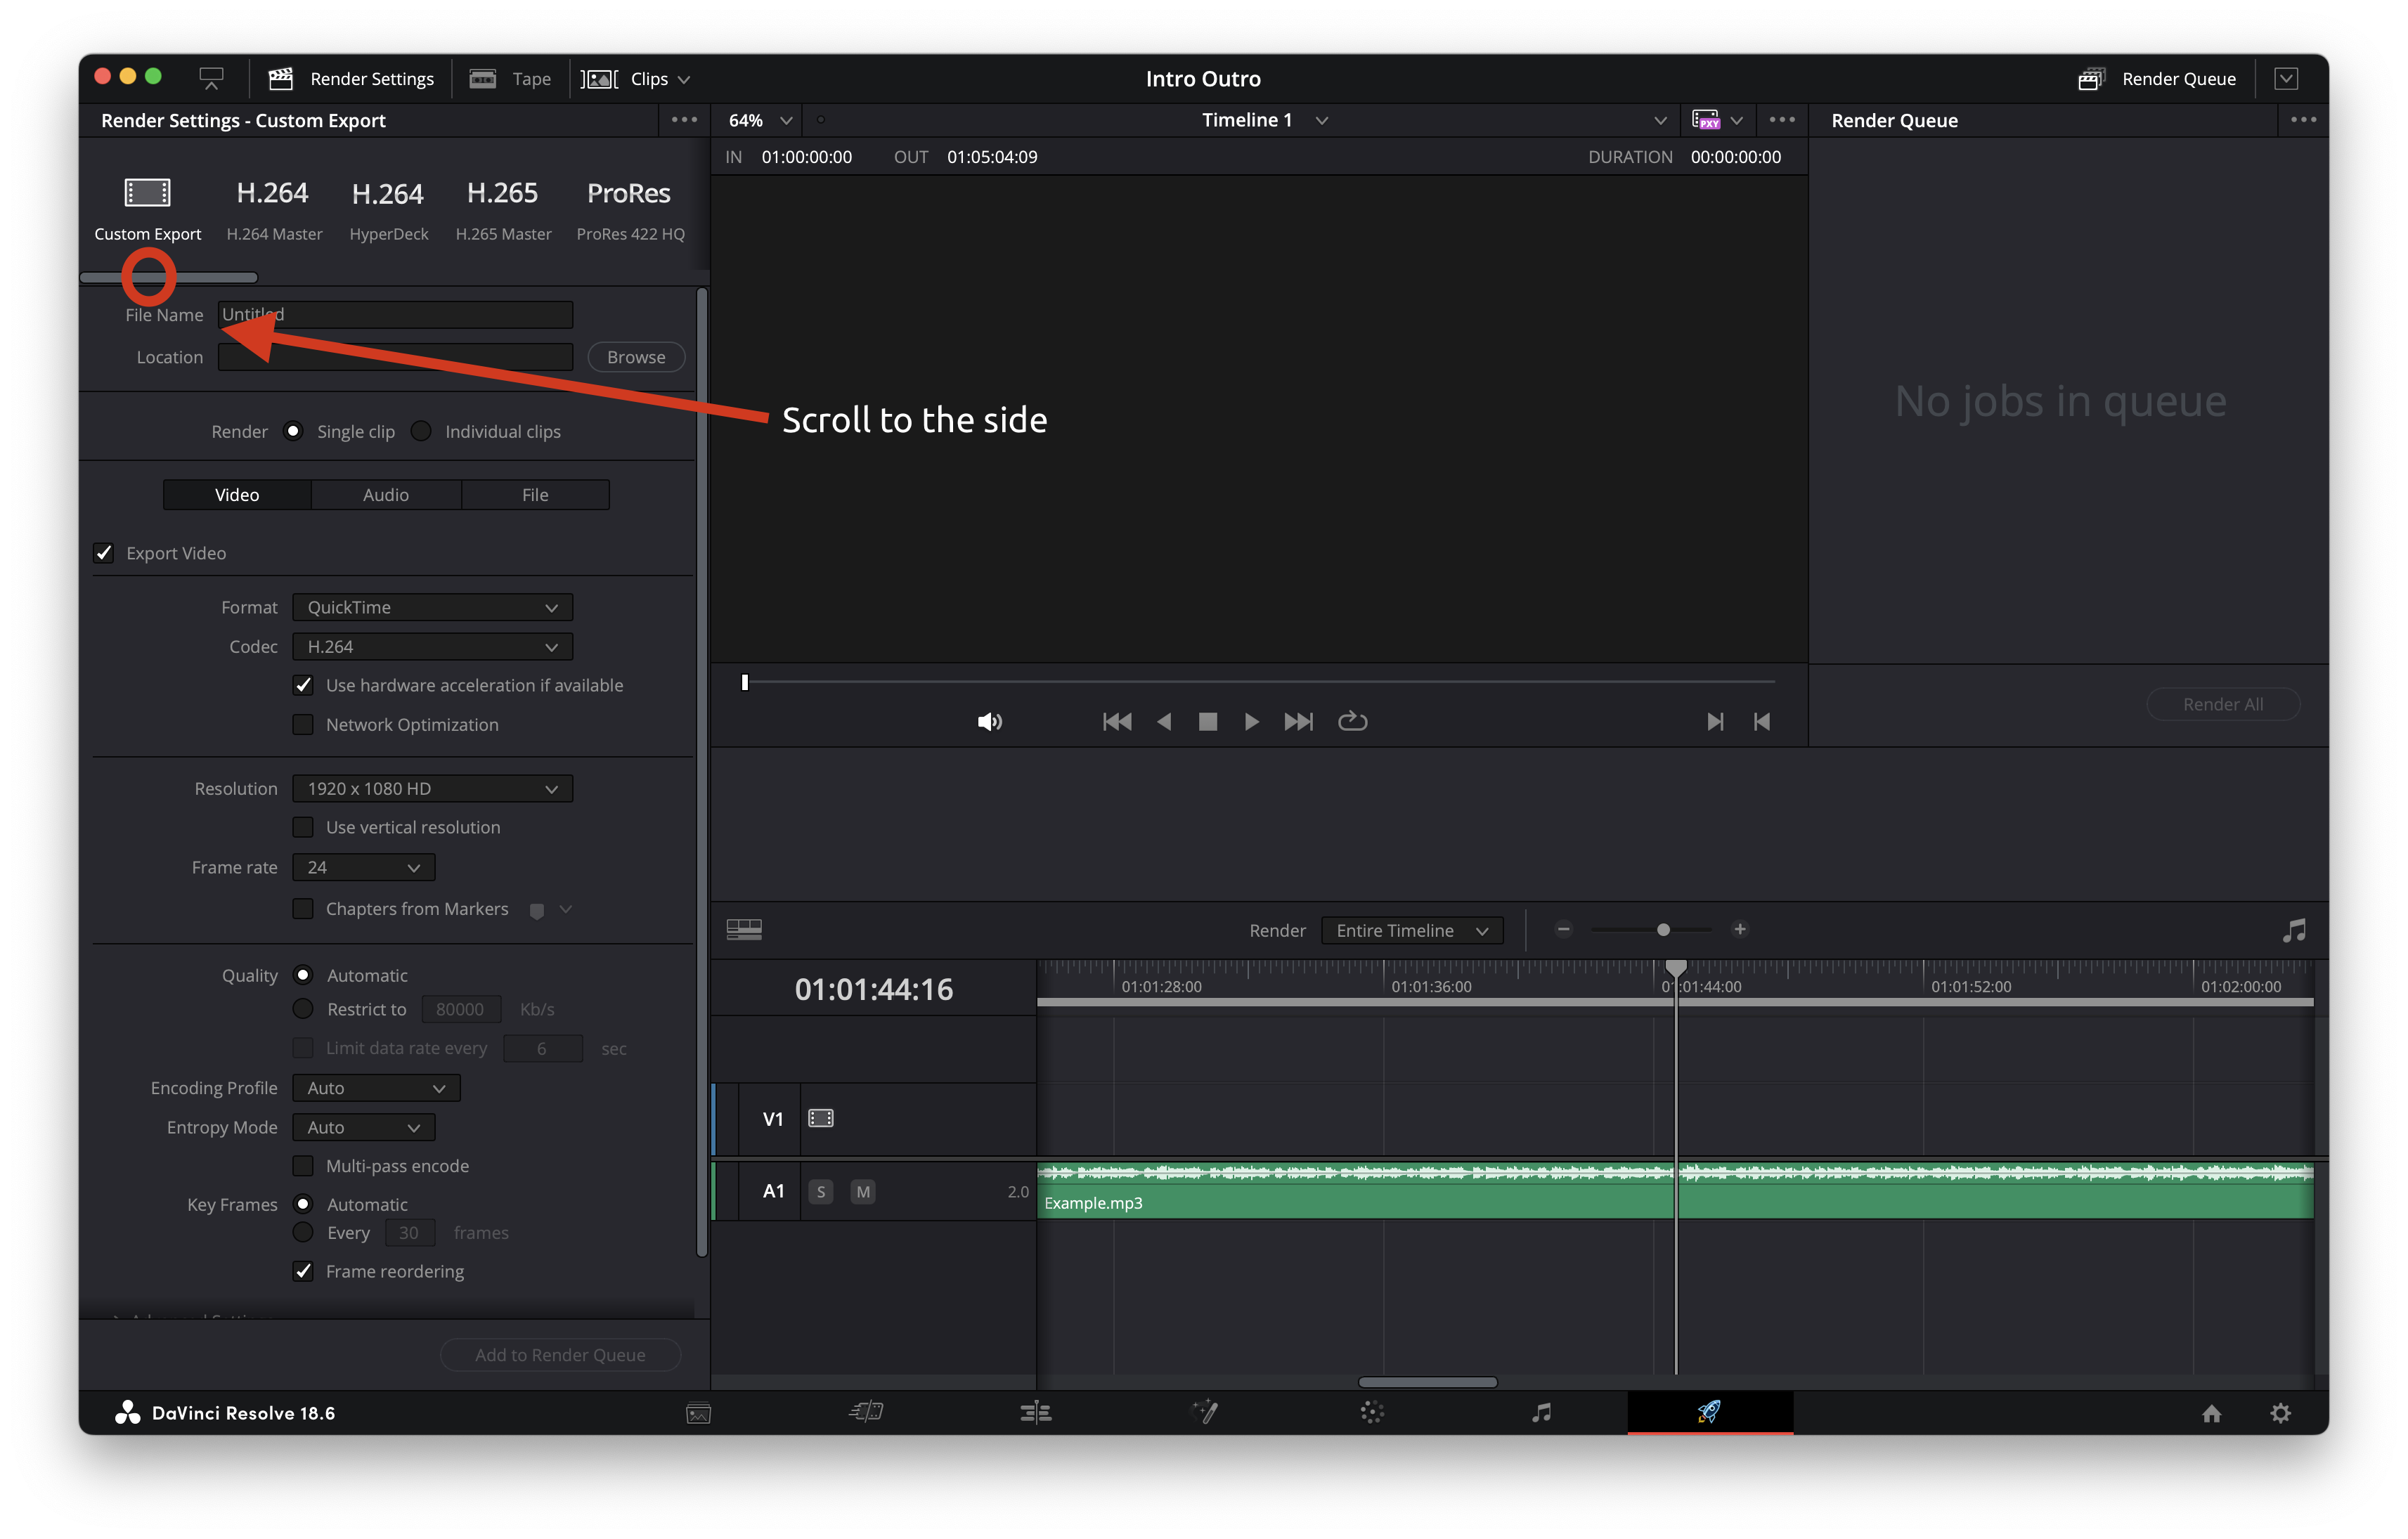
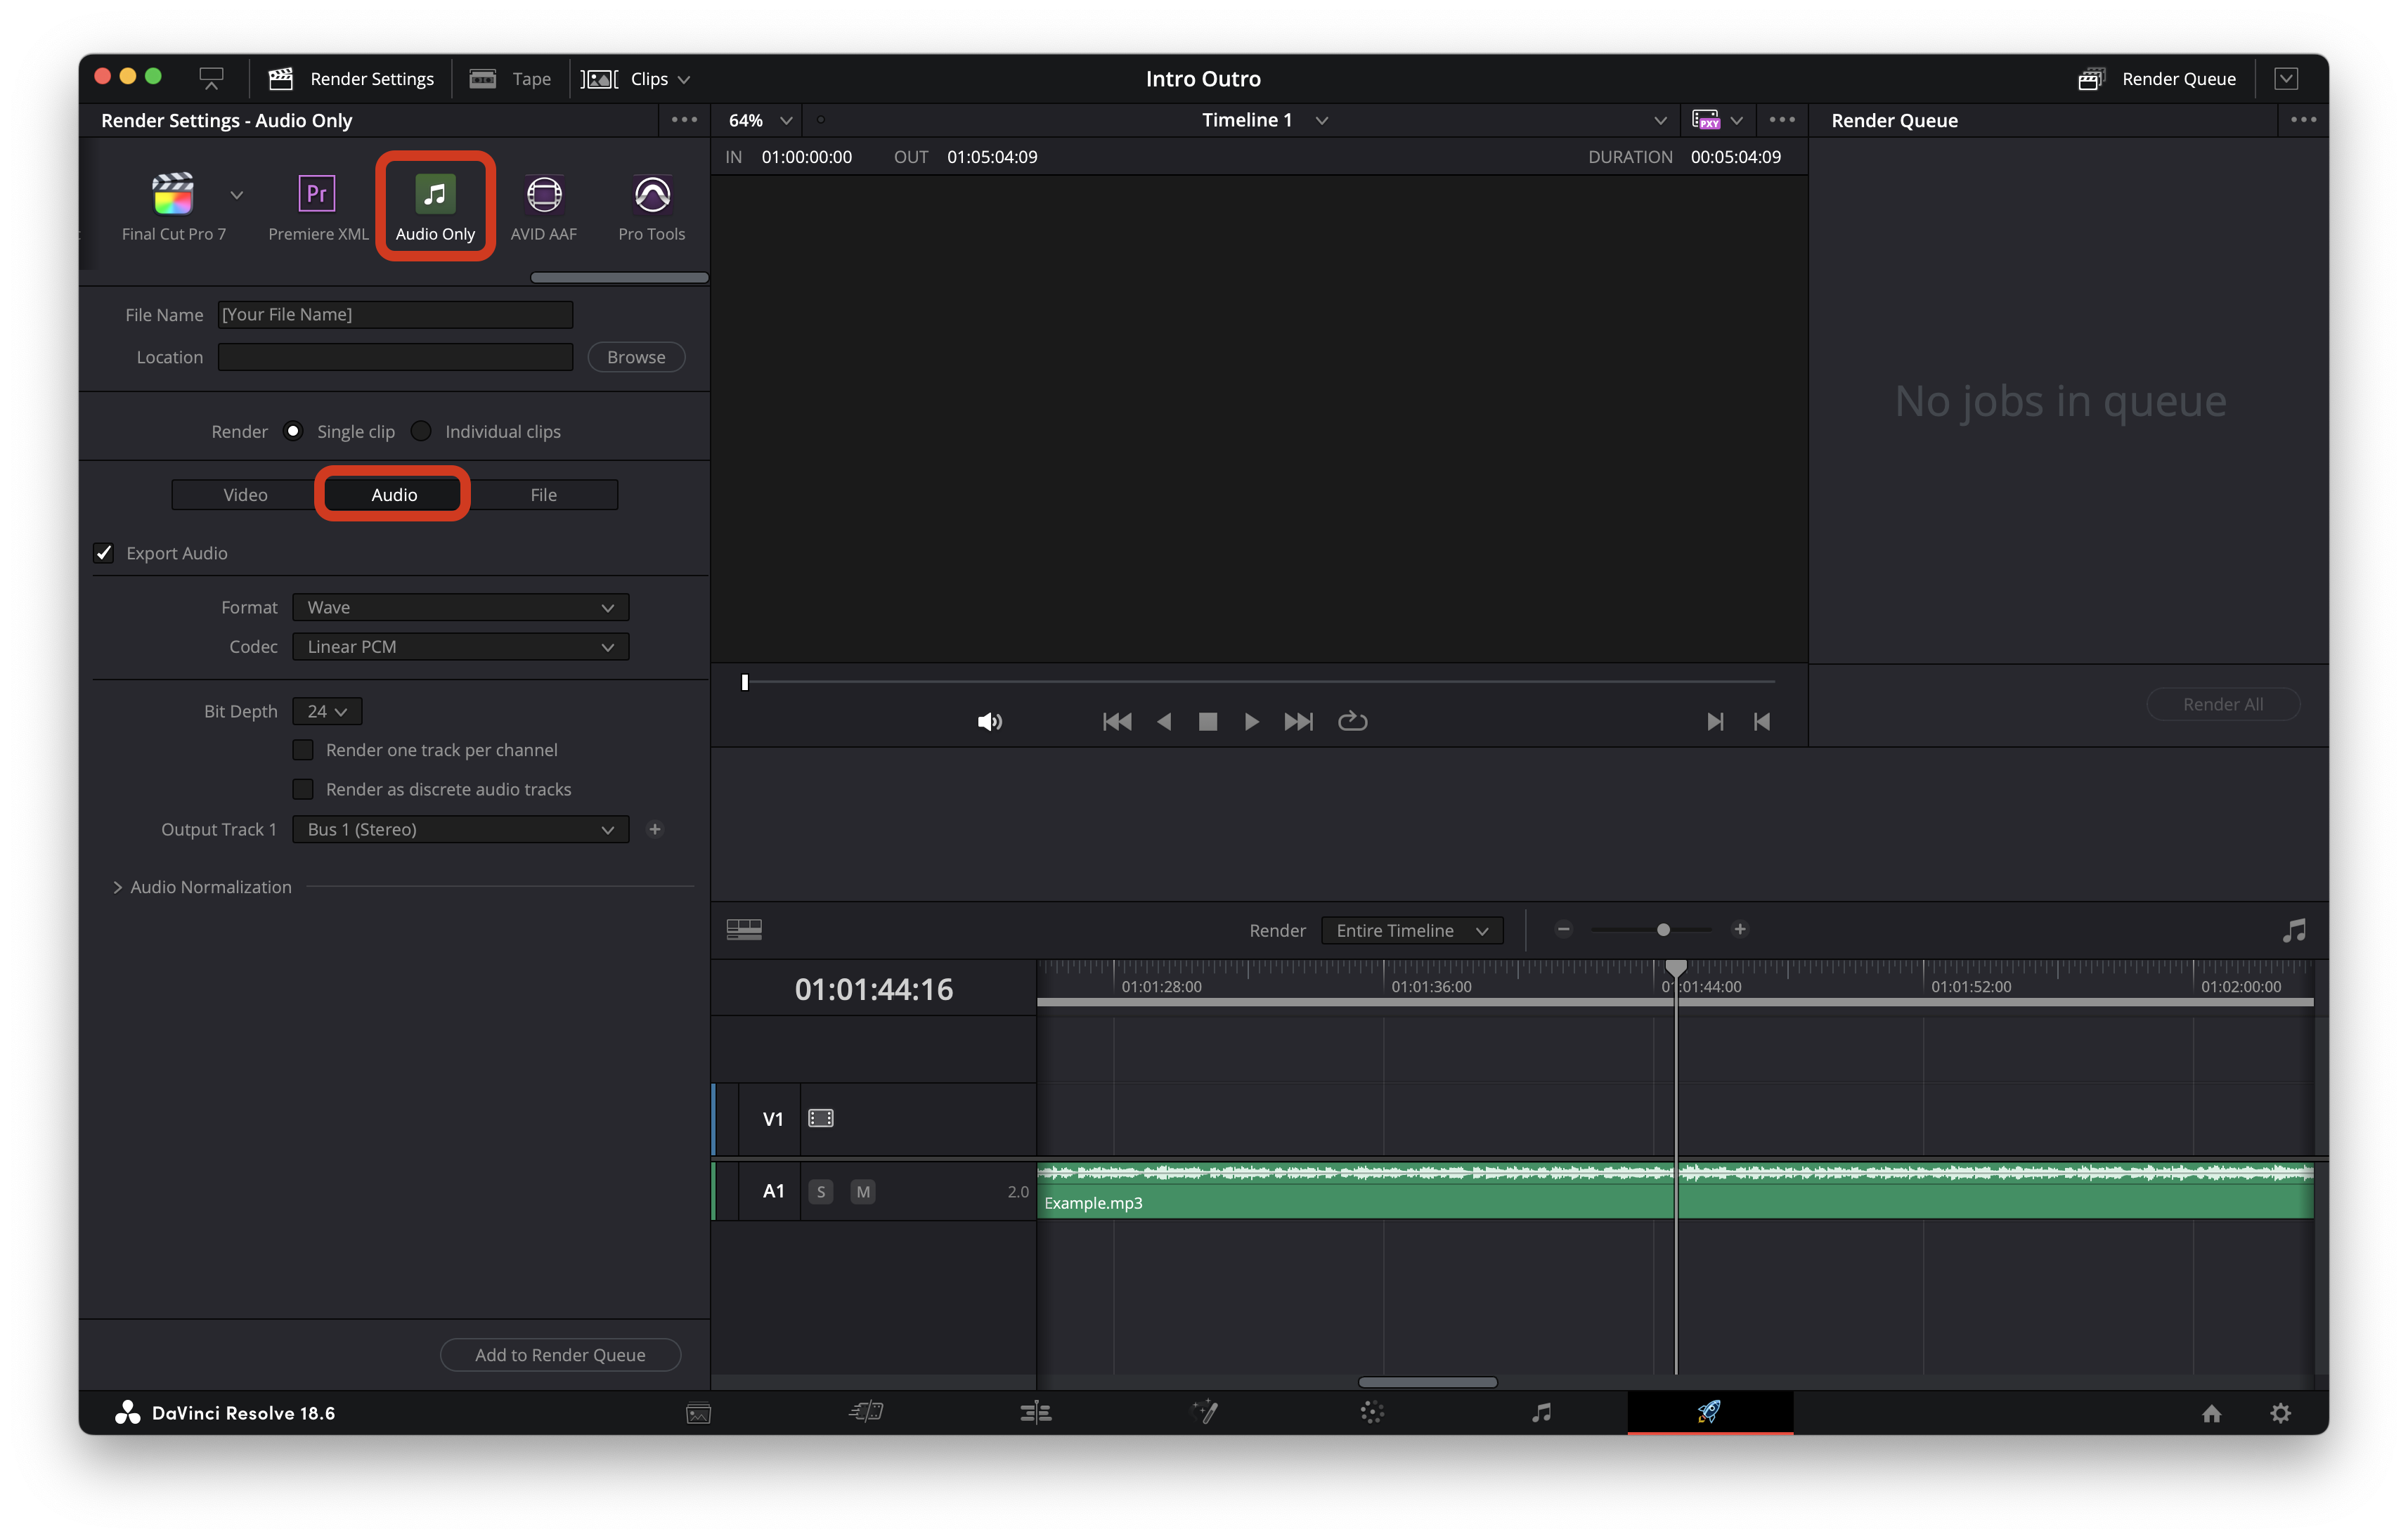
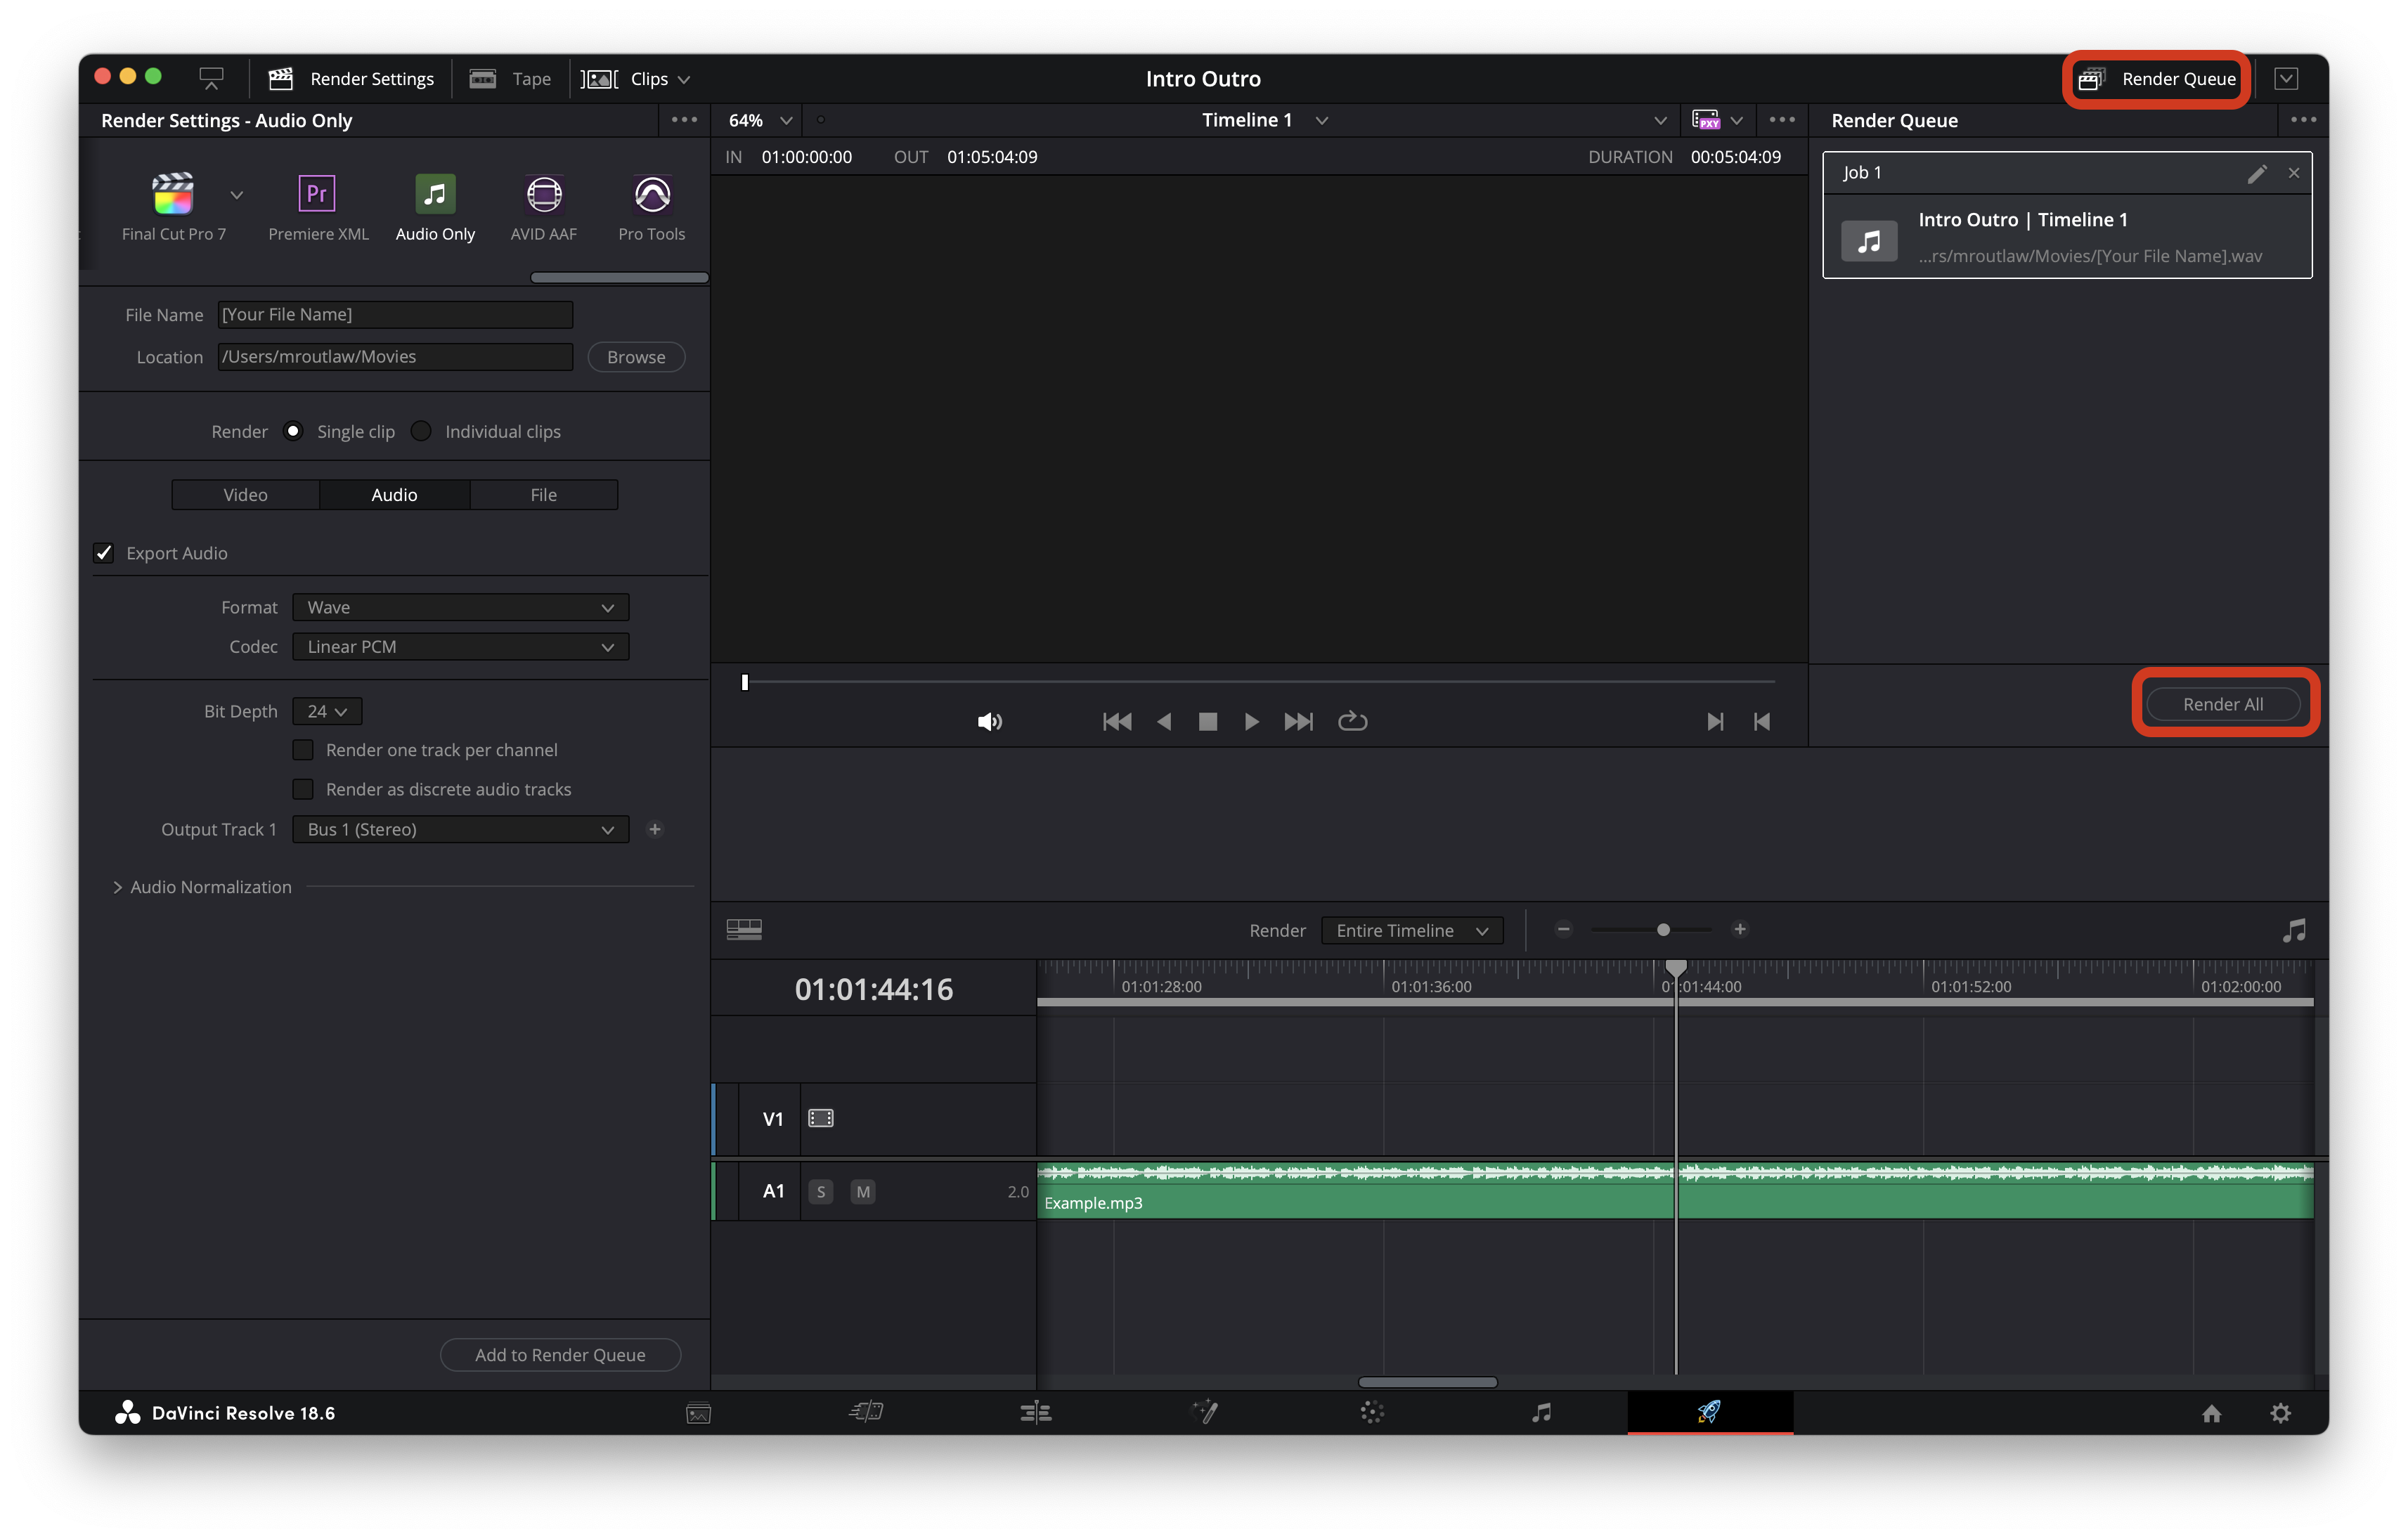
Head over to the "Deliver Tab" (The rocket ship), in the "Render Settings" tab of the inspector, scroll to the side and chose "Audio Only". Then click "Add to Render Queue"
Now Open up the Render Queue by clicking "Render Queue" in the top right corner, then click "Render Now".