Adding Seam Allowance to a Pattern in CorelDRAW
by TheLacedAngel in Craft > Sewing
4678 Views, 12 Favorites, 0 Comments
Adding Seam Allowance to a Pattern in CorelDRAW
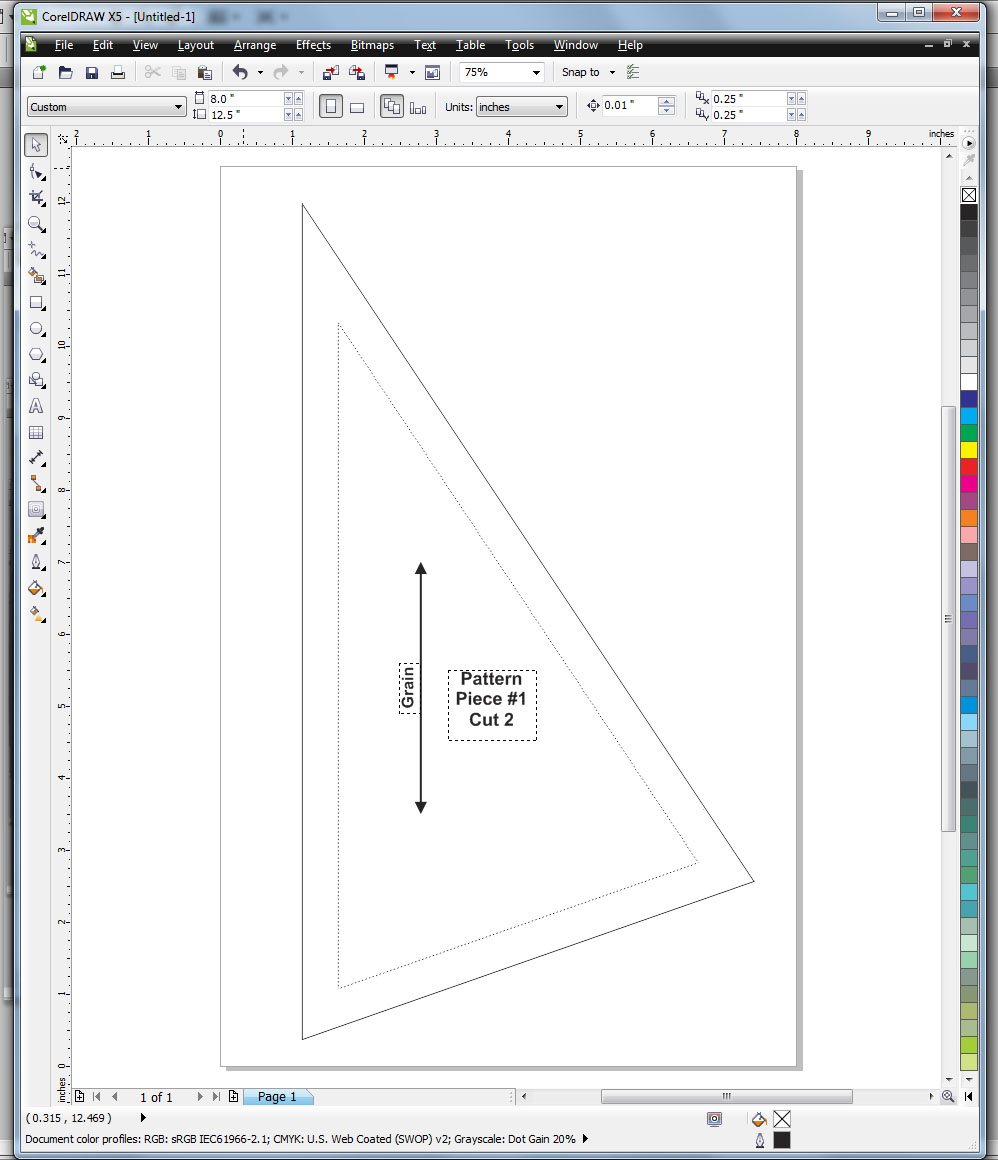
I draft my patterns without seam allowance to start, then add it after I'm sure I've got the pattern right. Here's an easy way to add seam allowances to an existing pattern piece in CorelDRAW. I did this using the software at TechShop Menlo Park.
Start With One Object Outline
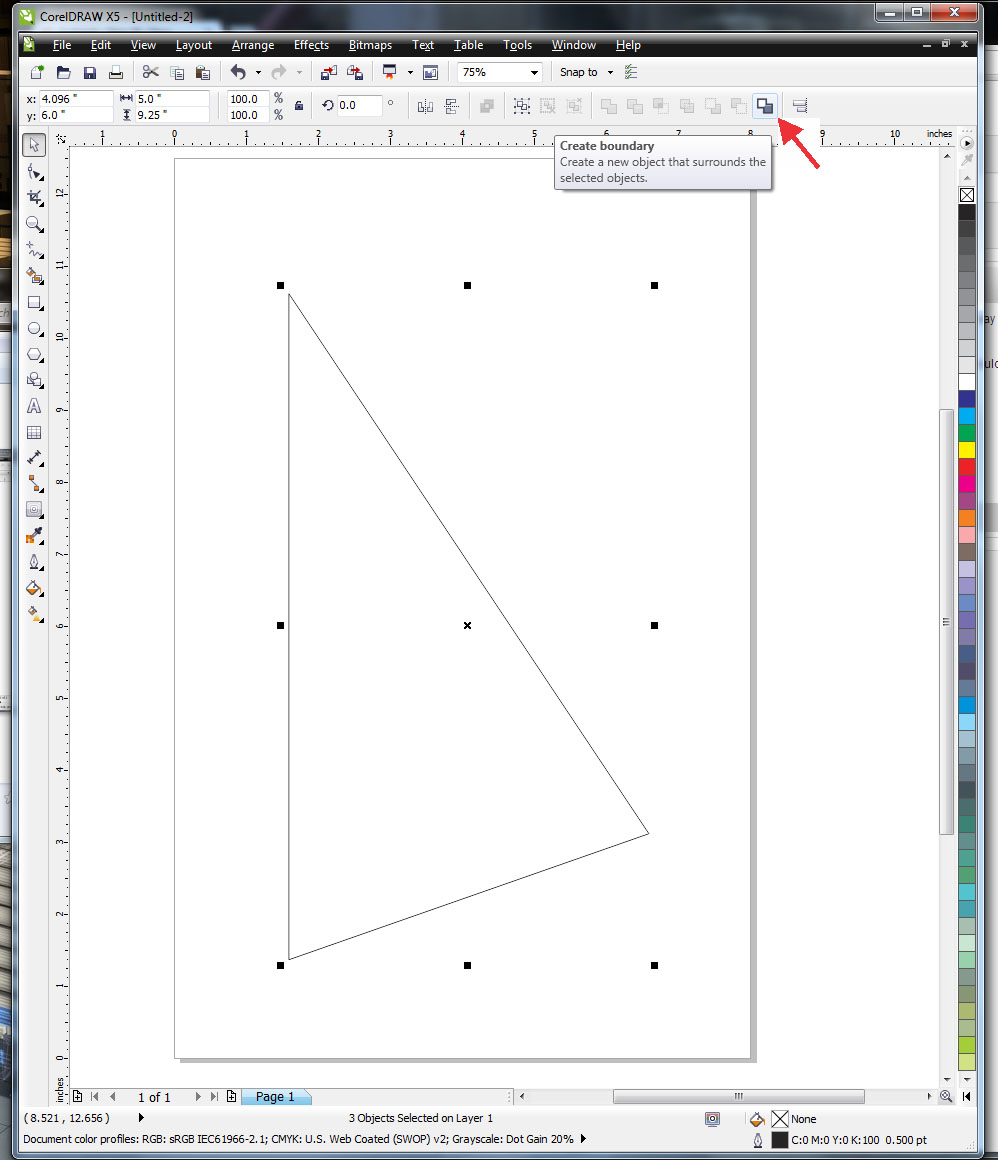
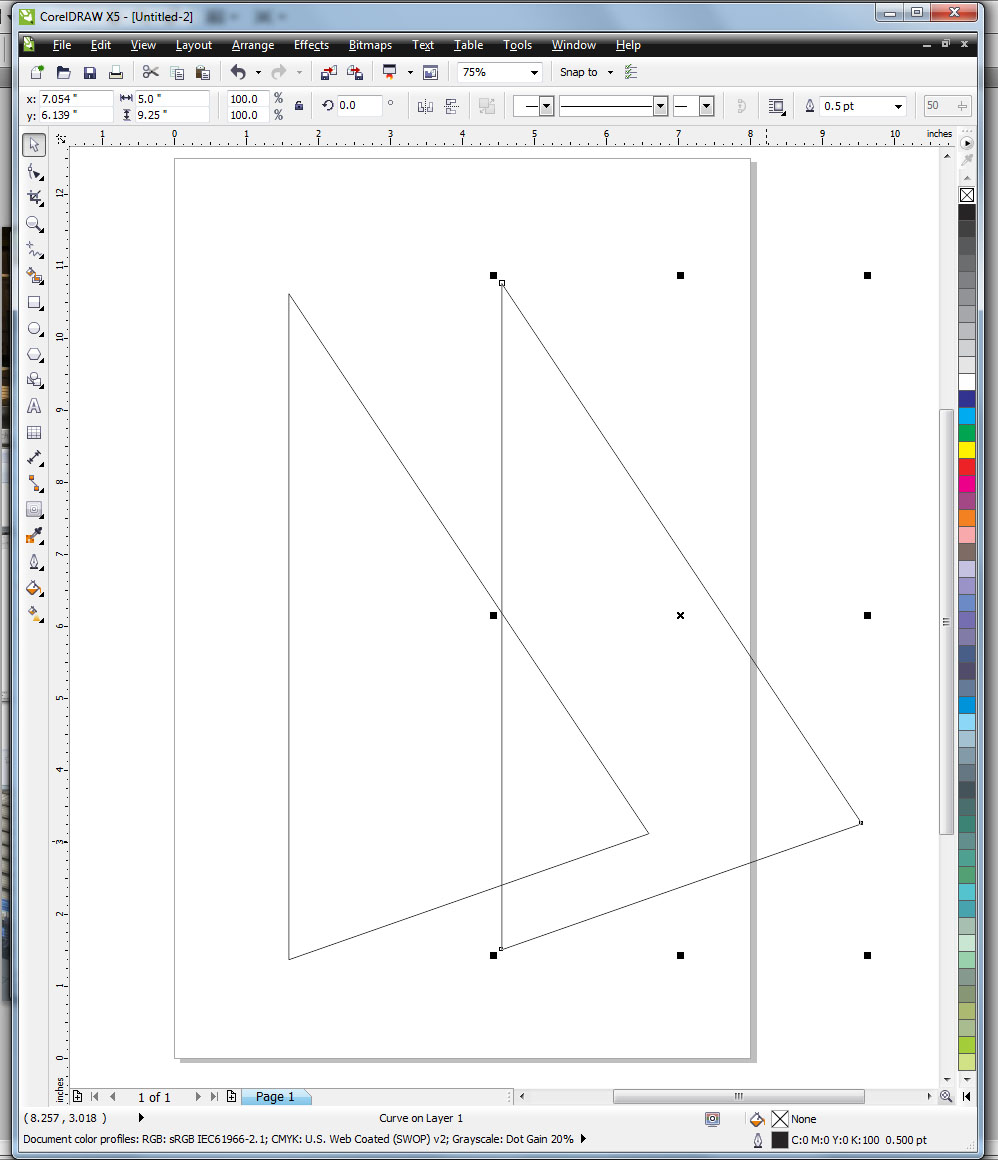
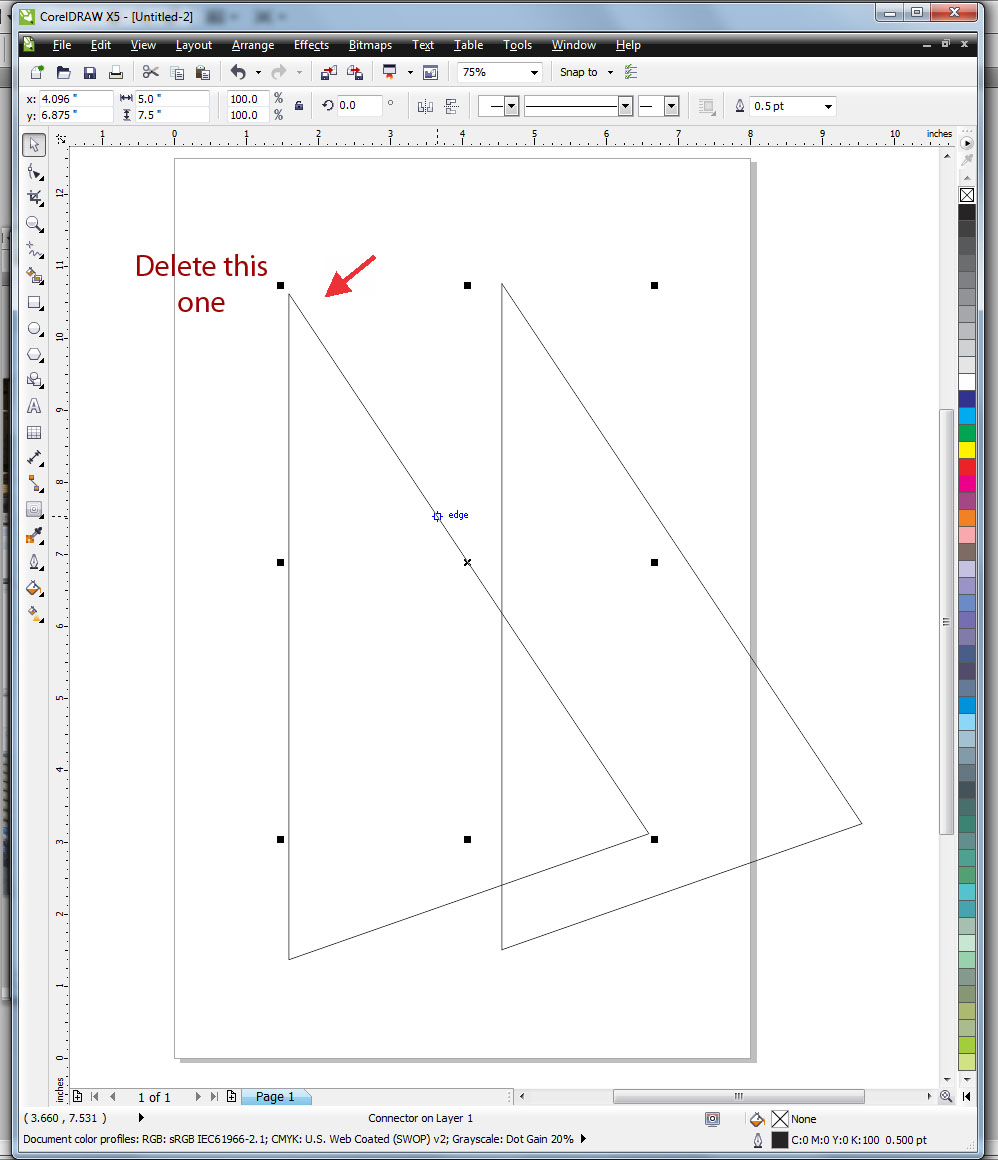
Work with one pattern piece at a time. If all your pieces are on one page, do each of them one by one. Each pattern piece should be one object with a single unified outline, rather than just a collection of lines or objects. If your pattern piece is a bunch of connected objects, use the Create Boundary icon to create a new object that has the same exact outline as your connected objects. Move it to the side, delete the original collection of objects, then move your new object back into place. You're ready to begin!
Select Object and Contour Tool
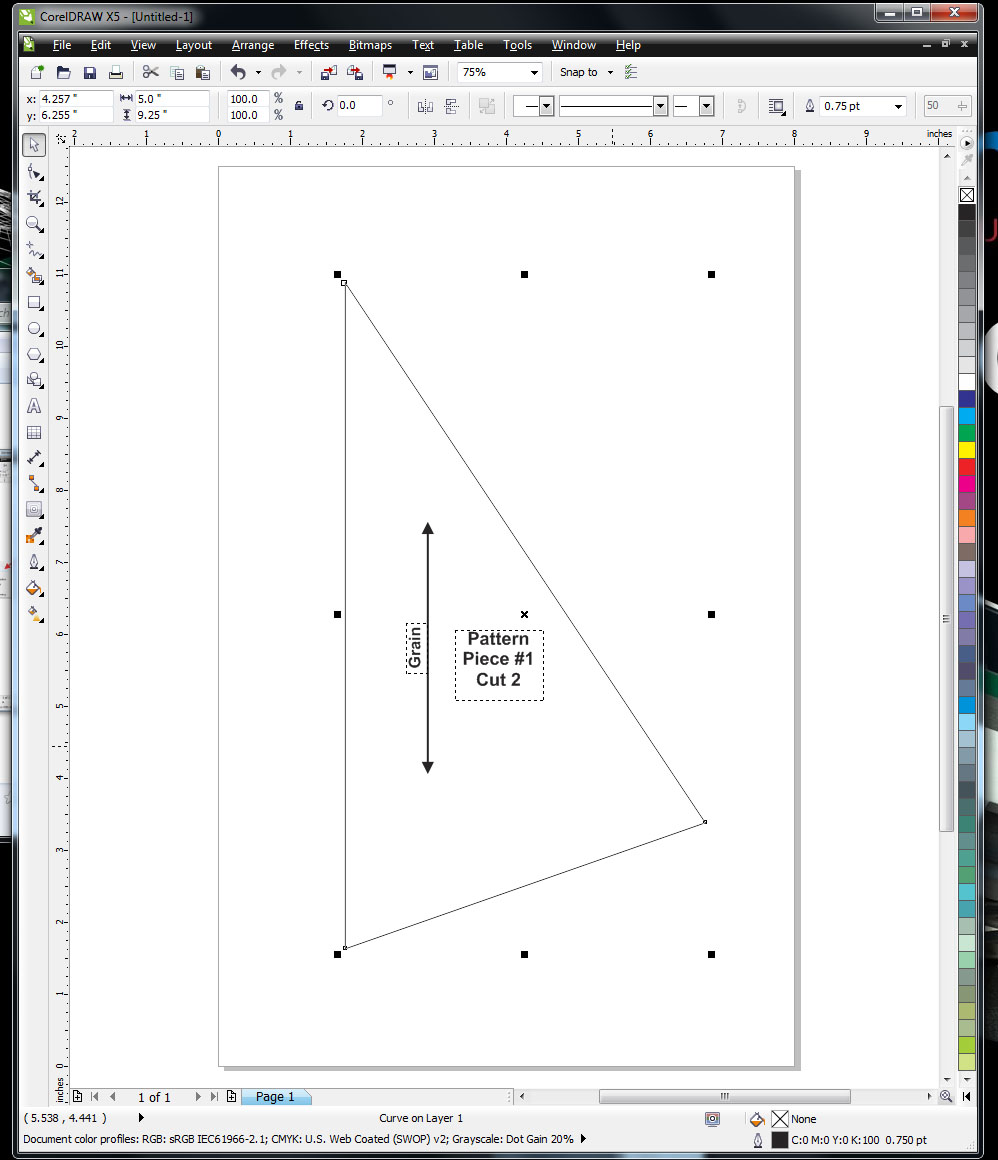
Select your pattern piece. (Please disregard the additional text and line elements that have suddenly appeared between the last step and the next; they are of no consequence for this instructable)
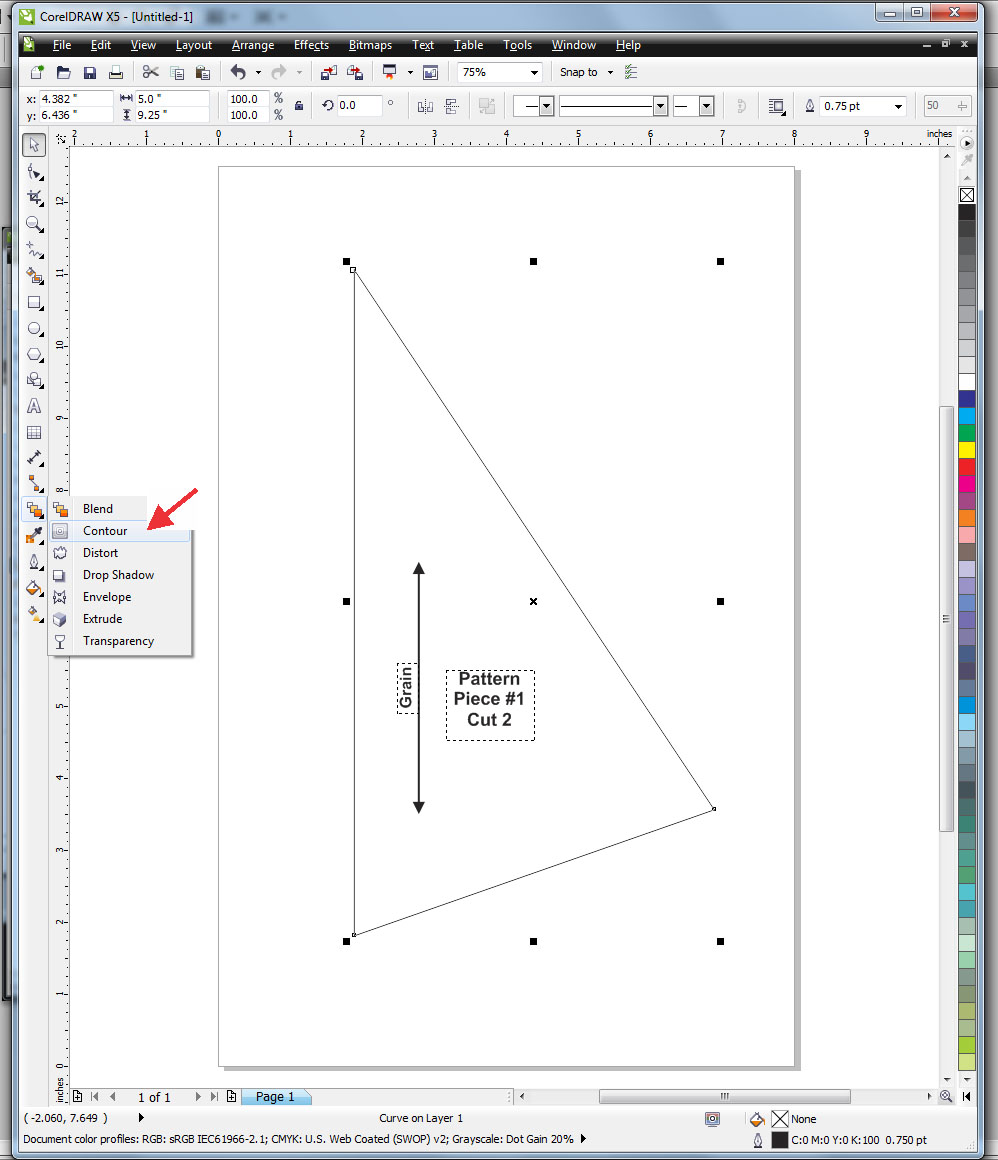
On the left side of your screen, find the Contour tool and select it. (See photo for location)
On the left side of your screen, find the Contour tool and select it. (See photo for location)
Apply Contour, Set Seam Allowance Width
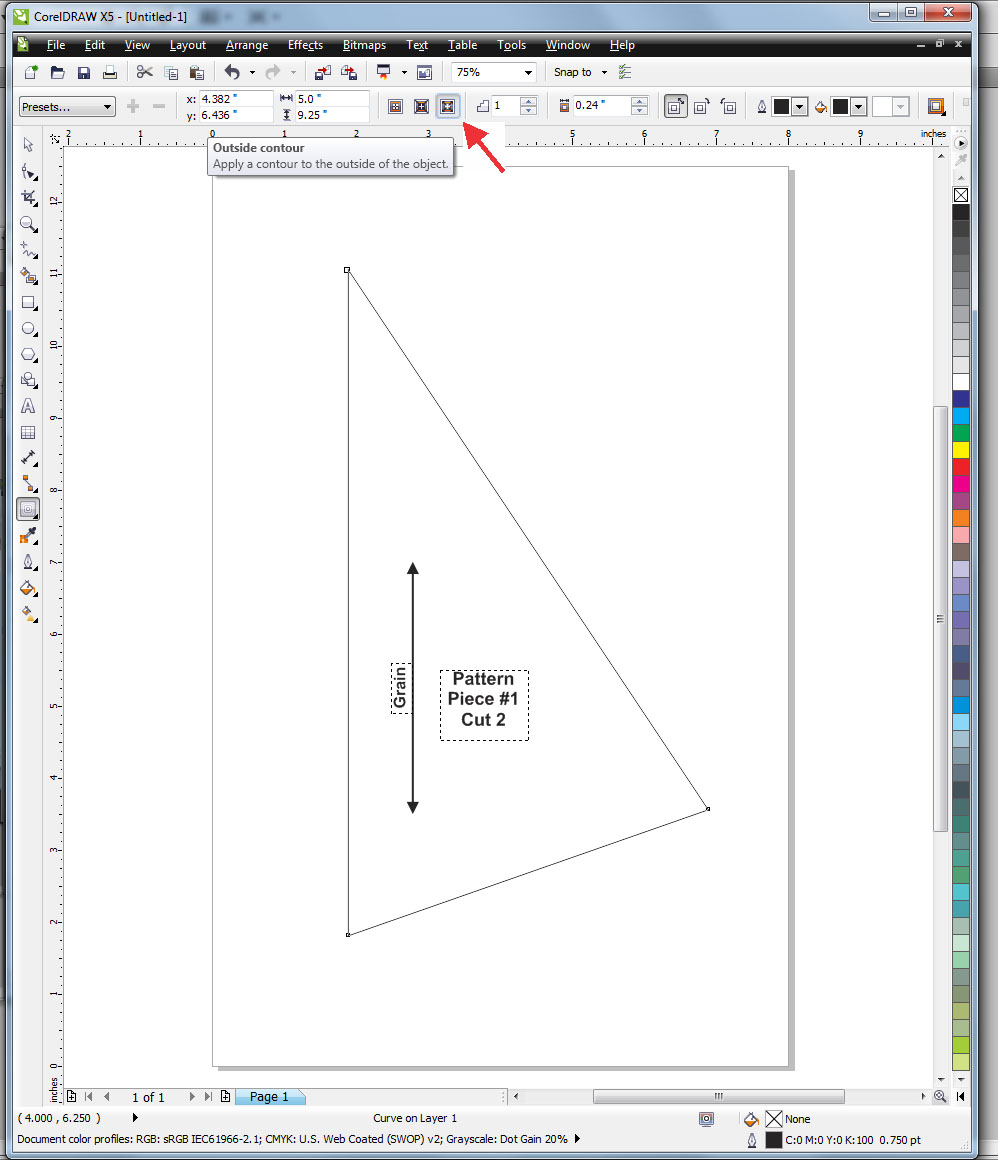
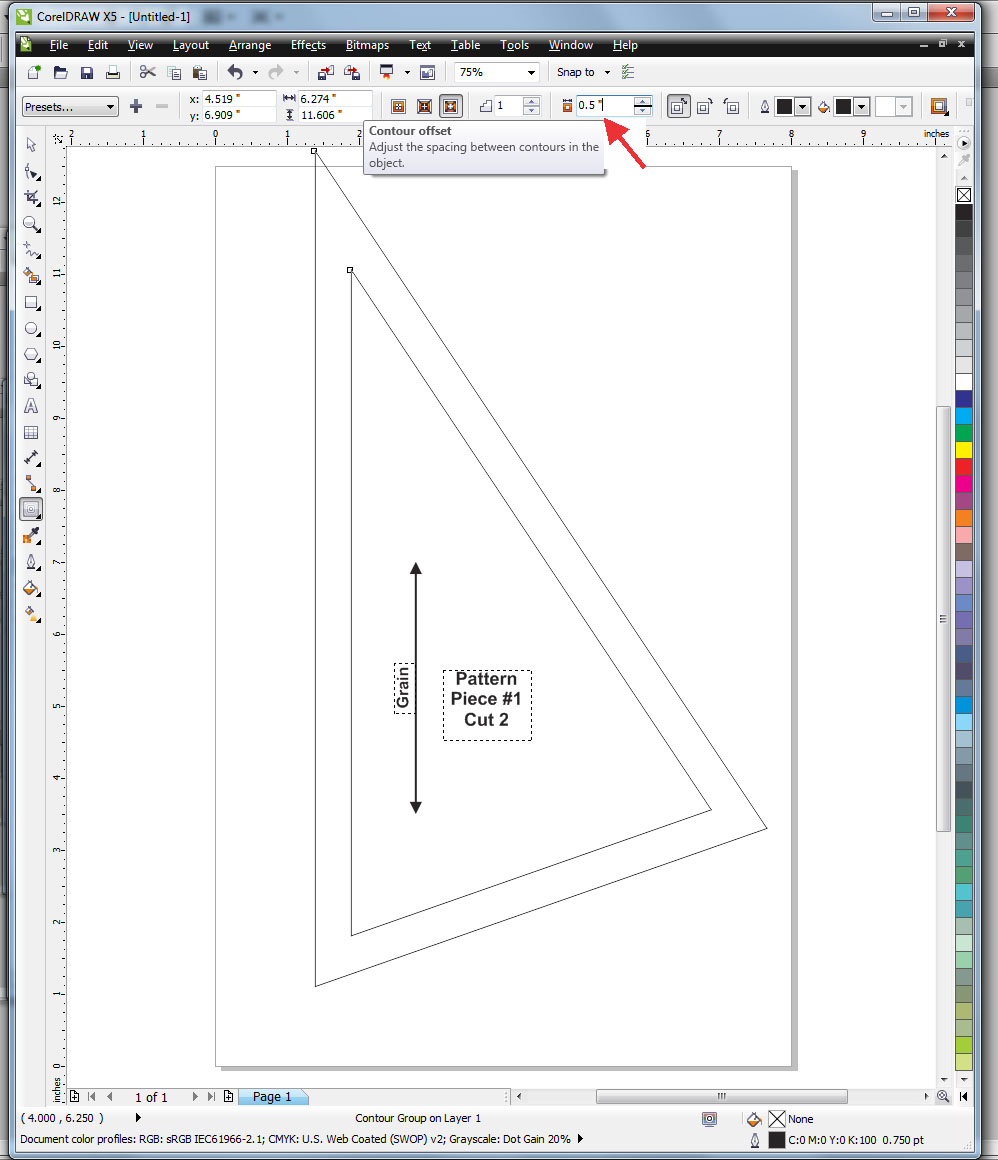
Near the top center of your screen, select the icon for an Outside Contour (see photo for location). This will create a new object that surrounds your original one. The distance between the two probably isn't correct, so adjust the spacing in the Contour Offset Box (see second photo for location). I've set mine to have a seam allowance of 1/2", but you could use 5/8" or whatever you choose.
Delete or Alter Original Cut Line
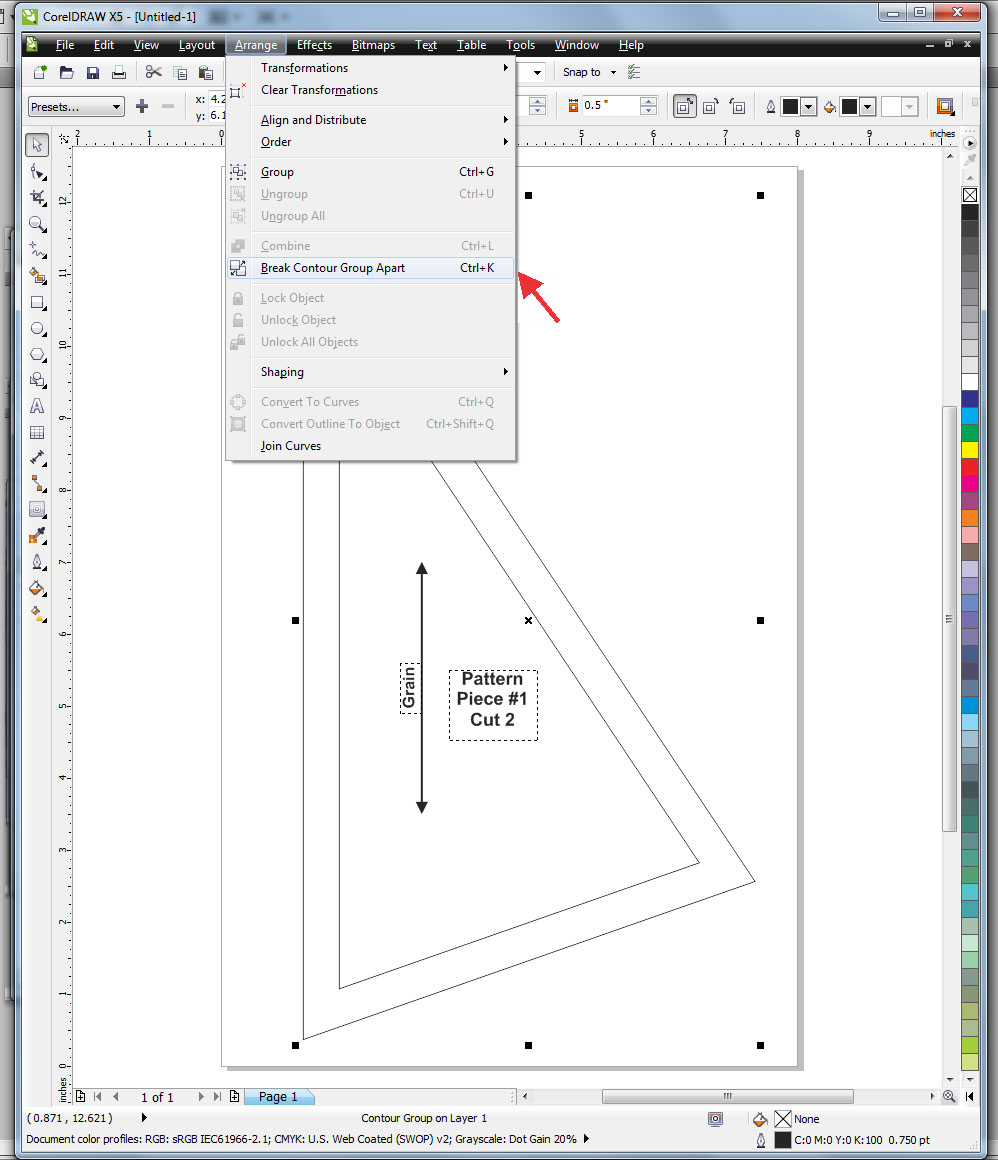
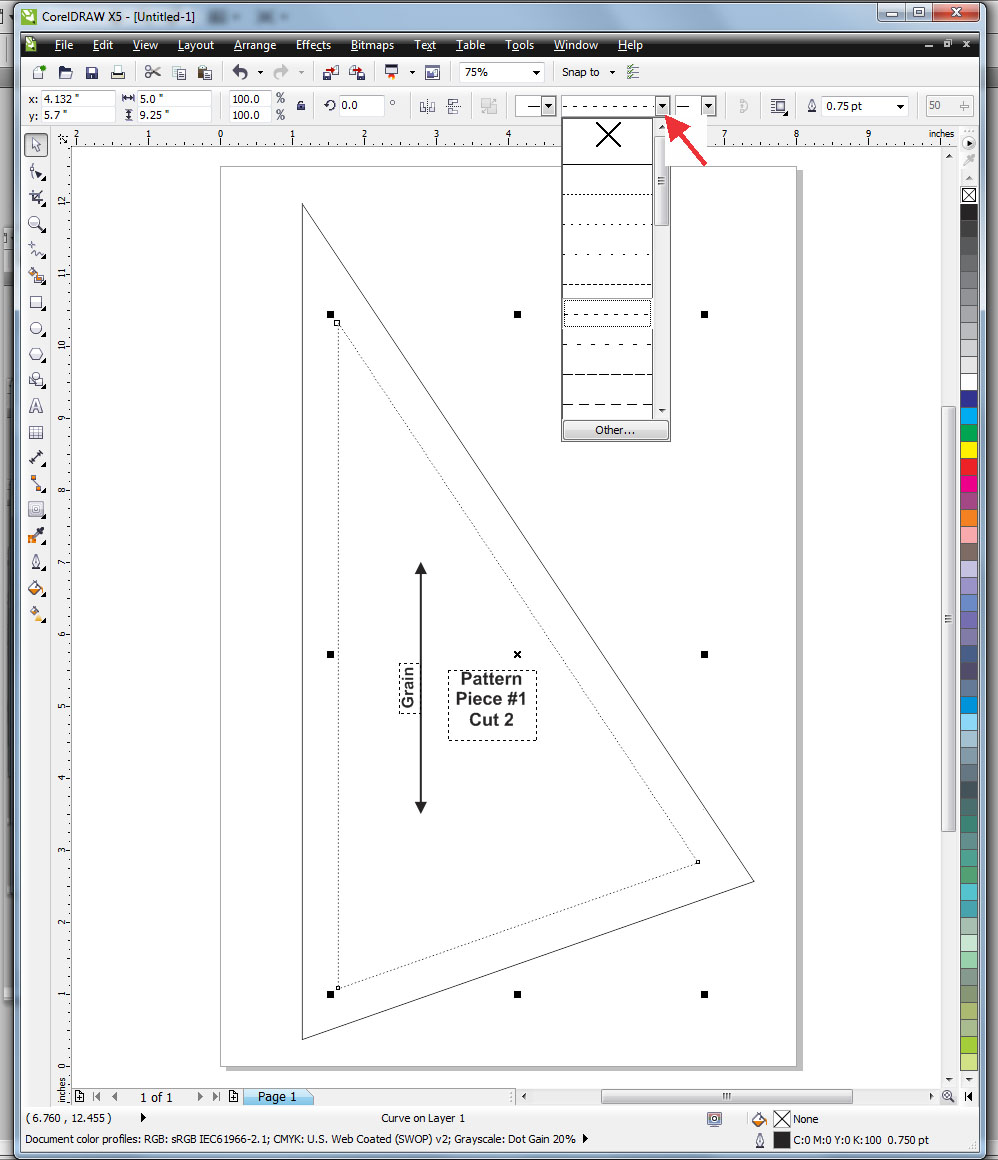
You could stop there. However, if you don't want your stitching line to be on the pattern, you can follow this last step to remove or alter it.
Currently, your seam line and your cut line are connected to each other, and if you delete one the other will vanish as well. With your pattern piece selected, go up to the Arrange drop down menu and select Break Contour Apart. This will disconnect the two objects so that you can alter or remove one independently of the other.
You can now select your original object and delete it. If you don't want to delete it entirely, but want to differentiate it from the cut line, you can select it and use the drop down line type selection menu to change it to a dotted line. You're done!