Adding Unlimited Memory to an EVO T20 With NT4e to Make a Usefull Computer
by nzqwack in Circuits > Computers
6666 Views, 5 Favorites, 0 Comments
Adding Unlimited Memory to an EVO T20 With NT4e to Make a Usefull Computer
Compaq EVO T20 Thin Clients can be picked up for less than $50 and are basically restricted mini computers, that with a little freely available software and some setup can be made into a useable silent low voltage desktop computer. The main issue with them is the lack of a hard disk for permament data storage of any decent size files . And this Project totally solves this limitation.
All you need is a NT embedded Compaq EVO thin Client - Wired ethernet broadband access a USB Keyboard a USB Mouse a Monitor and a USB memory stick formatted FAT- Plus these instructions.
Start off by Plugging everything in!
All you need is a NT embedded Compaq EVO thin Client - Wired ethernet broadband access a USB Keyboard a USB Mouse a Monitor and a USB memory stick formatted FAT- Plus these instructions.
Start off by Plugging everything in!
First Change to Administrator Mode
To do anything we need to unlock the clients flash memory.
So first of all turn it on ( single press of on off button when it is not showing amber - turns green and system boots - The system is NT4 and so starts with a Blue screen showing the system and memory. This Blue screen is totally normal and part of the NT boot! The unit will seem like it is doing nothing but it is all going on behind the blue screen, shortly it will start the traditional Windows Desk top )
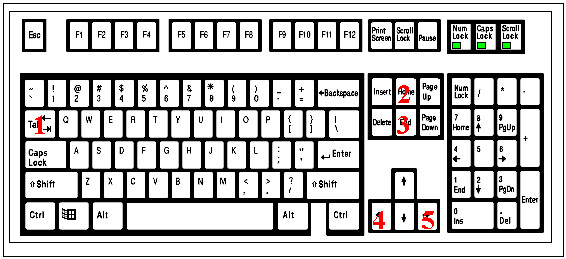
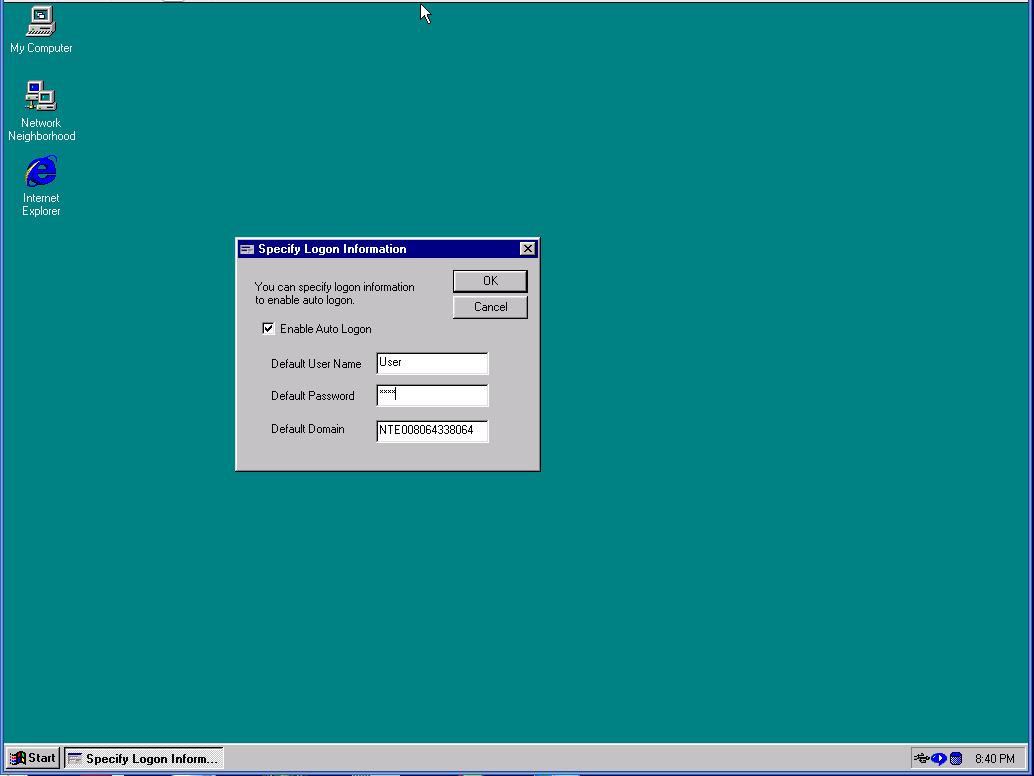
To Unlock it needs to be in Administrator mode to do this press Tab Home End Left arrow Right Arrow and this will start the Specify Logon Information
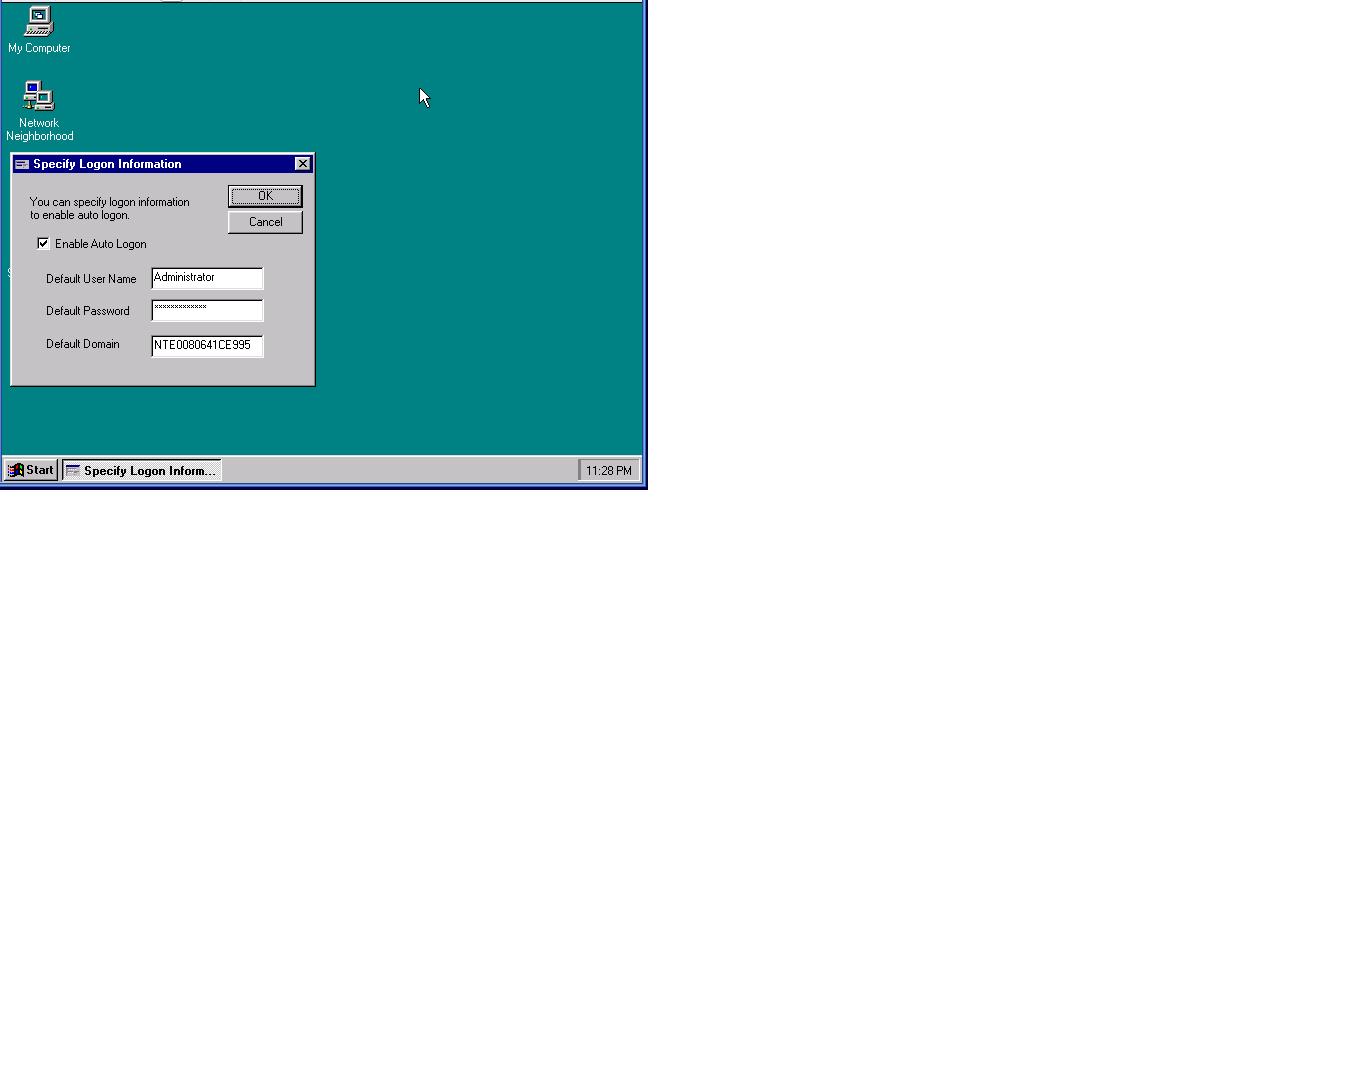
Will need to change the settings for Default User Name from User to Administrator
And Default Password From User to Administrator ( Note all these are case sensitive and fixed)
Can now change into Administrator mode by clicking start-logoff which will close the Desktop and reopen it As the Administrator with out restarting but gives you a lot more options .
Unlock the Flash Drive
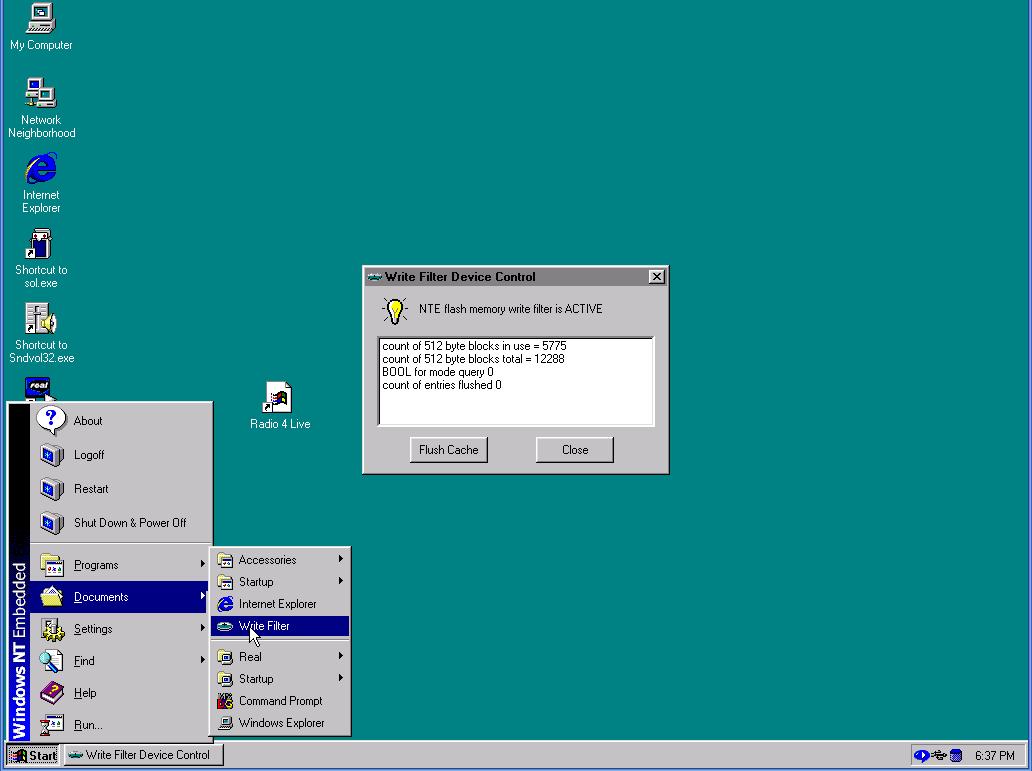
Now need to Unlock the Flash Memory to make permanent changes. If the Client was to be restarted without doing this any changes will be lost and you will be back to the begining. Most NT Evo have memory protection a few do not if yours does not have the memory protection you do not need to do this step every time you restart the unit in this installation procedure-
Click on Start programs Write Filter and this should start the Write filter Device Control
Click on Flush Cache and wait a few seconds
The Yellow light Bulb Icon on the infomation panel should Turn White and on some versions the small Blue Icon in the Bottom corner should Turn yellow Indicating the "Hard Drive" [actually the flash drive is now Unlocked !!]
Enlarge RAM Drive If Needed ( Z: Drive) to at Least 17megabytes
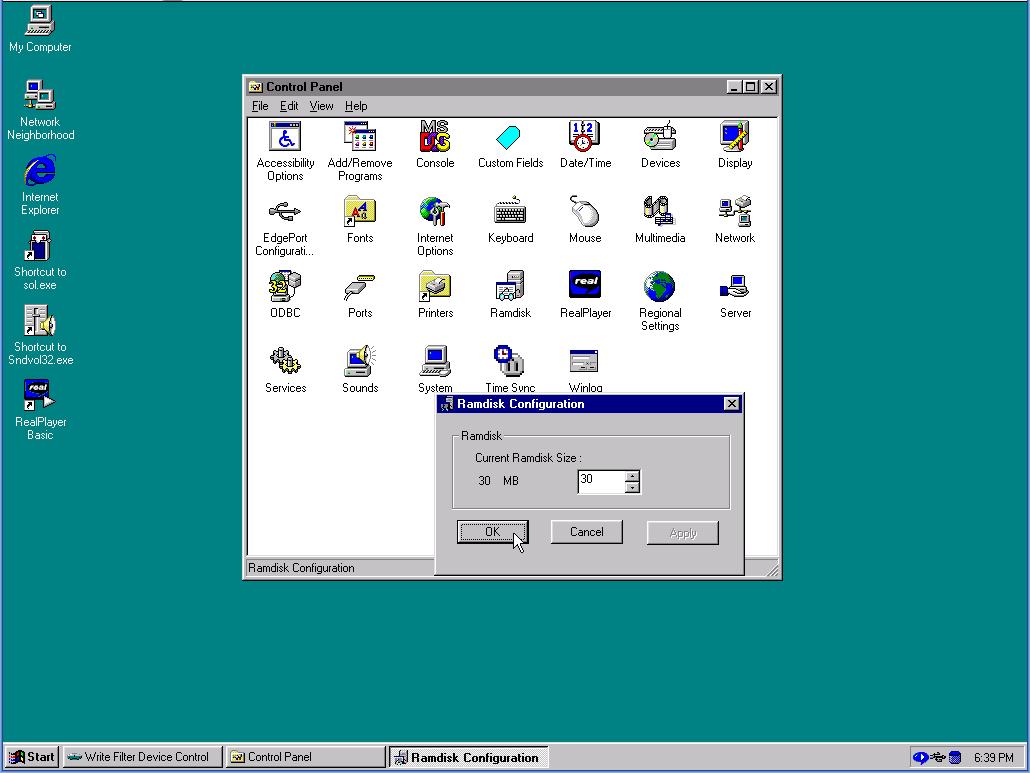

To install successfuly need somewhere to place the installation files and enough room to expand the files Ideally without using up any of the limited space on the C:drive. This can be done on the Ram drive Drive Z: open My computer on your desk top and see how big the Z drive is through its properties. 17 megabytes is just enough a little more would be better.
To set the Ram drive size go start >control Panel > click on Ram disk - set to anything from 17-30 megabytes ( dependant on how much ram you have in your EVO if you only have 30 megs of Ram 17 is a good choice if you have 128 then the Maximum 30 is better )
Reboot and on start up remember to again turn of the Write Filter again if one is fitted.
Download Software
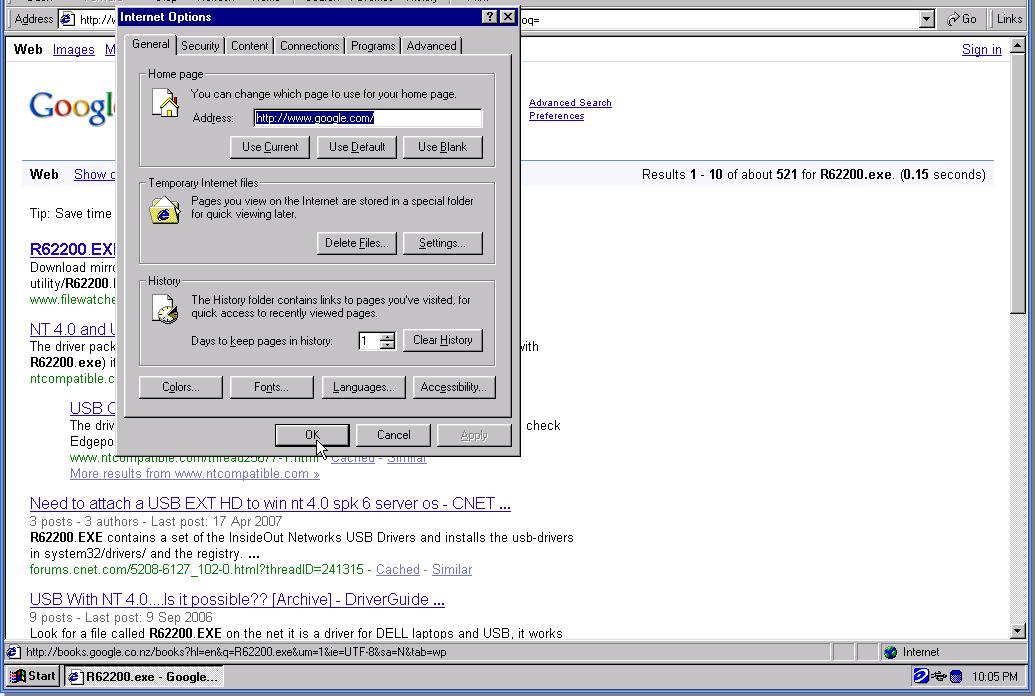
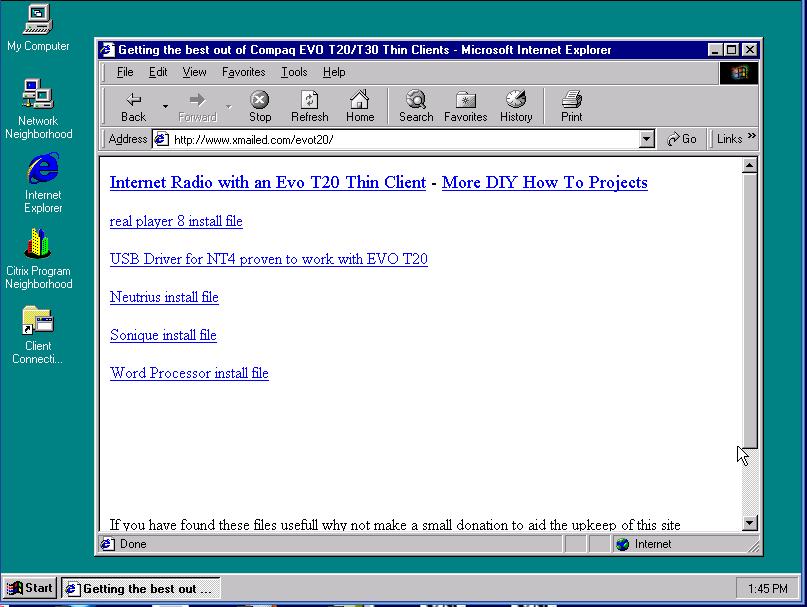
It is Now necessary to download some software. It is also a good time to change the default home page on the installed Browser Windows Explorer 5.5 : From the fairly unhelpfull www.Compaq.com to something usefull like www.google.com.
To do this click on the Internet Explorer Icon and then open > Tools> Internet Options and Edit the Home page to your Preferred Home page I would suggest http://www.google.com/
Click apply and Ok to save these changes Can now search for the software which is
R62200.EXE ( a Dell package which you can find yourself or down load dirrectly from my web site where I have archived a few usefull files)
http://www.xmailed.com/evot20/ NT4USB driver
Save this on the Ram Drive of the Computer Z: so you leave as much of the Flash Drive C: empty
Dependant on your EVO Thin Client Model you may have to delete some of the unnecessary Network programs to create space.
Run Software
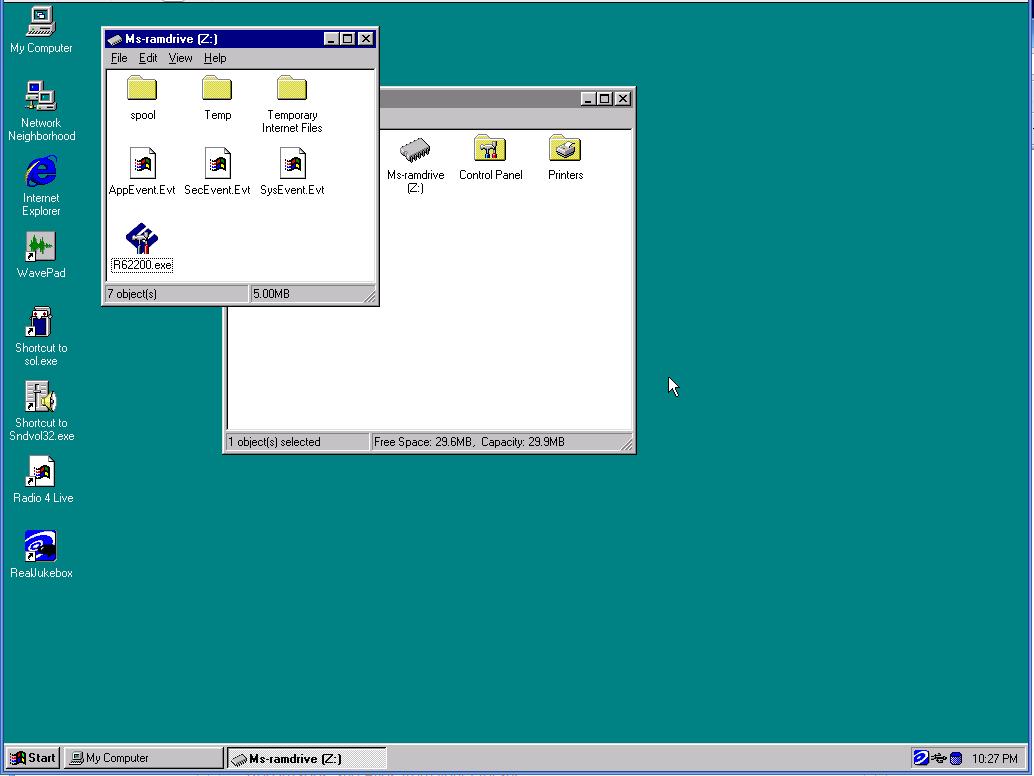
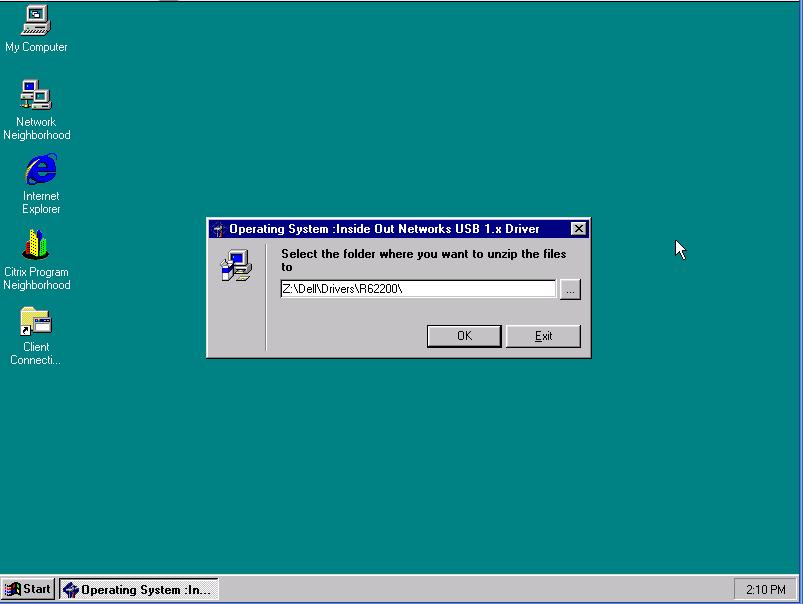
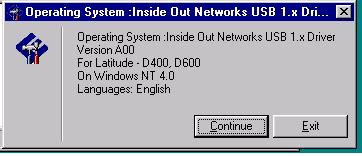
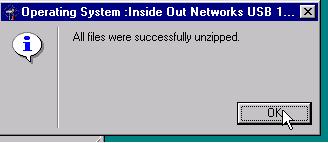
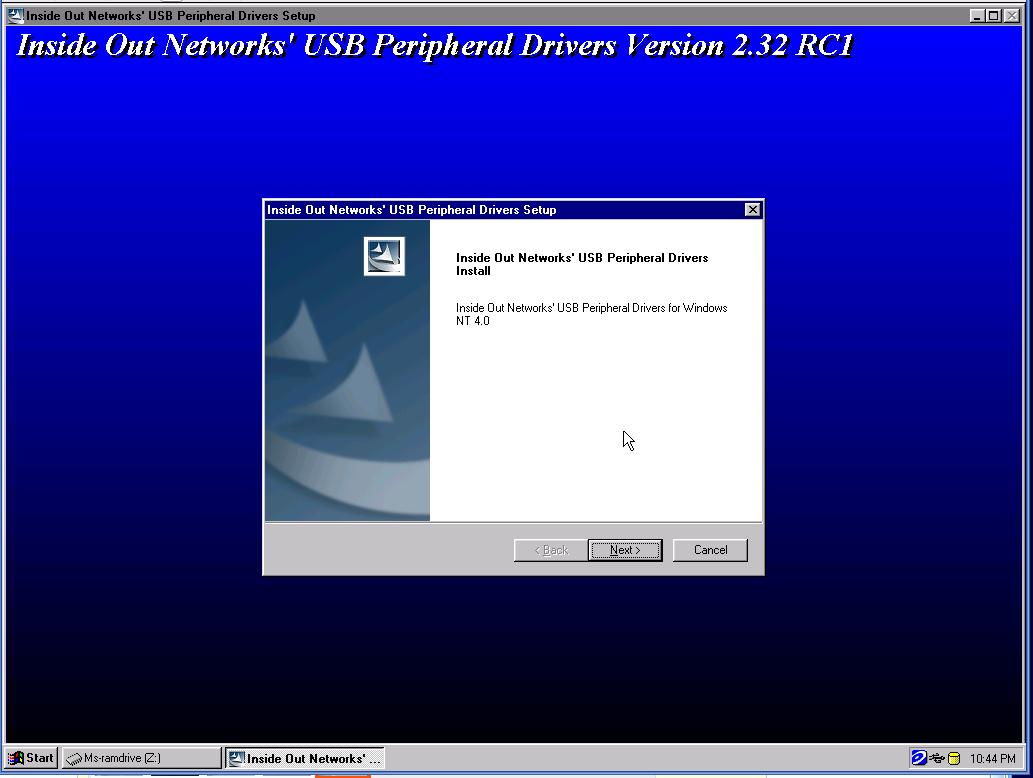
Double click on the File R62200.EXE and should self expand checking that the system is NT4 ( which it should be or you have been wasting your time and will have found these instructions rather odd ).
It will ask where to expand tempory files I would recommend changing this from
C:\Dell\Drivers\R62200\
to
Z:\Dell\Drivers\R62200\
to avoid filling your C drive with tempory files .
This should start the self install programe Click on "Continue" with first window that says " inside out Networks " OK for " folder selection " most options creates a Tempory directory called Dell/drivers/ that the files are unzipped too ( if space is at a premium on you C drive change settings to Z: ) and starts the install phase Clicking Ok and Next Loads the drivers.
Configer Software
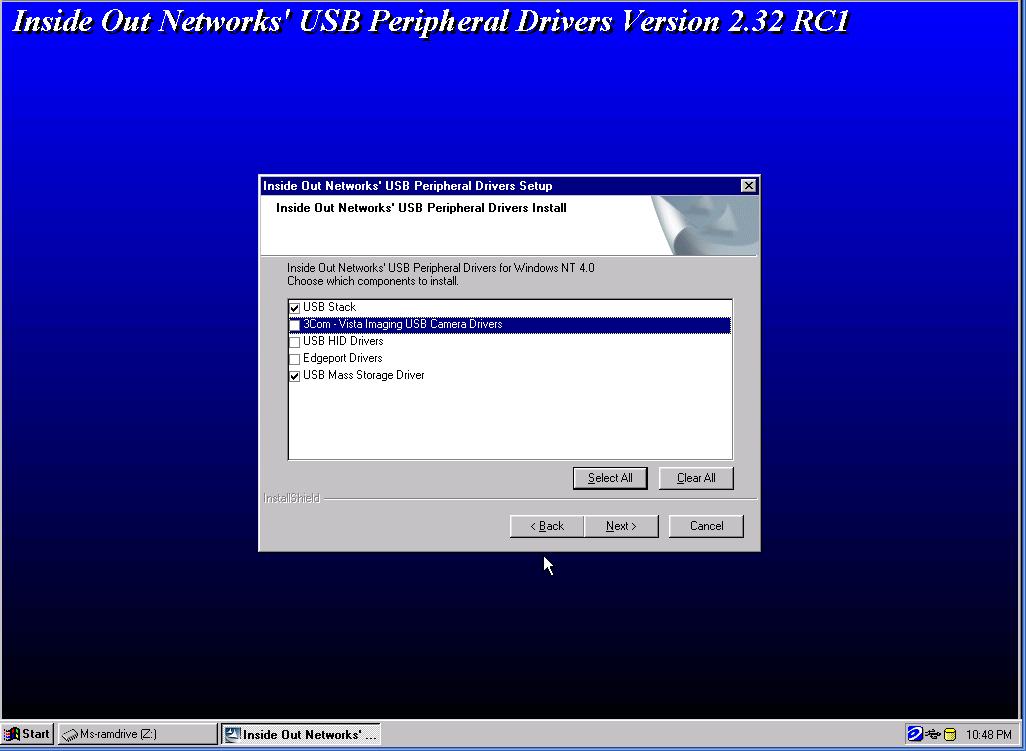
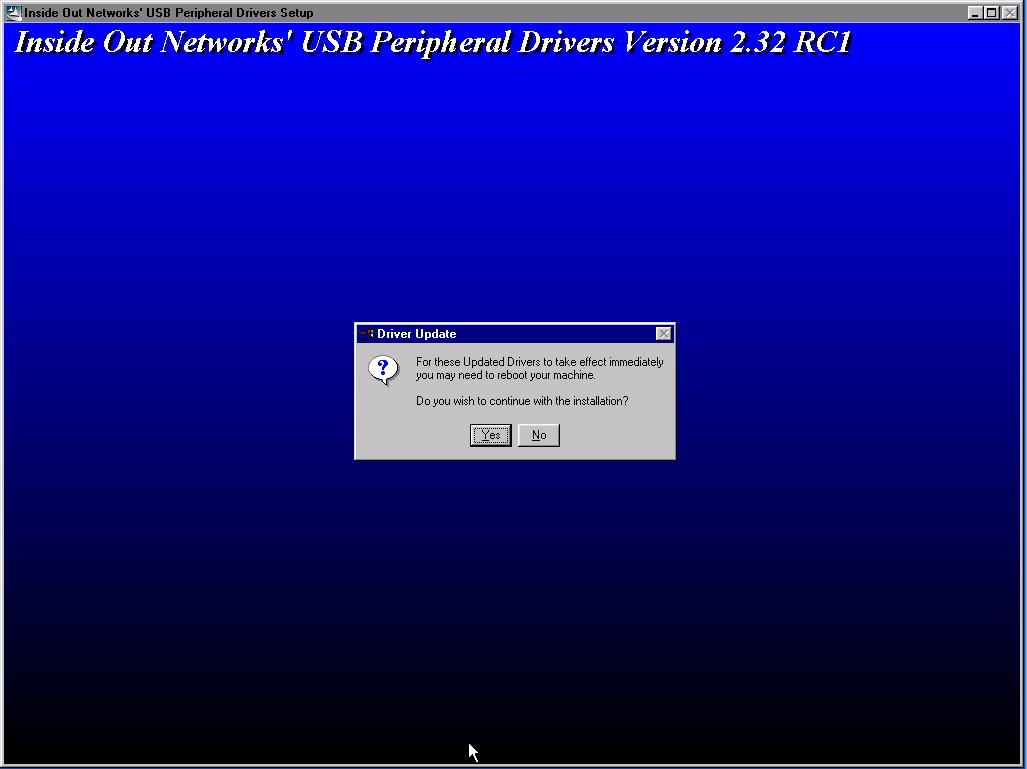
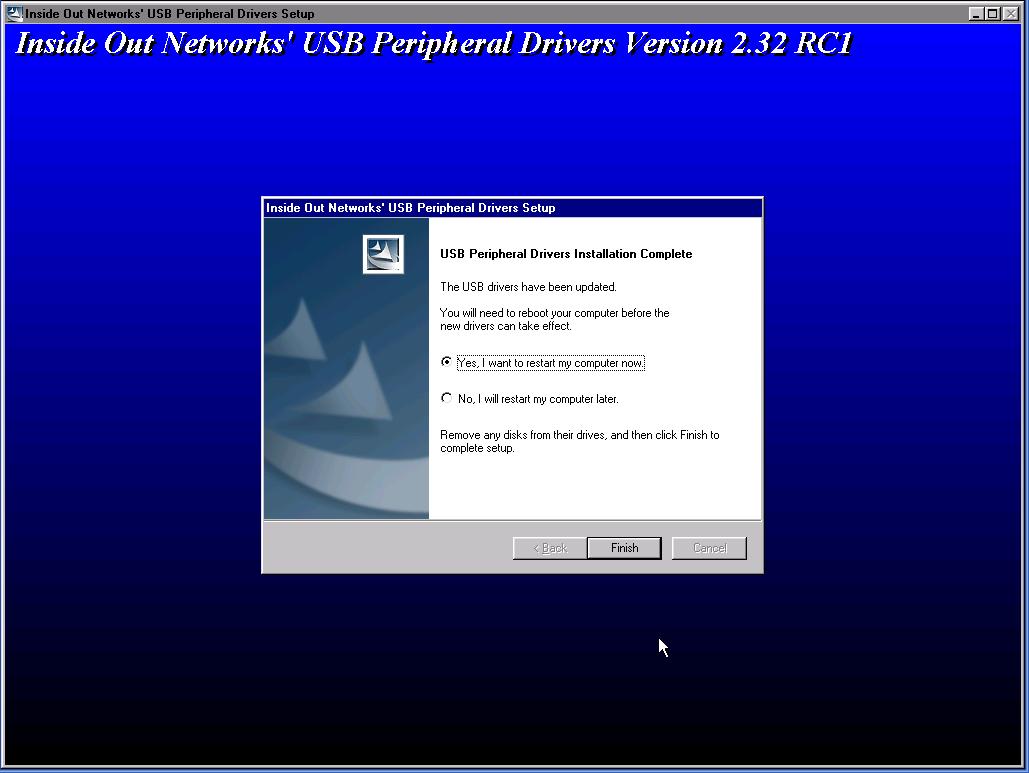
Select USB stack and USB Mass storage Drive then click next and The install program should do its thing, stopping at the end with a Driver Update reboot Window - Click Yes to reboot
Yes to install And Yes To already Plugged in ( It having found the the Key board and mouse )
After a few more screens ( clicking yes each time ) it will Come to final restart Screen.
Yes to install And Yes To already Plugged in ( It having found the the Key board and mouse )
After a few more screens ( clicking yes each time ) it will Come to final restart Screen.
Now Plug in USB Pen Drive

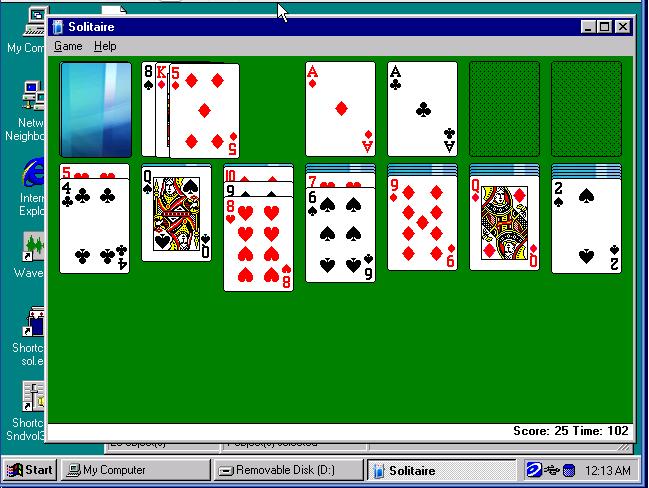
Plug In a USB Pen Drive of Decent capacity say 1 GIG ( if not already plugged in )
Note ; It Must be formatted FAT ( often default ) and not have any security features
Need to format it in an other machine as the Evo Client has no formating software ( at this stage )
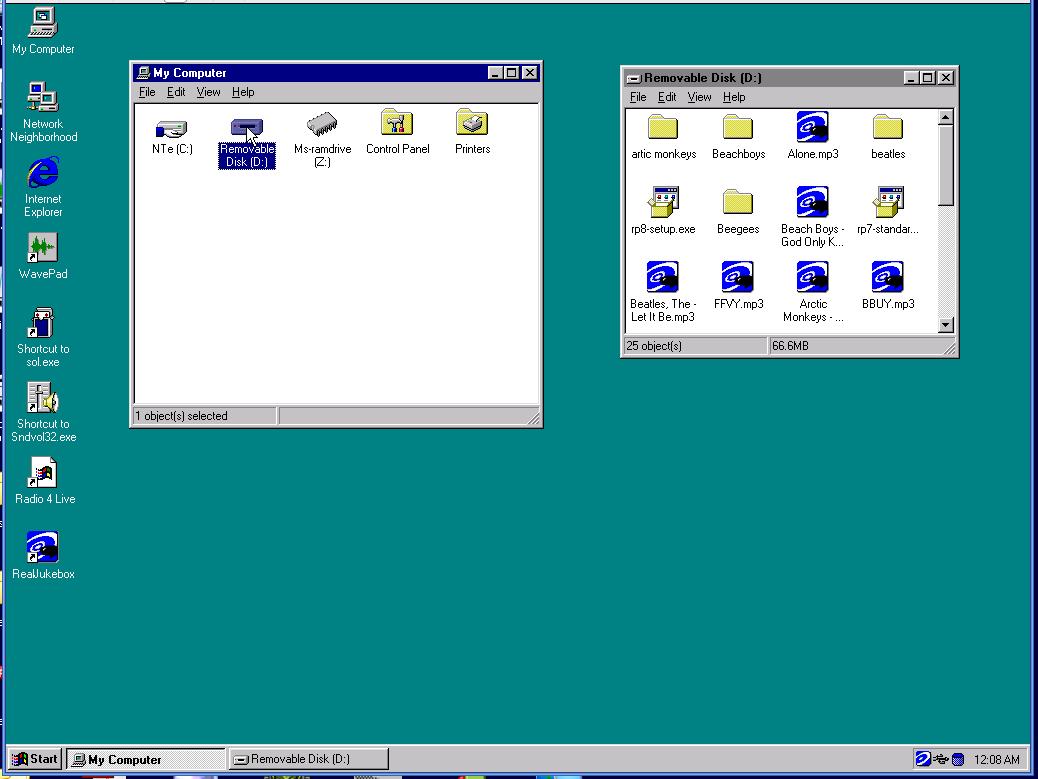
When you look in My Computer there in all its glory is you new Useful size Drive allowing you to easily save files and more programs Like a Word processor and of course Solitaire the main use for any computer If you Install an MP3 Player can make the unit into a Network controllable Jukebox Music Machine ( How to do this is Featured in another of my Instructable's)
Prior to rebooting return the Ramdrive size back to 3-4 megs to free up working Ram.
Enjoy Mark