Adding Effects to an Image in InDesign
by kdriver20 in Design > Digital Graphics
17867 Views, 4 Favorites, 0 Comments
Adding Effects to an Image in InDesign
Adding an image to your document in InDesign can significantly enhance your project. Better yet, adding an effect to your image will make it stand out to your audience and highlight specific features such as shape, shadow, depth, and texture. These easy to follow instructions will help a person of any skill level create a visually appealing image through the use of effects in InDesign. Depending on the effects you are adding to your image this process should take you 5 to 10 minutes.
Materials:
● Computer
● Adobe InDesign Software
● Image(s)
Open InDesign
Choose document size
Insert the Image
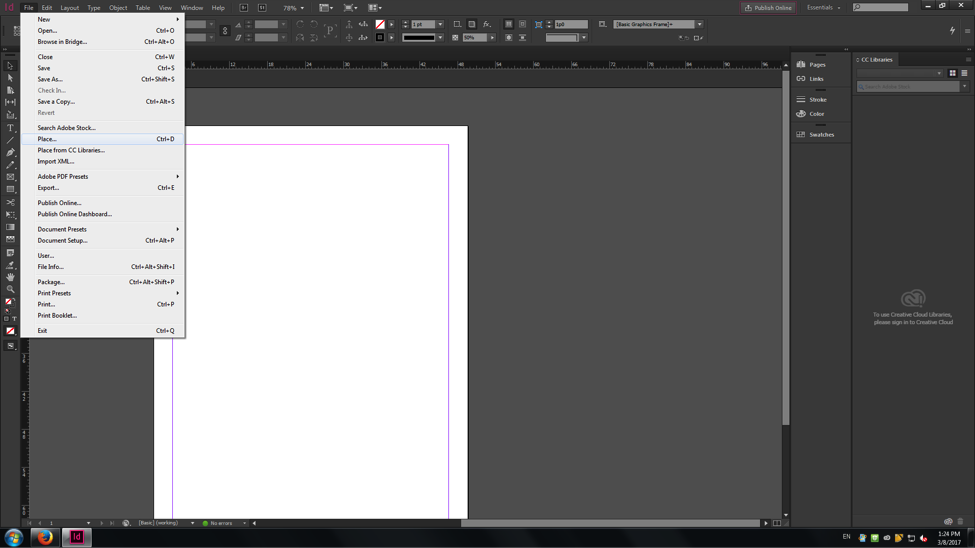
Go to the Toolbar and Select File>Place and choose the image from your folder that you wish to use.
*Note: Drag image into document with the selection tool.
Adjust the Size of the Image
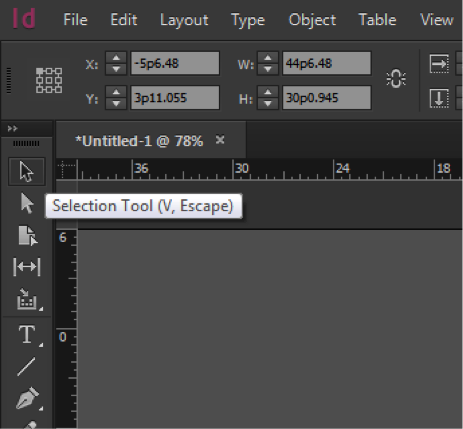
Select InDesign’s Selection Tool. Use the cursor or arrow keys to place the image in its desired location and adjust the size by dragging the corners.
*Note: Hold "control" "shift" if you want to change the height and width of the image
Display the Effects Window
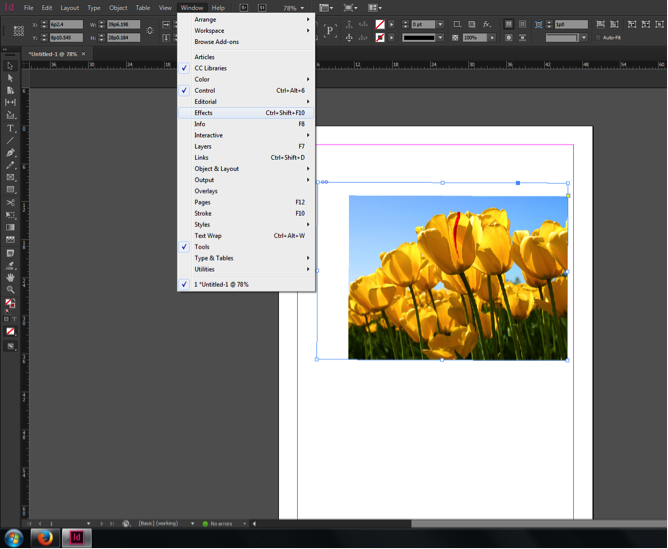
Select Window>Effects and a window labeled “effects” will pop up.
Select the Object

Click on the photo that you wish to edit.
Open the List of Effects
.png)
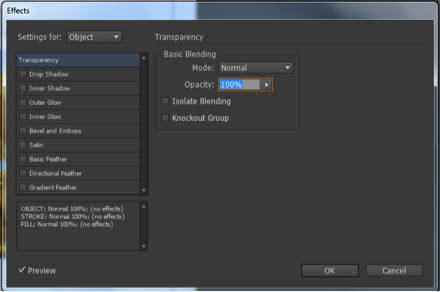
Double click on Object in the effects window to make another window appear with the different effects listed under Transparency.
*Note: Check the Preview box if you wish to see the effects on your image as you make them
Choose the Effect
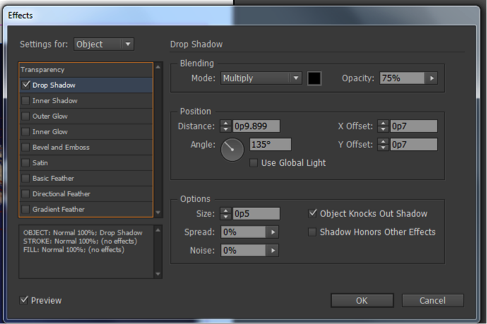
Click the desired effect (do not click directly on the checkbox) to bring up detailed preferences of the chosen effect.
Click "OK" when you are finished.
*Note: To clear all effects from an object click Clear All effects button in the effects
panel or choose Clear All Transparency on the effect panel menu.
Final
Now you have successfully added an effect to an image in InDesign. The result may be your finished product or simply the first effect added to the image. To layer more effects or for further details, go to http://www.adobe.com/products/indesign.html.