Add POI Locations to OSM Using Your IPhone
by hakkavelin in Design > Websites
3198 Views, 3 Favorites, 0 Comments
Add POI Locations to OSM Using Your IPhone
Adding Places of Interest (POI) locations to the Open Street Map (OSM) project is a great way to enhance the digital representation of your surrounding community! It's even easier than you think, since you can easily add POI locations using your iPhone (and other mobile devices).
What you need (besides a mobile device):
- An OSM account (briefly covered in step one)
- An OSM app for your mobile device
This instructable is specific to the iPhone and using the Pushpin app, which in our experience provides a user friendly interface to explore and add locations. The steps are very similar using other devices or apps, but the screenshots will not match.
Proceed to step 1 if you do not have an OSM account or skip to step 2 if you already have one that you want to have publicly associated with the POI you add.
Creating a New OSM Account
The OpenStreetMap is a free worldwide map, created by people like you. Think Google Maps that you can edit - or the Wikipedia Map - although there is no official affiliation between the Open Street Map Foundation and either Google or Wikipedia (that we are aware of). You might be tempted to think that such a map would be inaccurate, and for certain locations that might certainly be true. However, if you encounter an area that you are familiar with that is inadequately or inaccurately represented on the map, you yourself can take matters into your own hands, and fix it! To do that you need to have an OSM account, which you can do here: https://www.openstreetmap.org/user/new
You can alternatively use your OpenID to log in directly: https://www.openstreetmap.org/login
Remember that any POI you add is publicly noted and listed as having been added (or edited) by you, using the publicly displayed username you choose. You can change the username later in the preferences. Other information you provide, such as your email address, is not displayed publicly. You can read the OSM Privacy Policy here: http://wiki.openstreetmap.org/wiki/Privacy_Policy
Step 2: Checking for POIs
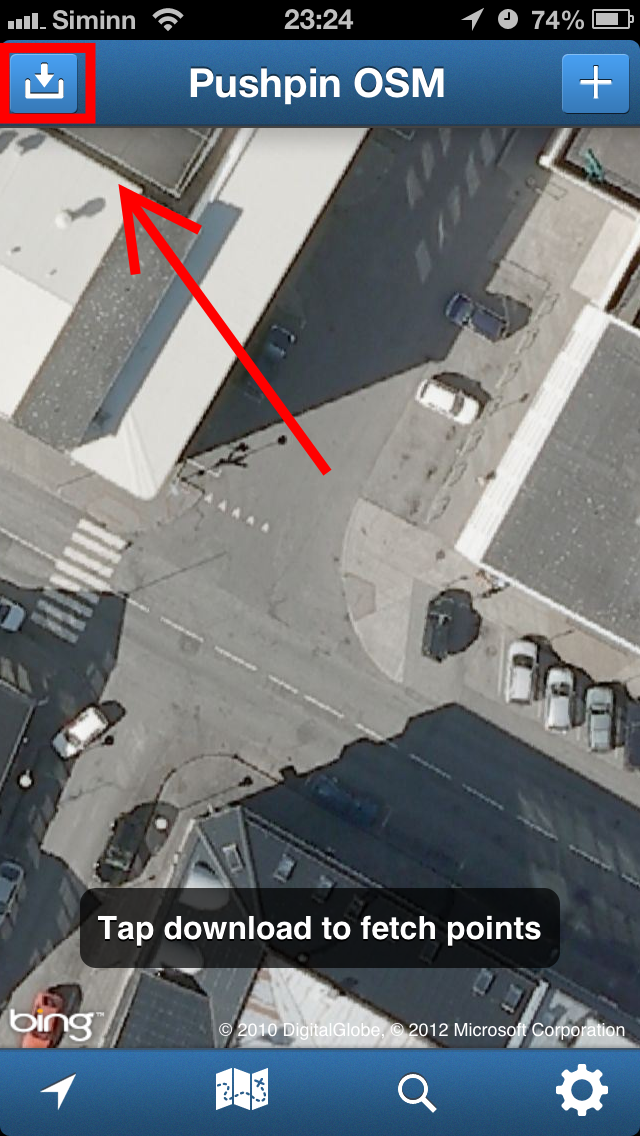
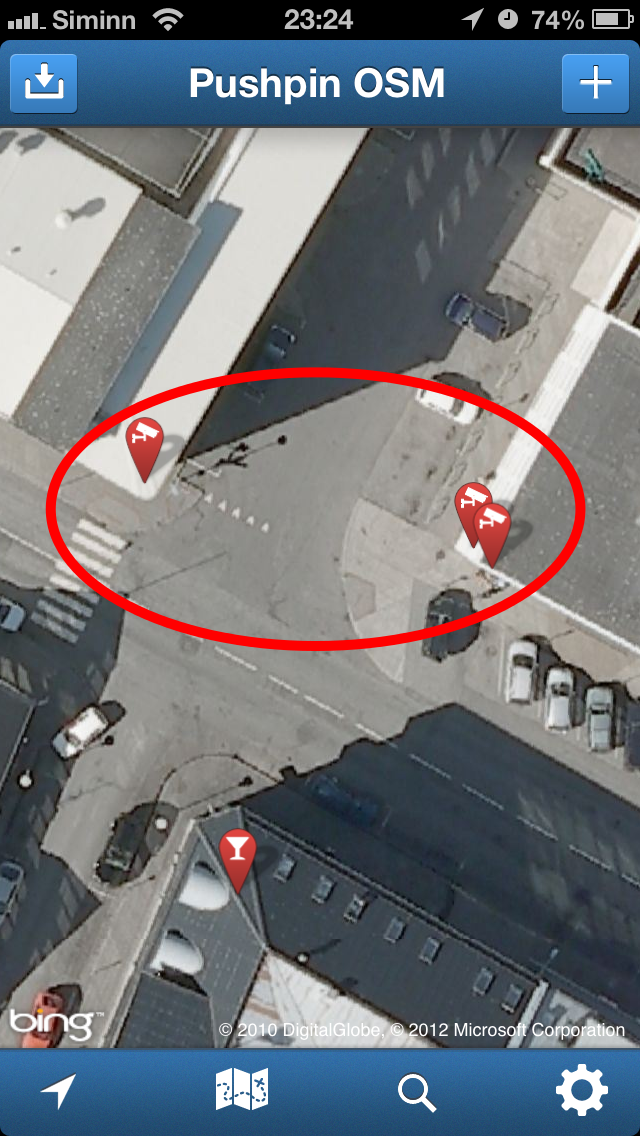
Before you add any new POI to the OSM, be sure to check if it has been added already.
In Pushpin you do this by zooming in to the area you are interested in and tapping the download button in the upper left corner.
If you see an icon representing what you want to add already present on the map, you can view it and update it if needed, but don't add another one for the same object.
In Pushpin you do this by zooming in to the area you are interested in and tapping the download button in the upper left corner.
If you see an icon representing what you want to add already present on the map, you can view it and update it if needed, but don't add another one for the same object.
Step 3: Marking the Location
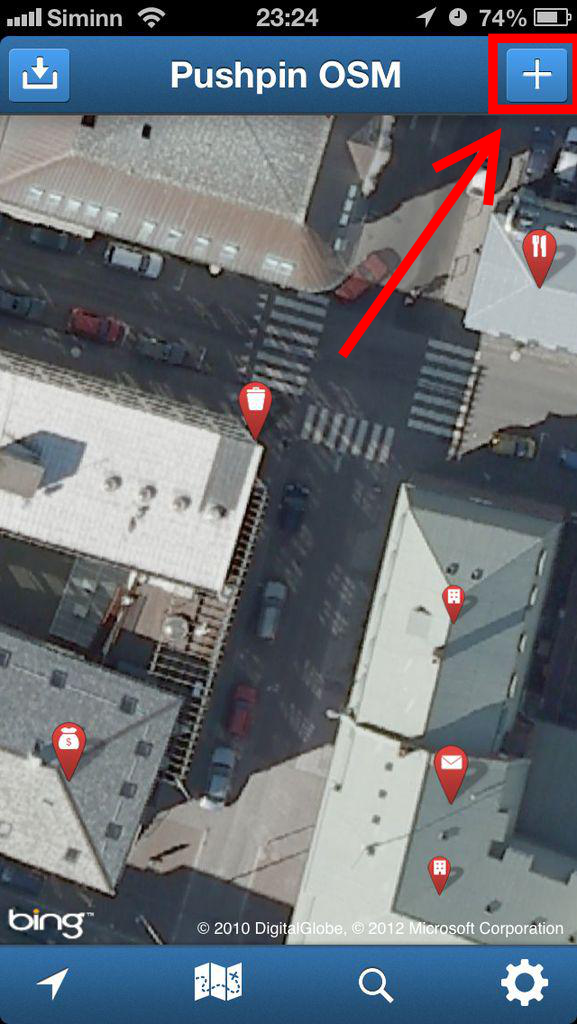
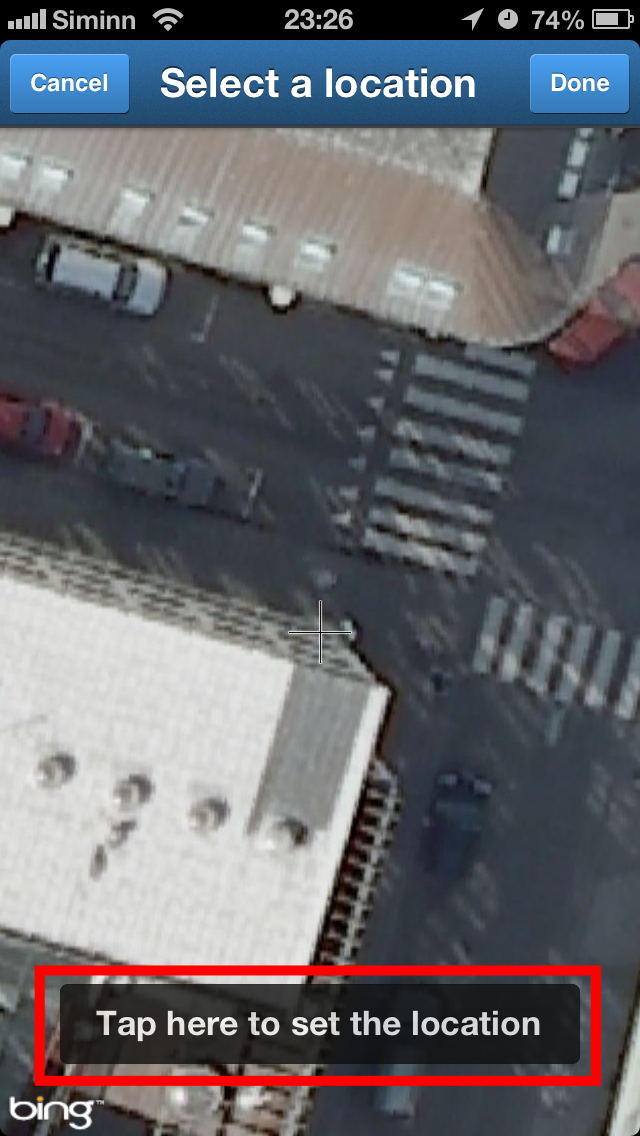
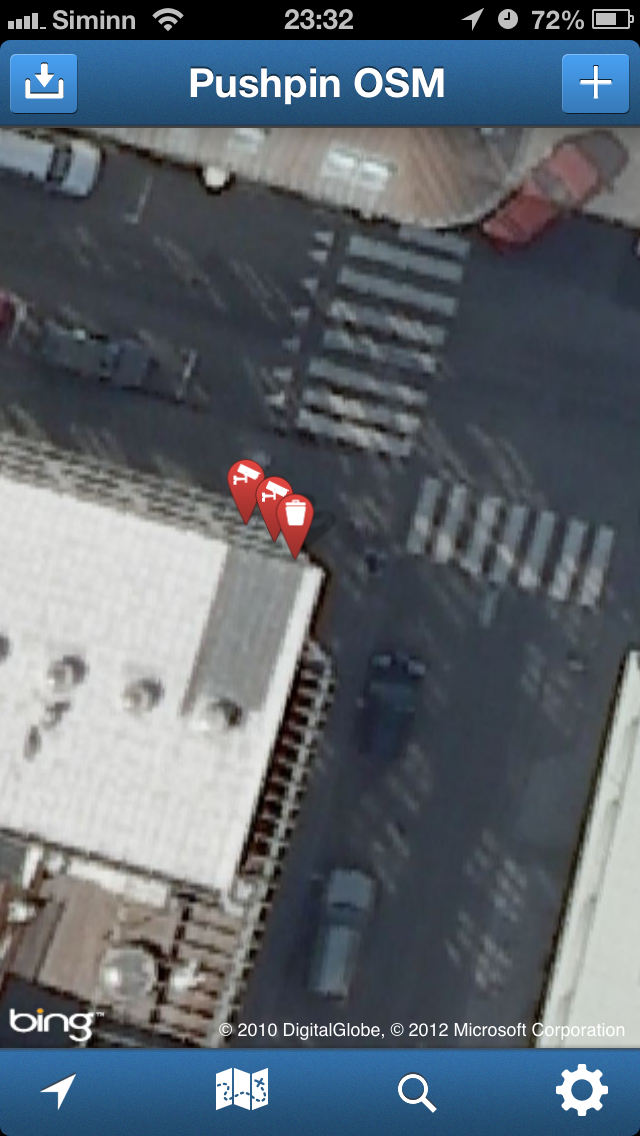
After you've found your location and have made sure that the item hasn't been added already, in this case a couple of security cameras on the corner where the trash bin is, you can add it.
You do this by pressing the + button in the upper right corner of Pushpin.
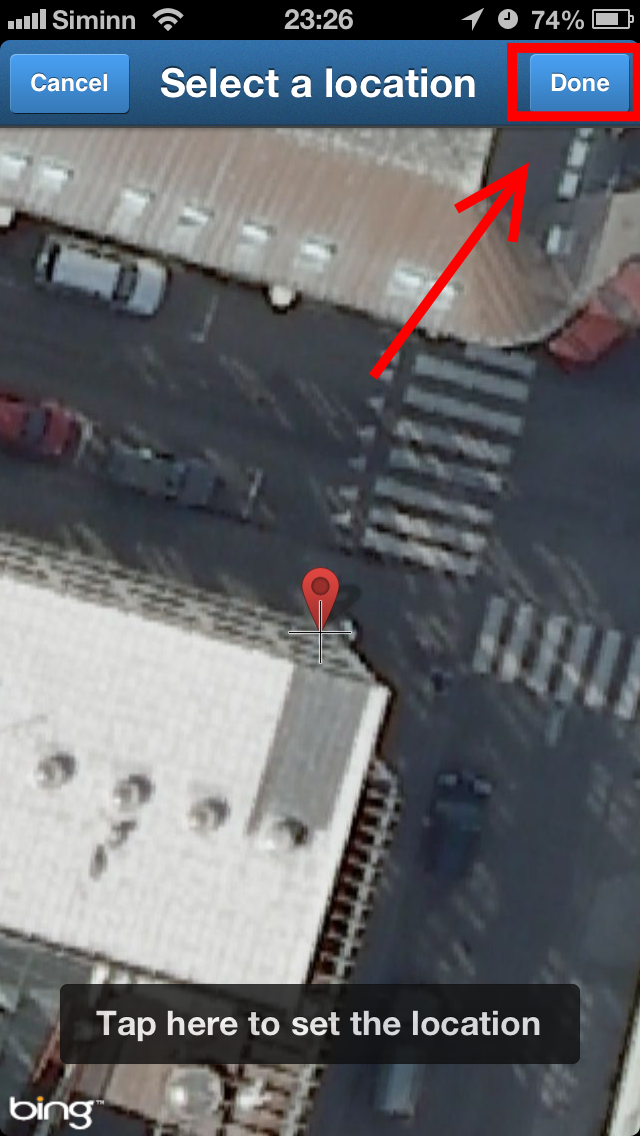
You then move around the crosshair marker on the map itself until it is in the correct location, and then press the "Tap here to set the location" overlay on the map (see Image 2 in this step).
The item is then marked with a little red bubble drop, see image 3.
Then you press Done in the upper right corner to proceed to the next step.
Step 4: Selecting the Type of the POI
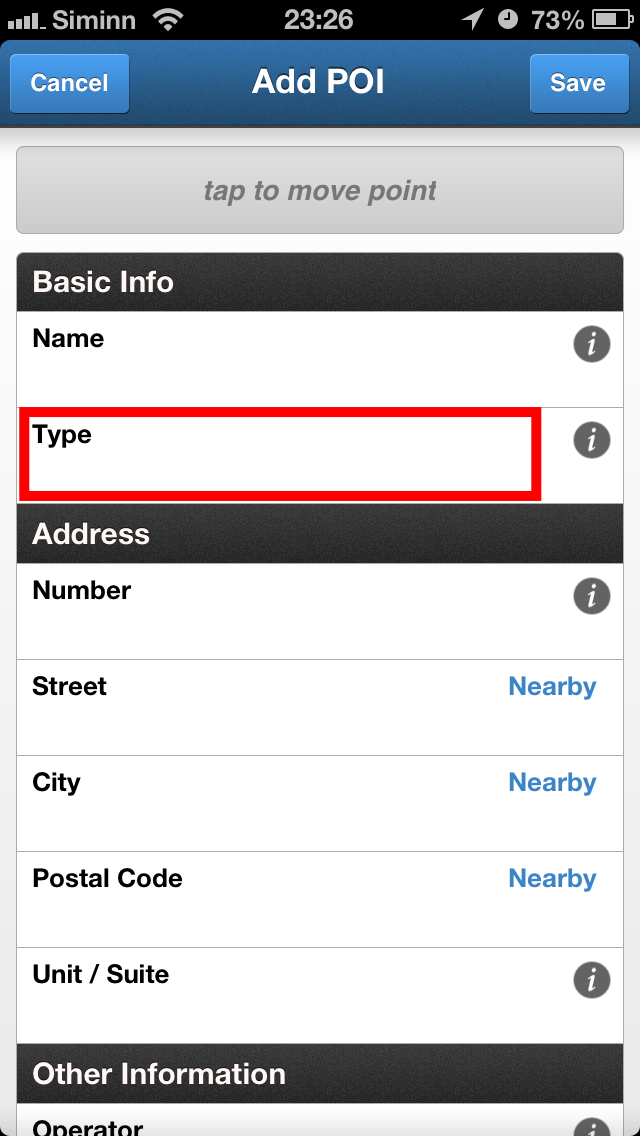
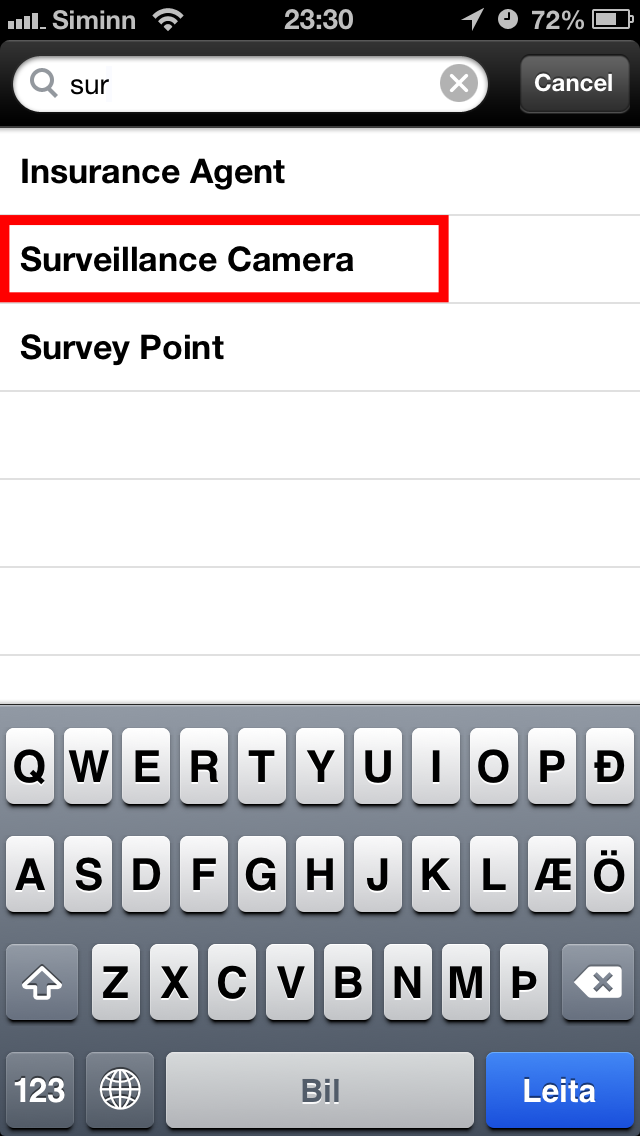
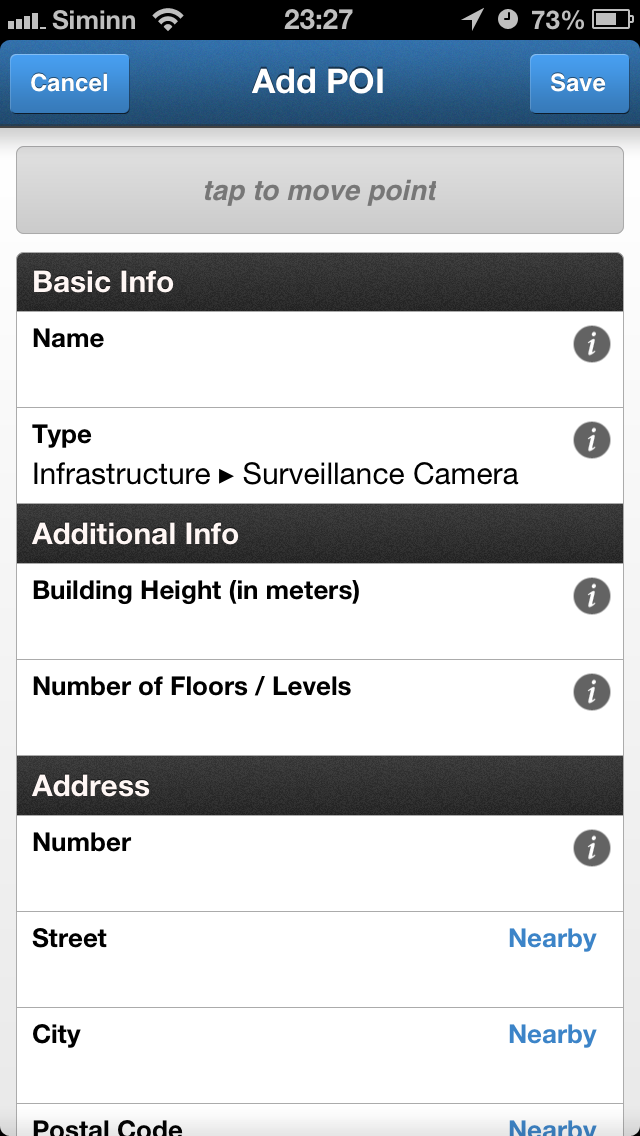
Once you've added the place marker to the map, the Add POI screen is displayed. Start by selecting the Type in the Basic Info part, as this can in some instances add extra fields below based on the type. If applicable, also add a name.
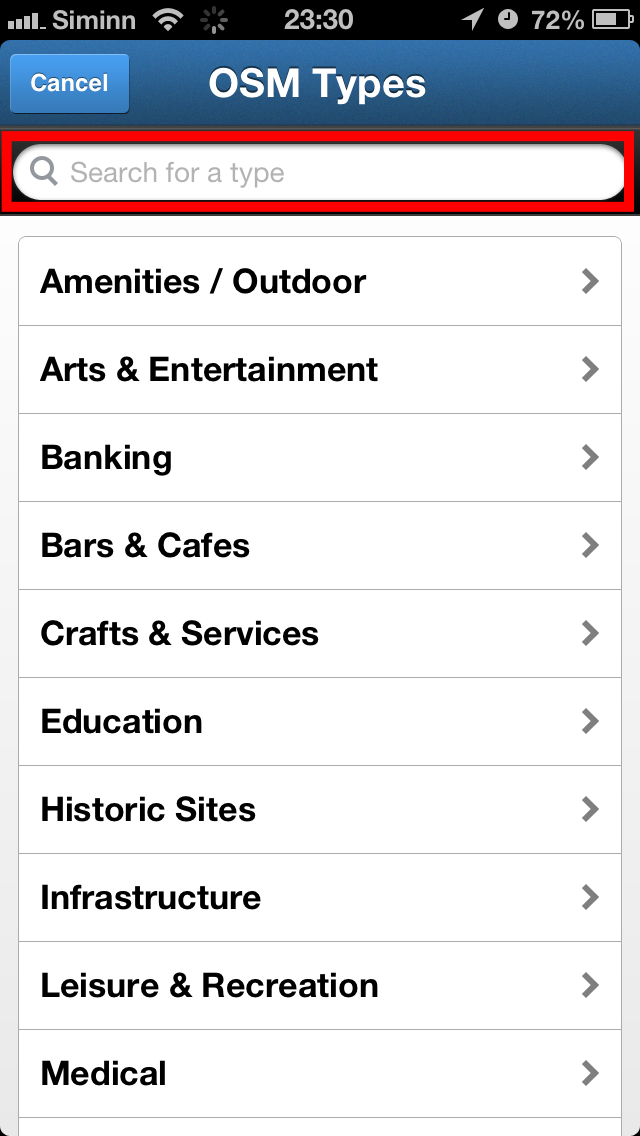
In this case we are adding a security camera in a public location outdoors. Tap the Type field and use the search field at the top of the screen that appears to make it easier for you to find the type you want, see image 2 in this step.
In this case we are adding a security camera in a public location outdoors. Tap the Type field and use the search field at the top of the screen that appears to make it easier for you to find the type you want, see image 2 in this step.
Step 5: Adding Information to the POI
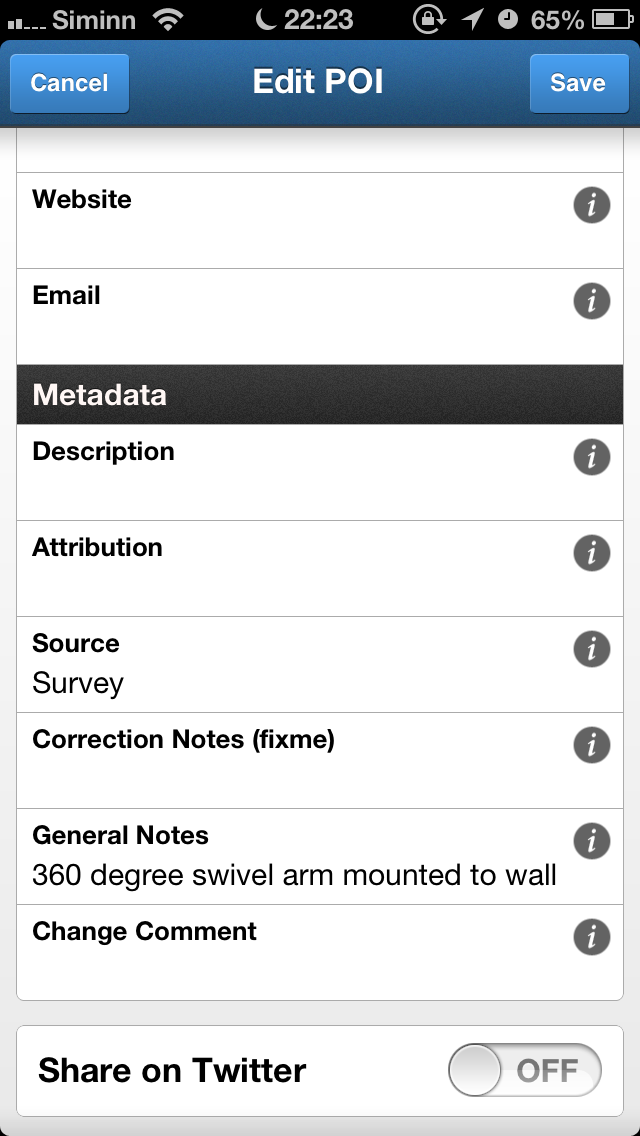
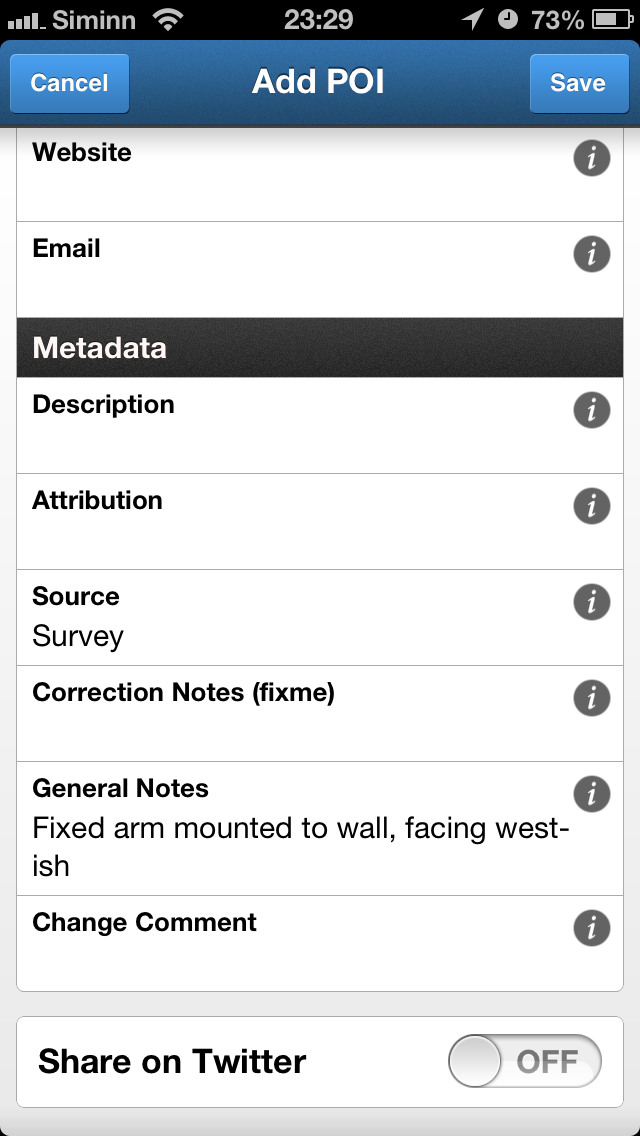

After you've selected the Type, be sure to add as much relevant information about the POI you are adding.
In our case we are adding a security camera, and we add the Operator (as it is apparent by a label on the camera) and General Notes about the camera, such as type, how it is mounted and info on what approximate cardinal direction it is facing (North - West - South - East) to distinguish between the many adjacent cameras in this location. Study the difference between the two different cameras captured in screenshot 1 and 2 in this step. They are very close and could easily be confused if not marked properly.
Add the Source as "Survey" if you viewed the location yourself.
Step 6: Enjoy Your Contribution!
Thats it! You've just helped make the Open Street Map even better! Enjoy your contribution and encourage others to add their own POIs.