Add DVDs to Your Zune
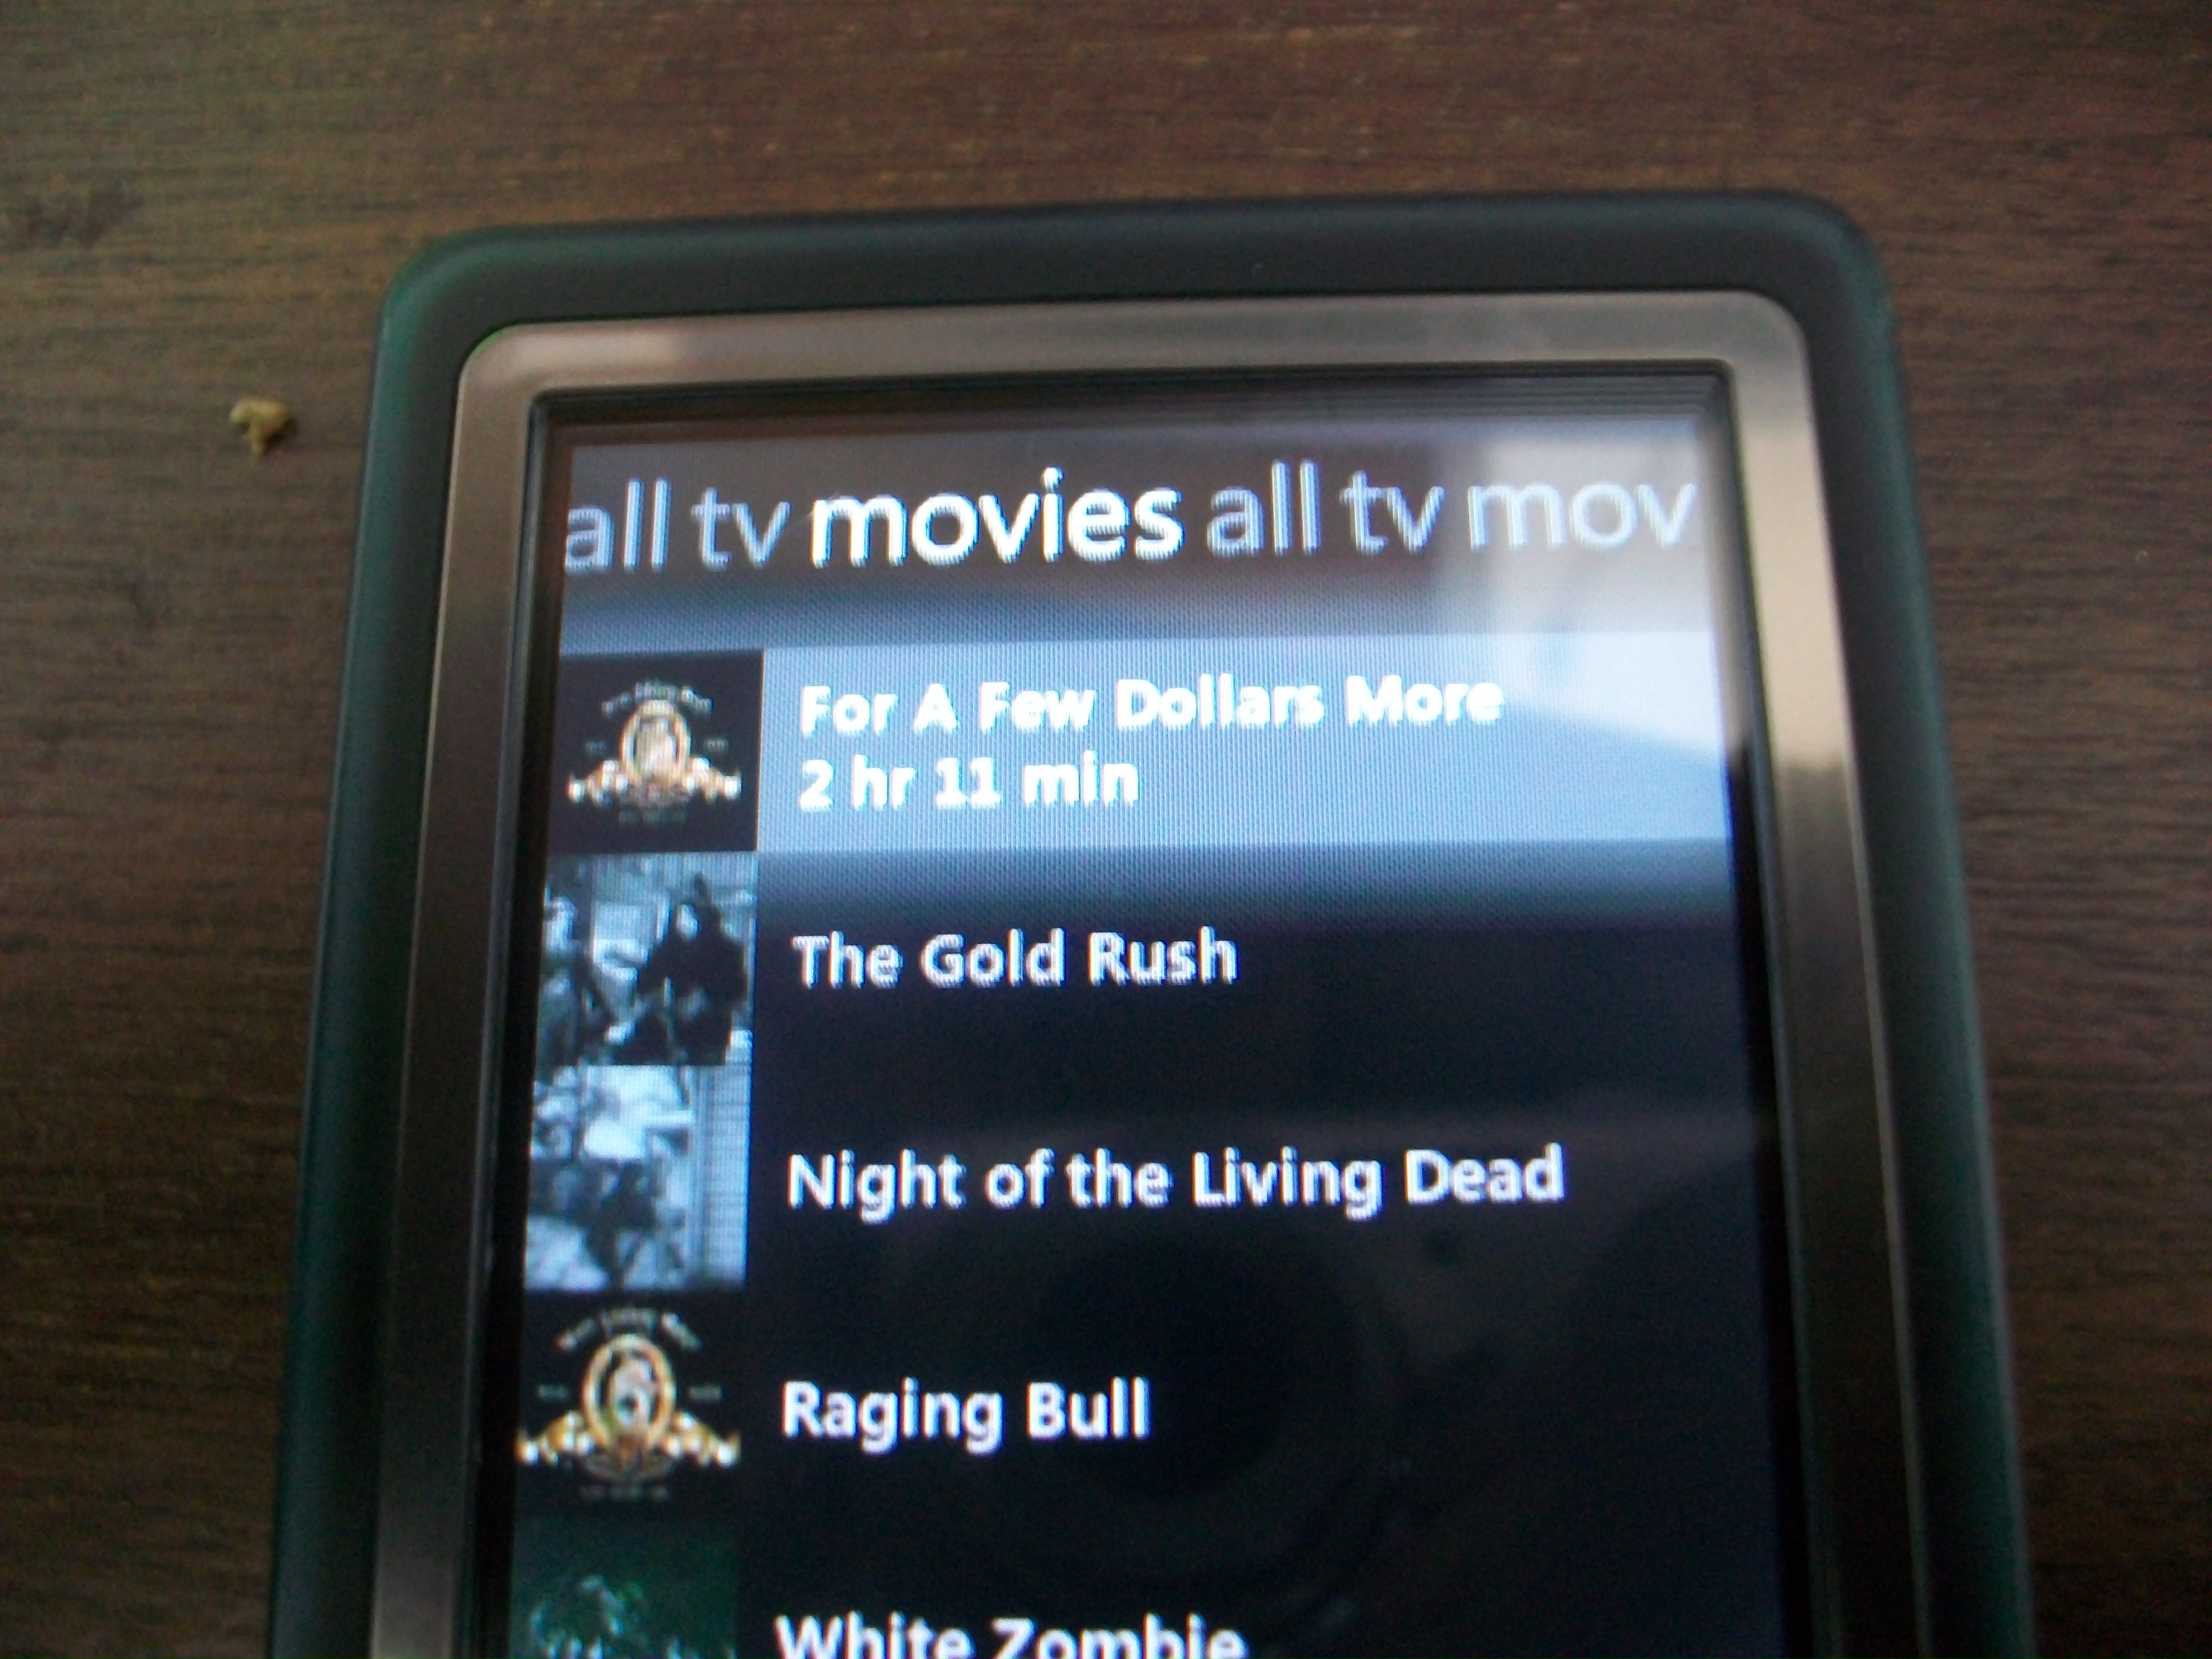
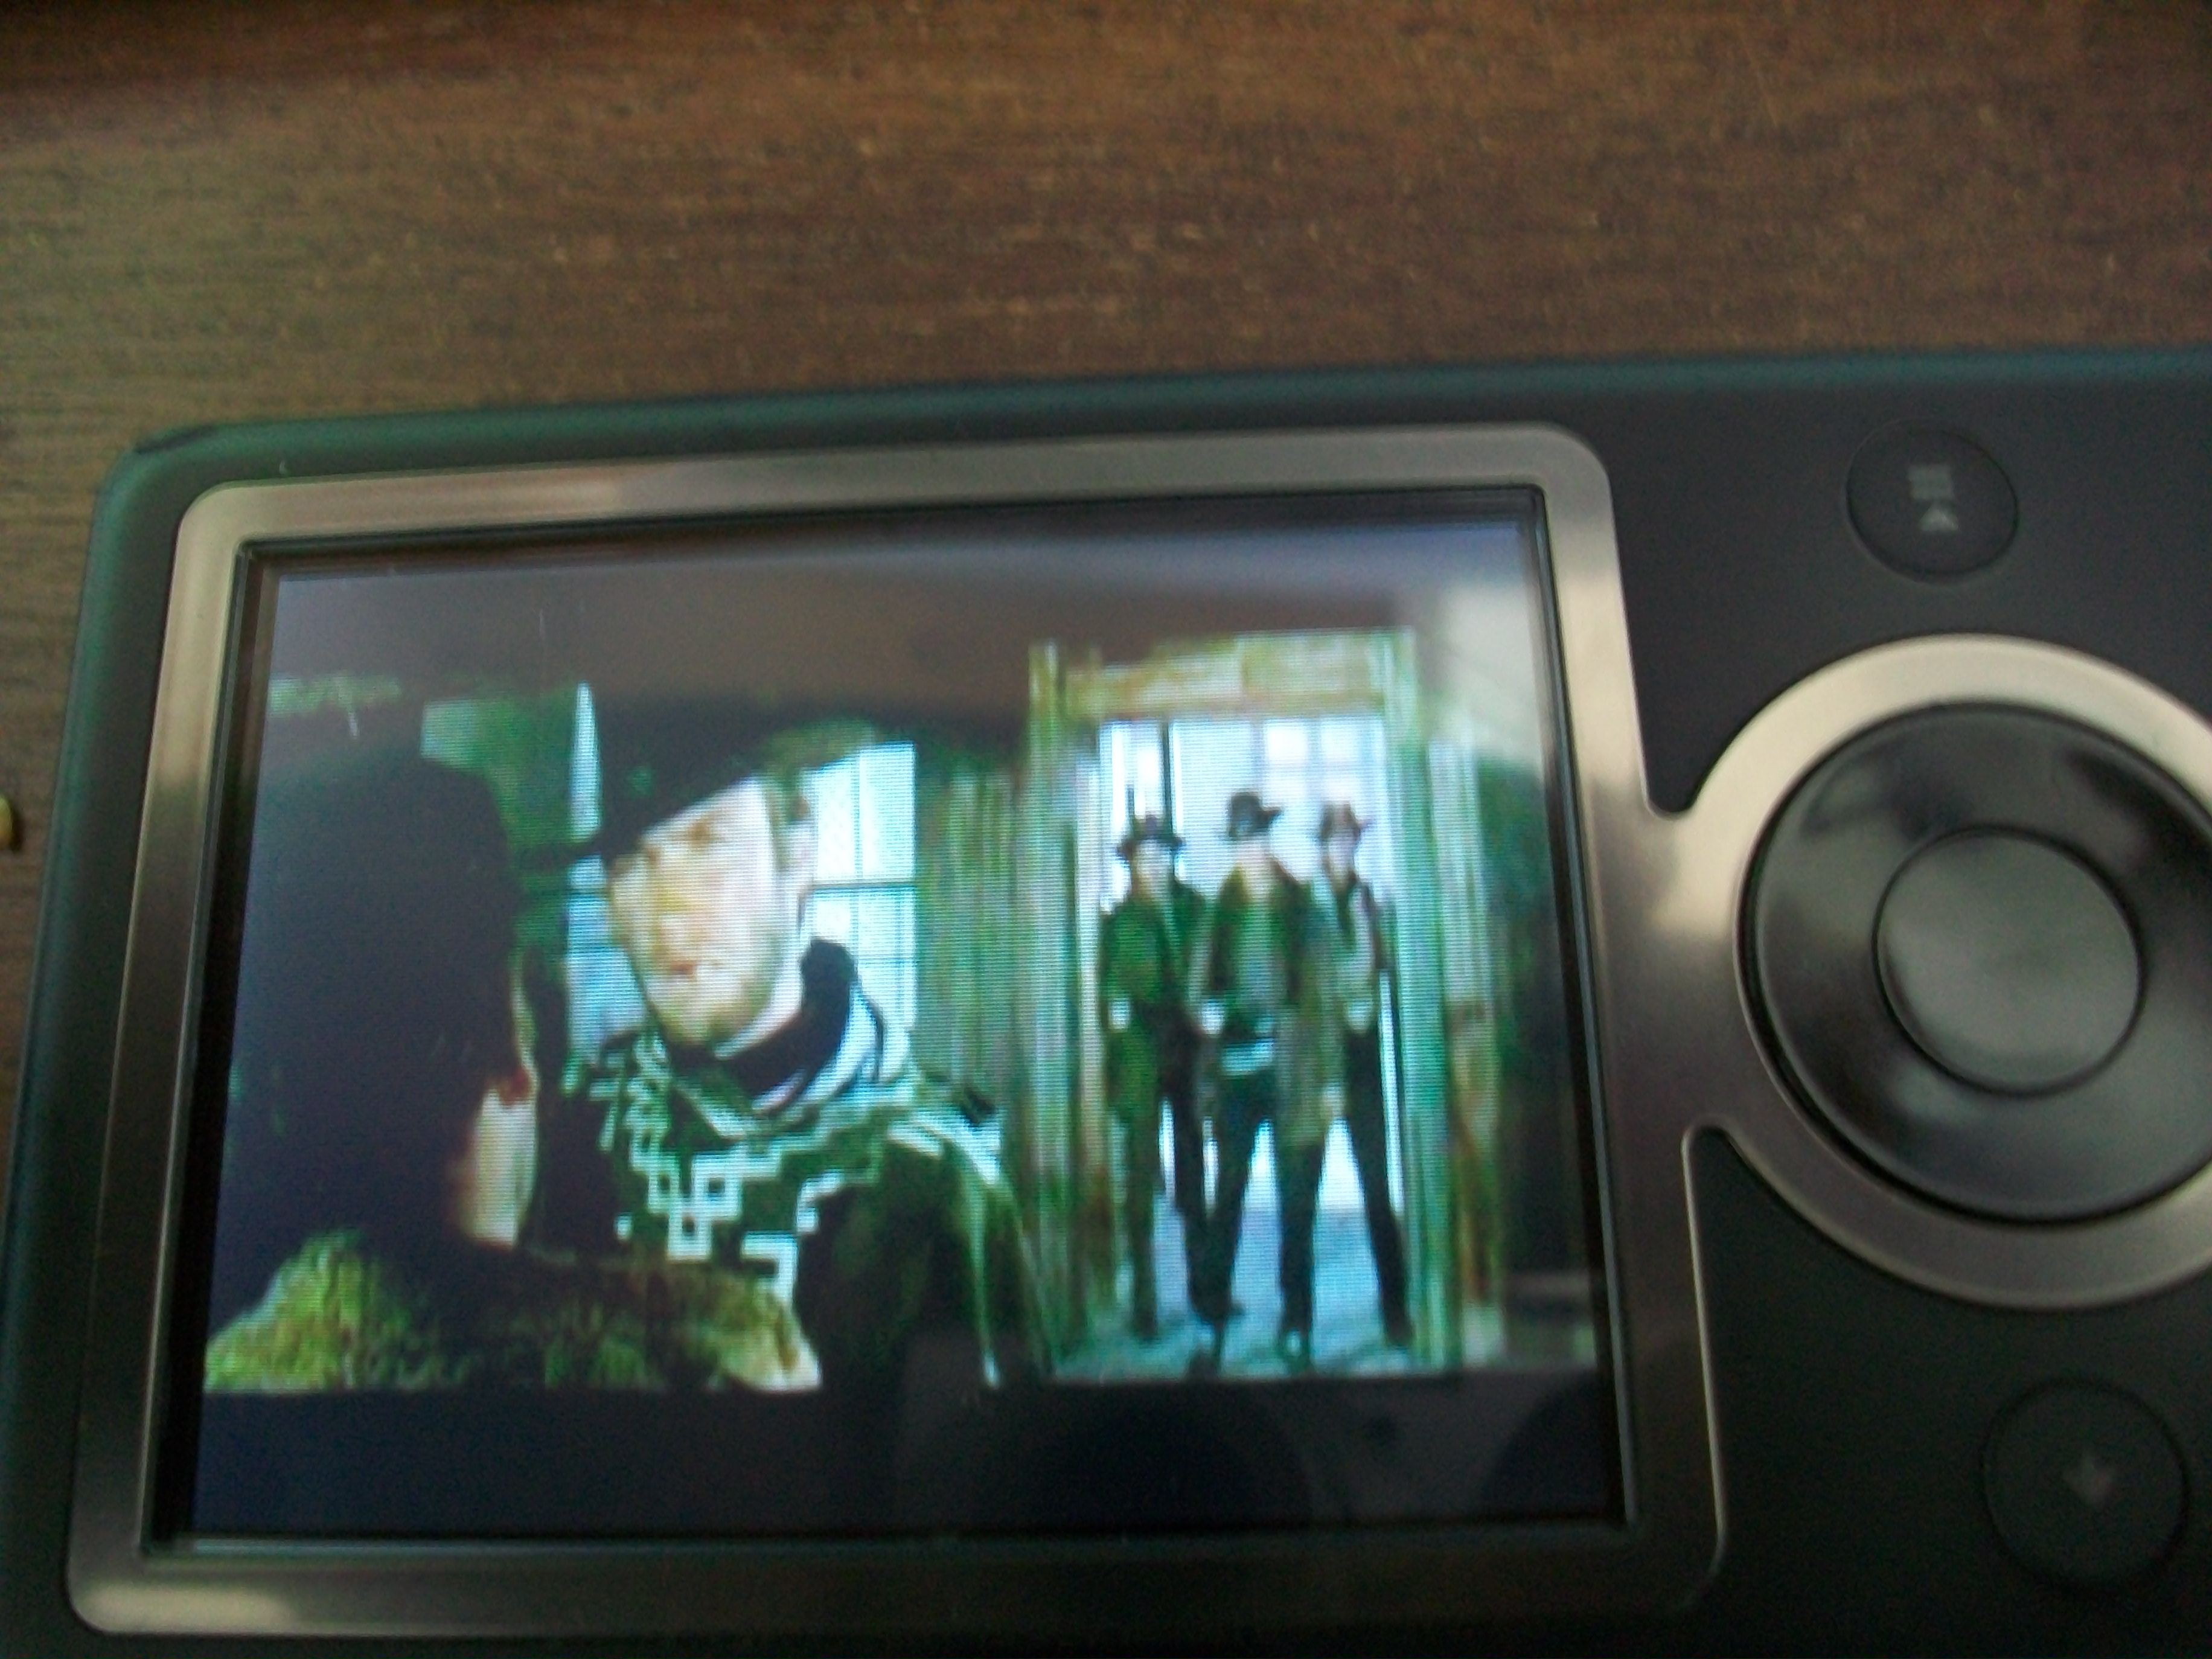
This Instructable will lay out how to rip, convert and sync DVD videos to your Zune successfully. By using a few programs, we can sync full movies (legally obtained) to your Zune in a format that is about 1.0 Gb in size (as opposed to the 4 Gb DVD format size).
Download Programs
There are 3 basic video programs you will need to rip and convert DVDs.
DVDShrink is a free DVD ripping tool that will also rip other content including Subtitles, multiple Language tracks, special features etc. You can download it for free here:
http://www.afterdawn.com/software/video_software/dvd_rippers/dvd_shrink.cfm
SUPER by eRightsoft is a free video converter and pretty well advanced. There many video formats and countless options to choose from but the reason we use it is because SUPER has a preset option for converting videos specifically to Zune WMV format. You can download it here:
http://www.erightsoft.com/SUPER.html
Note: The SUPER site is a little hard to navigate so I'll just give a quick description of what to do. On the first page scroll to the very bottom to the section called "Download and make full usage of SUPER for FREE." There's a link that says "Start downloading SUPER," click it.
On the next page, there's some red text in the main body of the page. There's also another link that says "download and use," click it.
On the third page, scroll to the very bottom to the section called "What Are You Waiting For.. Download SUPER it's FREE" then underneath the ads, there's a link. The link says "Download SUPER Setup file." Click it and it will start downloading then install it.
Sometimes it will not show the "Download SUPER Setup file" link because of too much traffic or it's unable to access the mirror. Just refresh the page or return later.
VirtualDub is a free video capturing and processing utility. Download it here:
http://virtualdub.sourceforge.net/
Ripping the DVD
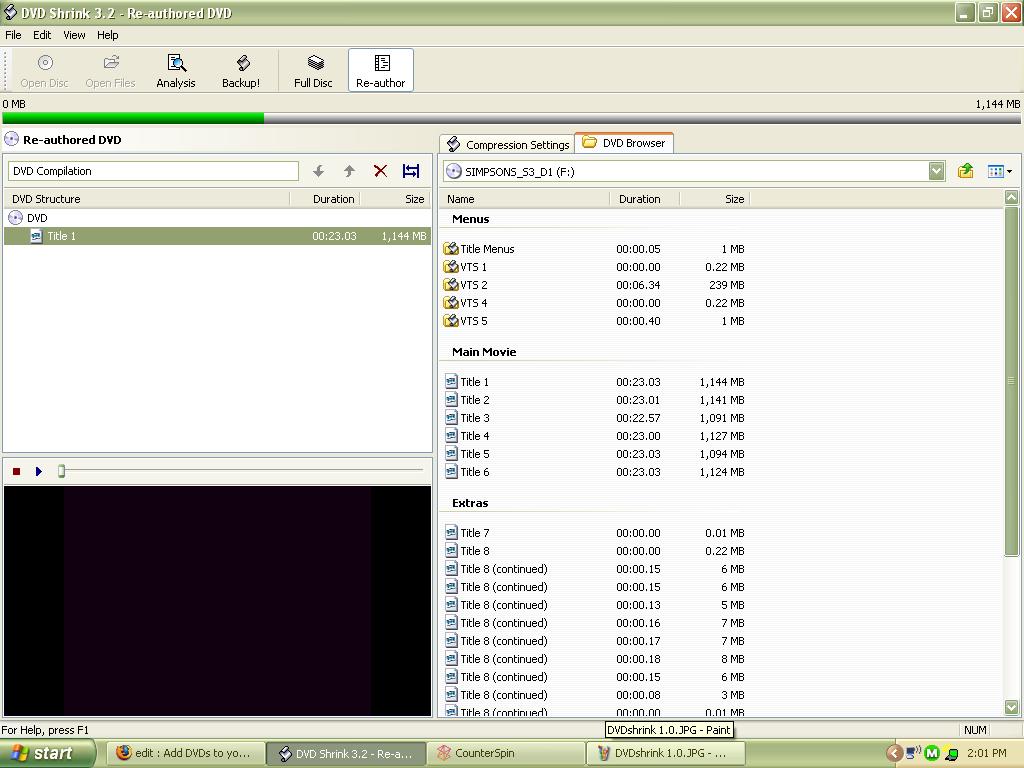
Insert the DVD disc into your computer and open DVDshrink.
In the Top-Left corner of DVDshrink is a Disc icon that says "Open Disc." Click it and browse to the drive that your DVD is in.
DVDshrink will start analyzing the disc to determine compression options. It will only analyze the disc once, then each time you re-insert the same disc there will be no need to analyze it again. When it's done there will be many options for ripping the disc including special features and audio language tracks (including commentary) and subtitles.
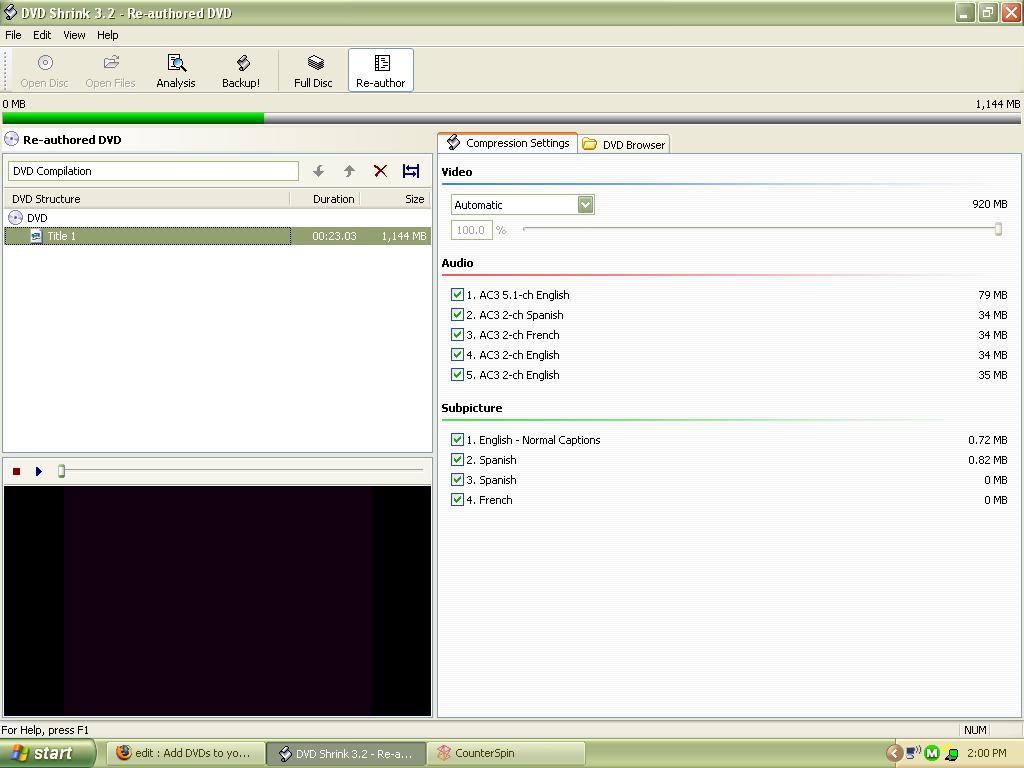
At the top, there are Six icons. Click the icon that says, "Re-author." By Selecting Re-author, you have the option to backup any of the Extra Content, Main Movie and chapters or even the Menus. Above the backup options, there are two tabs, "Compression Settings" and "DVD Browser."
When "DVD Browser" is selected you can see the DVD features that can be ripped. There is one section called Main Movie. Select and drag the file(s) that are in the Main Movie section to the left area of DVDshrink, the area called "DVD Structure."
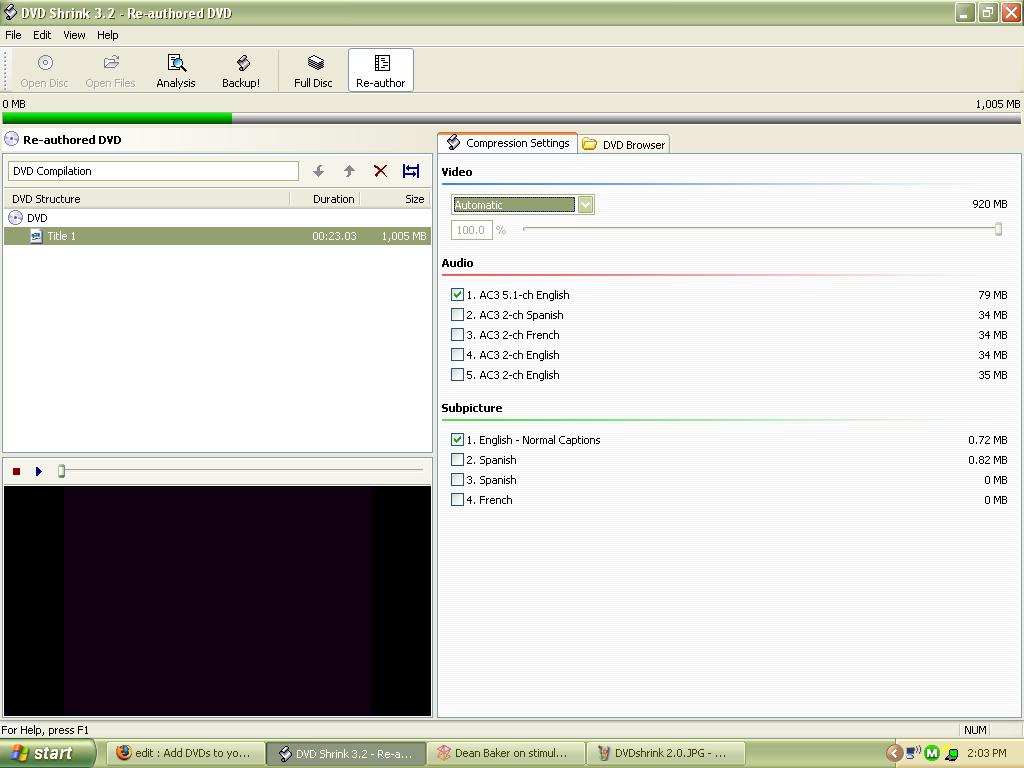
Now select the tab called, "Compression Settings." This shows the Audio tracks and Subpicture (Subtitles). Just uncheck the sections you don't want to backup.
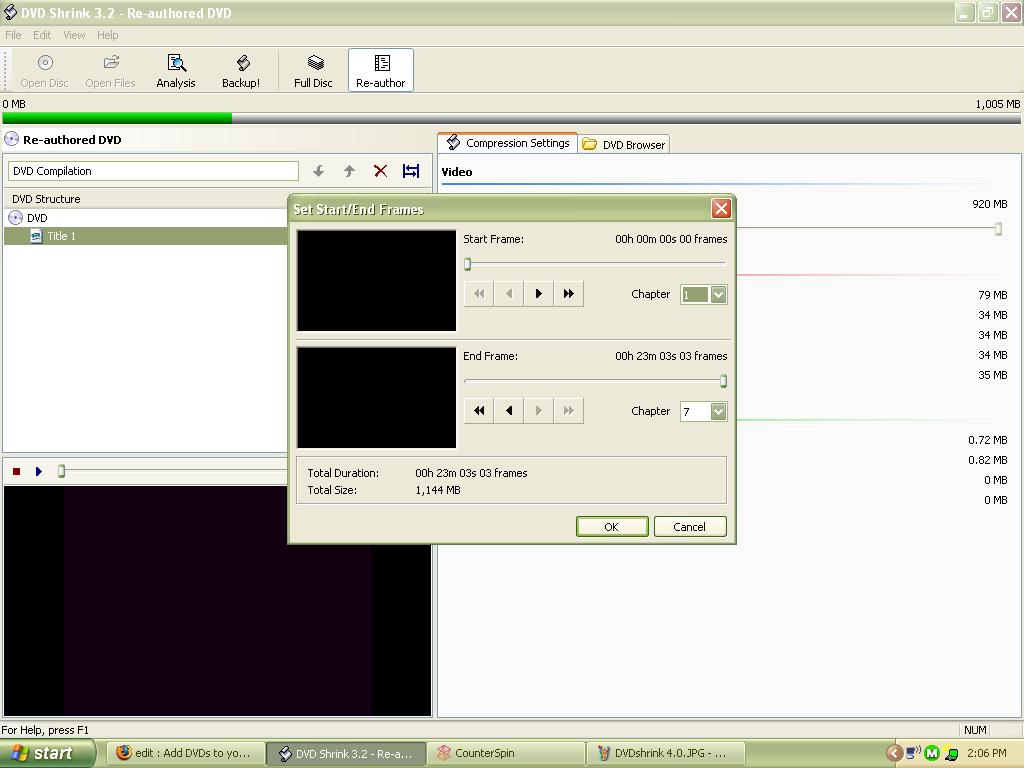
You can also adjust the video section you want to keep by clicking on the Blue Double-Arrow Icon. This icon lets you choose which frames you want the video to start and end on. You can also use this icon to select which chapters to include or exclude (like excluding the intro title of a TV show).
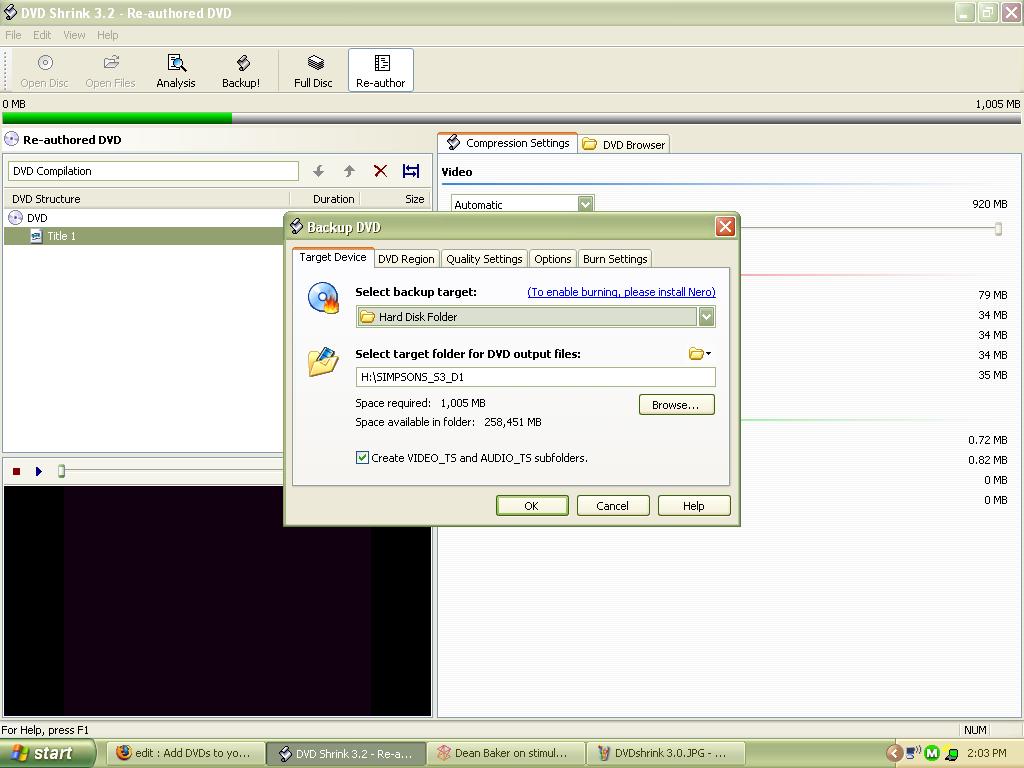
Once you have everything set, click the "Backup!" Icon at the top and browse to a folder you wish to save the .VOB file to. Then click OK.
Note: If you want to add subtitles to your videos, I recommend using this Instructable:
https://www.instructables.com/id/How-to-embed-subtitles-to-movies-for-your-mp3-vide/
You should also rename each file so you know which order the DVD file is in.
Example: Rename "VTS_01_1.VOB.AVI" to "DVD Part 1.AVI"
Second Note: When you backup the video, it will divide it in segments based on size. The video will separate for every 1 GB. So a 4 GB DVD file will be in 4 sections. You can change this by clicking EDIT > Preferences > Output Files Tab and uncheck "Split VOB files into 1 GB size chunks." It's recommended to leave it on, but if the video and audio becomes out of sync later, you may have to re-rip it as one file. If you do this, skip Step 4 but still convert it to AVI (as in Step 3) for good video quality.
Converting .VOB Files
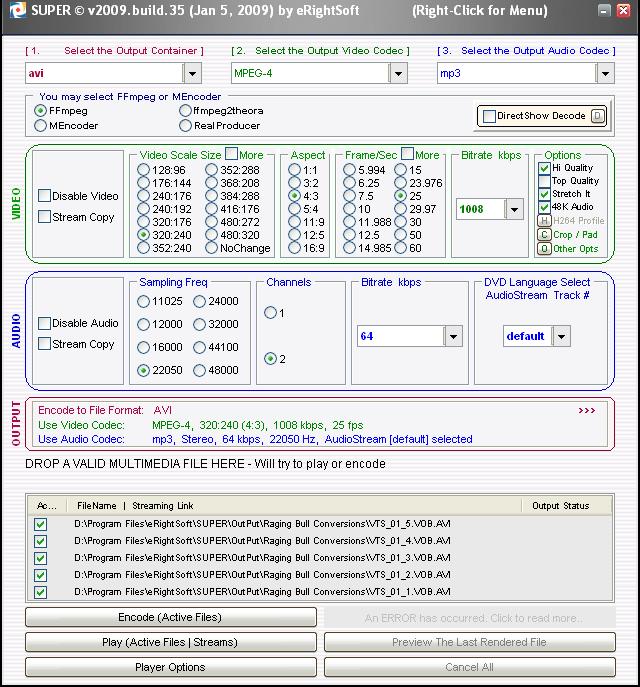
When you backup the DVD files with DVDshrink, it will divide the file if it's larger than 1 GB. So a 4 GB .VOB file will be divided into four sections. If this is the case with your files, you will need to re-combined them with SUPER and VirtualDub. If your file is alright and in one segment, you can skip this step and the next one too.
Open SUPER and import the .VOB files by dragging them to the bottom section.
At the top, there's a drop-down box that says "Select the Output Container." Click it and select the AVI (not the Pocket PC option) option.
In the next section, underneath, Select the "FFmpeg" encoder.
Set the Frame/Sec option to 25. I thought 25 FPS was the default but it changed on me a couple times and I got a laggy movie.
In the video options, Set the Video Scale Size to "320:240." This is the size of your Zune screen and by converting it to 320:240 it is faster, smaller in size and better quality.
Note: I think the Slim Zune Models require the video to be set at 320:180. If that's your Zune Model, try setting it to that Scale Size. You can do this by clicking the "More" check box at the top of the Video Scale Options. Click it twice and it gives you the option to enter a custom Size. Set it to 320 width:180 height.
Then click the "Encode (Acitve Files)" icon at the bottom. A message will pop-up and ask which DiVx option to choose, just click the first option.
This will export your video files to the .AVI video format so it is compatible with Virtual Dub.
Joining the Converted Files Together.
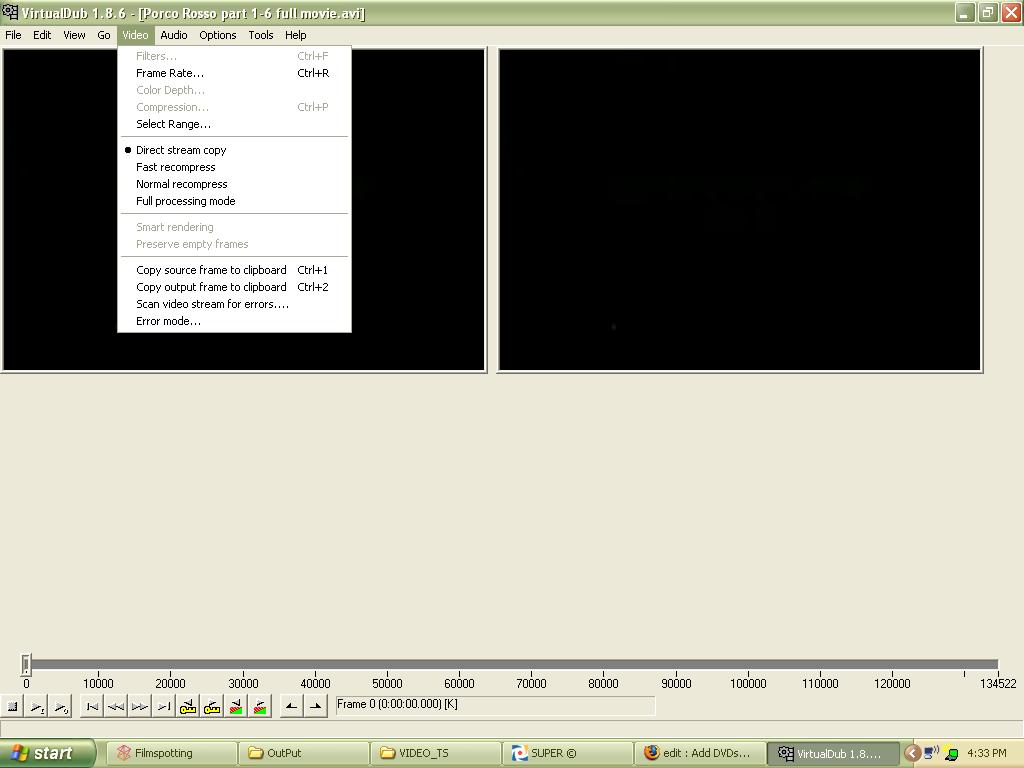
Open VirtualDub and import the First Part of your movie. You have to import the Beginning part of the movie first because you will be combing them so that they are in sequential order. If you don't do it right, you could get the movie jumbled up.
Anyway, click File > Open Video File > Browse to the first section of your converted file (Part 1).
Then click Video > Full Processing Mode.
Then click File > Append AVI Segment > Browse to the second section of your converted video file (Part 2).
Click Video > Compression. A new window and a list of codecs pop-up. Select one of them. If you don't, the converted video file will be huge (like 10 or 15 GB's). I usually select the FFdshow codec, which I think usually comes with SUPER.
Then click File > Save as AVI and browse to where you want to save the combined file.
VirtualDub can only combine two AVI files together at once so you have to repeat this step with the other movie files until it's a complete movie.
Reopen this combined file and join the next section (Part 3) by following the same steps.
Repeat this process until the entire video is combined. The last AVI video file should be the Full Movie.
Note: Use the Full Processing Mode to append all the files. I noticed that by using the Direct Stream Mode, it will cause the audio to be out of sync.
Final Conversion to Zune Format.
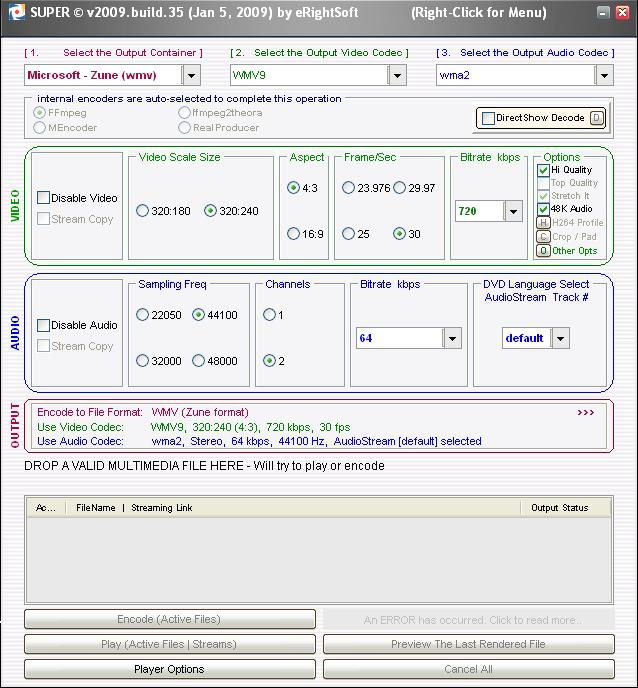
Now we have the Full Movie in one .AVI video file but we need to convert it to Zune .WMV format. You can convert it to any .WMV or .MP4 video format but there is a benefit to using Zune .WMV.
When you import a video into the Zune software, it is only able to handle .MP4 or .WMV formats. However, when you try to sync these videos to your Zune, you will notice that the Software will be converting your videos again while trying to sync it to your Zune. The reason for this is that the Software is converting your video files to adjust the Aspect Ratio. The videos need to be in a Video Scale Size of 320:240 so the Zune can play them well. If it's not in that Scale Size, the Software will convert them during the Sync, and also prolong the Syncing of your movie.
But by using the Zune .WMV conversion preset in SUPER, it already formats the file to a Size of 320:240 (or 320:180 if you have a Slim Zune) and as a result, your Final video will sync to your Zune without delay (and even faster if you use a USB2.0 port).
Final Conversion
Open SUPER and import your complete .AVI file. Set the Output file format by clicking the drop-box at the top-left corner that says, "Select the Output Container." A list of formats will appear and near the bottom are the special presets for devices like Apple iPod, MS Zune, Nintendo DS, and Sony Playstation formats. Select the preset that says "Microsoft - Zune (wmv)"
Make sure the Video Scale Size is set to 320:240 (or 320:180 if you have a Slim Zune).
Set the Frame/Sec to 25. This should be set to the same Frame Rate that you used to convert the previous files to AVI.
Also make sure the sum of the Audio and Video Bitrate (kbps) is less than 800 kbps. I think the default is Video - 720 kbps and Audio - 64 kbps.
Then at the bottom, click the icon that says "Encode Active Files."
The conversions should take a couple hours, maybe less time if you have a better computer than me. A 400 MB AVI file should convert to a 700 MB WMV file. That should be the average size of the movie files depending on the length and quality (Black and White movie or Colored Movie).
Sync to Your Zune.
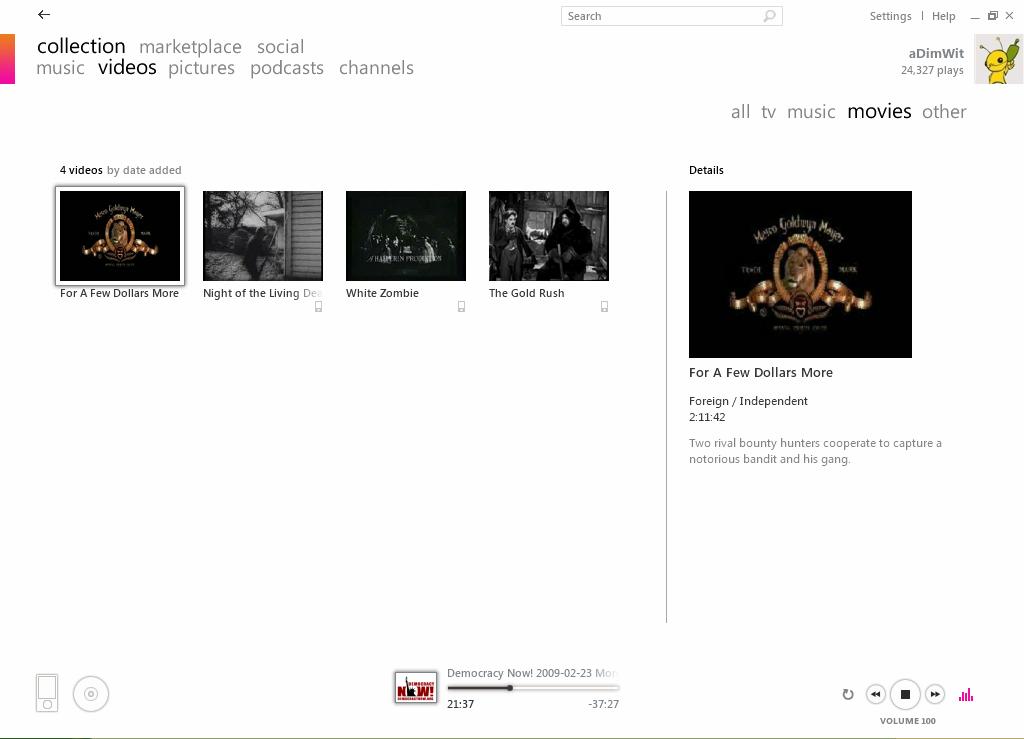
Open your Zune Software and select the Video section of your Collection. Import the Final Video by dragging it into your collection.
Right-click the video and select Edit. This lets you categorize the video (i.e. Movie, TV Show, News, Other etc.) and you can also name the episode/TV series or whatever.
Now sync it to your Zune. The video file should Sync right away without any additional conversions by the Zune Software.
Right-click the video and select Edit. This lets you categorize the video (i.e. Movie, TV Show, News, Other etc.) and you can also name the episode/TV series or whatever.
Now sync it to your Zune. The video file should Sync right away without any additional conversions by the Zune Software.
Enjoy Your Zune Movies.


You should now have a complete movie on your Zune. The Audio and Video quality should be excellent. Enjoy.
Notes:
Only use this for DVDs you own and have legally obtained.
There are some full movies available that are in the Public Domain. You can find them at Archive.org.
http://www.archive.org/details/moviesandfilms
The SUPER software has built in video codecs so you shouldn't need to install anymore.
- - -
If you have any questions, message me or send me an e-mail at aDimWit@hotmail.com.
Leave feedback too and let me know if something in this Instructable needs clarification.