Adaptive Legal / Lawyer / Banker / Real Estate Document - Adding Initials and Signatures in Word
by ManufacturedArtists in Circuits > Microsoft
3991 Views, 13 Favorites, 0 Comments
Adaptive Legal / Lawyer / Banker / Real Estate Document - Adding Initials and Signatures in Word
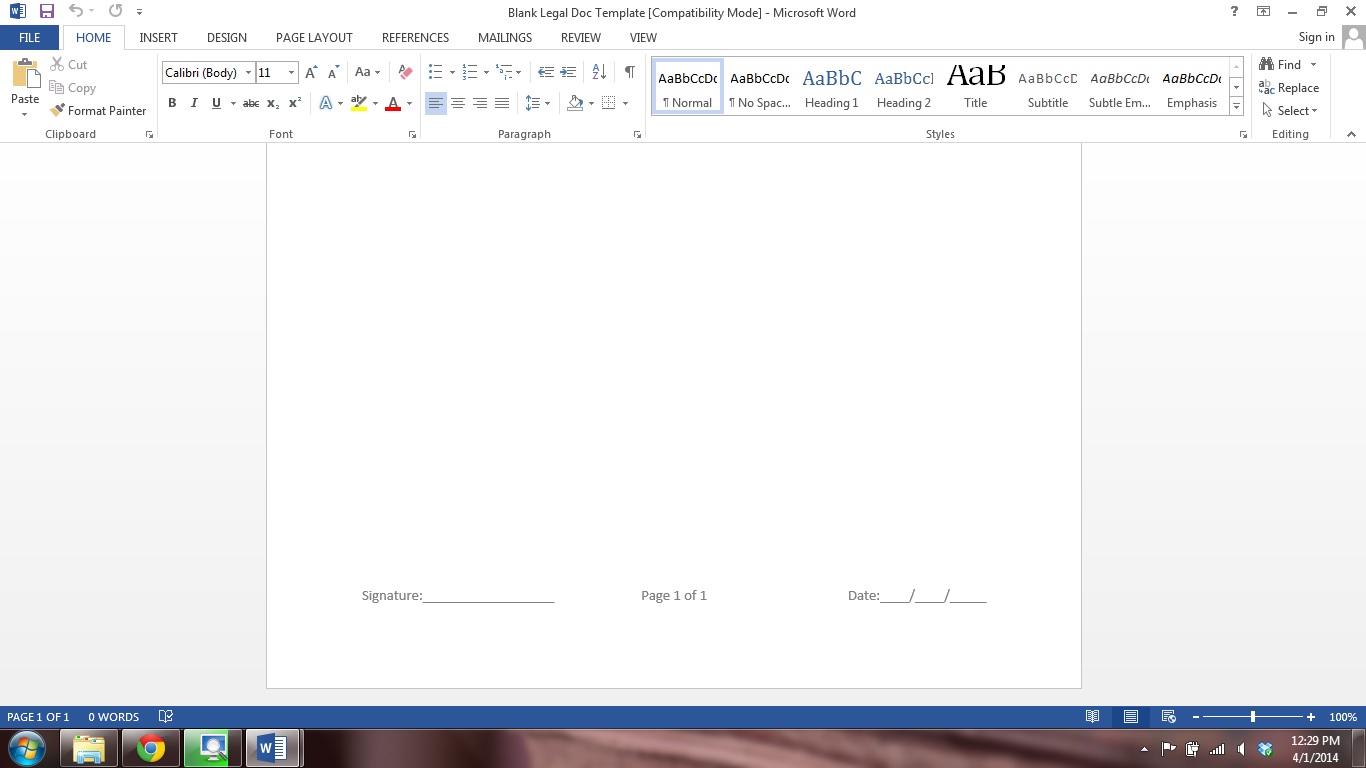
In the older versions of Word you used to easily be able to modify the headers and footers to display different things on particular pages. I found out the hard way the newest version of Word doesn't make it so easy. After dregging through tons of legaleese, I finally figured out a method to break it down into steps anyone can follow. This method lets you add content that adapts with the number of pages, giving you the option of the signature and date on the last page and having an initials blank on all the other pages.
Making the Template
This method works in Word 2013 and back, I'm not sure however, if it will work in Open Office.
Open your Word program and select a blank file. Save your file now, I named mine "Blank Legal Template" So whenever you what to type a new file with the signature and initial boxes you can just Save As and keep the template.
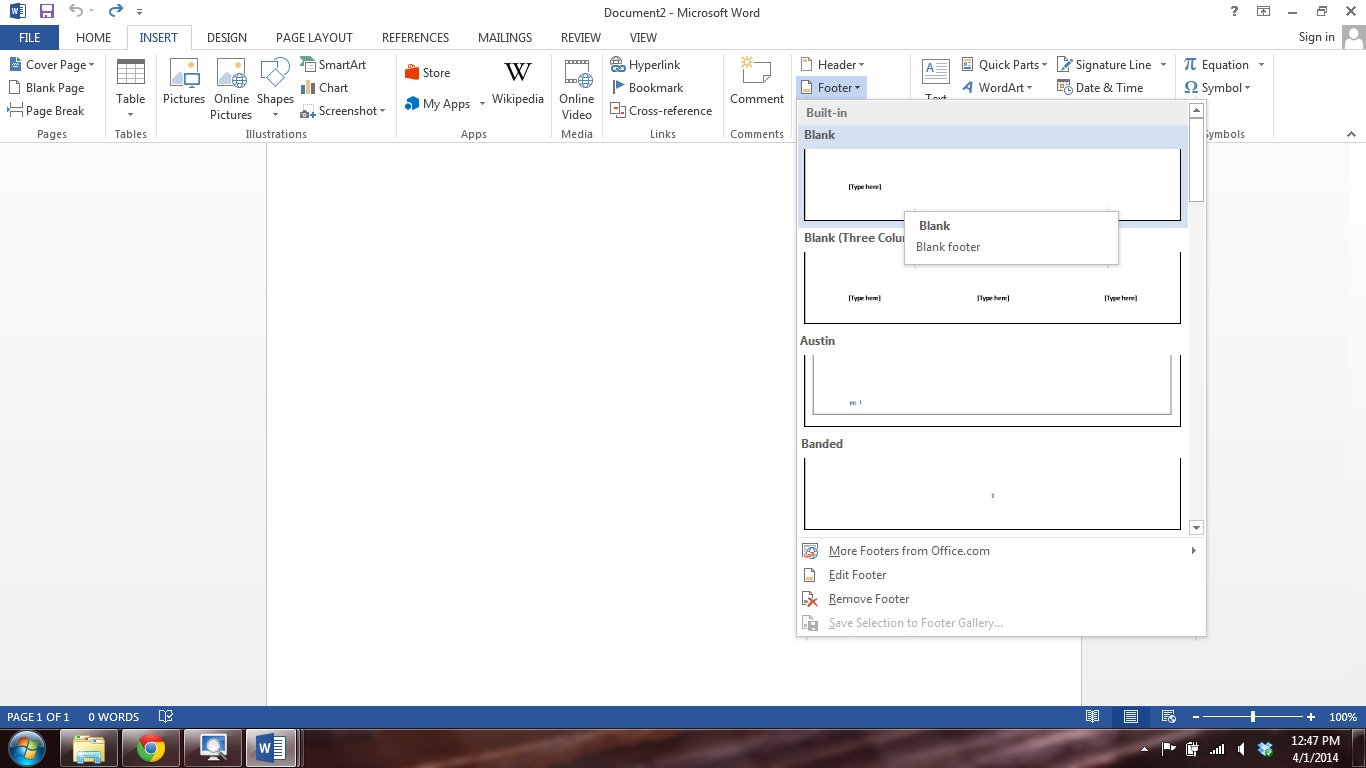
Next open the Insert tab and select footer type "Blank"
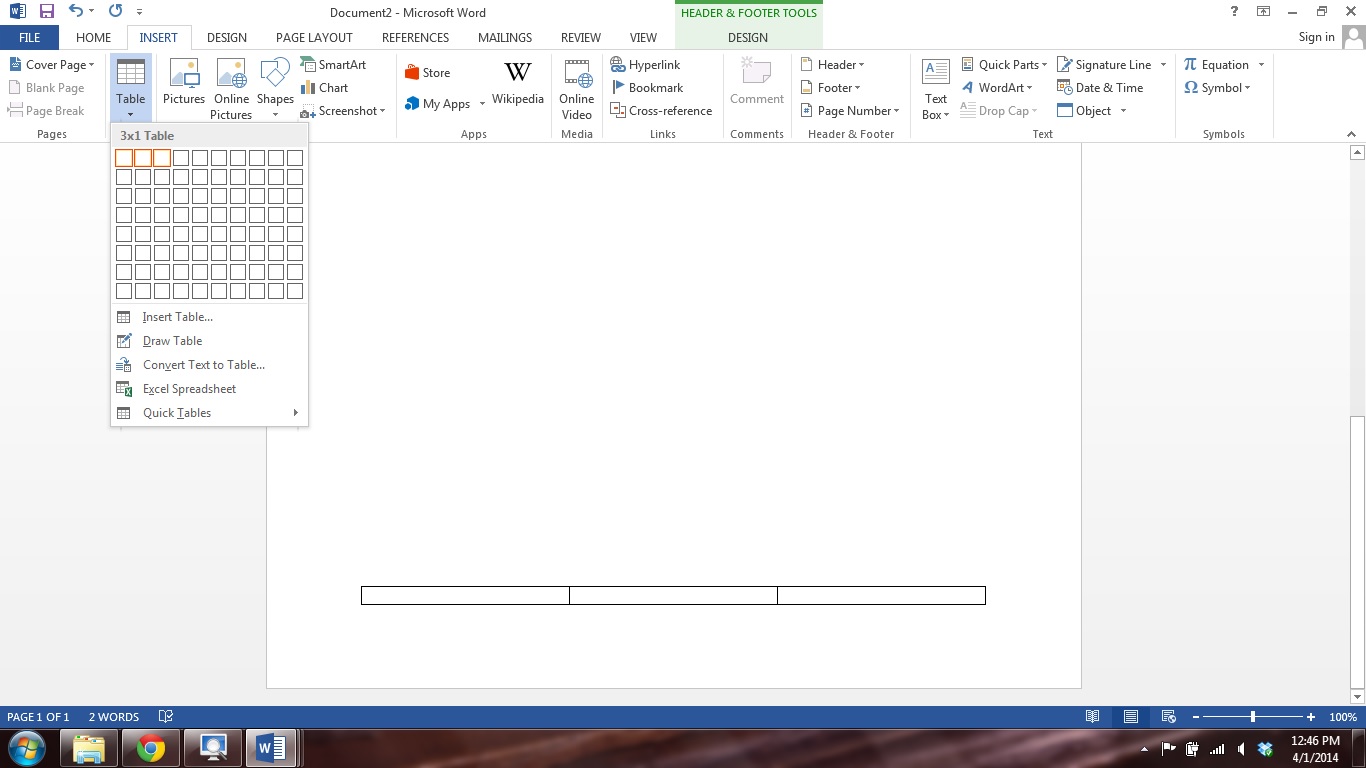
Now that your in the footer area, insert a table that is 3x1. You'll see 3 squares across the bottom of the page.
Creating the Content
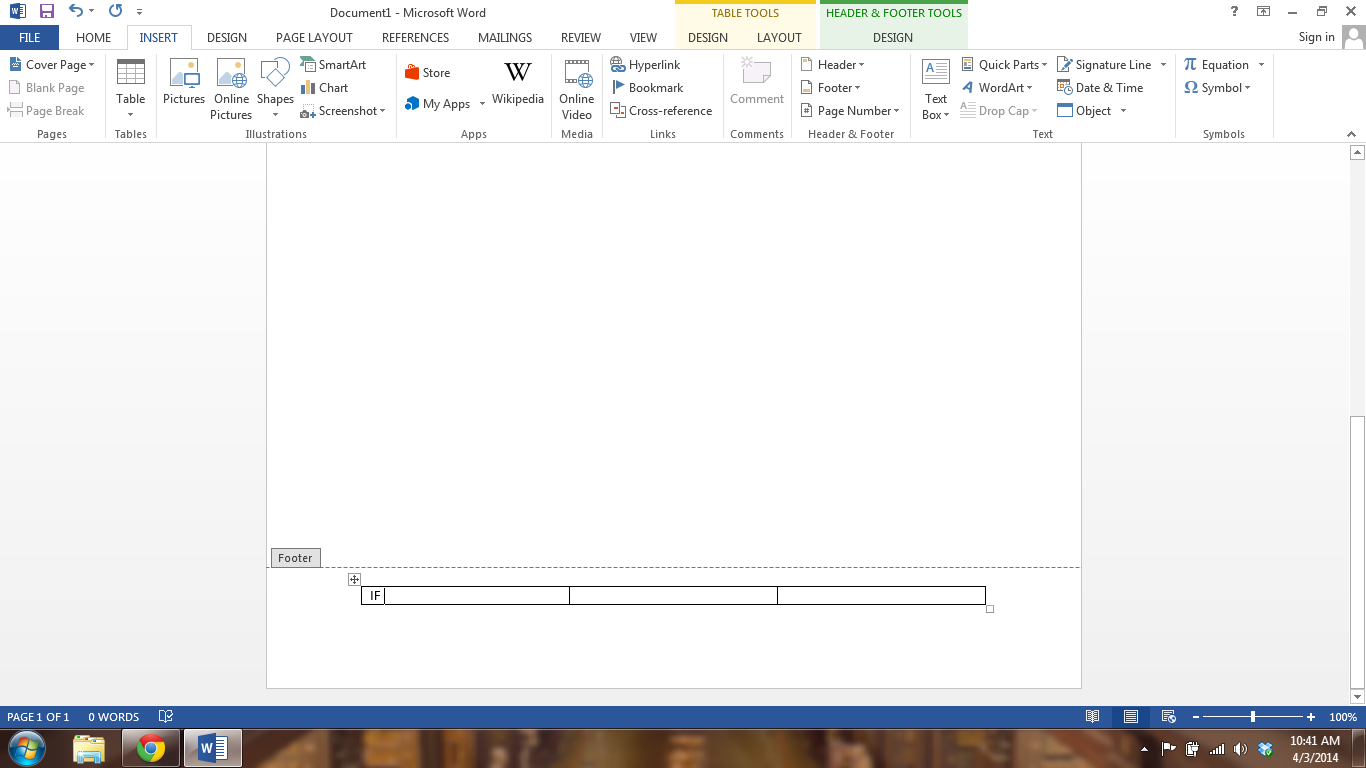
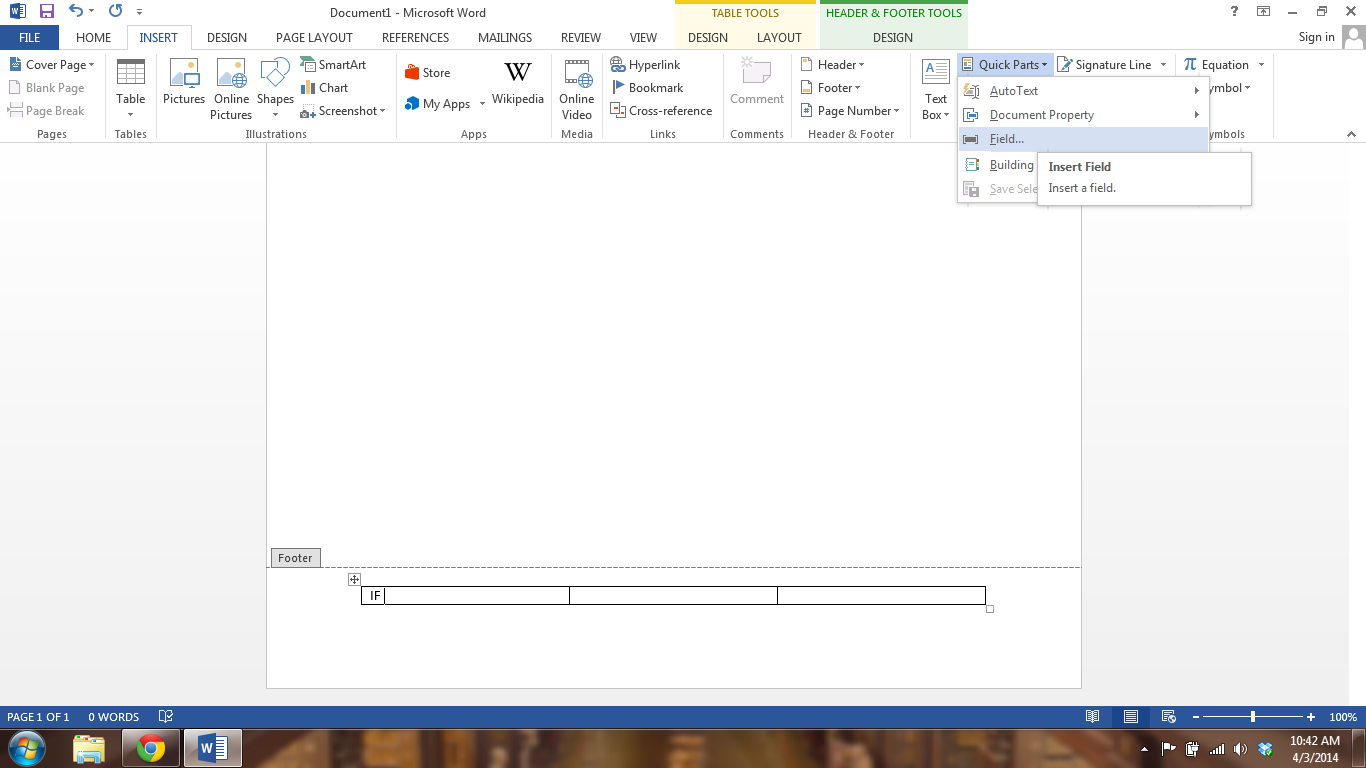
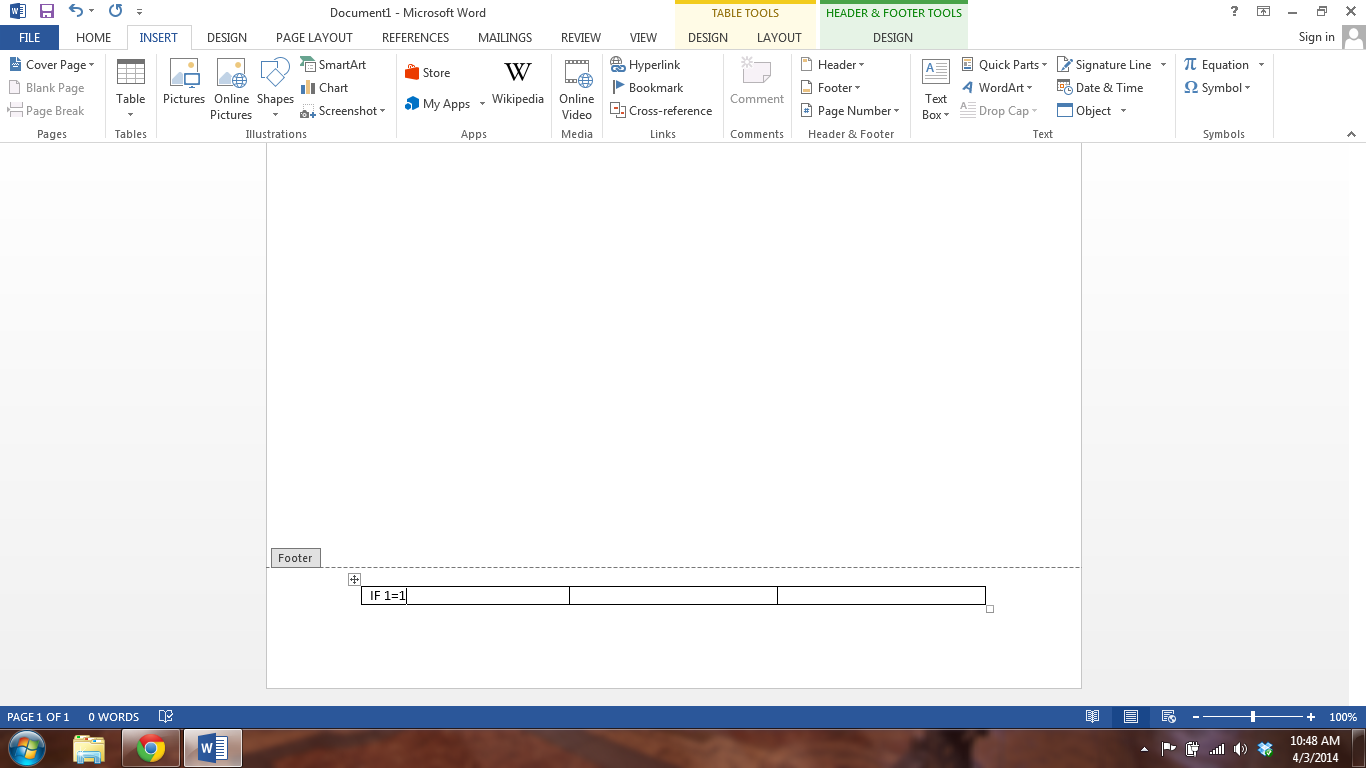
In the box furthest to the left, click and type the word "IF" followed by a space.
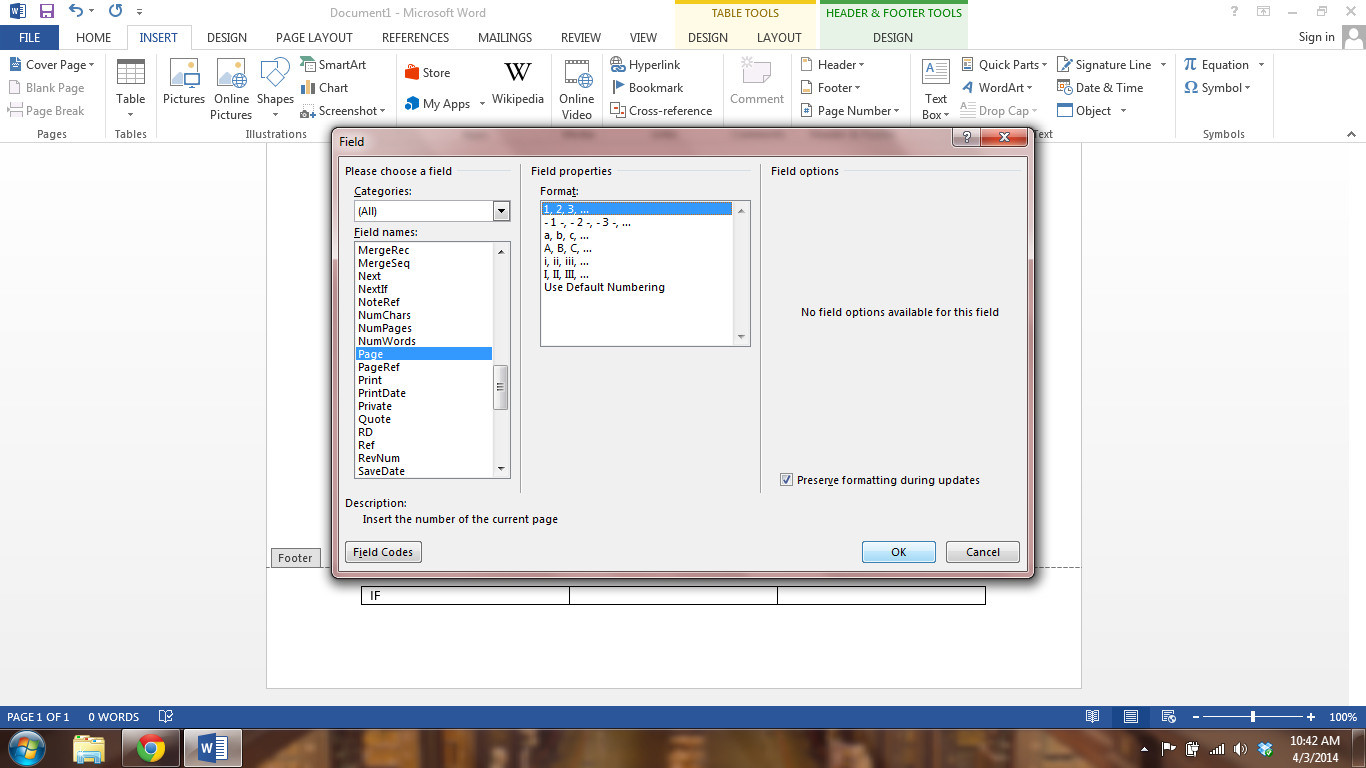
Under the Insert tab find the menu labeled "Quick Parts" and click the button called Field. This will open a dialog box.
On the left hand side of the dialog box, scroll down till you find the "Pages" option, click it. Just to the right you'll see more choices appear. Click "1,2,3,..." and click OK.
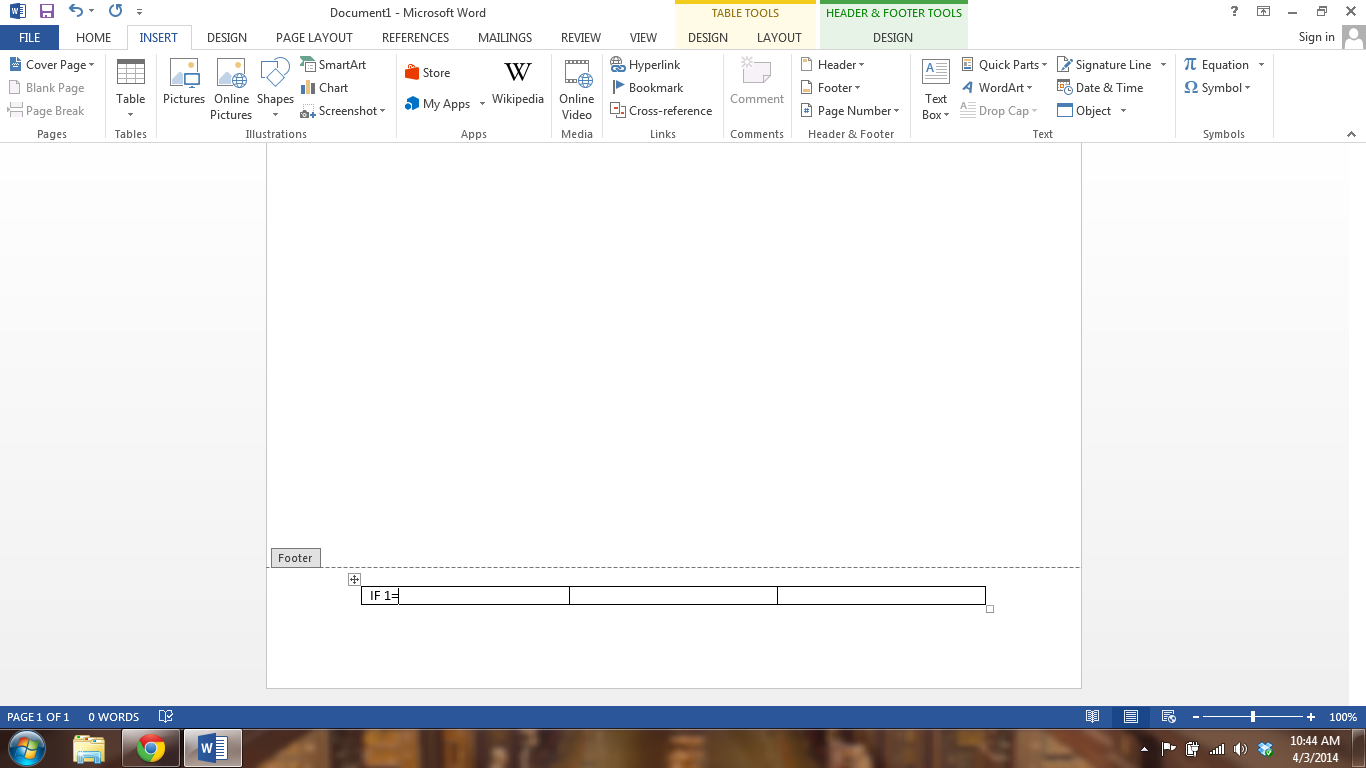
After the "IF" in the box you'll see a 1 appear, type an "=" following the 1.
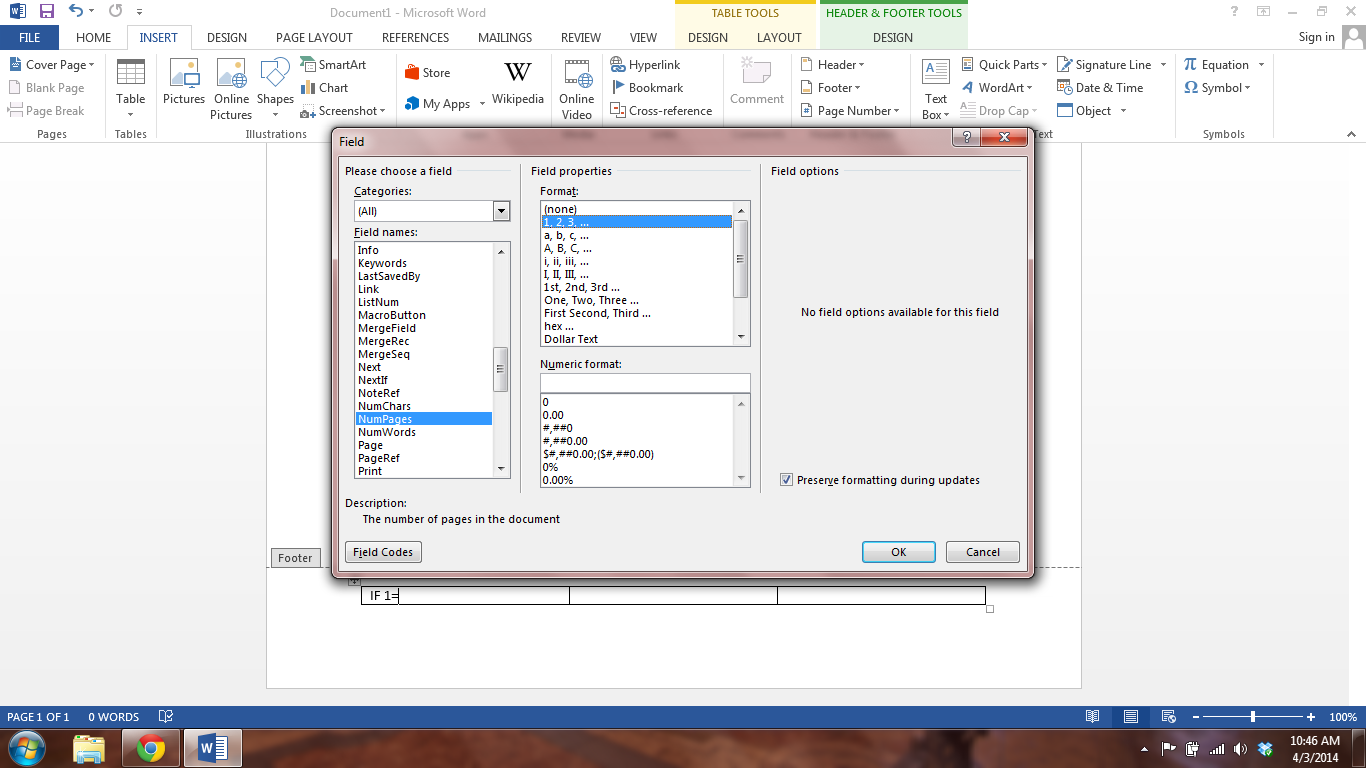
Now go back to the Field option and dialog box. This time we're going to use option "NumPages" and again click the "1,2,3..." option and OK.
You'll see another 1 appear right after the =. This is because right now you currently only have 1 page.
The next part works as an "If - Then" statement. For those of you that haven't had classes on computer logic statements, here's a quick rundown. The way this statement works is if whats on this side of the = is the same as whats on this side, the statement is true. And the computer will perform a certain action. If whats on this side DOES NOT = whats on this side, then the statement is false and the computer will also perform a certain action. What we're going to do in the next little bit is tell the computer what actions we want it to perform. Now, don't freak out, this is really easy. I swear, I'm one of the most computer illiterate out there and I got it to work.
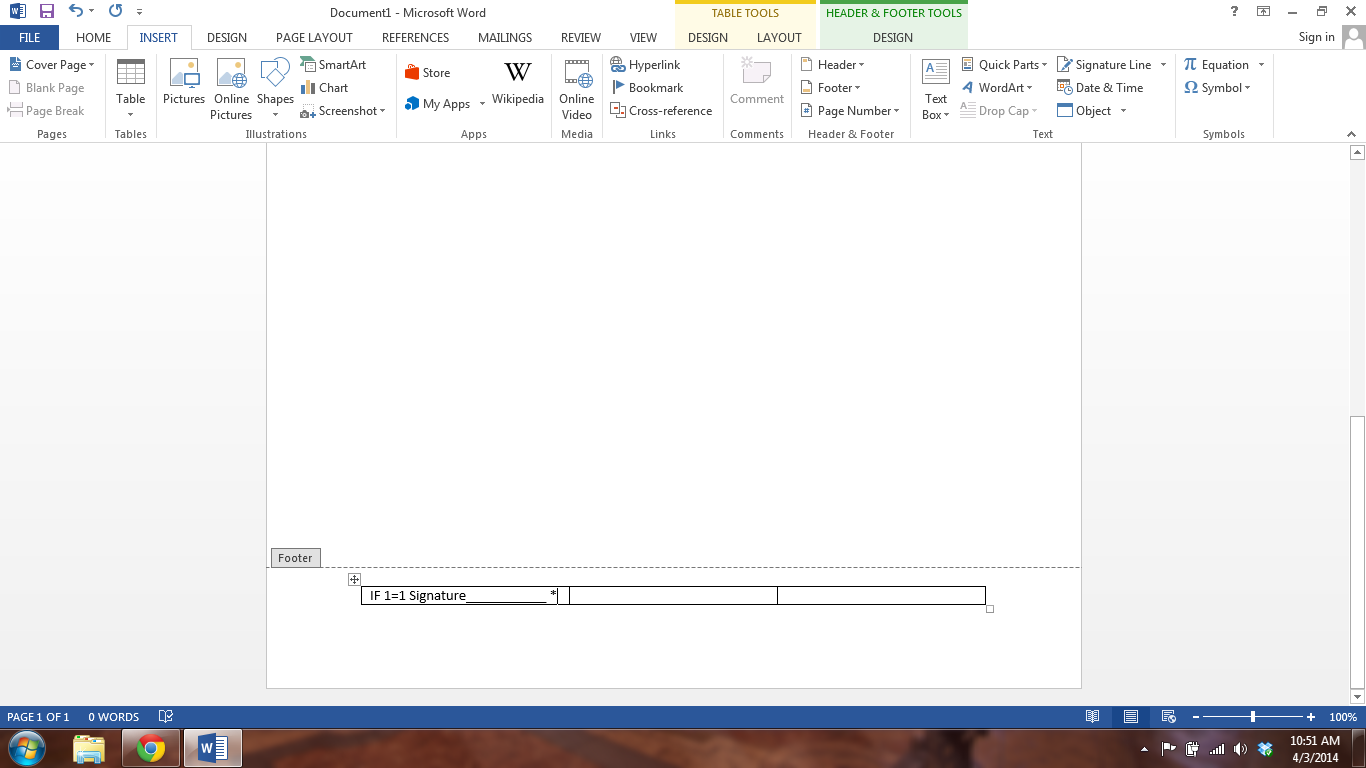
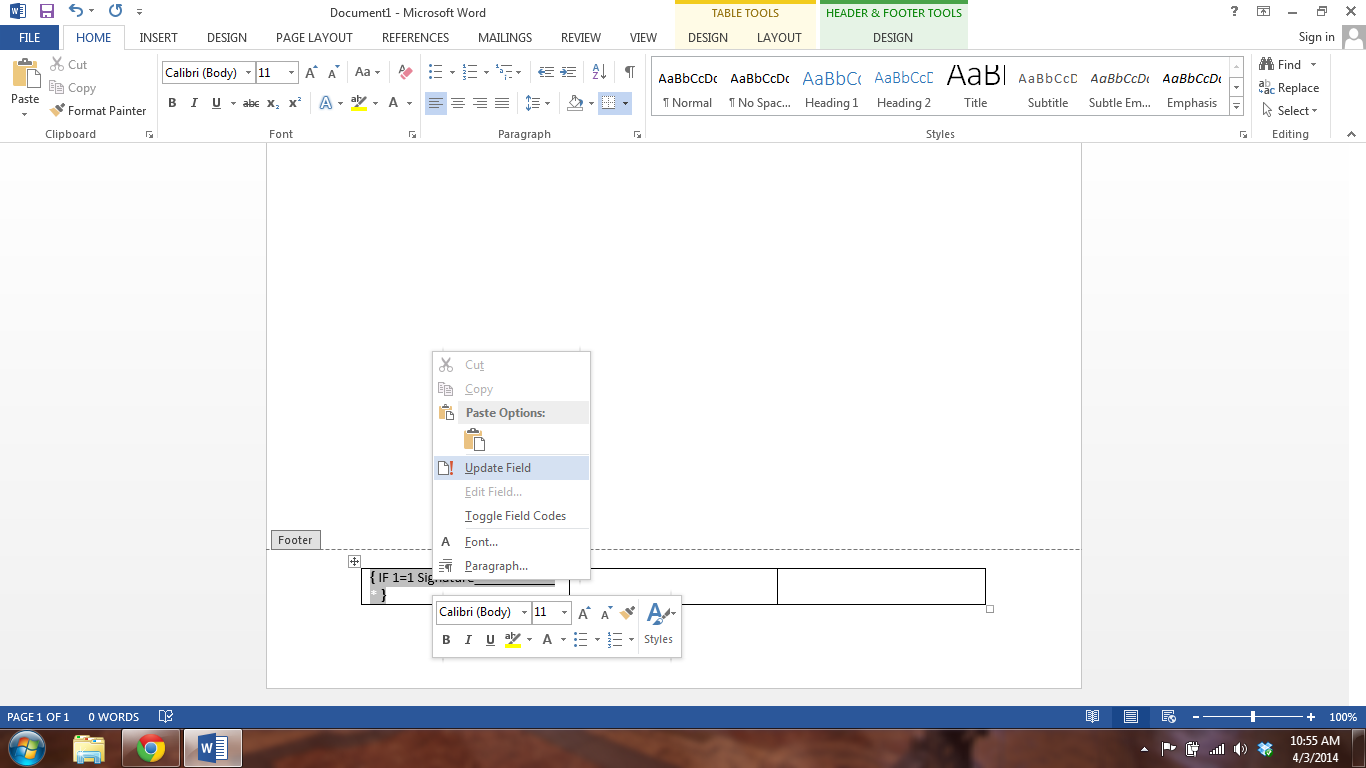
After the 1=1 add a single space and "Signature_____________" with no spaces in between signature and ther the last _ add a single space then an *
So all together it should look like this: IF 1=1 Signature__________ *
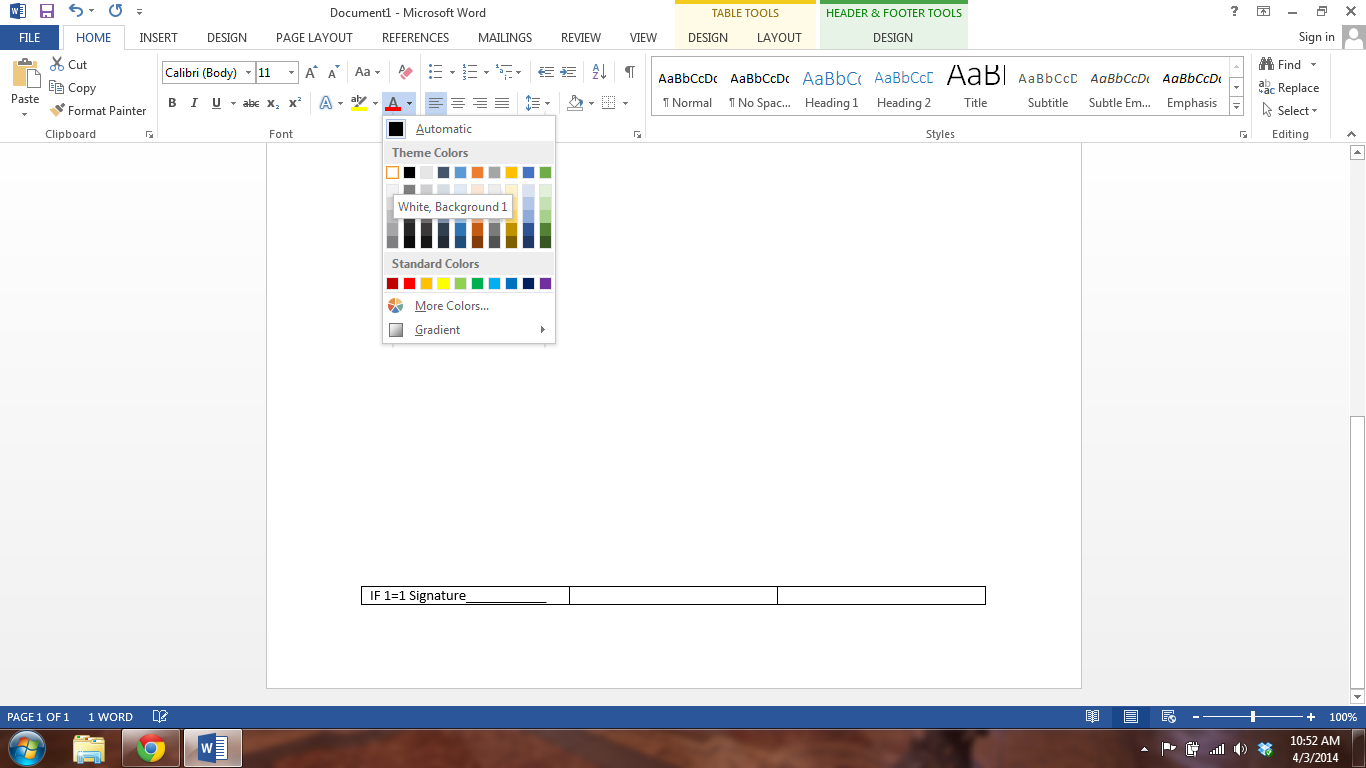
Now we want to format the * to be white. This will make the * invisible to our eyes, but still readable as a code input to the computer. So when the page is 1=1 the Signature line will appear but when you get more that one page like 1=2 the white * will appear.
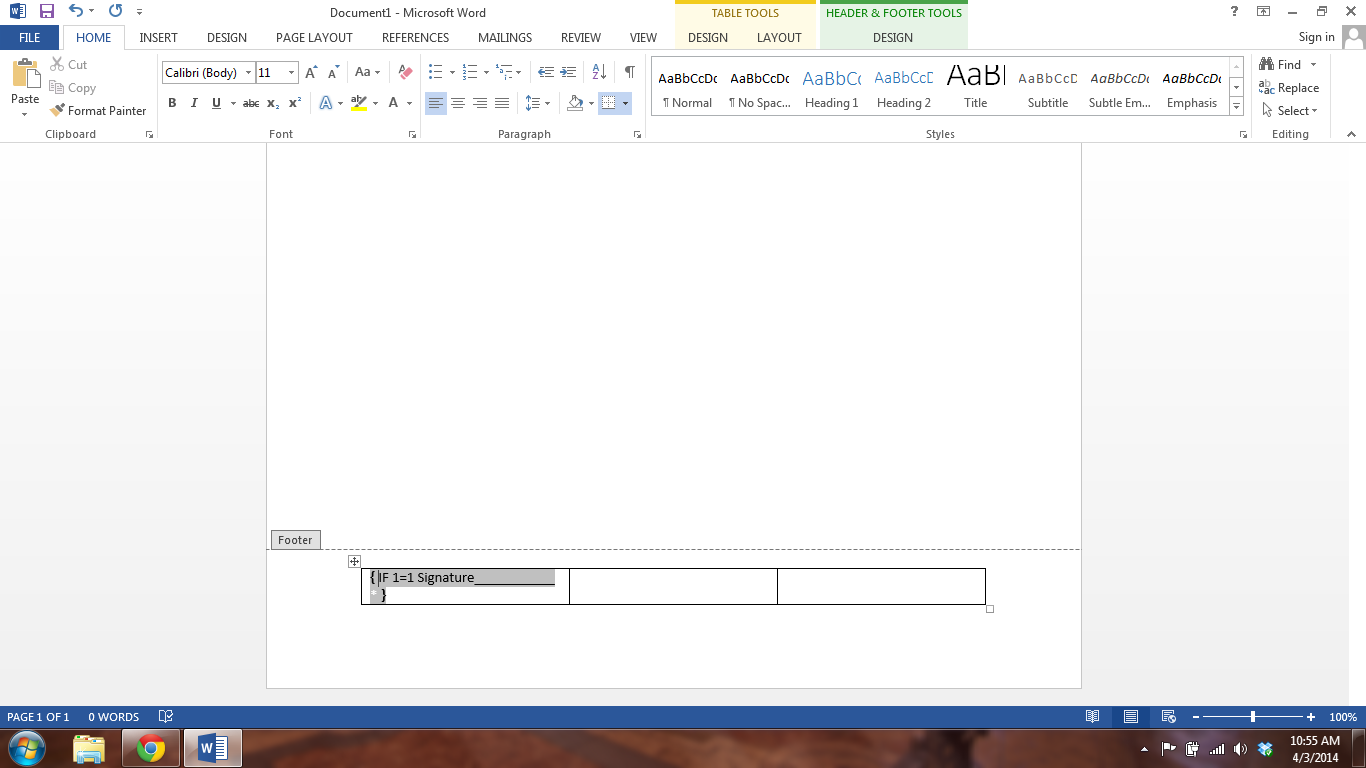
Once that's typed up, select all the text and press Ctrl + F9 and you'll see { } brackets appear around all the text.
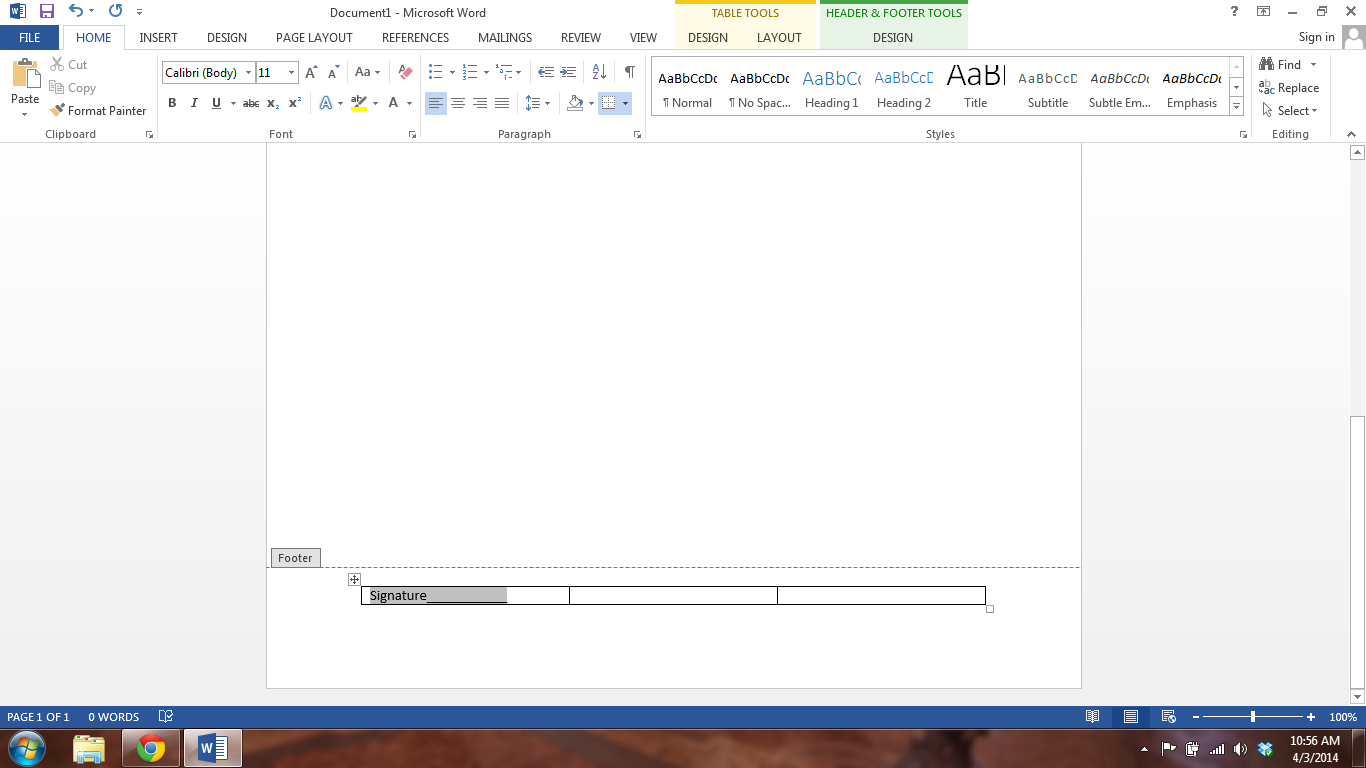
Now click somewhere inside the text then right click, in the menu that appears click "Update field" and you'll see everything but the Signature_____ disappear.
Cont.
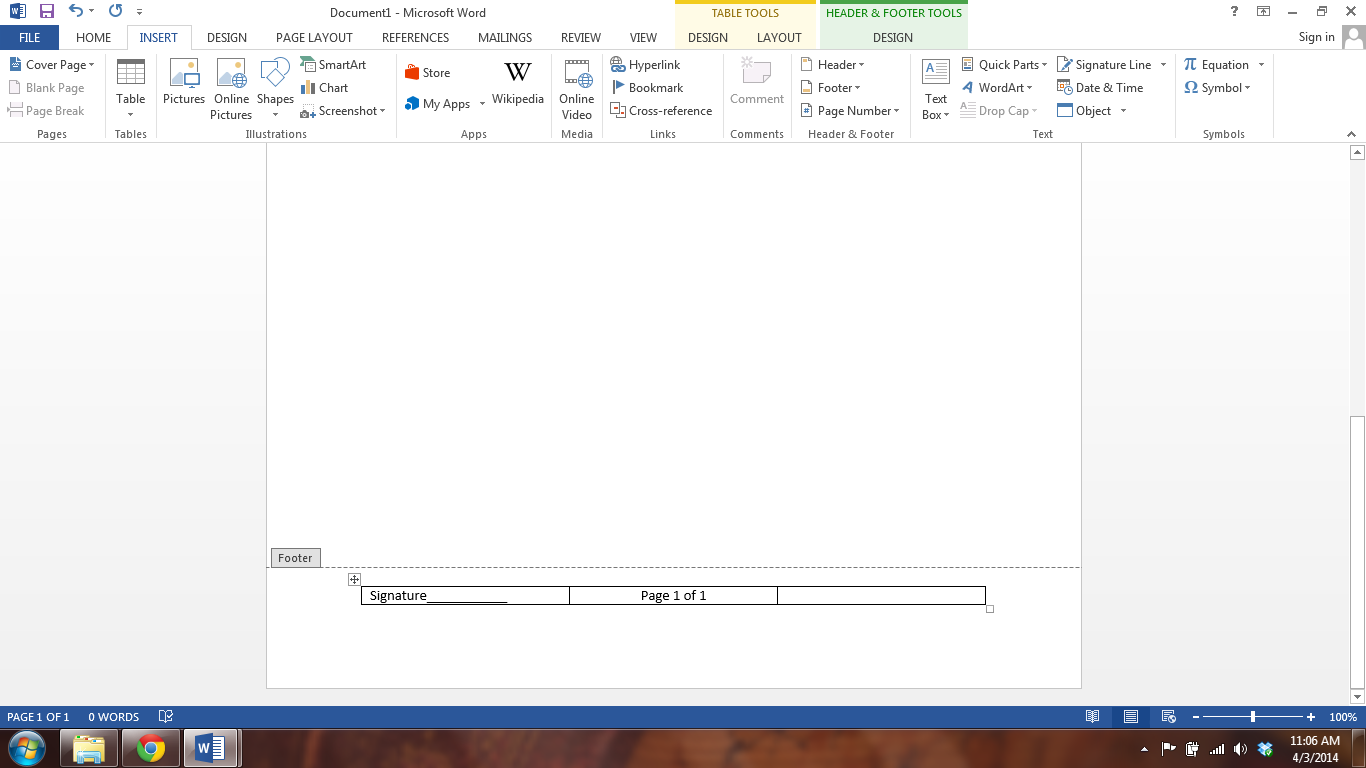
Now on to the middle block, most of the steps are going to be the same.
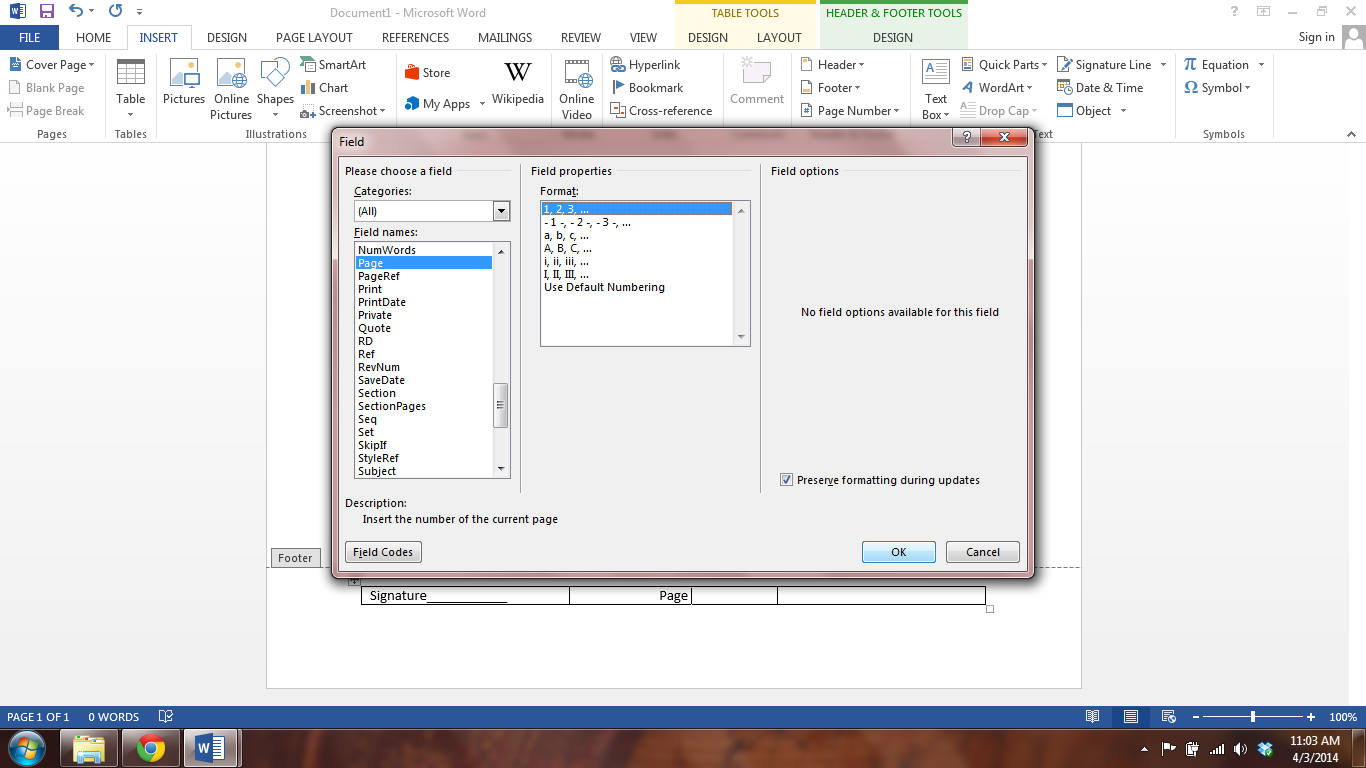
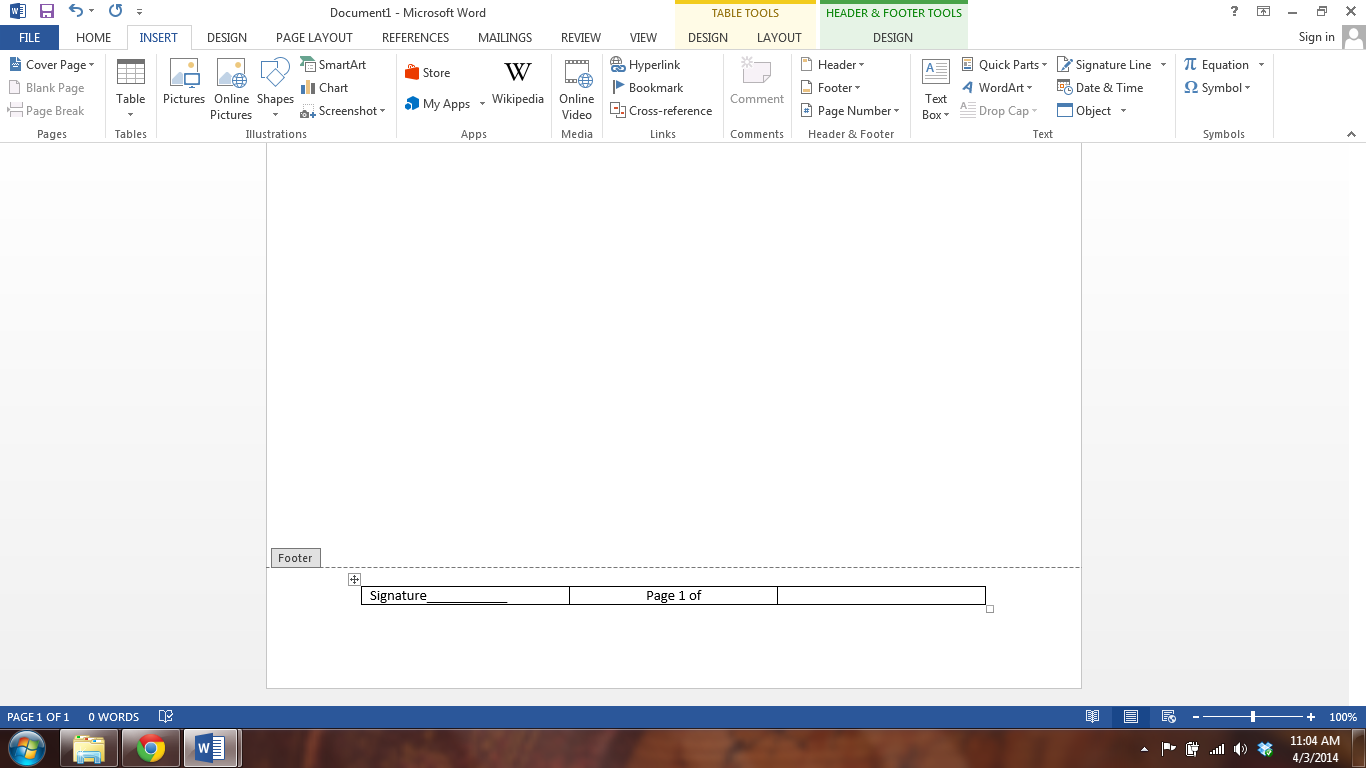
Select in the middle square and align the text to the center. Then type the word "Page" and a space. Then back up to the Field Dialog box just like before. Click Page, 1,2,3,..., and OK. Add a space then type "of" and add another space. Back to the Field Dialog box and click NumPages, 1,2,3,..., and OK. Now the text in that box should say: "Page 1 of 1"
Select in the middle square and align the text to the center. Then type the word "Page" and a space. Then back up to the Field Dialog box just like before. Click Page, 1,2,3,..., and OK. Add a space then type "of" and add another space. Back to the Field Dialog box and click NumPages, 1,2,3,..., and OK. Now the text in that box should say: "Page 1 of 1"
Cont.
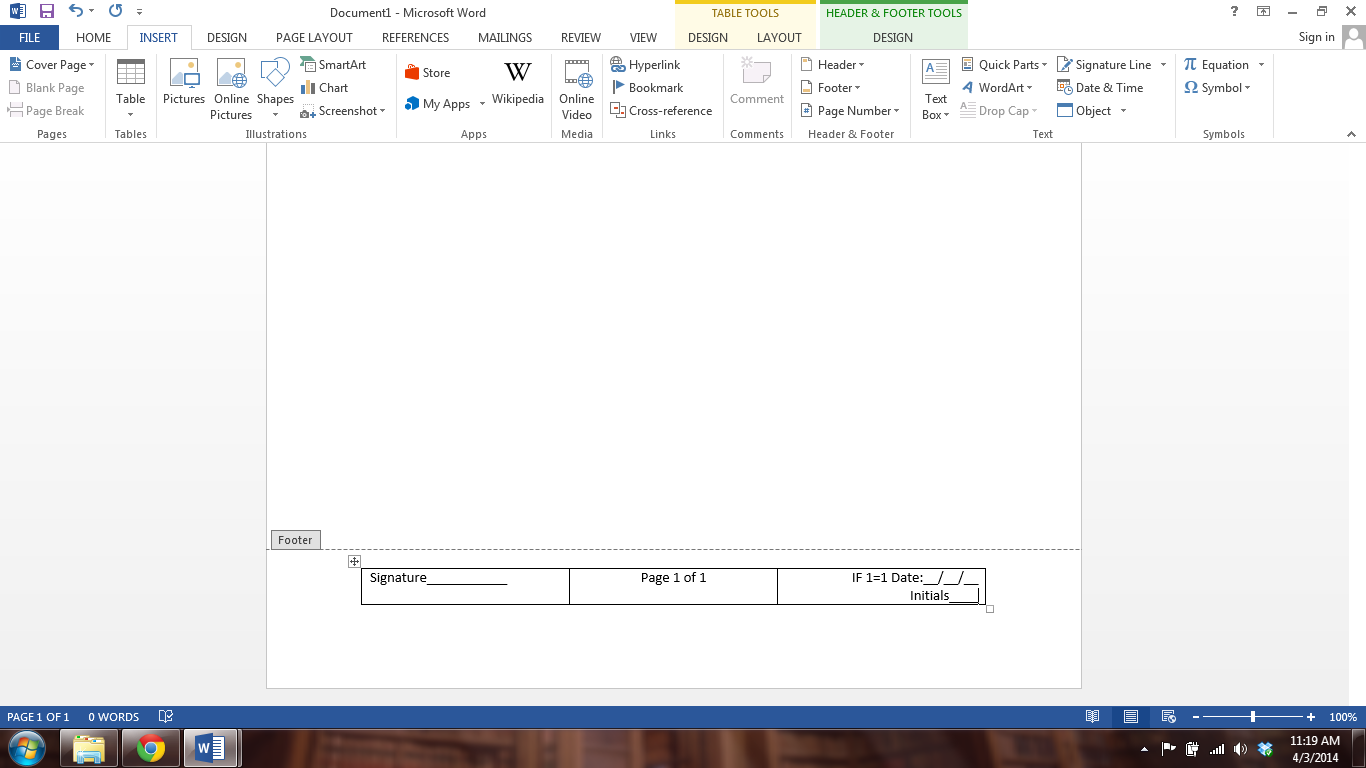
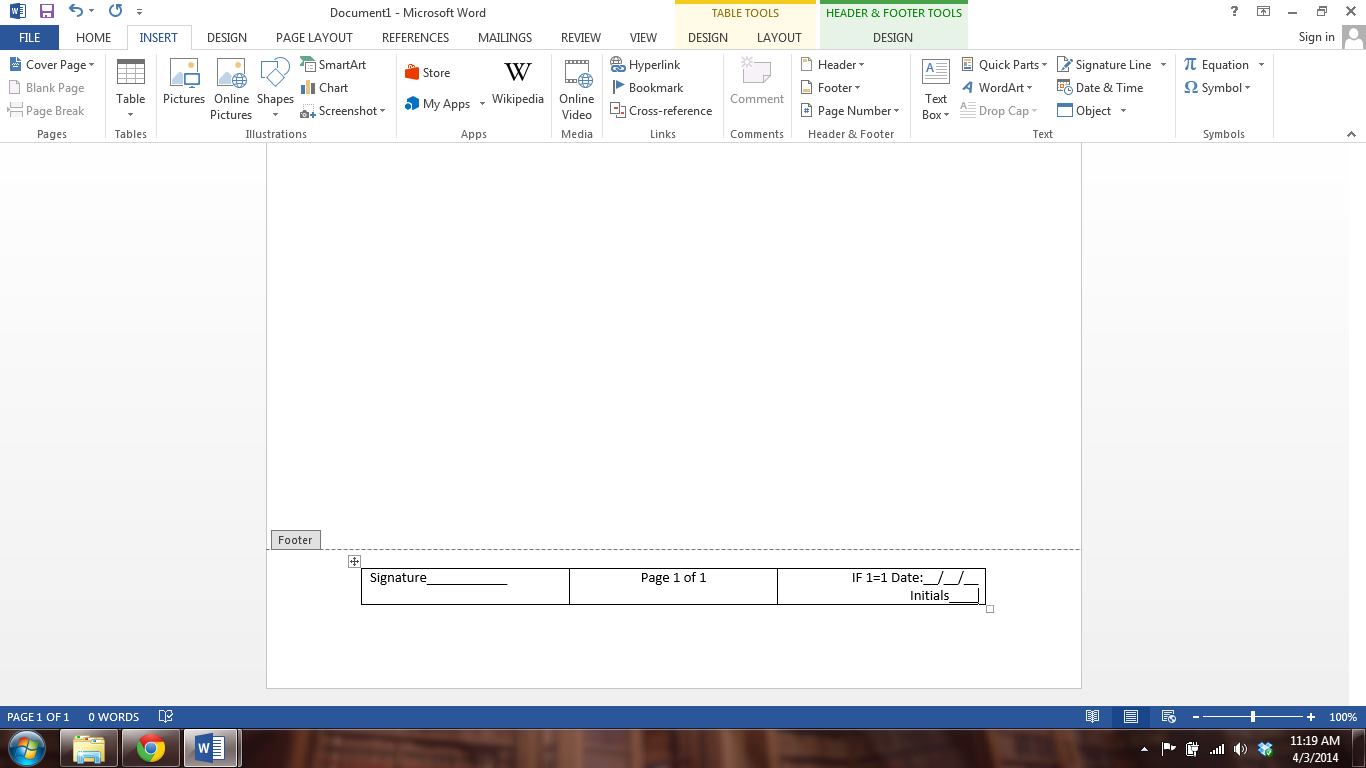
Now move over to the last box. This step is basically just like the first box, but with a little different data.
In the box furthest to the right, click and type the word "IF" followed by a space.
Back to the Field Dialog box. Repeat the Pages = NumPages step from before.
On the left hand side of the dialog box, scroll down till you find the "Pages" option, click it. Just to the right you'll see more choices appear. Click "1,2,3,..." and click OK.
After the "IF" in the box you'll see a 1 appear, type an "=" following the 1.
Now go back to the Field option and dialog box. This time we're going to use option "NumPages" and again click the "1,2,3..." option and OK.
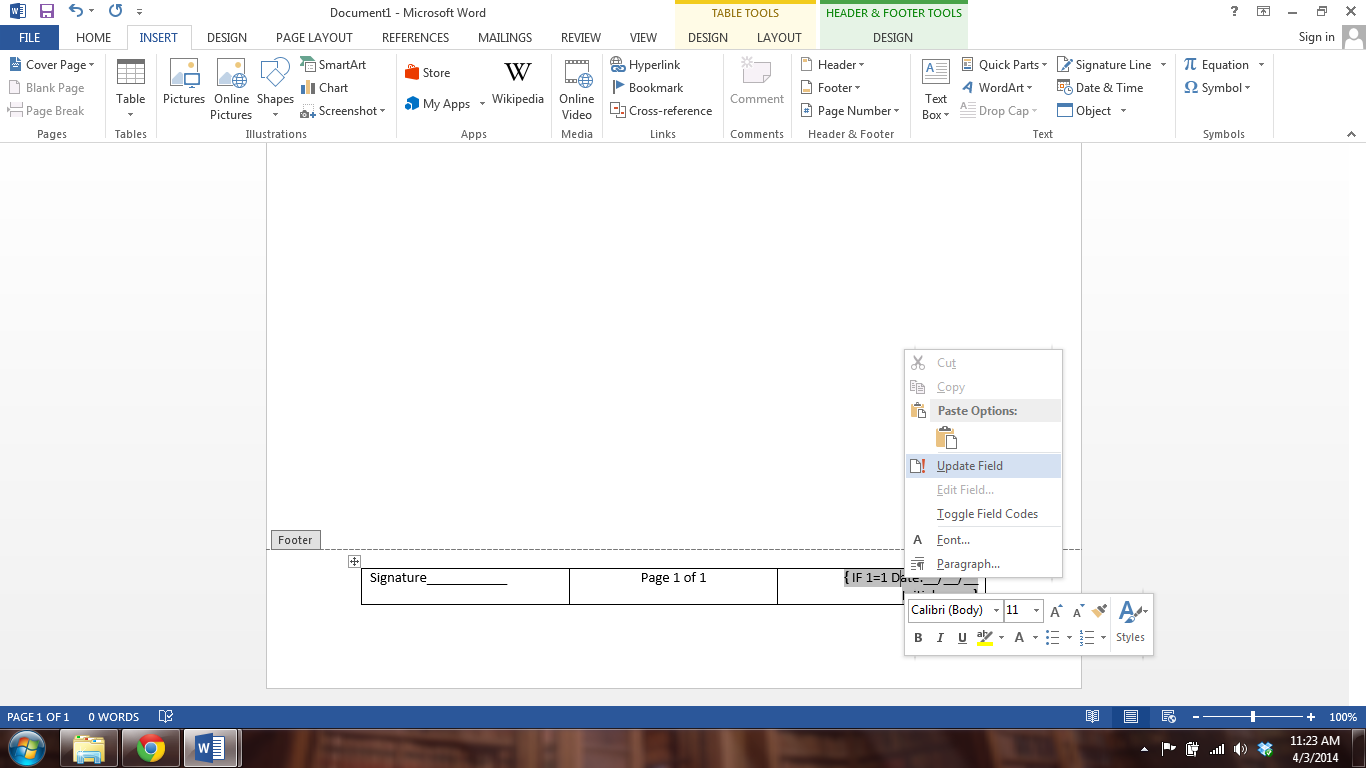
So here's where the difference starts. After your last 1 add a space, then "Date:___/___/___" and then another space and "Initials_____"
So now this box looks like: IF 1=1 Date:___/___/___ Initials_____
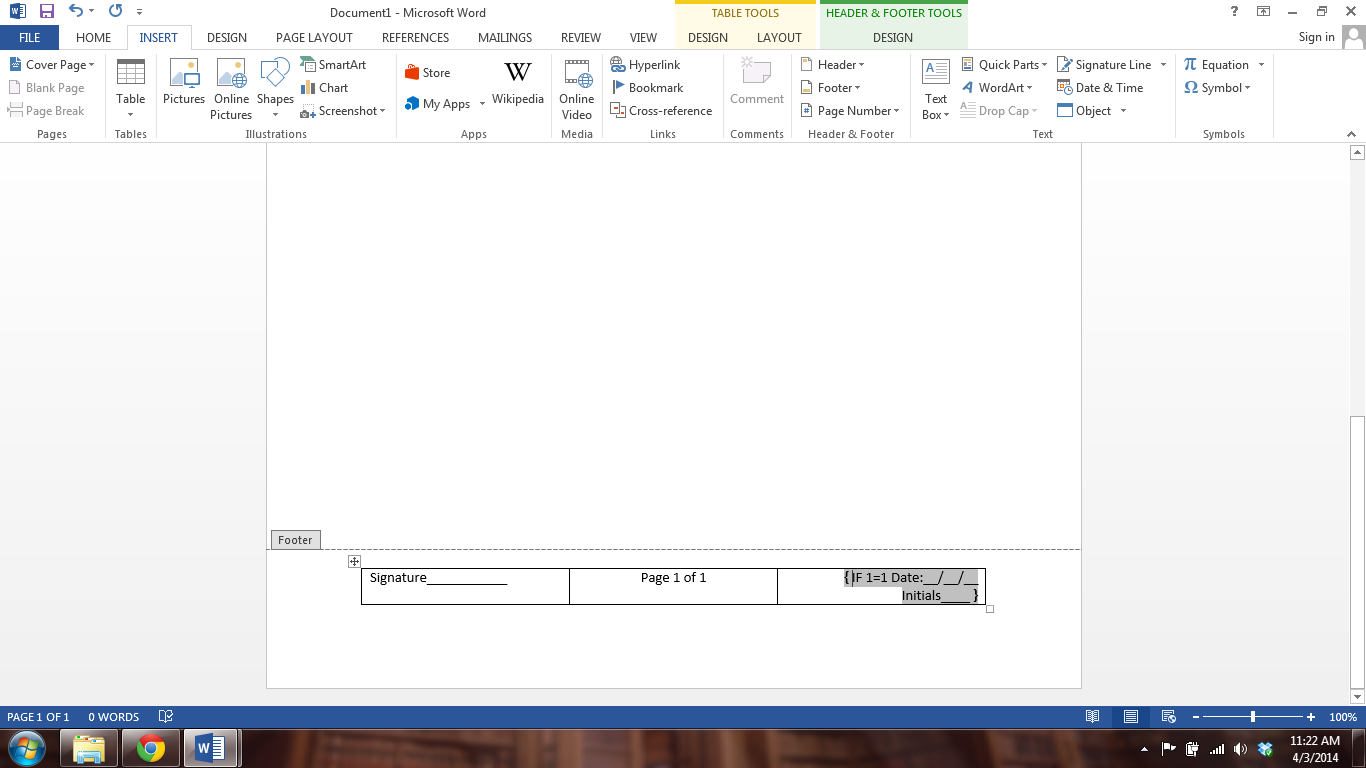
Once that's typed up, select all the text and press Ctrl + F9 and you'll see { } brackets appear around all the text.
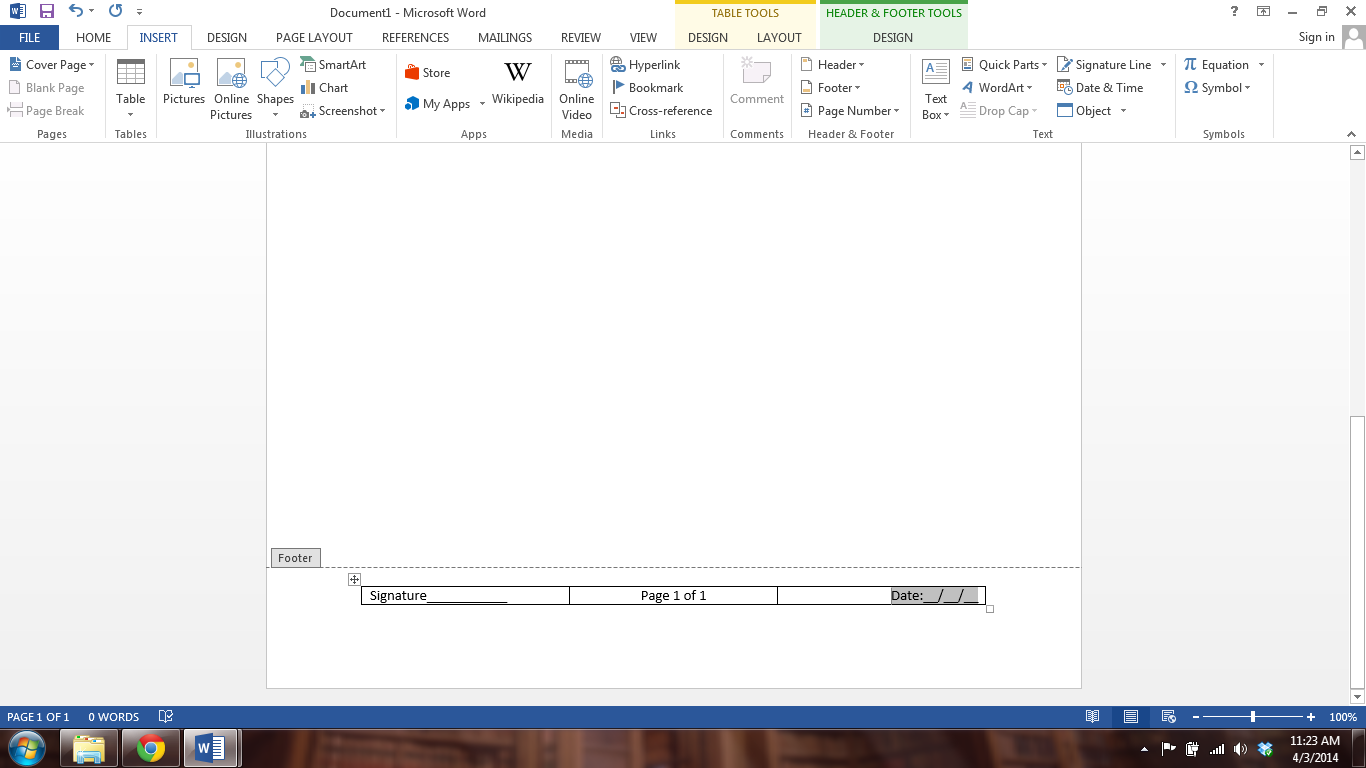
Now click somewhere inside the text then right click, in the menu that appears click "Update field" and you'll see everything but the Date part disappear.
Cleaning Up the Formatting
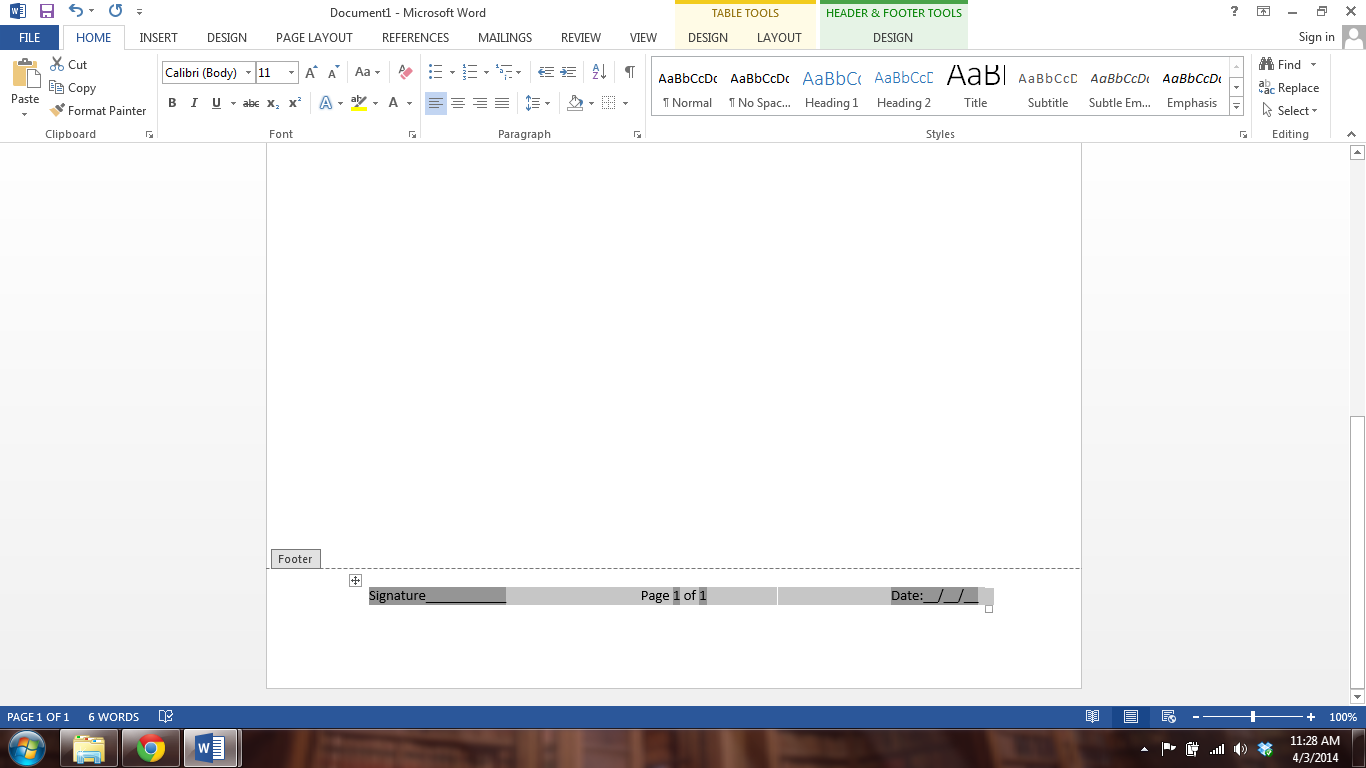
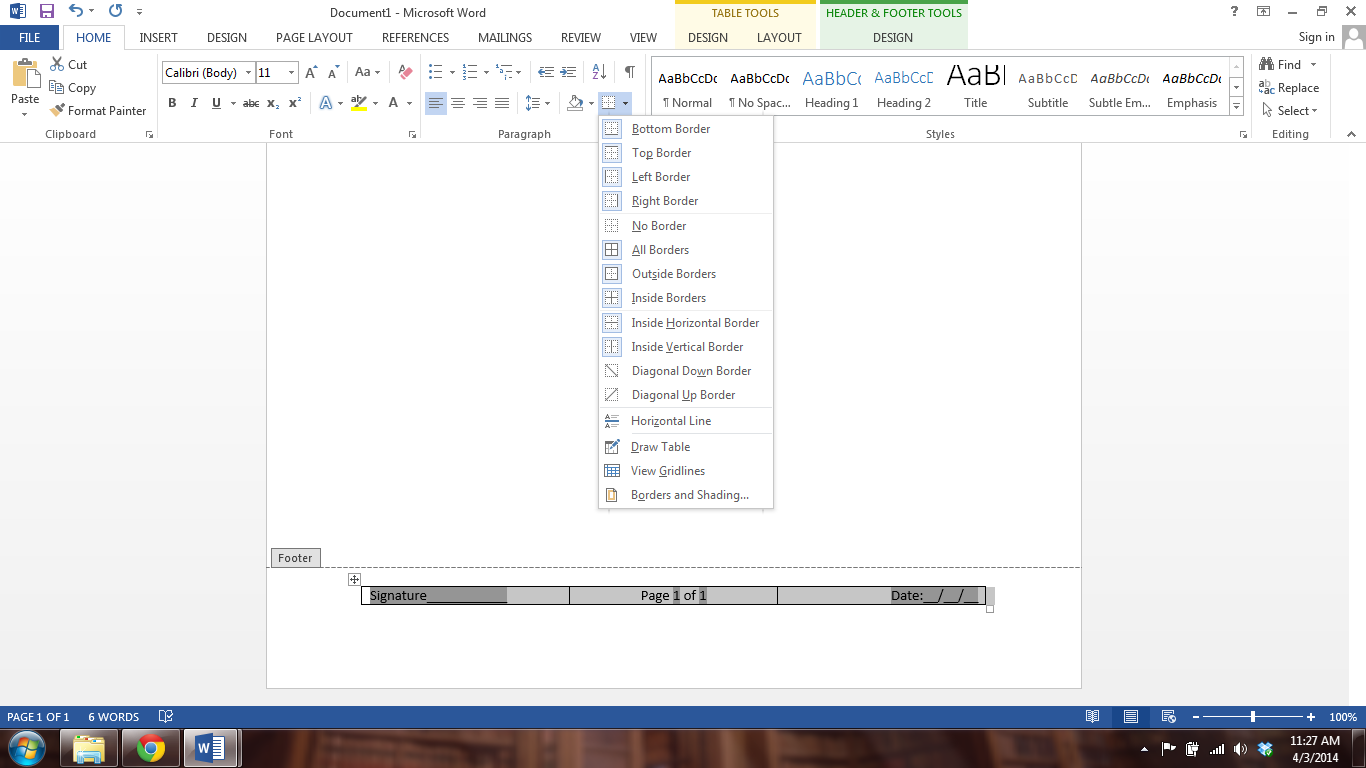
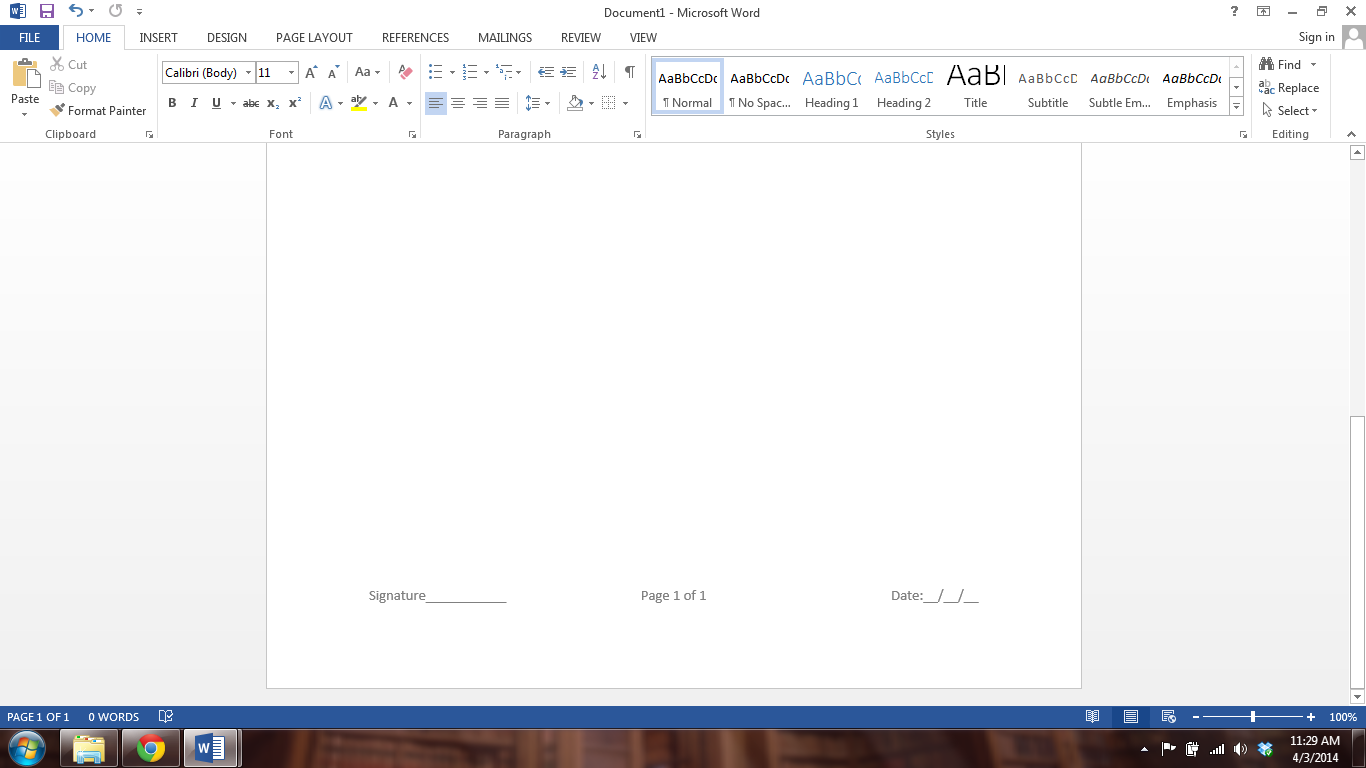
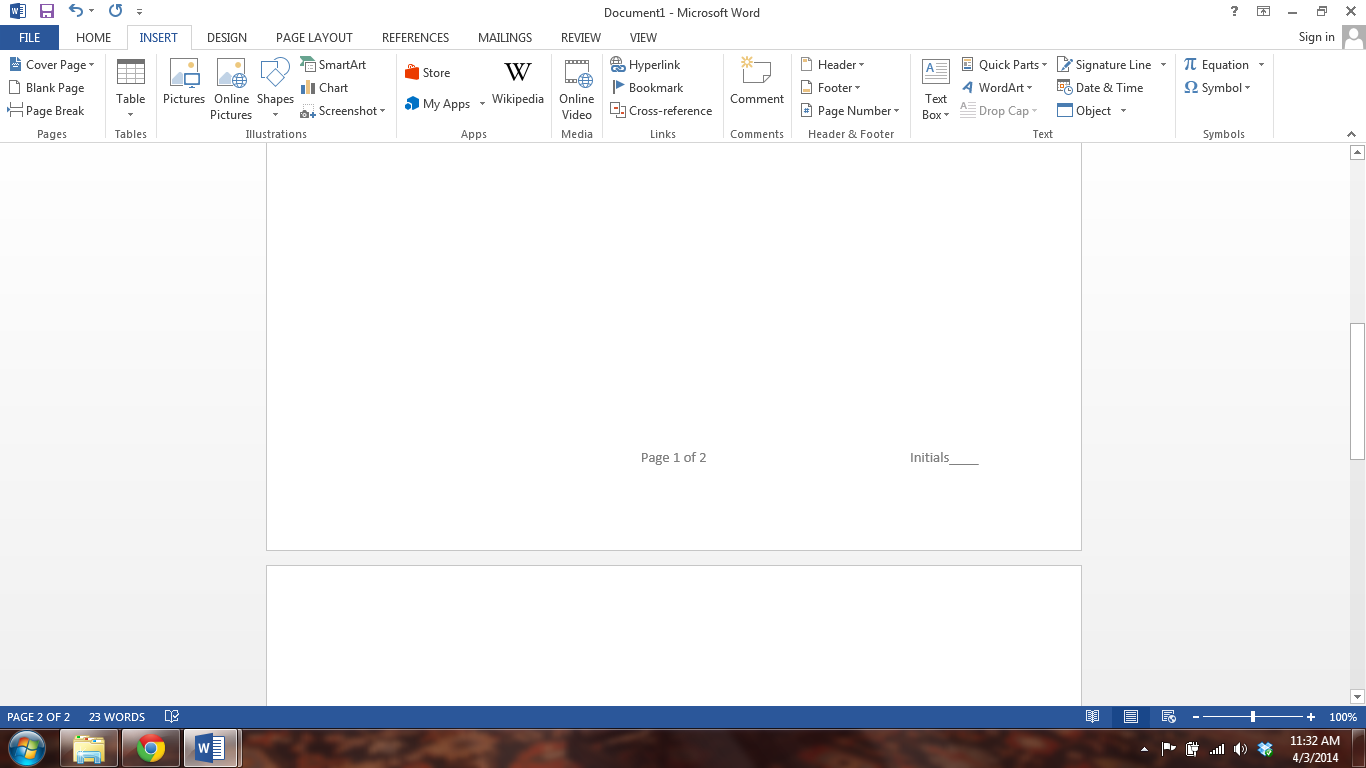
The last little step I like to do was to tinker with the formatting of the boxes. I don't like having the lines that make the boxes up, I think it looks more professional to not have the lines. So to get rid of the boxes, click the little + sign that's at the left top of the box, this selects the whole table.
Now on the home tab find the Borders button, it's right beside the paint bucket looking icon. In the dropdown menu find the option that says no borders. You'll see the borders disappear.
Now to check that everything is working, just run out a few sentences of text and add a page break. On the bottom of the first page you should now have Page 1 of 2 and an Initials_____ area. On the last page it should have: Signature_____ Page 2 of 2 Date:__/__/__
Save your template and any time you need a legal document, just open and Save As under a new name.
And if you don't have time and need this in a hurry or you are really not a fan of trying to argue with computers. I included a link to my template below. Thanks for reading, if you have any questions you can leave them below or shoot me a message, I'm happy to help if I can.
Link to my template
Also, if you have never used Dropbox, it's this great cloud storage that's totally free! However, they have a cap on how much you can put in it, but they have given you this handy little option of referrals to get more storage space. So if you don't have one, take a few minutes, click here, and make one. It will give you a boost in the introductory storage space.