Access\Control a Server or Most Any Windows Computer Remotely.
by jdogtotherescue in Circuits > Remote Control
10507 Views, 28 Favorites, 0 Comments
Access\Control a Server or Most Any Windows Computer Remotely.


This instructable is a combination of a few ideas that ive seen here on instructables. Ha4xor4life put out an instructable called Check up on your personal file server with ease. It is a good idea but it required a monitor with two inputs and i don't have that. It also required that the server had to be next to the original computer so the cables will reach. I recently got my little Compaq Deskpro p3 computer from the company that i work for. I wanted to do what Ha4xor4life did but my goal was to be able manage my little ftp server without having it right next to my main computer. This is easily done through my windows workgroup by using the Remote Desktop Connection feature. Currently i have an FTP server in my parents basement 300 miles away from my apartment. I use the tools i describe in this instructable to manage my ftp server.
Prepare and Setup the Server


Your server needs to be setup so that it can turn on and get to your desktop just by pressing the power button. That way if the power goes out or you want to turn off your file server for whatever reason you can just press the power button and it will go to the windows welcome screen. I turned off my servers firewall because firewalls cause access problems for some things and im not worried about getting viruses on my server. It doesn't surf the internet and pick up bugs like a regular computer. ***IMPORTANT NOTE*** You will not be able to access your server unless you give the profile a password. I don't use a password on my main computer but to use this feature on your server you will need to. Go to start>control panel>user accounts>change an account>pick your account and make sure it is password protected and if its not give it a password. You have to have the server hooked up to a monitor, mouse and keyboard to do this stuff. Obvious, I know but i get confused on some instructables sometimes so i thought id just put this in.
Set the Server in Its Place


Your server can connect through a wireless or wired connection. Which connection depends on you. The speed difference between the connections doesn't matter if you use the server for tasks like ftp because you're probably not going to get 54 mbps over the internet anyways. If you want to stream videos over your network then you'll want to use an Ethernet cable to connect to a router not that you cant stream videos on a wireless connection but i feel wired is better. Obviously the wireless connection is good for ease of server placement but bad for speed and the wired connection is not so good for ease of server placement but good for speed. I just like a wired connection because its the fastest available to me and server placement isn't an issue because i plan ahead.
Map the Shared Drives So They Show Up in My Computer


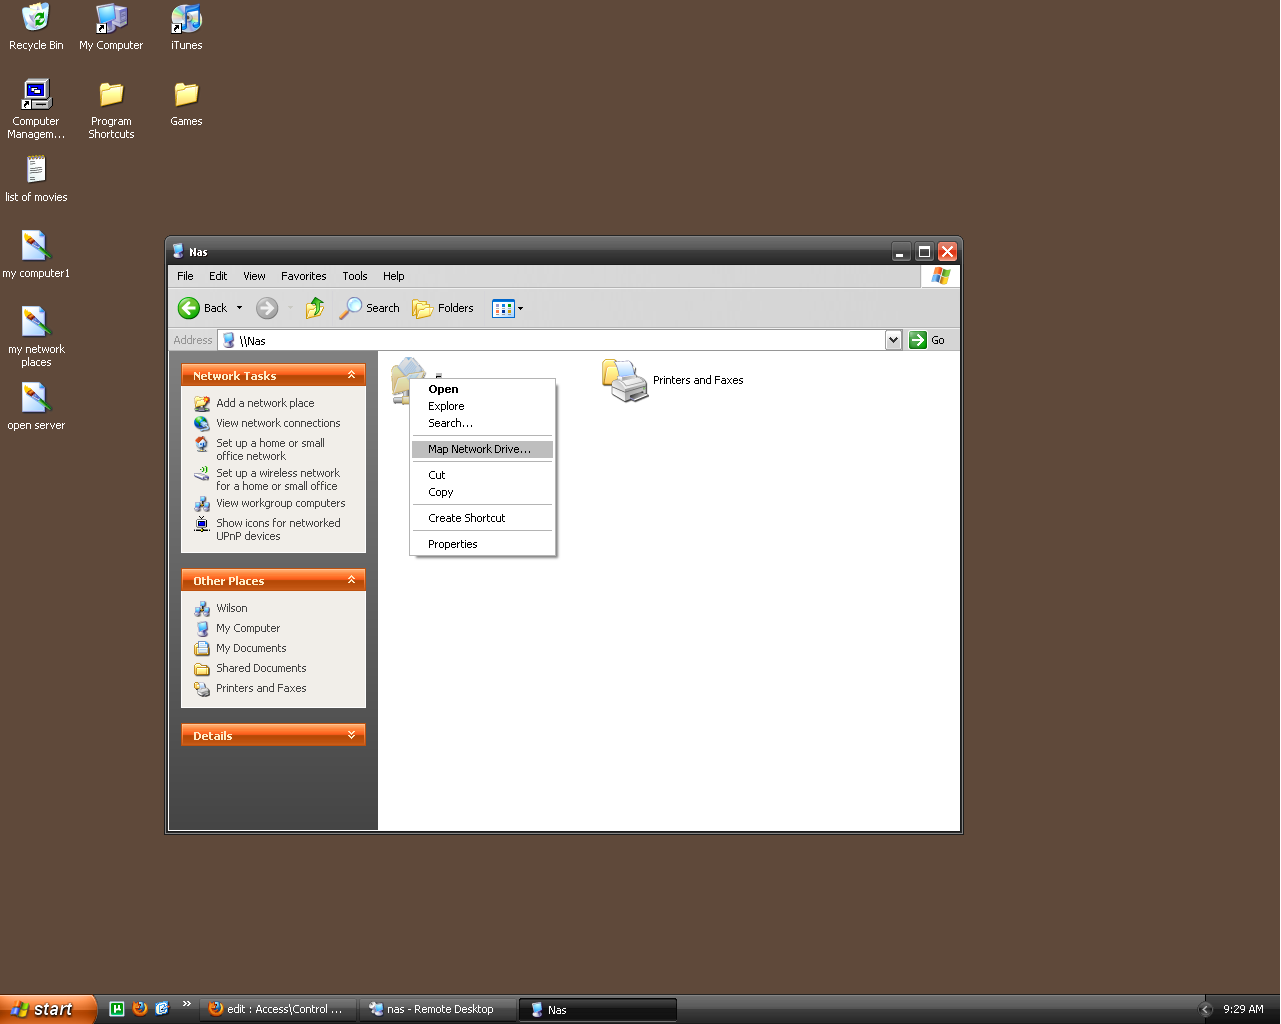
This step is one of my main reasons for this project. Mapping the drive in my computer can be done very quickly. I included step by step screen shots so you wont get lost. Im sure it can be done in vista and 7 but vista sucks so forget it. Right now my friends and i are playing with Hamachi2 to make a virtual LAN. I haven't tested it yet but it should be possible to write data to your server from your school or any internet access point over this network as long as it is functioning properly. If this is the case the 4th step wont be necessary.
Two Different Ways of Doing This Part.


So at this stage of the process we can accomplish our goal using a few different methods. First you can forward the port 3389 for windows remote desktop connection. Or you can go to step 5. The only reason that this step is better is because from some places like my current apartment complex block so many features of the internet that i cant access my server by way of the ip and port. So i use Hamachi2 to access my server for now. I have noticed that Hamachi2 doesnt have as quick a refresh rate as just forwarding the port. Maybe this has nothing to do with Hamachi2 but it seems like it to me. Anyways. Port 3389 is the remote desktop connection port so it is just standard. To do this you need to log into your router. Do that by opening up your internet browser and typing in your routers ip. If you dont know that open up a command prompt and enter ipconfig. Note your local ip and default gateway. The default gateway is your routers ip. Put that ip in your browsers url bar and hit enter. a window will pop up and you can enter the username and password to get into the router. If you cant remember your routers ip there should be a reset button on the router somewhere so you can wipe the settings and start over. There should be a option somewhere on your router page to forward and trigger ports or like in the case of belkin routers its the option of virtual servers. Enter that option and forward port 3389 for your servers local ip. You see the local ip of your server when you enter ipconfig in your command prompt. Add a service for remote desktop connection, forward port 3389 on inbound and outbound and apply that to your servers ip. Apply those changes and now your ready to go. Find your remote desktop connection by by hitting the start menu and hitting run then type in mstsc and remote desktop connection will pop up. Enter your servers external ip (you can find that out by going to ipchicken.com),that ip plus :3389 (no spaces) and that will bring you to your welcome screen.
Hamachi2!


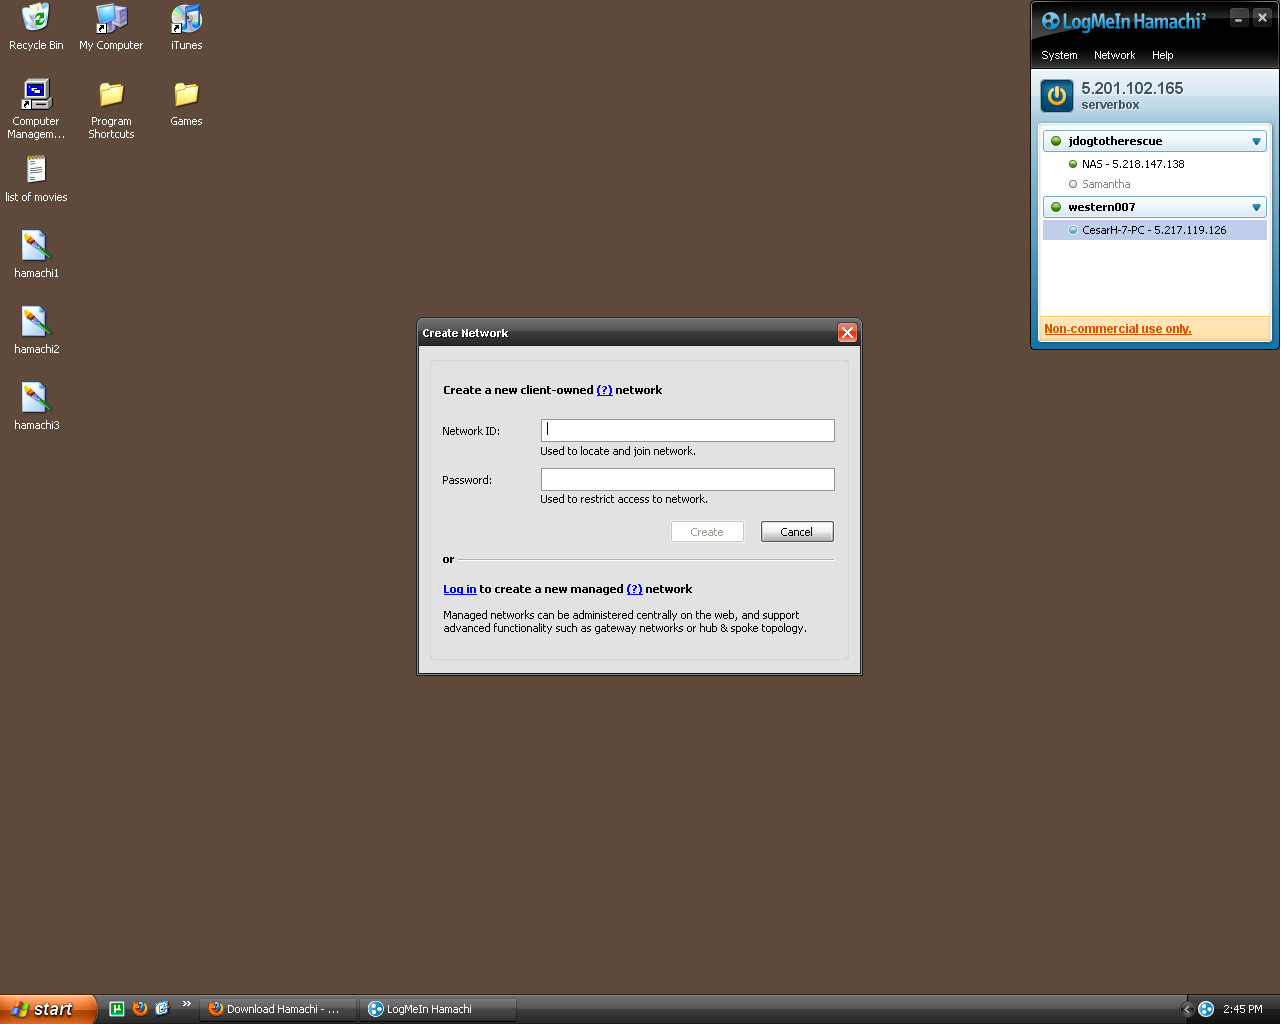
Hamachi2 is a super easy way to make this project work. Get it at
http://hamachi.en.softonic.com/download
If the link doesnt work just google "hamachi" Hamachi2 is a program that will make a virtual LAN so that your main computer will be able to use the remote desktop feature in windows without forwarding any ports and it is free as long as it is for non-commercial use. All you do is download and install Hamachi2 on both your server and main computer and then on one of them create a network and with the other join that network. It will make the computers link on this virtual network and it will allow remote desktop to work just by typing in in the the remote desktop connection box the name of the server.
Almost Finished


Now open up your remote desktop connection and put in the name of your server. Hit enter and you will be brought to a black screen that asks for your user name and password for your profile on the server. There may be a little lag but be patient because it is accessing it over the internet. You'll be glad you did this because you will be able to manage your server from where ever you are in the world as long as you have an internet access point.