AR Instagram Filters
by MakerEducationScienceMuseumofVA in Circuits > Mobile
1532 Views, 3 Favorites, 0 Comments
AR Instagram Filters
Here's a fun diversion to try at home while we practice social isolation! You can then stay connected and share your creations with friends on Instagram.
We've included a video, full length .pdf, and a step-by-step run-through.
Keep making stuff!
Downloads
Supplies
1. A desktop or laptop computer.
2. Spark AR Studio (free download, here; https://sparkar.facebook.com/ar-studio/)
3. Photoshop or other image editing software
4. A smartphone (and Instagram) to check out your creations!
Watch the Video
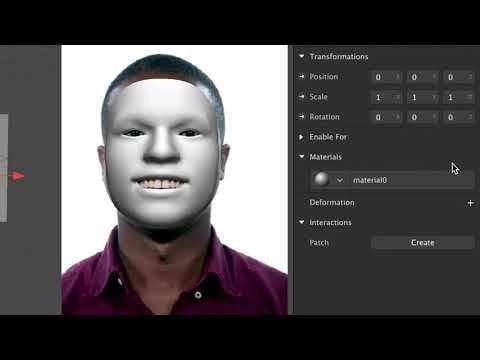
Do It Yourself: Static Objects
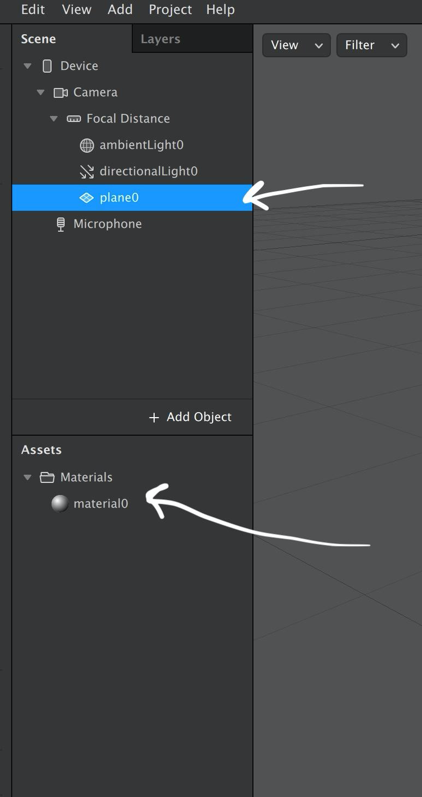
1. To start, click “Add Object,” then “Plane.” You will see a square appear in the work space and the preview area that can be moved around with the cursor. The “Plane” is essentially a flat attribute added on top of the image recorded by the camera. We will be using a “Plane” to make a digital frame for a photo.
2. Notice that when the plane is selected, the square in the work area is checkered. This means that there is no “Texture” applied to it yet and is essentially a blank canvas. In the left hand toolbar, select “Plane0” to edit this checkered box. Next, in the Inspector (toolbar in the right side of the screen) click the “+” sign next to “Materials.” This will create a material in the asset pane, “Material0”.
3.. When you select “Material0” in the assest bar, several options appear in the Inspector. Select the “Texture” option and then click “Choose File” next to “Material 0”. Select the example file named “plane example.” Now demonstrate the types of modifications you can do to the “Texture” you’ve applied to the plane. Click and drag the uploaded texture preview in the main work area to show it can be moved. Stretch and resize the texture preview using the scale tool or change the perspective on the image by clicking and dragging on the face in the phone preview.
A. Adjust position of selected object
B. Rotate selected object
C. Edit scale of selected object
D. Use objects local coordinate system
E. Pivot/ Center
Tracking
1. Click “Add Object” again, then select “Scene Understanding> Face Tracker.” Facetracker0 will now be visible in the scene panel in the left toolbar. You will also notice that the RGB arrows on the model in the work area are now moving with him.
2. Next, drag “Plane0” on top of the “Facetracker0” in the scene panel. The “Plane0” object is following the model’s facial movements- this is called face tracking. You can change where the object is positioned in relation to the model’s head by using the RGB arrows used to move the object before.
3. If you want to pause the movement of the face to more precisely position the image, you can do so on the left hand side bar.
Mask Effects
1. Delete “Plane0” from the scene bar by selecting “Plane0”, clicking Edit in the top left hand toolbar, then selecting “Cut”.
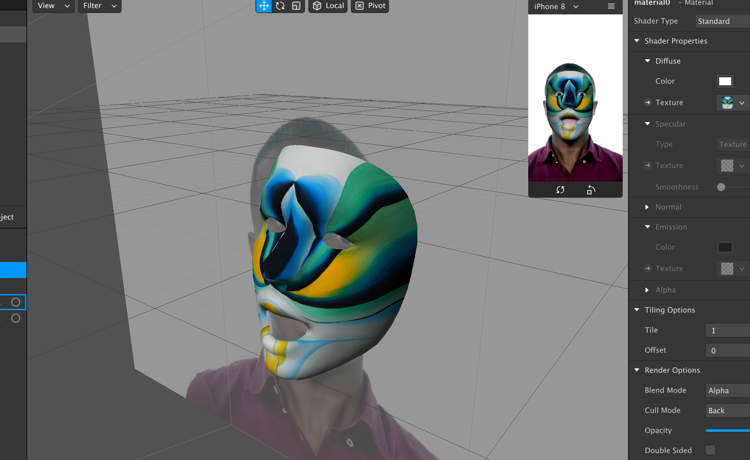
2. Click “+Add Object” and select “Face Mesh.” This will add a new object, “faceMesh0” under the face tracker. You will see a checkered 3D image of the model’s face appear on top of the camera preview.
3. Select “faceMesh0” and click the + next to Material in the right toolbar, then select “Create New Material” in the drop down bar. Now the model has a white layer over the face and there is a new material in the “Assets” panel to the left.
4. Once again, go down to the assets panel, select “material1 > New Texture” and select the example mask jpg. 5. You can already do a lot with just this by changing the parameters in the inspector. Try changing parameters in the “Material1” inspector and see what happens to the result in real time. Play with the sliders. You can also do the same mods to in the main work space like moving it around, stretching it, etc.
Extension of Mask Effect:
1. Take a look at the provided mask template file. This image file gives an easily editable template on which to draw or create mask effects. Open the file in Photoshop and create a new layer on top of the template. This layer can be drawn on, composed with other images, and more to make a custom mask texture.
2. When the new mask is completed, delete or hide the mask template in your photo editing software and export the file as a .png. Exporting as a .png preserves the transparency of the file.
3. Try importing this image as a texture into the SparkAR scene and see what happens!
3D Objects
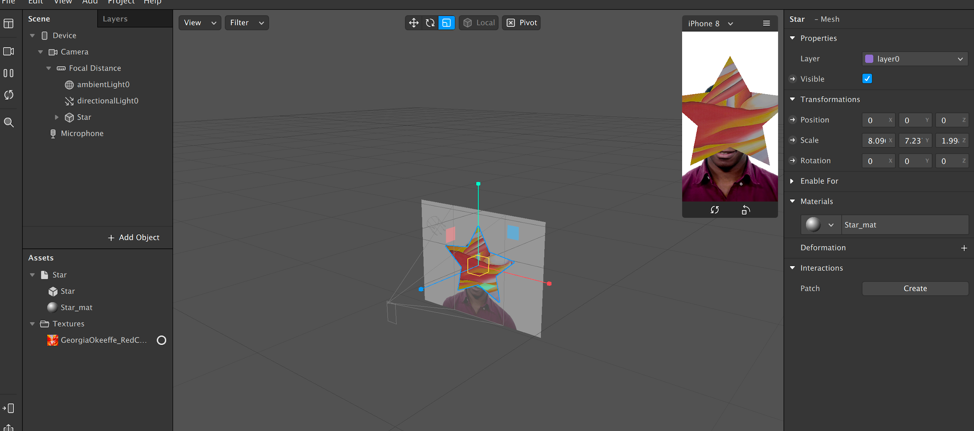
1. Just like any other object, 3D objects can be added to the scene. Just like the face mask, a 3D Image consists of a “mesh” and a “material.” The mesh is the 3D shape, and the material is the visual texture that covers that object.
2. Go to the assets panel and click “Add Asset > Add from AR Library.” This leads to a menu to choose from a wide number of example objects. Go ahead and select an object in 3D Primitives. Click Import to add to the shape to Assets.
3. The object will appear with two file parts, a mesh and a material. If you drag the cube into the scene you will see the shape appear in the preview window. Just like the plane and the face mesh, this can be moved around, resized, and edited in other ways. To edit the texture of this object, click the material of the cube, labeled “Cube_Mat” and replace the texture.
Plane Tracking and Lights
Plane tracking:
1. Plane tracking is very similar to face tracking. Go to “add object” and select “Plane Tracker.” This will add a tracker to the scene that tracks an “infinite horizontal plane” and will switch the preview view to a forward camera view.
2. This plane can be used to “pin” a 3D obejct, plane, and much more. Experiment with it!
Lights:
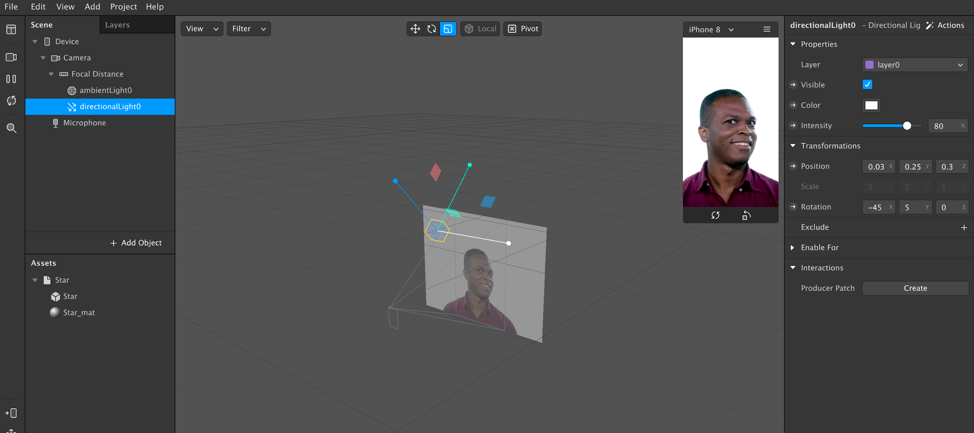
1. All of the 3D elements in the scene are rendered in a 3D engine that allows for lighting effects to be altered. By default, the scene comes with one ambient light (lights everything softly) and a directional light (highlights everything from a single direction).
2. These lighting elements can be deleted from the scene and new ones can be added. Go to “Add Object” and a list of lights will appear at the bottom of the drop down menu.
3. When a light is added, a cone shape with the RGB handles will become visible. This can be moved around in the 3D workspace.
Further Exploration
Any AR effect that you have seen or used on your phone is possible to achieve using the Spark Software. When you are opening the software, you will see an array of templates for new effects that you can simply modify to get your desired outcome. Spark will give you concise instructions on what files to replace. Spark also provides ample documentation and tutorials to achieve any affect you want.
Uploading and Publishing
To try out your effect on a smartphone, go to File>Upload to pull up a dialog box to upload. You will have to log into a Facebook account to upload the effect. It will take you to a form where you fill out various info about your effect including a title and a preview picture. Once you upload the effect, Spark will give you a test link in order to try out your effect. Sometimes, depending on the effect and your device, you may need to go back and tweak the effect after you test it. This is perfectly normal.