AI-powered Fully Automated Voice-Controlled Coffee/Tea Maker
by thelonelyprogrammer in Circuits > Microcontrollers
1302 Views, 6 Favorites, 0 Comments
AI-powered Fully Automated Voice-Controlled Coffee/Tea Maker
Making a cup of coffee/tea on a Sunday morning is hard. I would like to present my Rube Goldberg Device, a fully automated coffee/tea maker.
Supplies
Things used in this project
Hardware components
- Infineon PSoC 62S2 Wi-Fi BT Pioneer Kit × 1
- Infineon IoT Sense Expansion Kit × 1
- Seeed Studio Grove - Relay × 1
- Digilent IR Proximity Sensor × 1
- Digilent 60W PCIe 12V 5A Power Supply × 1
- Cup heater × 1
- Water pump × 2
- SG90 Micro-servo motor × 1
- Buzzer × 1
Software apps and online services
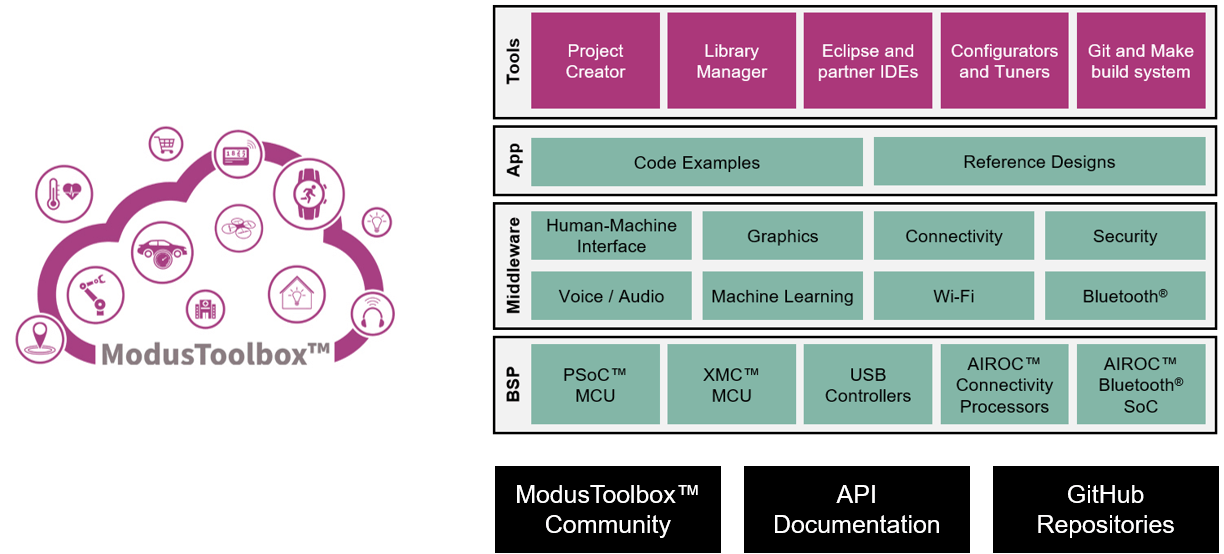
- Infineon ModusToolbox Software
- Picovoice AI Picovoice Porcupine Wake Word Engine
- Picovoice AI Picovoice Rhino Speech-to-Intent Engine
Hand tools and fabrication machines
- Hot glue gun (generic)
- Breadboard, 170 Pin
- 10 Pc. Jumper Wire Kit, 5 cm Long
Idea and Working Prototype
I would like to make a fully automated coffee/tea maker which can be turned on and controlled using voice commands. This can highly reduce the physical contact with the machine and can be implemented in public places, and in the office cafeteria.
The System is designed to process the voice data using the XENSIV MEMS Microphone in real-time. The trained model is fed with the voice data and inference is used to process certain actions. When the correct wake is called, the system is initialized and the successive words are used to identify the drink. Using a PSoC 62S2 & the AIROC Wi-Fi/Bluetooth Pioneer Kit + IoT Sense will make this system more robust and easy to implement in real-time. The audio data is processed using Picovoice.
I know this can't be a perfect coffee maker but I'm satisfied with the coffee made by this project.
Hardware Build
We are supplied with the PSoC 62S2 Wi-Fi/Bluetooth Pioneer Kit + IoT Sense Expansion kit. Thanks to Infineon for sponsoring this powerful kit for this project. Innovative projects using IoT entangle unlocking the possibility of AI on edge devices, where you can run complex AI algorithms right on the edge.

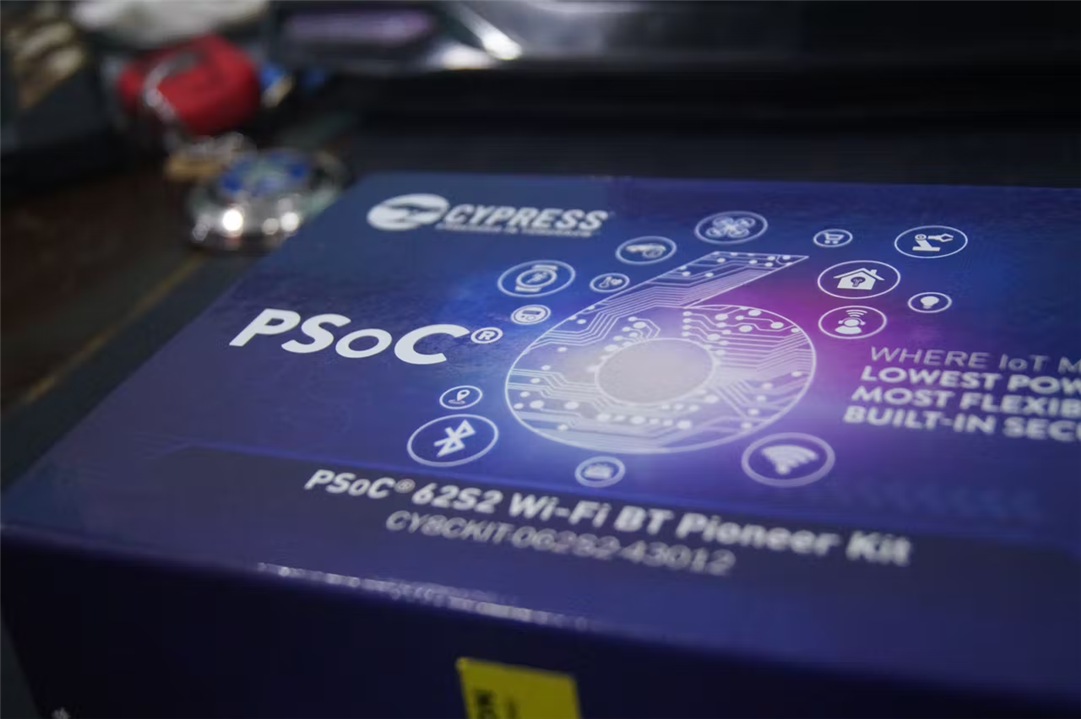
PSoC 62S2 Wi-Fi/Bluetooth Pioneer Kit
The PSoC 62S2 Wi-Fi BT Pioneer Board has the PSoC 6 MCU (CY8C624ABZI-S2D44) & Murata 1LV ultra-small 2.4/5.0-GHz WLAN and Bluetooth functionality module, a 512-Mbit external Quad SPI NOR Flash, 4-Mbit Quad SPI F-RAM. It also has KitProg3 onboard SWD programmer/debugger, CapSense touch-sensing slider, onboard user LEDs, and buttons.

IoT sense expansion kit (CY8CKIT-028-SENSE)
The IoT sense expansion kit is a low-cost Arduino UNO compatible shield board that can be used to easily interface a variety of sensors with the PSoC 6 MCU platform, specifically targeted for audio and machine learning applications.
- Digital XENSIV MEMS Microphone(s)
- Digital XENSIV Barometric Air Pressure Sensor
- Bosch 9-axis Absolute Orientation Sensor
- Piezo MEMS Analog Microphone
- Audio Codec and headset jack
- OLED Display Module
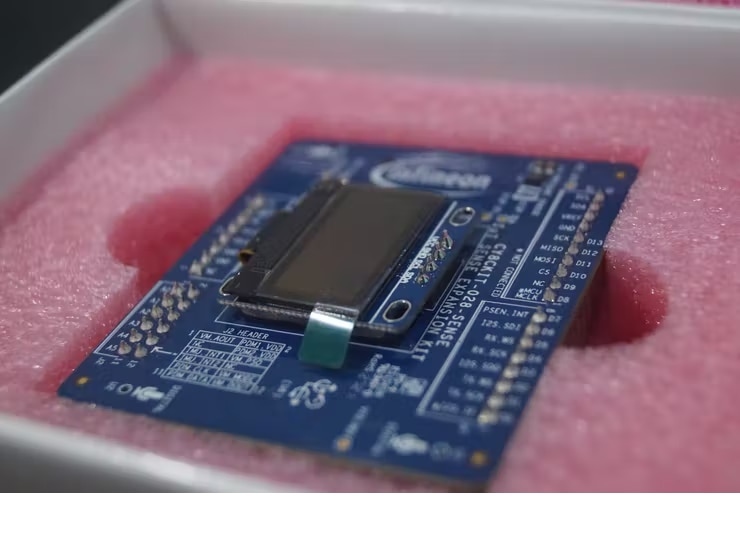
IoT sense expansion kit (CY8CKIT-028-SENSE)
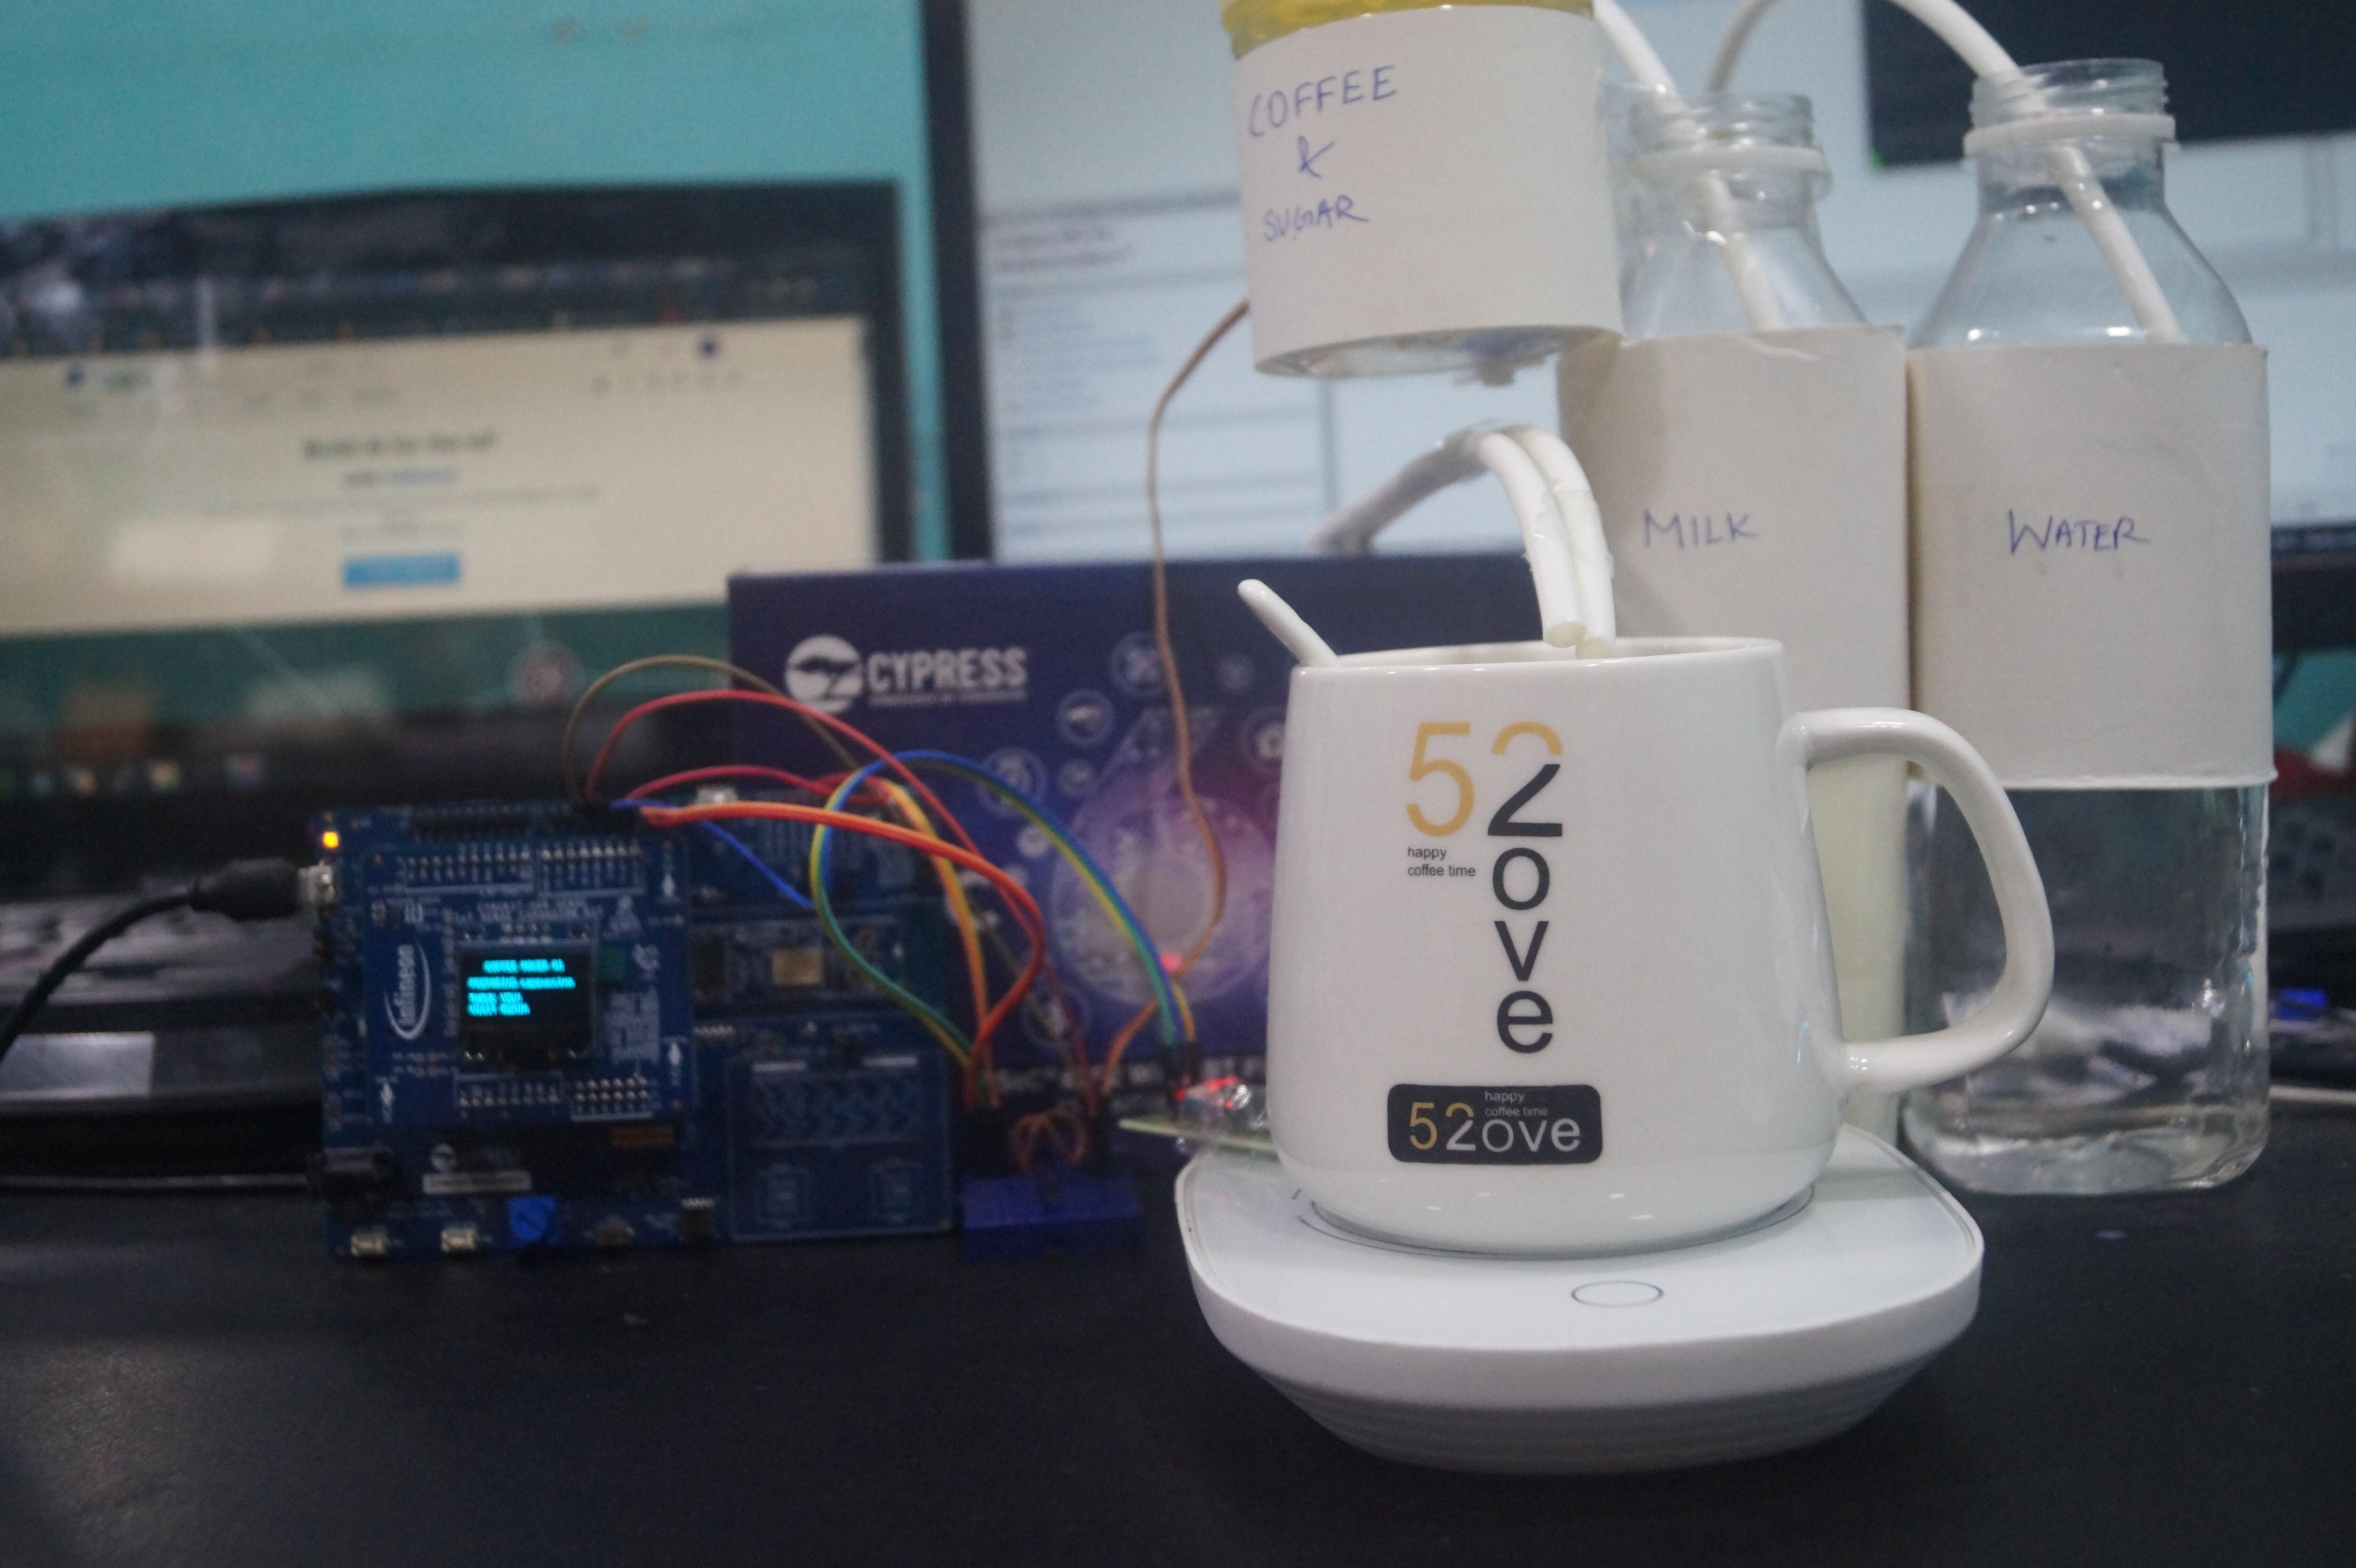
Relay Board is used to switch the warmer.

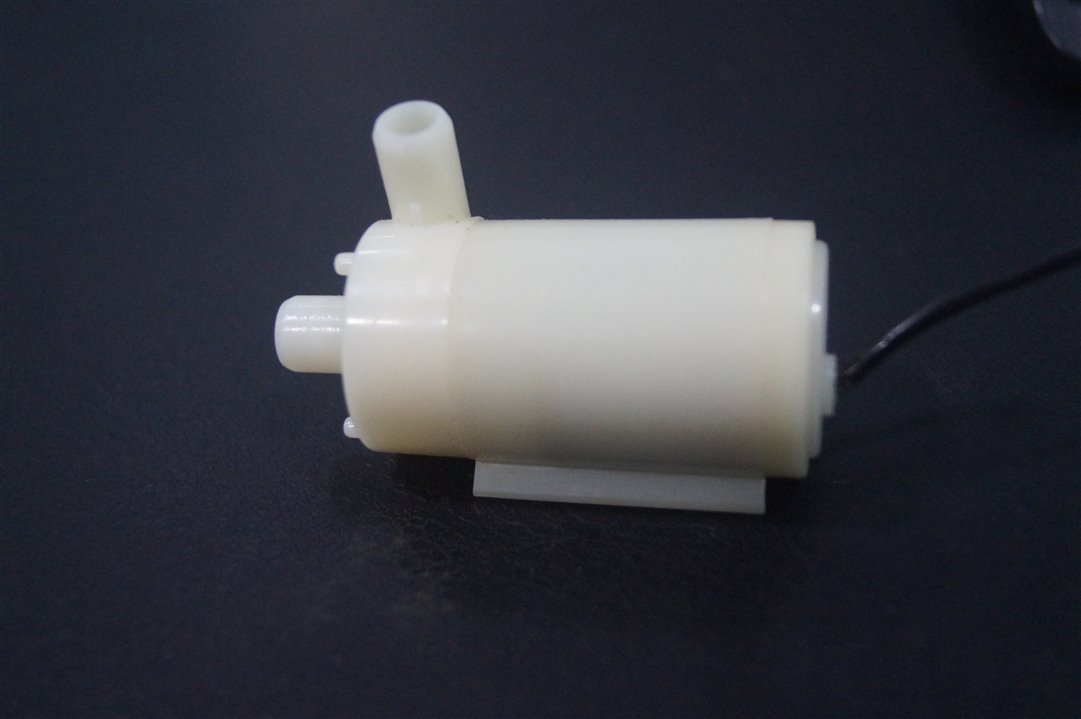
Motor pumps are used for filling the milk and water into the cup.
Servo Motors are attached to the sprinkler setup which is used to dispense the coffee and sugar.

Proximity Sensor is used to detect the cup. If the cup is not present in the holder, it alerts the user.
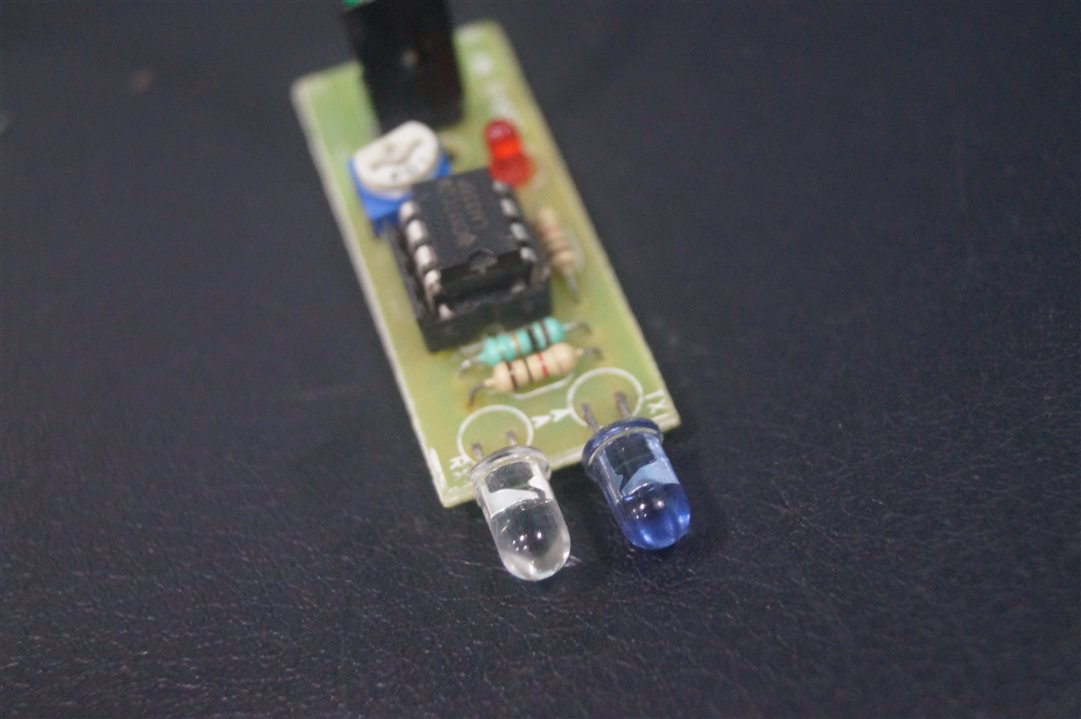
The total components used are shown below.

Overall Architecture
- Firstly, install the Modus Toolbox IDE from the official website.
Now, let's see how the AI-powered Fully Automated Voice-Controlled Coffee/Tea maker can be implemented. The Workflow diagram is given below:
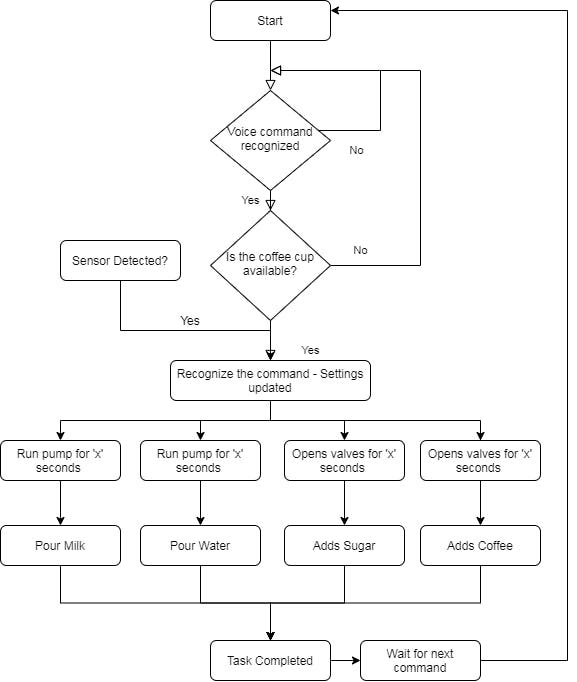
- We use Microphone to detect the audio signal.
- Use a proximity sensor to detect the cup
- Based on the voice command, we select the type of drink. We can customize coffee by changing the proportion of the milk, water, coffee, and sugar.
Here's the recipe for the coffee.
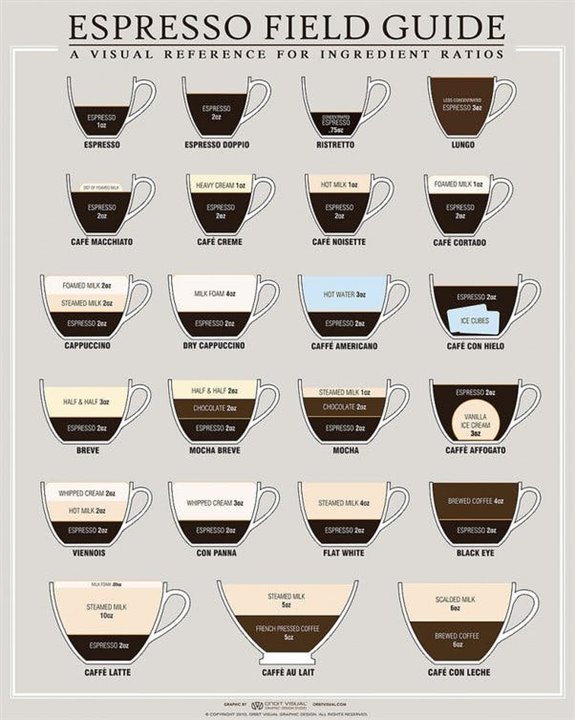
Americano, Cappuccino, Espresso, and latte are some of the classifications that we will be testing out.
- The milk and water pumps are turned on for 'x' sec or microseconds based on the chosen drink.
- Servo motors are used to sprinkle Coffee and Sugar.
Overall Architecture
- Use PSoC & picovoice to detect the audio command.
- Understand the type of coffee using picovoice
- Control the pumps and motors to make the desired coffee.
Implementation - Running a Voice ML Model on PSoC
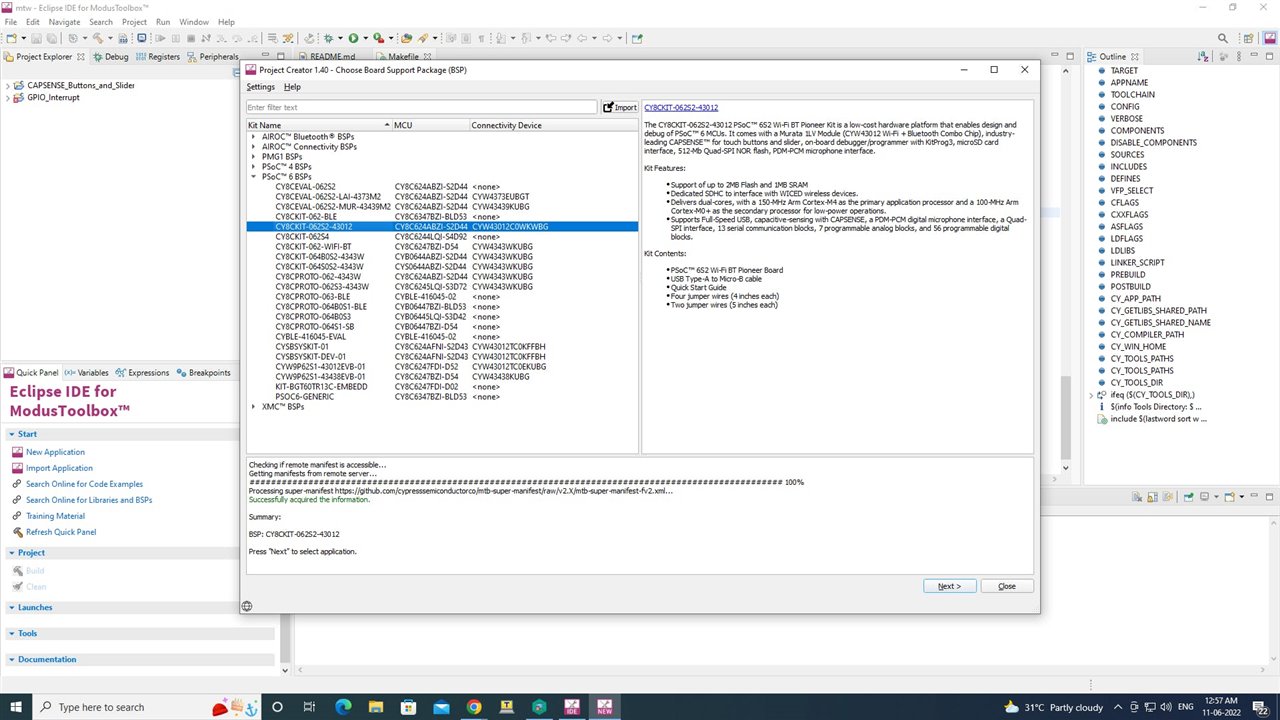
First, Let's create a new project. Select PSoC6 BSP & IoT sense and select Picovoice E2E Voice Recognition Demo as shown below.
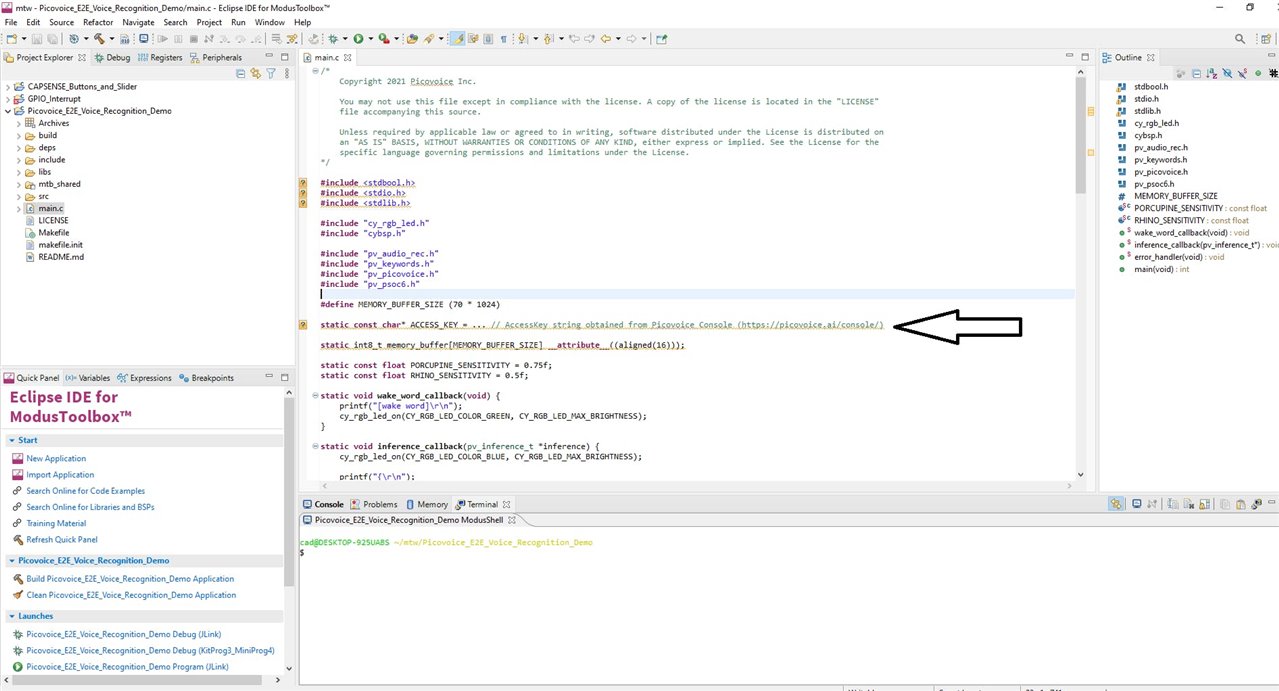
Create an account on the Picovoice console to generate a free trial access key.

Now paste the access key on the main.c file as shown and build the project. You can see the state on the Serial monitor.
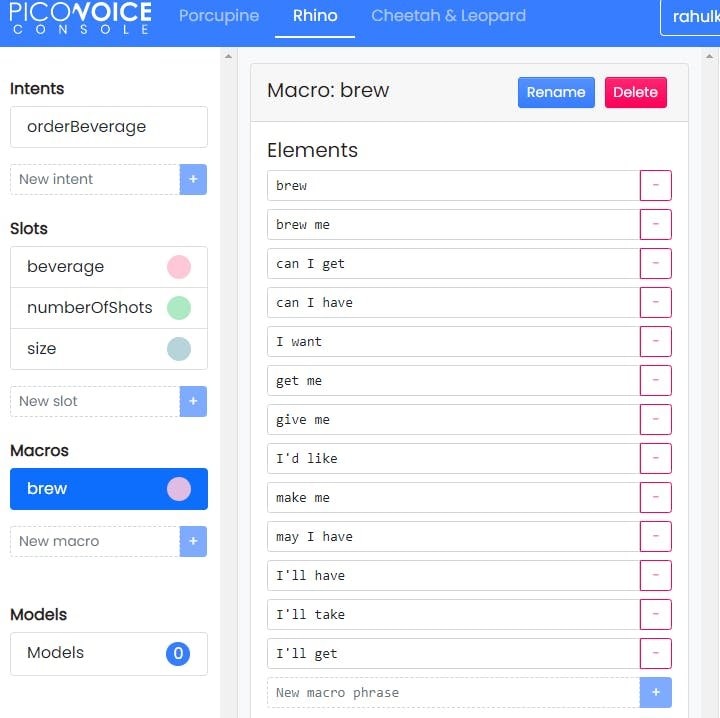
We will be creating a speech to intent using the Create new Rhino Speech-to-Intent context. On the picovoice console, we name the context as "coffee maker" with the Coffeemaker template and then Click on the CreateContext button.

We name the Intents as "orderBeverage" which has the Intent: orderBeverage as shown below.
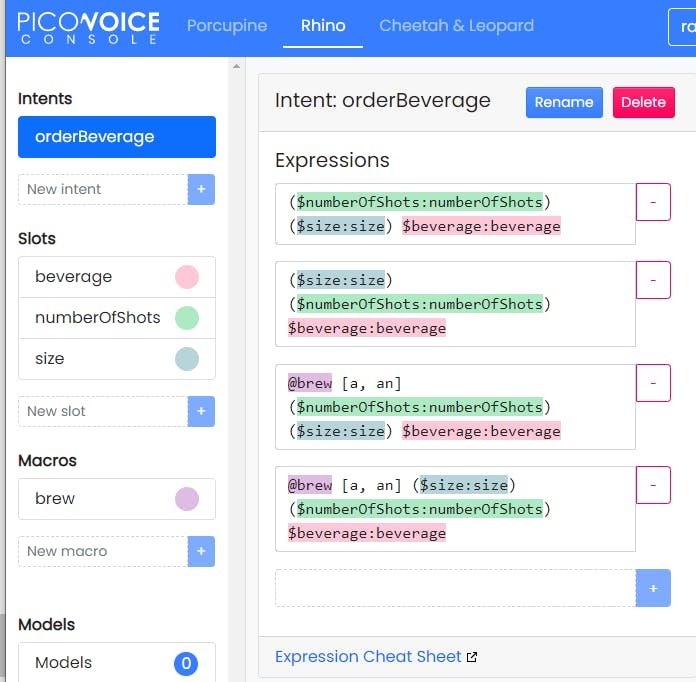
orderBeverage
We have Slots: beverage, numberOfShots, and size. These are the slots that are extracted from the audio data. The Elements under the Slots - beverage, numberOfShots, and size are listed below.

1 / 3 • Elements
And finally, the Macros for the following are set.
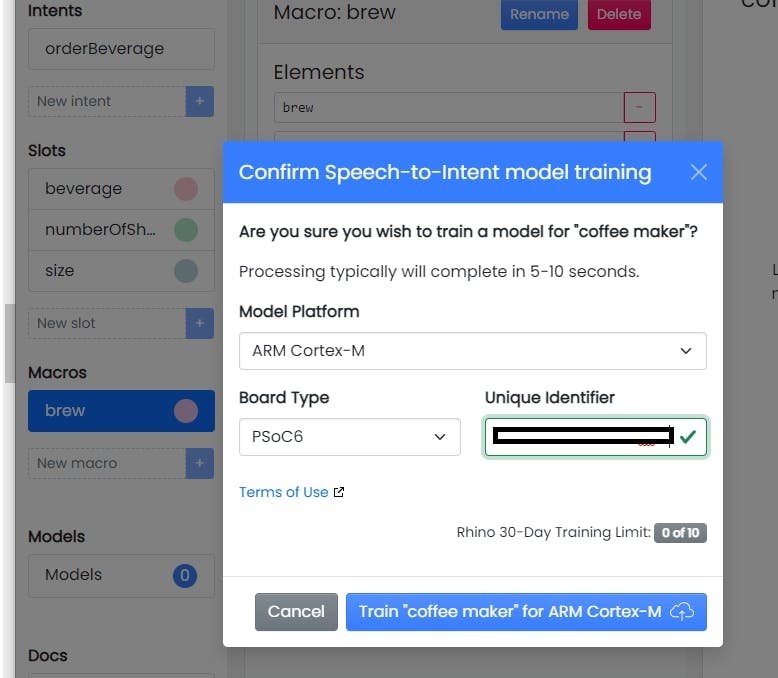
Click on the Train Button, Select the ARM Cortex-M in the Model Platform, PSoC as Board Type, and the UID.
Once the training is done, the model is generated on the Models tab. Click on the Download button and unzip the file.

Paste the CONTEXT_ARRAY from the coffee-maker_en_cortexm_v2_1_0.h file to the CONTEXT_ARRAY in the /include/pv_params.h on the project directory.

To use the OLED on the IoT Sense, the following configurations are made.
- Add this library to the application
- Add emWin library to the application
- Enable EMWIN_NOSNTS emWin library option by adding it to the Makefile COMPONENTS list:
COMPONENTS+=EMWIN_NOSNTS
Since the OLED example had already initialized the BSP, we remove the following line from pv_psoc6.c file

cy_rslt_t result;
cyhal_i2c_t i2c_obj;

/* Initialize the device and board peripherals */
result = cybsp_init();

CY_ASSERT(result == CY_RSLT_SUCCESS);

/*Initialize the I2C to use with the OLED display */
result = cyhal_i2c_init(&i2c_obj, CYBSP_I2C_SDA, CYBSP_I2C_SCL, NULL);

CY_ASSERT(result == CY_RSLT_SUCCESS);

/* Initialize the OLED display */
result = mtb_ssd1306_init_i2c(&i2c_obj);

CY_ASSERT(result == CY_RSLT_SUCCESS);

GUI_Init();
GUI_DispString("COFFEE MAKER AI");
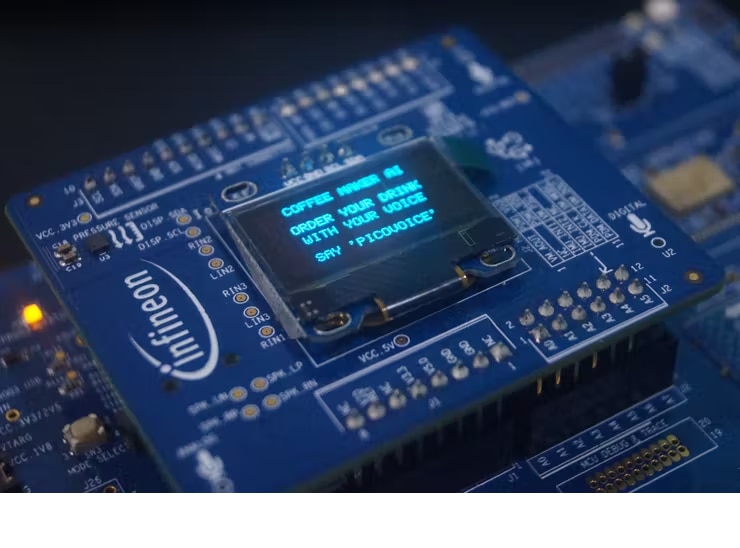
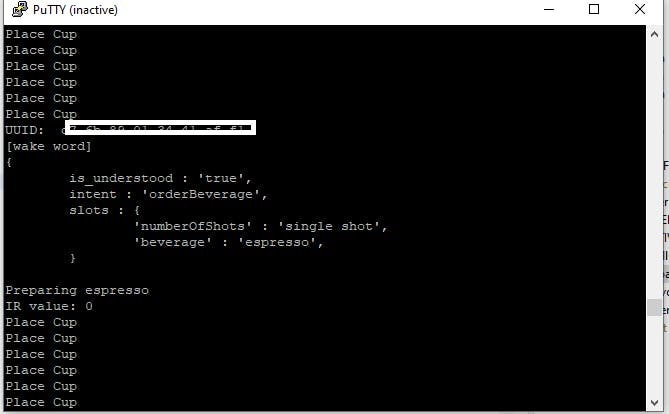
Now the picovoice has been implemented successfully. The Machine can now understand the following commands once we initiate the wake-up word PICOVOICE.
Brew me a {size} {numberOfShots} {beverage}
Make me a {size} {numberOfShots} {beverage}
Can I have a {size} {numberOfShots} {beverage}
Can I GET a {size} {numberOfShots} {beverage}
Hardware Connection - Pump Control, Proximity Sensor, Servo
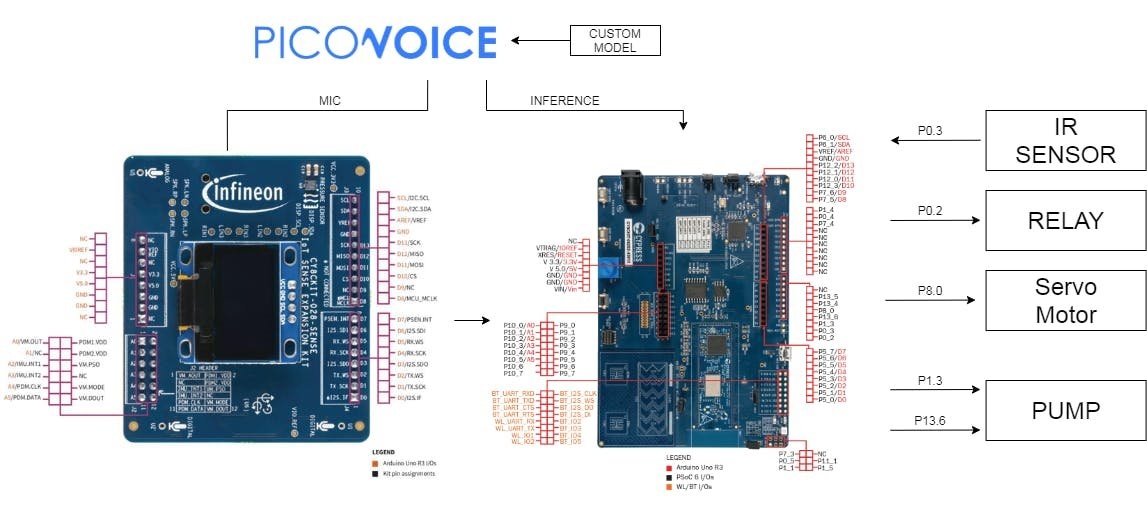
Now, let's see the hardware connections. From block diagram 2, the IOs for each hardware is connected.
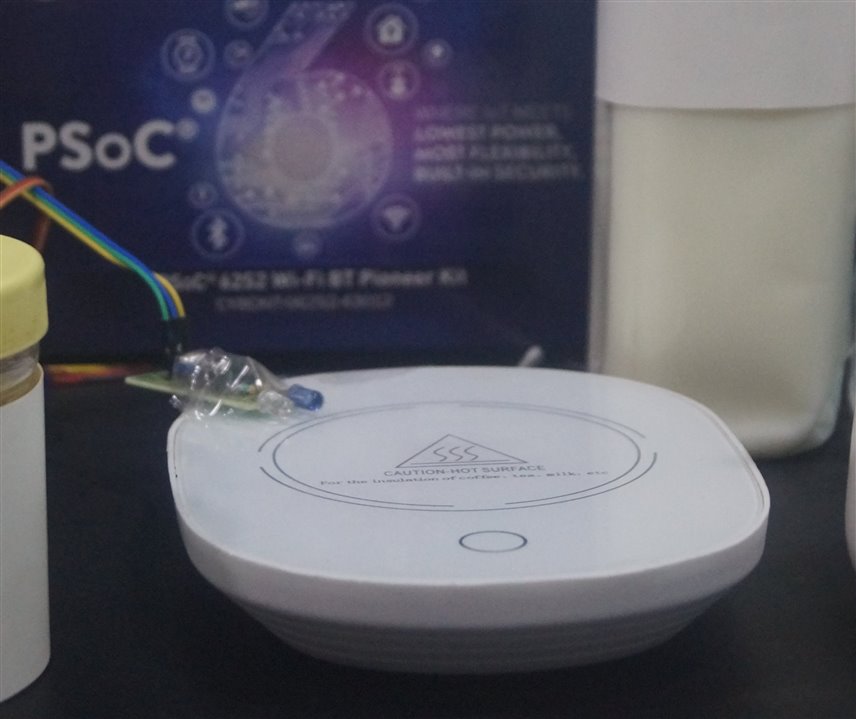
The Relay is connected to P0.2. The warmer is connected to relay output as shown here.
The cup is placed on an inductive heater to warm the coffee. This is controlled by a relay as shown below.

IR sensor is connected to P0.3 which is used to detect the presence of a cup.
Servo Motors is connected to P. The Servo motor is used to sprinkle Sugar & Coffee into the cup.
The water pump is connected to P13.6 & milk pump is connected to P1.3. These are used to dispense milk using the tubes. One end of the pump is connected to the bottle containing milk and water while the other is placed above the cup as shown below.


Deploying on PSoC
Make sure that you have completed the above steps properly.
Clone the repository
git clone https://github.com/Rahul24-06/psoc-Coffee-Maker
- Add the project to the Modus Toolbox and click on the Launch button to upload the program.
- Once the upload is complete, click the XRES button to reset the controller.
Working
The Final Setup is shown here.

On following the above steps, we made a voice-controlled automatic coffee maker that recognizes the words on the device using Picovoice ML. Finally, we are in the last step of this project. It's showtime!
----------------------------------------------------------------------------------------------------------------
If you faced any issues in building this project, feel free to ask me. Please do suggest new projects that you want me to do next.
Give a thumbs up if it helped you and do follow my channel for interesting projects. :)
Share this video if you like.
Github - https://github.com/Rahul24-06
Happy to have you subscribed: https://www.youtube.com/c/rahulkhanna24june?sub_confirmation=1
Thanks for reading