A Moon Cycle Lamp
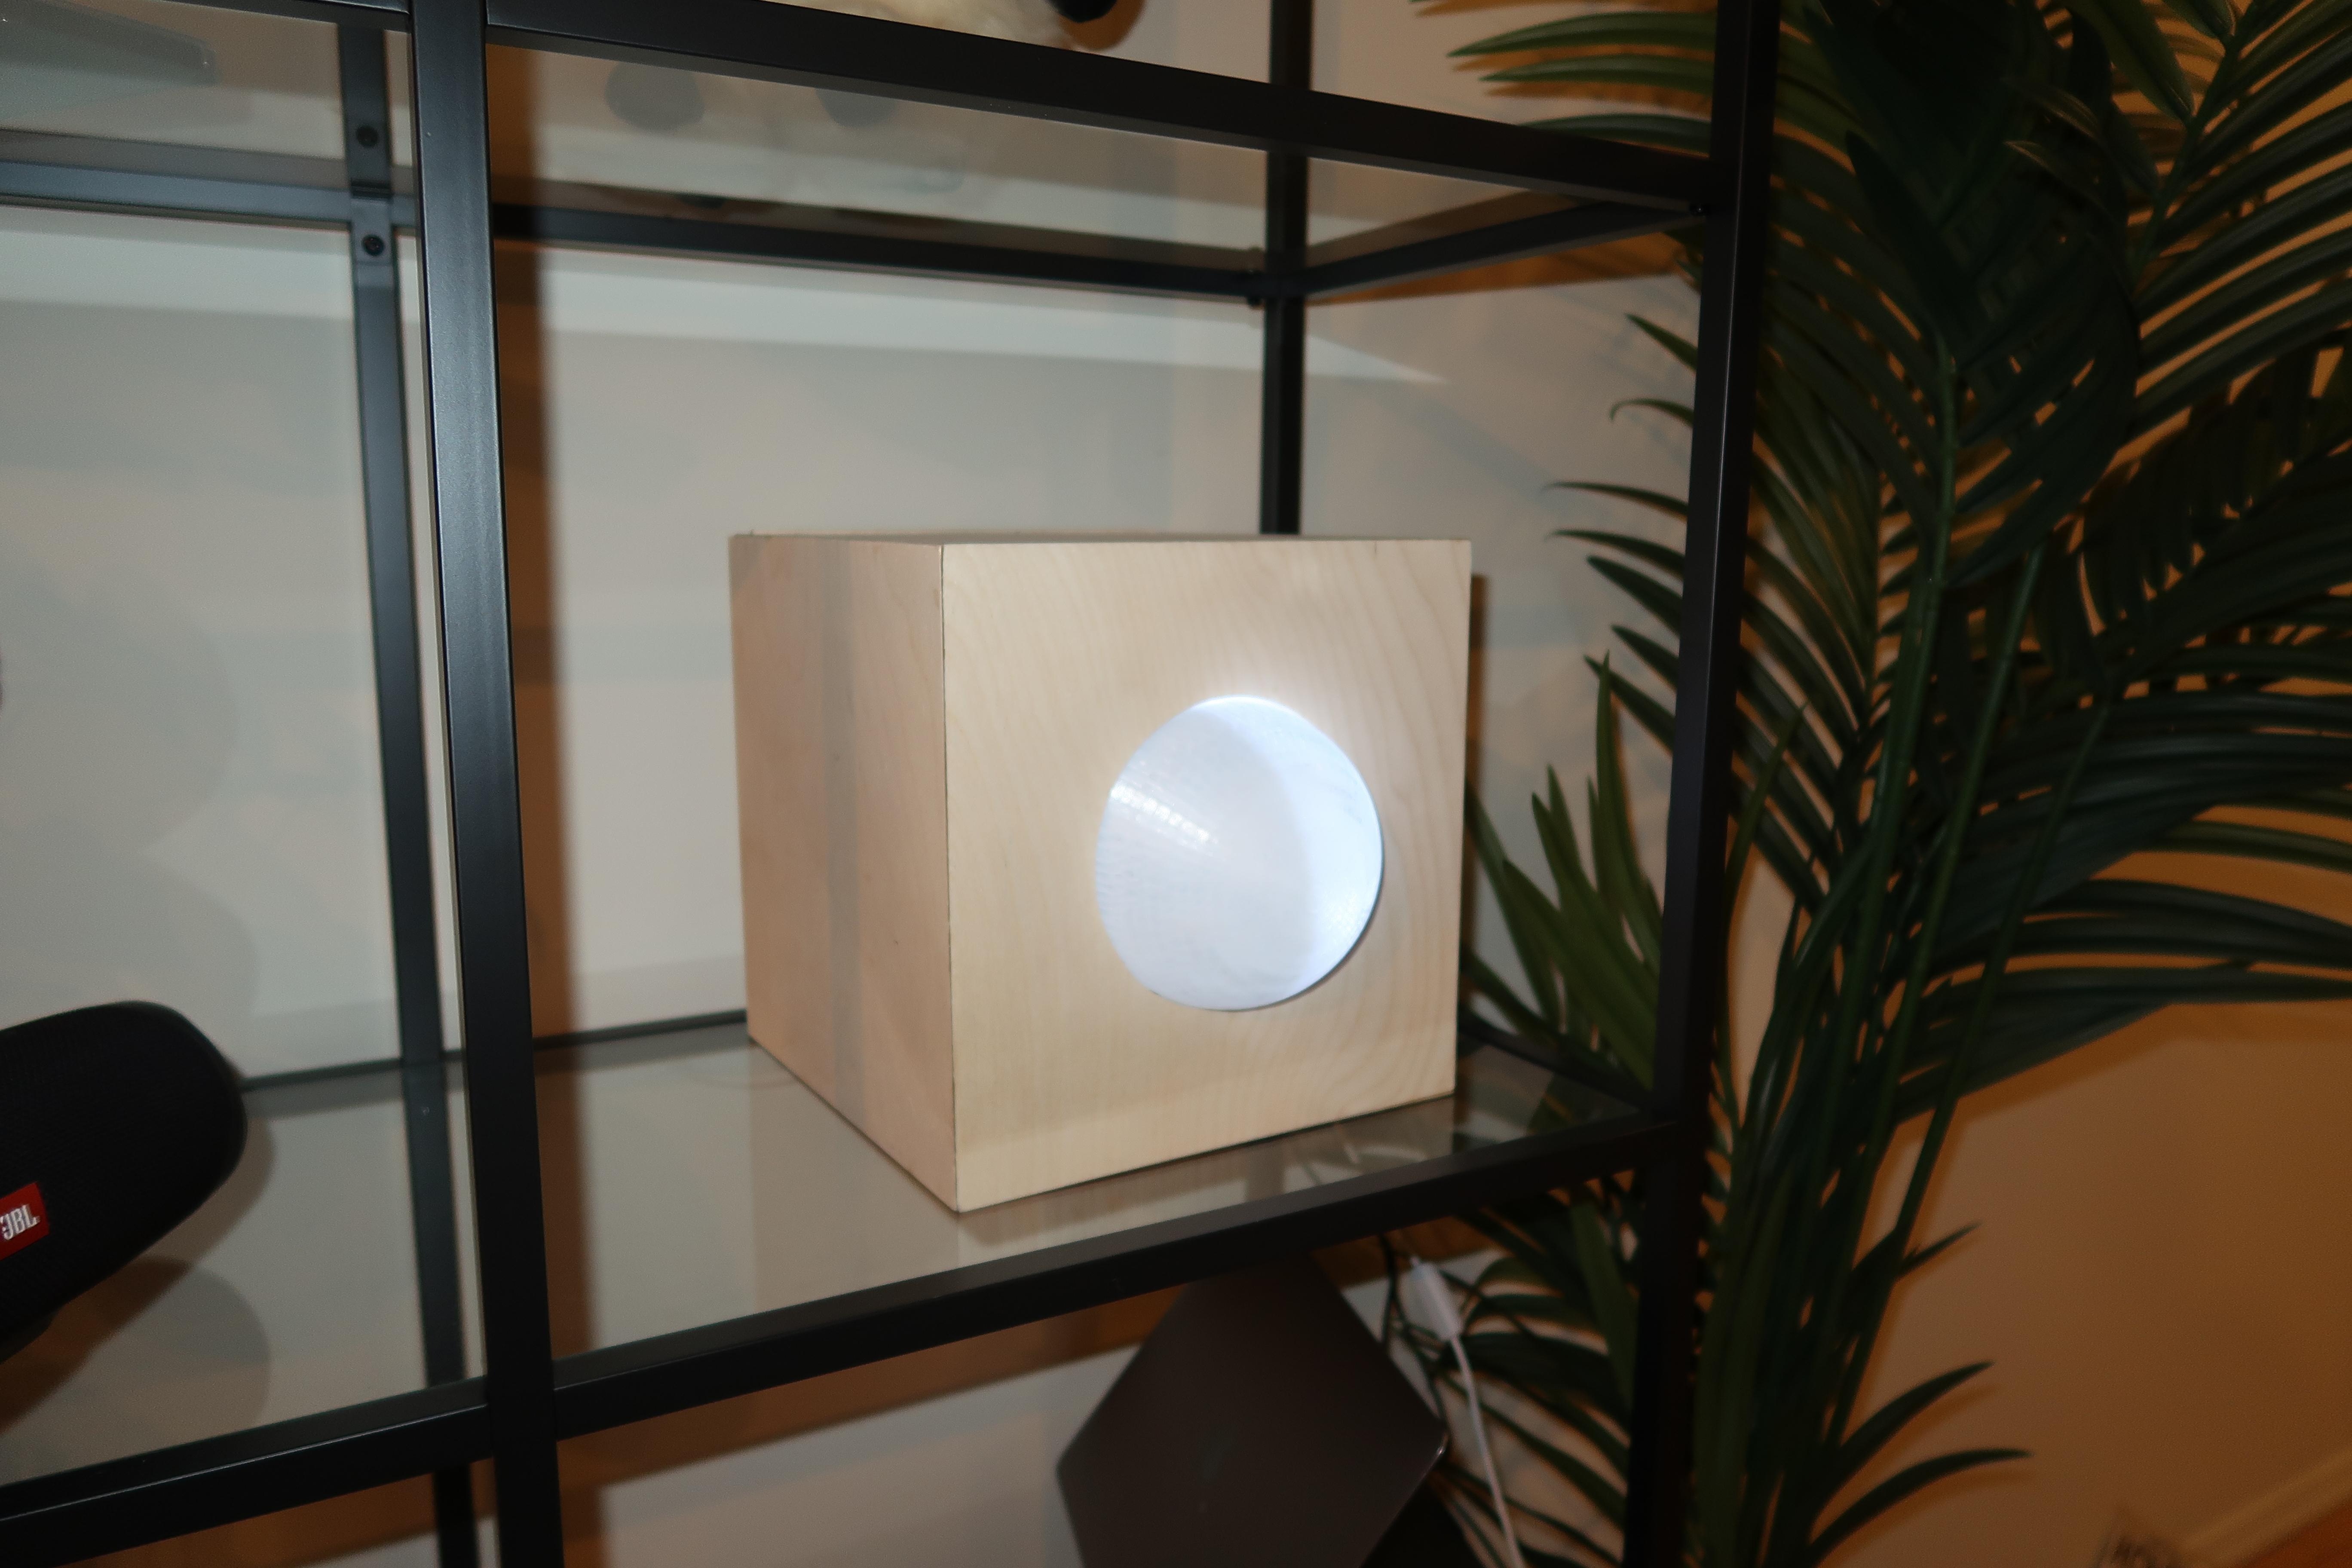
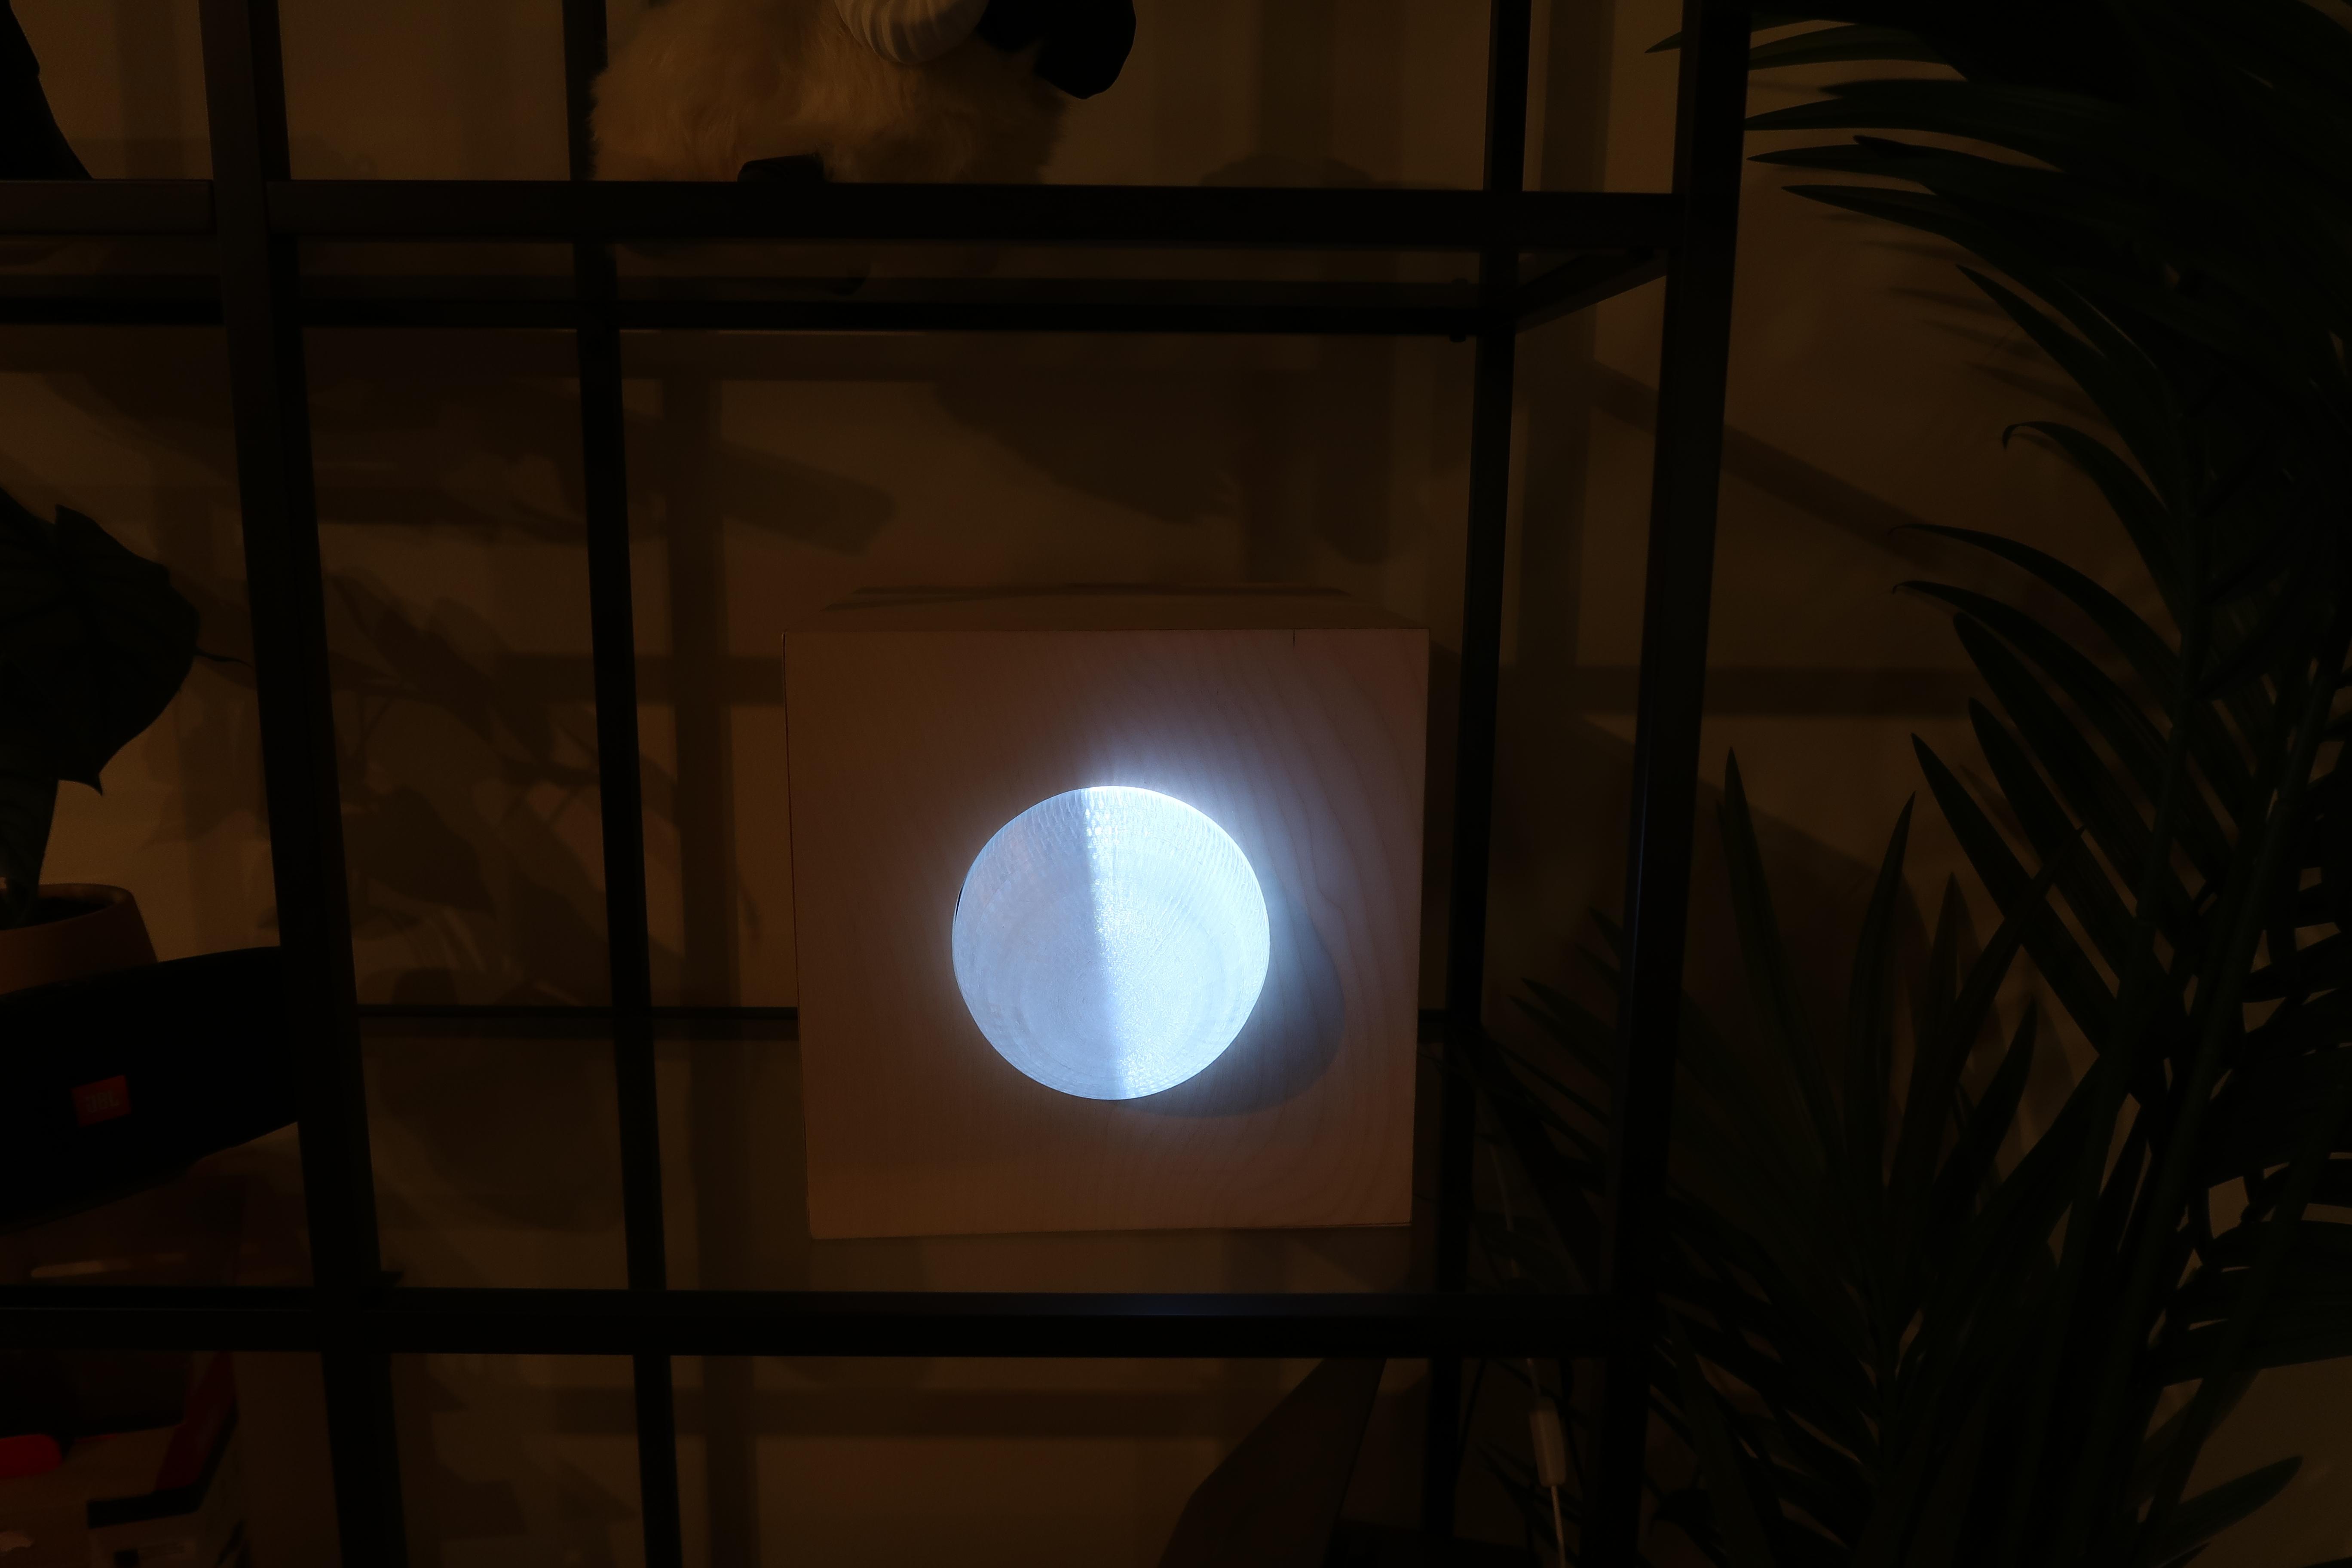
The Moon Lamp allows you to see the current cycle of the moon. I feel like I don’t see the moon enough so having a moon lamp that is synced with the real moon feels like I’m more in touch and a fun way to stay in touch with it.
Supplies
Materials
- 5 Wooden Plywood Squares (10 x 10 x 1 inches)
- Wooden Square (9.5 x 9.375 x 0.25 inches)
- Wood Glue
- Black 3D filament
- Translucent 3D filament
- Wire
- 5 Short philips screws
- Hot Glue
Electronics
- LED bulb light
- Stepper Motor Nema-23
- Motor Driver Breakout Board DRV8833
- Arduino Nano ESP32 Board
- Breadboard
- Wires
- Soder
- Power Cable 12V
- Resistor 100 ohm
Tools
- Table Saw
- Scroll Saw
- Benchtop Oscillating Spindle Sander
- Sodering Tool
- 3D Printer
- Drill
- Pencil
- Measuring Tape
- Sandpaper
- Clamps
- Tape
- Compass
- Hot Glue Gun
Software
- Rhino
- Arduino IDE 2.3.3
Printing the Domes
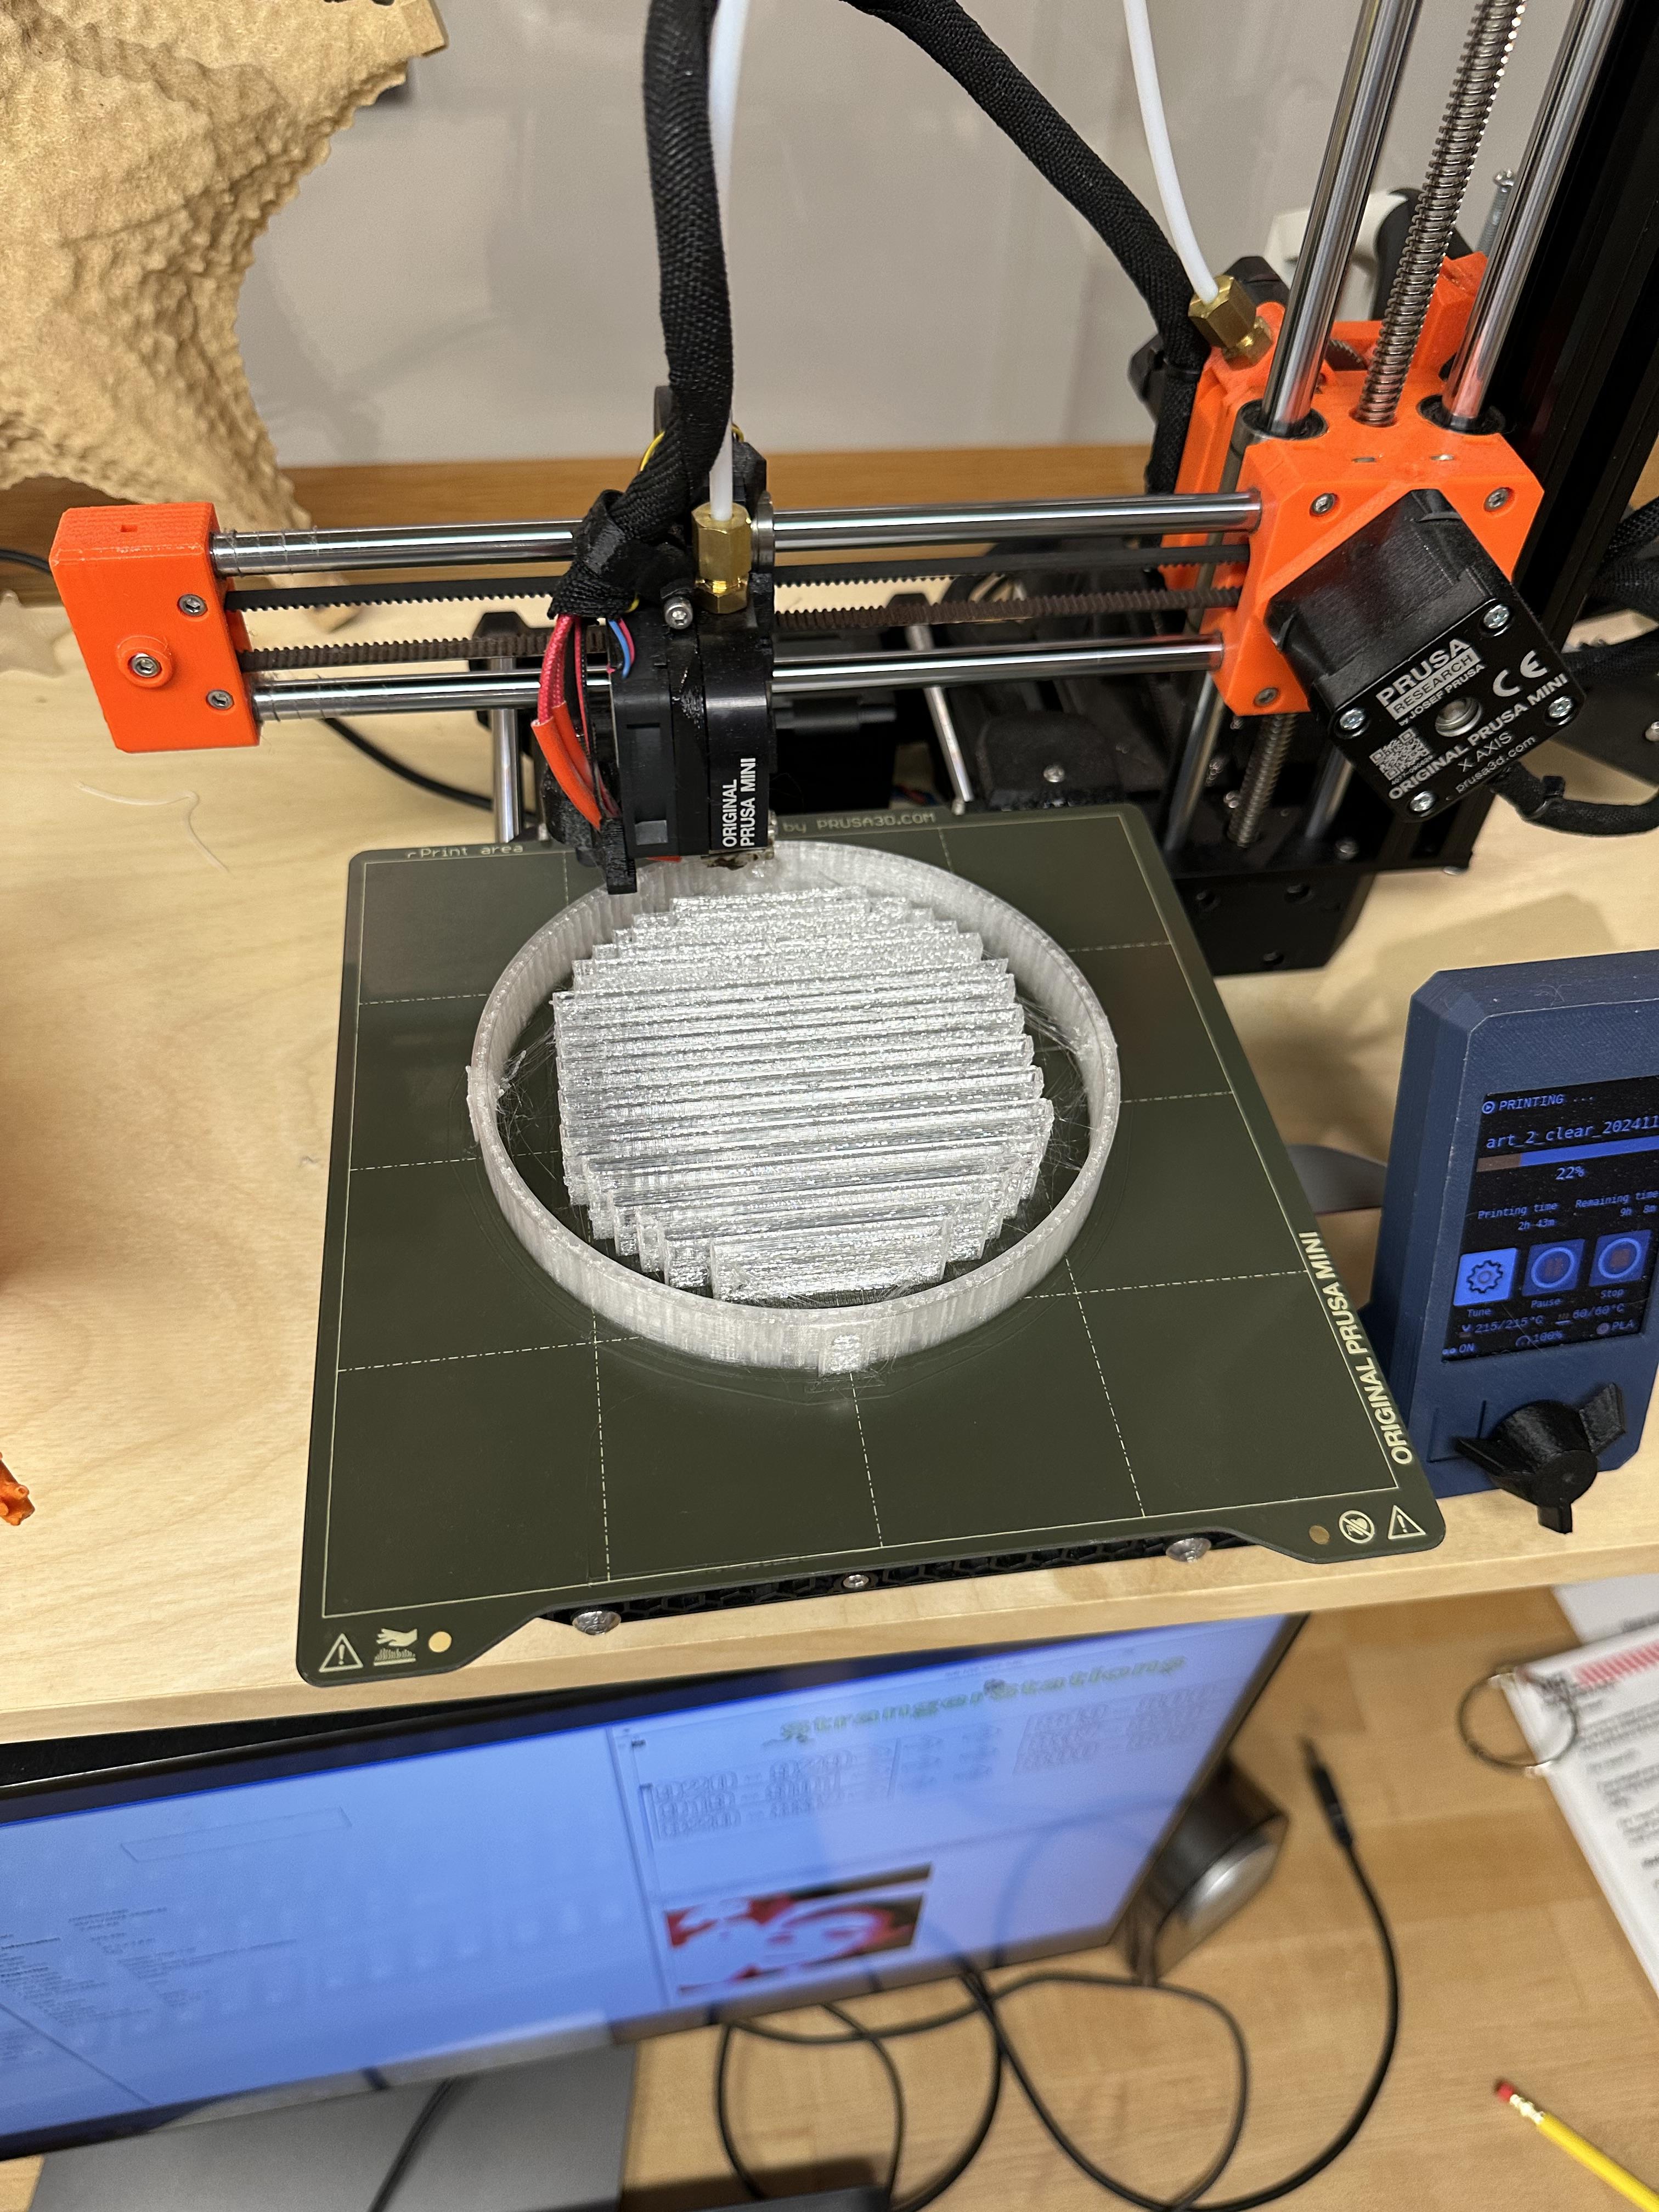
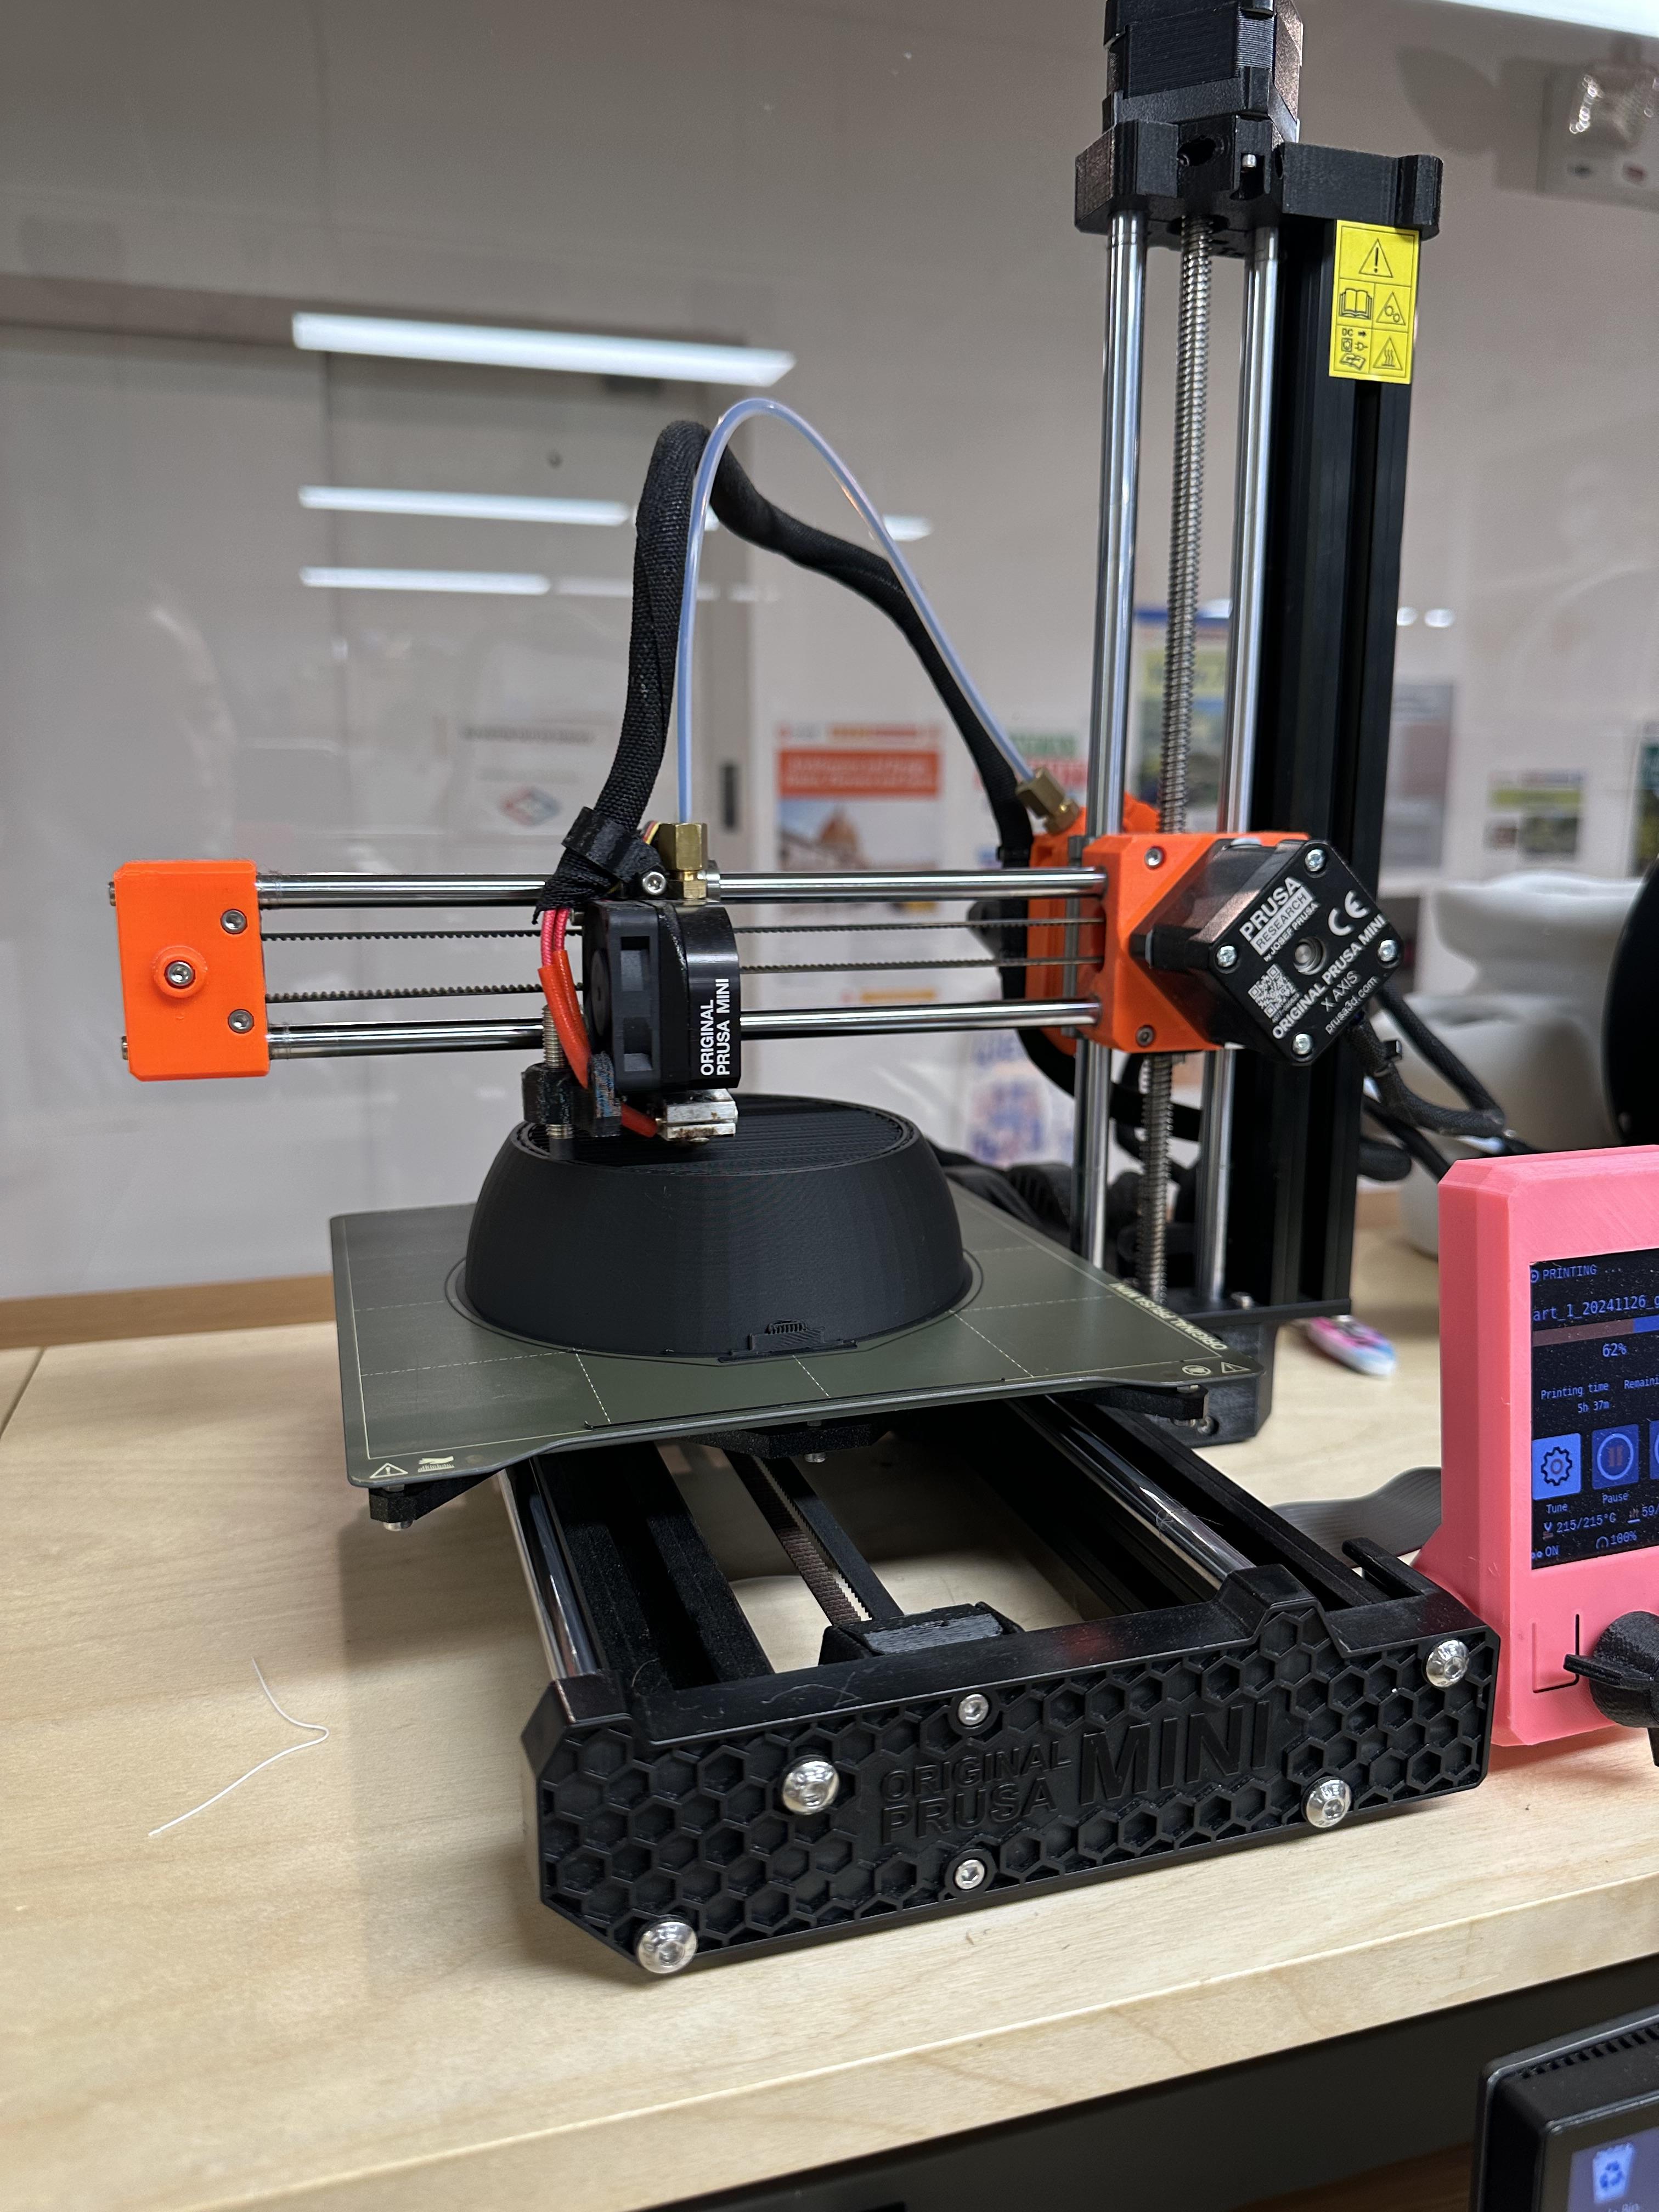
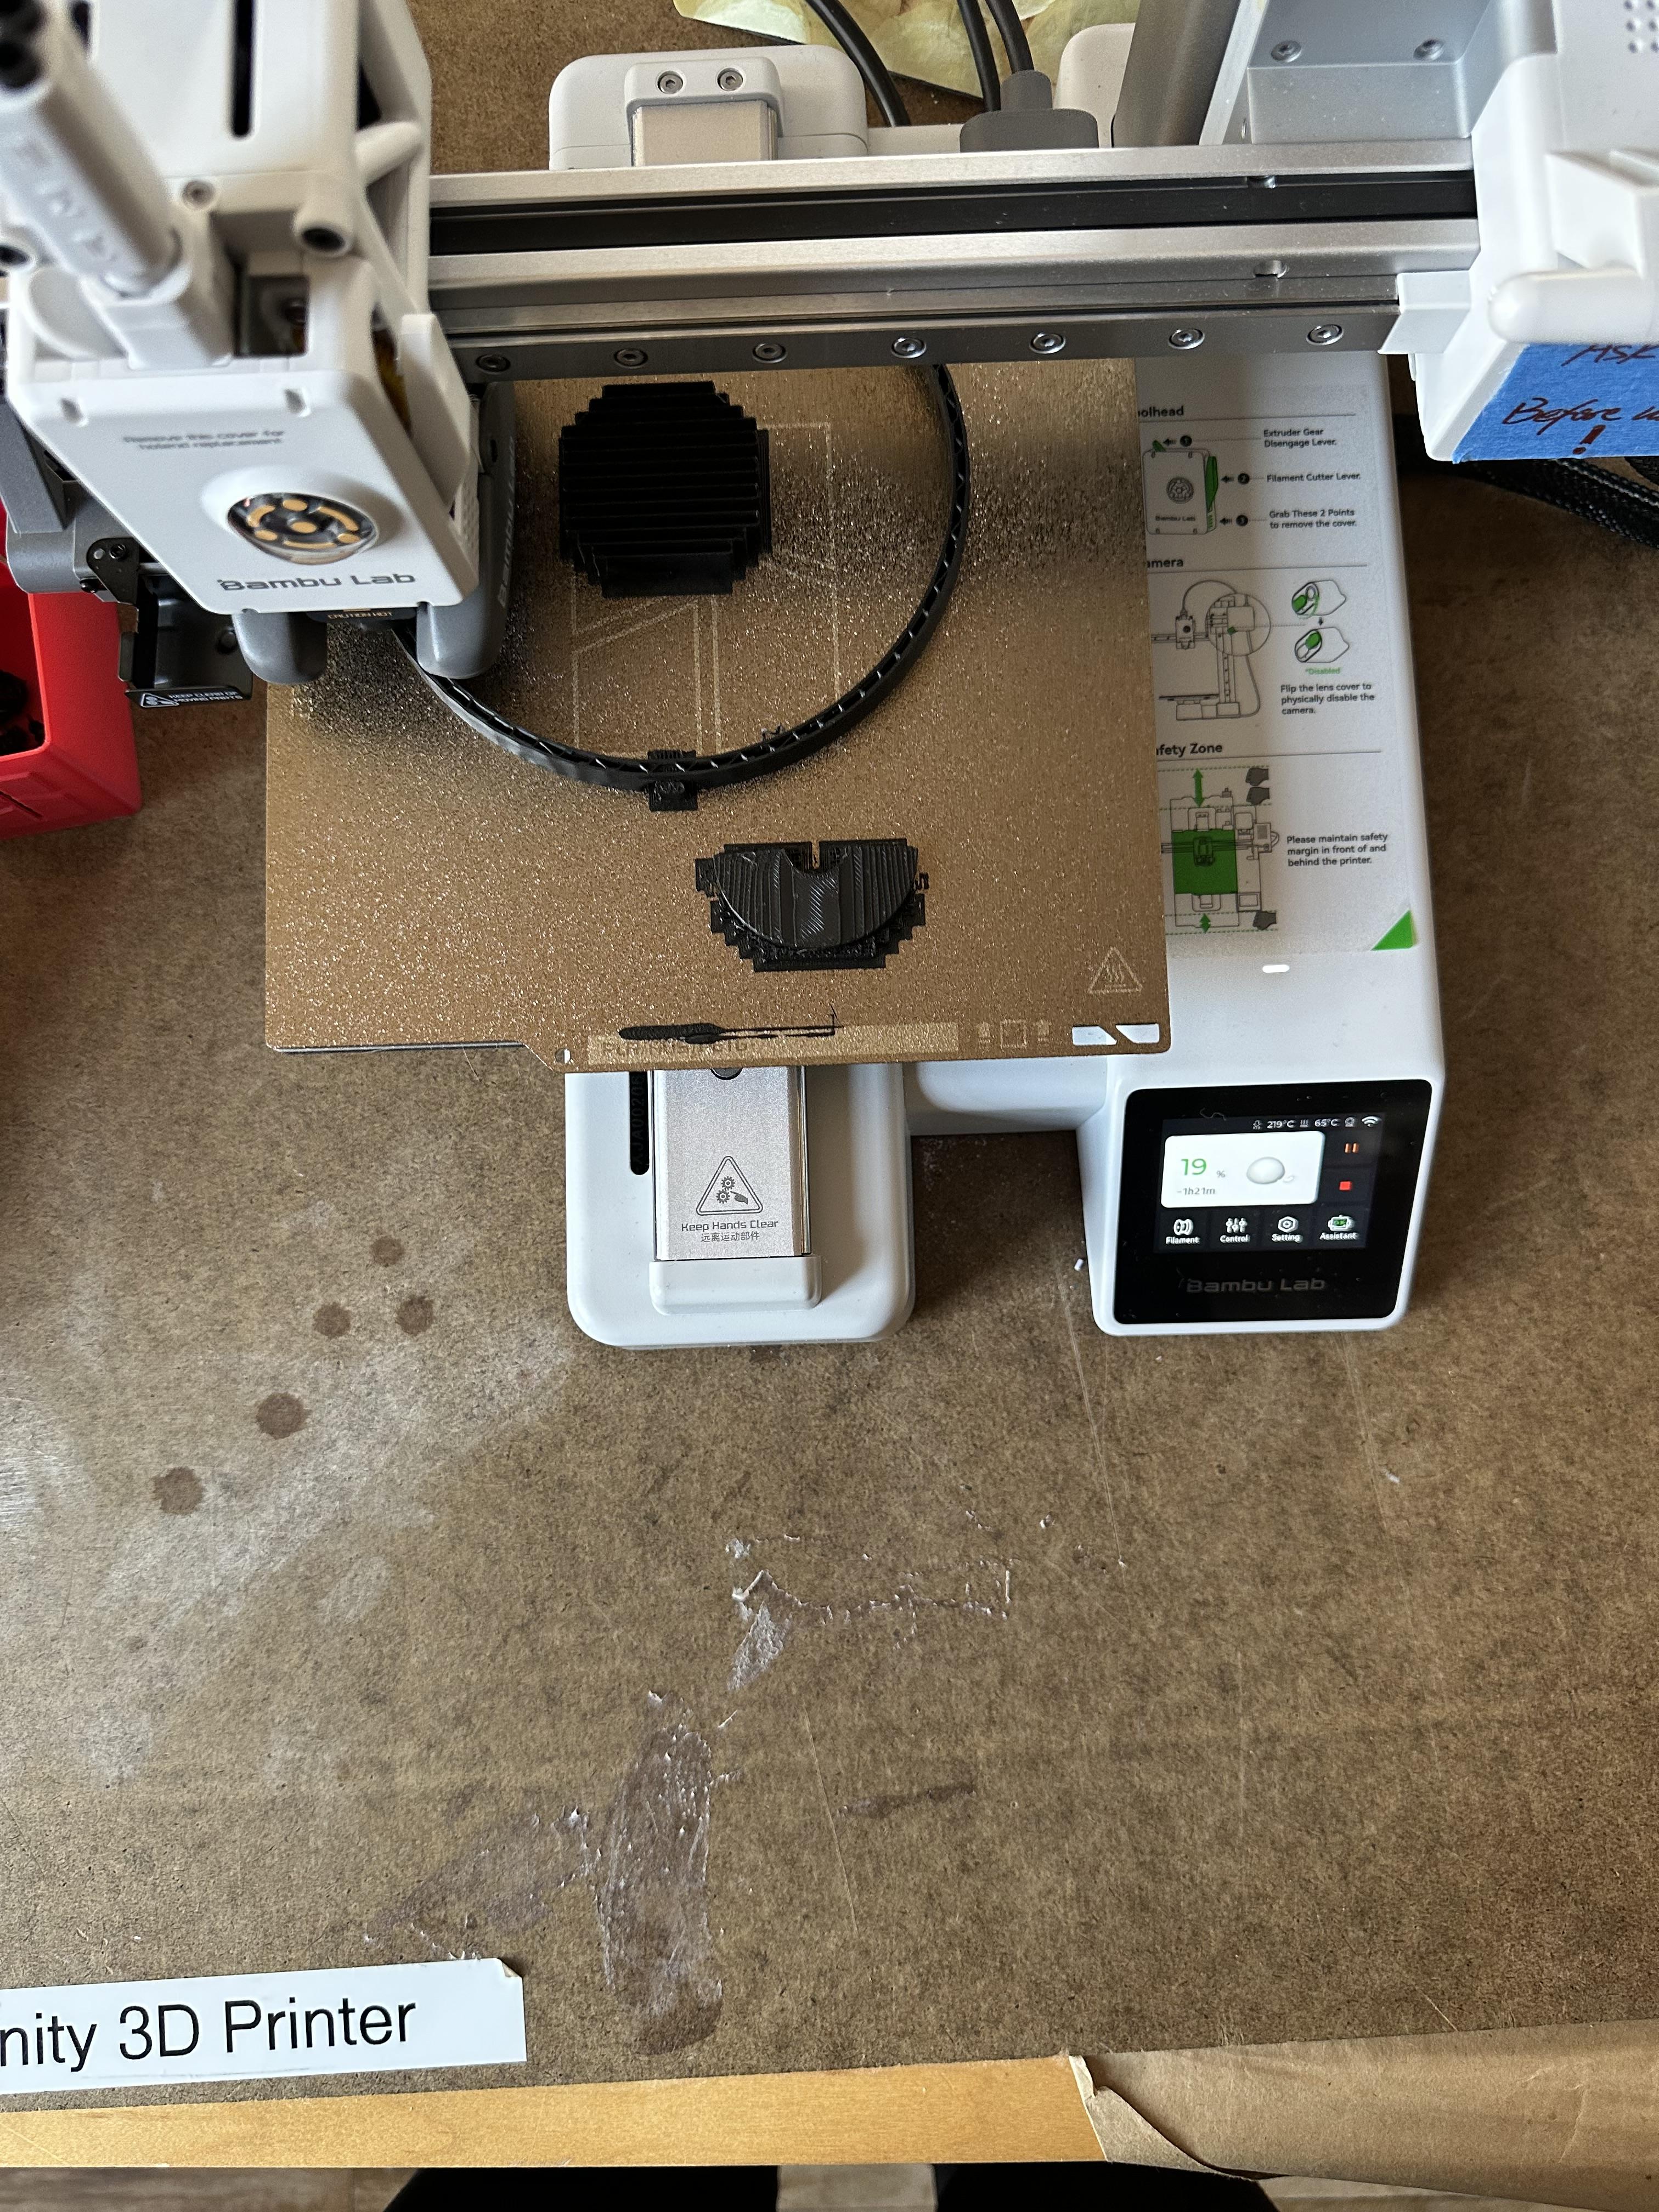
Download the files to print the moon and the dome that casts the shadow.
The outer dome is the moon and should be printed in a translucent color to allow the light to shine through.
The inner dome should be printed in a black color, this dome's purpose is to cast a shadow on the moon.
Preparing the Circuit
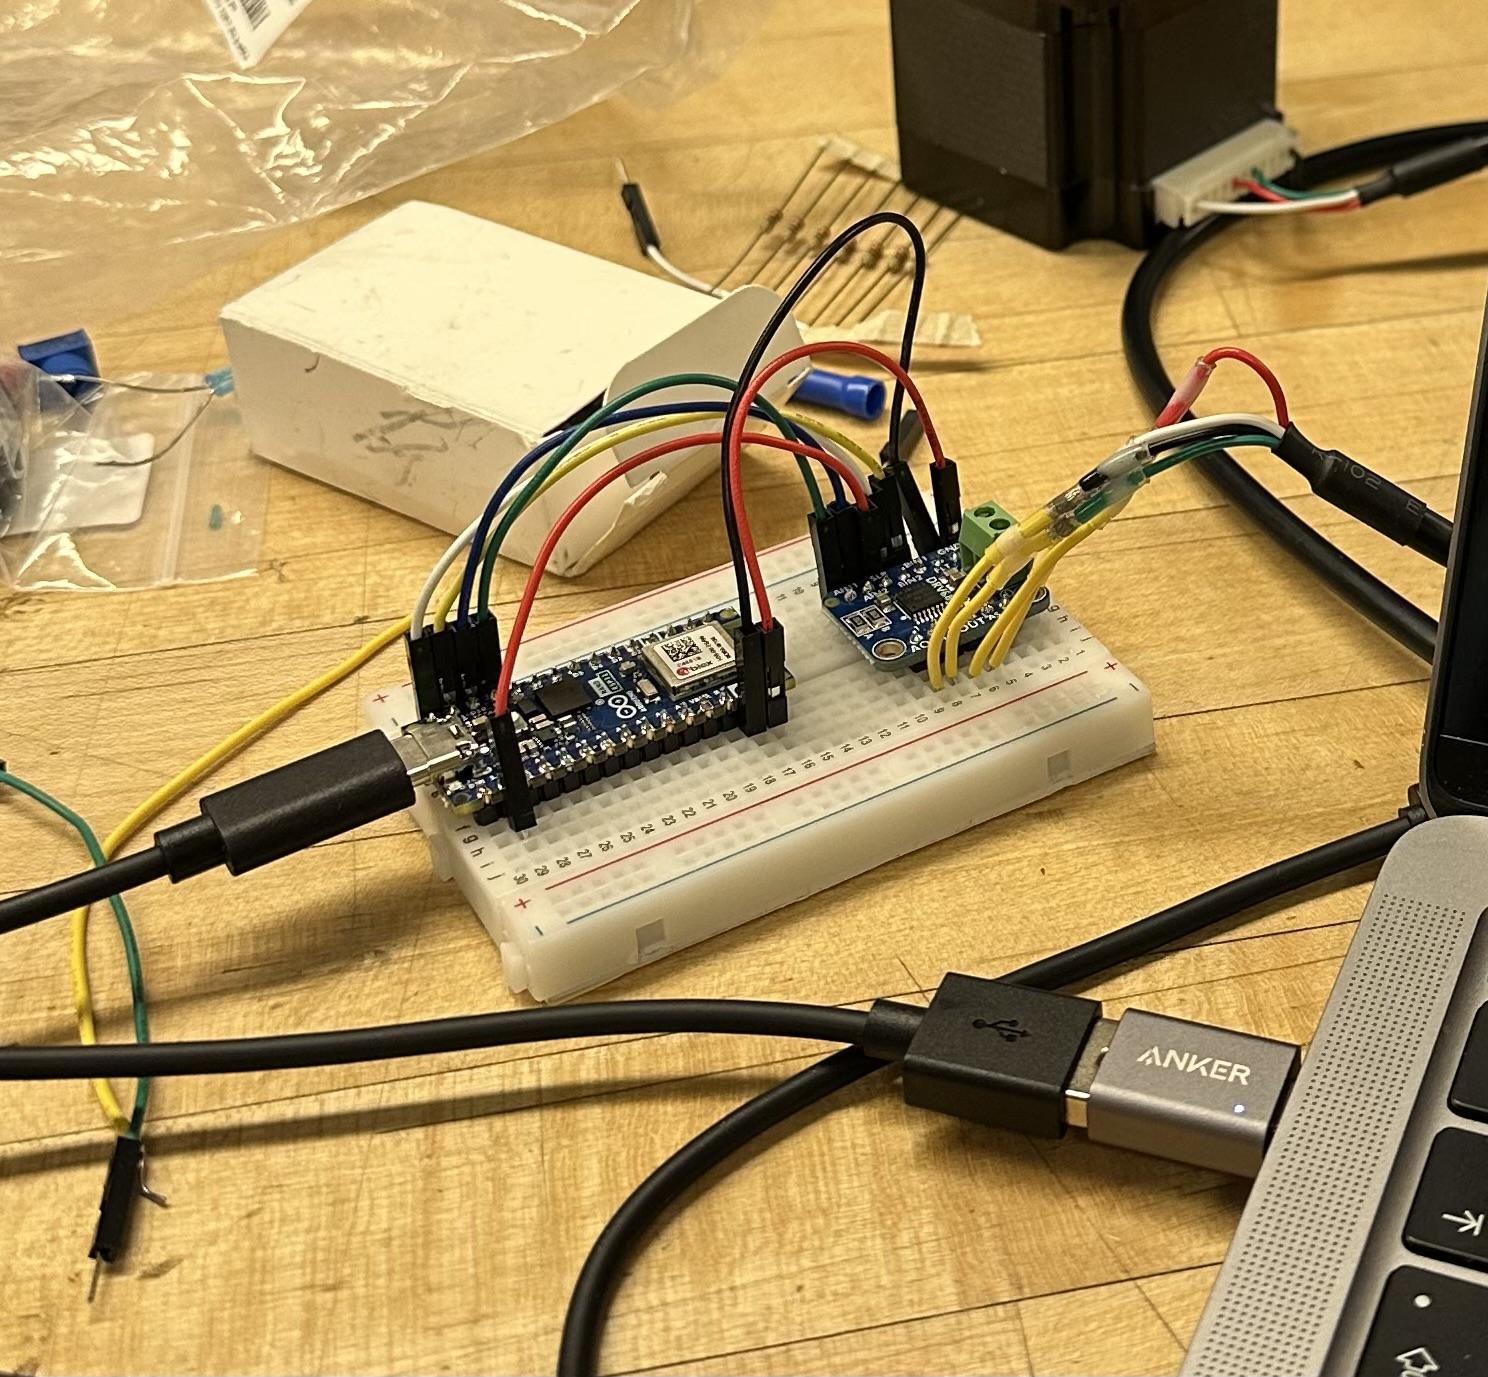
Solder the pins to the Arduino Nano ESP32 Board and the Motor Driver Breakout Board DRV8833. Cut the ends of the wire of the motor (only do this if the wire does not fit into the breadboard). Place heat-shrinking tubes to the wires and solder new wires to the wires.
Solder an orange wire to the long (positive) side of the LED bulb, and a black wire to the other side of the LED.
Connecting the Circuit
Step 3.1
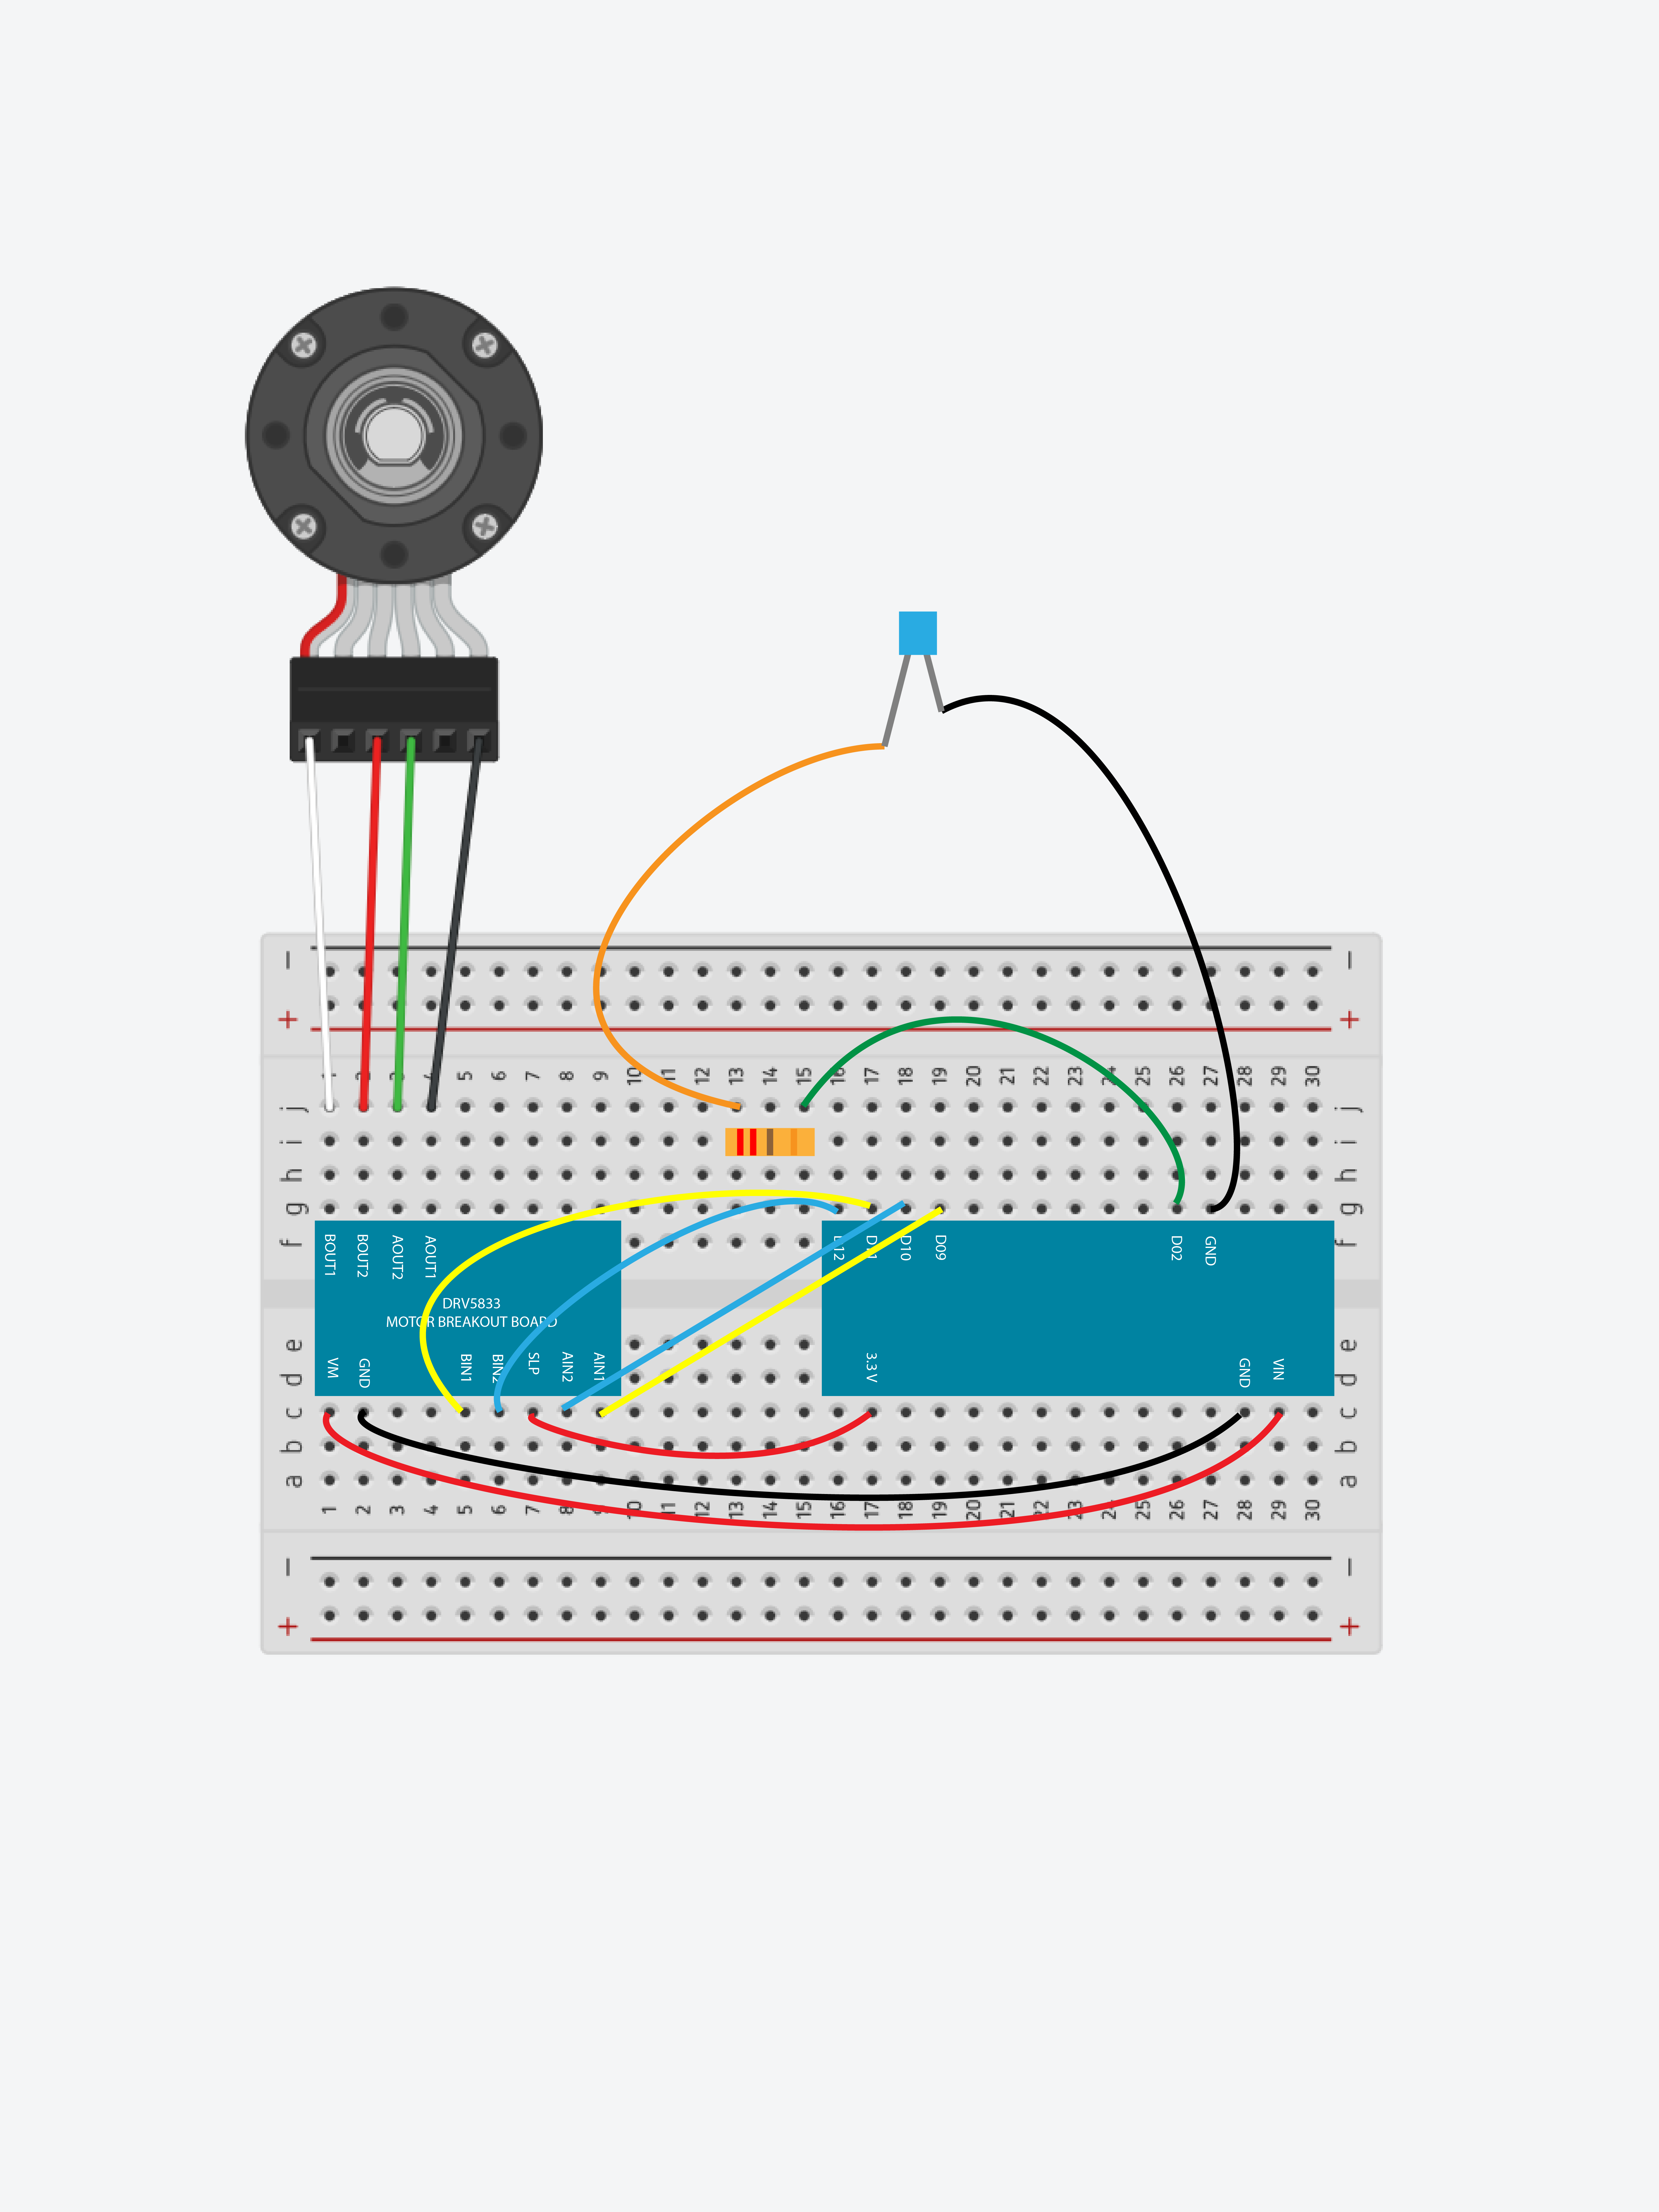
Place the Arduino Nano and the Motor Driver Breakout Board on the Breadboard.
Step 3.2
Connect the black wire from the motor to AOUT1, green to AOUT2, white to BOUT1 and red to BOUT2, on the Breakout Board.
Step 3.3
Connect SLP to 3.3 V or VBUS, VM to VIN, and GND to GND. Connect AIN1 to D12, AIN2 to D10, BIN1 to D9, and BIN2 to D8.
Step 3.4
Connect the green wire to D2 and to an empty breadboard row and place the resistor on the green wire. Connect the black wire to GND on the Nano Arduino and the orange wire to the empty side of the resistor.
Creating the Box
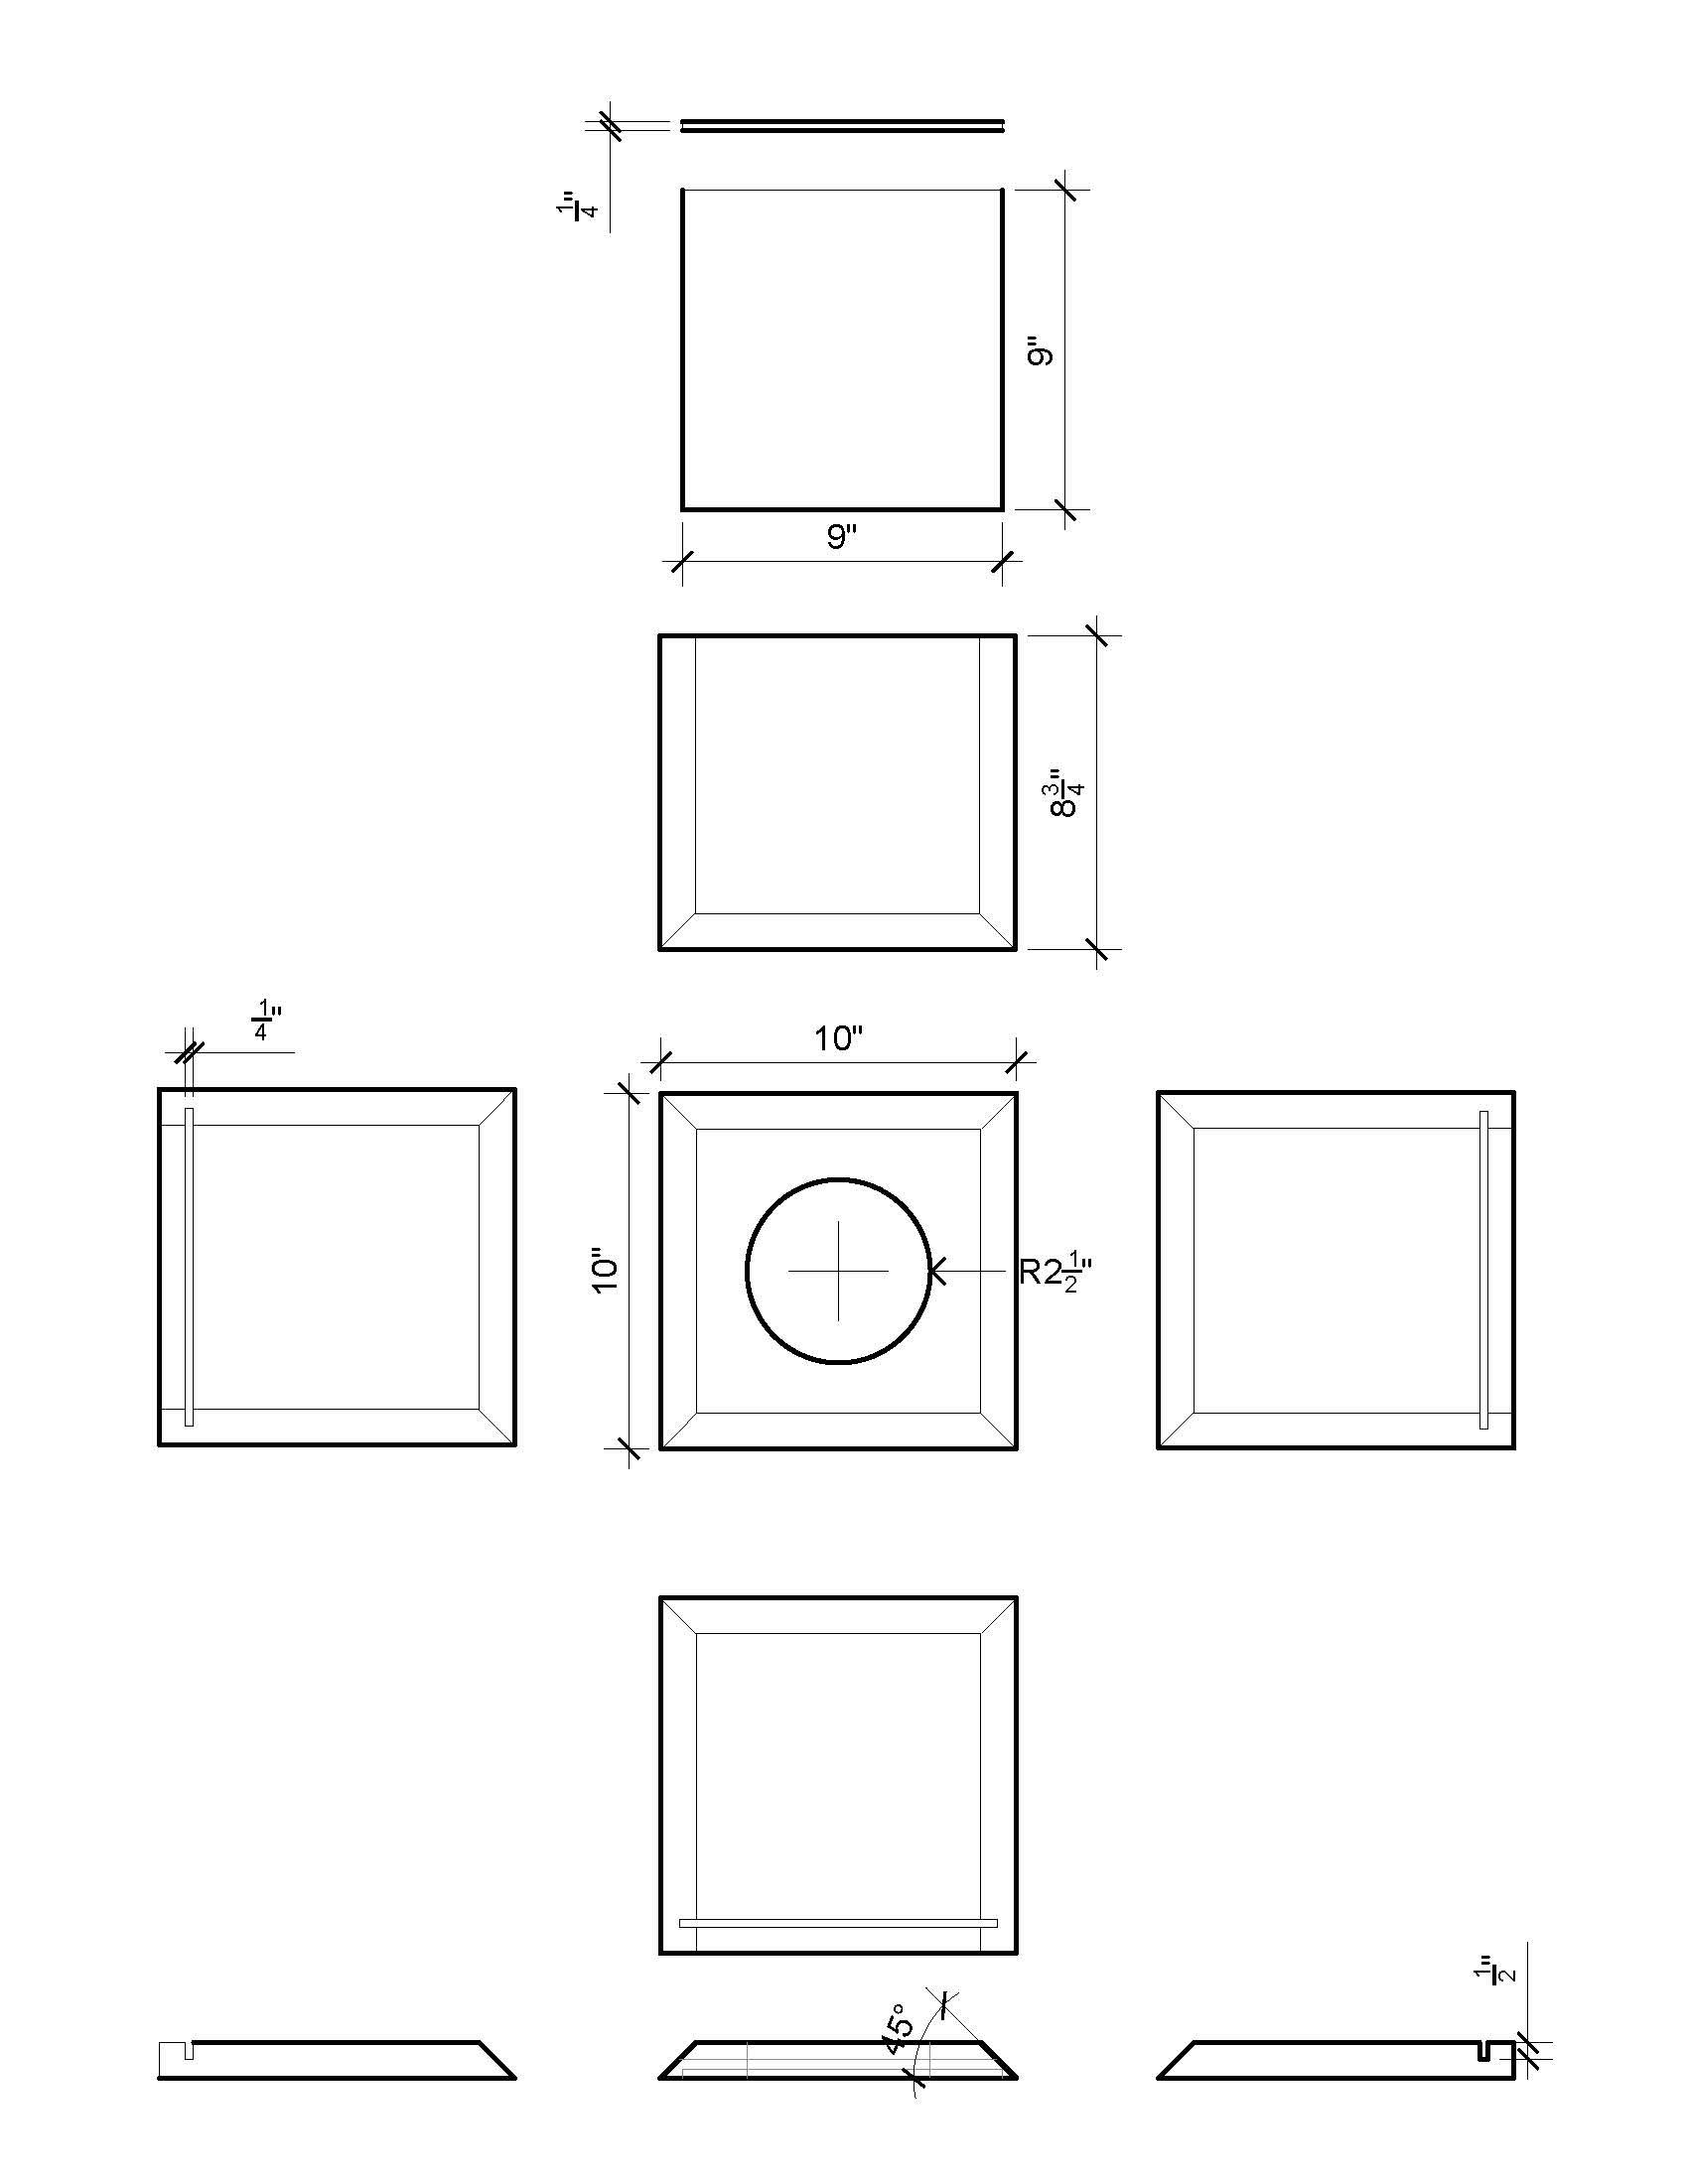
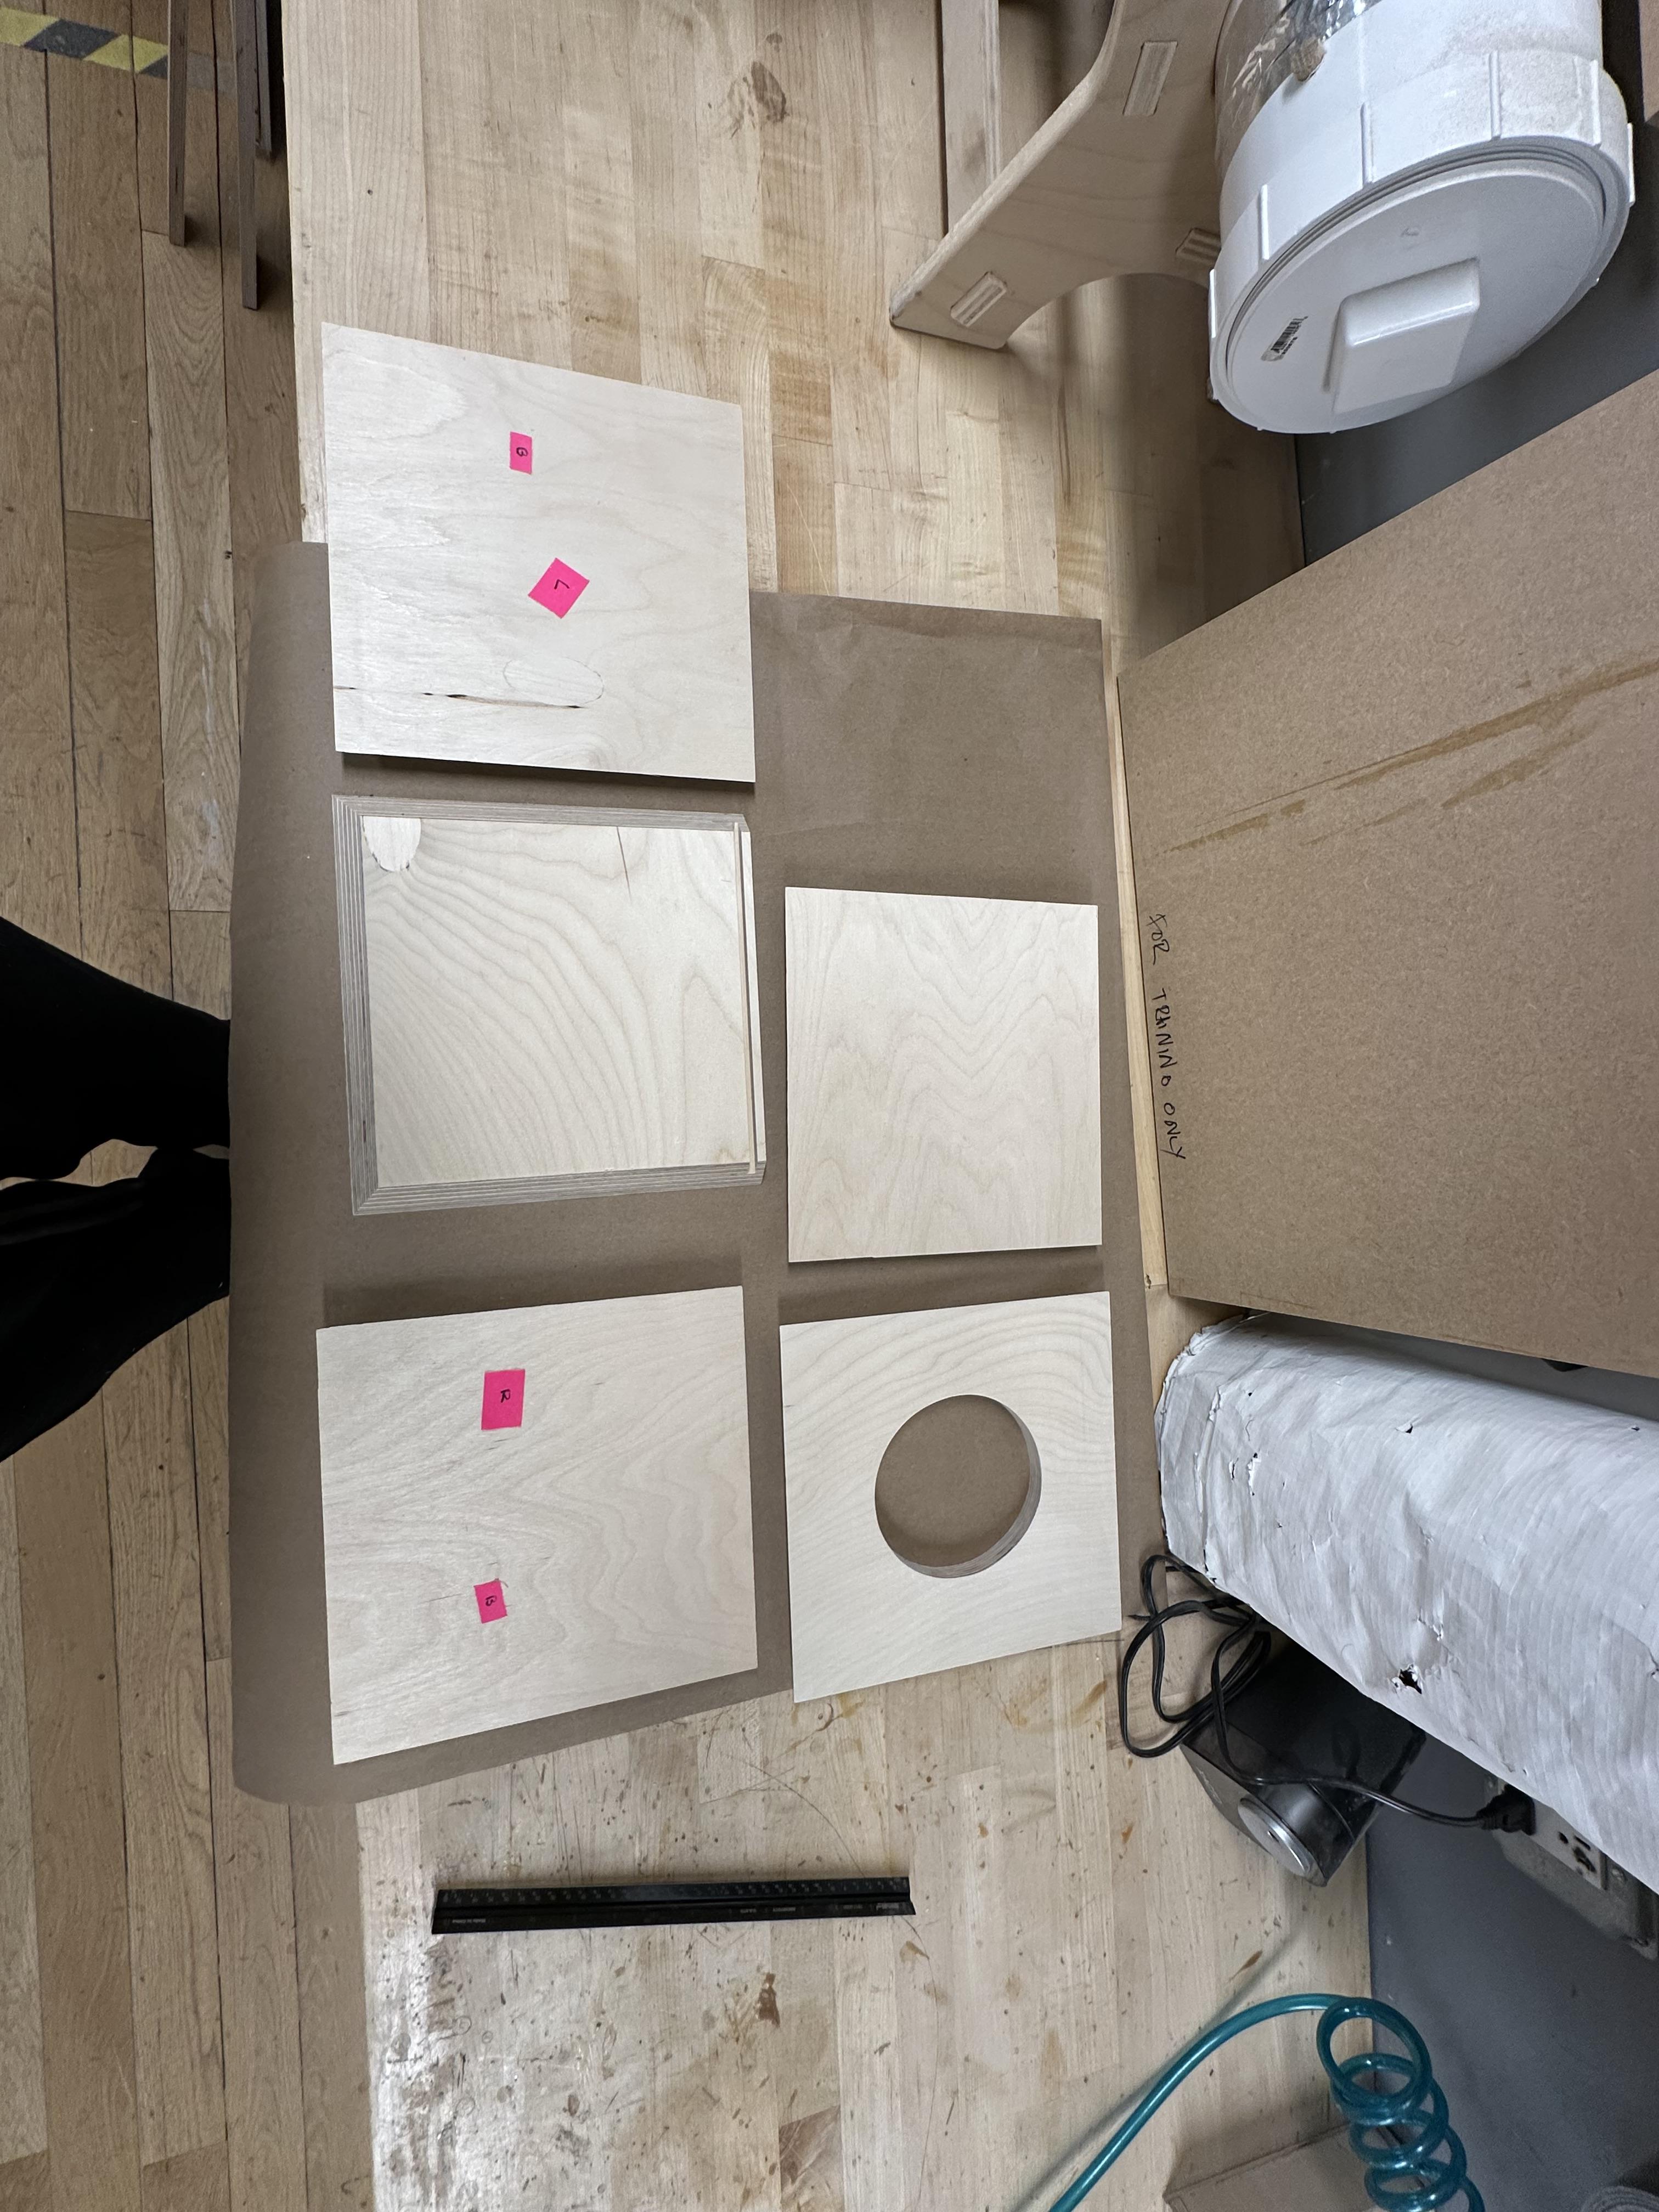
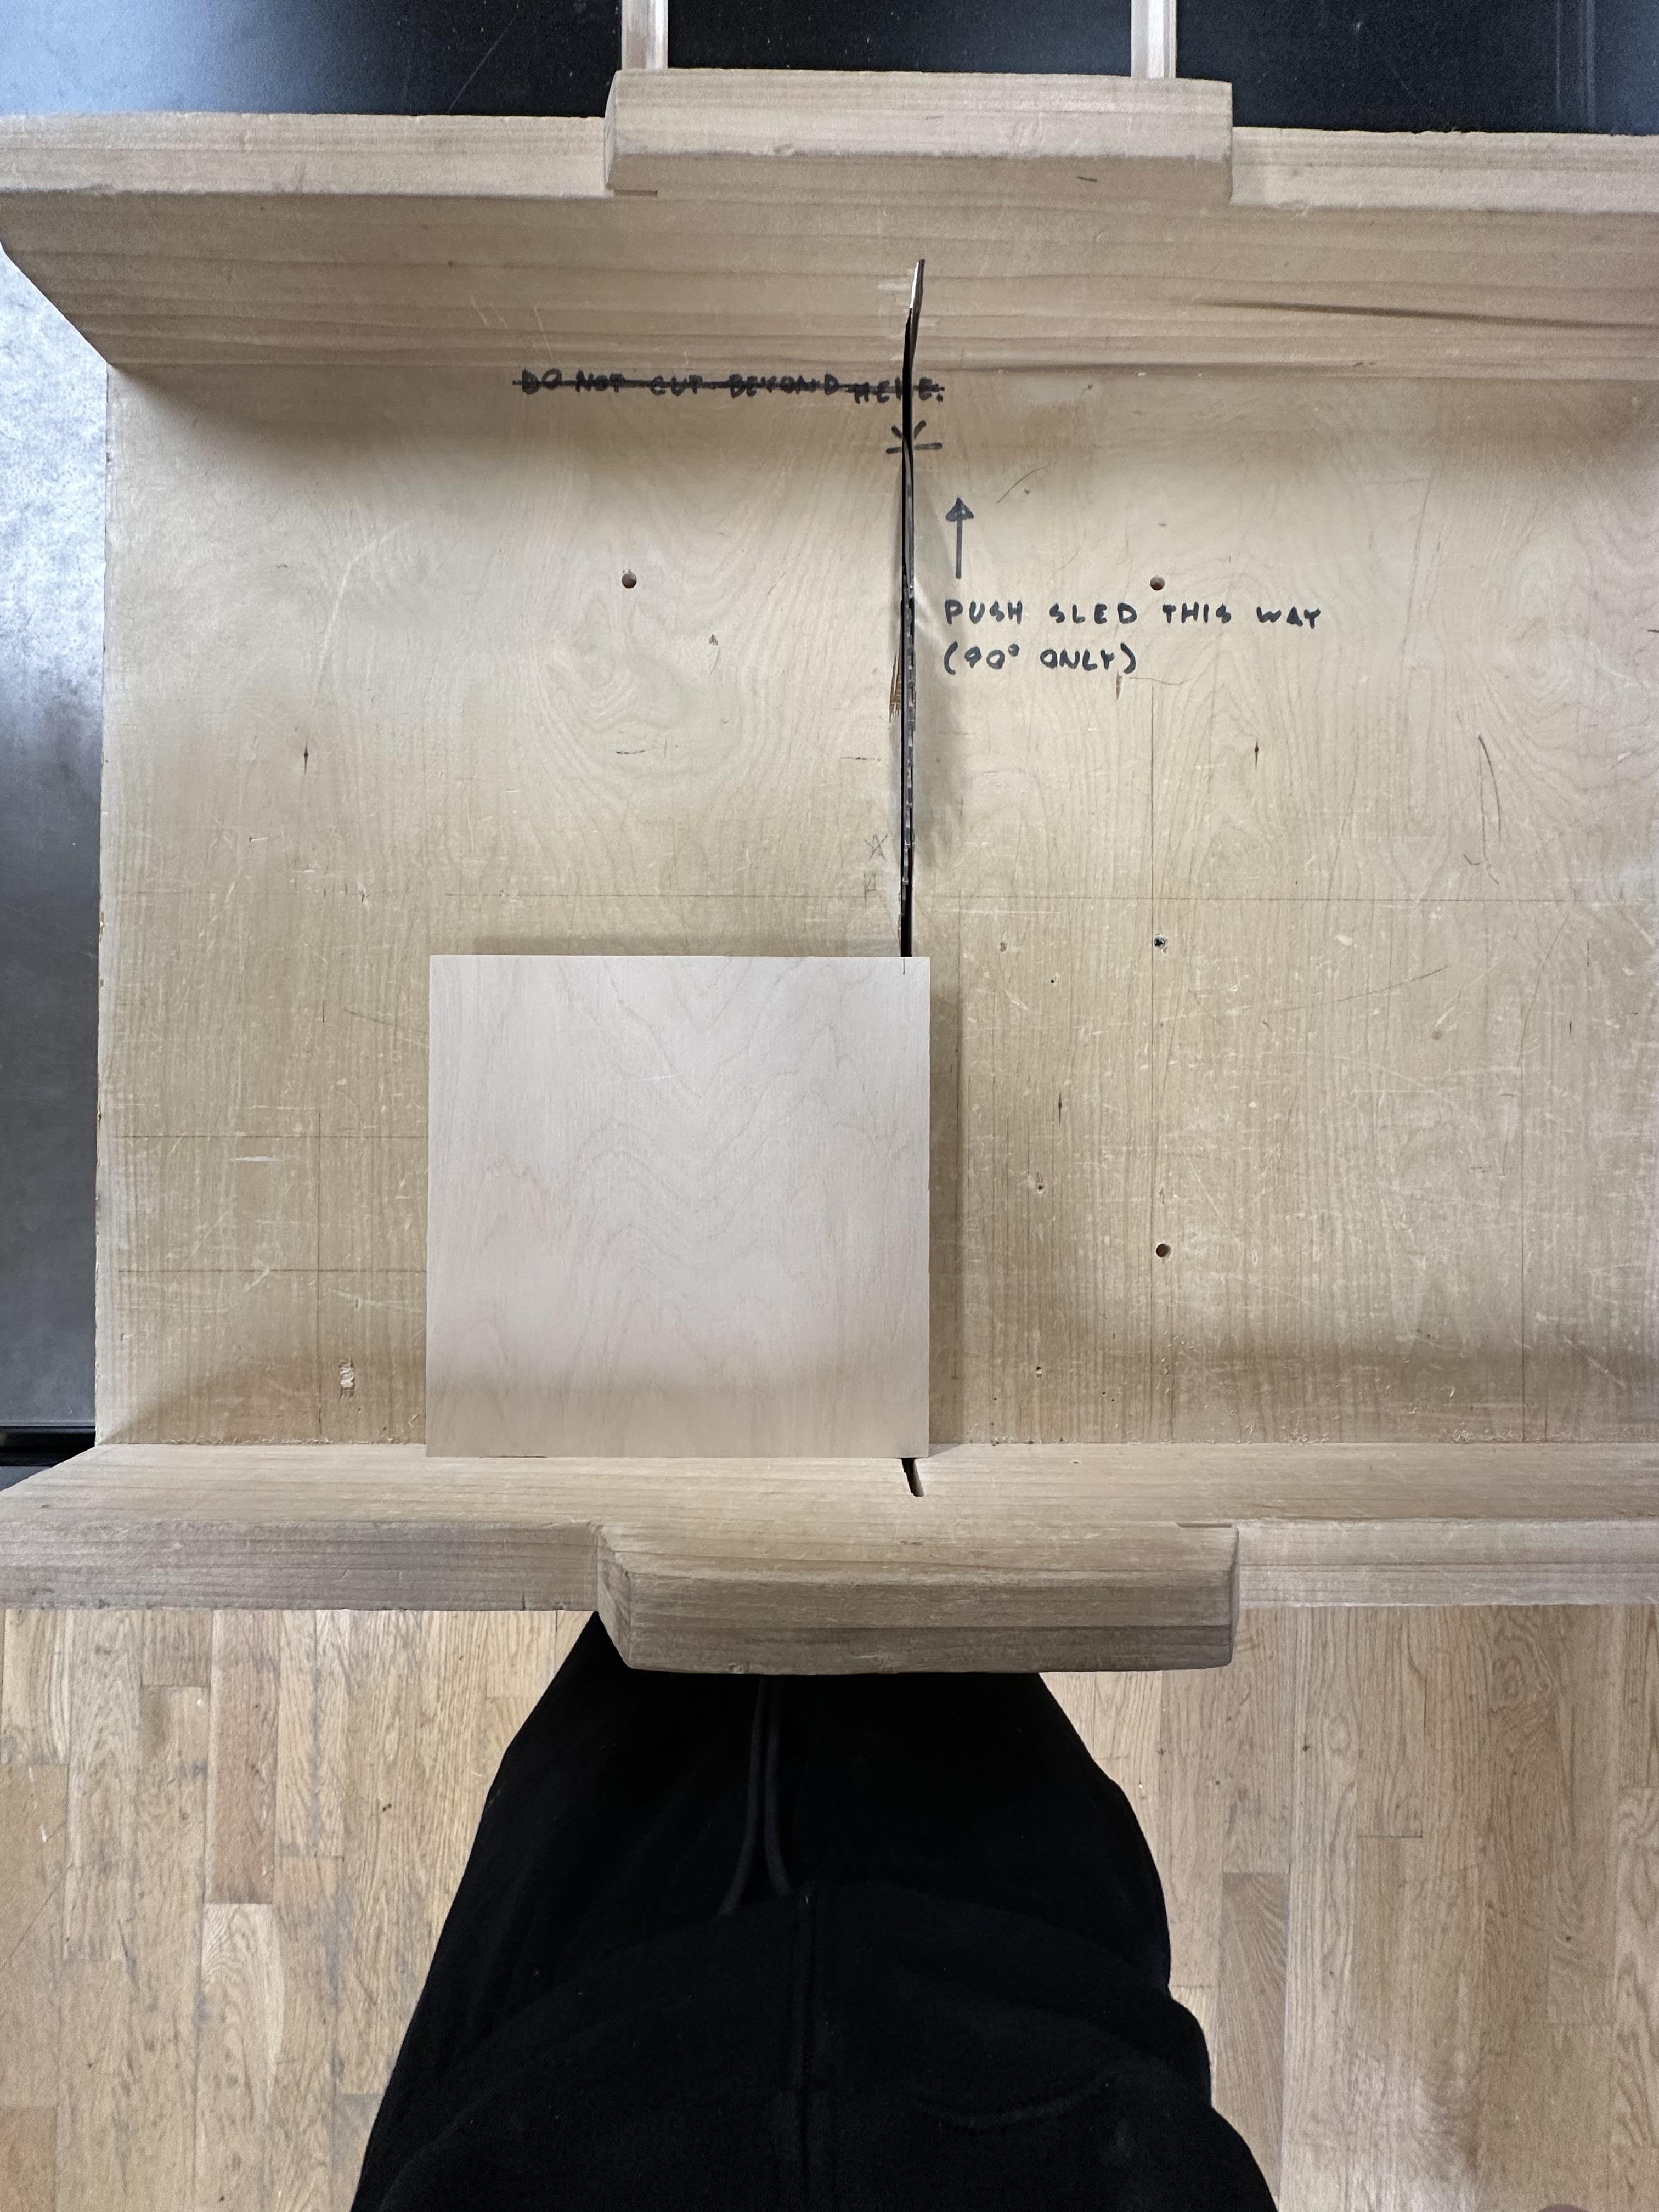
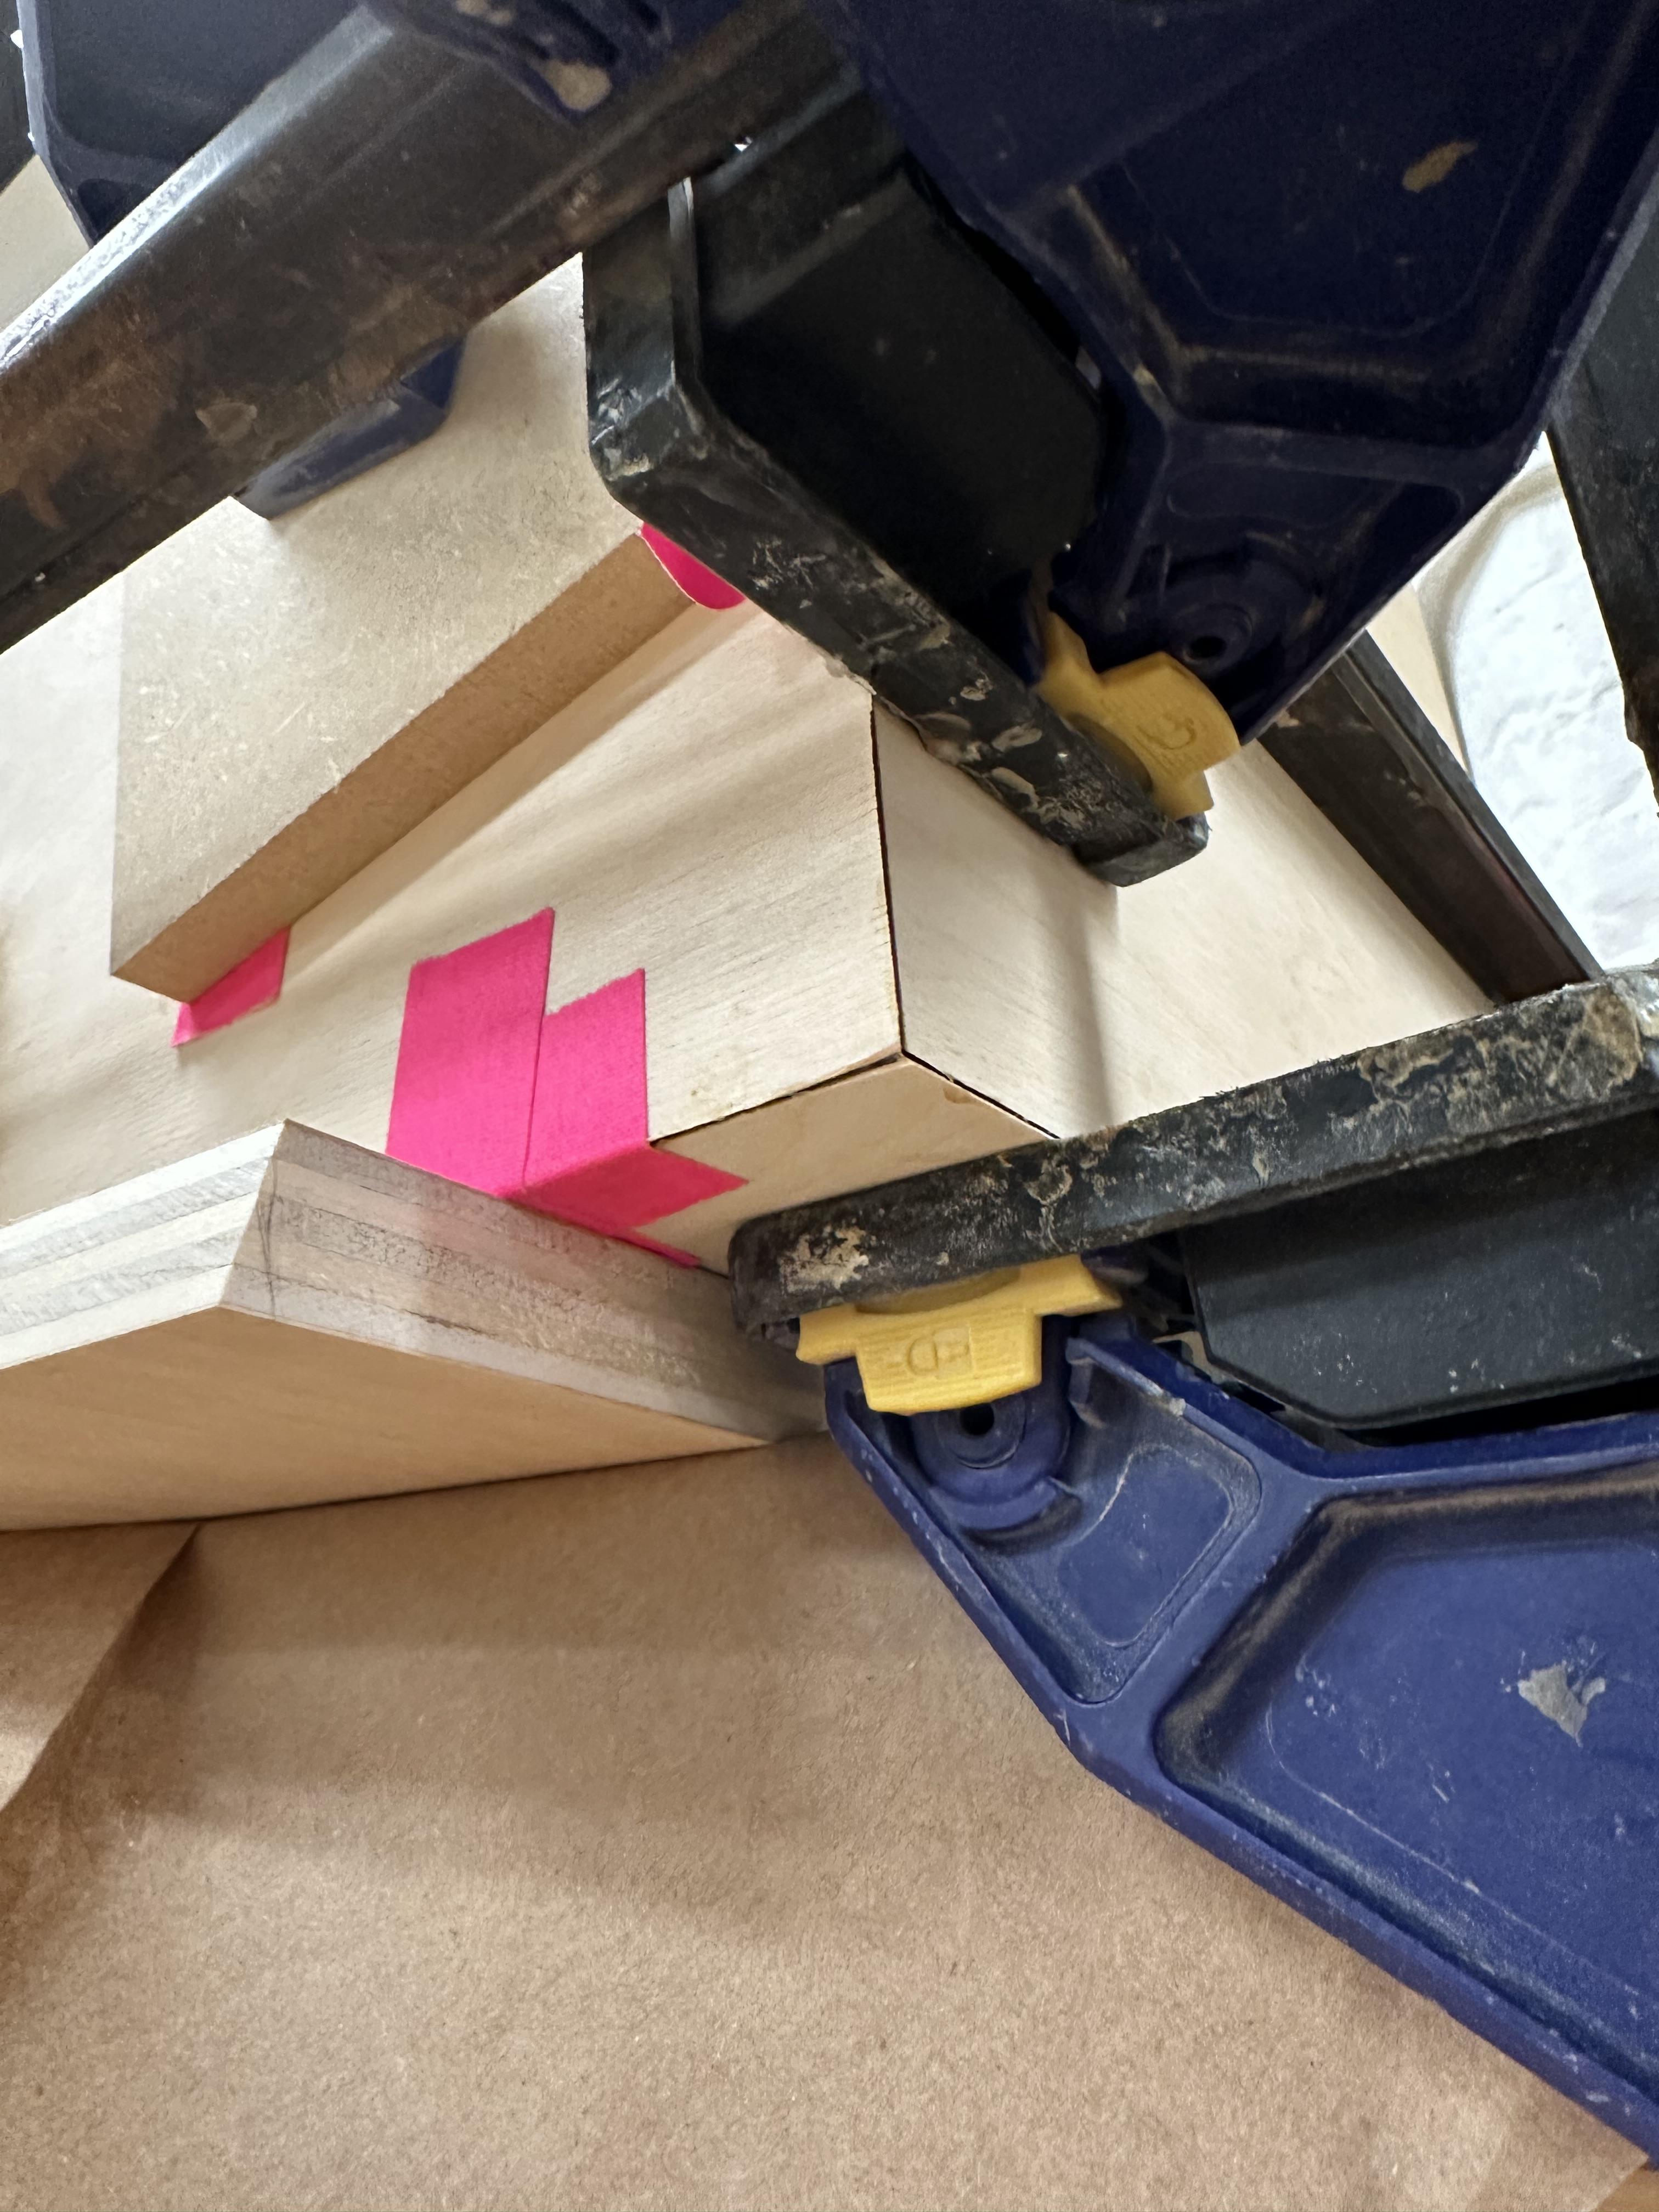
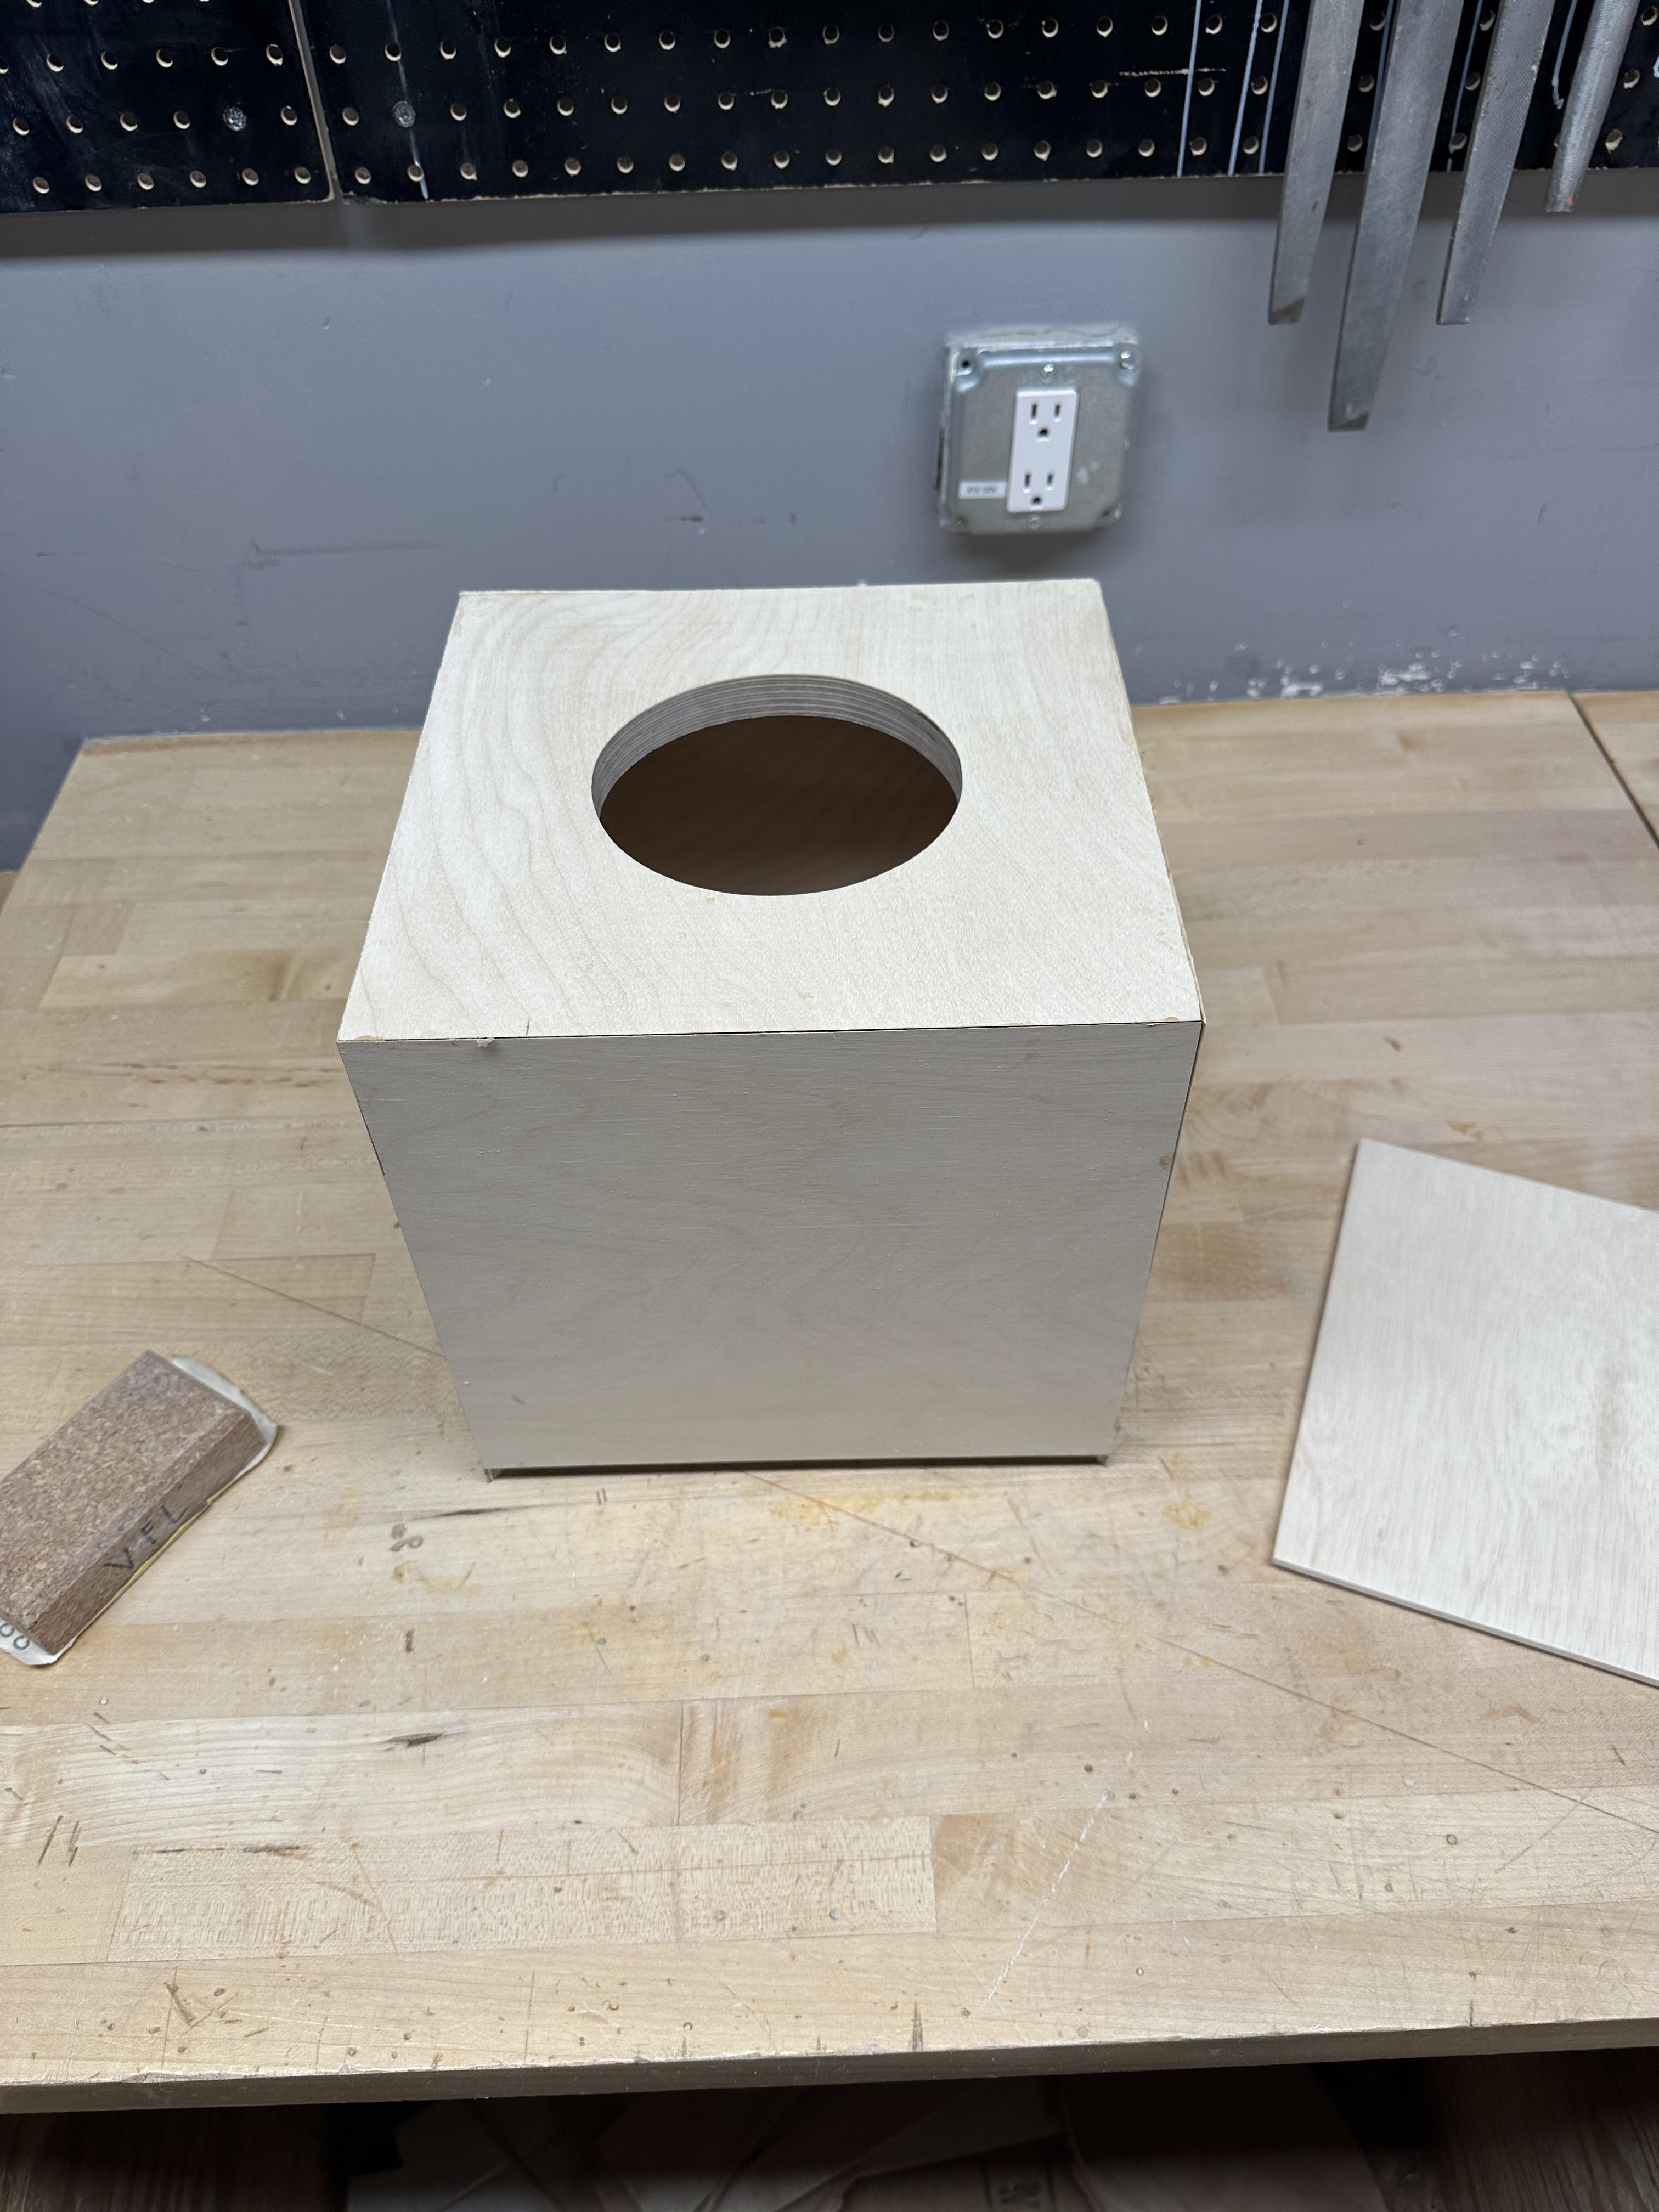
Cut out 5 (10 x 10) wooden squares. Use the table saw to do a miter cut (cut 45° off the edges). For one square, perform a miter cut on all edges, for the last four, only do a miter cut on three edges. Next cut a slot into 3 out of the 4 squares that have miters on only 3 edges. Cut it 3/8 deep. Next cut 0.5 inches of the square on the side that has there is no miter cut that doesn't have a slot. Take the last square with 4 miter cuts and draw a circle in the middle with a 2.5 inch radius. Drill a hole into the circle and use the scroller machine to cut out the circle but leave a bit of space for sanding. Use the Benchtop Oscillating Spindle Sander to smooth out the circle.
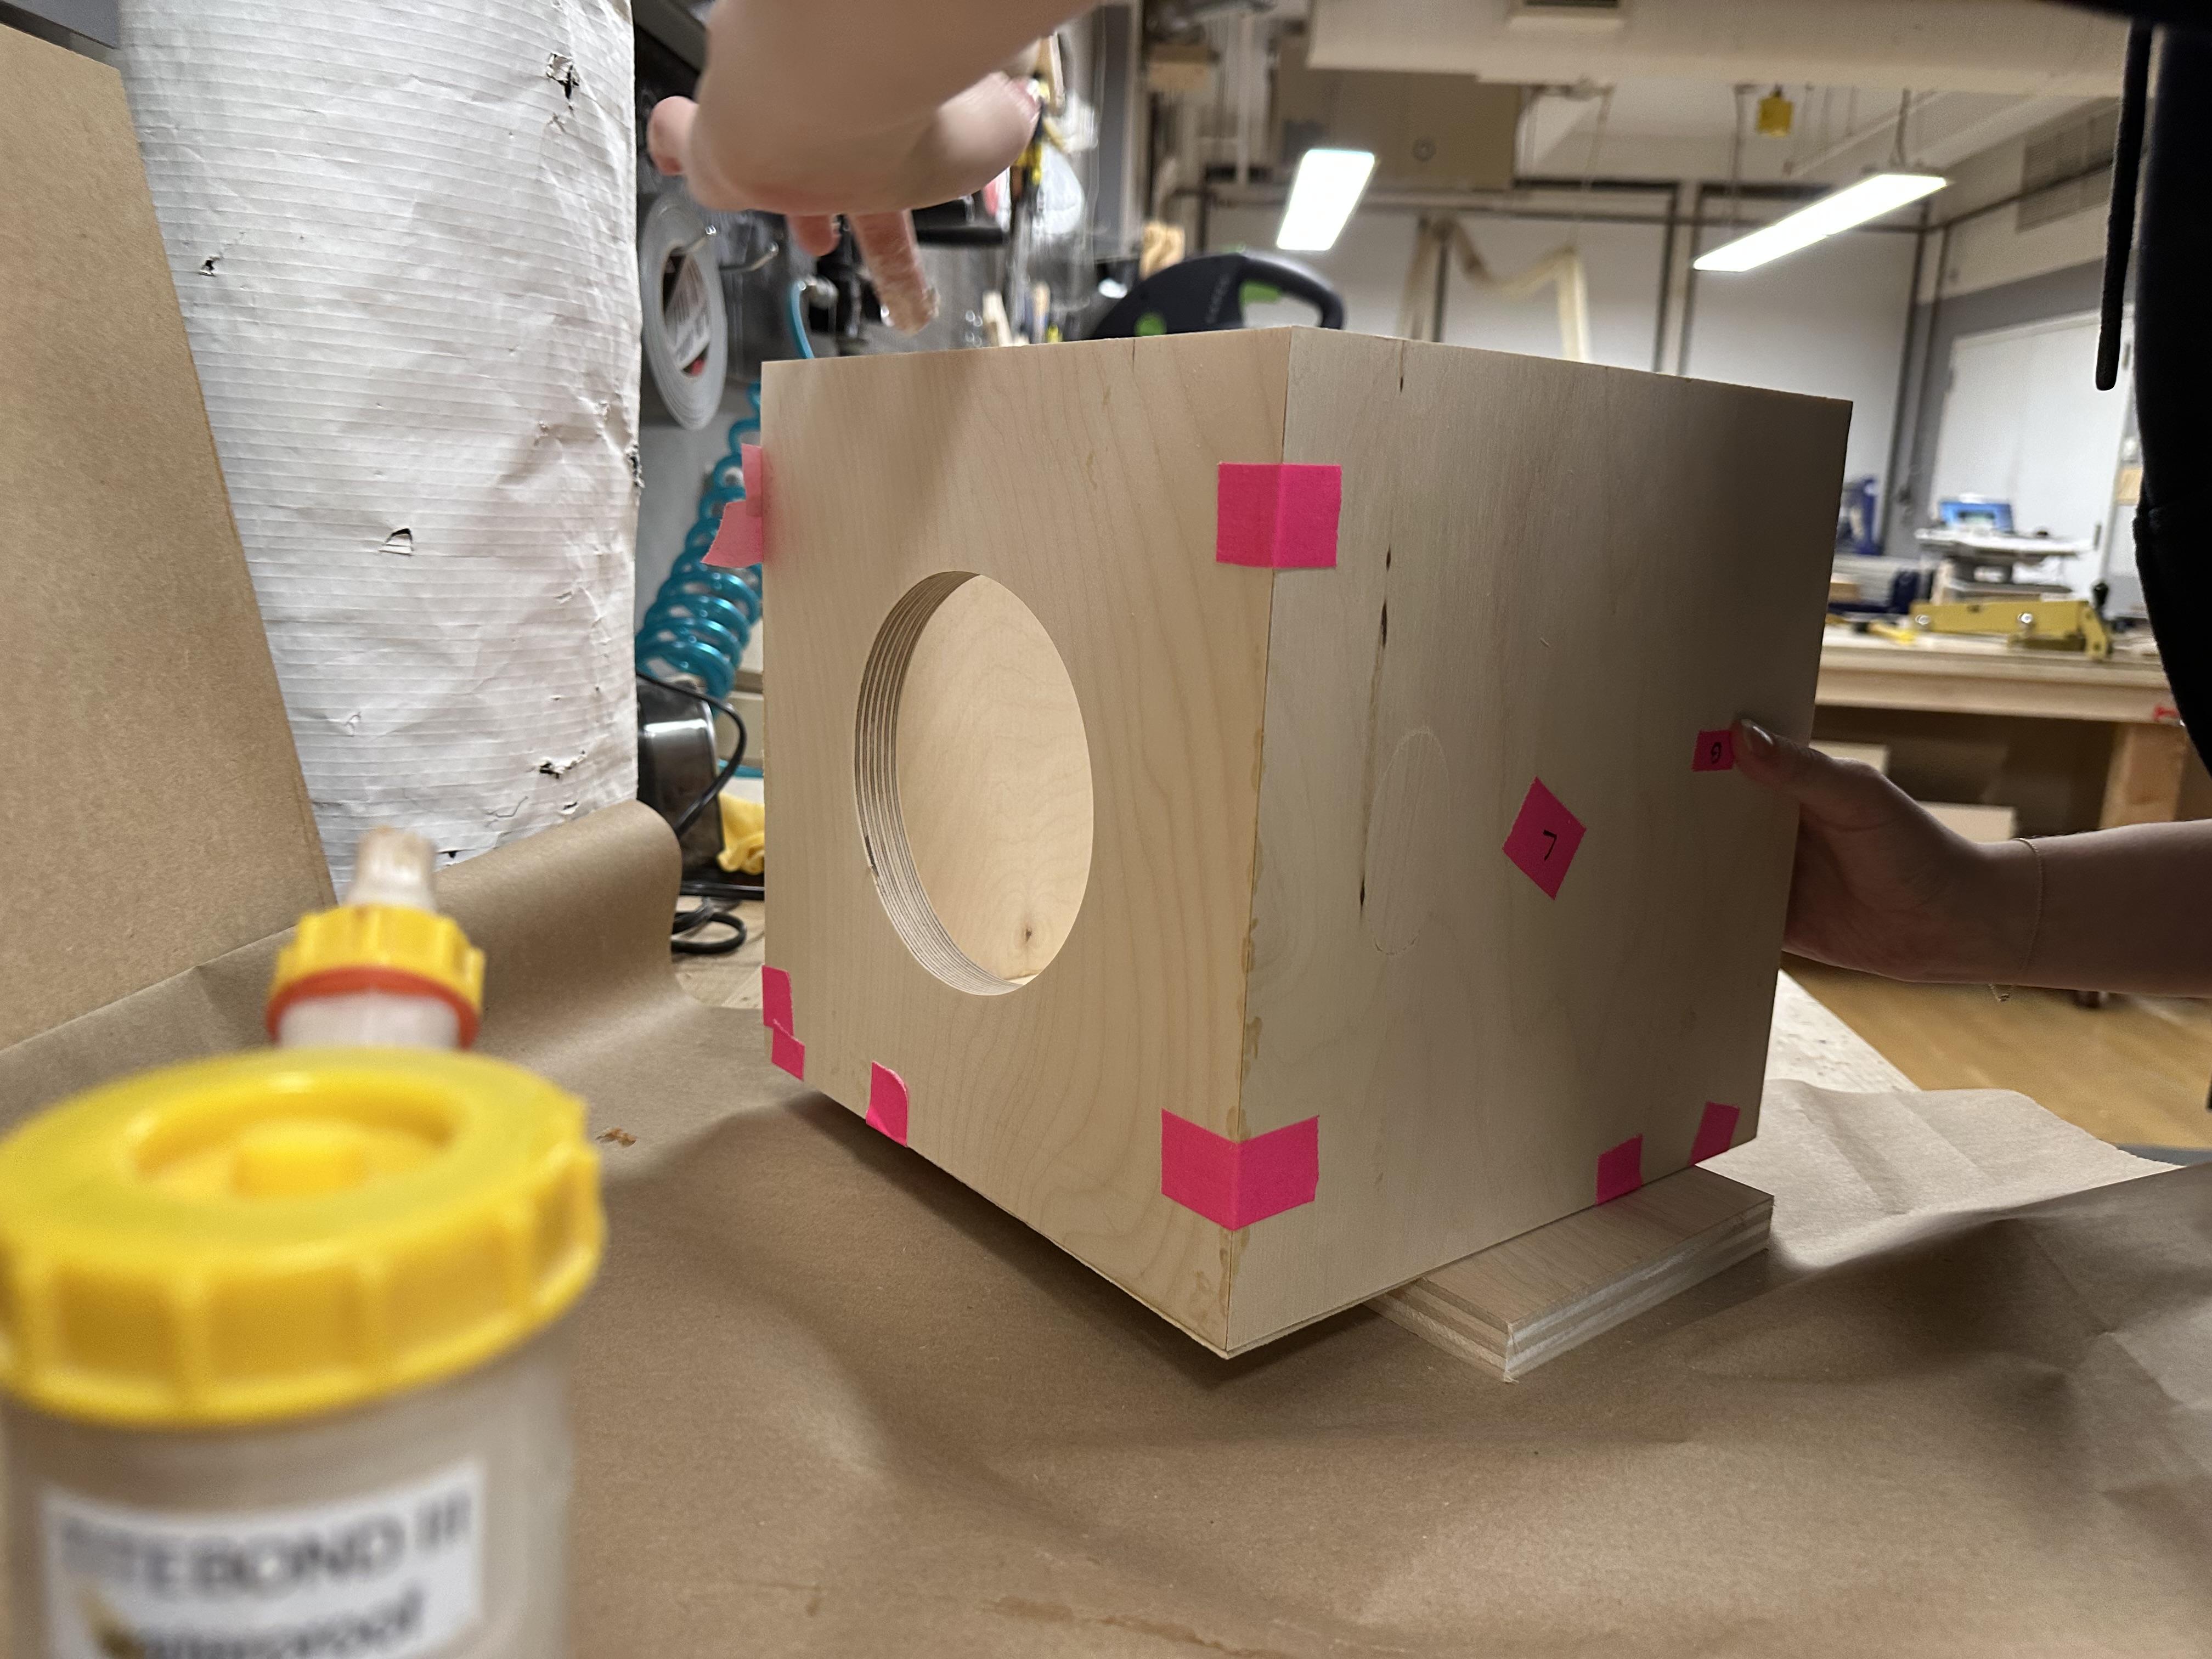
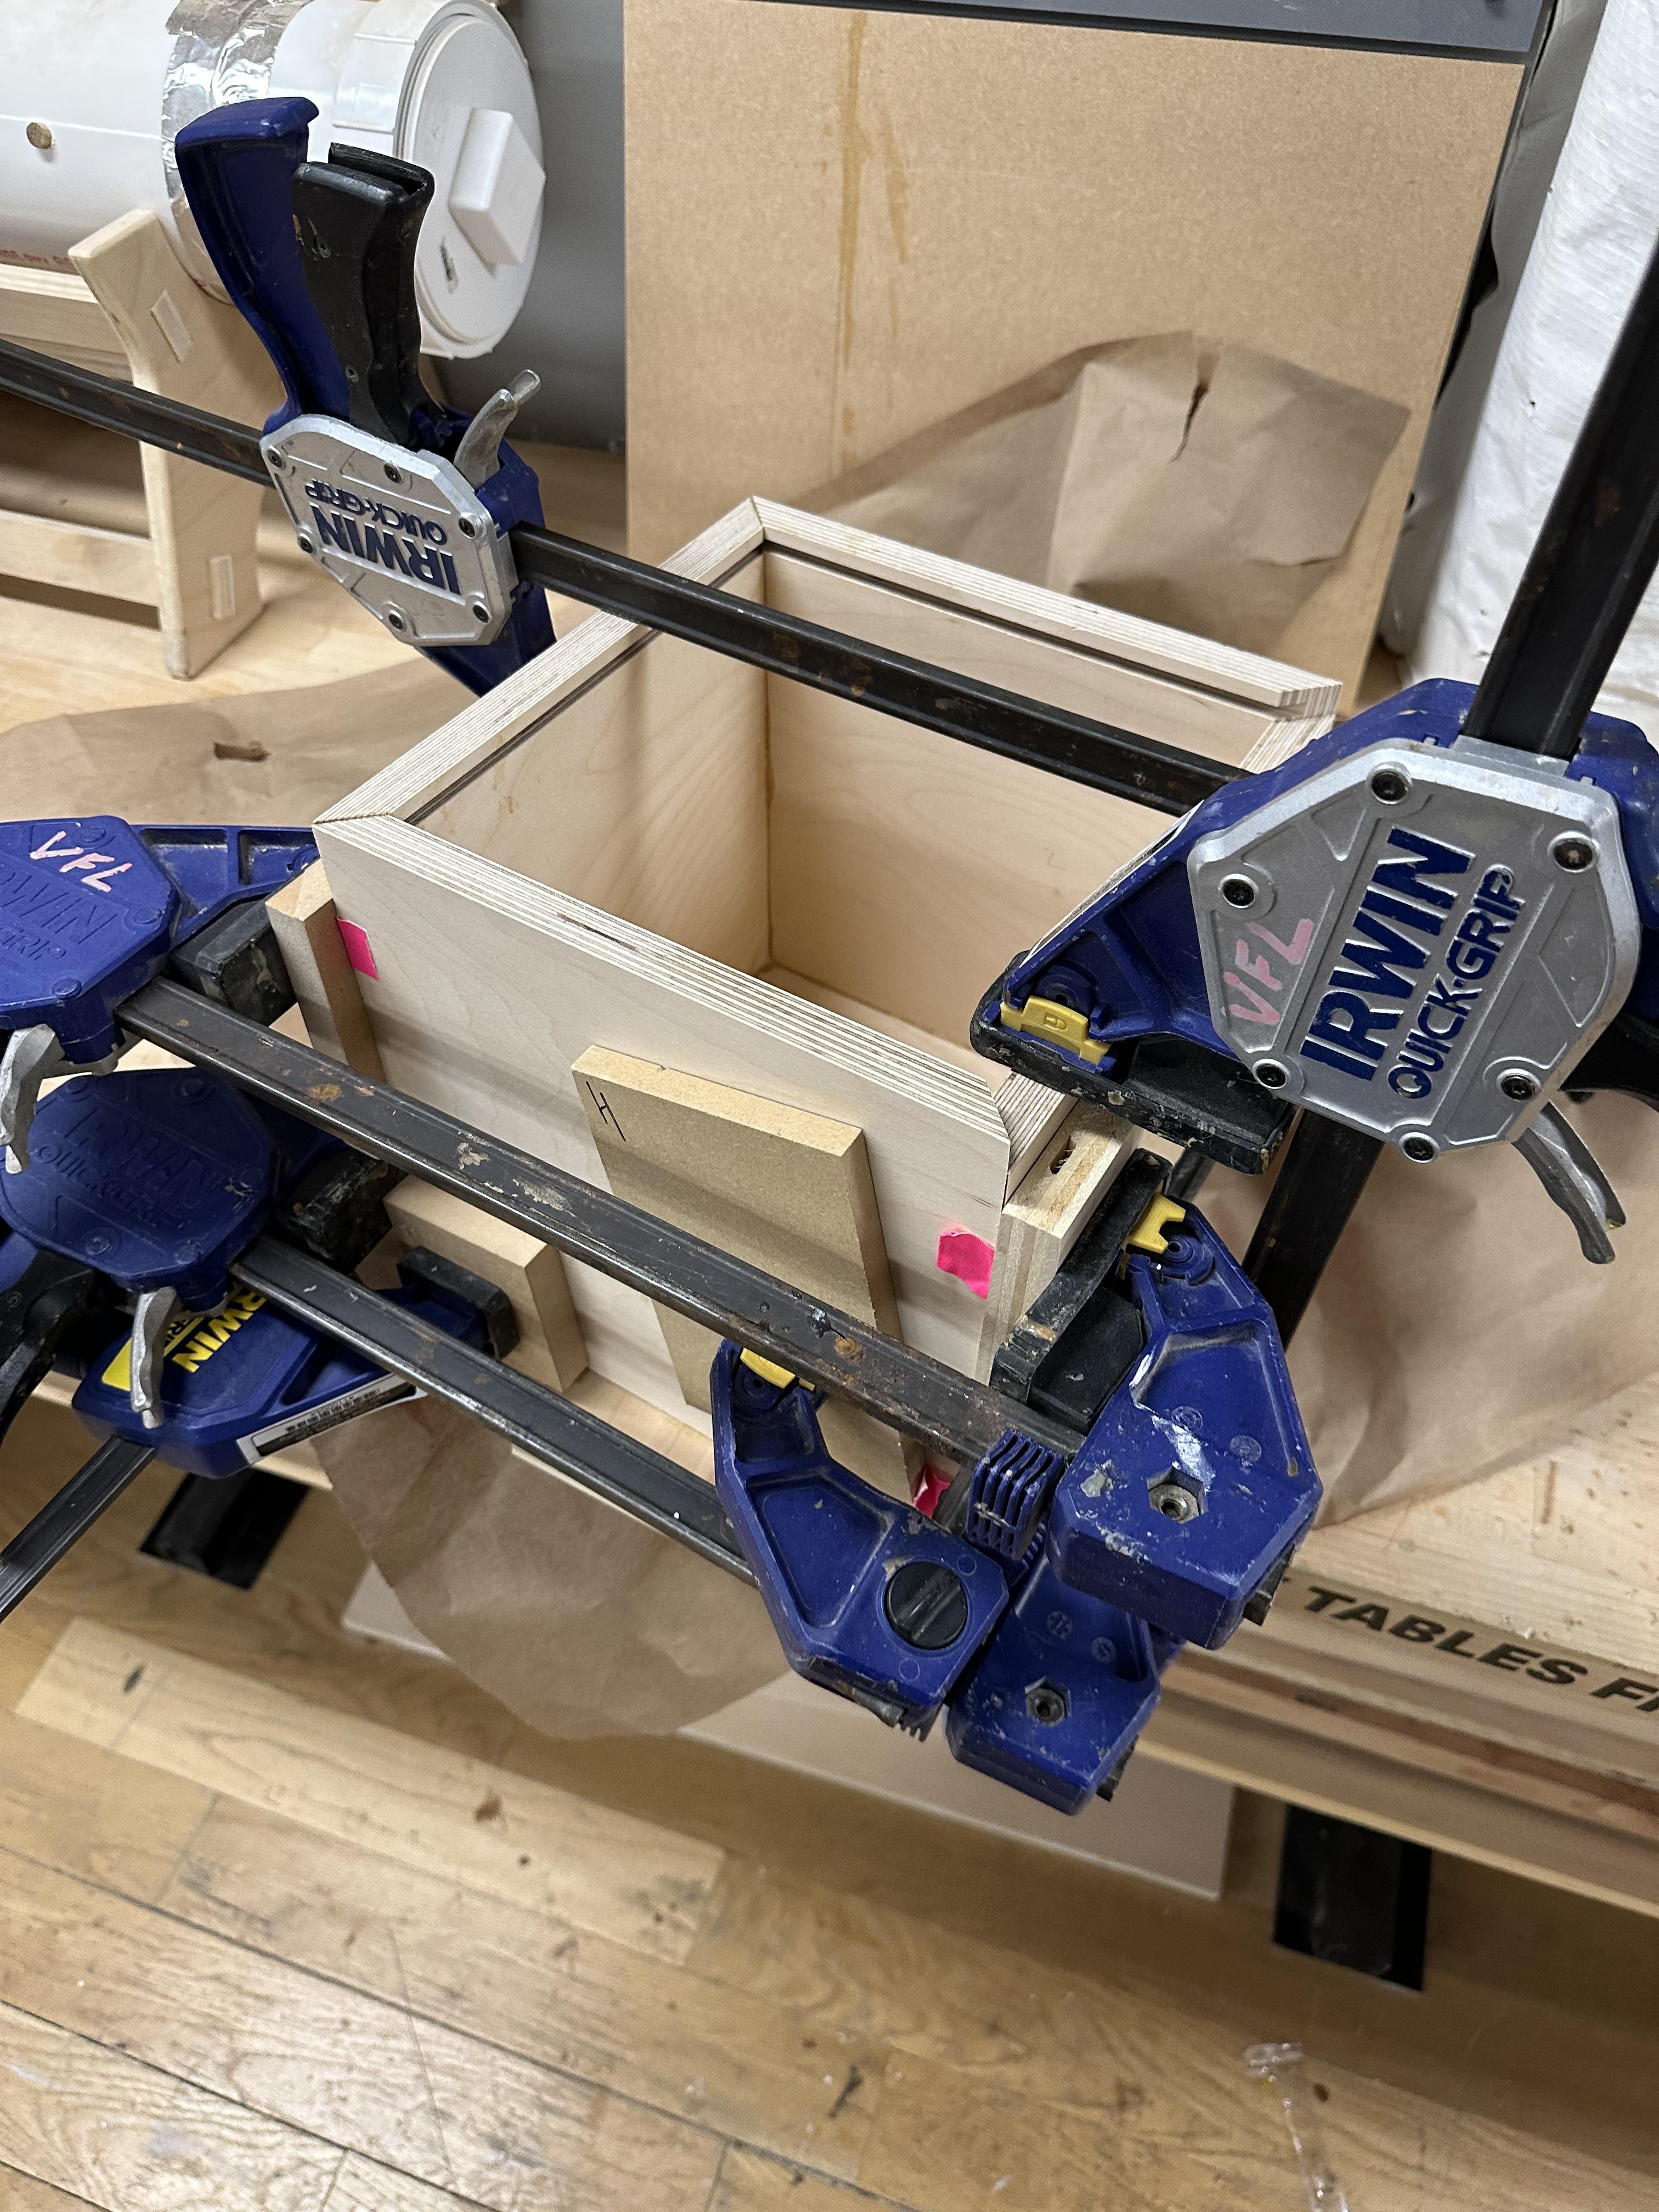
Tape the edges together, not all of them, and put glue in between, use your fingers to spread the glue evenly. Then, use clamps to secure it and leave it to dry for 24 hours. While waiting, take the thinner wood board and cut it down to 9.5 x 9.375 inches. After 24 hours sand the box
Adding Features to Box
Take the wire and create a small circle on the top that does not allow the whole Philip screw to go through. Place the motor with the dome inside the box and ensure the wire goes through the hole at the top of the dome. Attach the LED bulb to the wire with tape, just to make sure it doesn't go anywhere.
Screw the Philips screws to each corner of the motor so it doesn't move.
Coding
Upload the code to the Arduino Nano by running it in the Arduino Software.
Add packs in the library manager:
- RTClib by Adafruit
- Moonphase by Cellie
Downloads
Final Steps
Connect your circuit to a power supply and enjoy the Moon Lamp!