A Coaxial Golfball Cannon
by DeathBlade in Outside > Launchers
47247 Views, 55 Favorites, 0 Comments
A Coaxial Golfball Cannon

This is a instructable for my coaxial golfball gun, or any coaxial spudgun. If you're wondering, a coaxial is where the barrel is inside the chamber, much like a piece of coax cable for your TV.
Safety

All spudguns and launchers are dangerous, and should be used in a safe manner in accordance with your local laws and regulations. Using them in a unsafe manner may lead to injuries or even fatalites you have been warned.
The Operating Principles
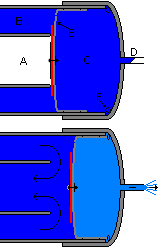
A coaxial spud gun consists of a barrel with the pressure chamber surrounding it. Like a piece of coaxial television cable, The valve for a coaxial is either a diaphragm or piston(this project uses a piston)The piston seals up against the edge of the barrel that is contained in the chamber section when air is compressed is behind it. Channels or holes in the edge of the valve allow the air to pressurize the section of the chamber infront of the valve. When fired the air pressure behind the valve is vented through another valve, the piston is then forced back by the greater air pressure infront as the air pressure to the rear decreases, unsealing the barrel allowing the air to flow down the barrel firing the payload.
The Parts

You can get all the parts for just about $45-50usd
All fitting and pipe are schedule 40 unless stated.
Chamber:
2x4" adapter 4.50
4" cleanout and cap 4.00
4'feet 4" pipe hardwall pipe 6.75 (foamcore this is NOT pressure rated)
Barrel:
4' section 2inch schedule 80 pipe donated (est $15)
4' section 1 1/2 inch SRD-21(class 200 pipe) donated (est $2.50)
(you can't get is pipe at home depot/lowes, try a plumbing supply store Near pittsburgh try PipeCo in leetstale,PA)
Piston:
2x pipe test caps 0.50 each
a section of scrap 3" pvc
a mouse pad
Filling valve:
(already had all parts below)
Shrader(tire) valve 1/4NPT (est $3.50)
Pressure gauge 1/4NPT (est $4.00)
Ball valve 1/4NPT (est $4.00)
Four way coupler 1/4NPT (est $3.75)
1/4NPT thread tap (est $5.00)
Cement/epoxy:
PVC Primer (est $3.00)
PVC Cement (est $4.00)
15minute epoxy (est $5.00
Modifing the 2 to 4 Inch Adapter
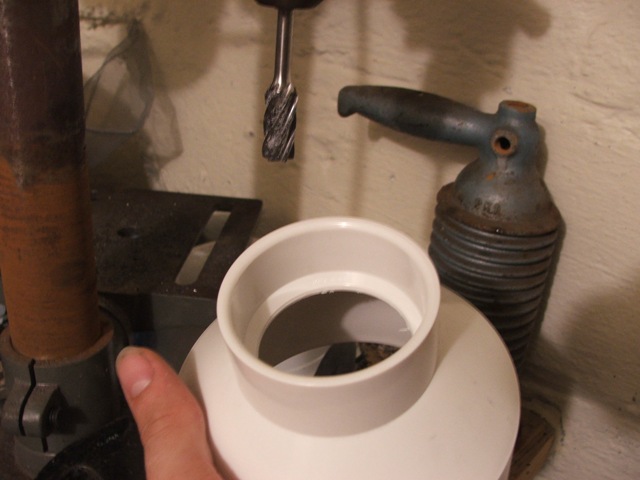

First, in a coaxial the barrel is inside the chamber to do this you have to remove the lip inside the 2x4" adapter. To do this you could use a file, knife, etc. I choose to use a milling bit in my drill press to cut out the edge. Once you have it cut away check to see if it fits over the barrel somewhat easily.
Making the Barrel Spacers


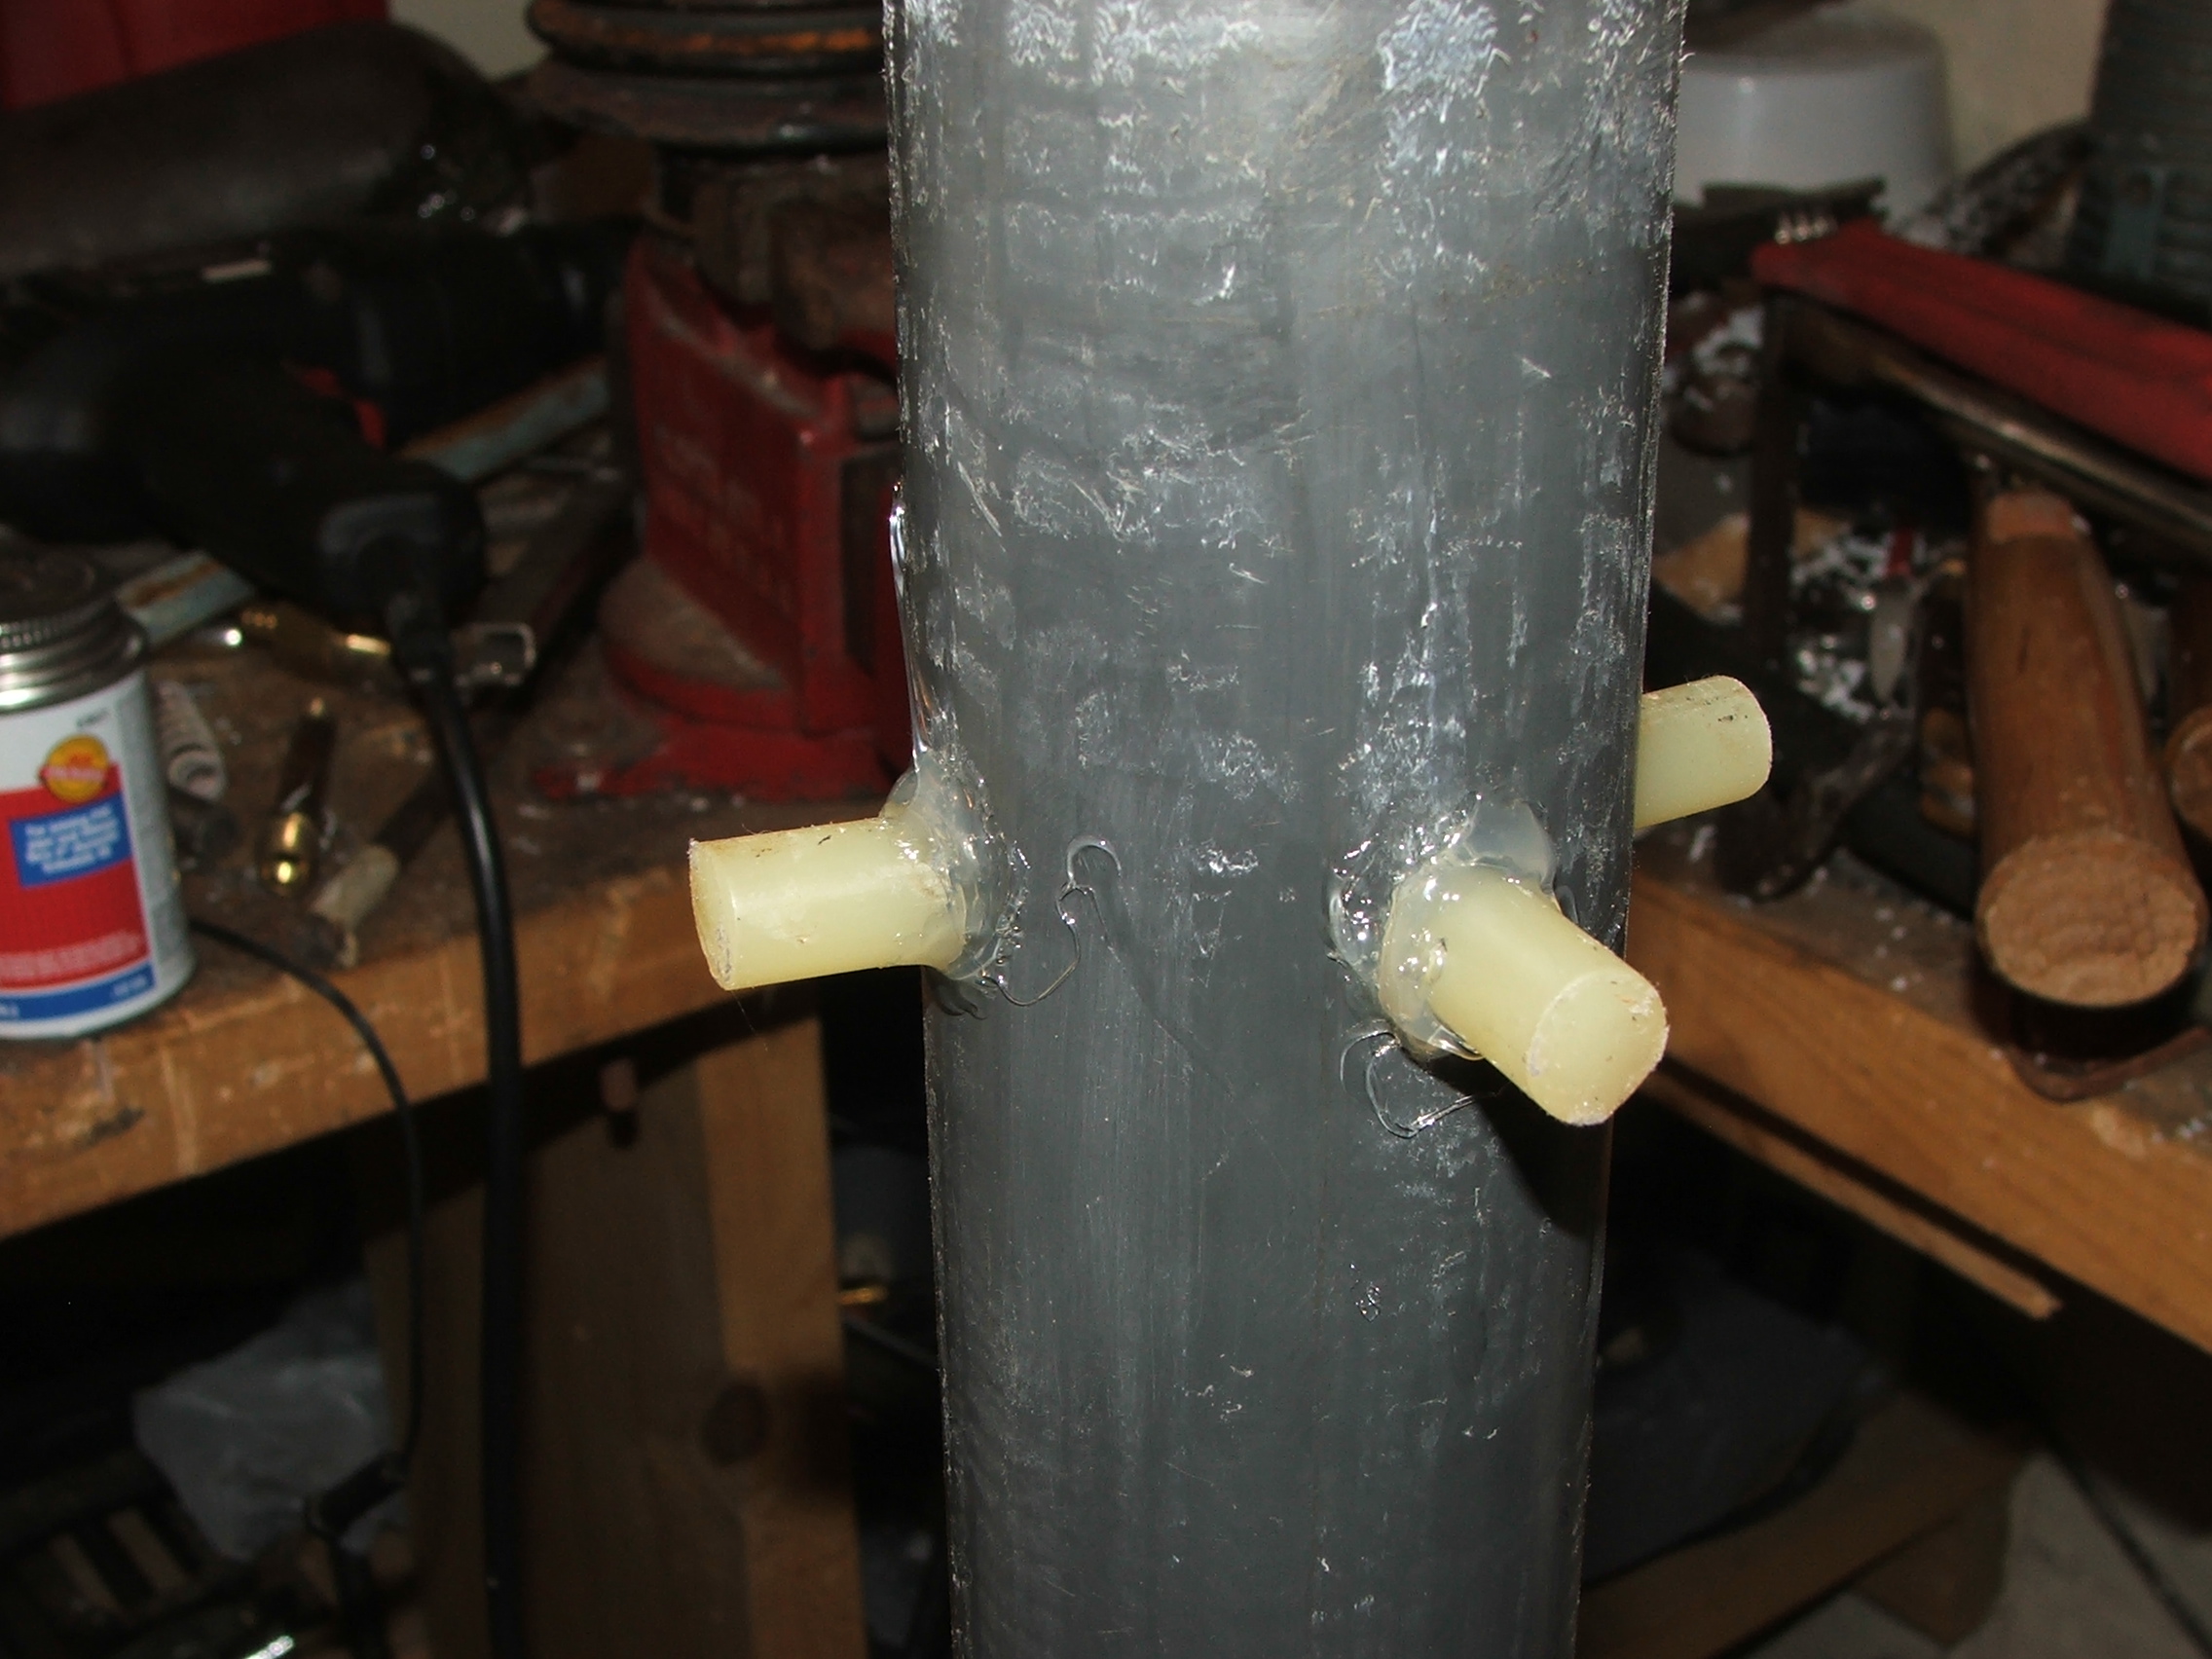
For the valve to seal correctly the barrel has to be centered and strait. To do this you will have to put some spacers around the barrel. First measure the inside diameter of the chamber pipe, in my case 4inch has a ID of 3.99, now measure the barrels OD 2.37" and subtract then divide the remainder by two
3.99 - 2.37 = 1.62 / 2 = 0.81" then measure and cut them out. I used hot glu sticks. You could use anything.
3.99 - 2.37 = 1.62 / 2 = 0.81" then measure and cut them out. I used hot glu sticks. You could use anything.
The Barrel
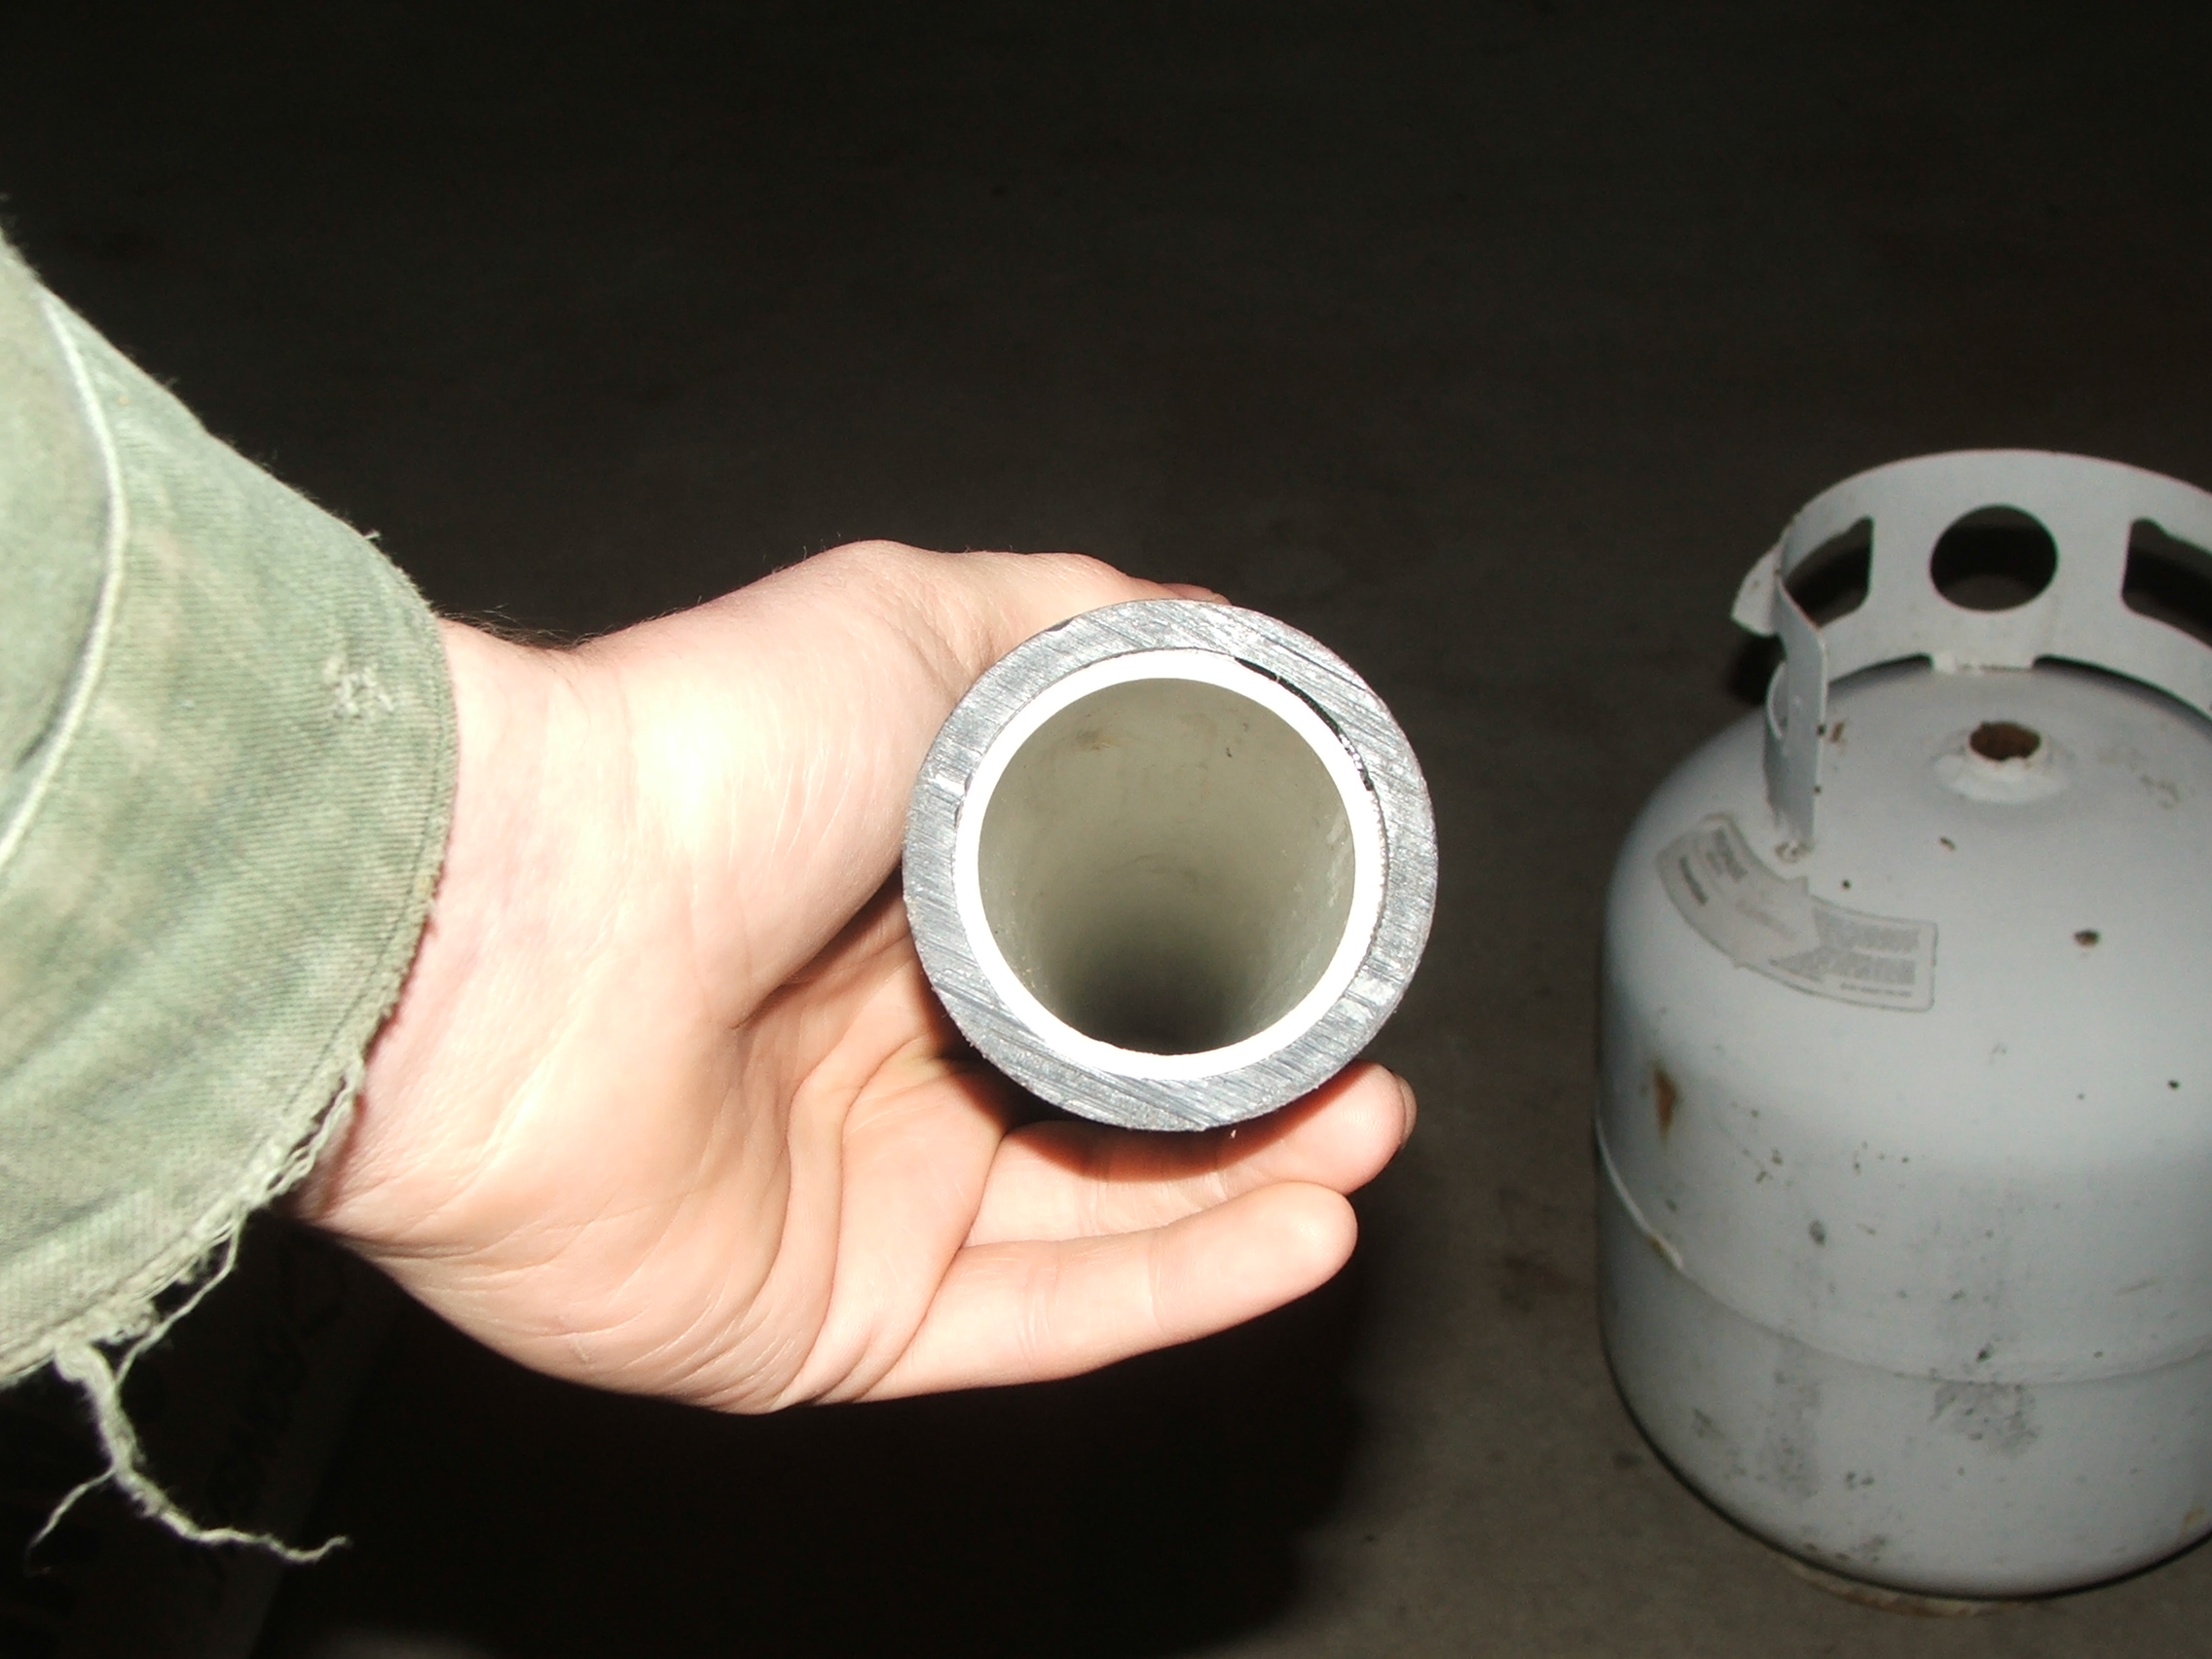
This is a describtion on how to assemble the barrel, First if you cant find SDR-21 2" SCH80 with some wadding will work as well.
To assemble the barrel first lightly sand the outside of the SDR-21, and coat it with a layer of the primer you must use primer when make a weld joint in PVC. Let the primer dry for a few seconds and then put some PVC cement around the pipe and start sliding it inside the 2" SCH80 adding cement as you go along, do this somewhat quickly so the two sections do not bind together before they are completly sheathed together. It is helpful to have someone there to add the cement as you force them together.
Before installing in the spudgun the end of the barrel that will be inside the chamber should be sanded with medium then fine grit sandpaper till the end is strait and flat. If the edge is even slightly off it might cause air to leak down the barrel.
Connecting the Adapter

Now that have your barrel, you need to solvent weld it to the adapter, This is a good instruction on the spudwiki on solvent welding PVC Solvent welding on the Spudwiki
Now you have your adapter and have primed the 2" section along with the end of your barrel and the inside of the adapter, put PVC cement on both areas to be joined and push them together turning slightly as you go. you can have the barrel flush with the adapter if you want. I have mine a inch or so past so I could add this 2" thread coupler.
Below is what your pipe should look like(minus the coupler), make sure it is one strait! You dont get a second chance!
Attach the Barrel and Adapter to the Chamber.
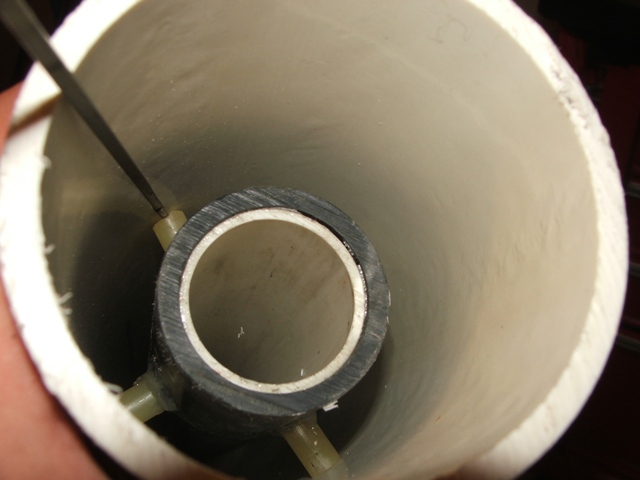
Now test fit the barrel/adapter in the chamber and make sure the spacer keep the barrel is centered, if not now its the time to adjust it. Once it is welded it would be rather hard.
Now glue the adapter/barrel to the chamber the spacer we added before will keep the barrel centered while it is drying. Again we will solvent weld the two parts together. First a light sanding and the primer, then the cement and slightly twist the parts together. The barrel should look like this when inside the chamber.
Now glue the adapter/barrel to the chamber the spacer we added before will keep the barrel centered while it is drying. Again we will solvent weld the two parts together. First a light sanding and the primer, then the cement and slightly twist the parts together. The barrel should look like this when inside the chamber.
The Cleanout Cap


The cleanout cap is were we will mount our fill valve(shrader/tire) out vent valve(the ball valve) and the pressure gauge The fittings and valve should either 1/4" or 1/2"(I used 1/4" I should have used 1/2" It allows faster firing).
First drill and tap your location of choice. Now thread the parts together to the fourway coupler and thread the coulper into the cap. You should have some teflon tap on hand for the threads, incase they leak.
Now turn the cap over and glue some pieces of foam rubber or even bubble rap to the inside of the cap to act a bumpstops for the piston.
The Piston

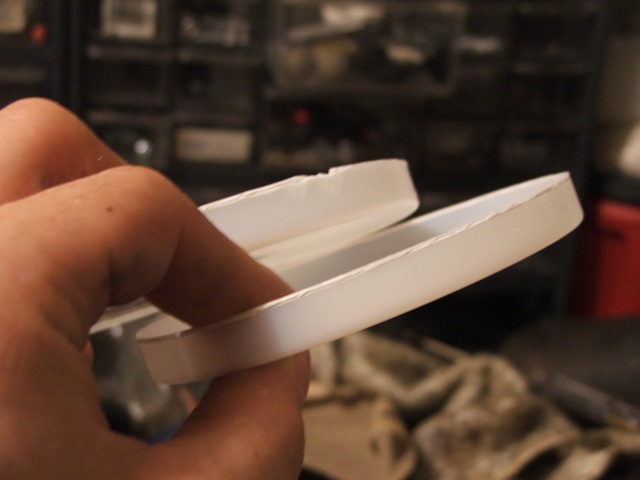
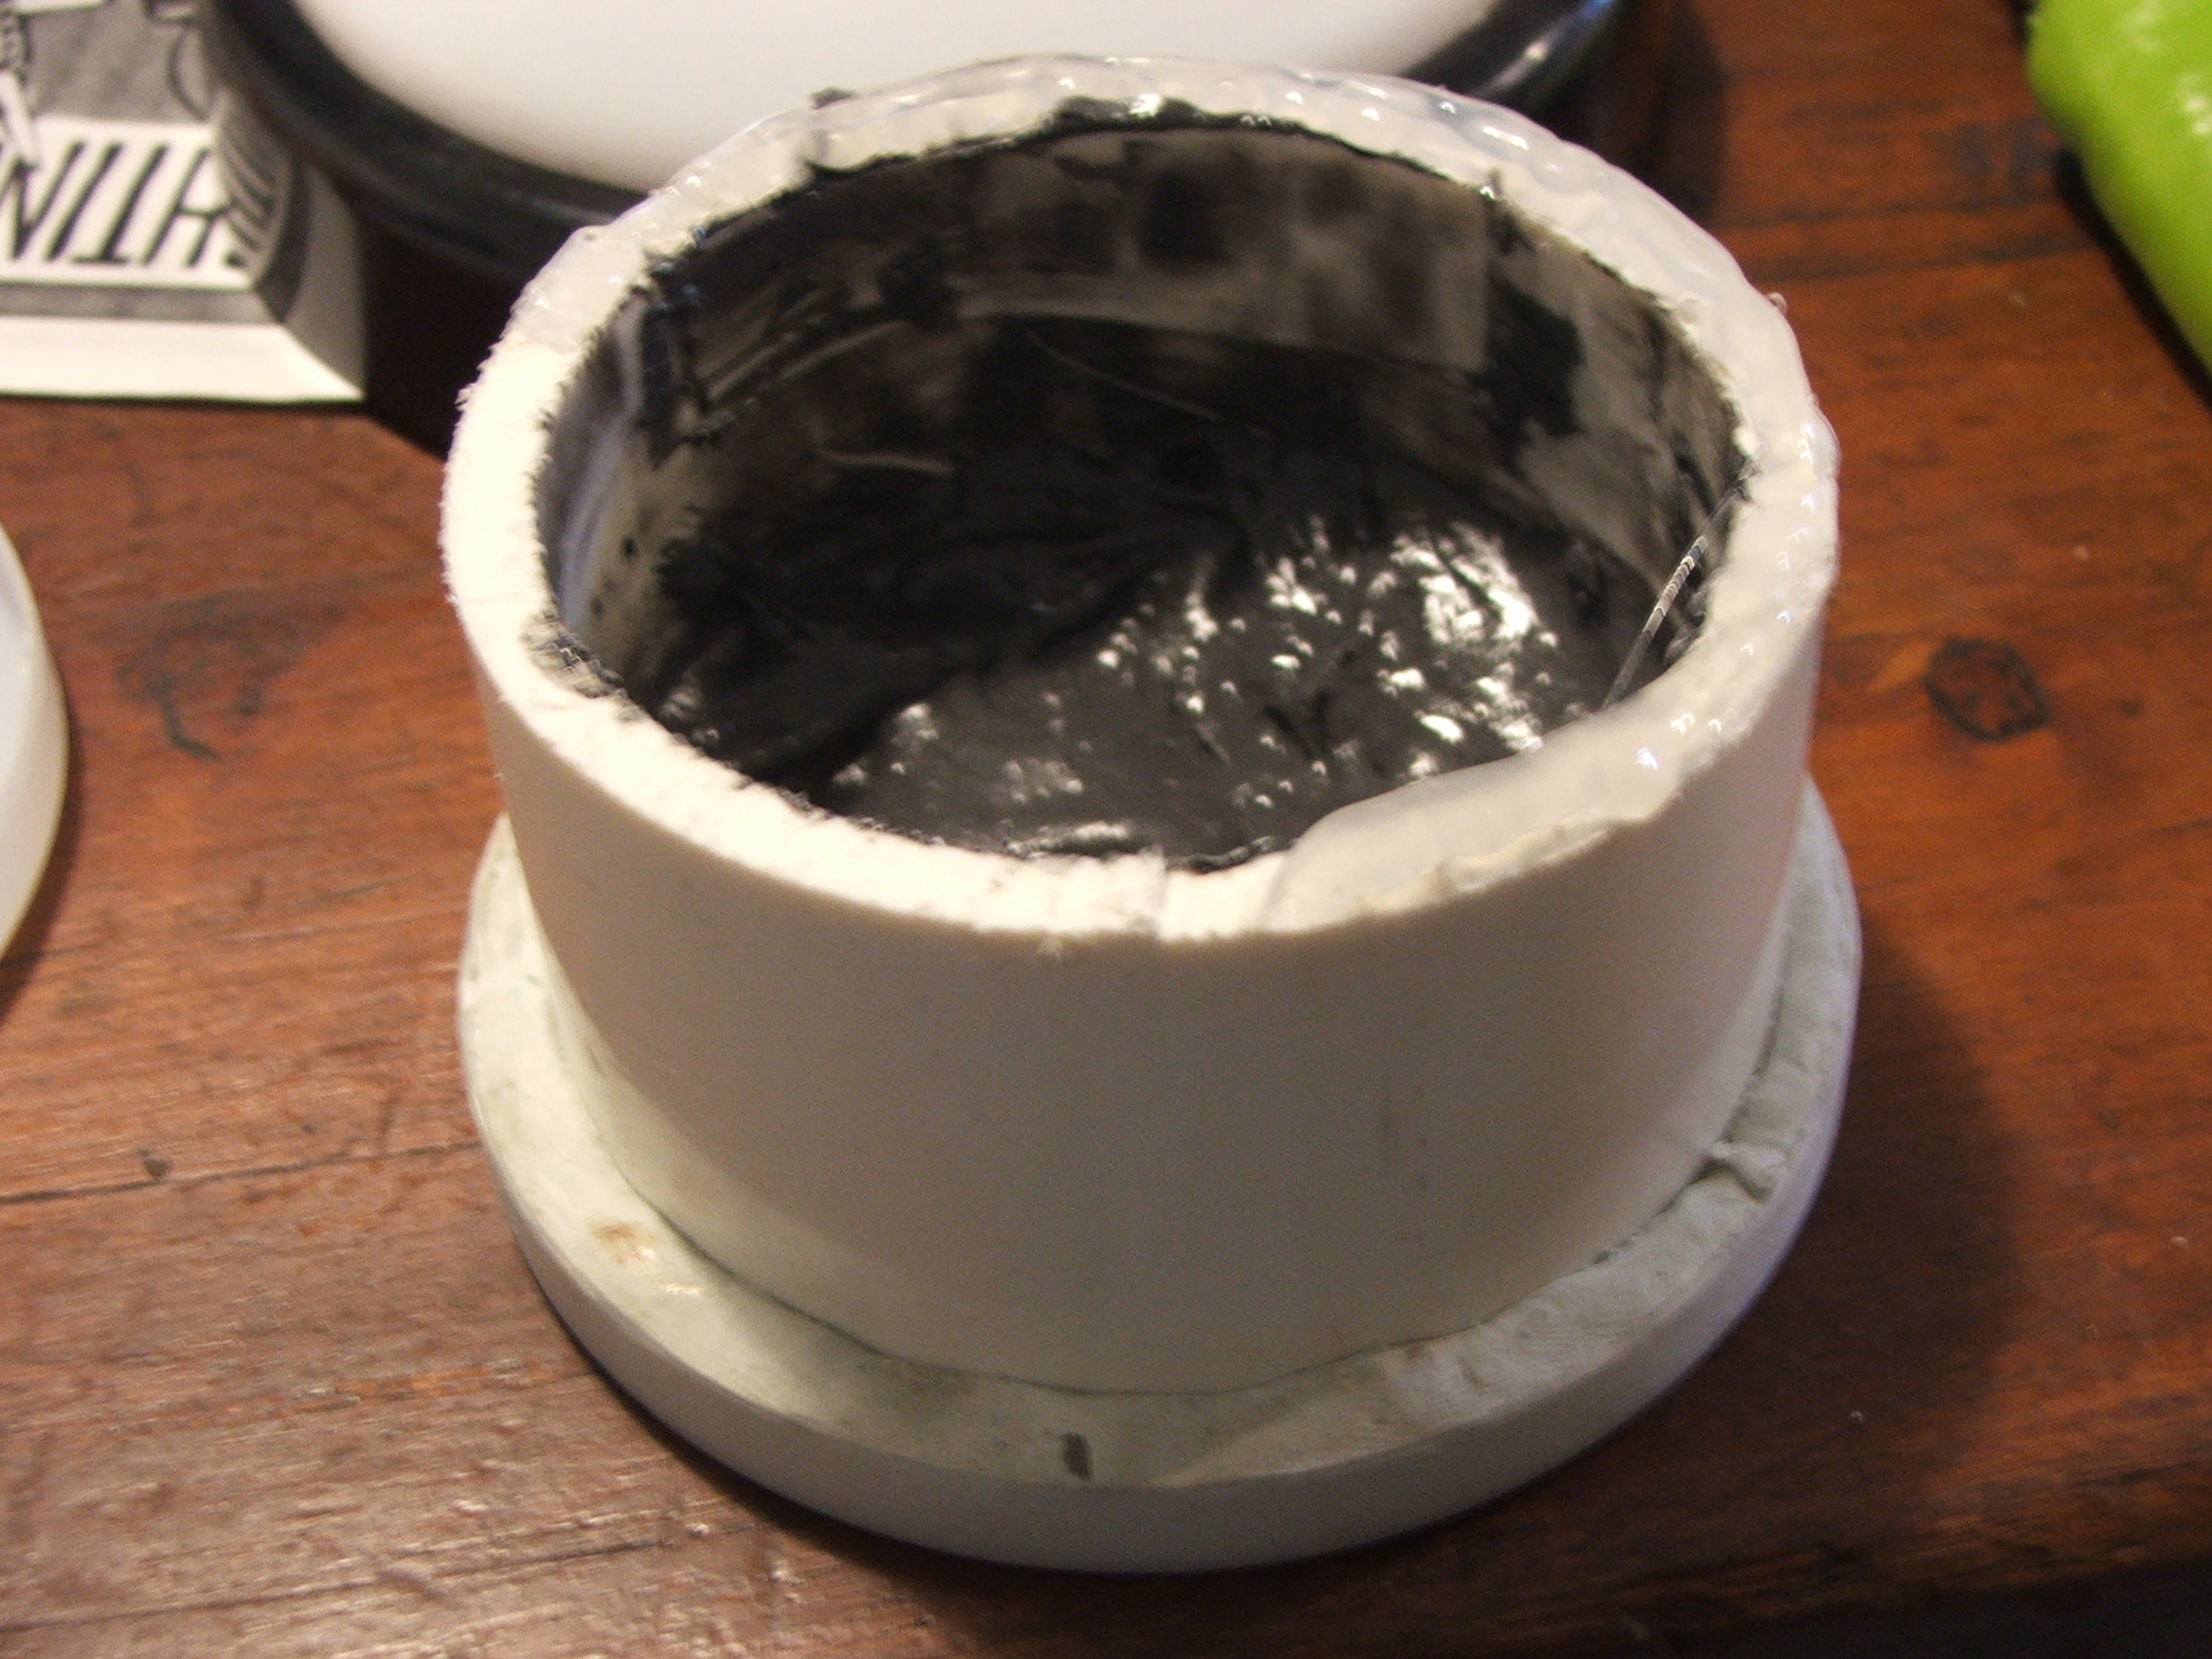

Here we will be using the test caps. These test caps are a thin PVC that will fit inside of the PVC pipe of our chamber. But they have a edge in the way so use a exacto knife or sharp pair of scissors and remove this edge.
After removing the edge we need to use the epoxy to attach the section of the three inch PVC, make sure the section was cut strait. Now mix a small amount of the epoxy and coat the inside of the test cap and center the PVC section, Now while it is drying mix a larger batch of epoxy and add a quater inch(or to the heighth of the rim of the test cap) inside the pipe section and between the pipe and the cap rim; and let dry.
Once dry repeat the process with the other cap expect for only adding epoxy in the space between the pipe and the cap.
Once all the epoxy is dry, glue on your sealing material I used a 4" circle of a old mouse pad to the side of the piston that has the epoxy inside the pipe.(this side will face the barrel)
(any material can be used for the sealing material as long as it is somewhat thick and rubber or rubber like)
The final step for the piston is to drill one or two small holes(no greater than 1/8") in the sections of the test caps that overlap the pipe section, this will allow the air to flow through and pressurize the other side of the chamber.
Final Assembly
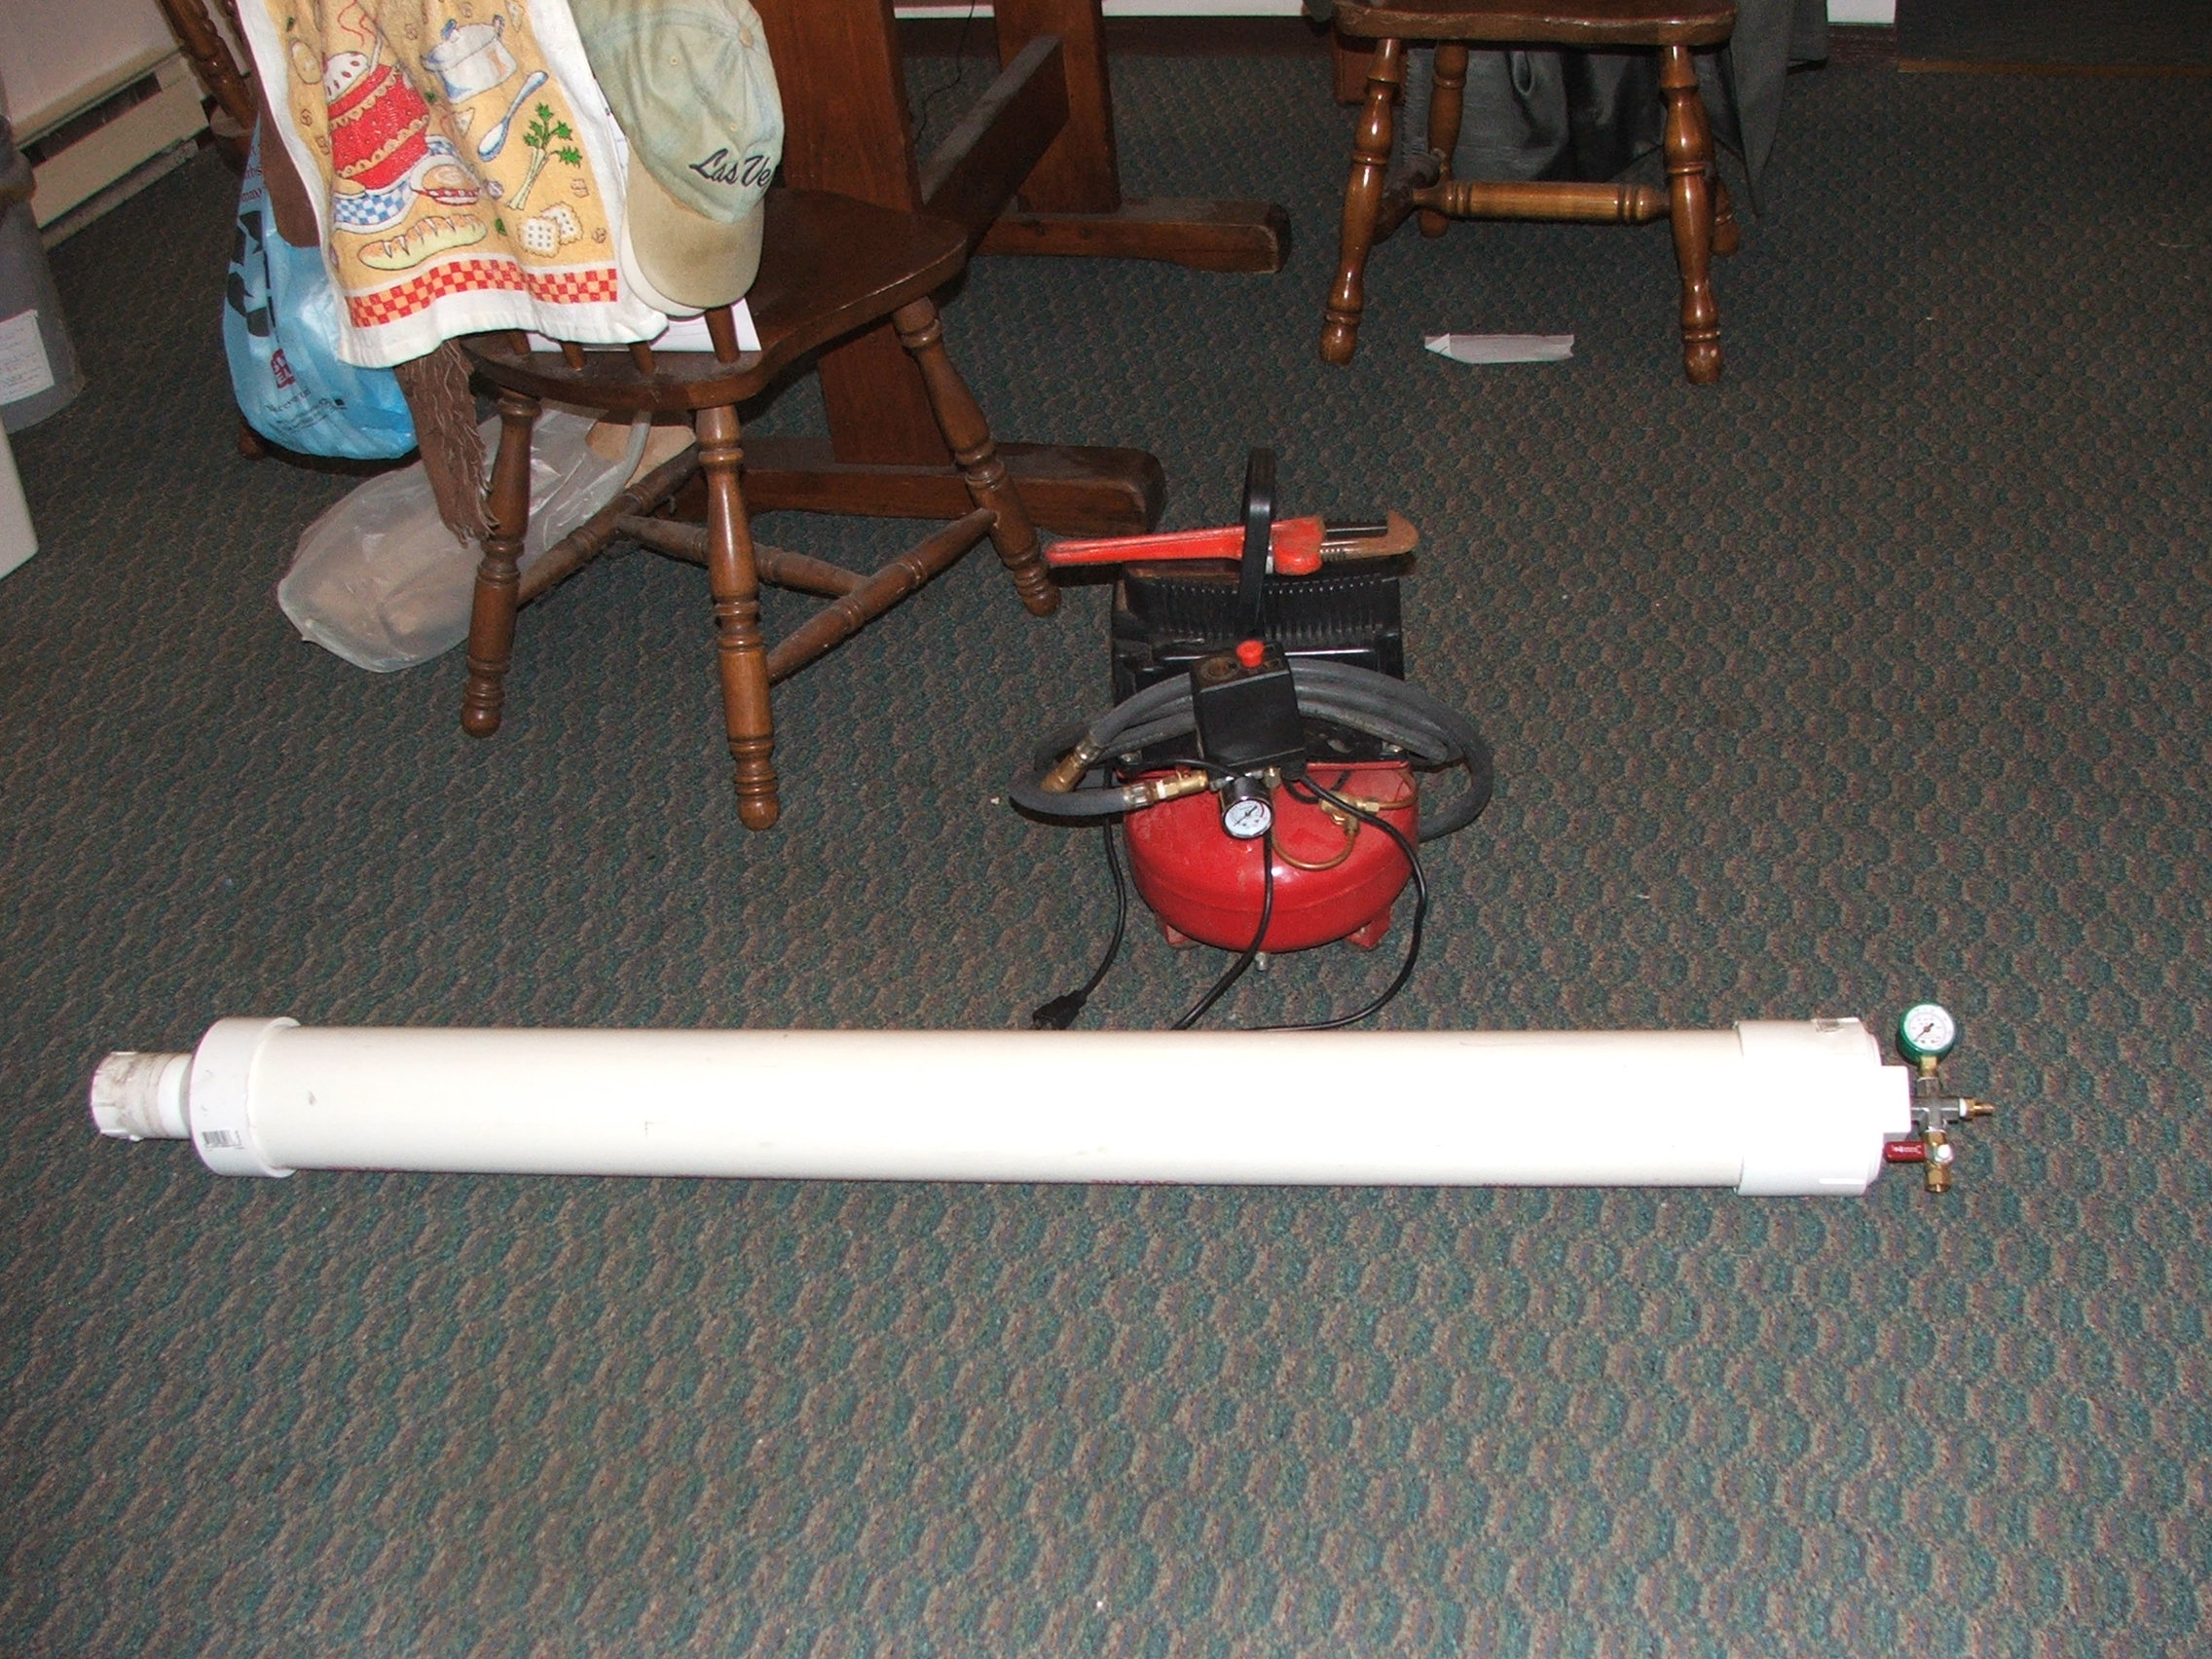
This the final step before firing, is assembly, put the piston into the rear of the chamber and if there is to much friction to move the piston easliy add some light oil.
Now rap the threads in the cleanout cap in teflon tape and thread in and tighten the cleanout cap. Now to test, attach the hose from your compressor to the shrader valve and set the compressors regulator to 25psi if you dont hear a soft 'thump' noise slowly increase the psi to 50psi if you still dont hear it, unscrew the cap and remove the piston and sand the edges of the cap slightly, re-oil and repeat the previous steps, if it still dont hear is sand the inside edges of the pipe. And repeat till the piston moves and seals between 25-50psi. Now set the regulator on your compressor to 100psi and set the spudgun pressurizing and leave the area for a few minutes, if you hear any air escaping you should look at your seals you may have to coat the joints with more cement to fully seal them. If you joints and seals dont leak your spudgun with care will last you a long time.
Now rap the threads in the cleanout cap in teflon tape and thread in and tighten the cleanout cap. Now to test, attach the hose from your compressor to the shrader valve and set the compressors regulator to 25psi if you dont hear a soft 'thump' noise slowly increase the psi to 50psi if you still dont hear it, unscrew the cap and remove the piston and sand the edges of the cap slightly, re-oil and repeat the previous steps, if it still dont hear is sand the inside edges of the pipe. And repeat till the piston moves and seals between 25-50psi. Now set the regulator on your compressor to 100psi and set the spudgun pressurizing and leave the area for a few minutes, if you hear any air escaping you should look at your seals you may have to coat the joints with more cement to fully seal them. If you joints and seals dont leak your spudgun with care will last you a long time.
Firing!
Firing, the last step and the one you have been waiting for. First we start slow, around 50psi, we attach the air hose from our compressor to the shrader valve and pressurize the spudgun, Now we need to aim and then release the vent valve, the air behind the piston will vent releasing the piston and firing our golfball gun. Remember to check you firing range for items or people that can be damaged or injured before firing.