A Christmas Village Drive-In Theater
by Bobs_Creations in Workshop > 3D Printing
2414 Views, 13 Favorites, 0 Comments
A Christmas Village Drive-In Theater
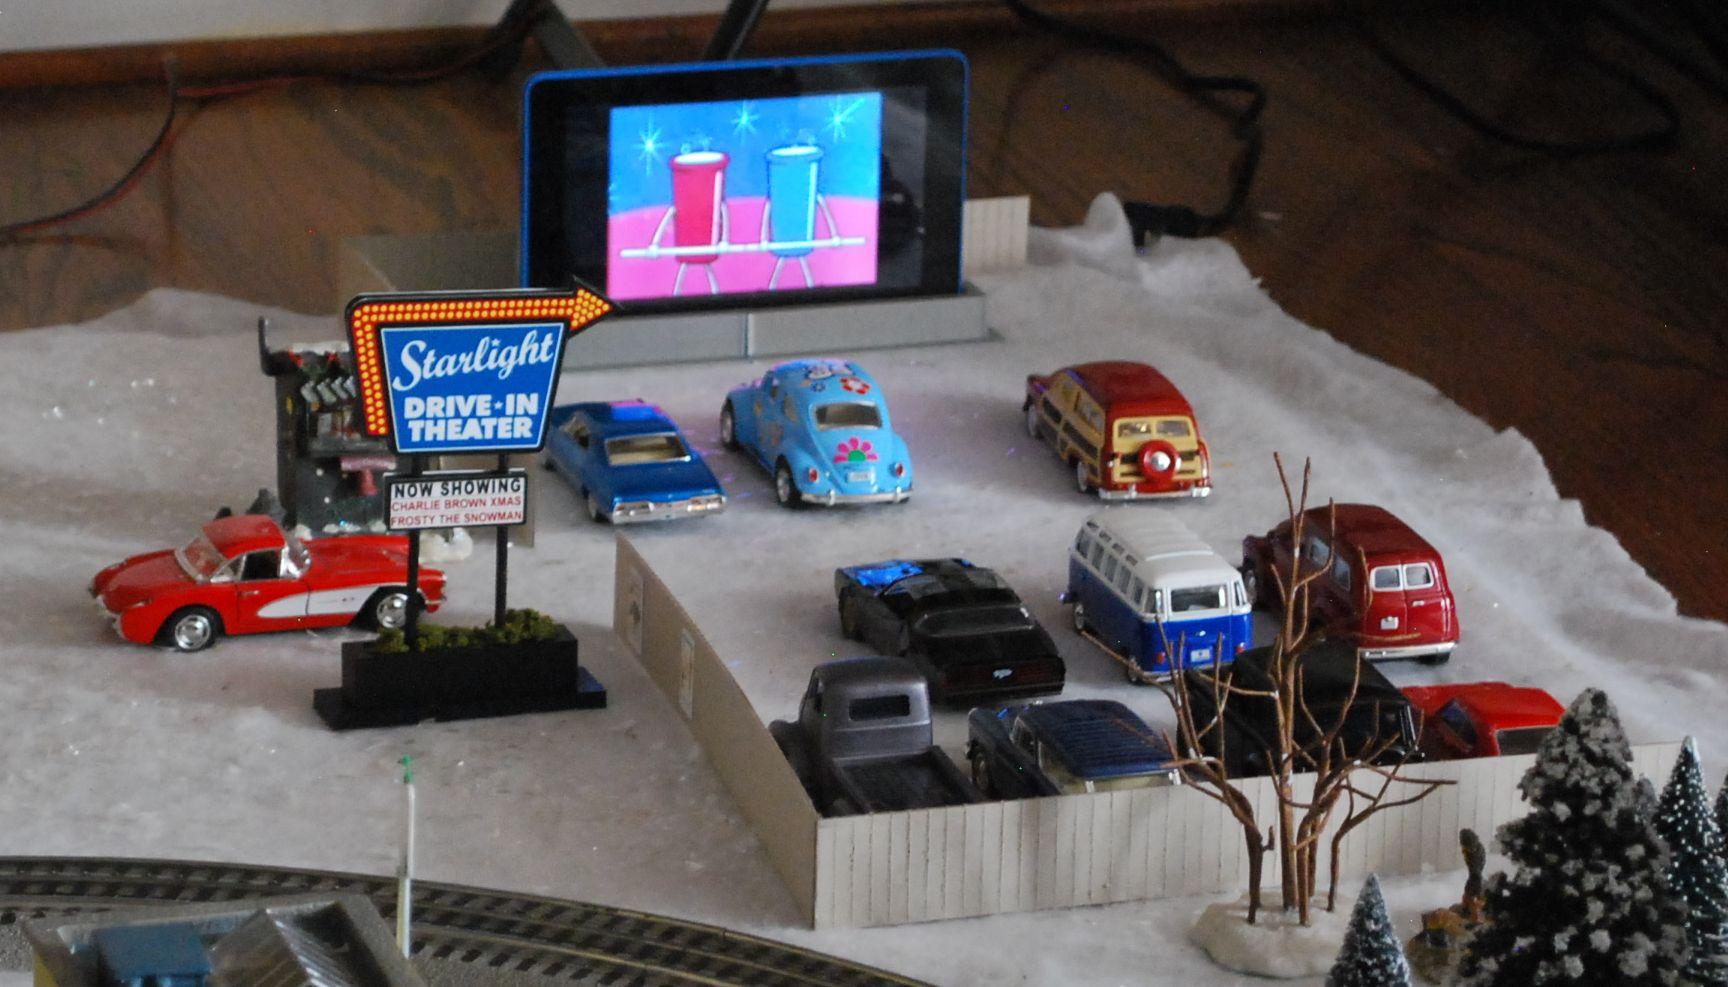
Every year at Christmas we set up our Christmas Village under the tree, and over time it has gotten larger and larger. This year we decided to create our village as a 1960s-70s small town, and what better symbol of that time period than a drive-in theater.
This project actually involves 4 separate smaller projects:
- A 3D printed stand for the Kindle (our movie screen)
- Creating the Drive-In movie clips to play on the Kindle
- Fencing surrounding the Drive-in
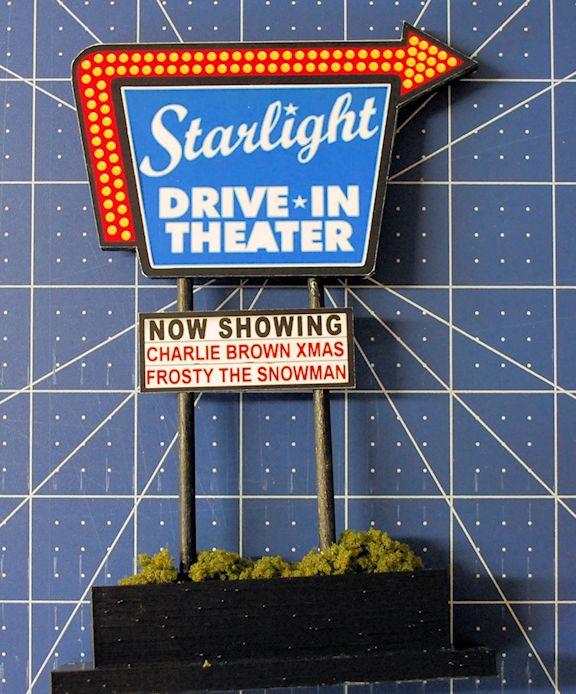
- A Drive-in theater sign and marquee
We will go over each of these in this Instructable.
Supplies
Materials used in this project
- Chipboard (1.5mm thick)
- Foam board
- 1/8-inch dowel
- PLA filament (black and silver)
- Photopaper
- Cardstock
- Model railroad shrubs
- Modeling clay (black)
- Kindle tablet
Supplies
- Fabri-Tac glue
- Hot glue gun
- White glue
- Black paint marker
Equipment & Tools
- 3D printer
- Hobby knife
- Metal scribe
- Hot glue gun
- Cutting mat
- Straight edge
The Drive-in Theater Sign
For this part of the project you will need the following:
- Foam board
- 1/8-inch dowel
- Photo paper
- Regular printing paper for test prints
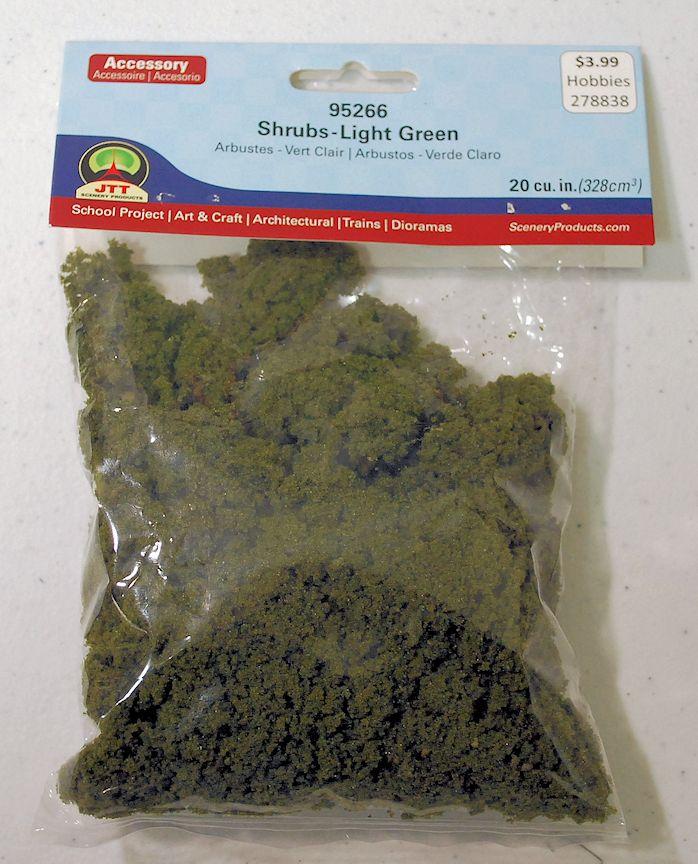
- Model train shrubs
- Black filament
- Modeling clay
The following tools and supplies are used:
- 3D printer
- Color printer
- Black paint pen
- Hobby knife
- Fabri-Tac
- White glue
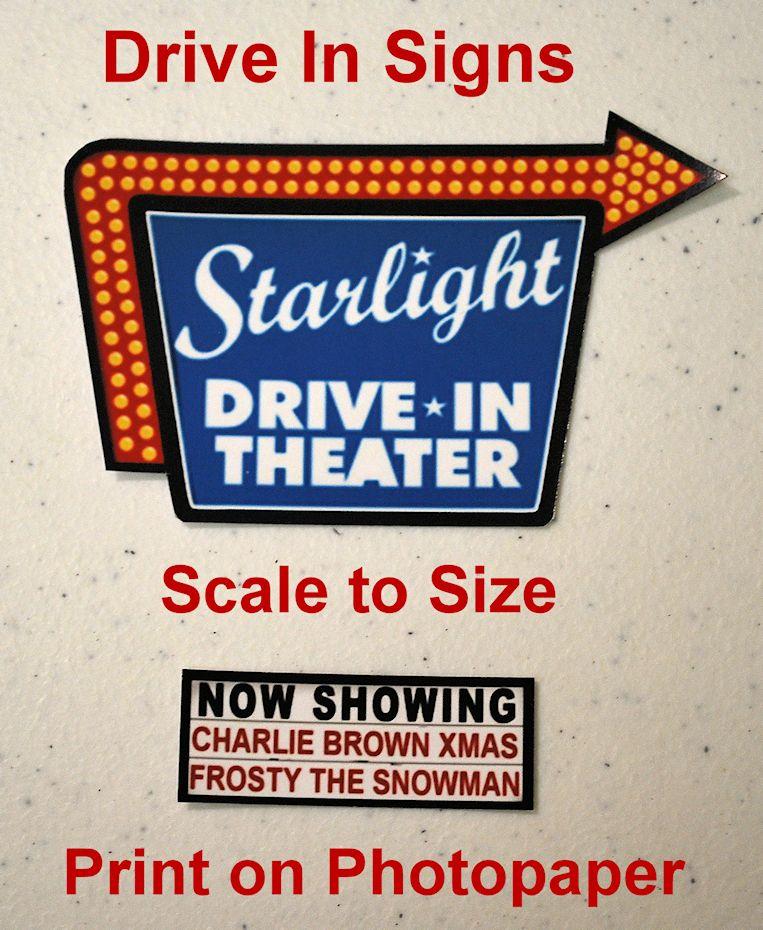
Making the Sign Graphics
We'll start with the Drive-In Theater sign construction.
- Start by doing a Google/Duck-Duck-Go image search for drive-in theater signs. Find one you like that has a good resolution for printing. Our final sign ended up at 1000 x 1500 at 72 dpi that was printed on 8.5 x 11-inch paper. This included both sides of the main sign and the marquee.
- If your sign has an arrow, you may need to create a mirror image to have it read properly from either side.
- The marquee was simply a box. Mix red and black letters to give it a realistic look (look at pictures of the old drive in marquees). Our main features were going to be "A Charlie Brown Christmas" and "Frosty". More on this when we talk about making the movie screen.
- Once you have the sign and marquee graphics, print out a test copy on regular paper. Make sure the size is right for your layout. Adjust and reprint test copies as needed. Do at least one test print in color to make sure the colors look right.
- Using the test copy as a guide, trace the outline of the sign on the foam board. Cut out the foam board using a sharp knife. Keep the blade at a 90-degree angle to the board. Using the test print, align the sign against the board. Make small corrections using sandpaper, while using a knife for larger corrections.
- Once the sign is the correct size, use a black paint marker to color the edges of the foam board.
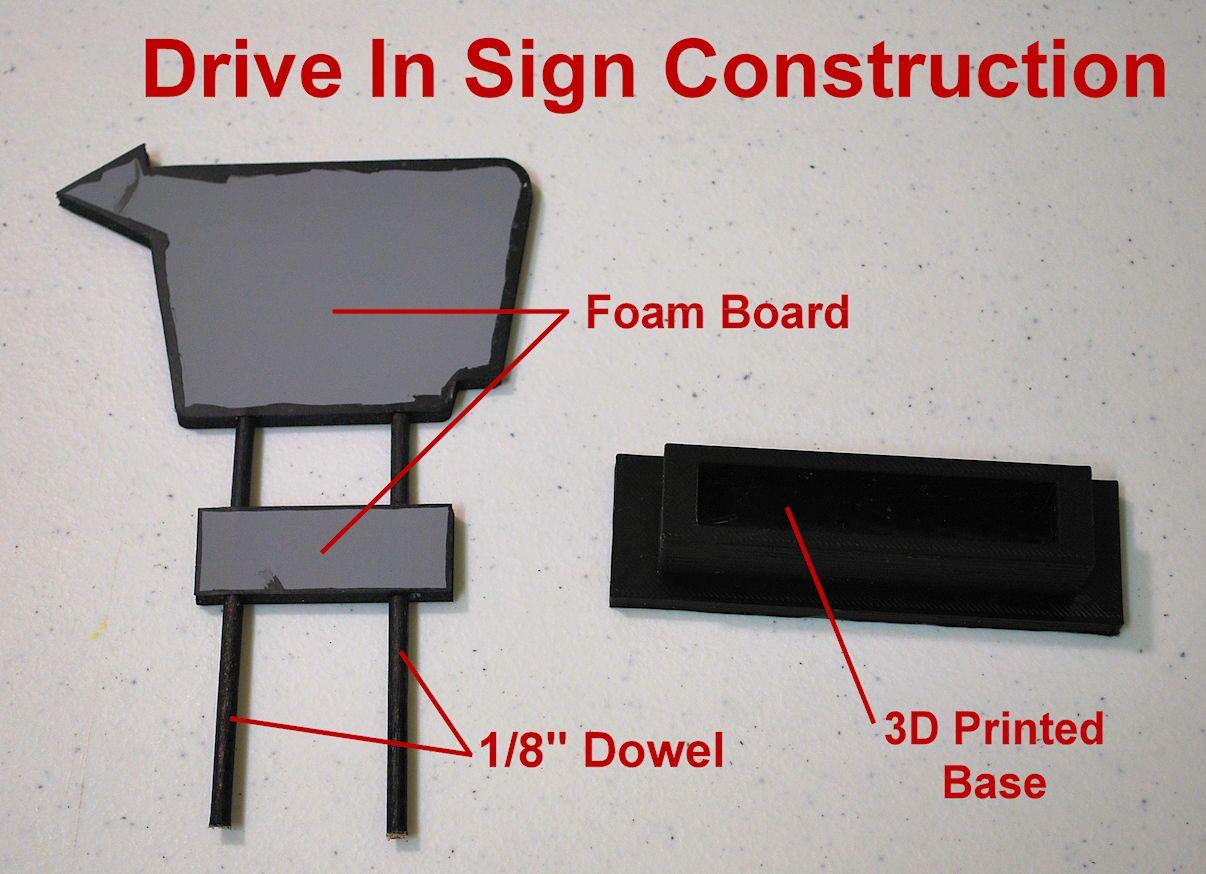
Sign Base and Posts
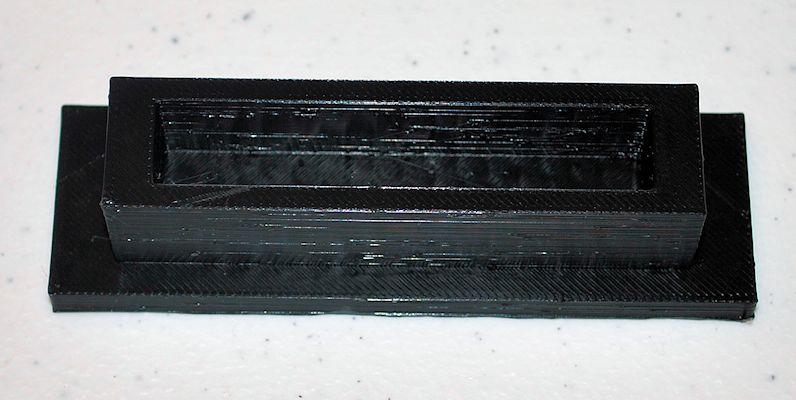
- The base of the sign is made with a 3D printer. The STL files for the base (and the movie screen) can be found at Thingiverse (https://www.thingiverse.com/thing:5155907).
- While the base is being printed, cut your 1/8-inch dowel into two 4-inch long sections. This will be longer than we need. We will cut to size when we perform the final assembly. Paint the 4-inch dowels with the black paint pen.
Downloads
Sign Assembly
- When everything has been printed, painted and cut to size, we are ready to begin assembly.
- Start by filling the base with modeling clay. This will do two things. It will add weight to the base making it less likely our sign will tip over. It will also provide an easy mounting point for our dowels.
- Take one dowel at a time and insert it all the way through the marquee. Do this for both dowels.
- Insert the tops of the dowels partially into the Drive-in Theater sign. Keep the dowels straight.
- Take the sign and place it in your layout. Determine how tall you want the sign and then cut the dowels to length.
- With clean hands, its time to glue the signs to the foam board. I use Fabri-Tac for this step. I have found that Fabri-Tac bonds well to paper (I use when constructing flying model rockets made from card stock) and it doesn't cause the bubbling or other issues often seen when using white glue. If you have a favorite adhesive for paper, use what you like best.
- With the signs glued to the frame, insert the frame into the modeling clay in the base.
- To finish out the base, apply some white glue to the top of the modeling clay and then add some of the model railroad shrubs to complete the look. This also helps cover the clay in the bottom of the base.
With the sign completed, let's move on the construction of the fence.
The Fence
Our drive-in has a fence around the outside of the property, along with some posters of upcoming movies. To create the fence you will need the following:
- Chip Board 1.5mm thick (12 x 12-inch sheet)
- White card stock
The following tools and supplies are used:
- Color printer
- Hobby knife
- Metal scribe
- Straight edge
- Fabri-Tac
- Hot glue gun
Cutting the Boards
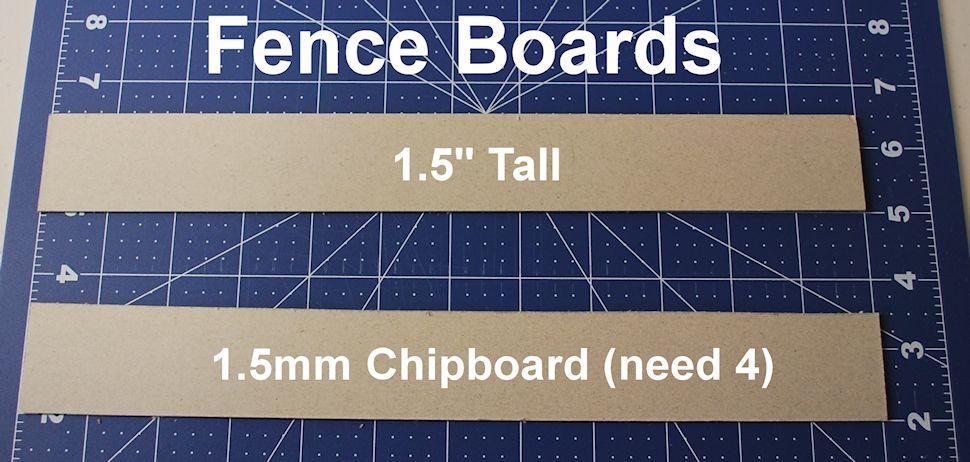
- For our layout, we determined that a height of 1.5-inches would look about right. Adjust the height to best match your layout.
- For our layout we determined that four sections of chipboard 12-inches long and1.5-inches tall would make the right size drive-in.
Making the Panel Lines
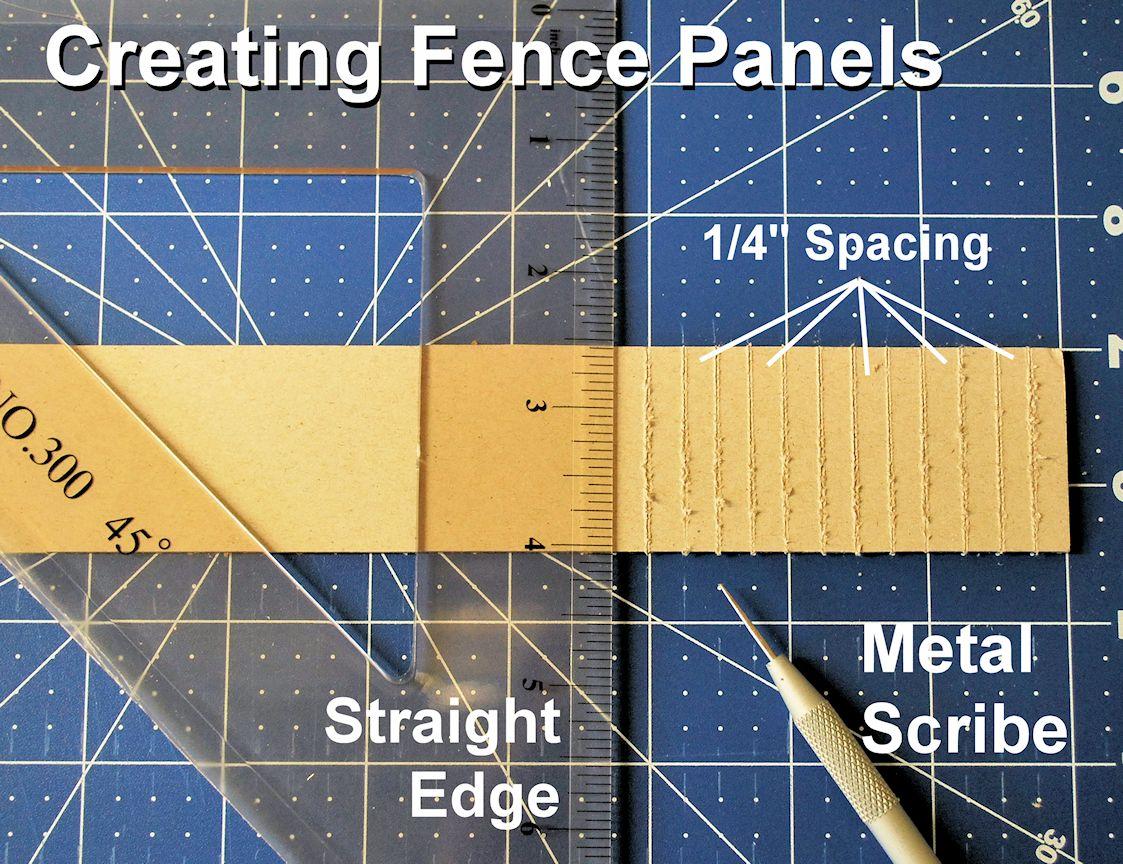
- To give the fence the appearance of boards, we used a metal scribe to create indents 1/4-inch apart.
- To help with this, we found a cutting mat with 1/4-inch markings worked great.
- Use a straight edge to keep the lines straight.
- We found it took two swipes with the scribe to get the right look. Play around with a piece of scrap chip board to get the look you want.
- We lightly brushed the shavings off, but left the roughness in each line.
- You may need to do both sides of the chip board if your fence can be seen from both sides.
- With the panels completed, we used a hot glue gun to glue the ends together.
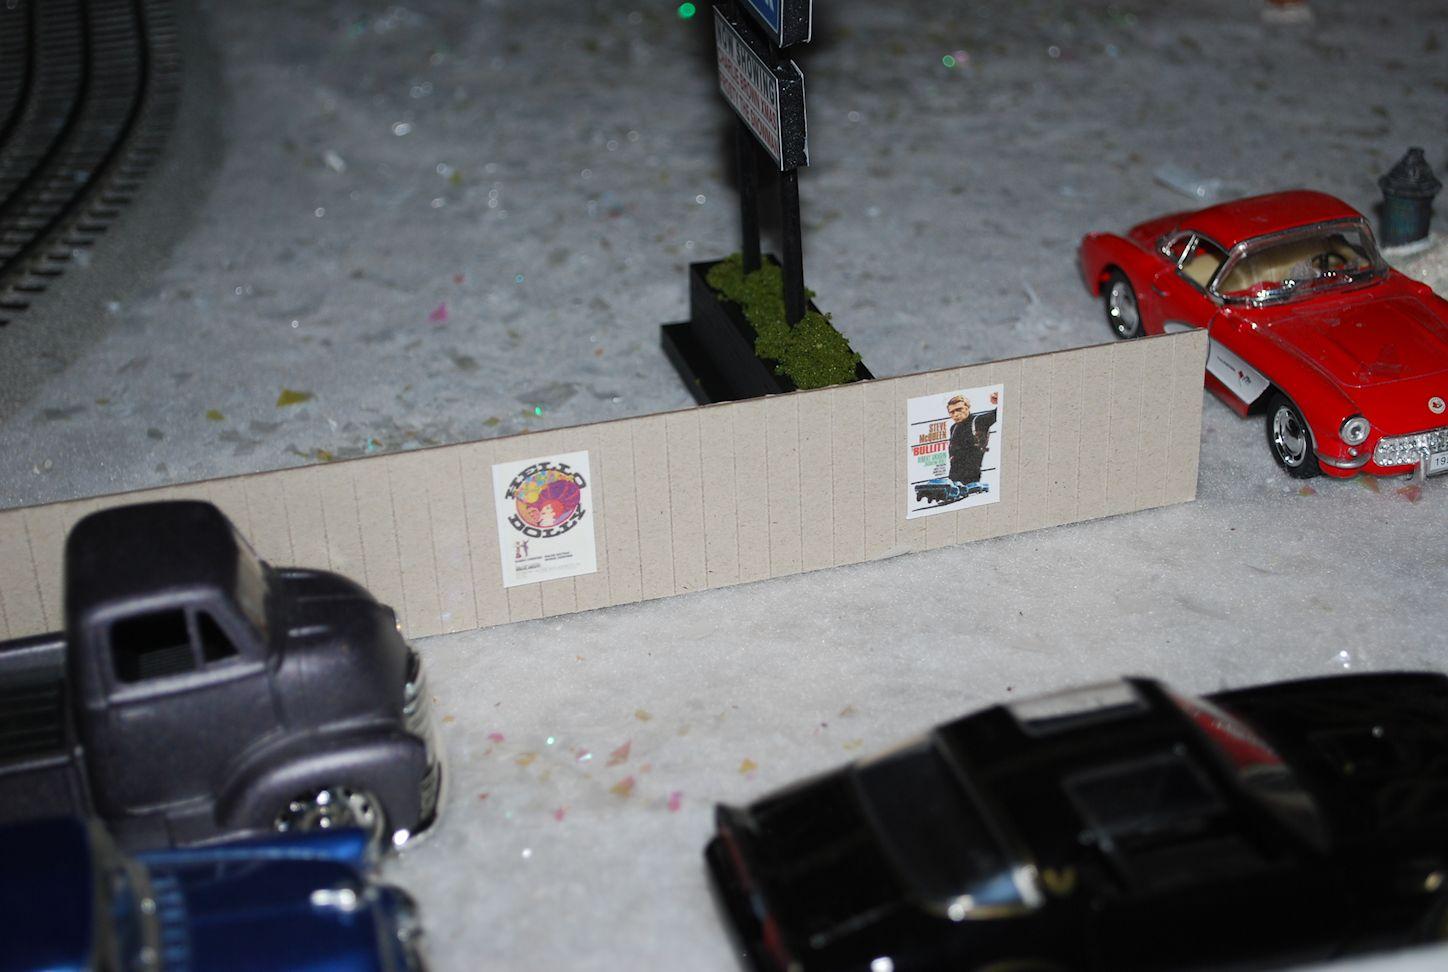
Creating the Movie Posters
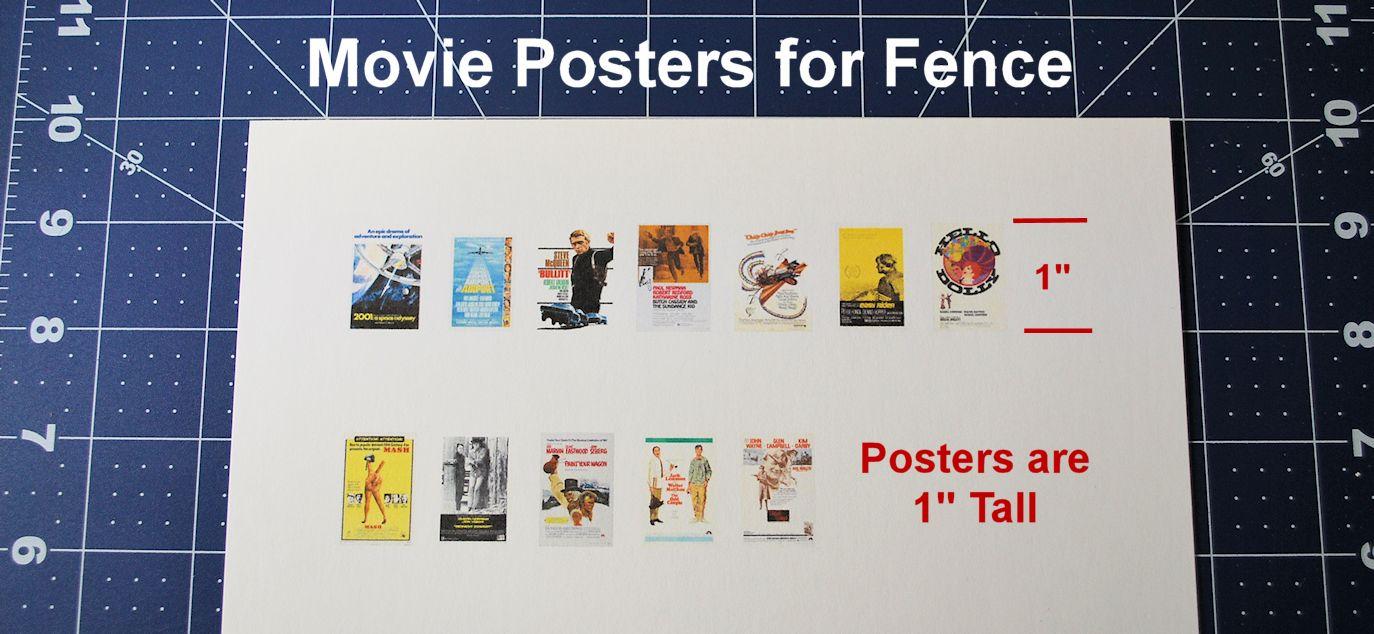
- To create the movie posters, do a Google/Duck-Duck-Go image search for movie posters. Try to find those that have big letters, bright colors, and not a lot of writing. These are going to be scaled down and we want them to be recognizable.
- All of our posters are sized to 1-inch tall. You should adjust the poster size to match your fence height and layout. They were created on a LibreOffice Writer document (you can use MS Word). Make sure you leave space around the posters for cutting them out.
- The posters were printed in color on a single sheet of card stock. Use a hobby knife and straight edge to cut them out.
- To attach them to the fence, we use a drop of Fabri-Tac (about 1/4-inch diameter) placed in the center of the poster. Press the poster to the fence, however, don't press it all the way down. We wanted them to stick up a little bit.
- You can now add the fence to the layout.
With the fence completed, lets move on to the movie screen.
The Movie Screen

The movie screen is a simple 3D print. You will need the following:
- Silver filament
The following tools are used:
- 3D printer
Printing the Stand
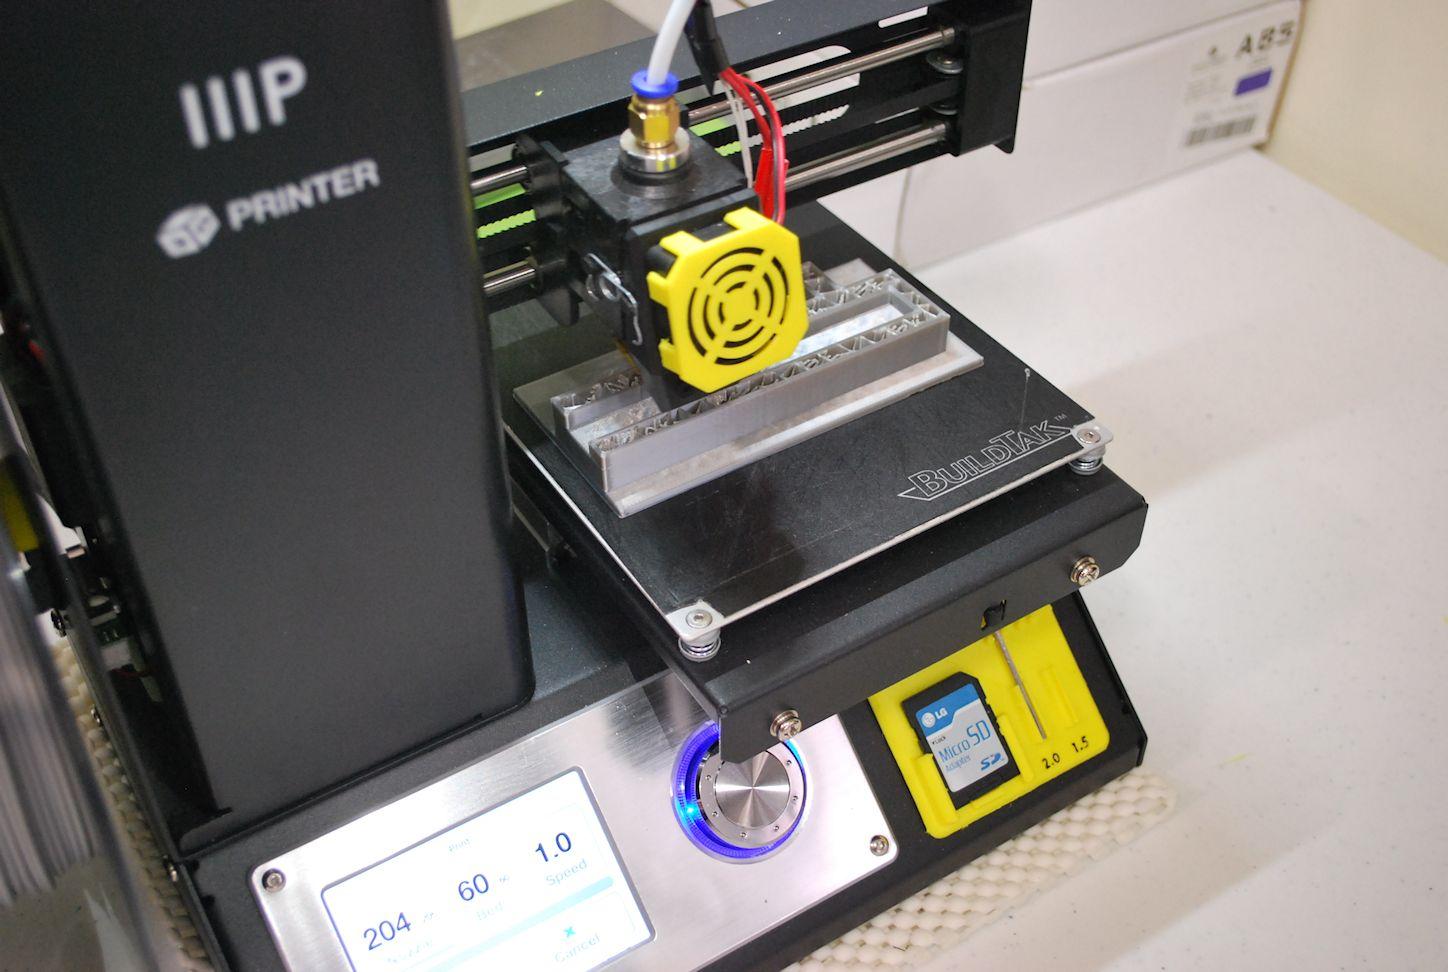
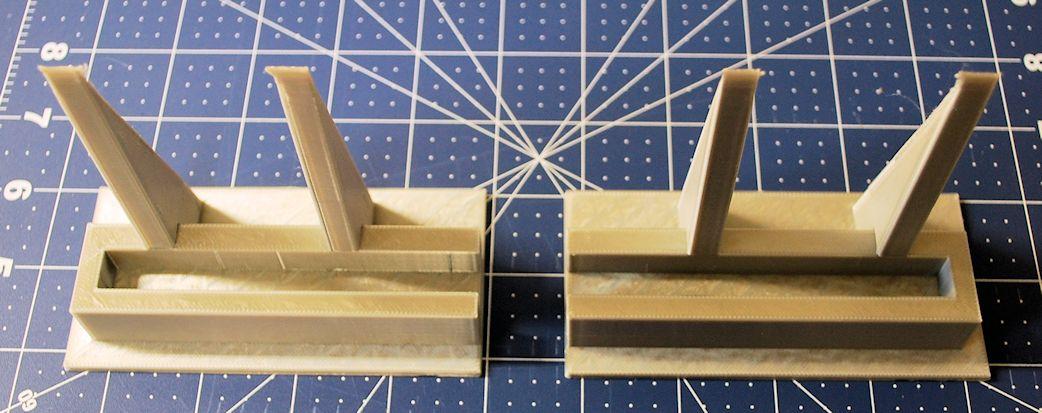
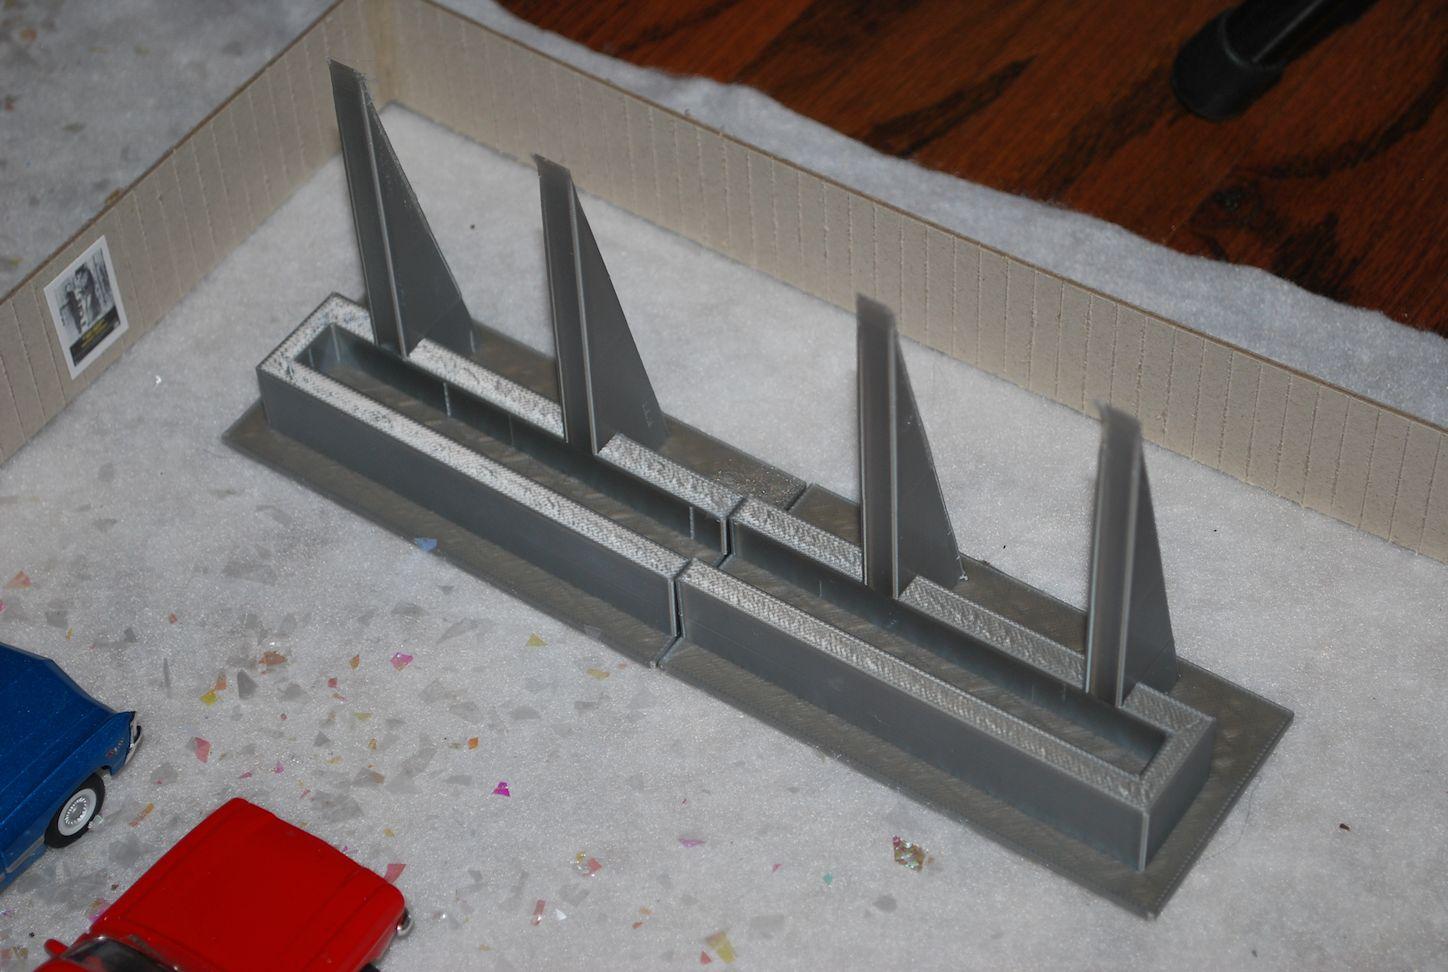
- The STL files for the movie stand can be found at Thingiverse (https://www.thingiverse.com/thing:5155907)
- We are using a MonoPrice Select Mini which has a small print bed, only 120mm square. For this reason you will find a left and right base. If your printer has a larger print bed, you can combine the two files into a single base.
- We used silver filament for the base.
- When the stand is done printing, place the two pieces together and insert your Kindle (or other suitable tablet) into the slot at the base of the stand.
With all the construction completed, let's put a movie night together.
Movie Night
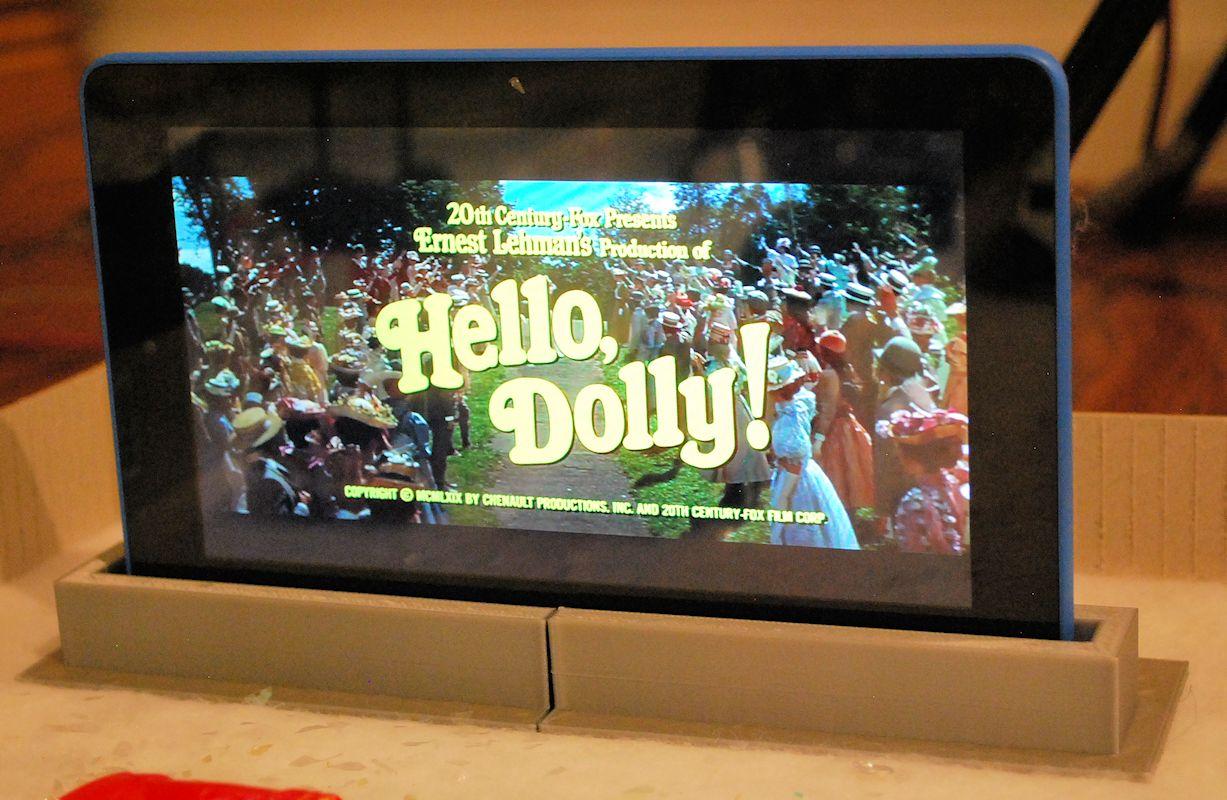
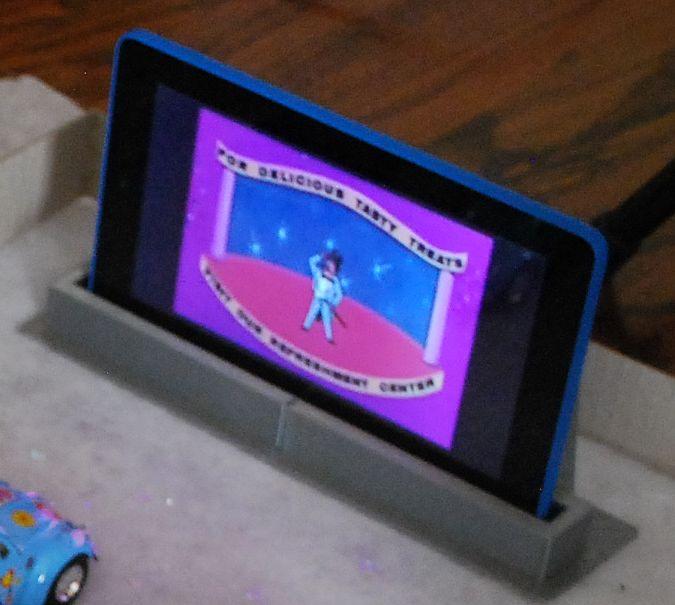
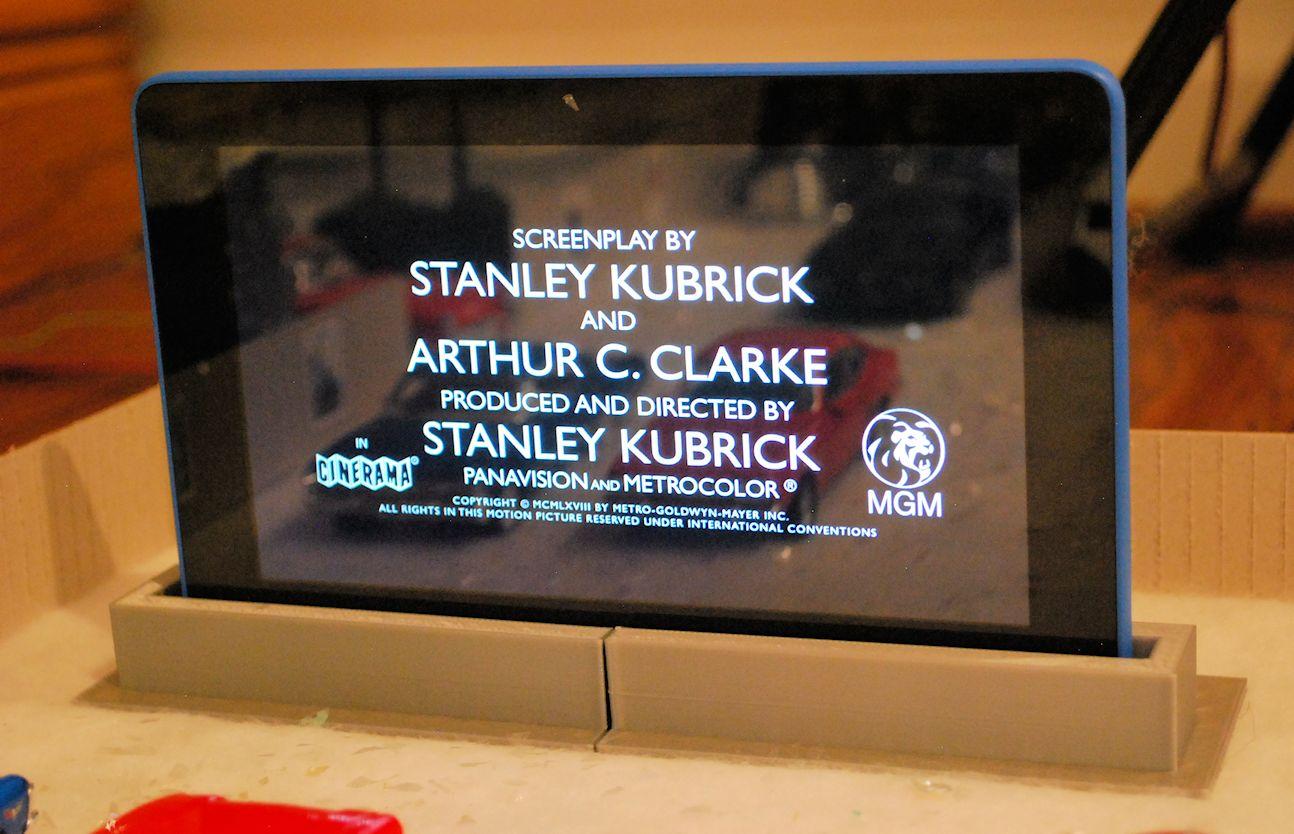
We wanted the look and feel of a real movie night and the Kindle was the perfect size movie screen for our layout. The next step was to get the movies onto the screen. This time we used YouTube to search and download movie trailers and intermission films from 1968-1969. We also wanted to show "A Charlie Brown Christmas" and "Frosty" as our feature attractions. All of these were transferred to the Kindle's SD card.
Next we installed the VLC movie player that is available for free in the Amazon store. It has a playlist feature which allowed us to place the various videos in the order we wanted. Our playlist looks like this:
- Intermission film 1
- Trailer: 2001 A Space Odyssey
- Trailer: Hello Dolly
- Trailer: Bullitt
- "Our Feature Presentation" clip
- A Charlie Brown Christmas
- Intermission film 2
- Trailer: The Odd Couple
- Trailer: True Grit
- Trailer: Paint Your Wagon
- "Our Feature Presentation" clip
The folks who have come by the house to see the layout all comment on the intermission clips and trailers the most.
The last thing you need to do is place some period correct cars in the lot. It is a Drive-In Theater after all!
Conclusion
Hope you found this Instructable enjoyable. We found it fun to make, and even more fun to watch the reaction of the folks who stop by to view the village.