A Cardboard Polaroid Camera: Webcam Holder
by siennaolen in Craft > Cardboard
944 Views, 3 Favorites, 0 Comments
A Cardboard Polaroid Camera: Webcam Holder


Ever since a national pandemic occurred many instances happened where meetings, school, and even get-togethers happened through online platforms such as zoom. This new form of social interaction and communication would sometimes require a face to be present. That's where a webcam comes to play, but sometimes a plain old webcam is not enough. So, why not make it look cool for cheap? This polaroid "camera" is the perfect place to store something such as a camera. I created this camera to add something new to my room that allowed for a more artistic viewpoint. The best part is that this project uses items that are fairly easy to come by and cheap. I hope you enjoy creating this cardboard polaroid camera, let me know how it goes!
Supplies
-Cardboard box
-Cardboard from a toilet paper roll
-A hot glue gun
-Fabric
-Scissors
-Colored pencils
-Tape
-Sewing tools (includes one button)
-Paint and spray paint
-exacto knife
Plan Ahead


1) First, draw a sketch of the desired look and label the camera with the desired colors.
2) Next, think about how big you want the camera to be and write down the measurments
Time to Sew


1) Measure out a long piece of fabric (I measured mine to be 2 times the base +3)
2) Once the fabric is marked cut out the piece and then iron it to create a flat surface
3) Fold the fabric in half and keep it in place by using pins throughout the piece
4) Sew one end and the long side before stopping
5) Now that one end is left, start to push the fabric out completely flipping the piece
(This hides all the incisions made with the thread and needle)
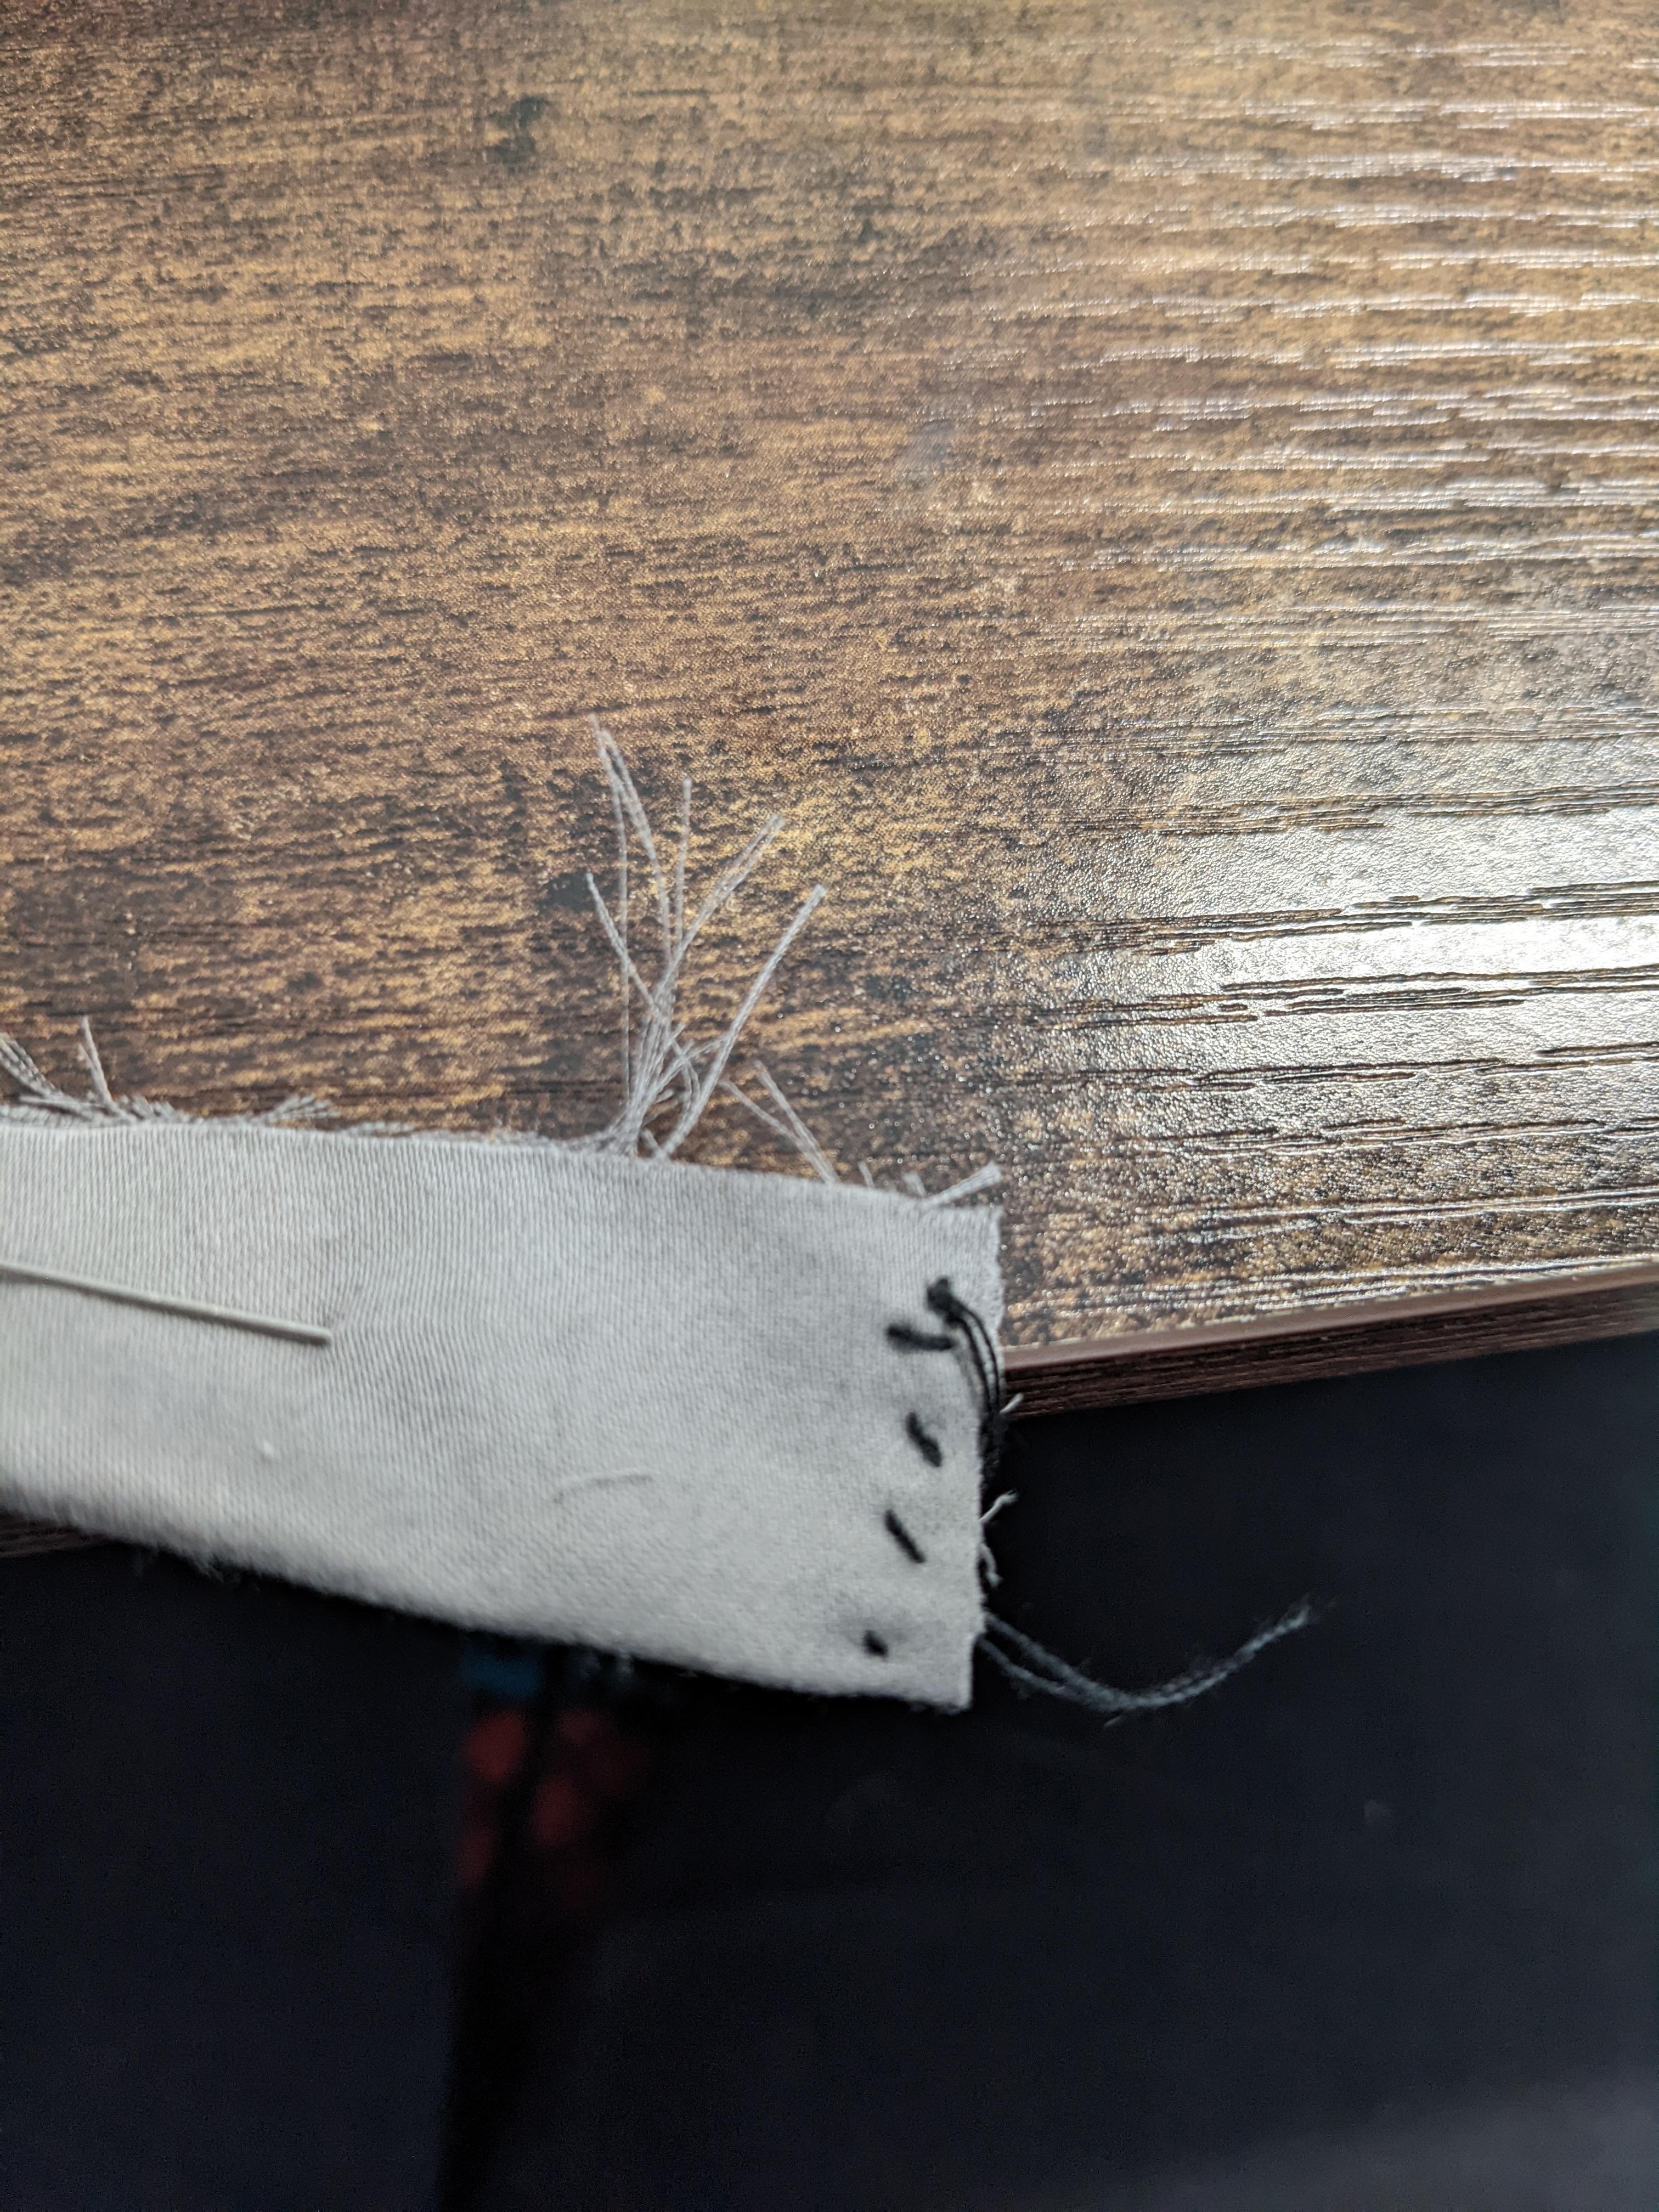
6) Once the piece is turned inside-out sew the last past together (I got the end and folded it in half to create a cleaner look which can be seen in image 8)
7) Iron the piece of fabric until flat
8) Bring both ends together and sew them with one on top of the other
9) Choose a button with your desired color and sew it ontop on the top pieces of fabric
Prepare Cardboard Pieces


1) Cut a toilet paper roll into two and keep one side
2) Cute two pieces of cardboard any size since they can be modified later but keep them near the baseline of your measurements
3) Staple the two pieces of cardboard together
4) Grab a cardboard box and cut it until 4 sides are left separate
Finalize the Shapes


1) Using the measurements from step one, cut the front side of the camera into the desired size
2) With an exact knife cut a toilet paper sized roll sized circle in the middle
3) Now, draw out the rest of the shapes made from planning and cut them with the exact knife as well
4) Add the cut toilet paper into the middle of the circle
5) Now, cut out the back piece using the same measurement as the front piece
6) Cut out a square like hole that is sure to fit your desired camera
7) Measure and cut out the other four side
Create a Shape With Glue


1) Allow a glue gun to warm up and don't begin to use it until t drips on its own (put proper protection over the table, I used cardboard)
2) Once the glue gun is ready, place glue on both sides of the front piece and attach the respective sides to it
3) Glue all the needed sides and place the bottom of the camera on top
4) The pieces of cardboard stapled together previously can now be adjusted in size and glued just below the holes
5) On the last piece of cardboard create a circle at the bottom left and clean up the shape with a paper
6) Once the glue is dried, glue the top piece to the camera
Add Some Color


1) Place tape over the glue "button" along with a line that goes straight up from the circle hole
2) Spray paint the entire box, including the inside, with a gray or metallic paint
3) Allow the paint to dry for at least 24 hours
4) Once the piece is dry, peel off the previously placed tape
5) I painted the "button" red to clearly stand out and the straight line was painted with the colors of the rainbow
6) Once this paint had dried I use a blue shimmery paint to trace the rainbow and "lens" for the polaroid
Bring in the Finishing Touches


1) CUte out a piece of aluminum foil, fold it and glue it down onto the inside of the polaroid and over the smallest square shape
2) Over the largest square shape grab a piece of plastic and glue it down
3) On the side glue the previously made cloth
Create the "image"

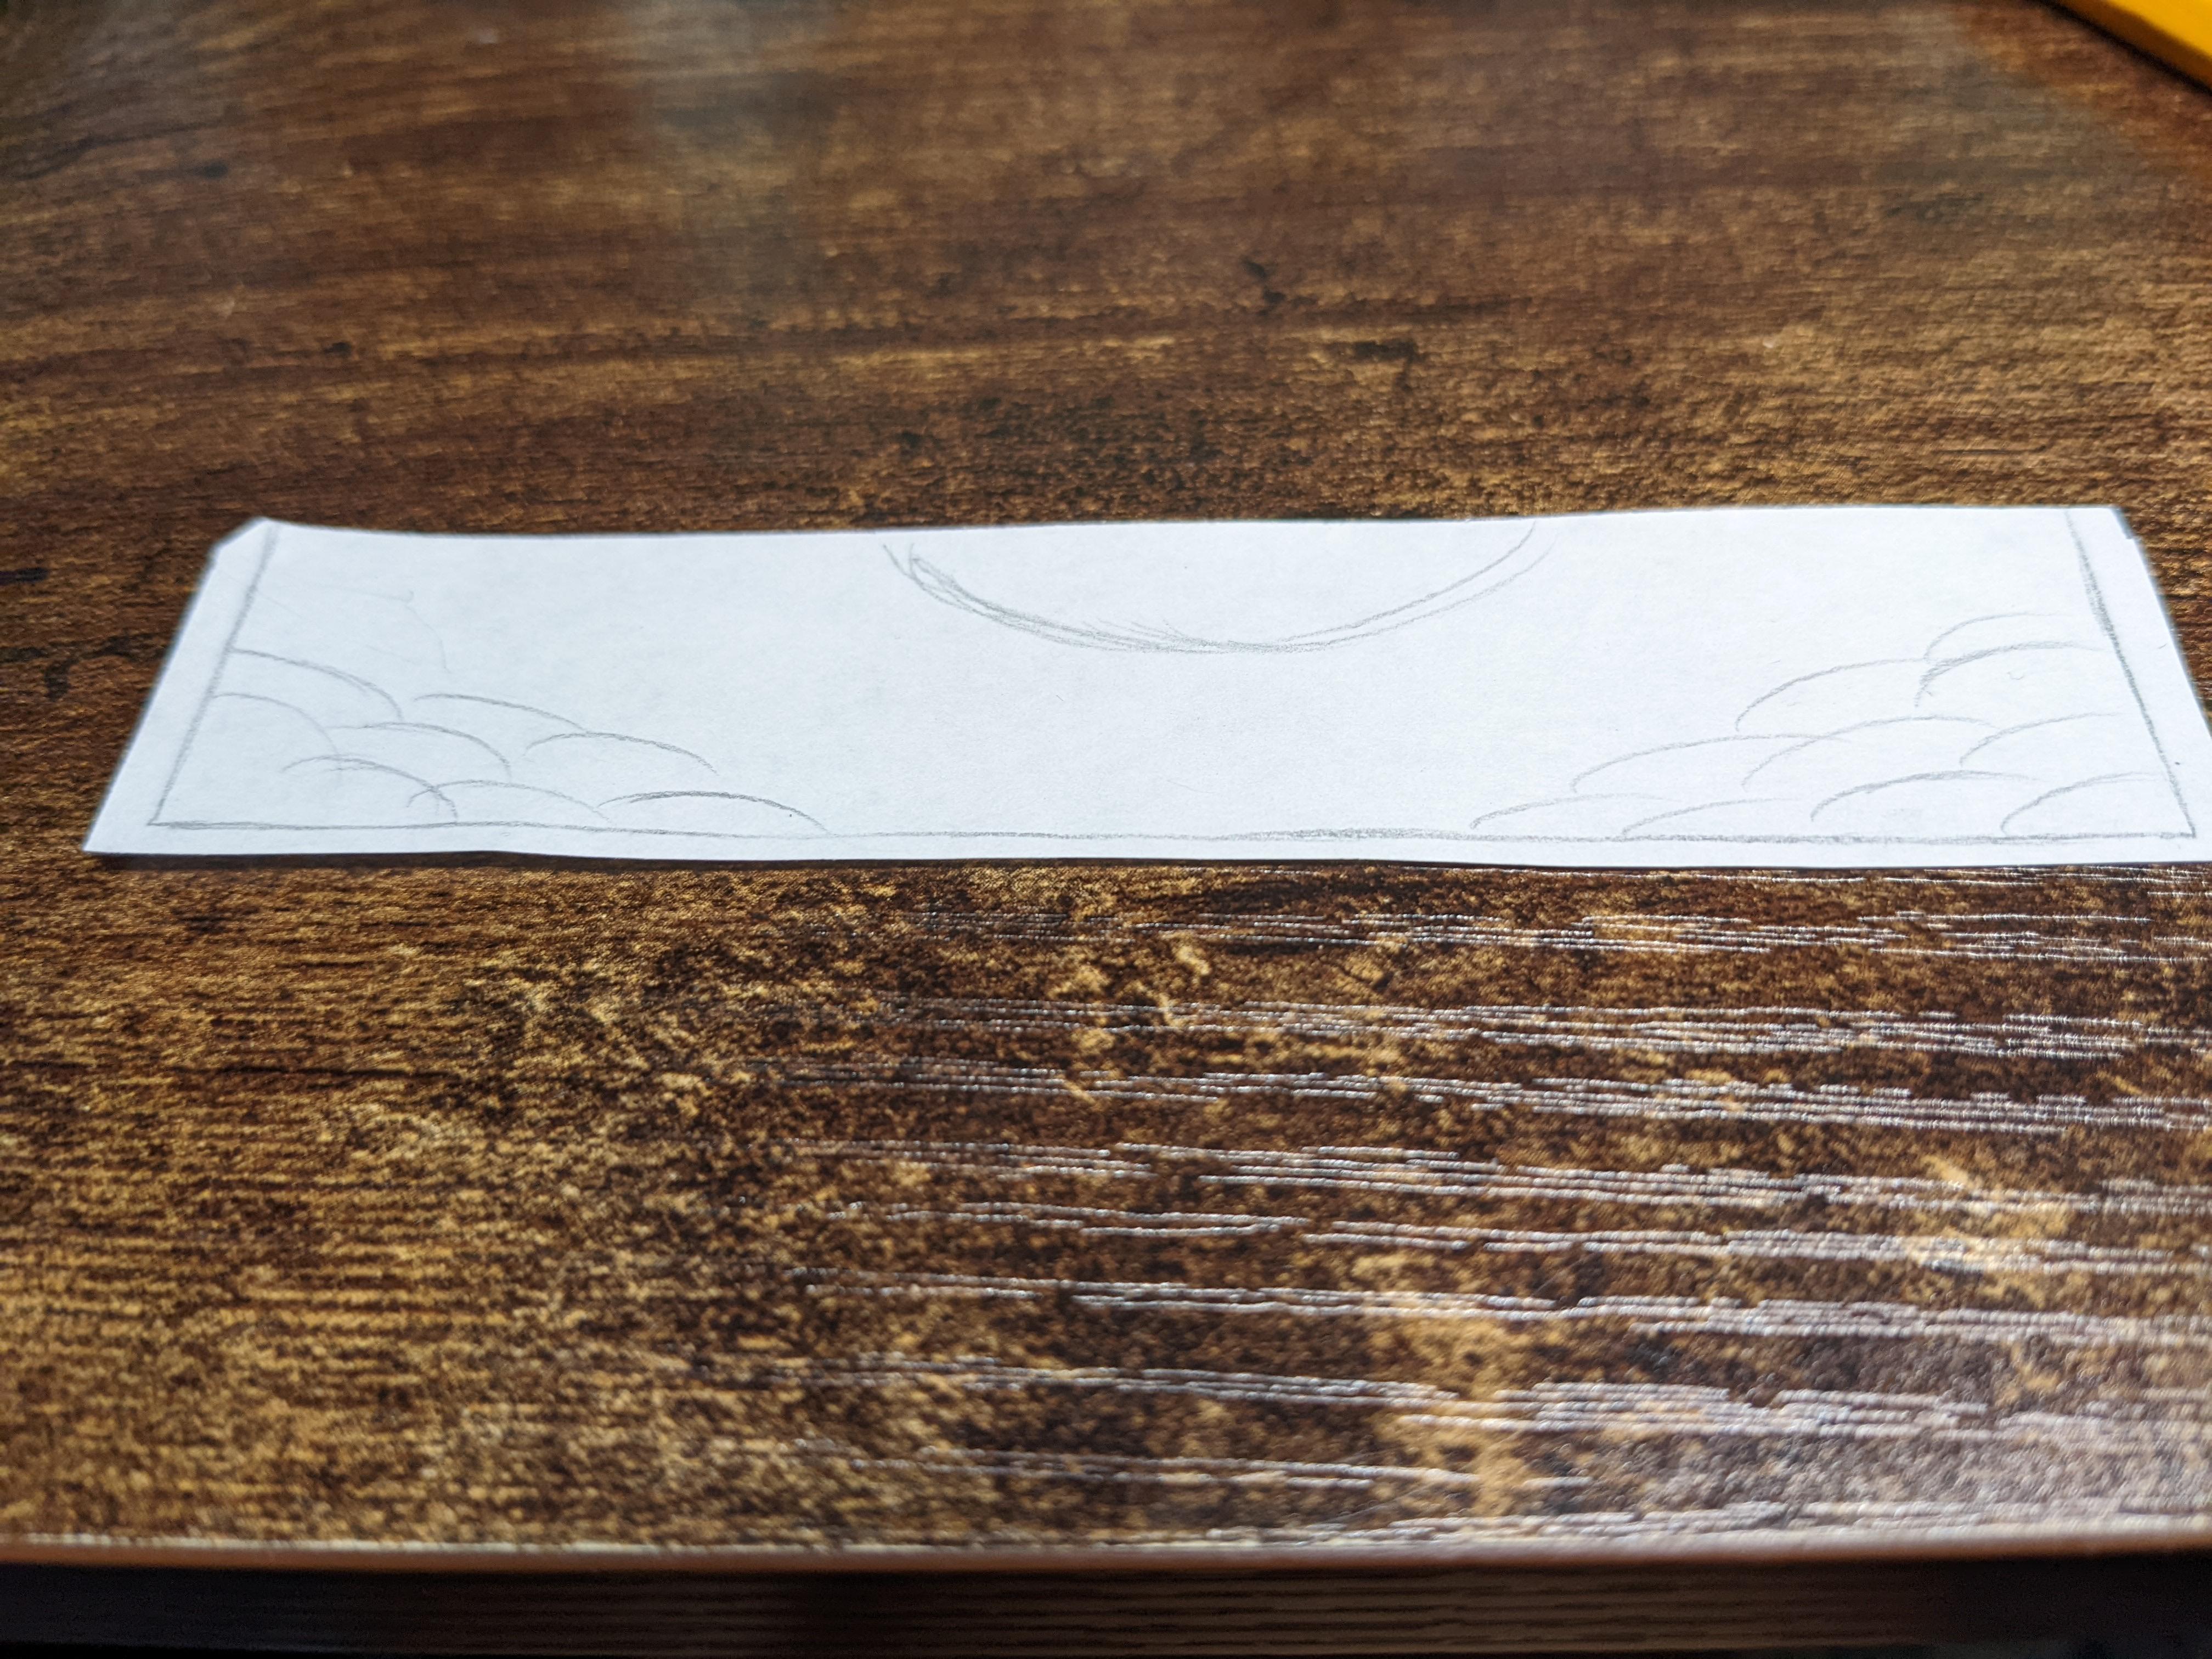
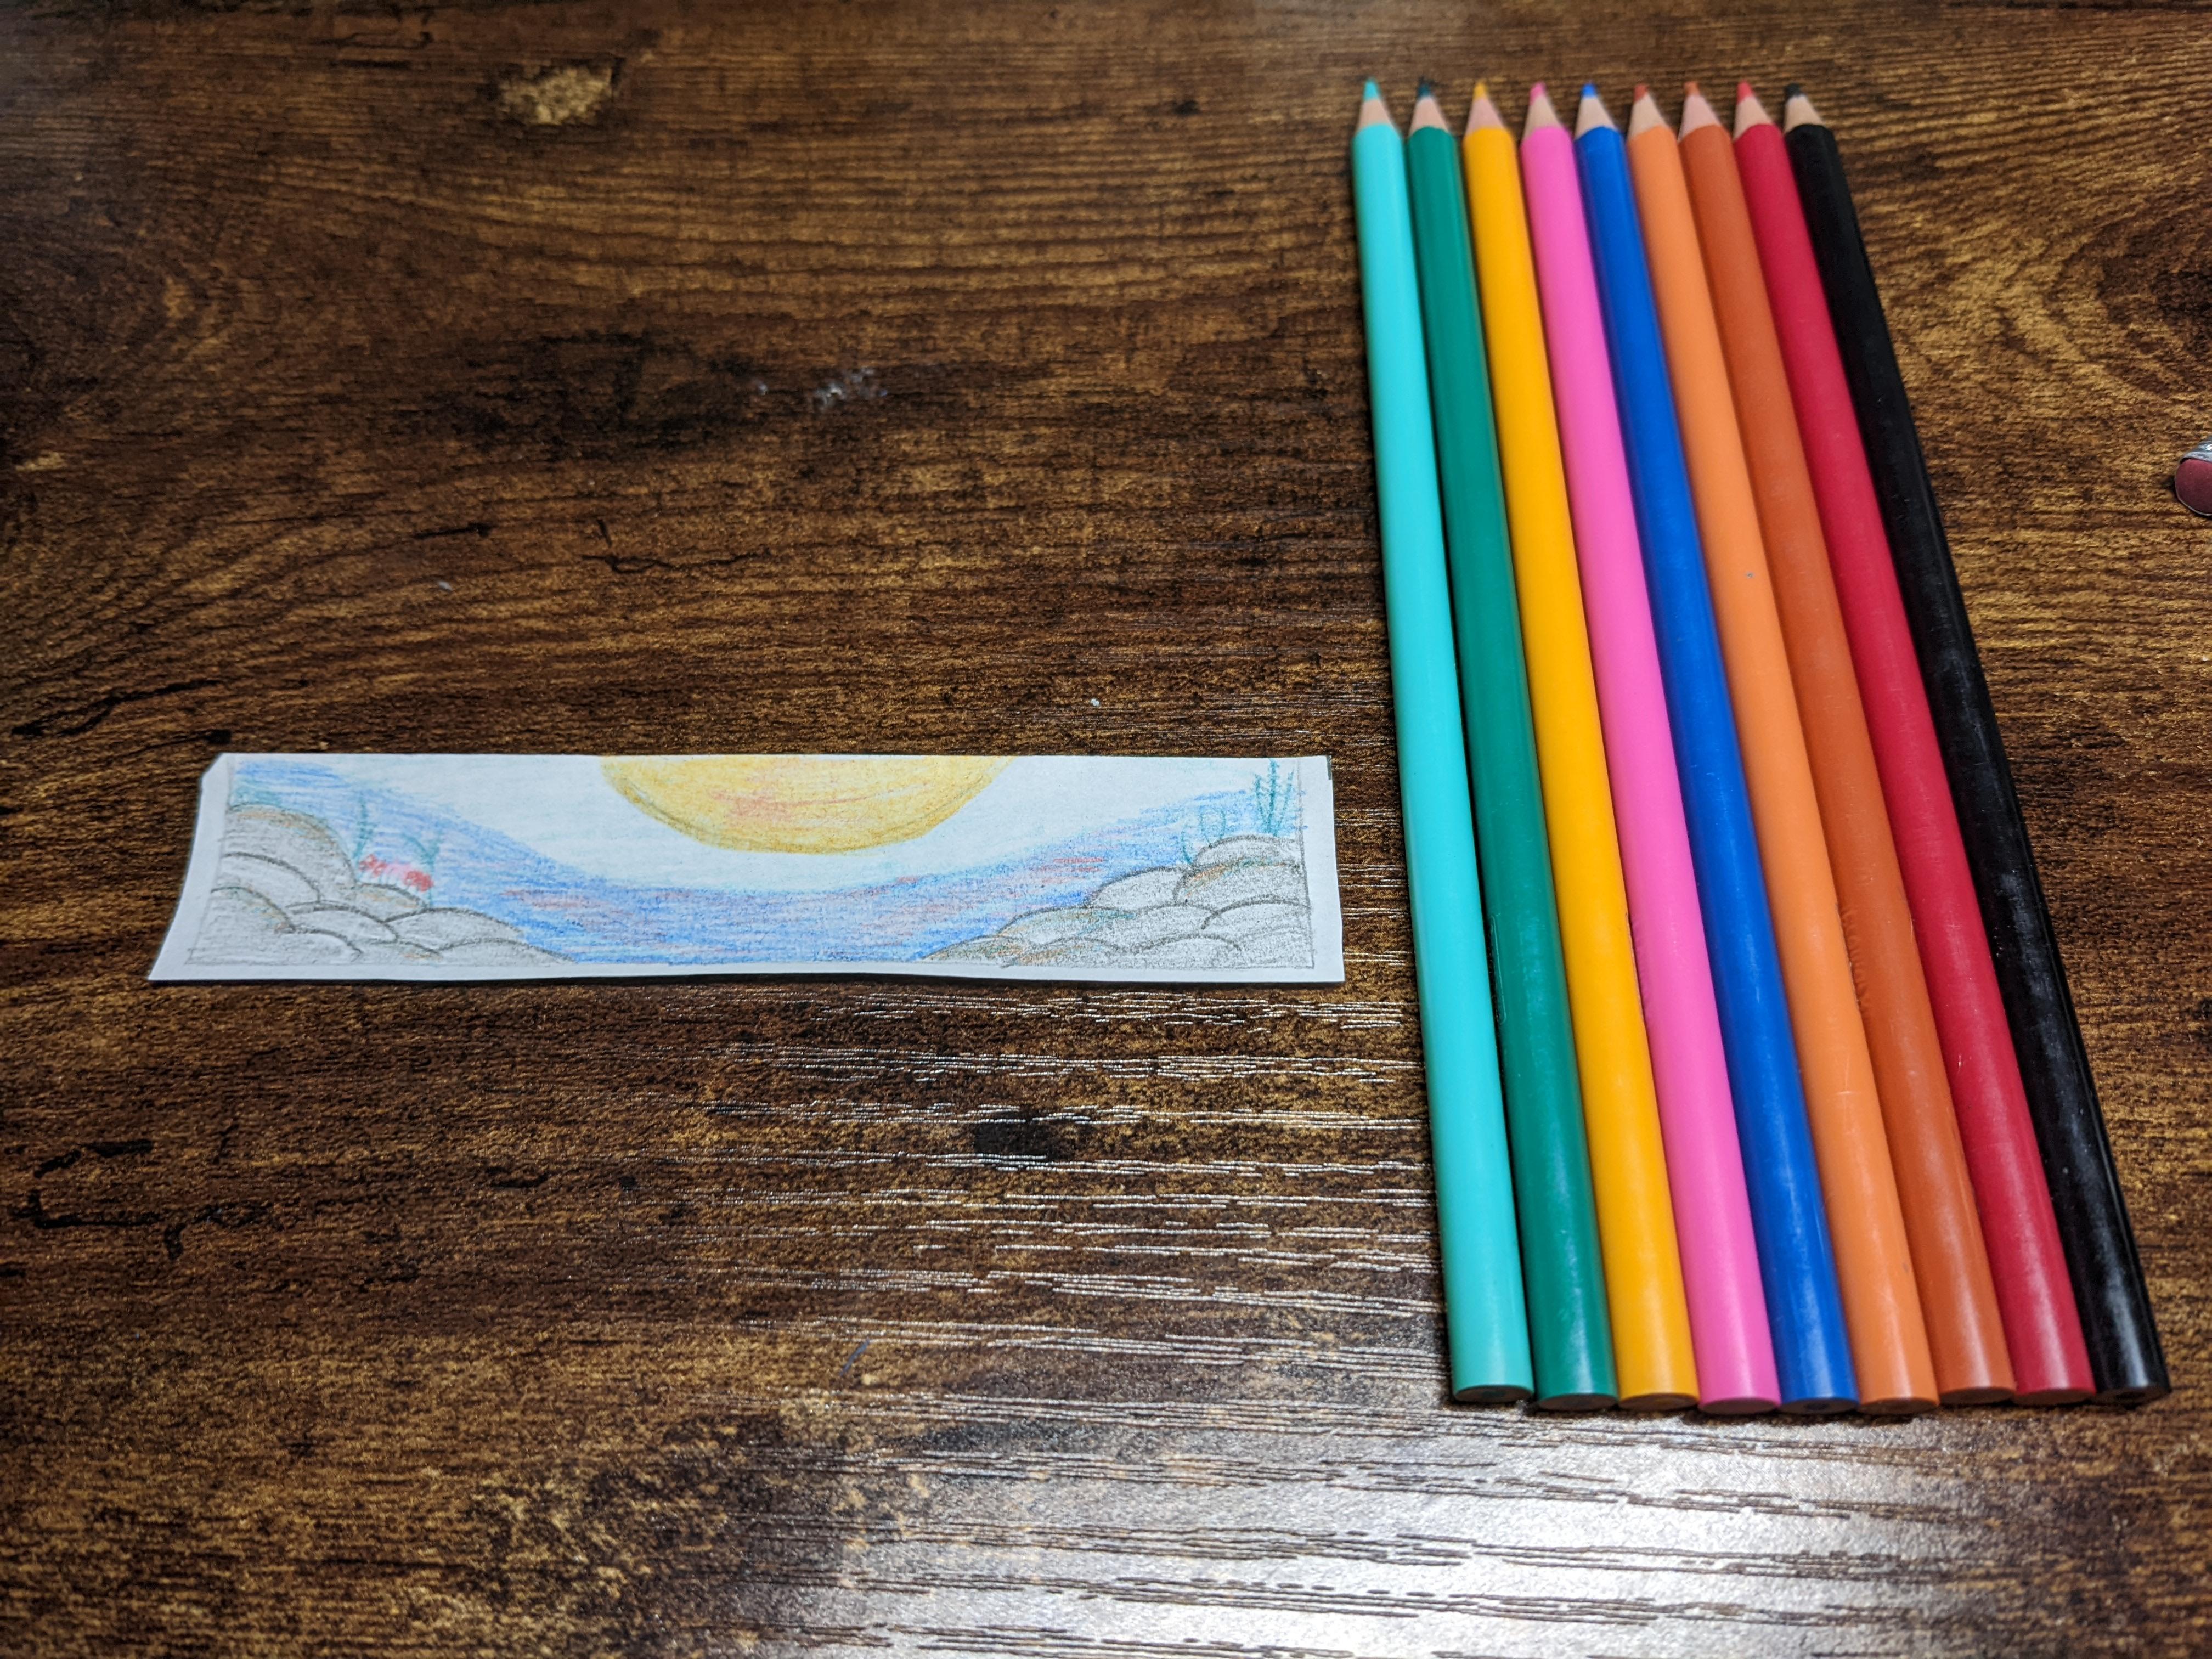

1) Measure the photo hole of the polaroid and cut out a piece of paper of the same size
2) Draw a picture with colored pencils
(I layered hues of pink, purple, and red. Then I added blue on top for the water. The rocks on the side were gray with tints of yellow and green on top of some rocks to create the sense of moss. Flowers and plants were added throughout the rocks)
3) Once the picture is complete slide it into the hole
Add the Camera and Marvel at Its Glory


1) Place the camera into the polaroid through the back and allow it to rest on the ledge previously created
2) Enjoy!