A Beginner's Guide to Autodesk Circuits Simulators (3 Projects at the End)
by Make Zone in Circuits > Arduino
14664 Views, 168 Favorites, 0 Comments
A Beginner's Guide to Autodesk Circuits Simulators (3 Projects at the End)
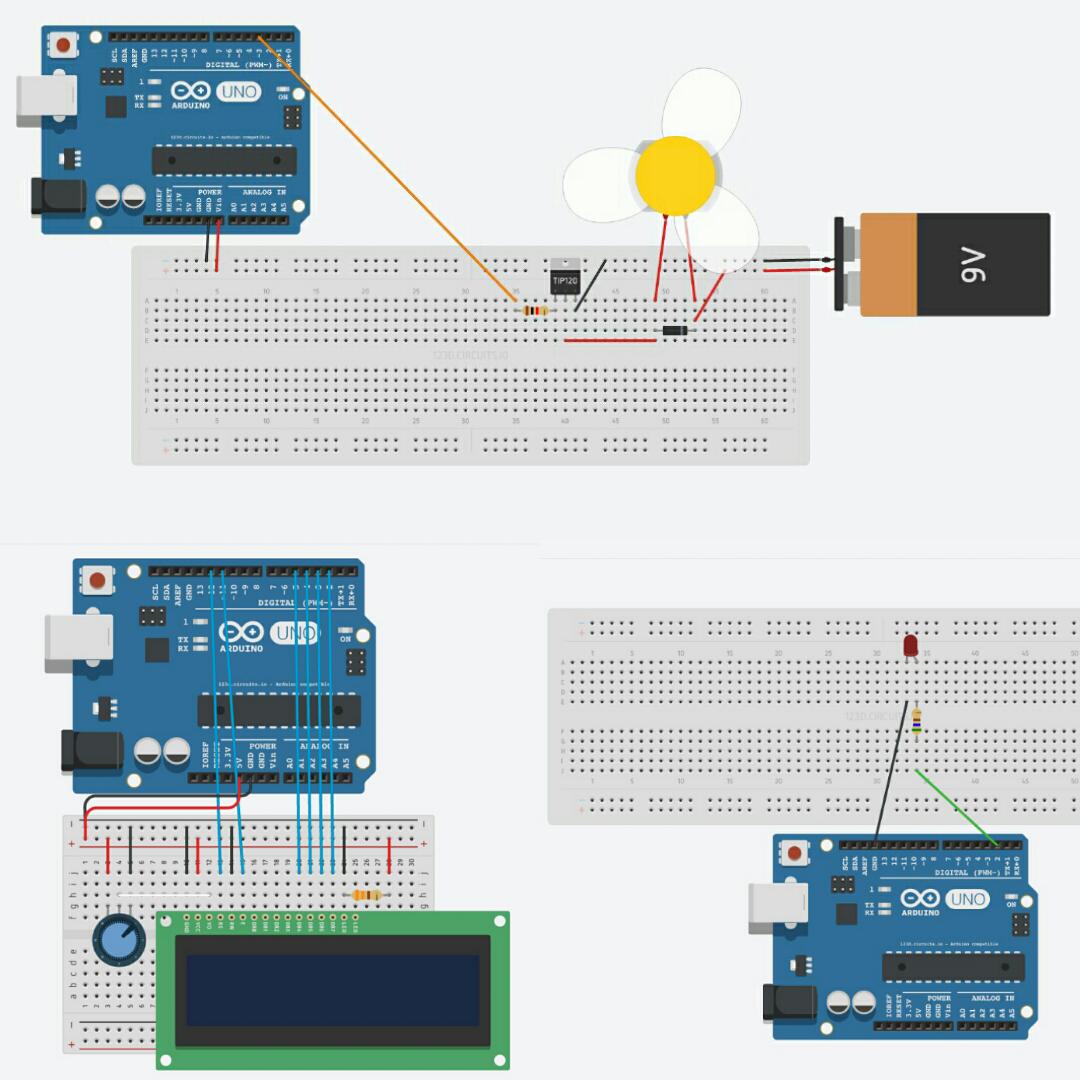
Autodesk Circuits simulation is mainly used to experiment or test arduino projects and designs before creating them in real life. In this Instructable, we'll cover the functions of basic arduino components, the basics of how to use Autodesk Circuits and near the end I'll show you how to make a programmable LCD panel, blink an LED and create a motor controlling design.
What You Will Need...
-An account for Autodesk Circuits (sign up here: http://www.123dapp.com/circuits)
-Access to a computer
-An arduino starter kit (this is optional unless you actually want to do the projects in real life)
Understanding the Functions of Arduino Components
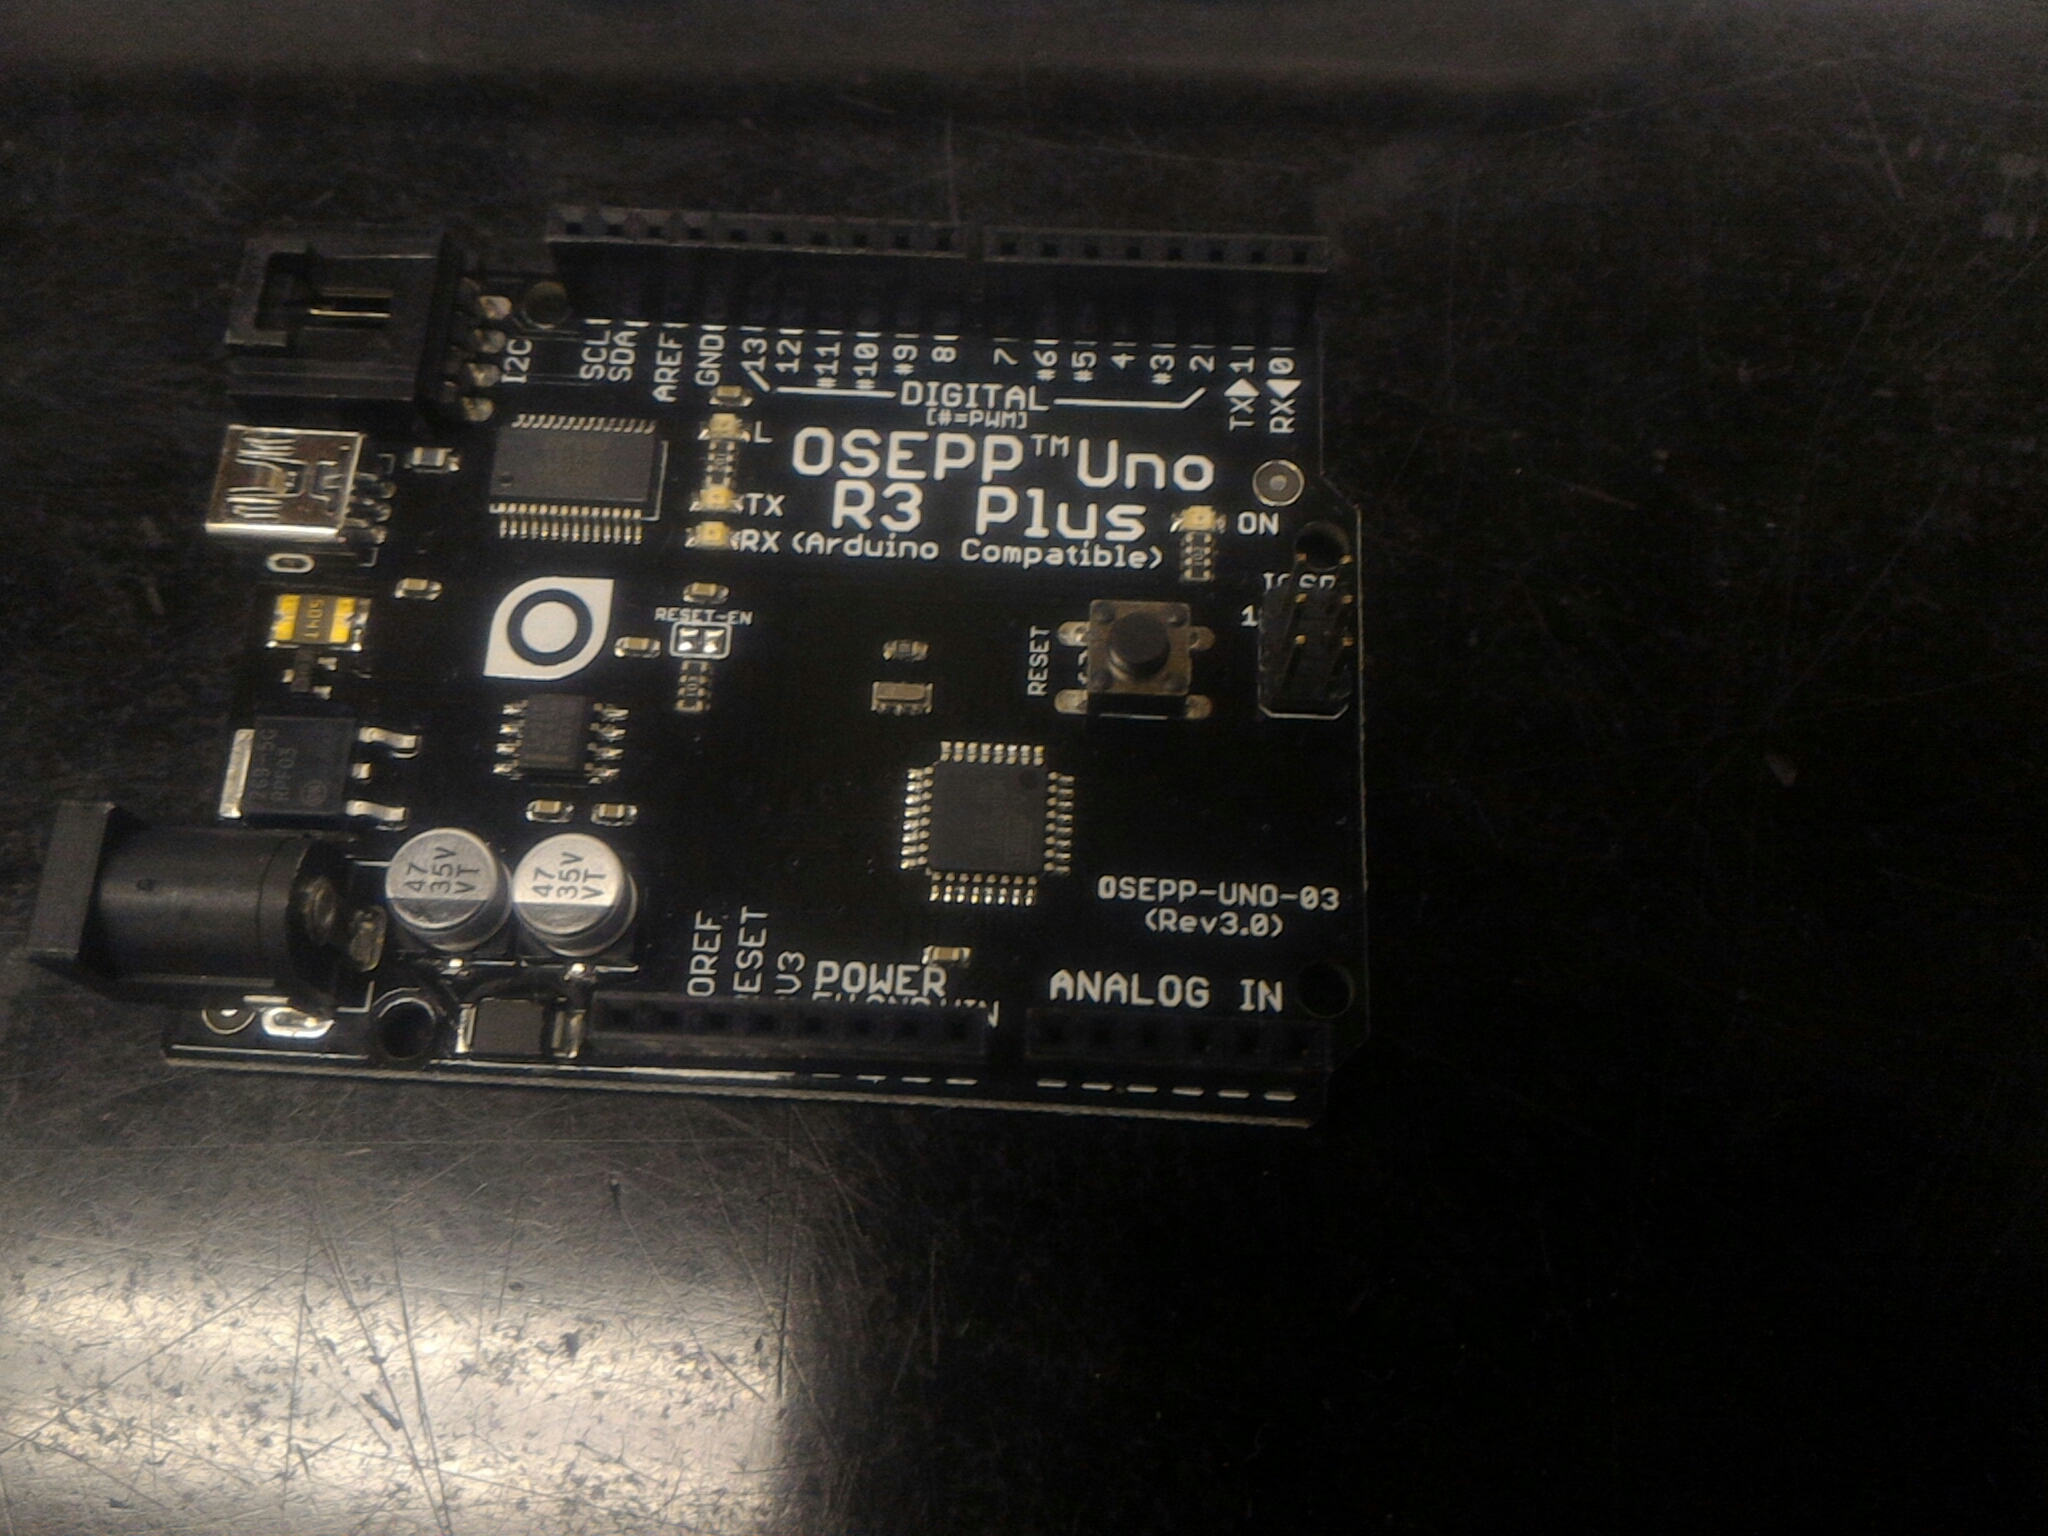
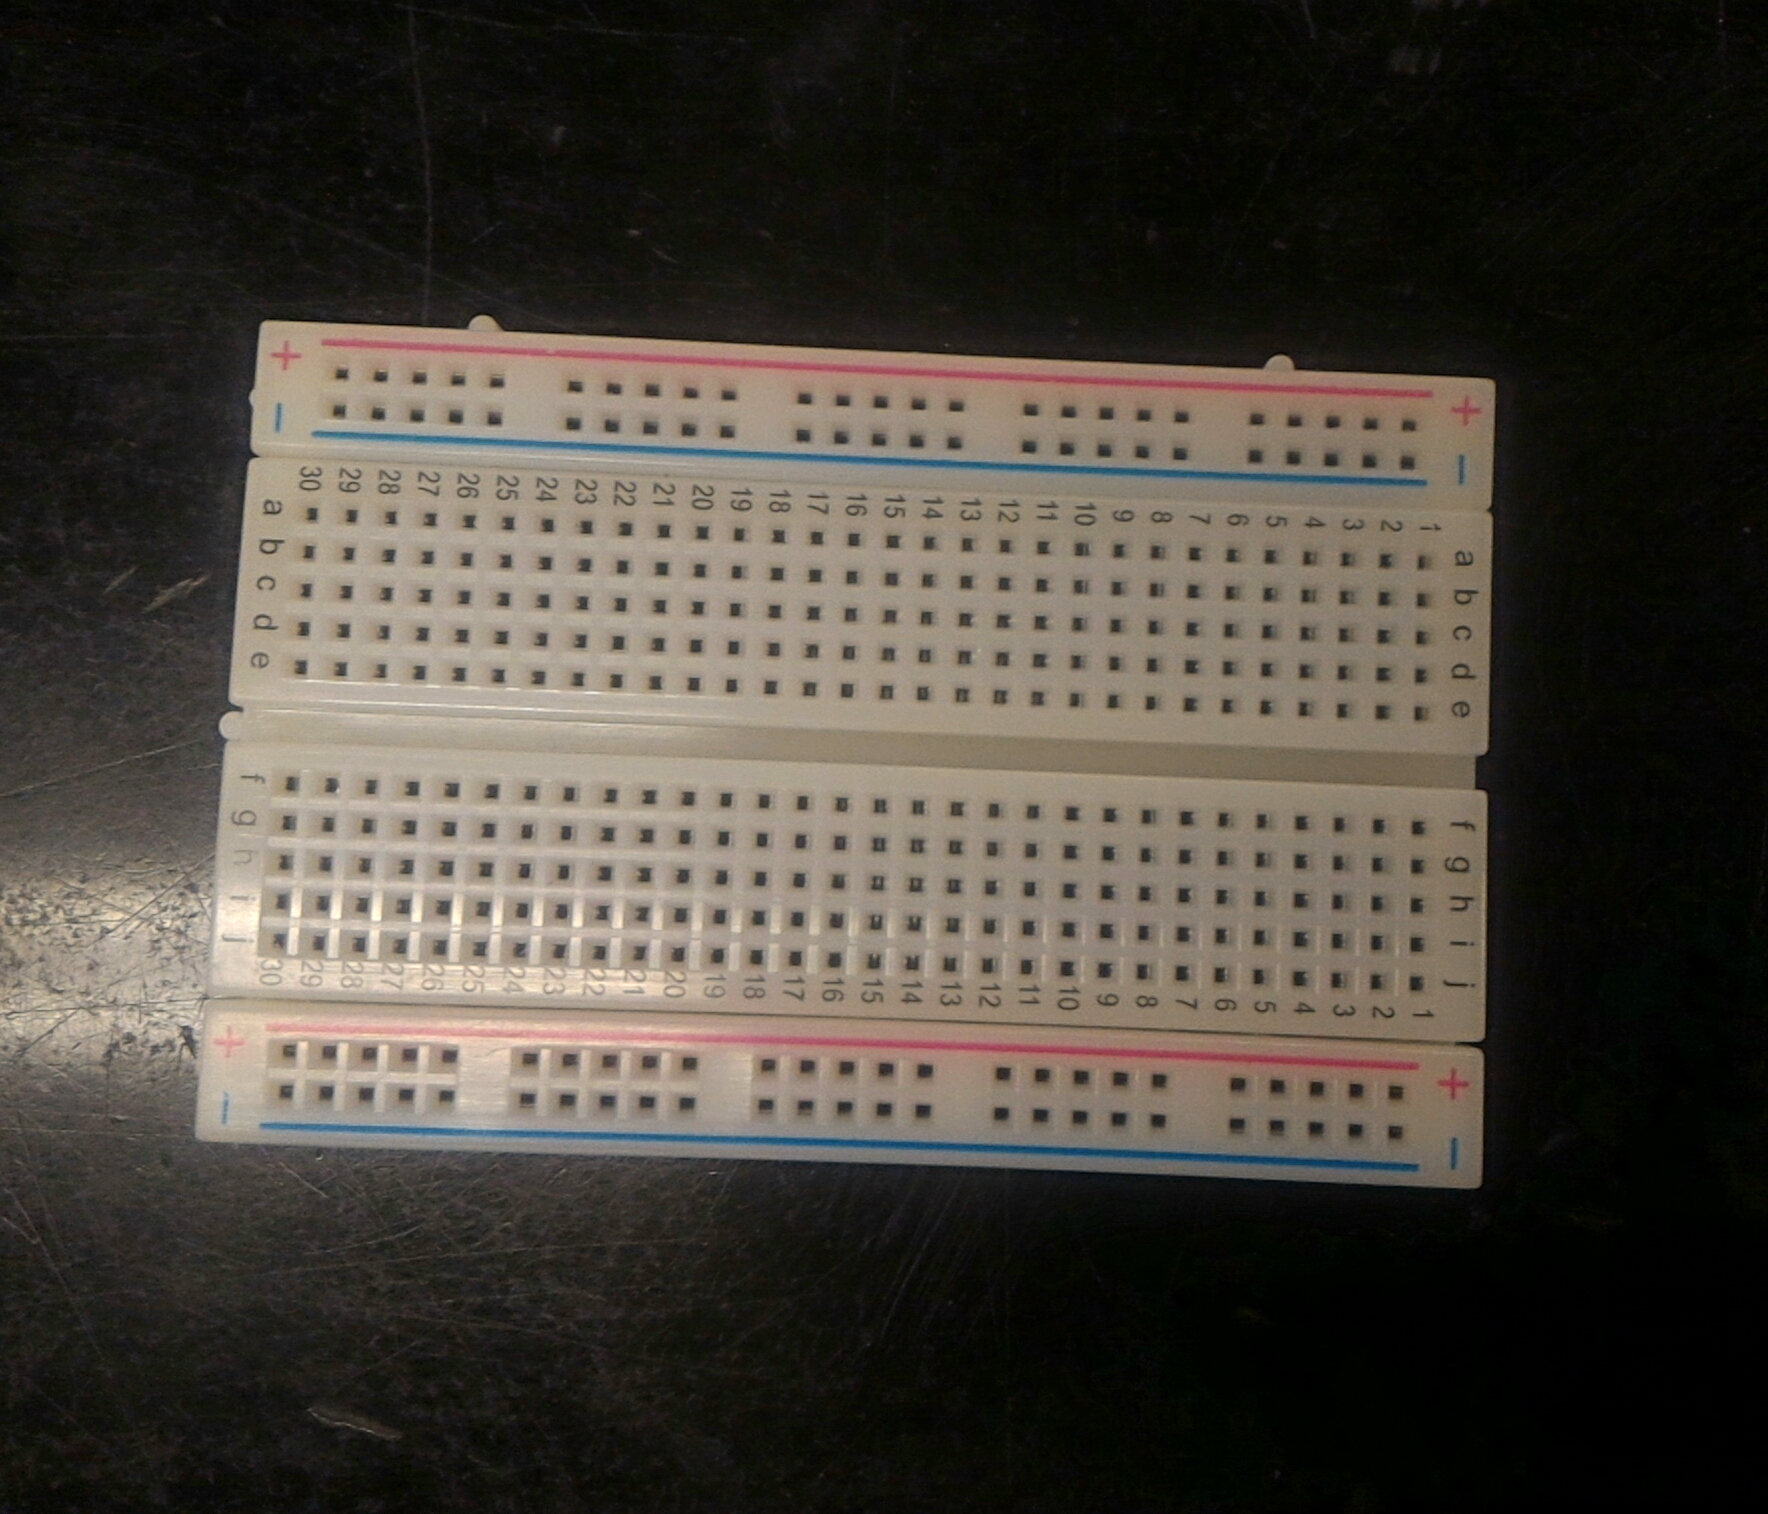
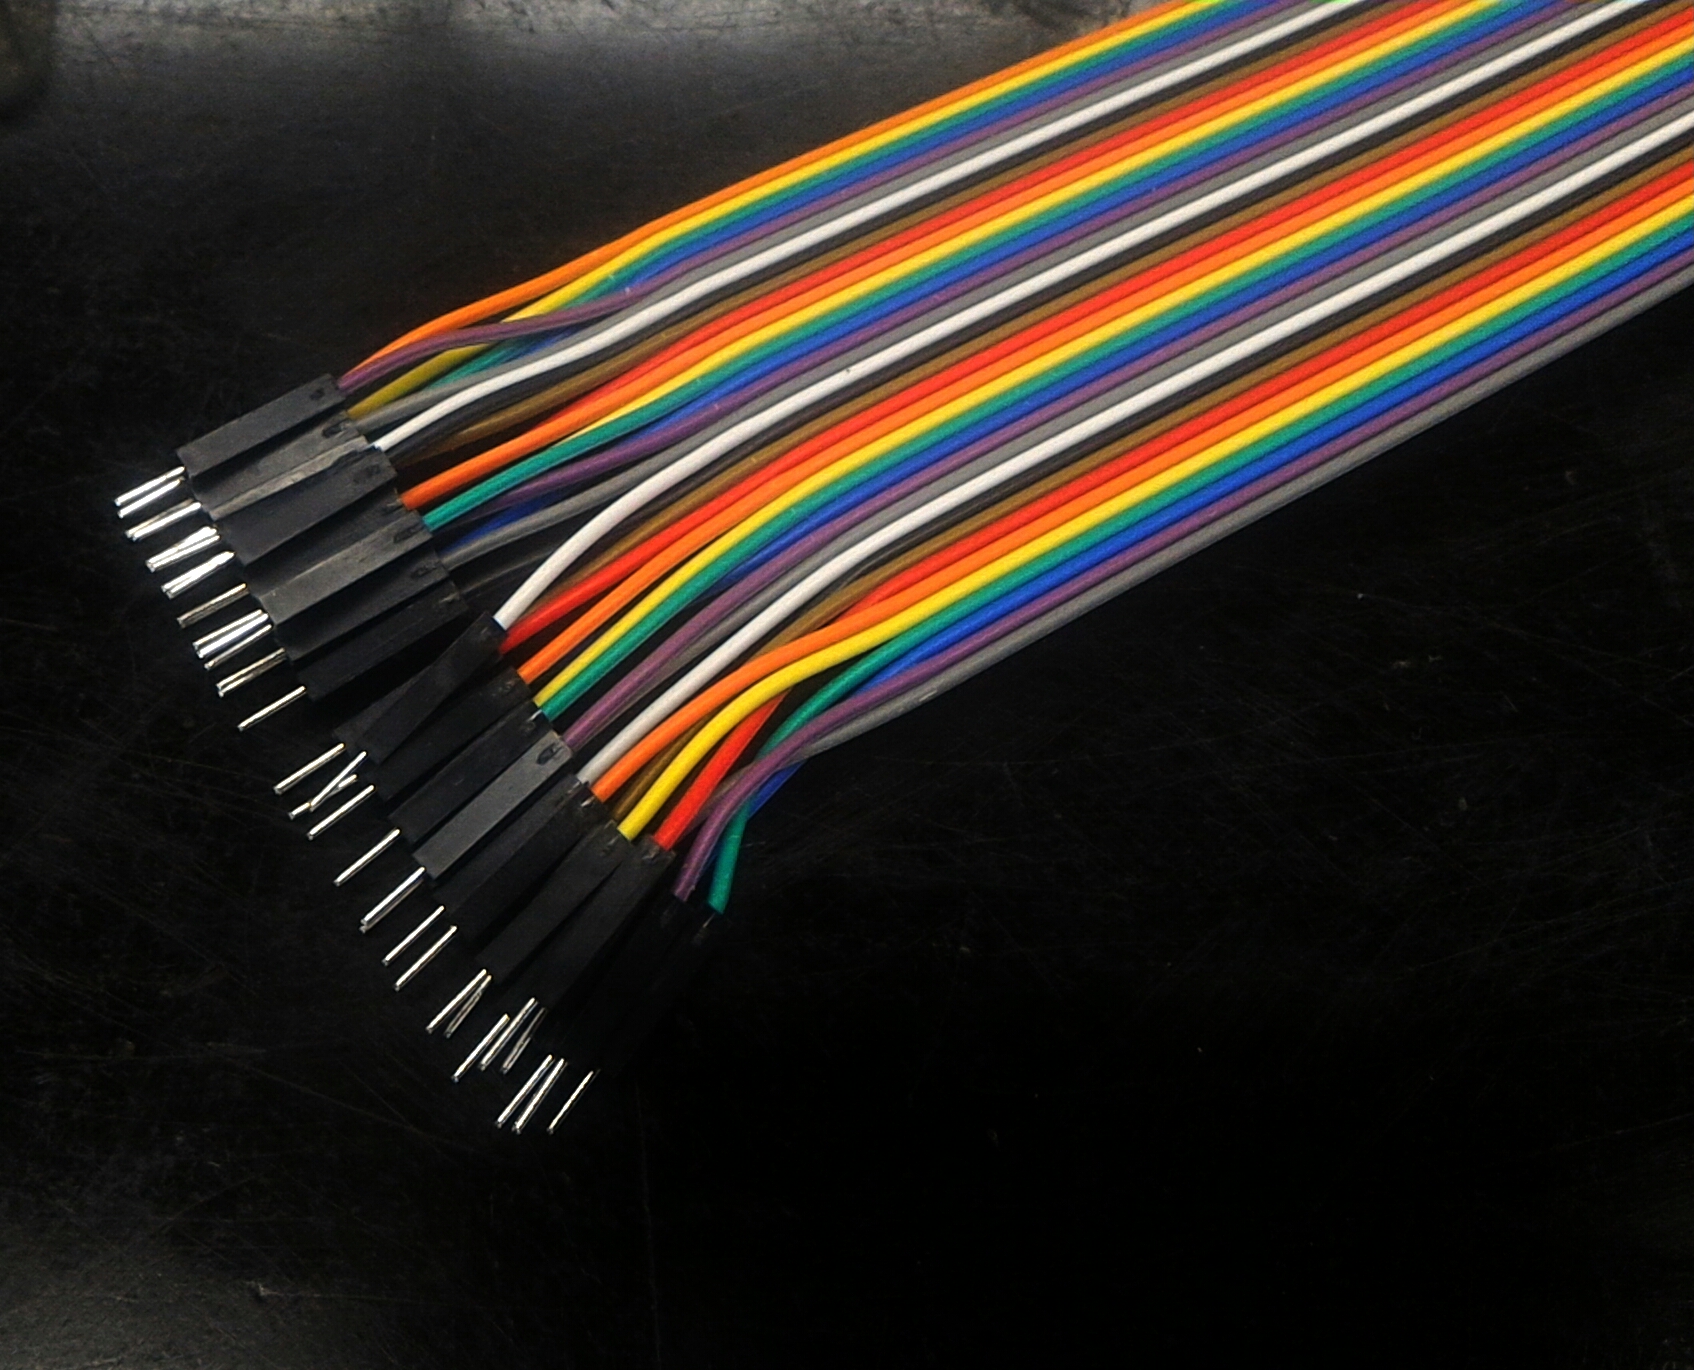
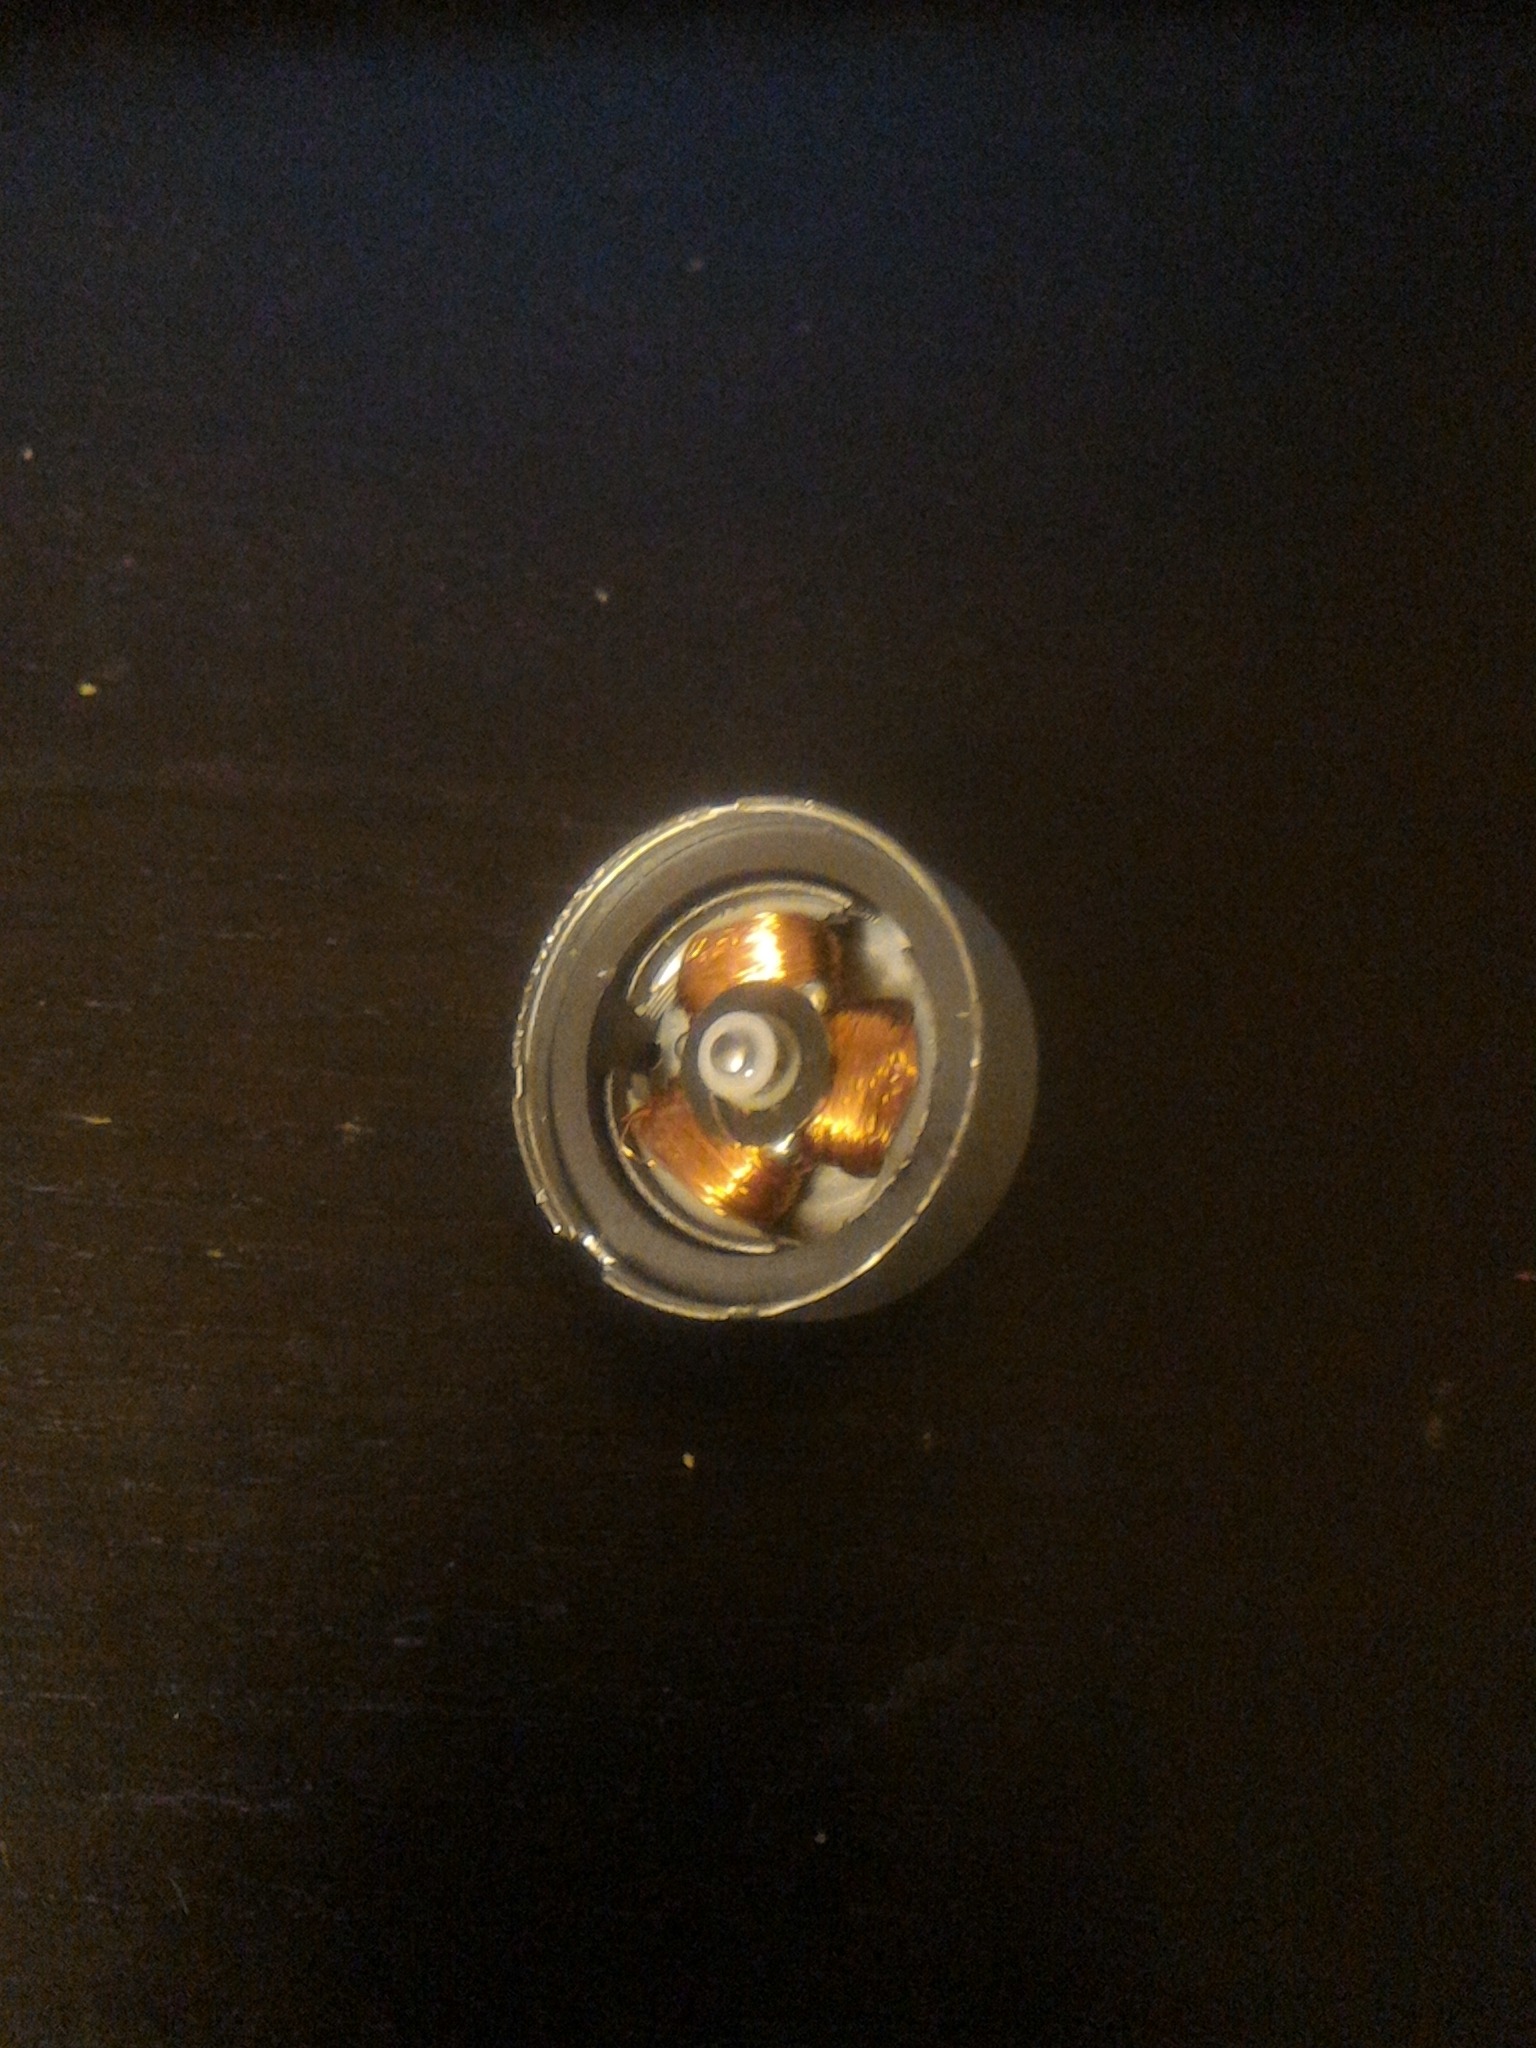
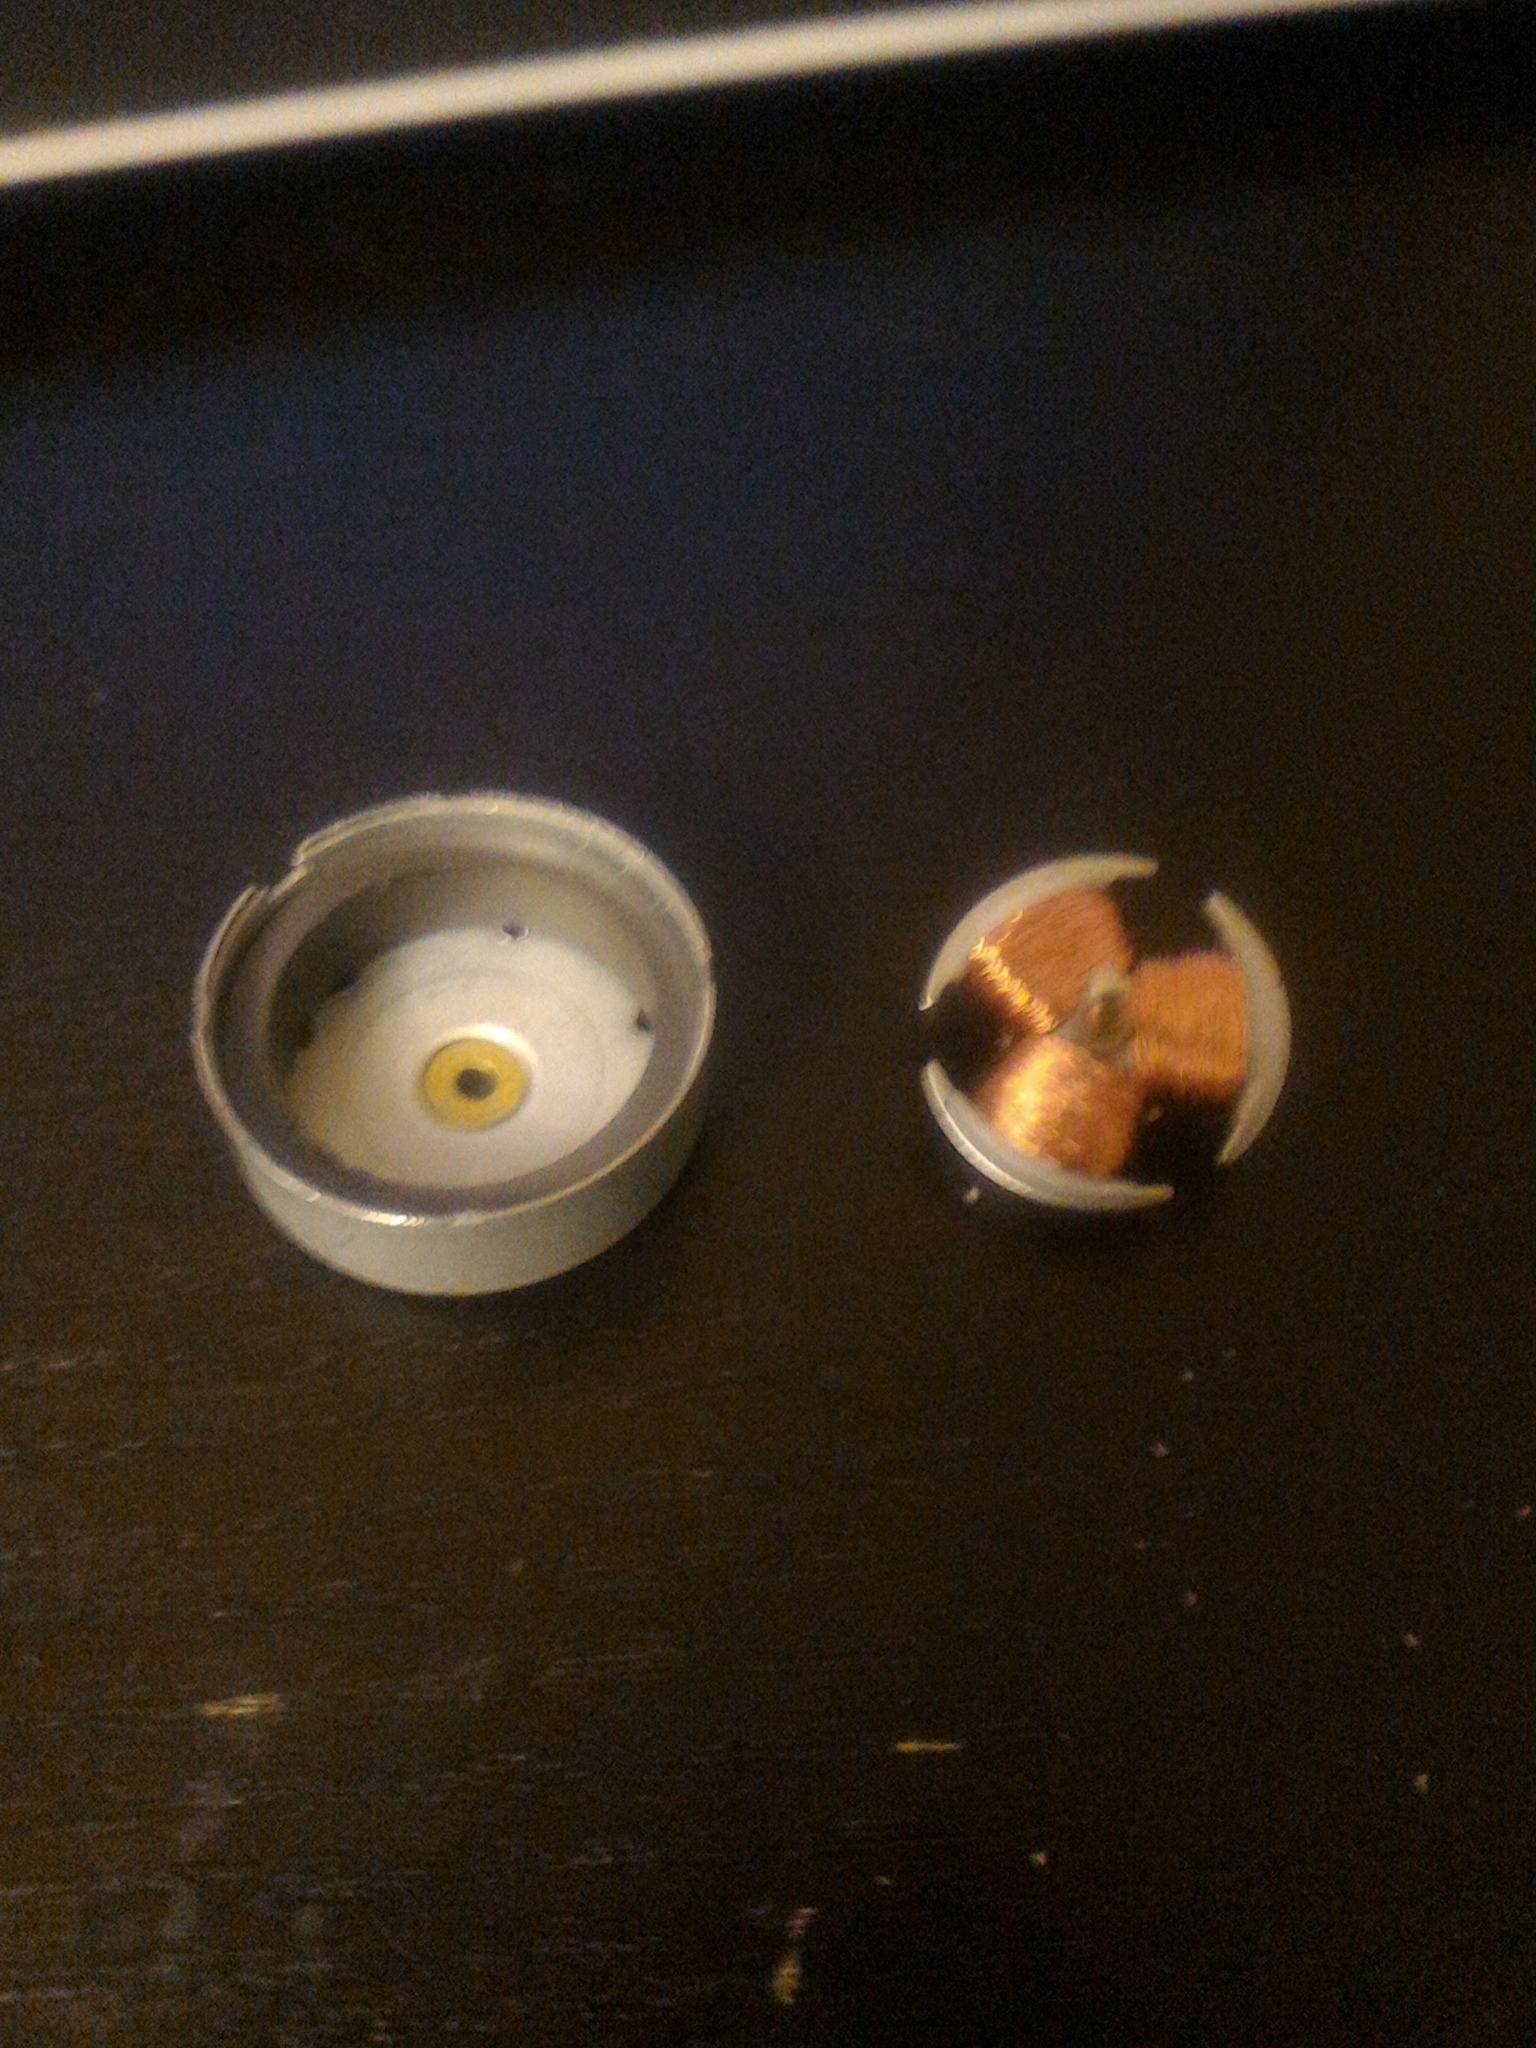
If you are new to Arduino it's important to understand what each component does so that you know what situation to use a certain component for what you want to accomplish. Let's start with the more commonly used ones first....
An Arduino Board (Image 1): An Arduino is essentially the brains of your circuit and accepts various inputs of code to run a function or whatever you programmed it to do. There are also different types of Arduino boards from the orginal all the way to the Arduino Mega a or the Arduino Nano. By far the most commonly used Arduino would be the Arduino Uno in my opinion.
A Breadboard (Image 2): This is usually what you would use if you're trying to interconnect components together to make a functional circuit. However, this can also be used to prototype a circuit without making it permanent and move you components to a real circuit board later on so that it is permanent.
Breadboard Wires (Image 3): Breadboard wires (also called jumper cables) are used to transfer electricity through 2 points or components in your circuit.
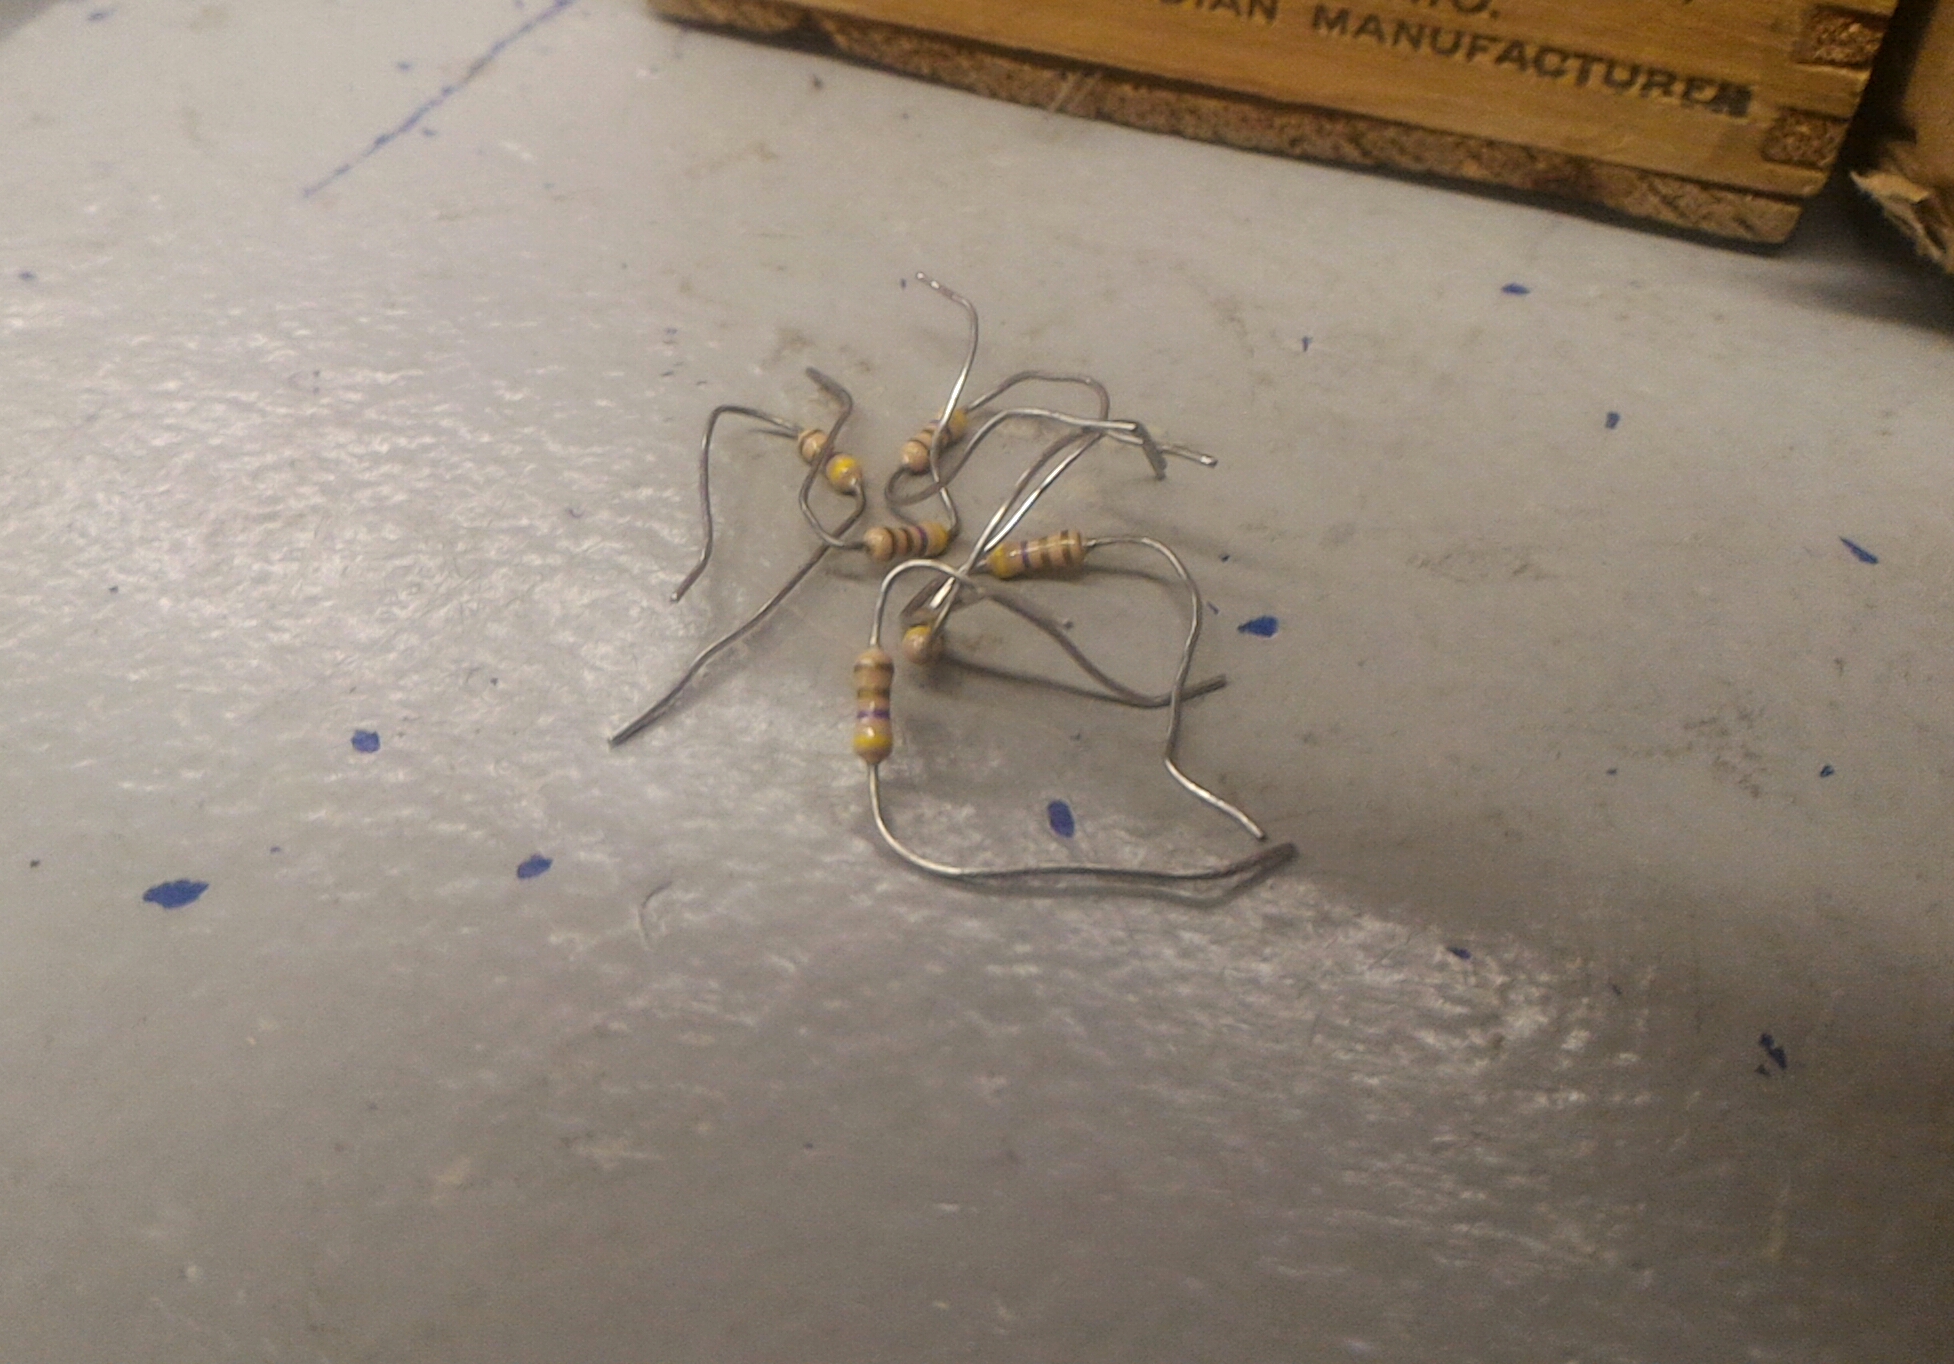
A Resistor (Image 4): The resistor limits the amount of electrical current that is flowing to your next component it's connected to. This is usually used when you have for example, an LED and a 9 volt battery. The LED cannot handle the amount of electricity from the battery so you would put a resistor in between to limit the flow of current and prevent shorting of the LED.
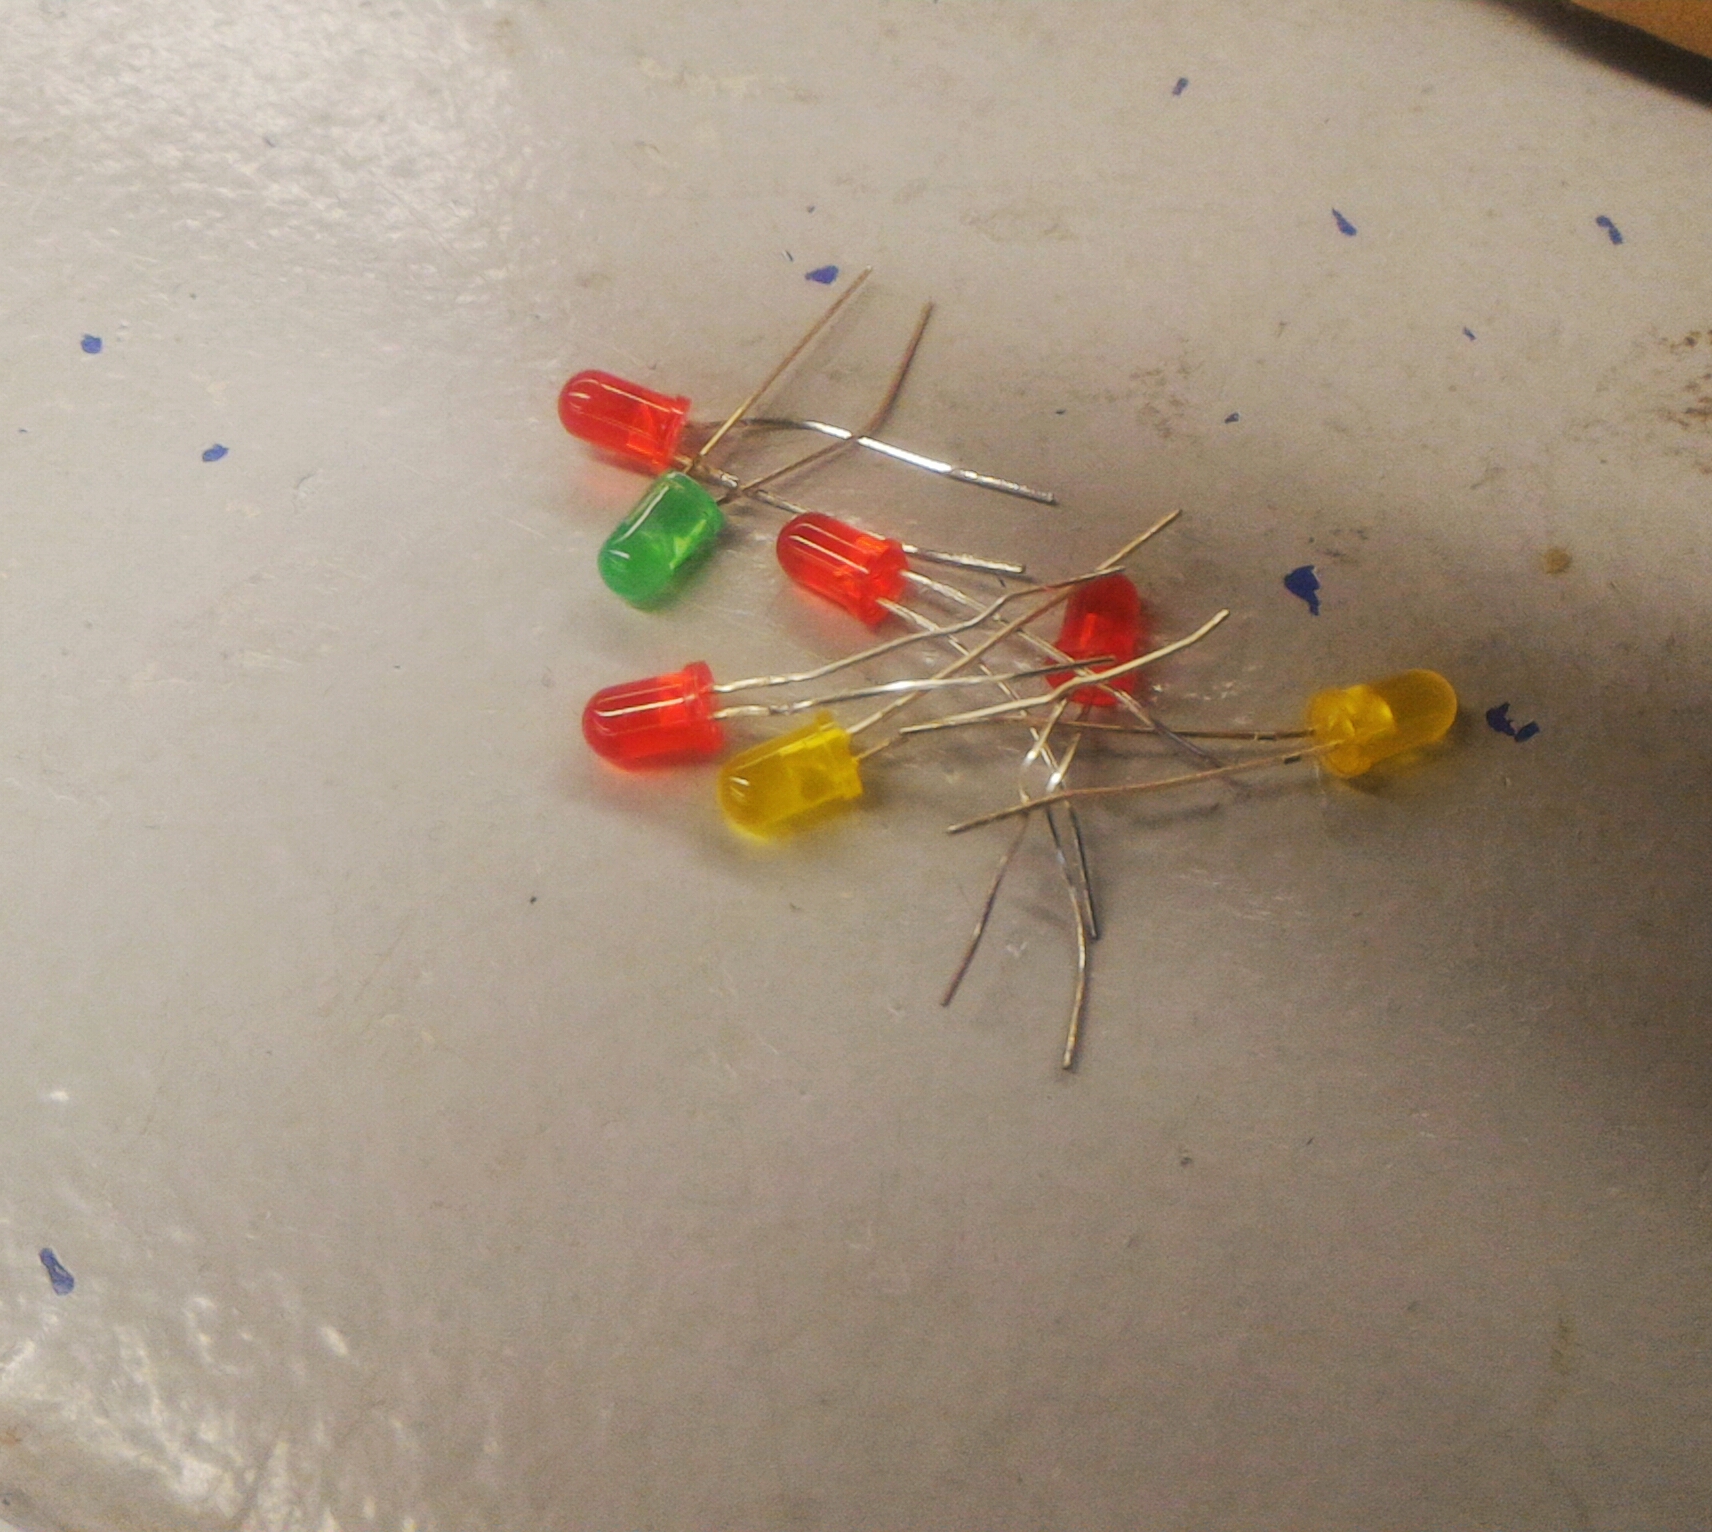
LED (Image 5): An LED (Light-emitting diode) emits light and brightness of the light can be changed depending on the amount of current flowing to it. LEDs come in many colours and are the perfect solution for lighting up a project or just adding a bit of decoration.
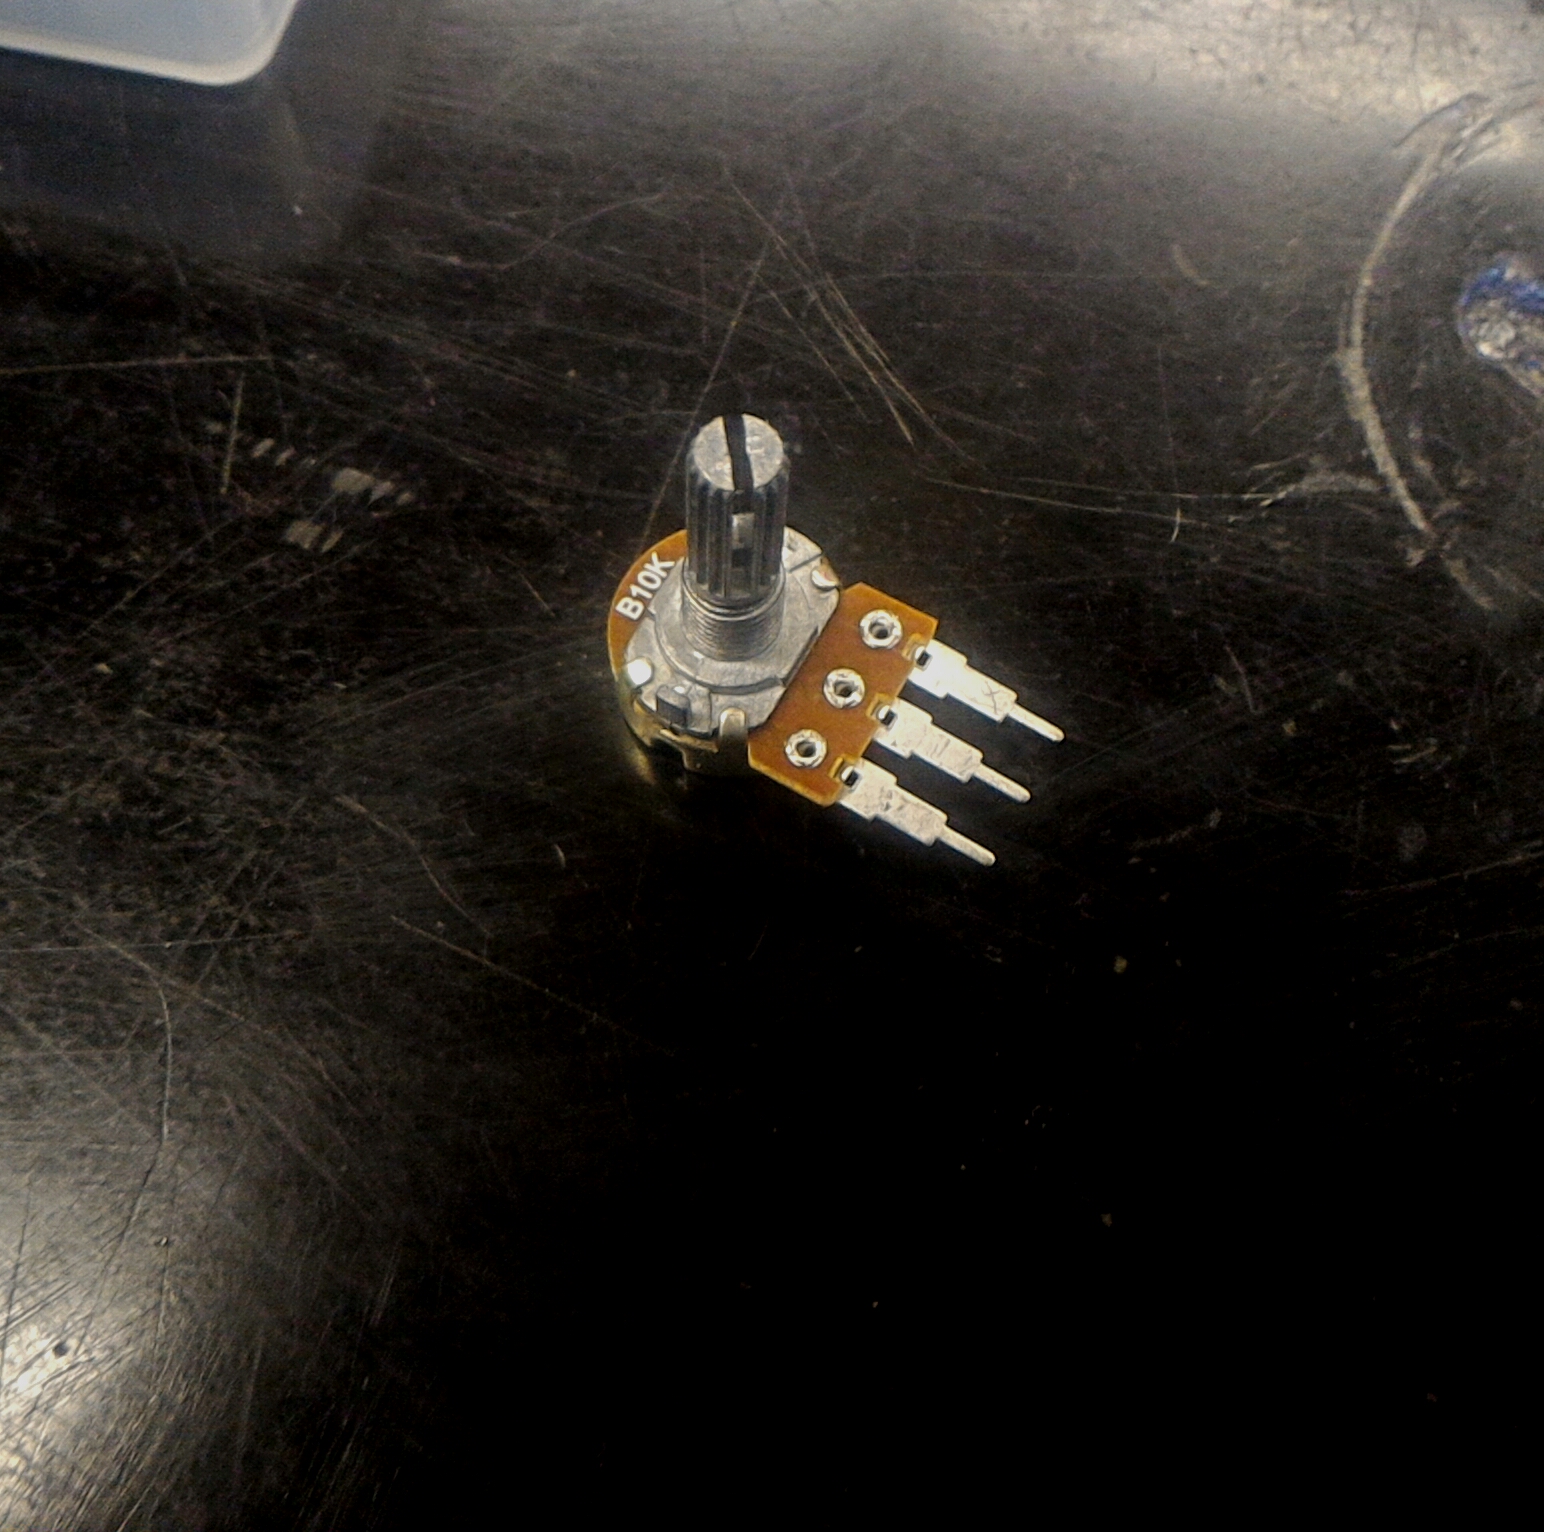
Potentiometer (Image 6): A potentiometer is a simple mechanical device that provides a varying amount of resistance as it is turned (lets more current through as it is turned). An example of how this is used is you can connect it to an LED or DC motor and as you turn it the current gets higher or lower thus making the LED brighter or motor spin faster.
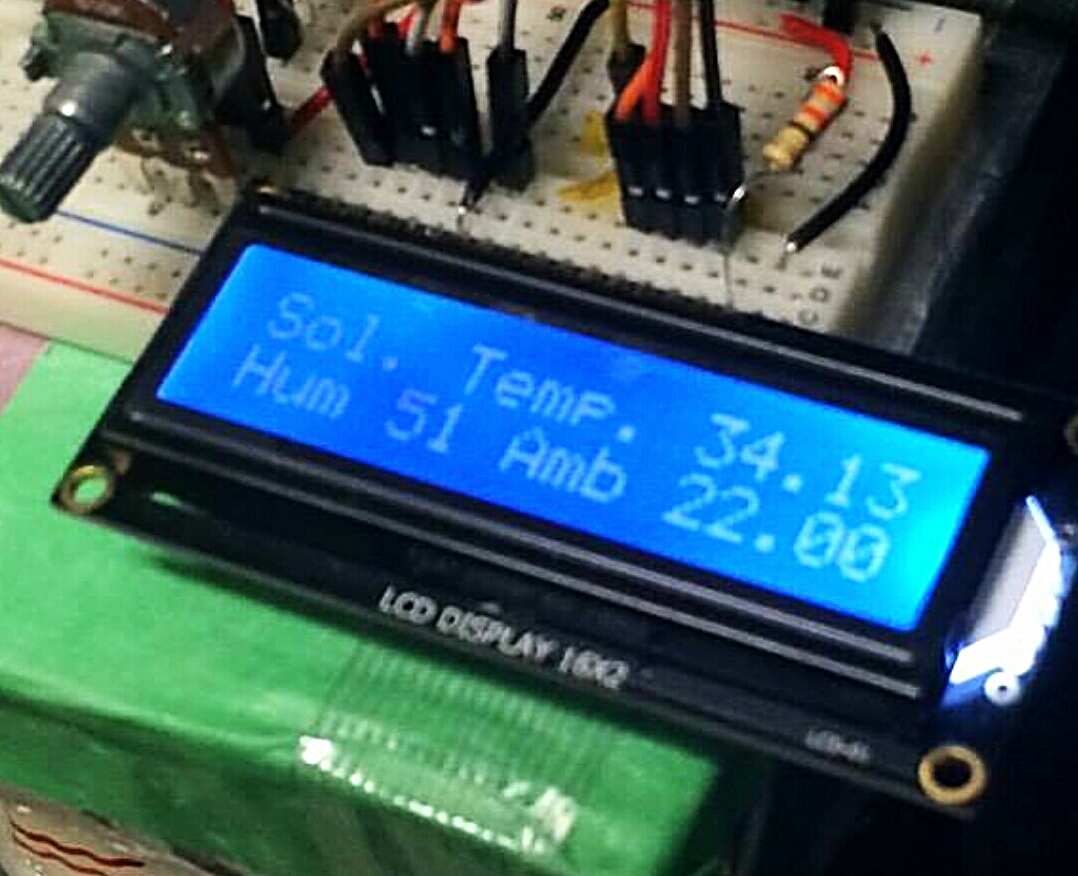
The LCD (Image 7): An LCD (Liquid Crystal Display) receives information and displays that information back to you so that you can know whether a circuit is working the way you'd like it to or not. You can code your arduino board to make the LCD display a message you want which is one of 3 projects we'll do later. These displays come in many variations and sizes so you can easily find the right one for you.
A DC Motor (Image 8): A DC motor (direct current motor) is a device that converts electrical pulses into mechanical movement. These motors can be used to make something move in a project. Inside a DC motor is a series of copper coils and typically neodymium magnets as you can see in the last 2 images.
Using Autodesk Circuits
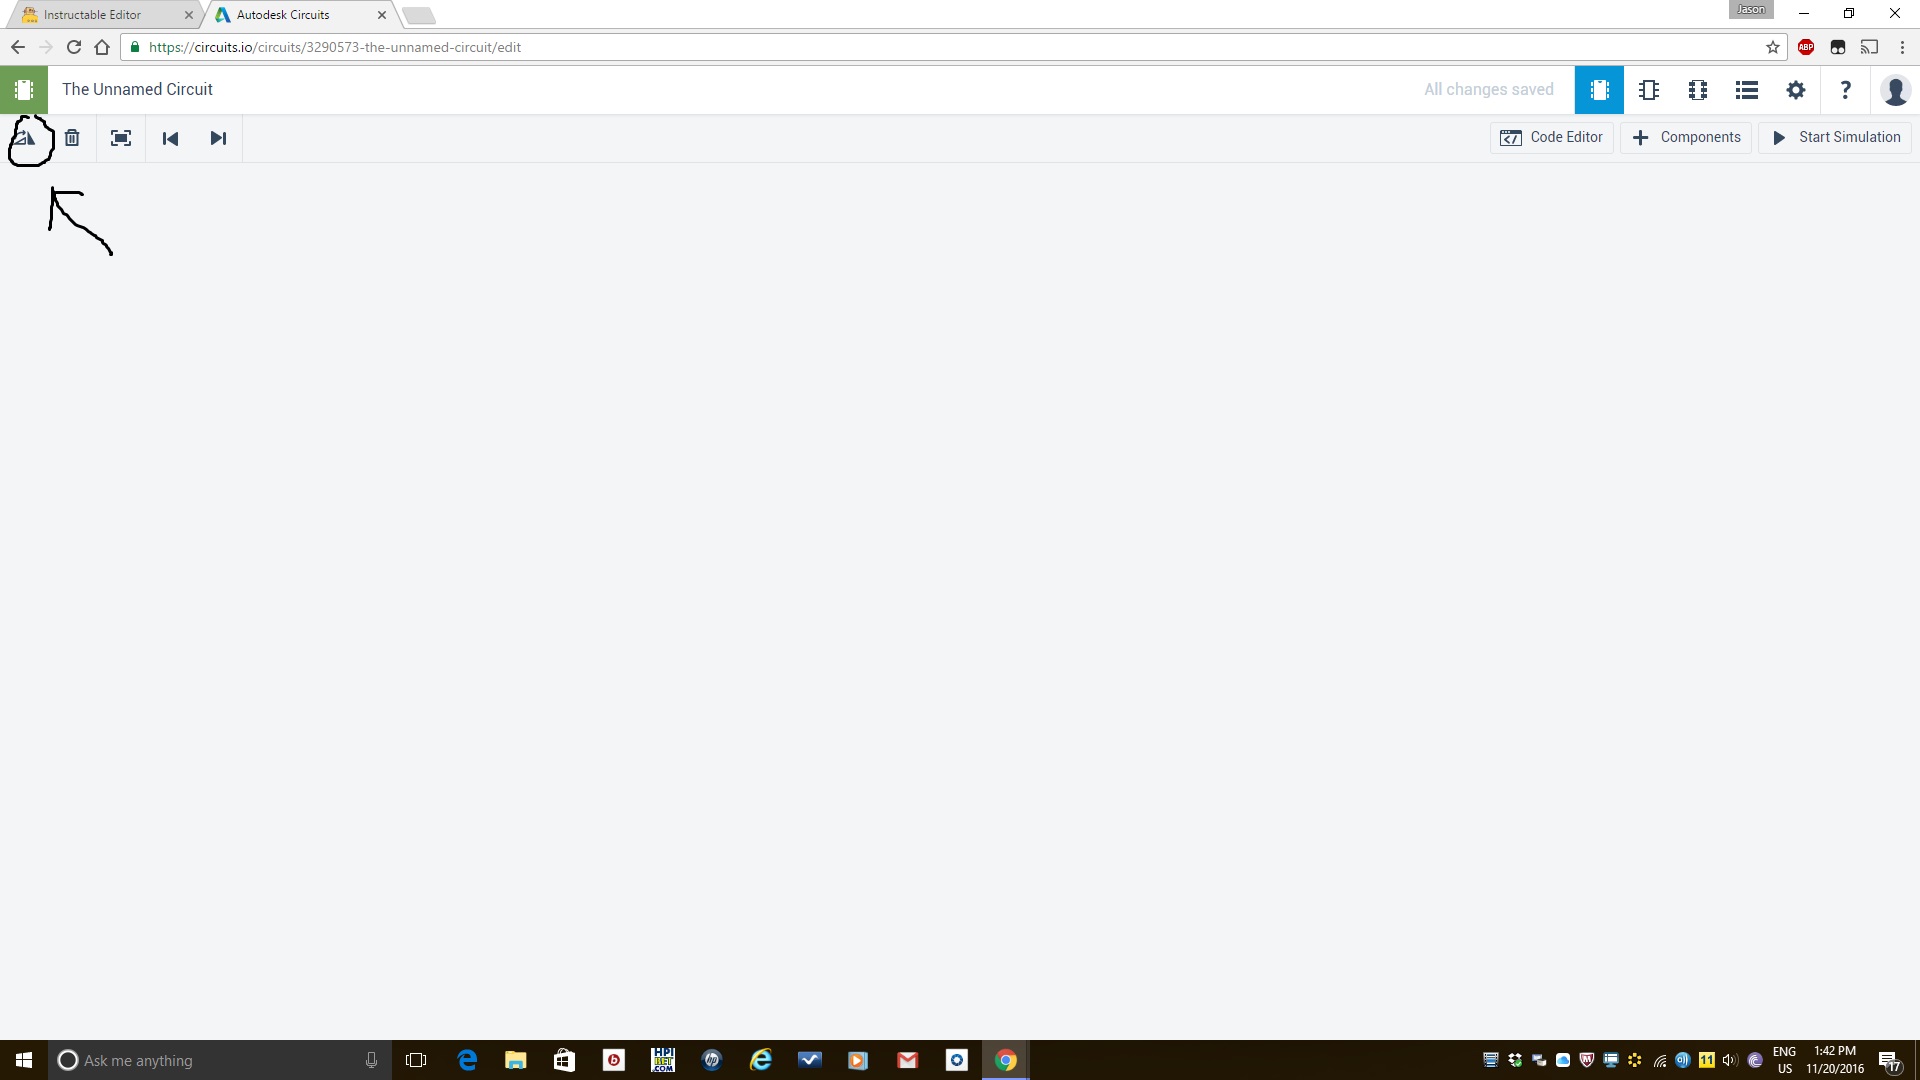
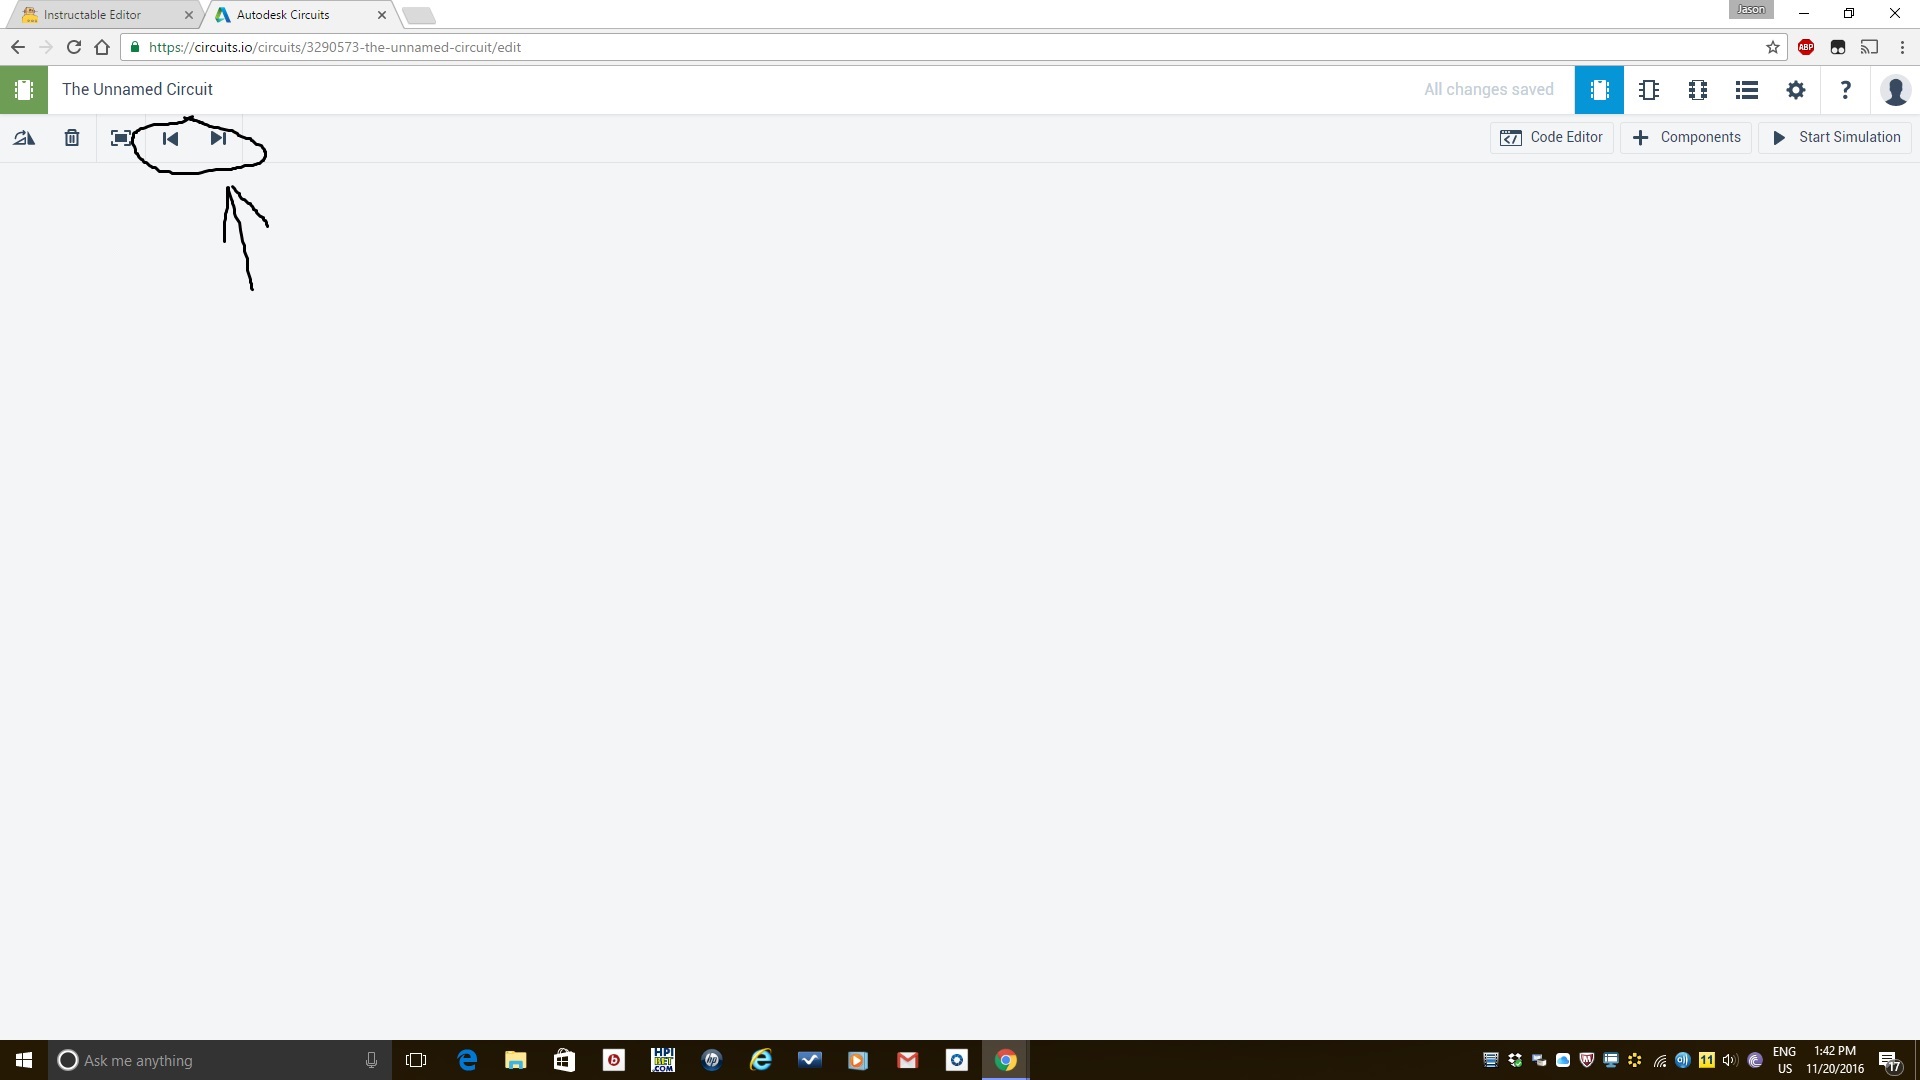
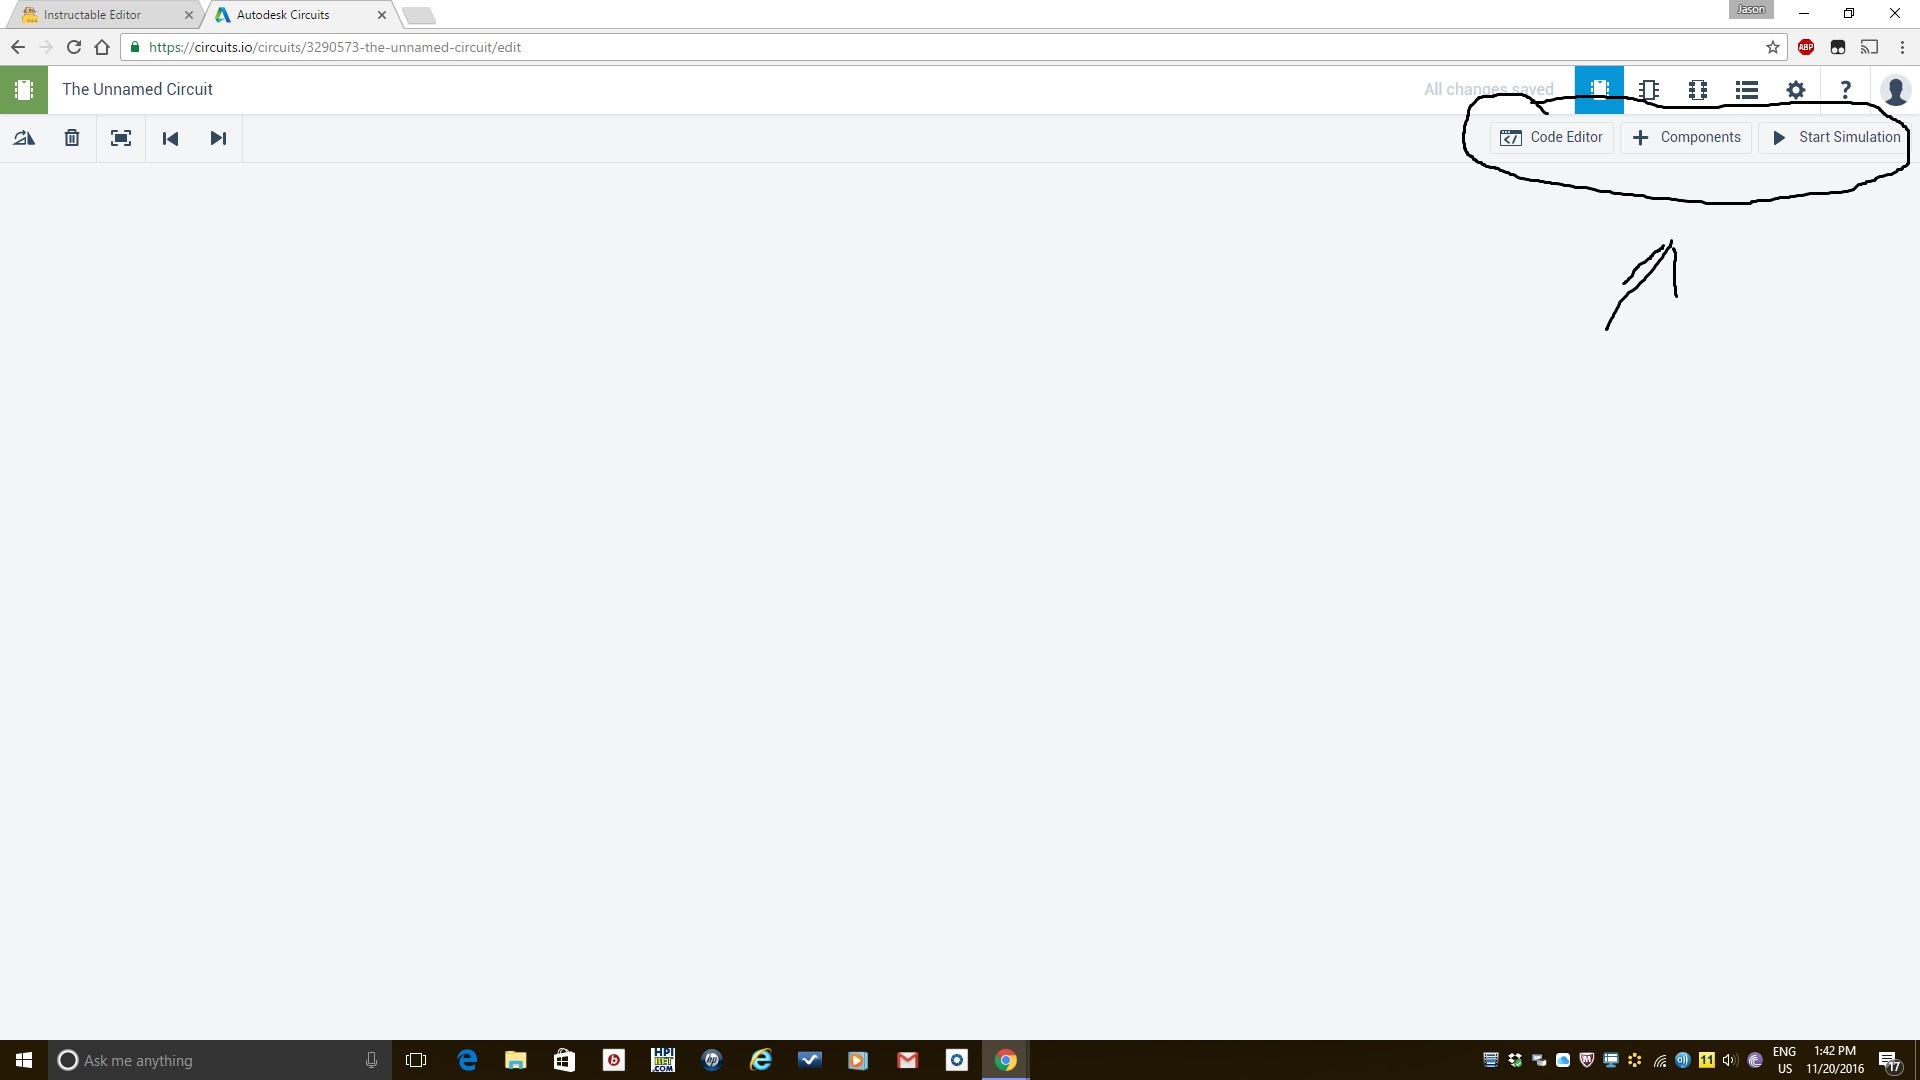
You are now one step closer from starting to design circuit prototypes in Autodesk circuits. All you need to do now is understand how to use this program. Take a look at Figure 1, if the icon circled is selected you can rotate components to the angle you desire. In figure 2, this icon is used to delete components from the work space. All you need to do in order to delete a part is to select the part you want to delete then click on the trash icon. In figure 3, the icons shown here can be used to redo or undo things you've done. Lastly in figure four there are 3 icons, the 1st is used to view your code so you may edit it. The icon after "code editor" is "+ Components" and that is used to show you the menu of available parts so you can use them in your design. And the last one beside that is called "start simulation" which uploads code into your virtual design and starts a simulation so you know if the design works or not.
Project One: a Programmable LCD Panel
.png)
.png)
One of the most simple and fun designs you can start first is make an LCD circuit that displays anything you program it to. You will first need to select components using the "+components" icon and drag and drop out:
-16x2 LCD (1x)
-A "Small breadboard" (1x)
-An Arduino Uno (1x)
-A resistor (1x)
-A Potentiometer (1x)
-Breadboard wires (Drag and drop them as you follow along)
Steps
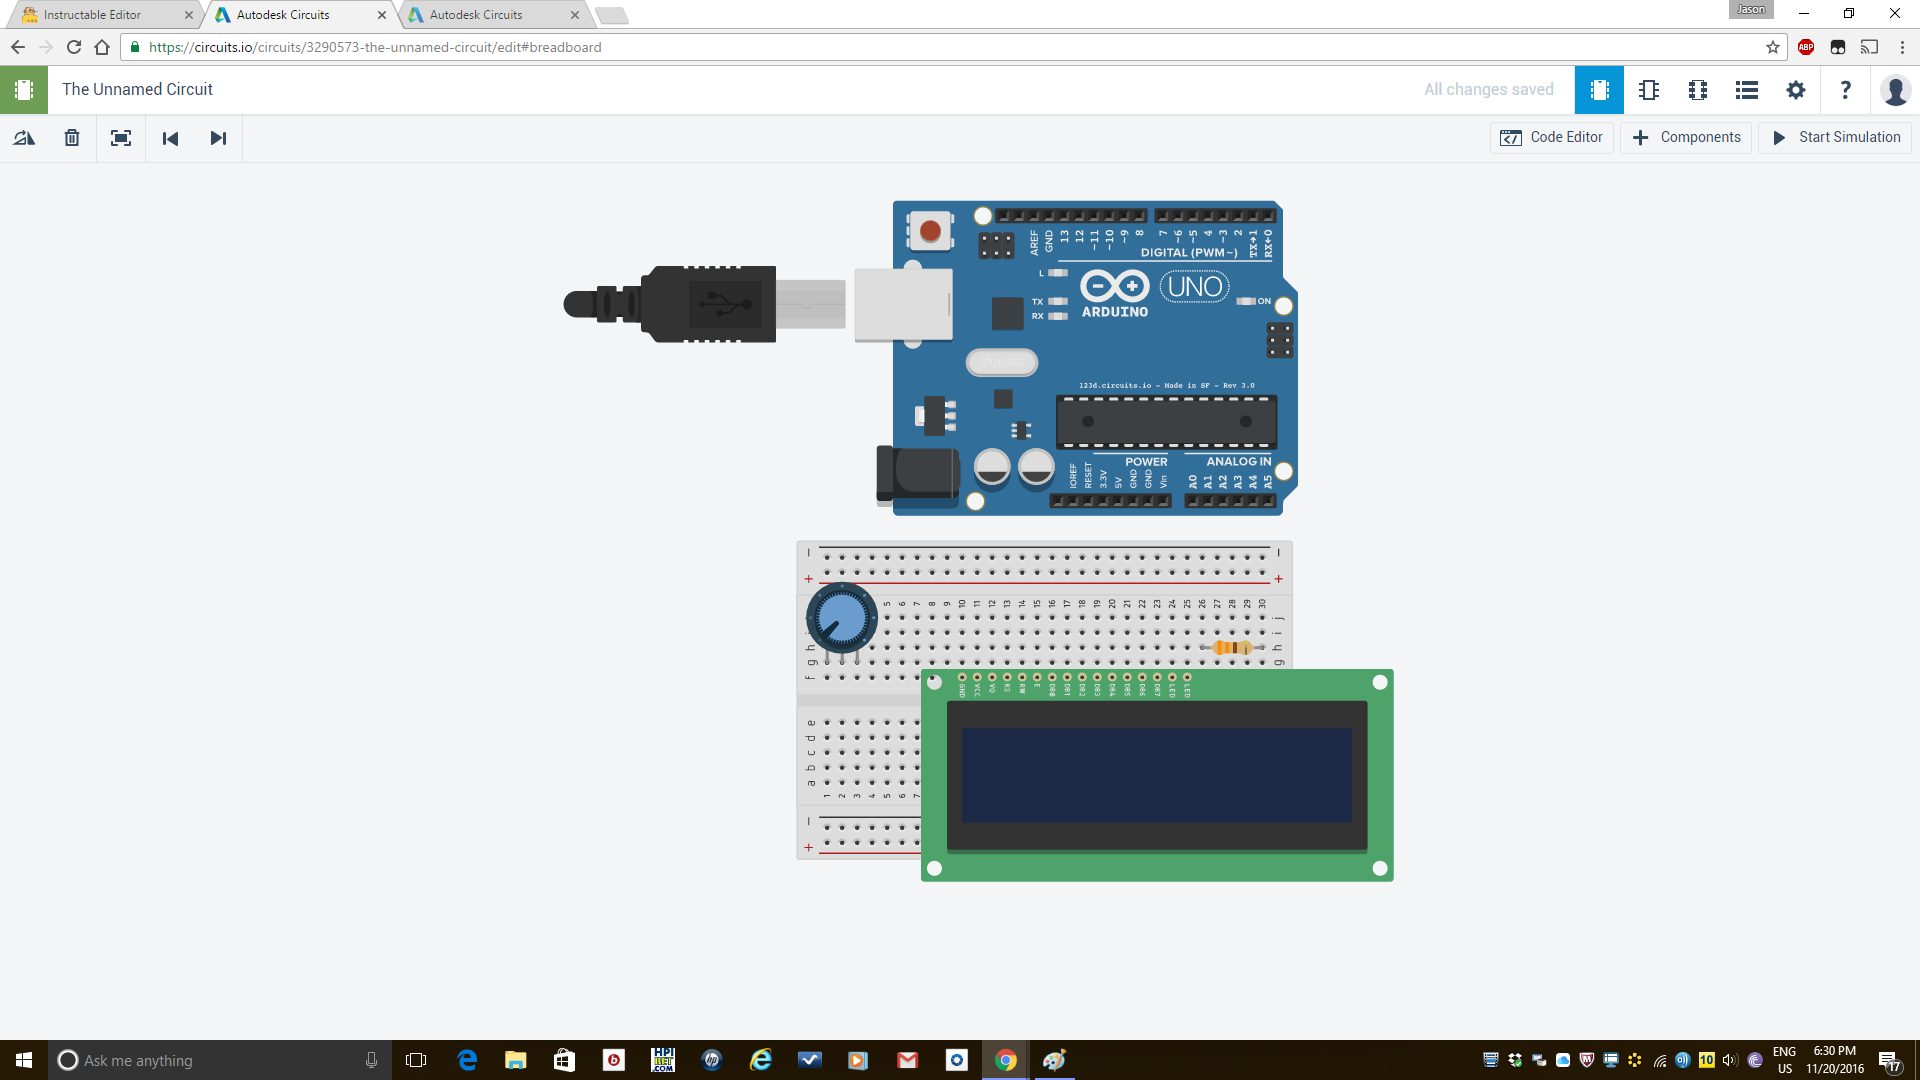
1. Line up the LCD's GND hole with F10 on the breadboard
2. Drag and drop a resistor and potentiometer to the work space. Click on the resistor and set the resistance of it to "330" and select the "Ω" symbol from the menu. Do the same for the potentiometer but set its resistance to 10 and choose "k0hm".
3. Line up the Potentiometer's 3rd terminal with G3 on the breadboard
4. Line up the resistor's 1st terminal with H26 on the breadboard (rotate the resistor 90 degrees before doing so)
At this point, take a look at image one to make sure you have the components lined up in the right place. If not, go back and make sure they are correctly placed and move to step 5.
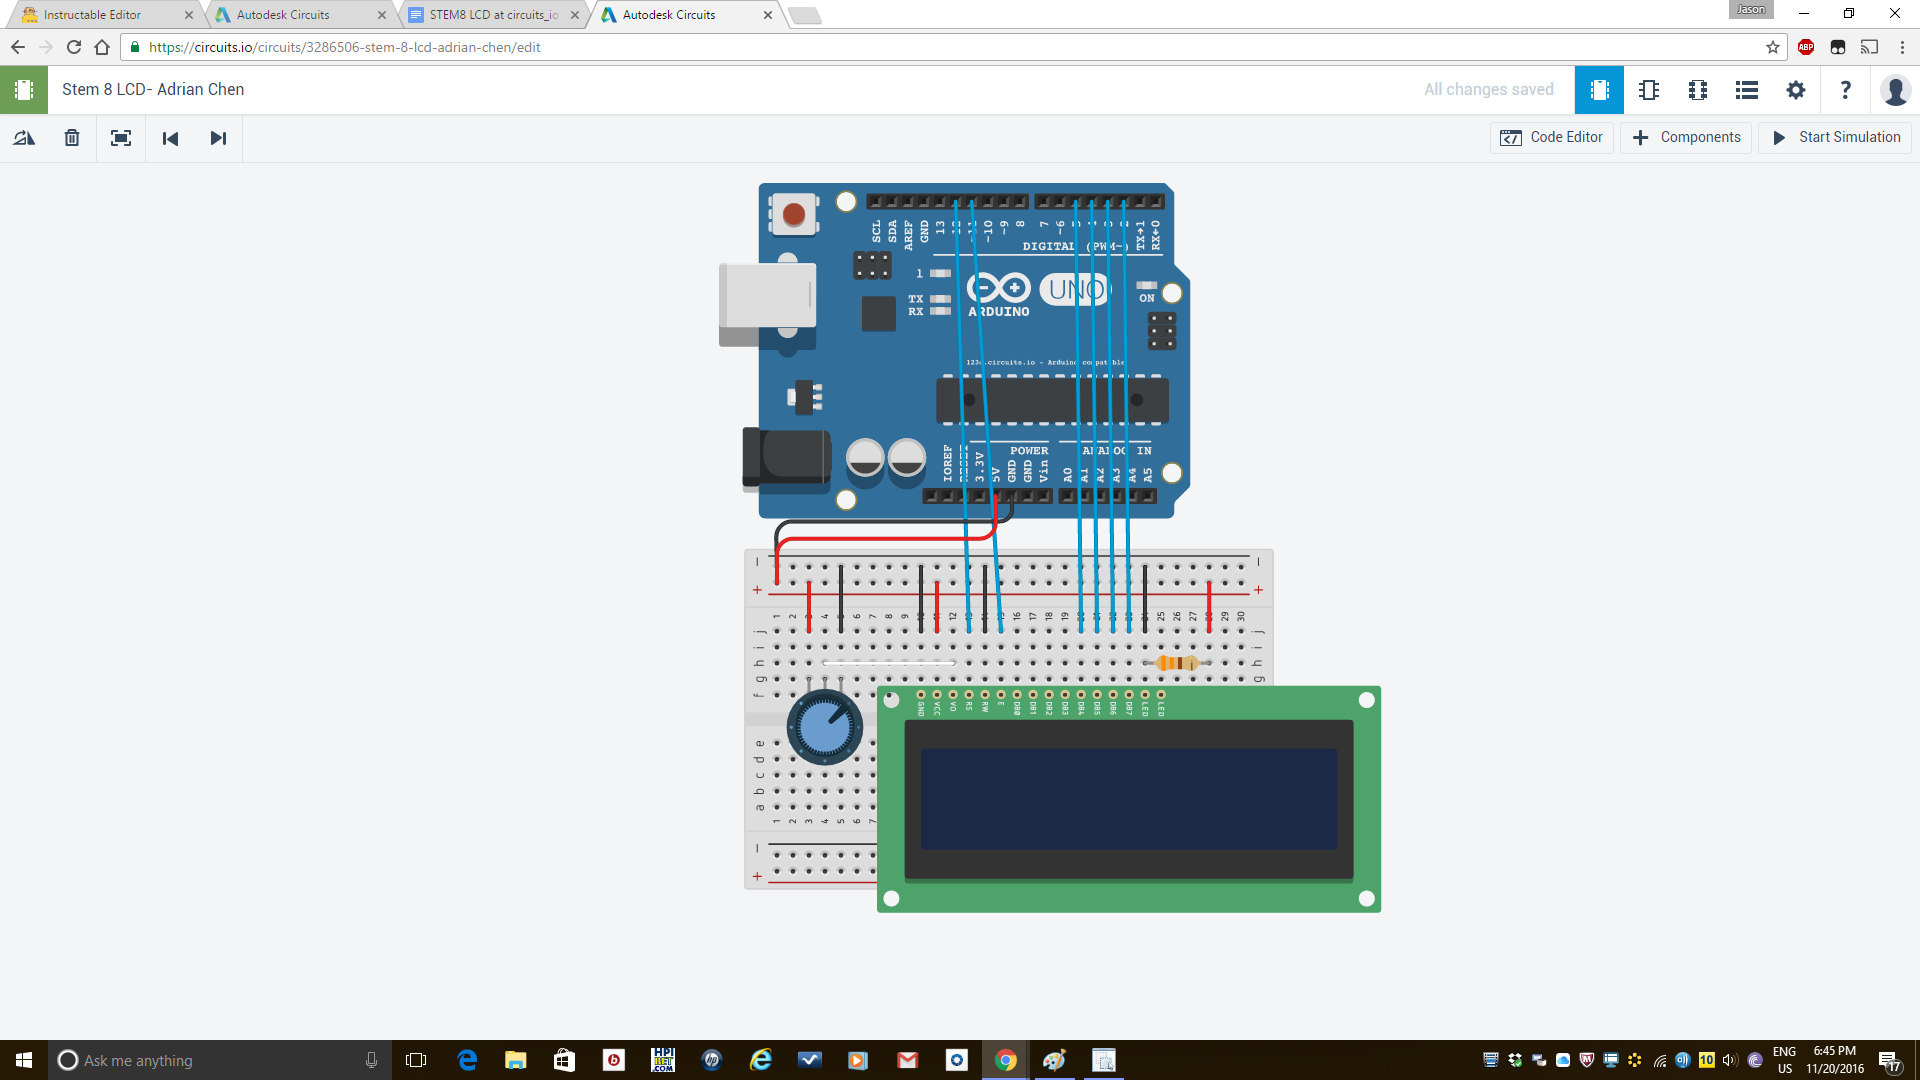
5. Connect a “Breadboard wire” from UNO GND to the “-” pinhole adjacent to j1 and whatever you want.
6. Connect a Breadboard wire from UNO 5V to the “+” pinhole adjacent to j1 and colour whatever you want.
7. Next, wire from j3 to “+”; and connect a wire from j5 to “-”.
8. Connect a wire from j10 to “-”. Connect a wire from j11 to “+”.
9. Connect a wire from j14 to “-”. Connect a wire from j24 to “-”.
10. Connect a wire from j28 to “+”. Connect a wire from h4 to h12.
11. Connect a wire from j13 on the breadboard to UNO port 12. Connect a wire from j15 on the breadboard to UNO port 11.
12. Lastly connect a wire from j20 on the breadboard to to UNO port 5. Connect a wire from j21 on the breadboard to UNO port 4. Connect a wire from j22 on the breadboard to UNO port 3. And connect a wire from j23 to UNO port 2.
Once you have all the connections in place, refer to image 2 to make sure you have the wires in the right place.
13. Get the code from this link: https://docs.google.com/document/d/1WQL8tdBQAJmd3x0fBME8fhFGkwvJFEJsV0uL1bWAiLU/edit?usp=sharing
Then, delete all the existing code inside code editor and paste you new code in.
14. On line 63 of the code, there should be something that says ("(Hello World"). You want to use backspace on the "hello world" part and write something new in. I chose to keep it just for now.
15. In code editor, click upload and run. You should see the text pop up on the display and you can even change the brightness of the LCD with the potentiometer by turning it.
Project 2: Controlling the Spin Time on DC Motors
.png)
This project will show you how to control a DC motor in Autodesk Circuits. With changes to the code in this design, you can control how long the motor spins for. The components you need for this design are the following:
-A DC motor (1x)
-An Arduino Uno (1x)
-A 9v Battery (1x)
-A breadboard (1x)
-A TIP120 (1x)
-A diode (1x)
-Breadboard wires (Drag and drop them as you follow along)
Steps:
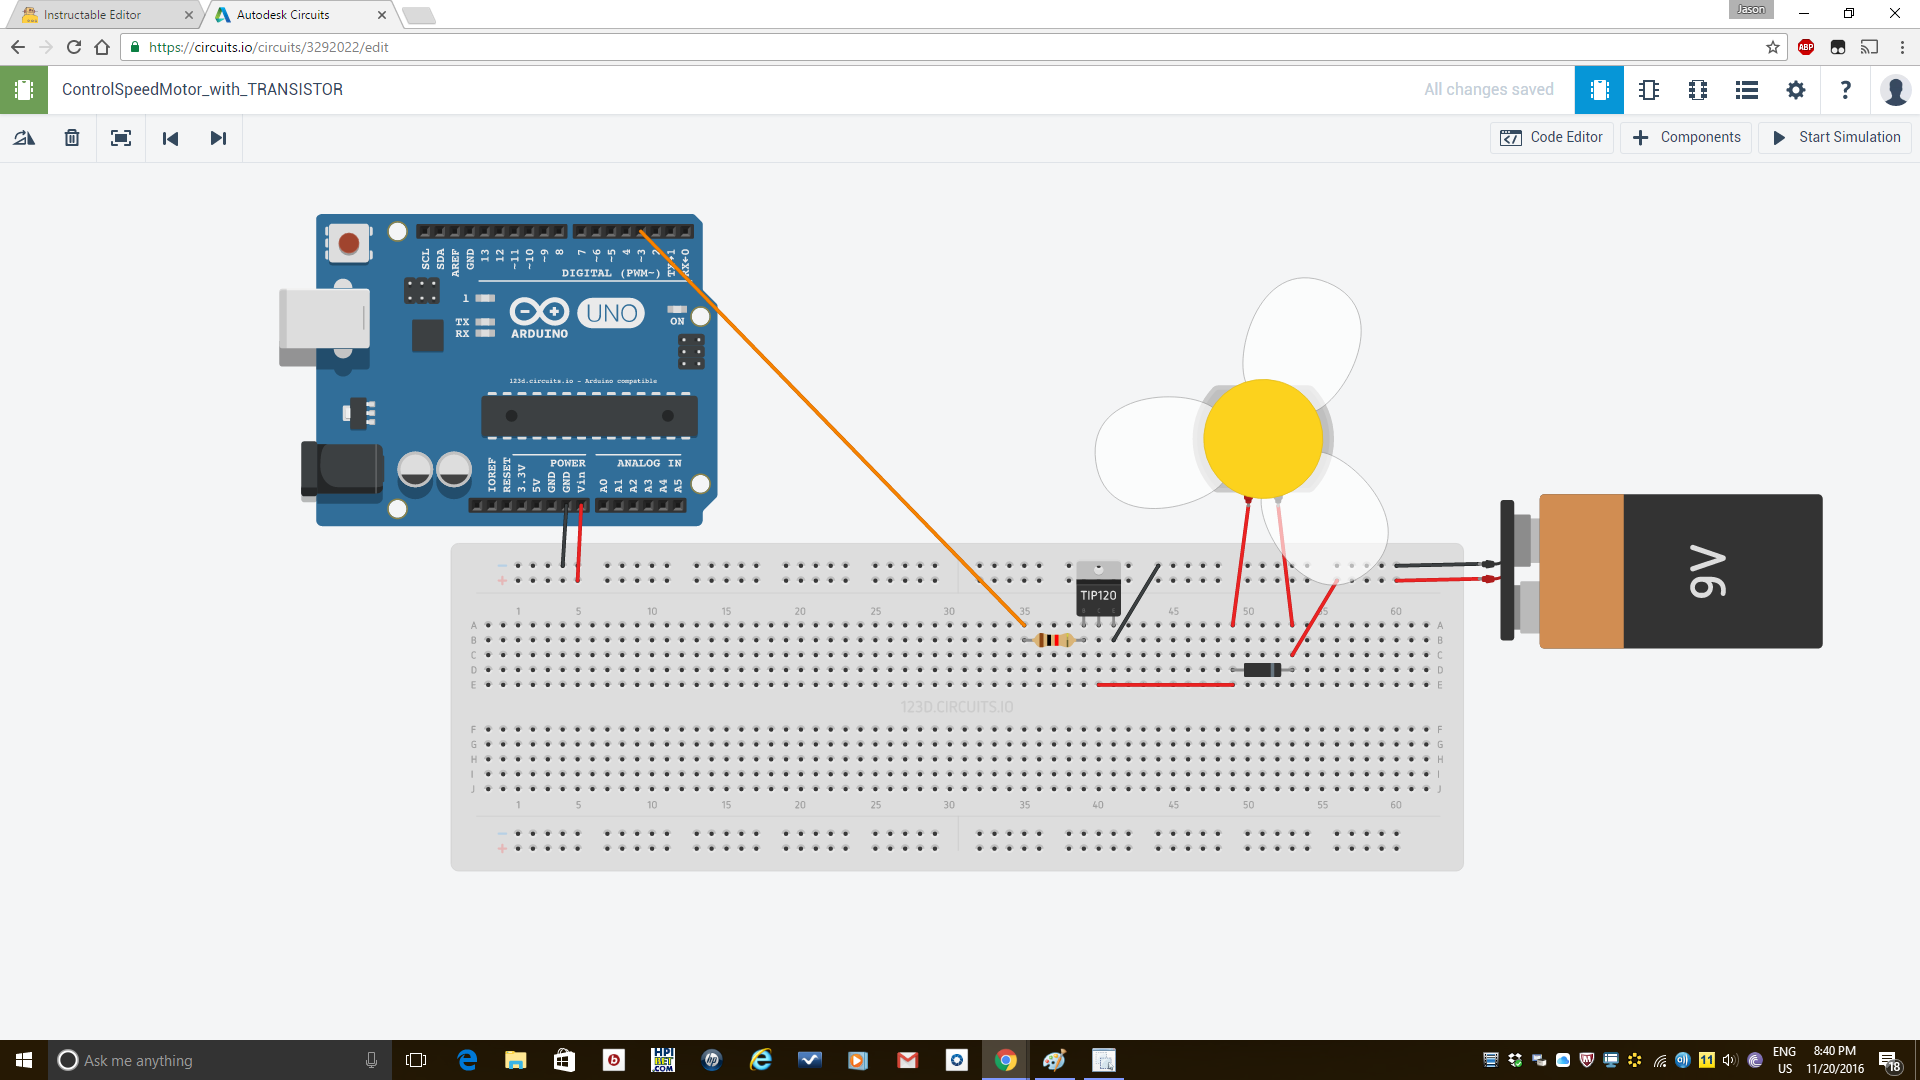
1. Connect GND on the Arduino Uno with a wire to "-" pinhole 4. Connect VIN with a wire on the Arduino Uno to "+" pinhole 5 on the breadboard.
2. Connect ~3 to A35 on the breadboard with a wire.
3. Drag and drop a DC motor onto the work space and connect terminal 2 to A49 on the breadboard. Connect terminal 1 on the motor to A53 on the breadboard.
4. Drag and drop a DC motor onto the work space and connect negative to "-" pinhole 60 and connect positive to "+" positive pinhole 60.
5. Drag and drop a Diode and connect the anode to d49 on the breadboard. Make sure to rotate the diode 90 degrees first.
6. Drag and drop a resistor and set the resistance to 1 and select "kΩ" on the menu. Then, connect terminal 1 of the resistor to B35 but make sure it's rotated 90 degrees.
7. Take a TIP120 sensor and line up the "base" lead with A39.
8. Connect E40 on the breadboard to E49 also on the breadboard with a wire.
9. Lastly, connect B49 on the breadboard to "-" pinhole 44 with a wire.
Verify that everything was properly connected by referring to image 1.
10. Code Link: https://docs.google.com/document/d/1yY5ArI9wyxf0IA5b55zn0jSx7gtGrHyuQAnAcuEpdk4/edit?usp=sharing
11. Clear all the existing code in the code editor section and paste the new code in. On line 16, you will see a part where it says (Sp > 300). The value 300 is in seconds so you want to change that value to the time you want your motor to spin for.
Project 3: Blink an LED Light
.png)
If you don't want to spend too much time on designing and coding a huge design, this project is probably what you should do instead. It is very simple but although small, the same concept can be used on a much bigger scale! The components you need for this design are....
-An LED (1x)
-A resistor (1x)
-An arduino Uno (1x)
-A breadboard (1x)
-Breadboard wires (drag and drop as you follow along)
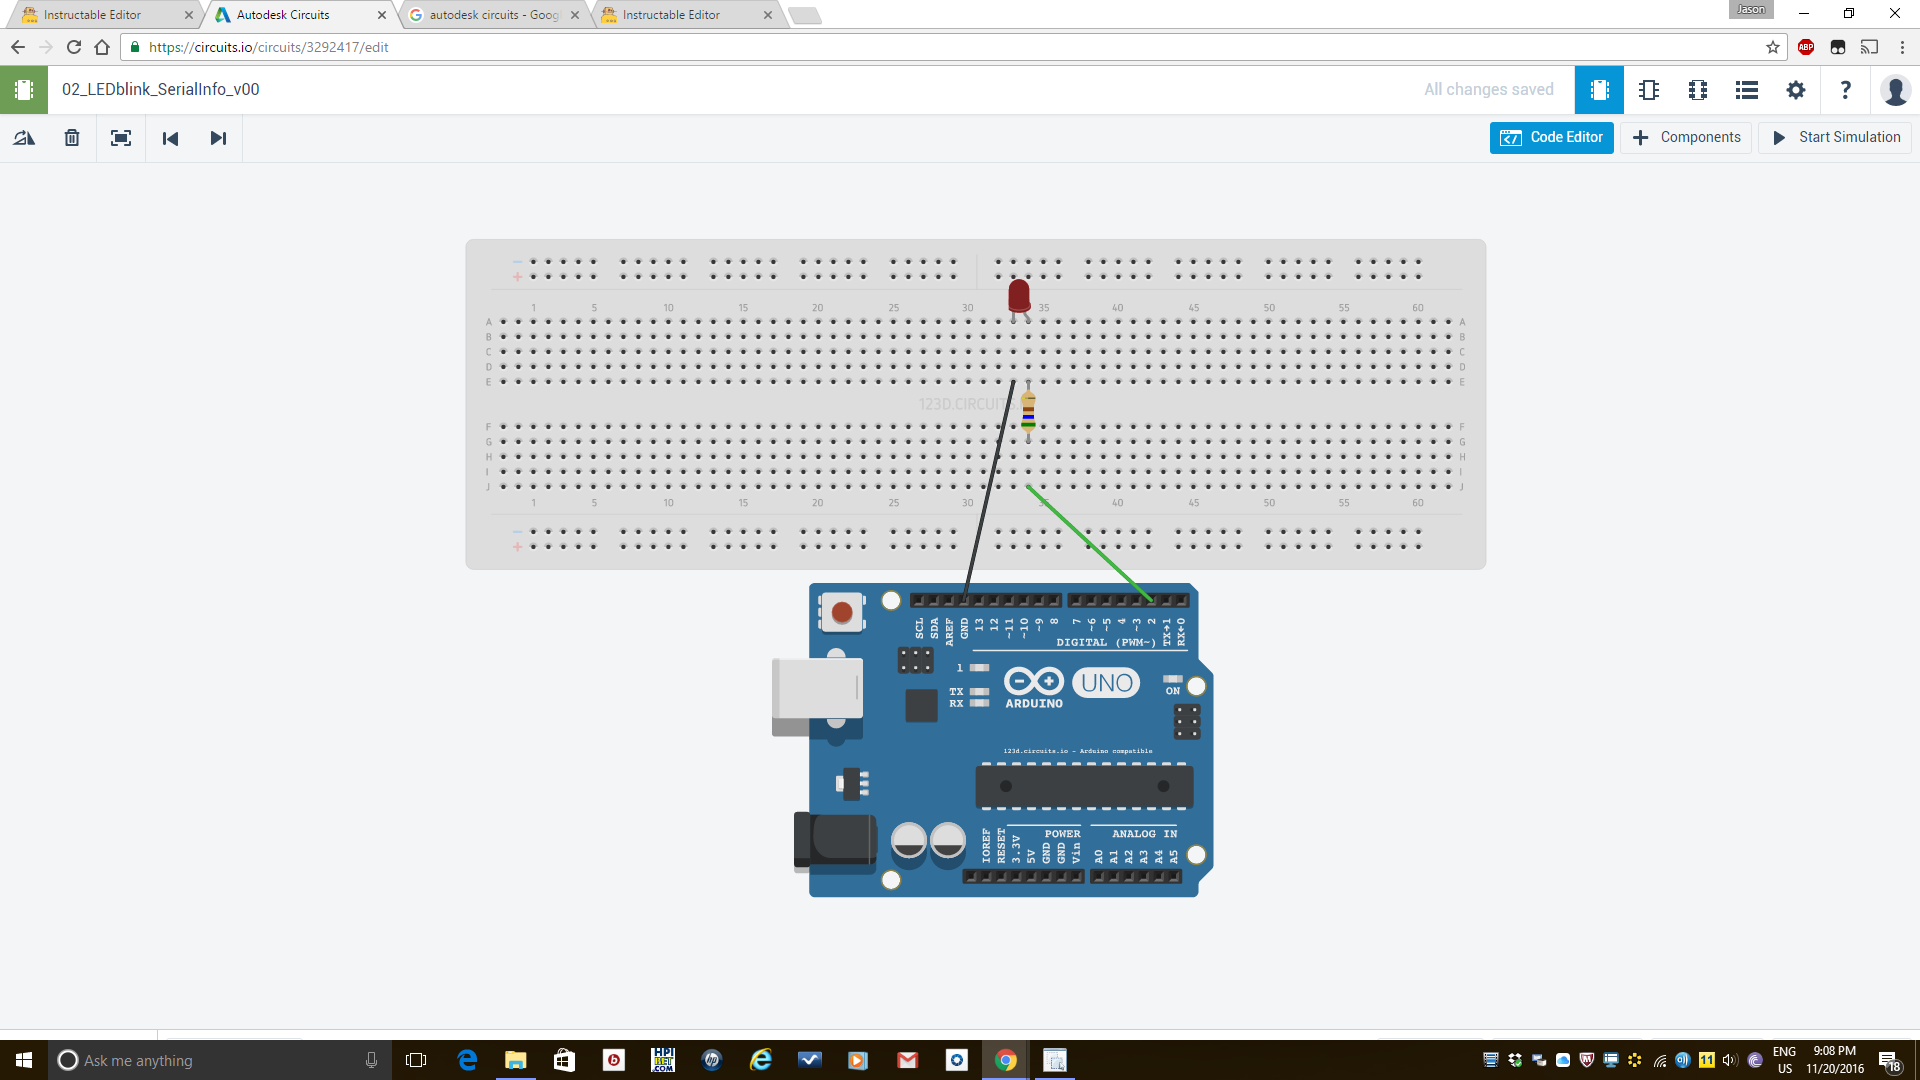
1. Connect the anode of the led to A34 on the breadboard.
2. Rotate a resistor so that terminal 2 is at the top. Set the resistance to 560 and select "Ω" on the menu.
3. Connect terminal 2 of the resistor to E34 and connect terminal one to F34.
4. Drag and drop an Arduino Uno into the work space. Connect GND of the UNO to E33 on the breadboard using a wire. Lastly, connect terminal 2 of the UNO to j34 on the breadboard using a wire.
Please verify that your wiring is correct by referring to image 2.
5. Delete all the existing code in the code editor section and replace it with the code here: https://docs.google.com/document/d/1z7n69RQ9XKbSfJWRWoG-sc4A5KalRi1iw5NHZeaCW8s/edit
6. On line 18, you will see something that says "delay(1)". If you change the value to a higher one the LED will blink in much slower intervals. If the value is changed to a lower one (lowest is 1) it will blink in much faster inetrvals. Change this value to your preference.
Conclusion
.jpg)
Congratulations on reading to the end of this guide and making all 3 of these designs. I hope you've learned a little more about Autodesk Circuits or even a little more on Arduino programming. I would love to see the designs you made from this tutorial or even your very own designs so post them in the comments below. If you also have suggestions for designs or things I should add let me know! If you liked this instructable, please hit that follow button to keep up to date with future tutorials, or even better vote for my instructable in the Circuits contest. Thank you!