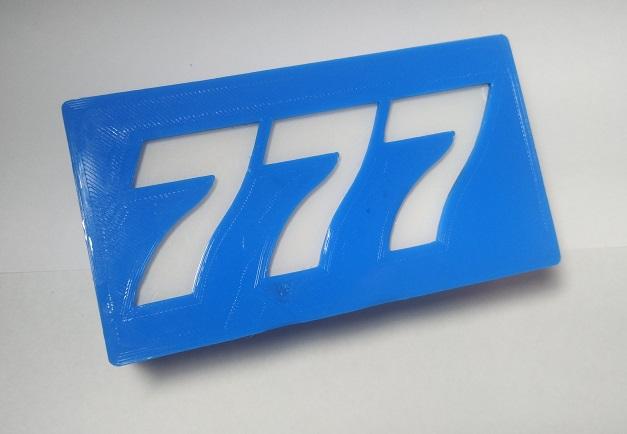
777 Aircraft Lamp
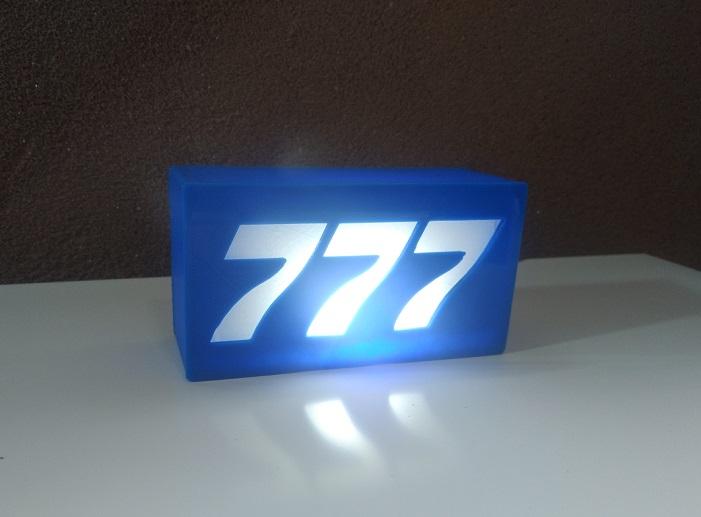
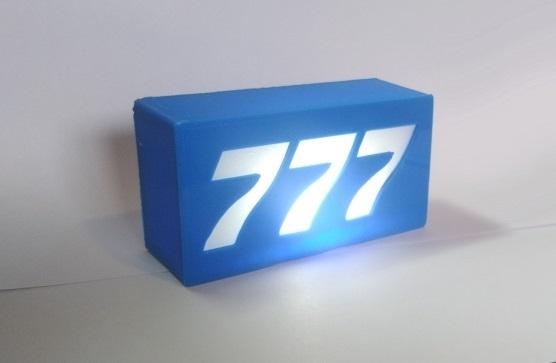
While watching Youtube channels about aviation, I noticed a guy who have in the scenery a sign with the letters of the iconic minijumbo 777. So I decided to make one for me and turn it into a lamp.
So, I hope you enjoy this piece of decoration I made for the fans of the 777 aircraft.
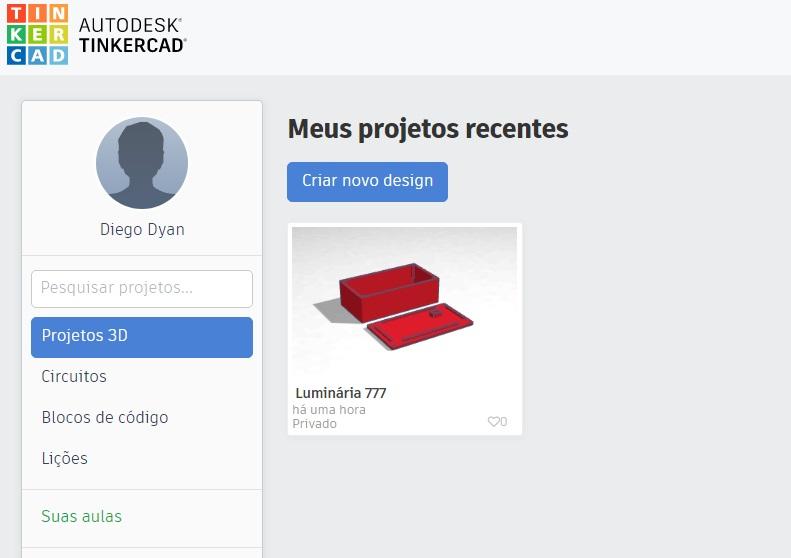
I used the Tinkerkad online design tool to create the model, so you can get the original files and modify to your favorite aircraft.
Supplies
- 3D printer
- Hot glue
- 4 M3 screws
- Switch
- 560 ohms resistor (or what suits your circuit)
- Some piece of acrilic (a CD cover will do the job)
- White LED (could be LED bars, strips or regular leds)
- Soldering iron
- White spray paint
- Handsaw
Open the Thinkercad Design Tool
I will try to make a step-by-step guide of how to use the basic of Thinkercad design.
The tool itself is pretty intuitive, but some tips are always helpful.
Open Thinkercad and click on "Create new design"
PS.: The link to my design: https://www.tinkercad.com/things/4PzhDnFNycf-luminaria-777/edit?sharecode=Wt0Fetyrtqvdb87t3VHeF3rfnUZJiDEF5Hsp9jNsa1c
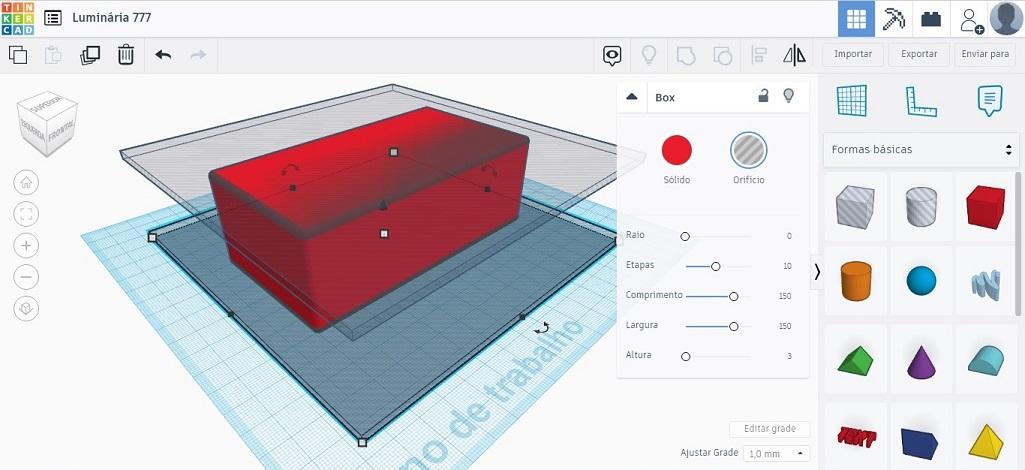
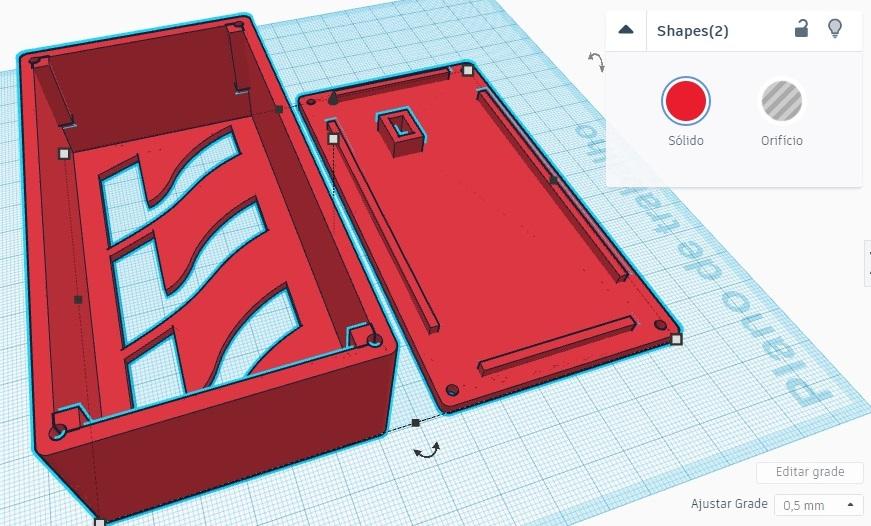
Make a Box and Smooth the Edges
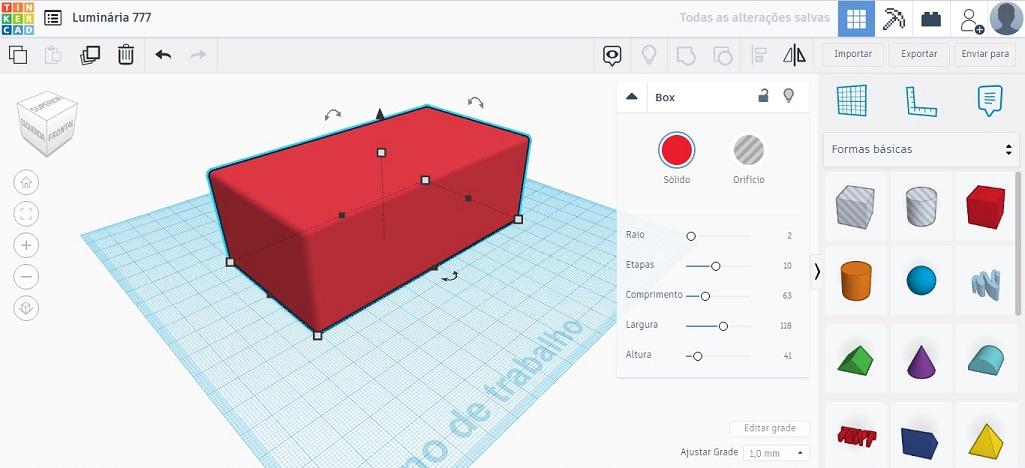
Thinkercad make it easy to round the edges of a box.
Draw a box with the parameters showed in the picture.
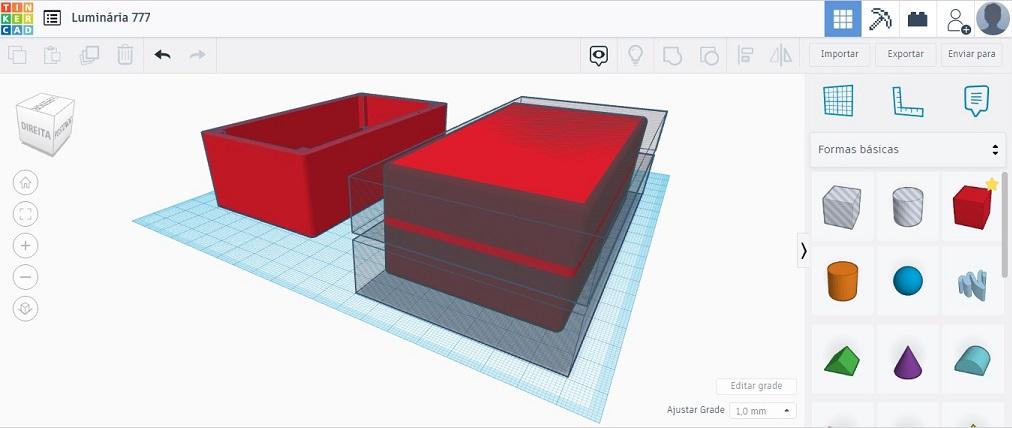
Cut Away the Bottom and the Top

We wanted just the sides rounded, not the borders of the top and the bottom, so we will unite the object with another two hollow boxes, this will exclude the intersection parts with the original cube.
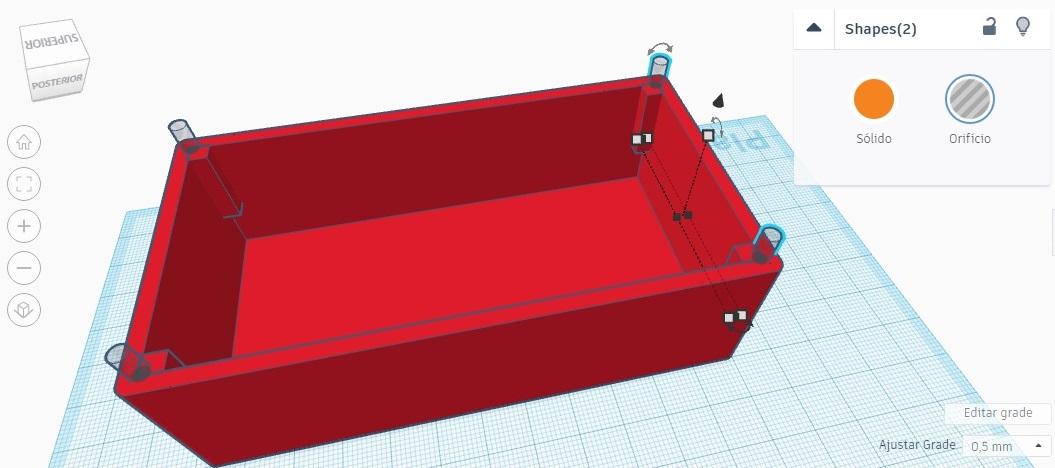
Hollowing the Box
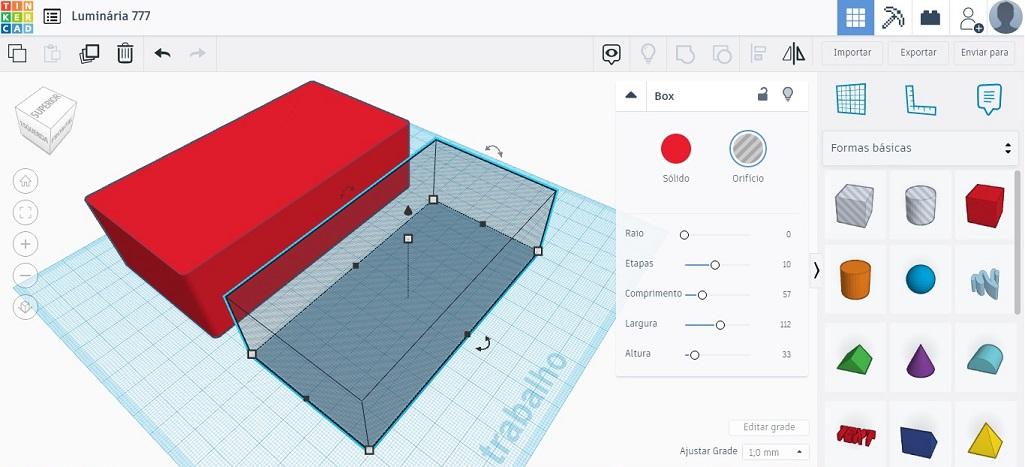
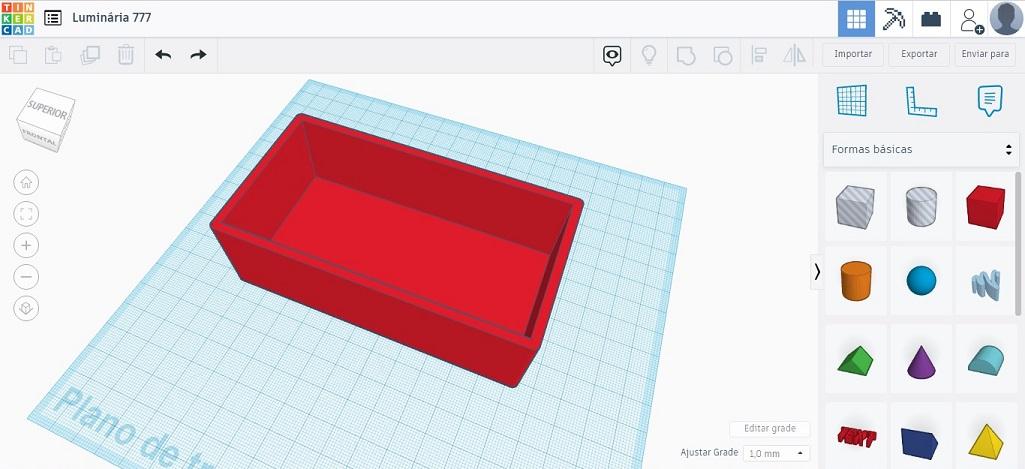
Draw another negative cube with the dimensions showed. Use the align tool to center the two models, so group them to make the box itself.
Identation for the Screws
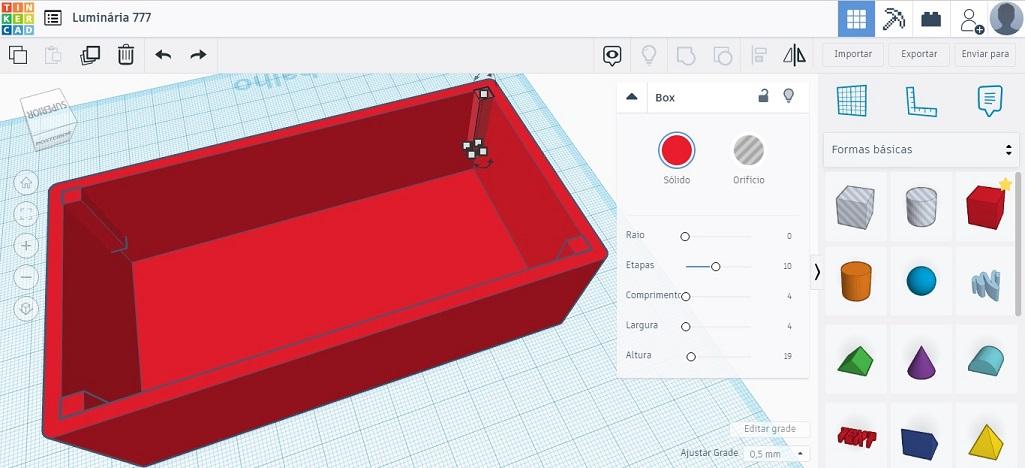
Draw for more cubes in the inner sides. This is where the holes for the screws will be.
TIP: Change the grid adjustments to 0.5mm.
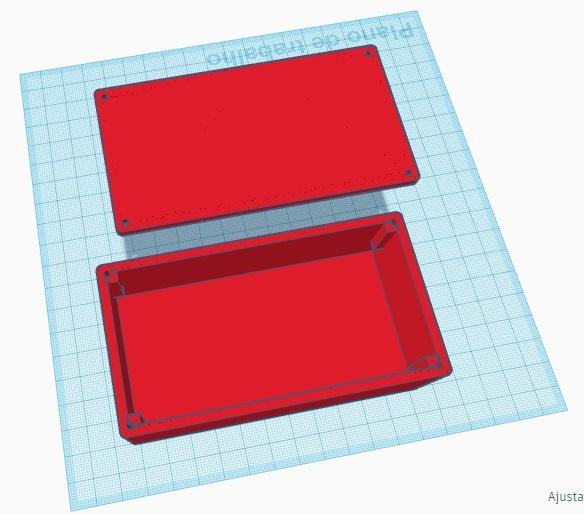
Making the Lid
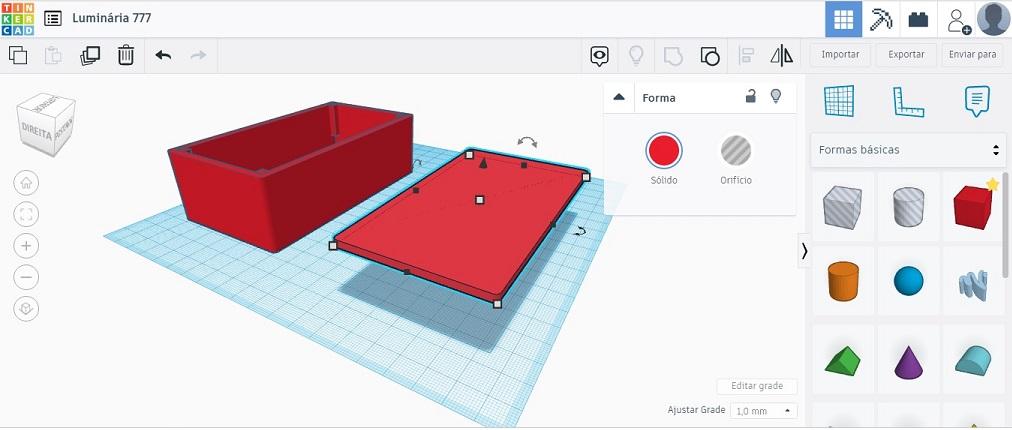
To make the lid, draw a box equal to the first box you drew in the first step.
So add two negative cubes in order to get a 3mm slice of the original shape. This slice will fit perfectly with the other box.
It's optional, but you can add some notches 3mm away from the borders to help fit in the main box.
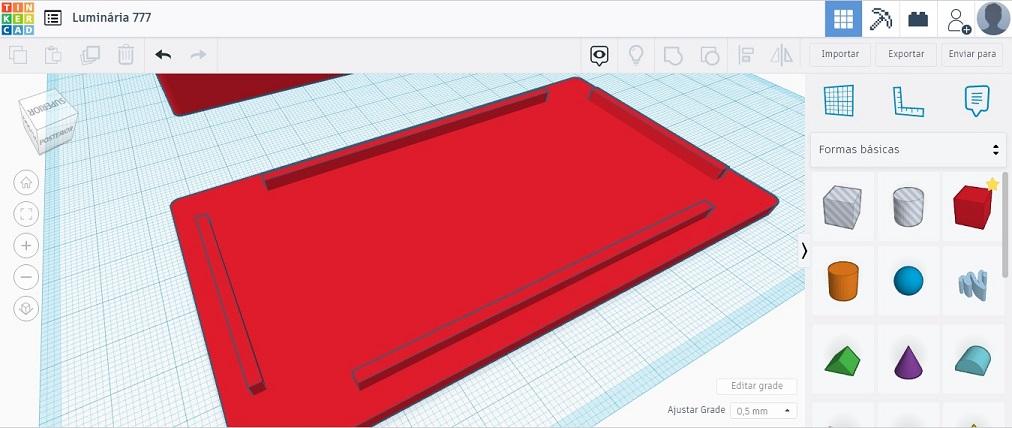
Making the Holes for the Screws
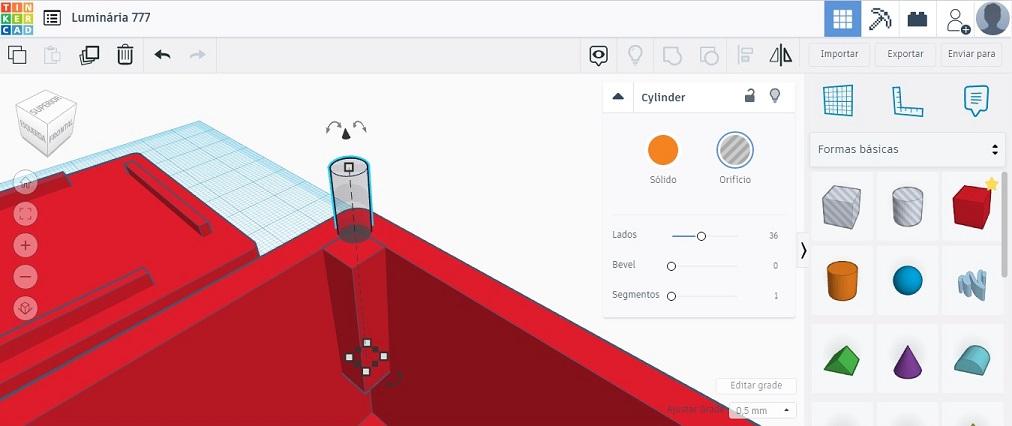

Add a negative cylinders in the identation made in the step 5. Copy and paste in all corners.
This part is tricky because you need the same holes in the lid, but you cant group the box and lid together, so the tip is put for cylinders on the corners and duplicate them, lefting them in the same place. Align the lid and the box and group four cylinders with the box and four with the lid.
On Off Switch

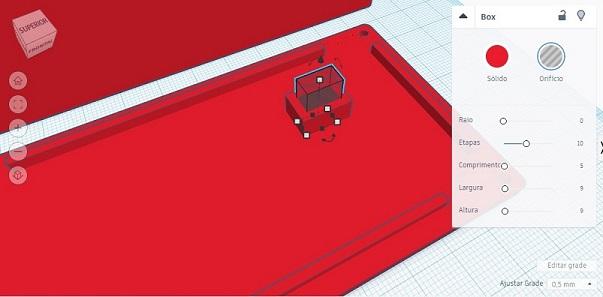
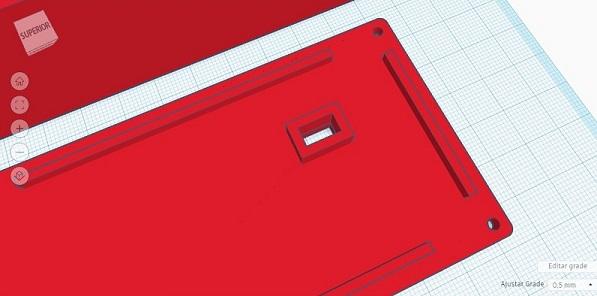
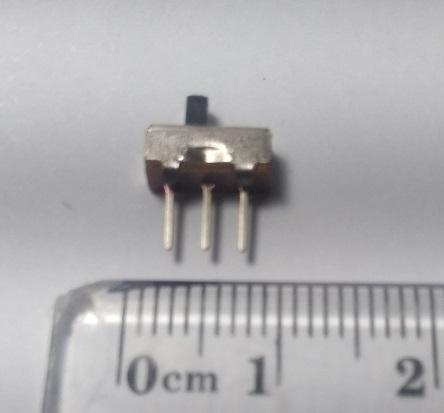
I have some very small switches that are leftovers from other projects, so I drew a rectangled hole for it.
If you get to this point, I think is already clear to you how to make hollow shapes, so you can make holes to fix the whatever kind of switch you have the way you want.
Putting the Numbers
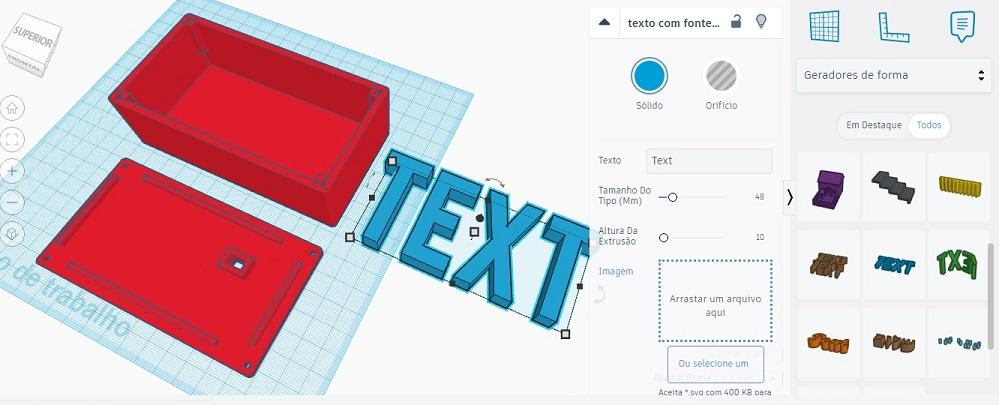
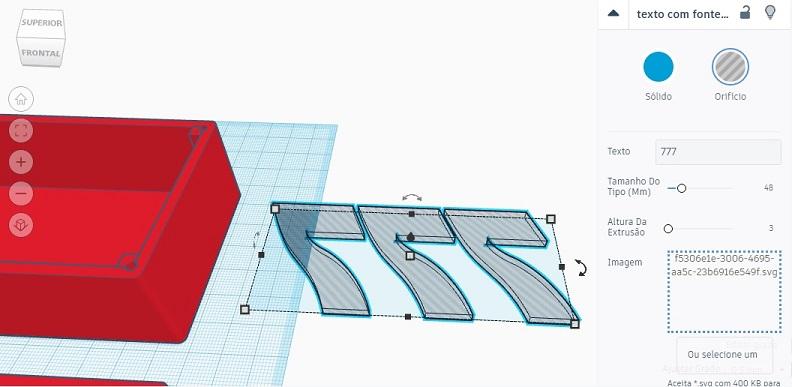
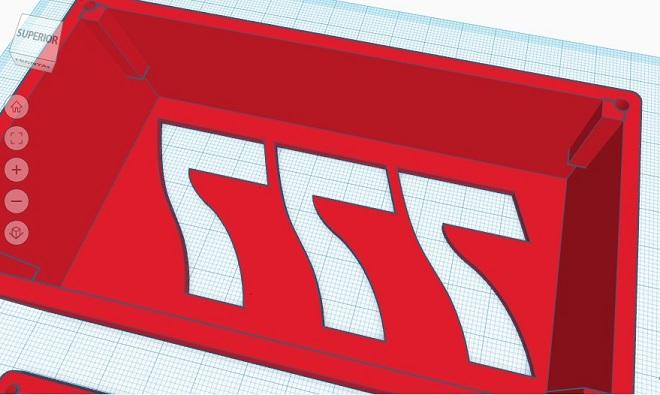
For this part, click on "Shape generators" and find "custom text font" like in the image.
When you drag the object, a box will open then click on "Or choose one..." and upload the SVG file boeing-style-font.svg
Edit the text, find the best position, make it hollowed and turn into 45° to invert it.
Downloads
Print the Model
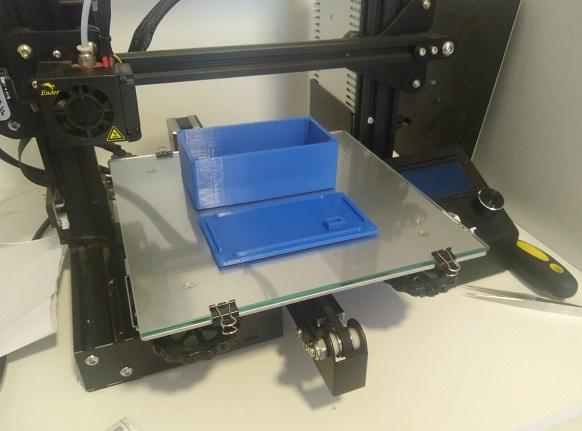
The hard part is over. Export the file in STL format, generate the code on your favorite slicer and print it.
If you dont want to go through all this steps, I left the STL file ready to download.
Downloads
Light Diffuser
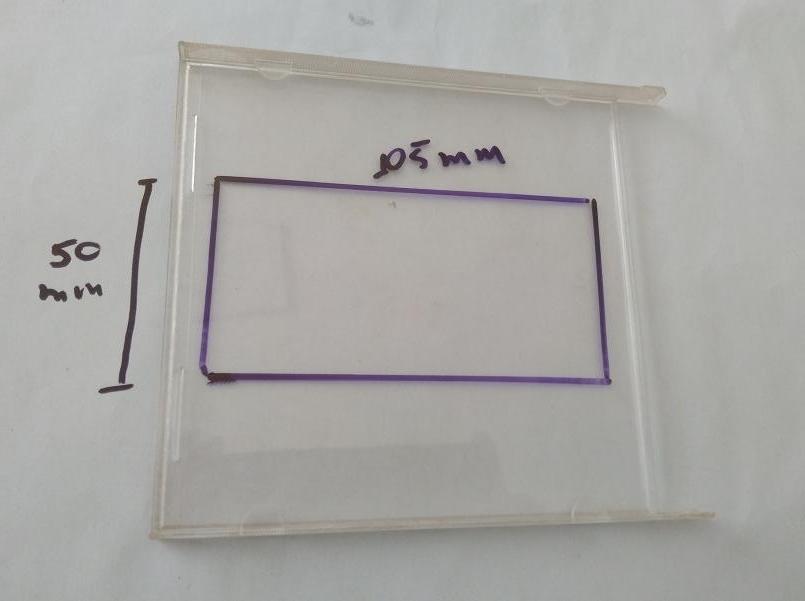
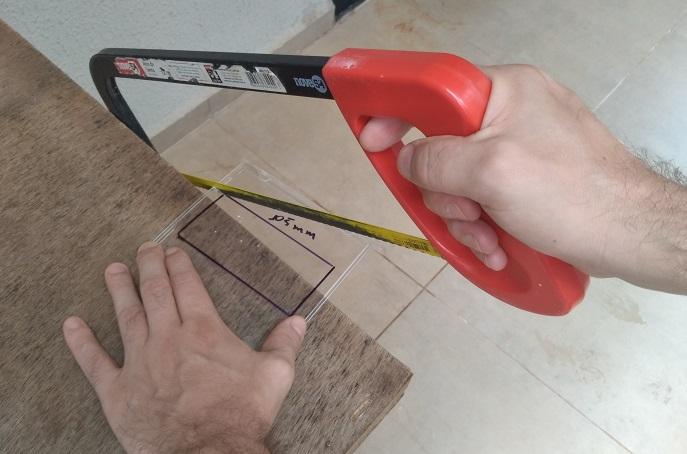
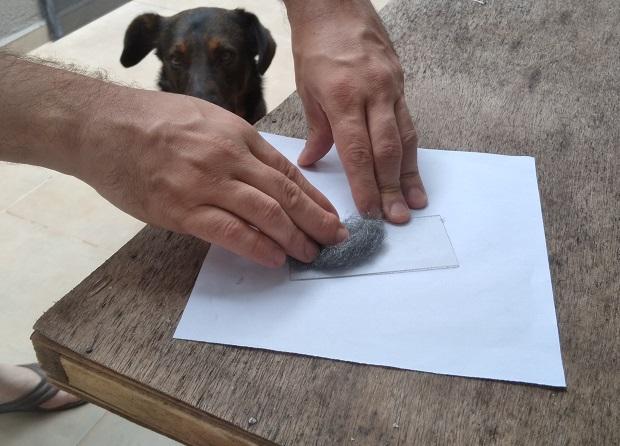
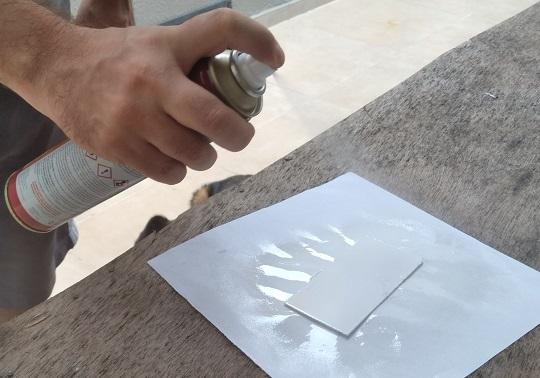
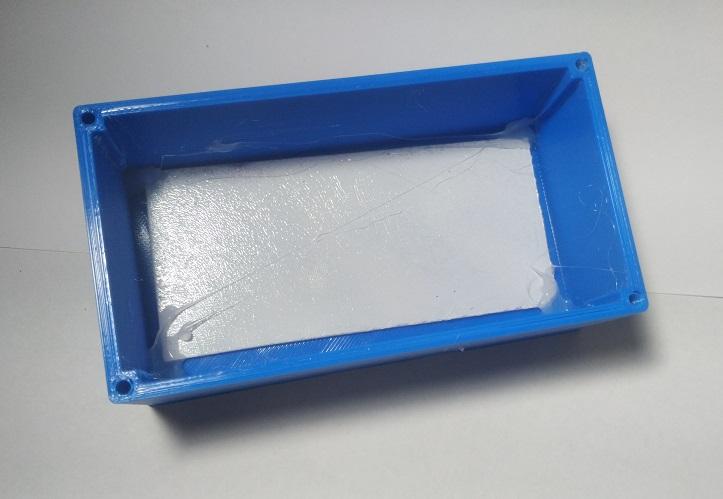
As a diffuser I used an old CD cover and cut it to fit inside the main box.
Scratch and paint the side that will be faced to inside.
Use hot glue to fix the acrilic.
Light Source
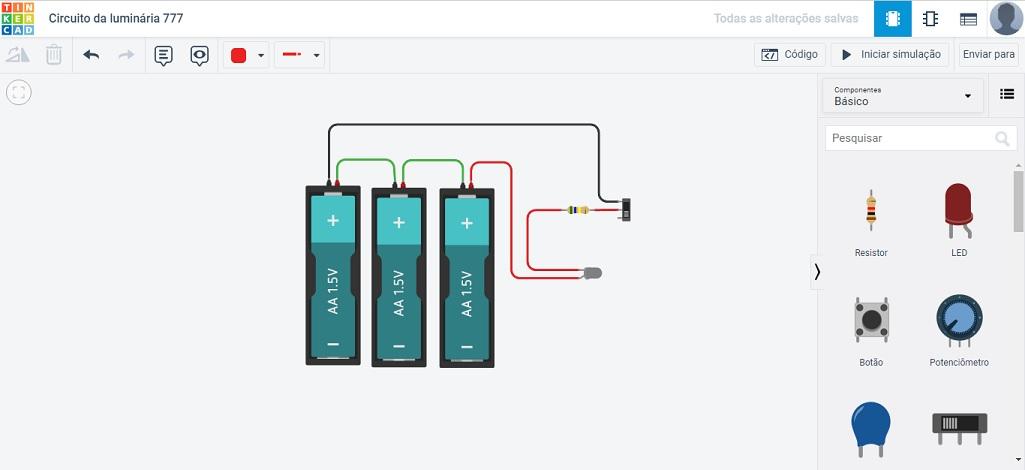
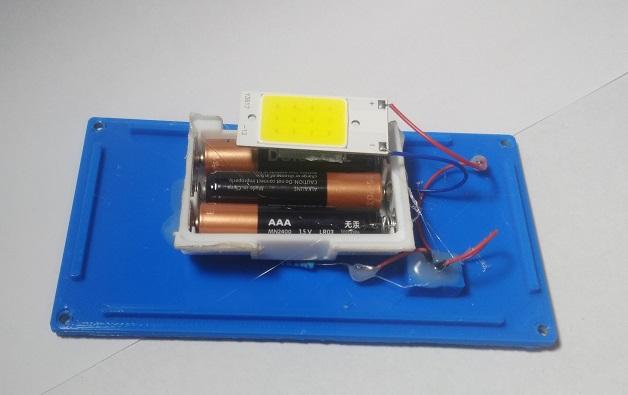
I used the circuit of an old cabin light. You can use a broken lantern for example, or regular leds in serial or ledstrips.
Again Thinkercad has a tool to implement the electronics and can even simulate the real life functioning.
Check my example and click Run Simulation to test the circuit.
https://www.tinkercad.com/things/b7PnQMopvUN-circuito-da-luminaria-777/editel?sharecode=2O7O_zF1fUSydNIZI4Btcmk5AKdv0H3TYEvMs-b_dwc
The End
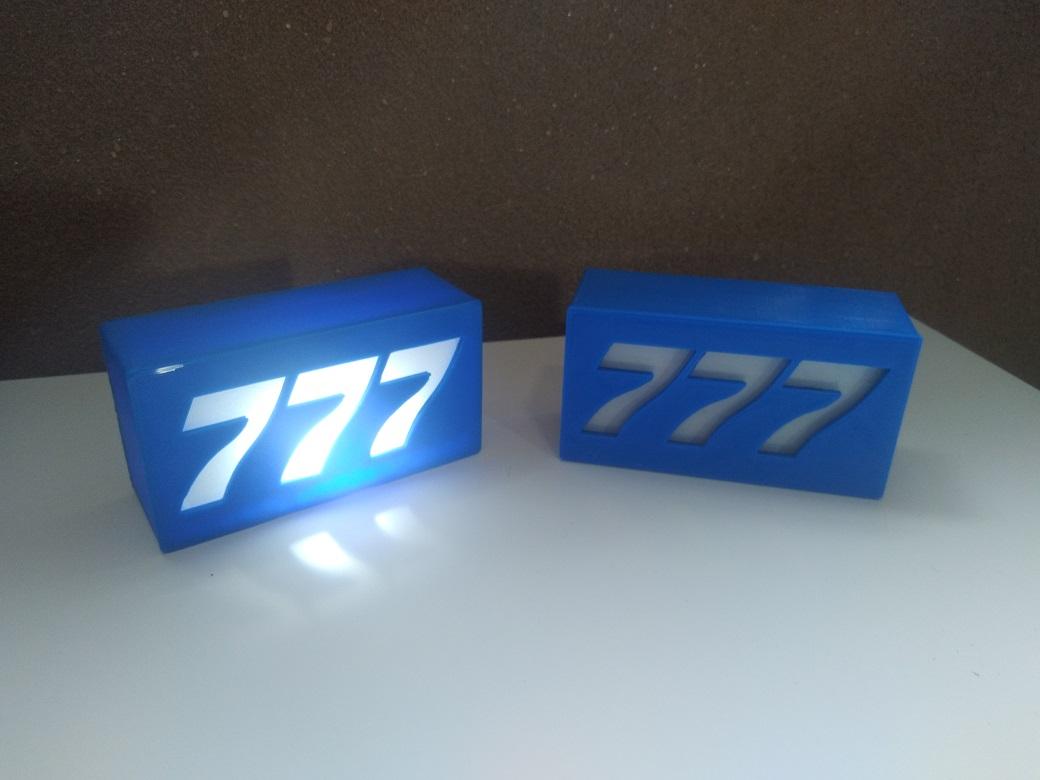
Now you have a unique piece of decoration and learned the basics of how to use Thinkercad tools.