6CH Smart Power Strip With Wemos D1 Mini and Blynk
by radiowinr in Circuits > Arduino
6396 Views, 17 Favorites, 0 Comments
6CH Smart Power Strip With Wemos D1 Mini and Blynk
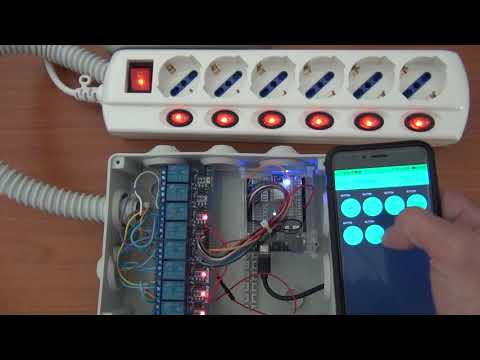
This project describes how to make a 6CH smart power strip controlled by smartphone with Blynk and Wemos D1 mini R2 virtually anywhere in the world using Internet.
For this project I was inspired by this nice Instructables:
Warning: This project deals with AC electricity which is dangerous if you don’t know how to treat it safely. You must treat electricity with caution!
Introduction
A power strip is an extension cord with more than one power socket at the end, while there are different types of power strips (Surge Protecting etc.), for the purpose of this project a basic one will do.
For this project I used a power strip with 6 power socket each with a switch to control the socket independently. Of course after the modify applied in this project you can deal to control each of the 6 sockets with your smartphone using Blynk app (or override the Blynk control by pressing the socket switch on the power-strip).
To control the power-socket with the Wemos D1 mini a optoisolated relay board is needed to switch the current On or OFF to the power socket.
A relay is an electrically operated switch, where basically a current is used to turn a switch on or off. Relays can be of many types, the one I will be using is an electromagnetic relay, but feel free to use anything that matches your requirements. The relays I will be using will also be optically isolated, which means that the driving circuit of the relay is kept completely separated from the mains circuit it controls. To make my life easier I got a 8CH board and used only 6 relays for this project.
Requirements
What you need for this project:
8CH Realay Board (actually only 6 relays will be used for this project as the power-strip has 6 power sockets)
Blynk App for IOS or Android
A 6CH (or 8CH) power strip like this one (EU plug)
Colored wires and male-to-female Dupont wires
Blue wire and Black or Brown wire for Live and Neutral AC power
Setting Up the Power Strip
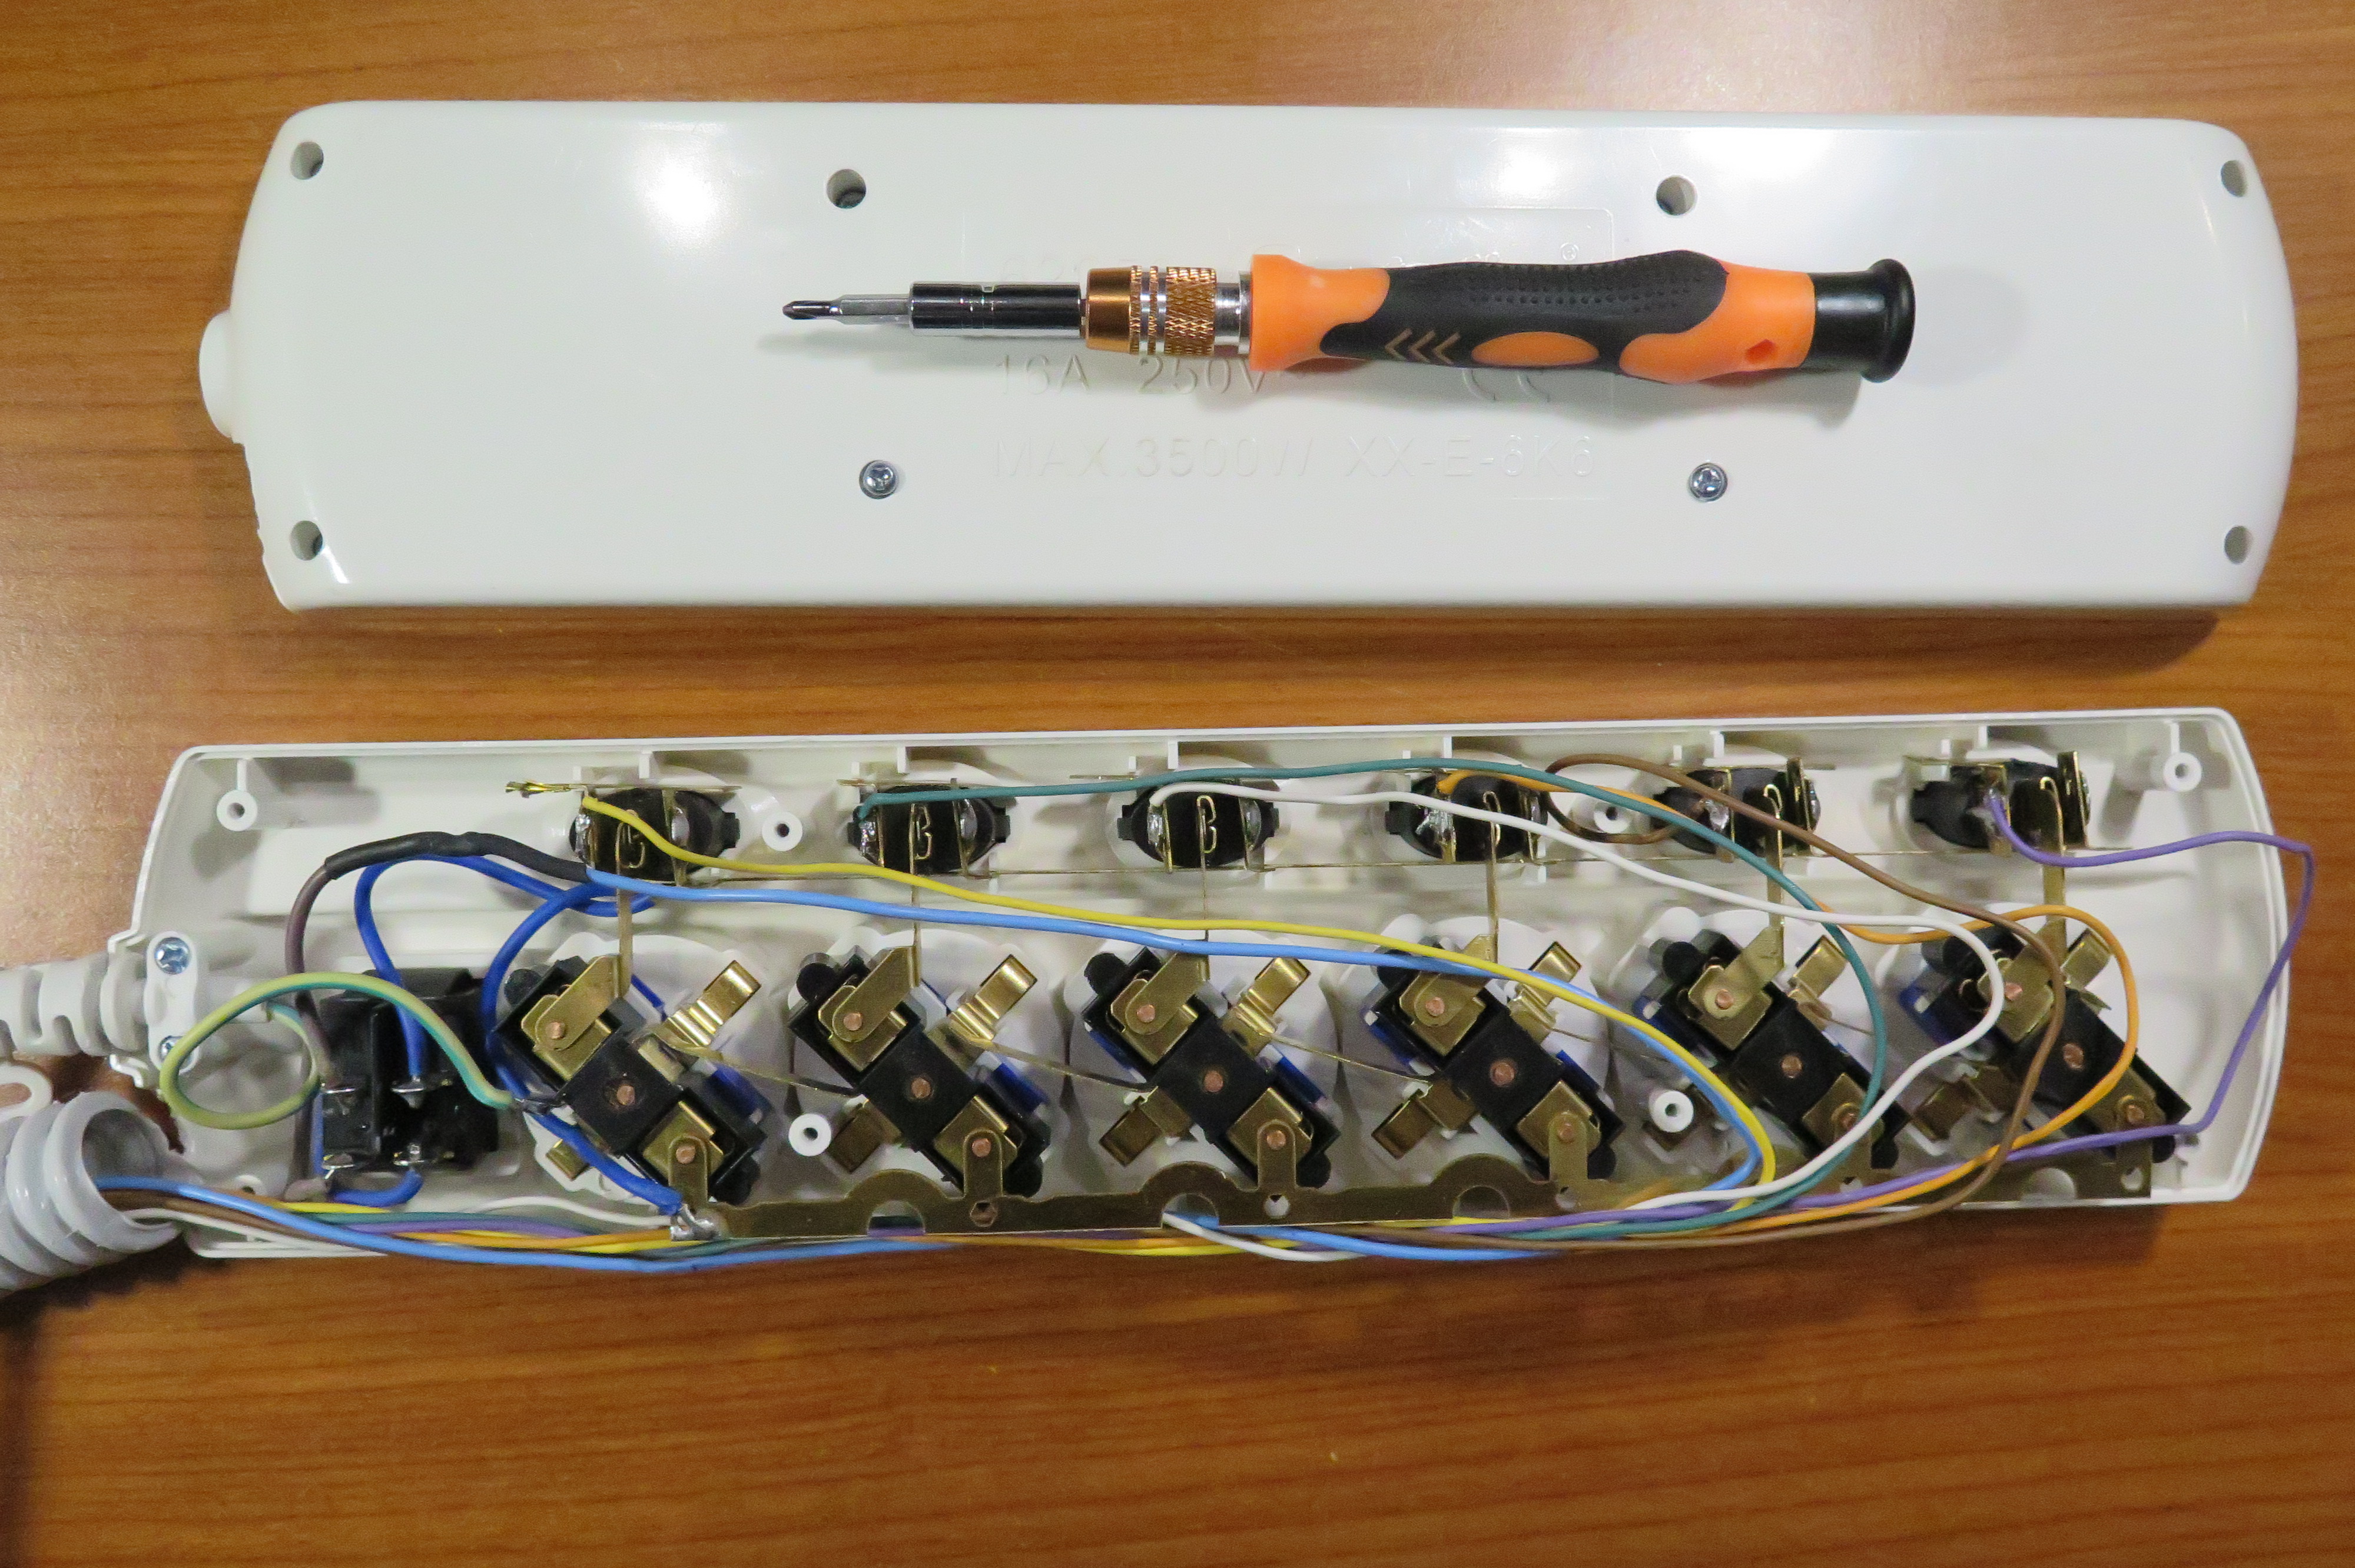
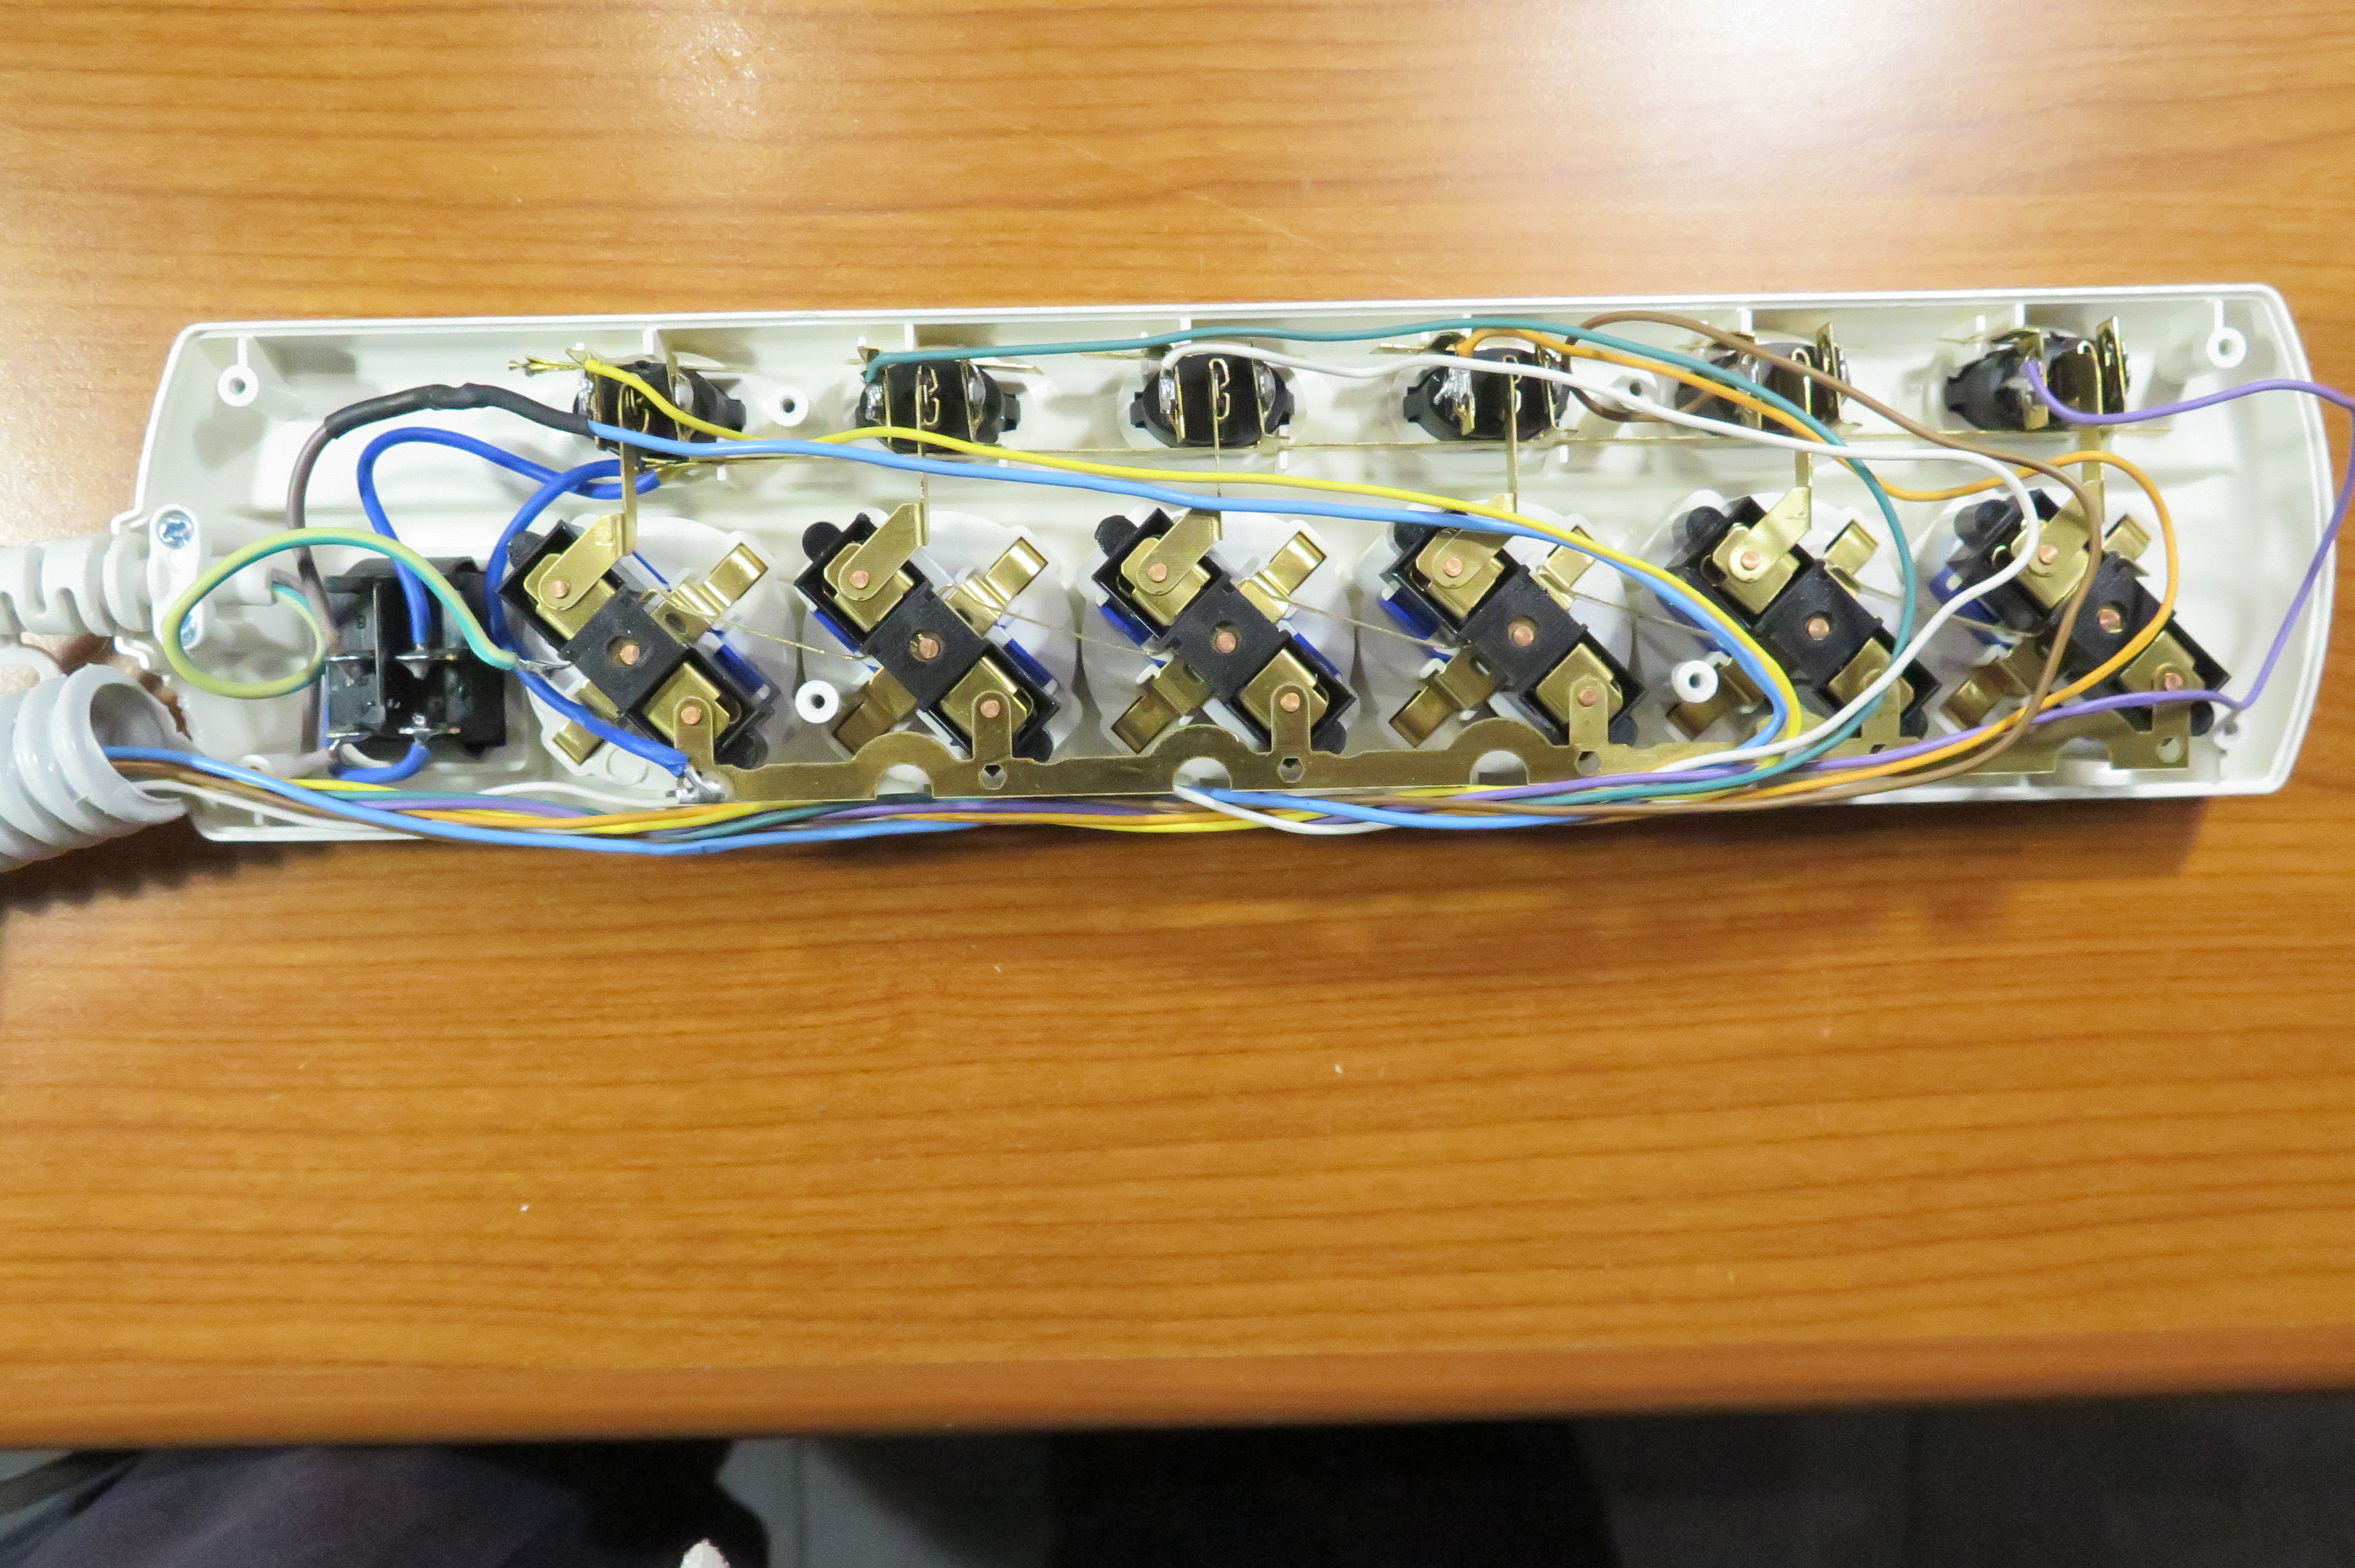
Make sure the power strip is UNPLUGGED!
Unscrew all the screws at the back of your power strip
Generally power-strips comes with tamper-proof screws, so you need a screw-driver designed to unscrew the tamper-proof screws.
Take off the top cover and examine the circuitry
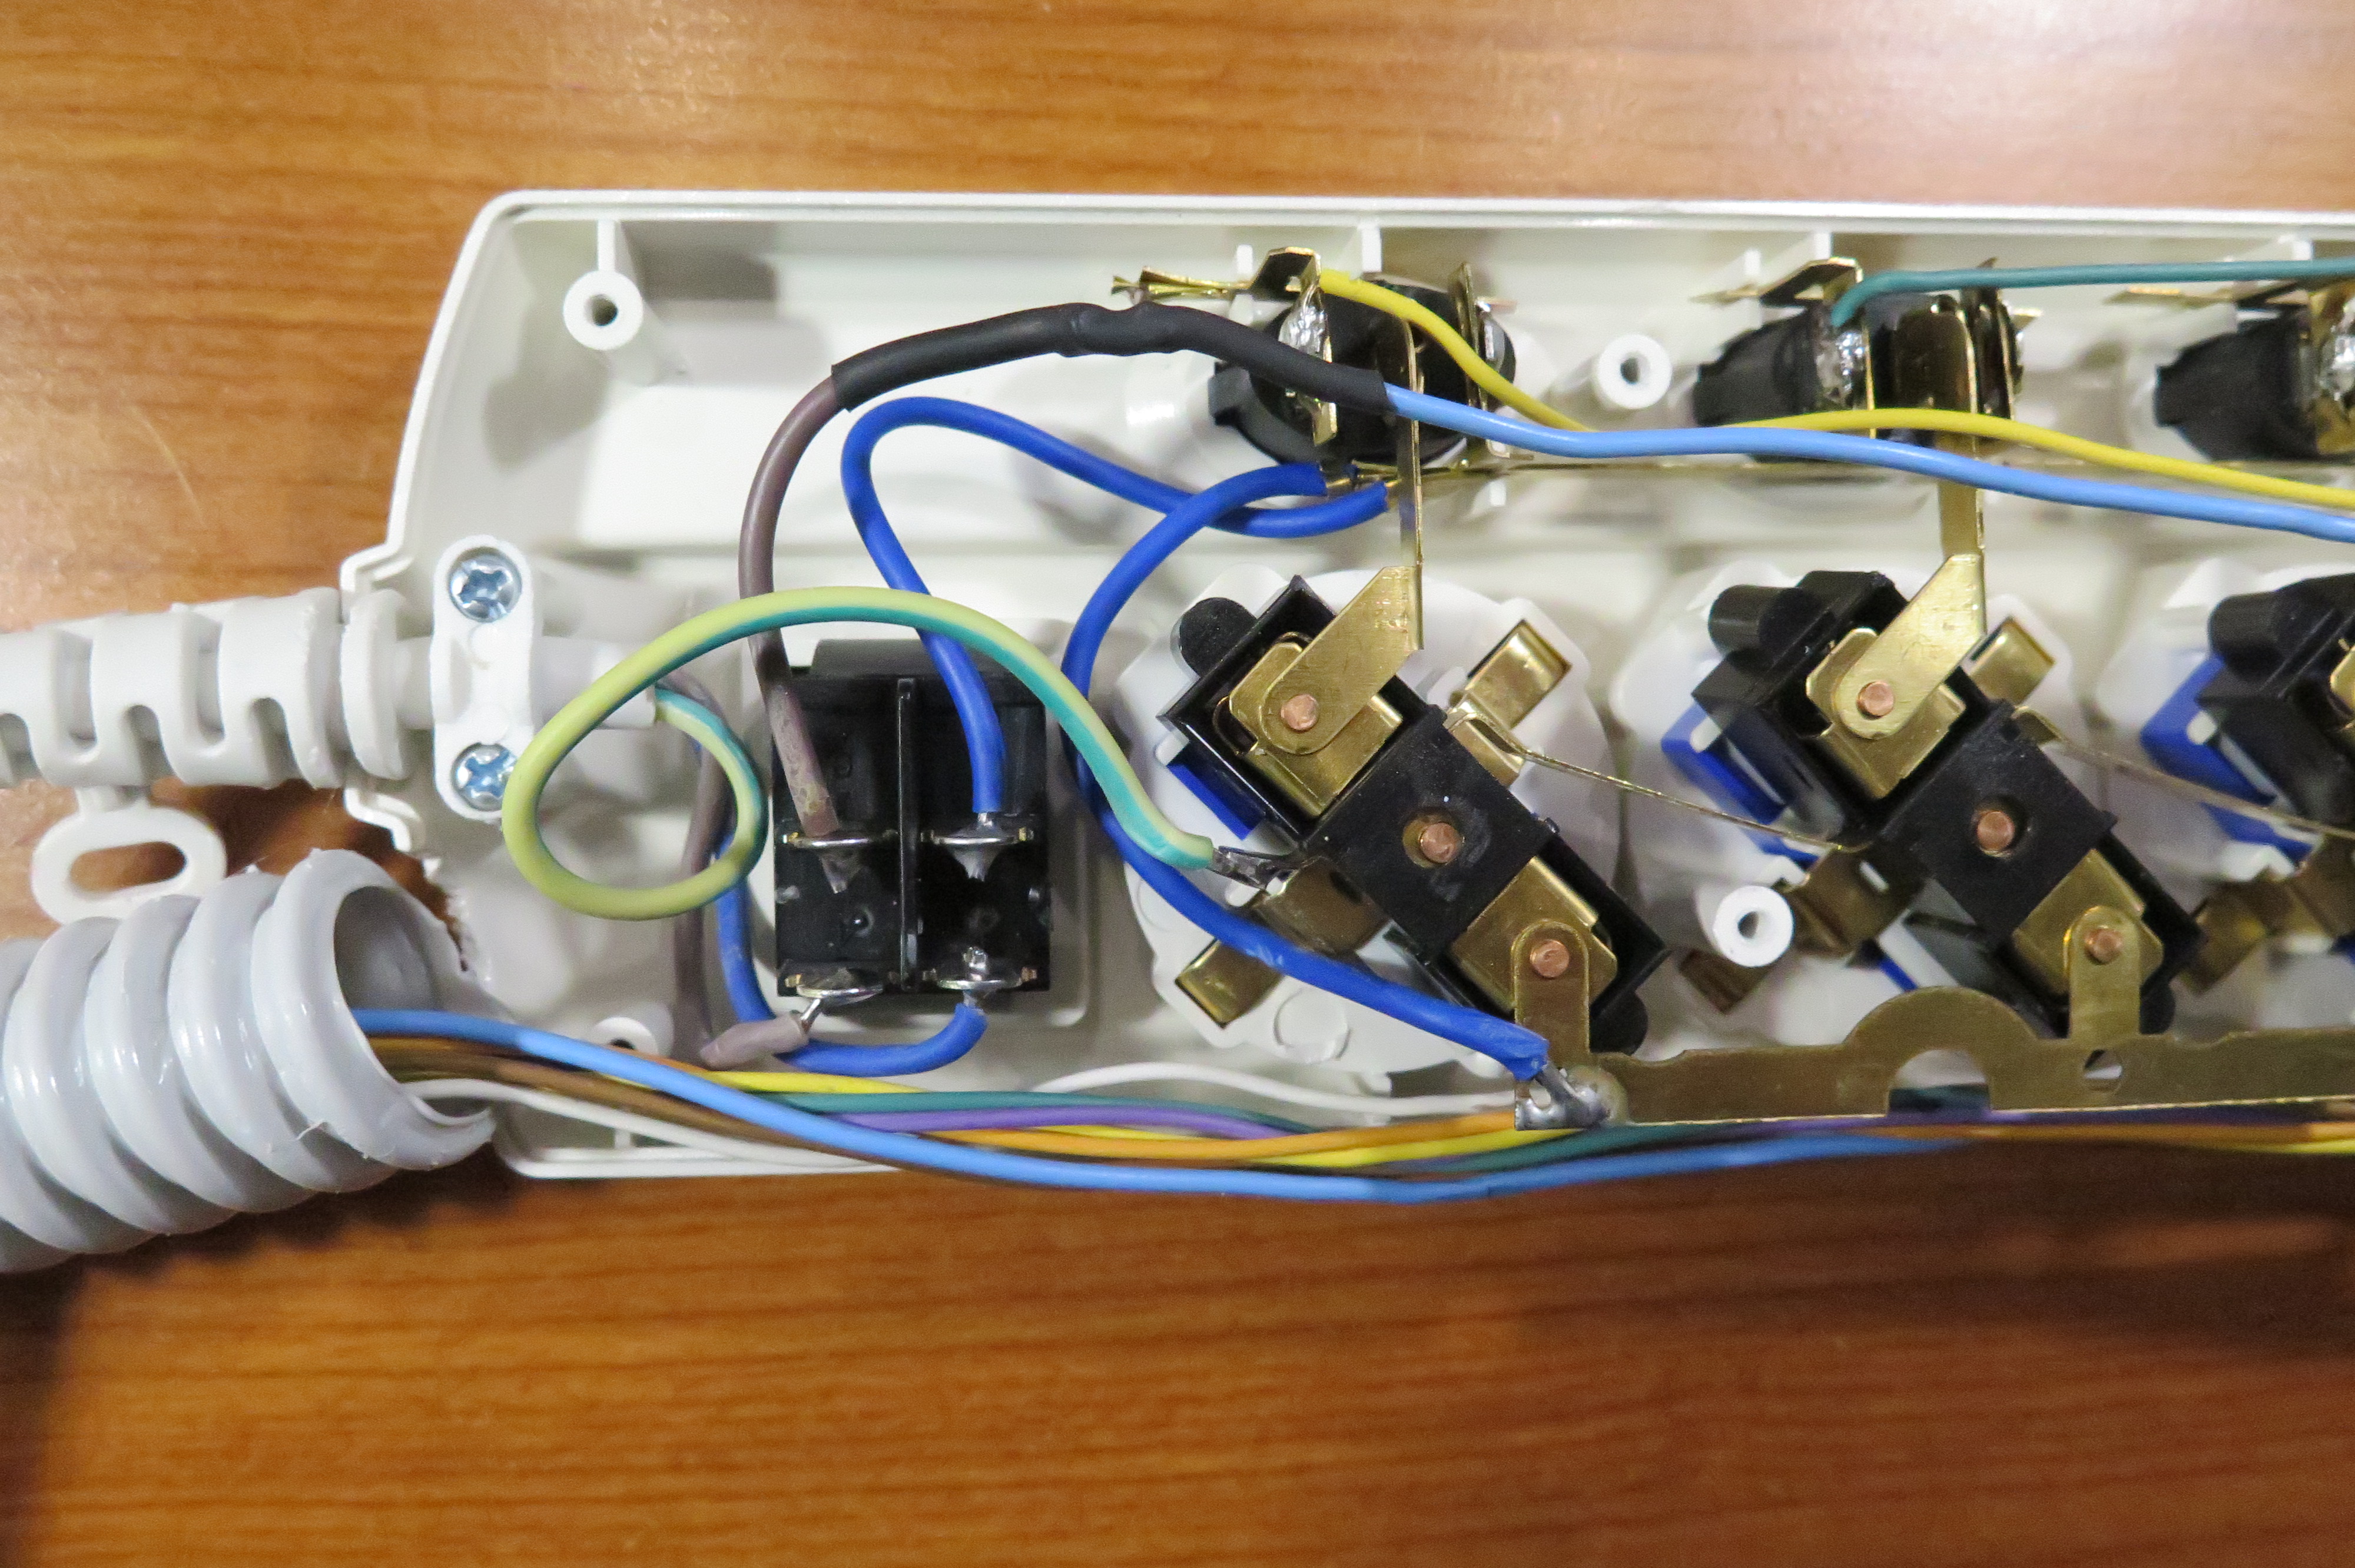
You have to cut the connection "LIVE AC" across all the 6 power socket and maintain the connection "NEUTRAL AC" across all the 6 power-socket.
Solder the wires coming from the relays directly to the hot (LIVE AC) terminal after you have cut the connection "LIVE AC" across all the 6 power socket.
The power strip I am using has individual switches for each plug. If it doesn't have individual switches the procedure is the same but you can't override Blynk control to turn OFF a socket.
Refer to picture to figure out how to make these connections.
Wiring
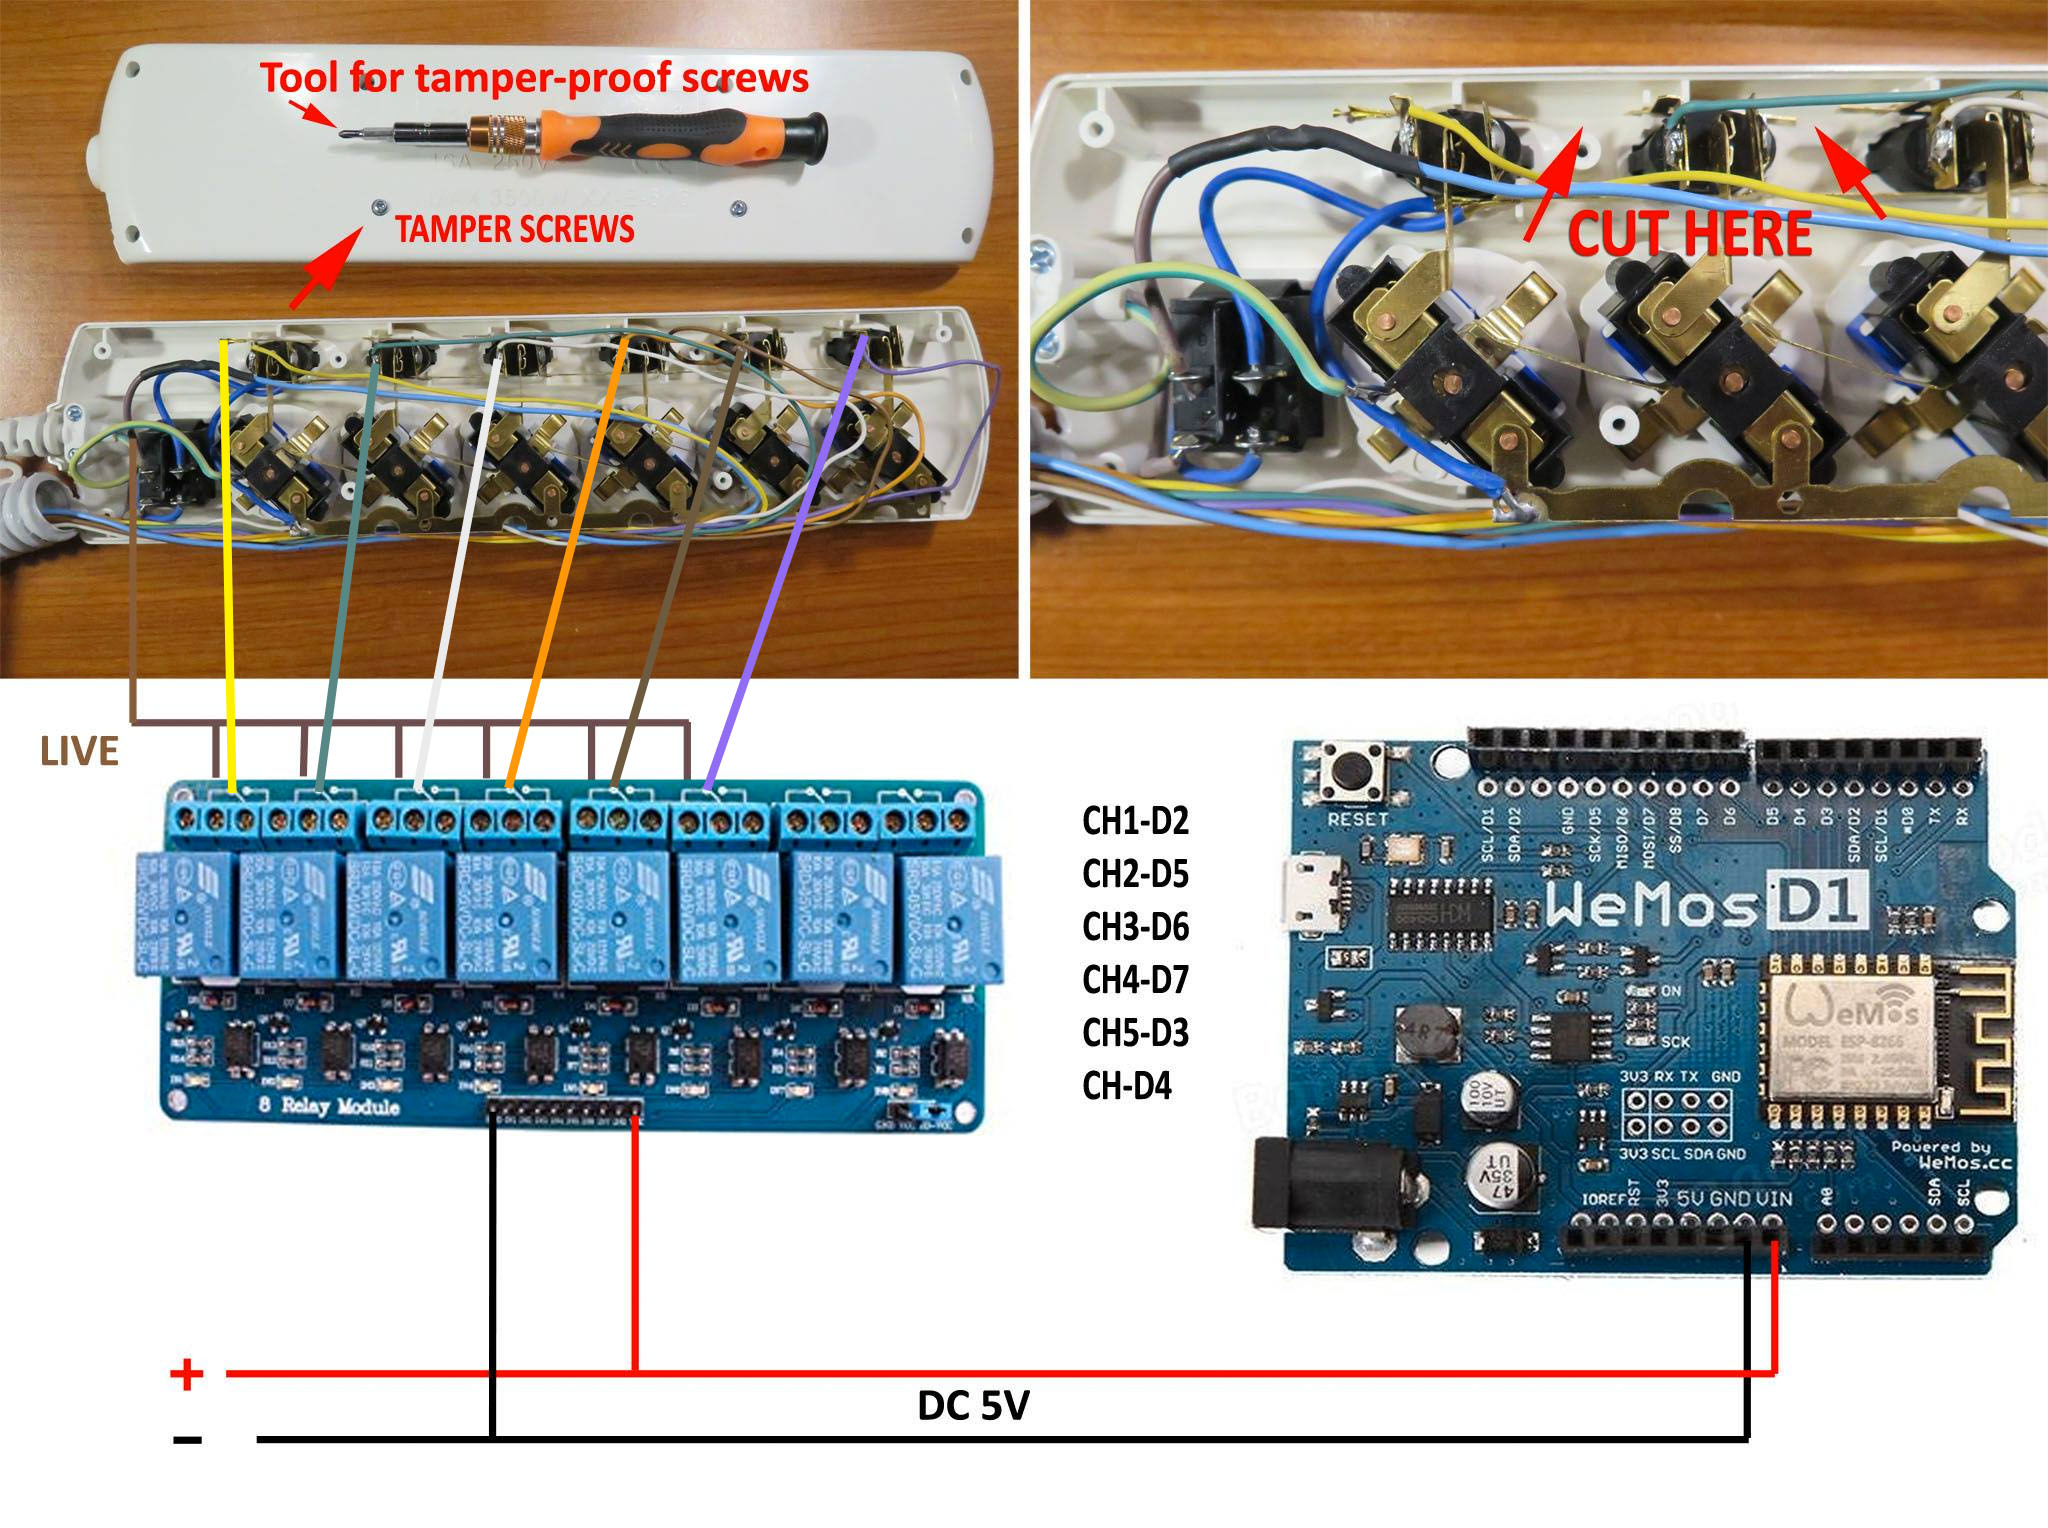
The figure shows how to wire the power strip to the 8CH relay board and the Wemos D1 mini R2 development board.
As the power strip have tamper-proof screws, you need a tool to open tamper-proof screws as shown in the figure.
Once you open the power strip, you have to cut the connections of the "LIVE AC" terminal of each power socket and solder a colored wire to the "LIVE AC" terminal of each socket as shown in the picture.
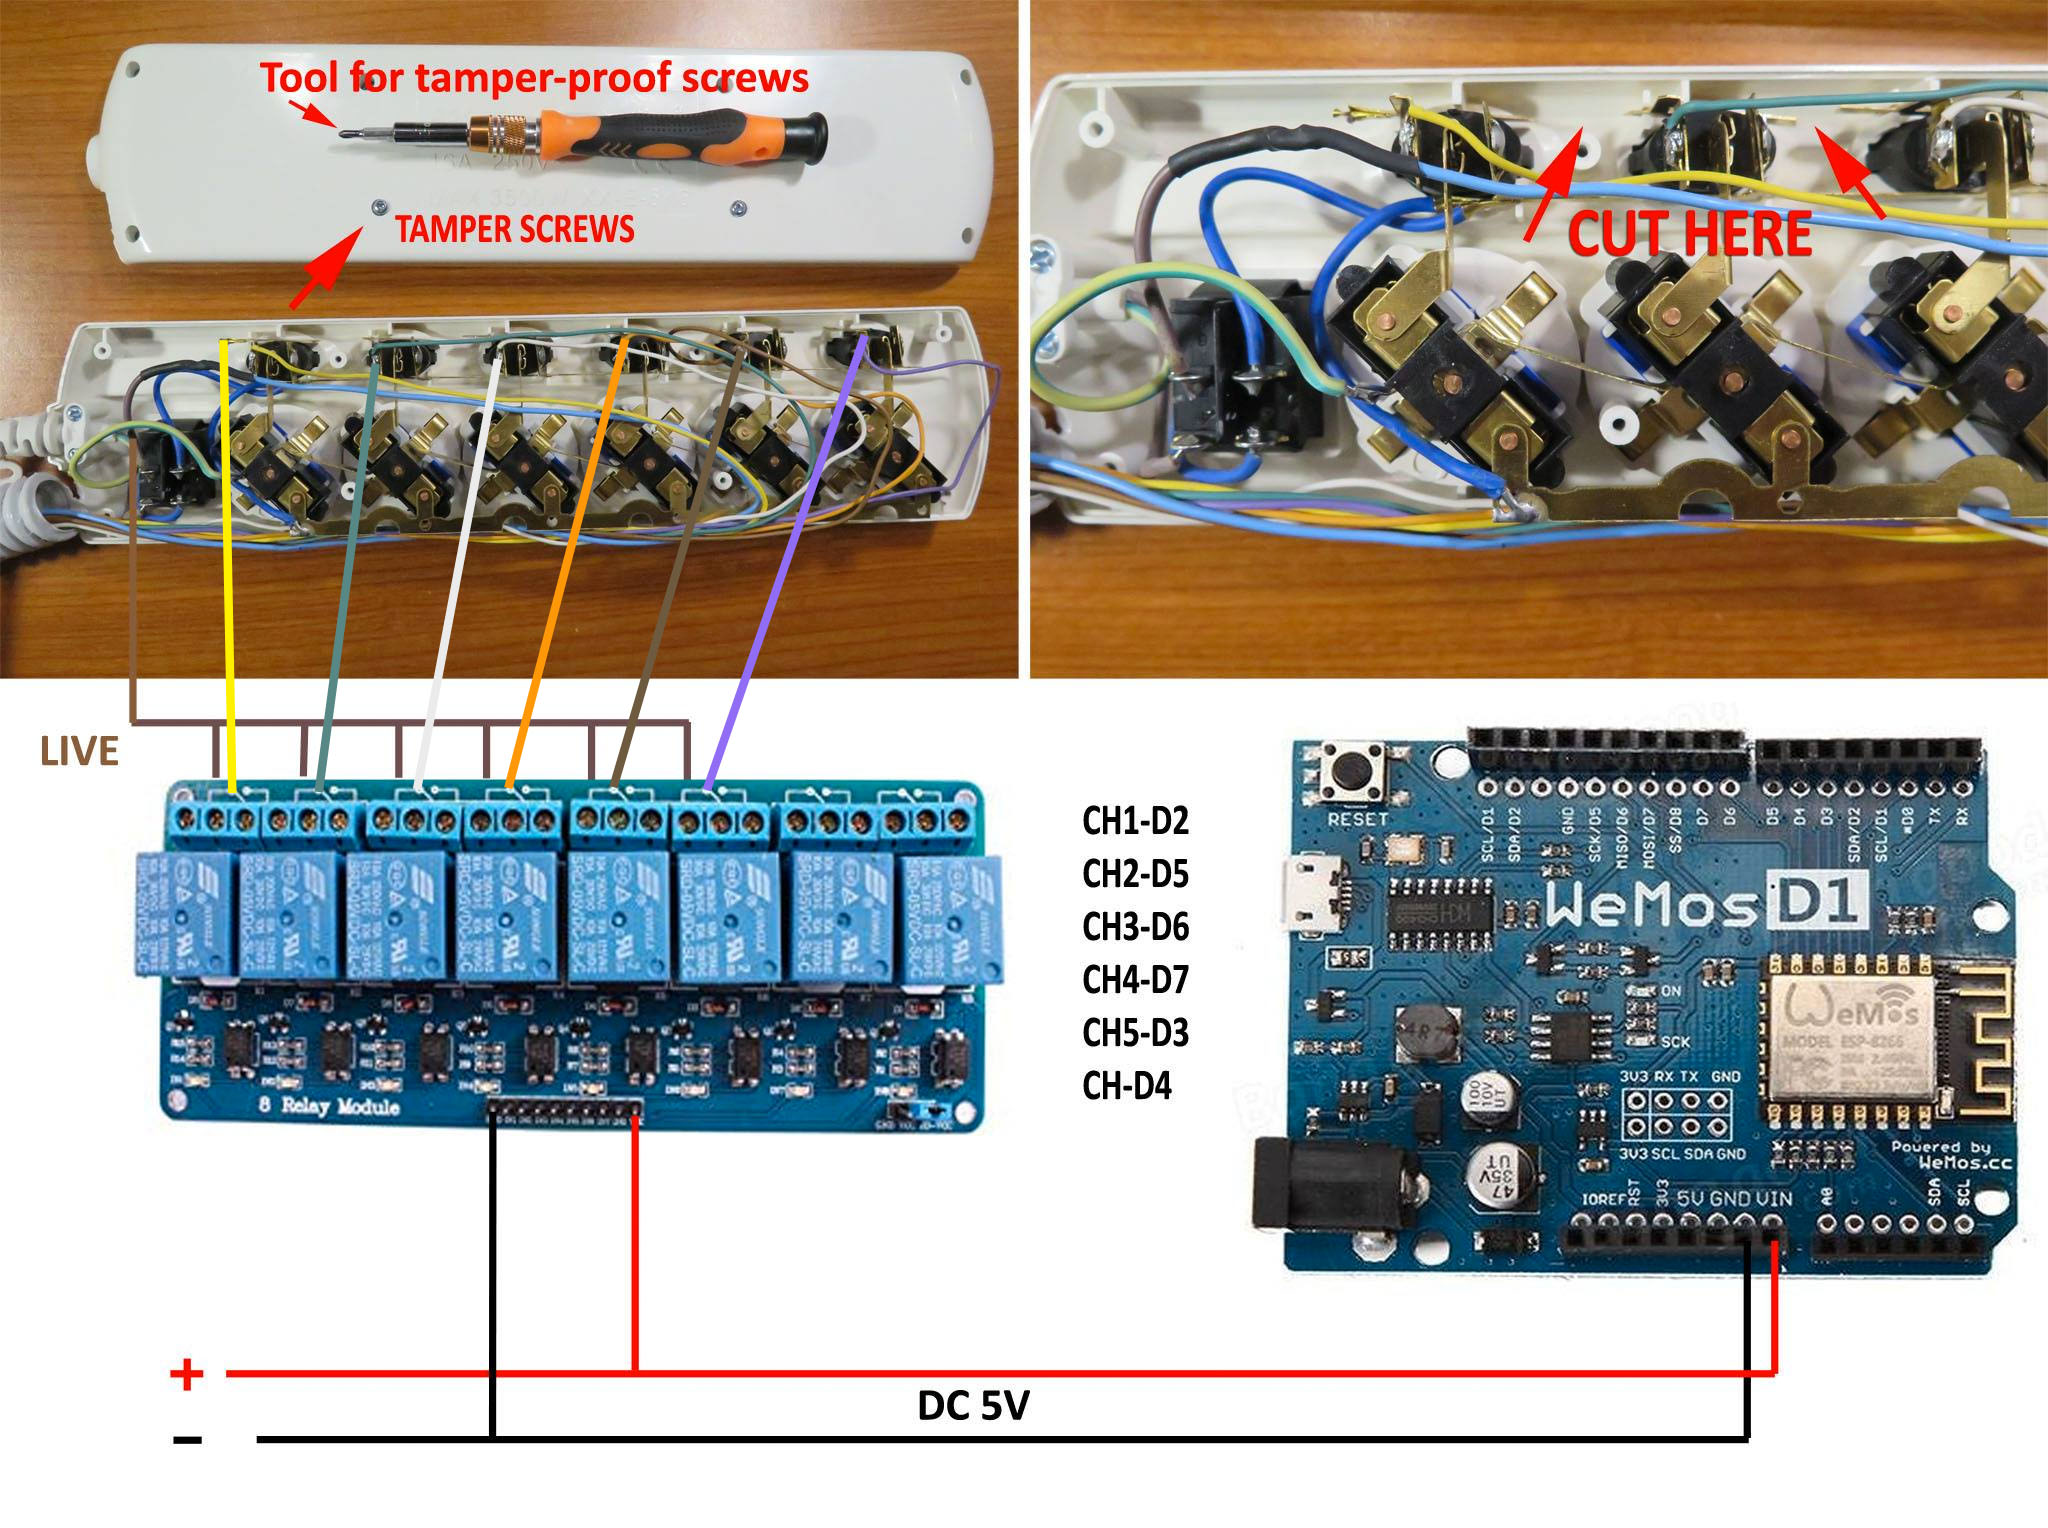
Connecting to the Wemos D1 Mini R2
All you need to connect are the GND and V+ pins to the 5V and GND pins of the Wemos D1 Mini R2 and then connect the relay inputs to any Wemos D1 Mini R2 GPIOs of your choice, I used D2, D5, D6, D7, D3, D4.
Software
Using Blynk you are completely flexible to control the Wemos D1 Mini R2 GPIOs consequently the relays.
I will be updating this post with a full tutorial on how to setup Blynk for this purpose.