*6 WAYS* to Make a Cardboard Robot Costume REALLY Robotic
by BrownDogGadgets in Circuits > Electronics
15870 Views, 100 Favorites, 0 Comments
*6 WAYS* to Make a Cardboard Robot Costume REALLY Robotic
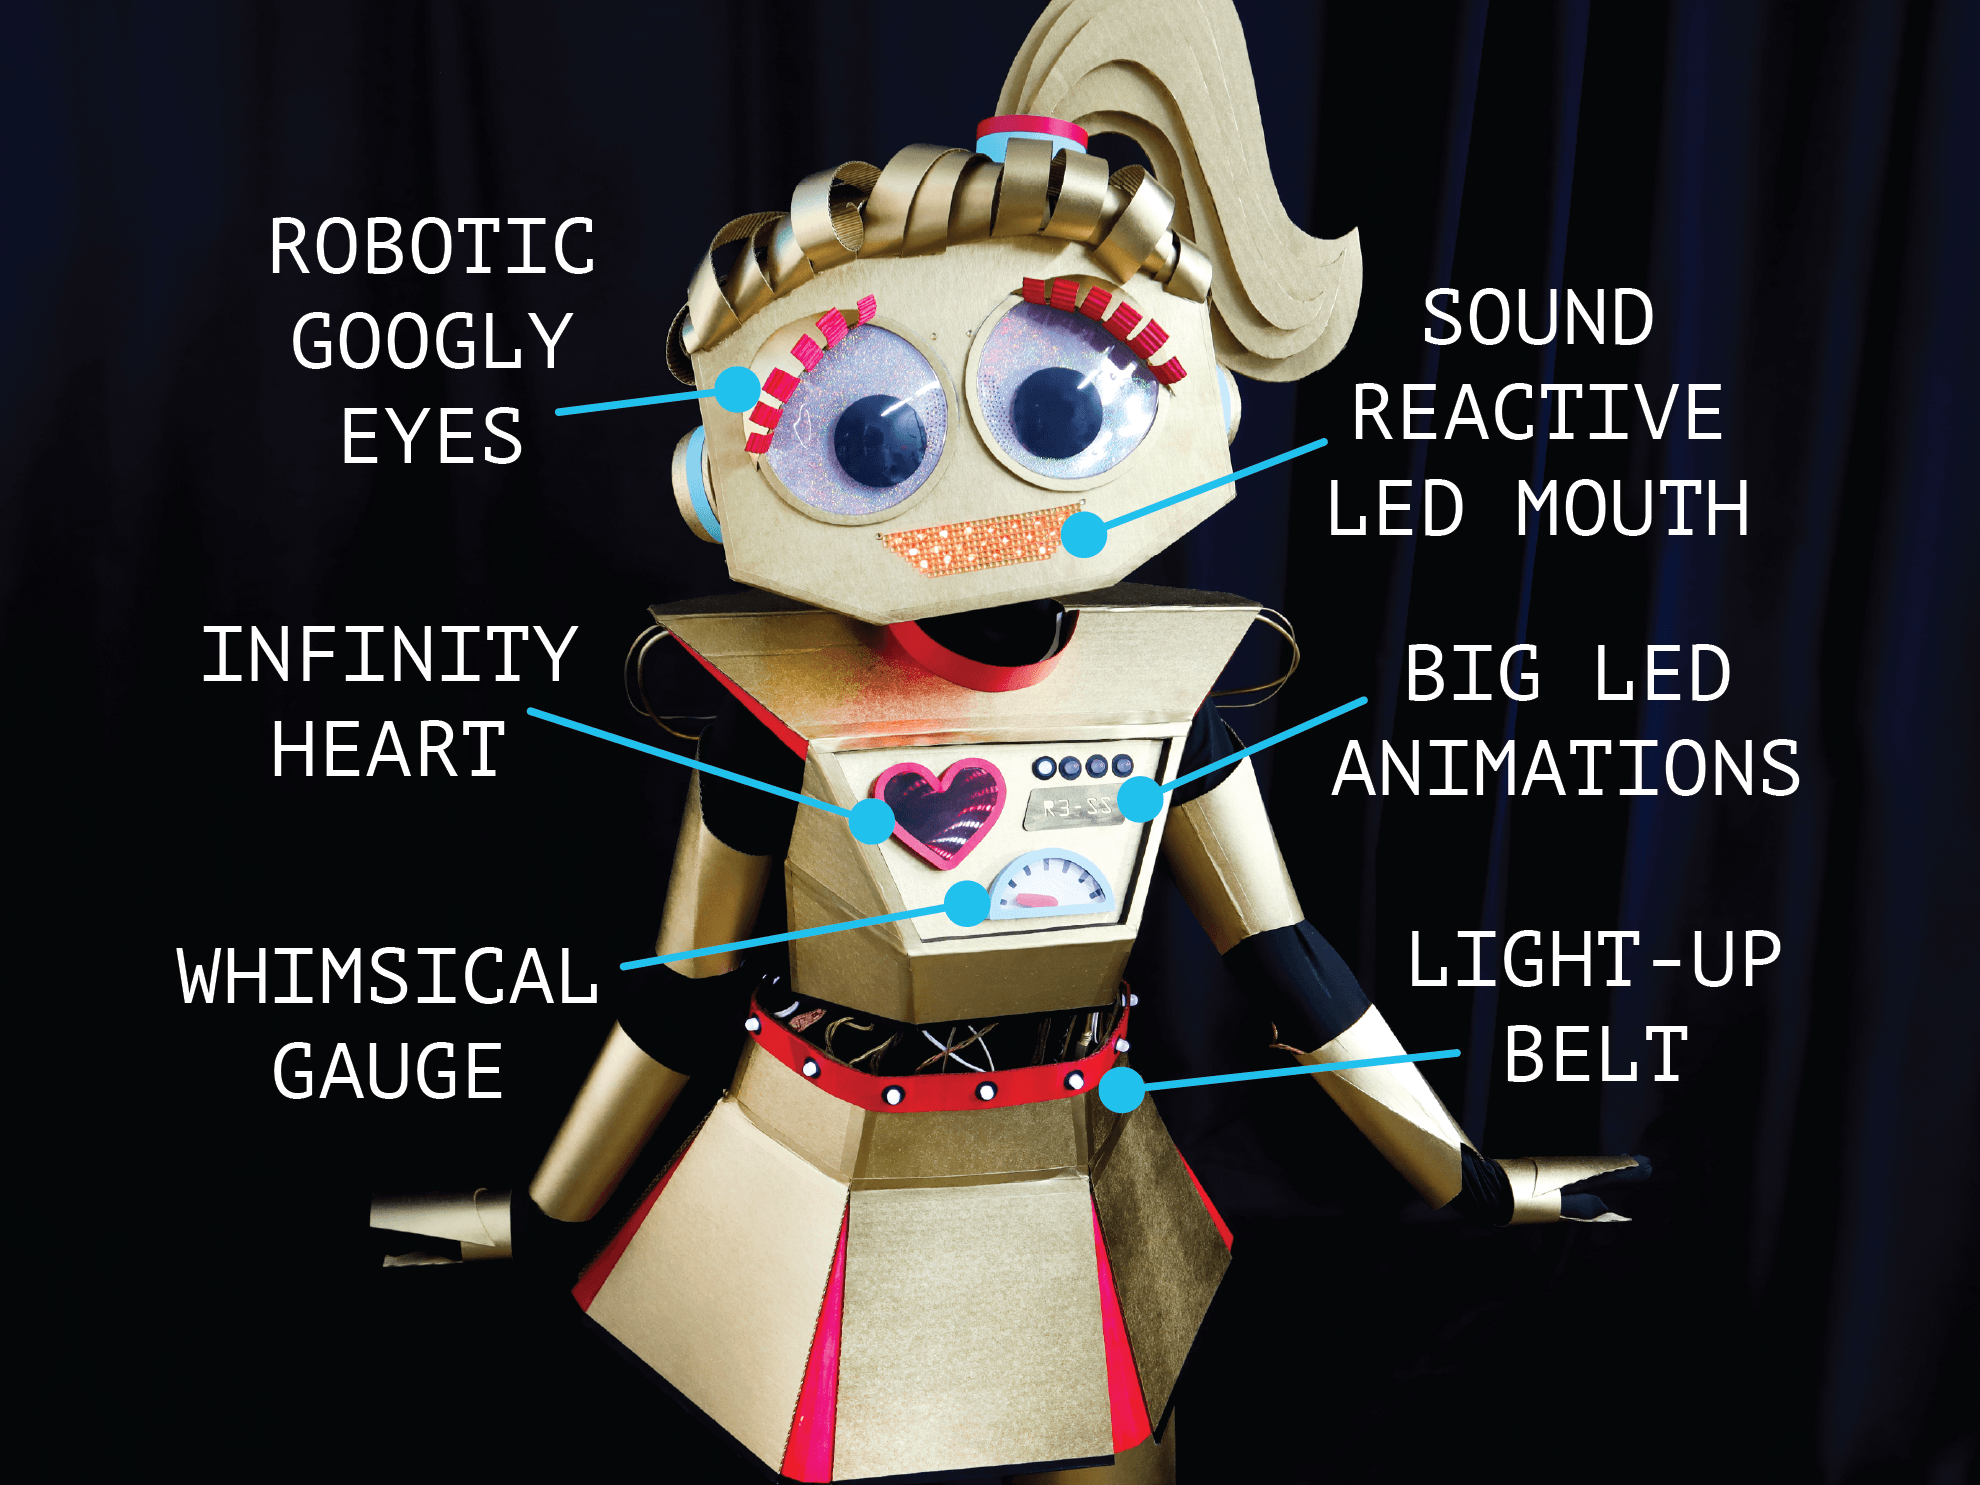
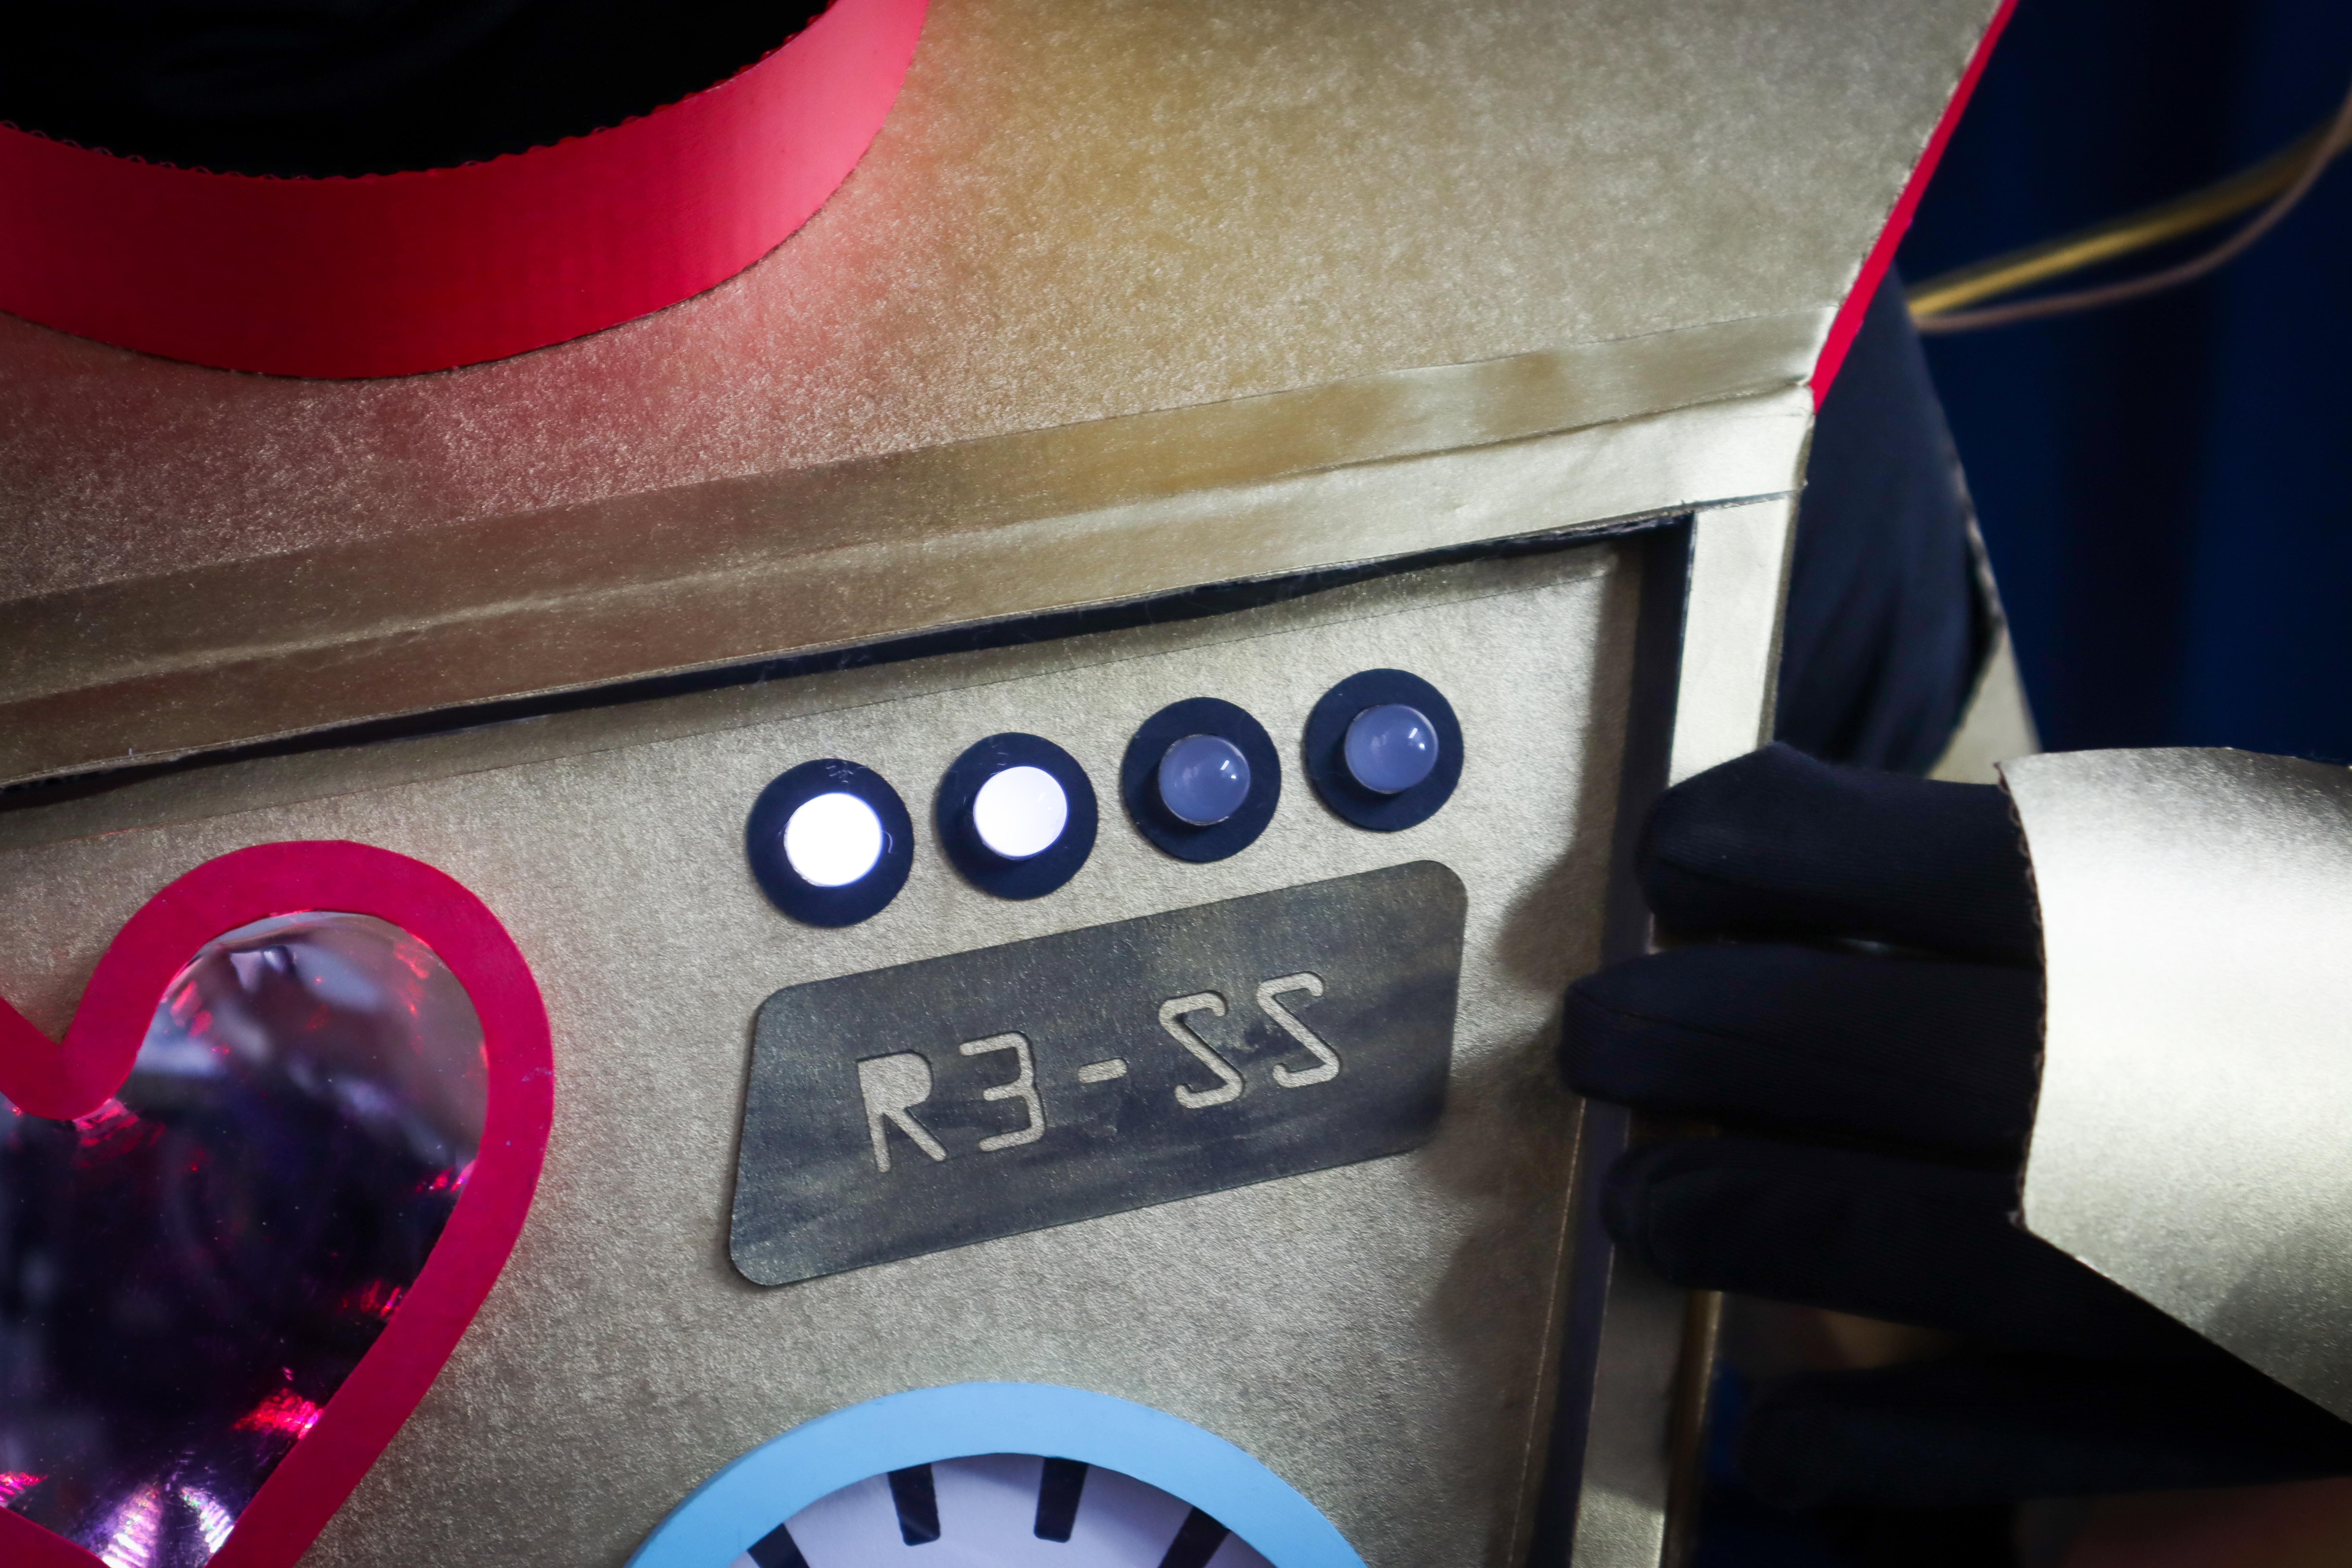
Makers, Meet Sally Servo:
She's our Really Robotic Robot (or R3 for short).
She's got a digital heart, animated status notifications, swinging gauges, blinky LED mouth, and robotic eyes that will melt your human heart. Even her hips don't lie - they light up!

In this Instructable, we'll show you 6 different ways to add electronics to a cardboard robot costume using micro:bit, a Brown Dog Gadgets Bit Board, and common components like 10mm LEDs, Maker Tape, servo motors, and neopixel LEDs.
From simple circuits to more intermediate-level techniques, we hope this inspires you to add real electronics to your next cardboard robot costume - no matter your skill level!
Make your robot costume really robotic with this mega tutorial.
THE 6 WAYS:
#6: Sound Reactive LED Robot Mouth
If you like our projects and want to see more of what we get up to each week please follow us on Instagram, Twitter, Facebook, and YouTube.
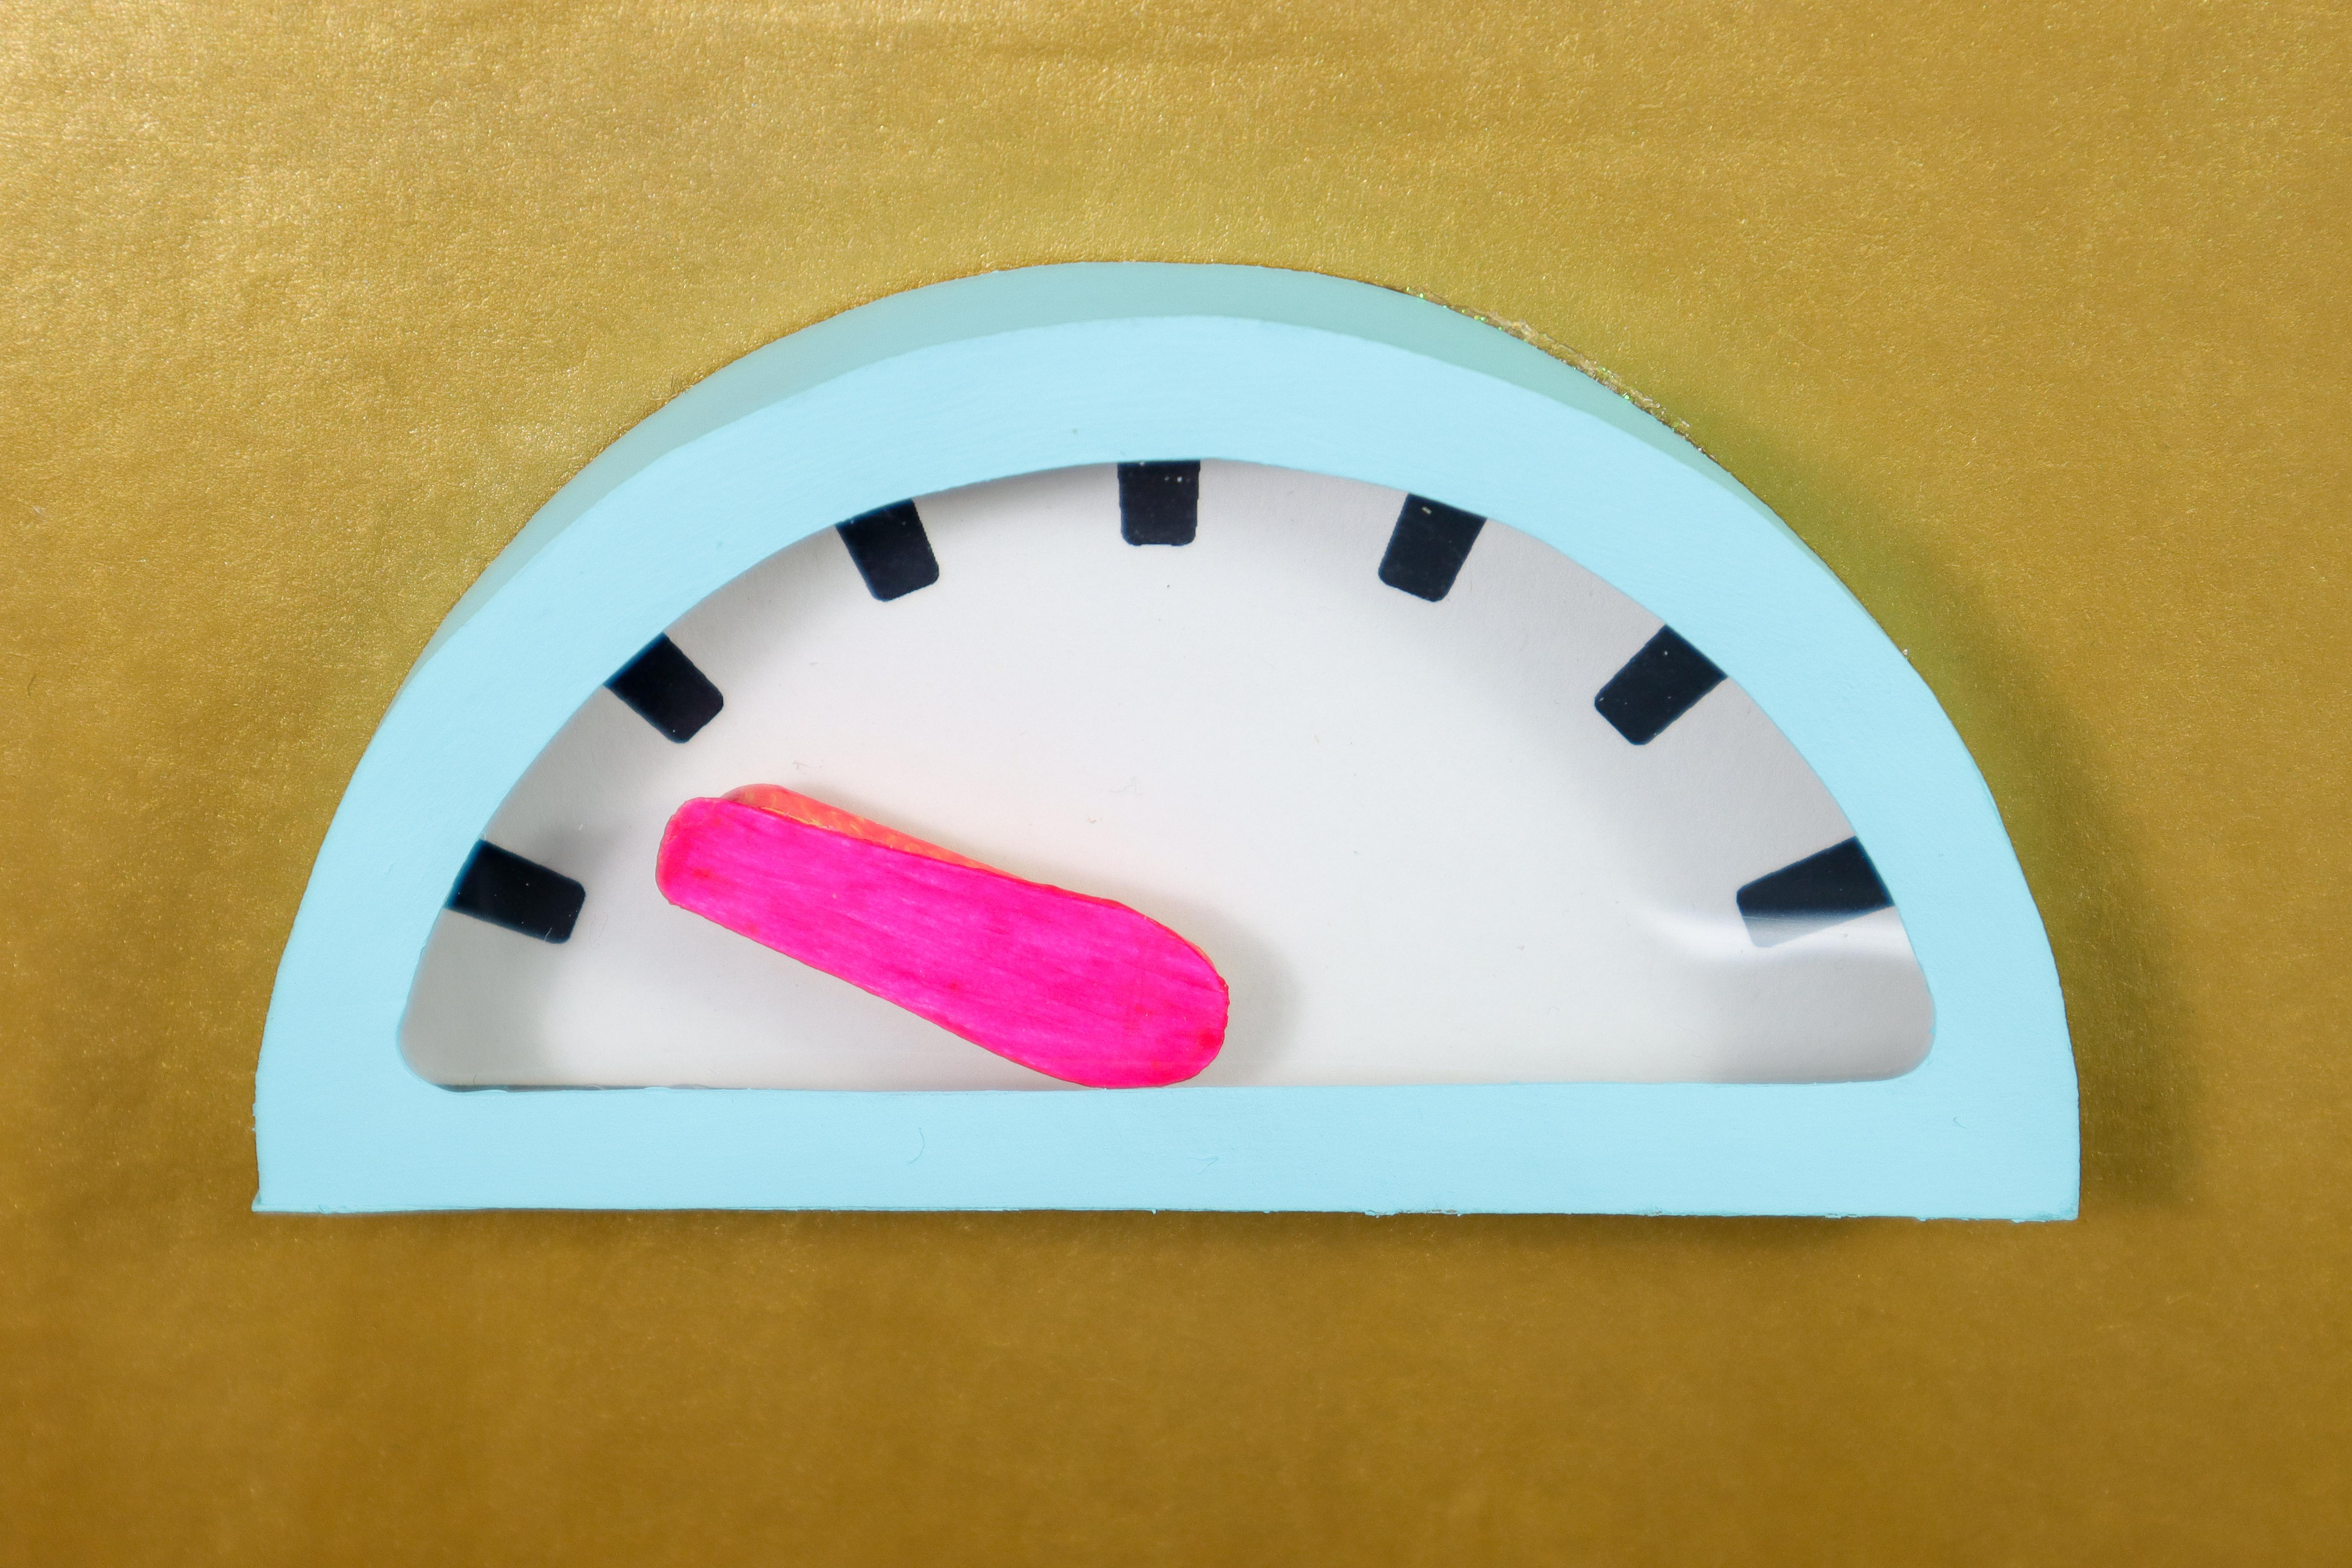
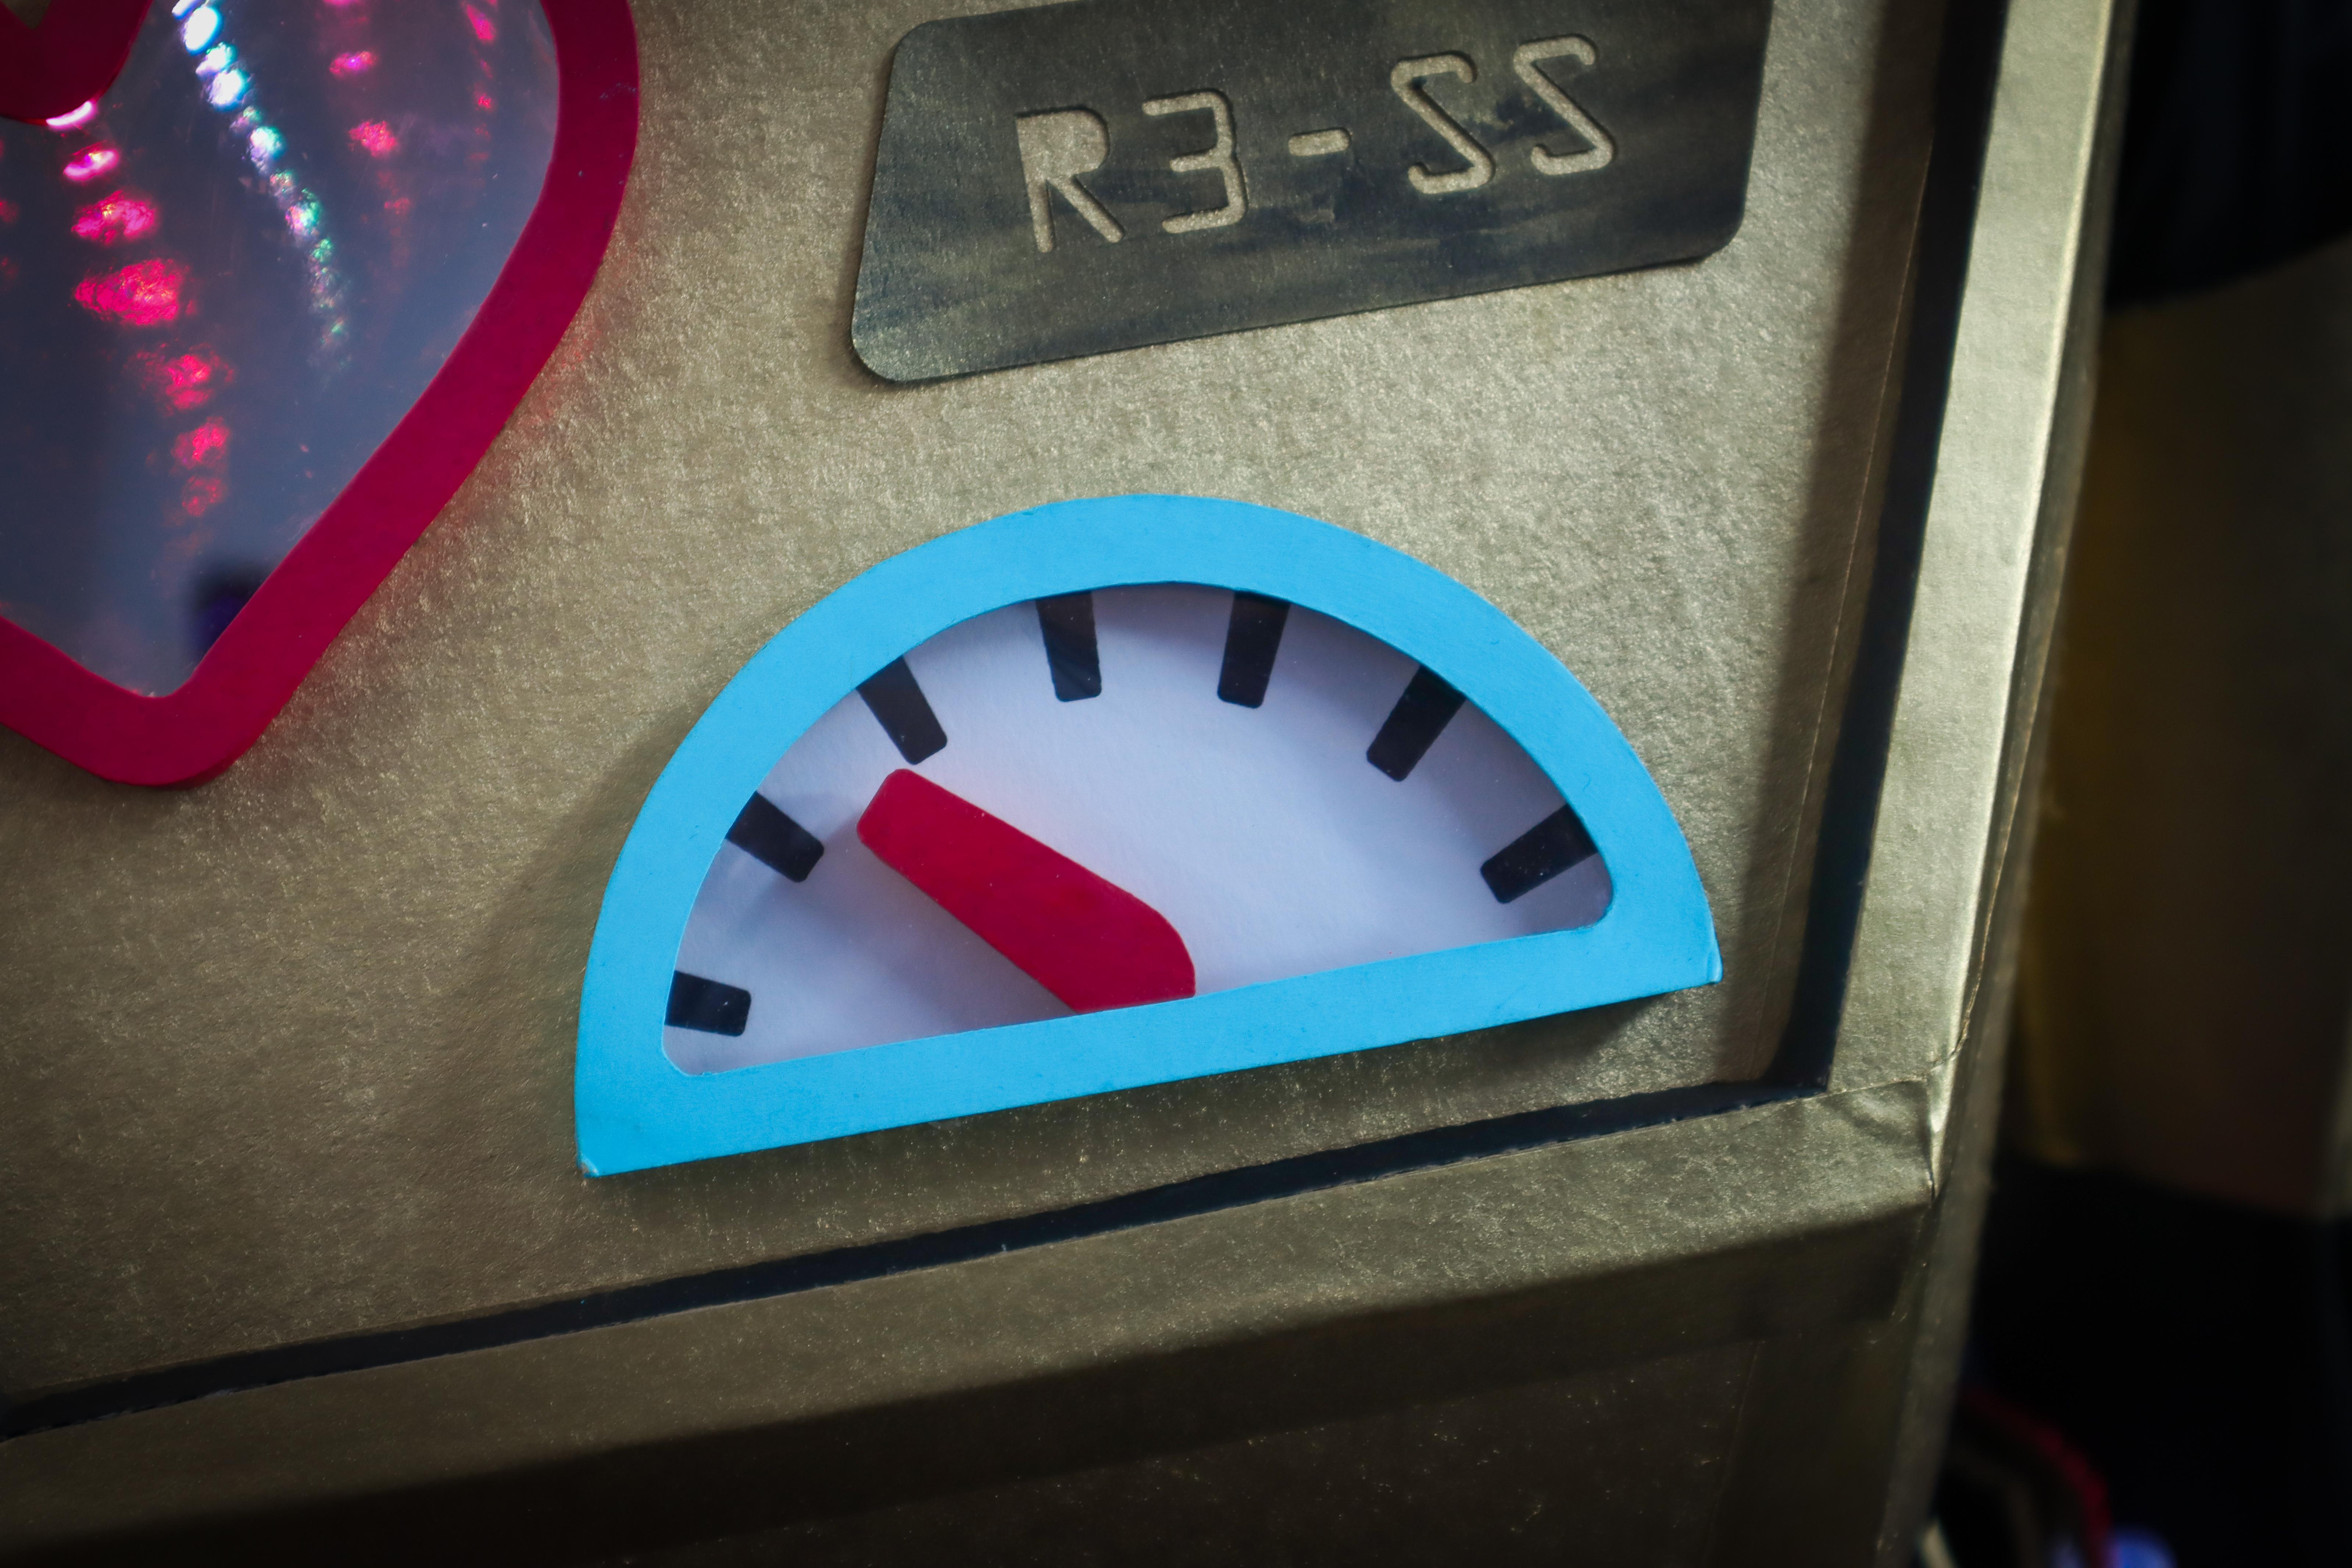
ROBOT FEATURE #1: THE WHIMSICAL GAUGE
Make a moving gauge like the one on Sally's robot suit. This is a great "introduction to micro:bit" project using the built-in microphone as an input and a servo motor as an output.
Supplies:
micro:bit, Crazy Circuits Bit Board, LEGO Compatible 270 Degree Servo, 2 AAA Battery Holder, Cardboard, Cardstock, Acrylic Paint
Print the Template

- Print the template on white cardstock or thick paper.
Downloads
Cut Out the Shapes
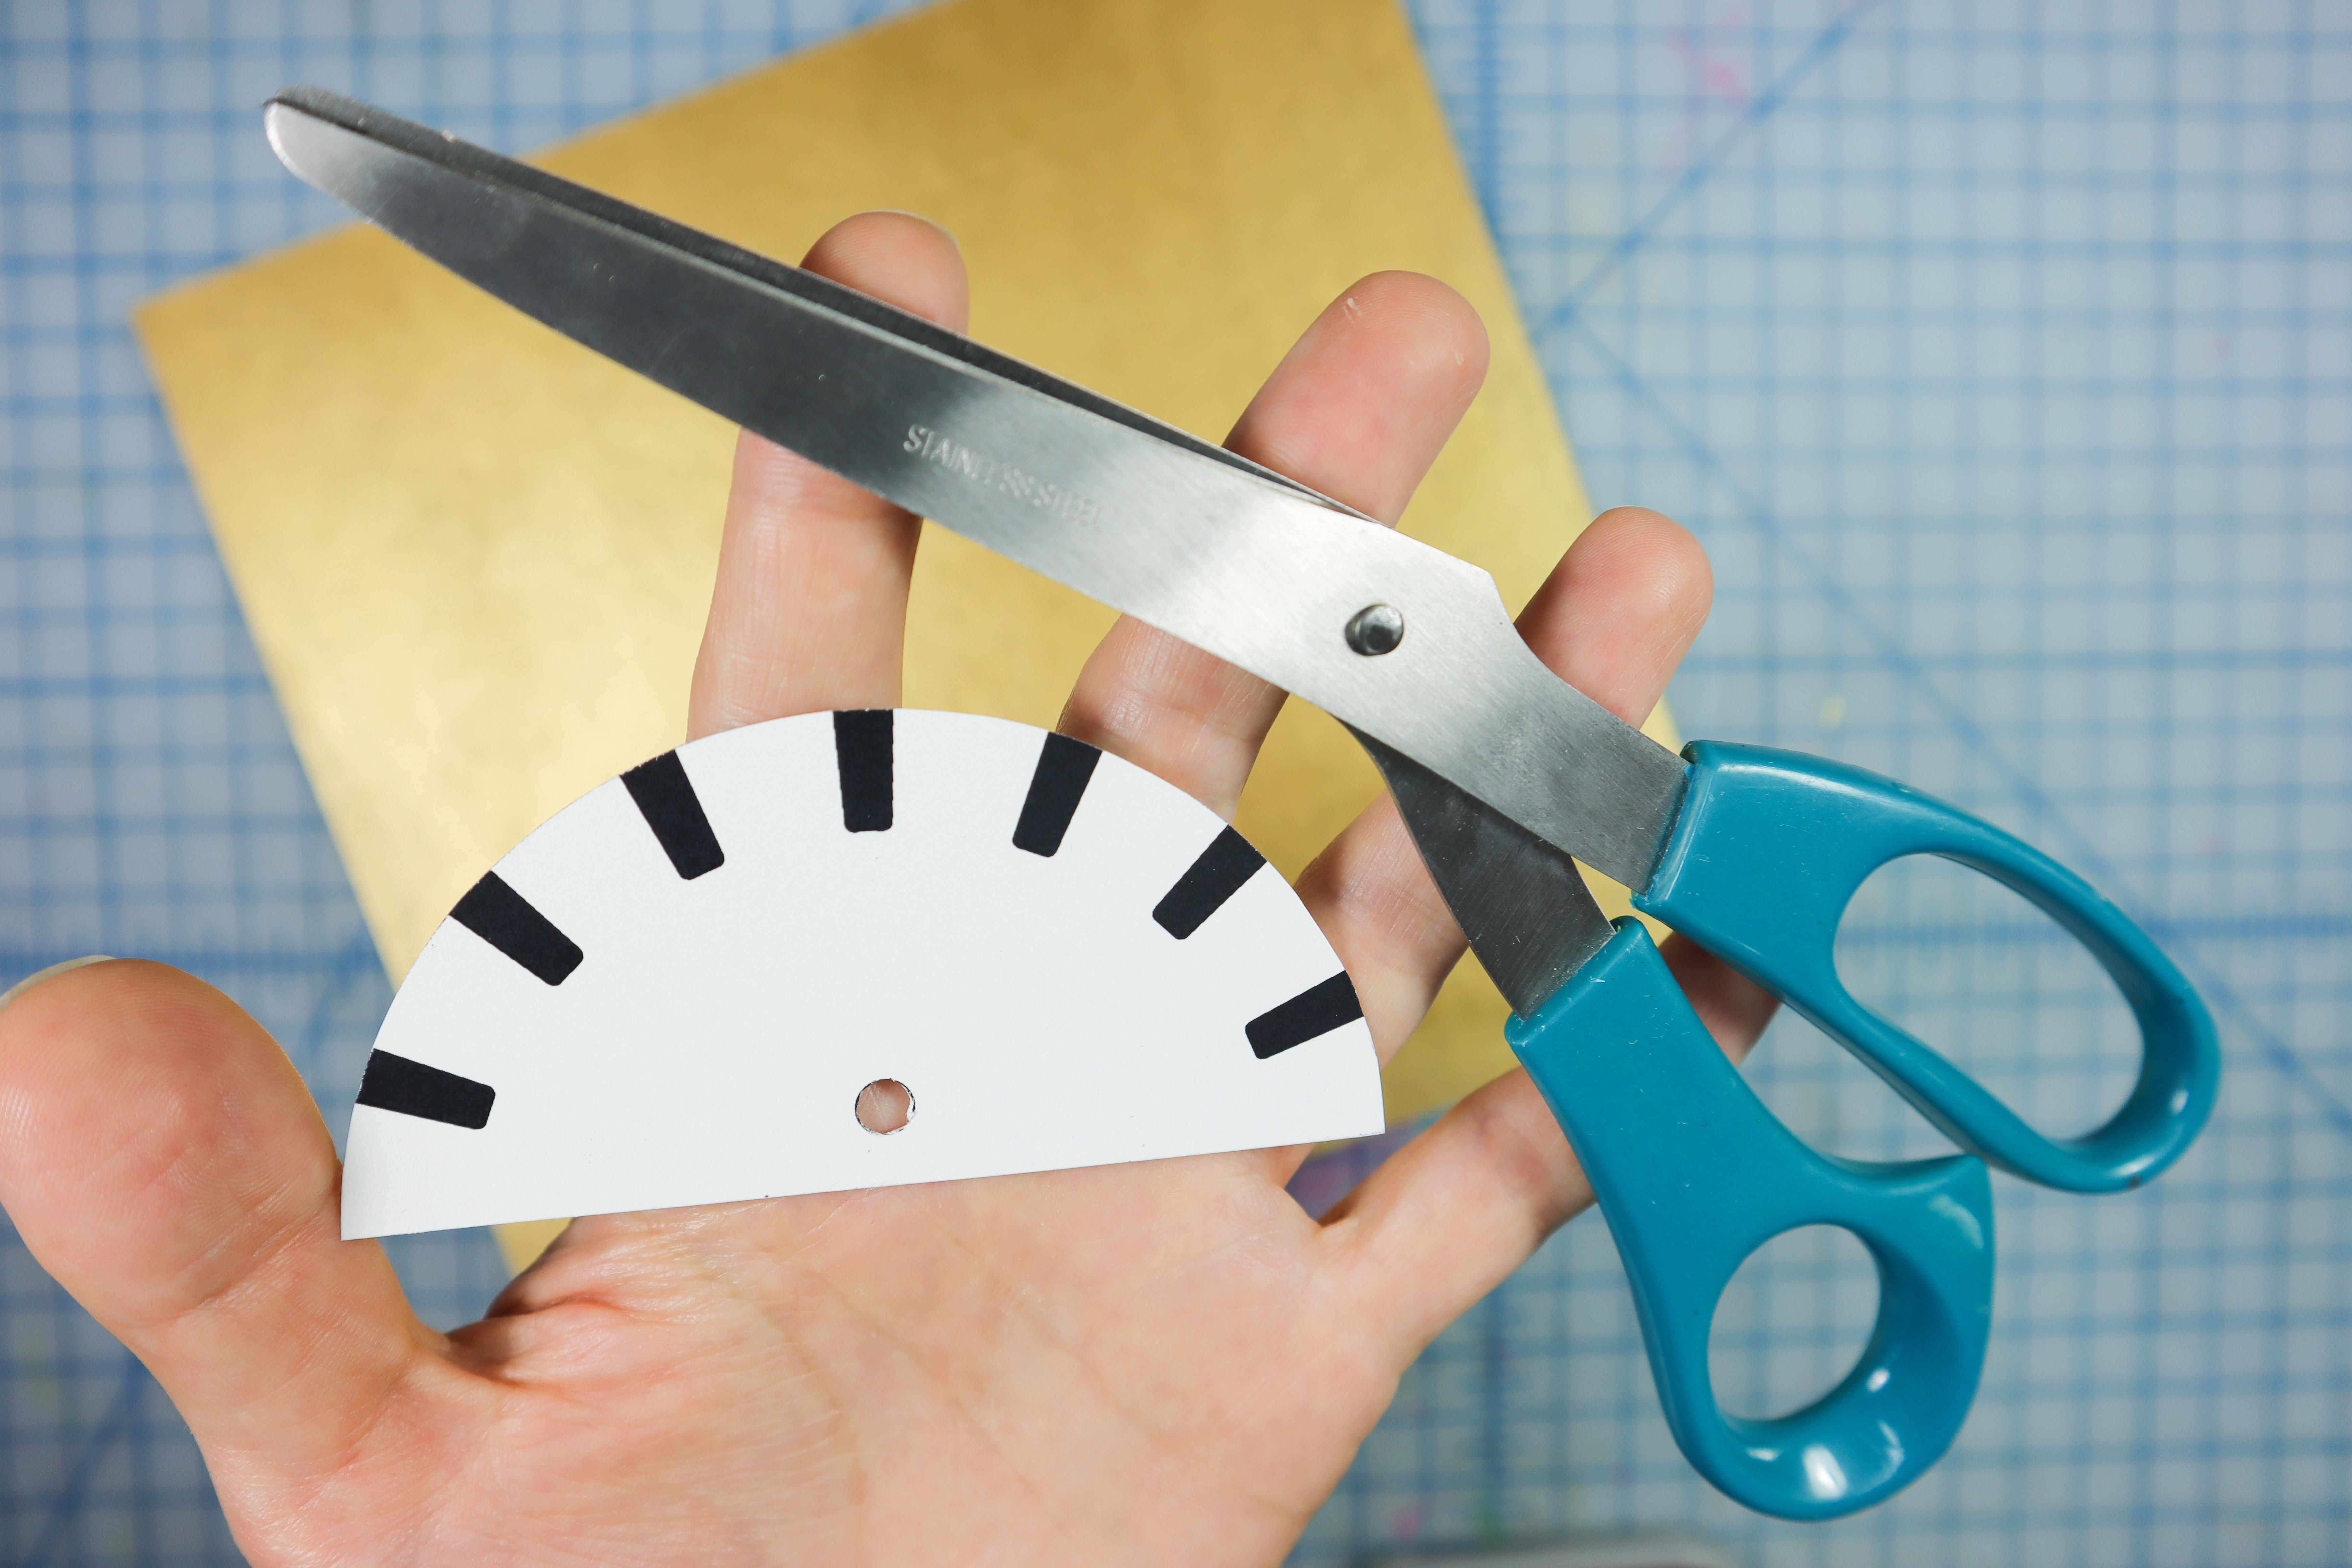
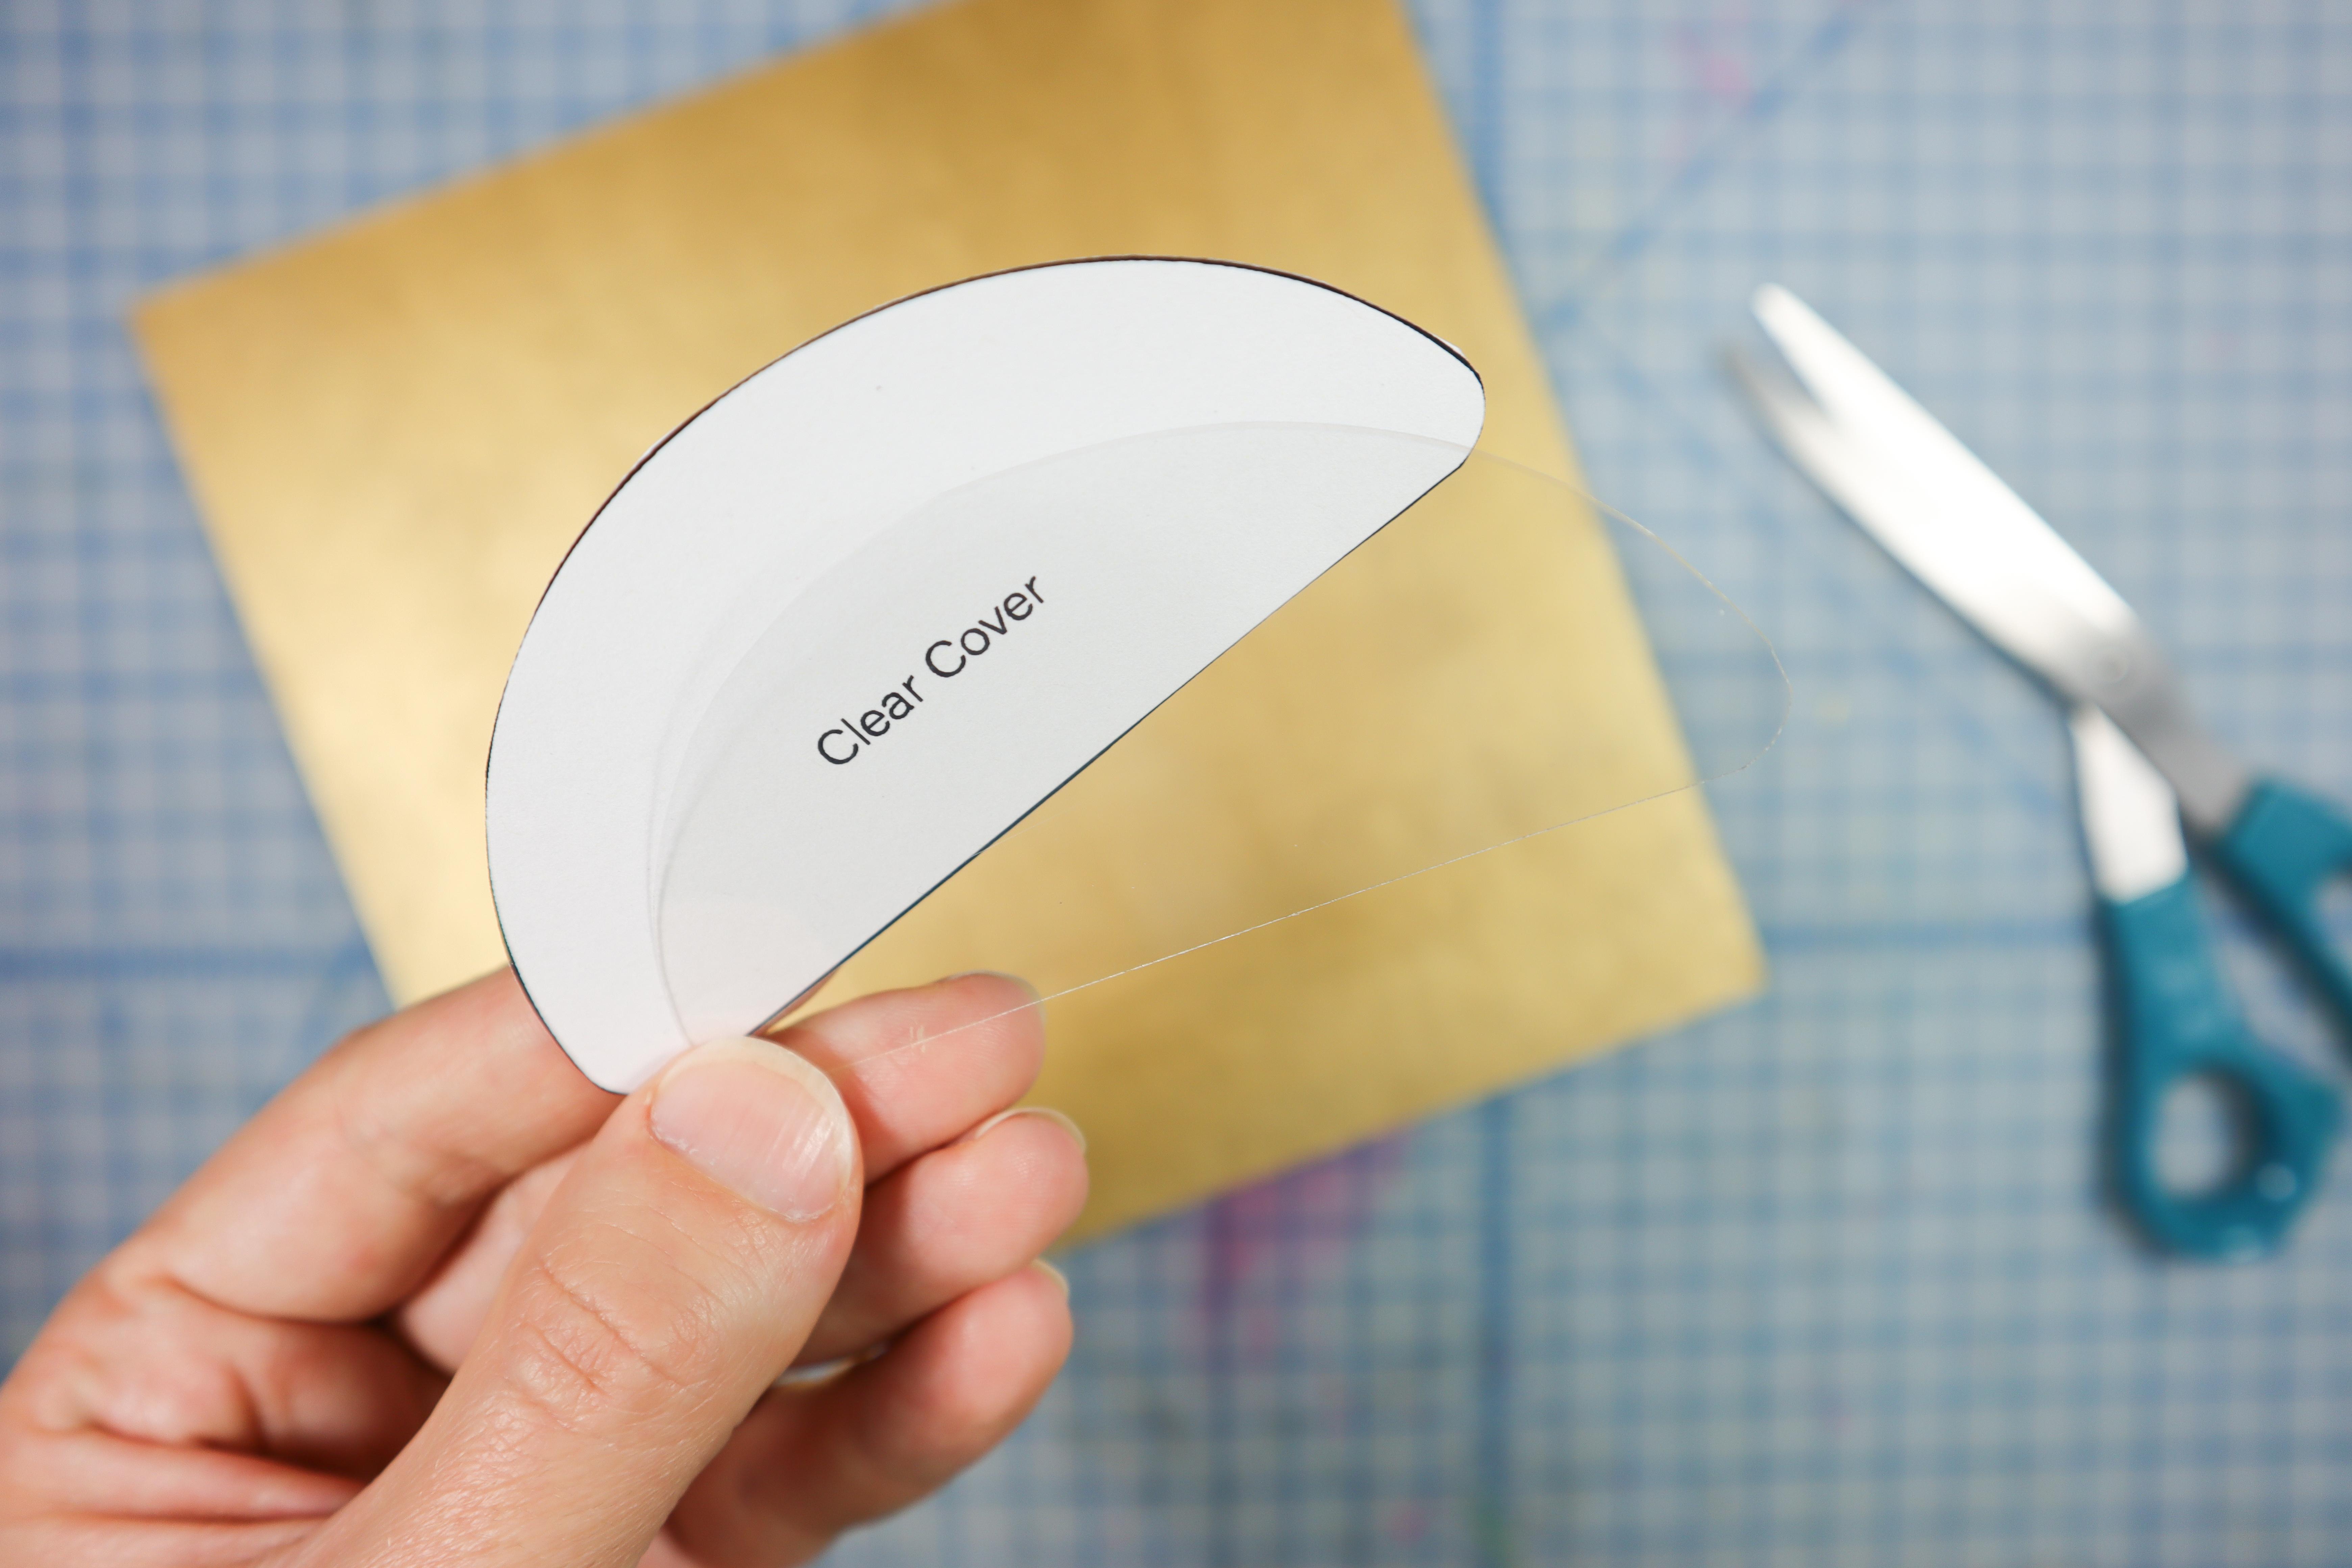
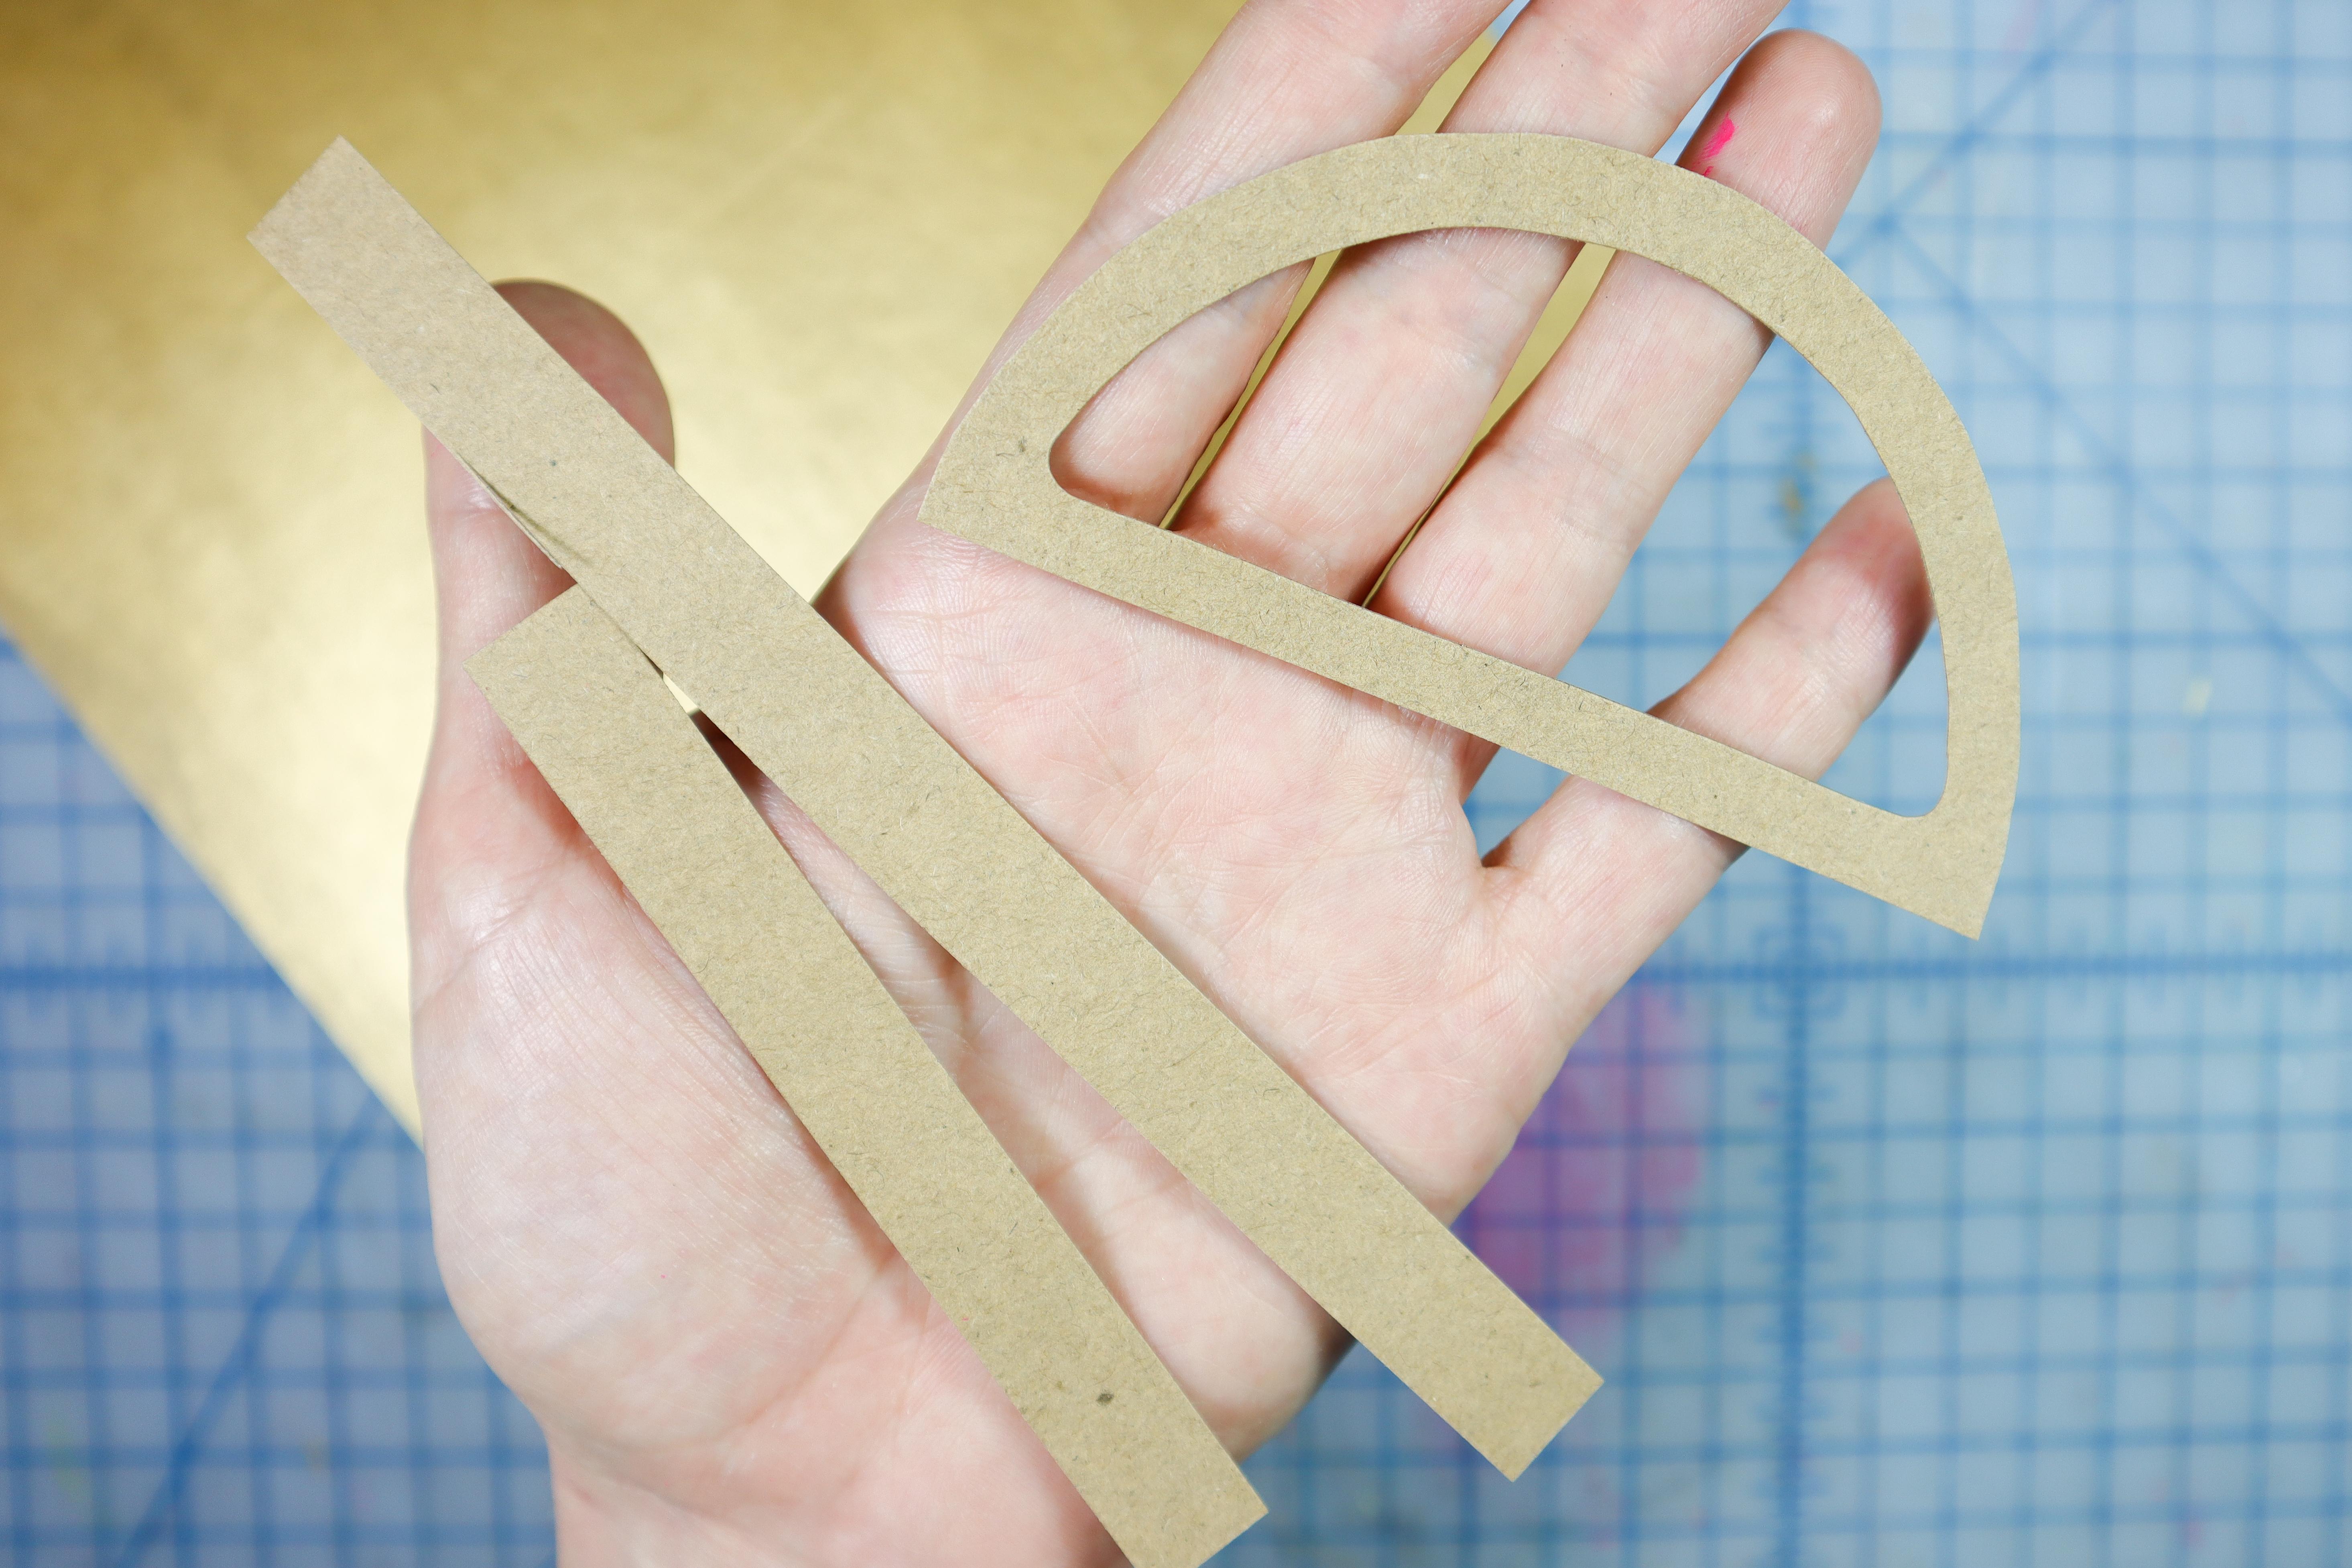
- Cut out the shapes as instructed:
- The gauge face from the paper template
- The cover from clear plastic
- The remaining pieces from thick paper or cardboard with one side of the corrugation removed
Make a Hole in the Cardboard
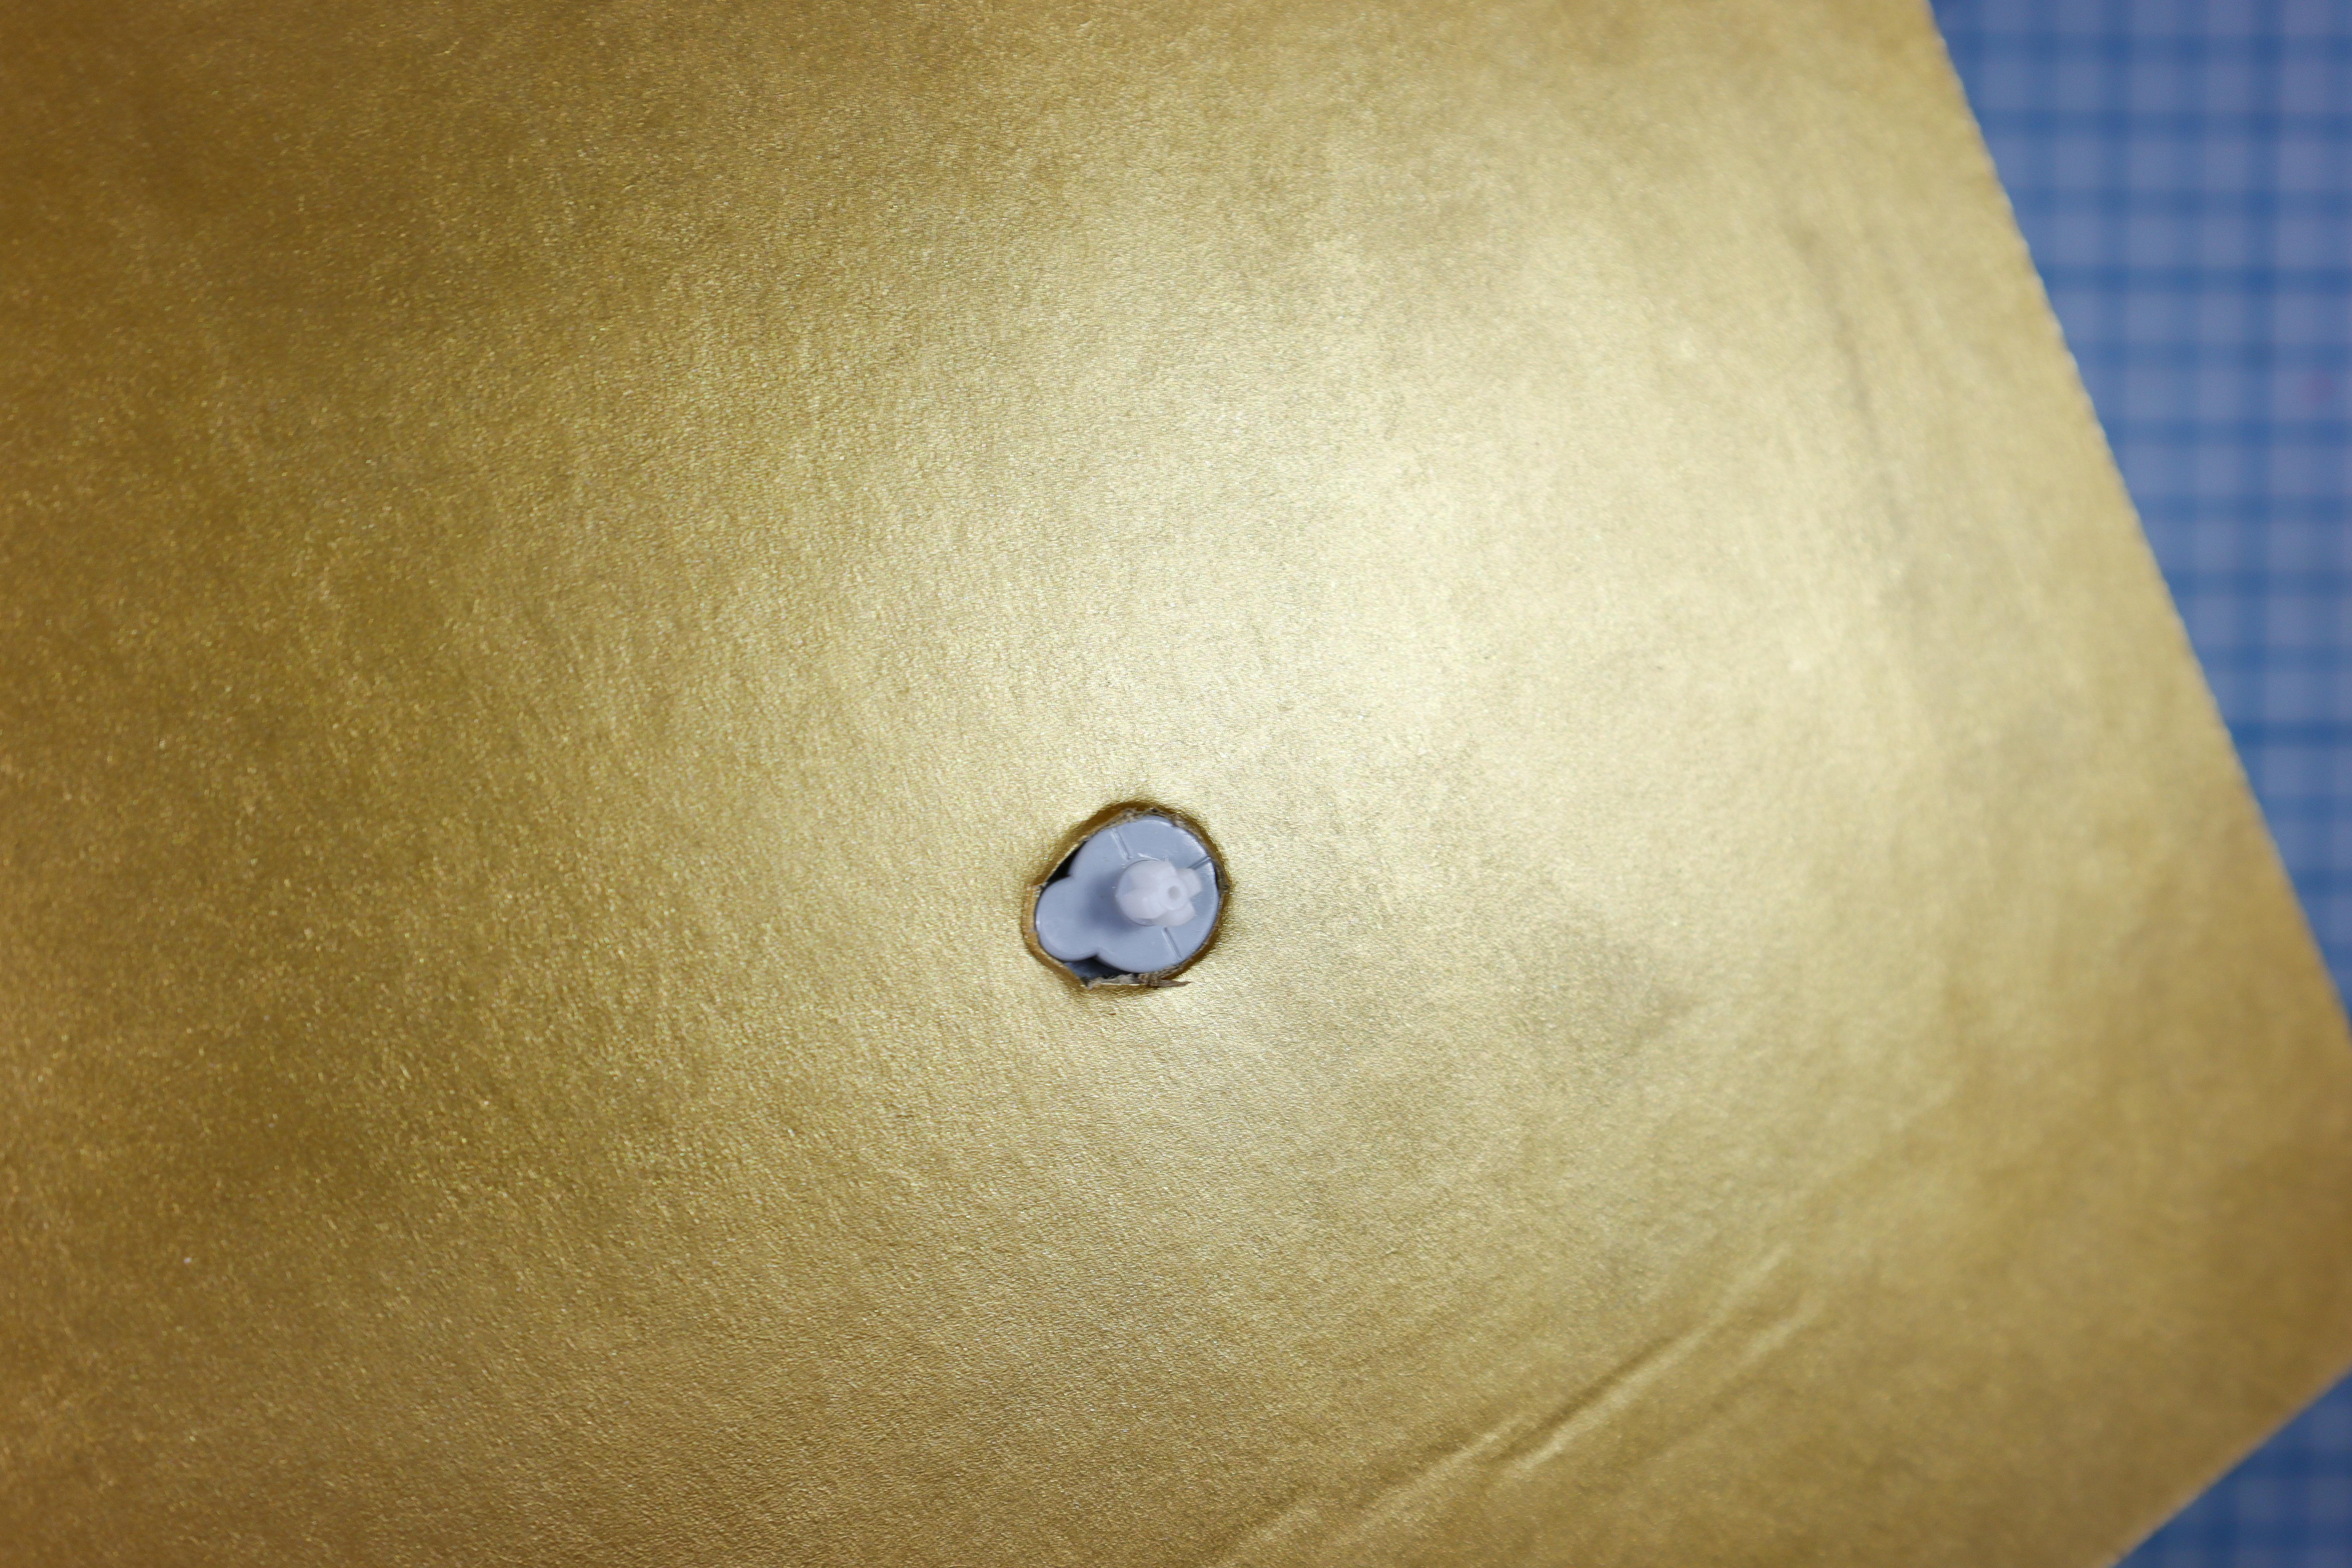

- If you plan to paint the base of the robot costume, do so before proceeding.
- Put a 1/2 inch hole in the cardboard where the center of the gauge will go. Then, add a notch so that the motor sits flush with the top of the cardboard as shown.
Glue the Motor in Place
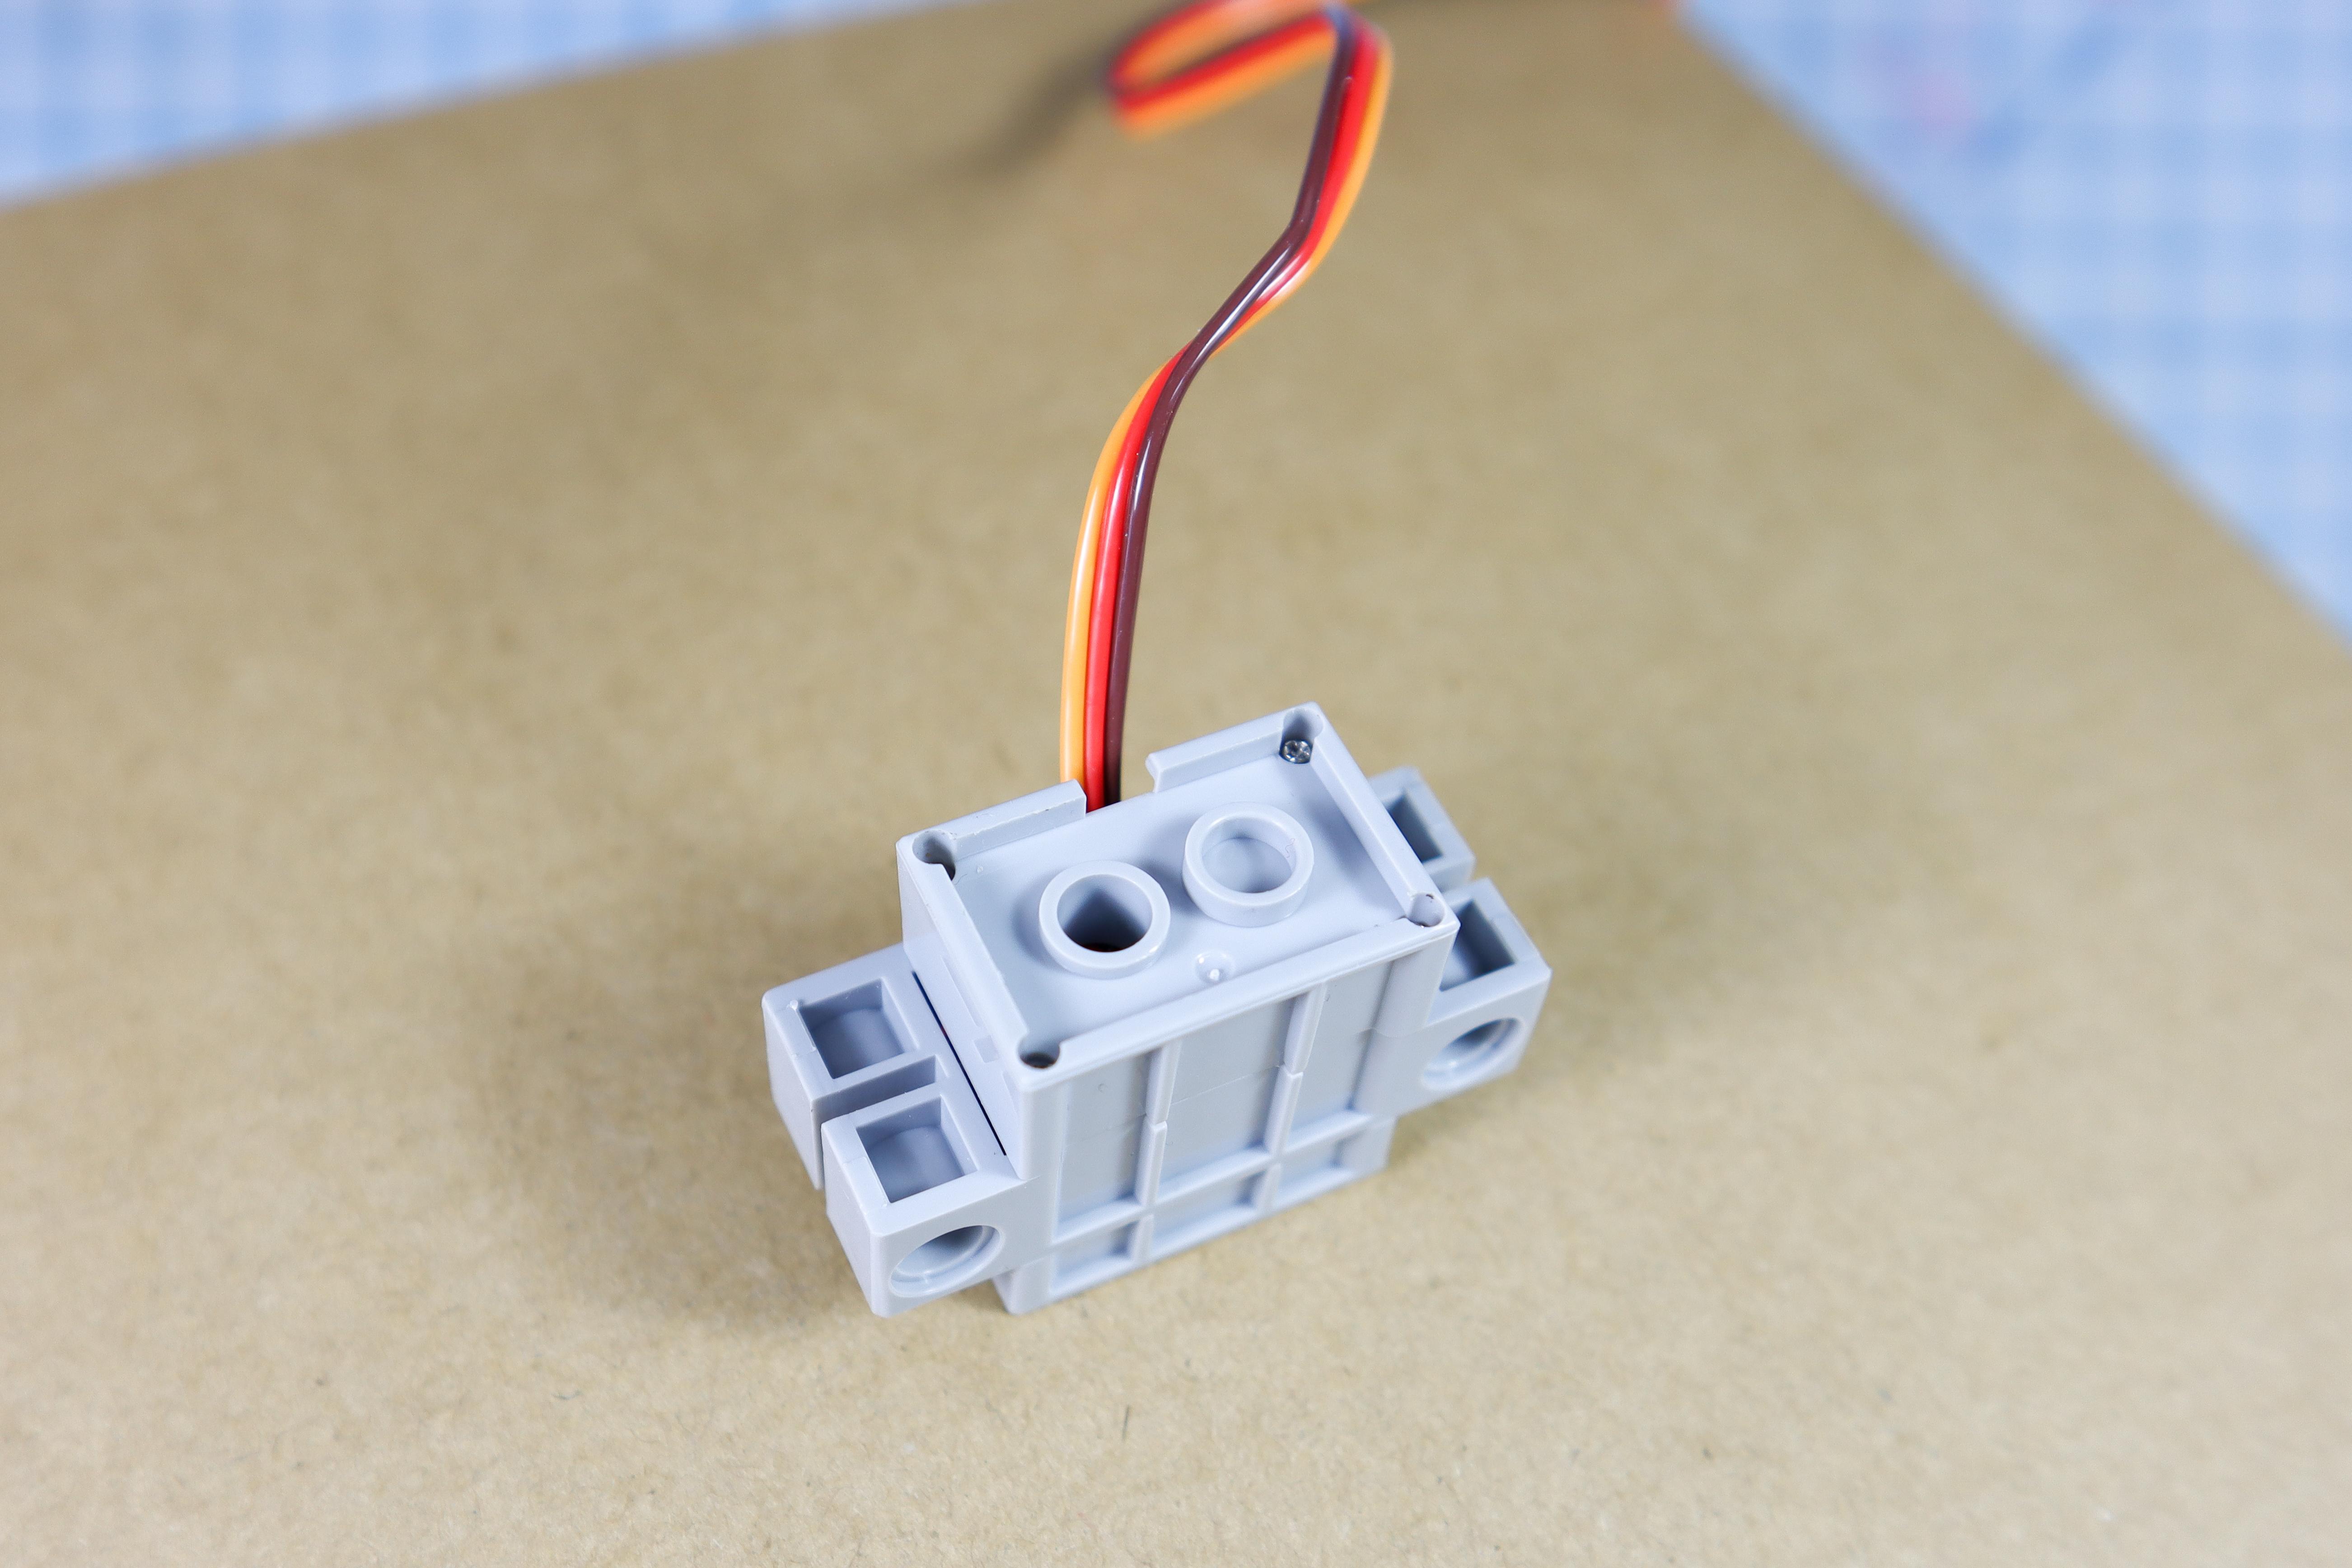
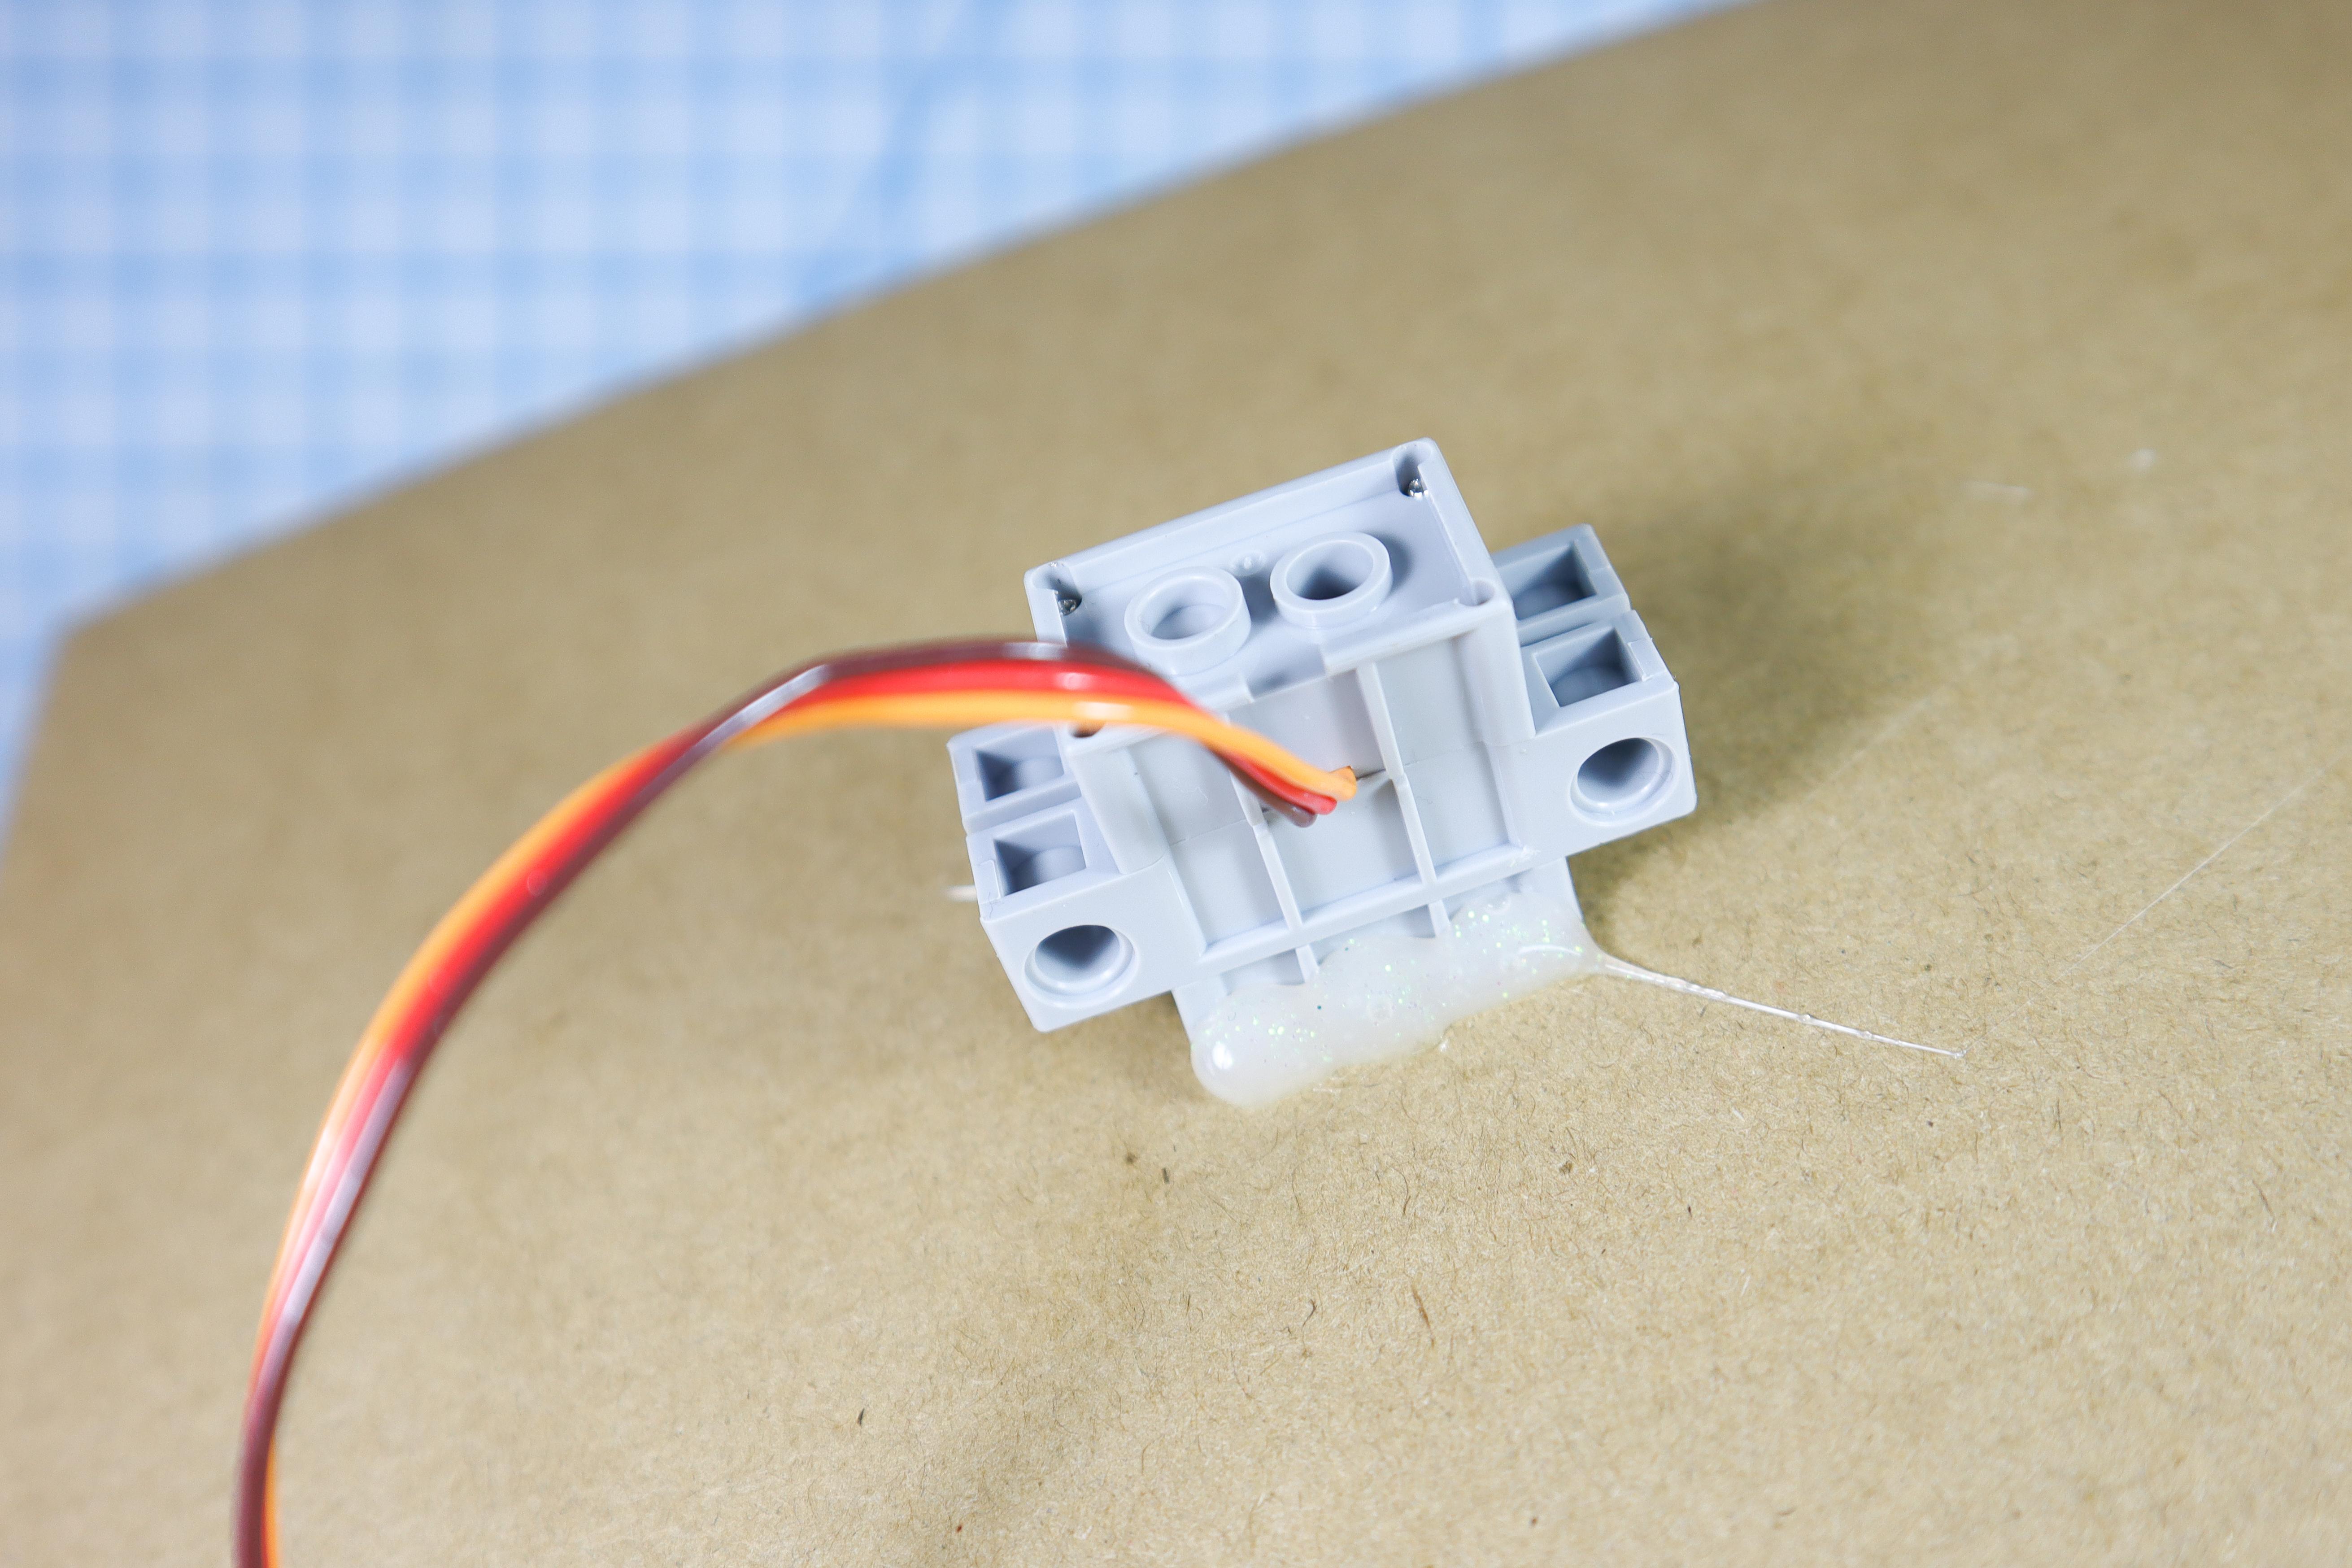
- Hot glue the motor in place
Glue the Gauge Face in Place
- Insert the gauge face over the motorhead and glue it to the cardboard with hot glue.
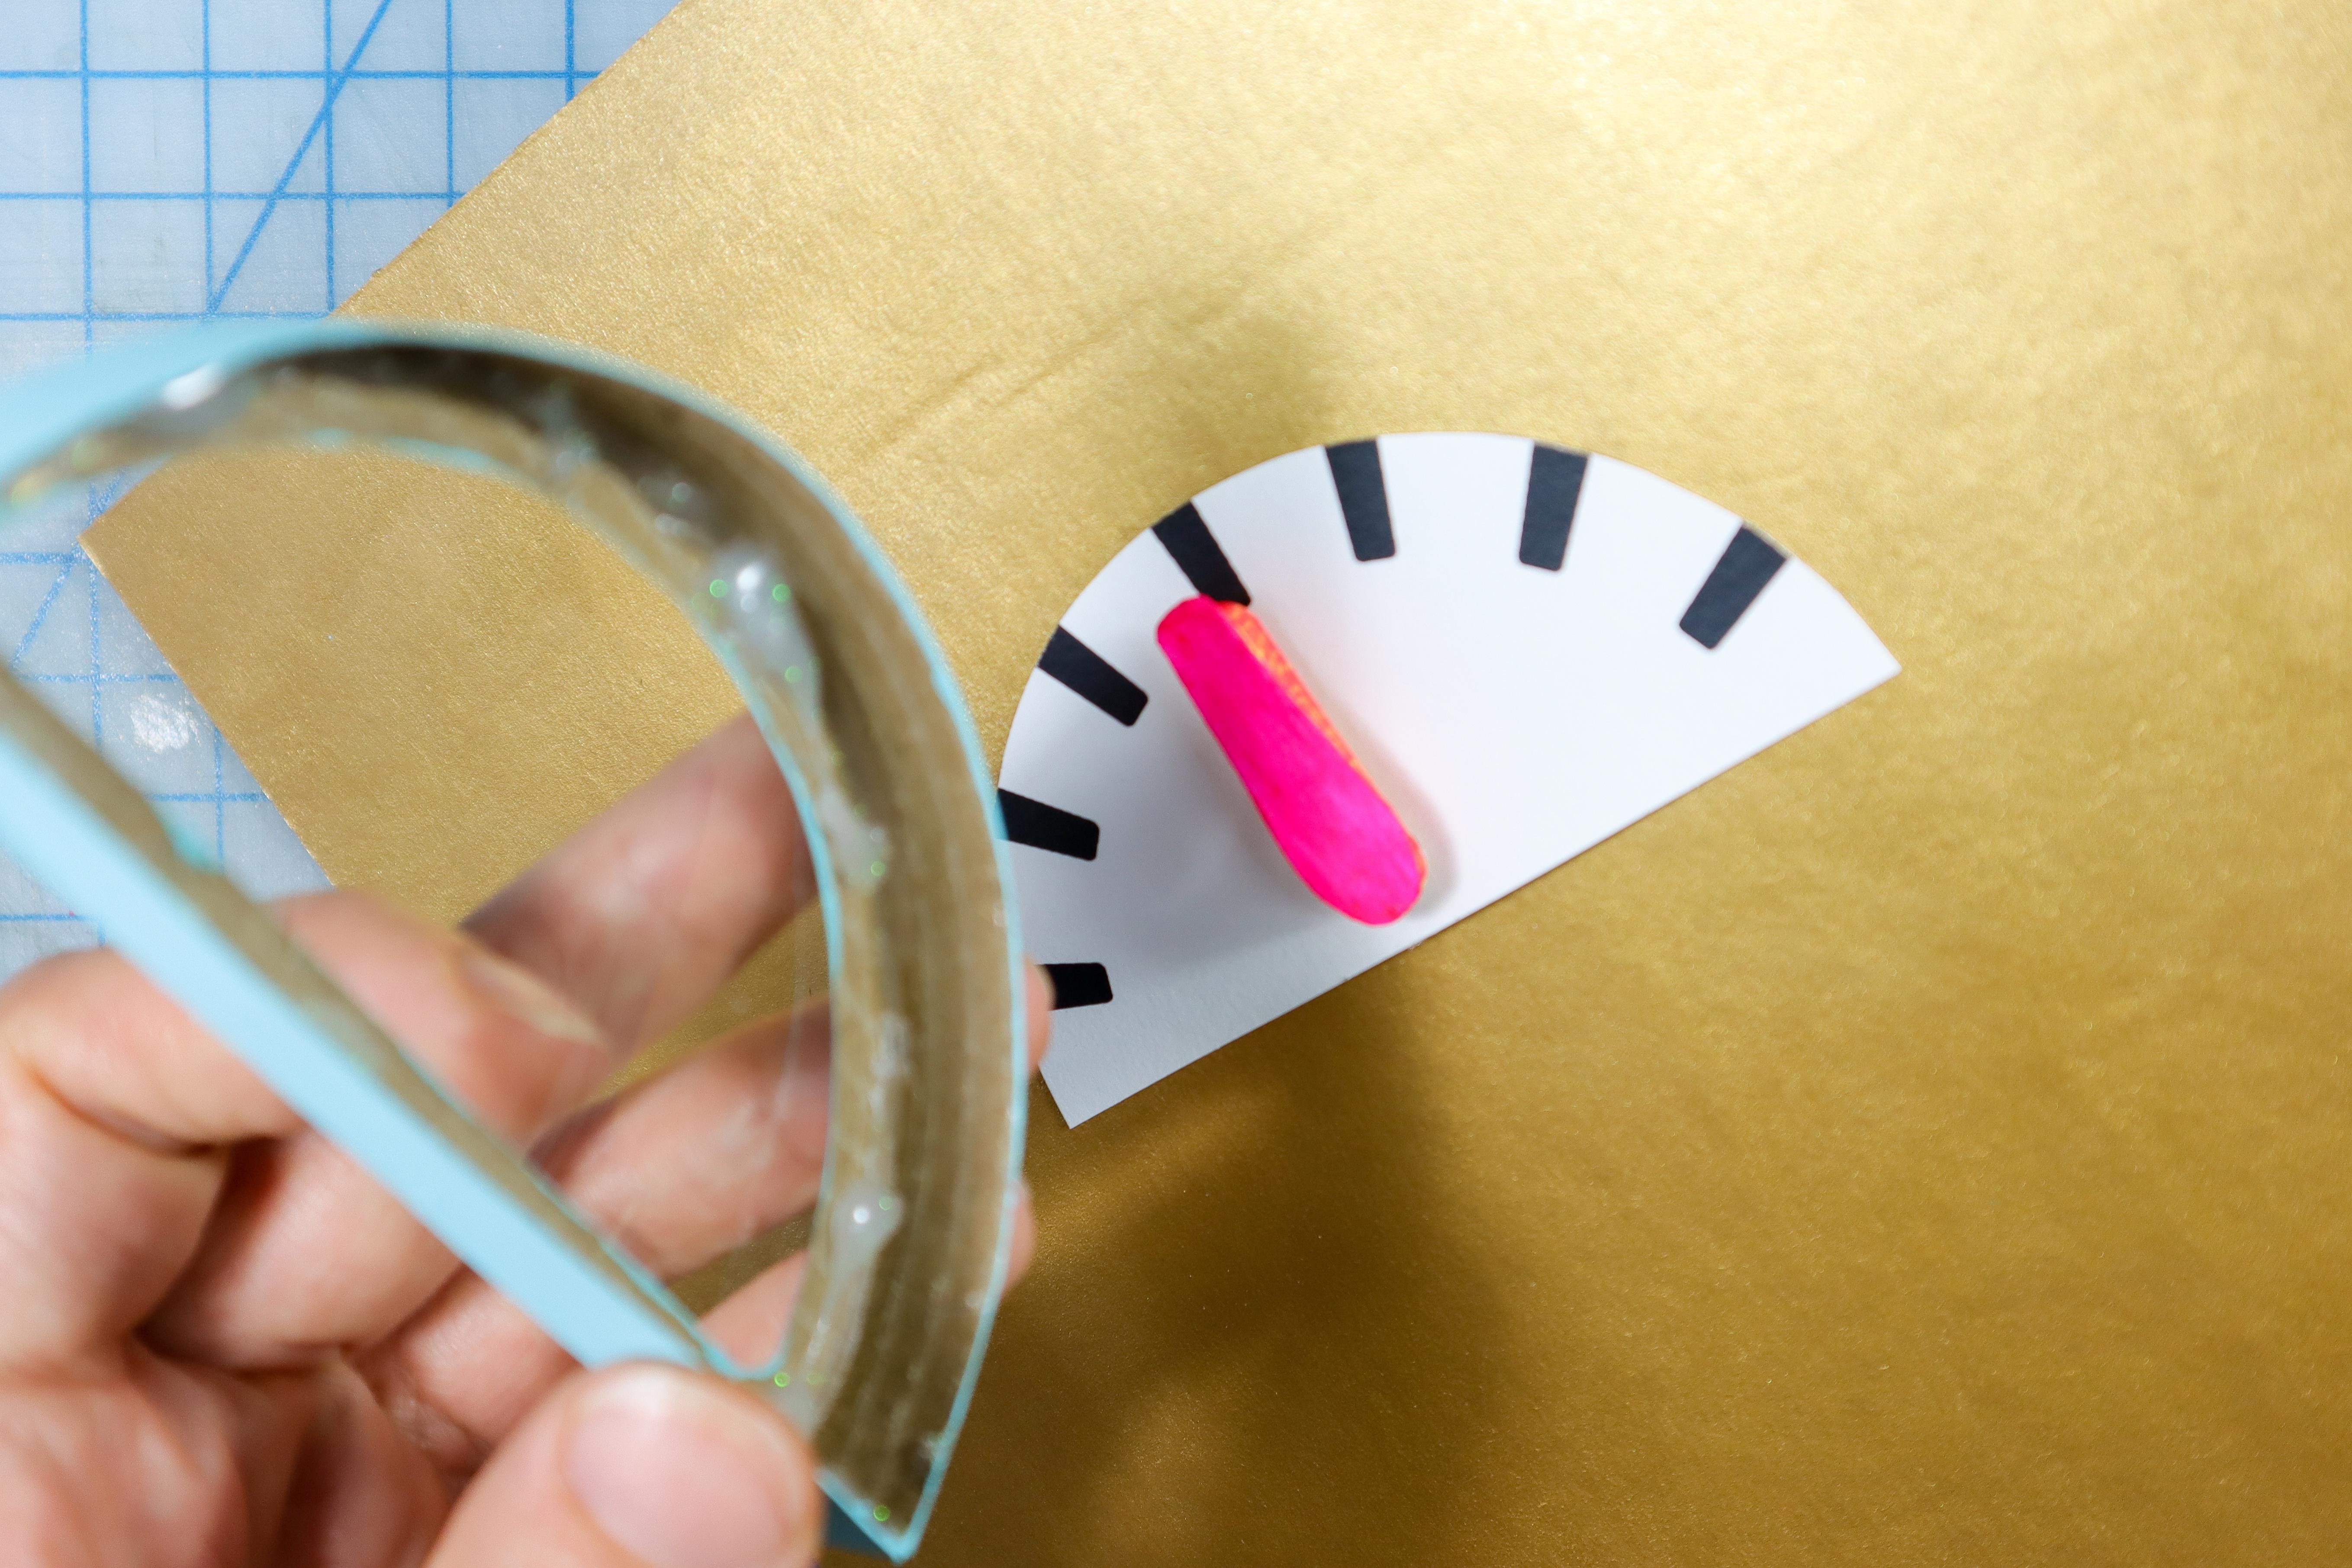
Create the Box

- Using hot glue, adhere the long strip to the round edge of the gauge and the short strip to the bottom.
- Only glue the interior of the box to keep the exterior looking tidy.
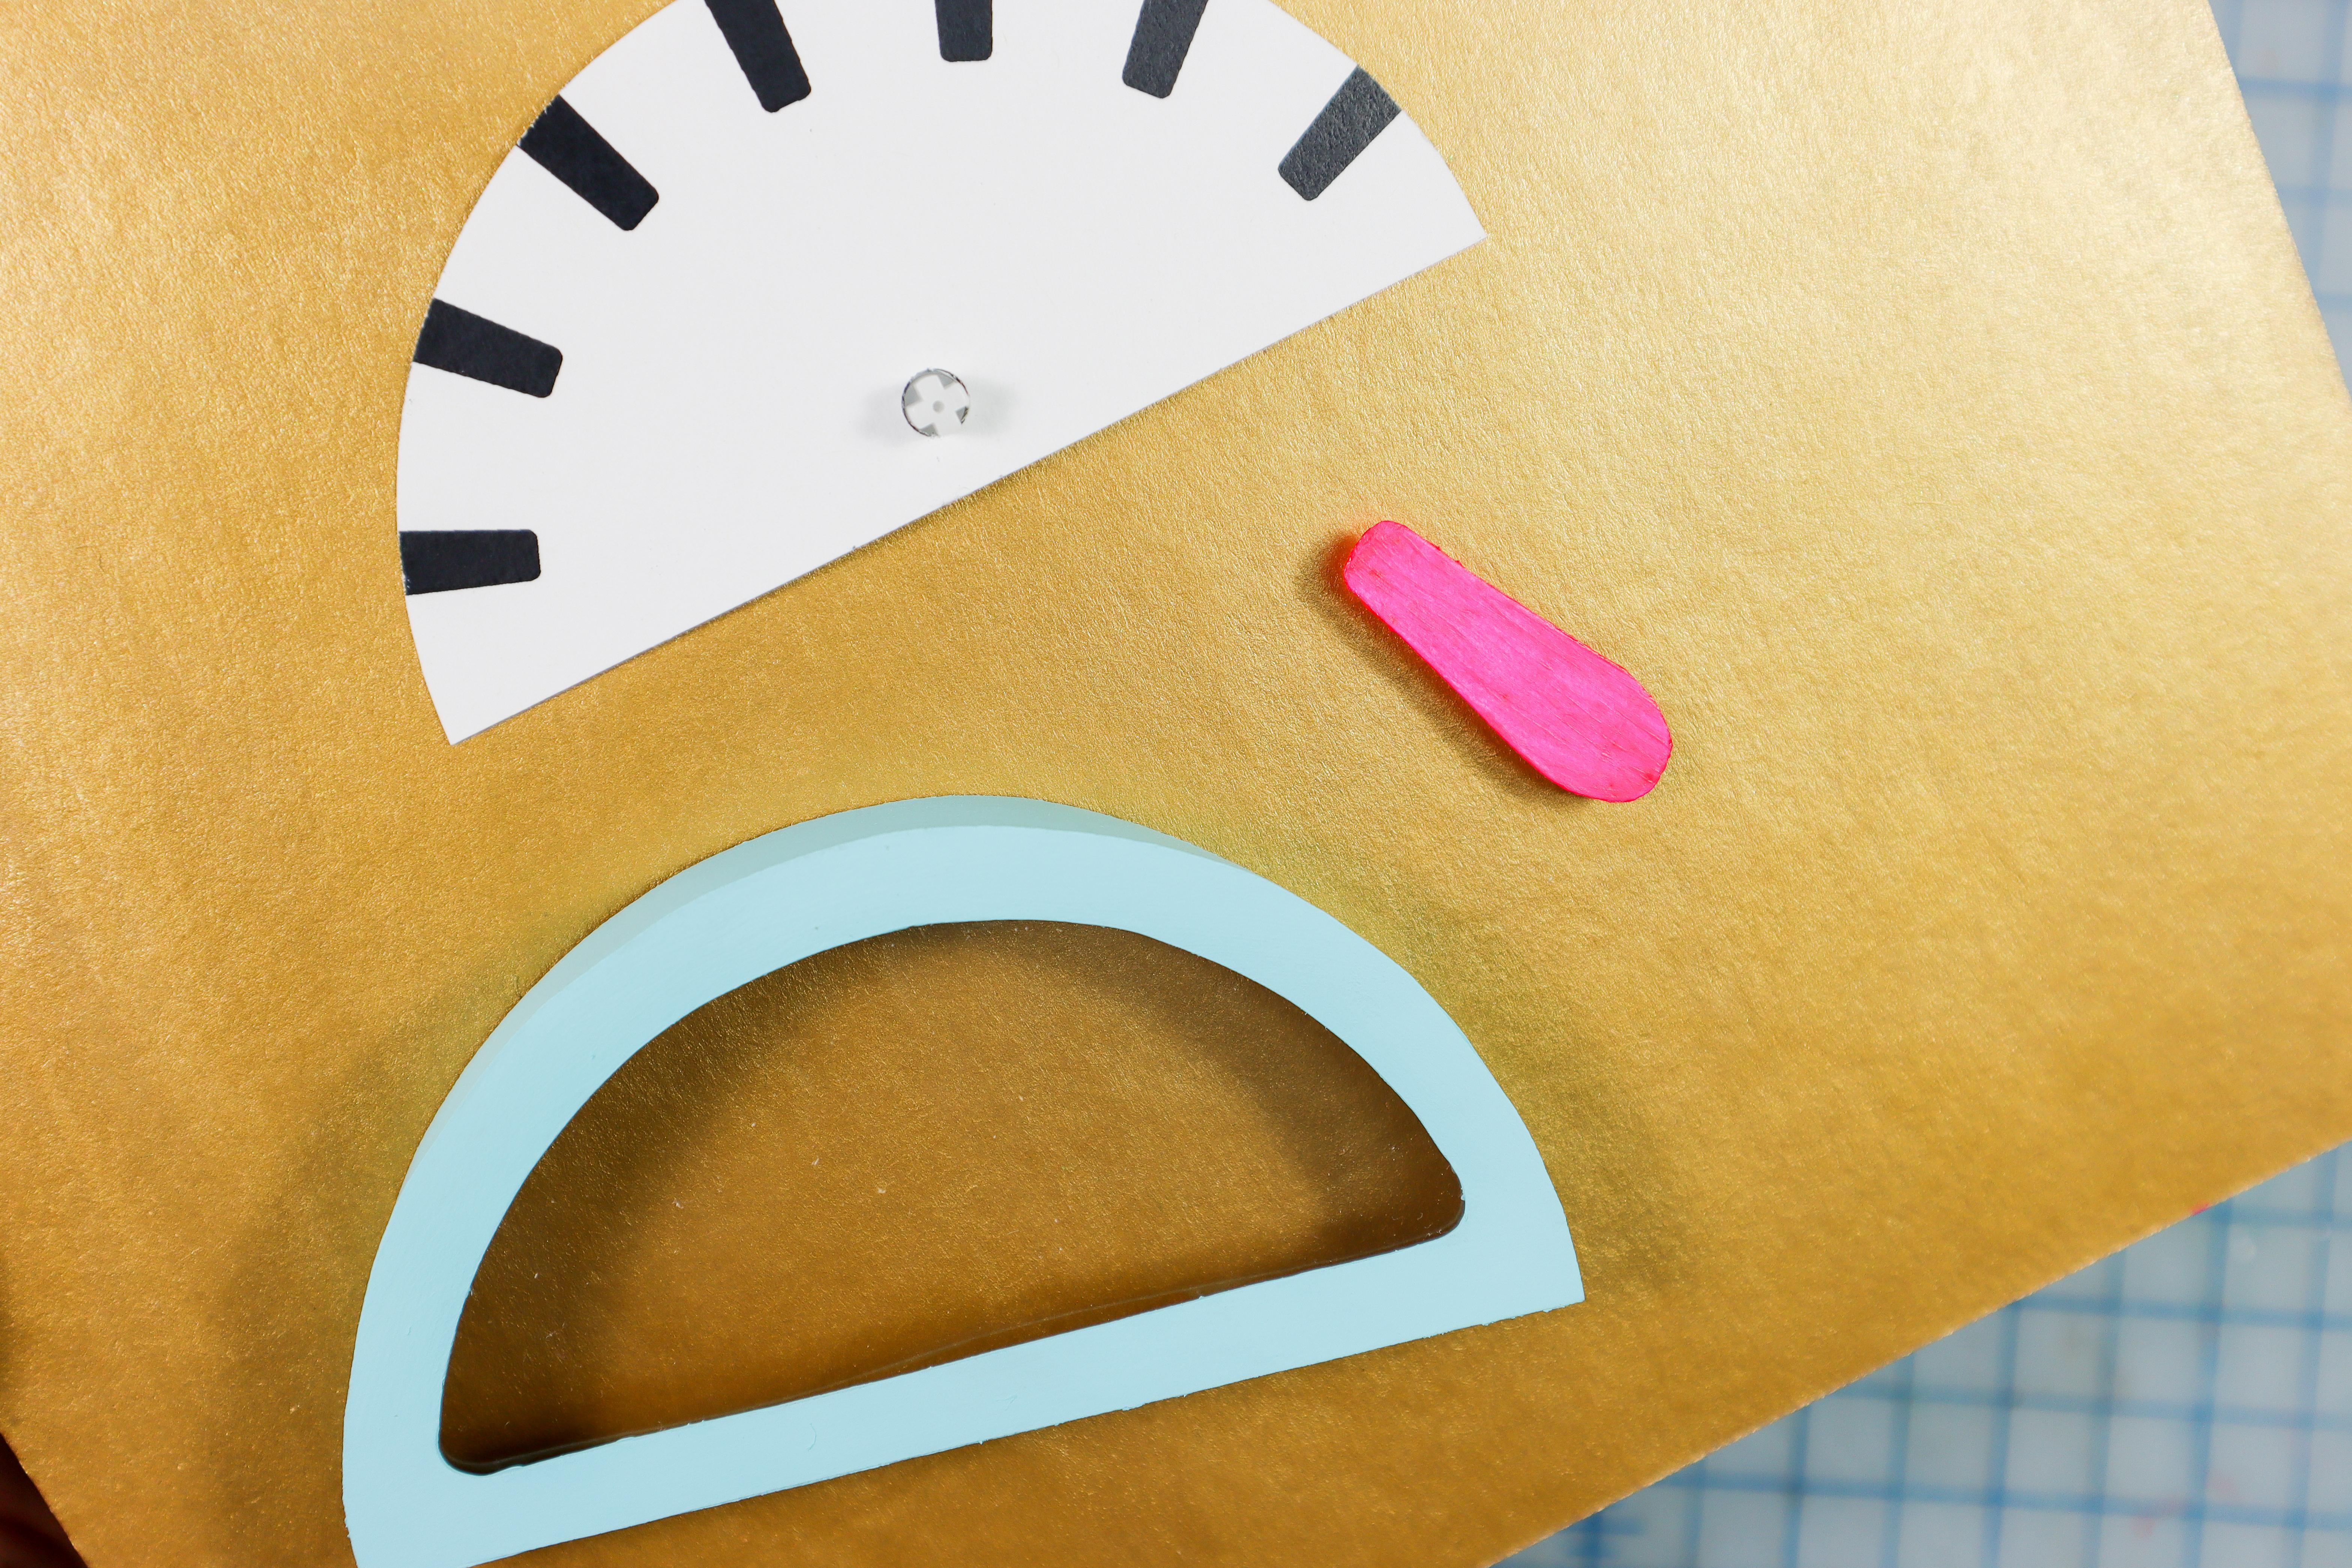
Create the Dial Hand
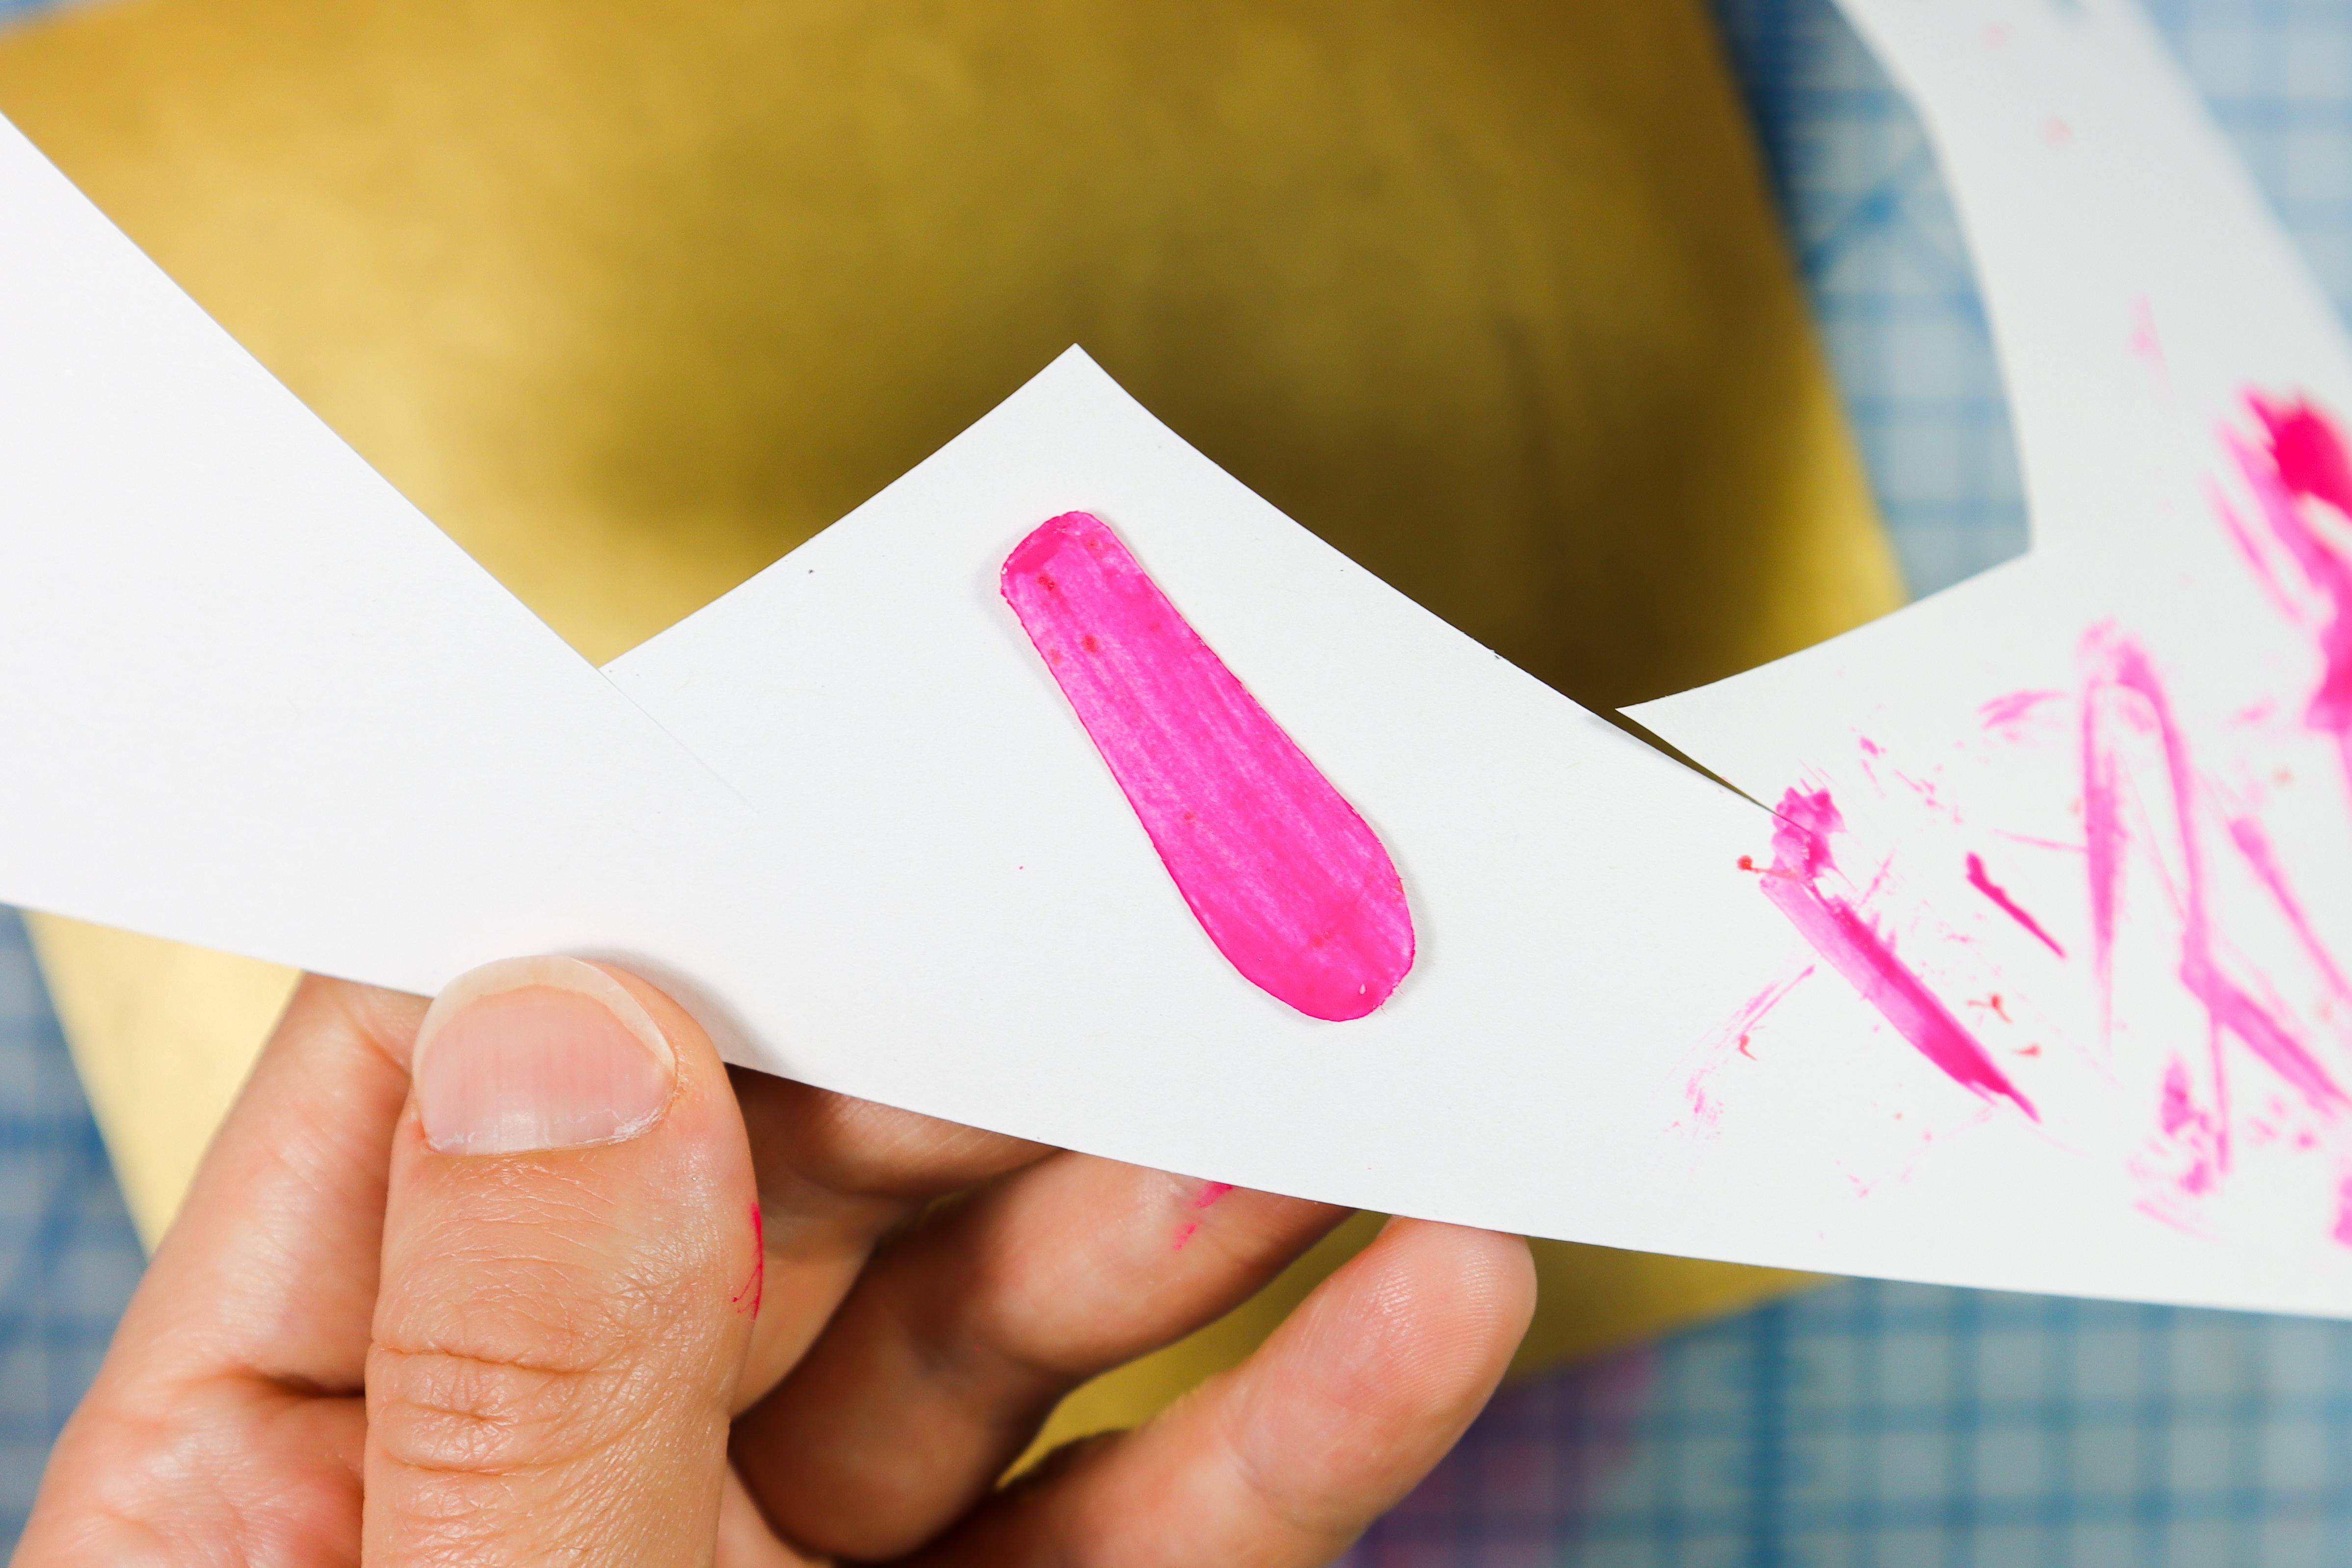
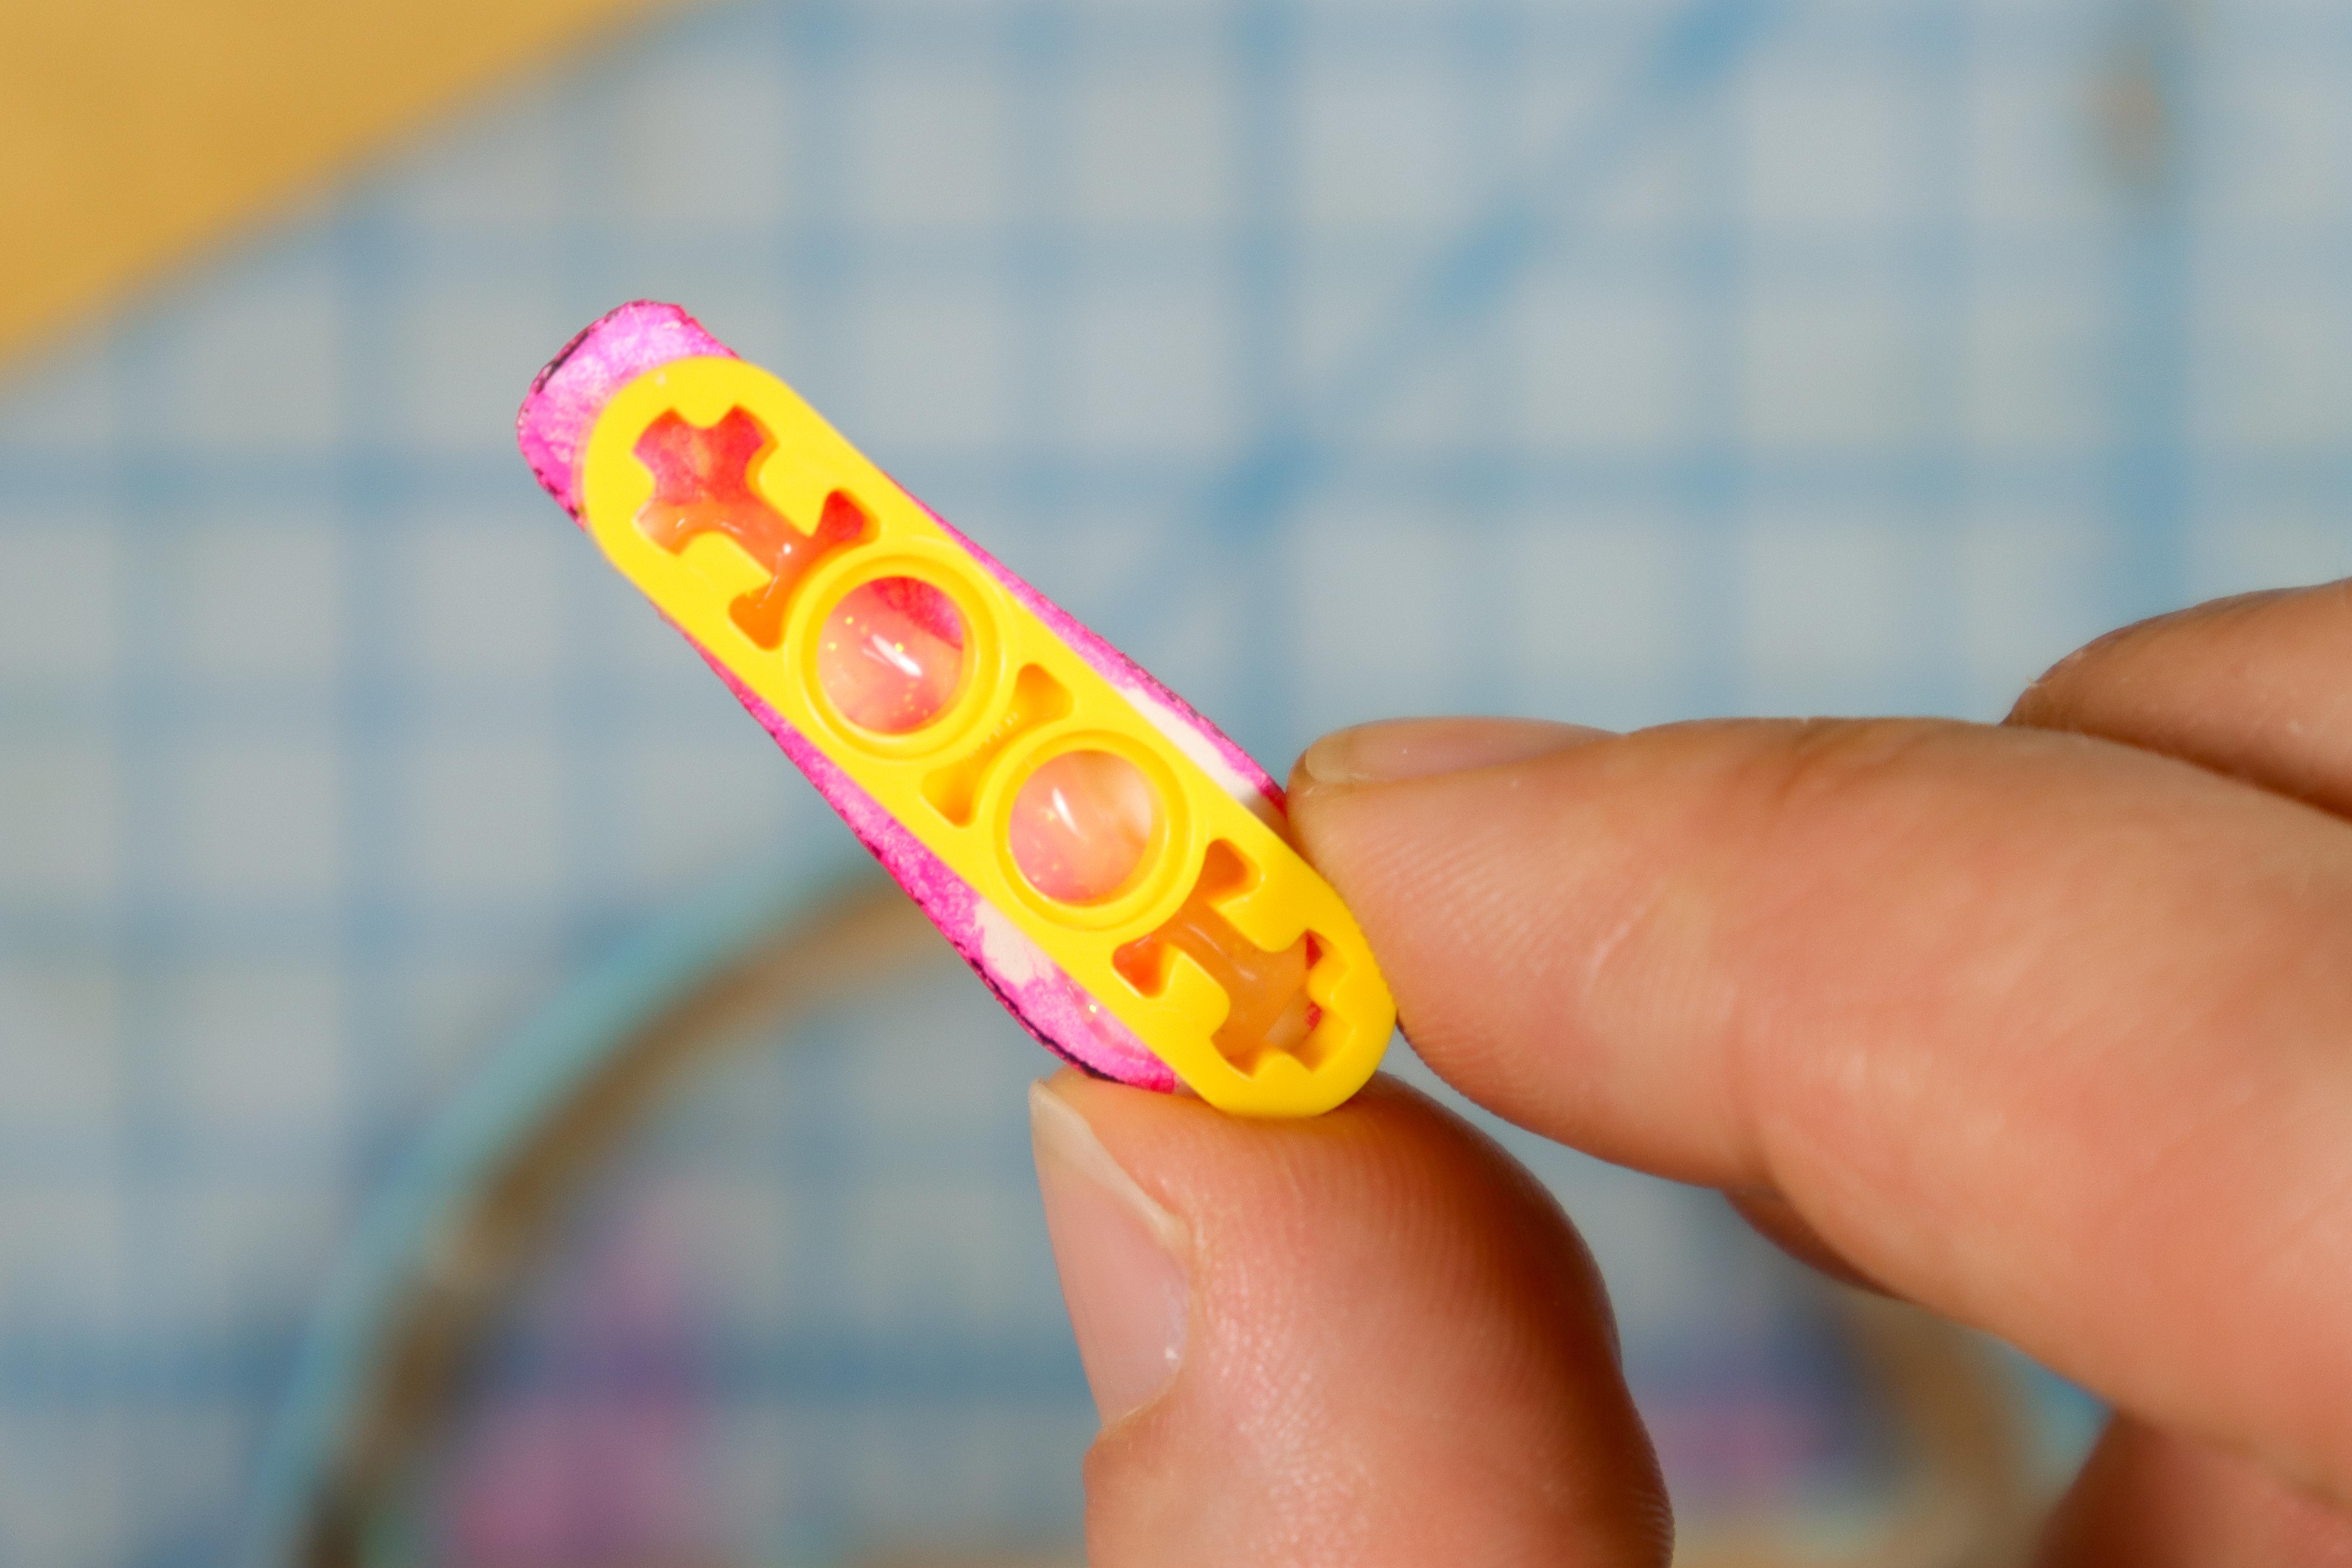
- Cut out the dial hand from the template. If the paper isn't thick enough, trace the shape to a thicker material.
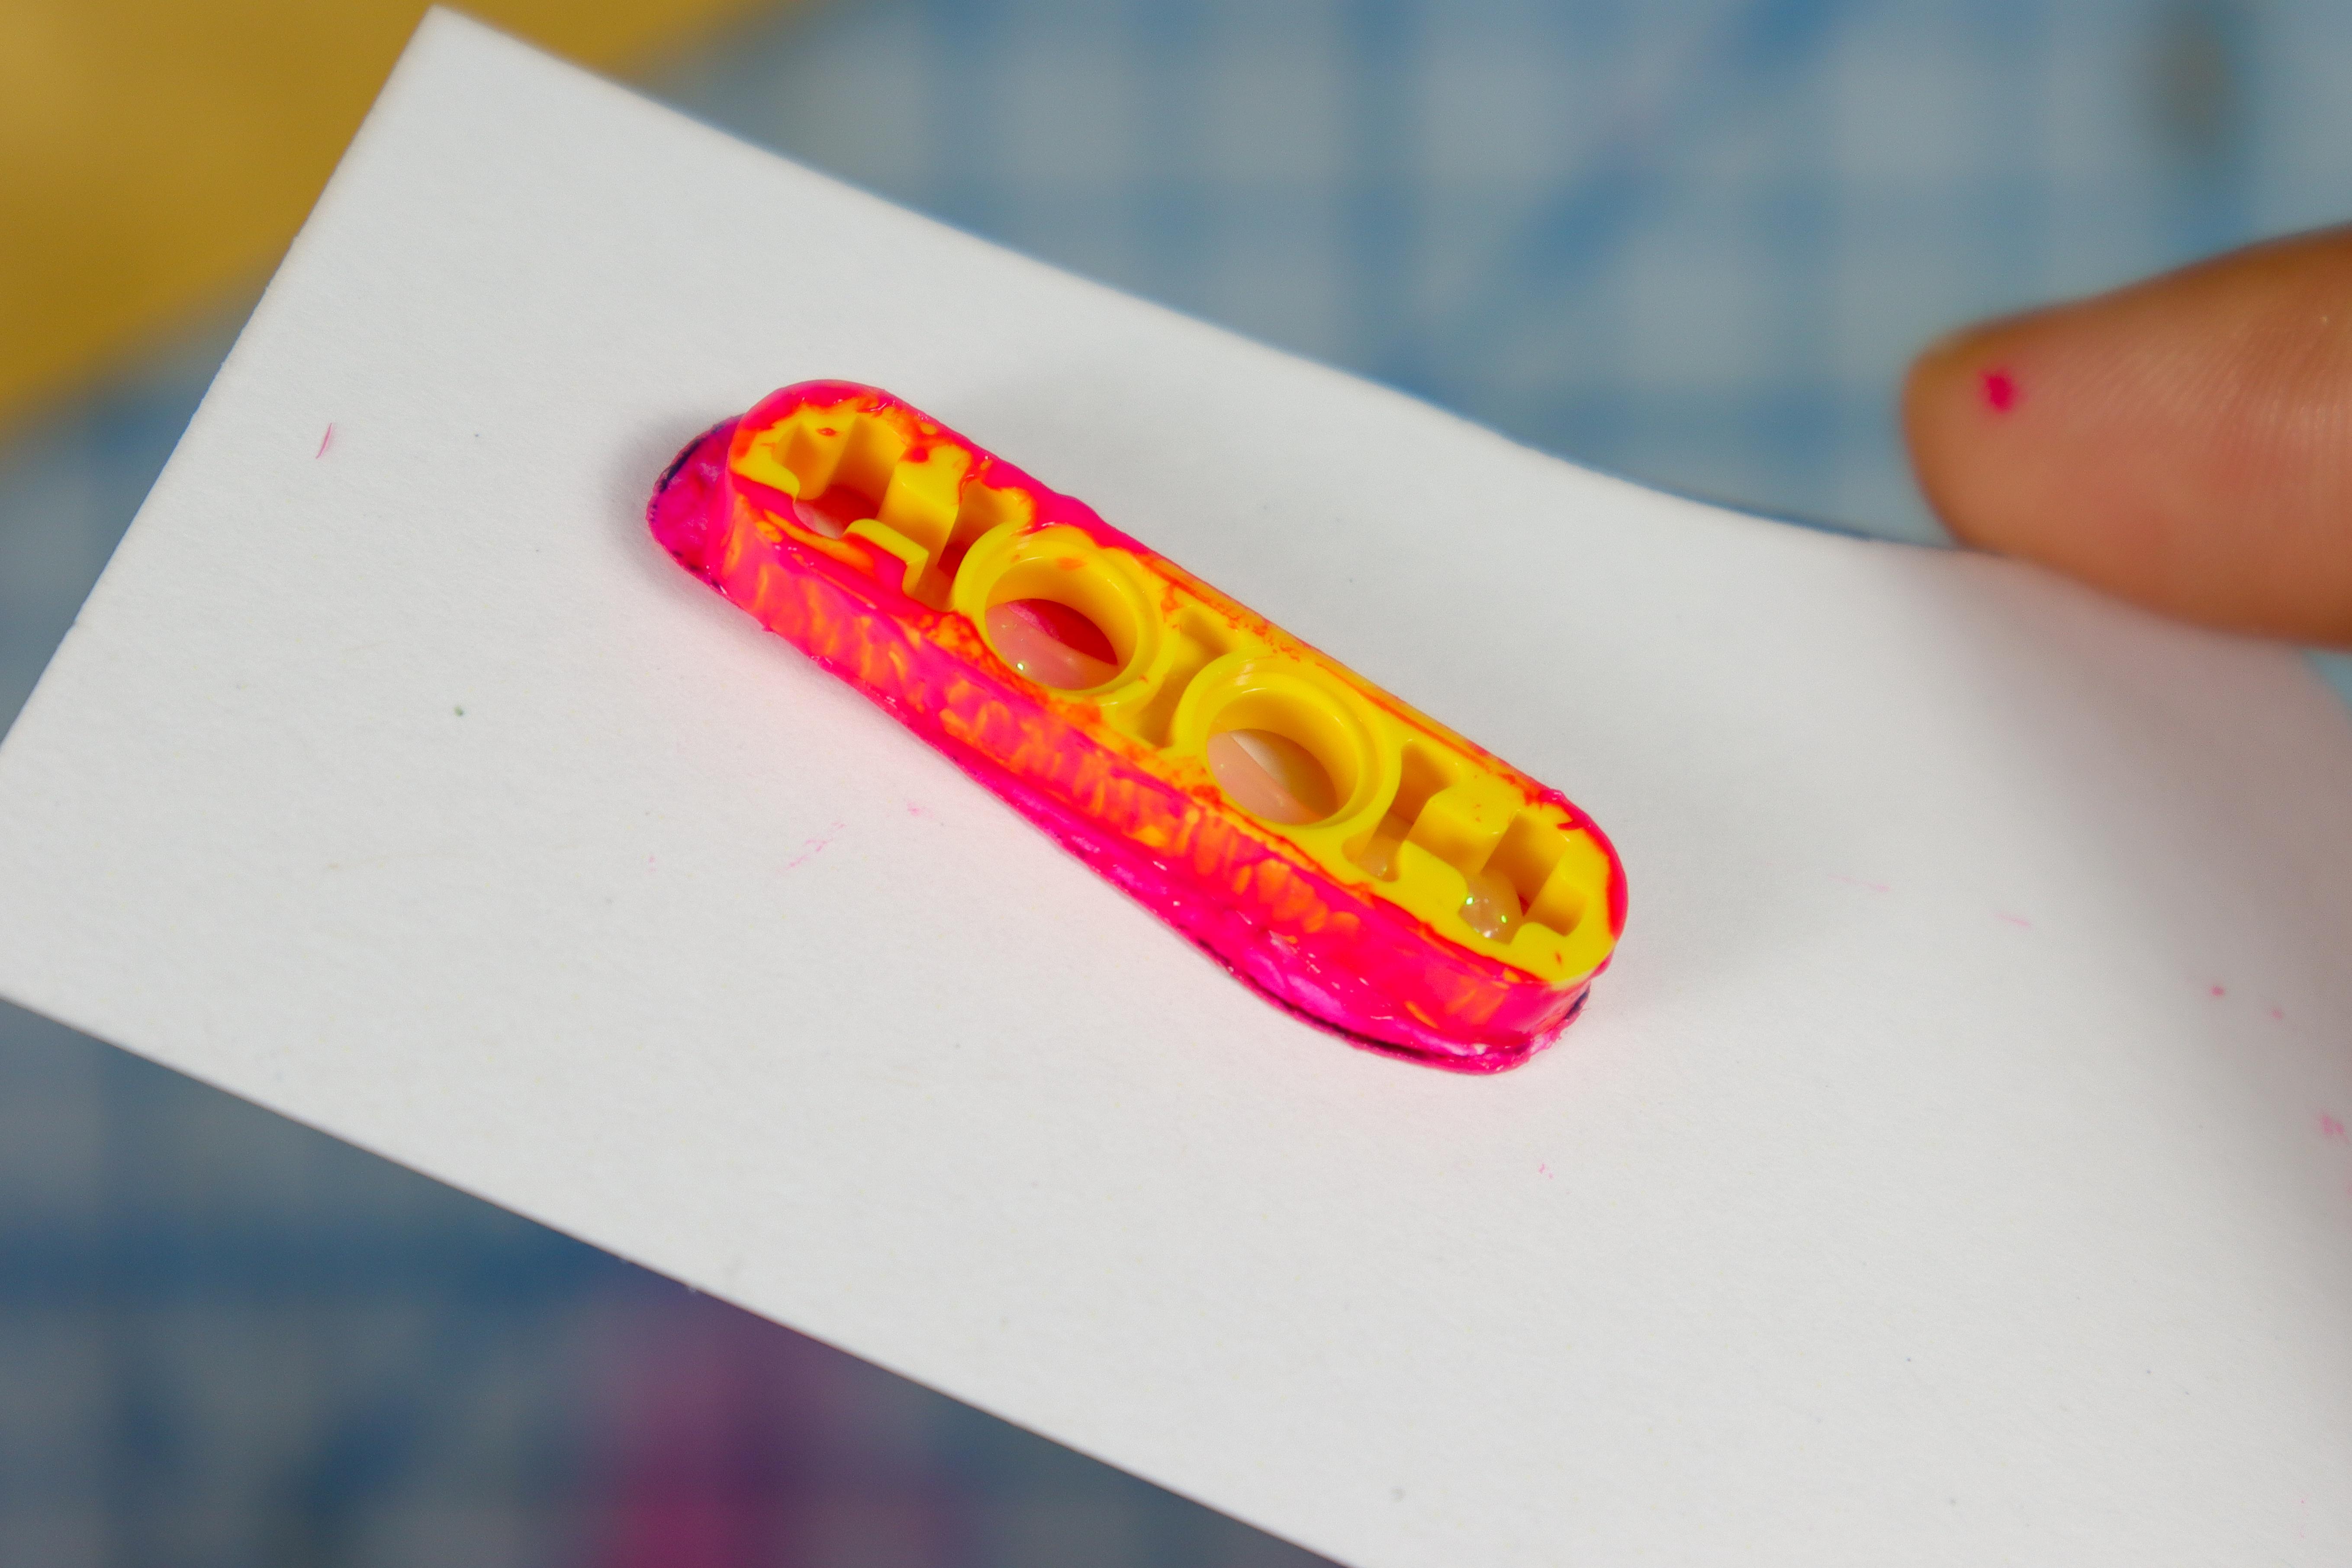
- Glue the LEGO piece to the back of the dial hand and paint the front and the edges to make it blend in.
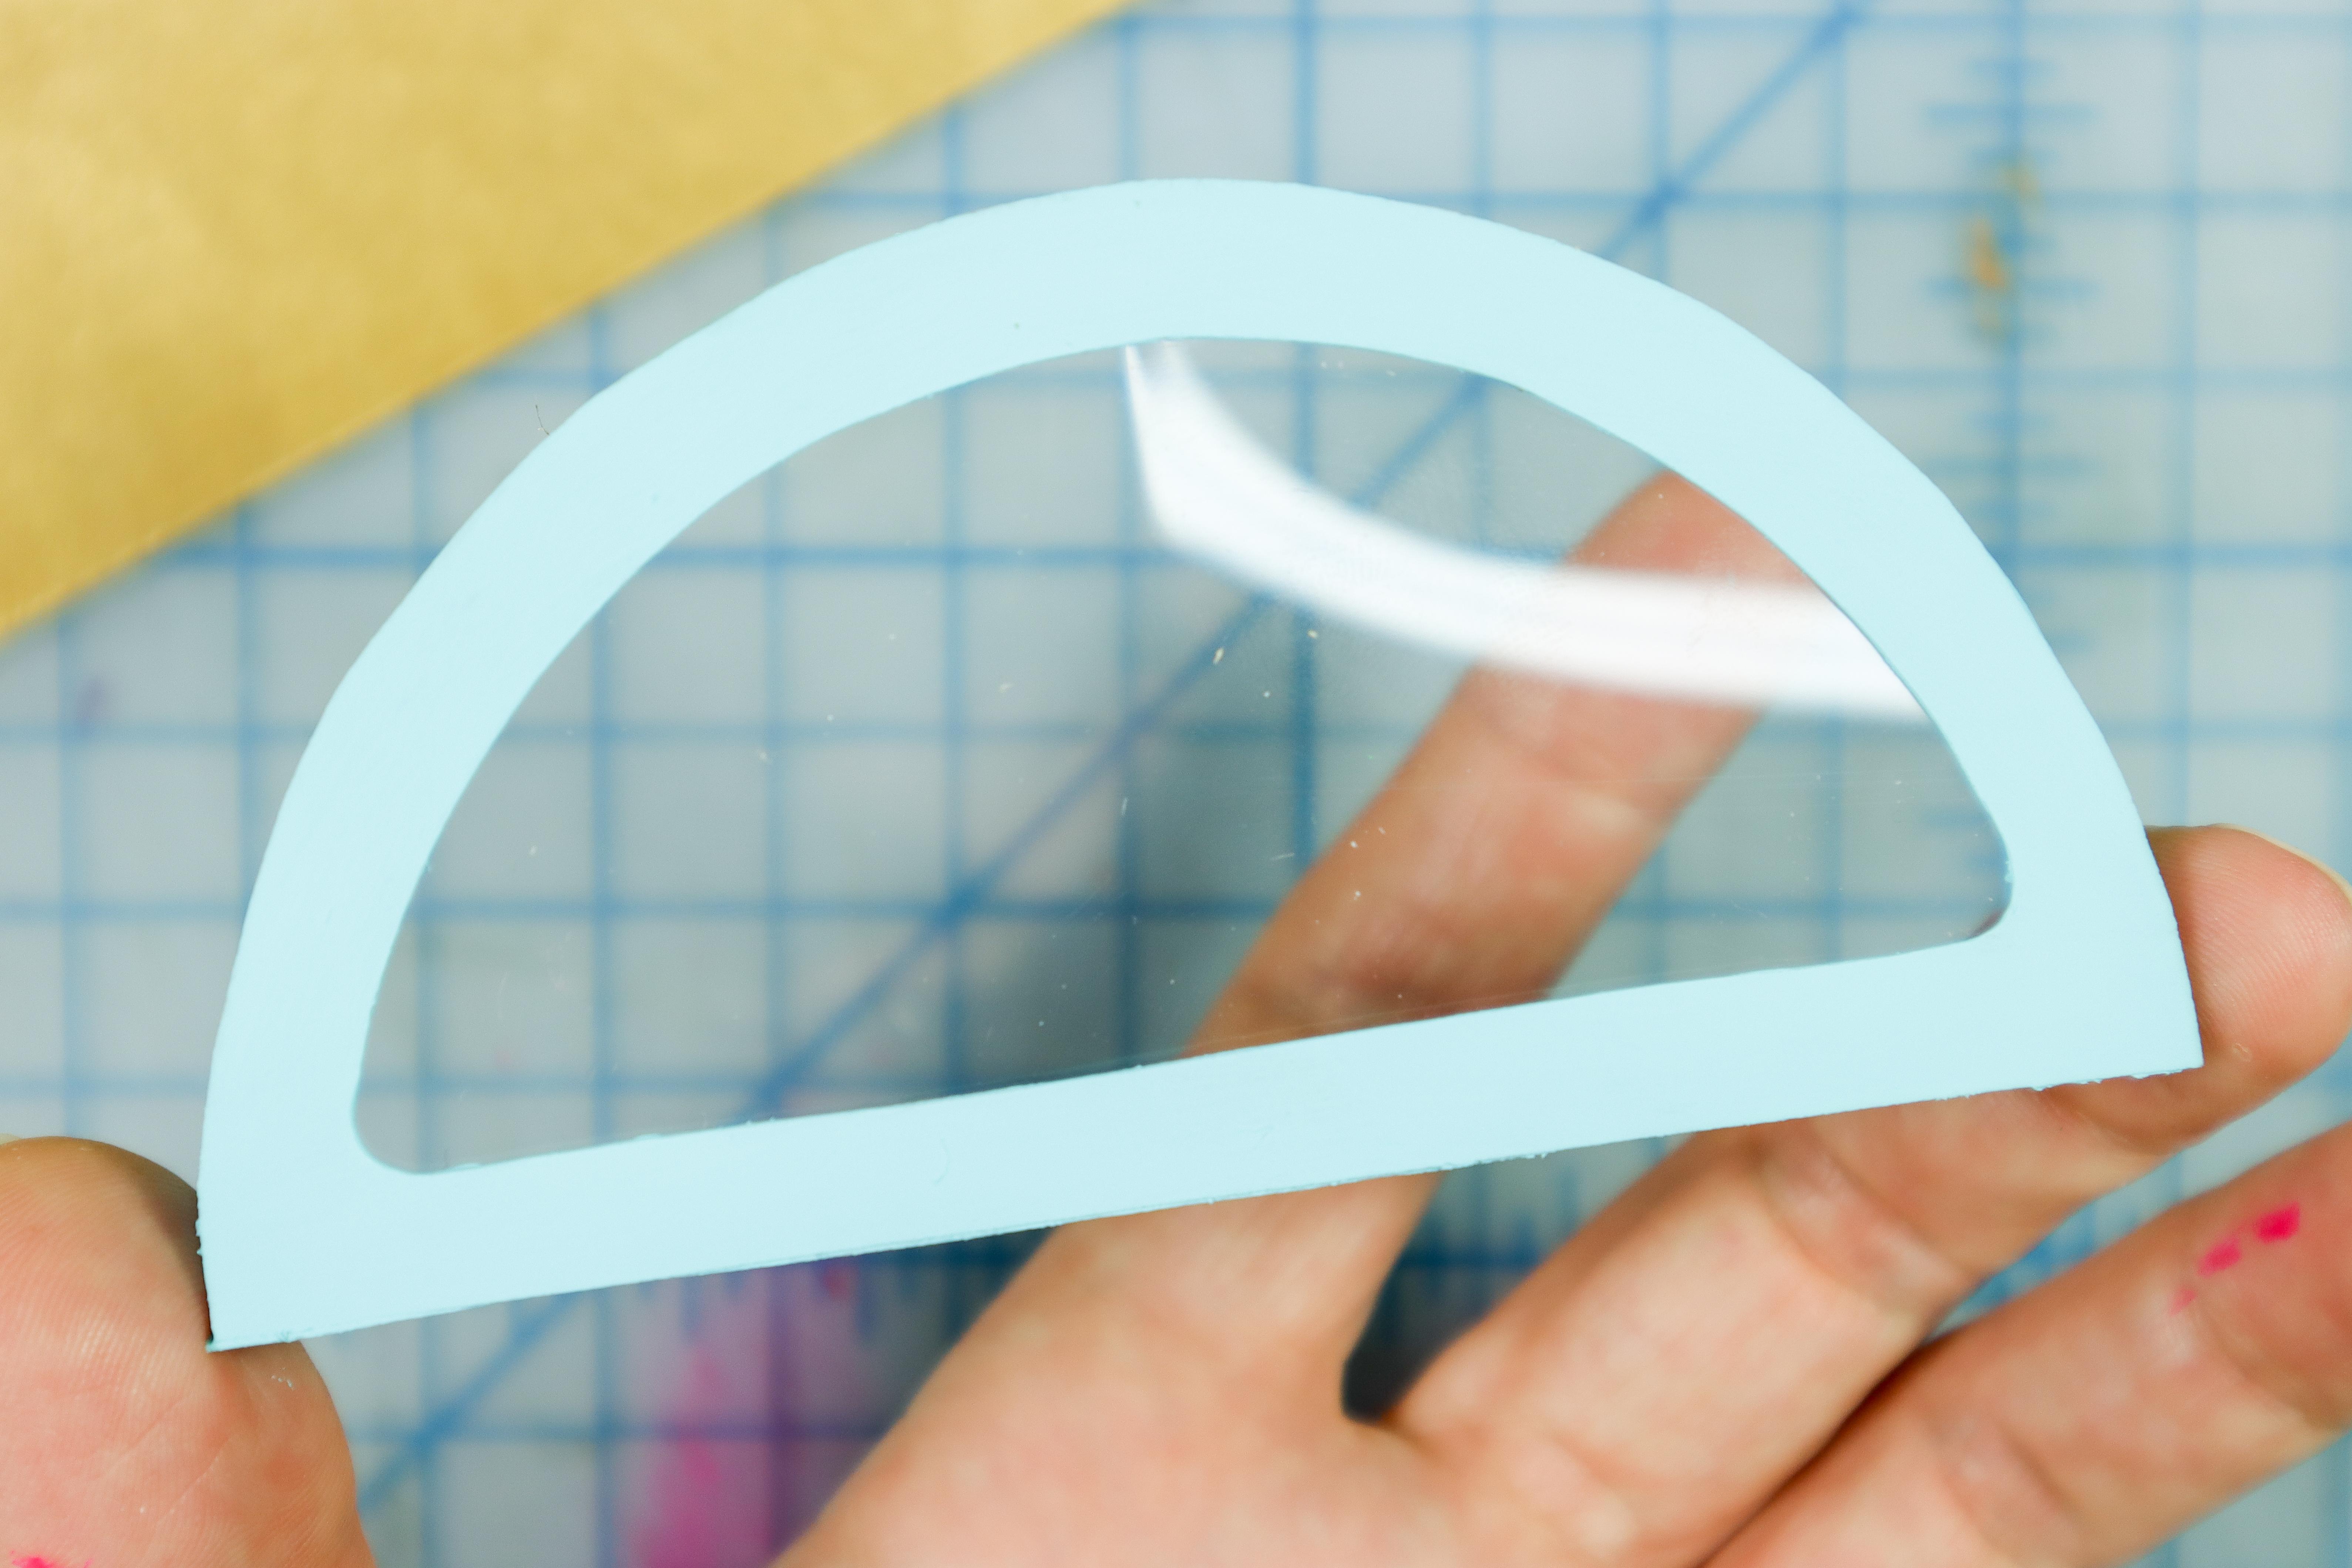
Paint the Box
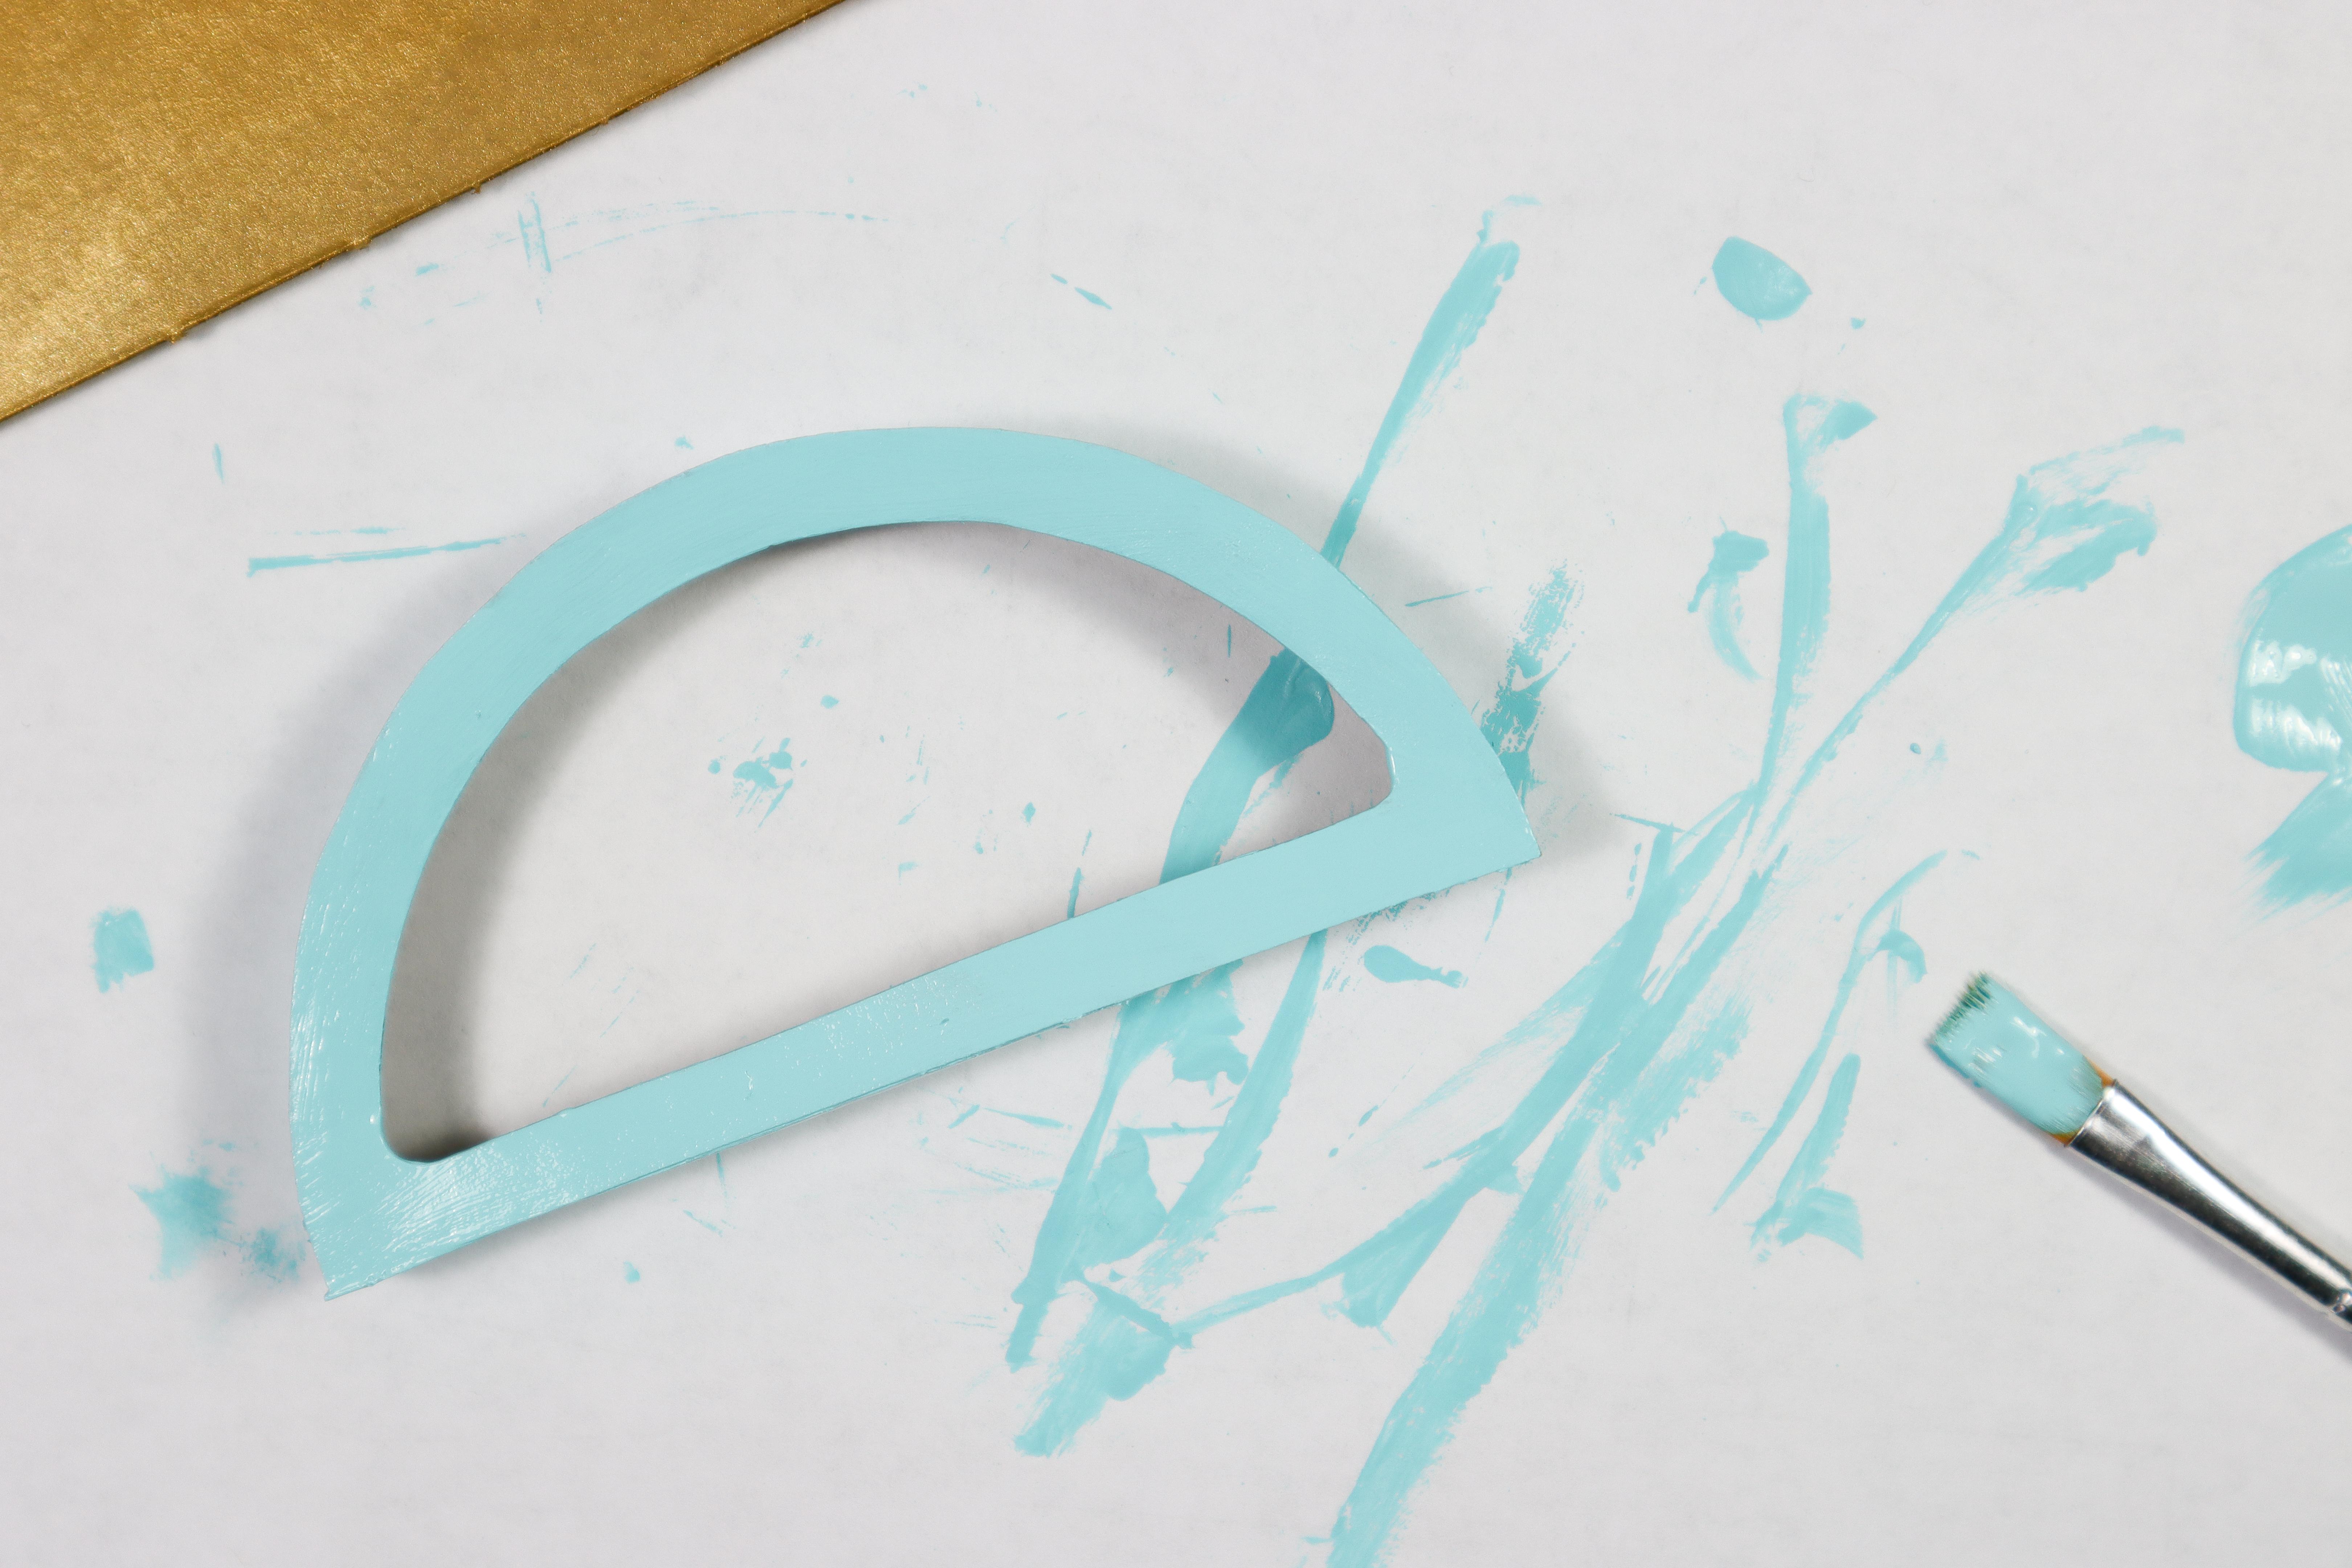
- Paint the box its final color.
Glue the Plastic in Place
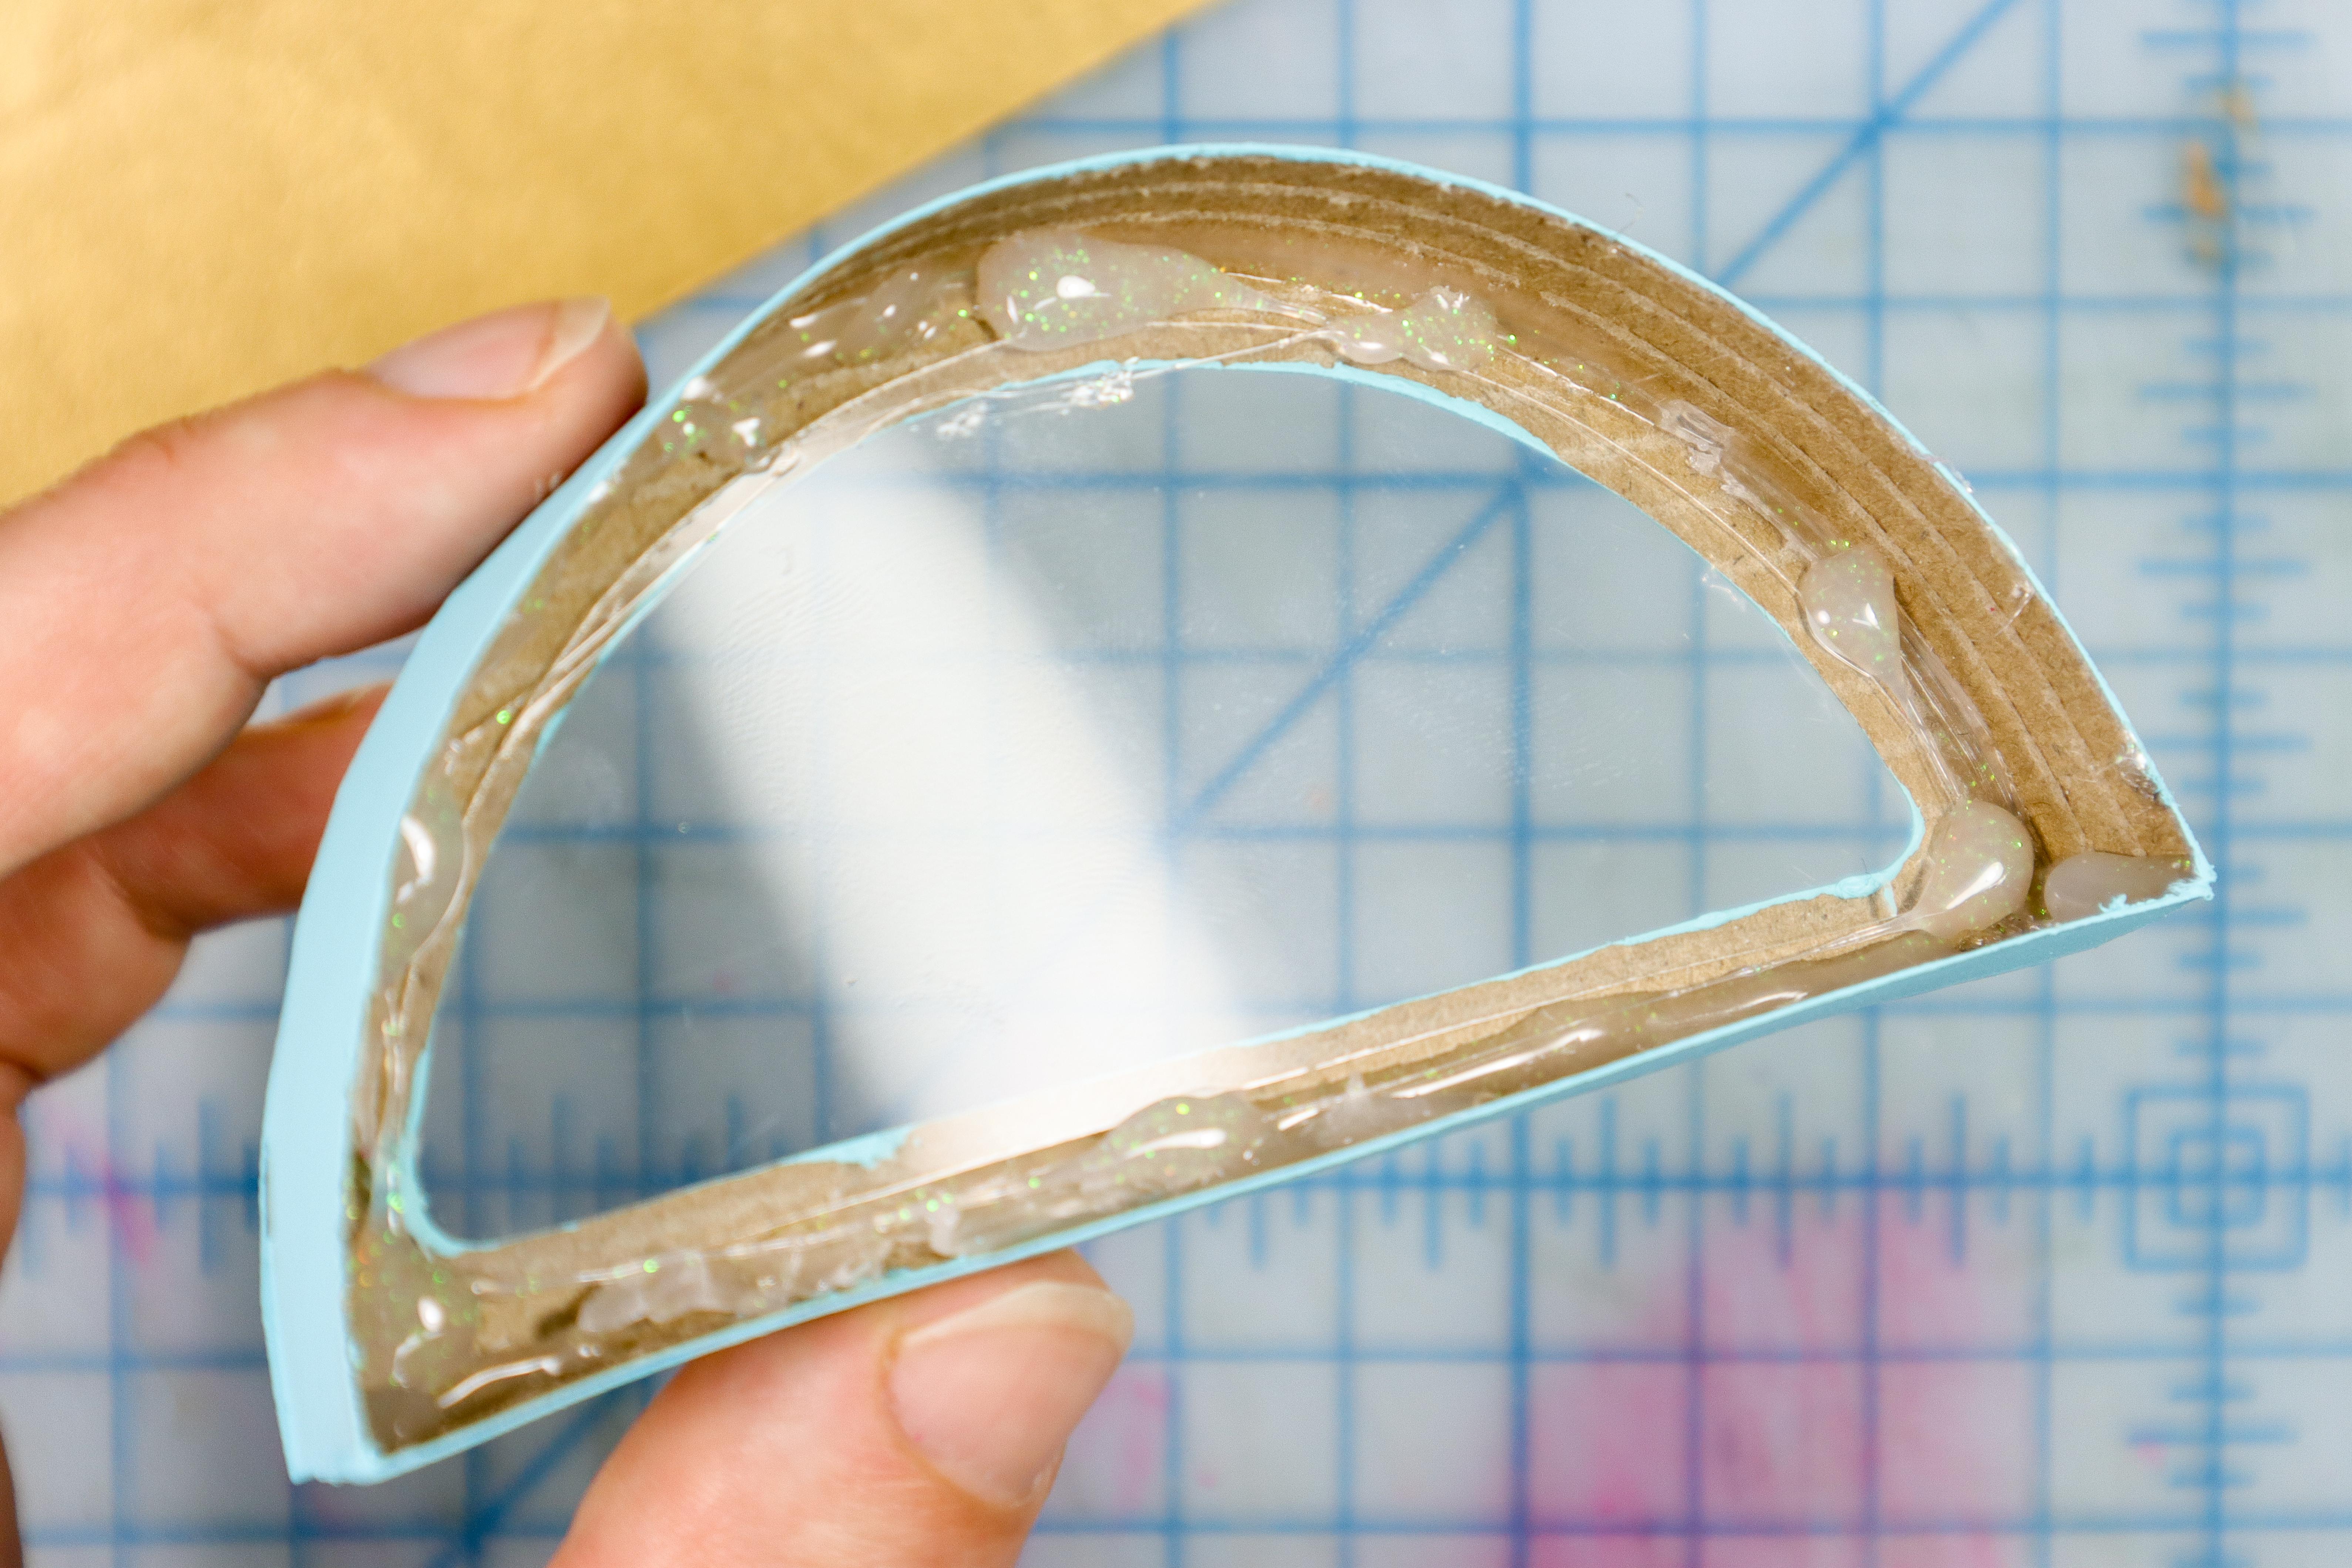
- Use hot glue to secure the plastic inside the window of the box. A few dabs of glue will work, just be sure to keep the glue away from the edge so that you can't see it from the front.
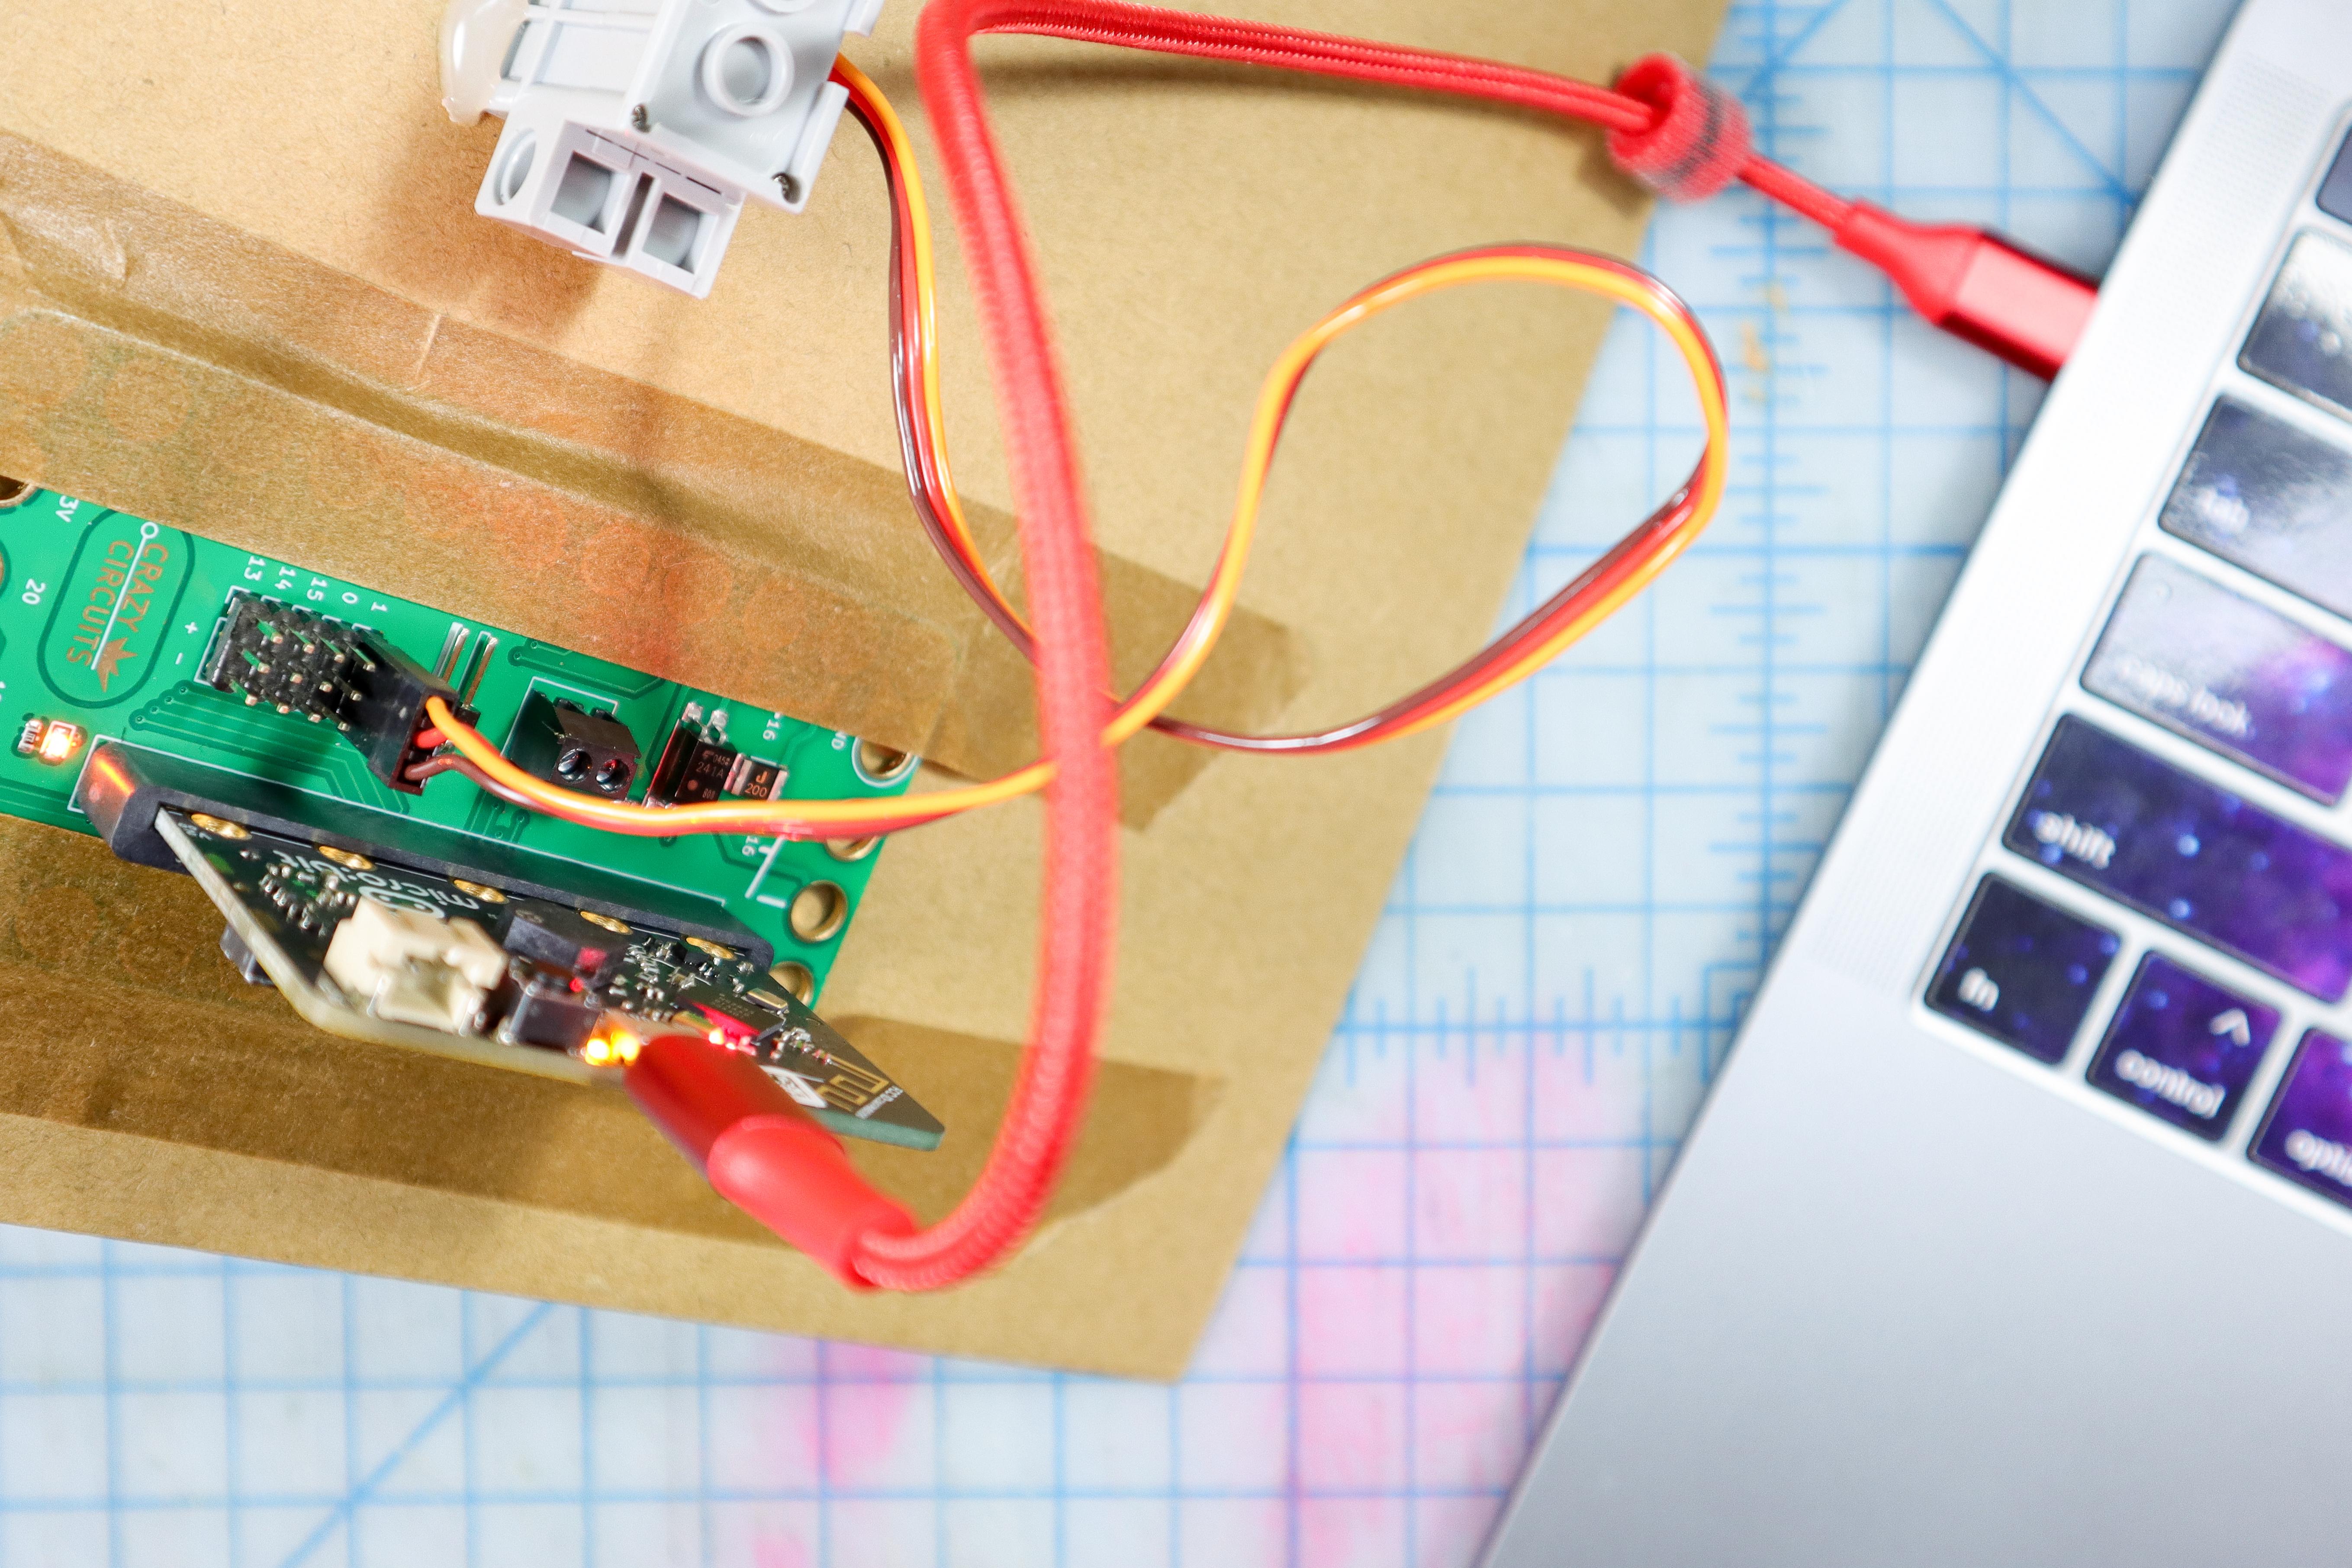
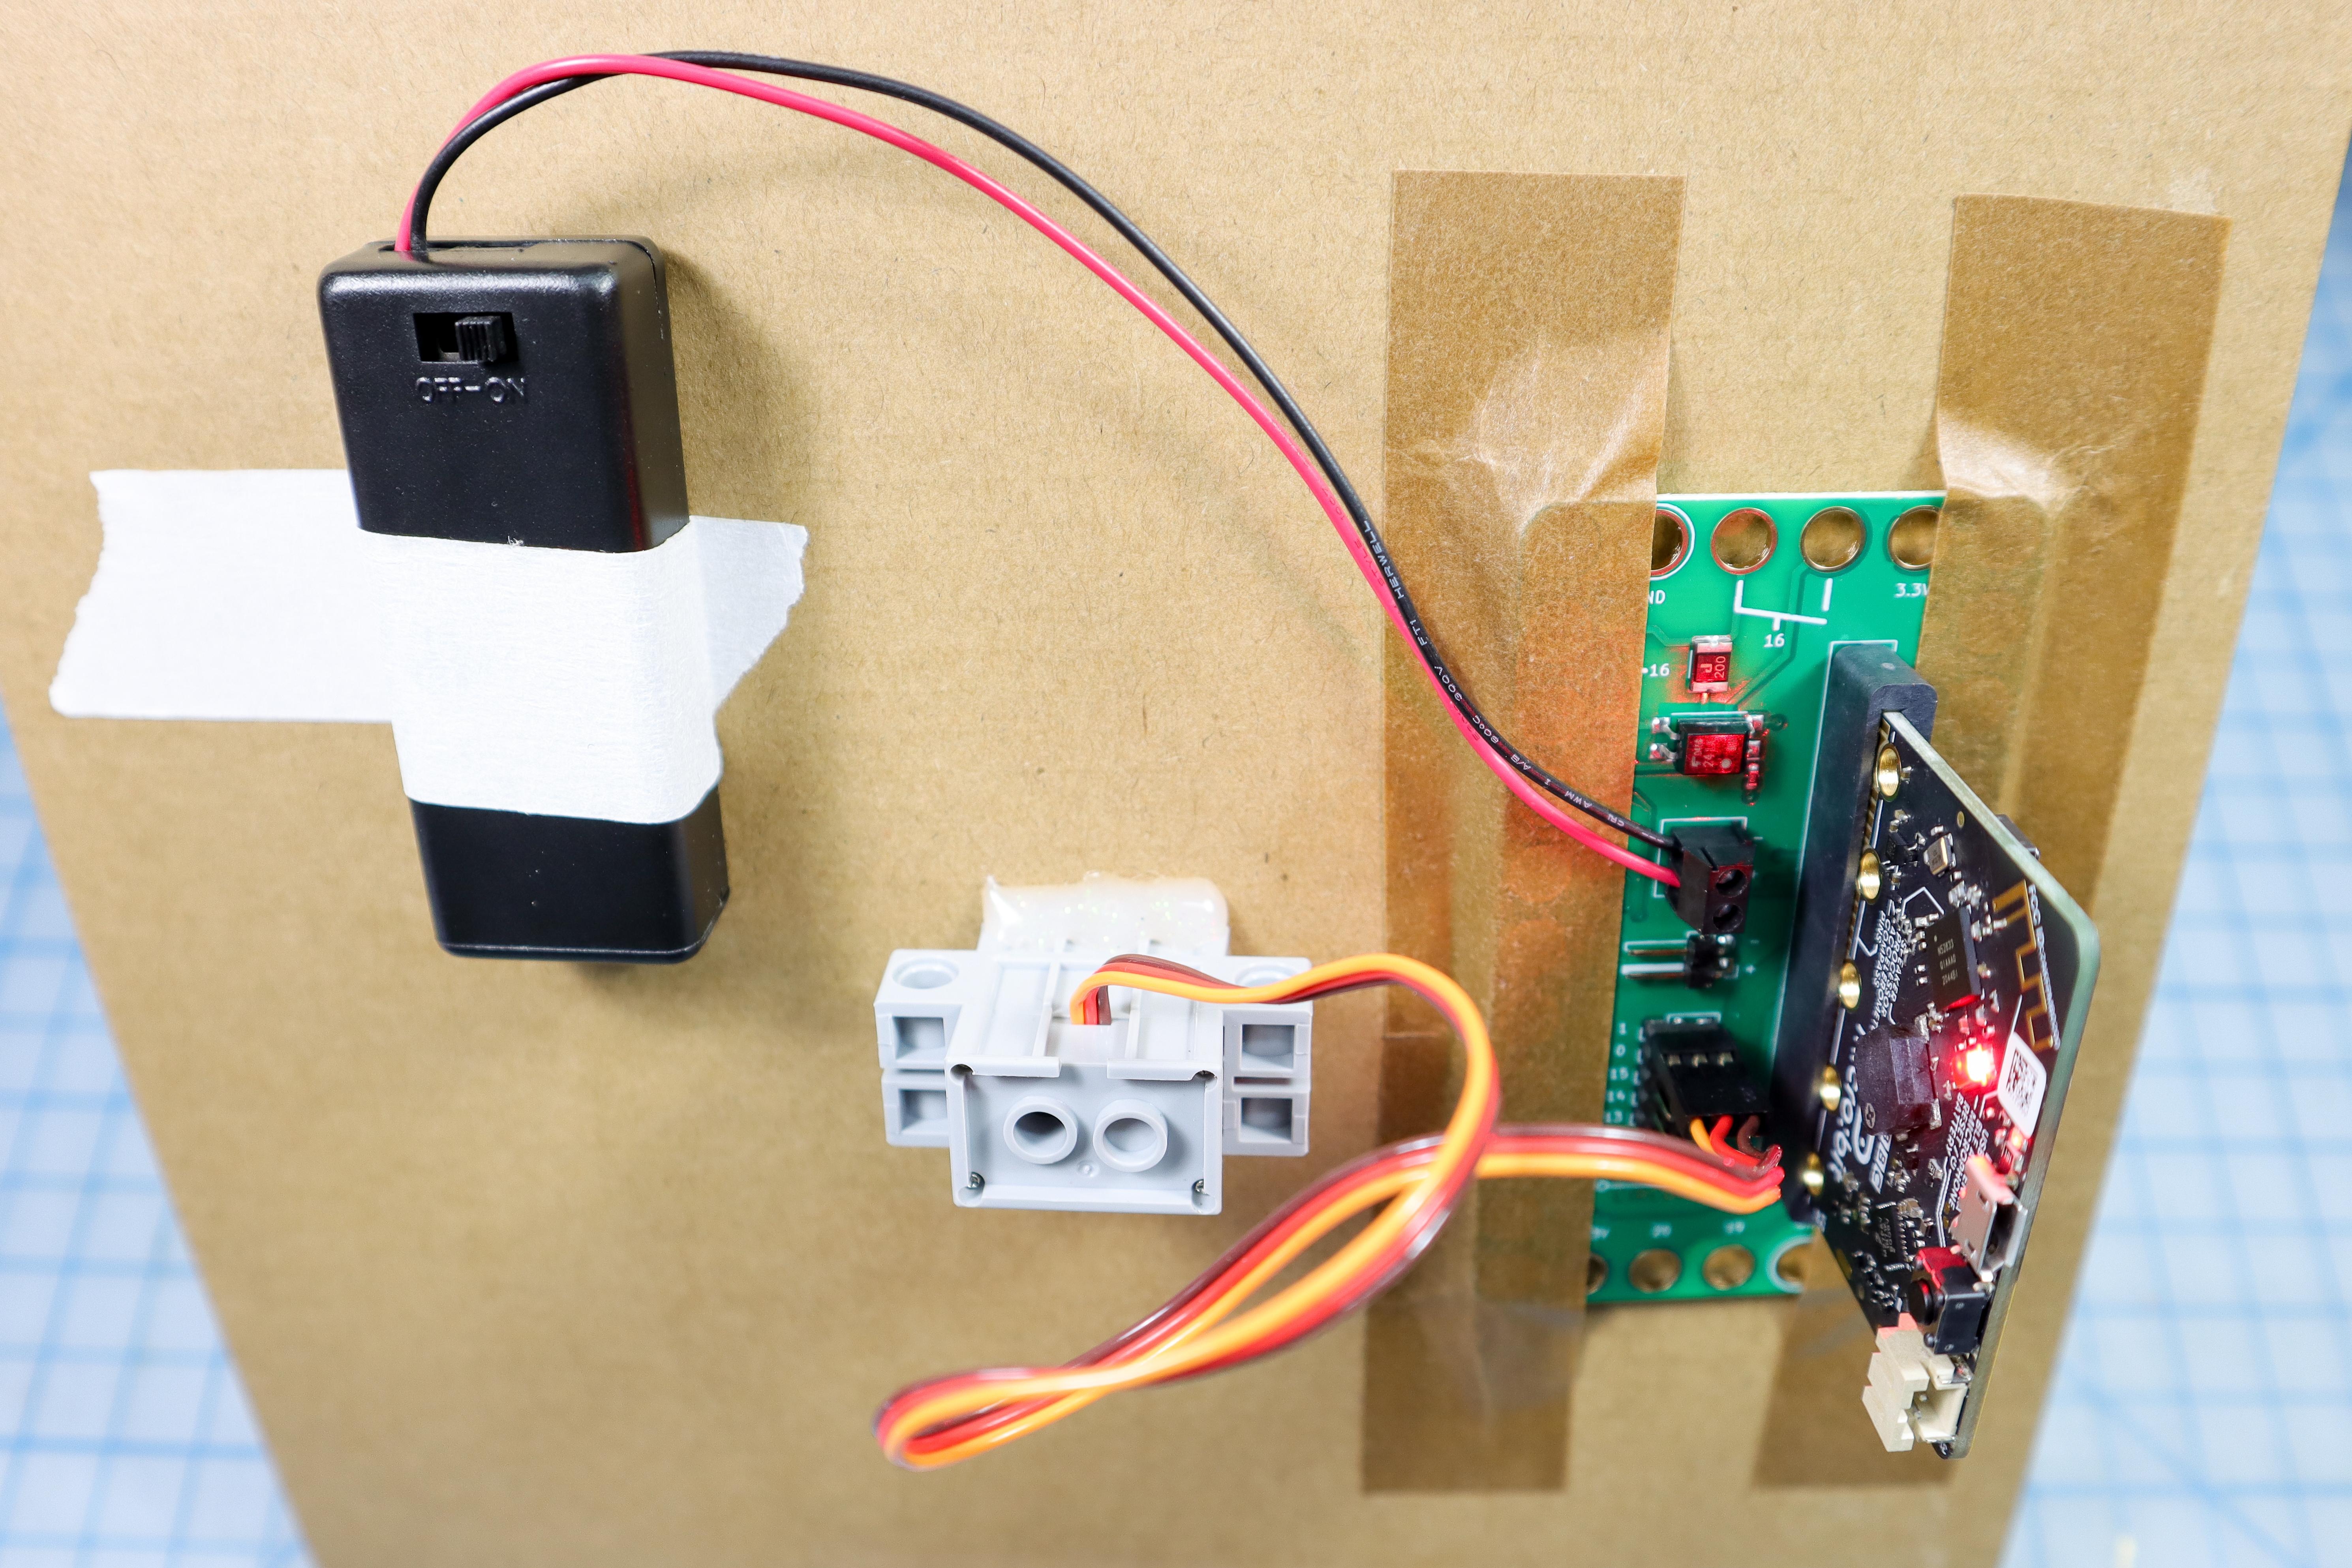
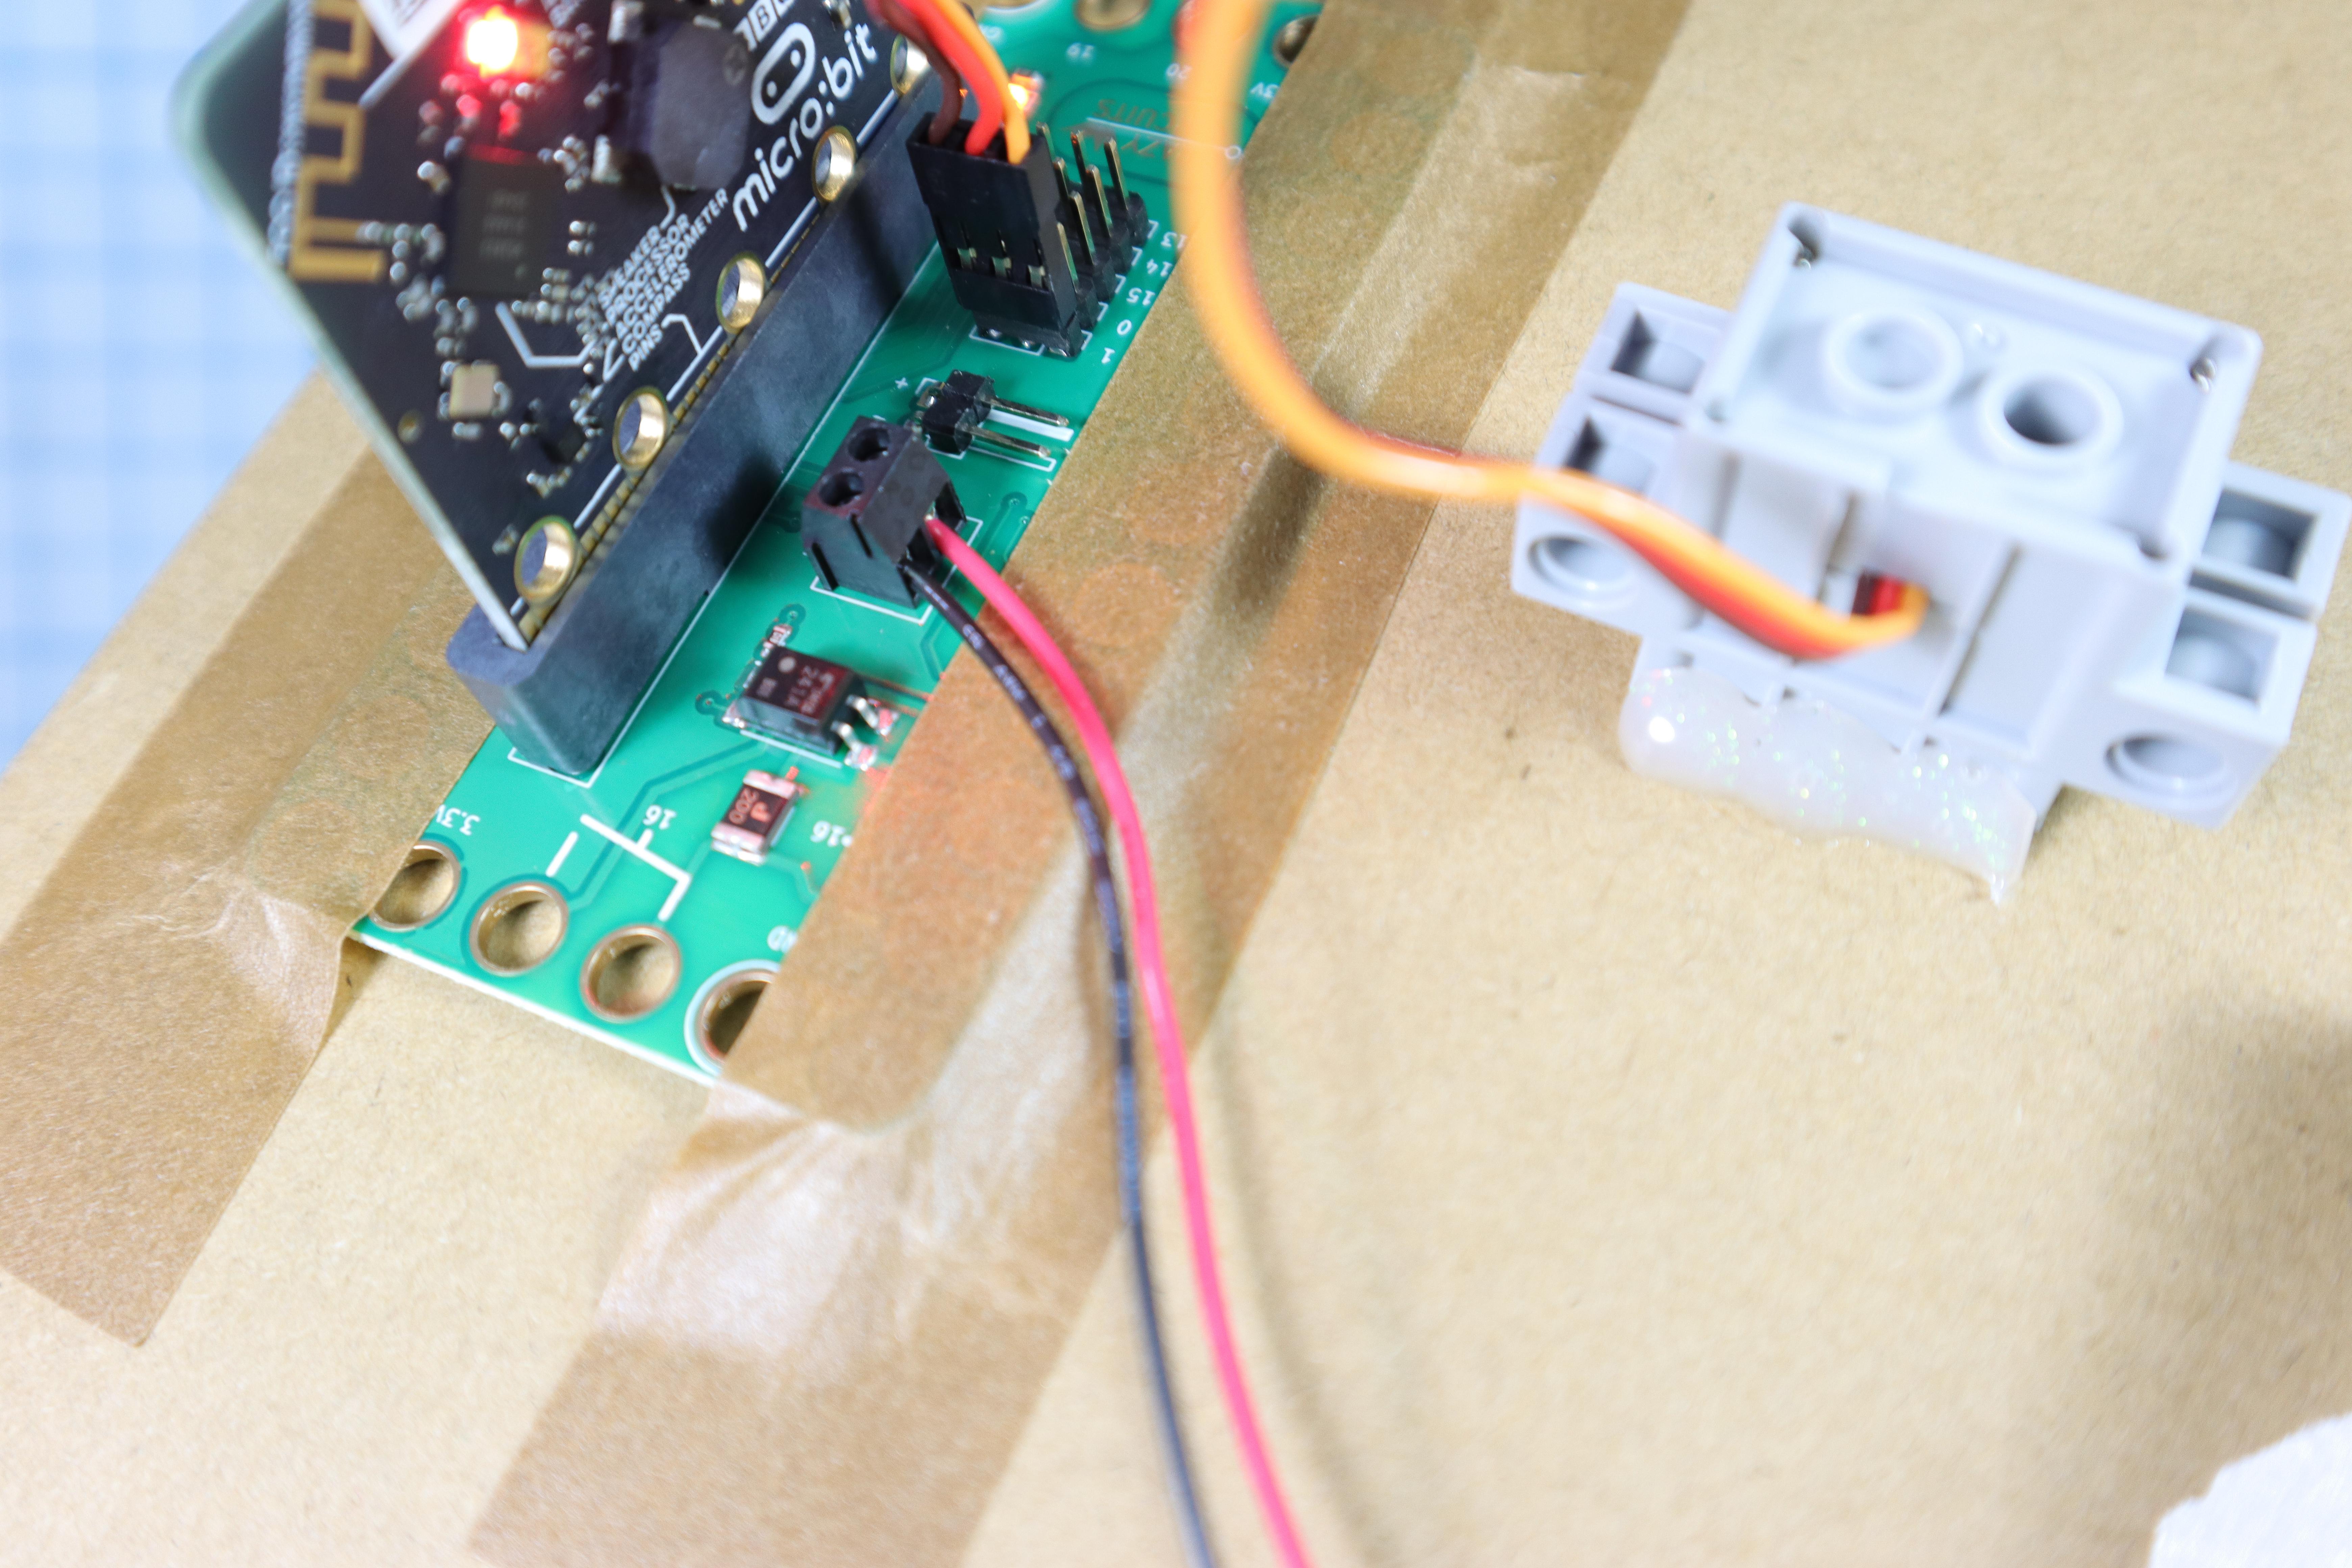
Connect the Circuit
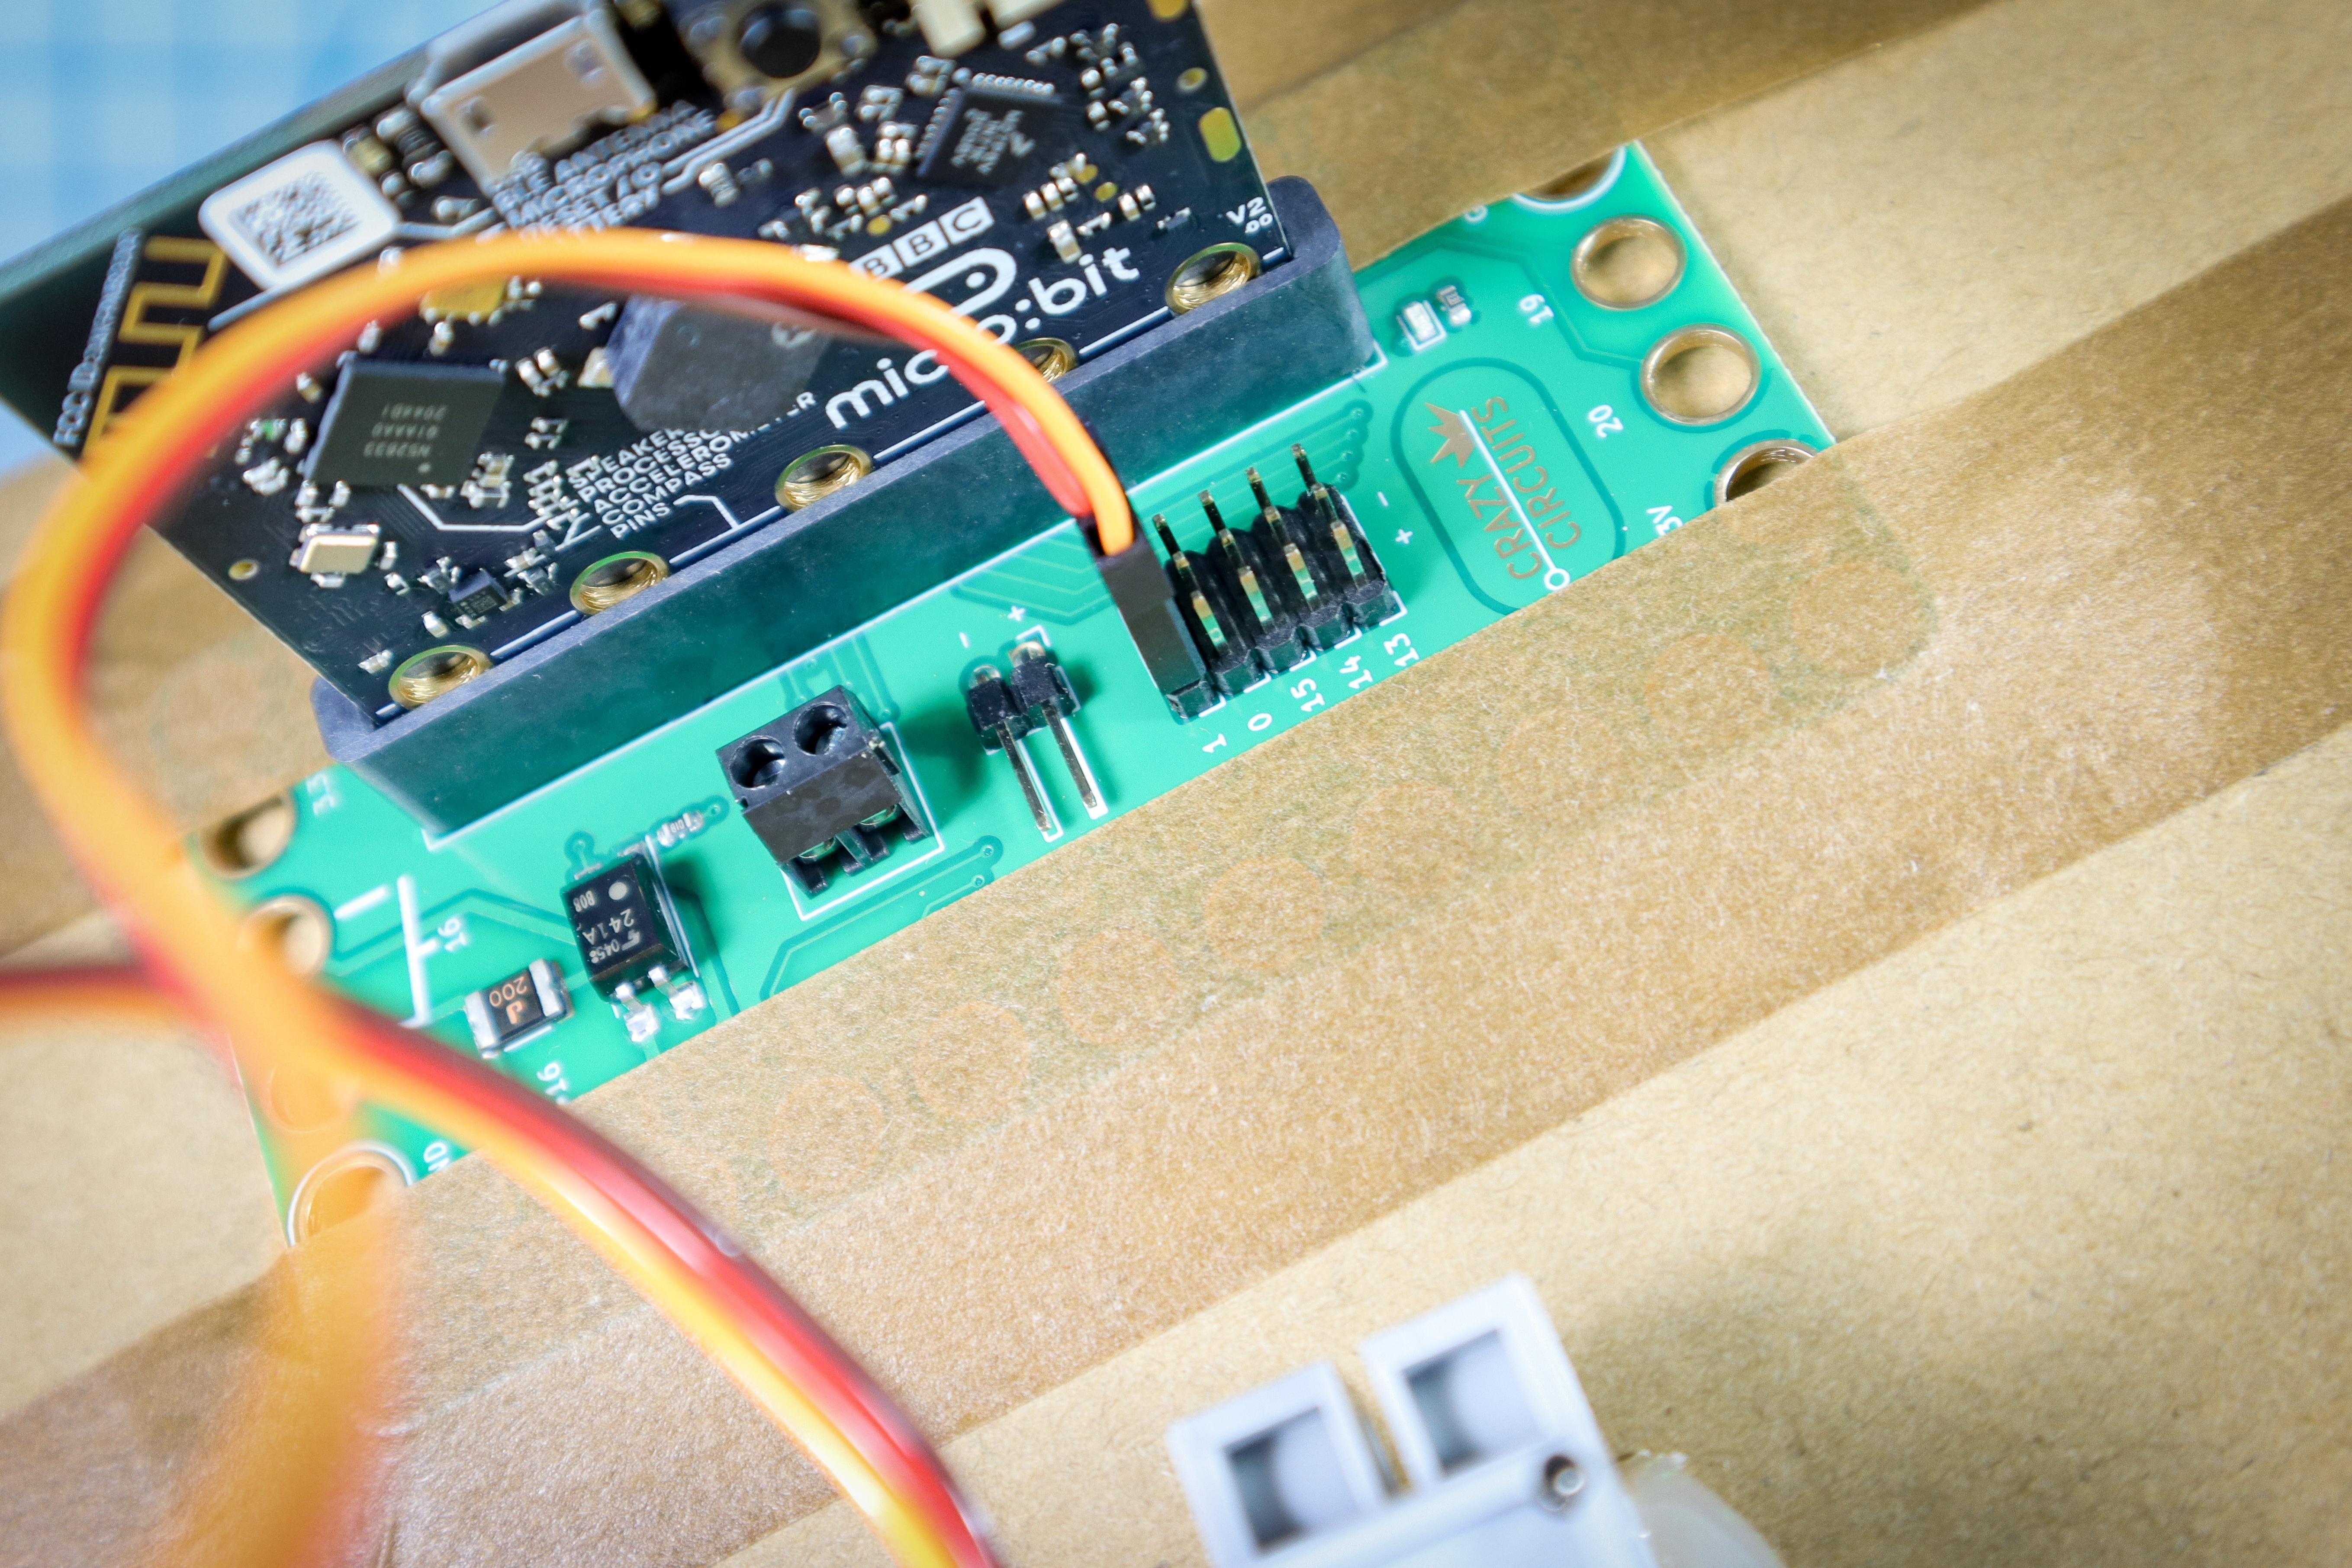
- Tape the Bit Board to the back of the cardboard.
- Connect the servo motor to pin 1, with the orange wire nearest the numbers. The red wire will then be in the + (positive) column and the brown wire will be in the - (negative) column.
- Insert the micro:bit into the Bit Board.
Code the Micro:bit
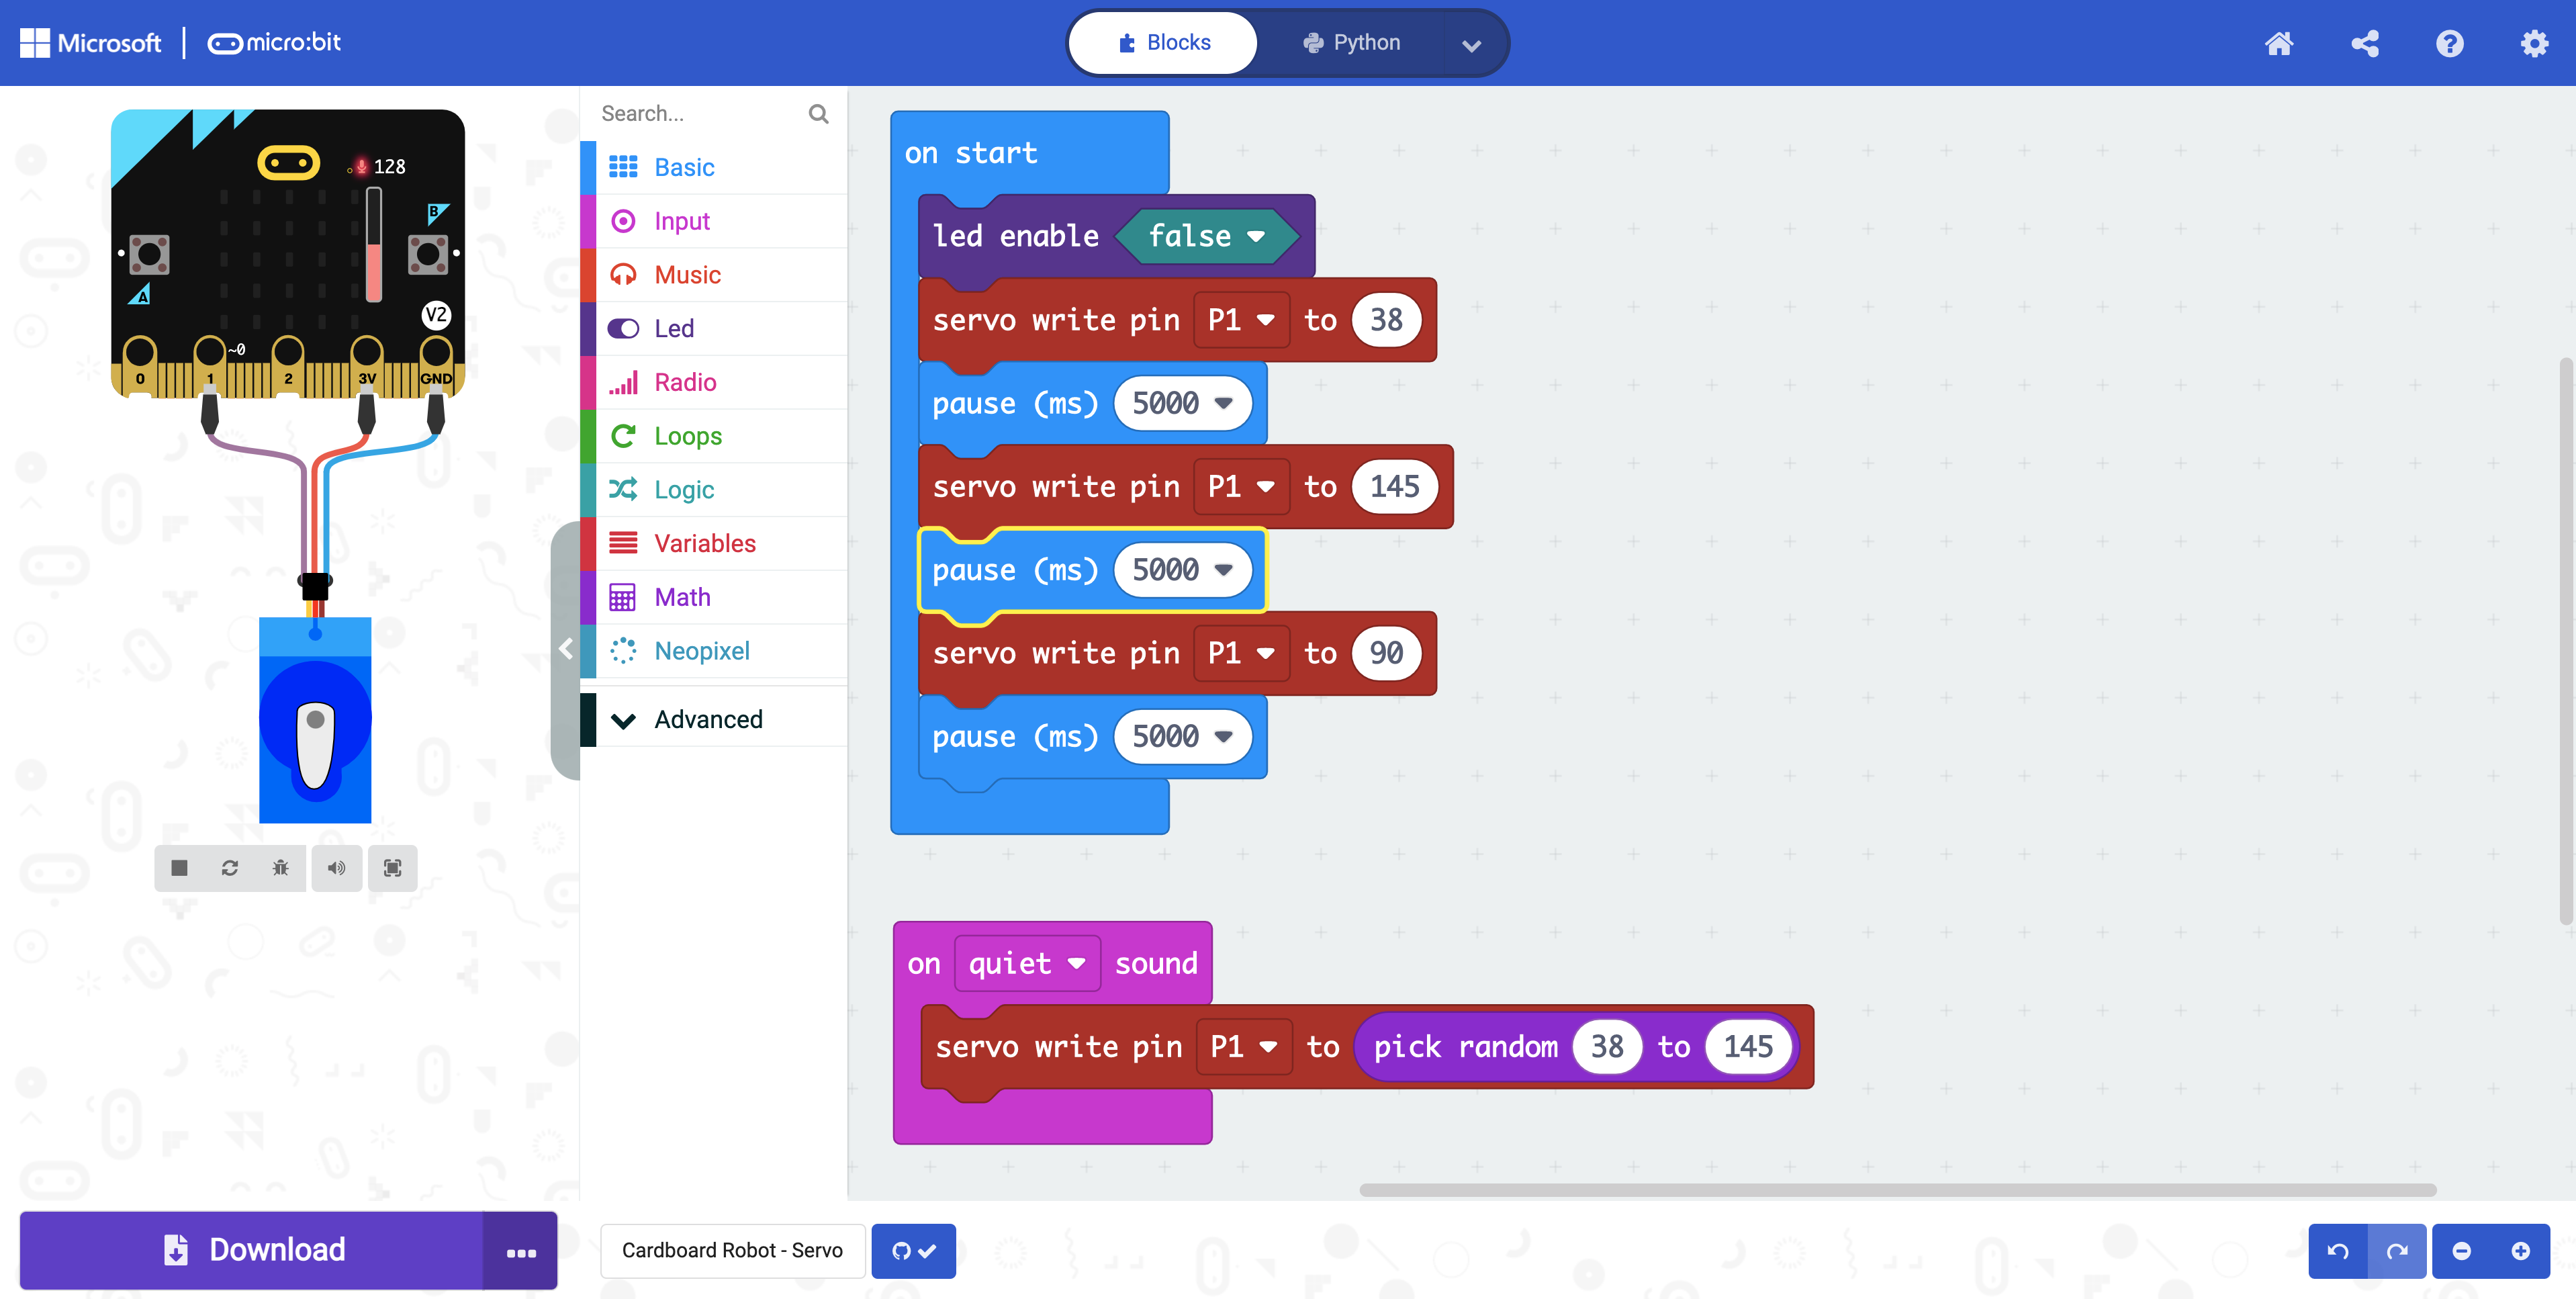
- Download the code, available here.
- This code randomly moves the dial when a sound happens, like when someone claps.
Put the Dial Together
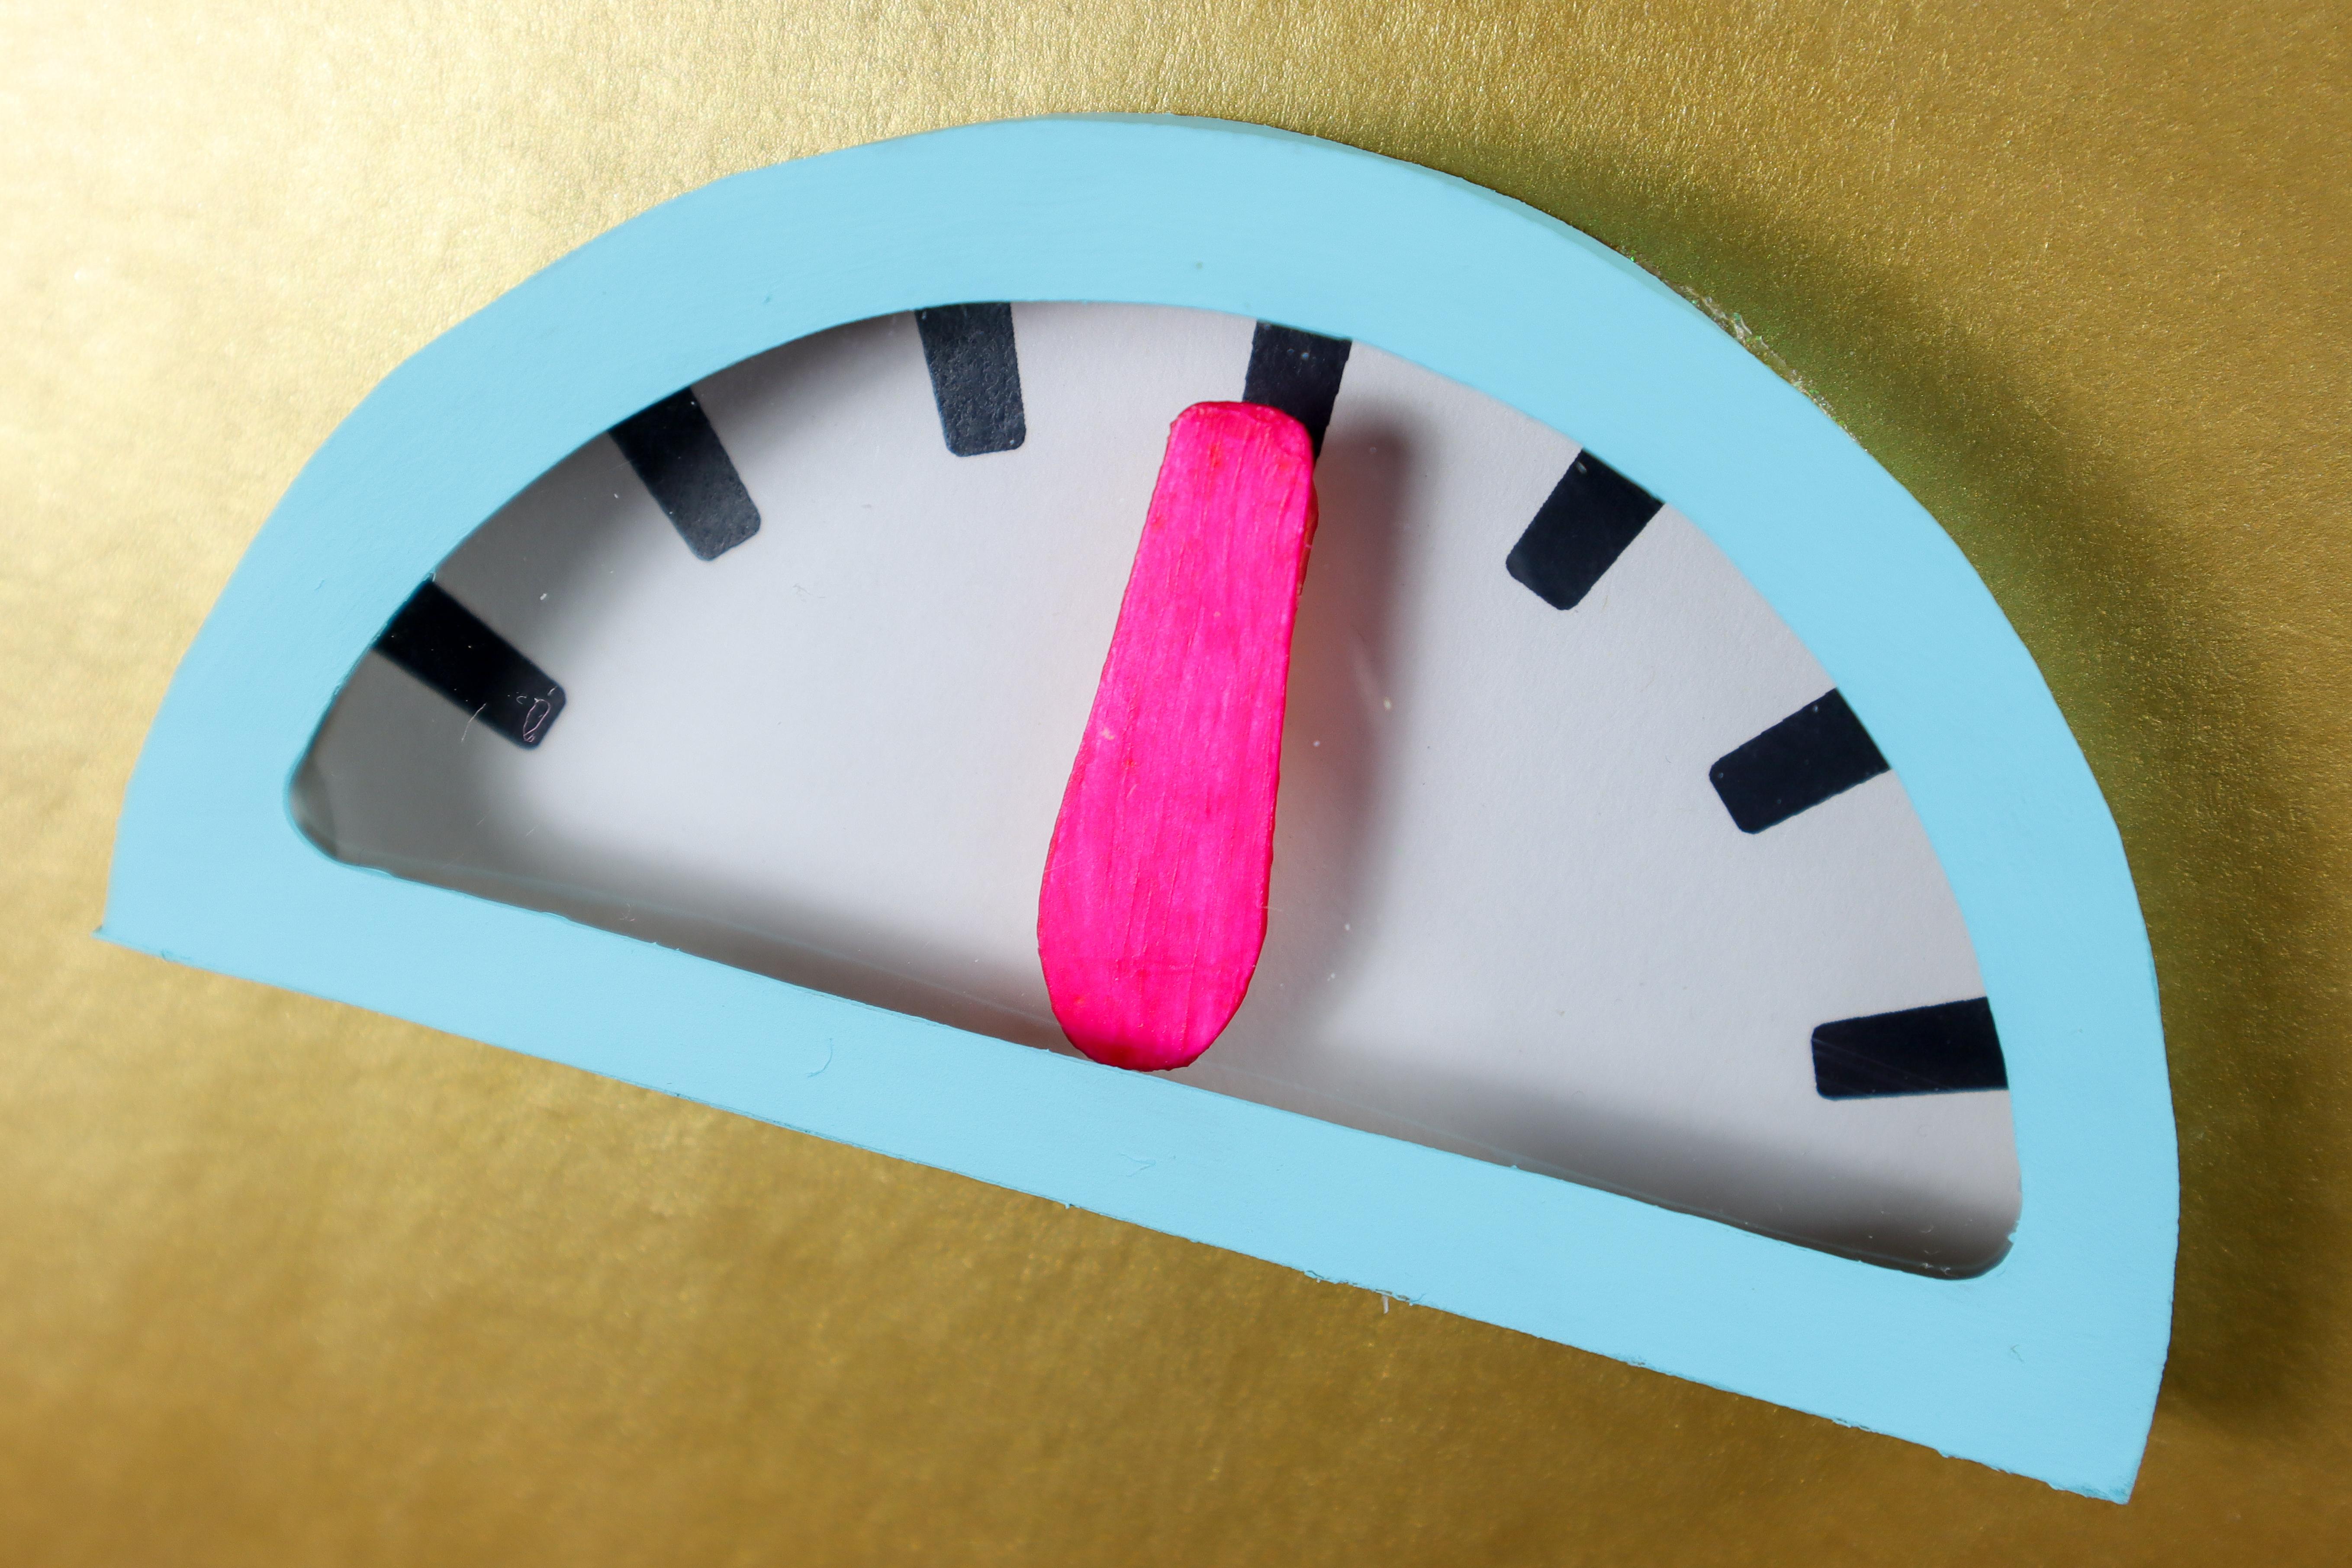
- Restart the code so that the dial goes to 90 degrees. Place the dial hand on the servo.
- Glue the box on top of the dial face with hot glue.
Connect the Battery
- Connect a battery pack to the Bit Board to power it on the go.
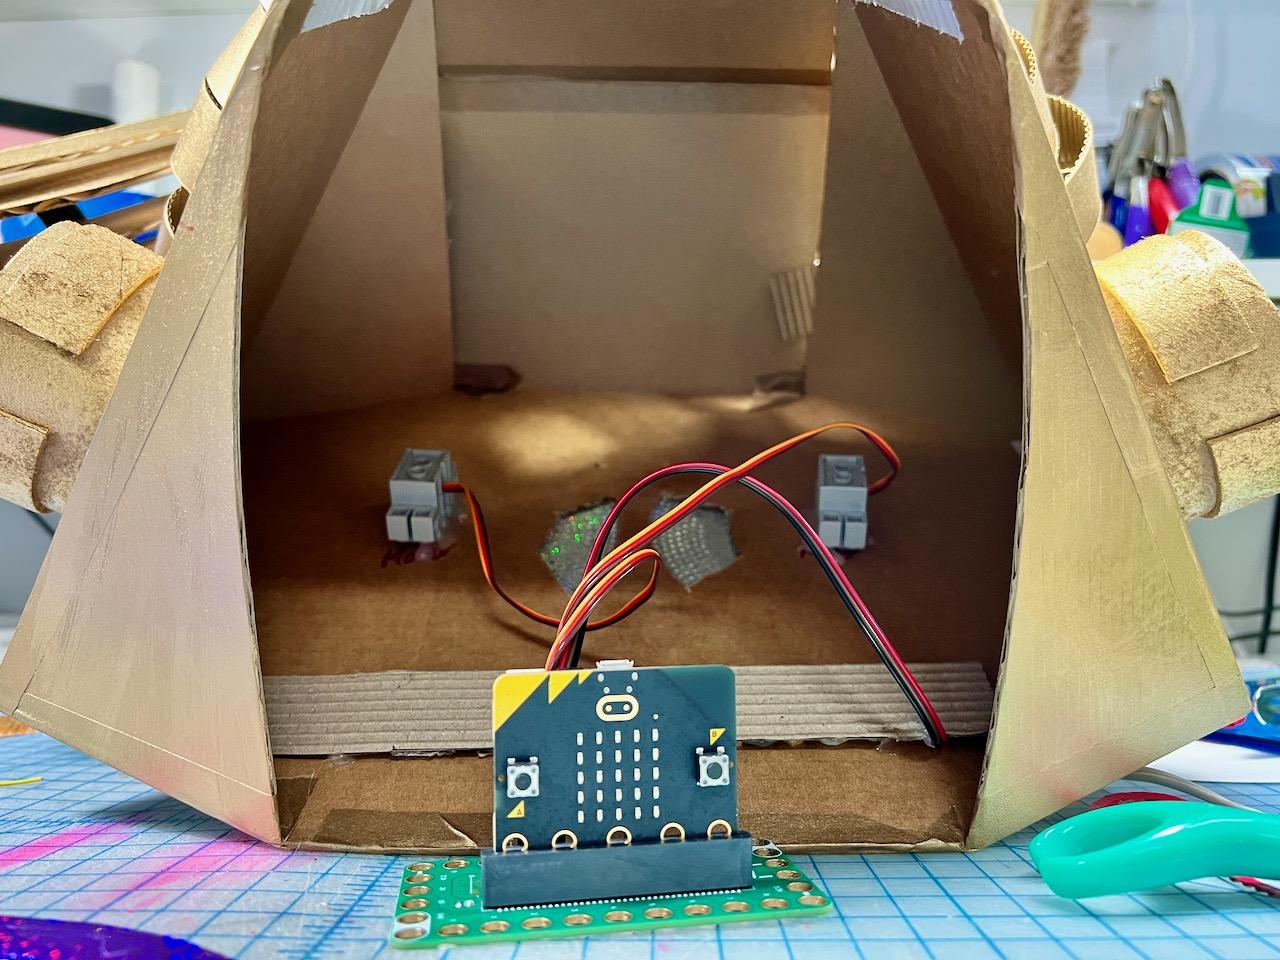
Here's How We Built It Into Sally Servo:
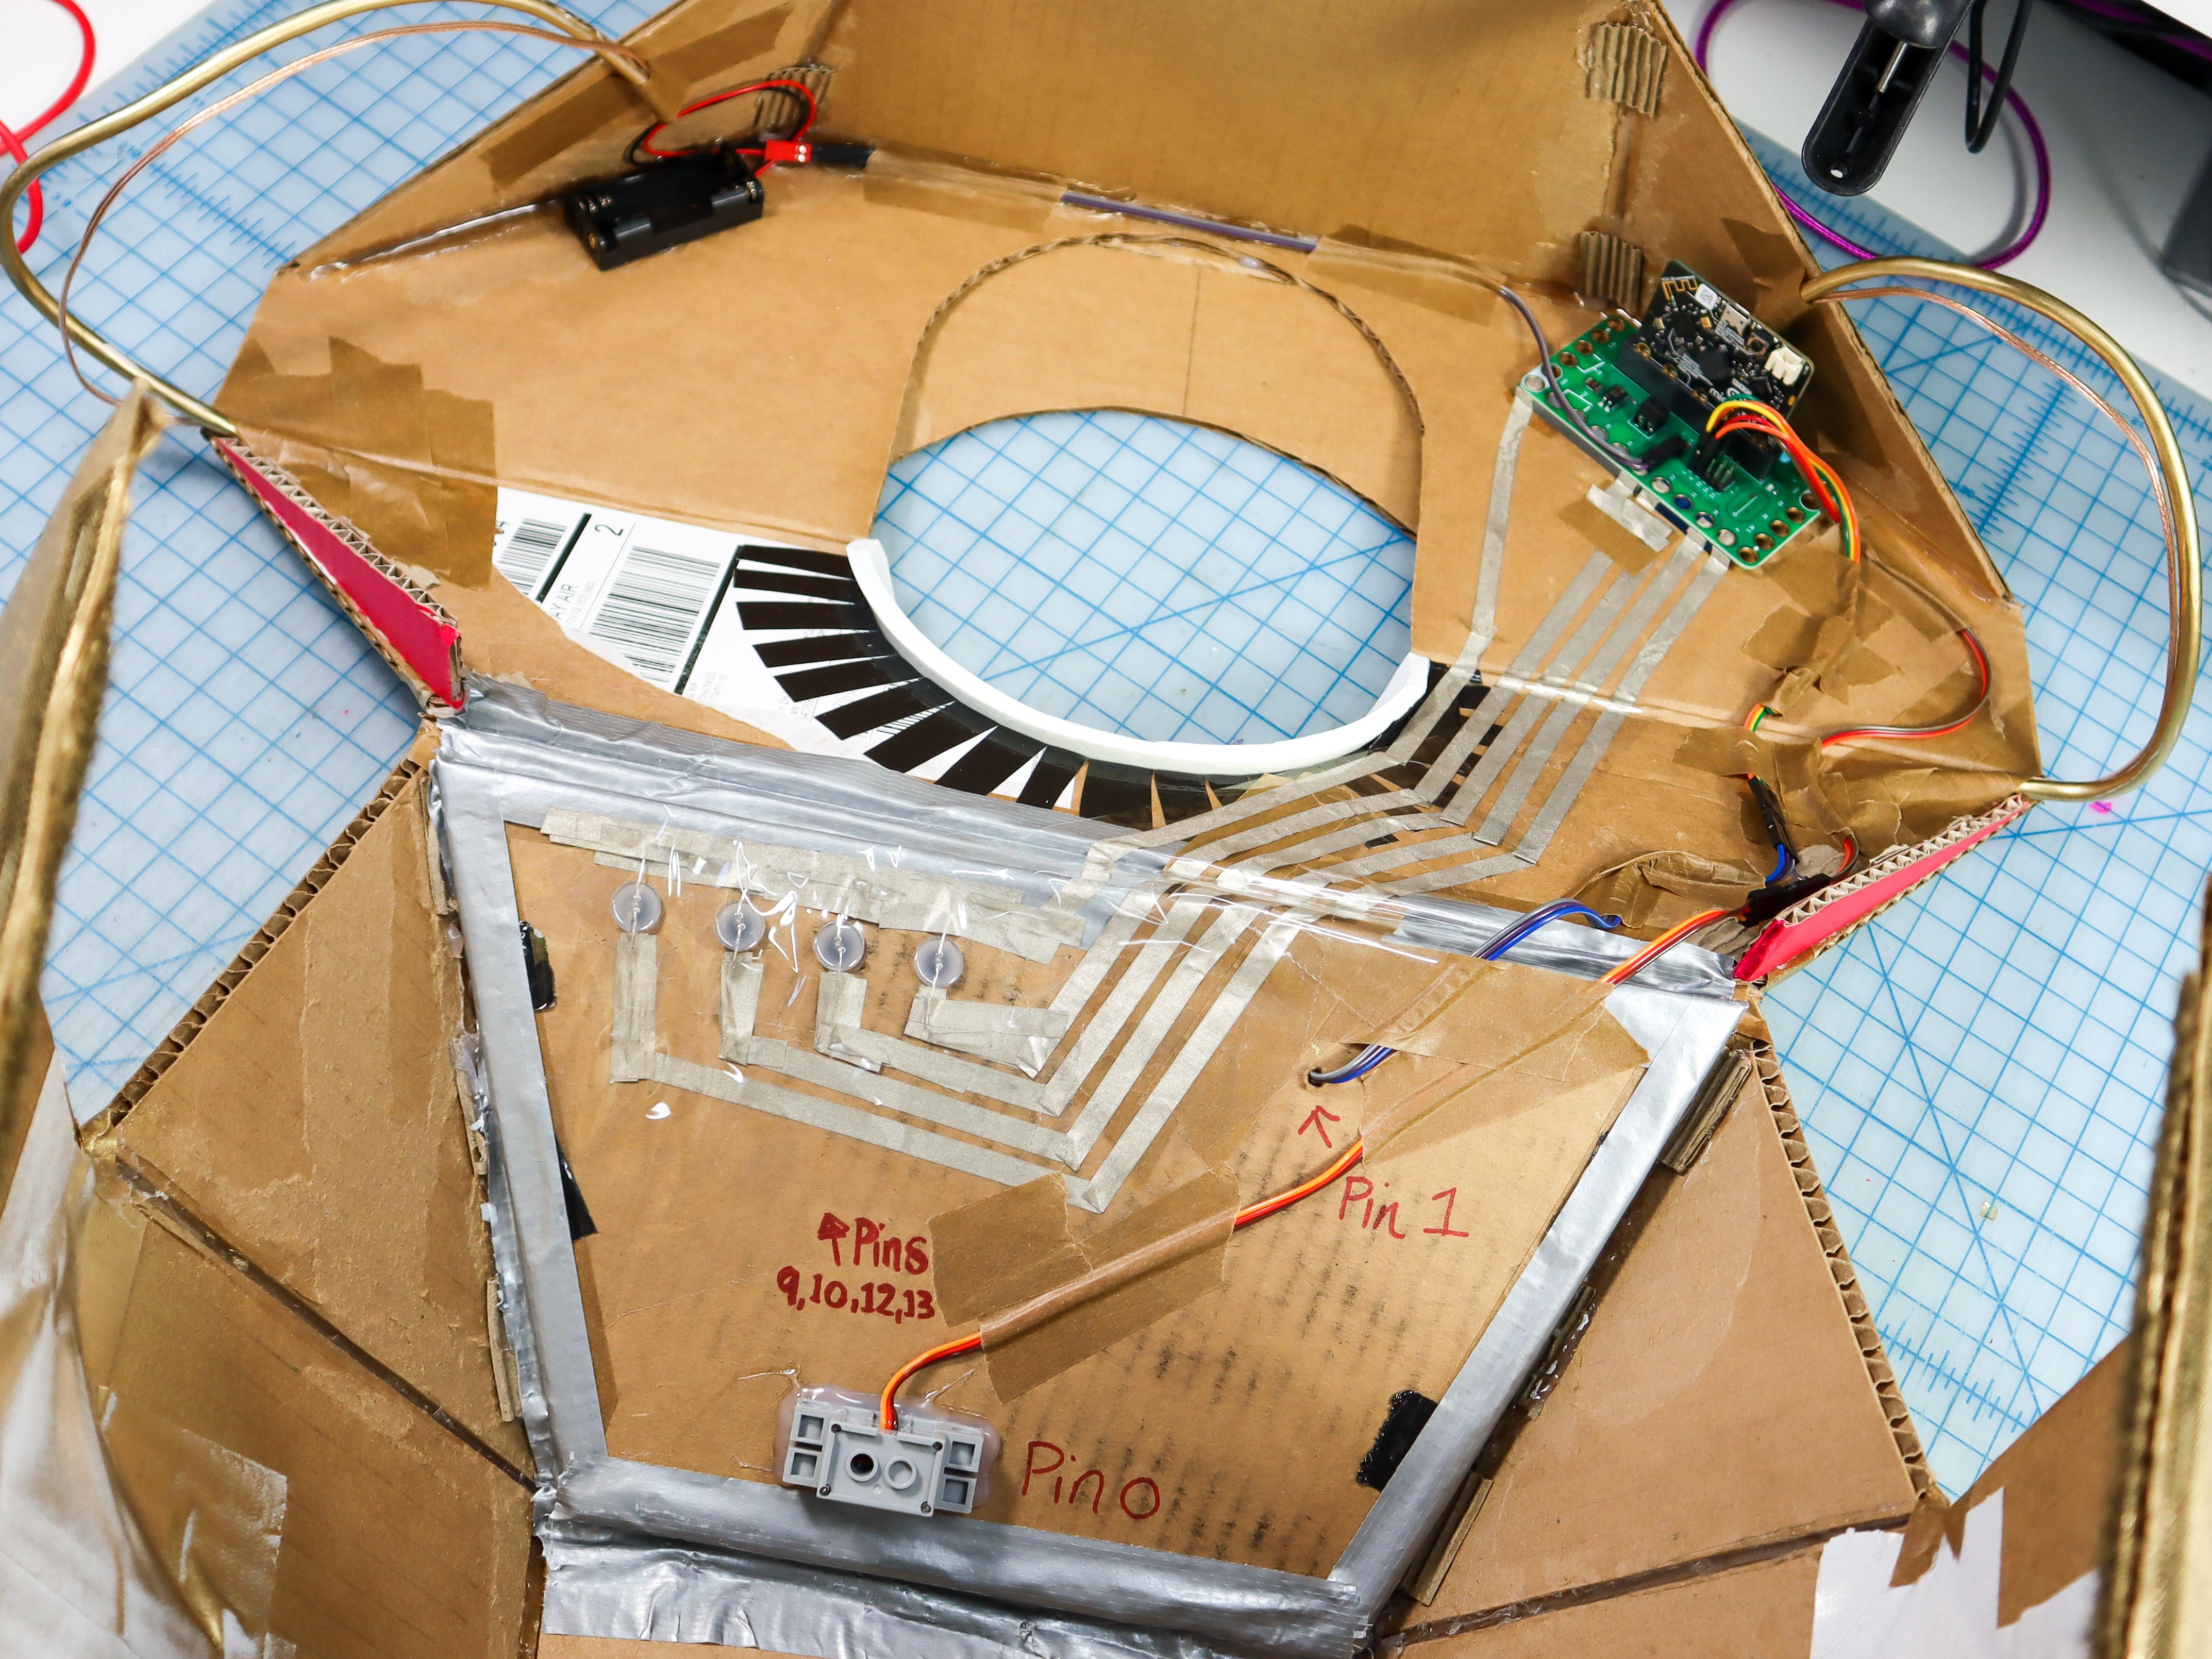
- To install this circuit into our Sally Servo costume, we planned out a good location for the Bit Board, the battery, and the servo. We extended the wires with extension cables to balance the components and make the project comfortable for the wearer.
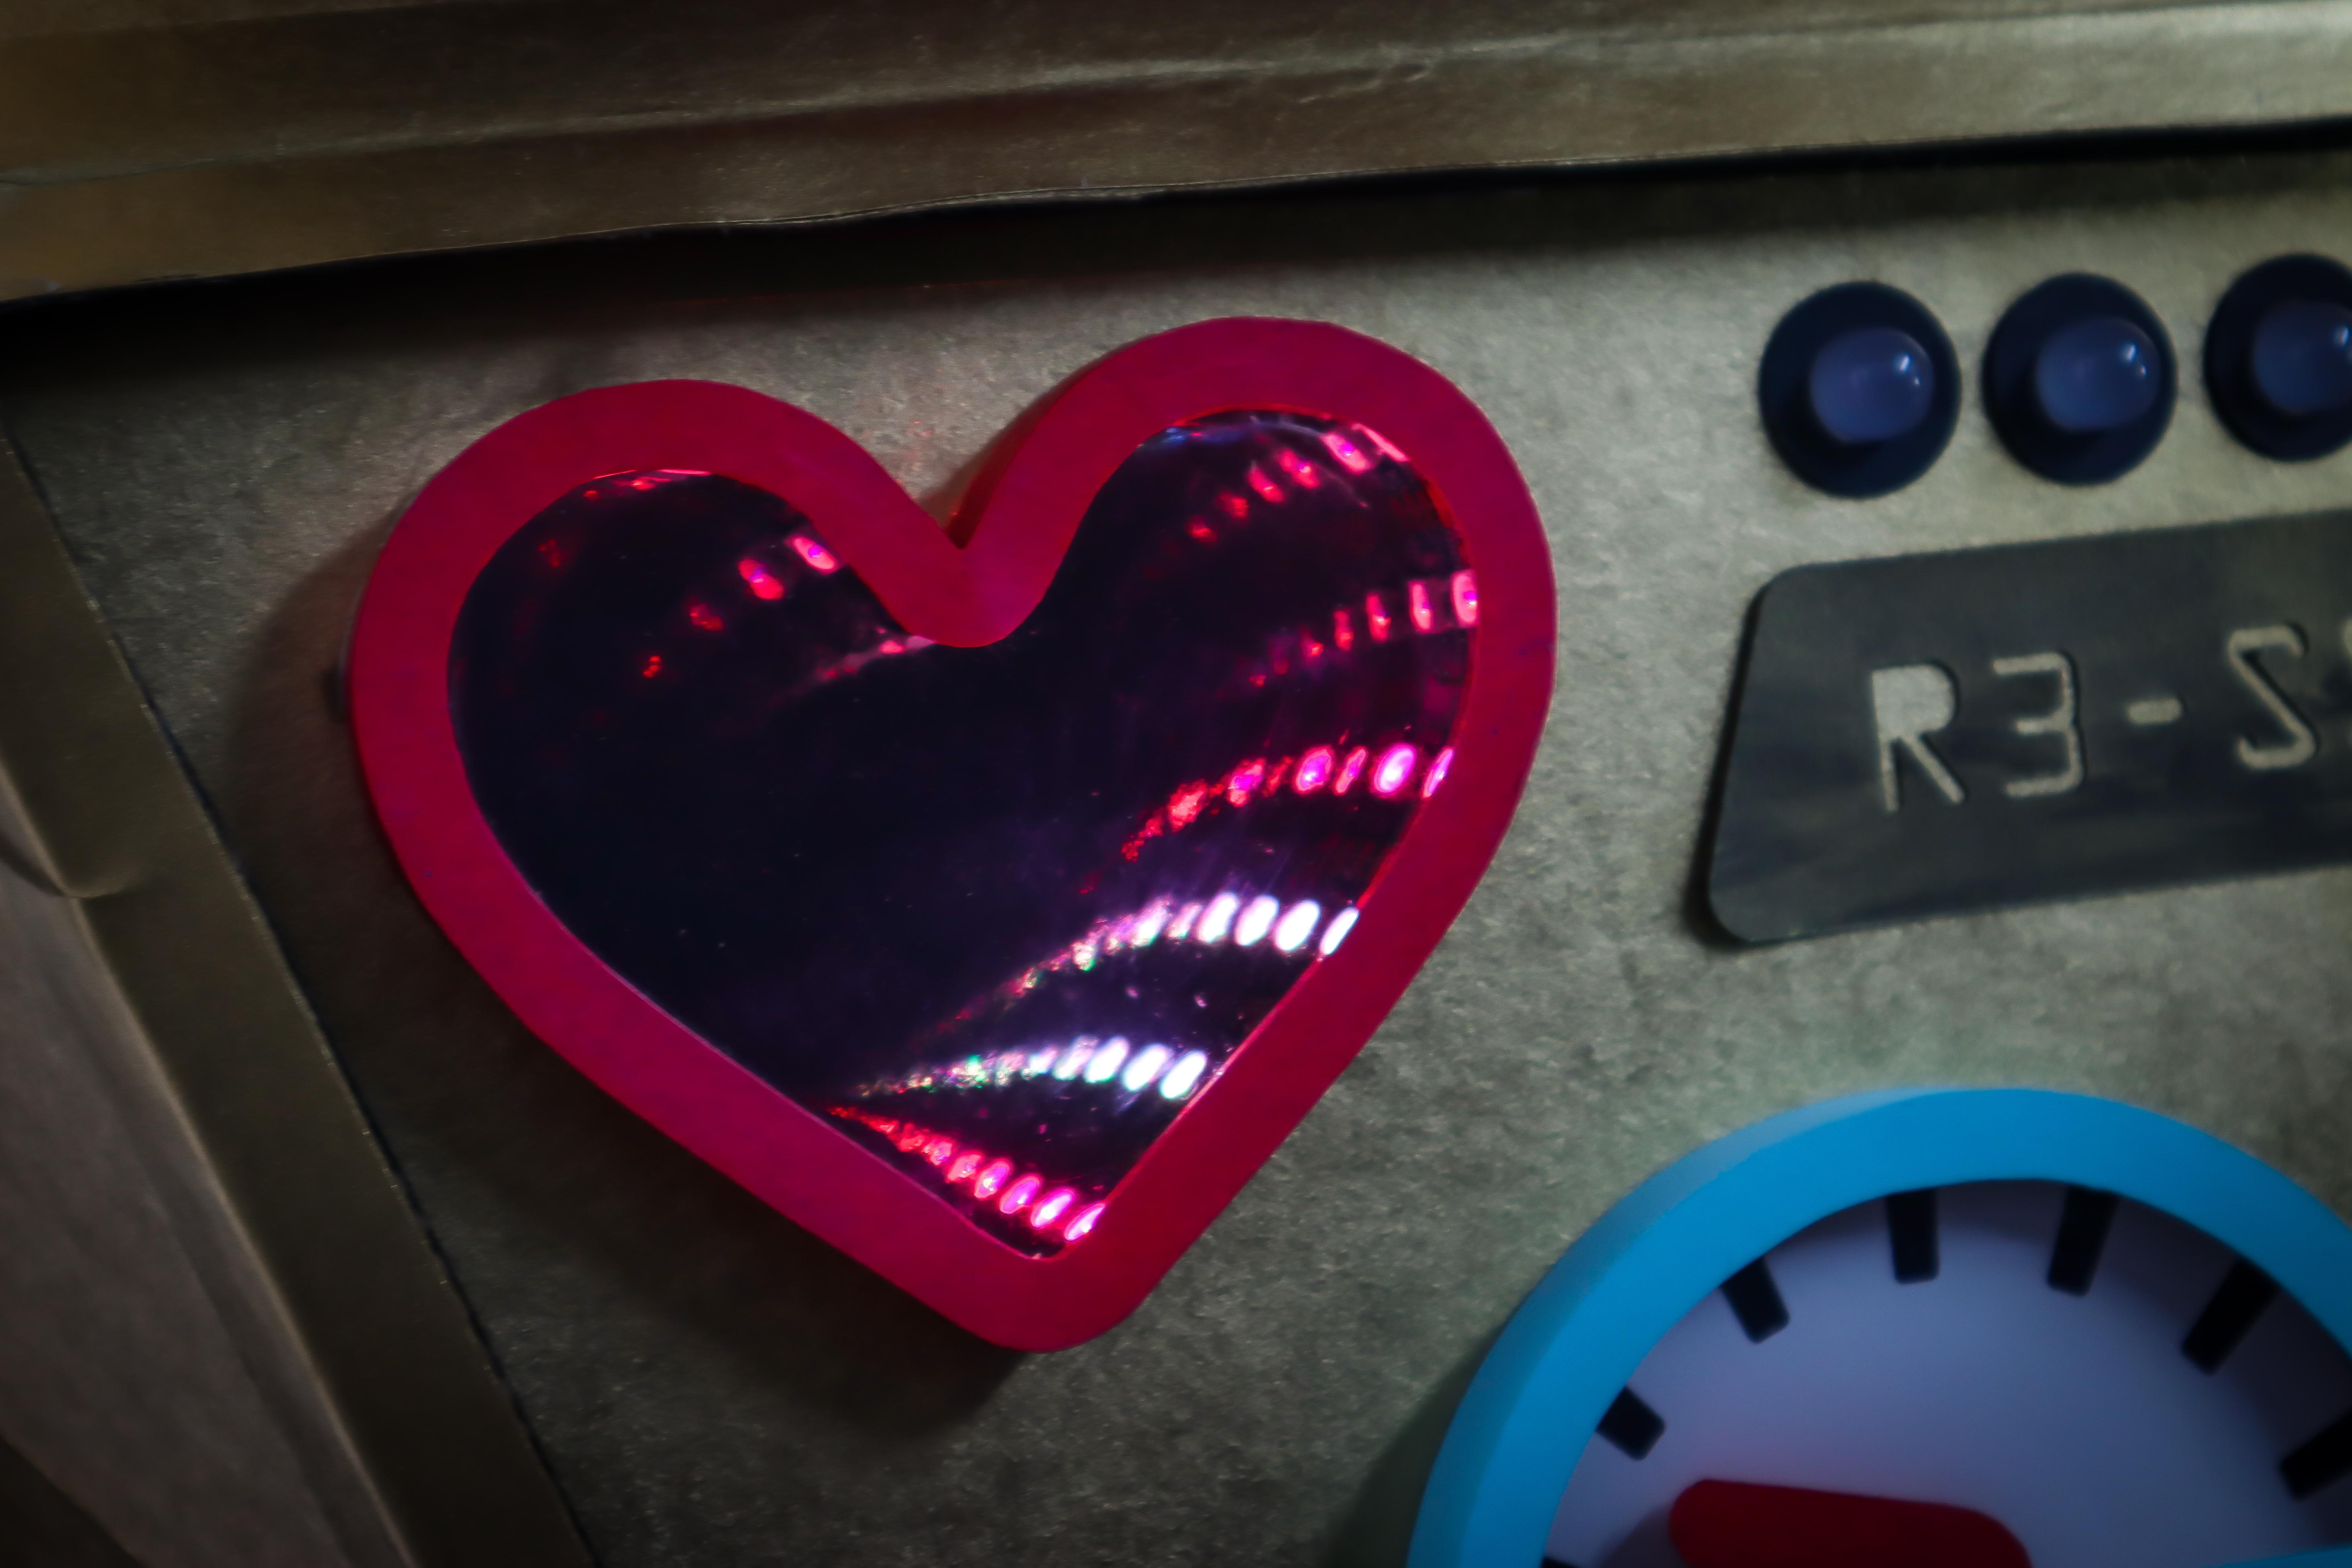
ROBOT FEATURE #2: LED INFINITY HEART
Sally's robot love goes on forever!
*This part of the build is a bit advanced and is best completed with a laser cutter and soldering iron.
Supplies:
micro:bit, Crazy Circuits Bit Board, 2 AAA Battery Holder, 60 LED/meter Neopixel Strip, 2-Way Mirror Acrylic, Silver Mirror Paper, Cardboard, Cardstock, Acrylic Paint
Download Template
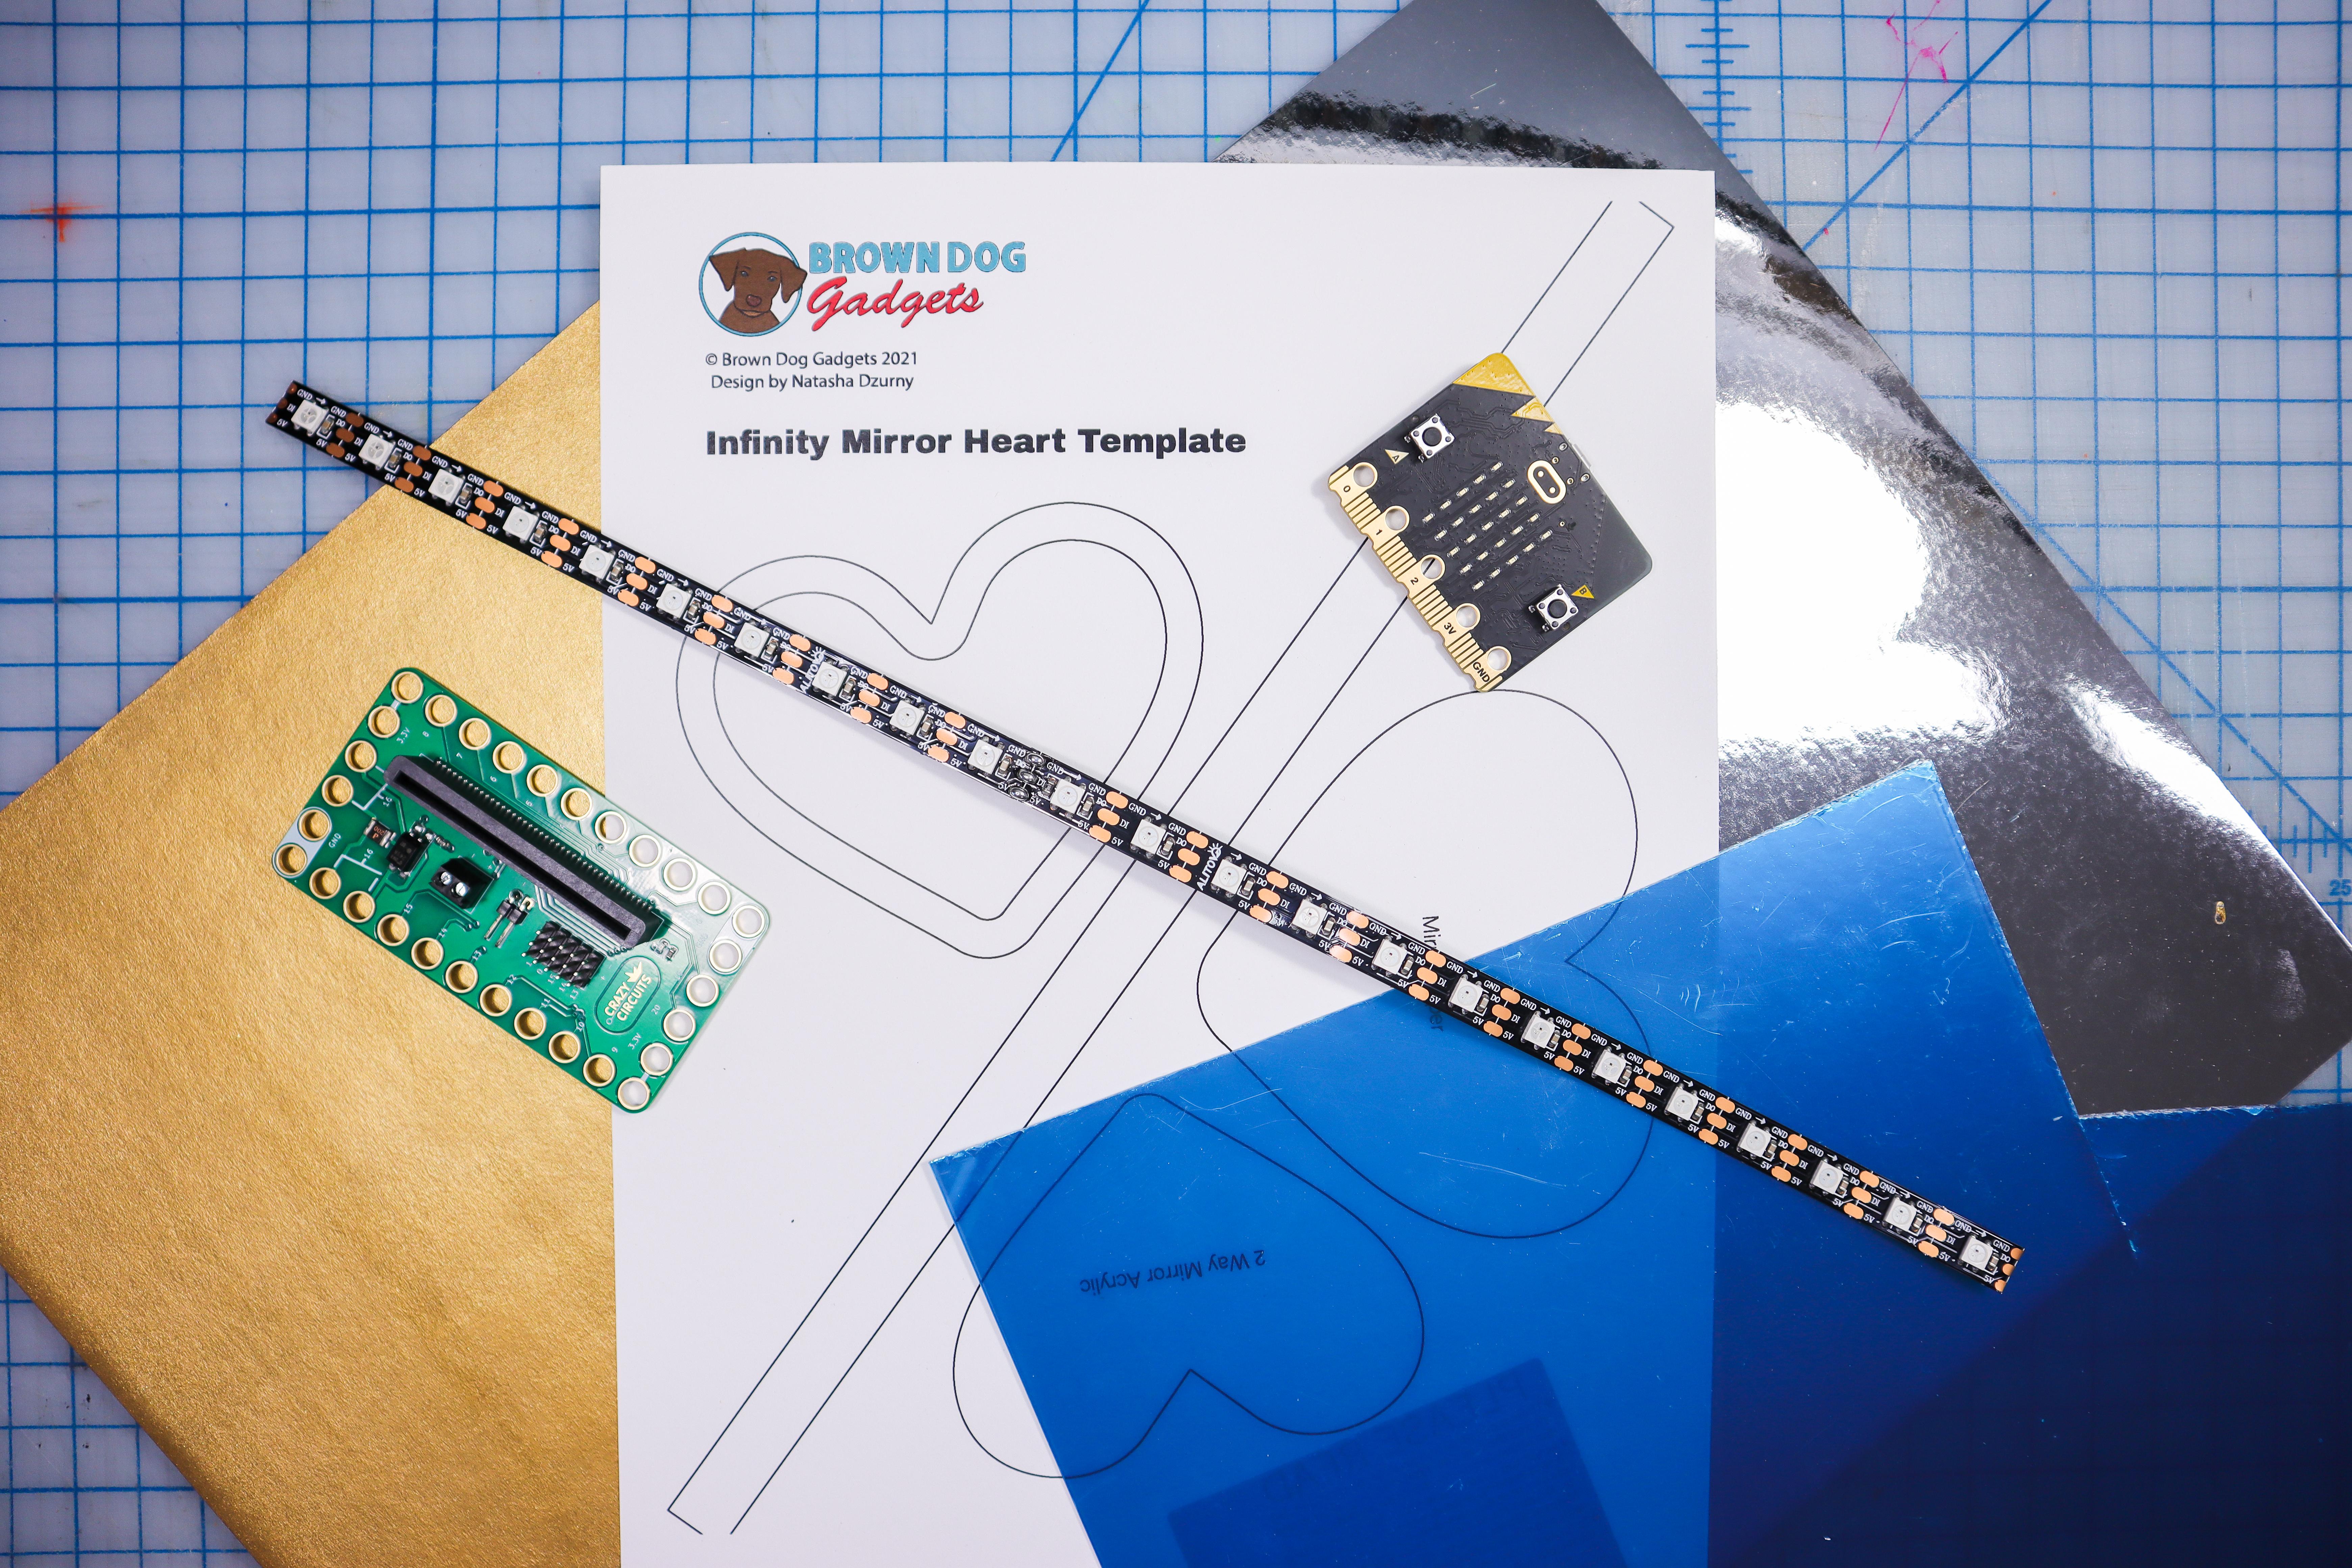
- Download and print the template.
Downloads
Cut the Two-Way Mirror
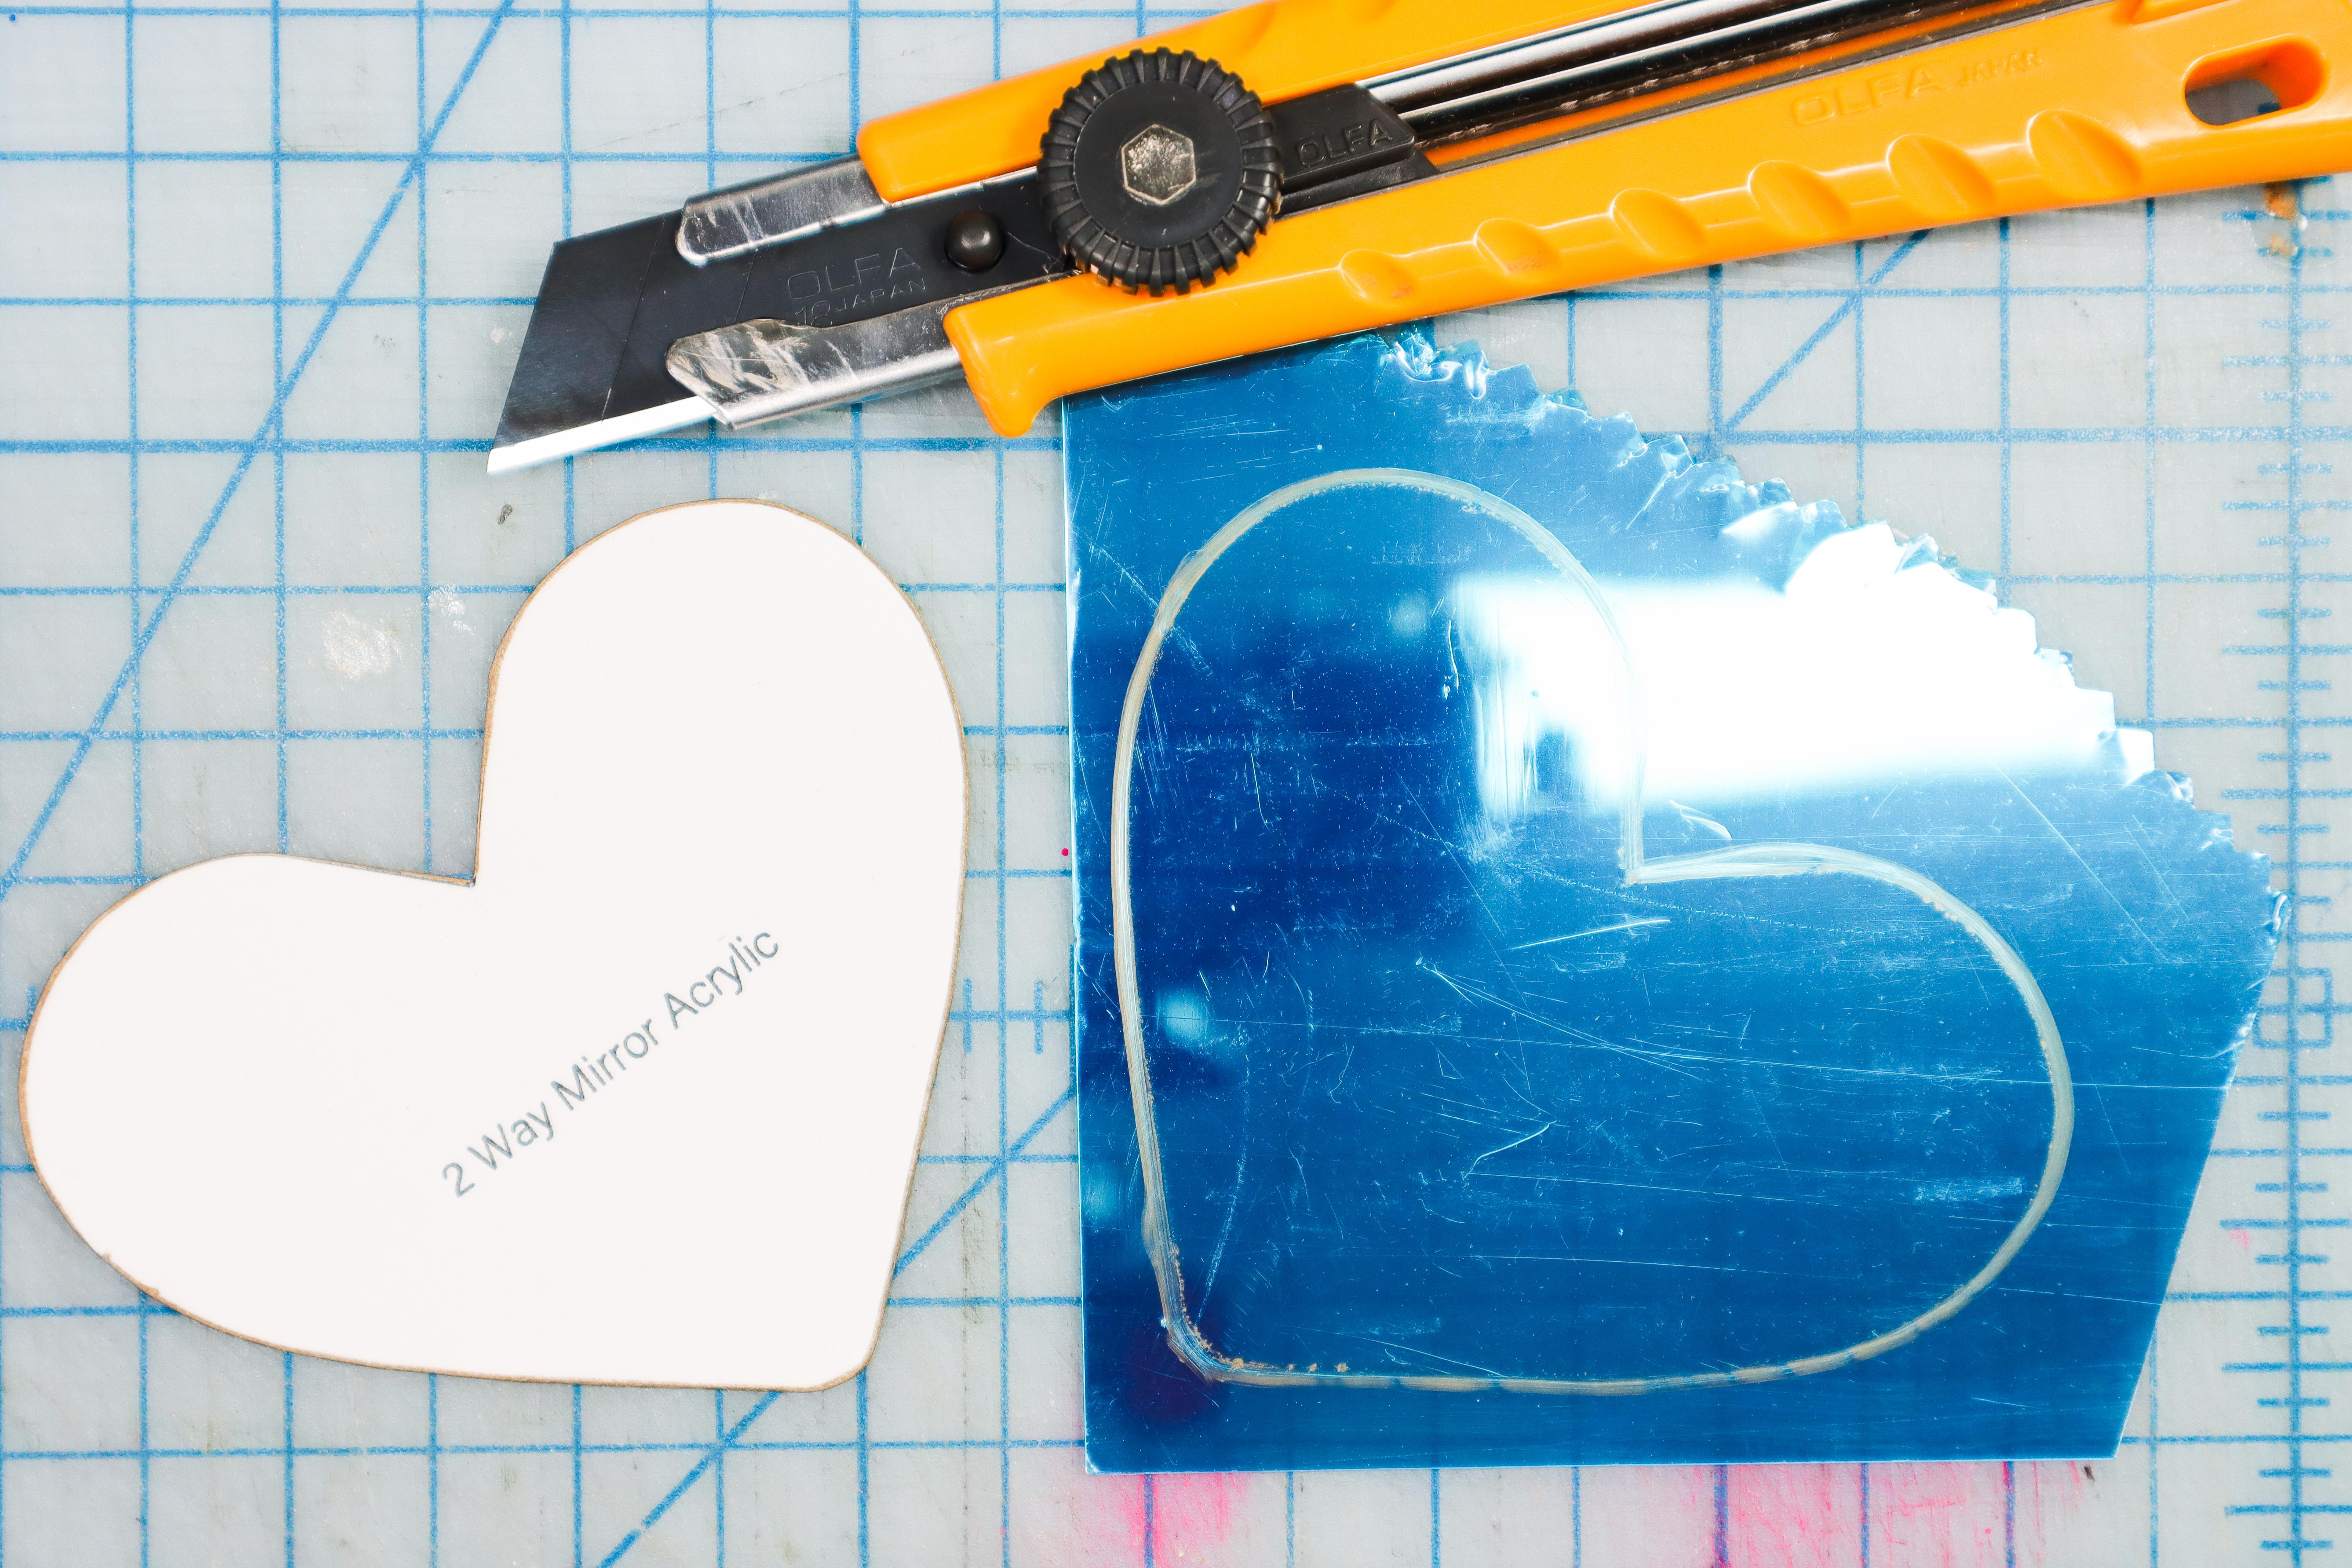
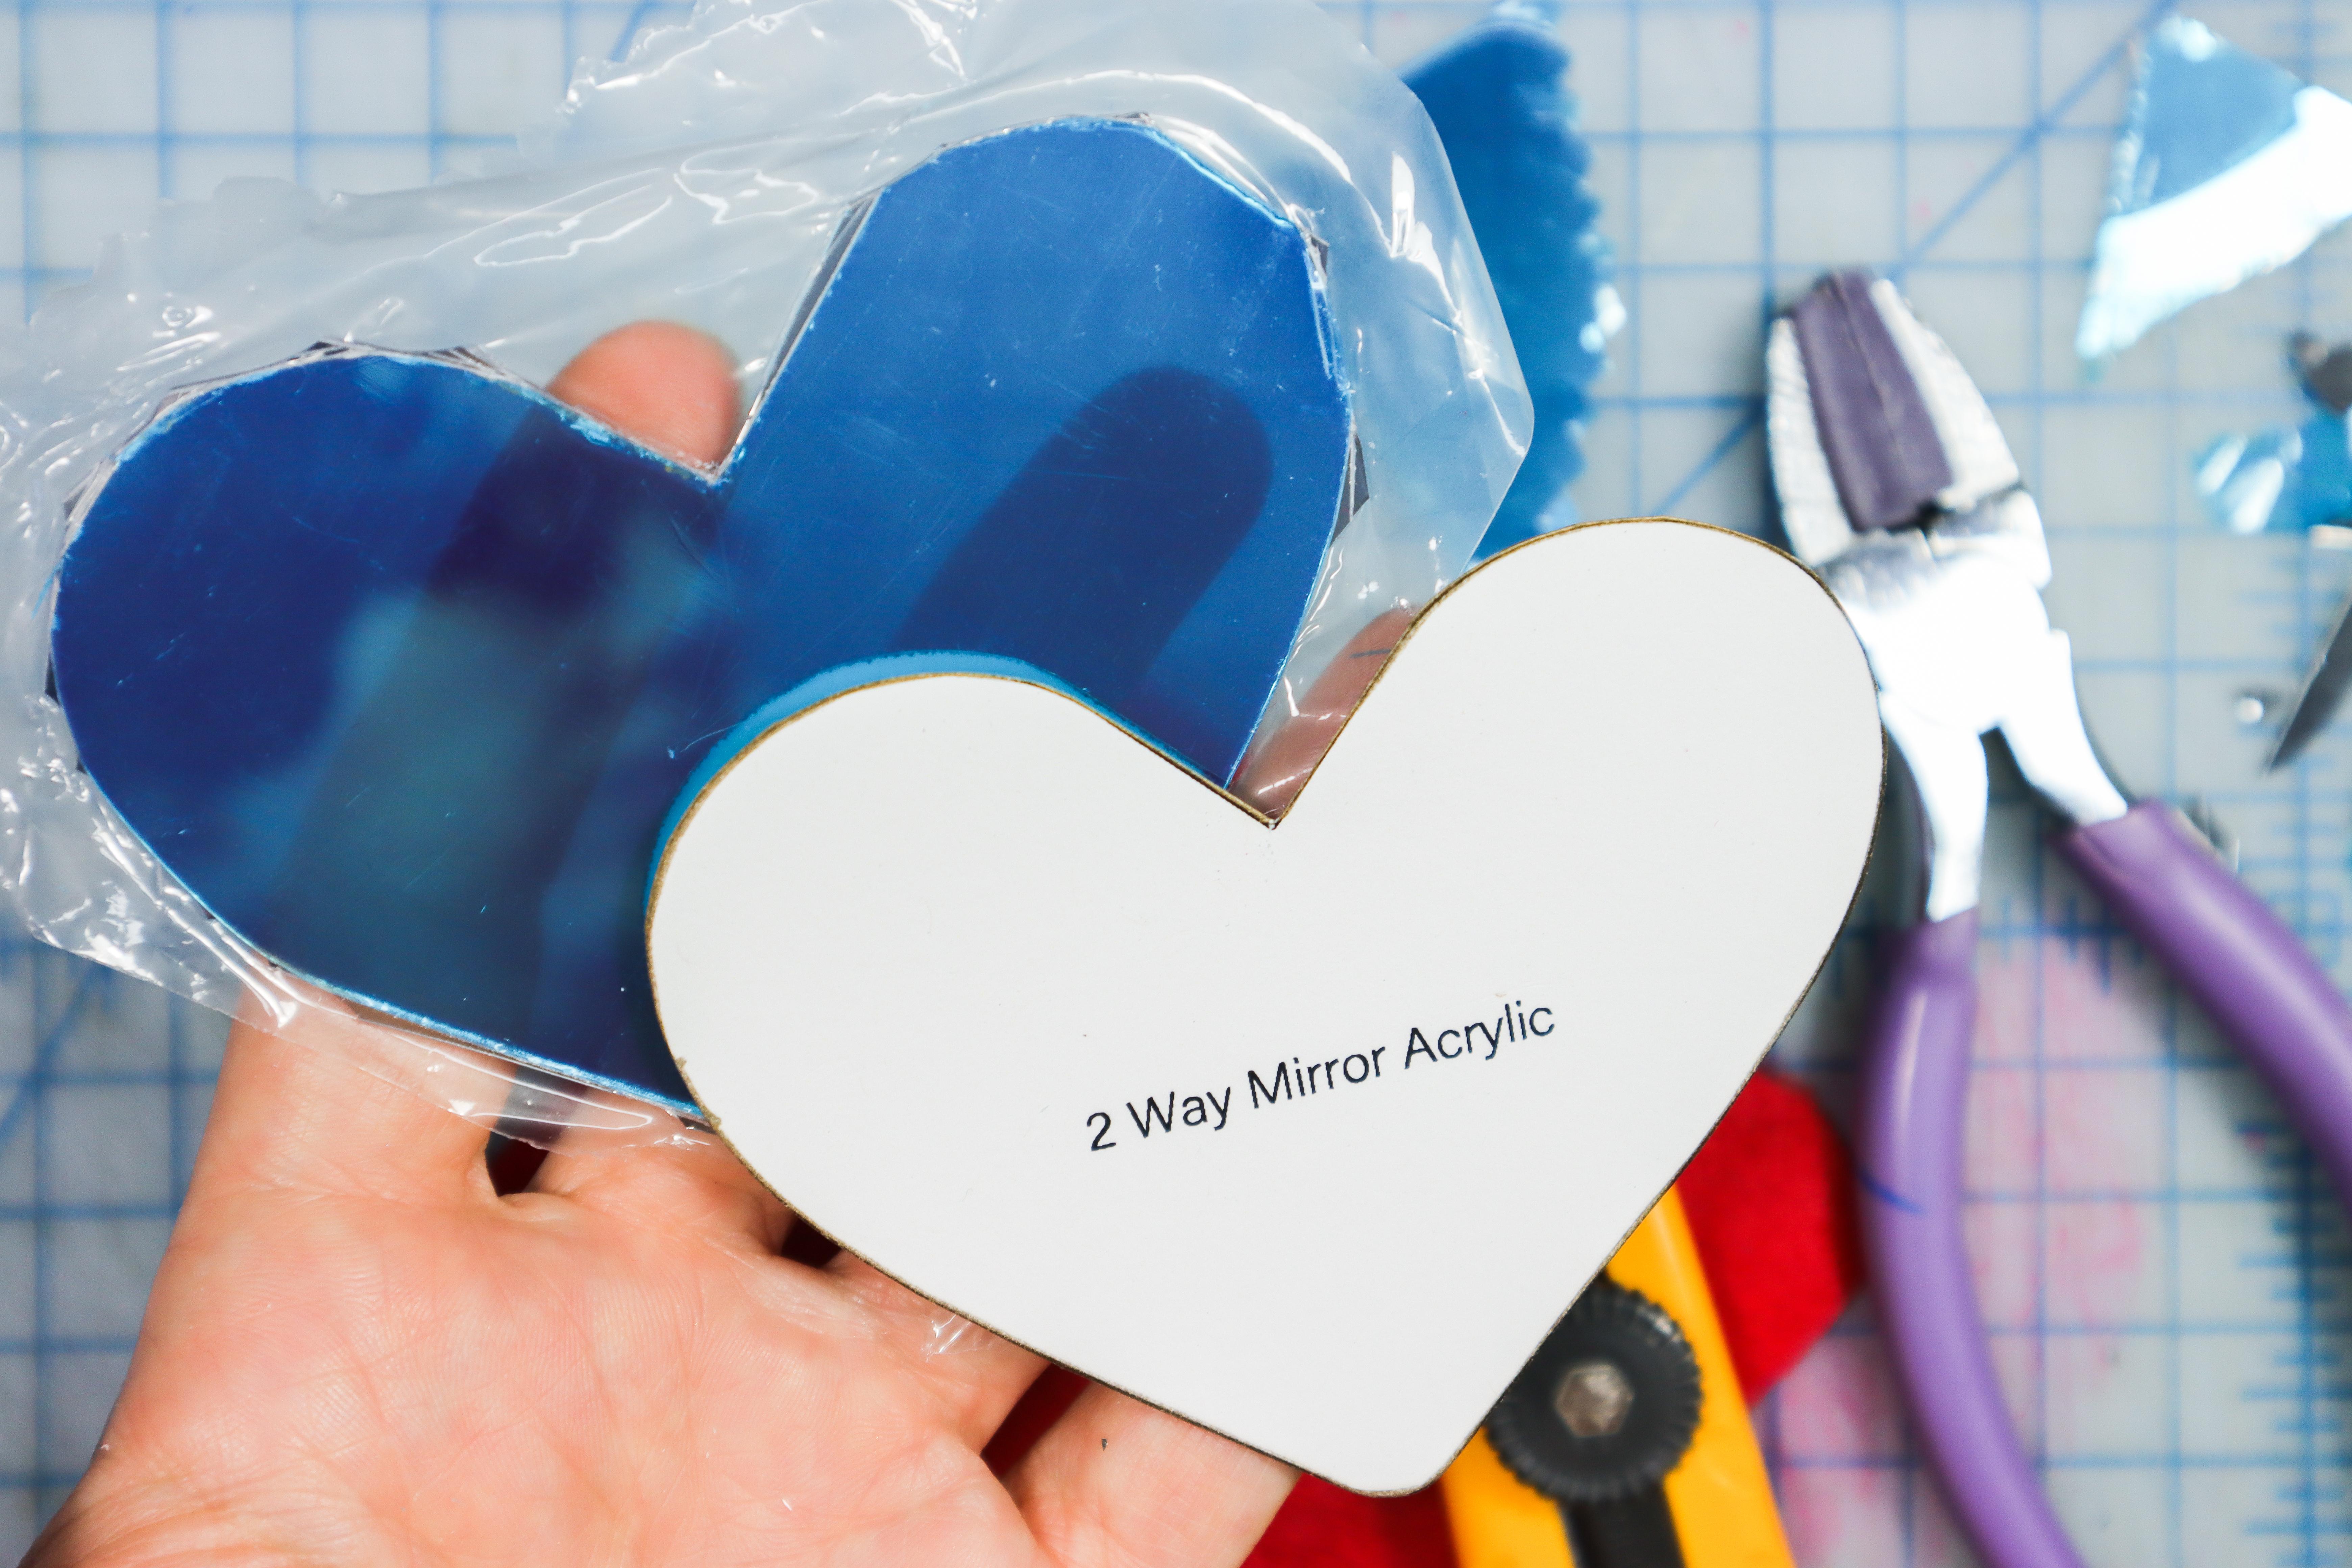
- The easiest way to cut the mirror piece would be with a laser cutter.
- If you don't have access to a laser cutter, slowly and carefully go over the heart shape with a box cutter, and use pliers to chip the excess away. The edge of the heart doesn't have to be perfect because it will be inside the box, but be careful not to crack the mirror.
Make the Heart Box


- Cut out the template pieces as shown.
- Use hot glue to adhere the strip to the exterior of the heart. Start at the point of the heart and slowly work your way around. Only apply glue to the inside to keep things tidy.
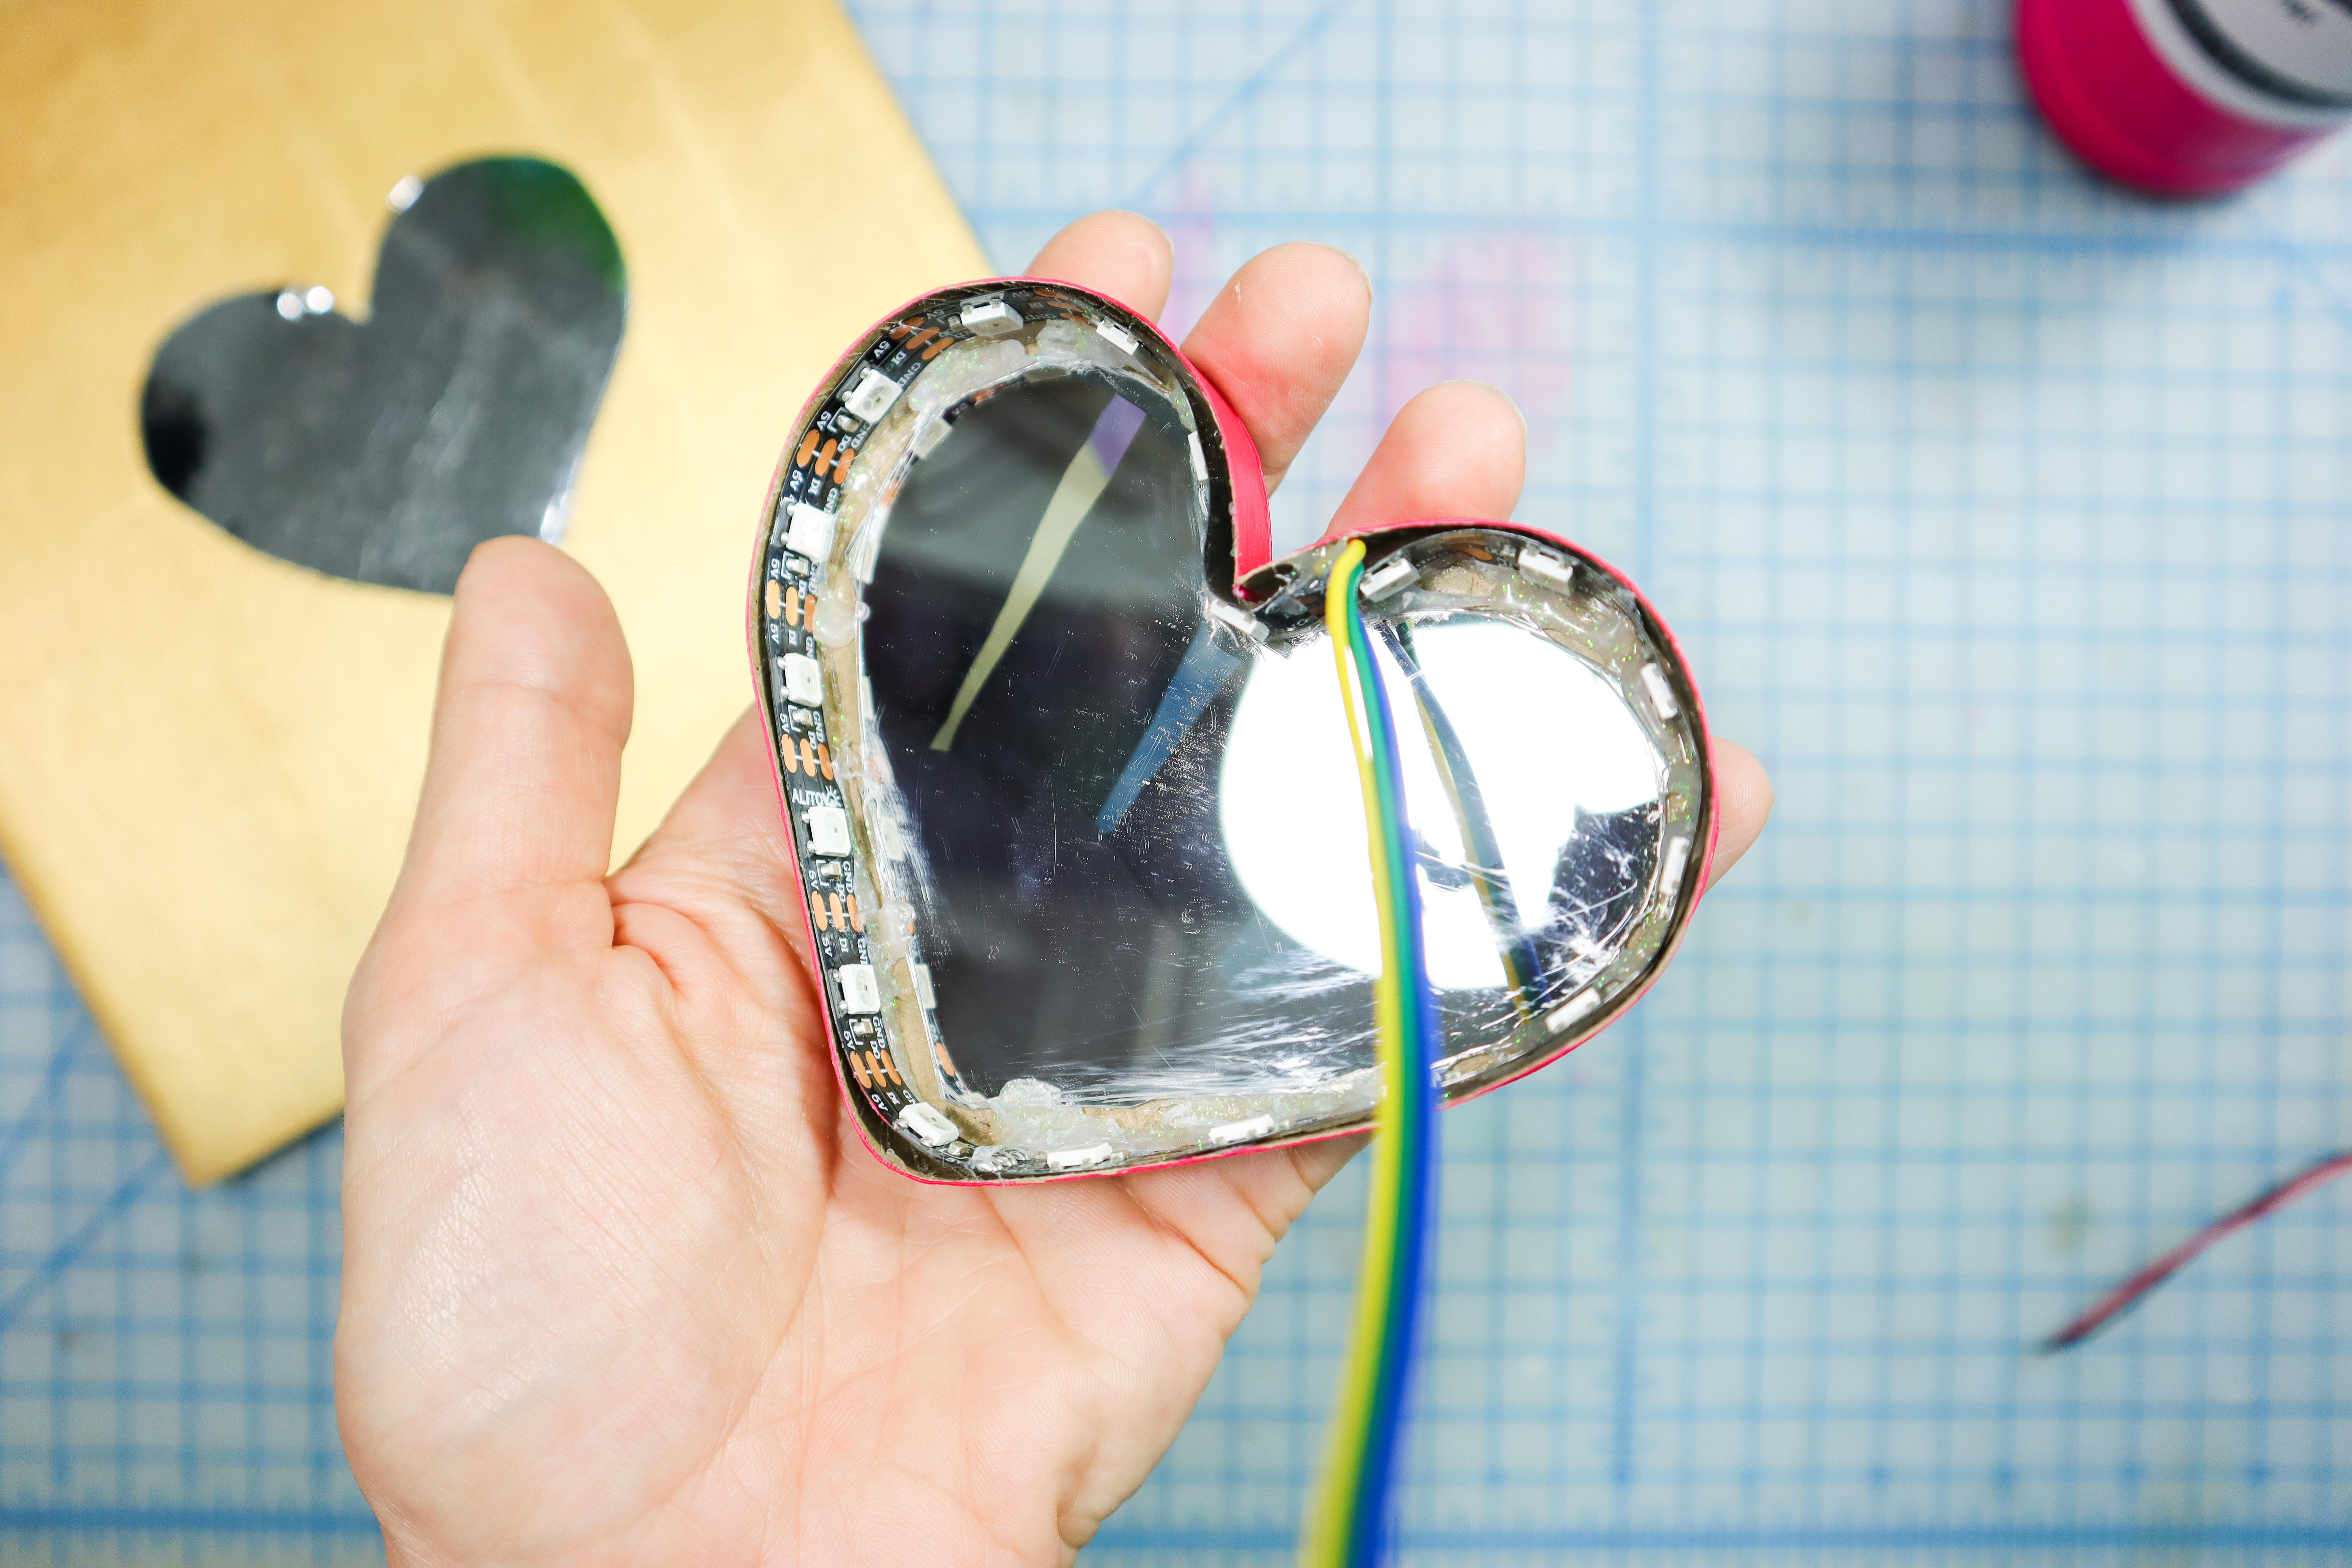
Solder the Wires
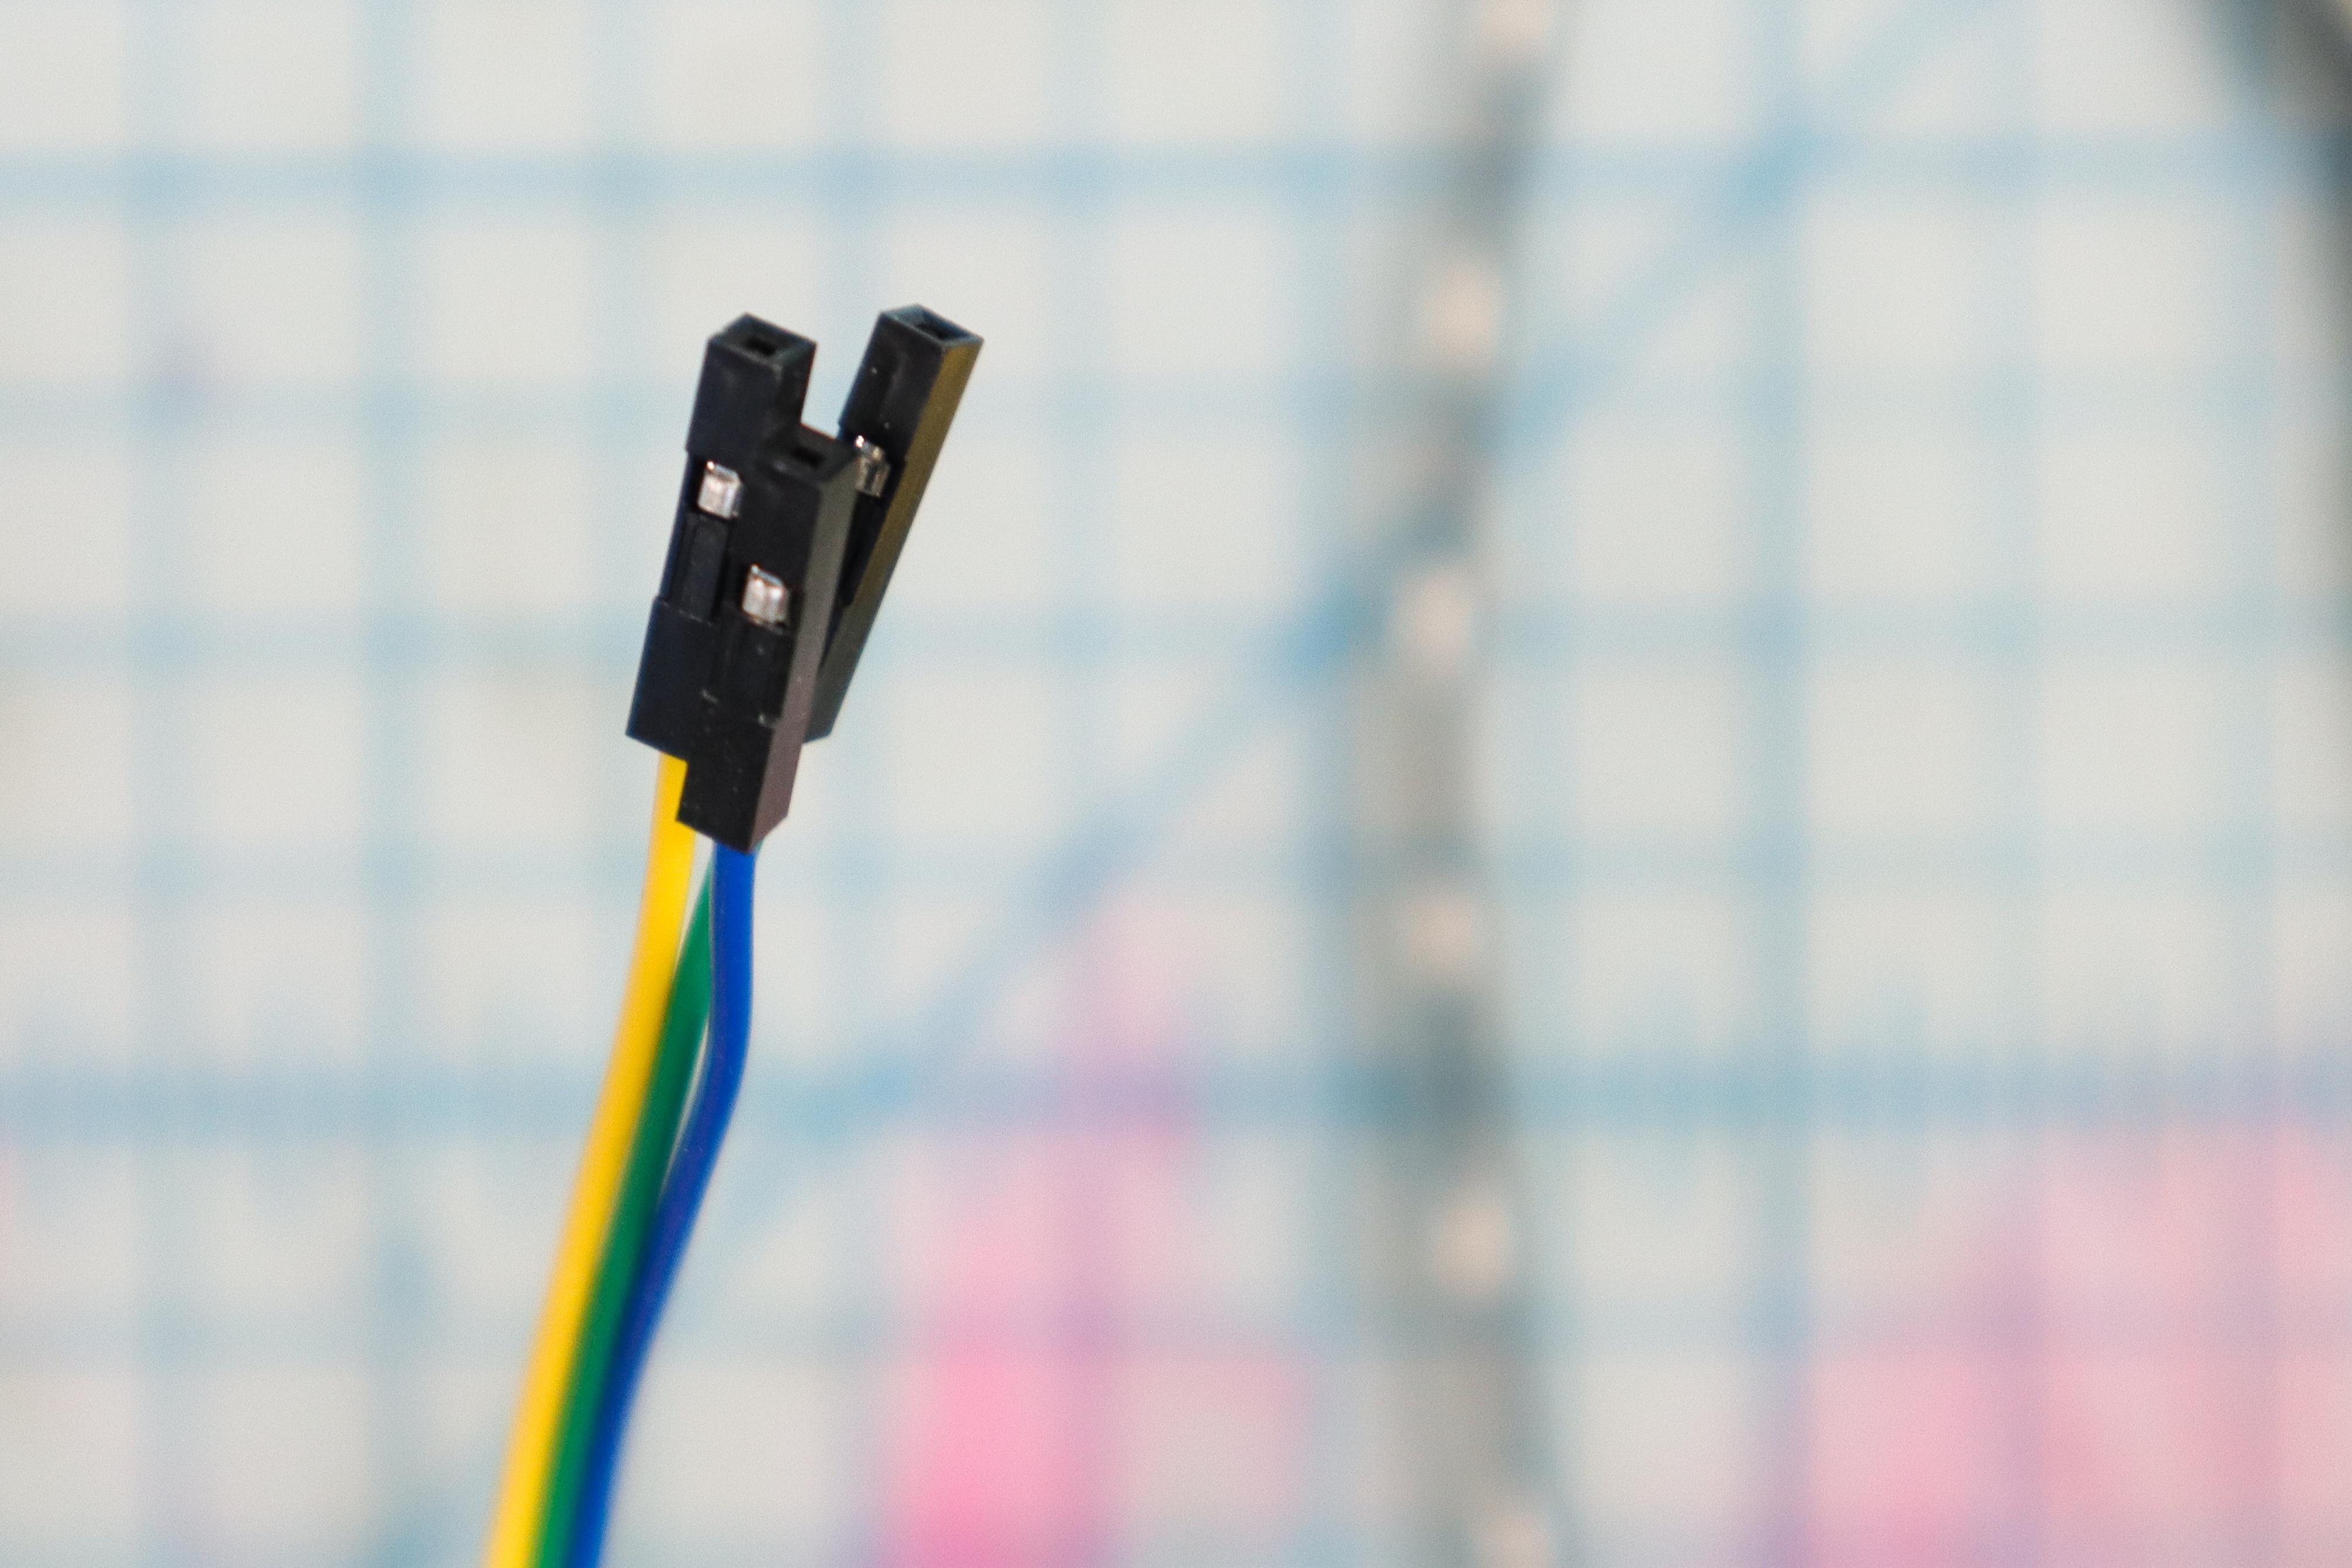

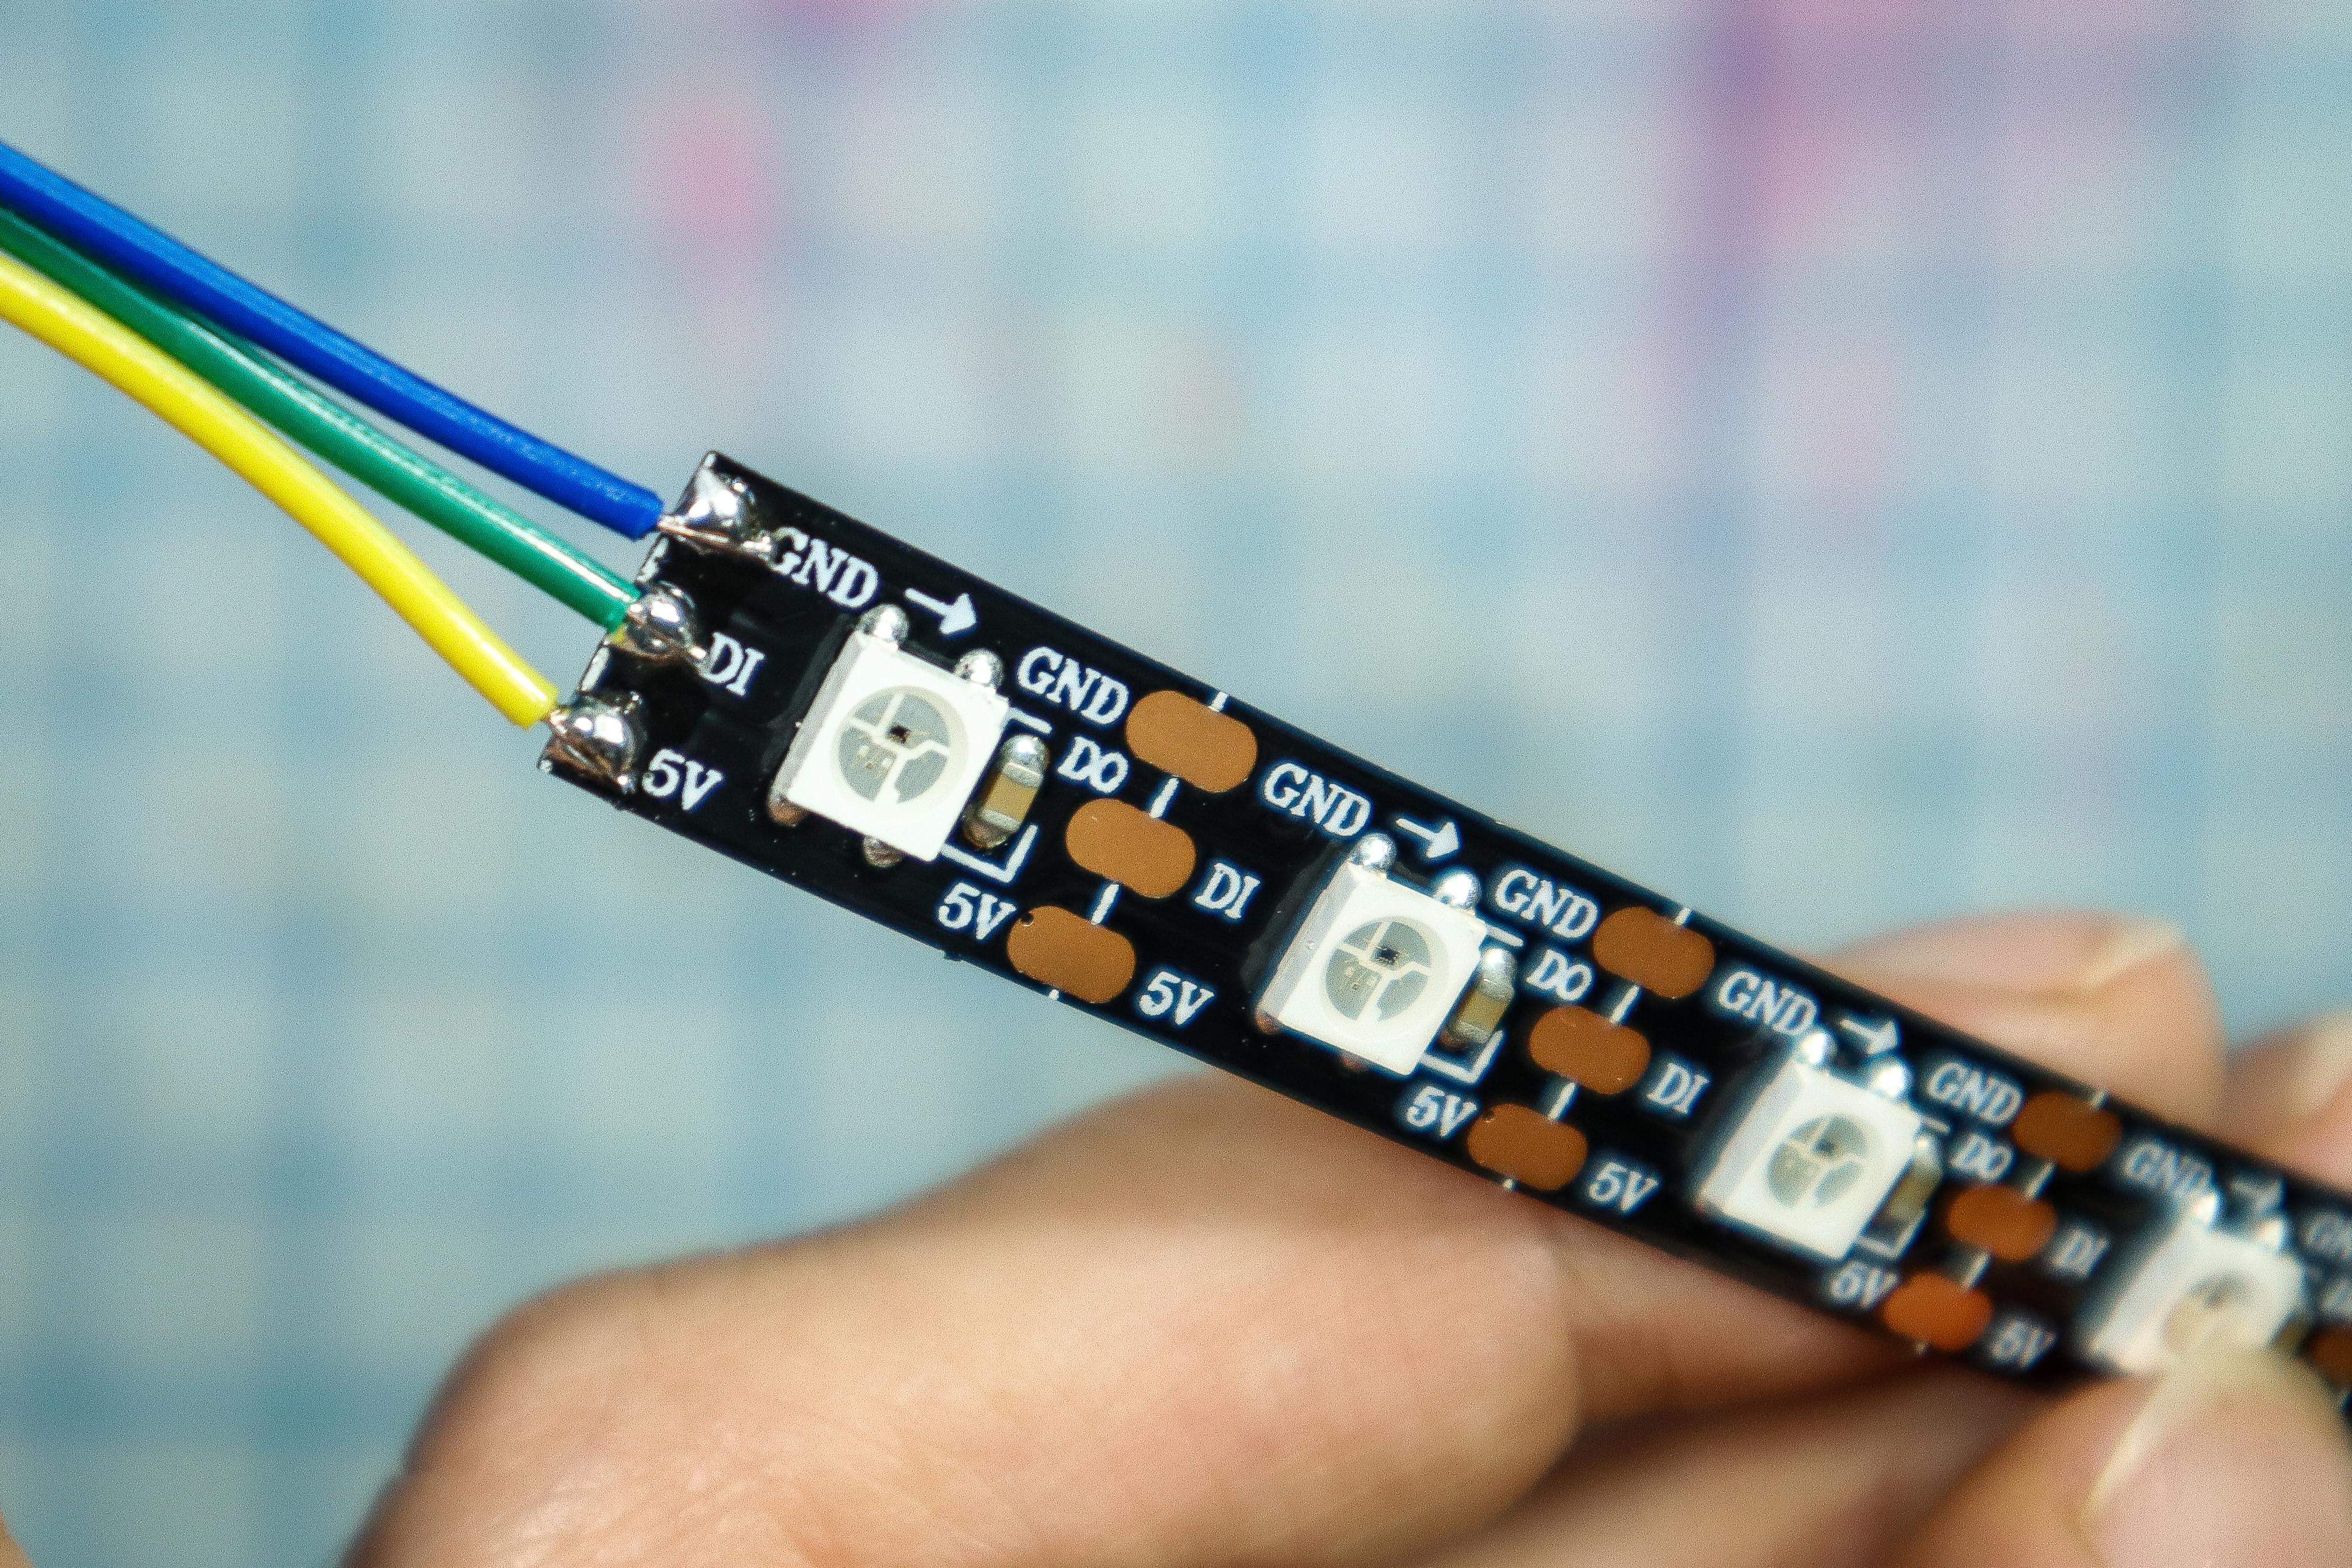
- Solder three hookup wires to the +5V, DI, and GND pads on the LED strip.
Glue the Strip in Place
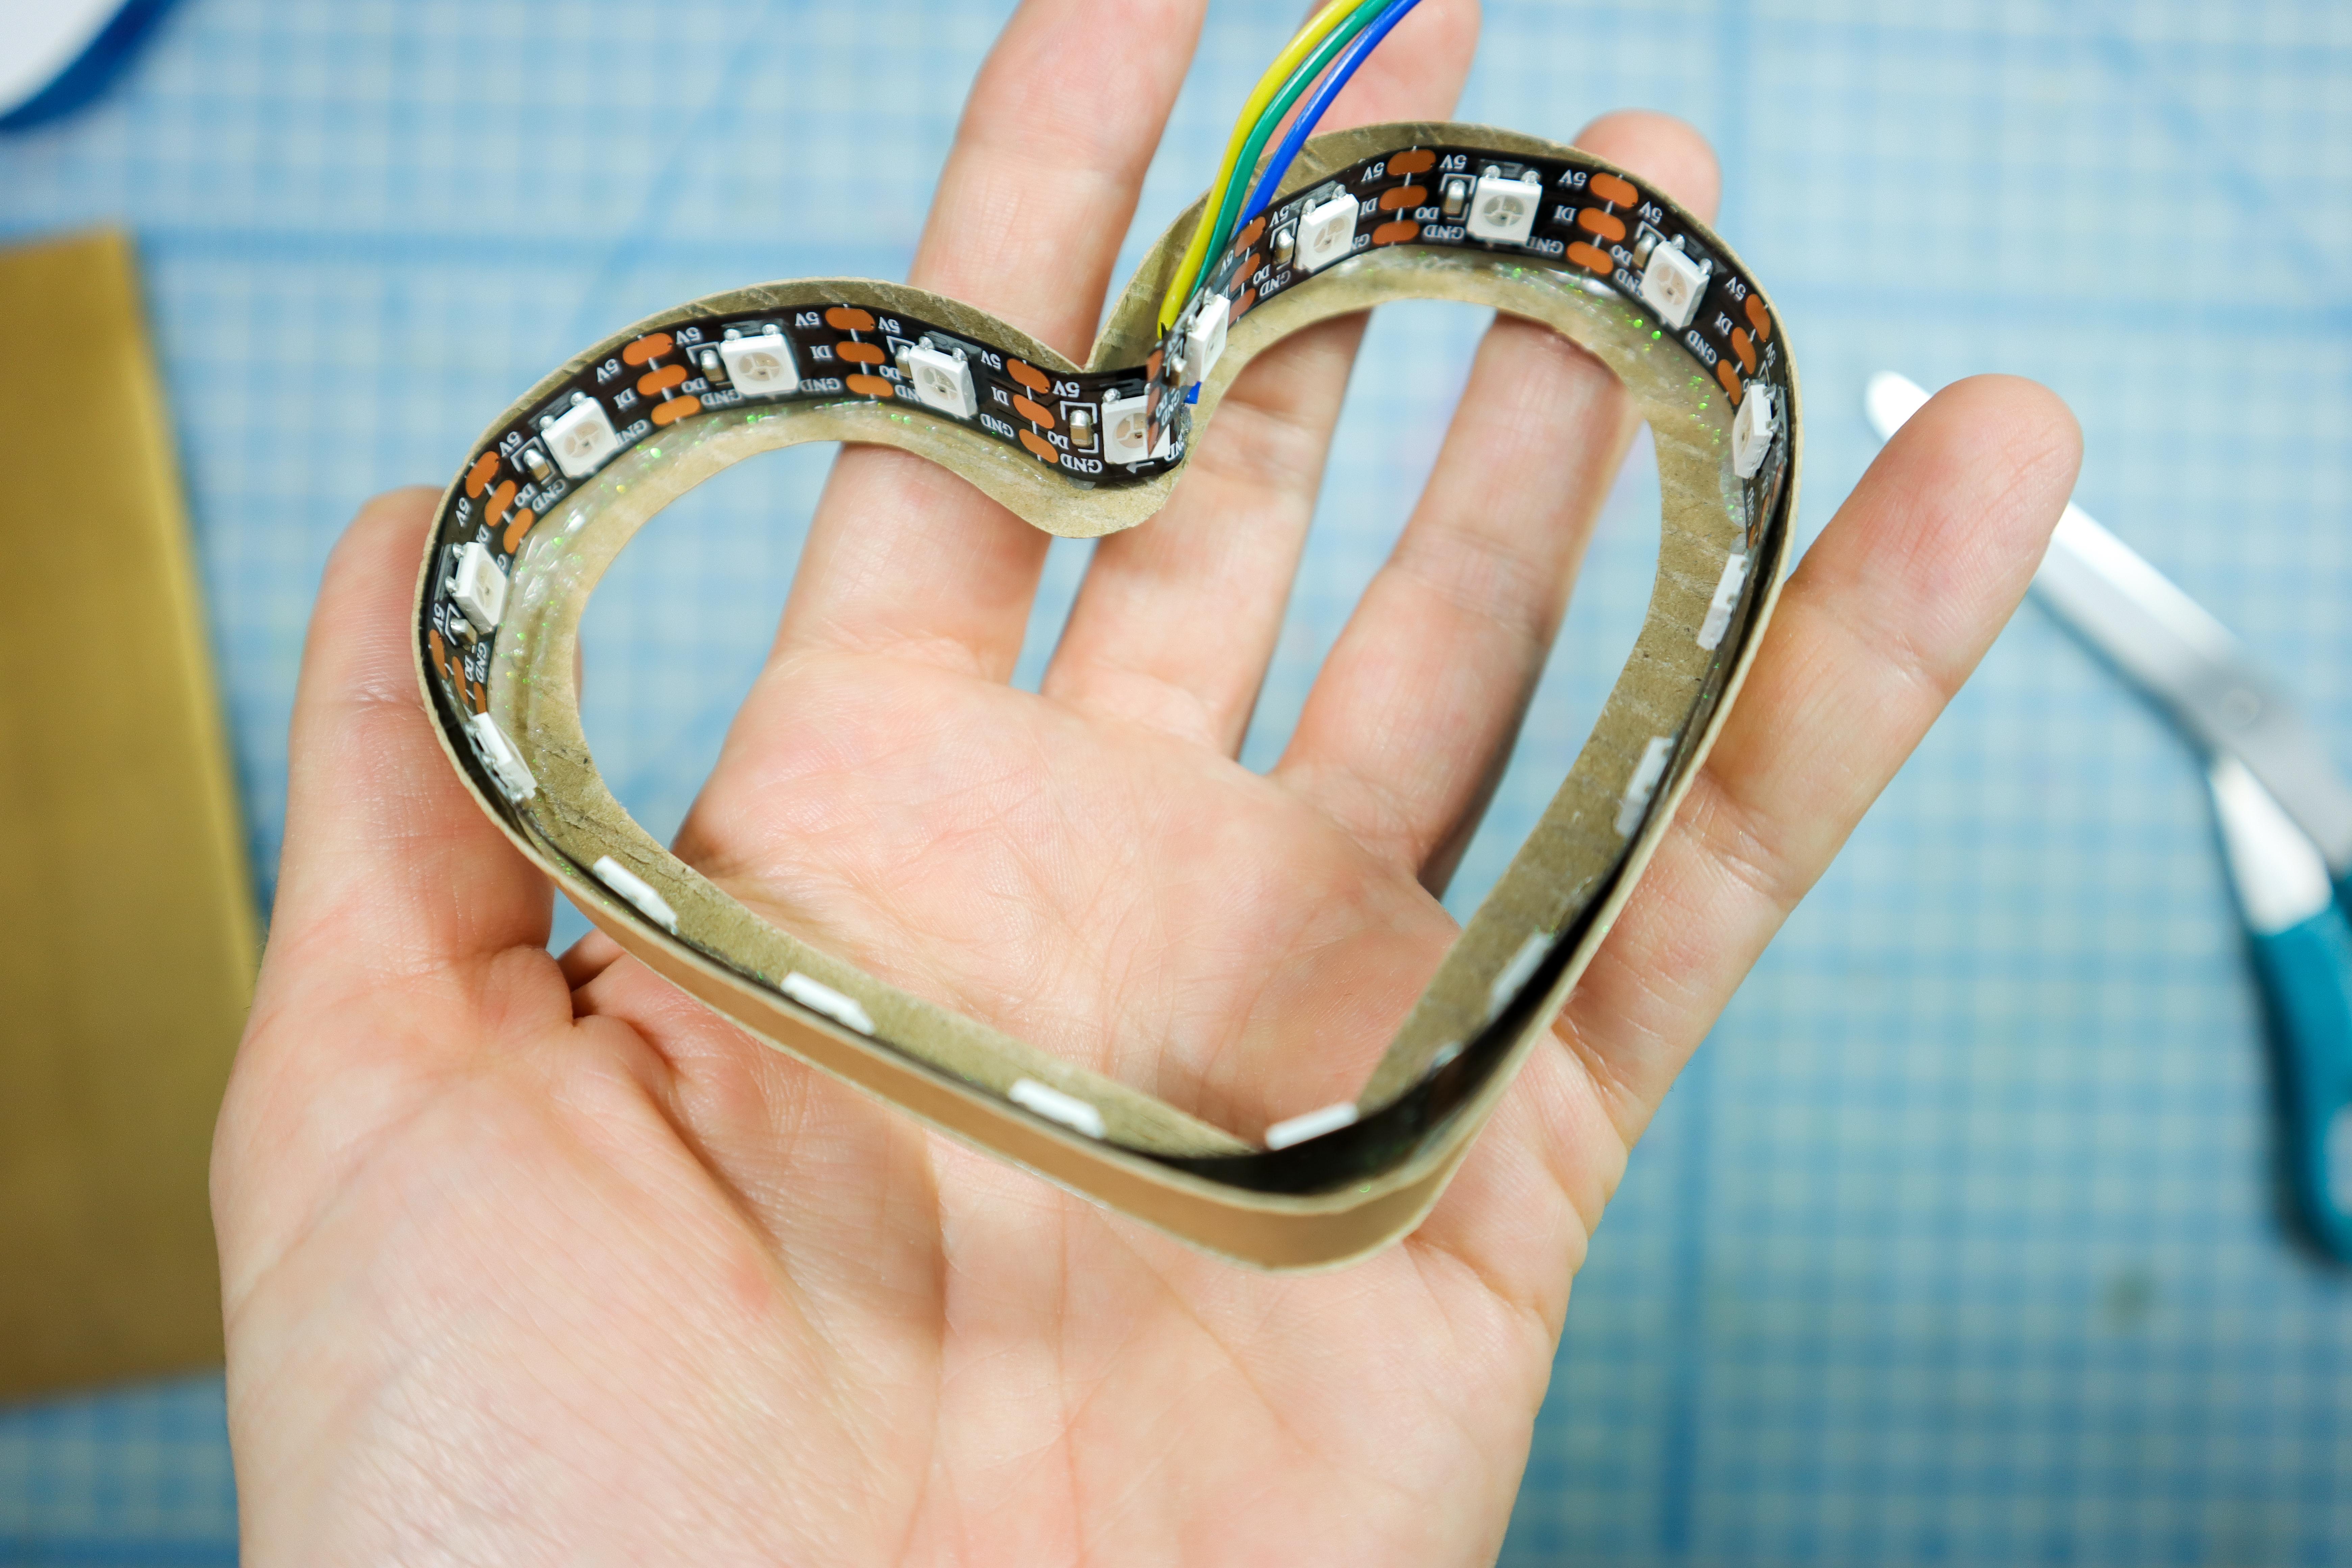
- Glue the LED strip into the interior of the heart.
- Allow the wires to escape behind the strip.
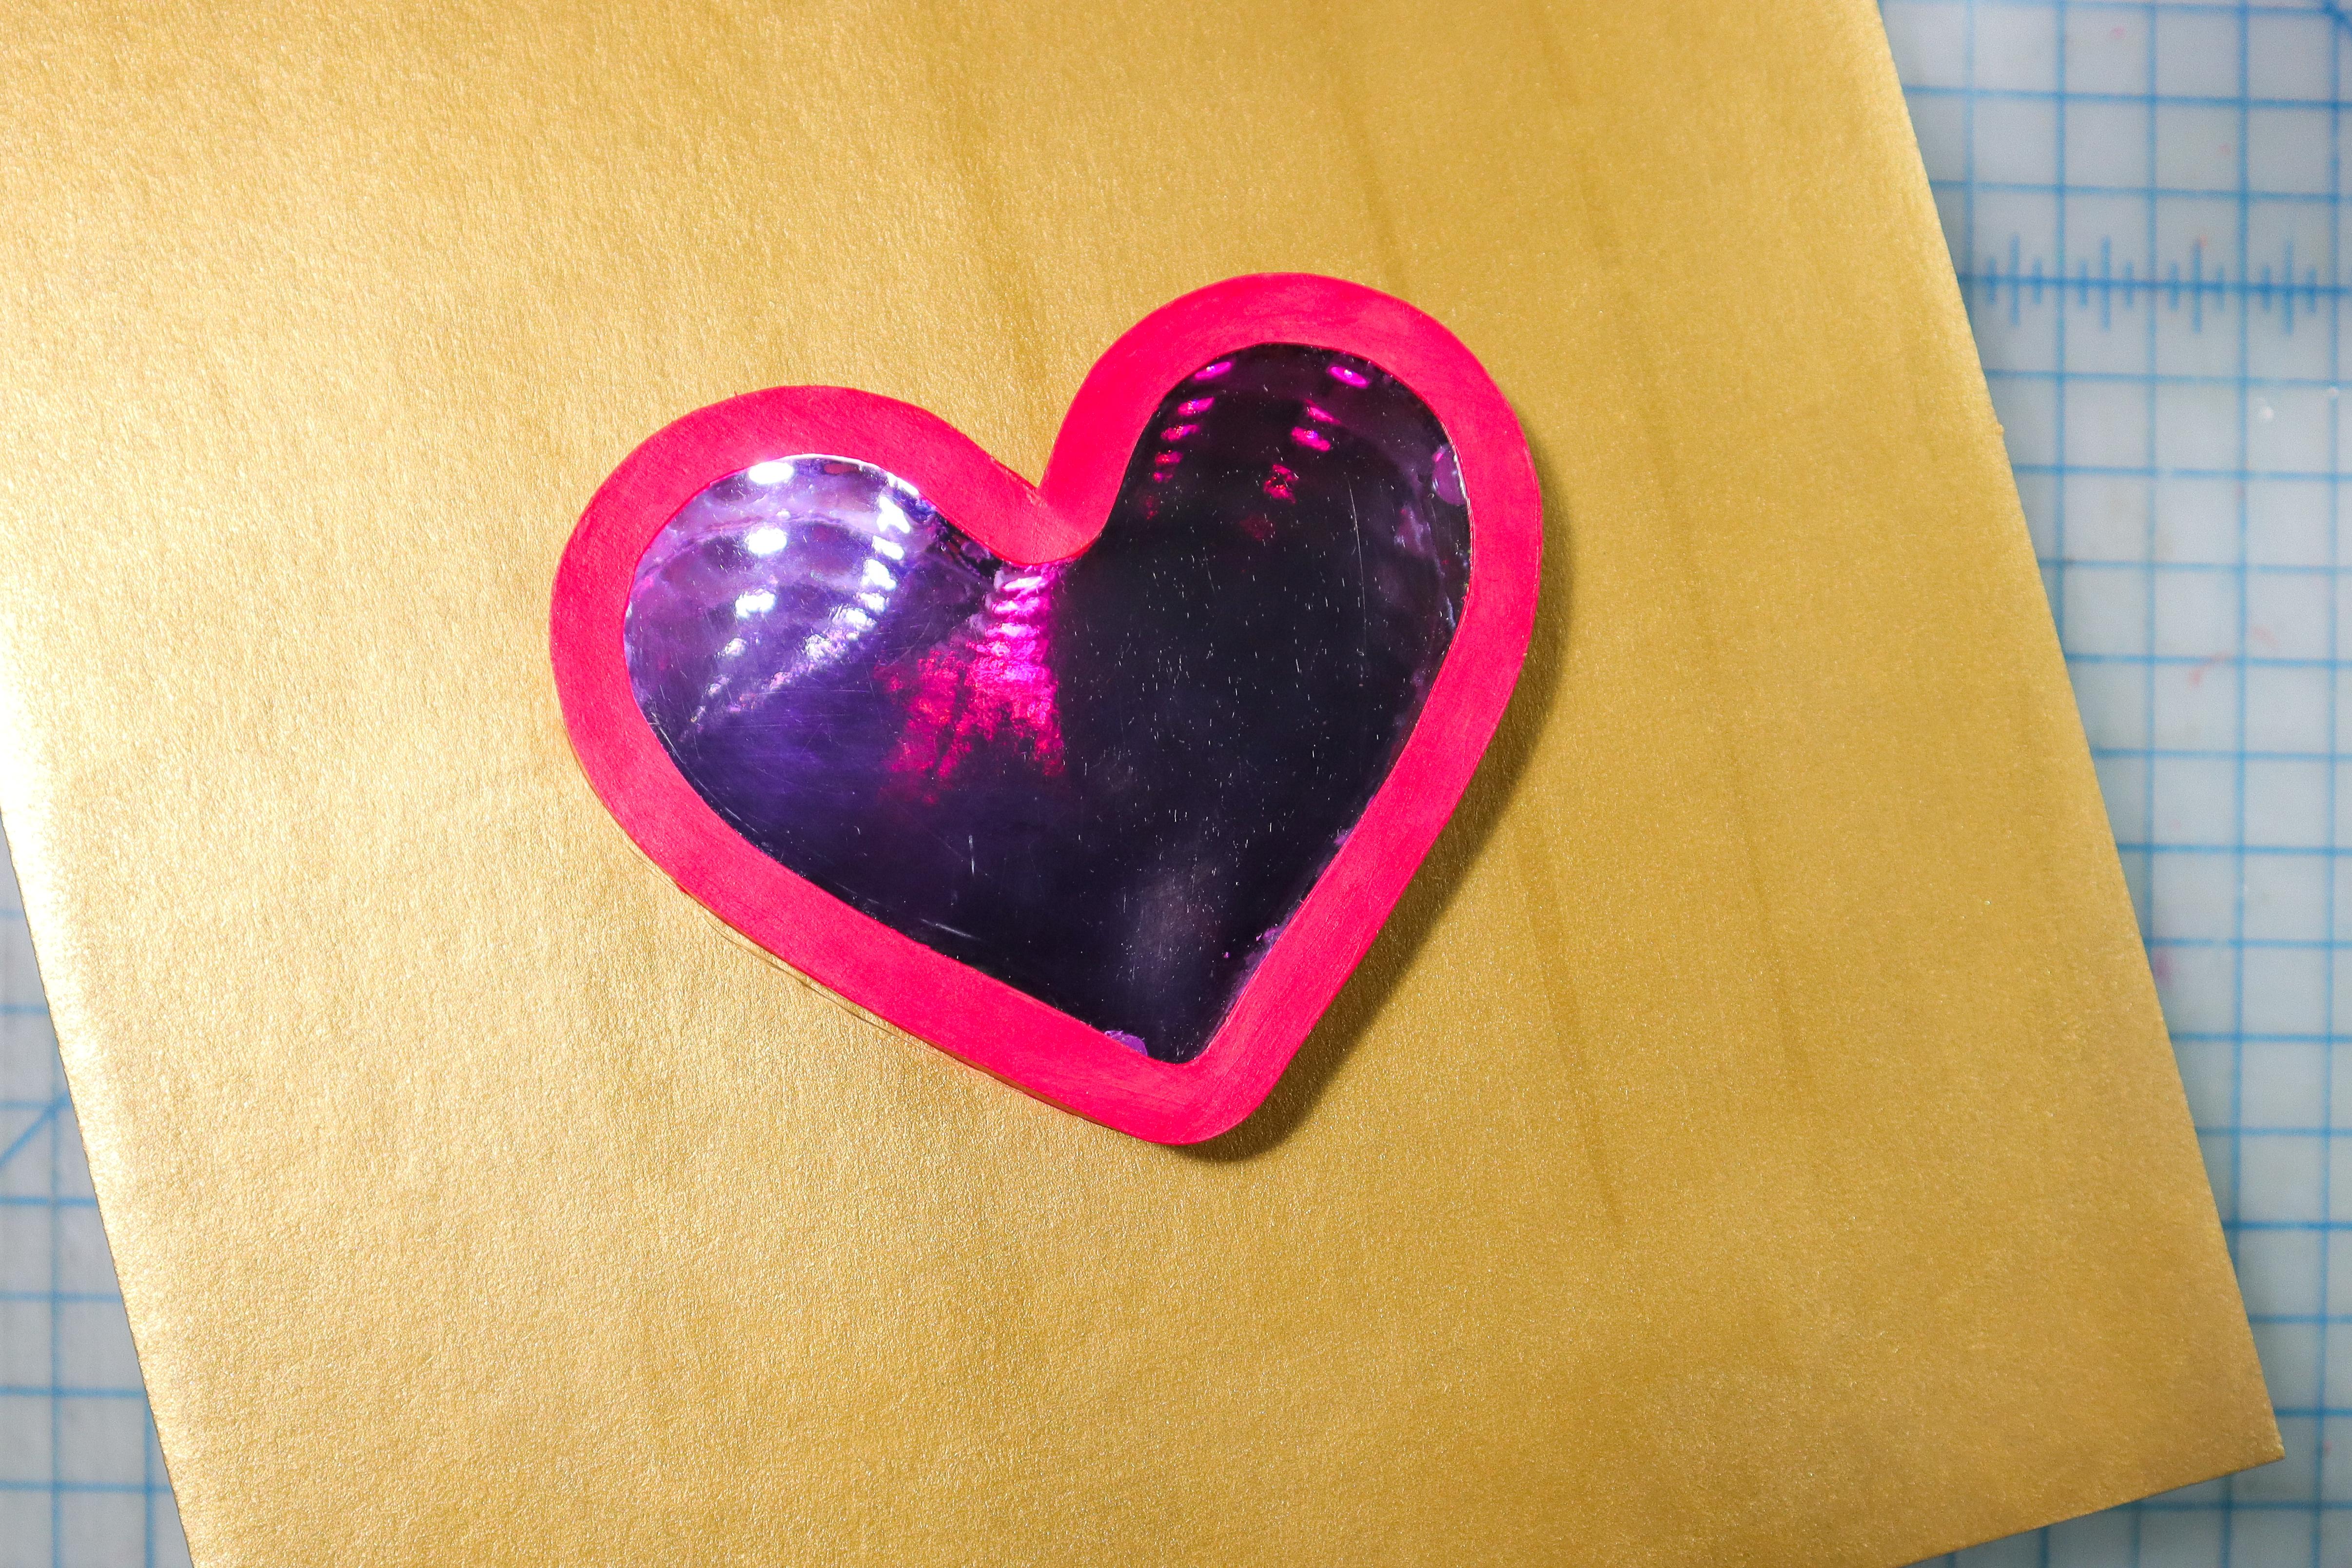
Paint the Heart
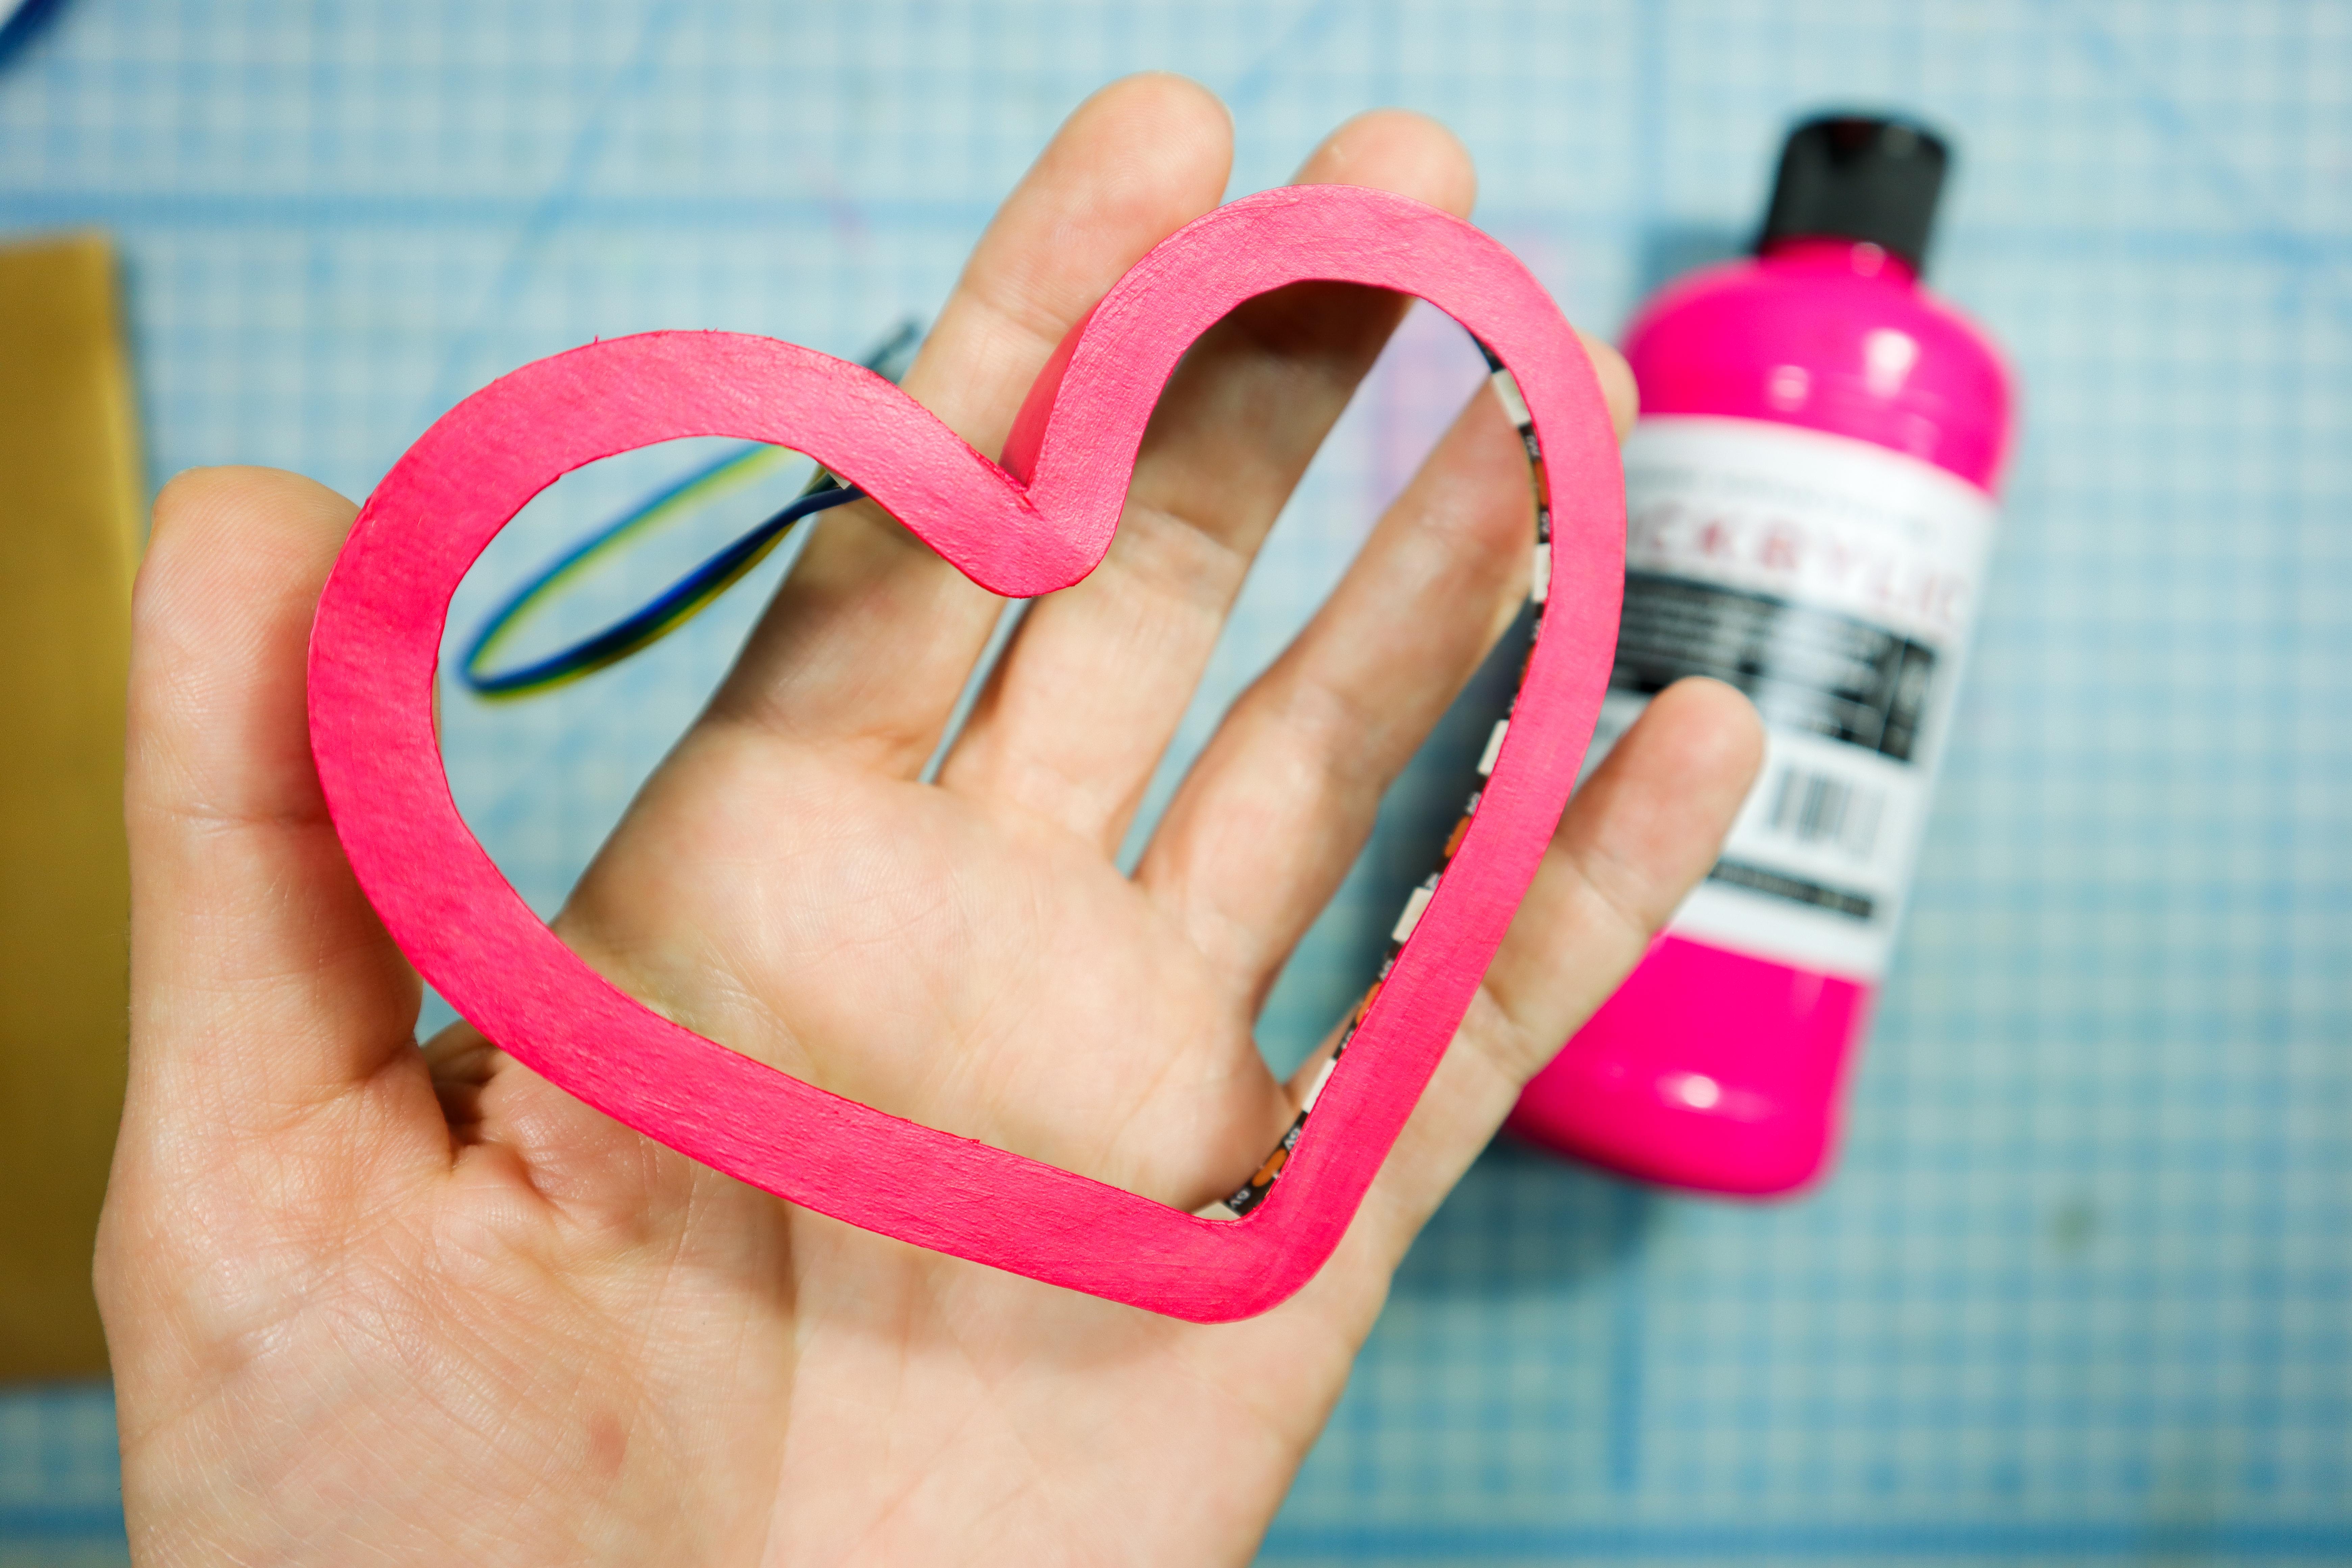
- Paint the box pink!
Add the Mirror Heart
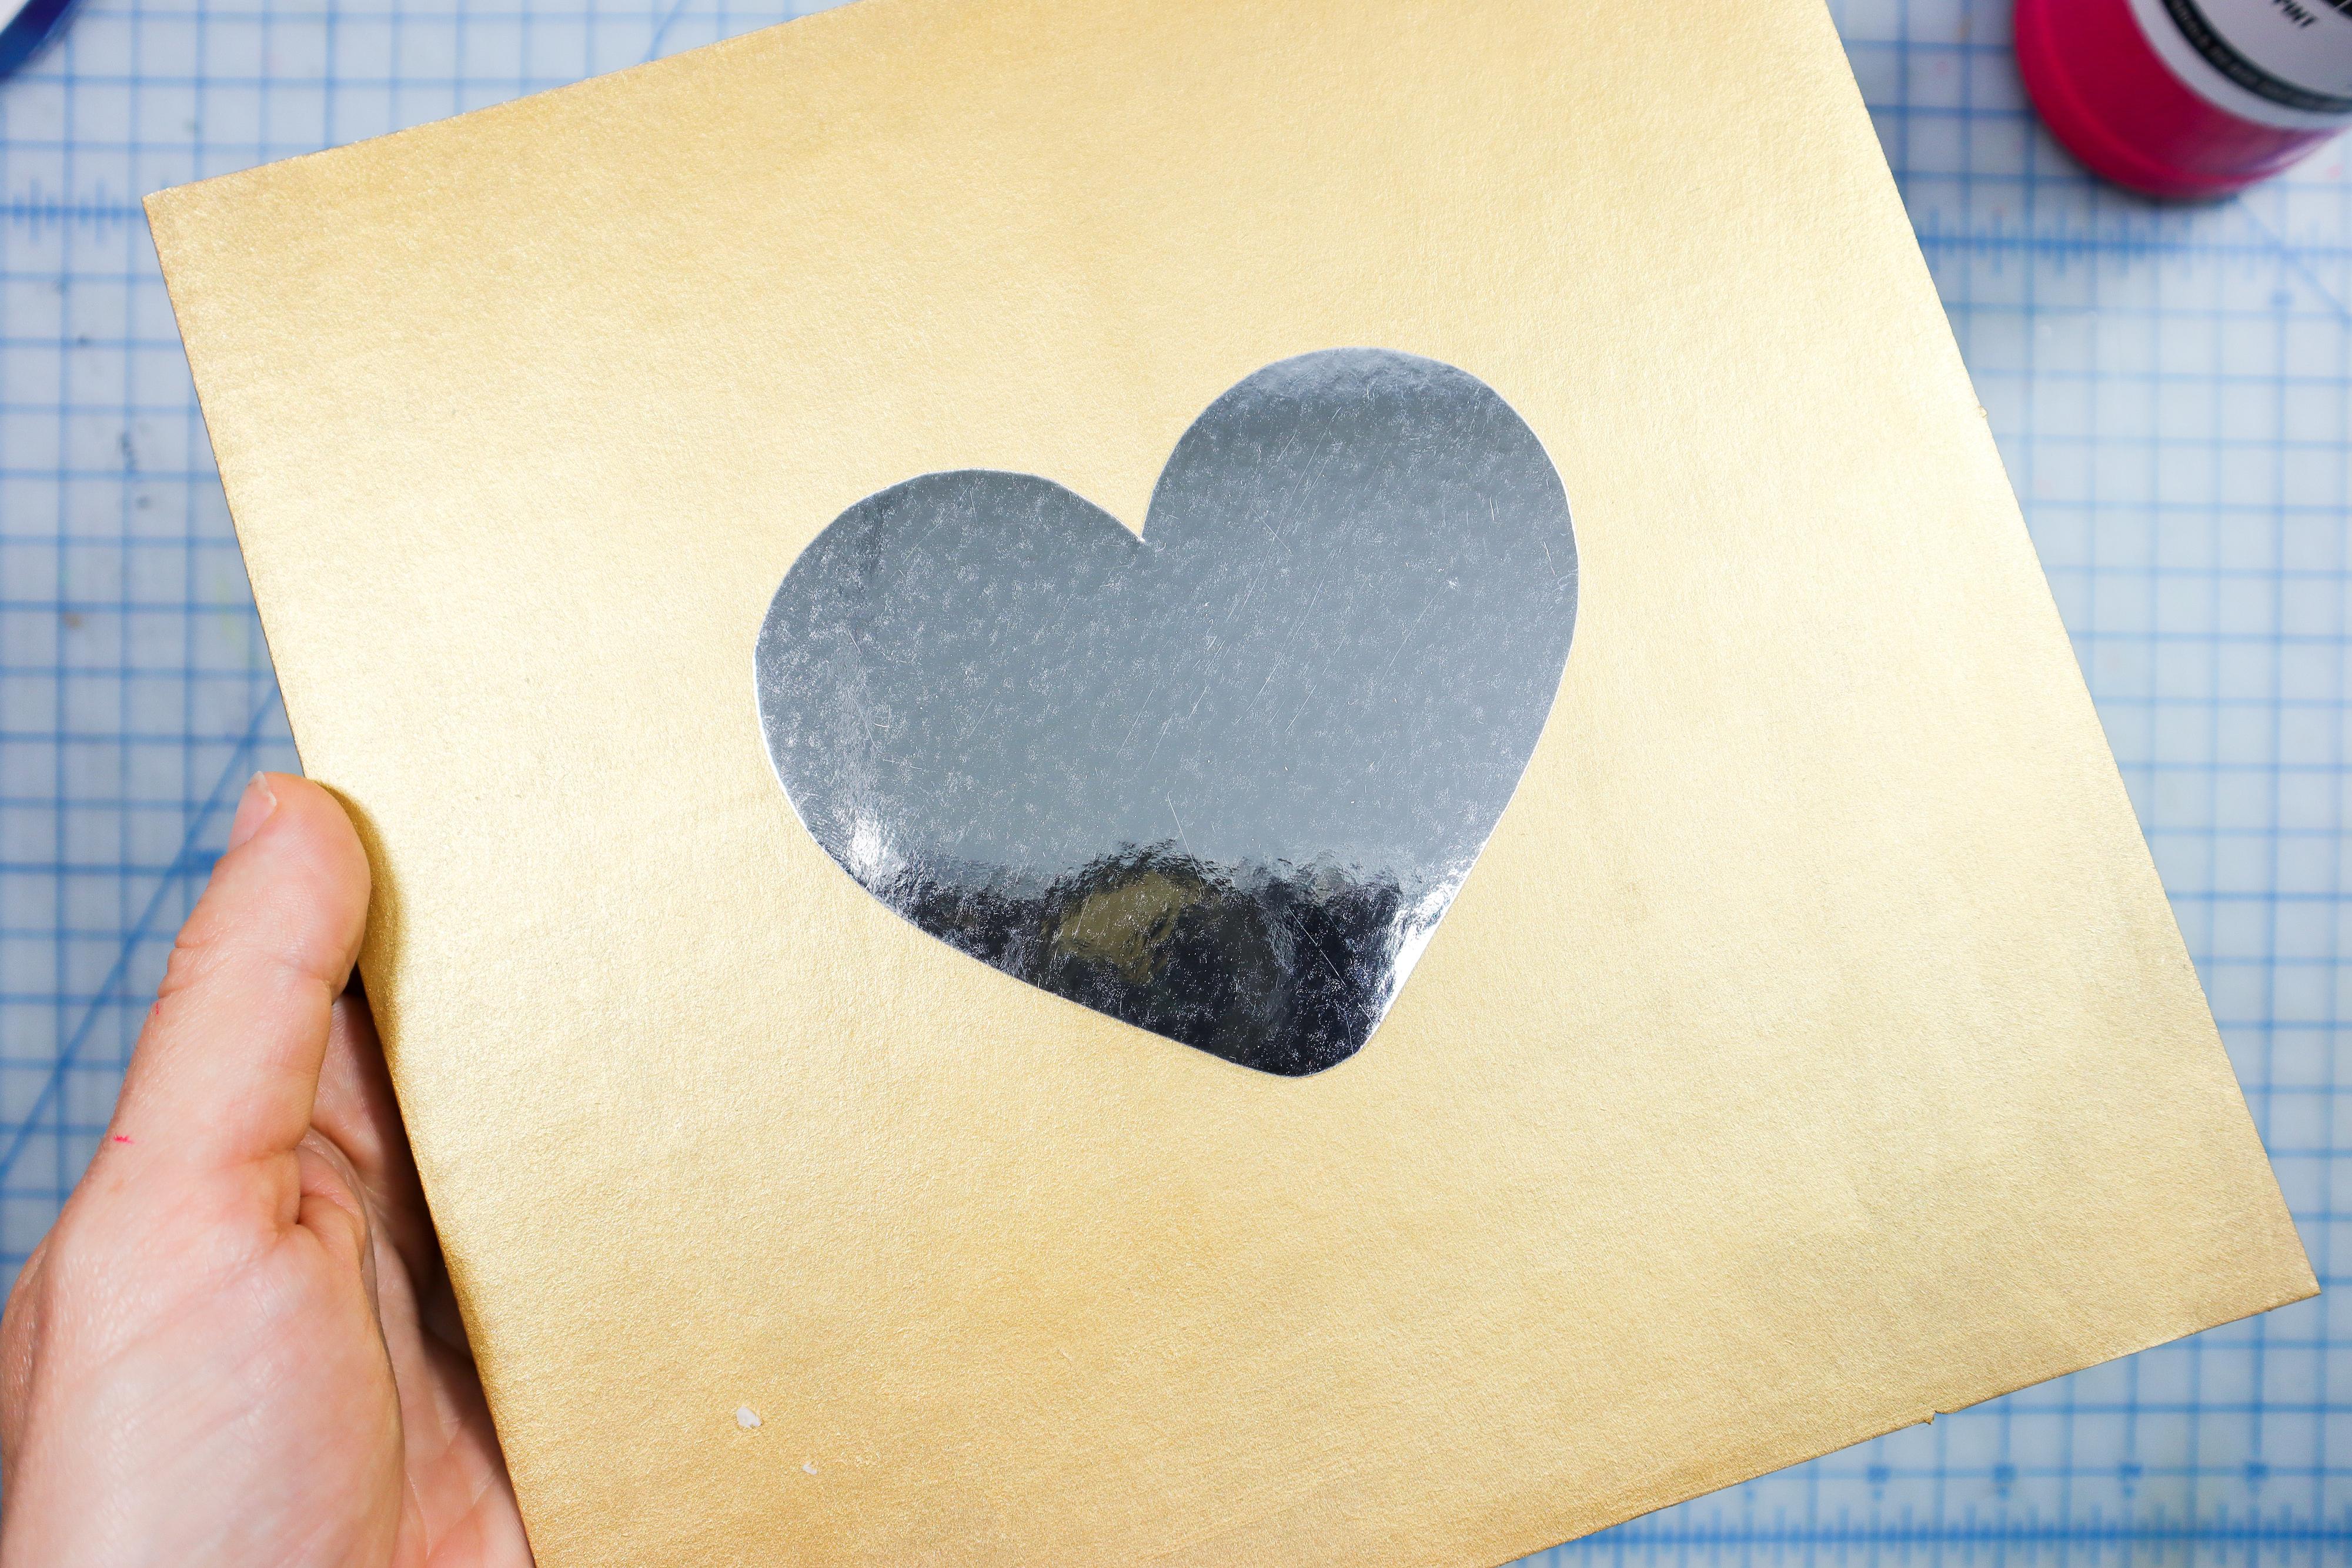
- Cut the template from mirror paper and glue it to the cardboard.
Add the Two Way Mirror
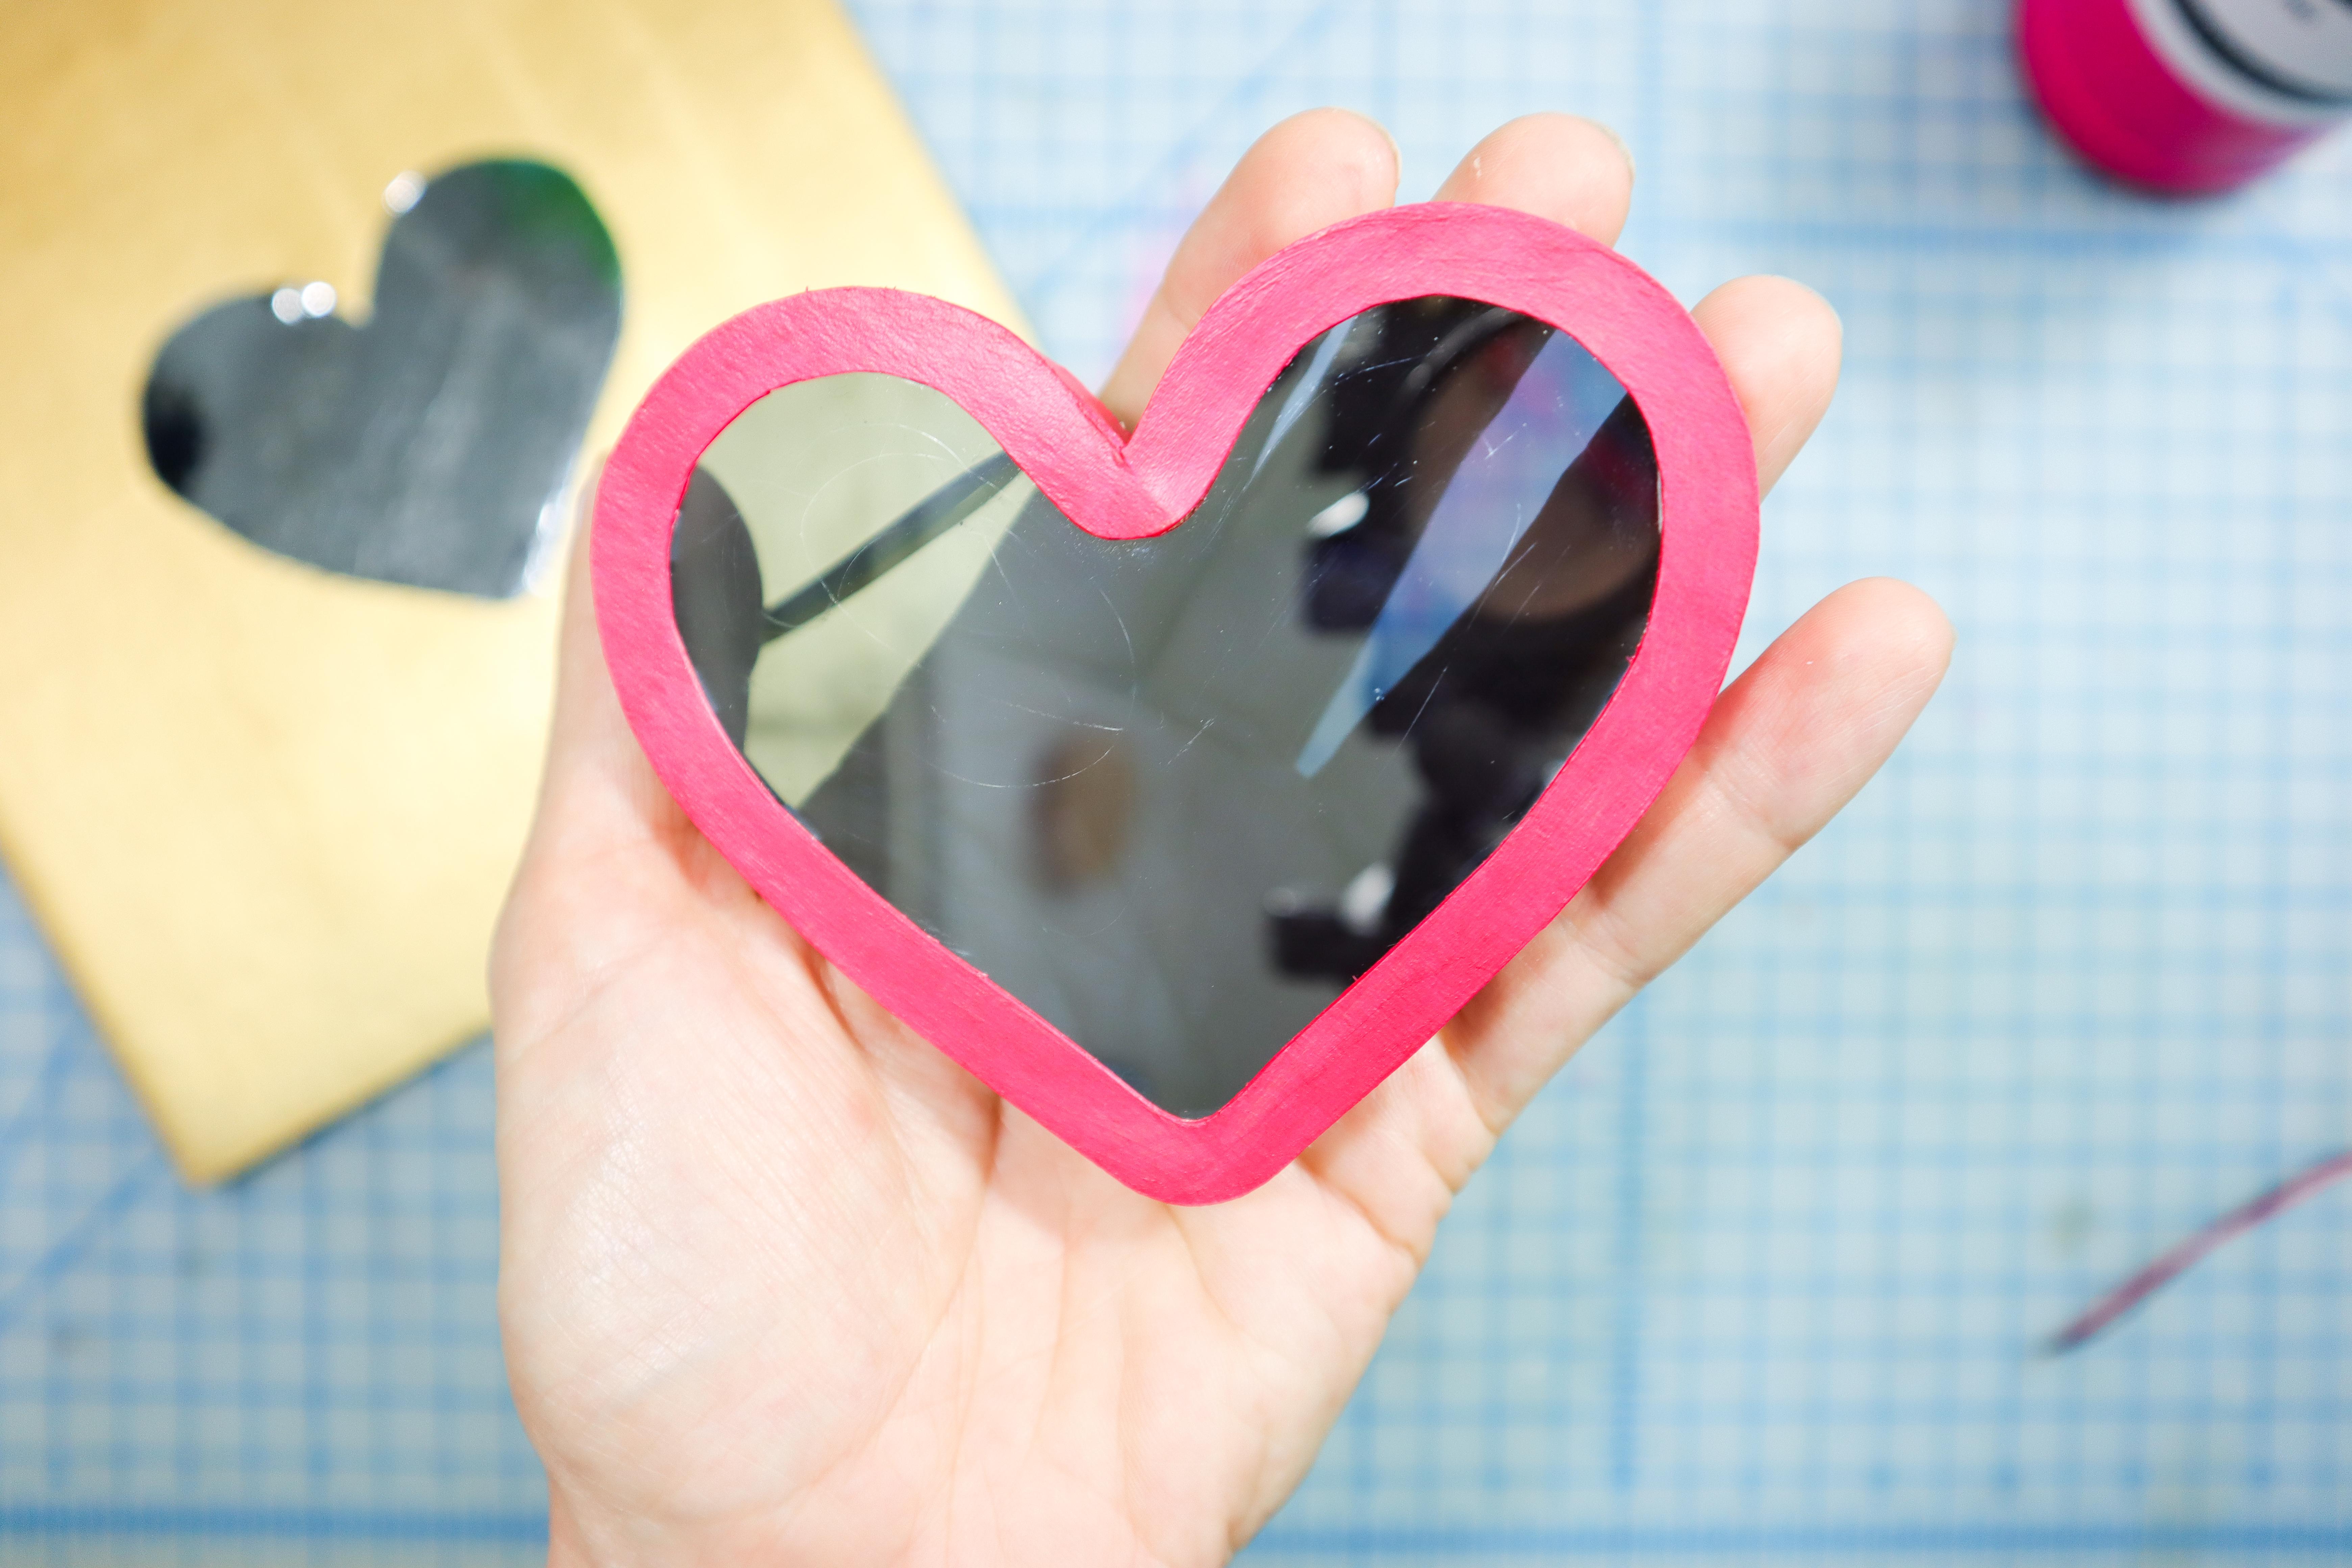
- Glue the two-way mirror piece inside the heart box. Remove the protective coating, and be careful not to scratch it.
Glue the Hearts Together
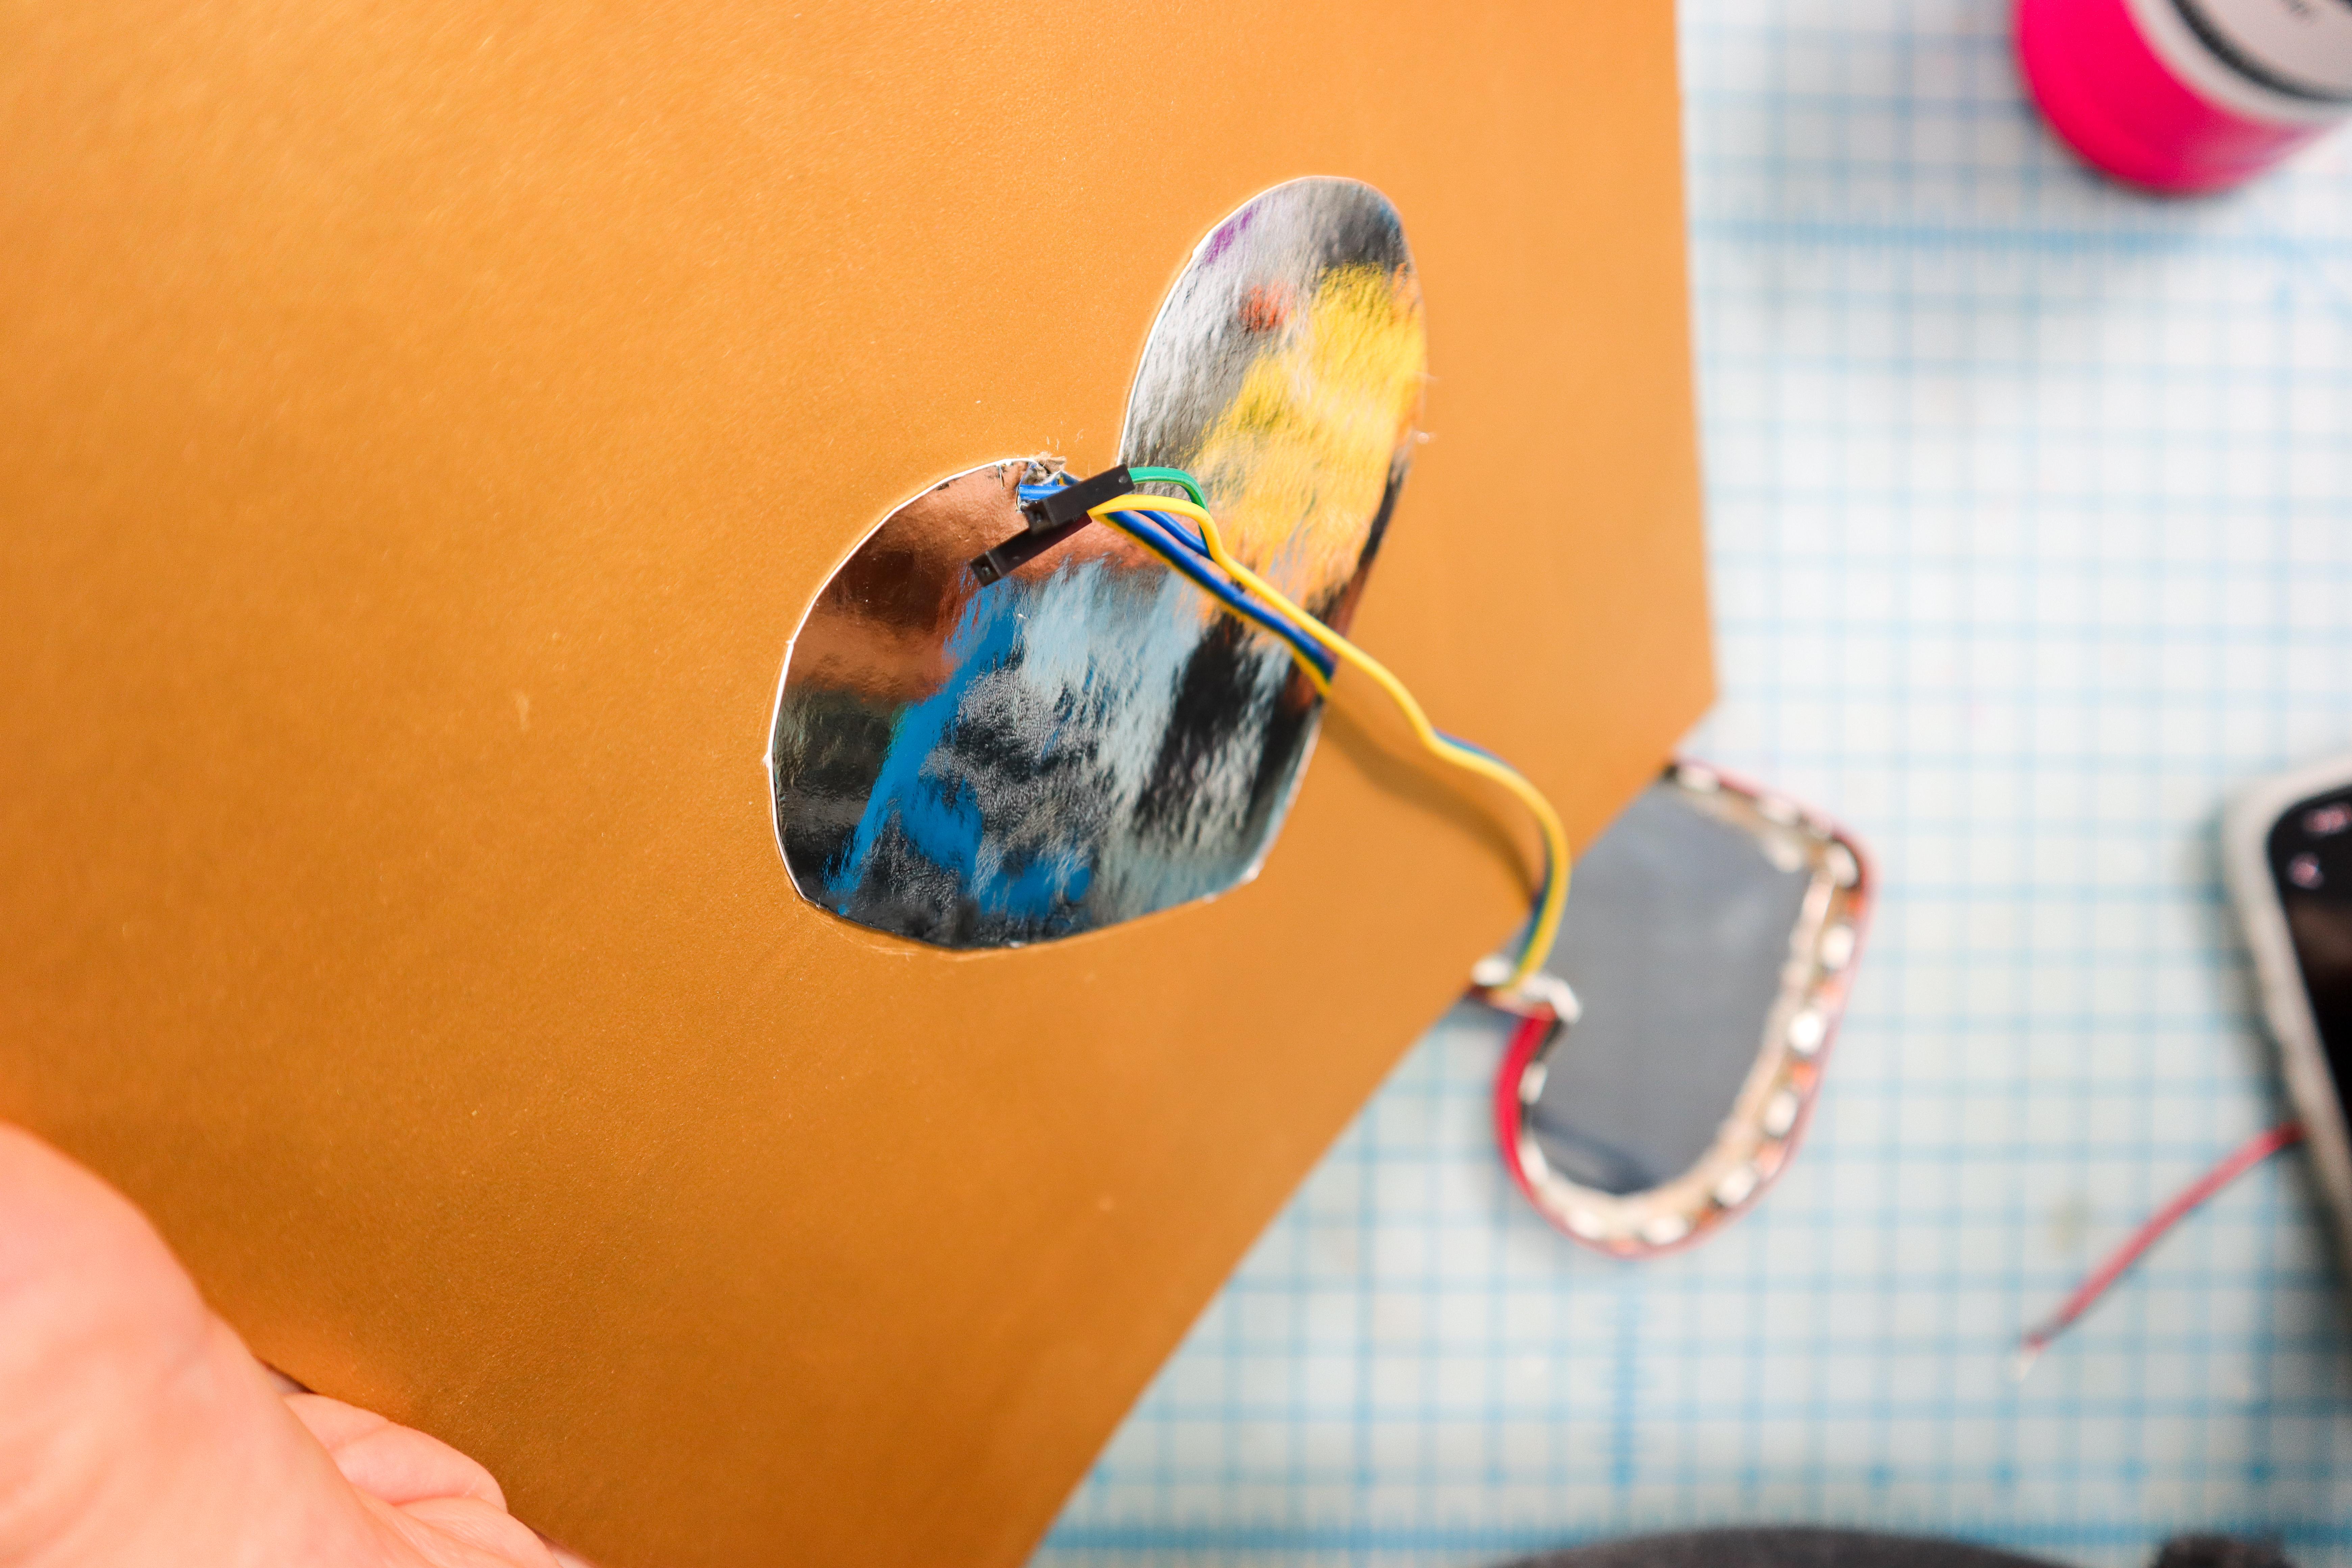
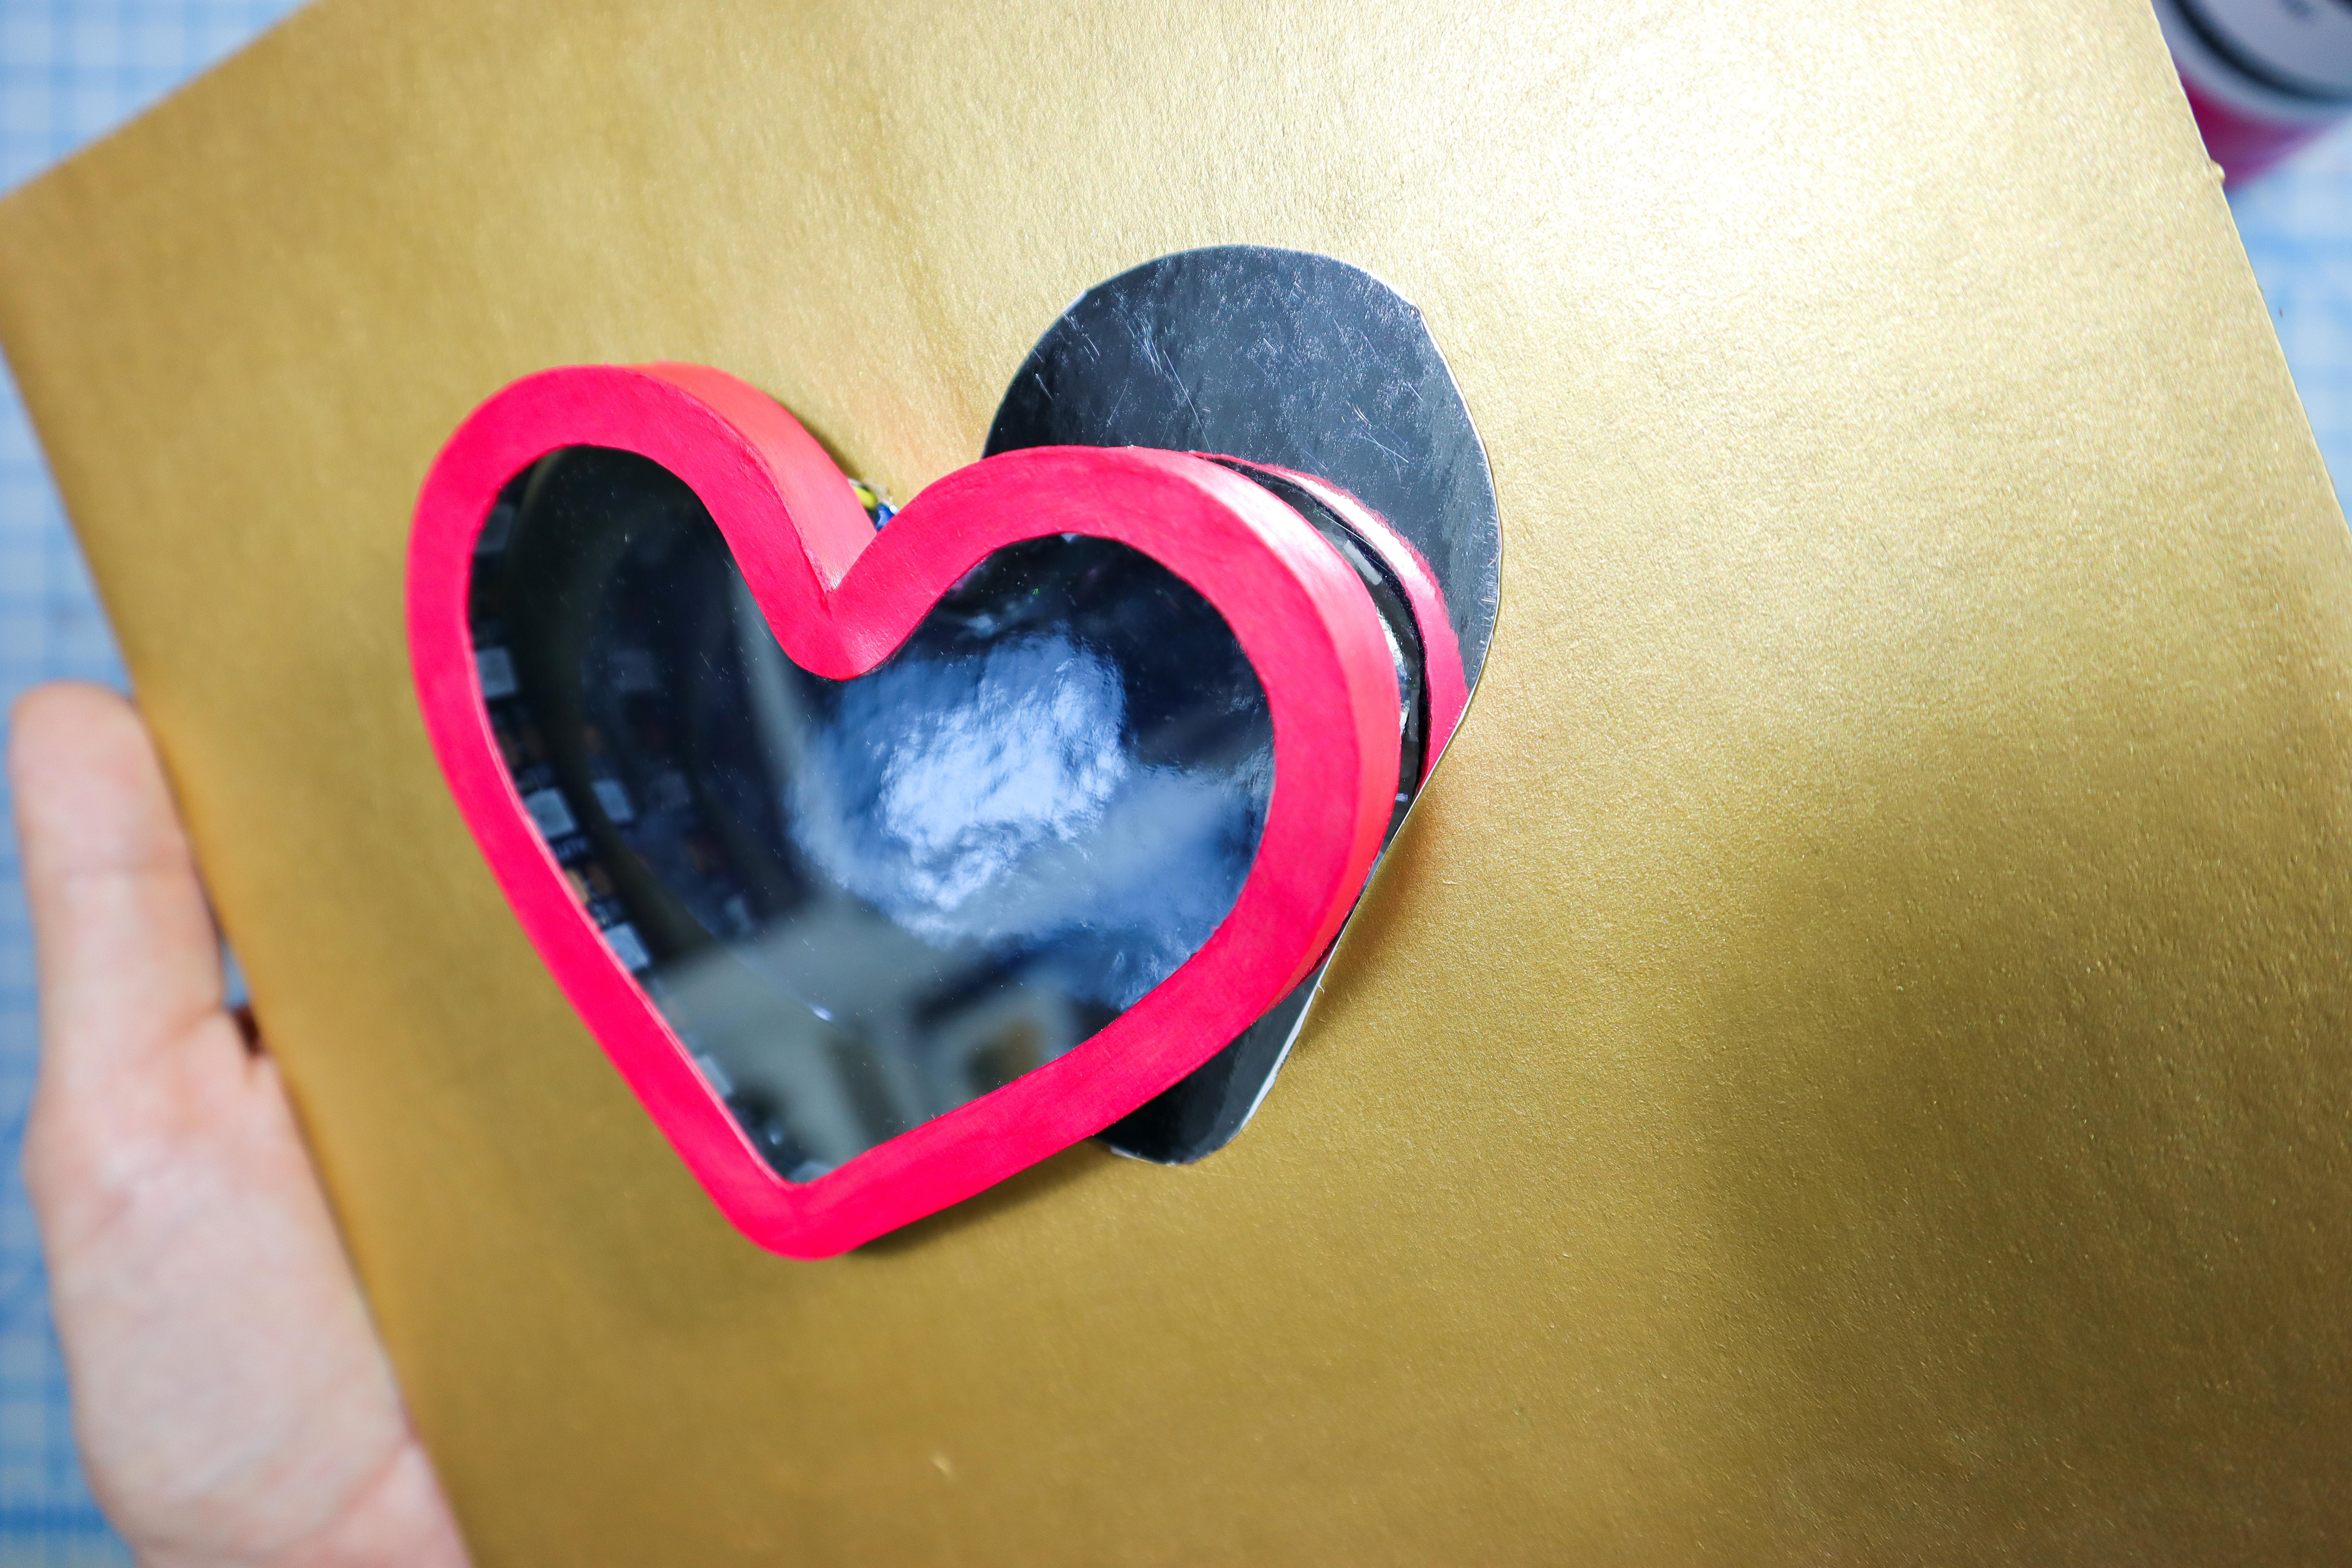
- Make a hole in the cardboard to thread the wires through to the back.
- Then position the heart box over the mirror paper heart and glue it in place. Remove any excess glue from the outside of the heart.
Connect the Circuit
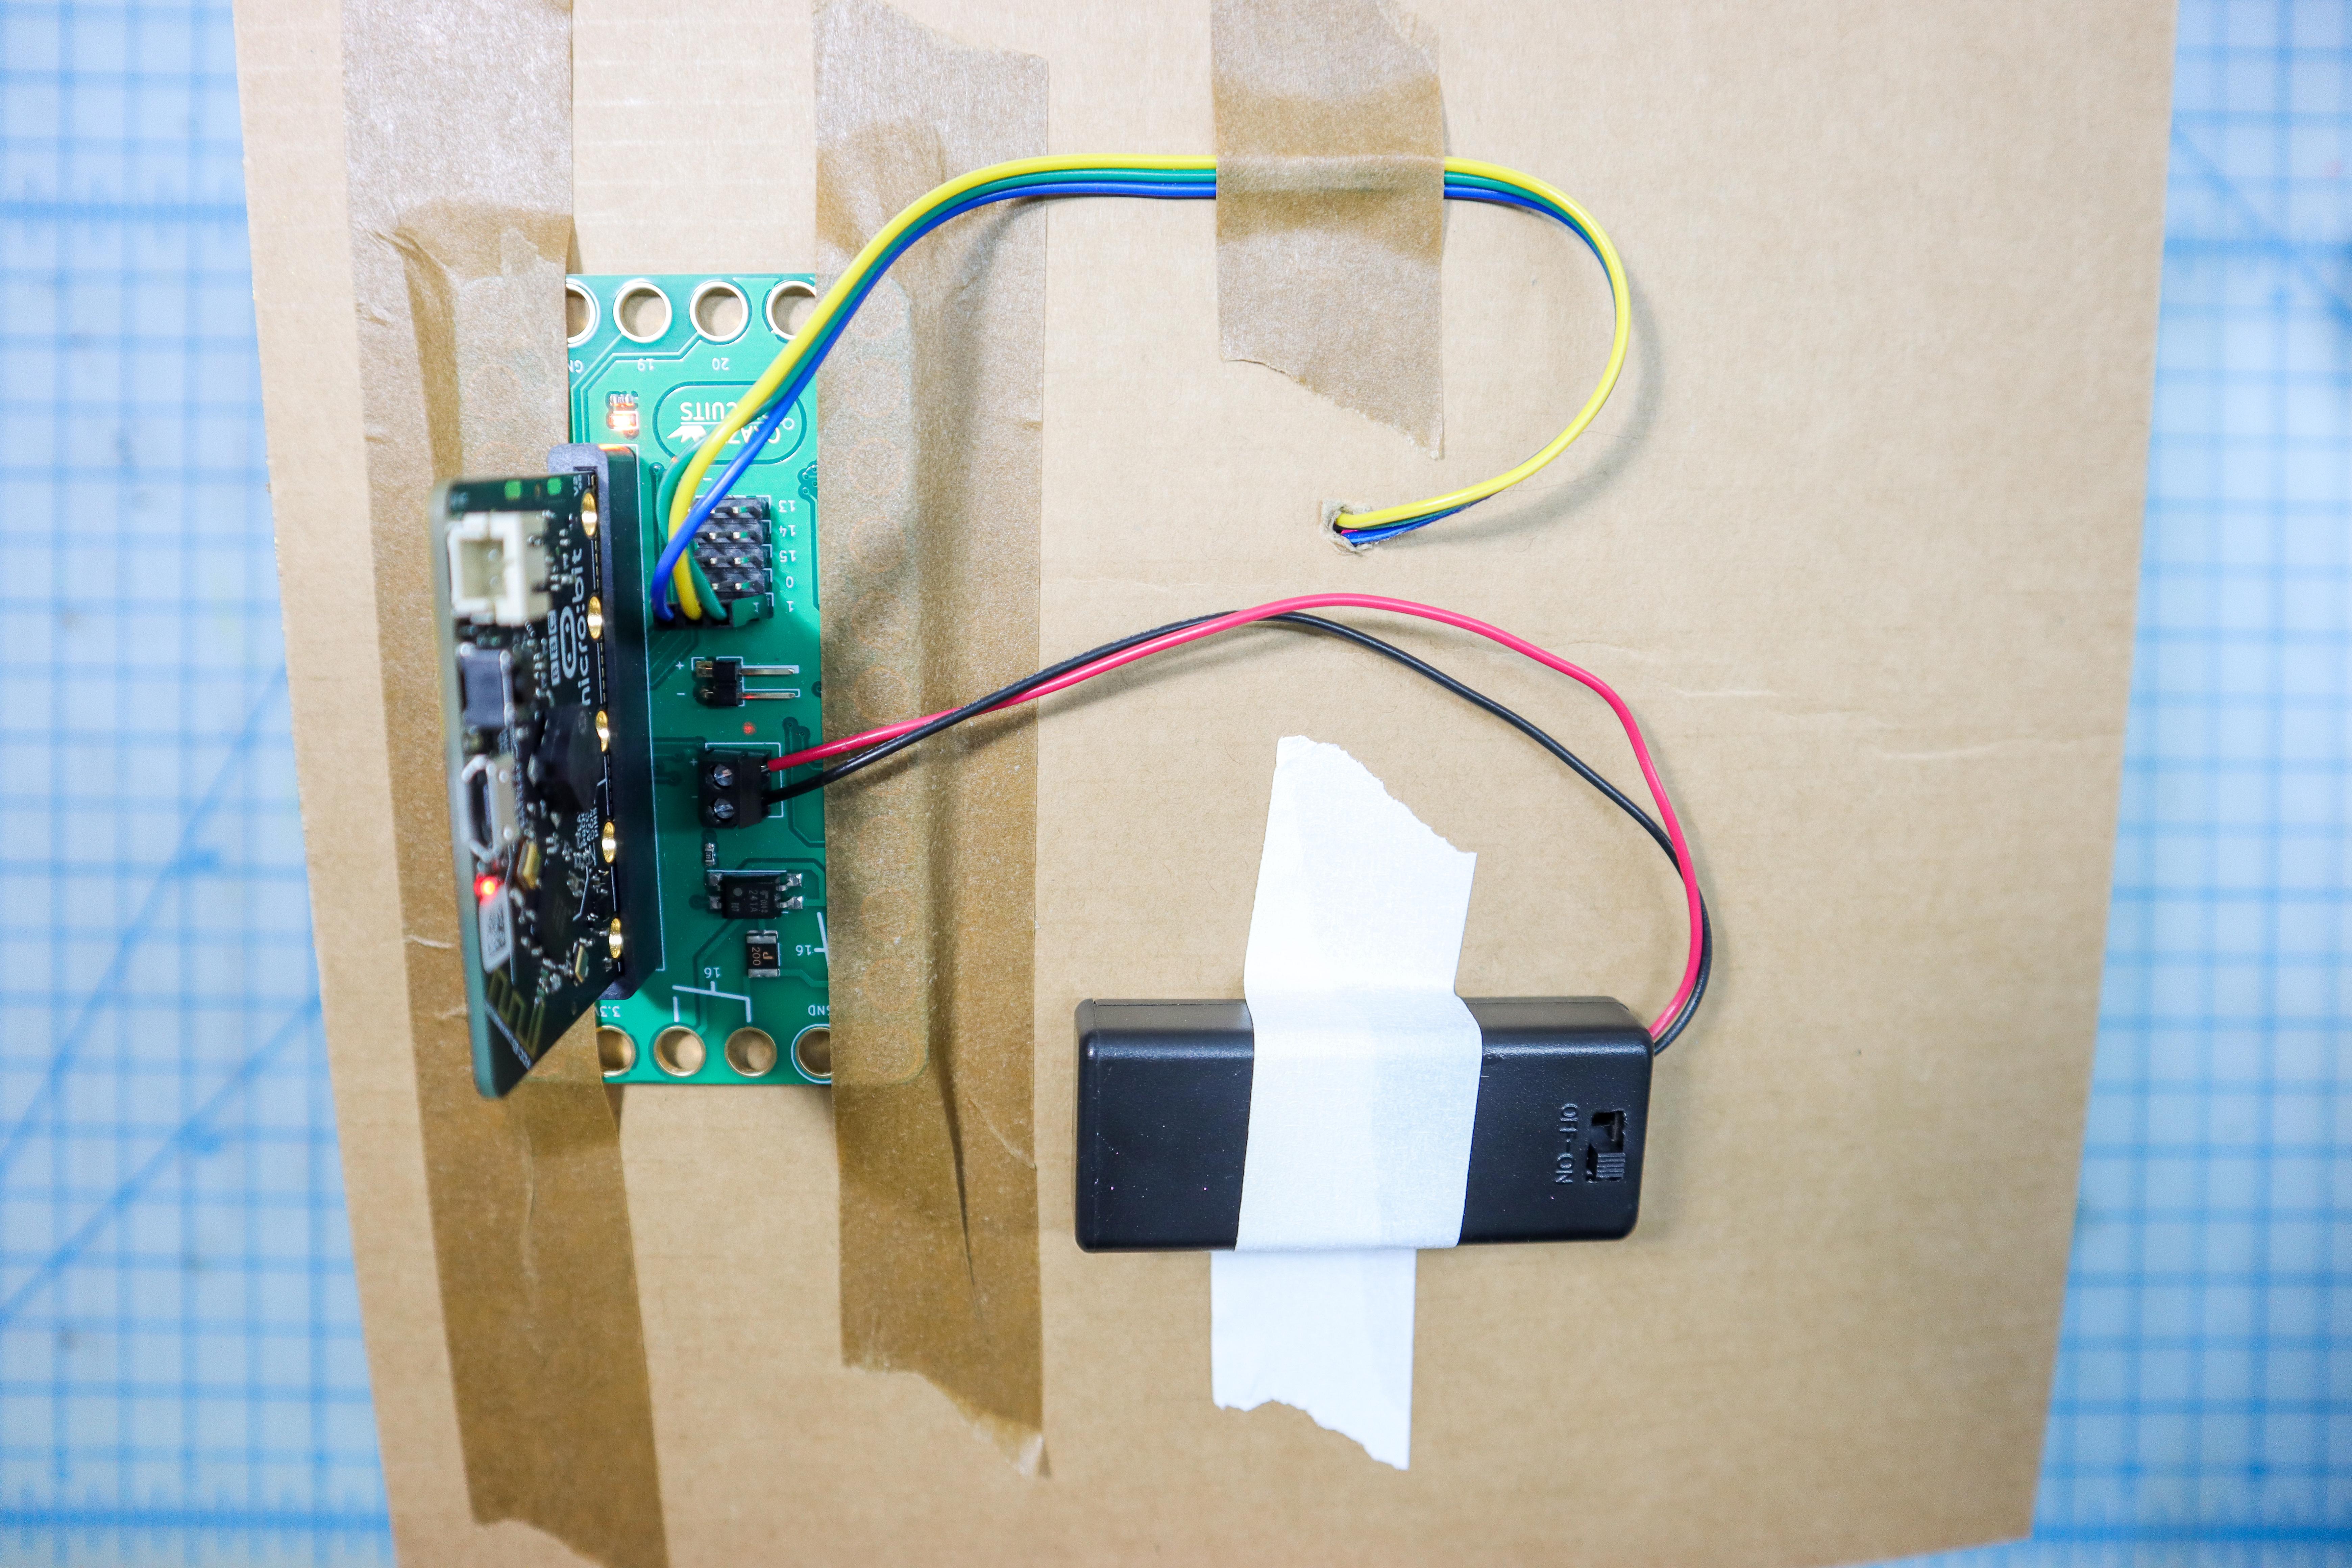
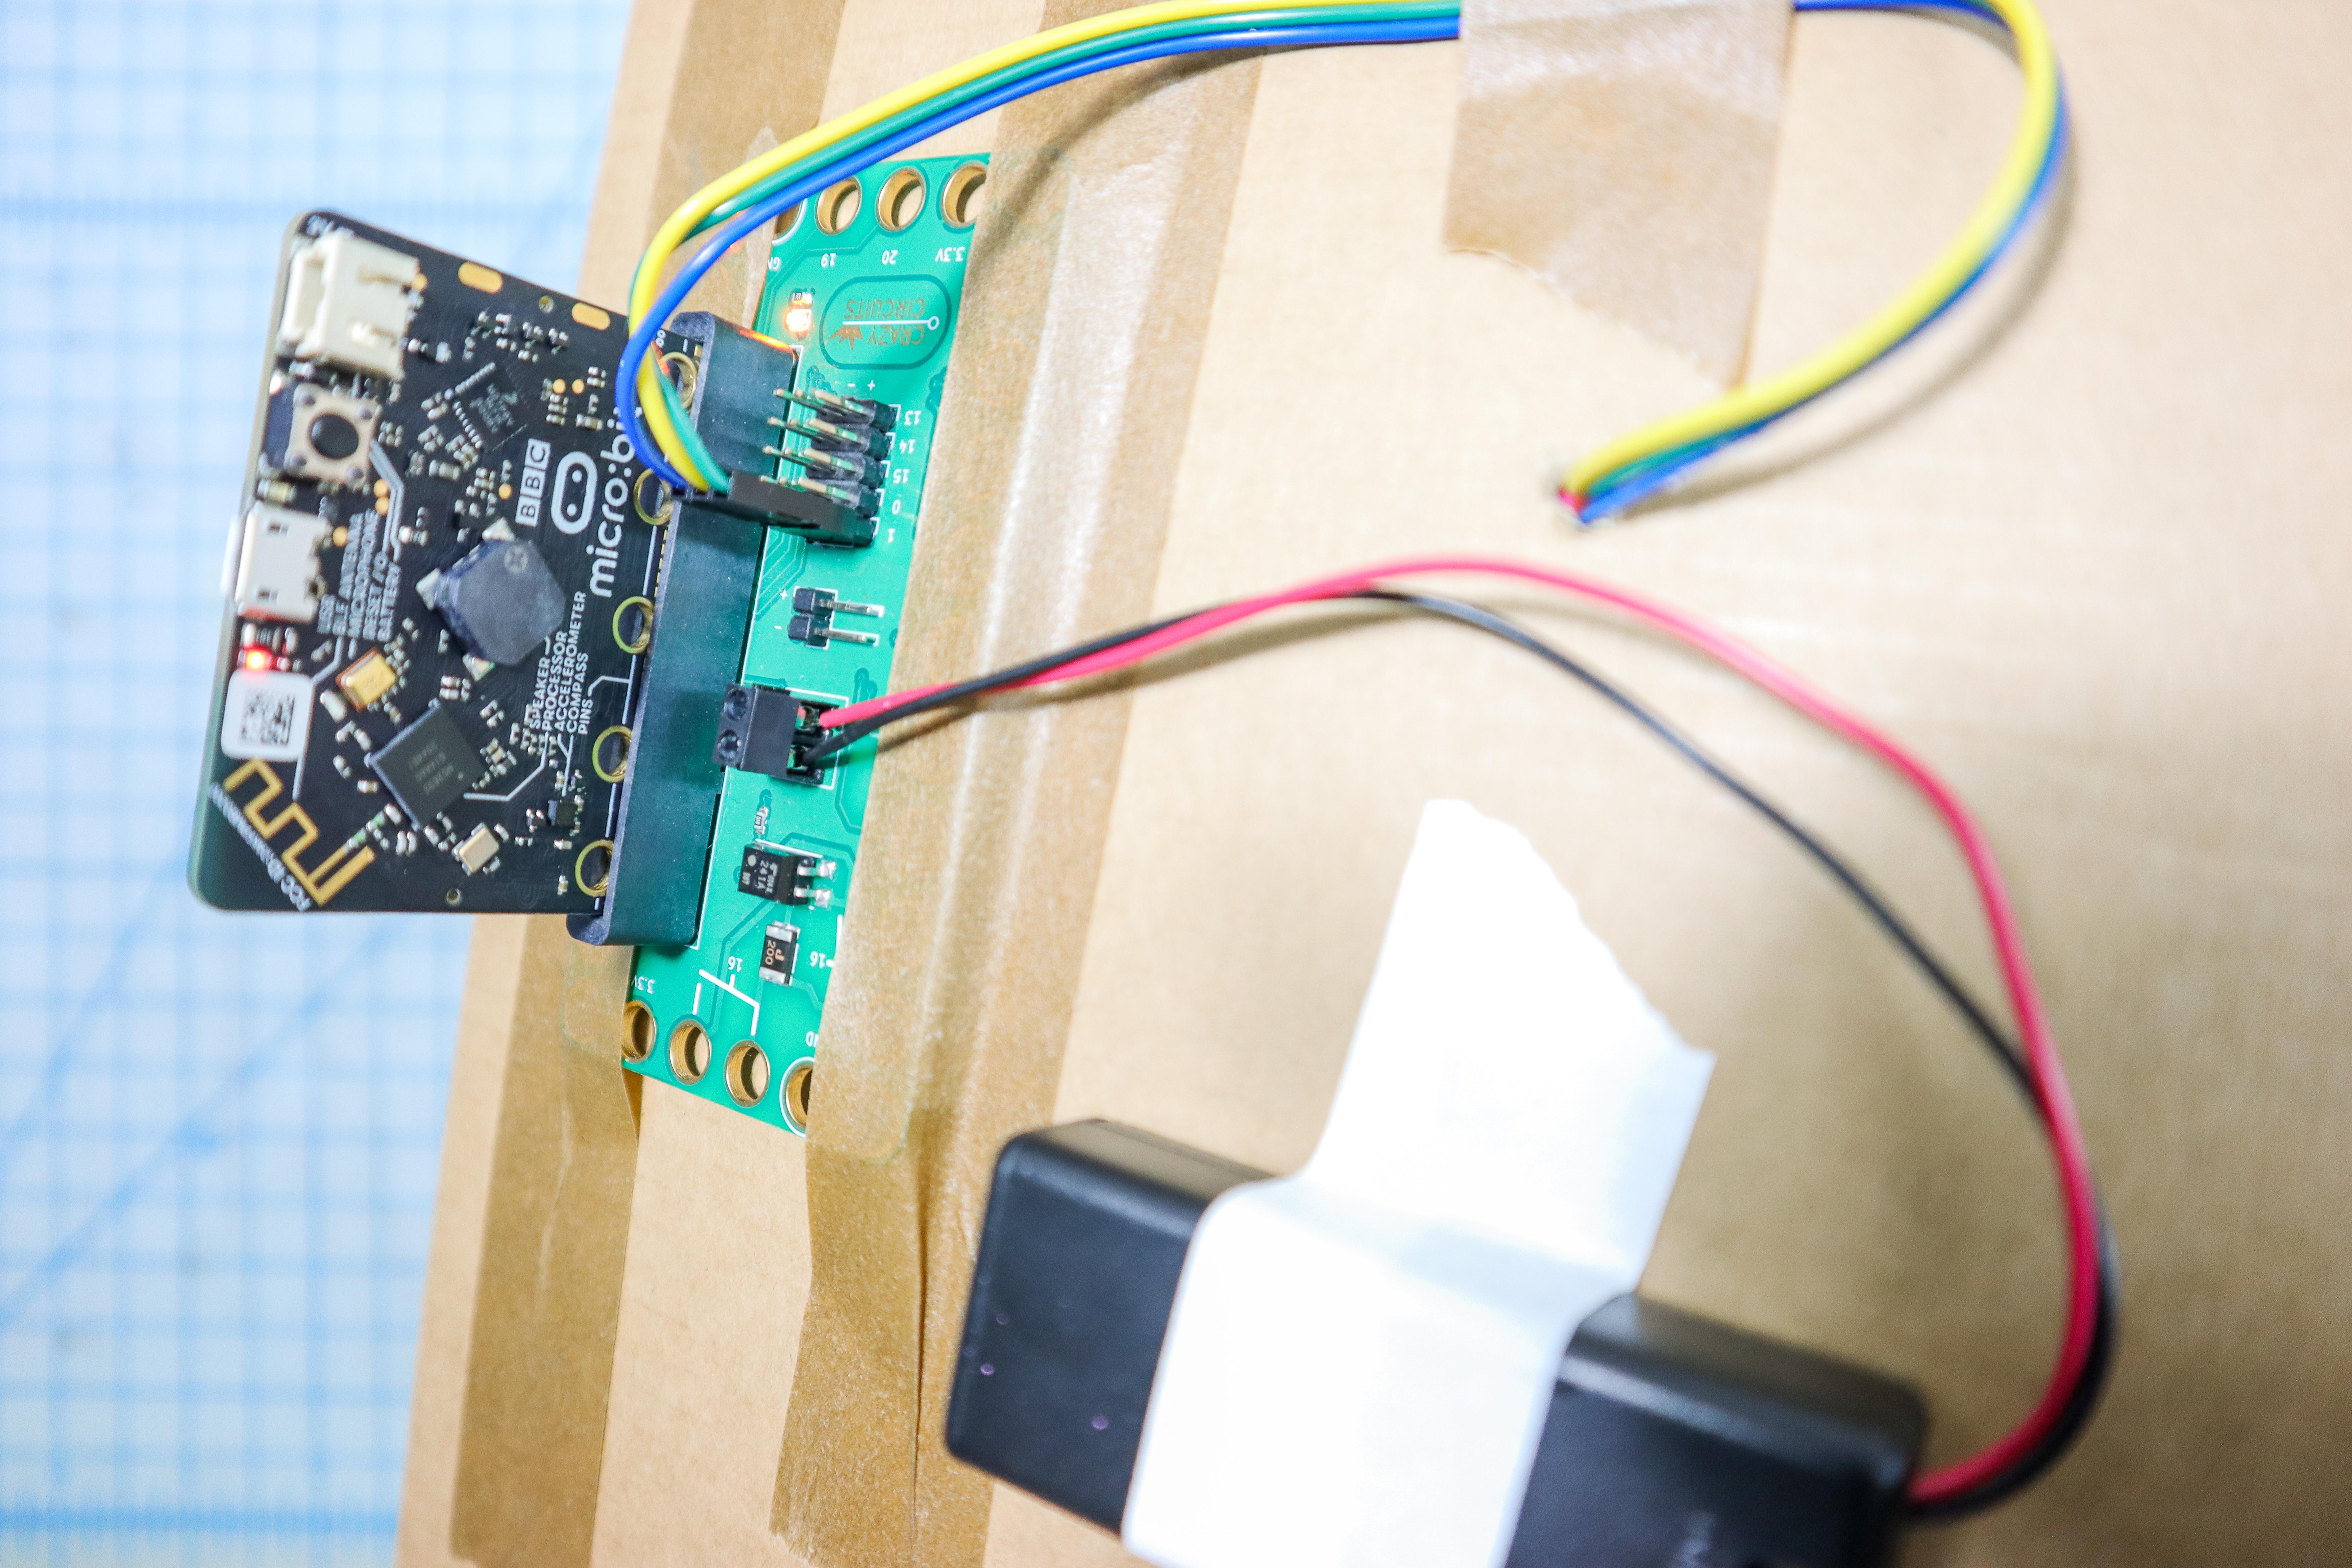
- Tape the Bit Board to the back of the project and insert the micro:bit.
- Connect the DI wire to Pin 1, +5V to + and GND to -.
- Add a battery pack to the power terminals.
Download the Code
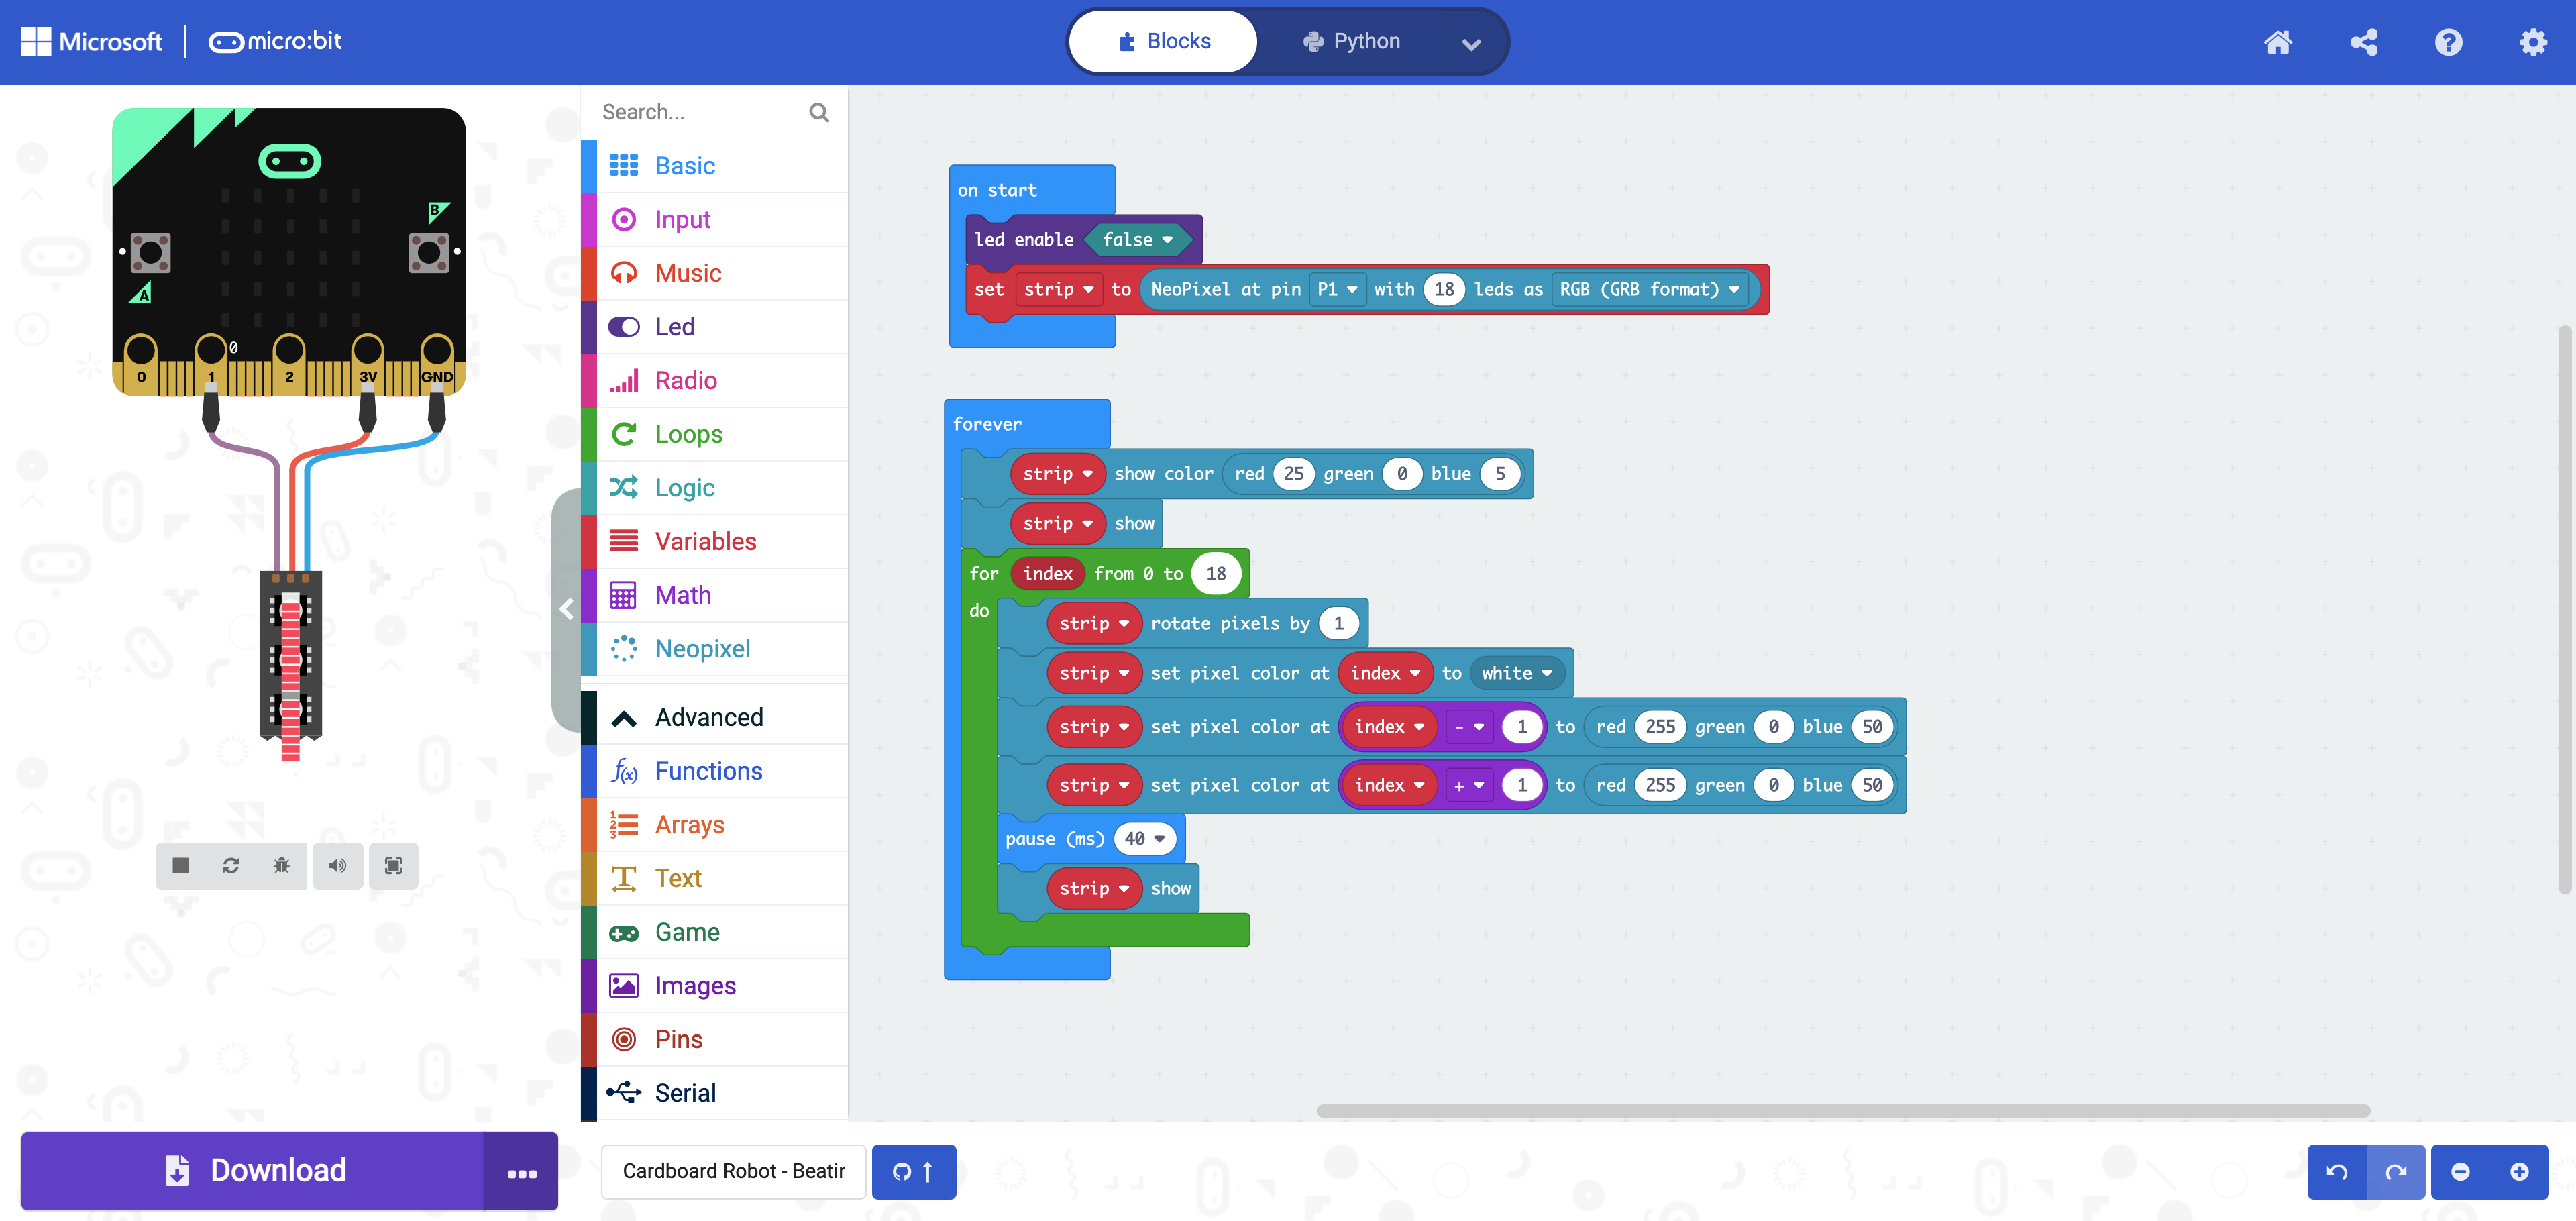
- Download the code, available here.
- This code lights up the heart pink and circulates white lights around. It's really neat how the heart shape appears to "pause" as the white light passes the point of the heart, and therefore it looks like it's beating!
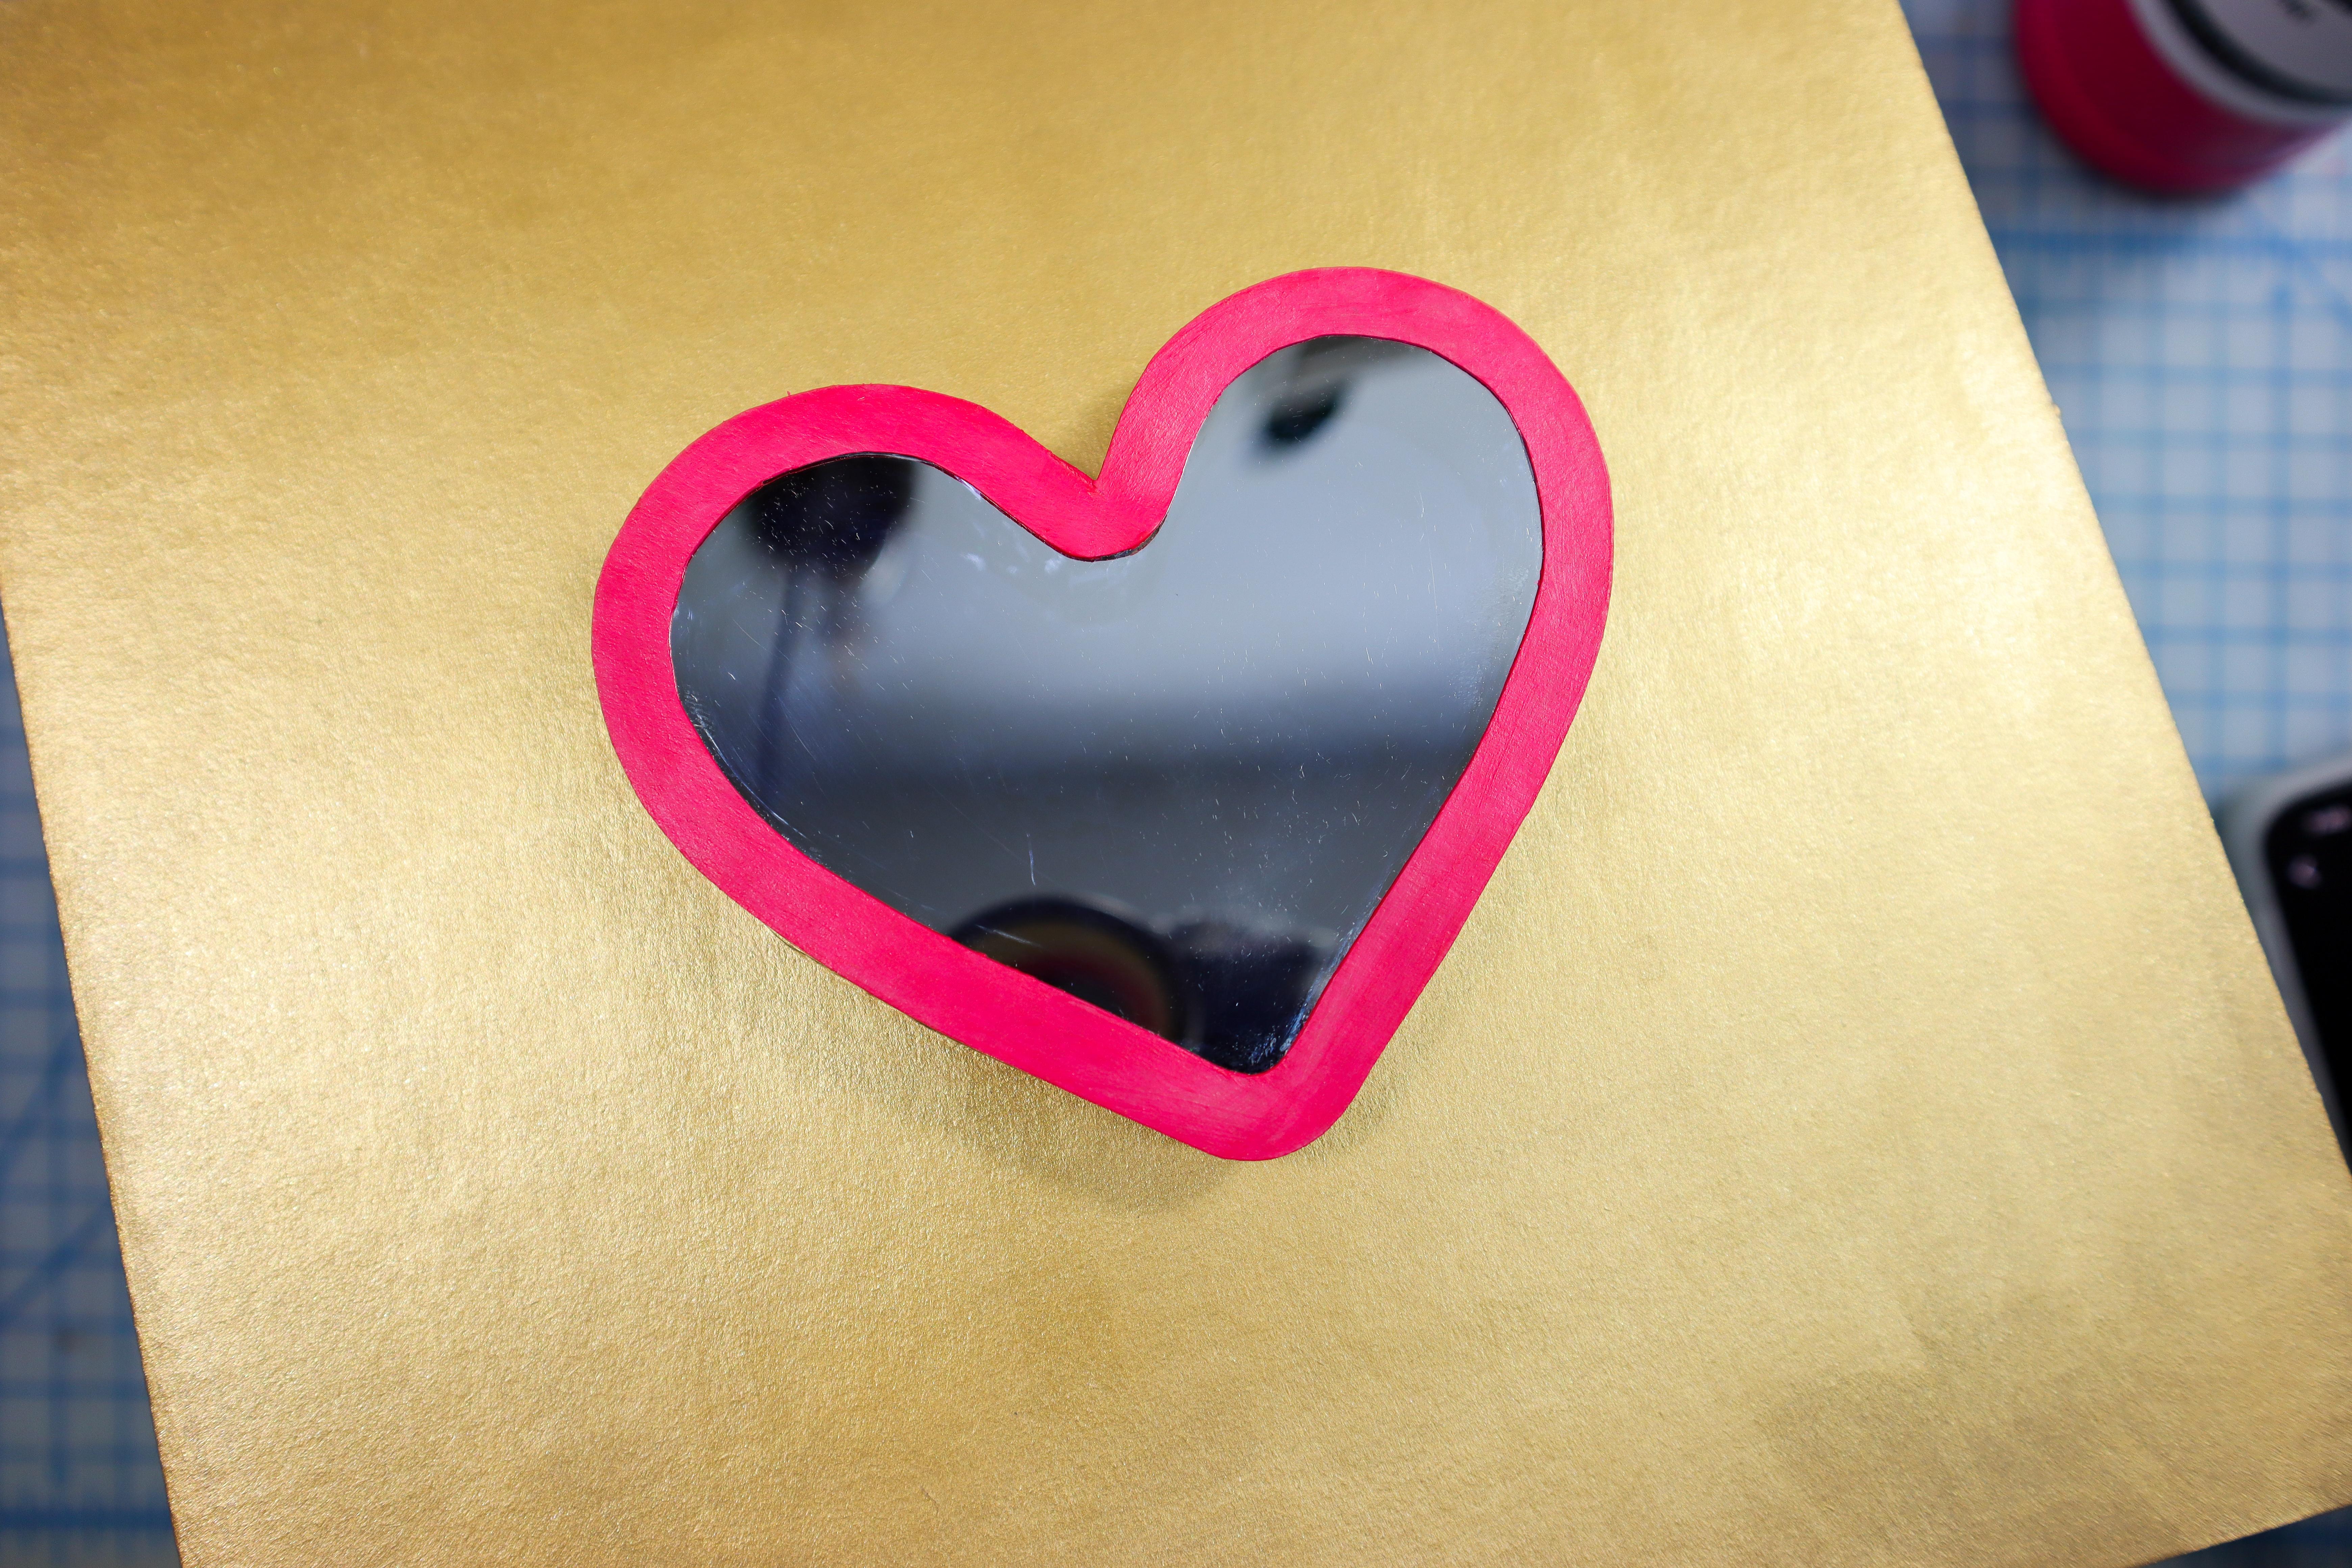
Watch the Heartbeat!
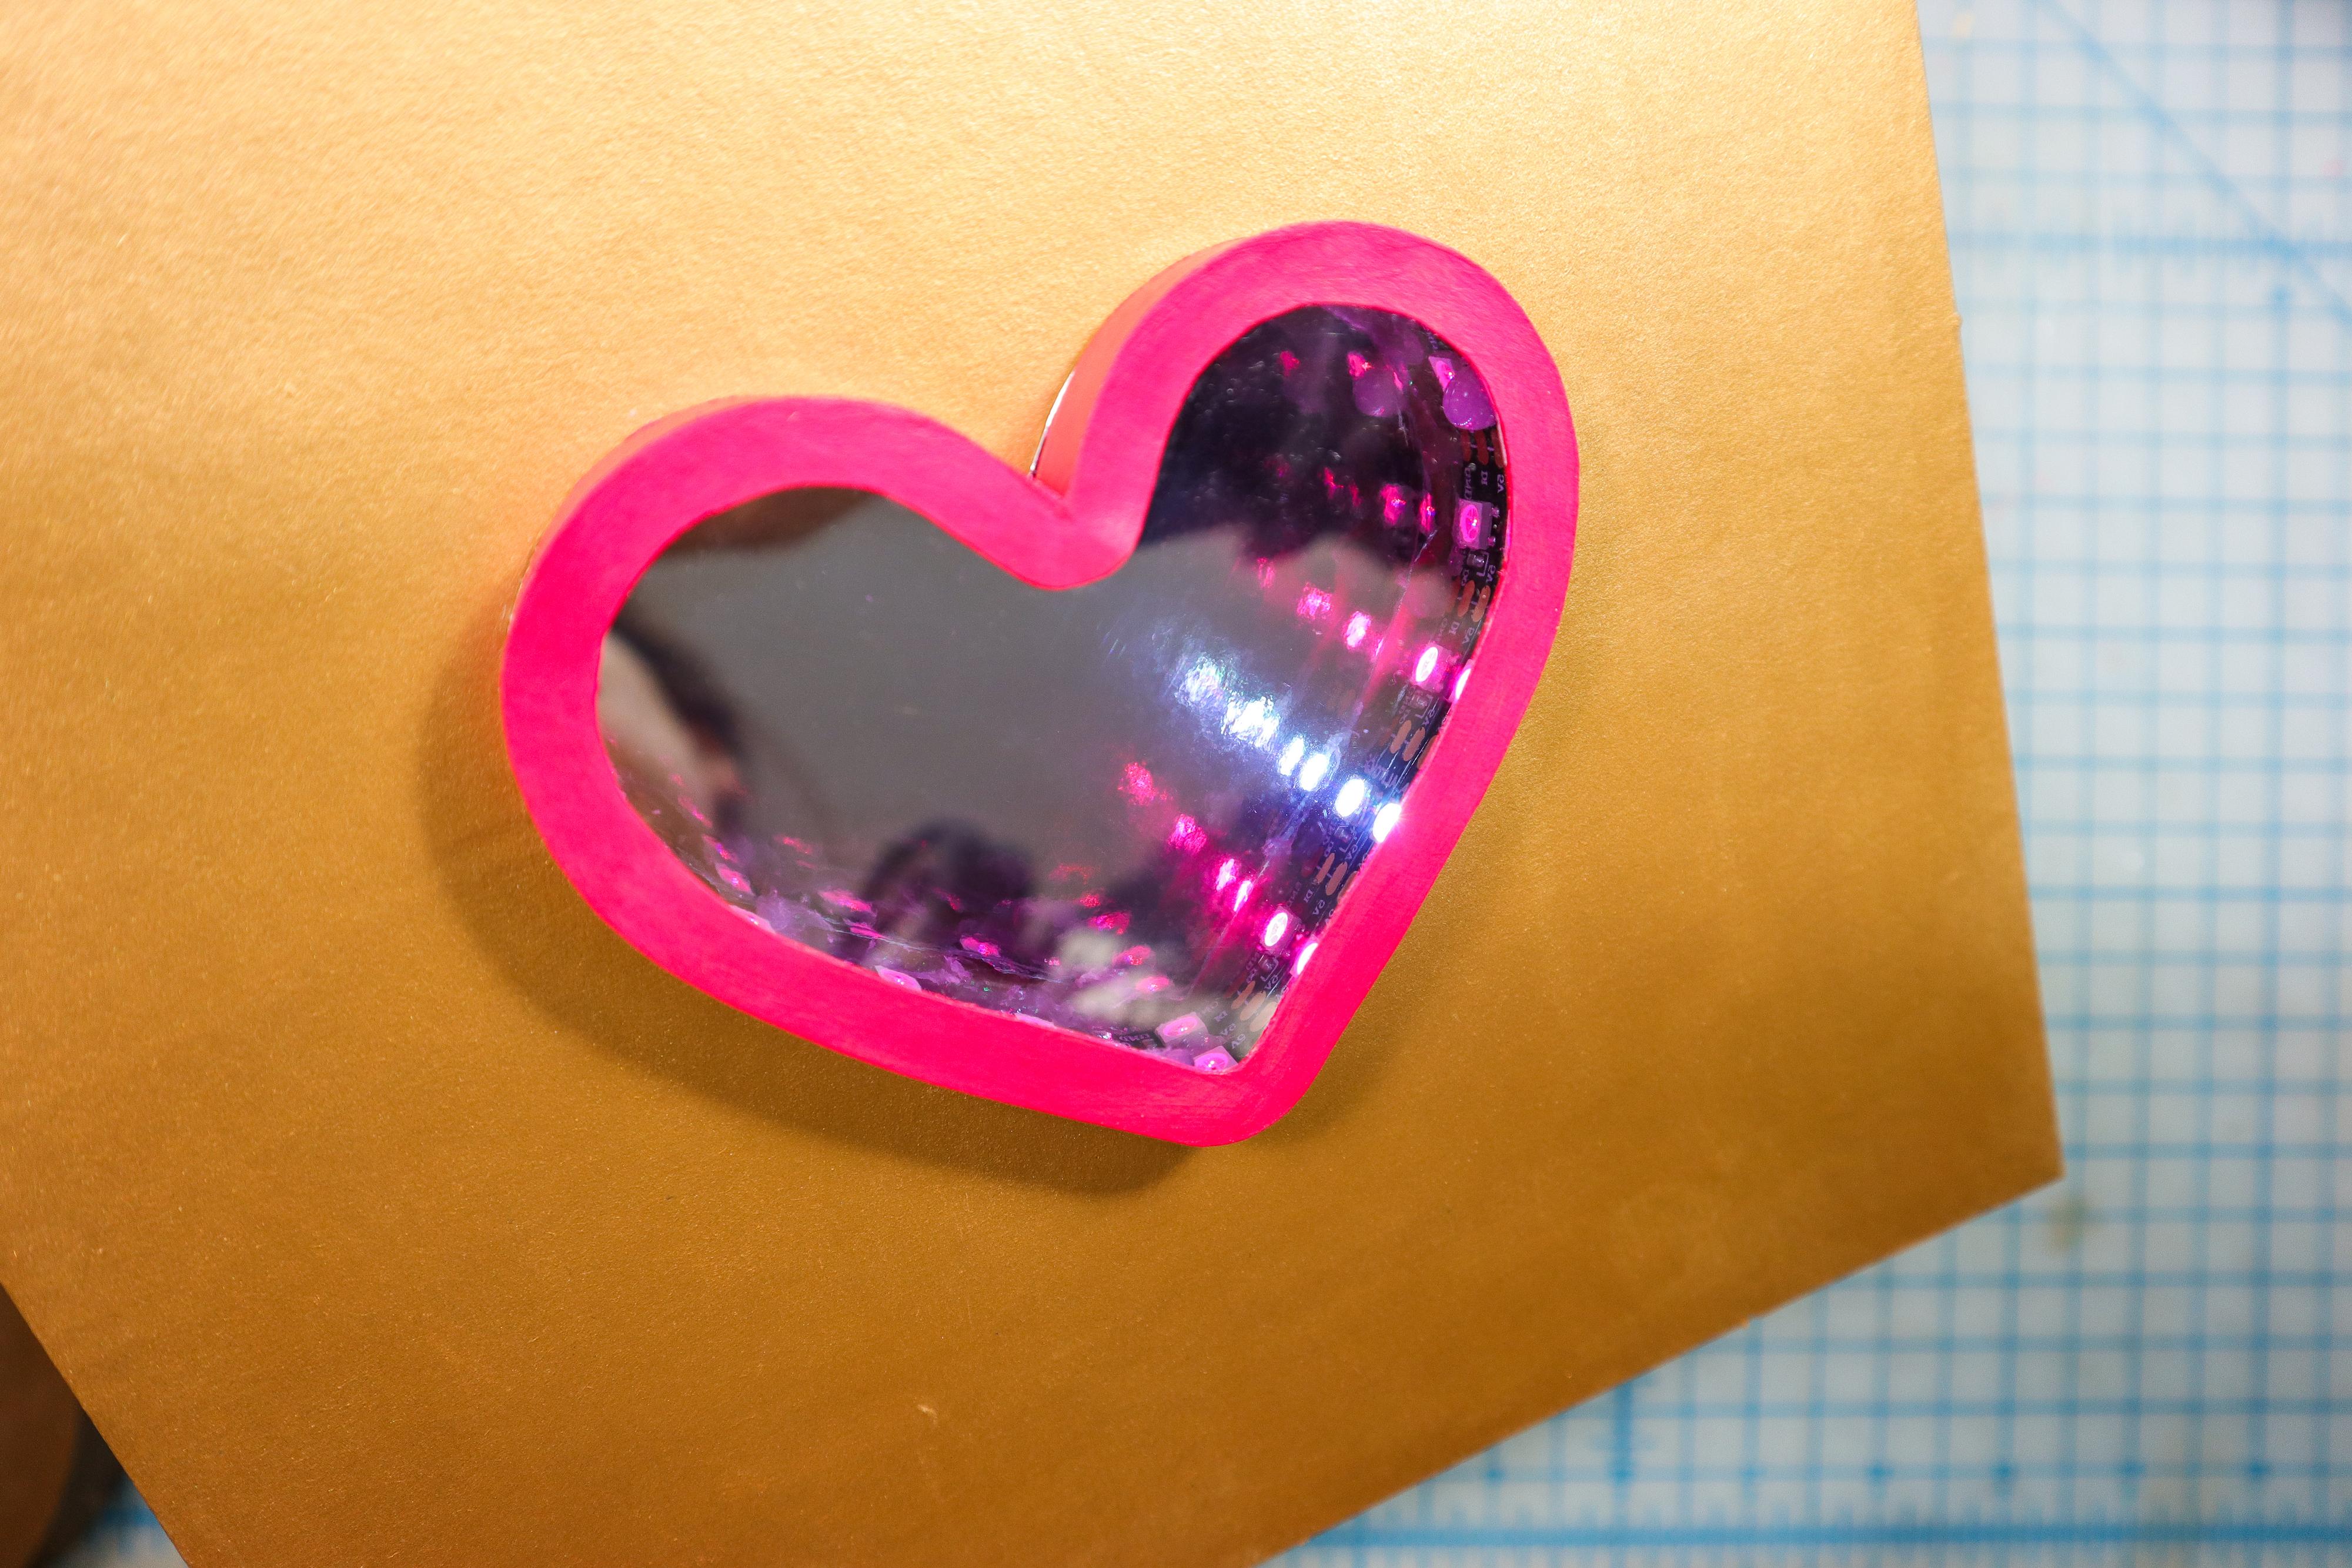

- With the heart "beating" with the spinning white light, the 3D effect will make it look infinite!
- What can you add to the code to create your own look?
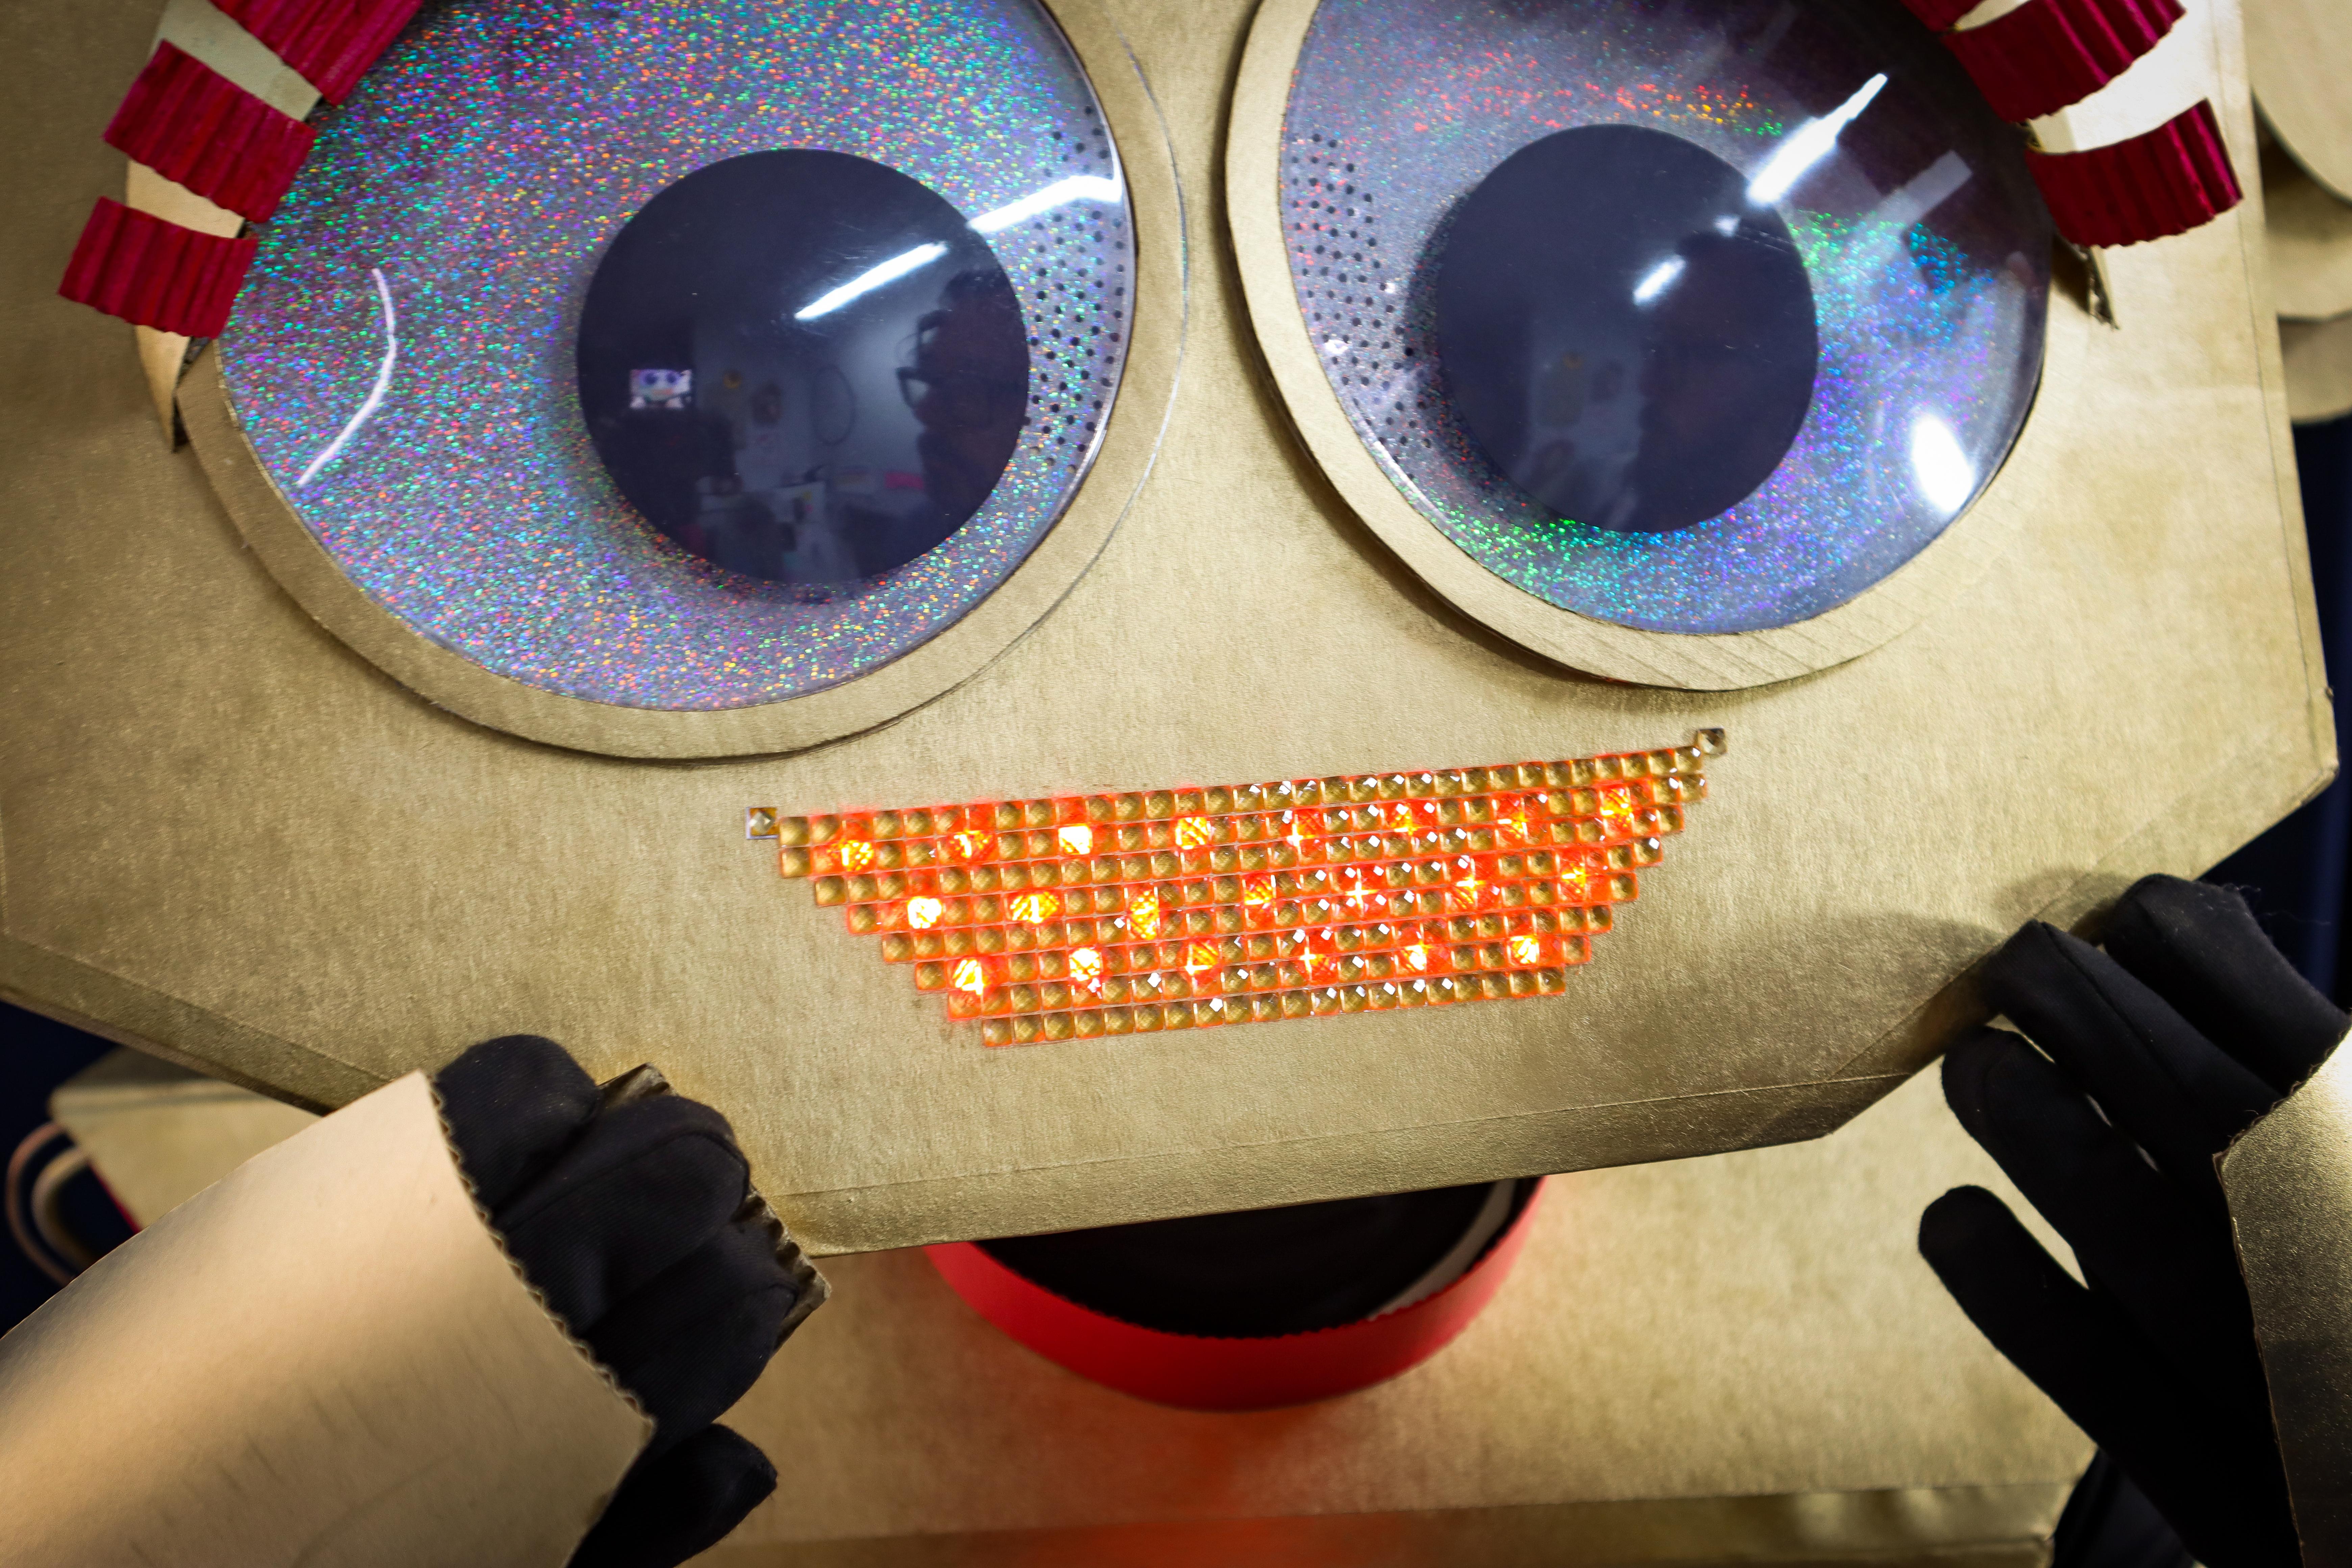
ROBOT FEATURE #3: ROBOTIC GOOGLY EYES
Googly eyes are the best - but we made them better by being able to control them!
✨
Make googly eyes that are controllable by simple servo motors. This is an easy project and a great introduction to micro:bit -- with a big impact!
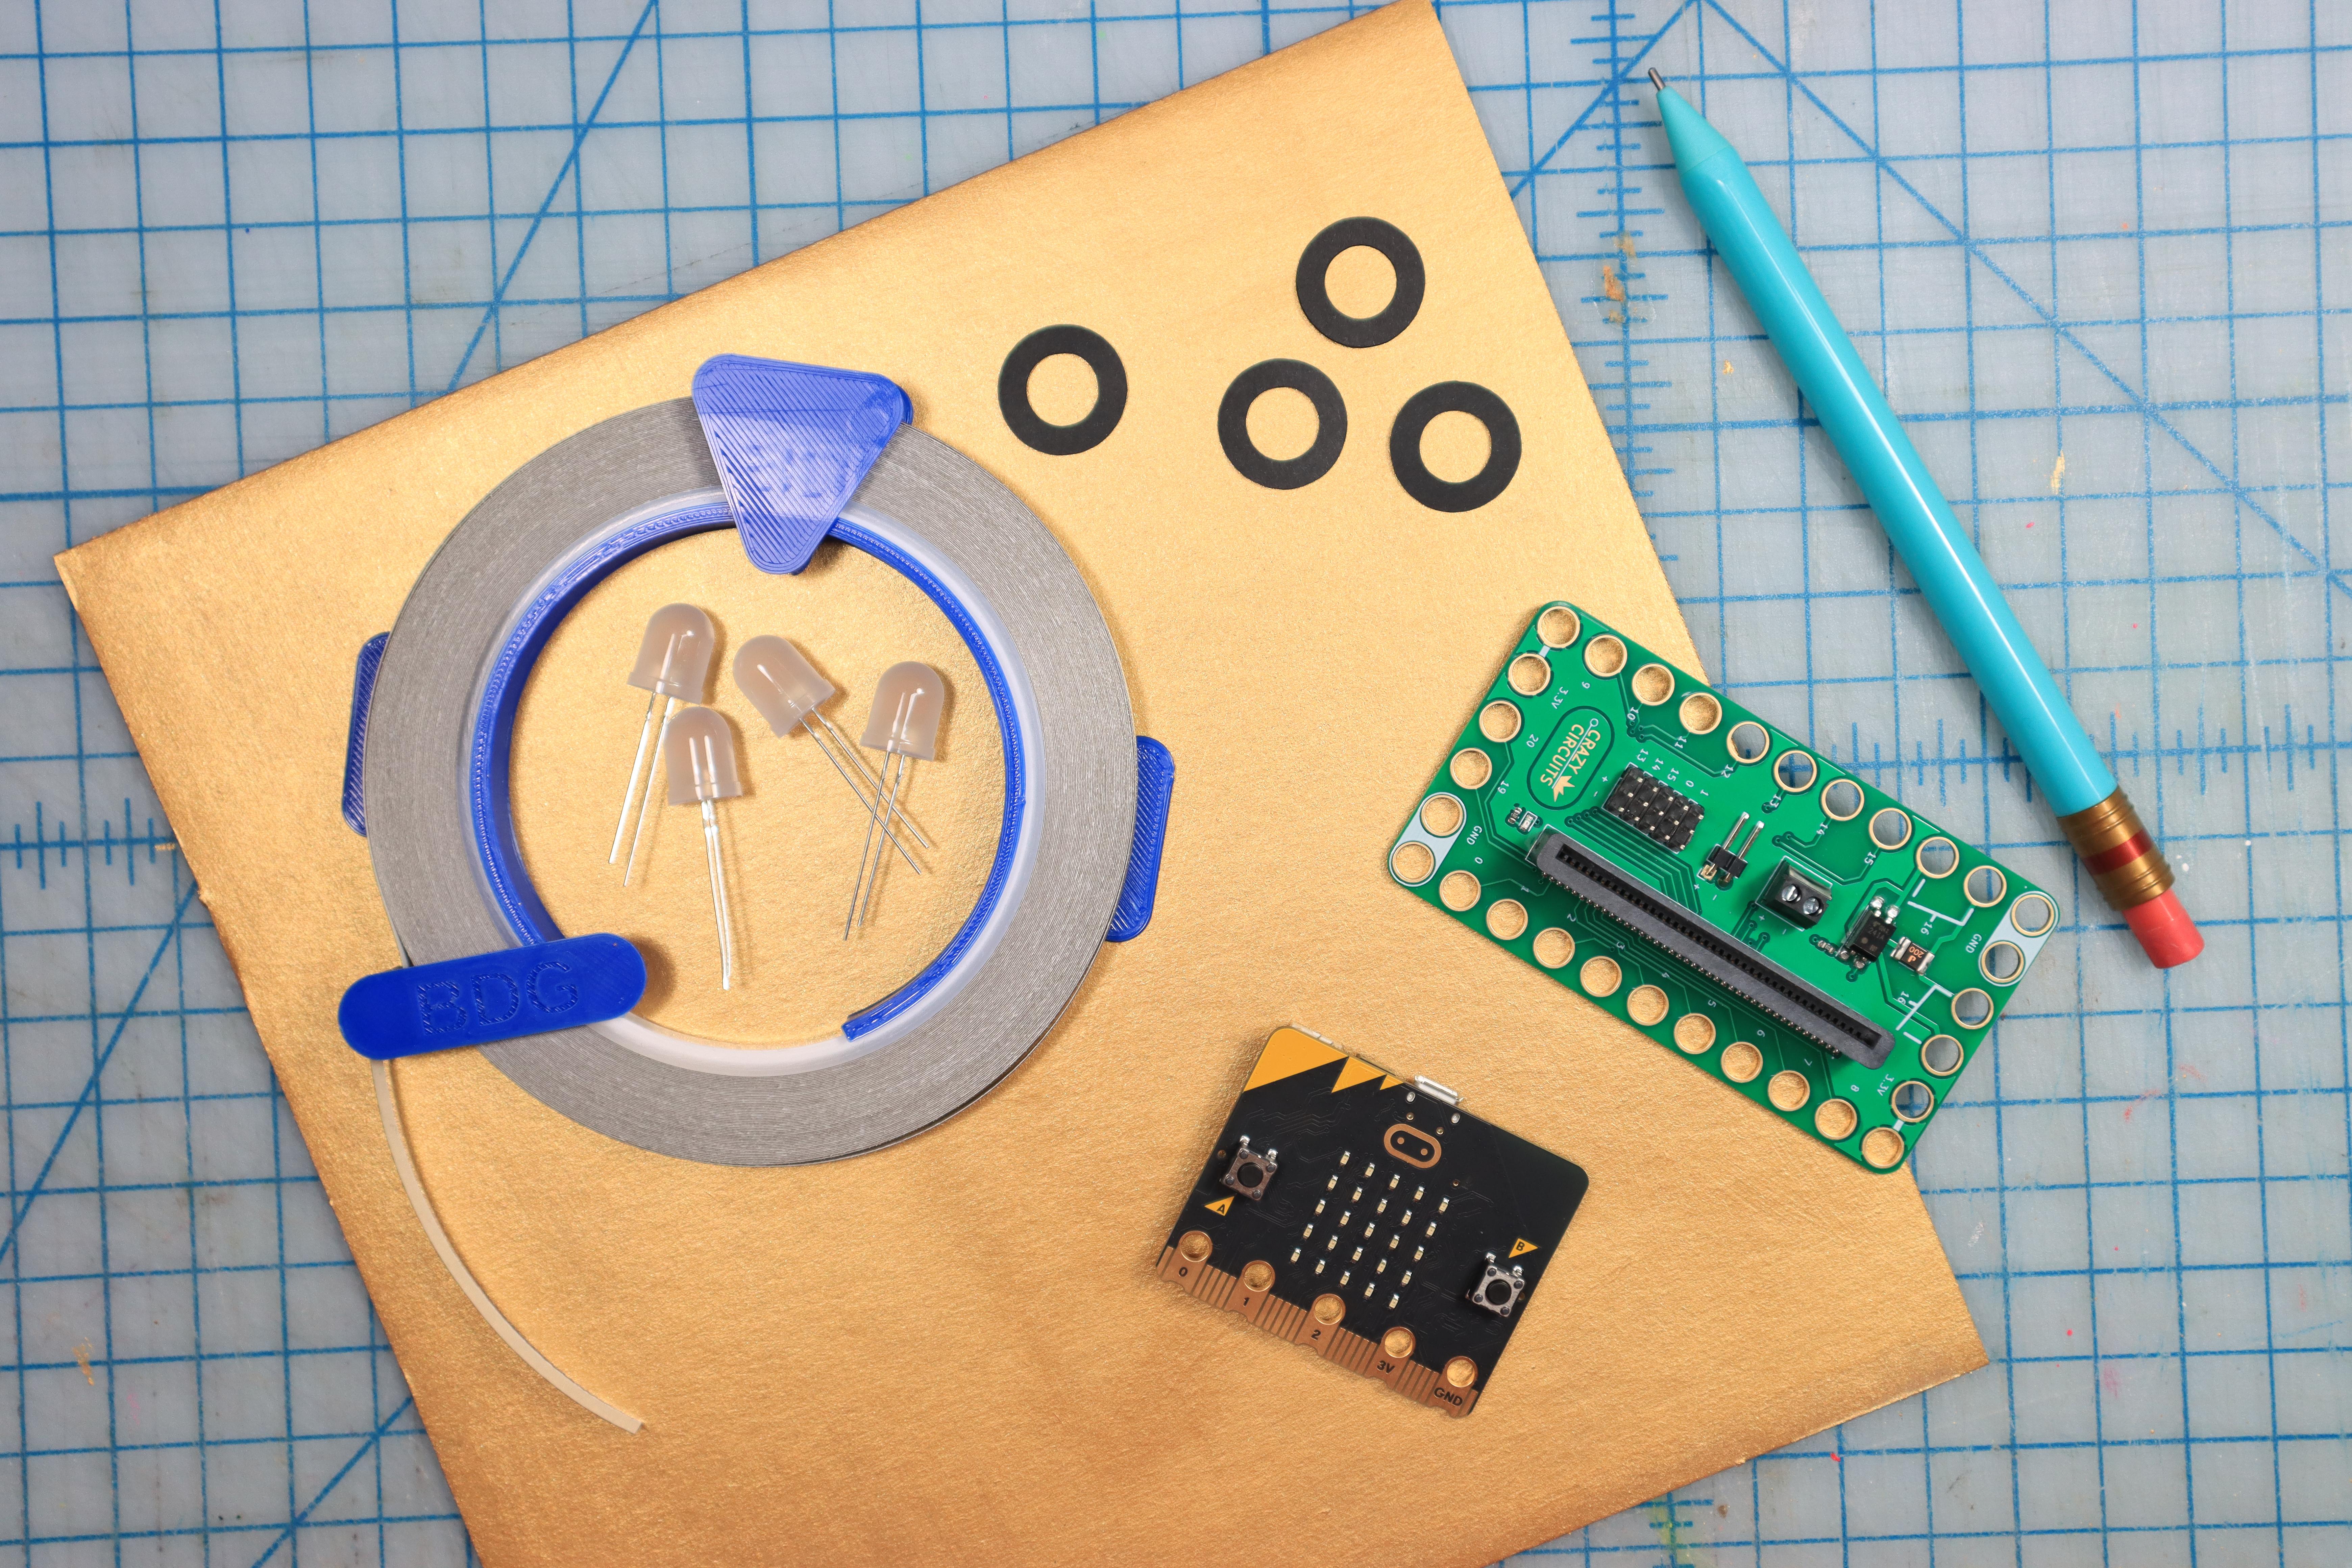
Supplies:
micro:bit, Crazy Circuits Bit Board, LEGO Compatible 270 Degree Servo (x2), Extra-Large Googly Eyes, 2 AAA Battery Holder, Cardboard, Glitter Cardstock, Cardstock, Acrylic Paint
Gather Supplies
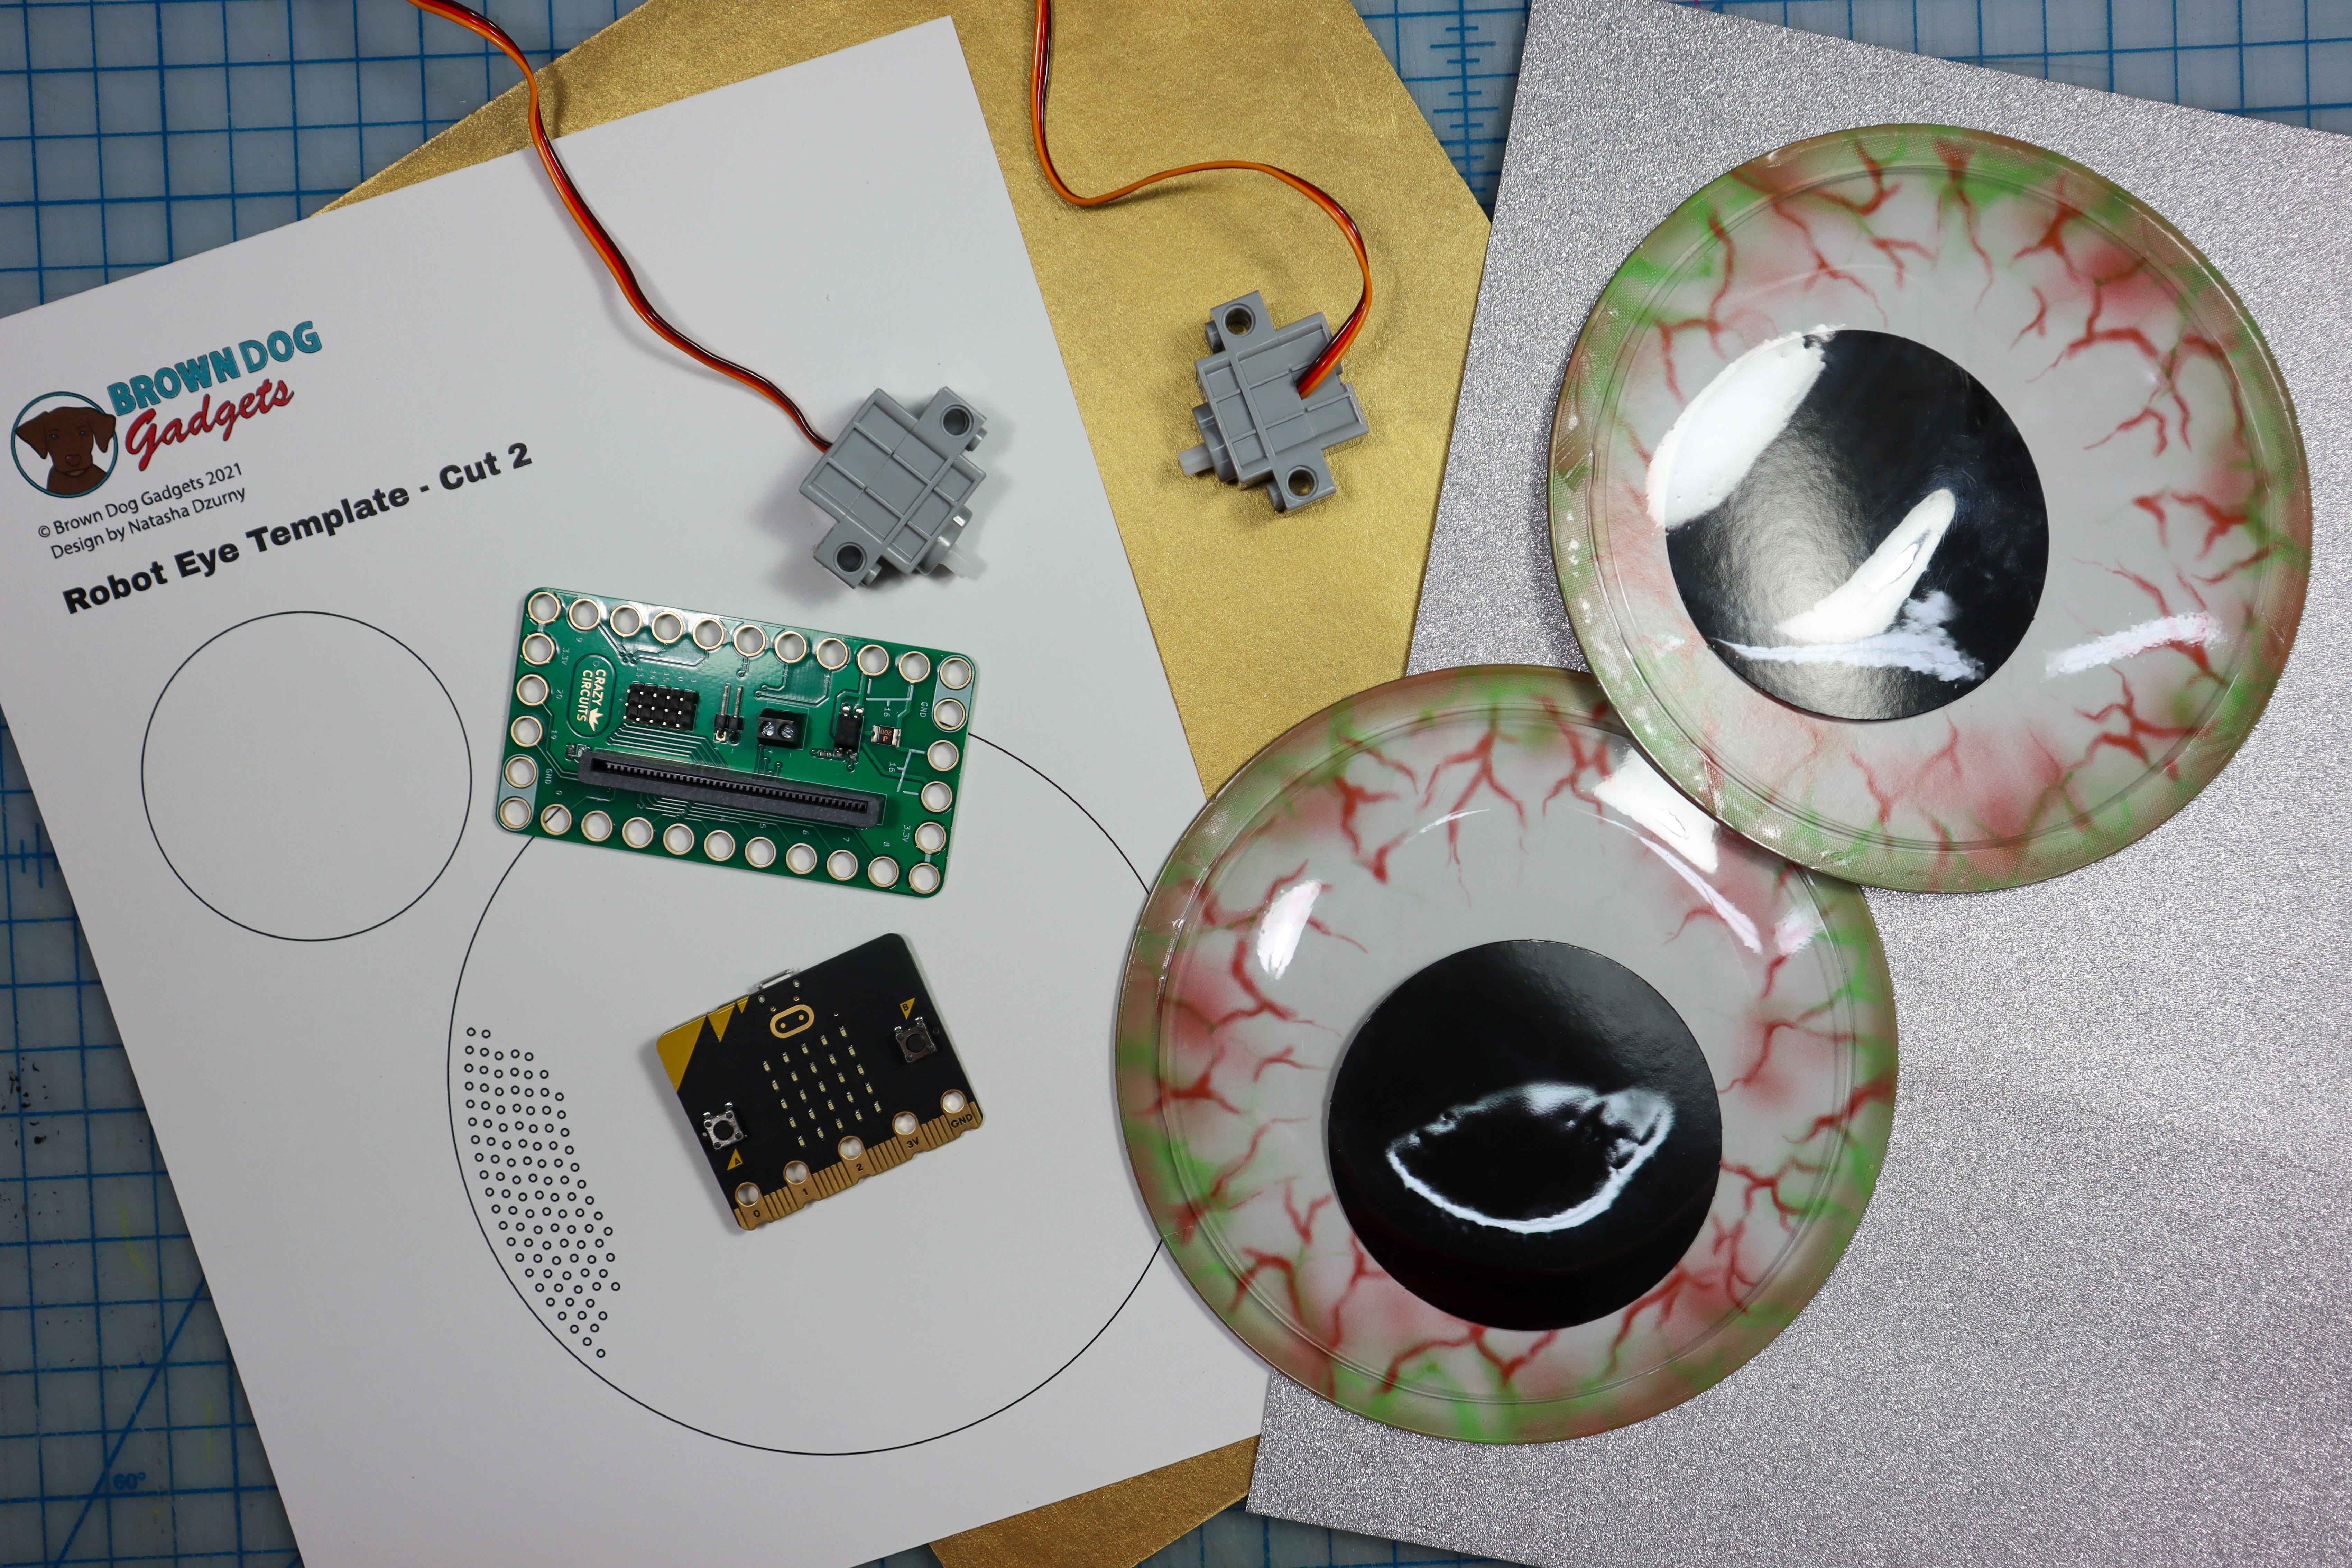
- Download and print the template
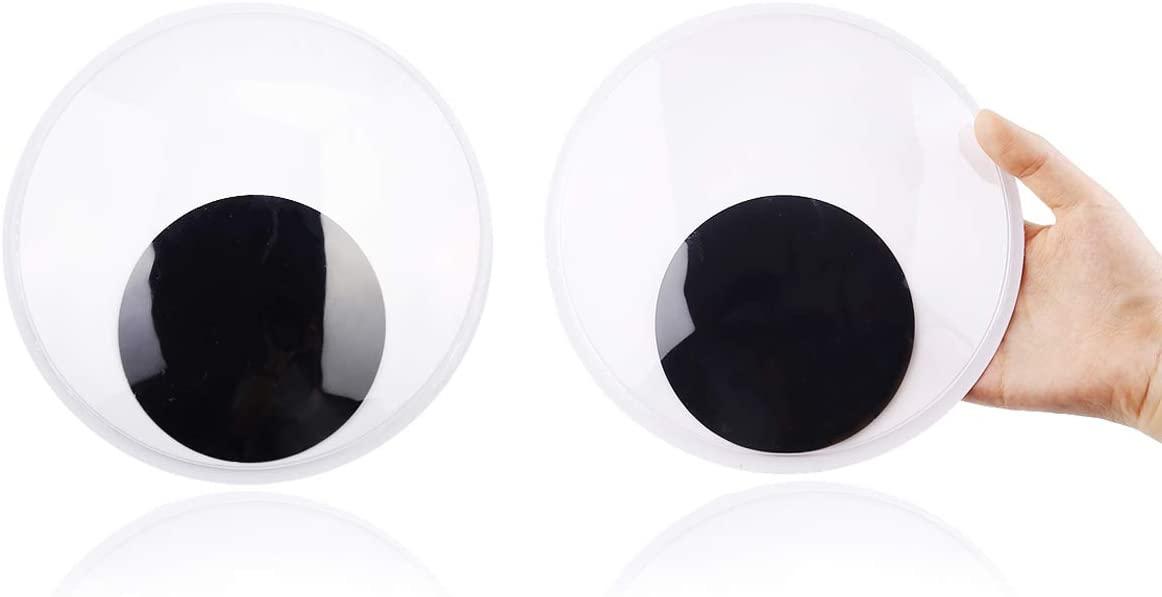
- You will need a pair of extra-large googly eyes. If the size of your eyes is different from the template, enlarge or reduce the size of the large circle to match
Downloads
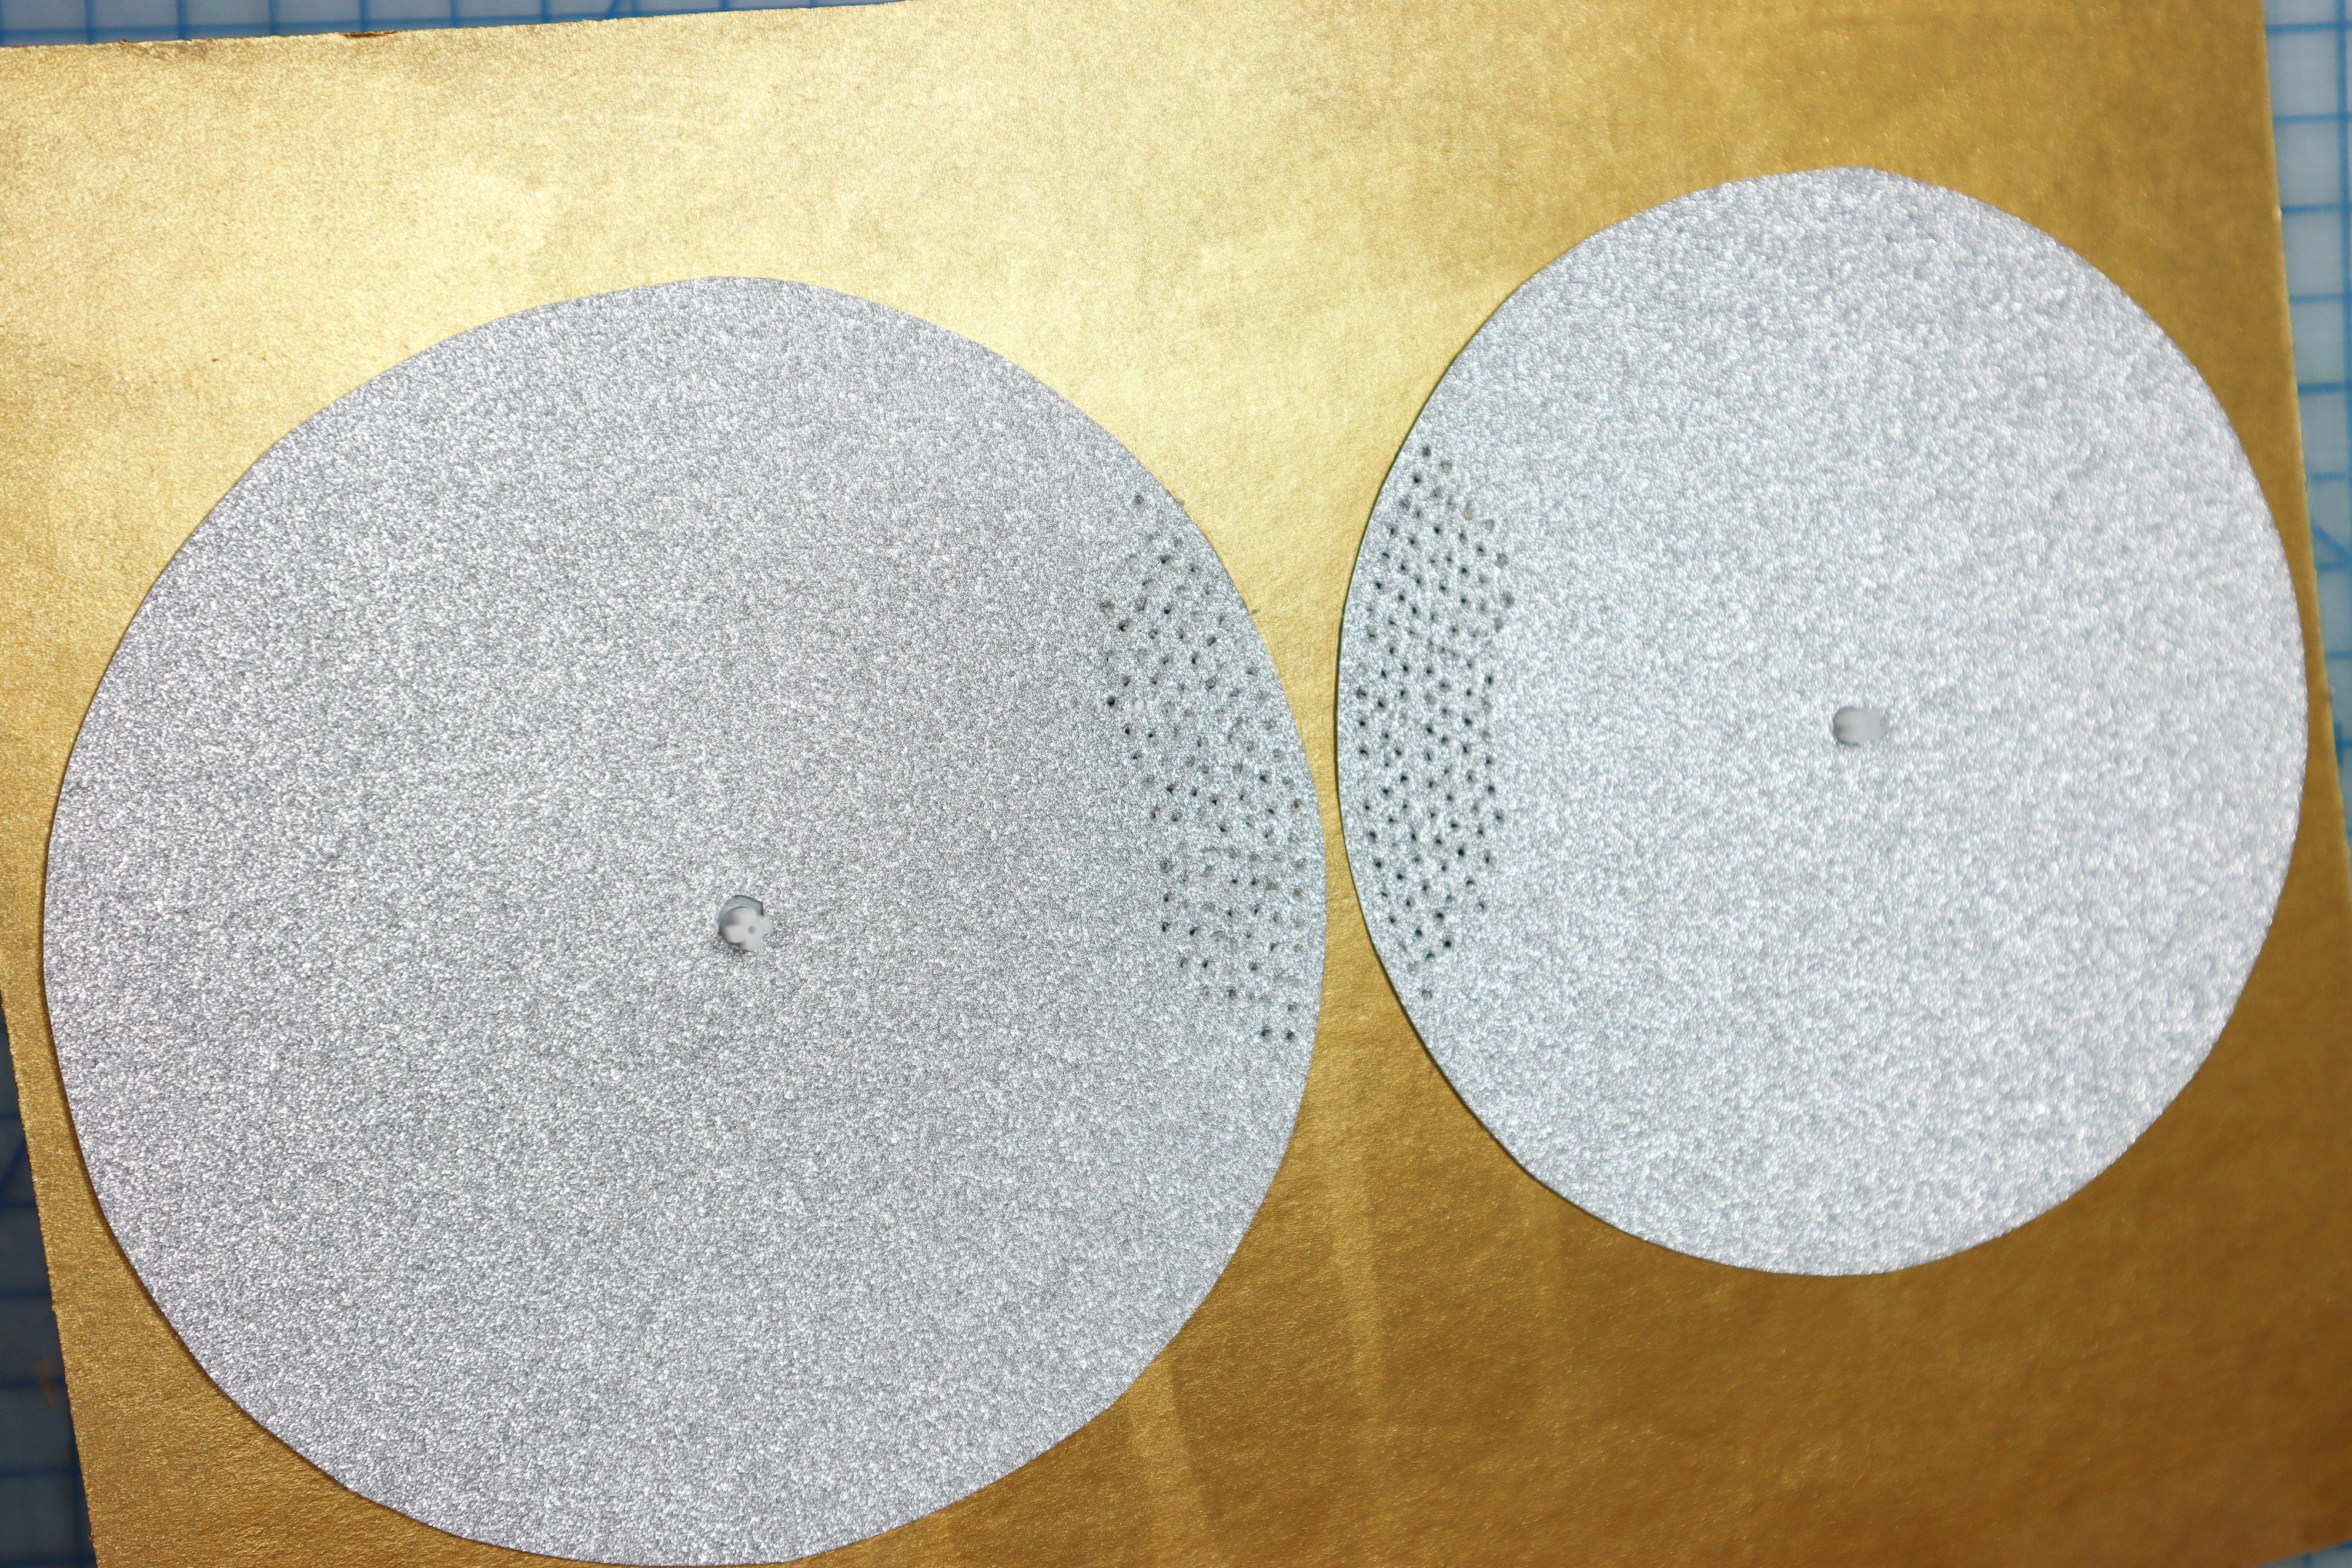
Cut Out the Large Circles
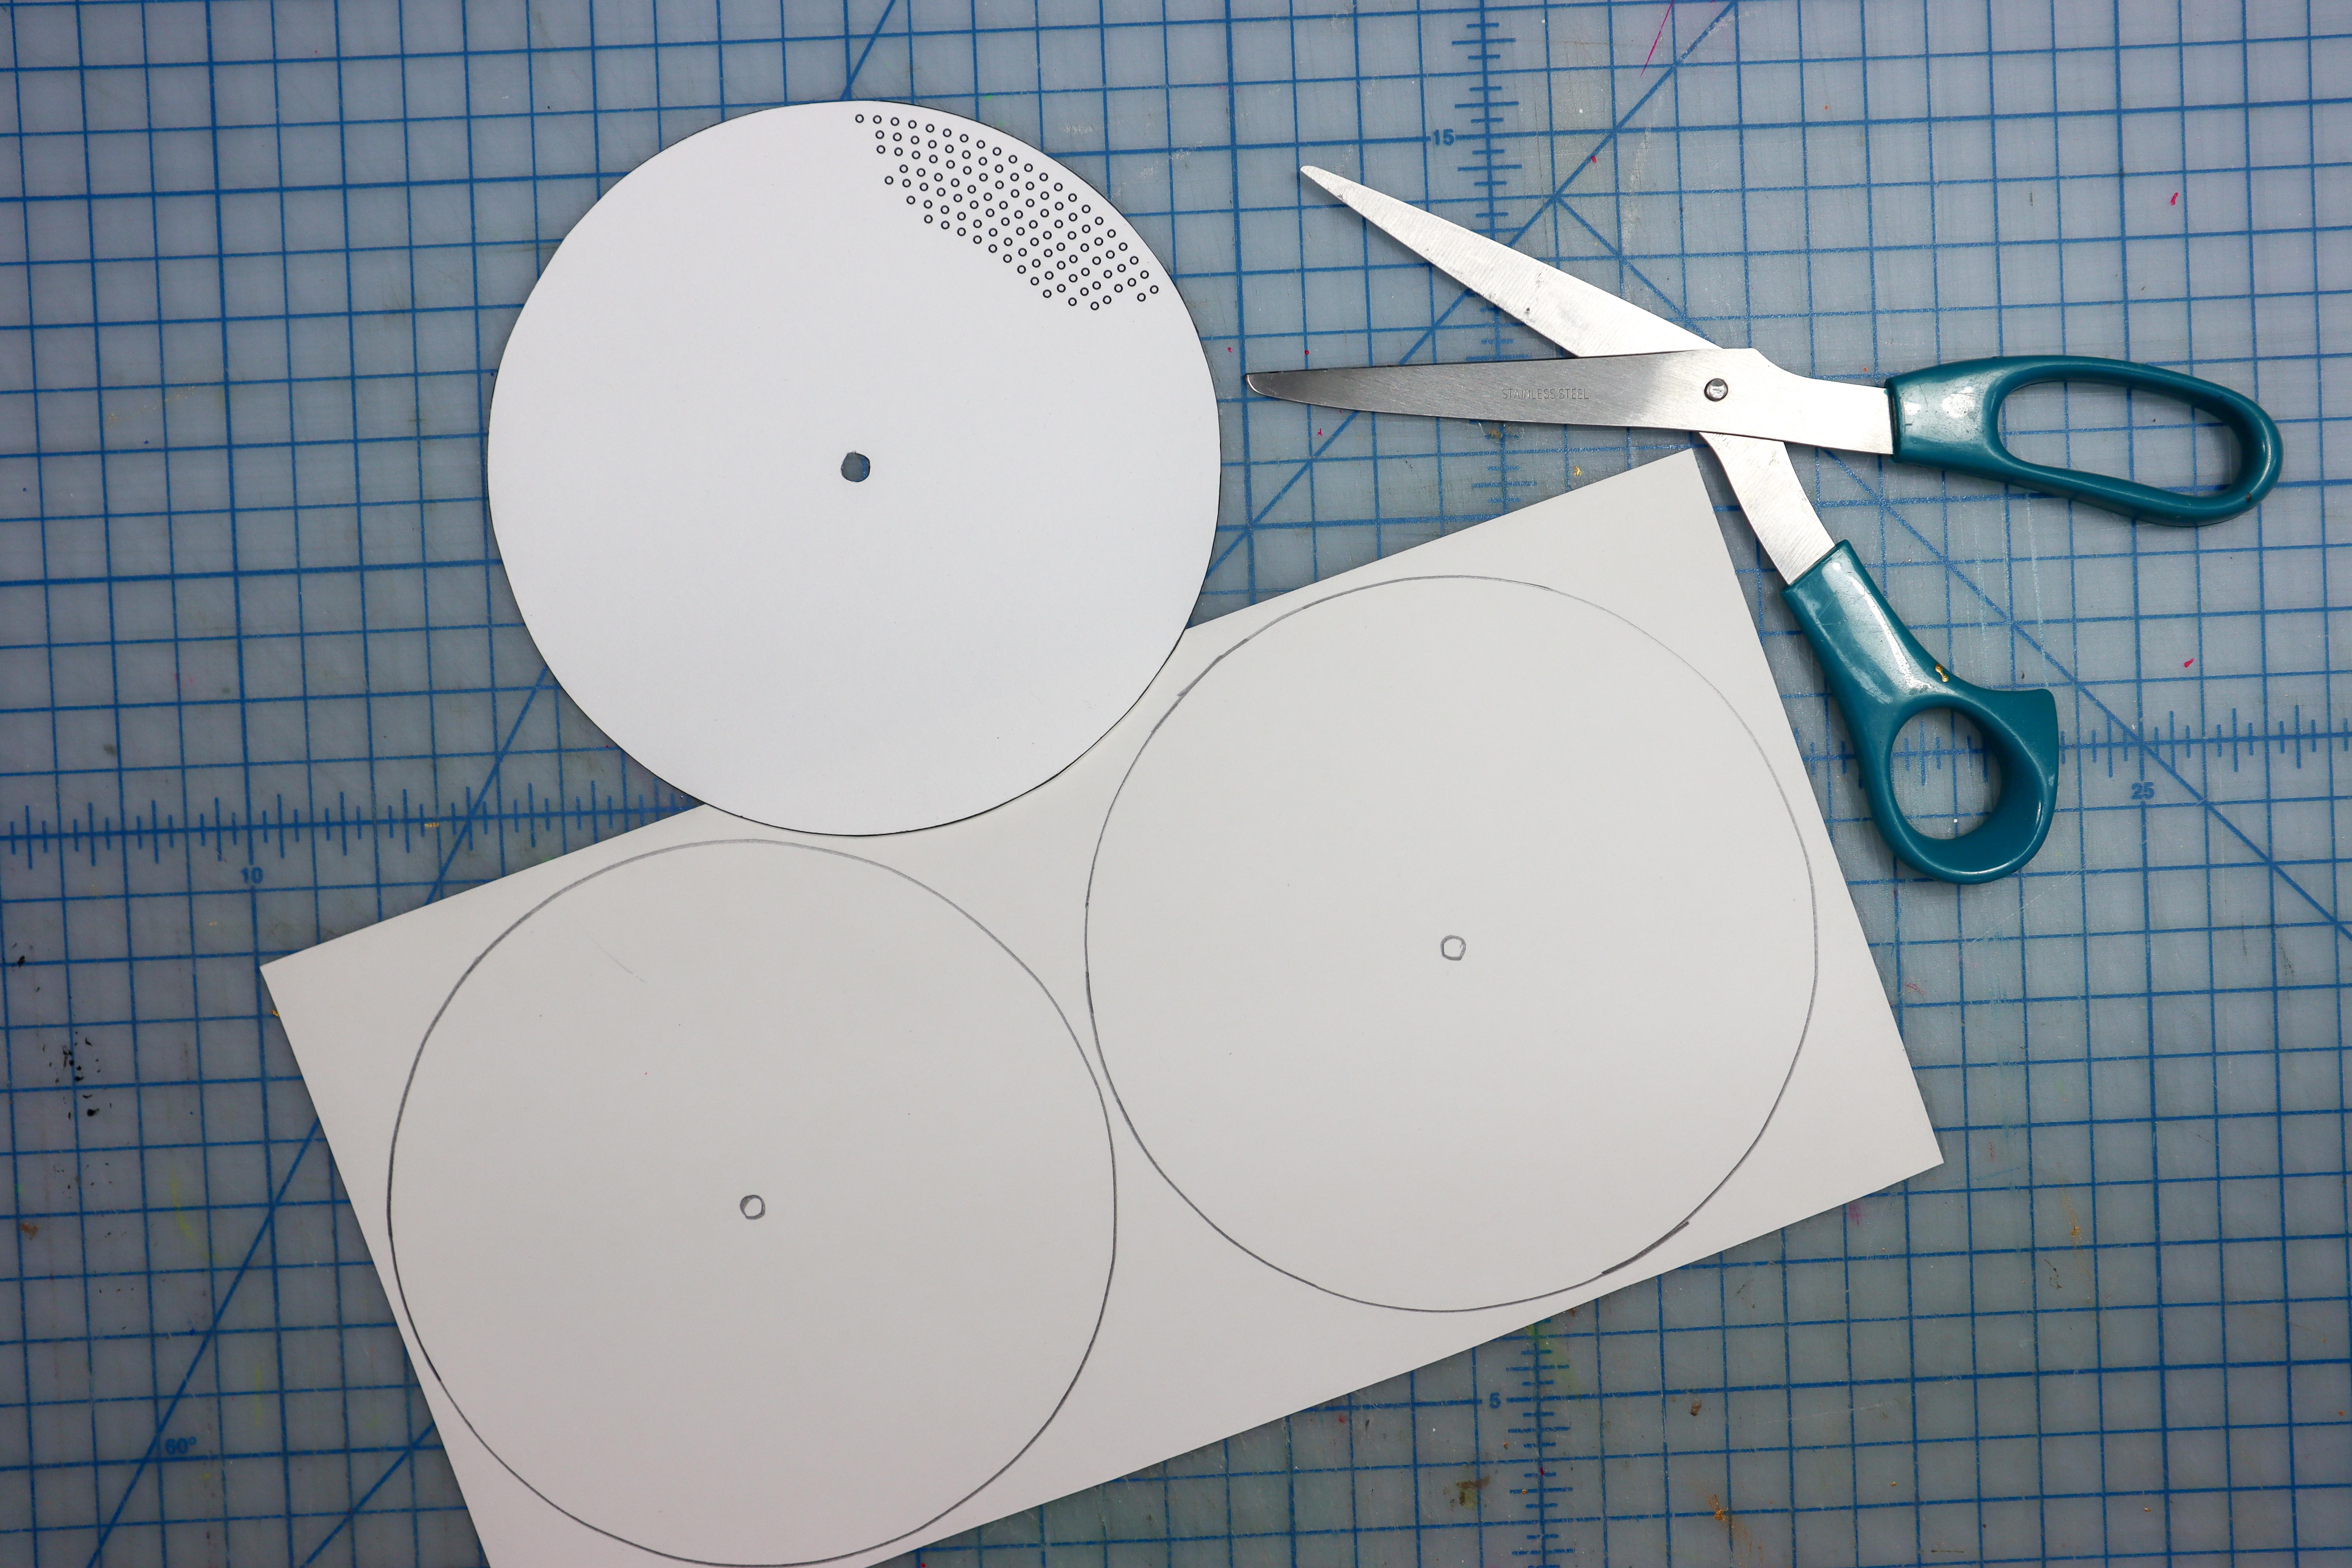
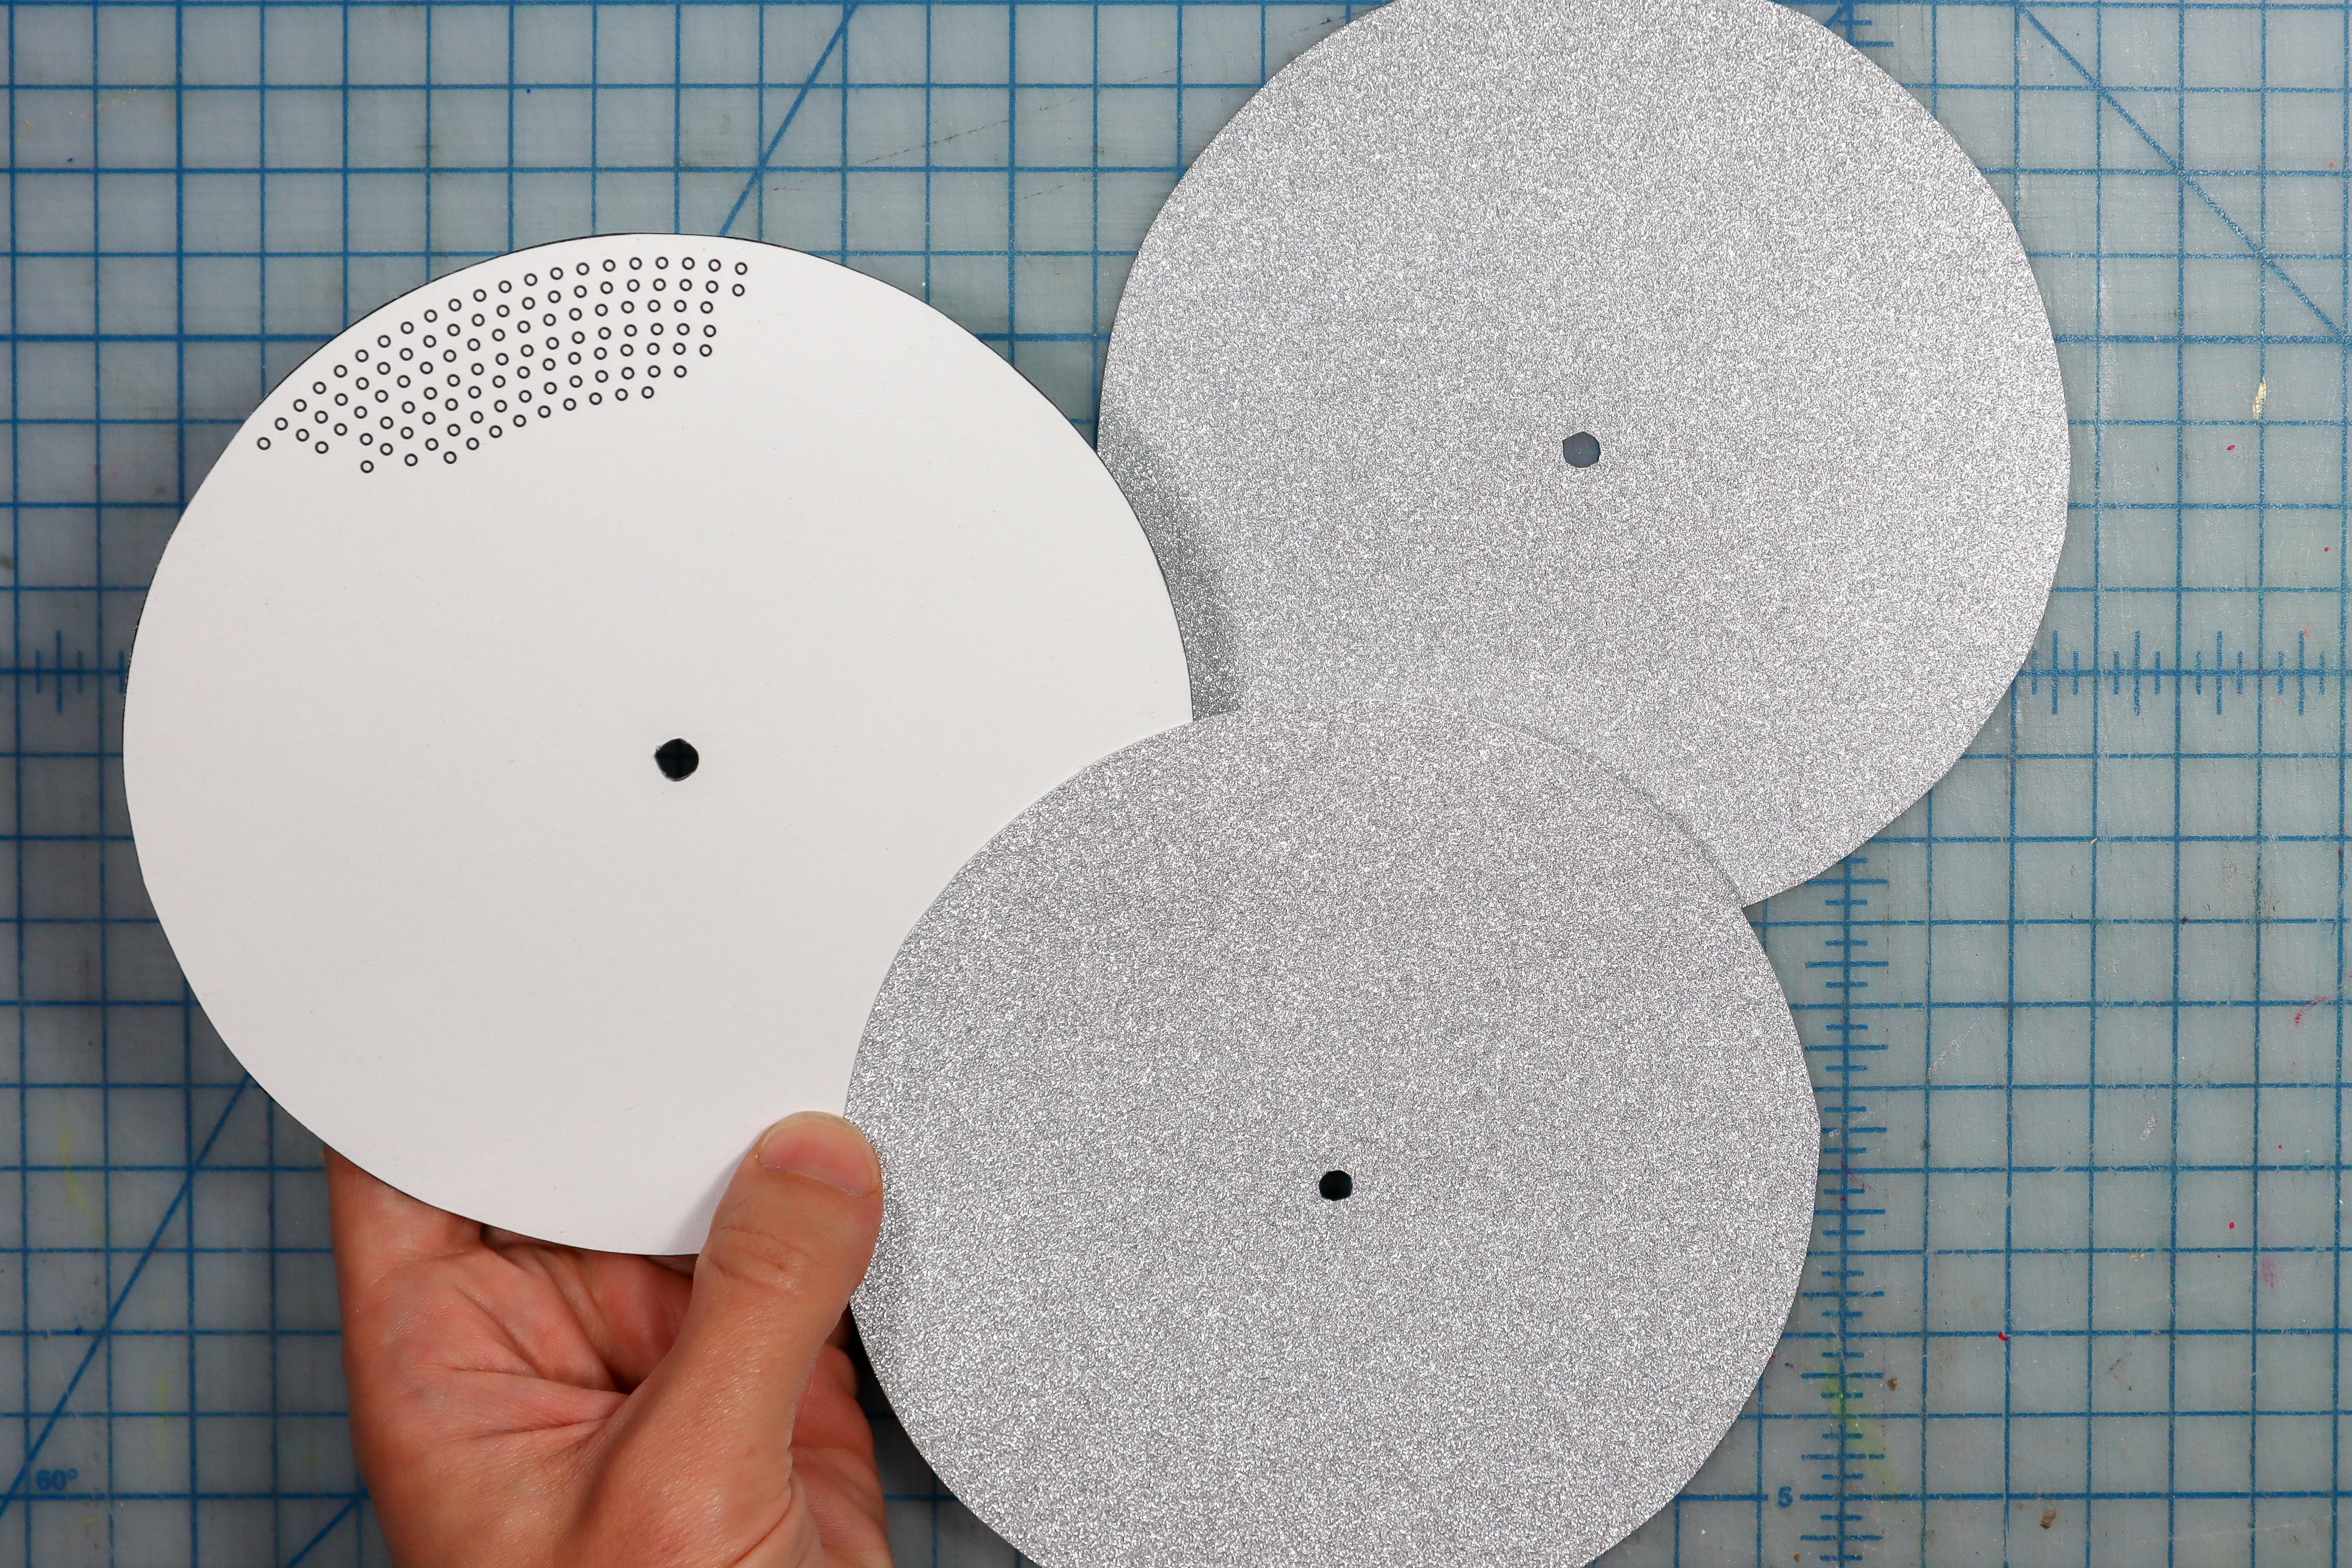
- Cut out the large circles from glitter paper.
- We've found that the shinier/glitterier the paper, the better the eye holes are hidden. This way, you can see out of the mask while hiding the eye holes!
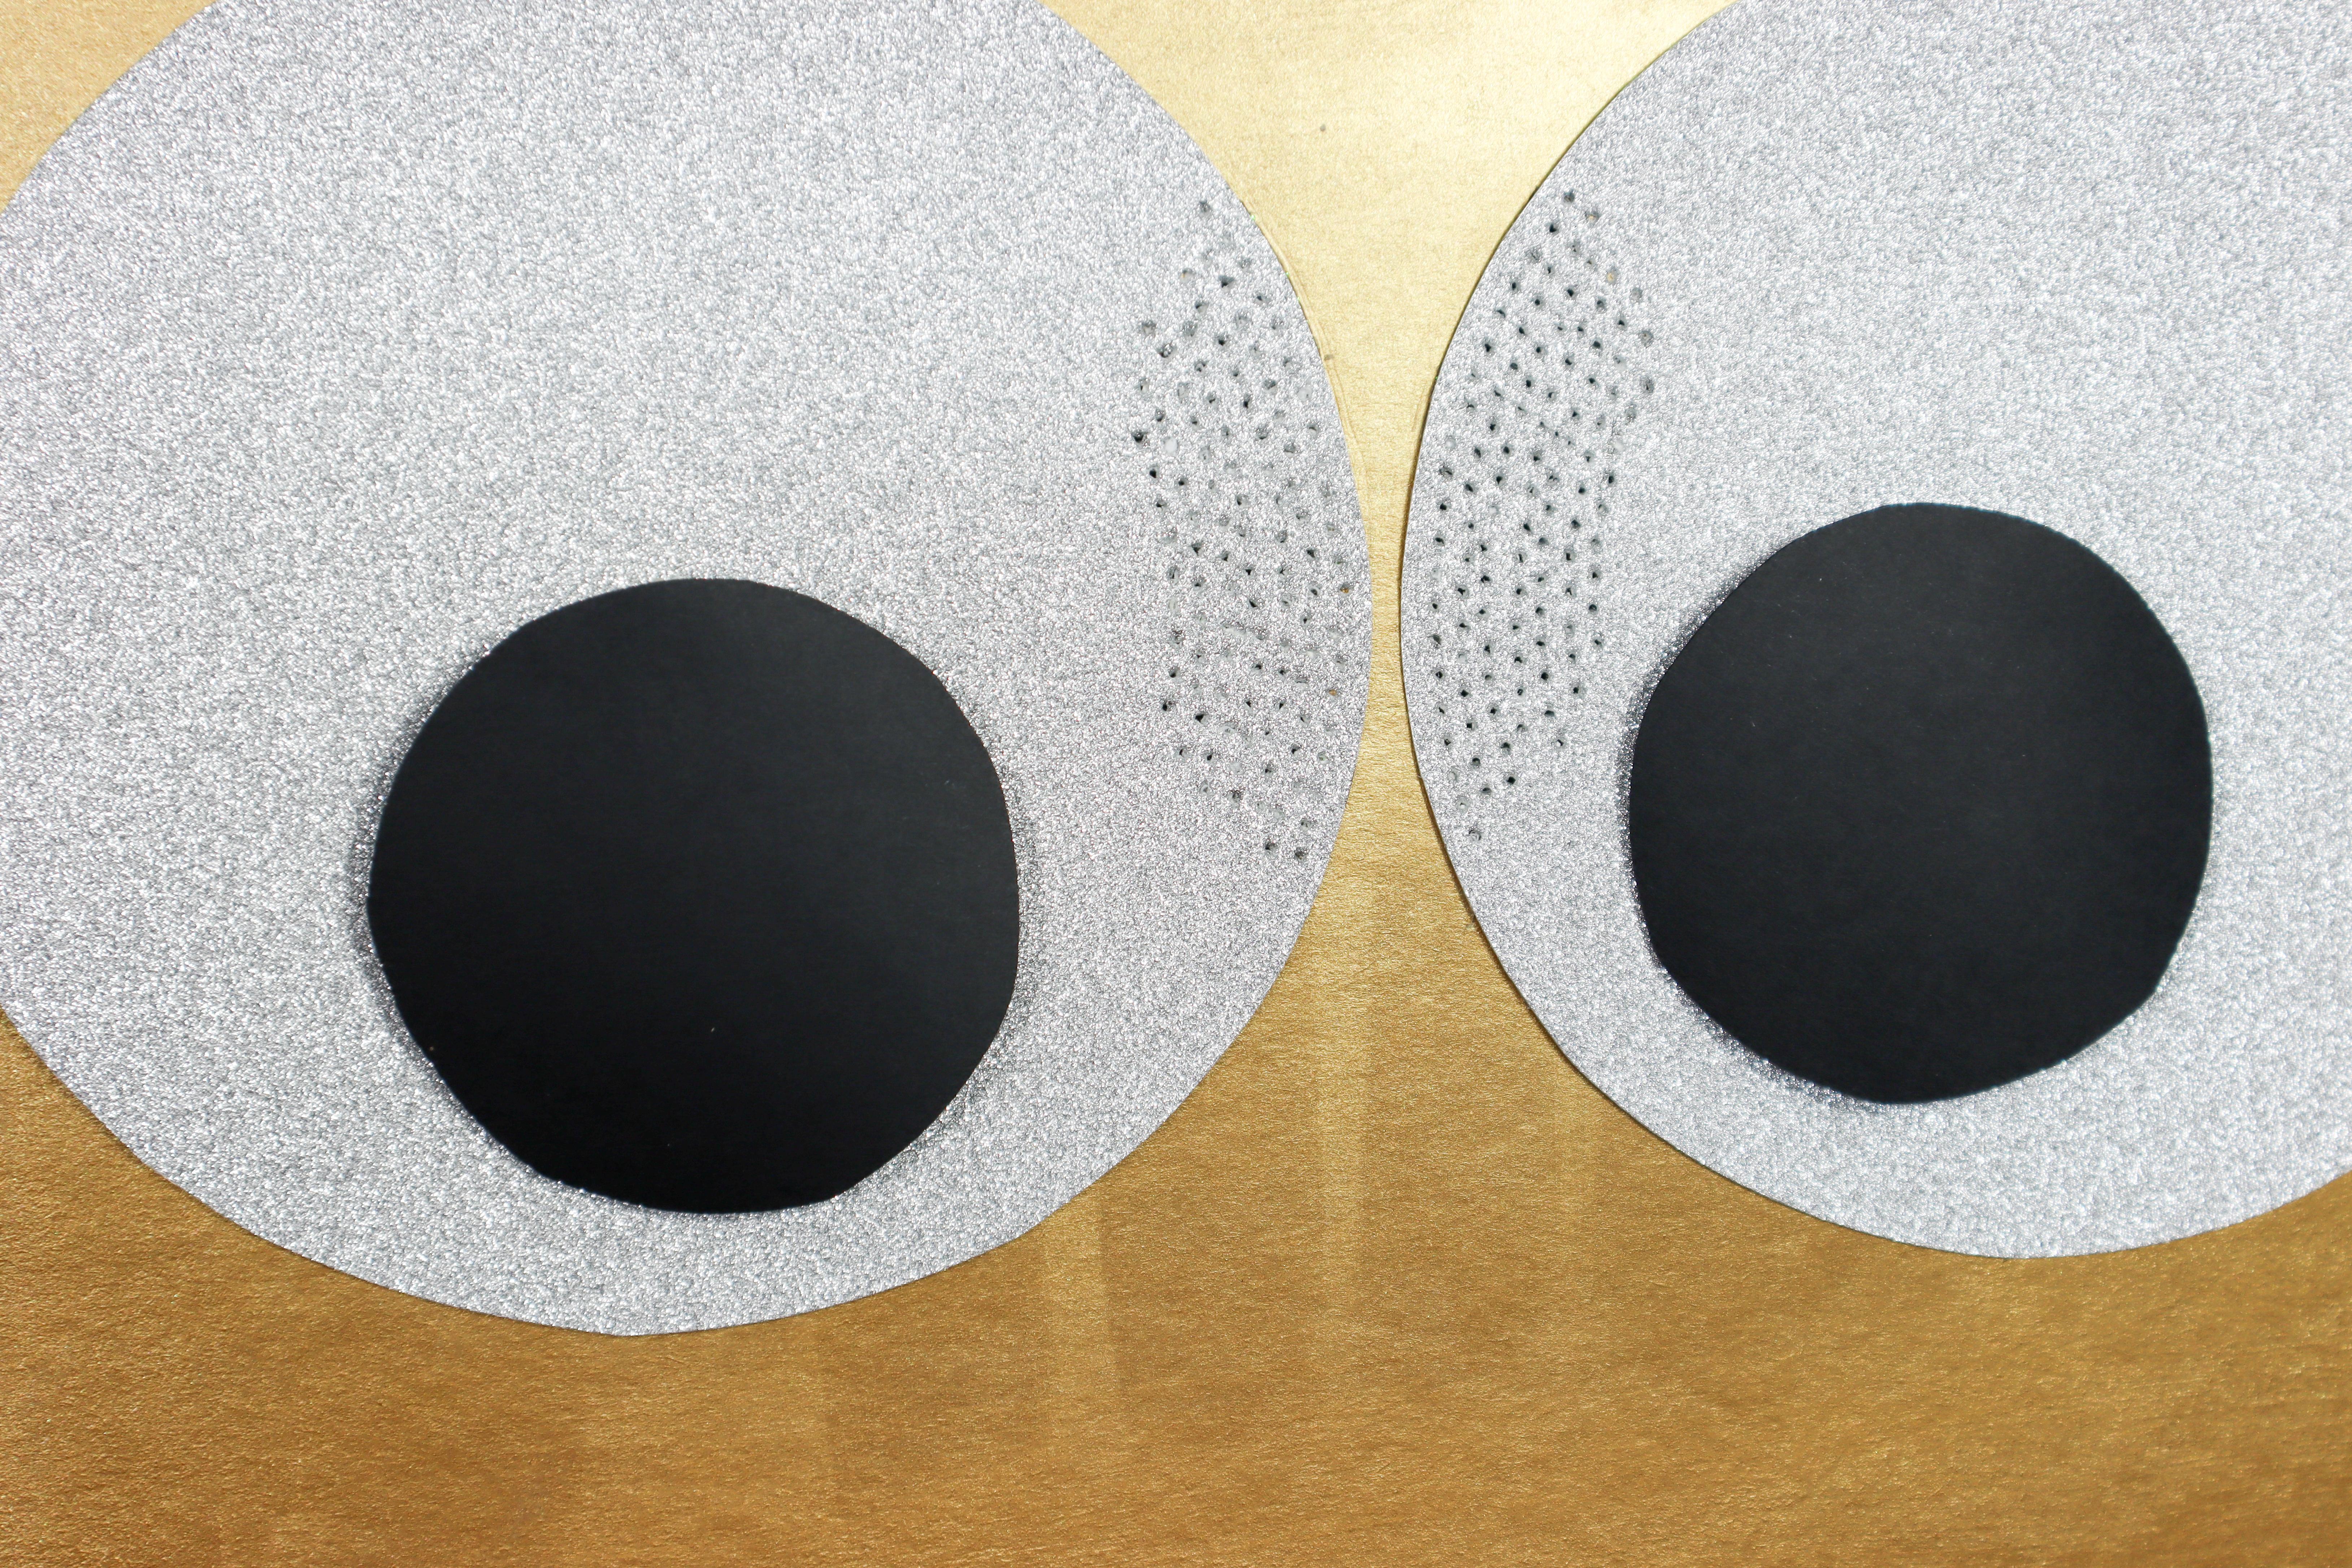
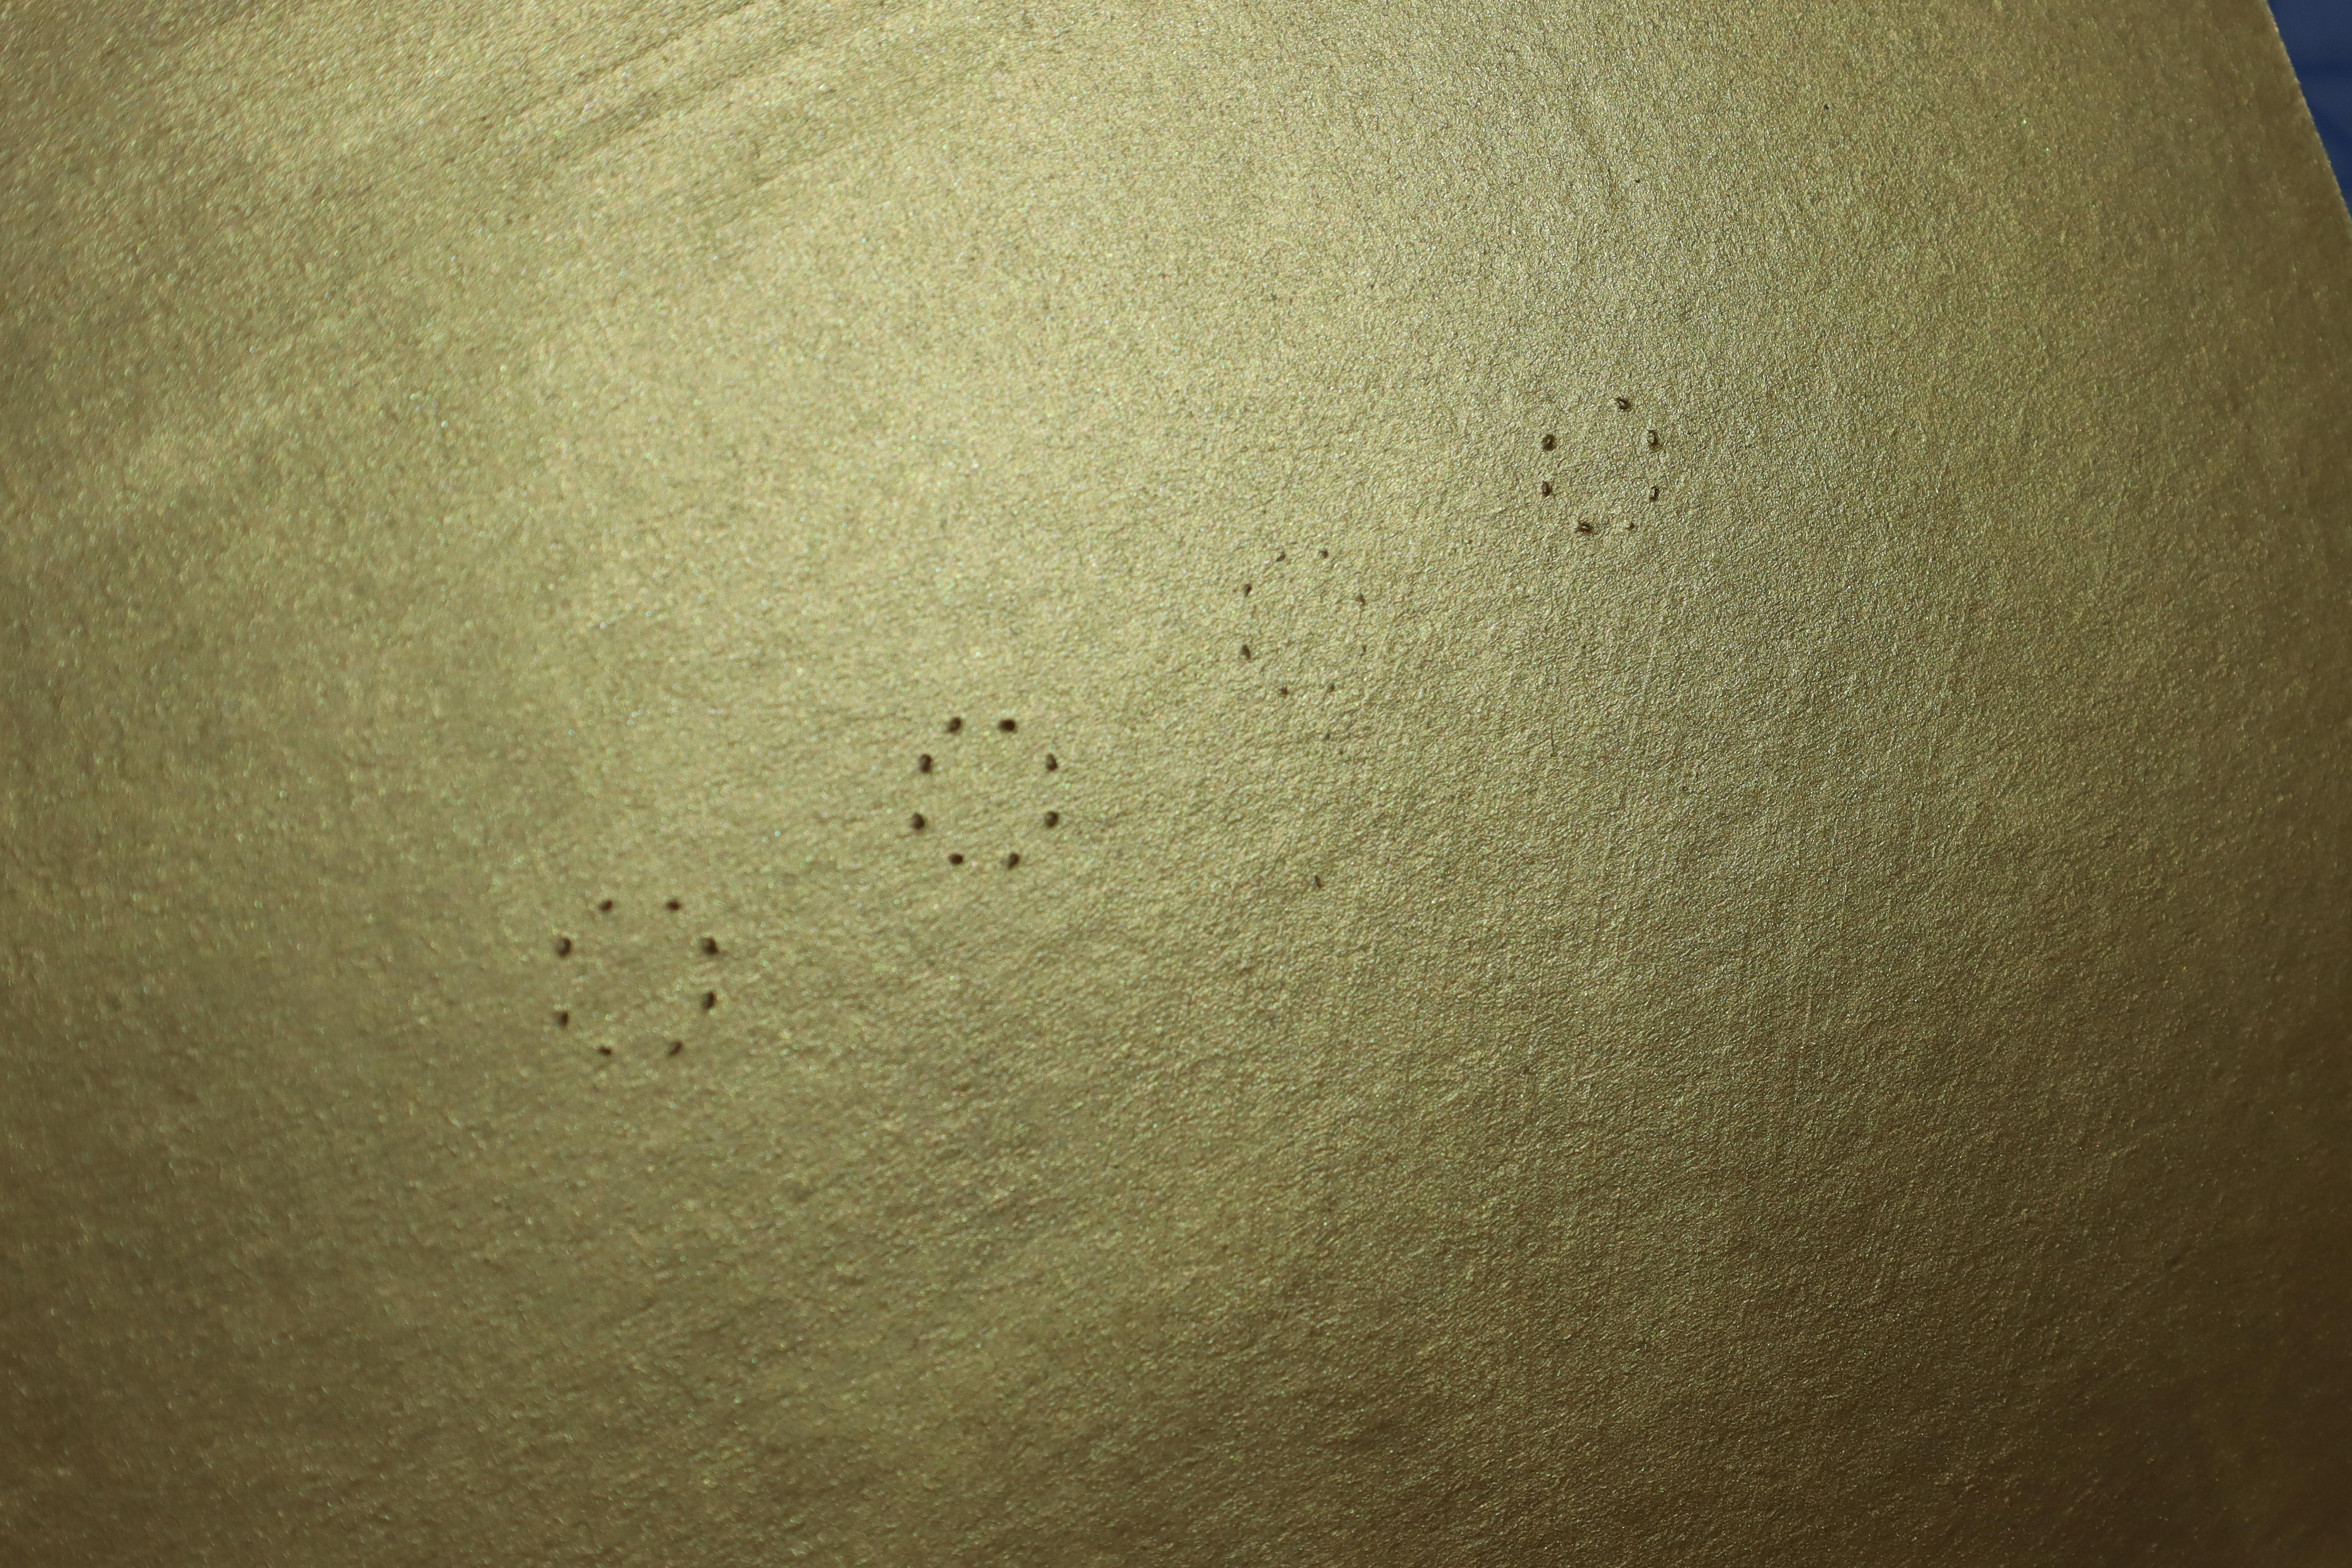
Poke the Tiny Holes
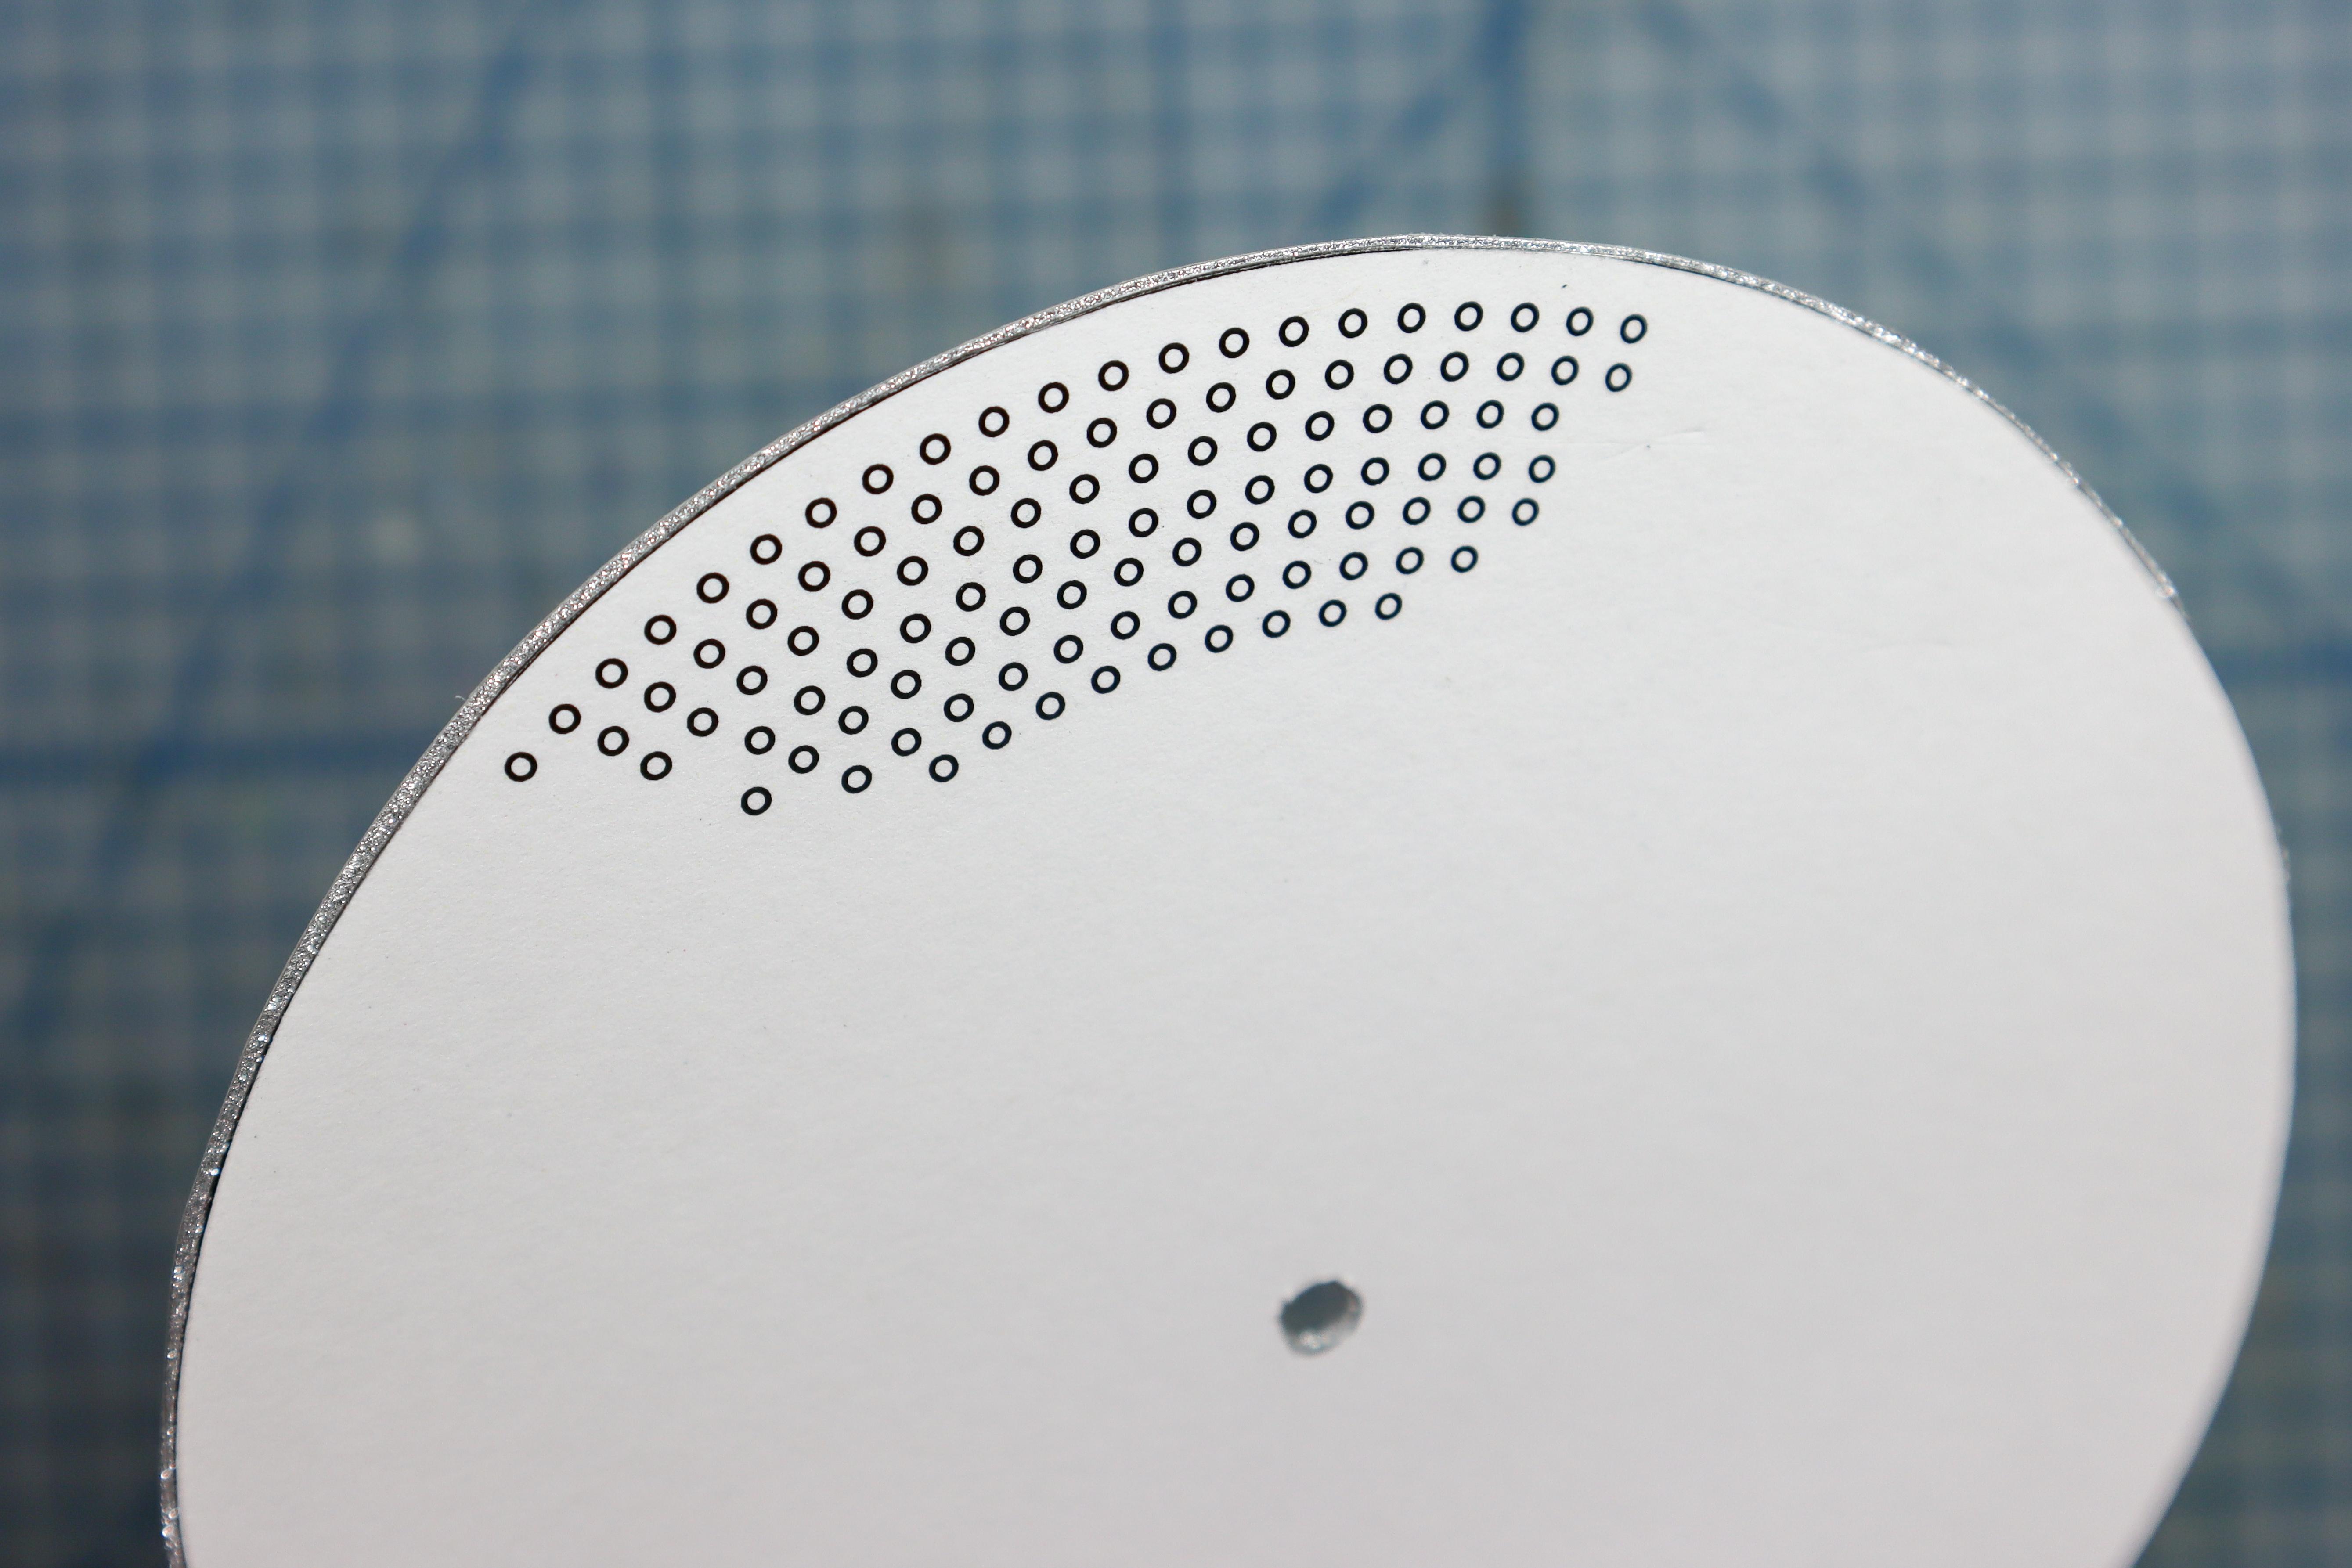
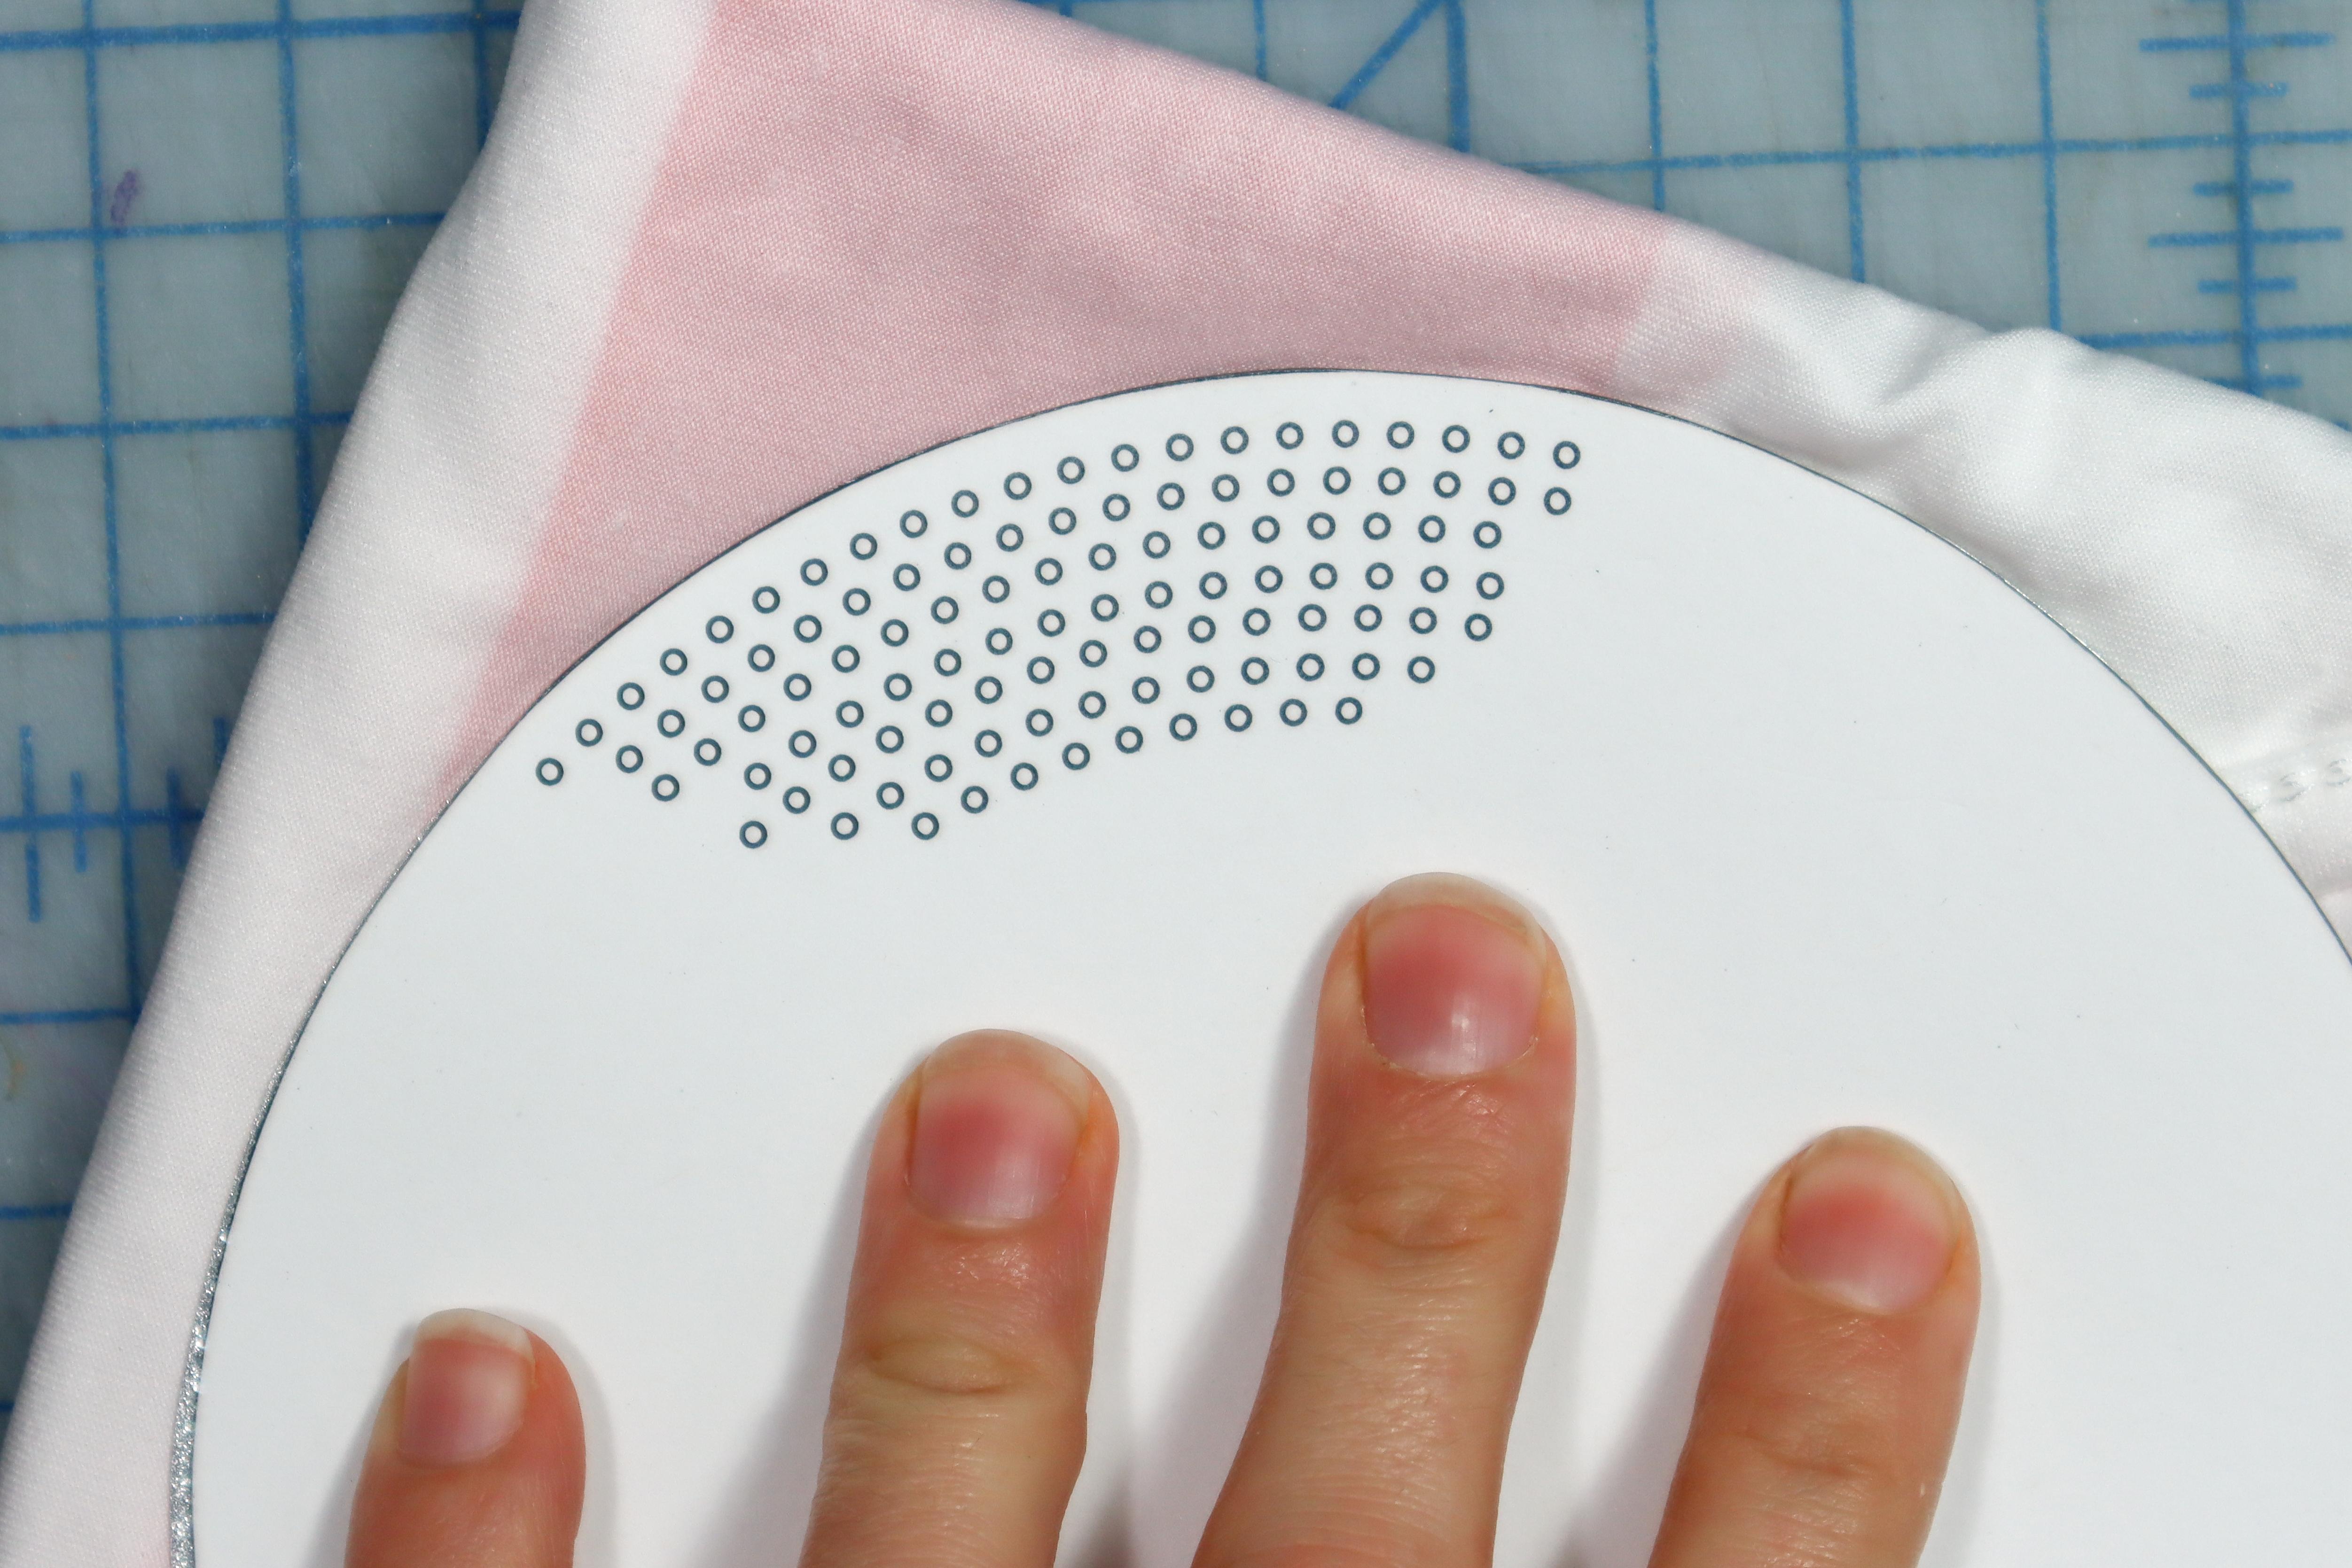
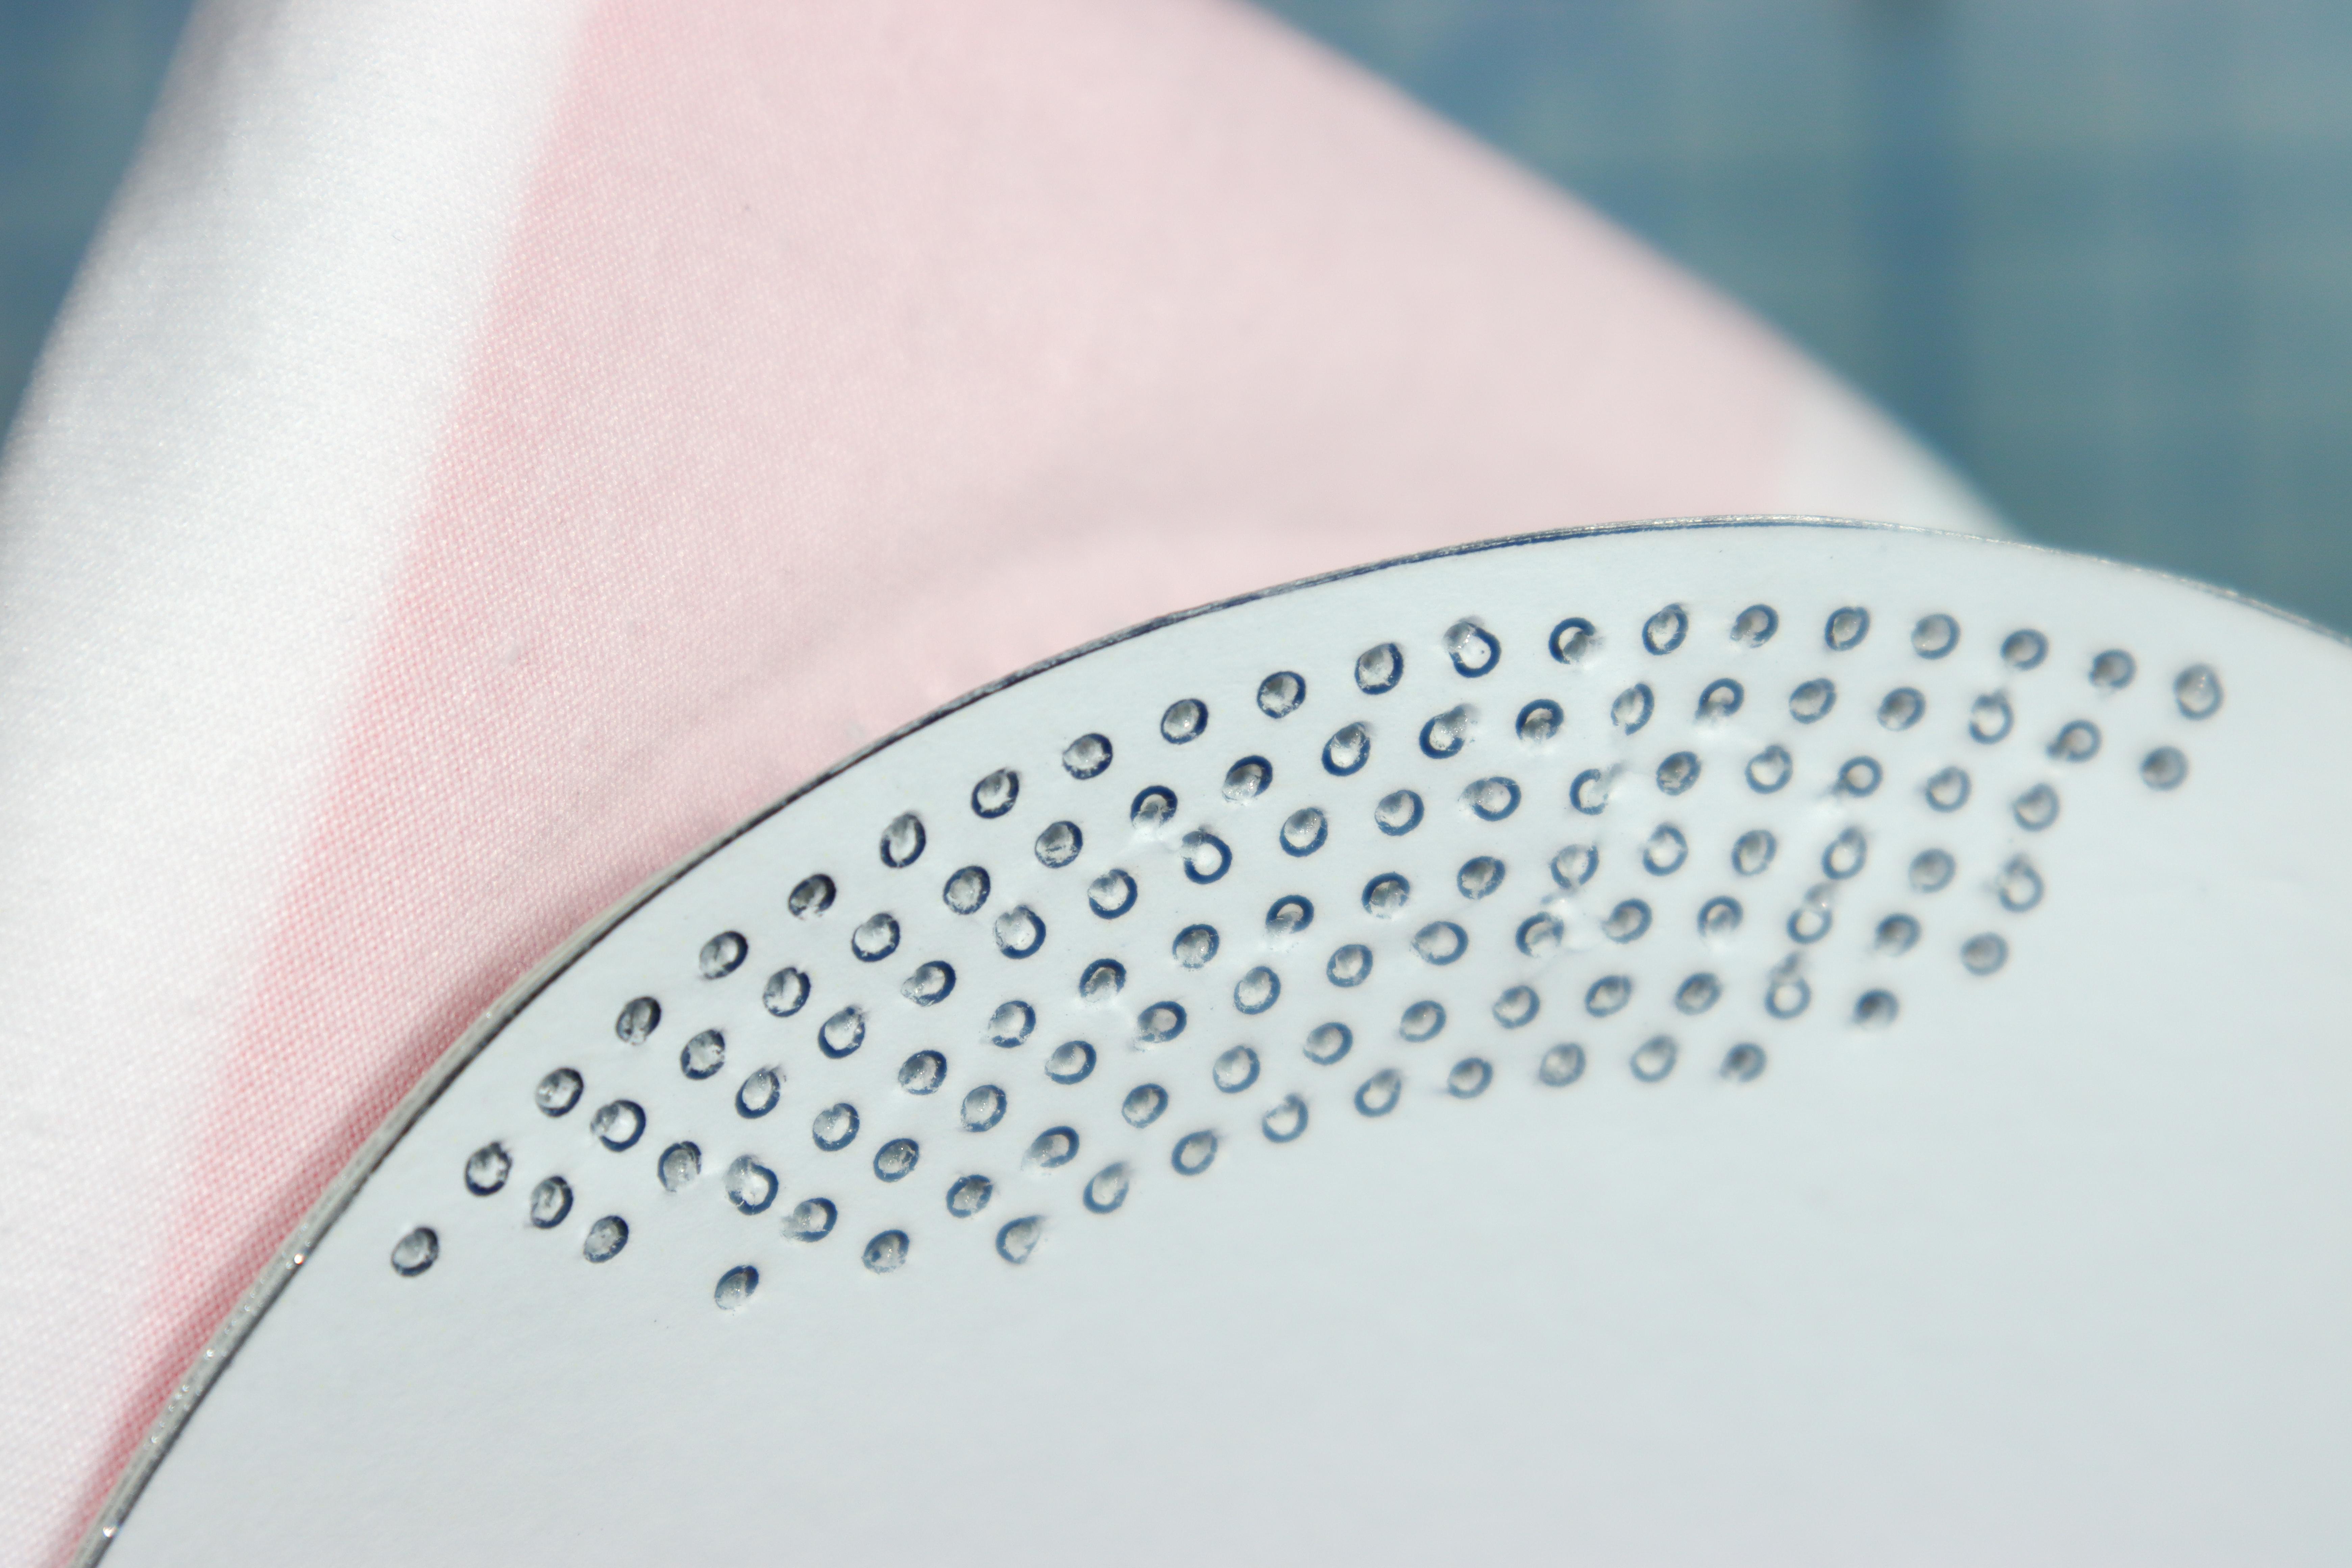
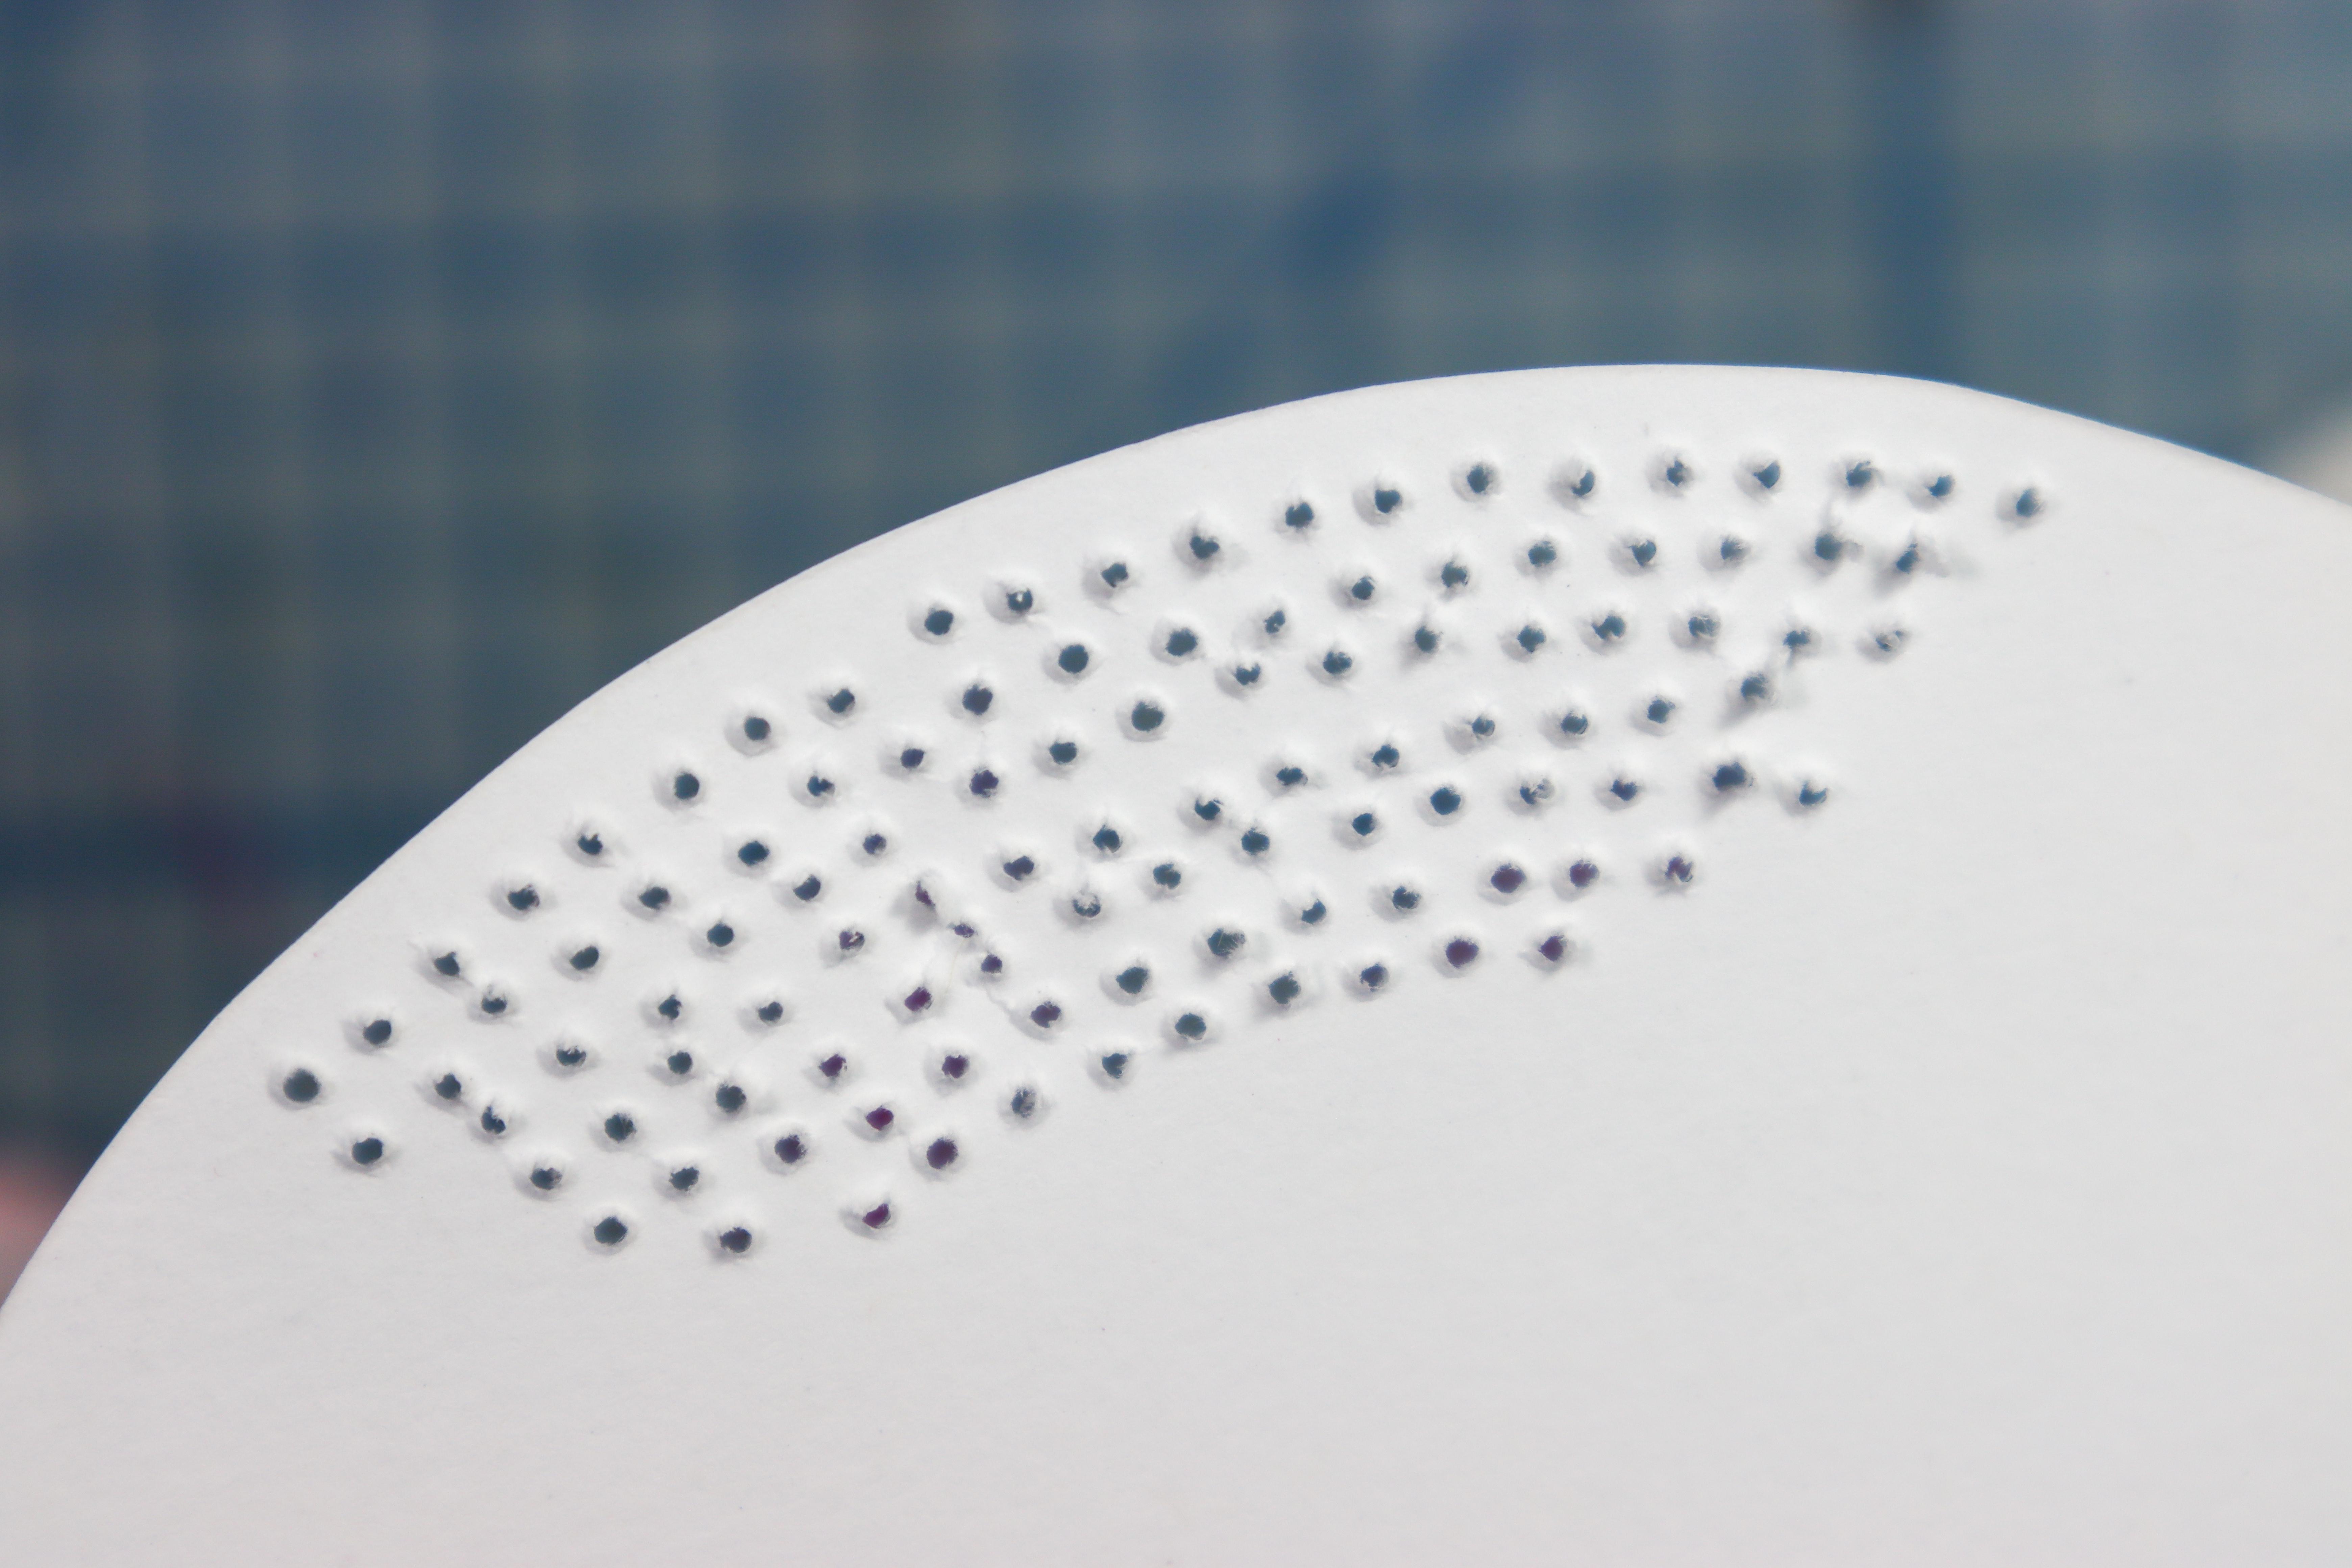
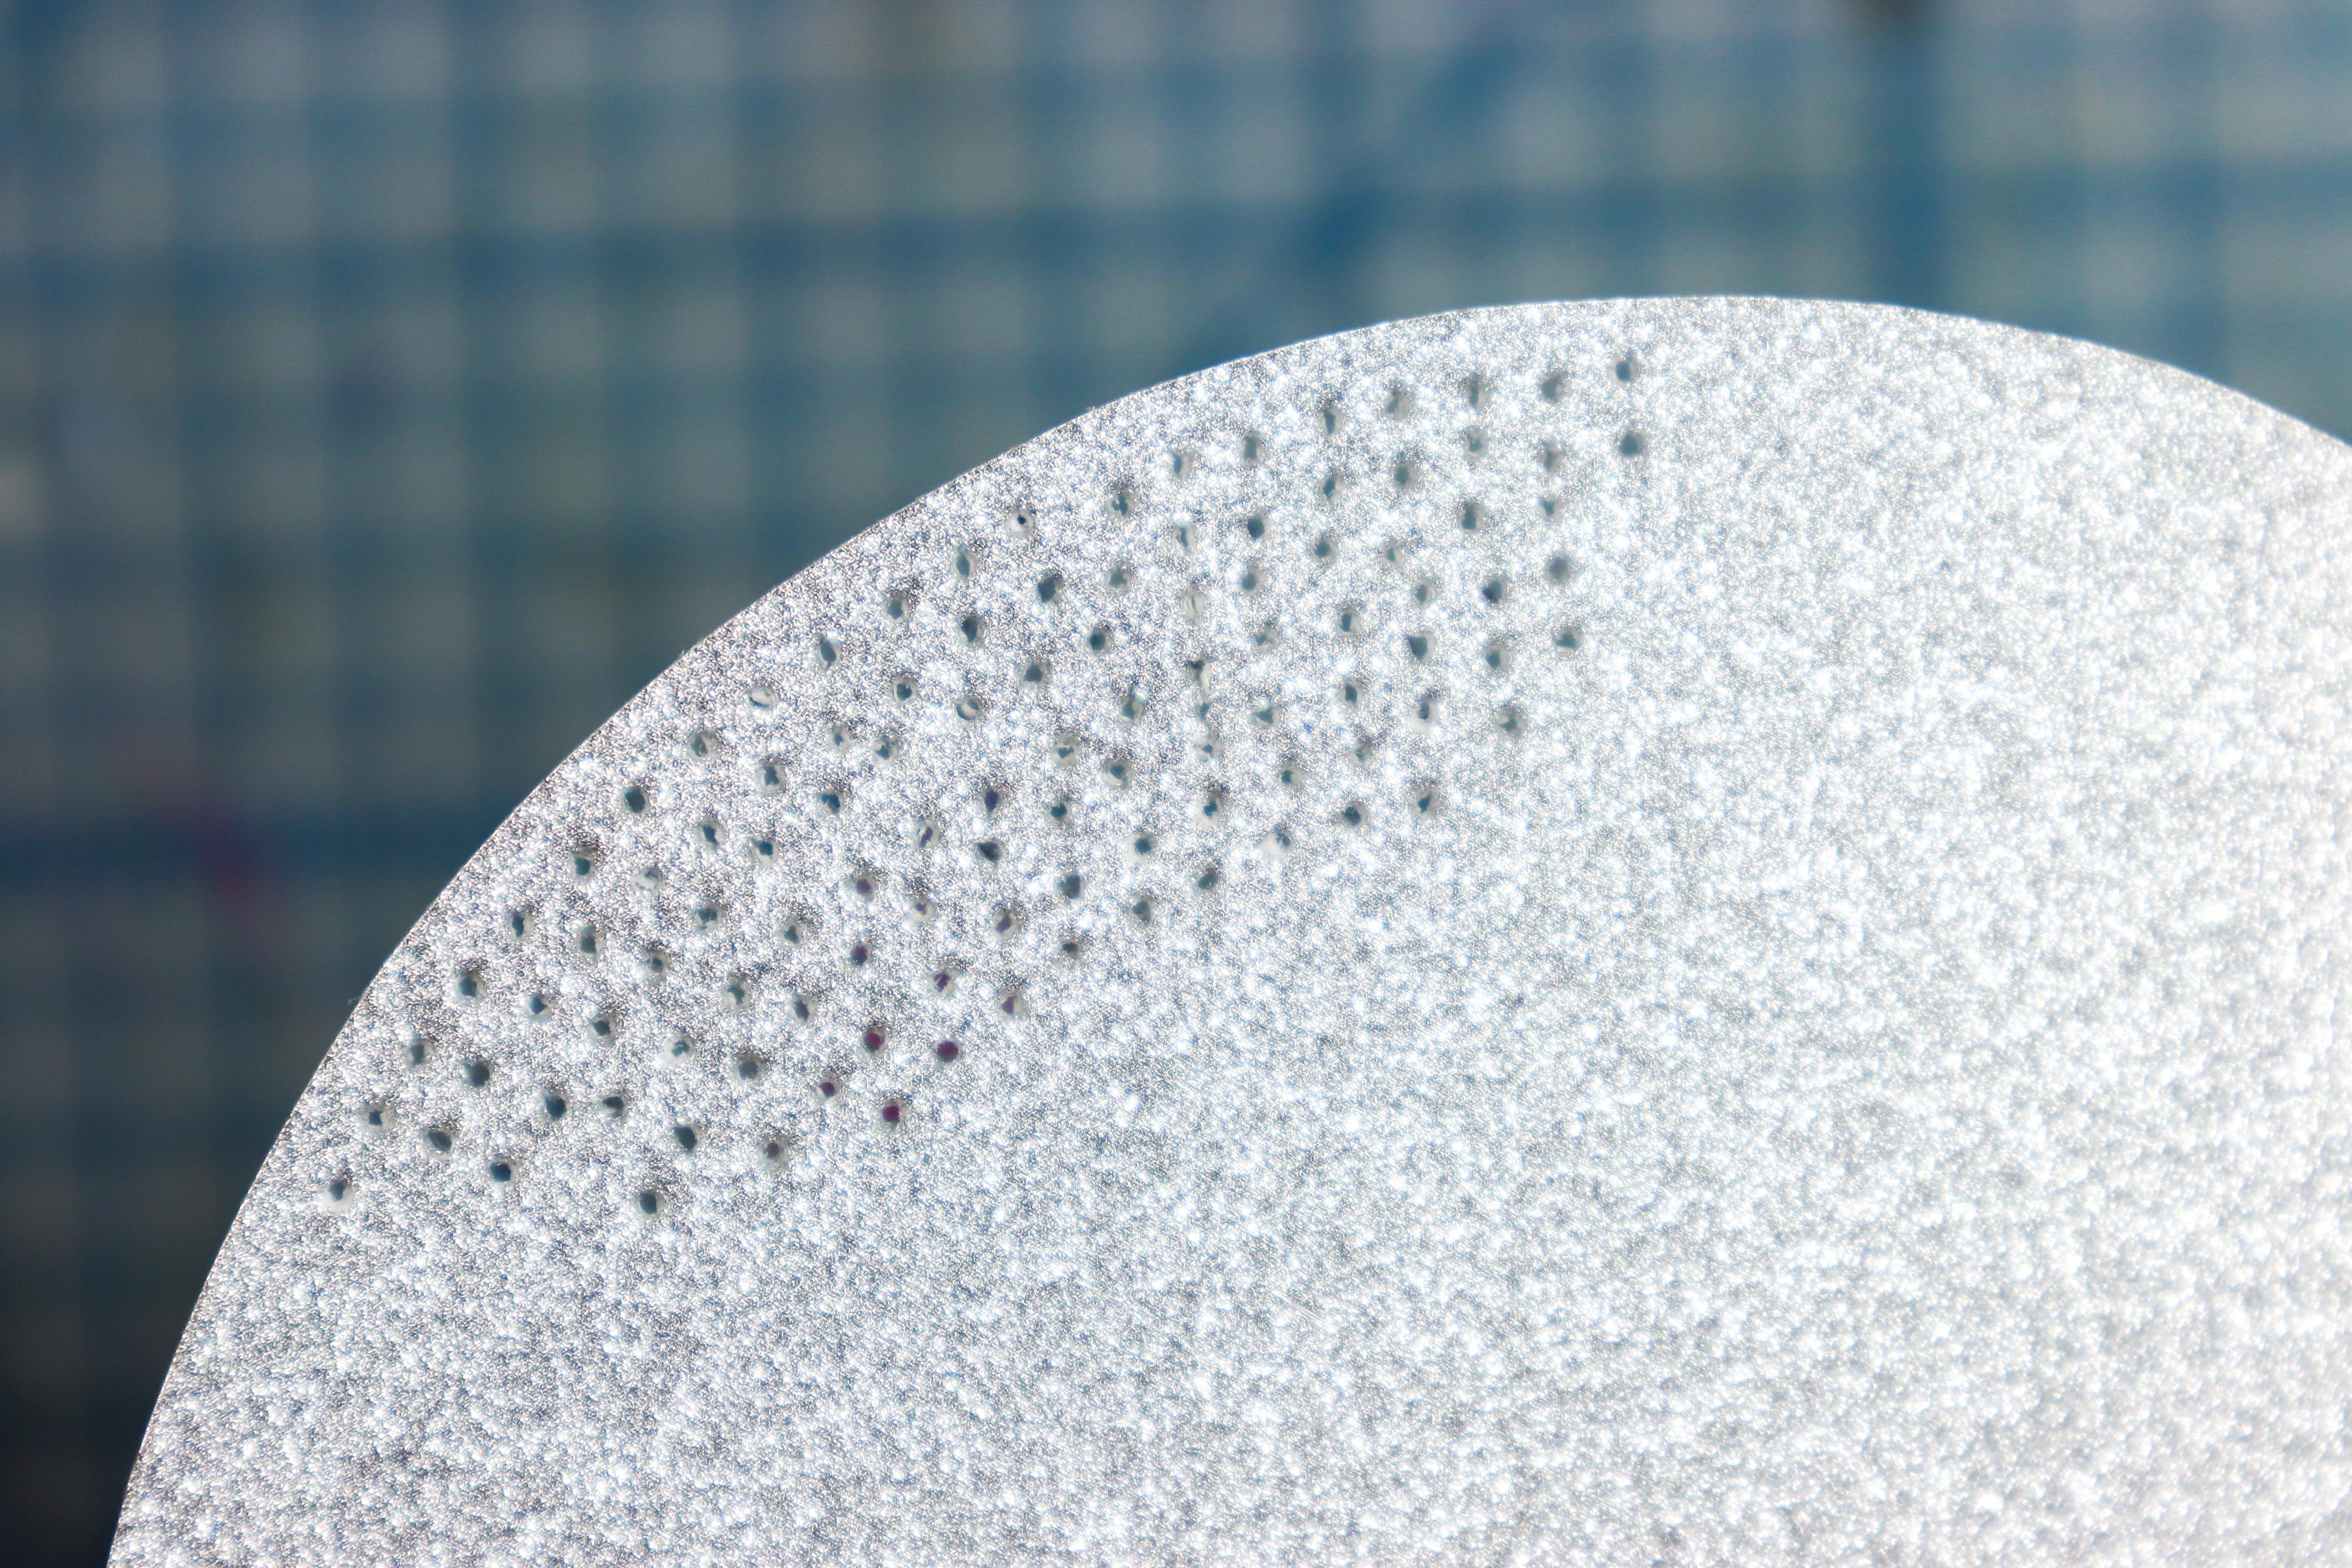
- Using an awl, poke out all the tiny holes according to the template.
- To make it easier, use an old piece of cloth under the paper to allow the awl more room to move through.
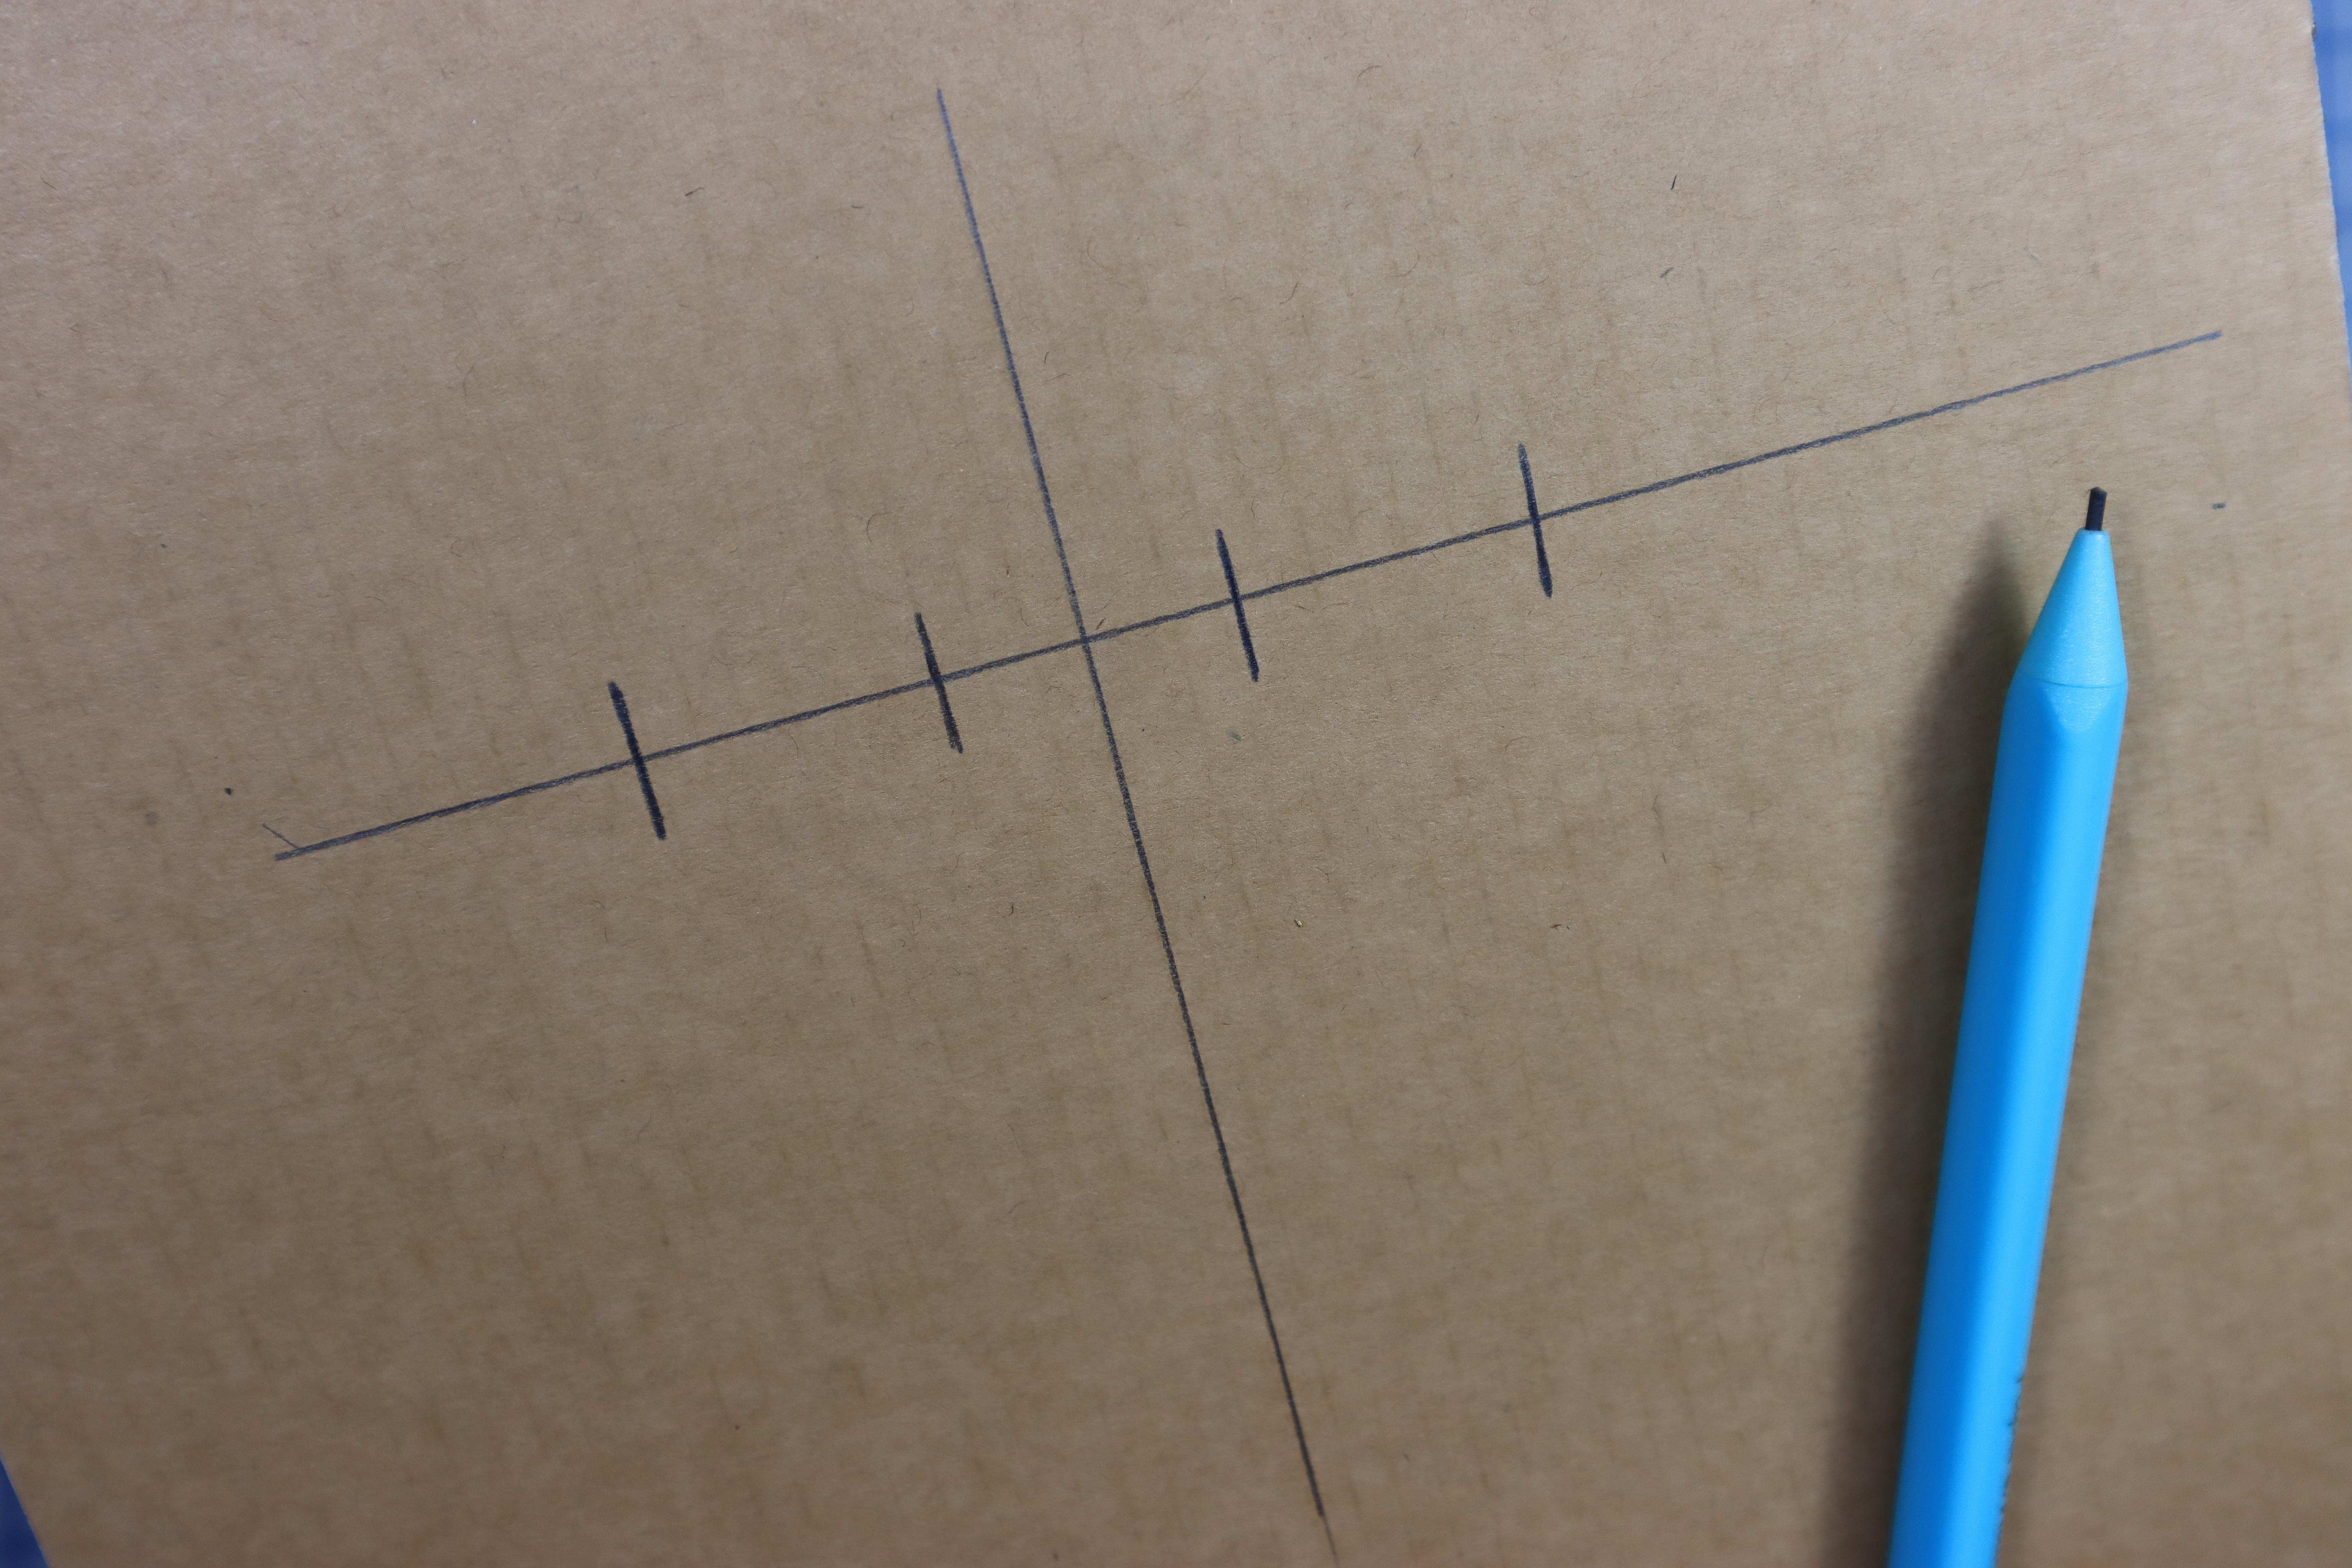
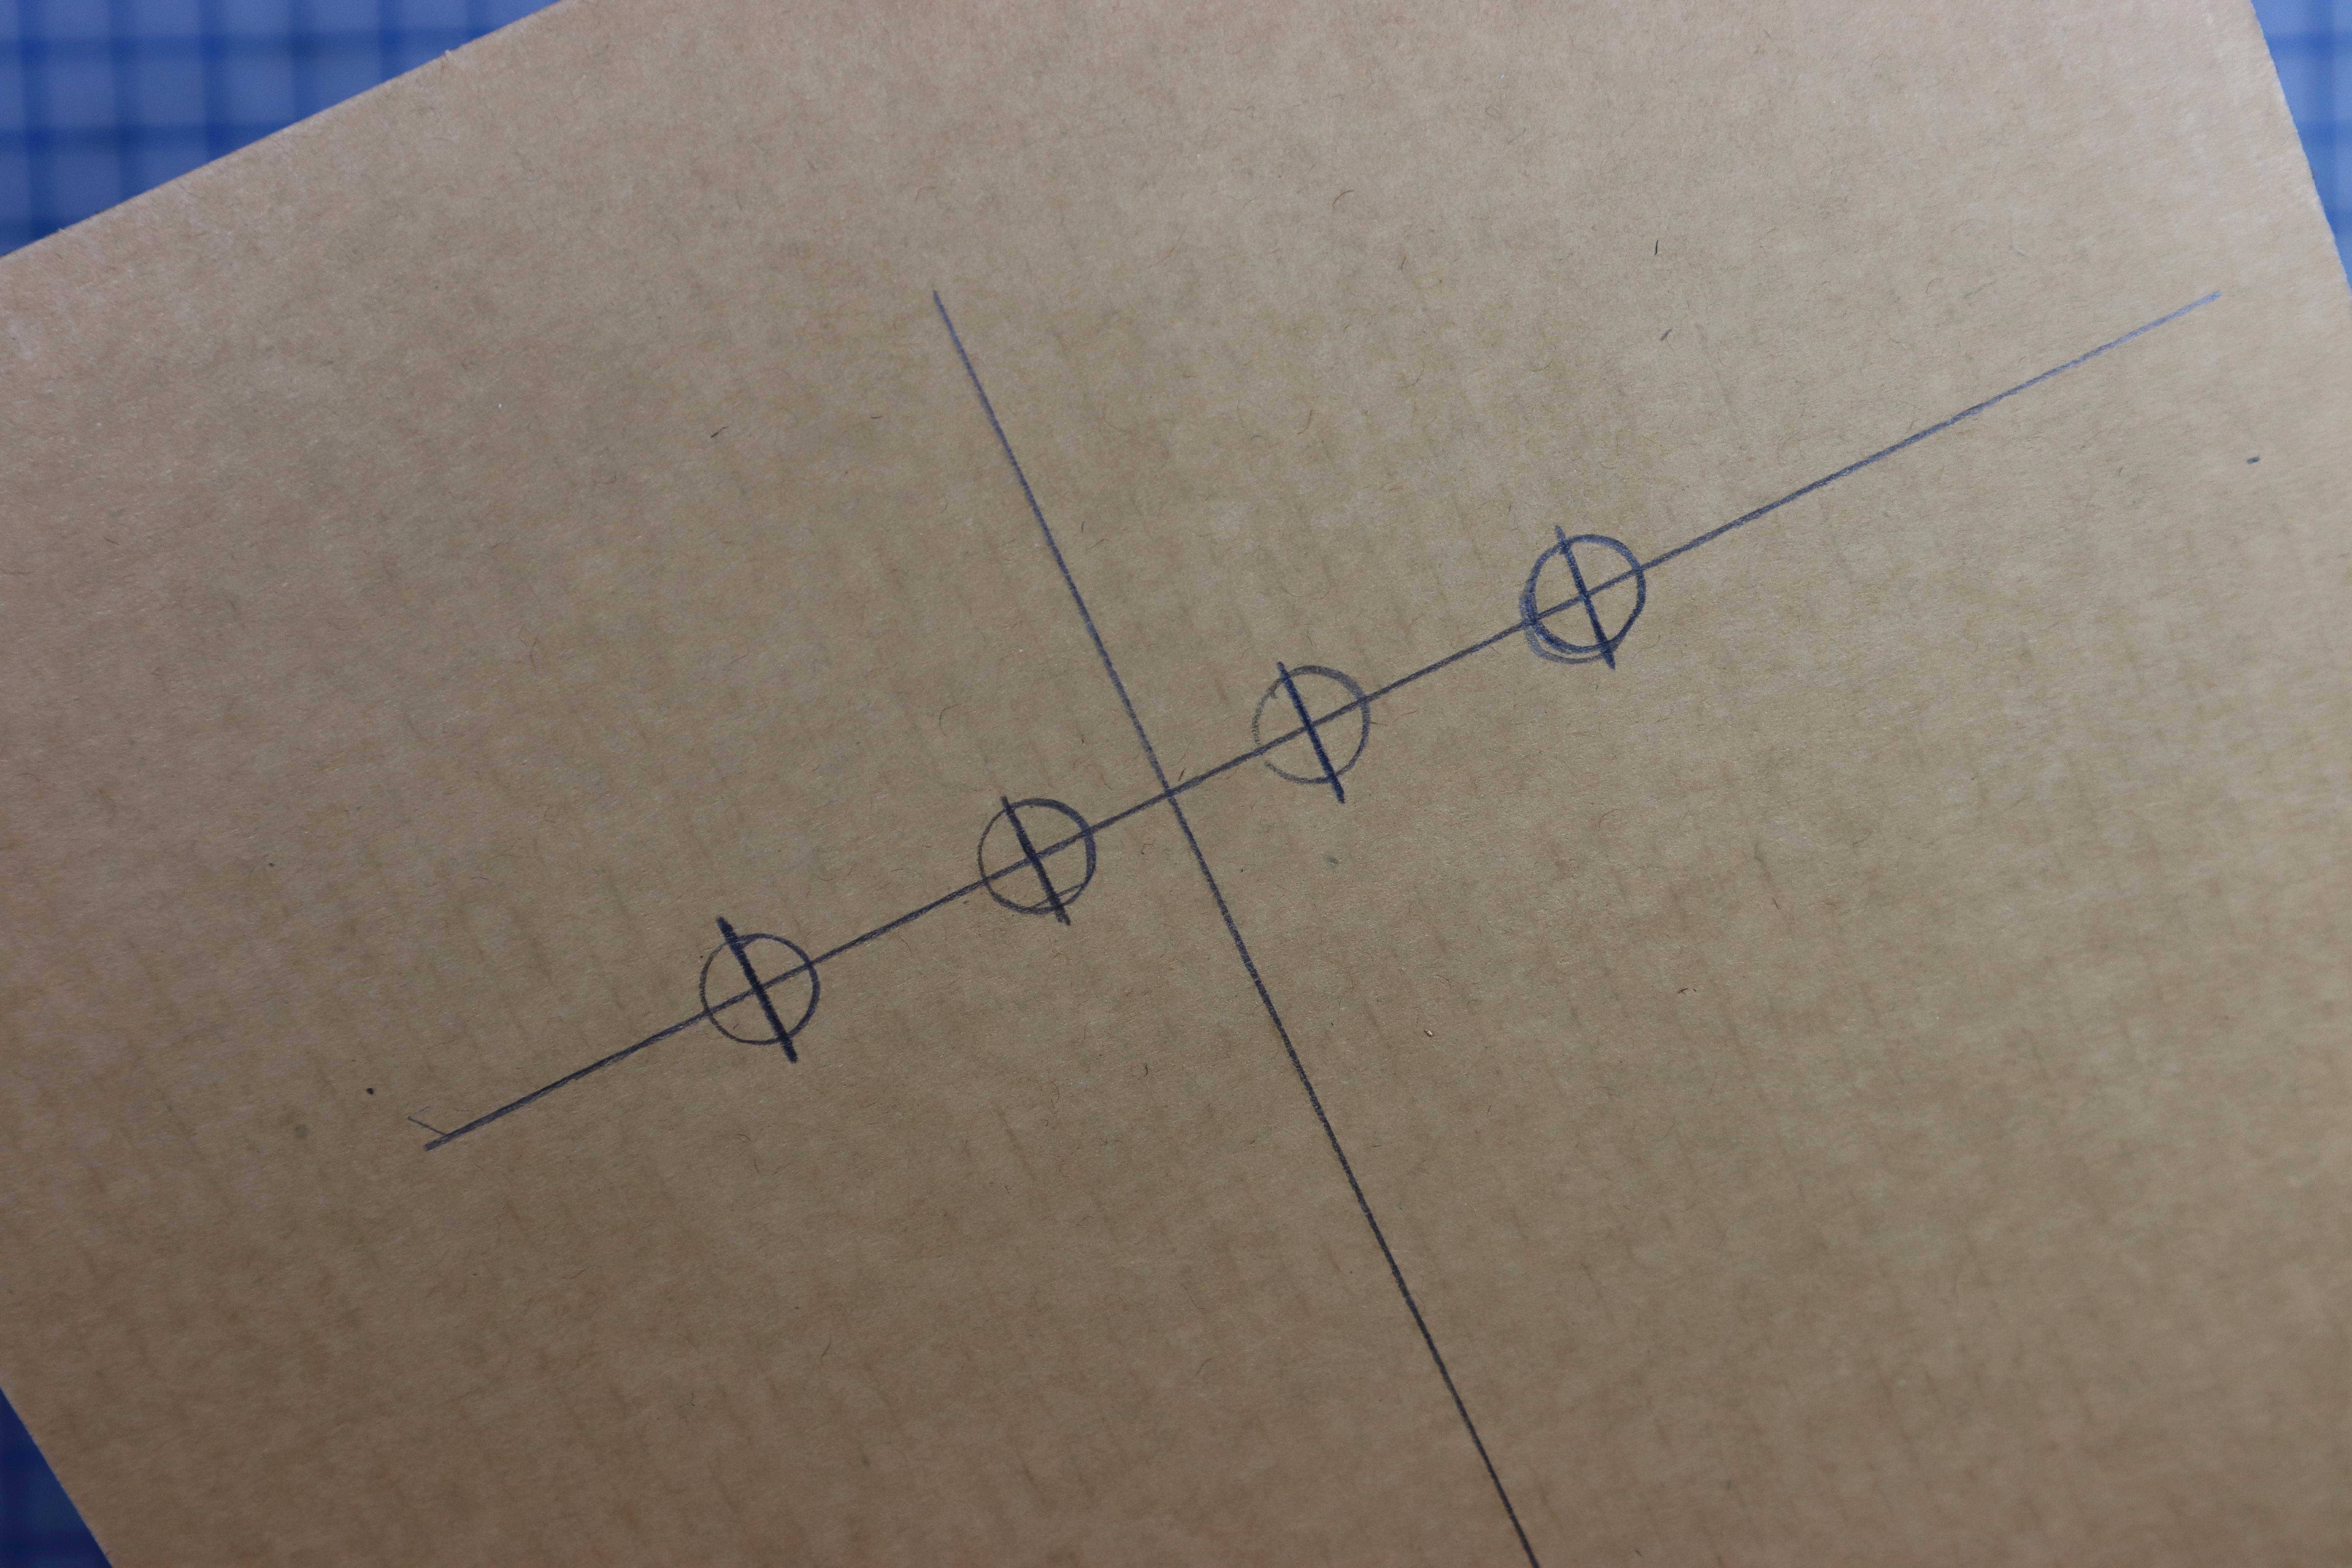
Mark & Cut the Eye Locations
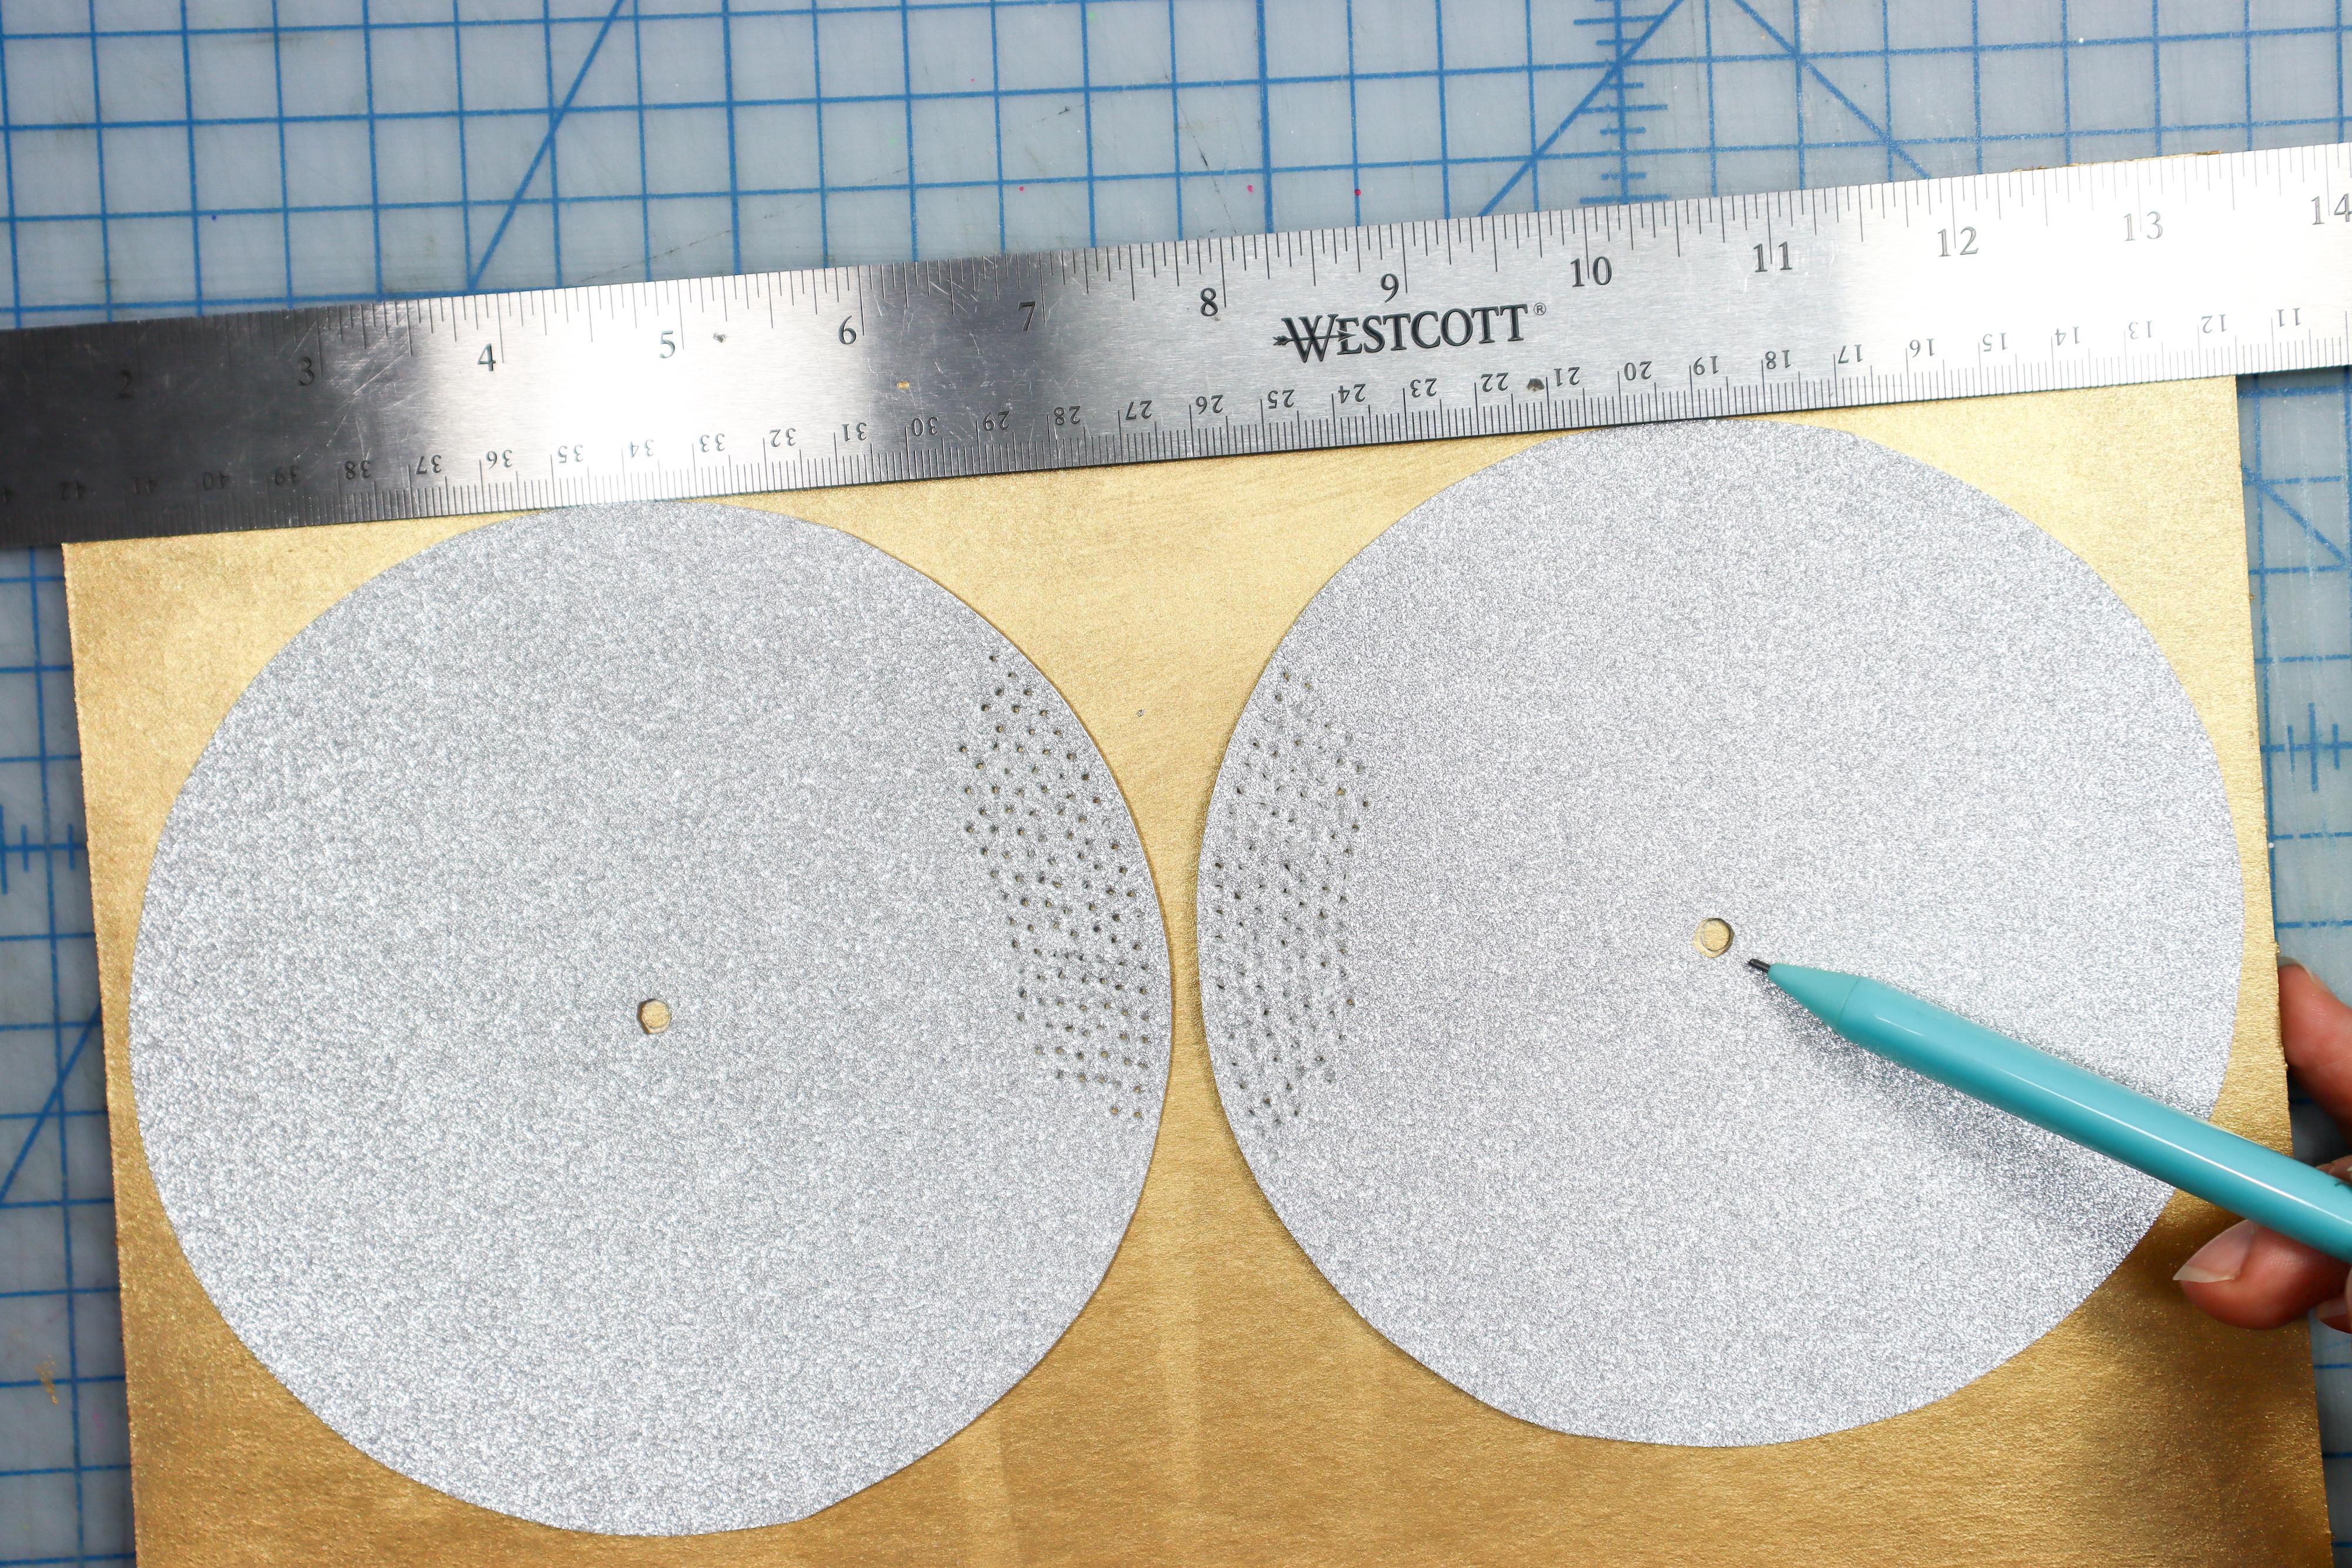
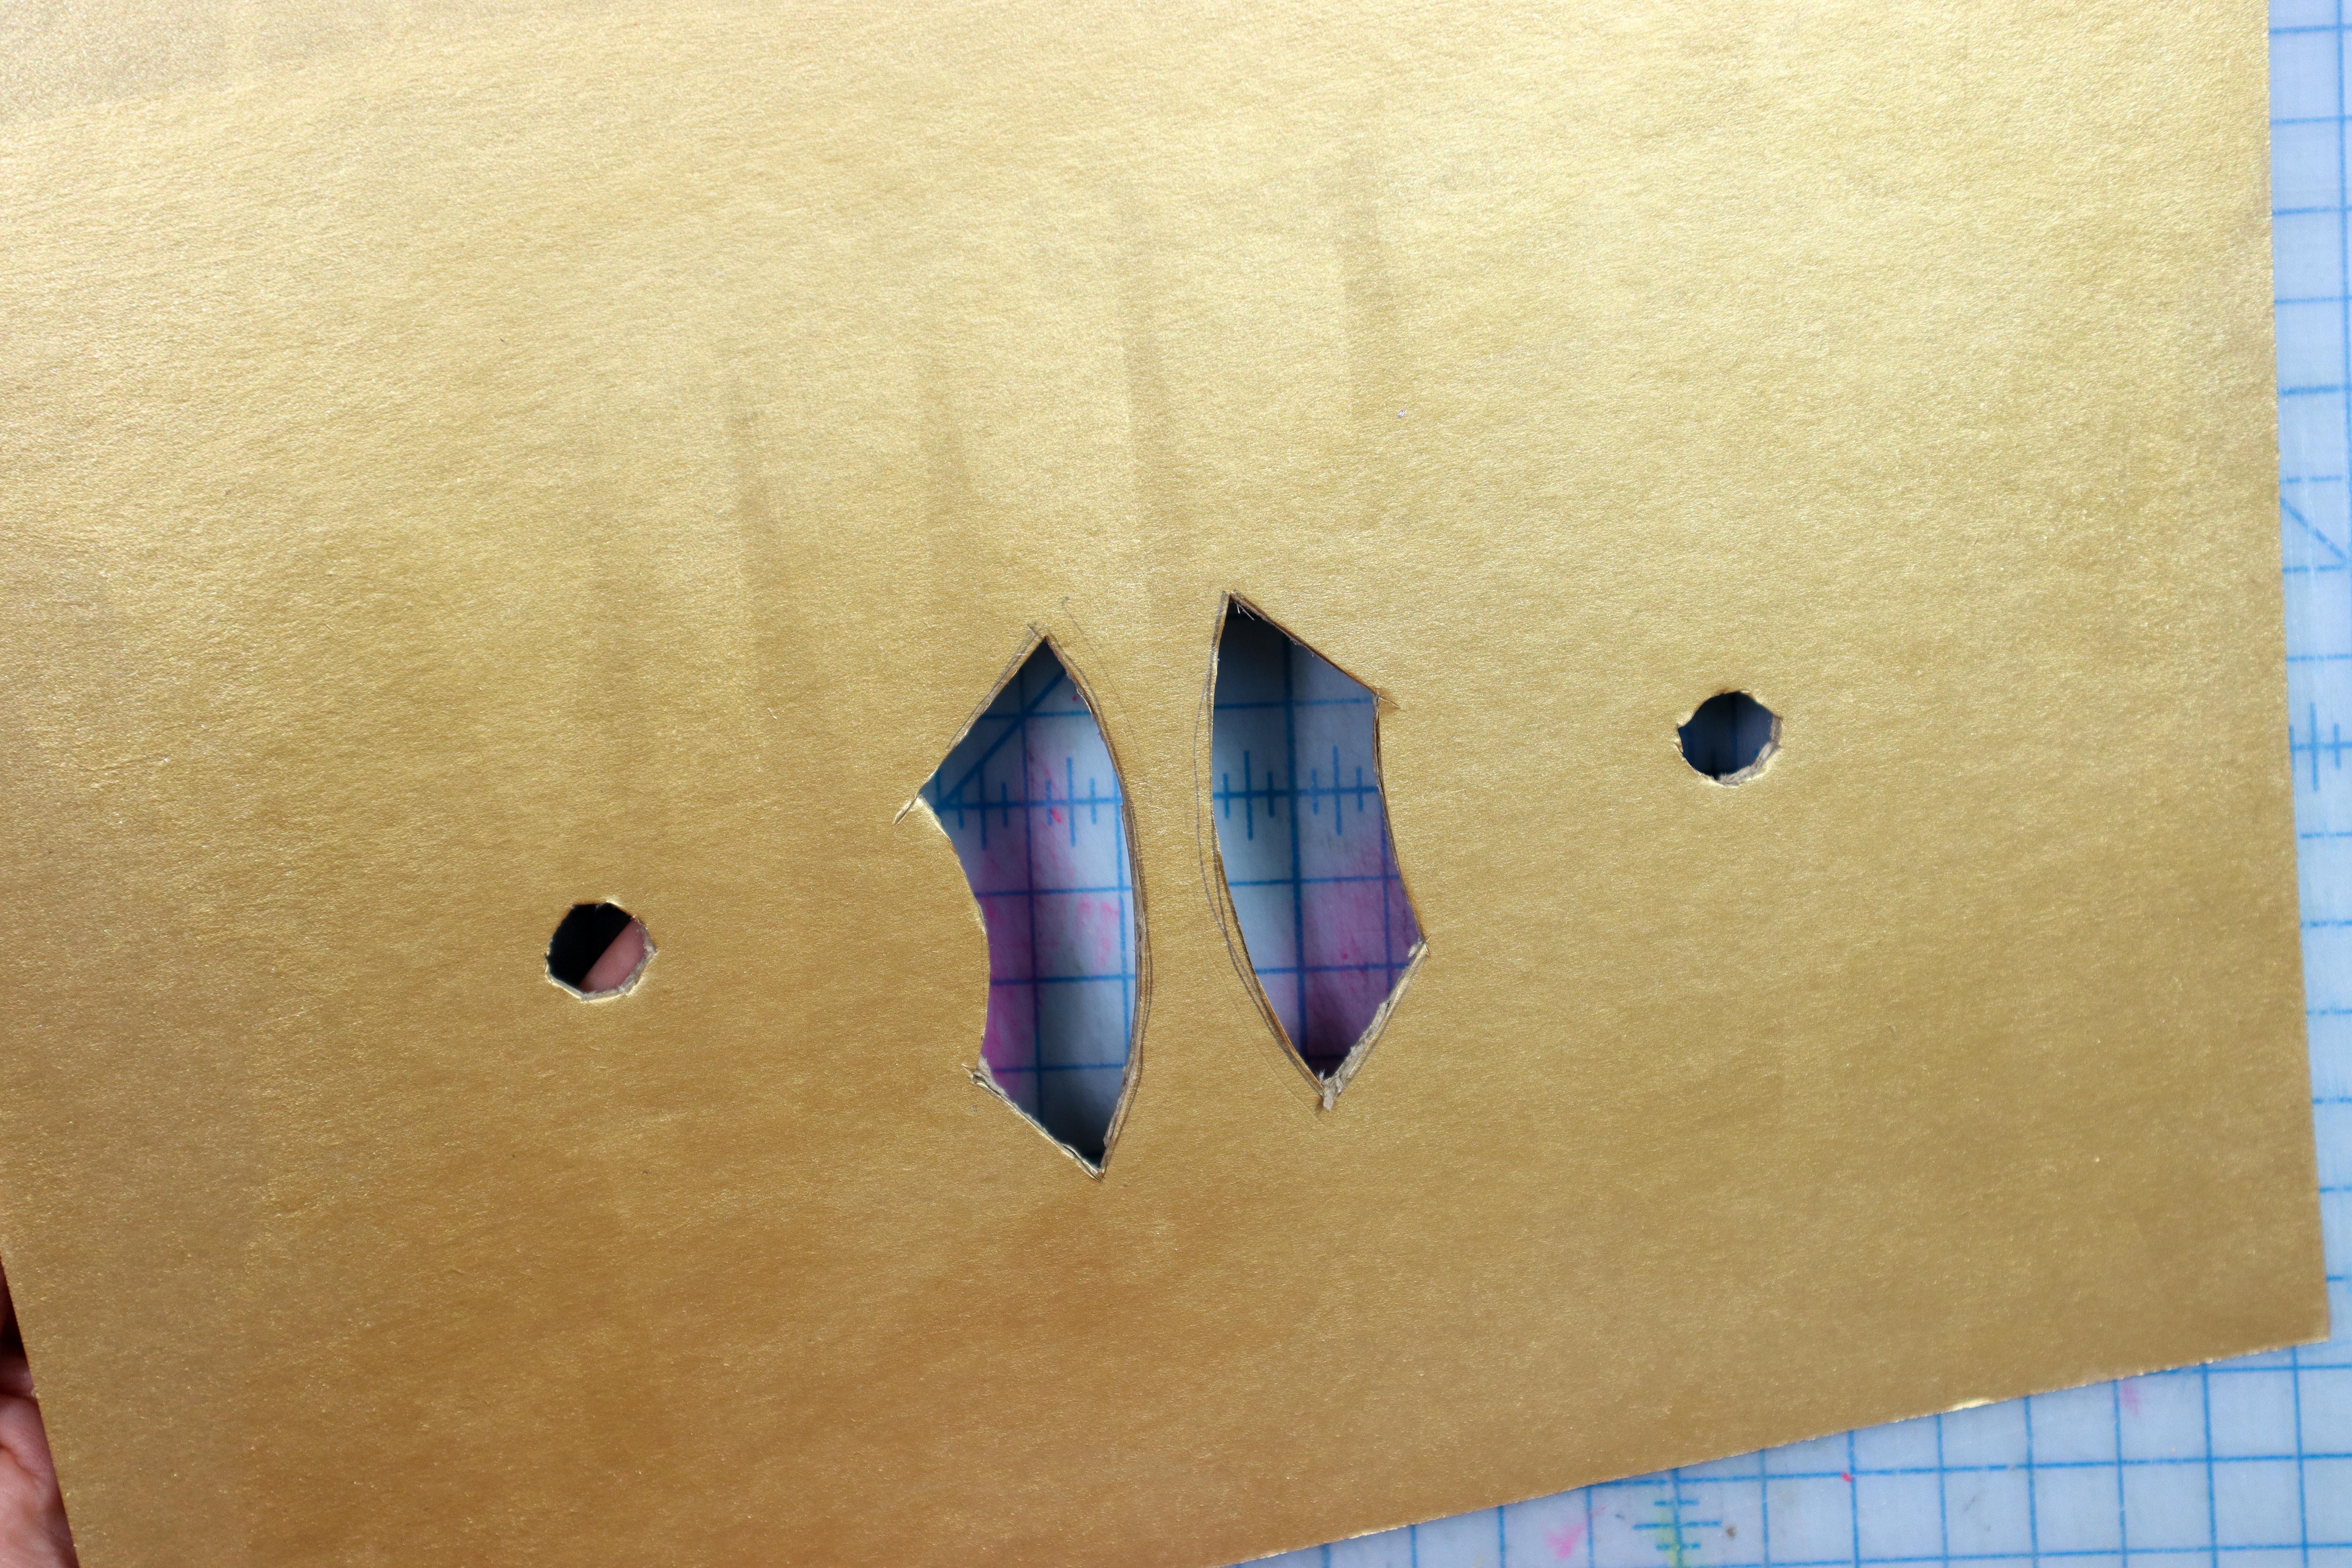
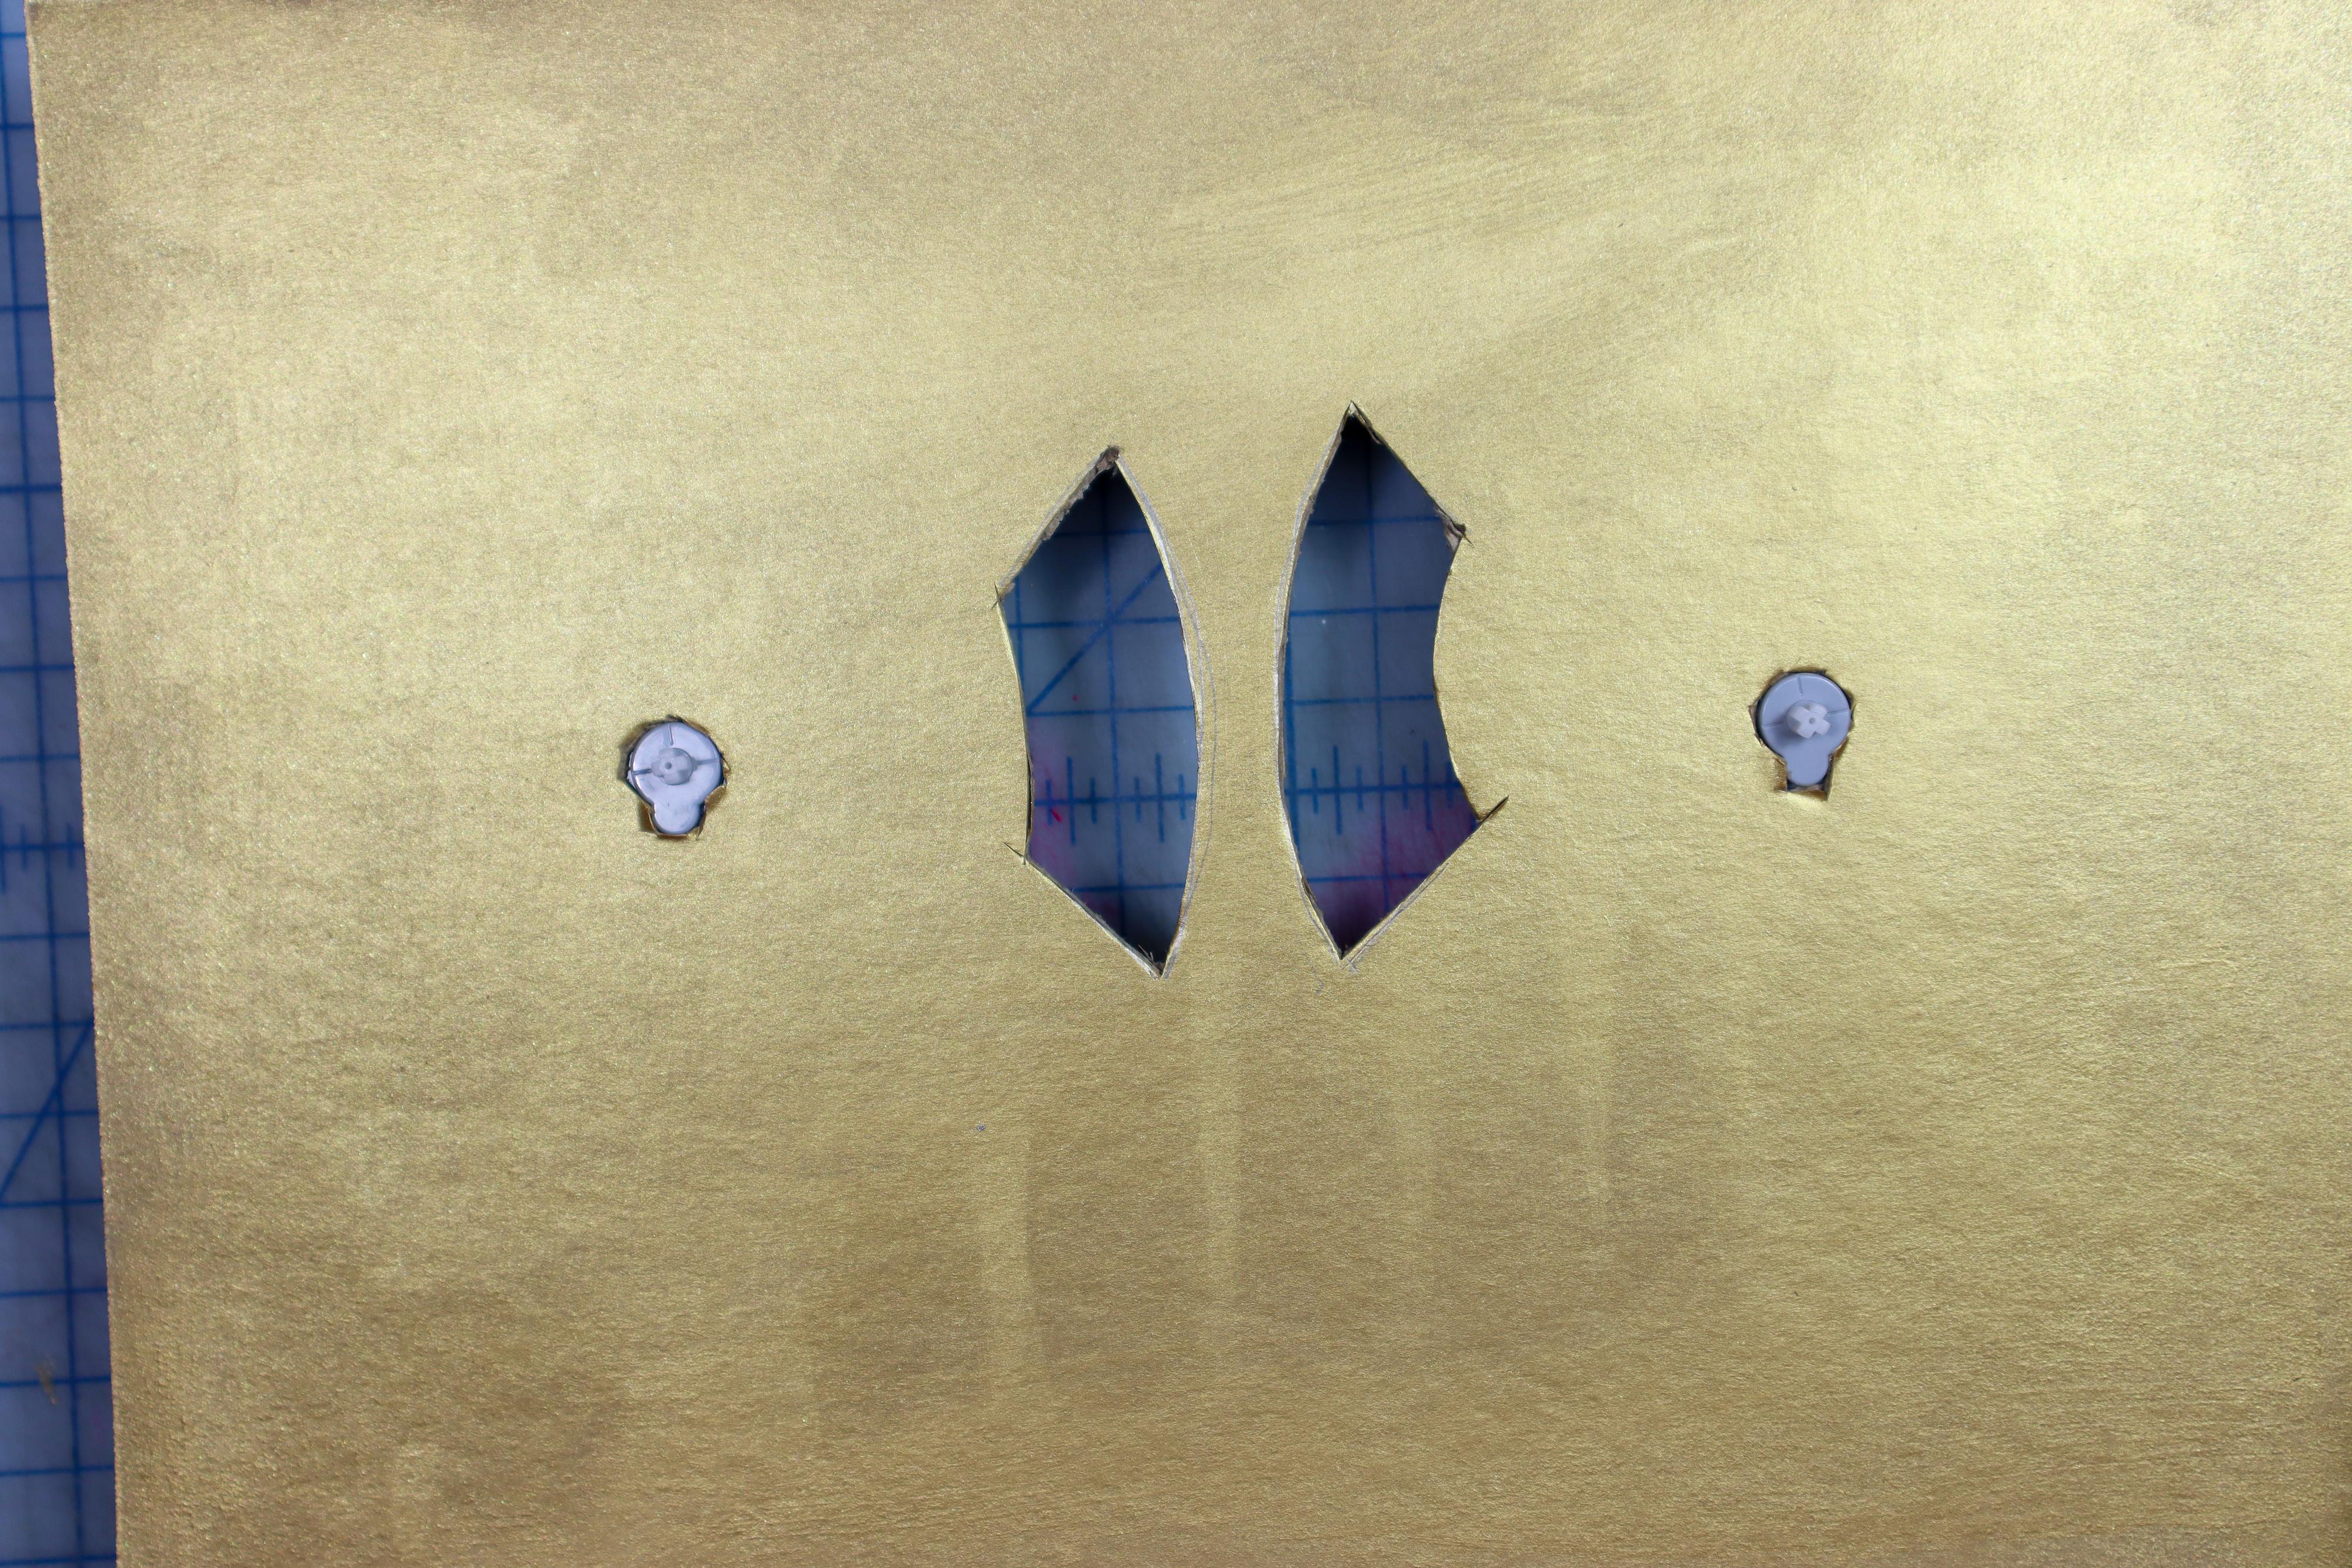
- Place the large circles onto the cardboard where the eyes will go. Mark the center of the circles and also the location of the tiny holes.
- Cut out the section under the perforation holes. Make sure you don't cut too far outside the area so that the eyepieces cover the hole completely.
- Cut holes for the motors to go through. The center is about 1/2 inch, and a small notch needs to be cut from the bottom to account for the shape of the plastic, as shown.
Glue the Motors in Place
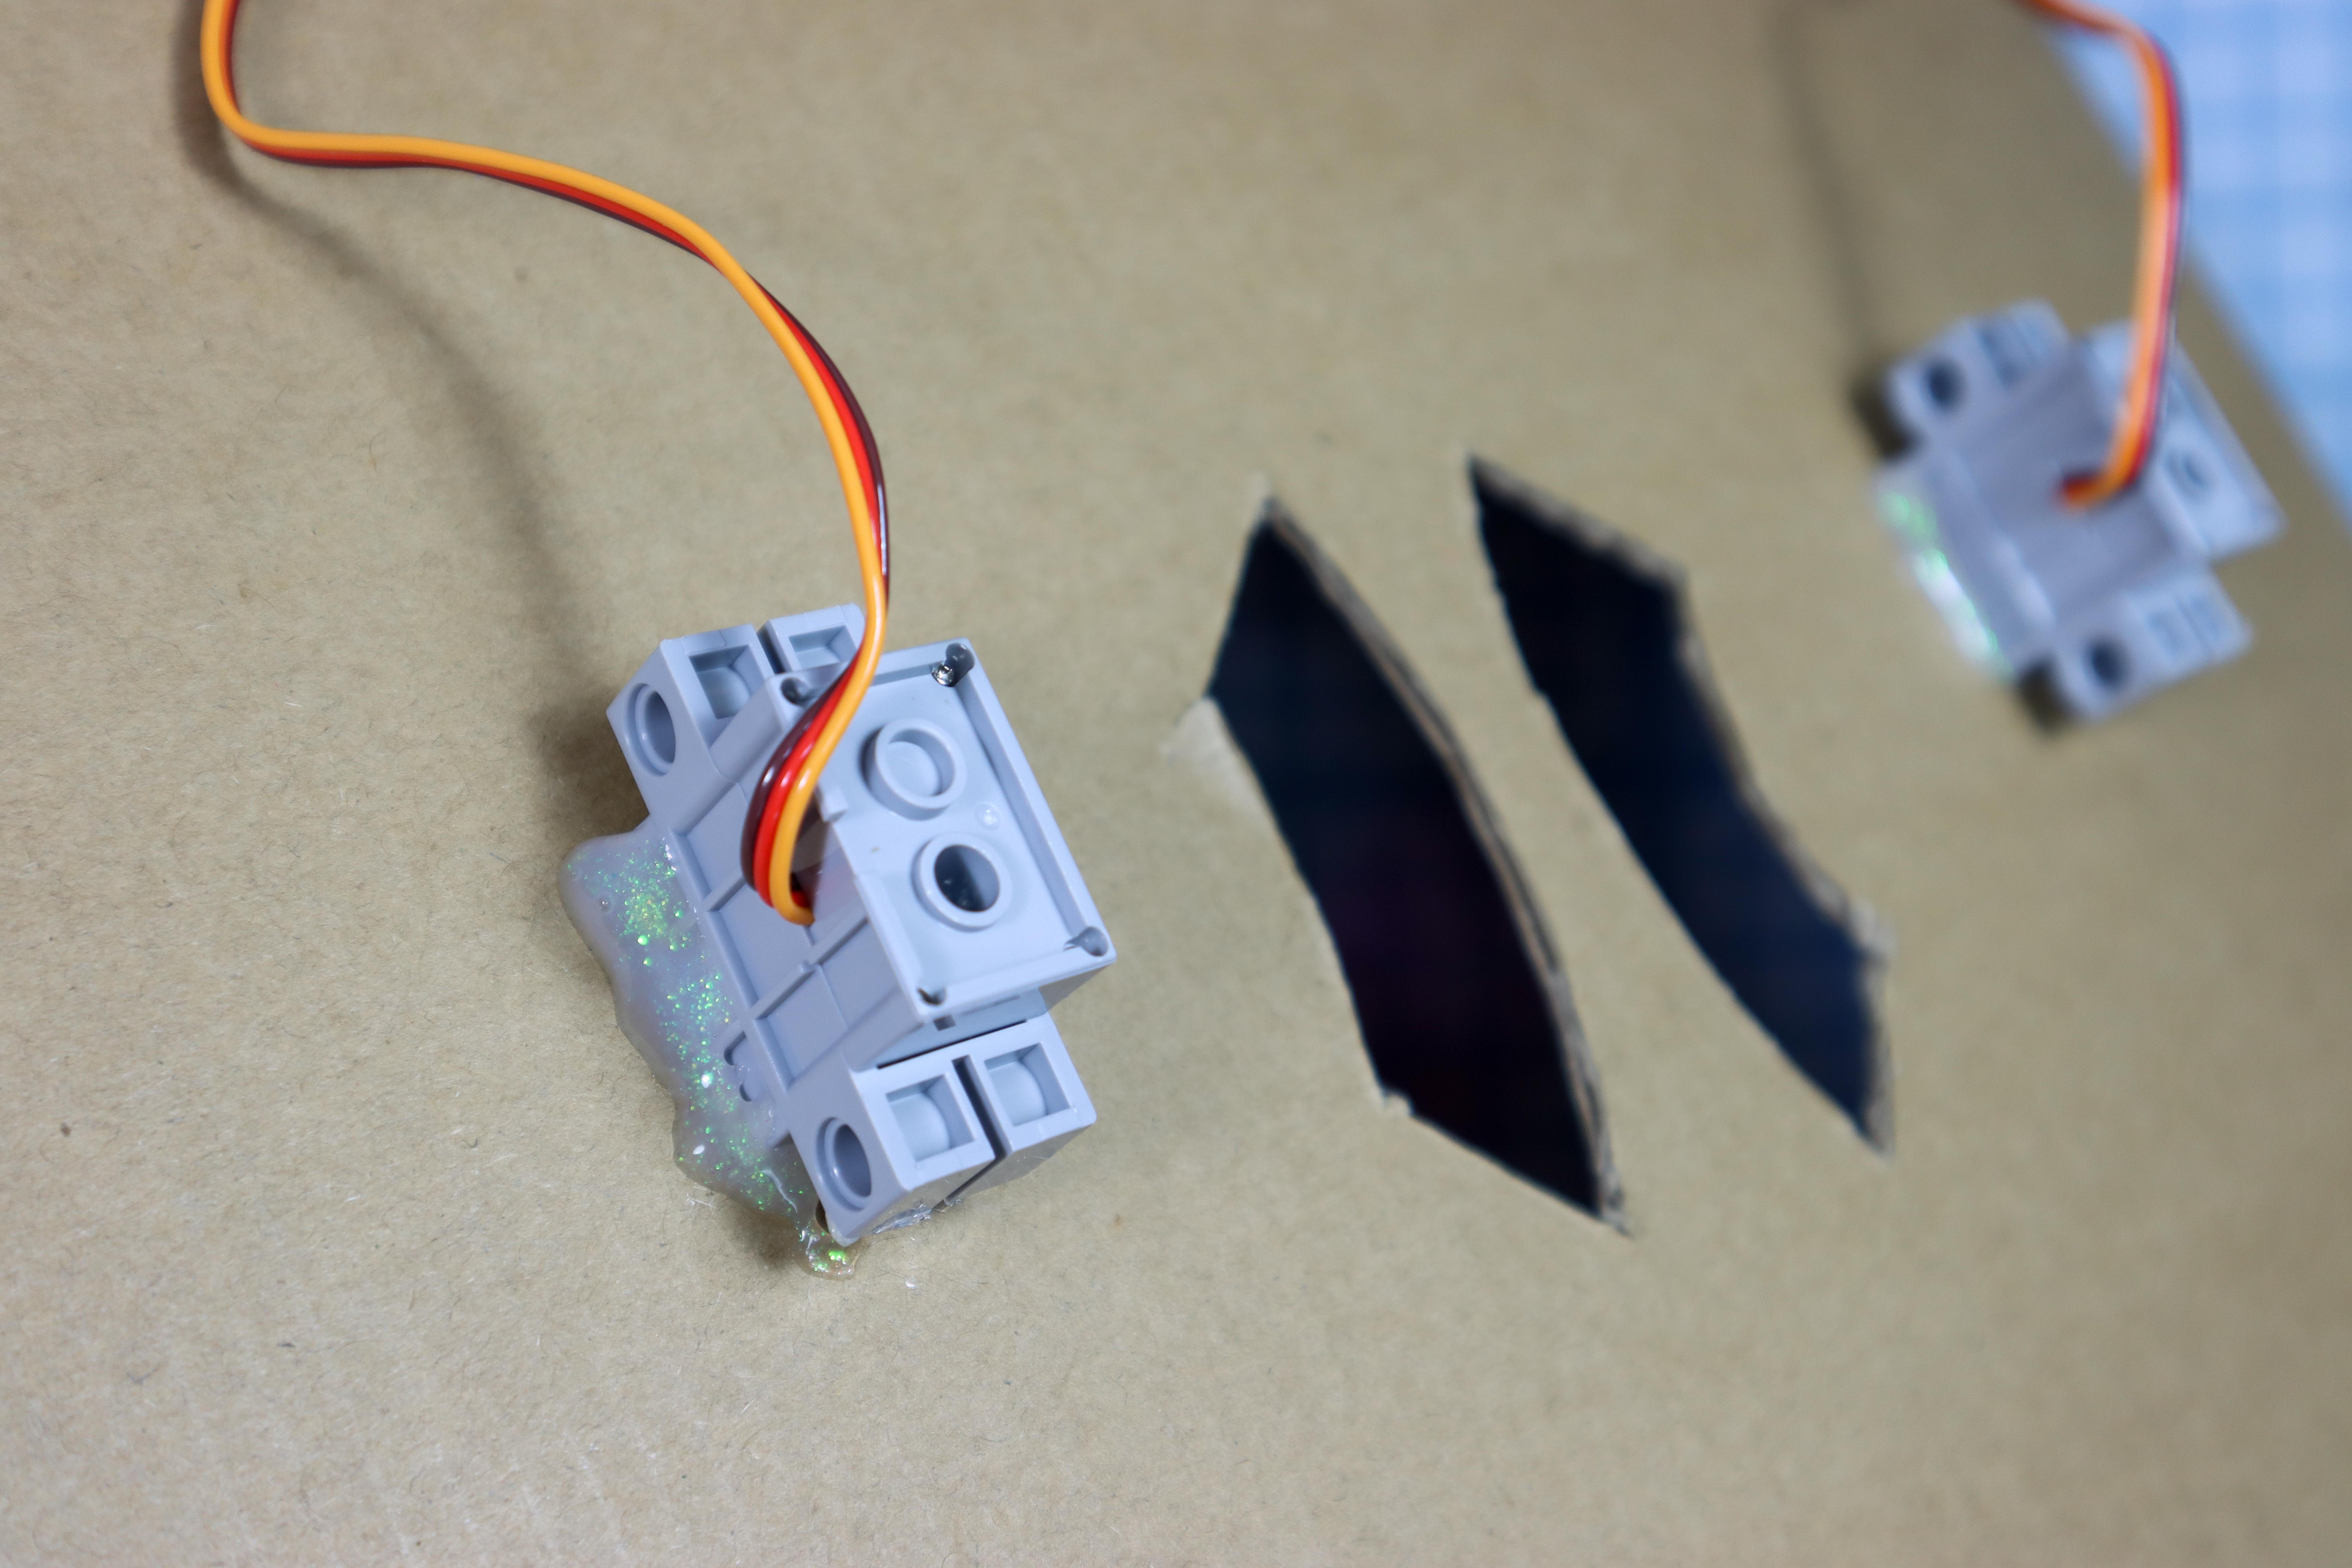
- Glue the motors in place from behind. Both motors should be facing the same direction. This will make the angles easier to code.
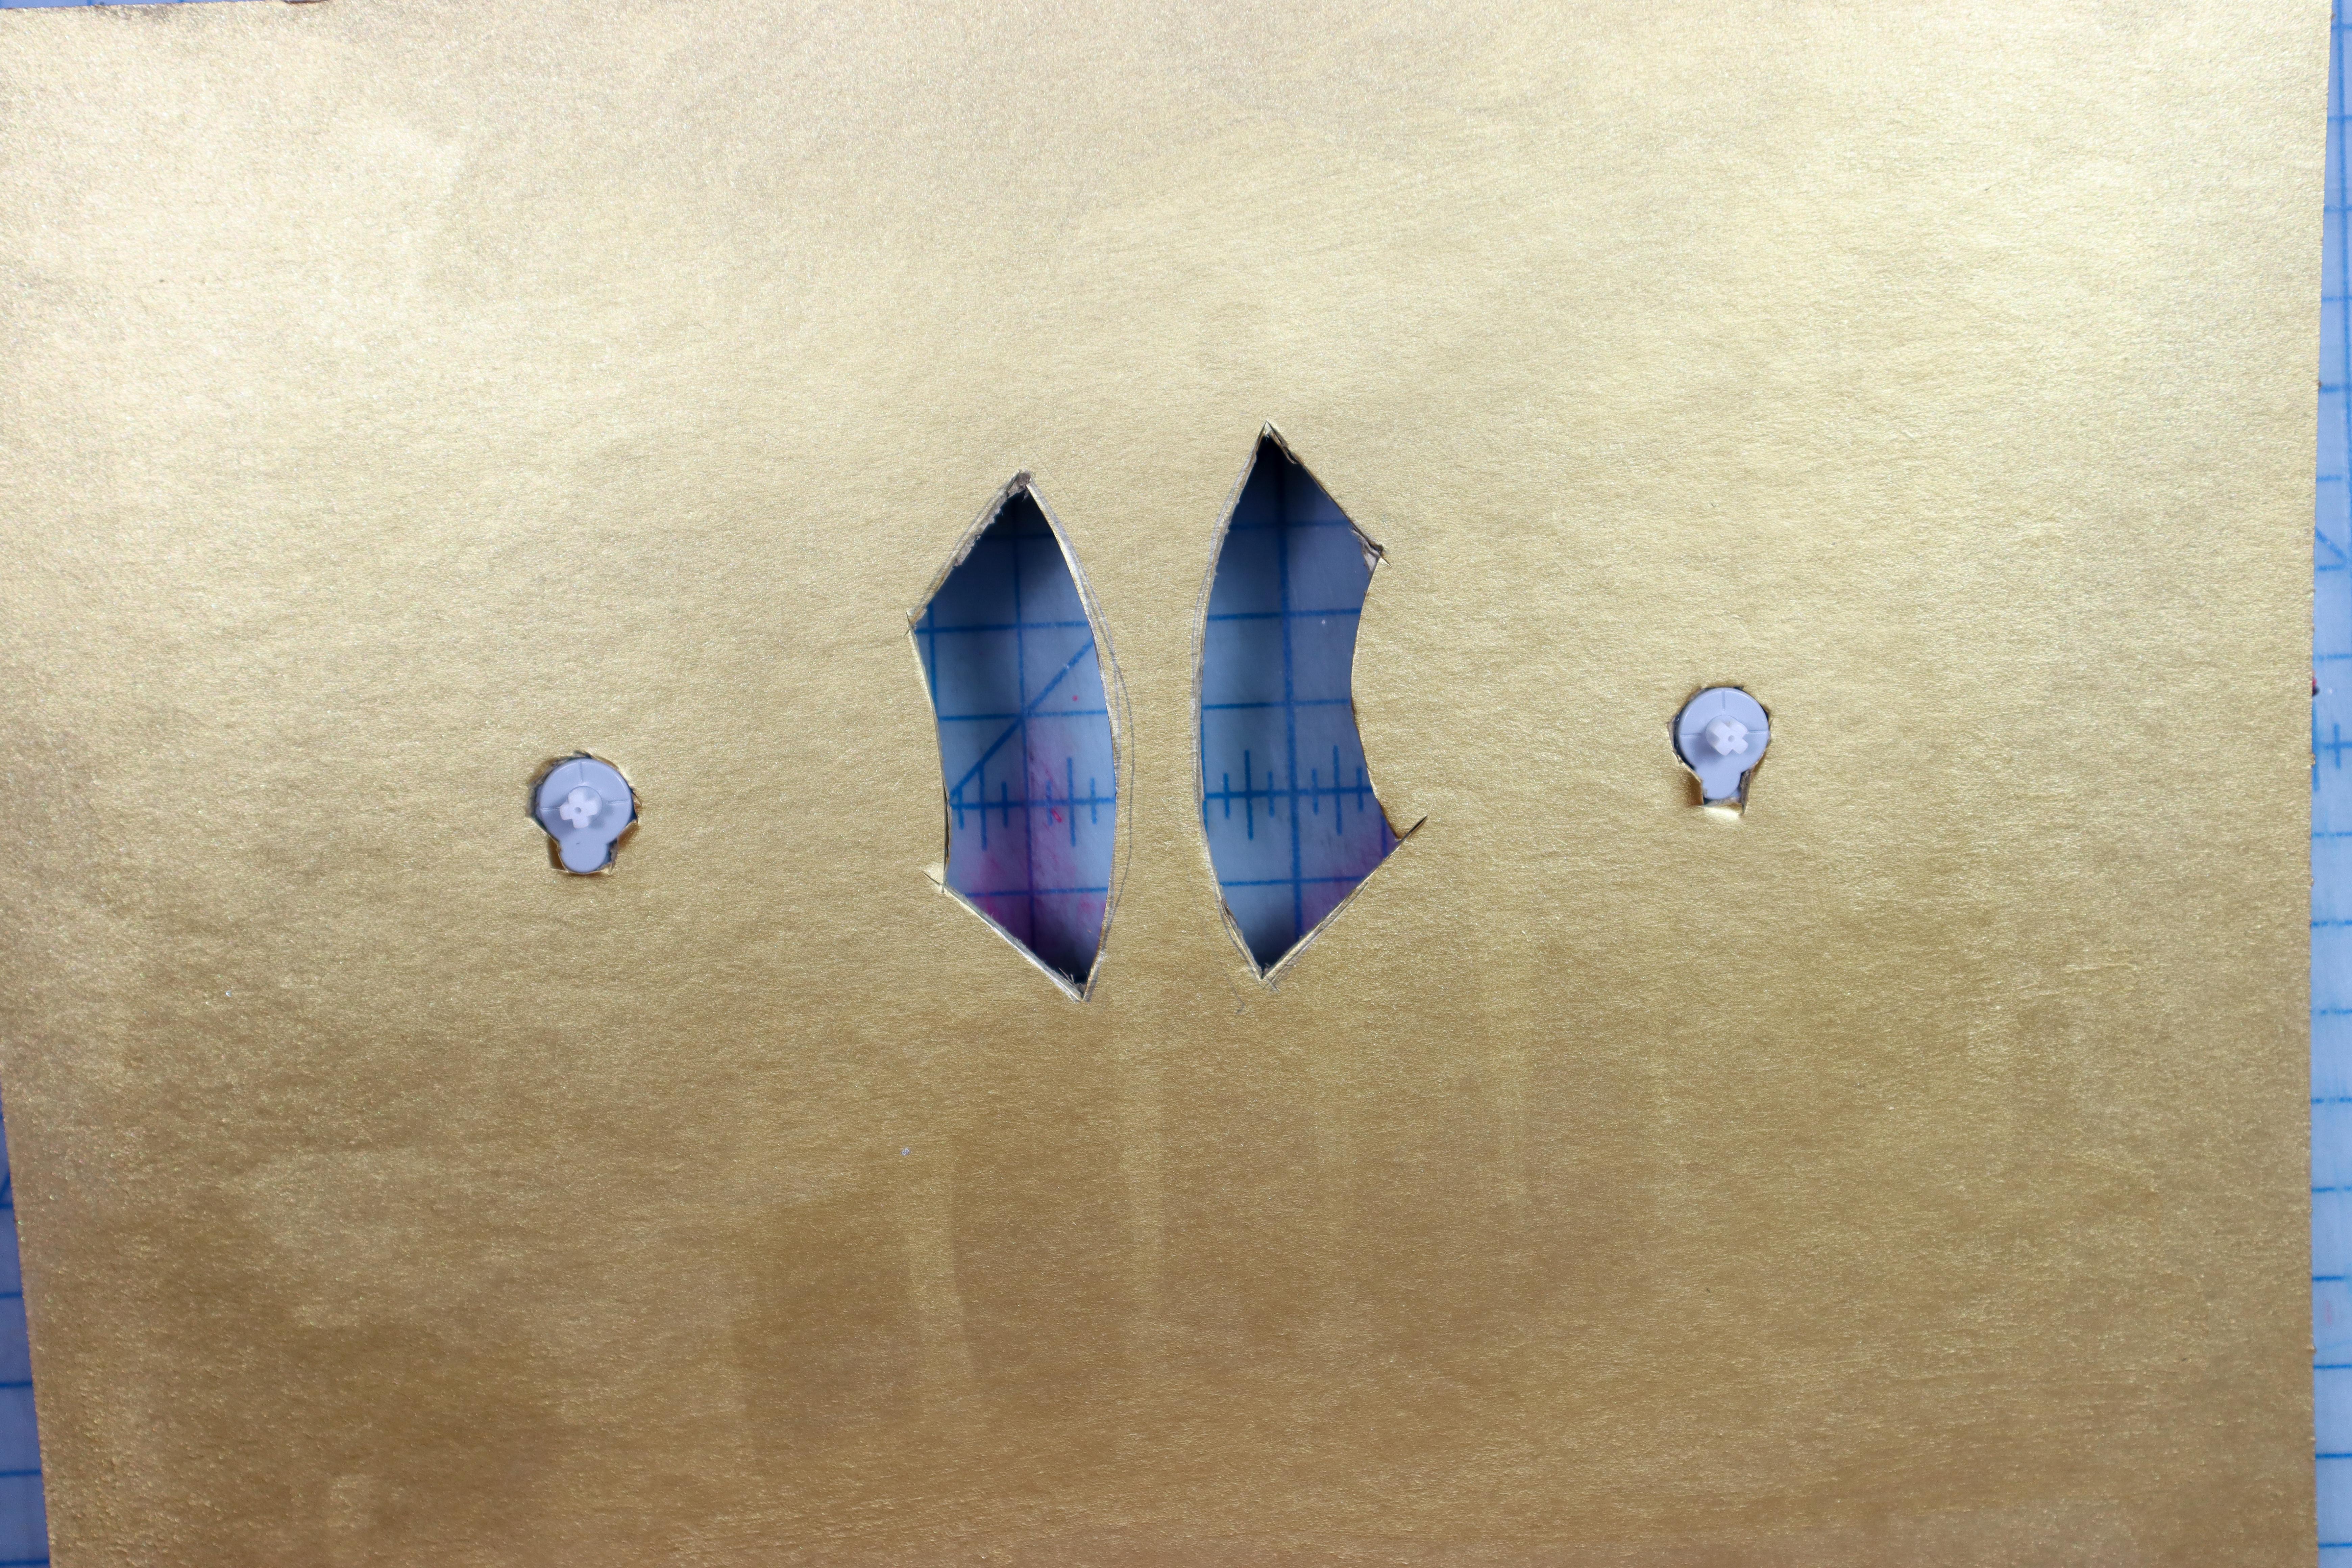
Glue the Pieces
- Glue the eye pieces in place, aligning the holes with the cutouts.
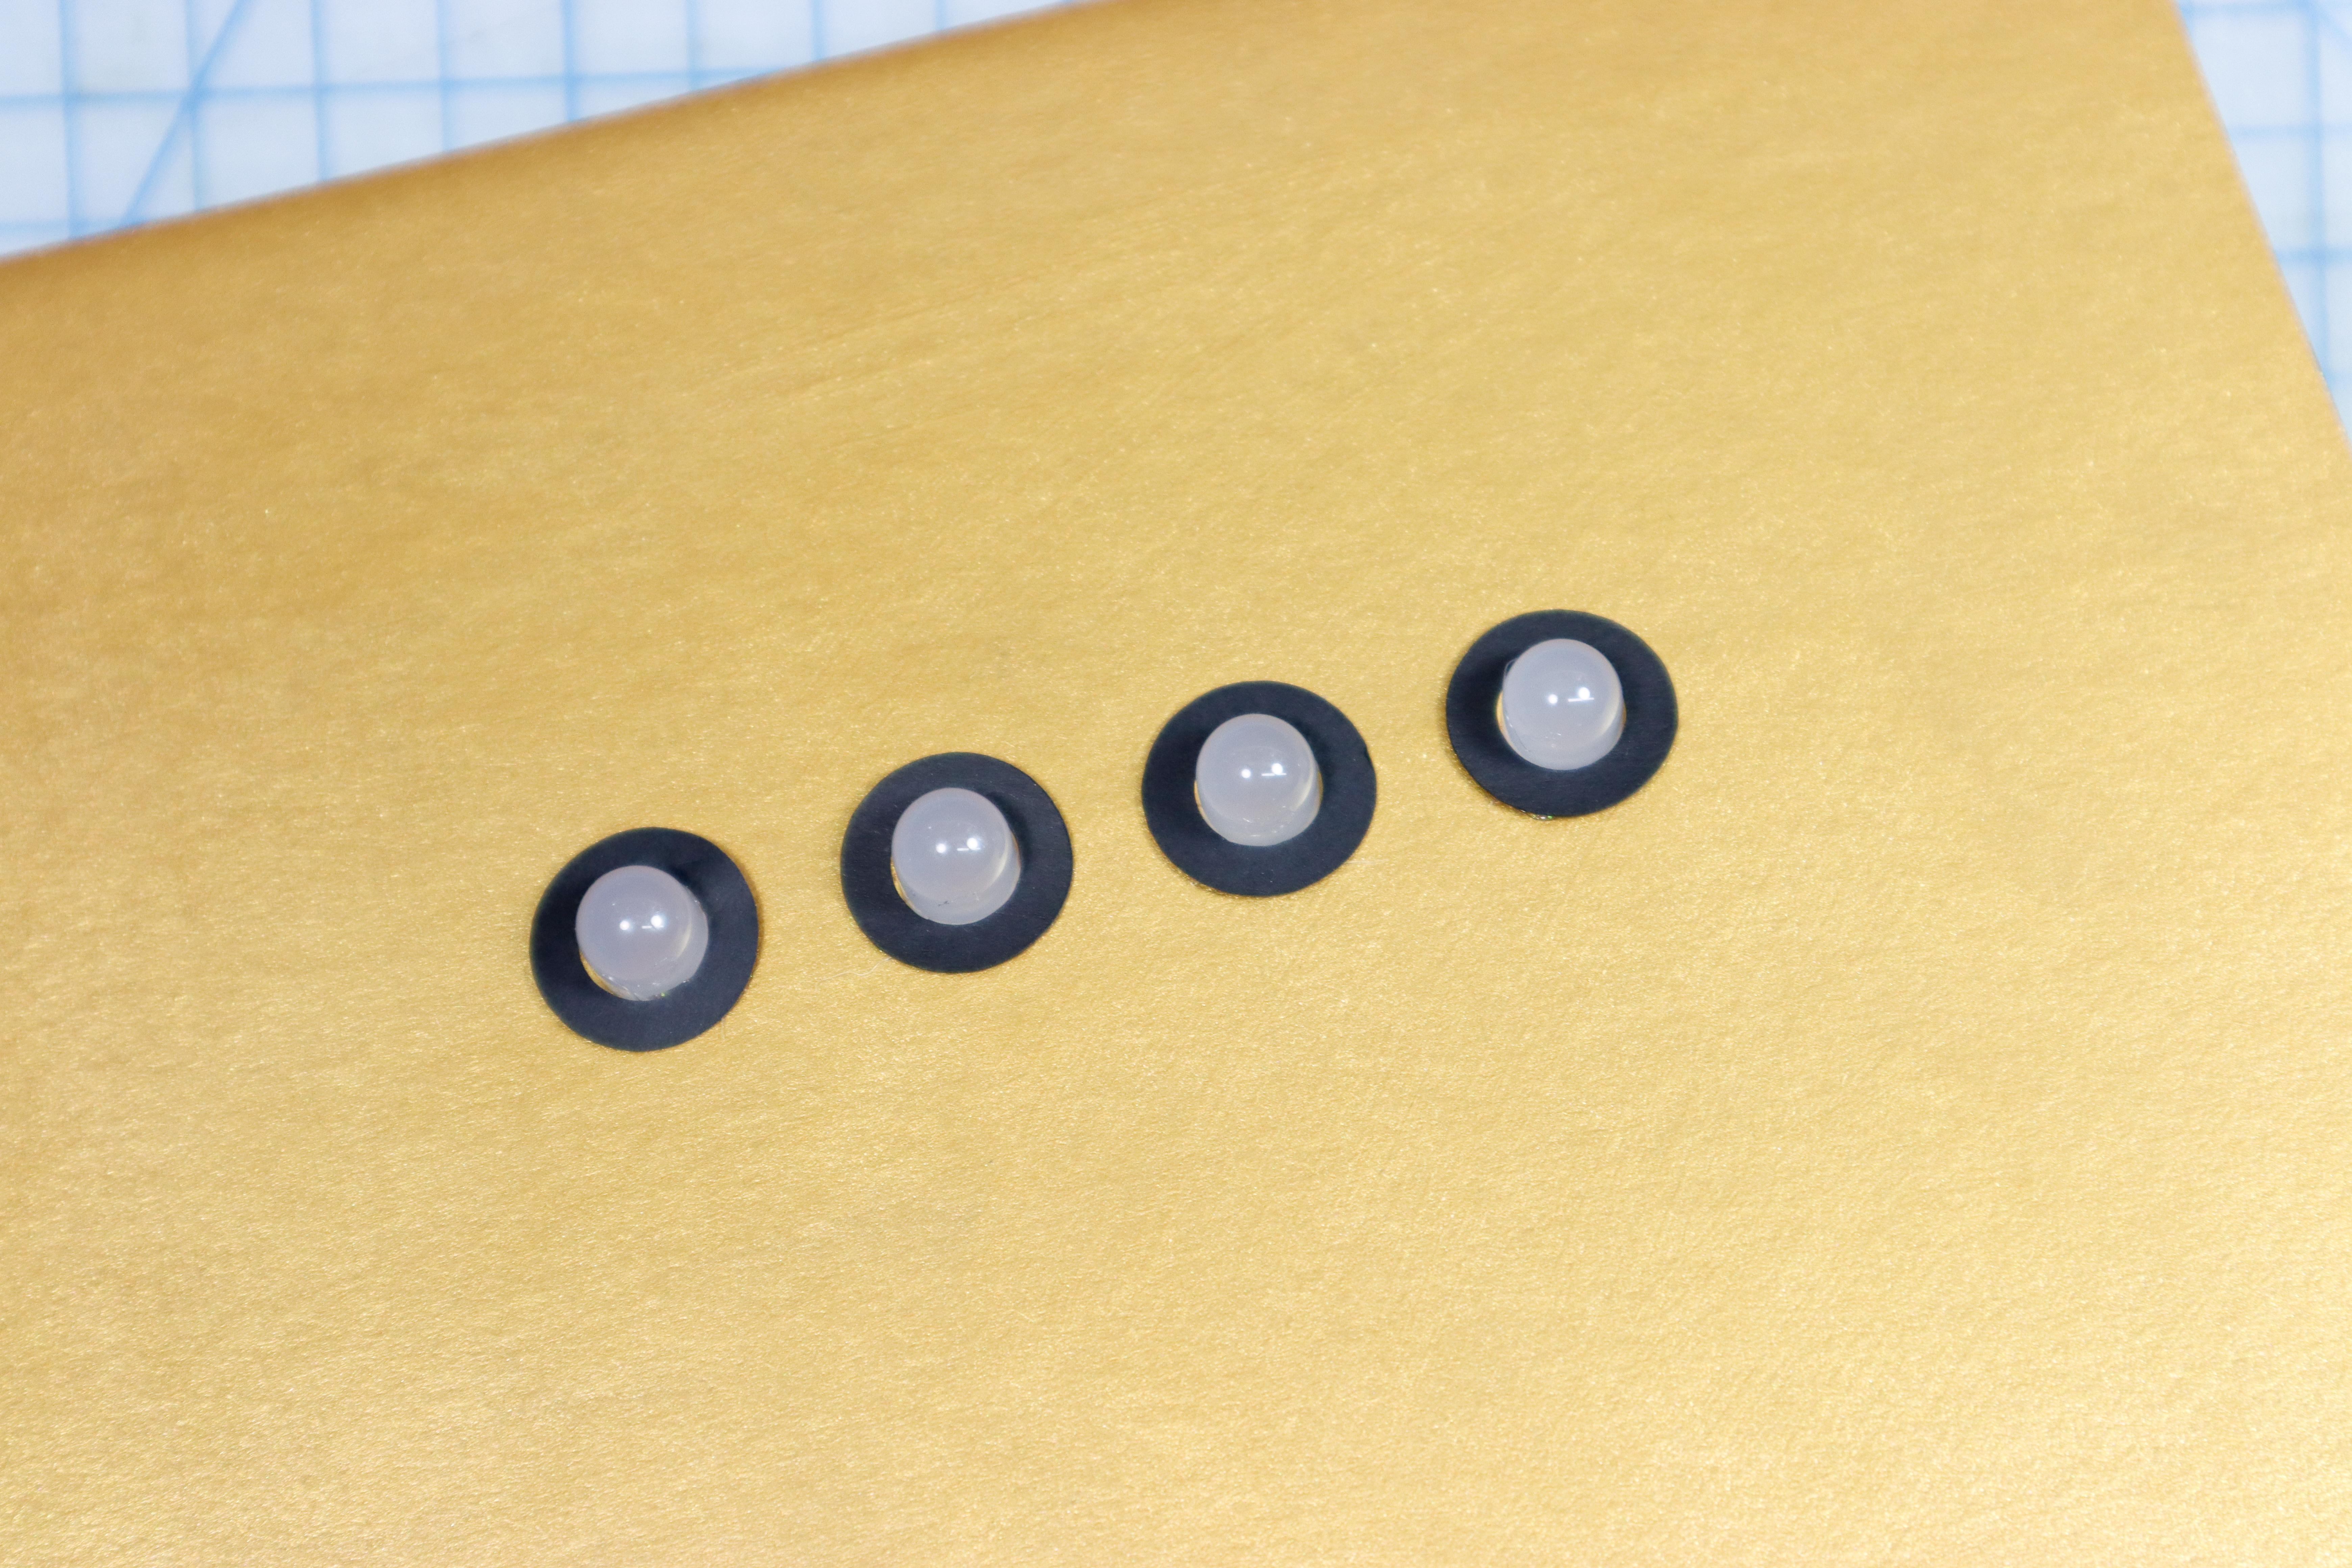
Prepare the Eye Balls
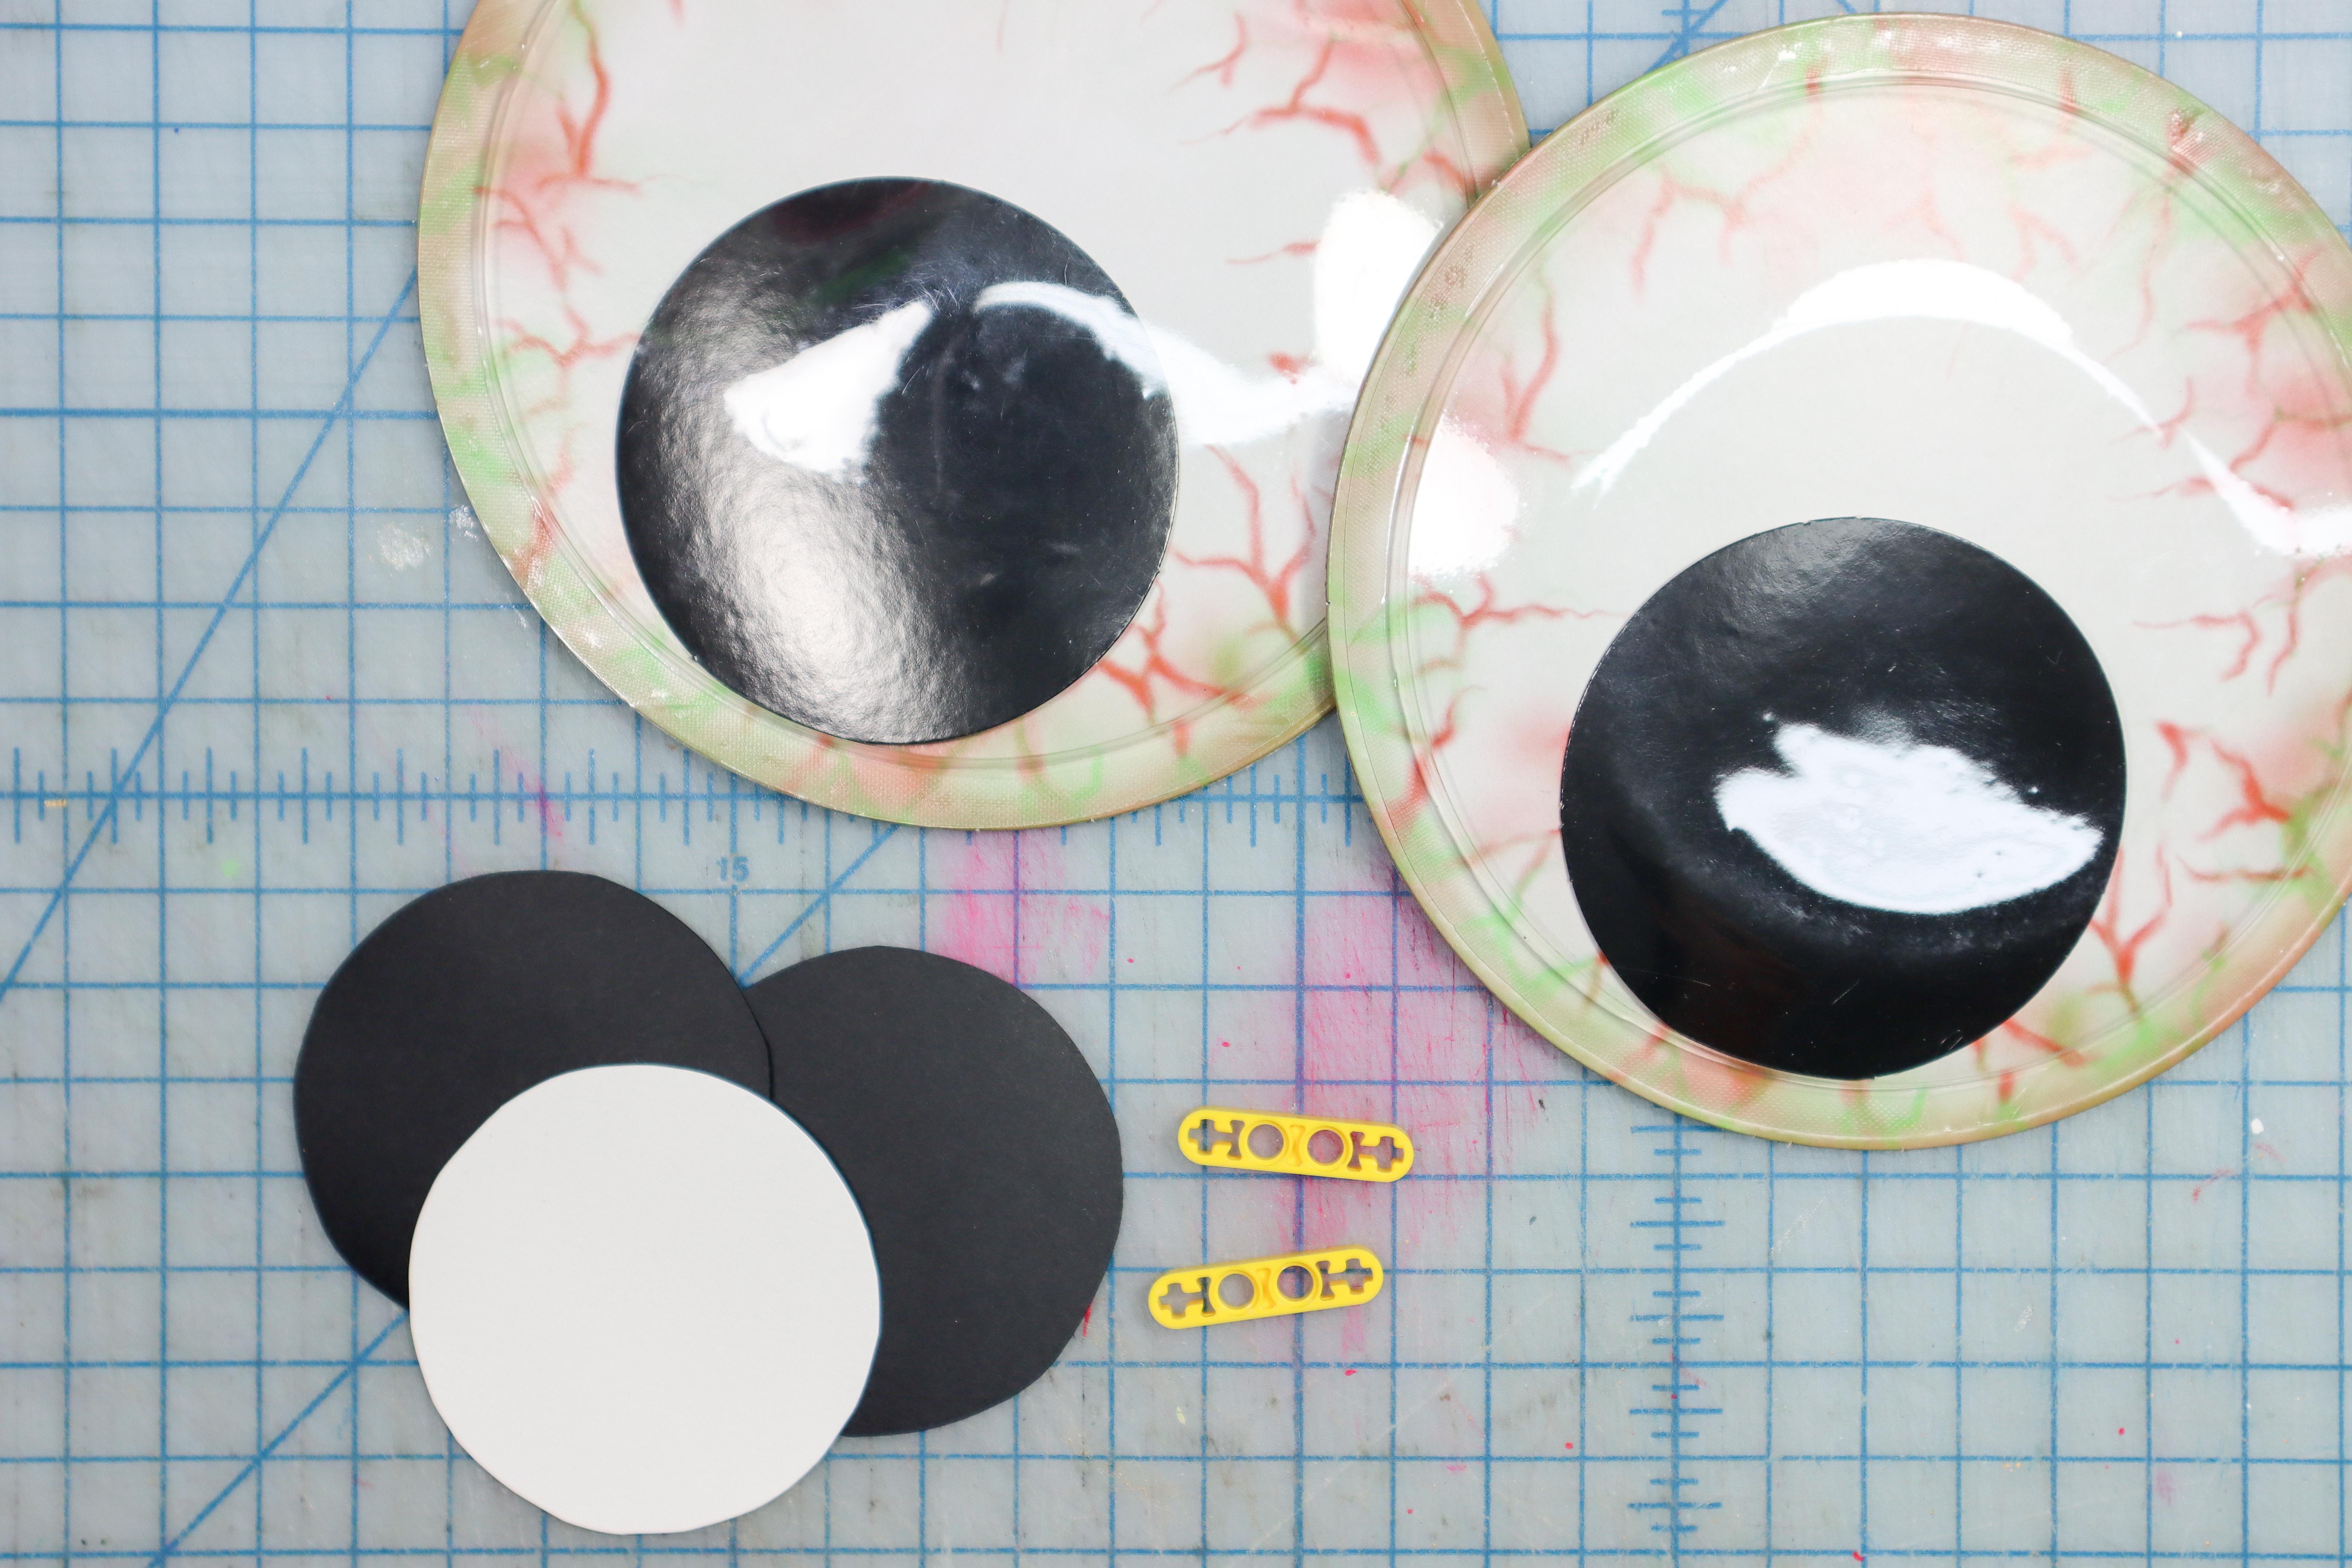

- Cut the small circles from black paper (or reuse the pupils from the large googly eyes.)
- Remove the plastic covers from the googly eyes. Discard the backing.
Glue the Motor Heads
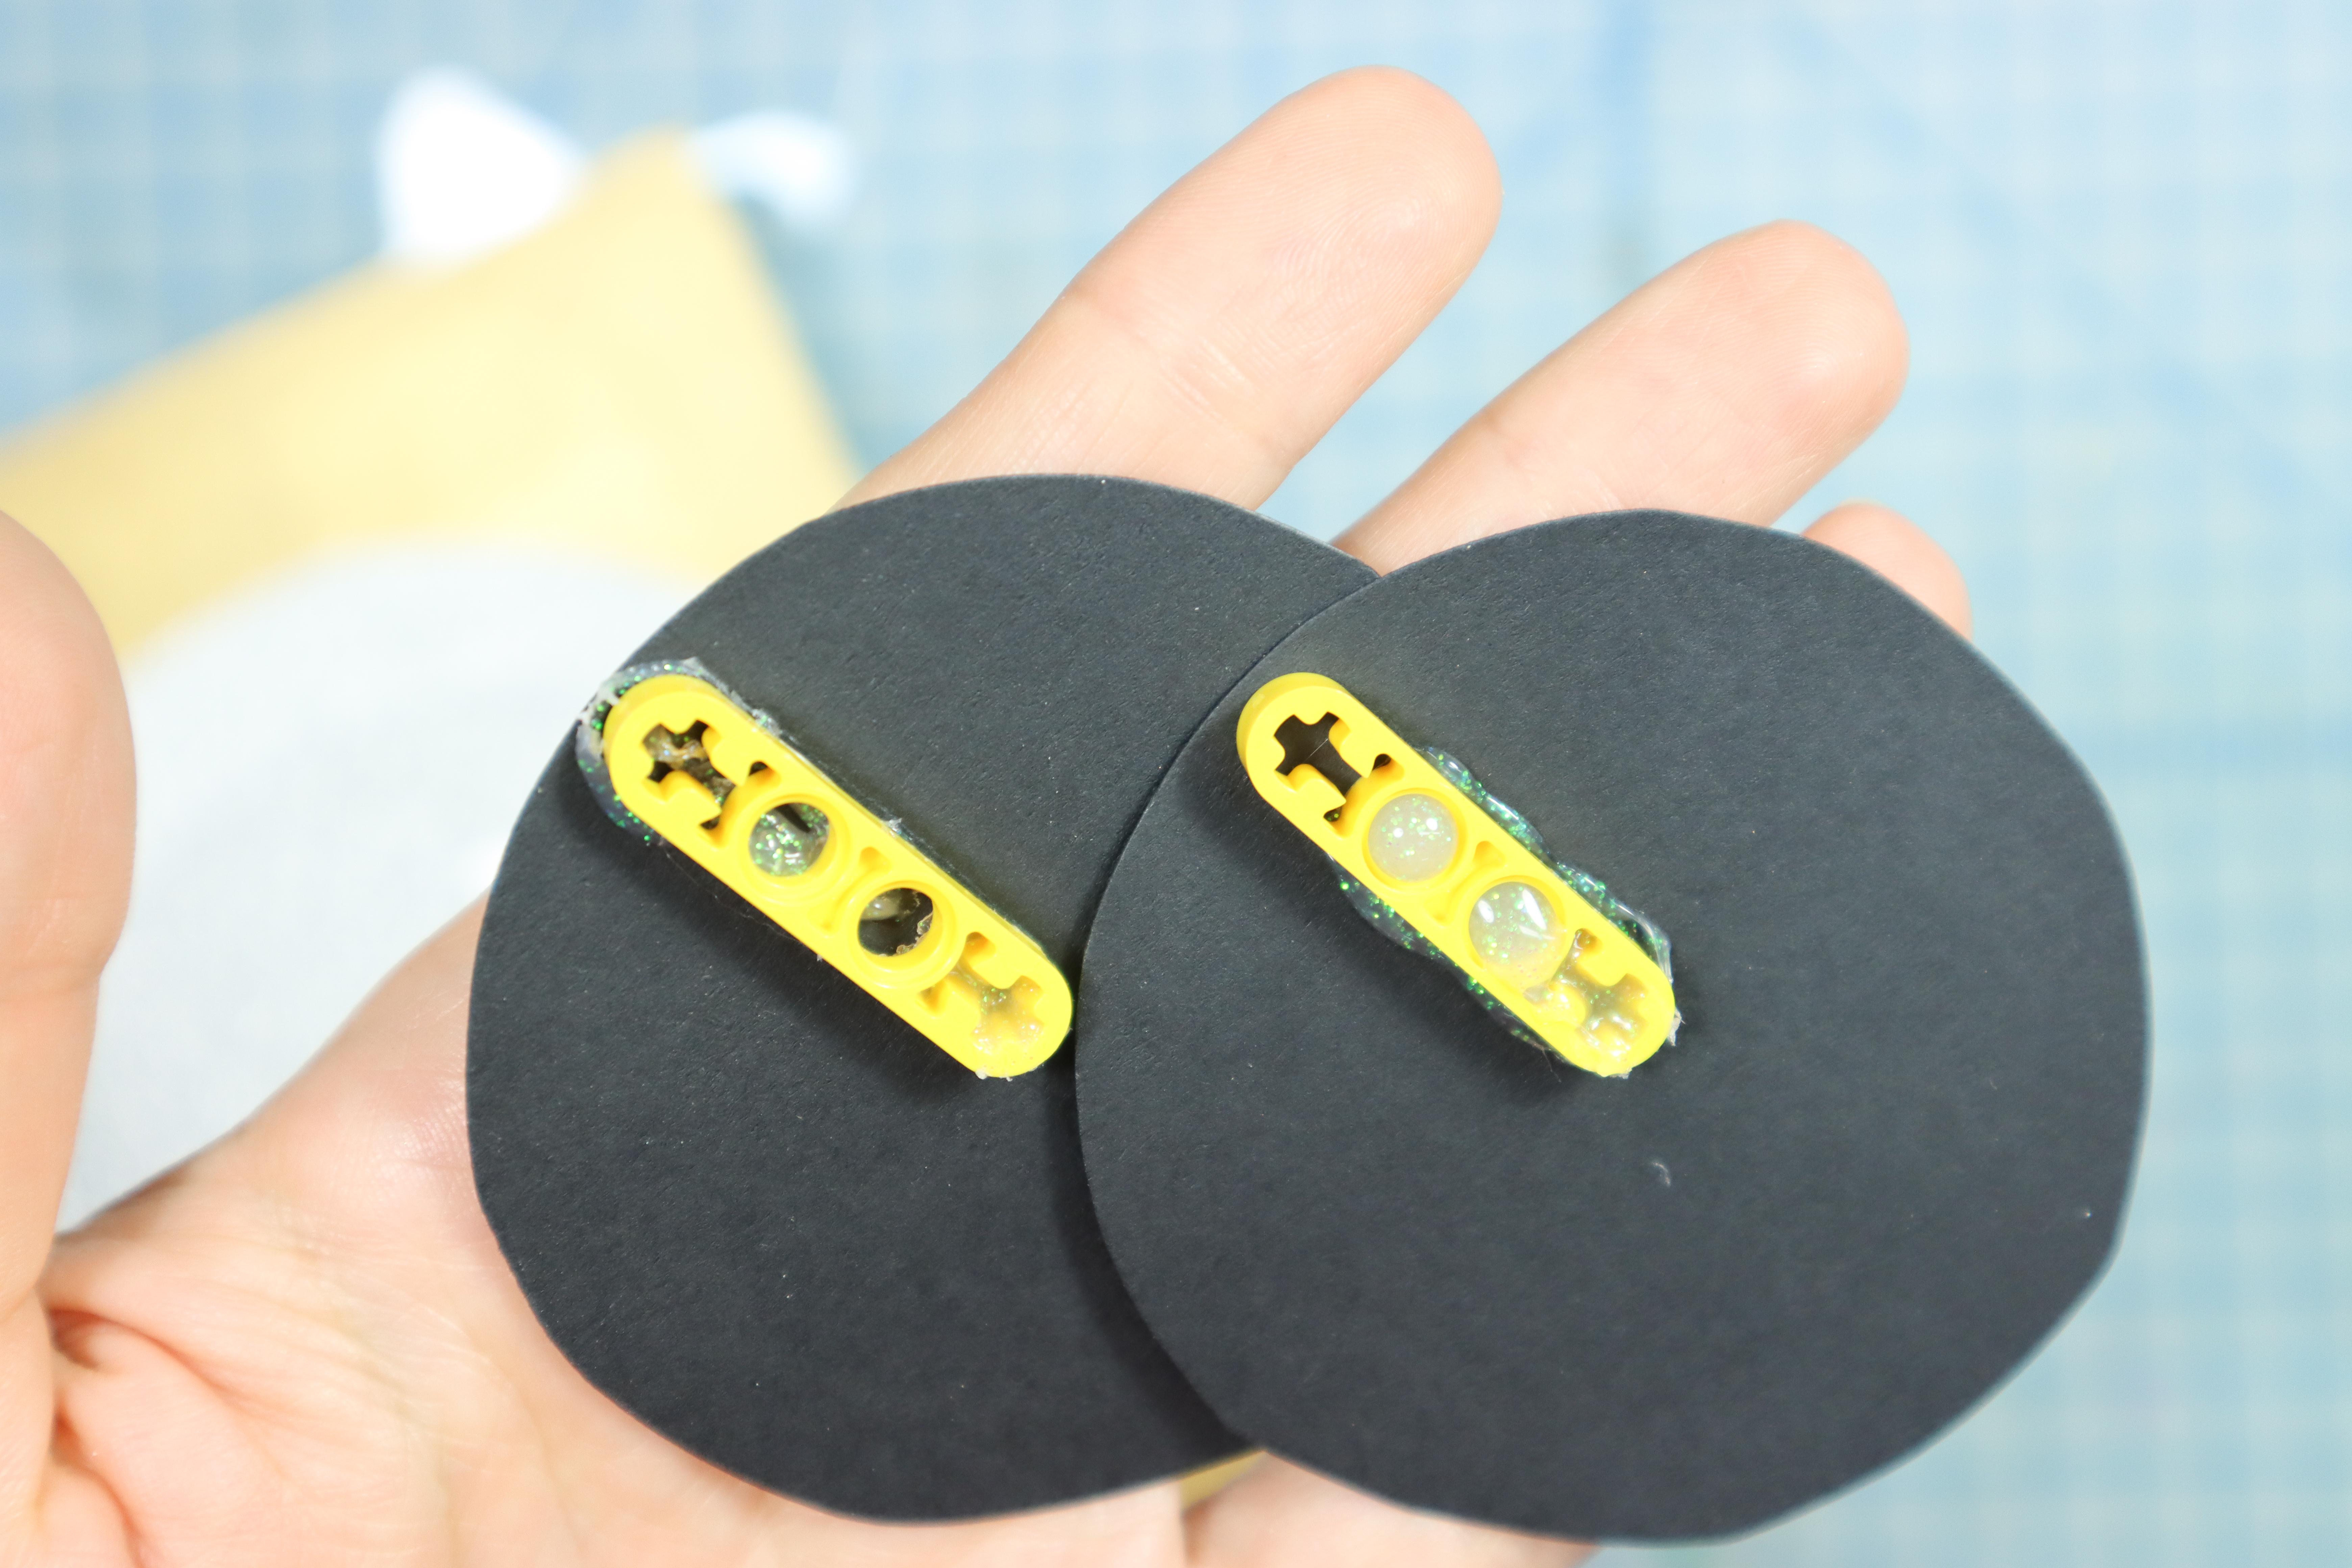
- Hot glue the LEGO pieces to the pupils as shown with the "+" part at the edge.
- Tip: Avoid getting glue into the "+" area near the edge so that the motor head will fit inside.
Connect the Circuit
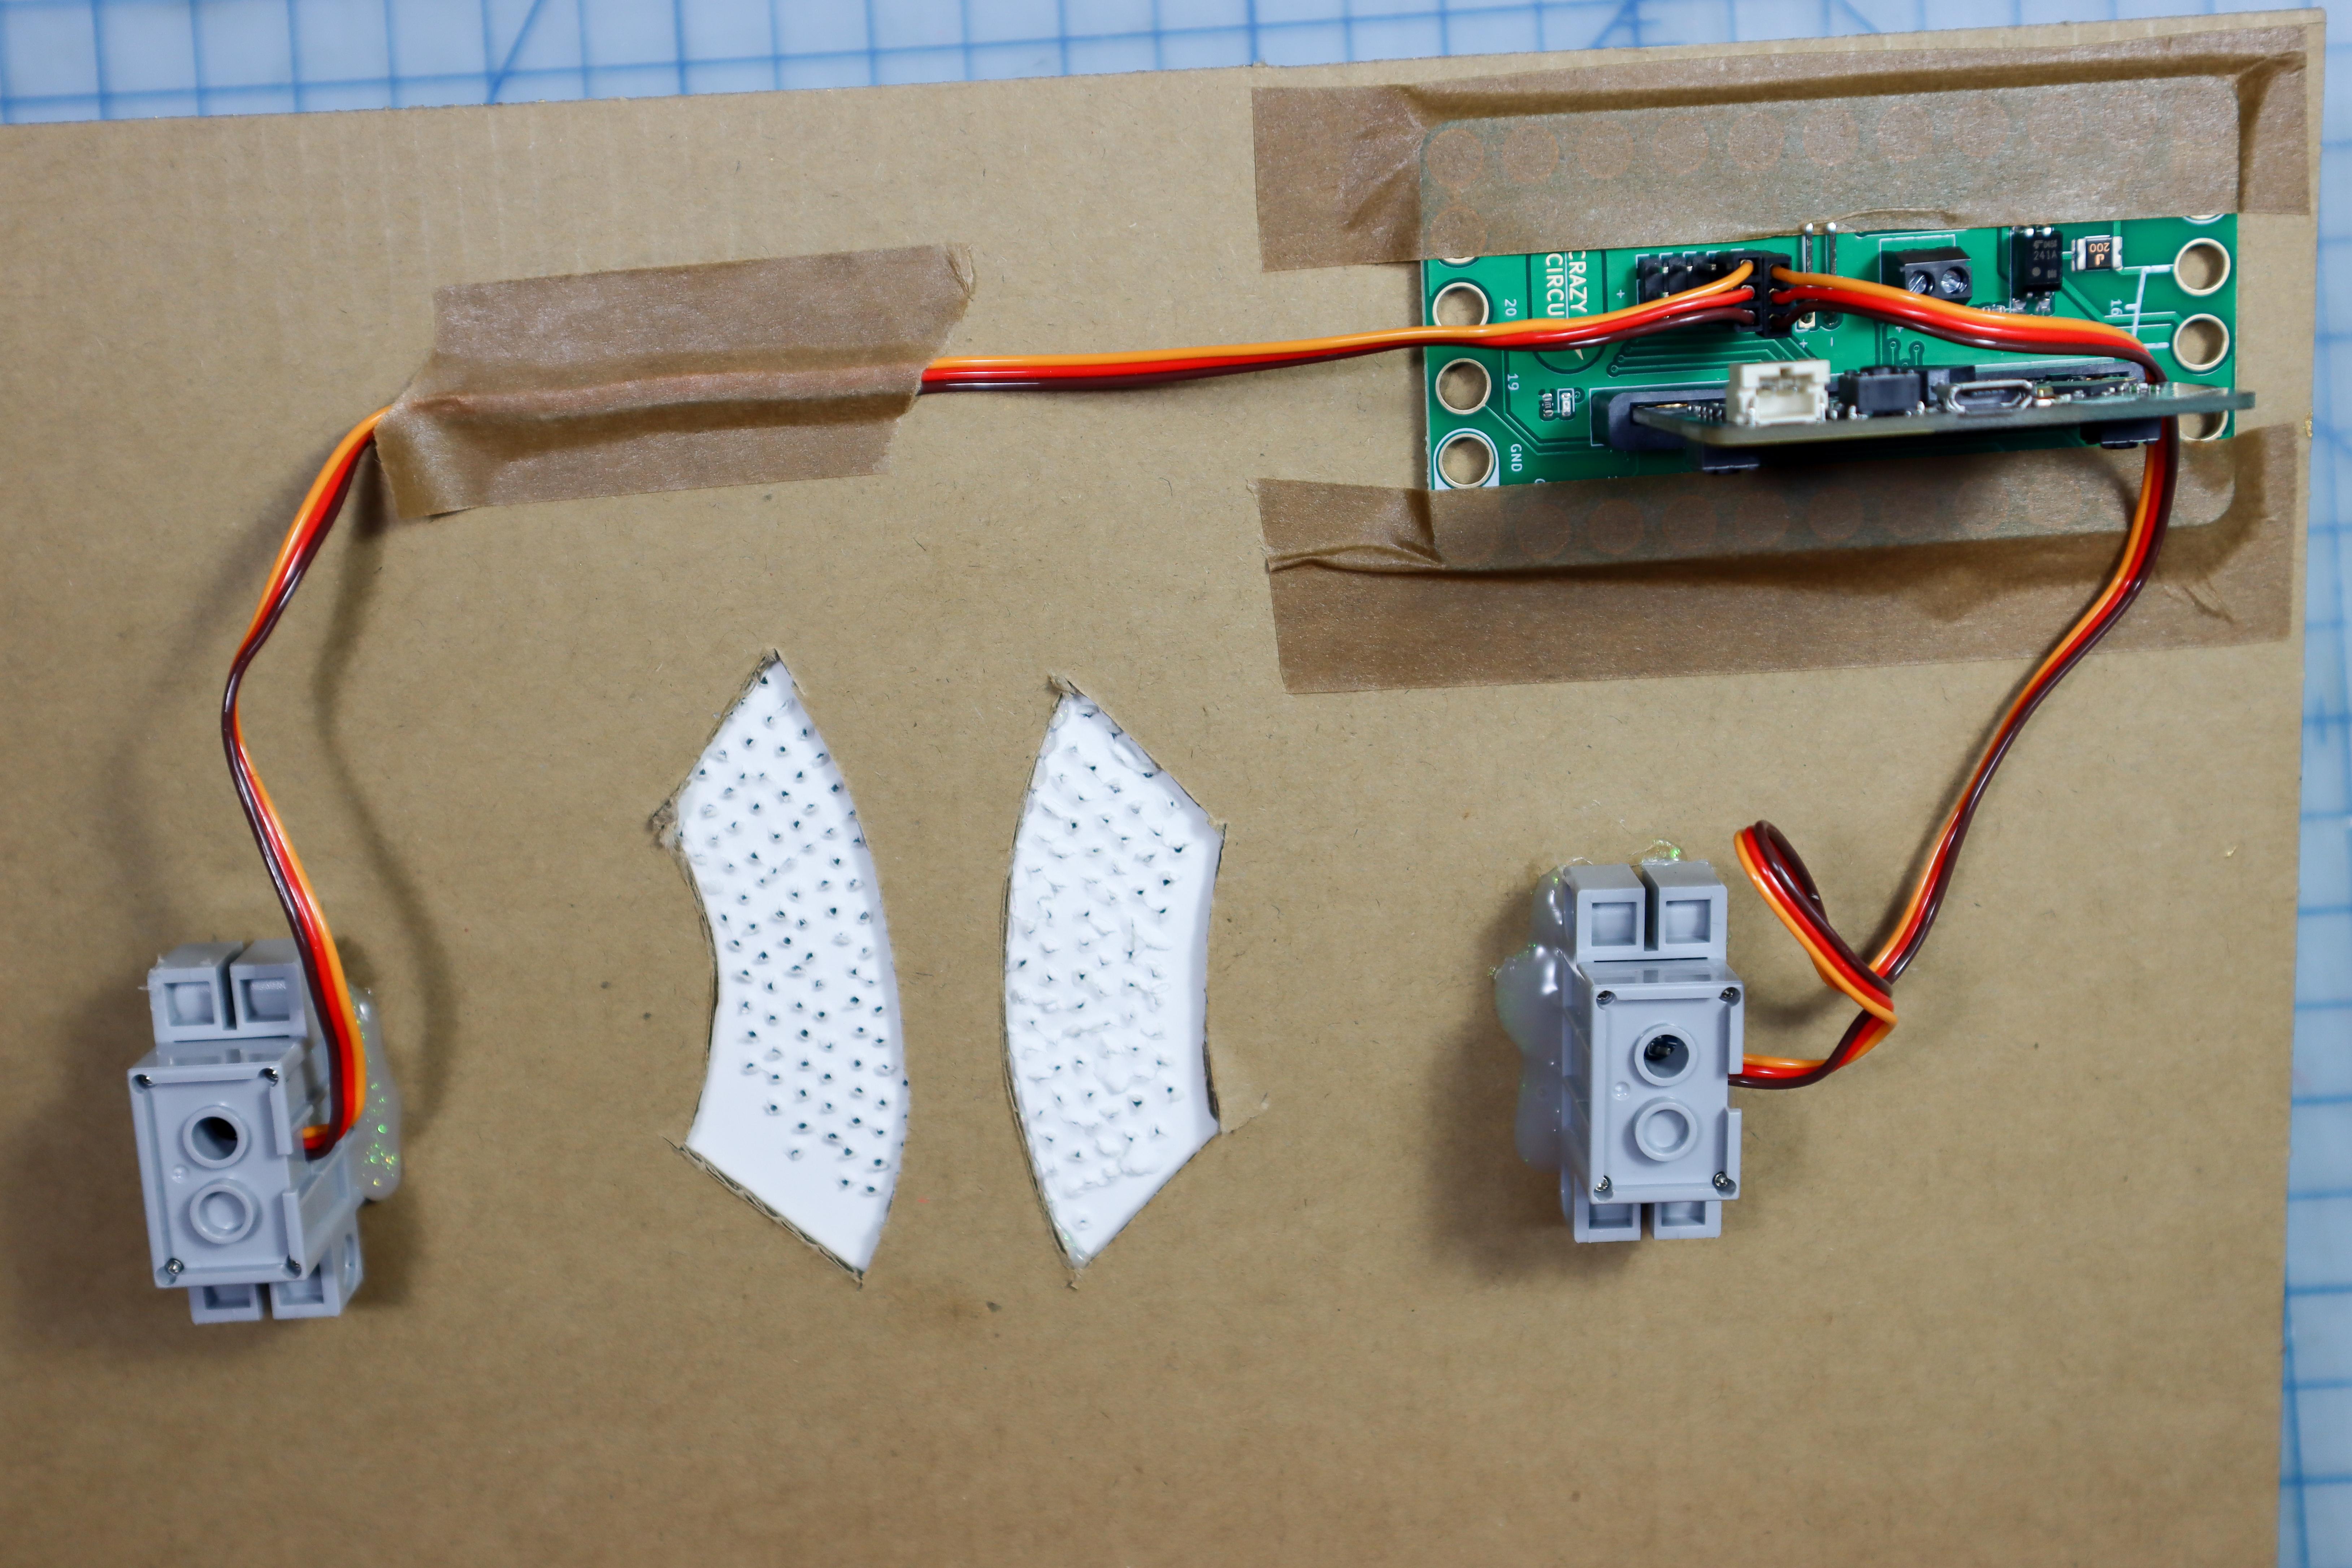
- Connect the motors to Pin 0 and Pin 1 on the Bit Board. The orange wire goes closest to the number, and so the red wire is in the "+" row and the brown wire is in the "-" row.
- Connect the micro:bit to the Bit Board
Code the Micro:bit
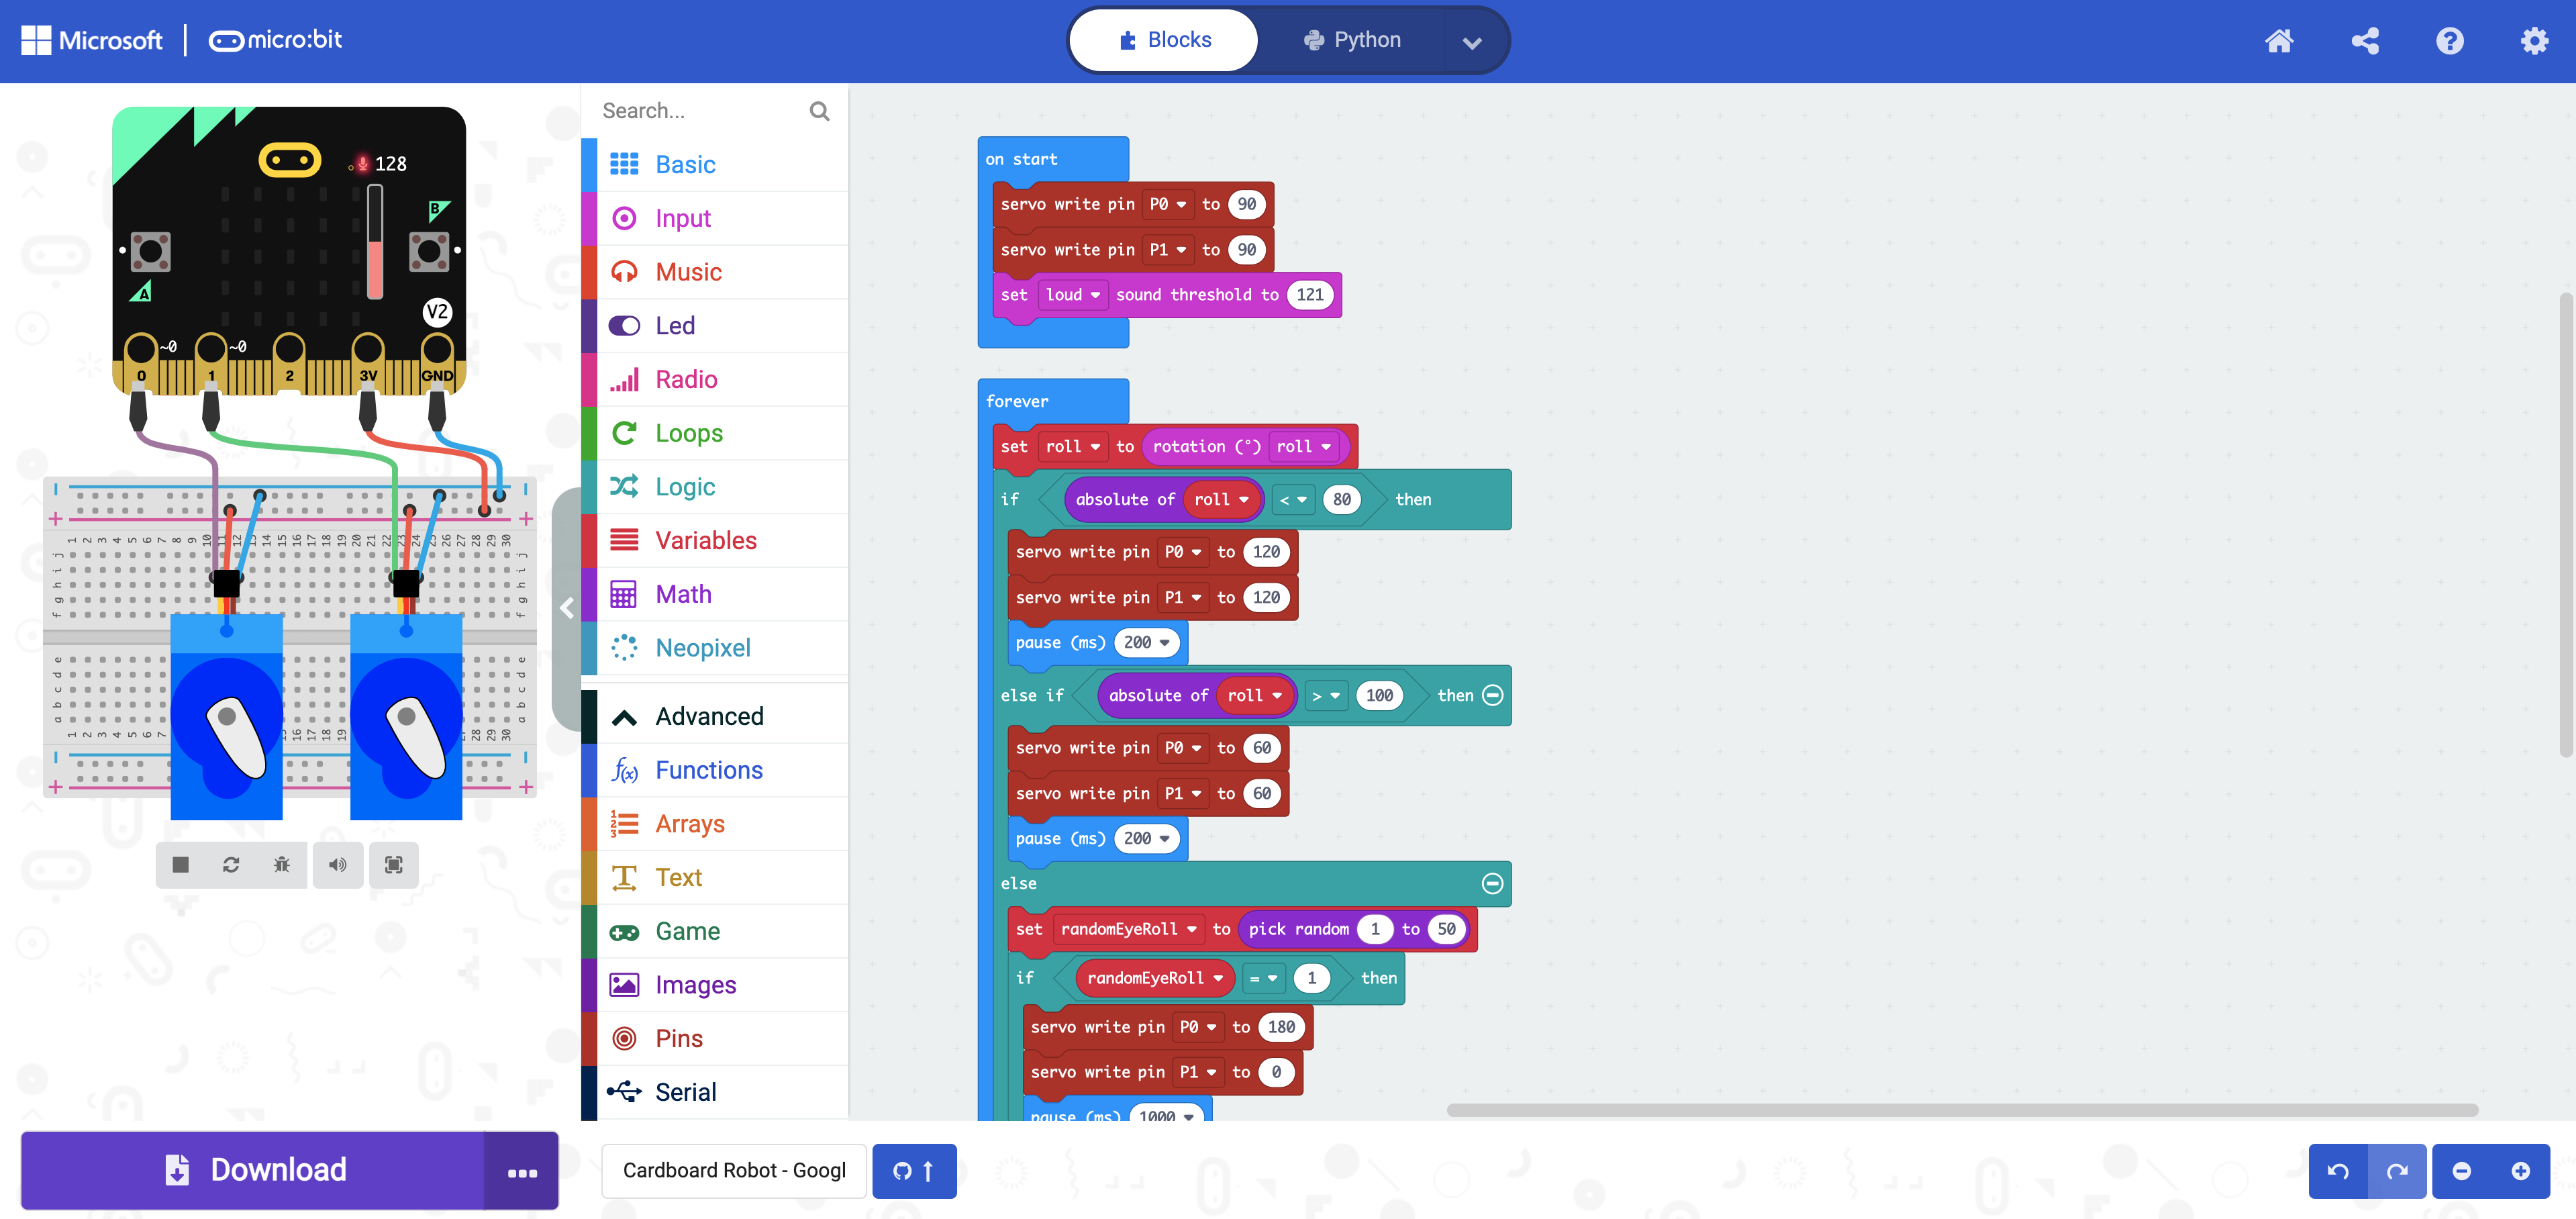
- Download the code to micro:bit, available here.
- This code moves the eyes when the head is tilted, and randomly rolls the robot's eyes for dramatic effect.
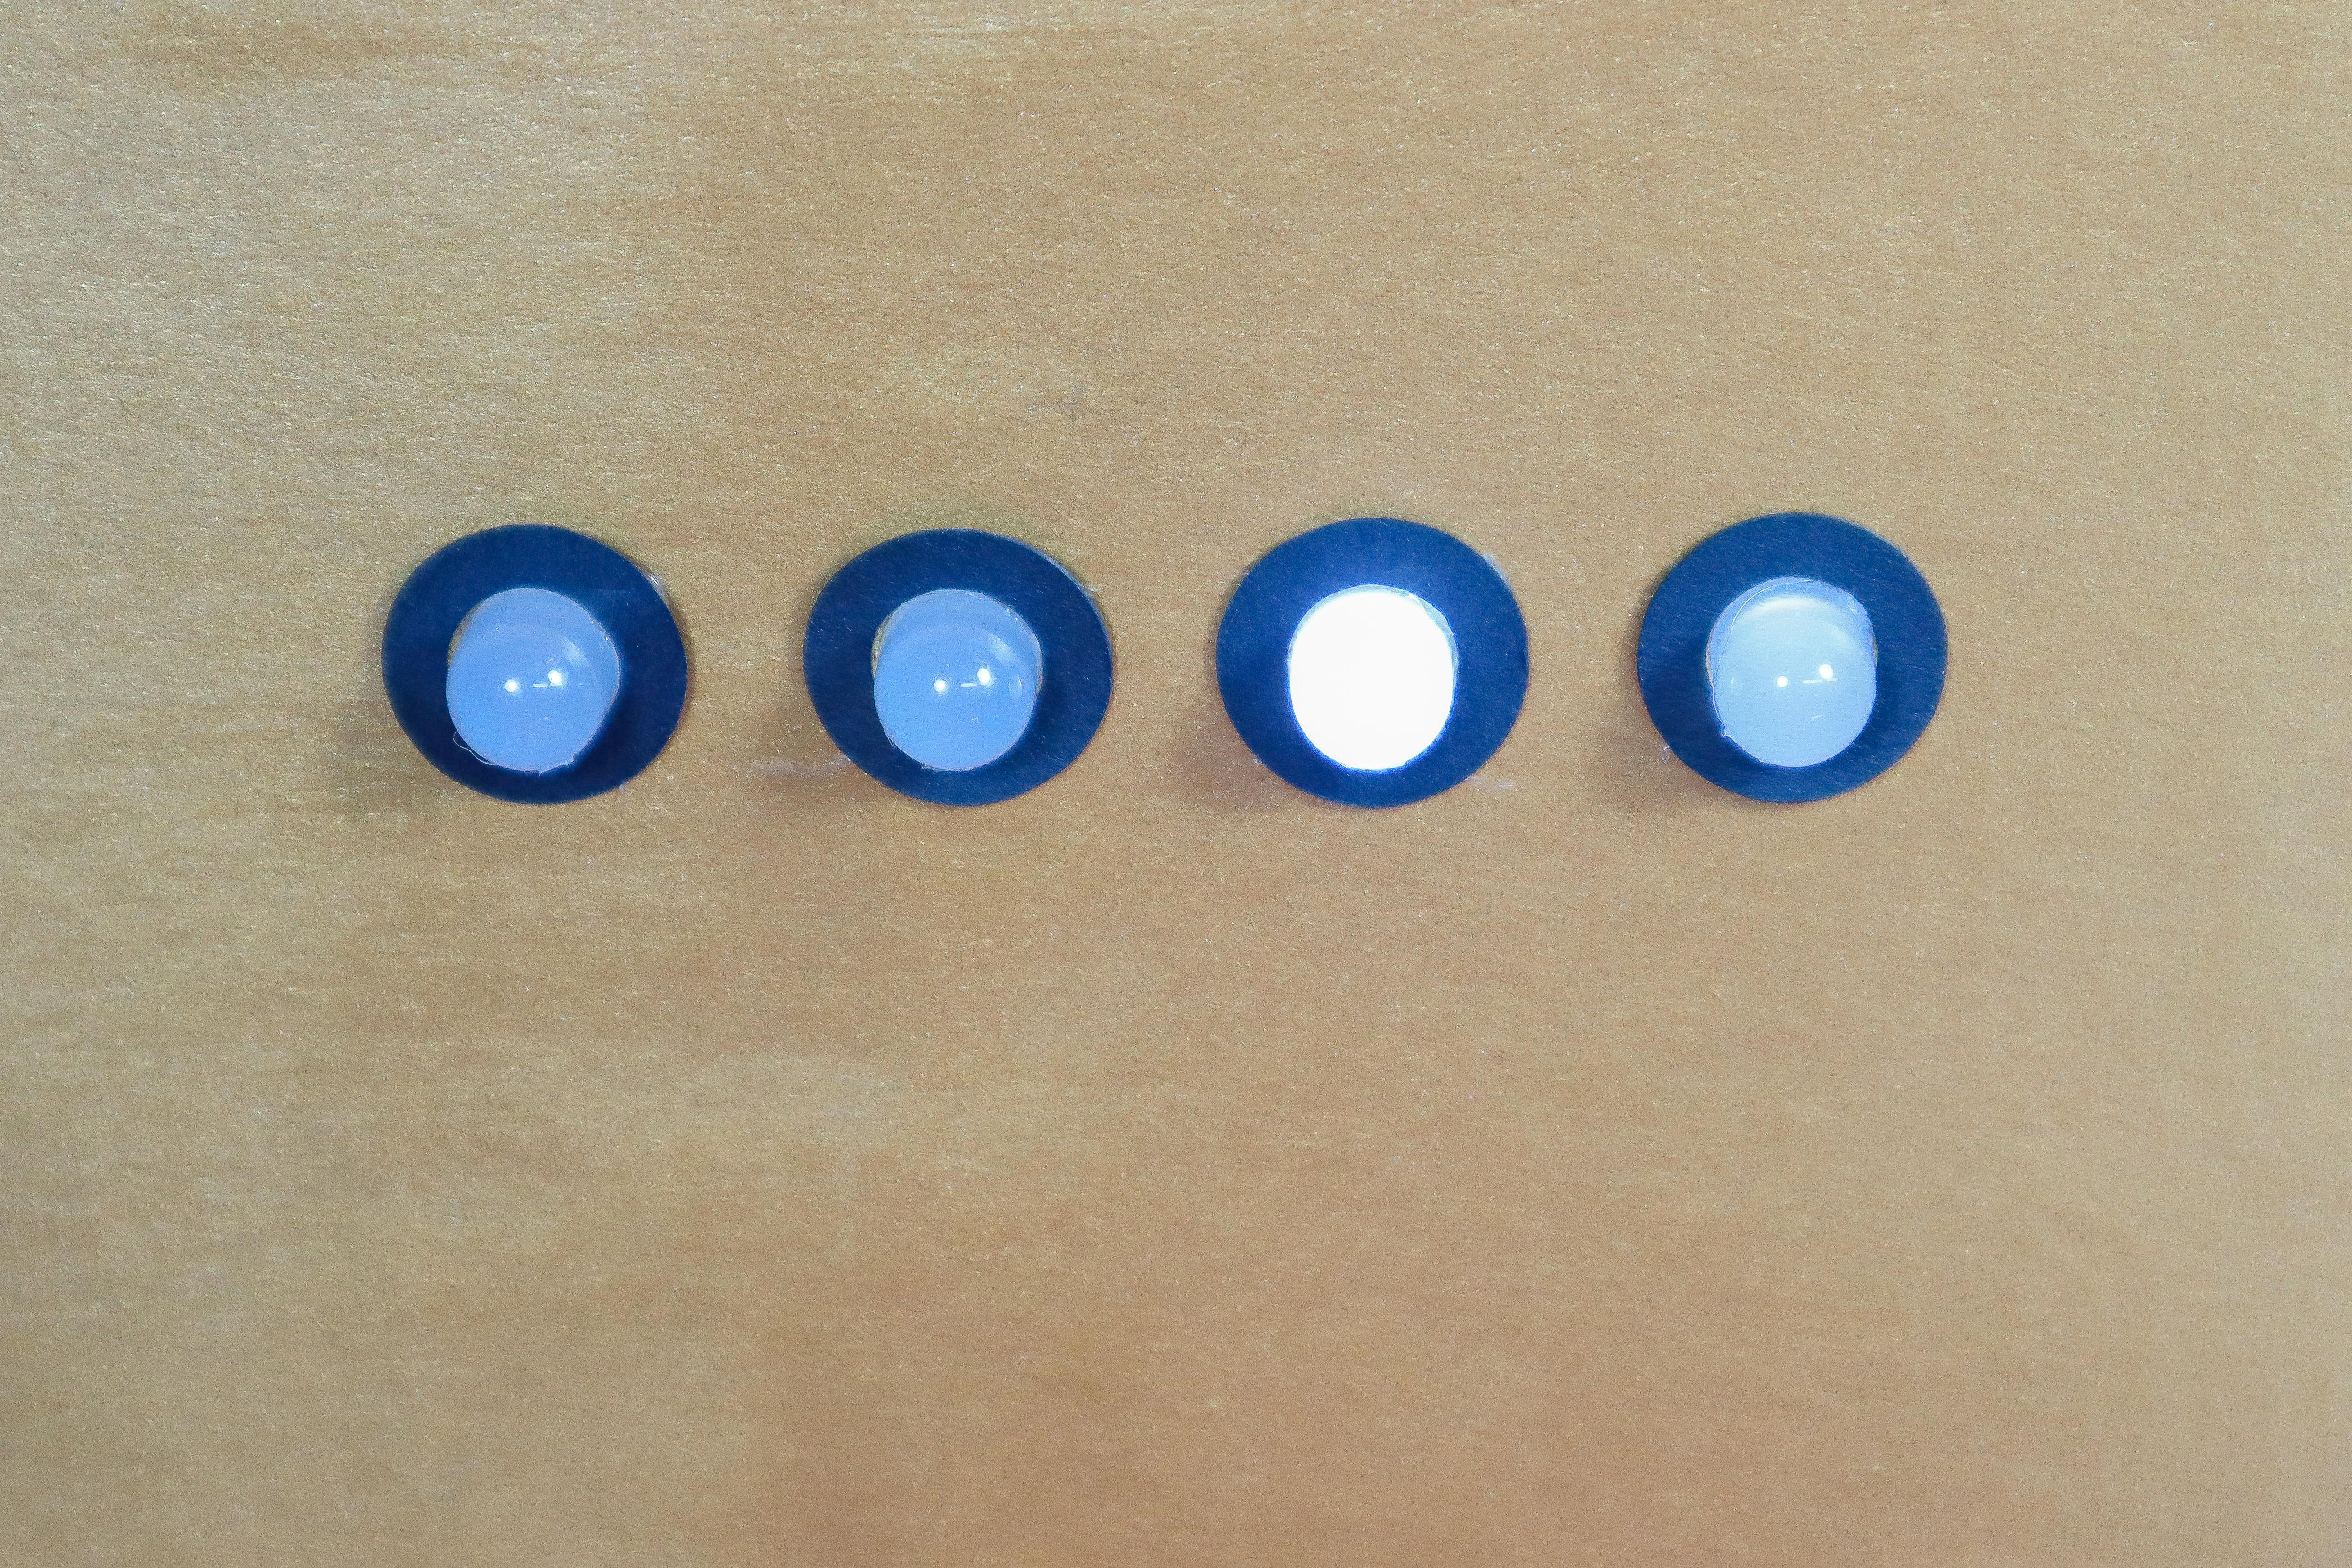
Place the Pupils
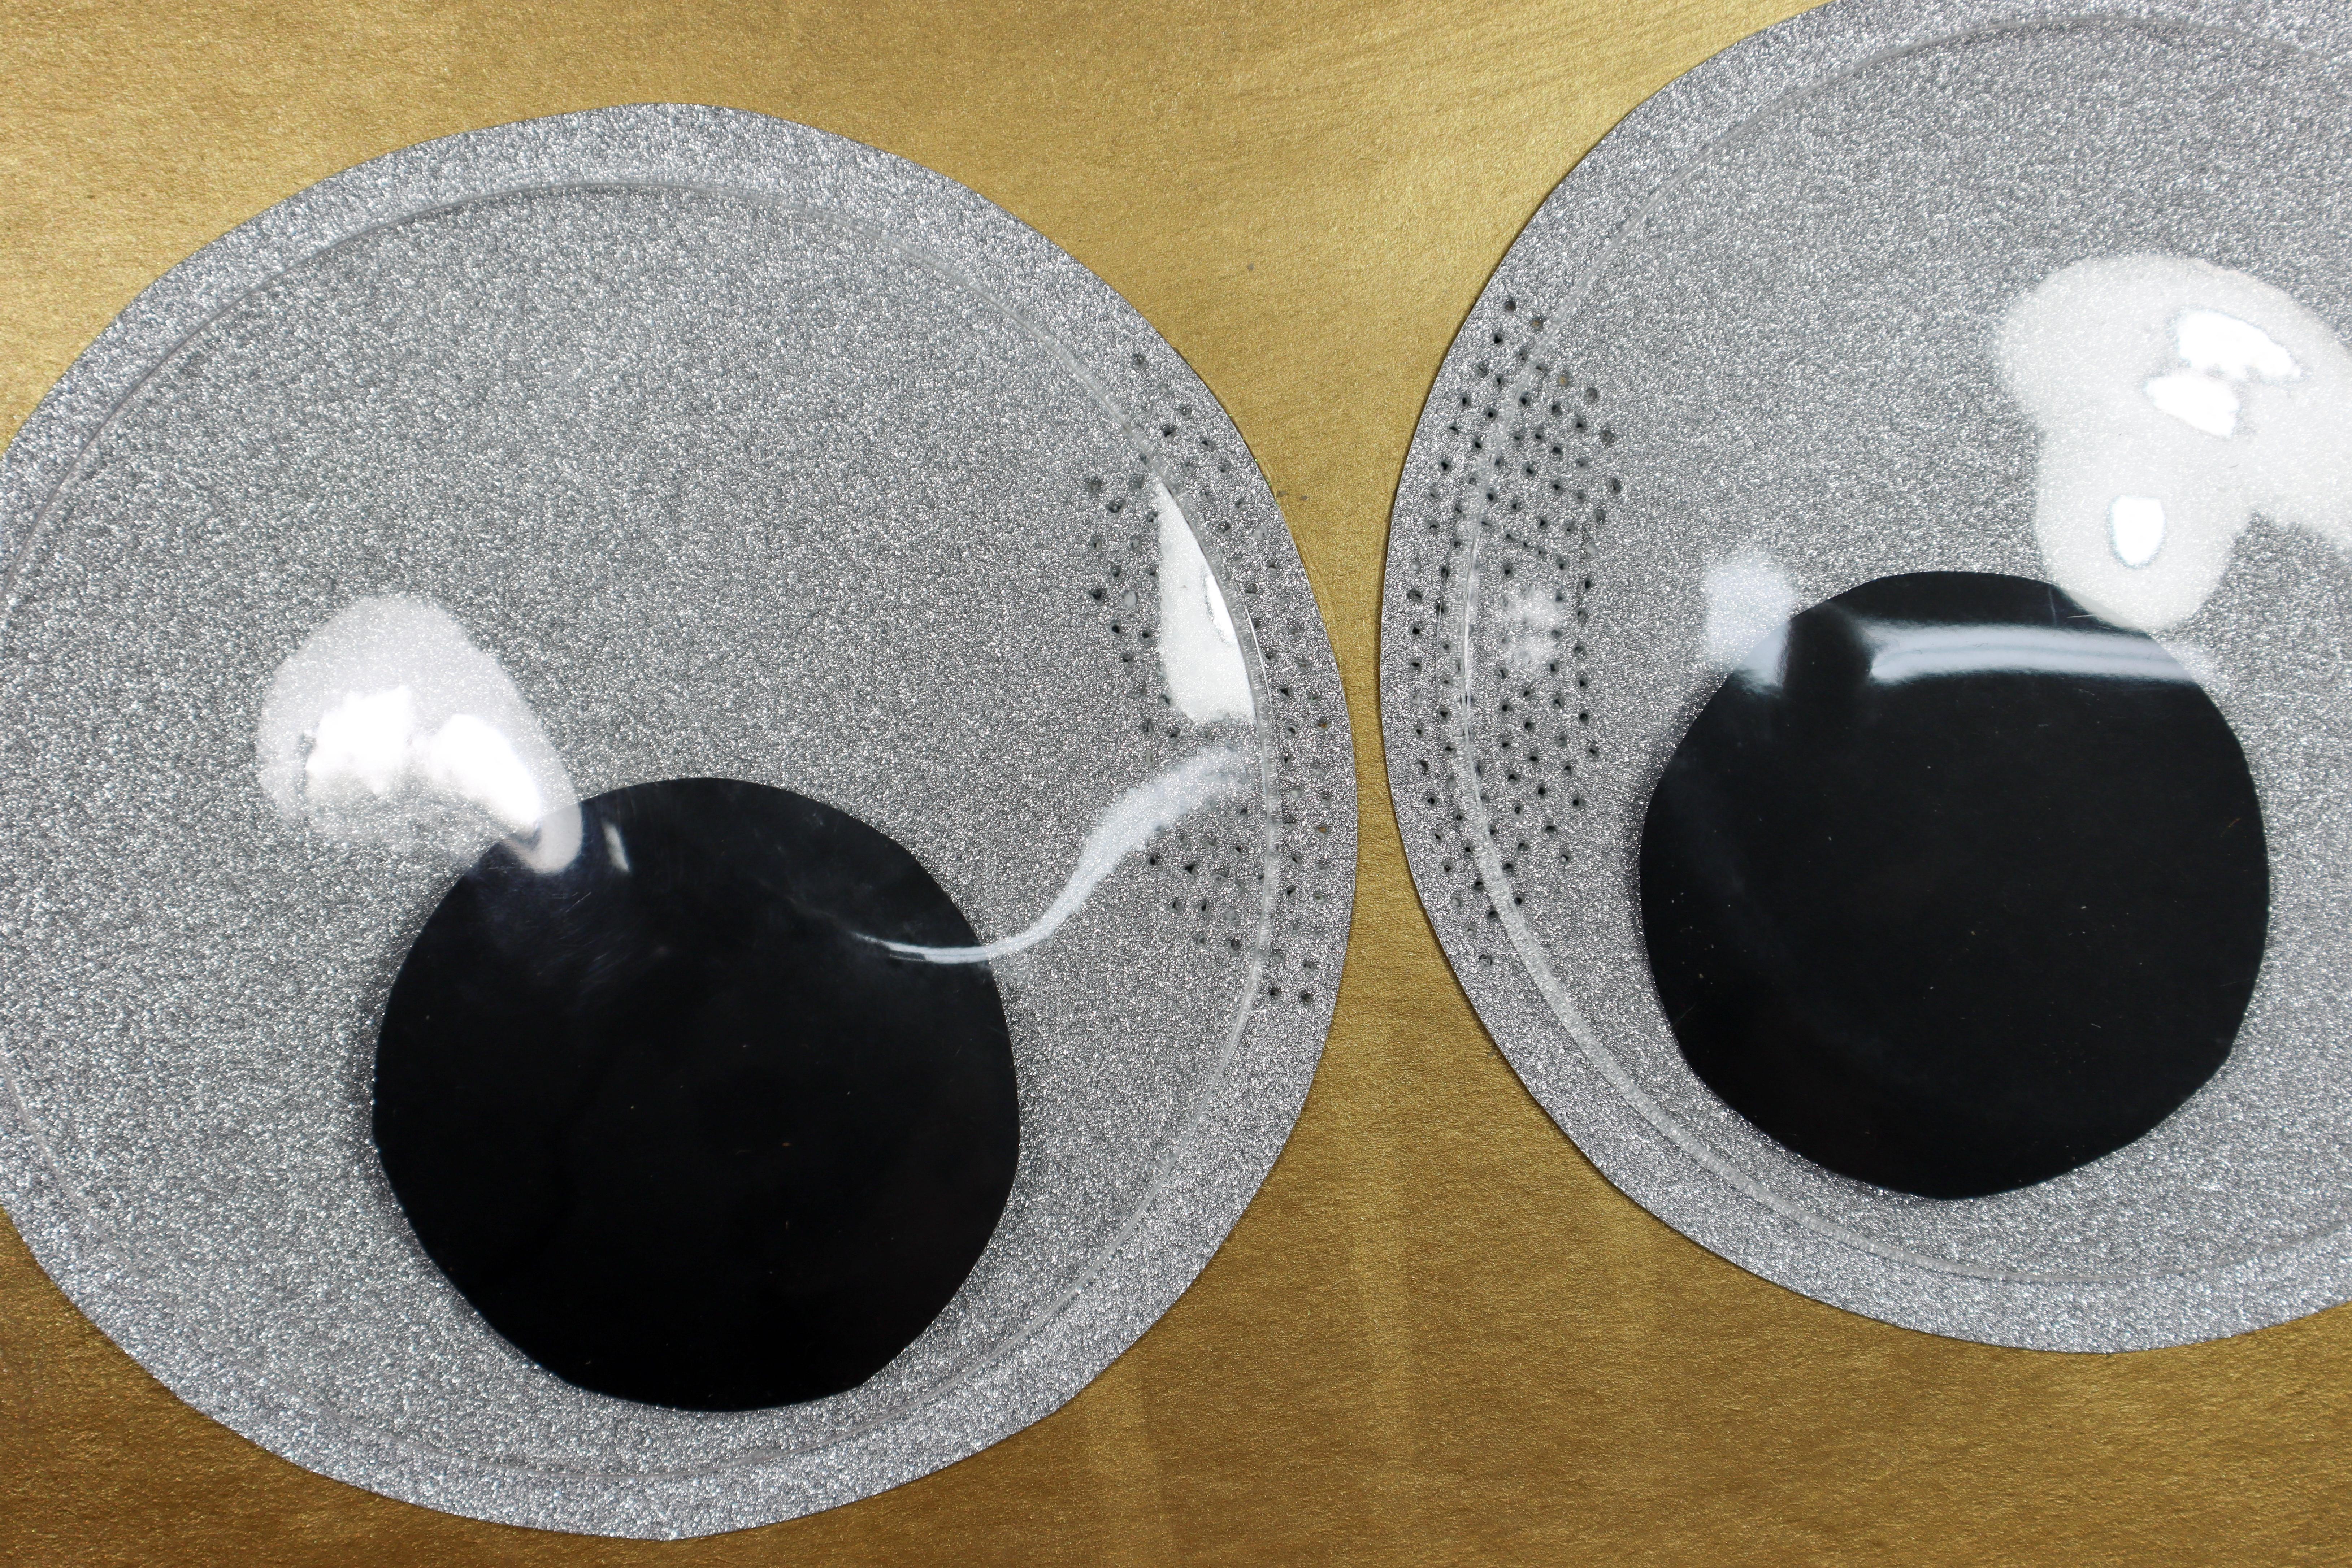
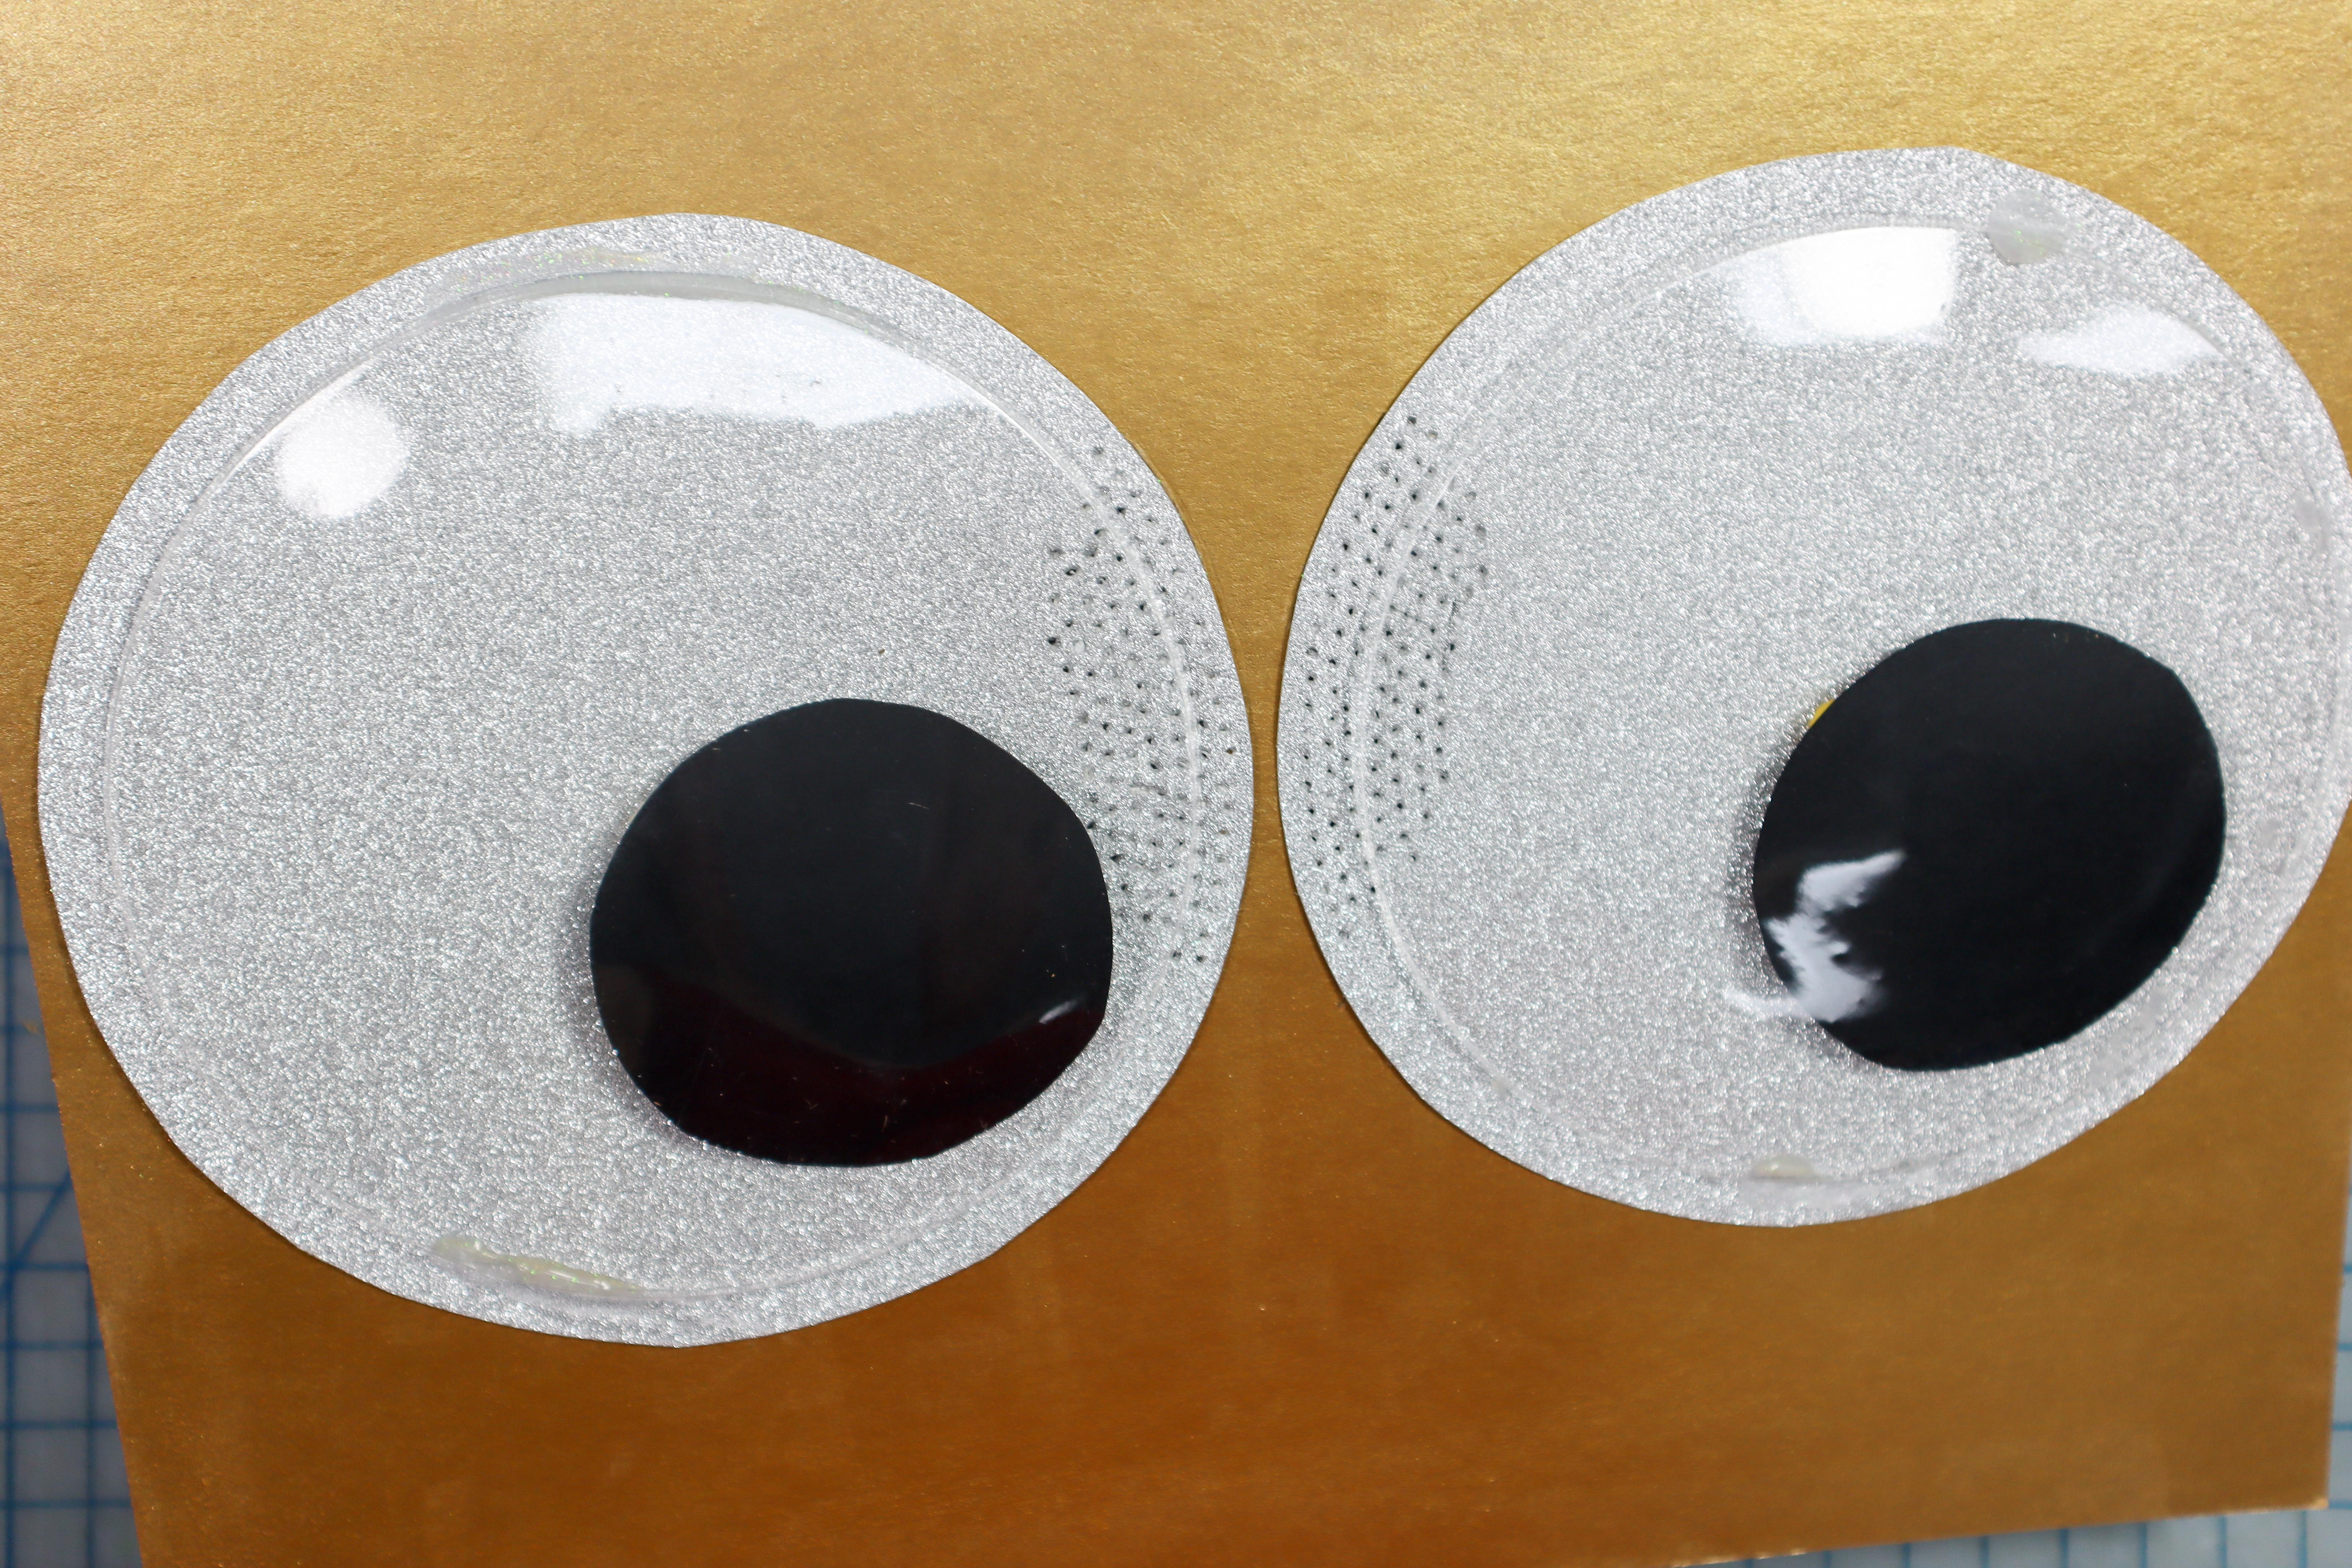
- Place the pupils on the eyes and test the code. Be sure that the pupils are attached to the motors at the correct angle.
- Once the pupils are correct, glue the plastic domes over the eyes.
Add a Battery Pack
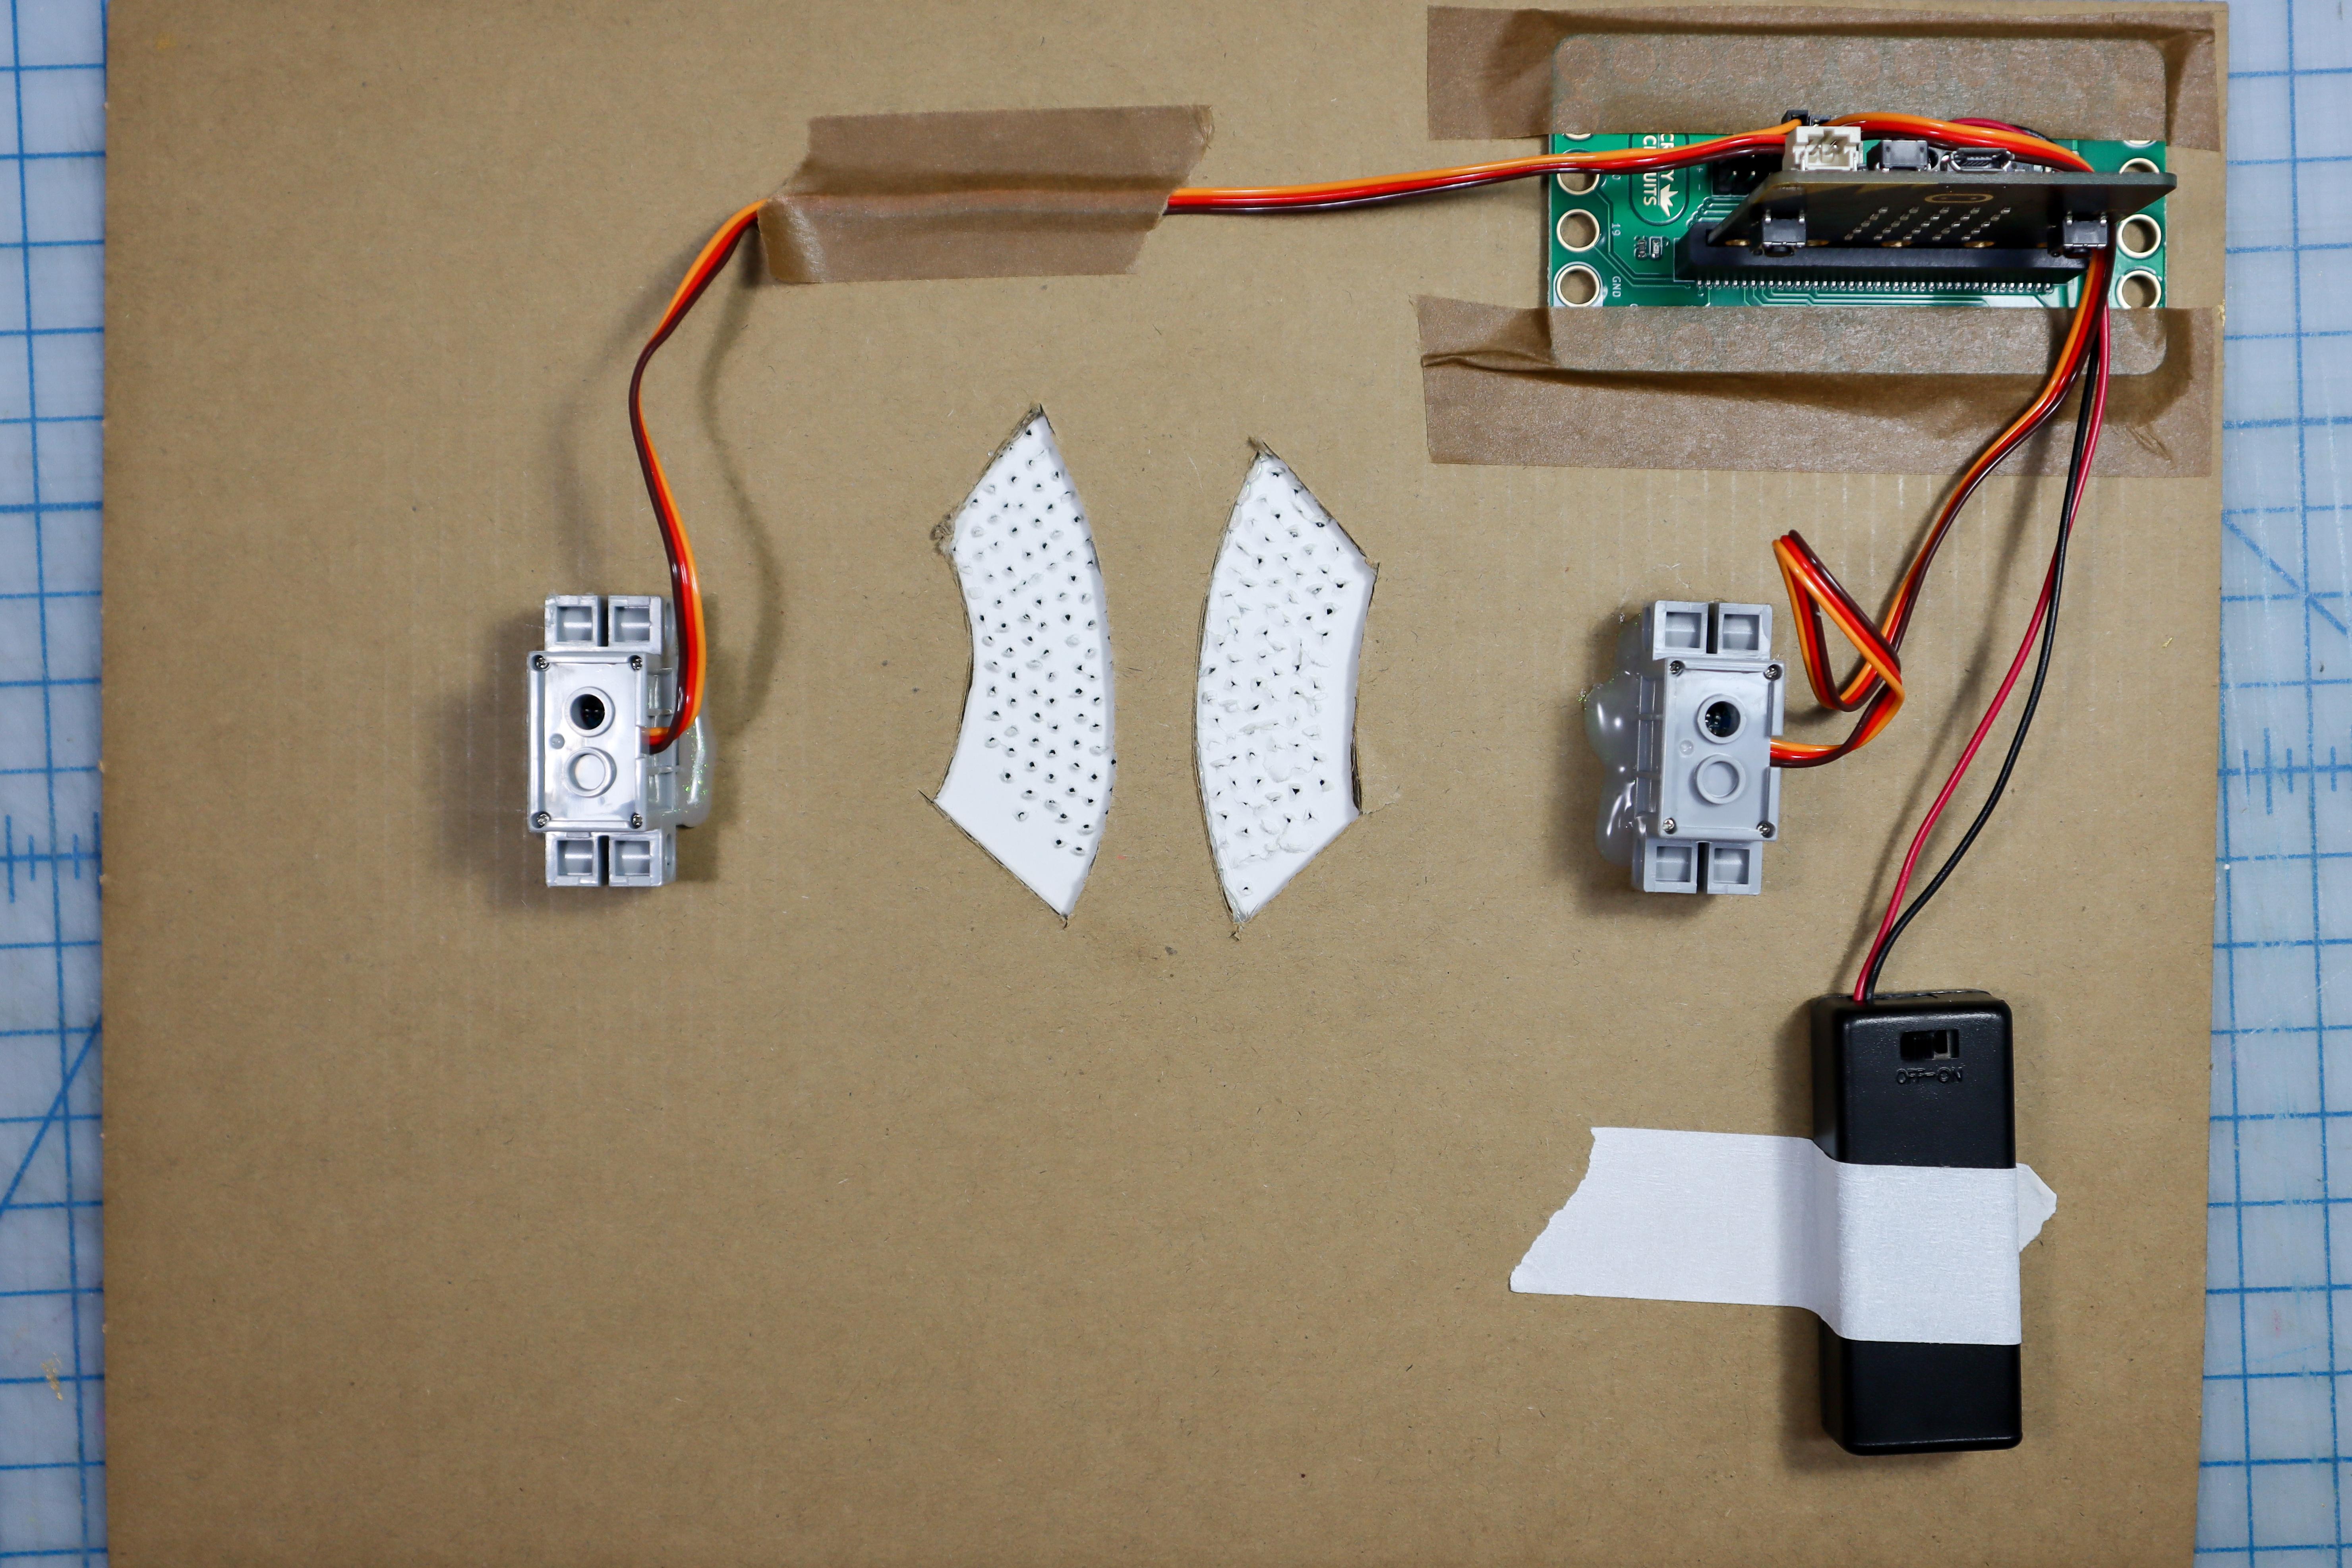

- Add a battery pack to the Bit Board's power and ground connector to make the project mobile.
ROBOT FEATURE #4: BIG LED LIGHT ANIMATIONS

Every robot has a good status symbol light. Use maker tape and four, 10mm LEDs to make a status animation for your Really Robotic Robot.
This is an easy project and a great introduction to micro:bit with many ways to customize it!
Supplies:
micro:bit, Crazy Circuits Bit Board, Jumbo 10mm Diffused LED, Maker Tape, Misc. LEGO parts, 2 AAA Battery Holder, Cardboard, Cardstock, Clear Packing Tape
Gather Supplies
- Gather supplies, and print the template (optional).
Downloads
Mark the Holes
- Mark the locations of the four holes for the LEDs. This photo shows the holes 1-inch apart. You could also use the template to mark the locations if you like the spacing.
Cut the Holes

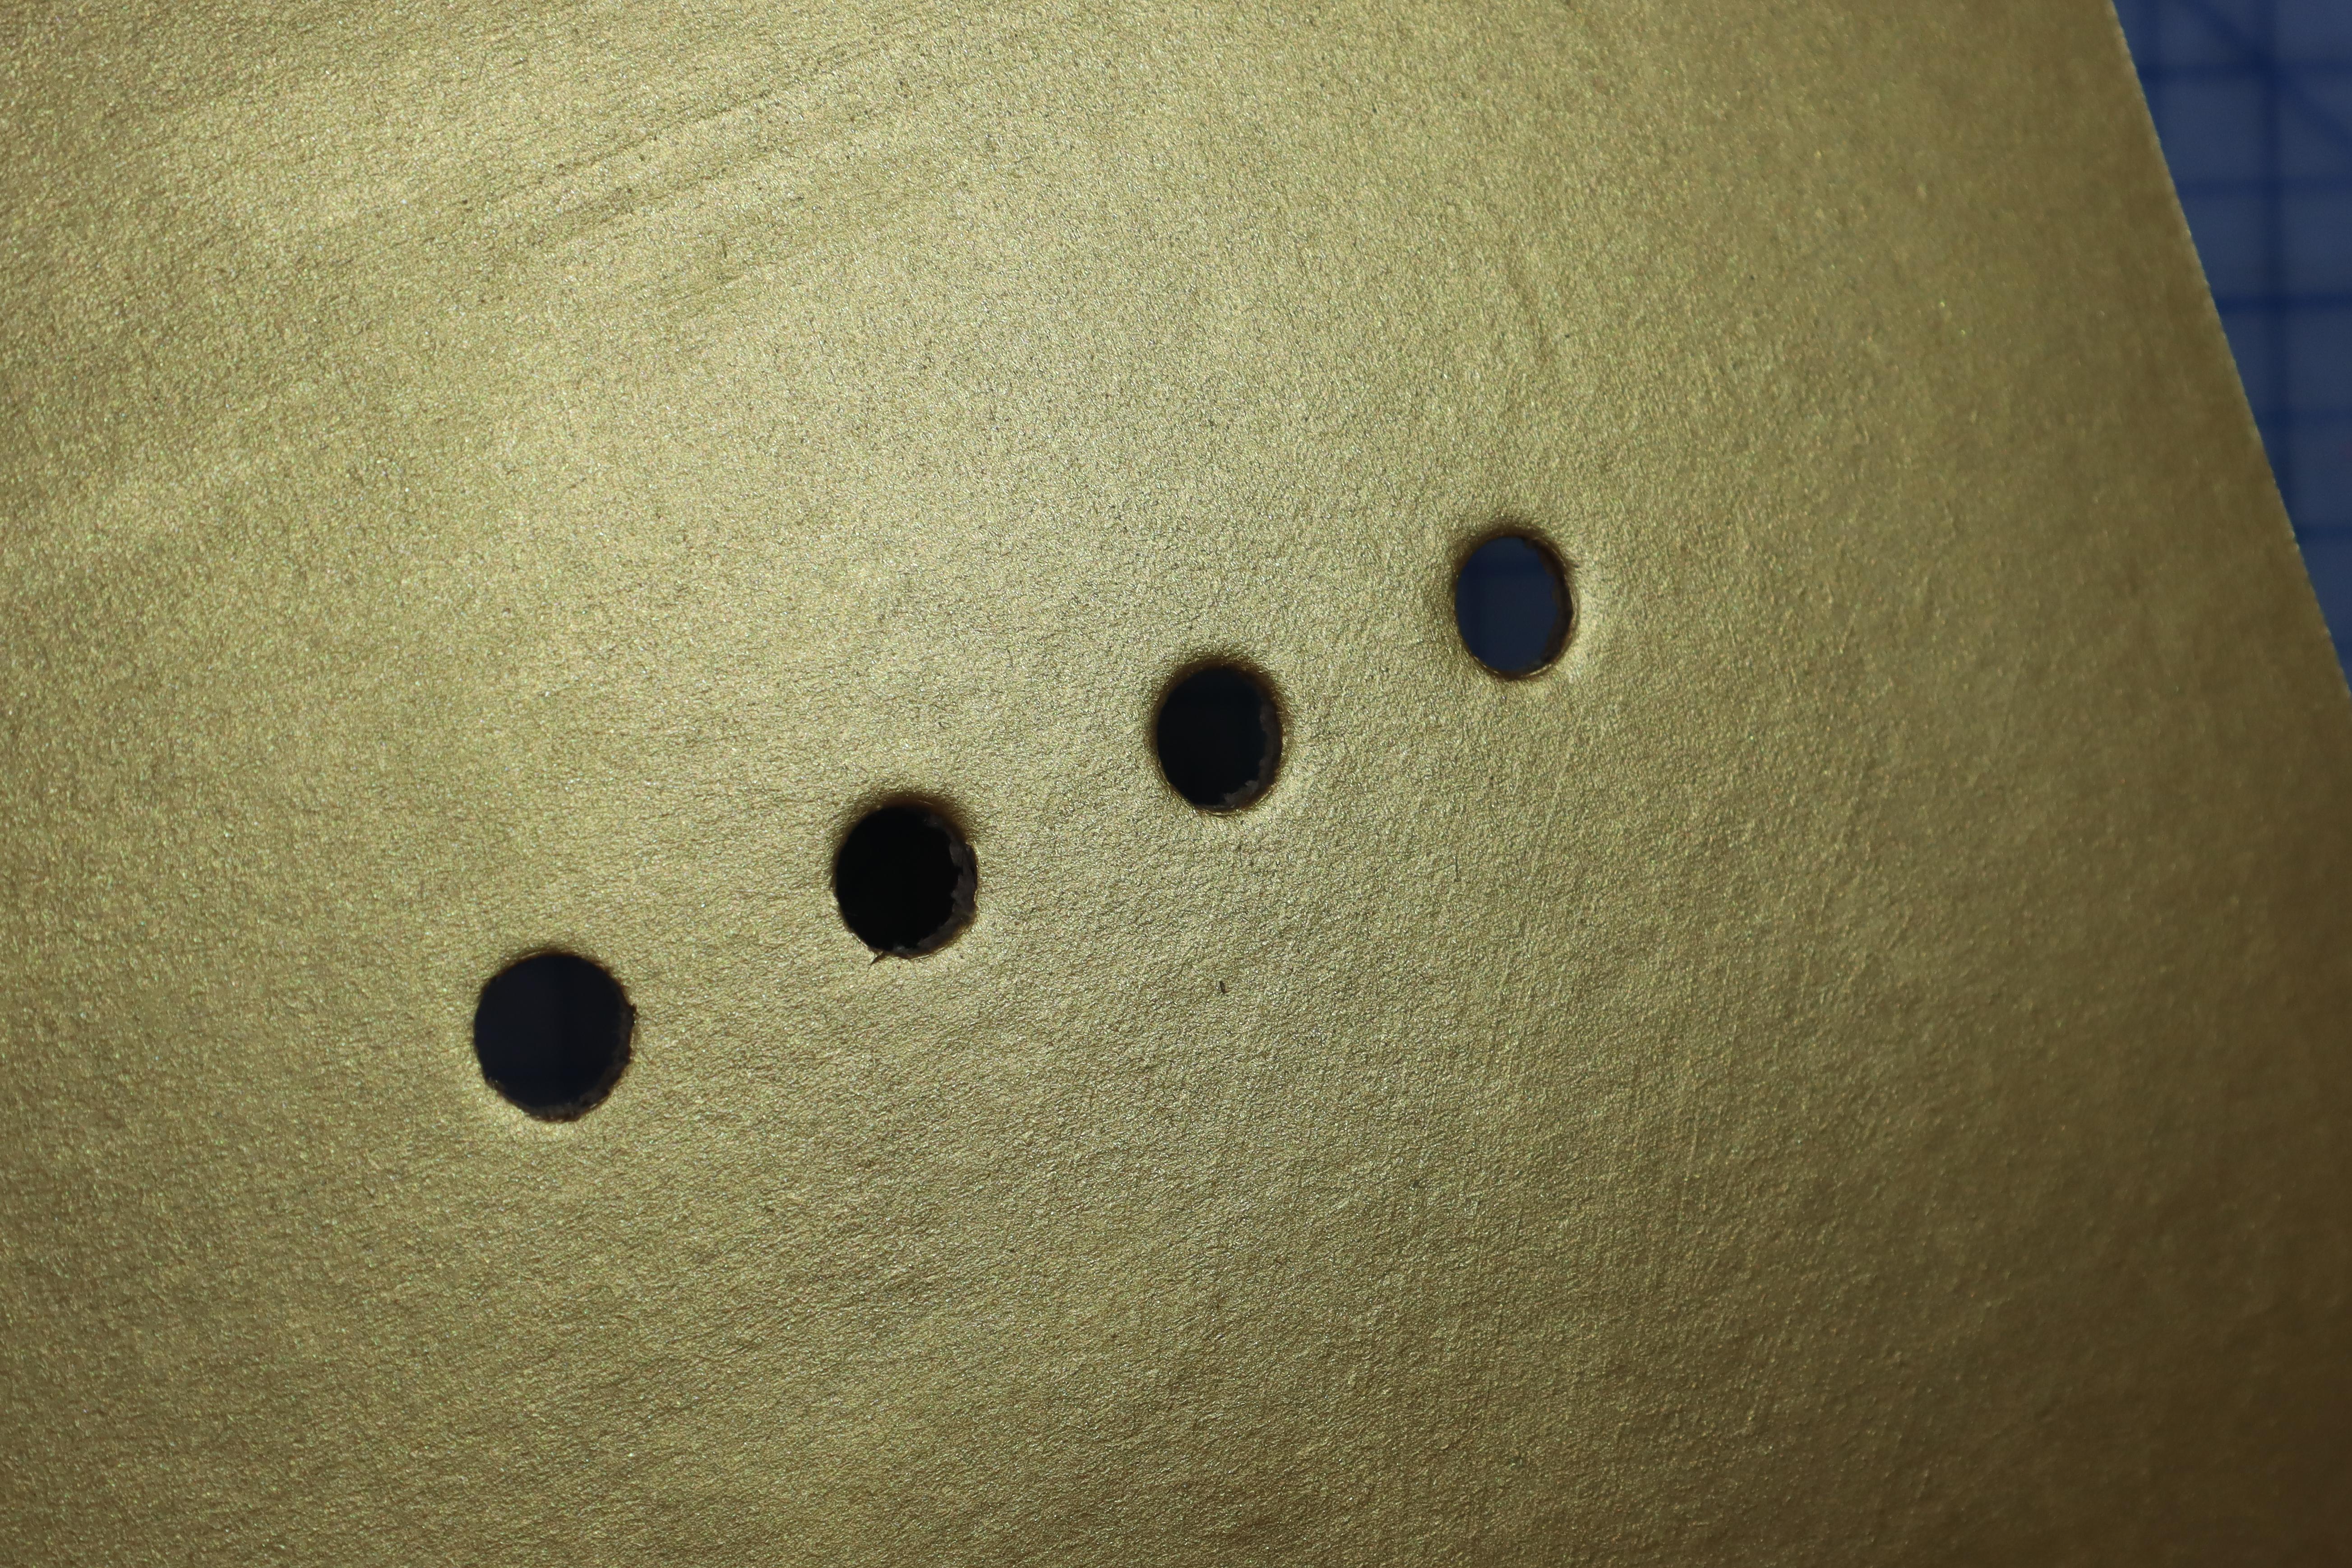
- To cut the holes, we used a craft knife to mark the circles from the backside and then cut out the holes from the front.
- Tip: You can poke the 10mm LED through the holes from the front side to make the edges nice and smooth. (picture 3).
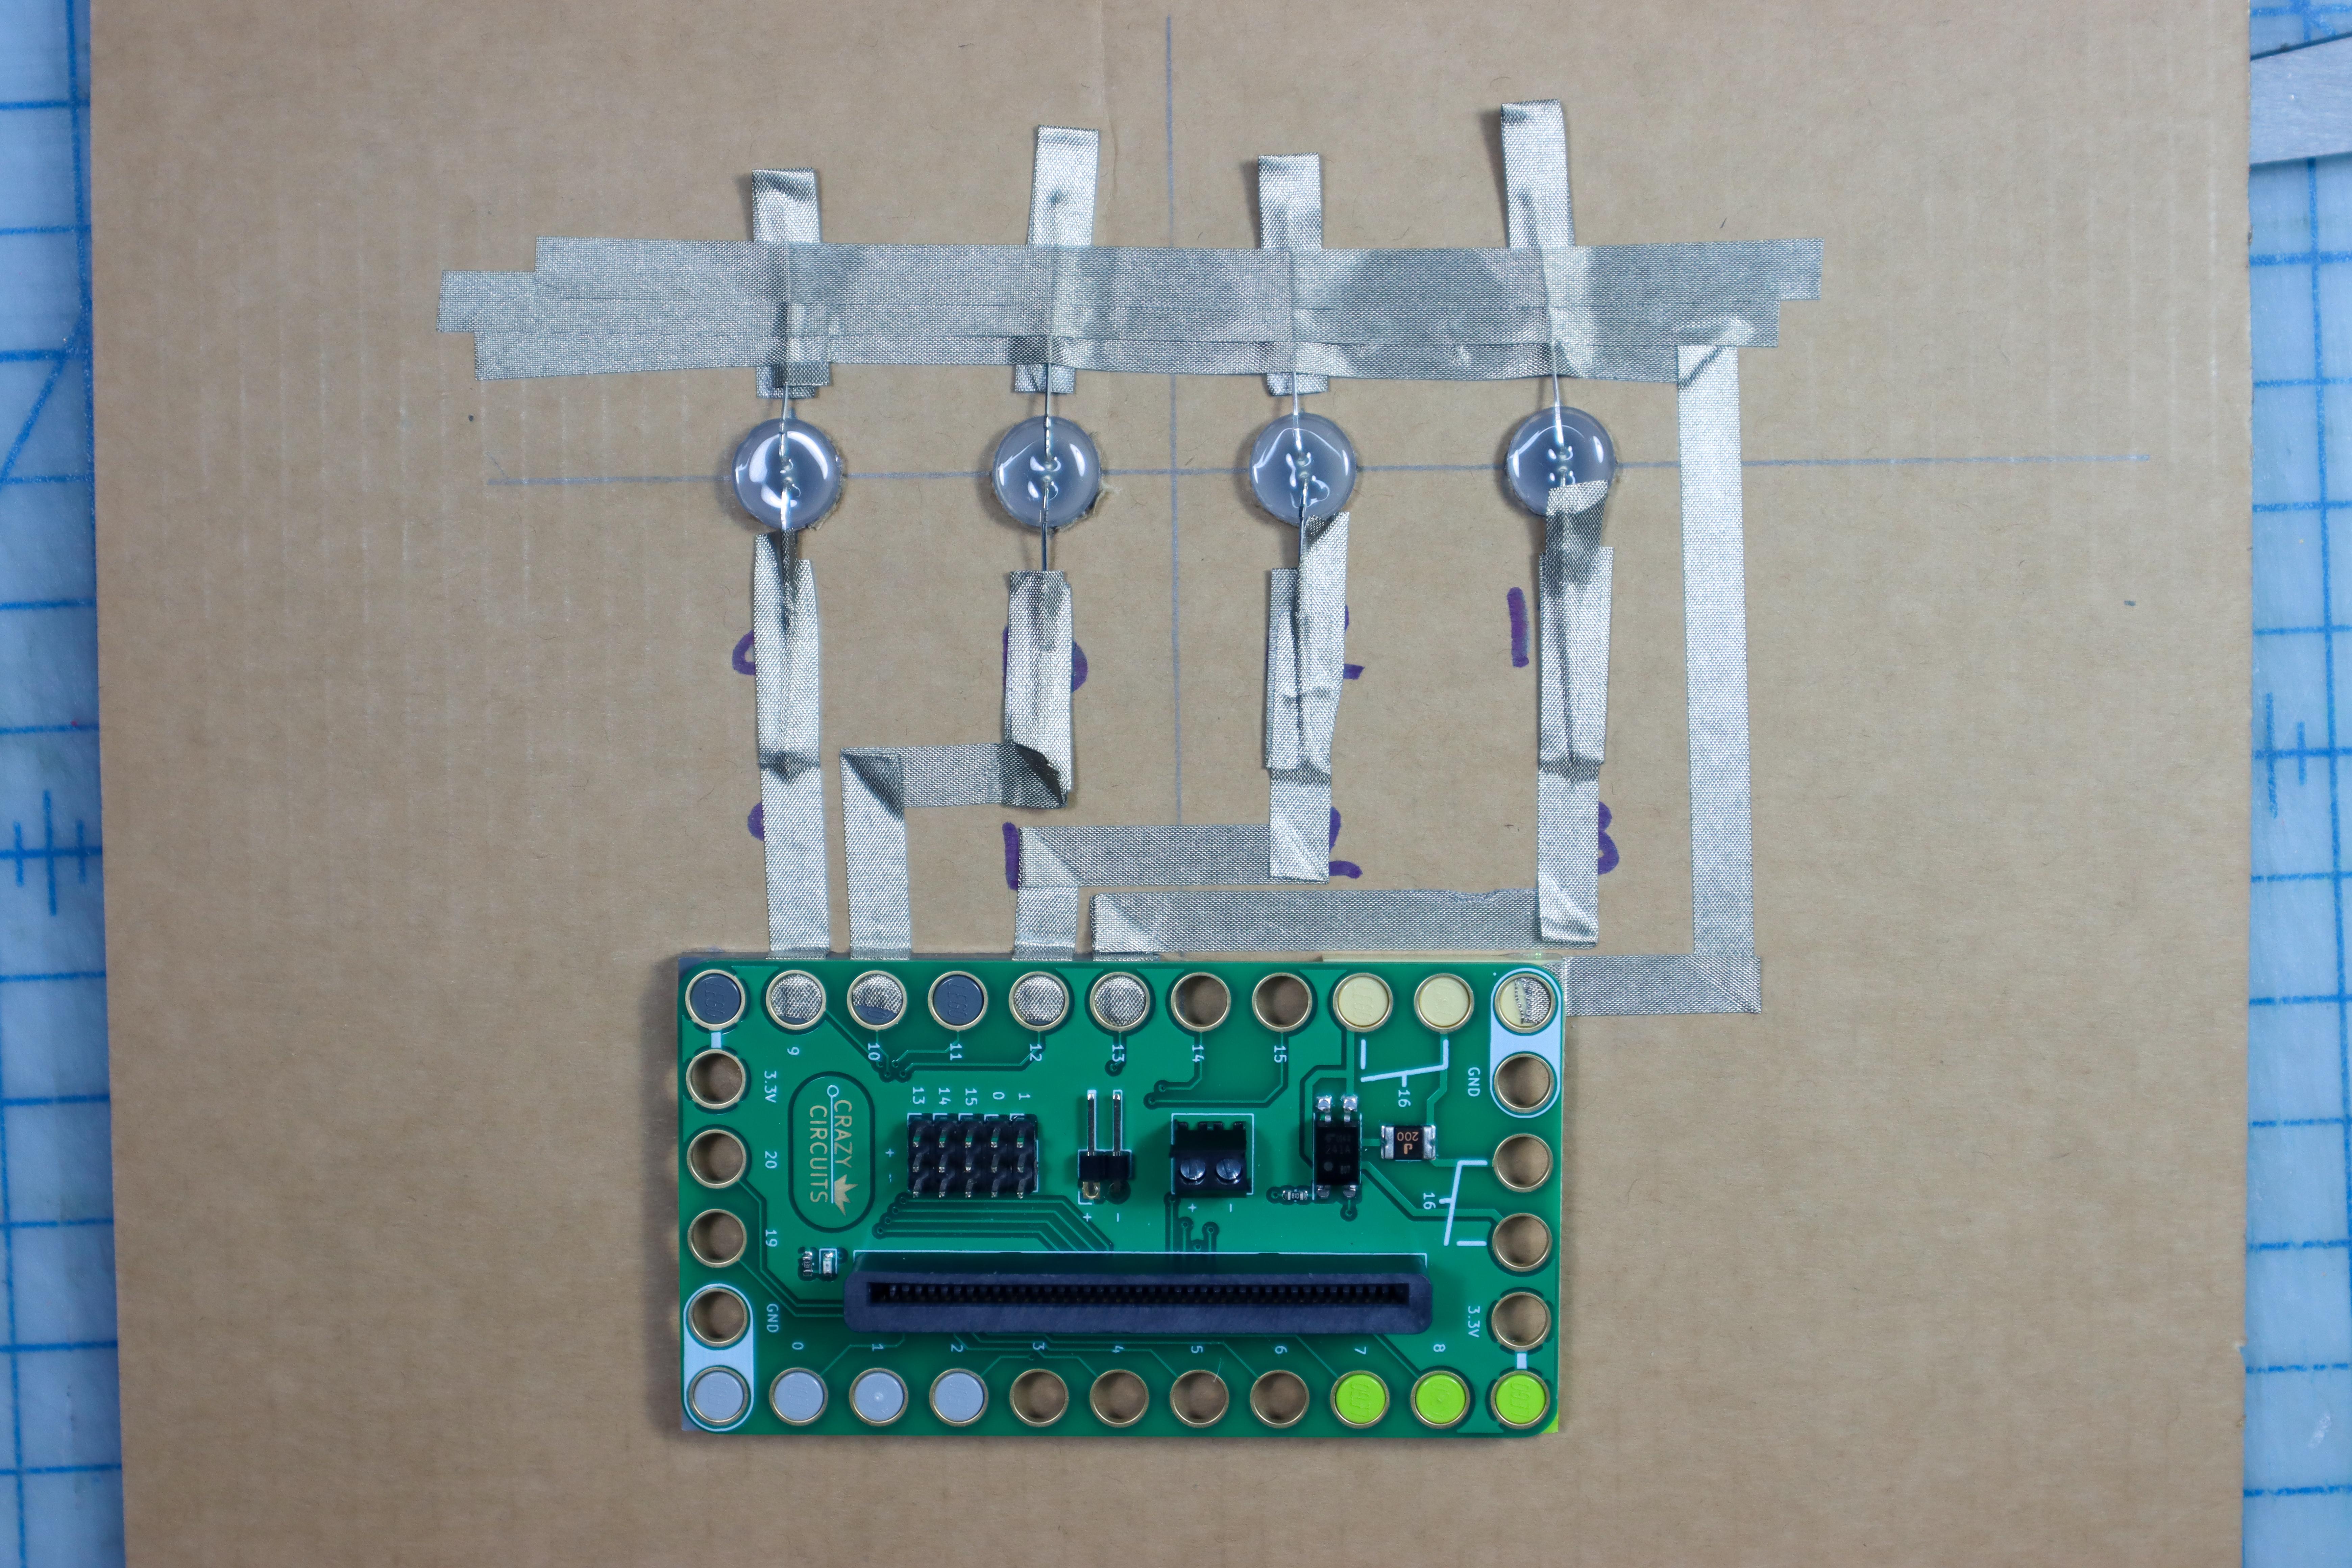
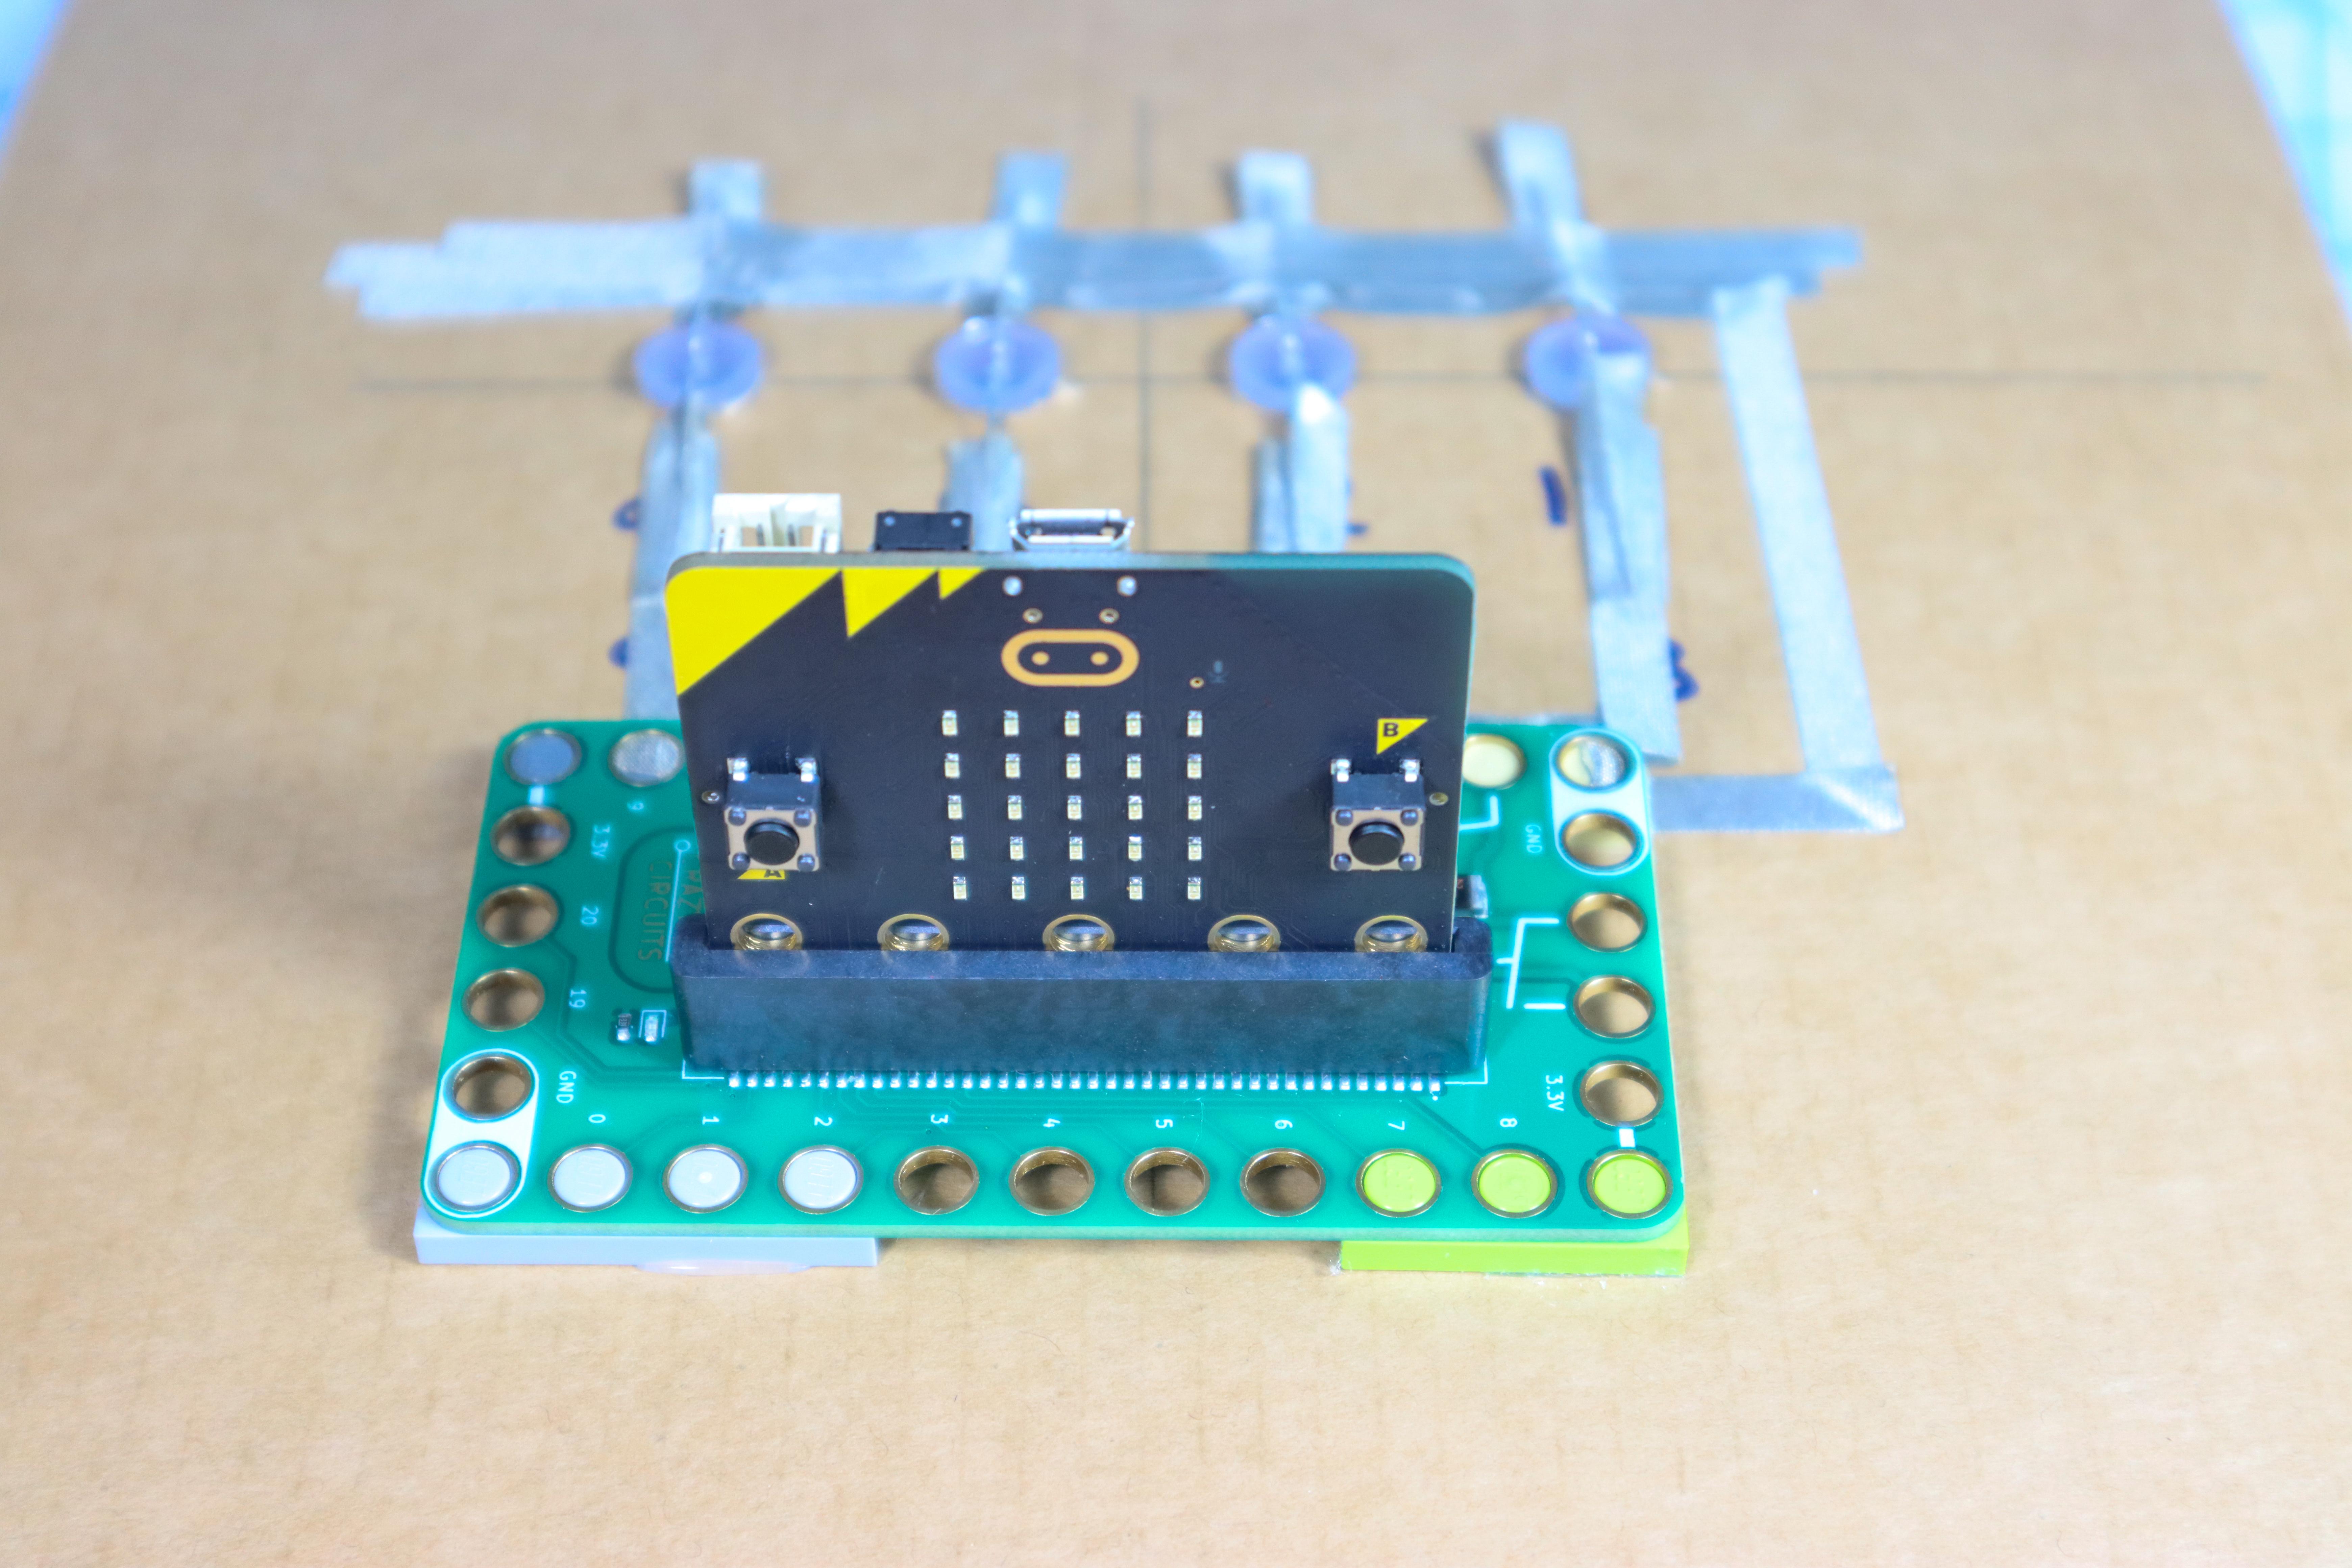
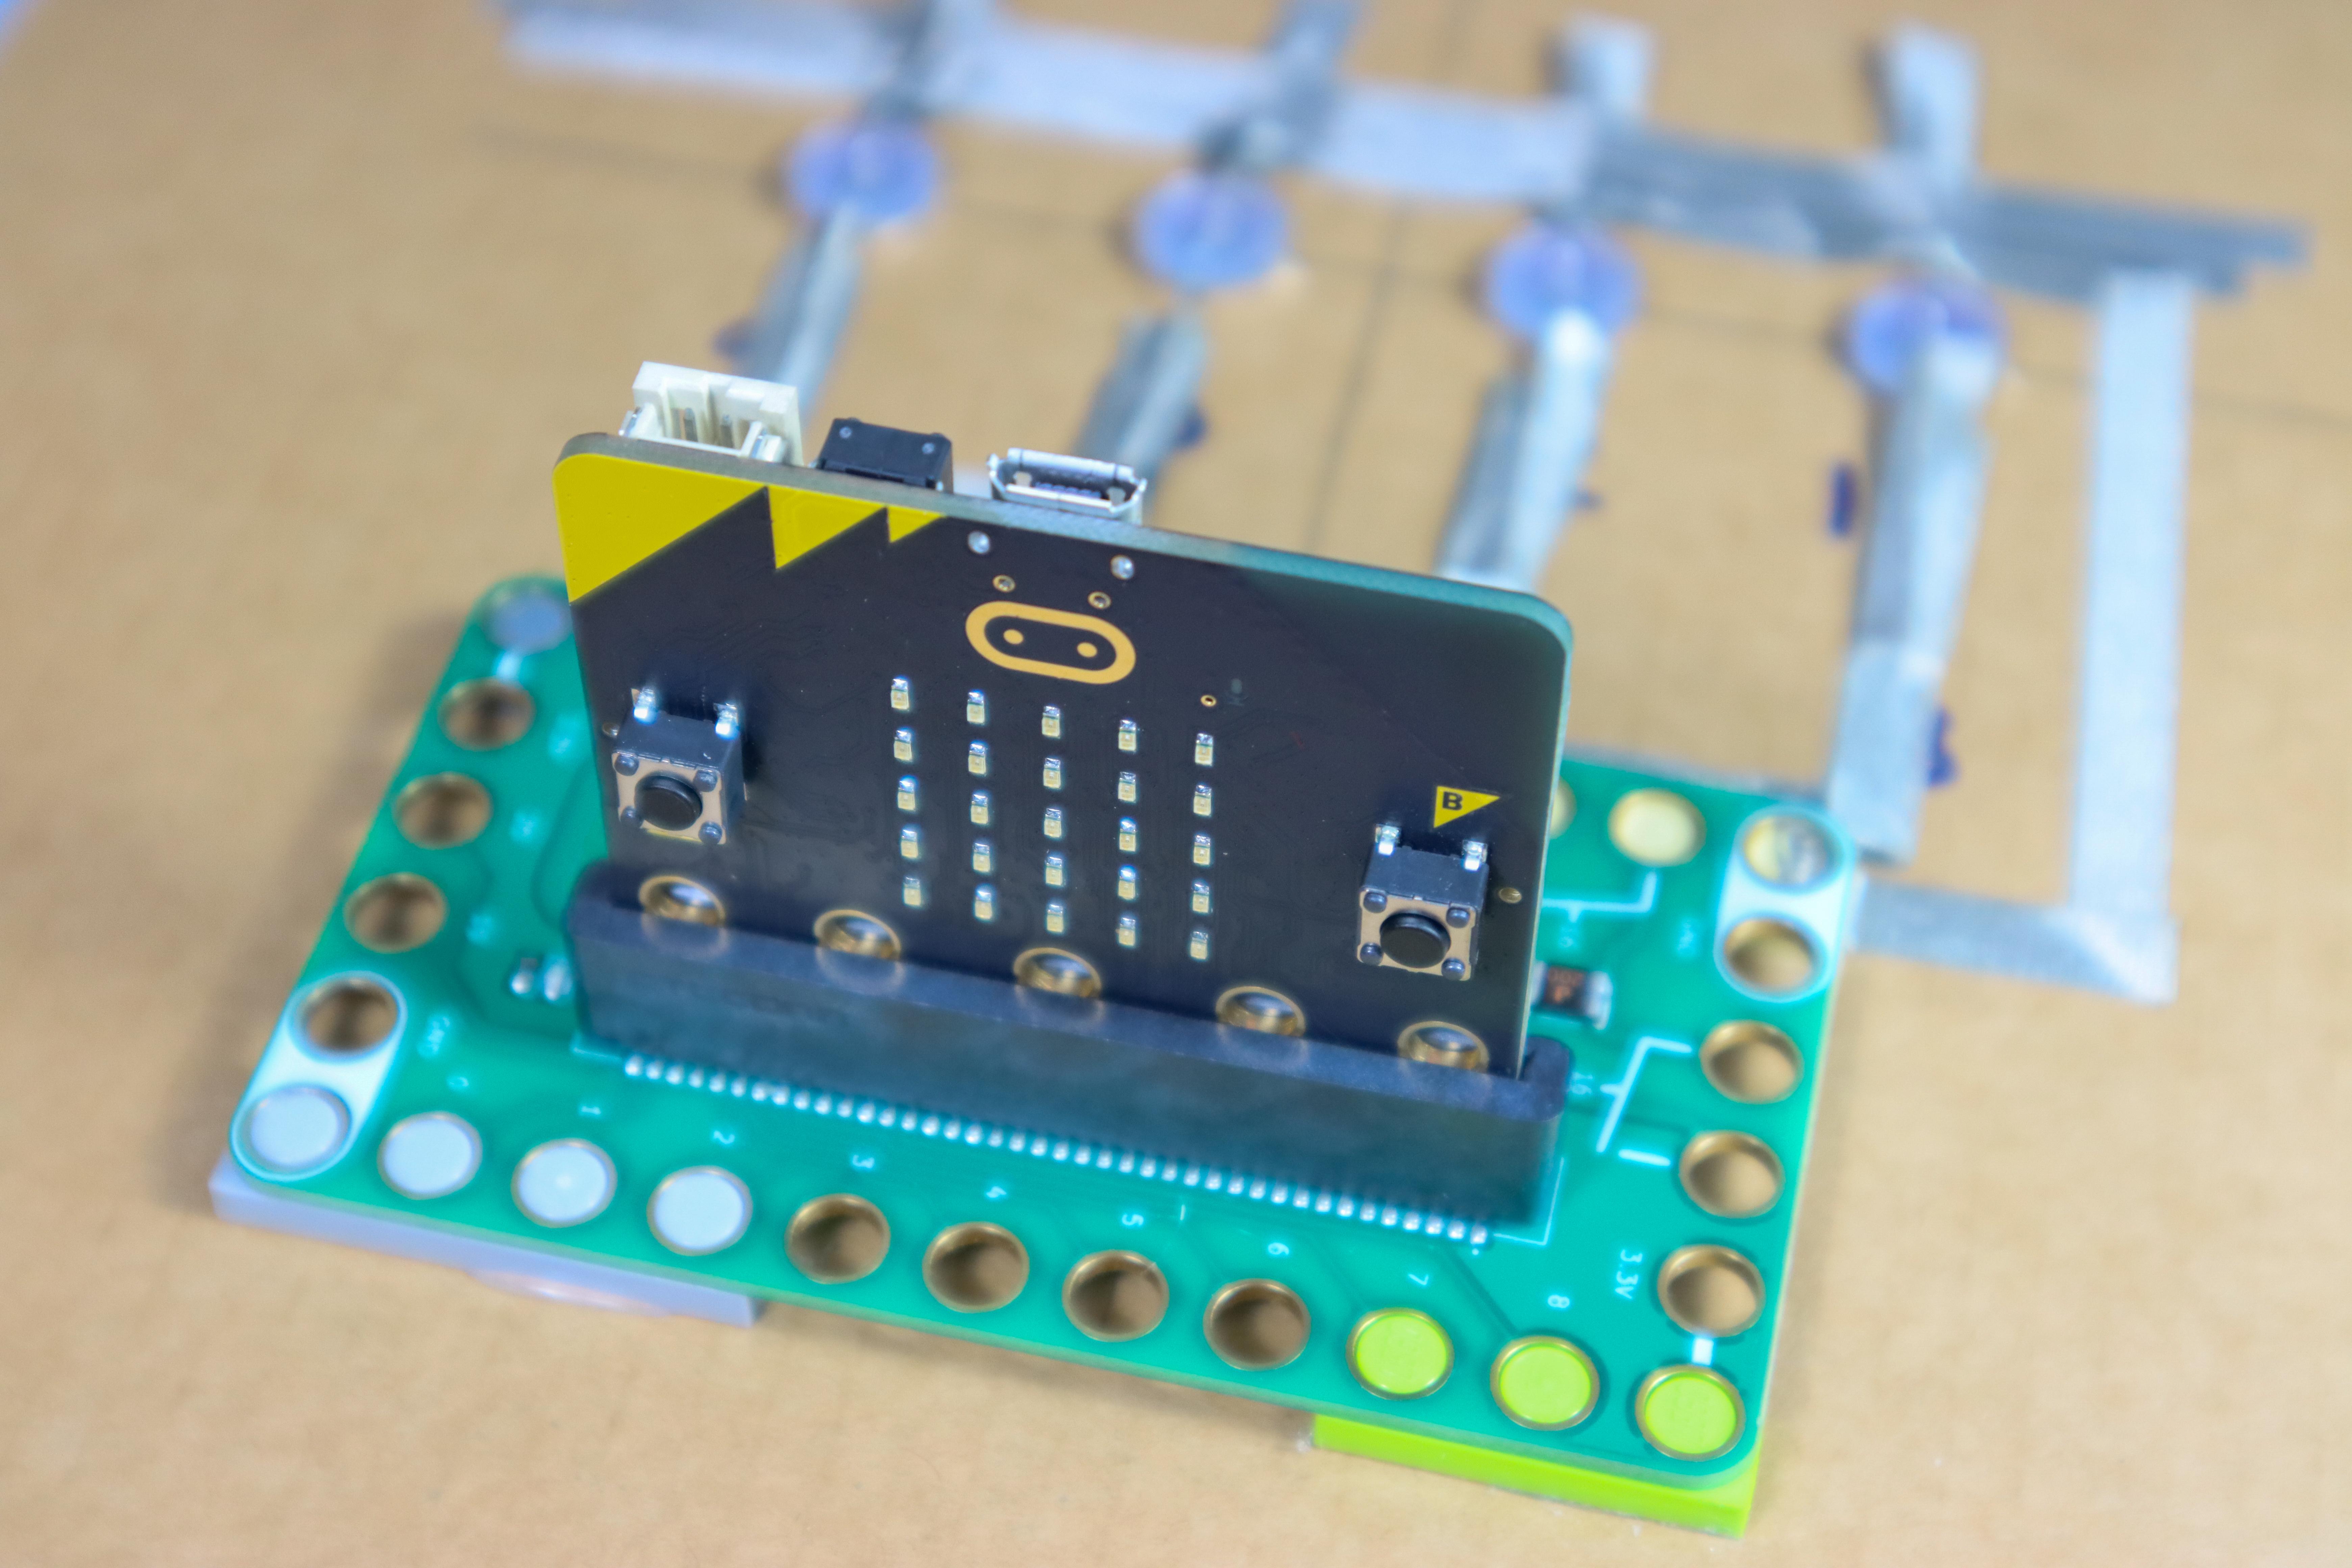
Glue the LEGO
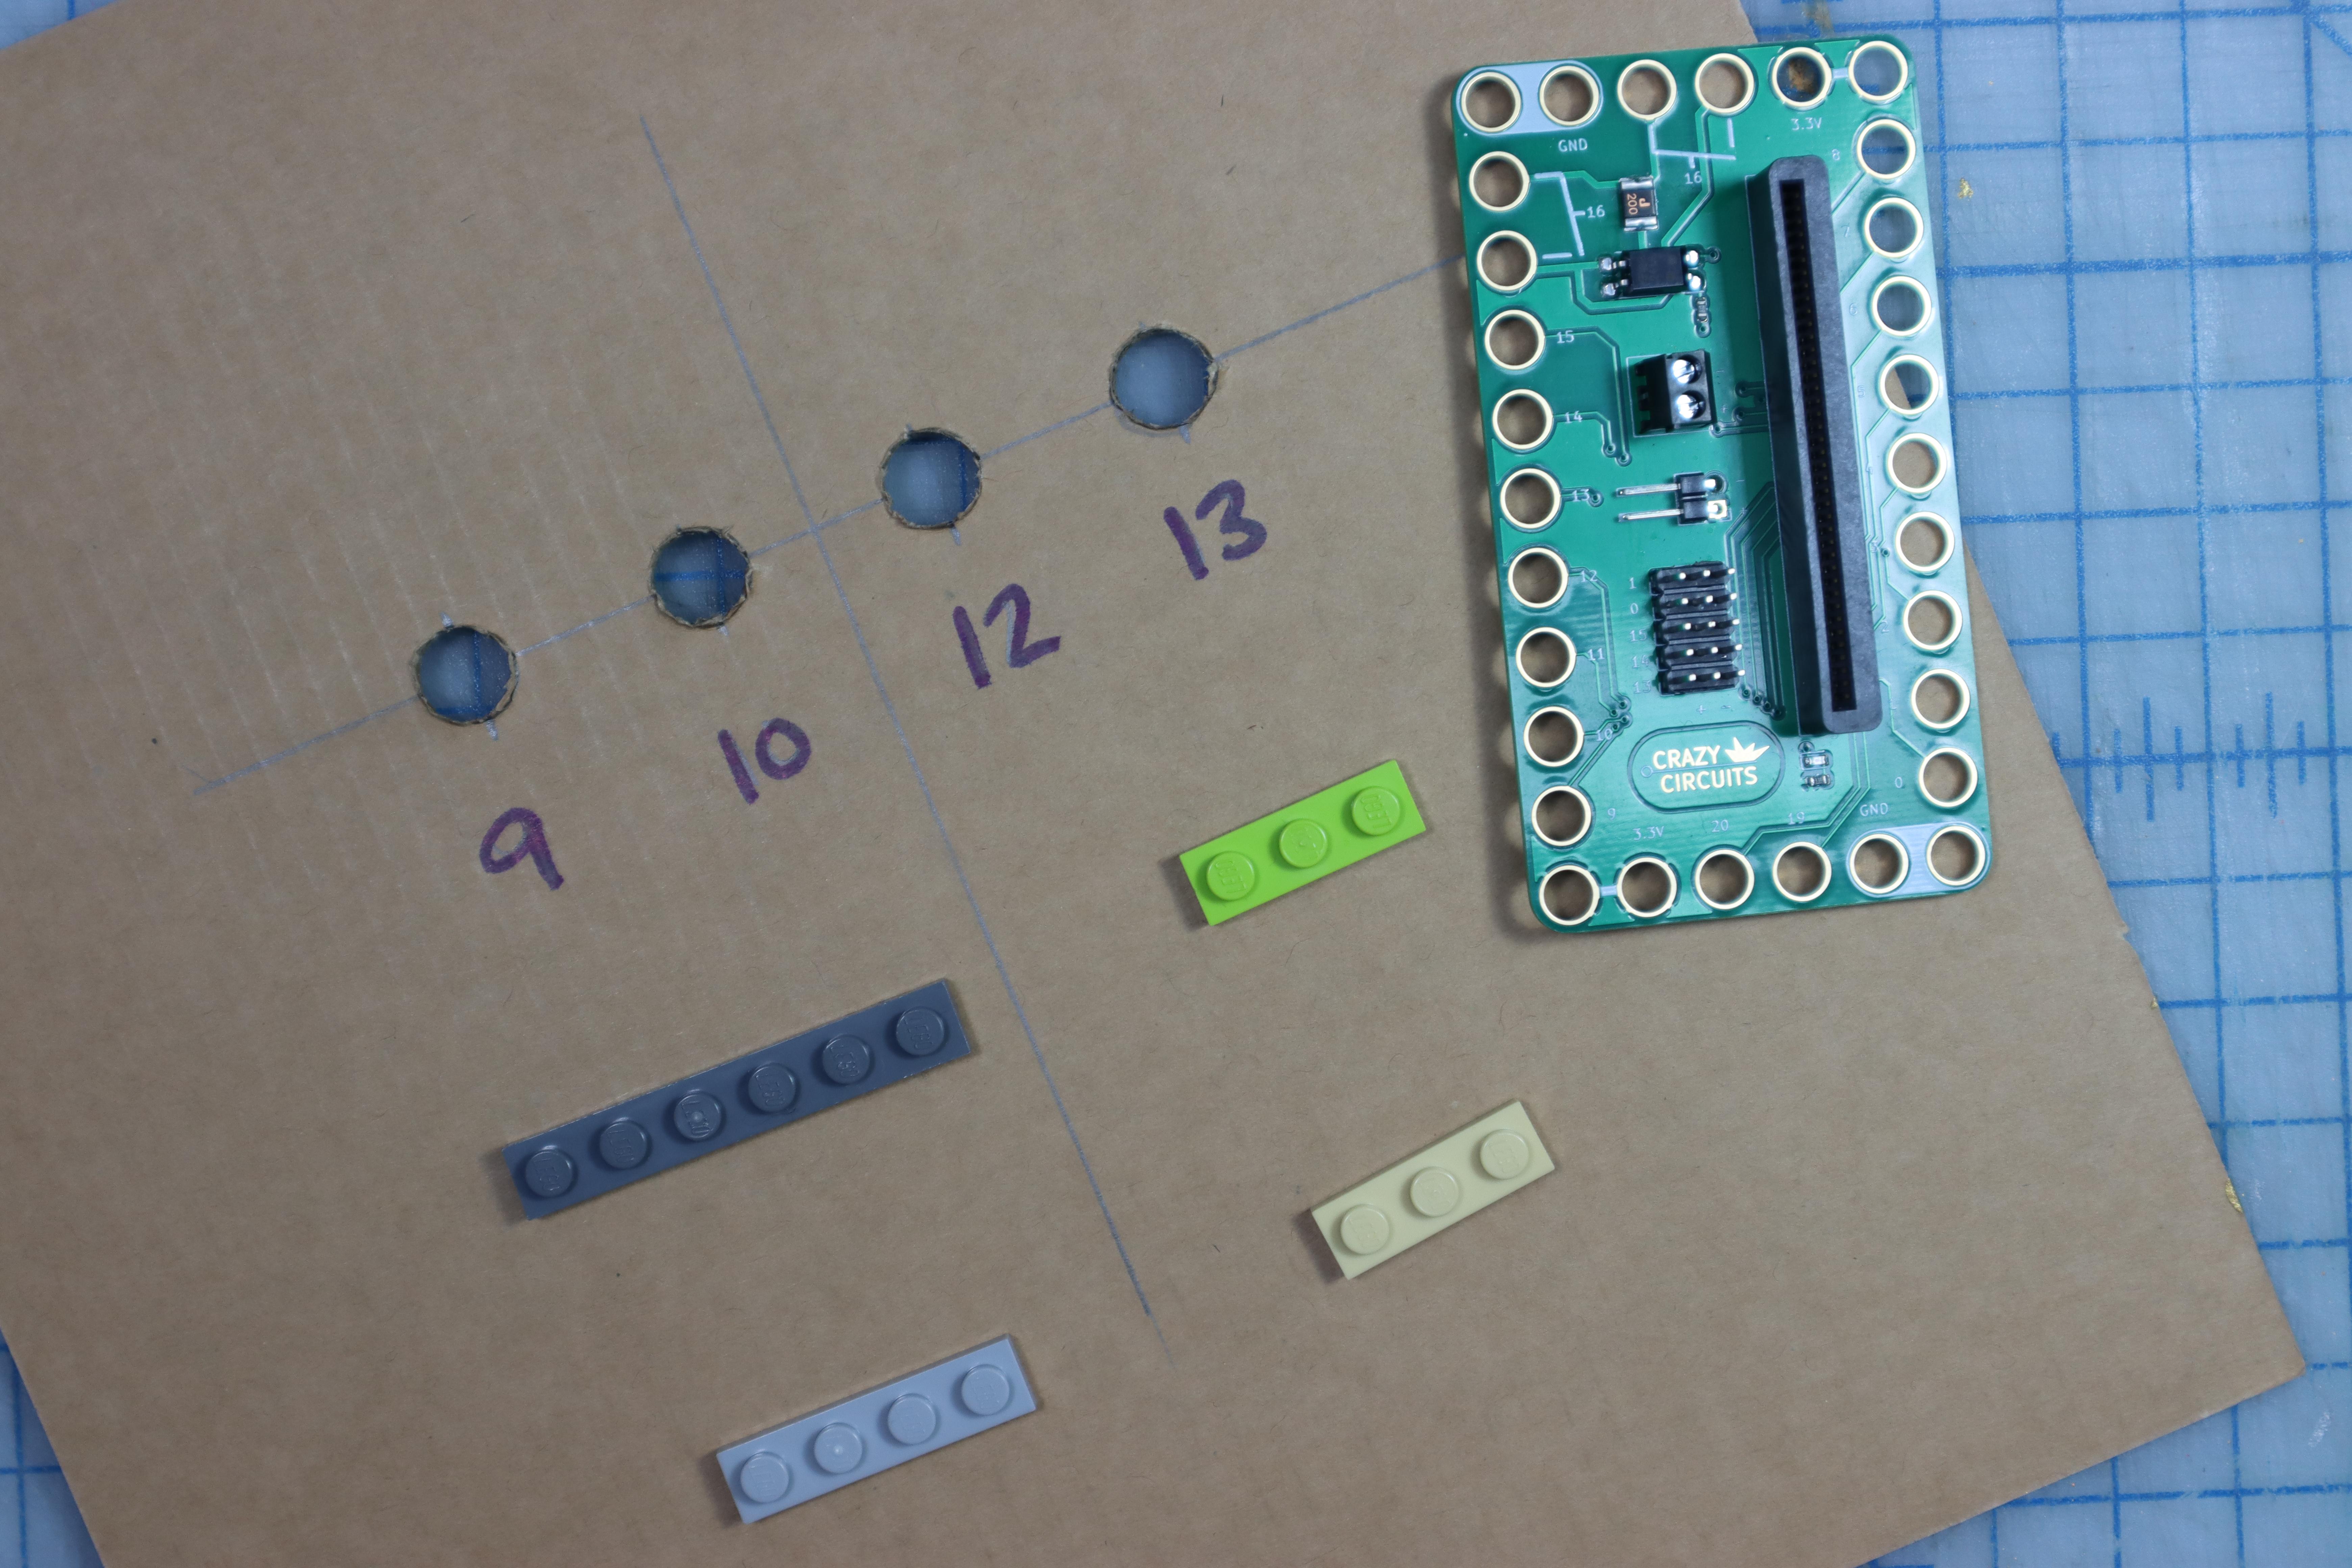

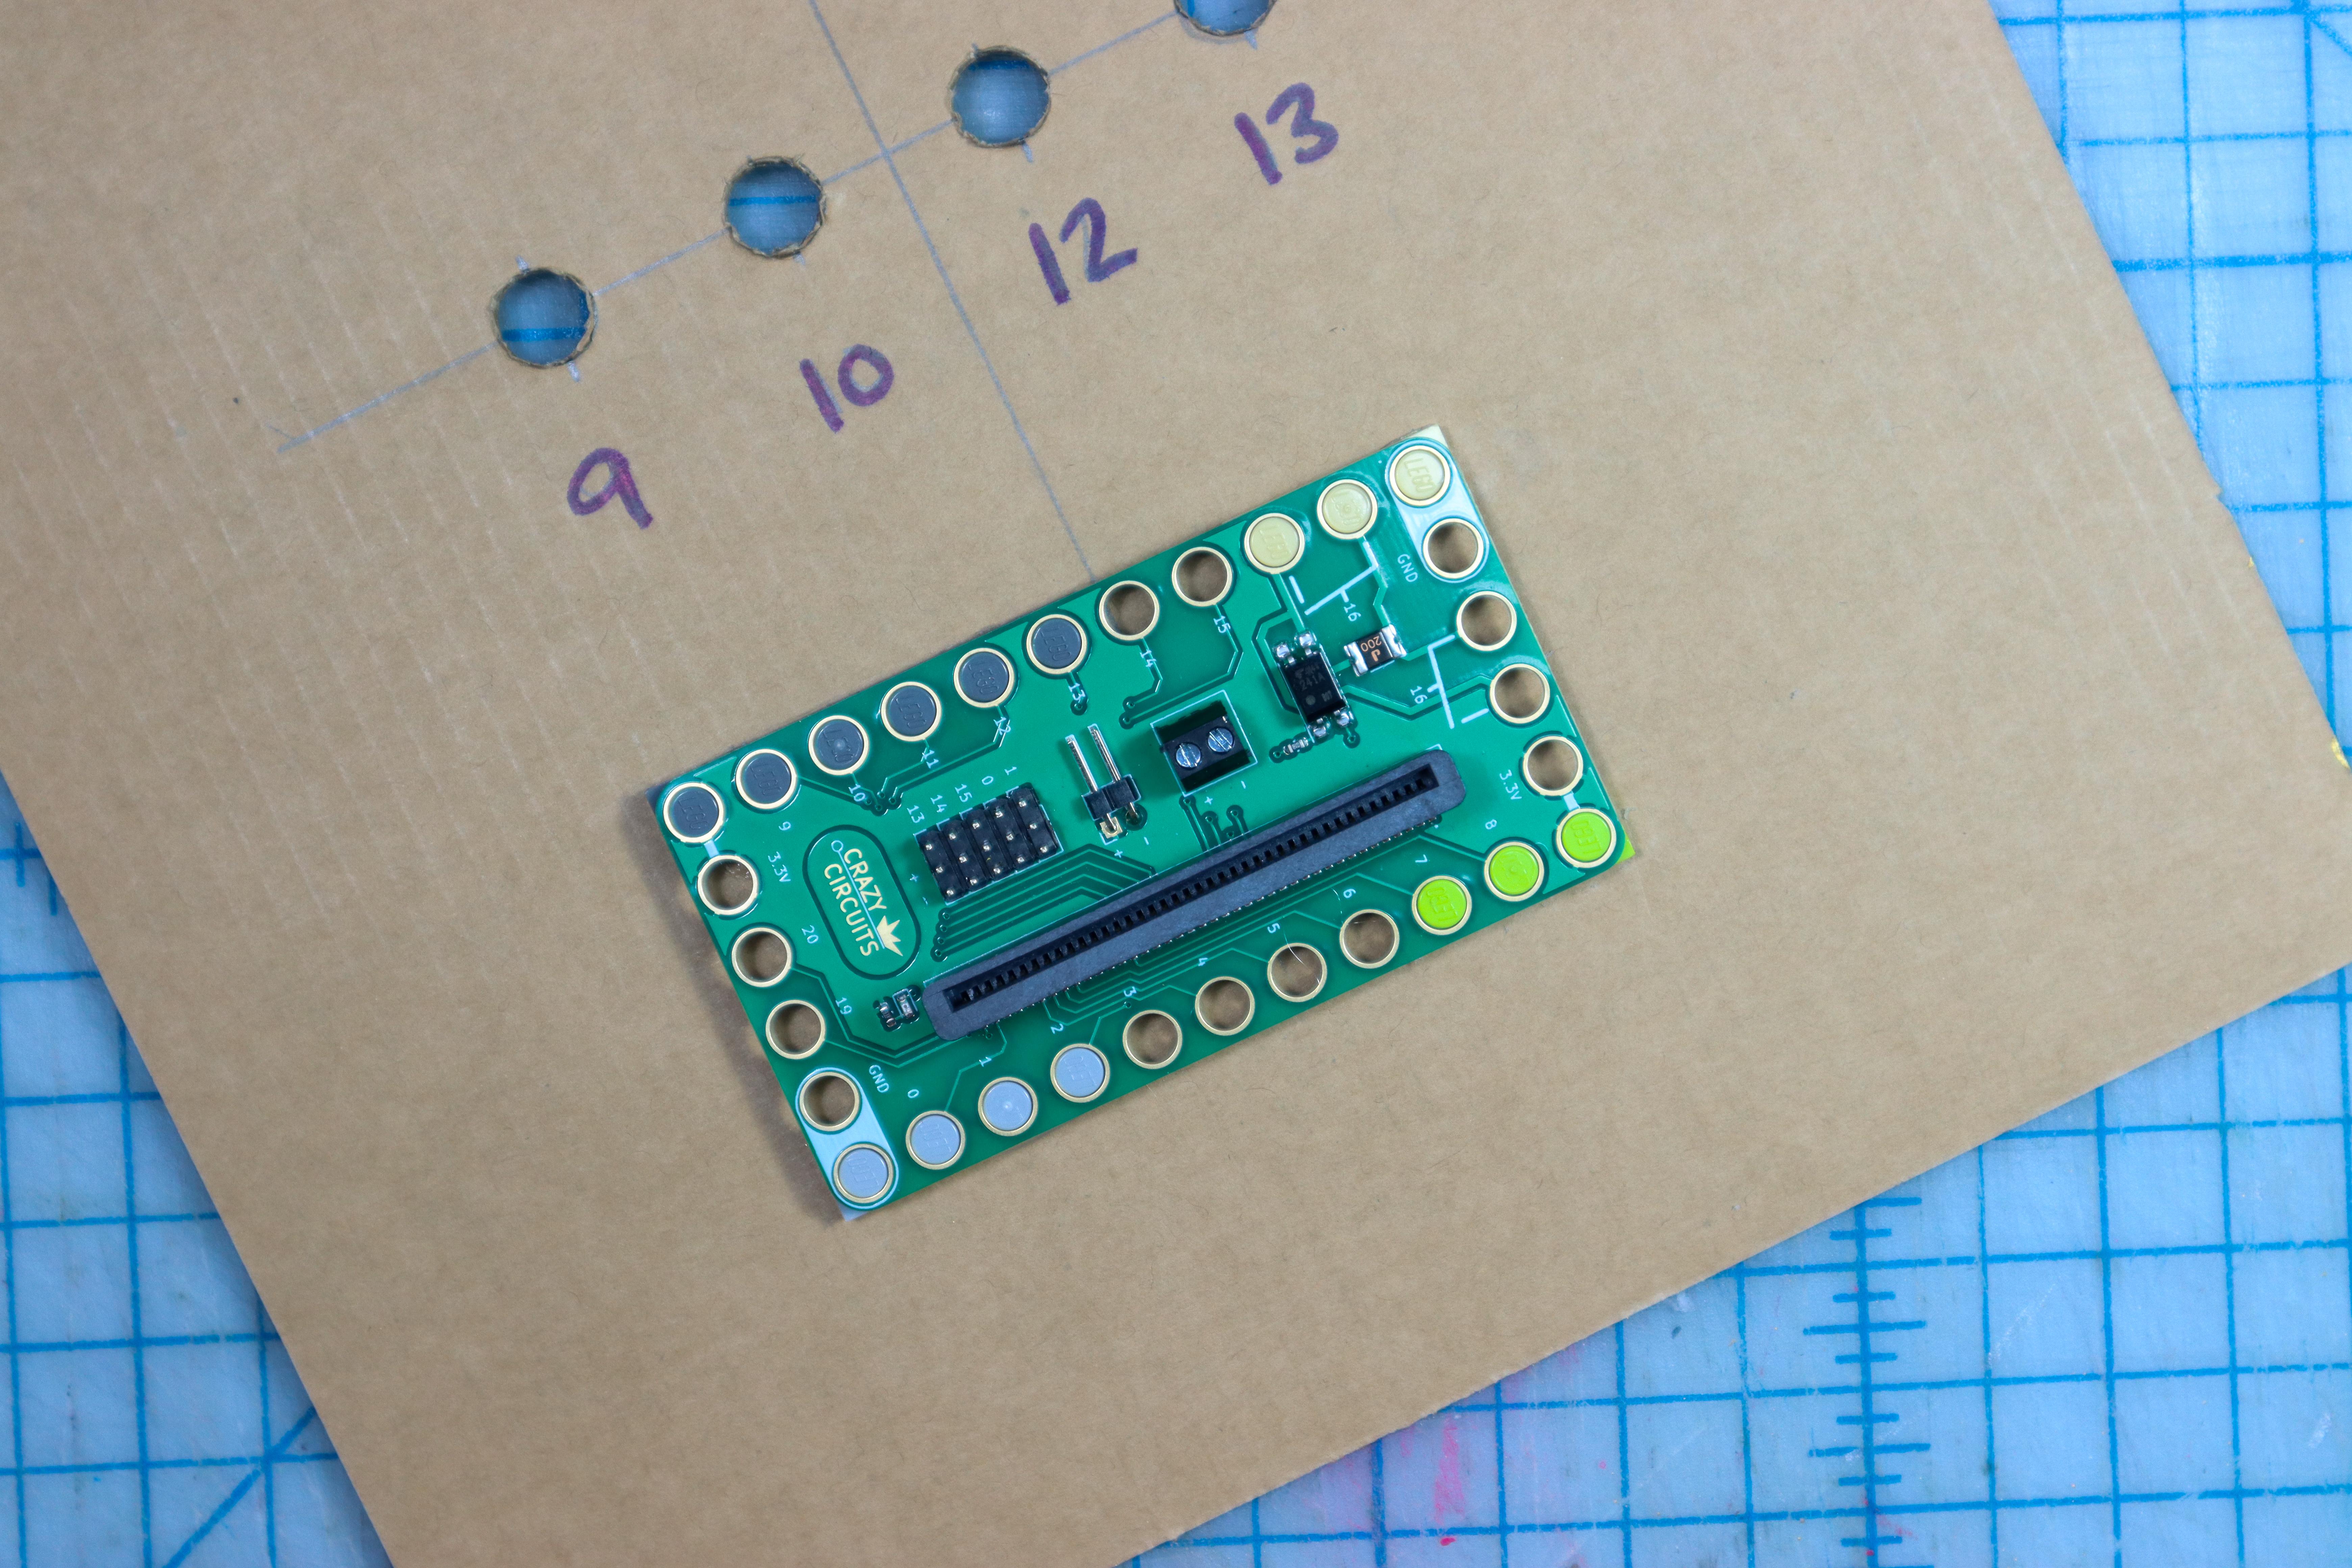
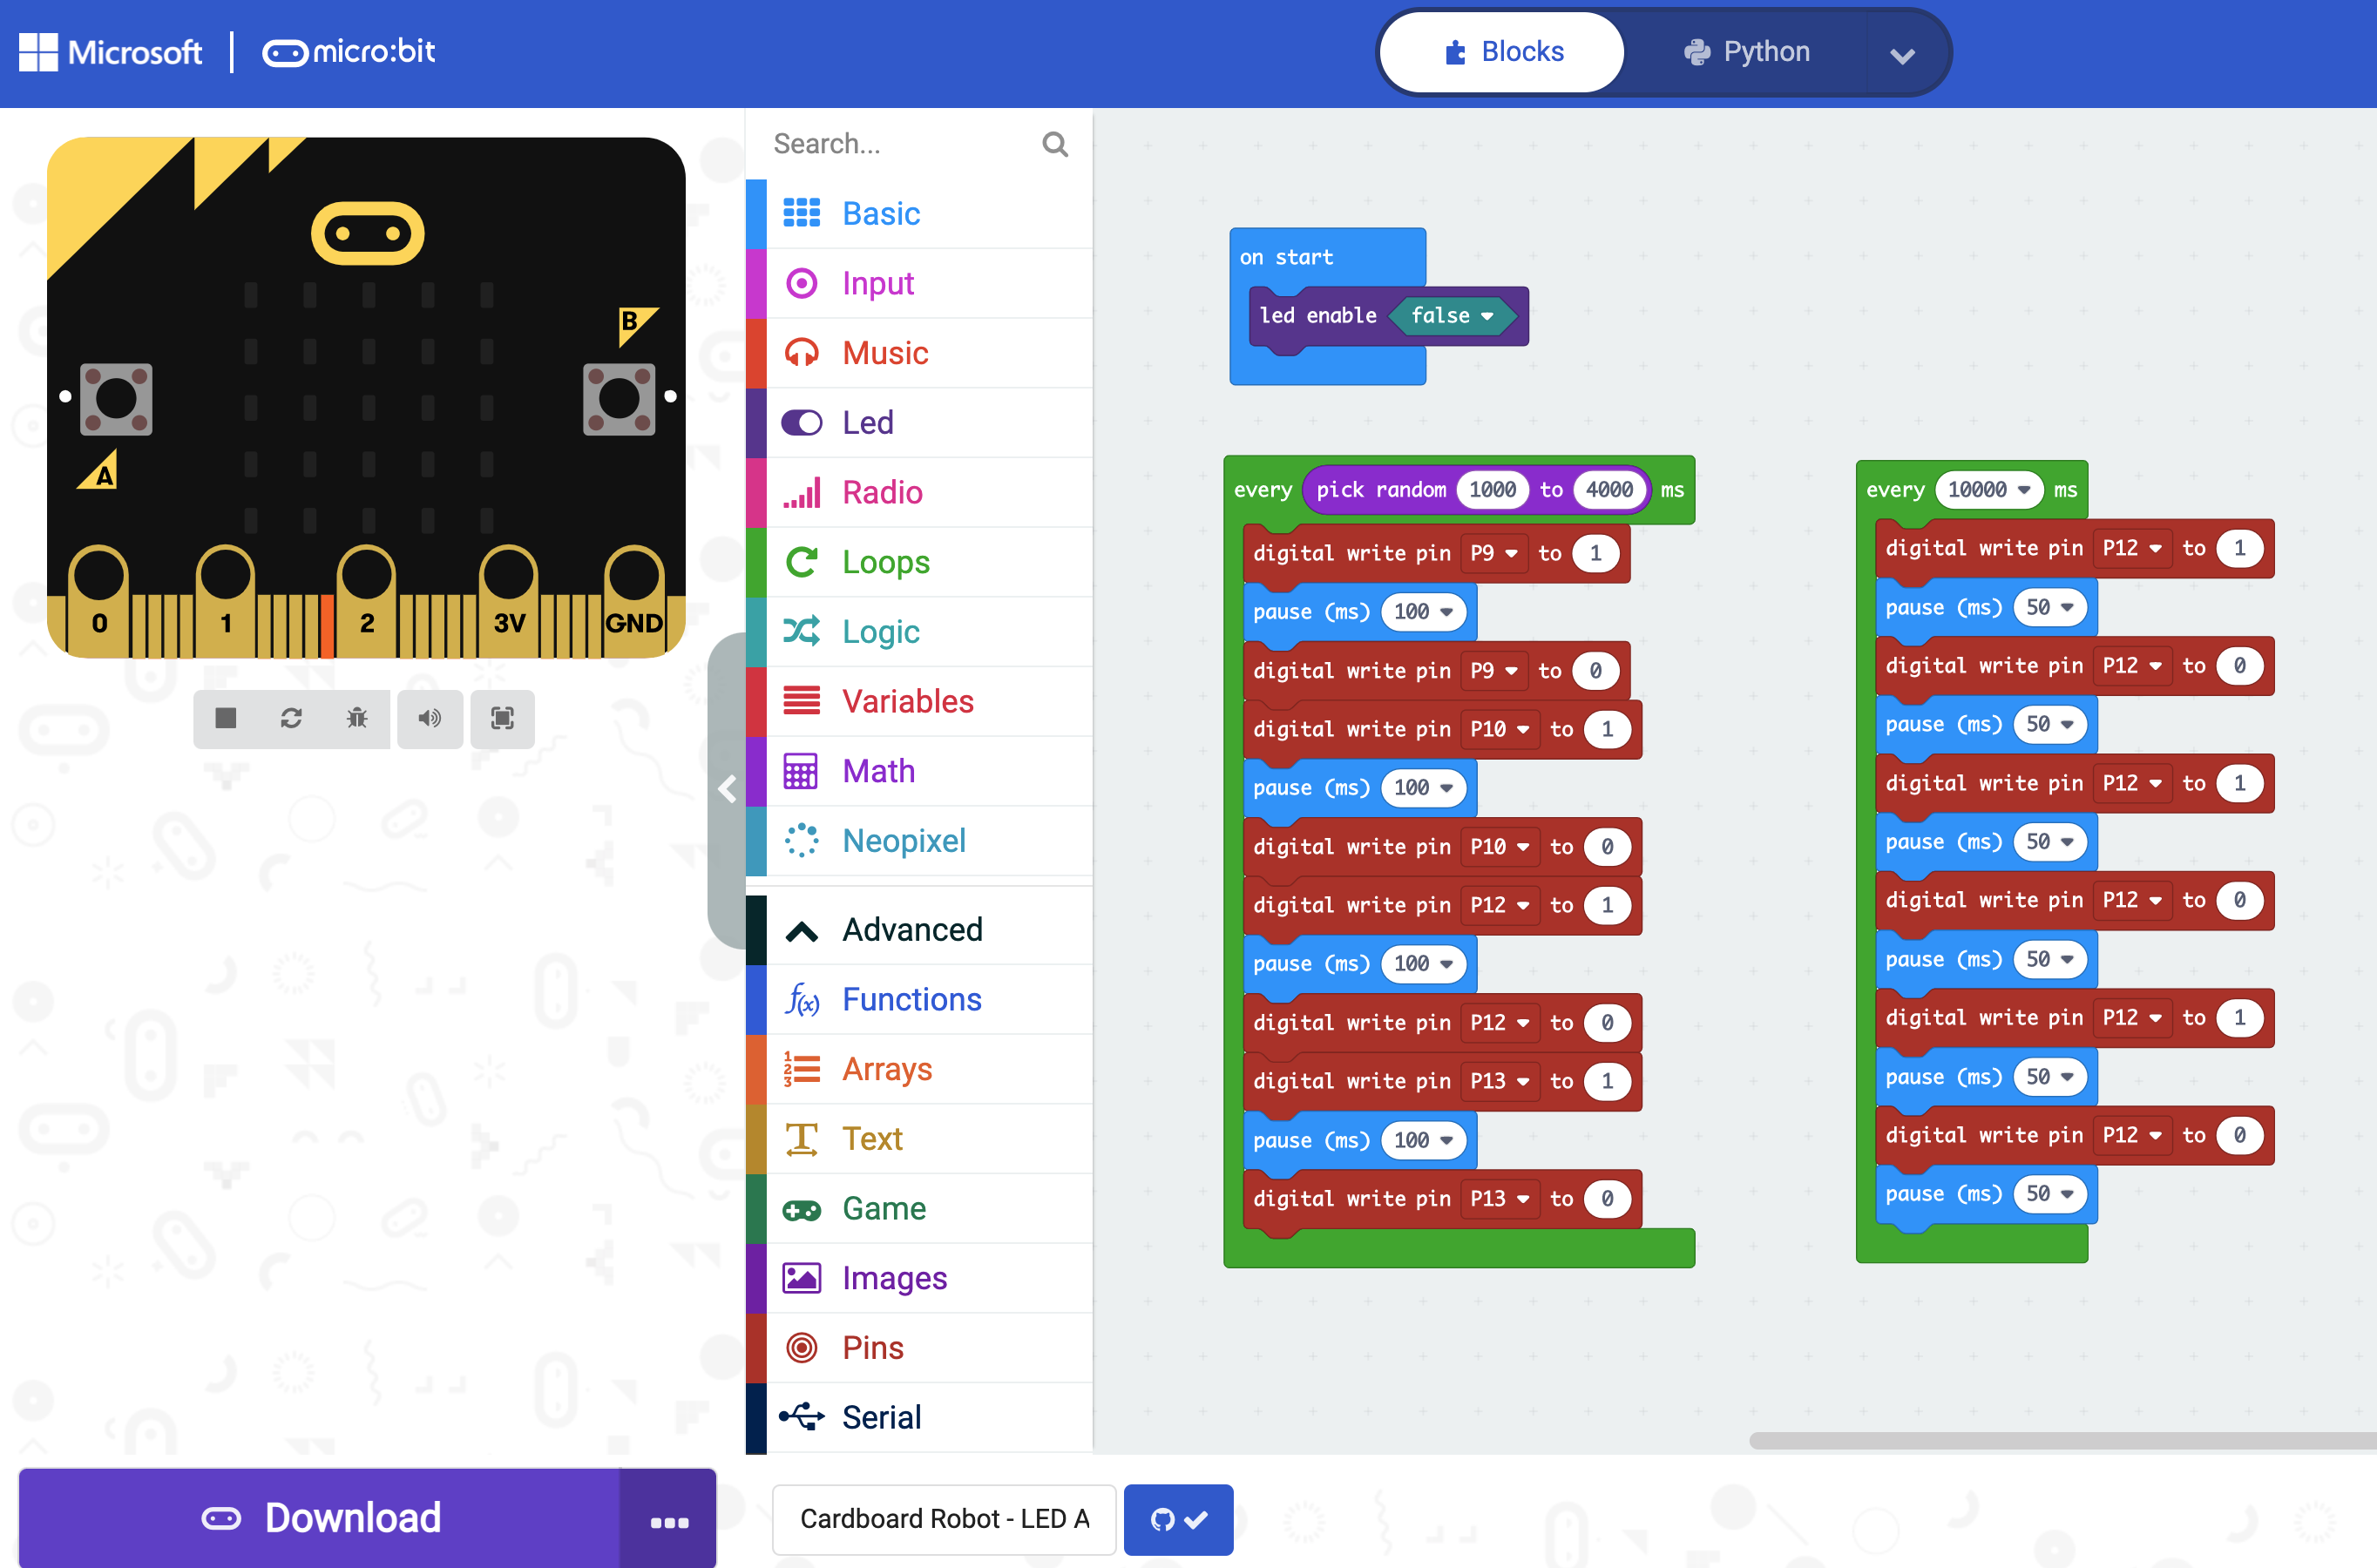
- Position the Bit Board so that Pins 9-13 are facing the holes.
- Glue LEGO in place, making sure that the holes for pins 9, 10, 12, 13, and GND have a LEGO peg inside them. The other LEGO are just for support.
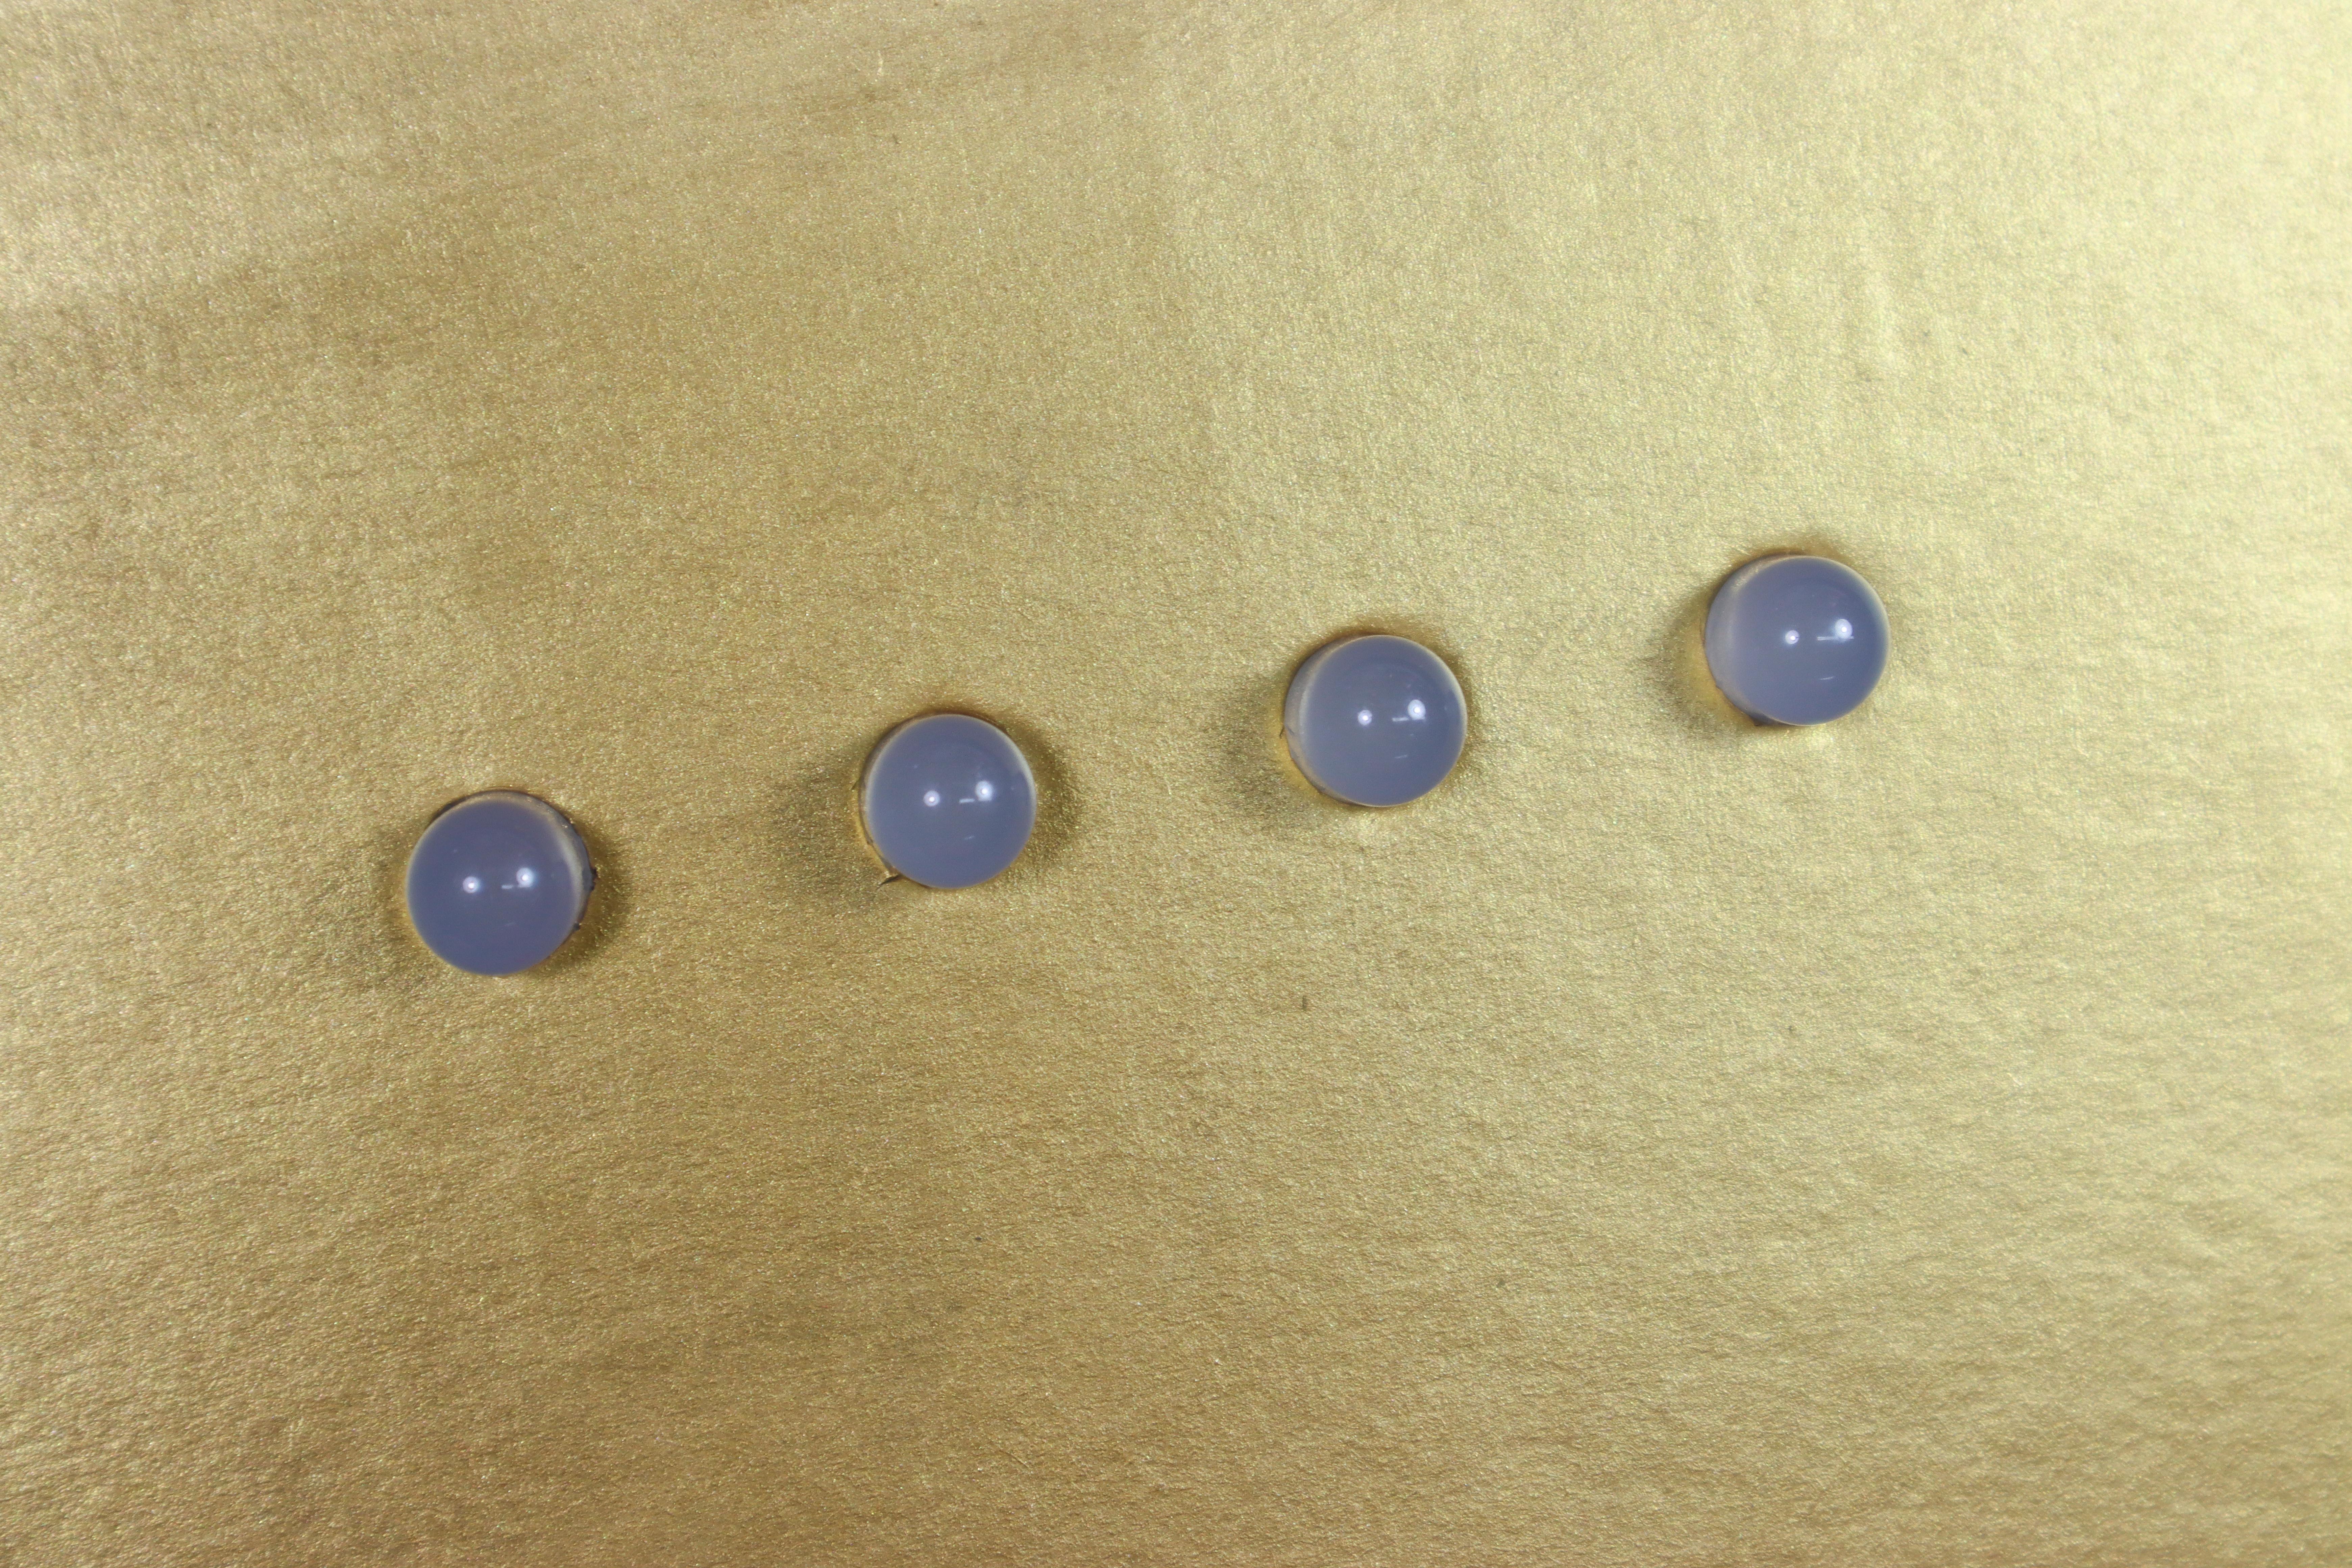
Place the LEDs
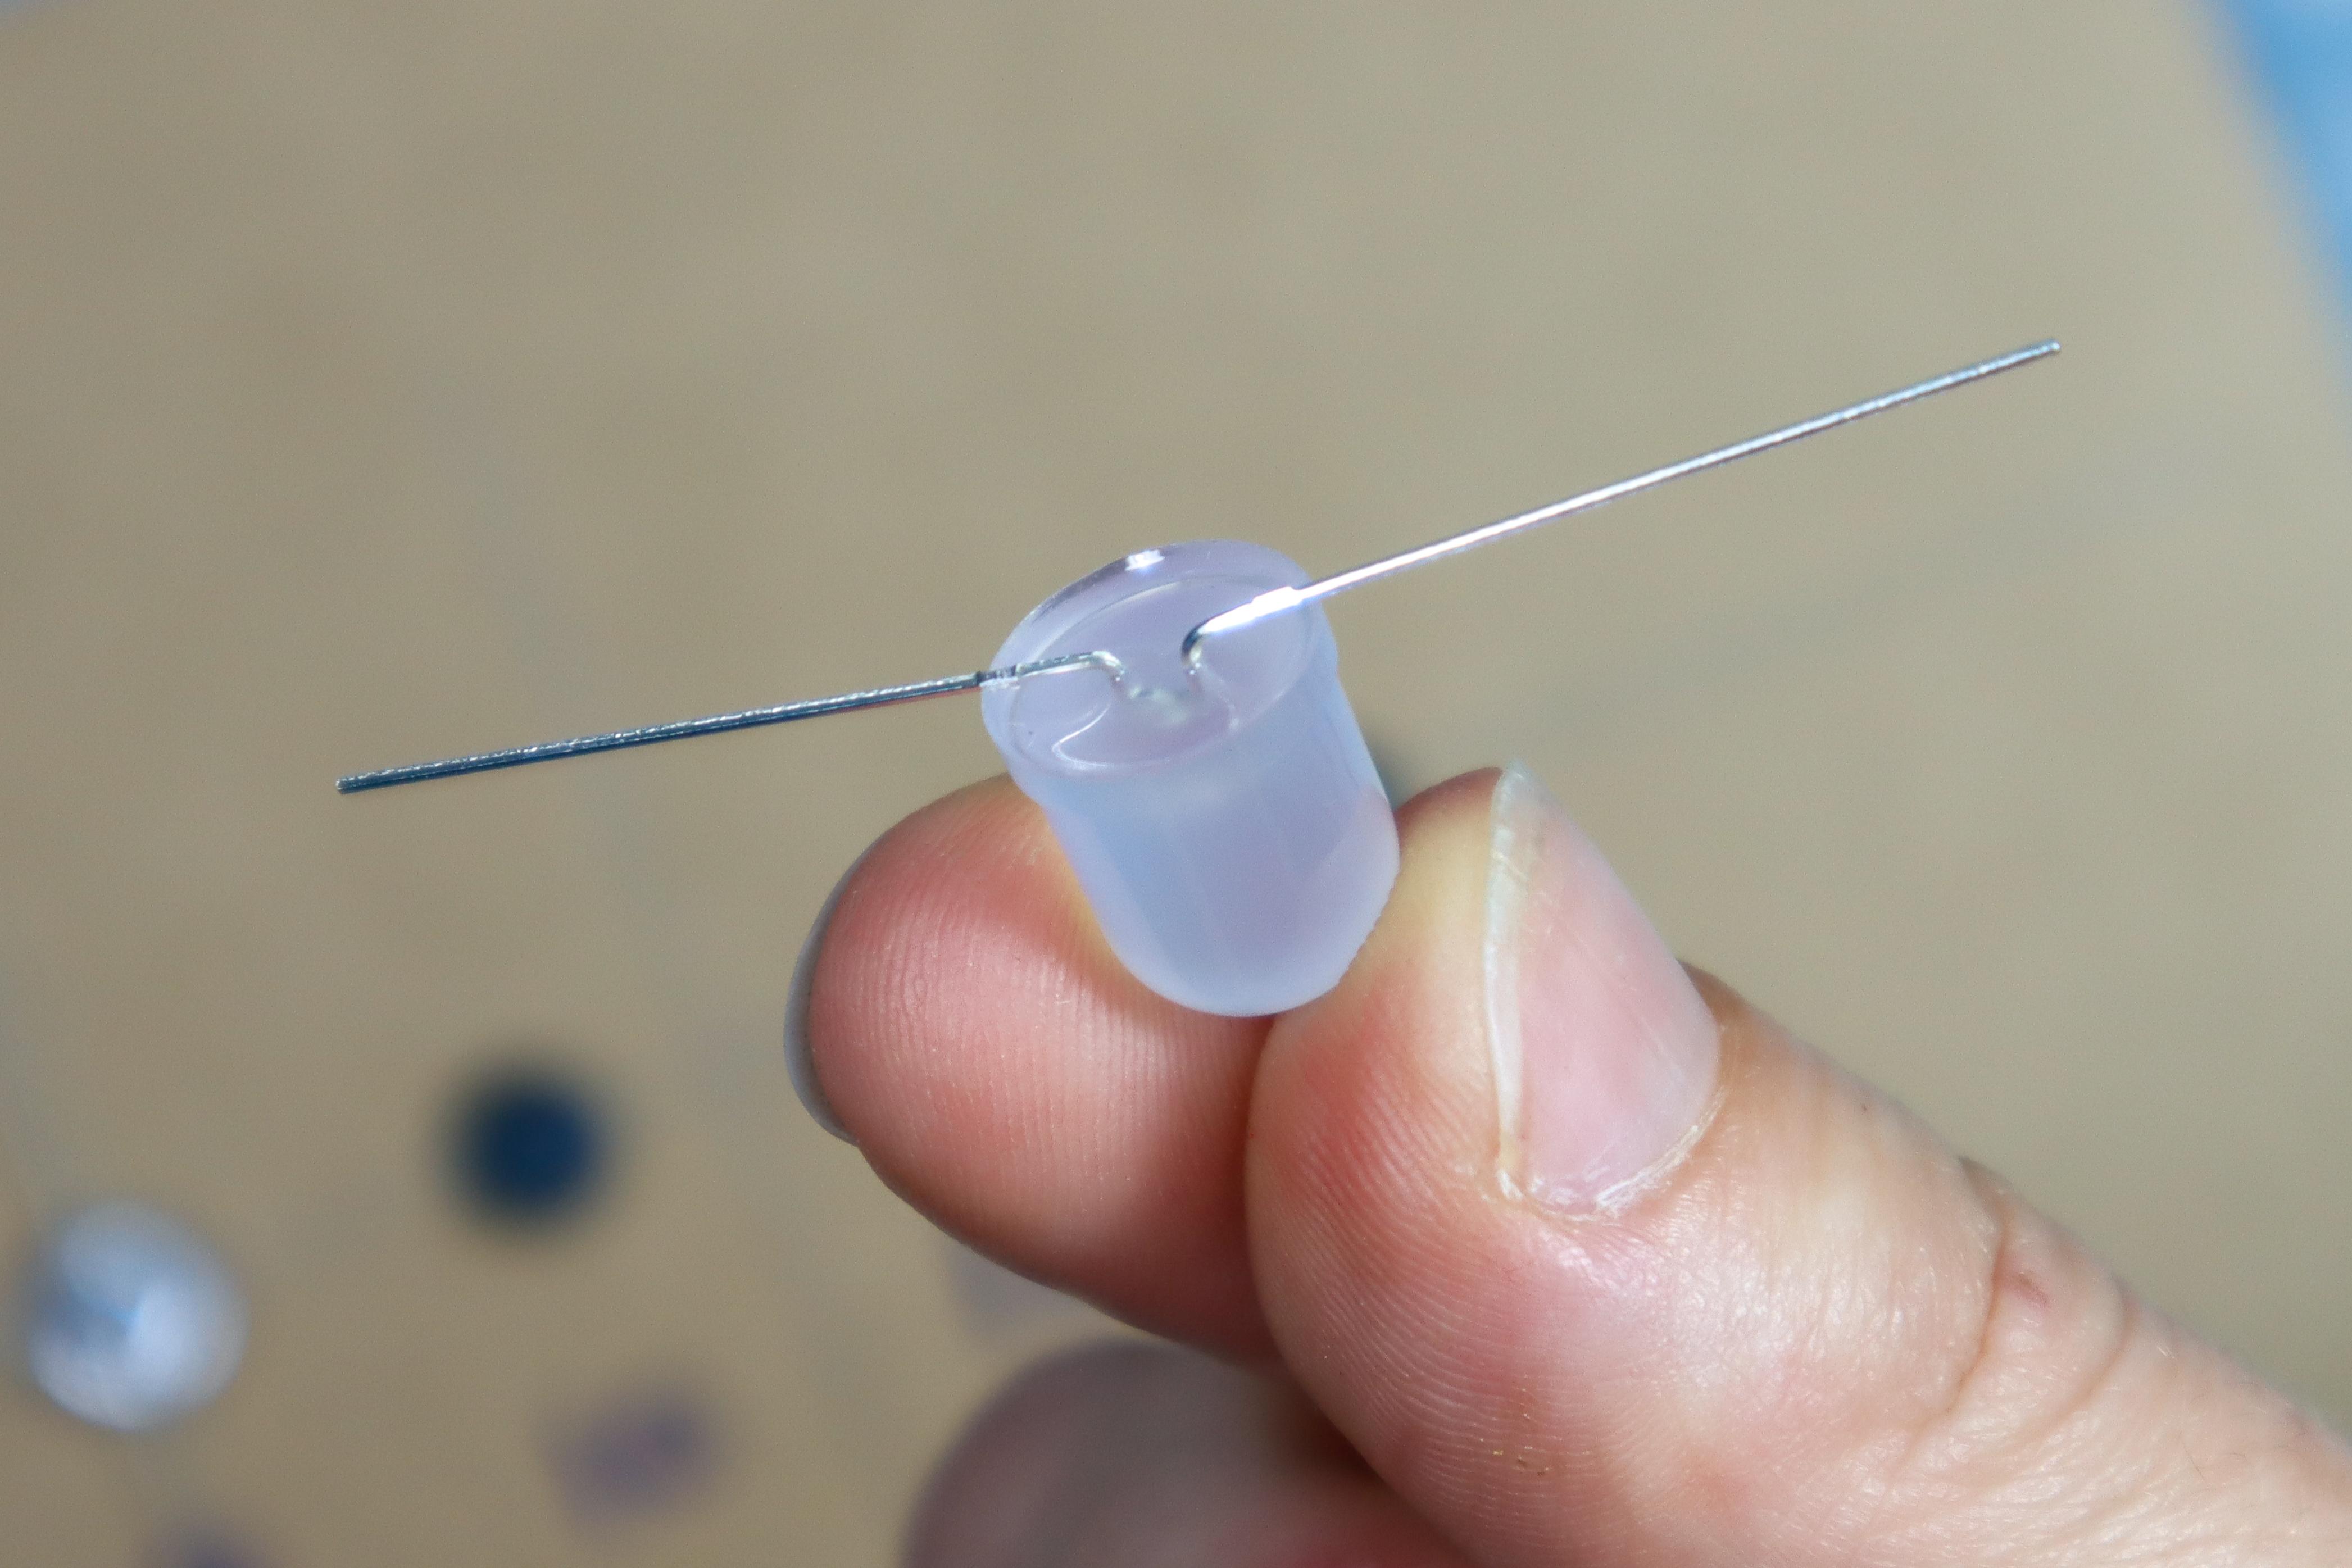
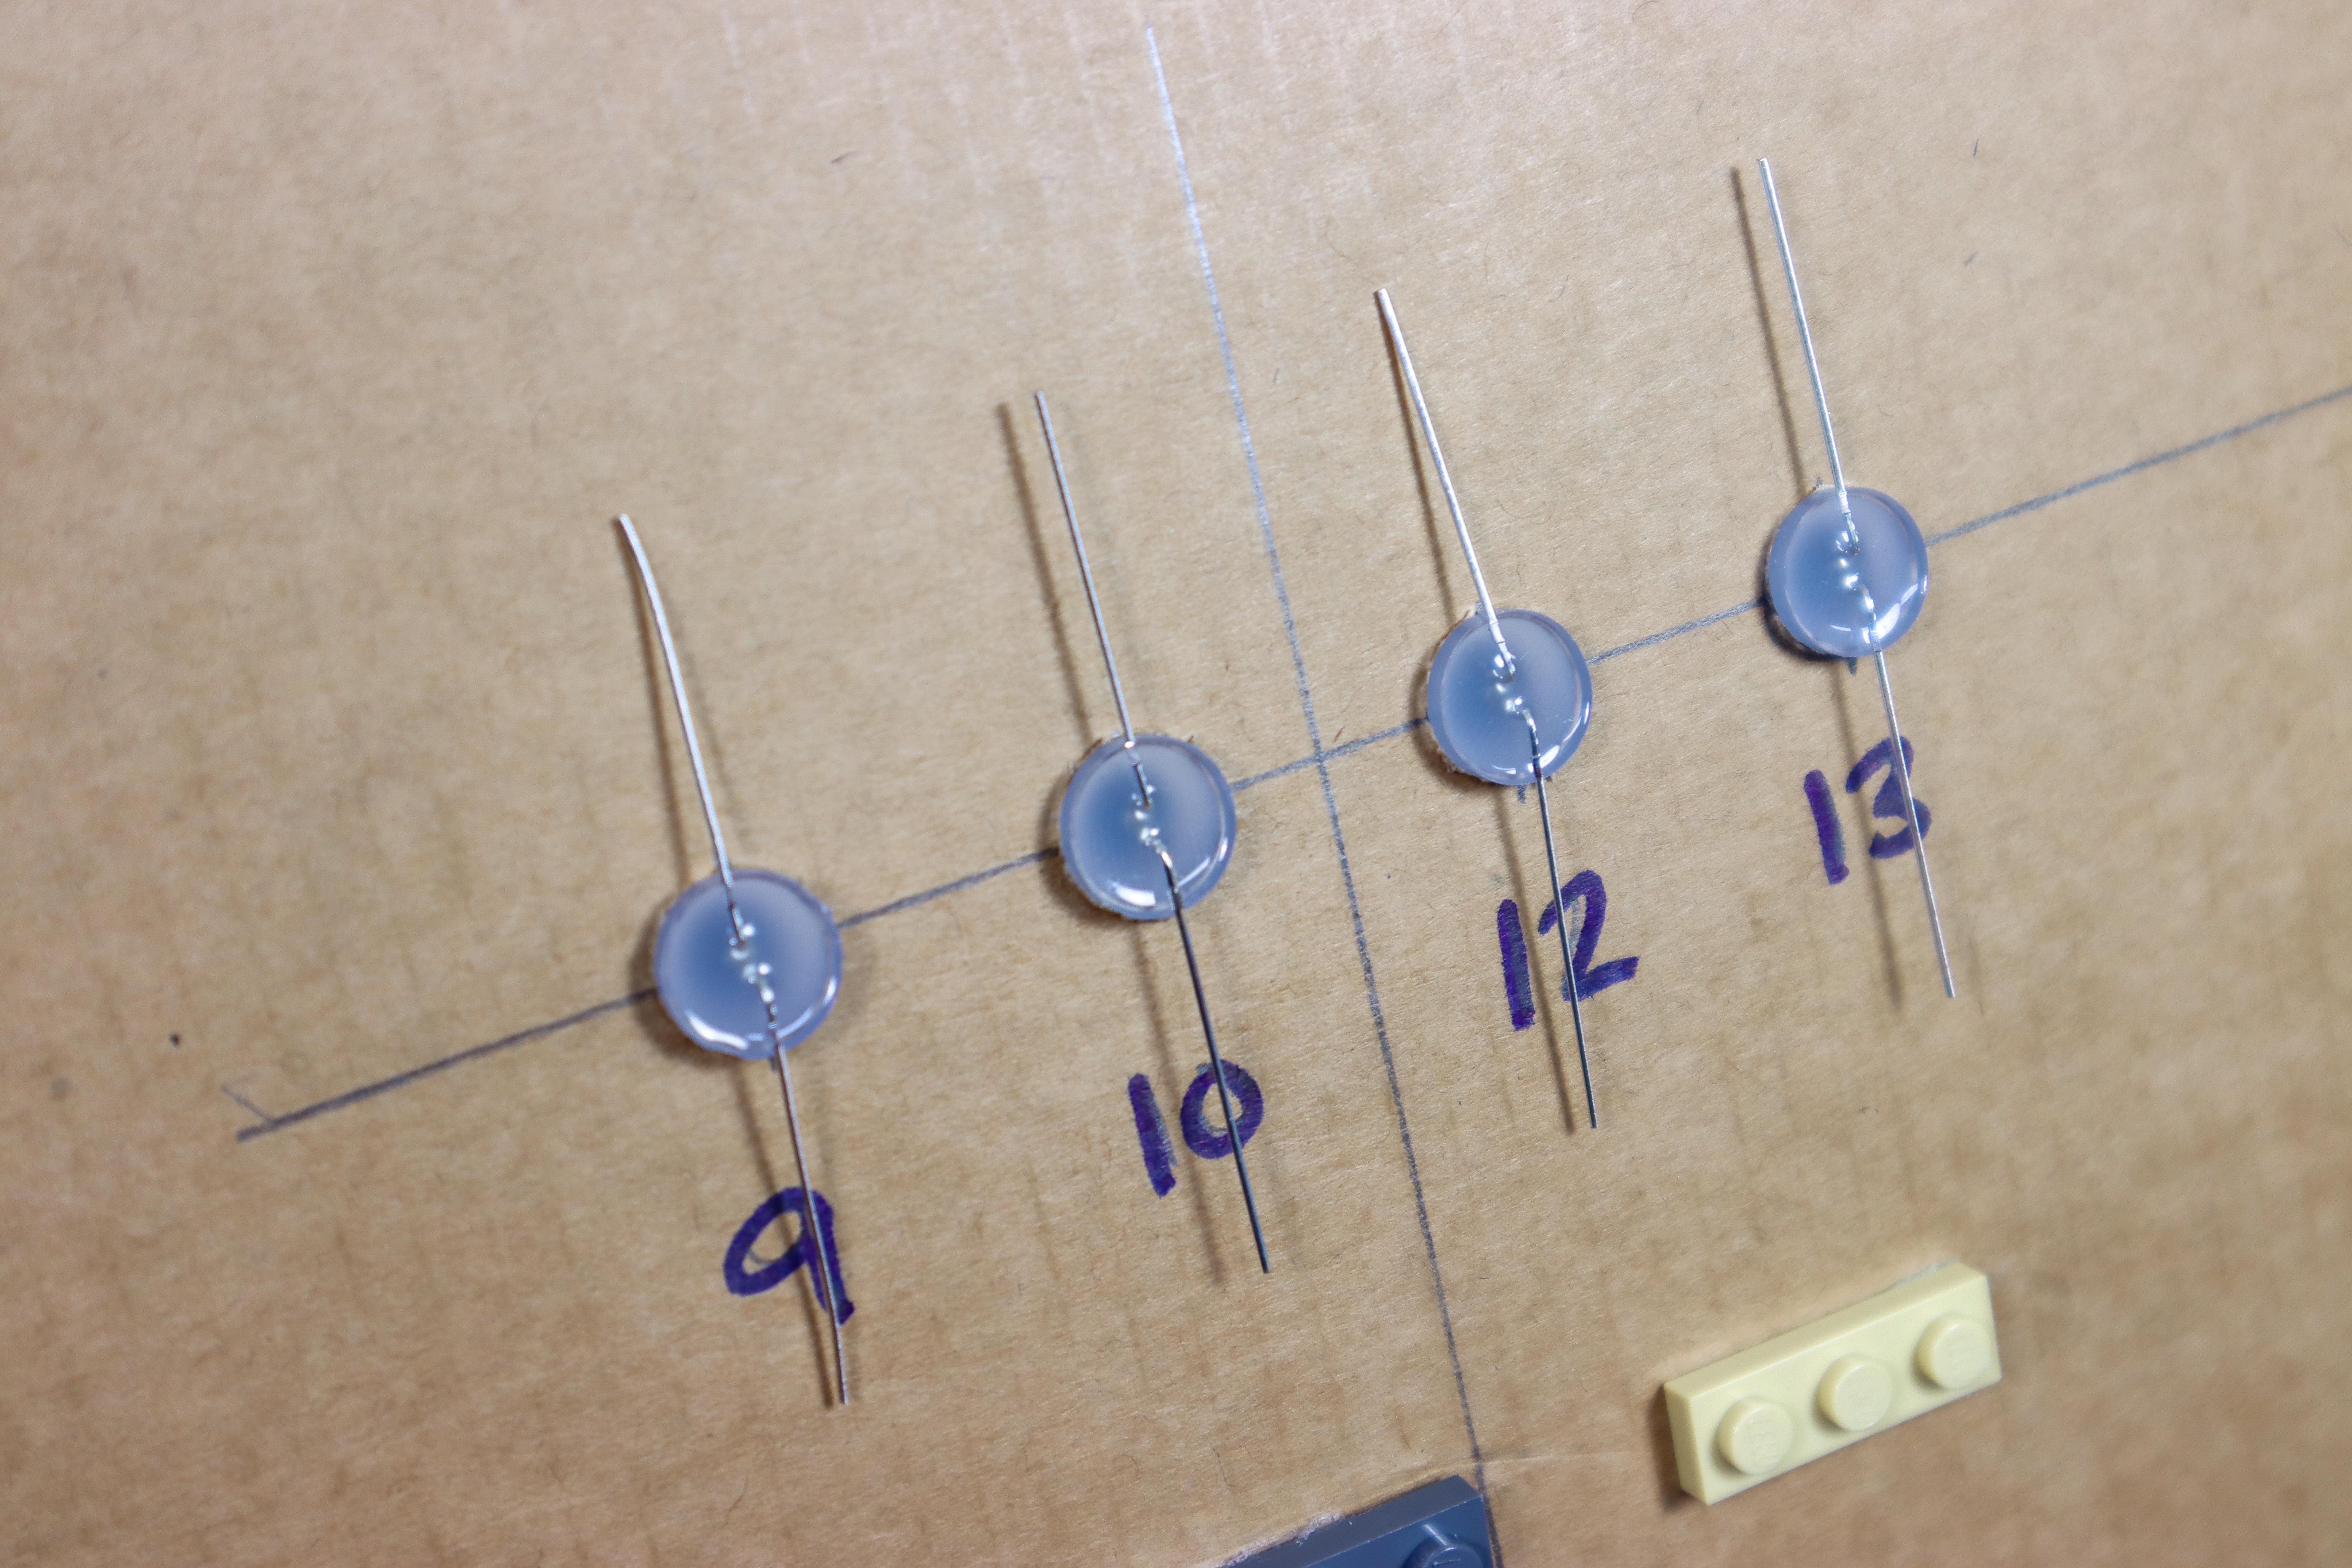
- Make note of the shorter, negative leg of the LED.
- Bend the legs open and flat.
- Place the LEDs in the holes with the negative legs facing away from the Bit Board.
Add Maker Tape
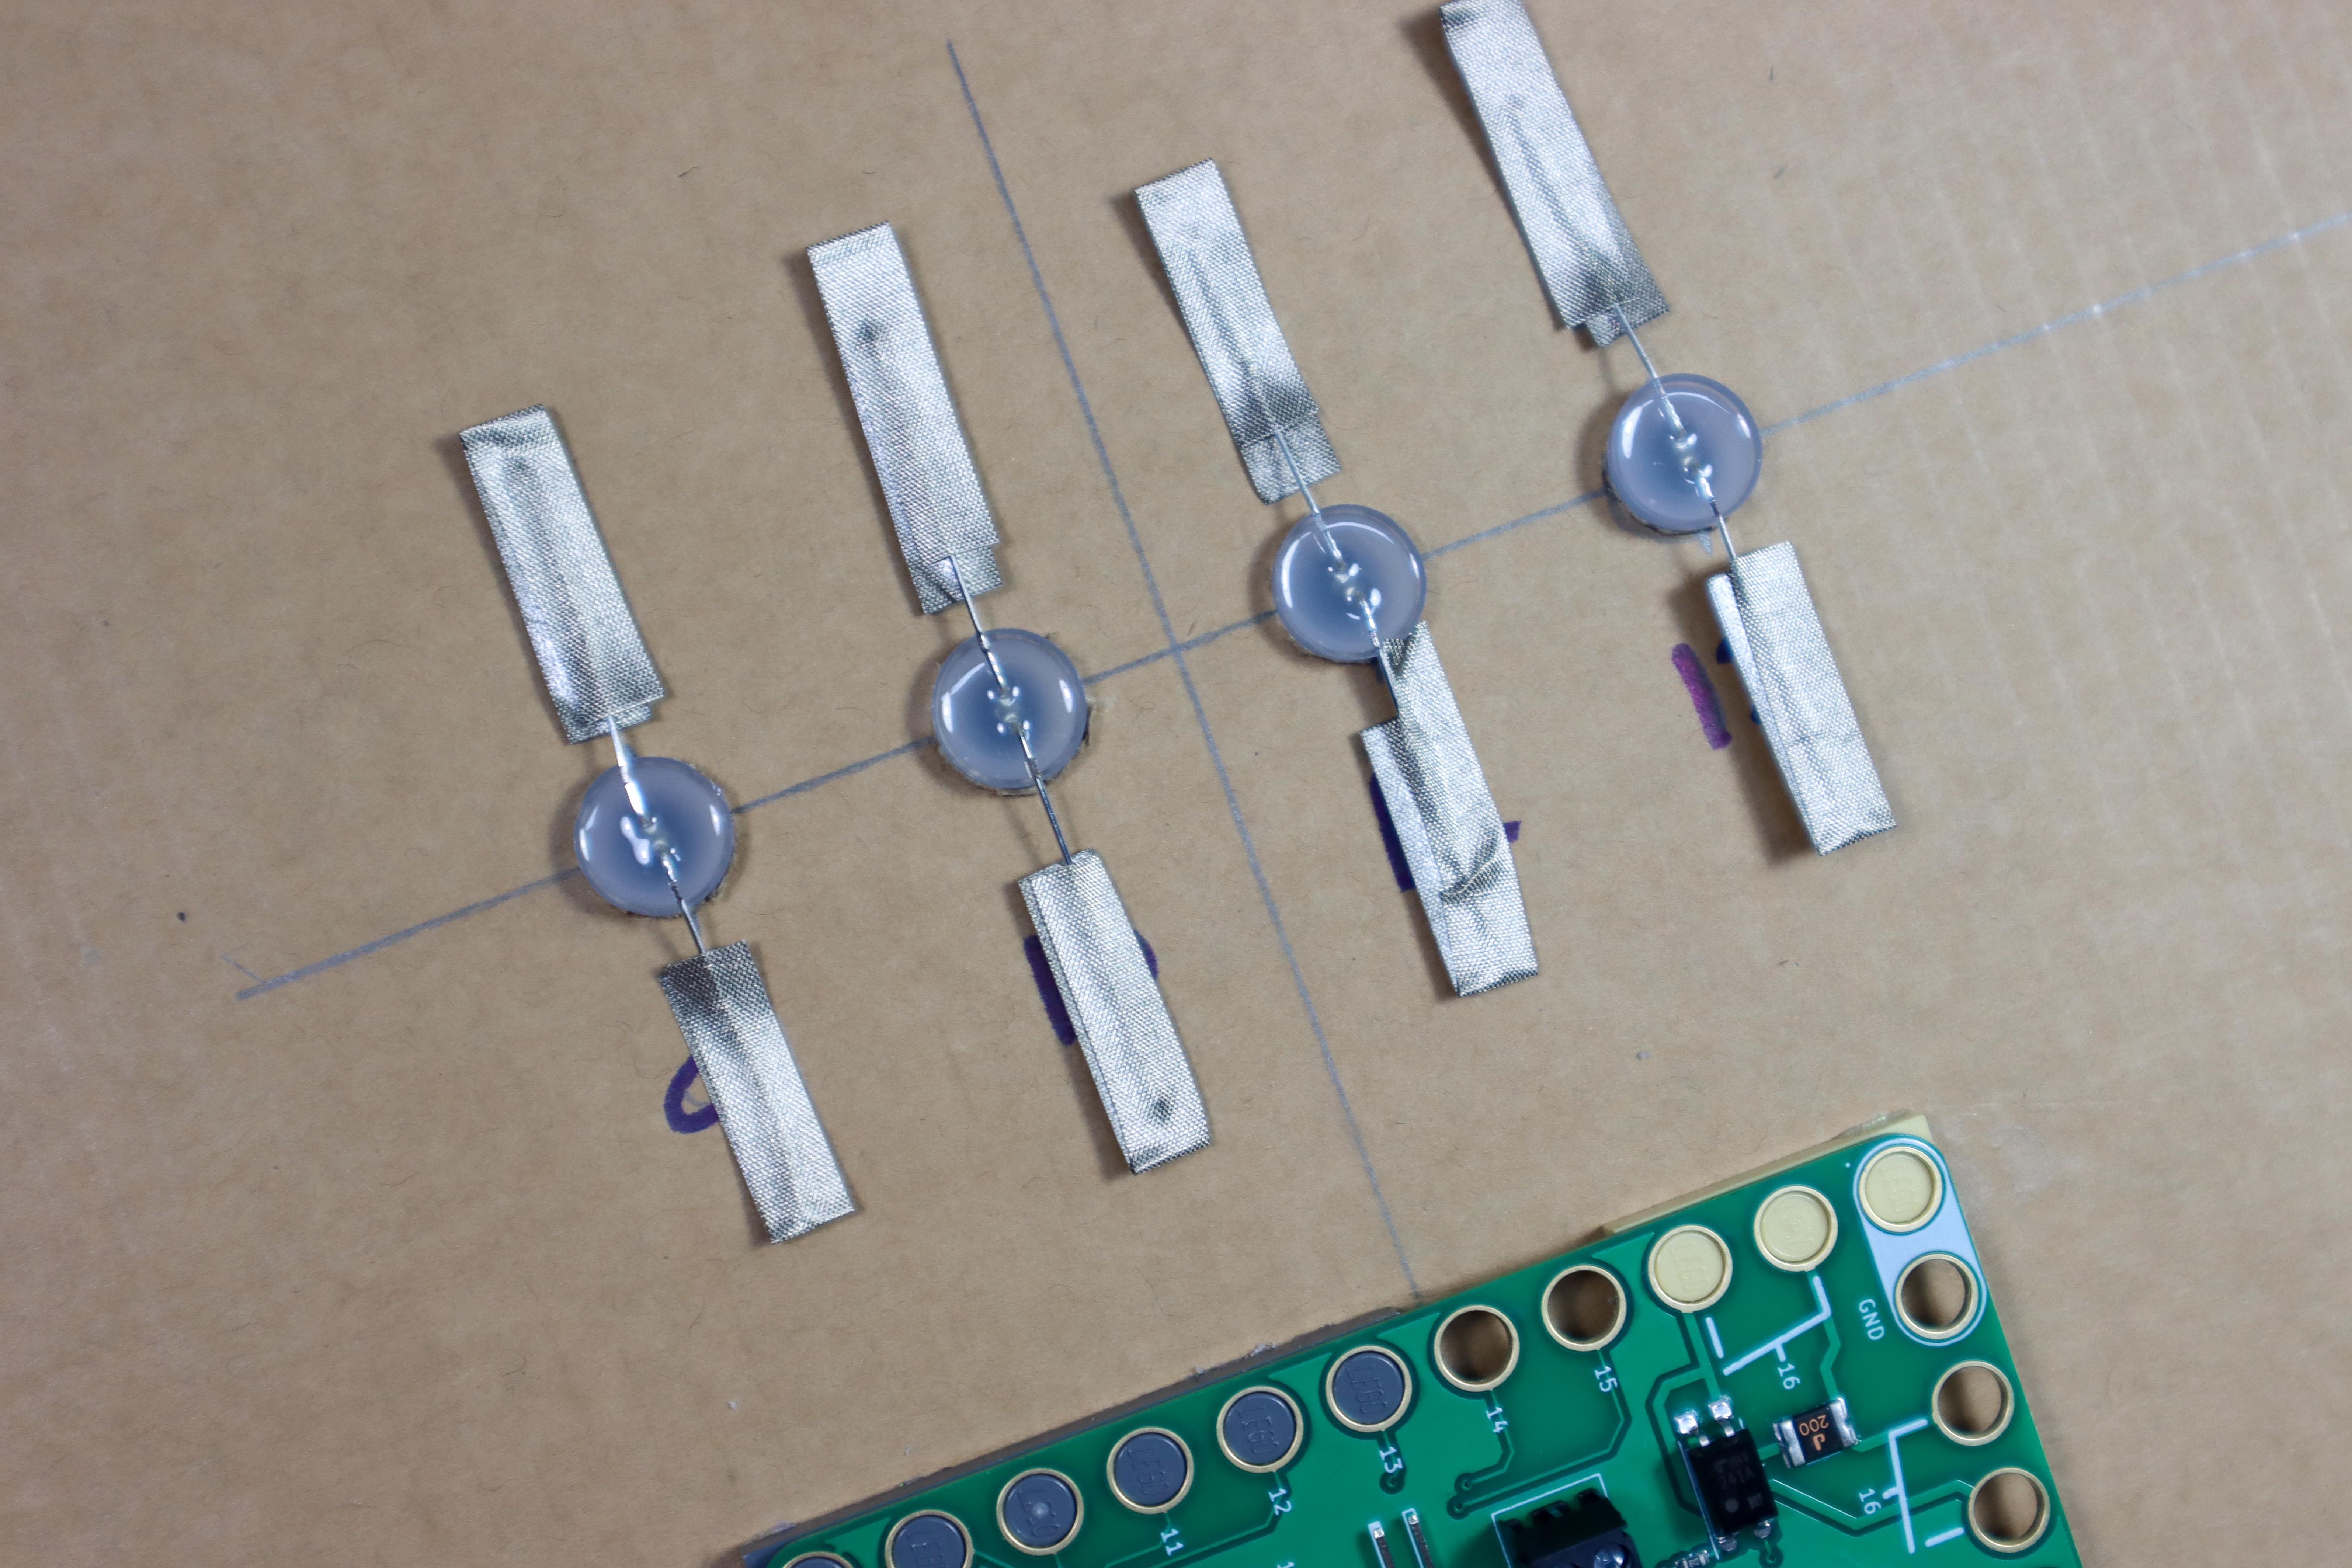
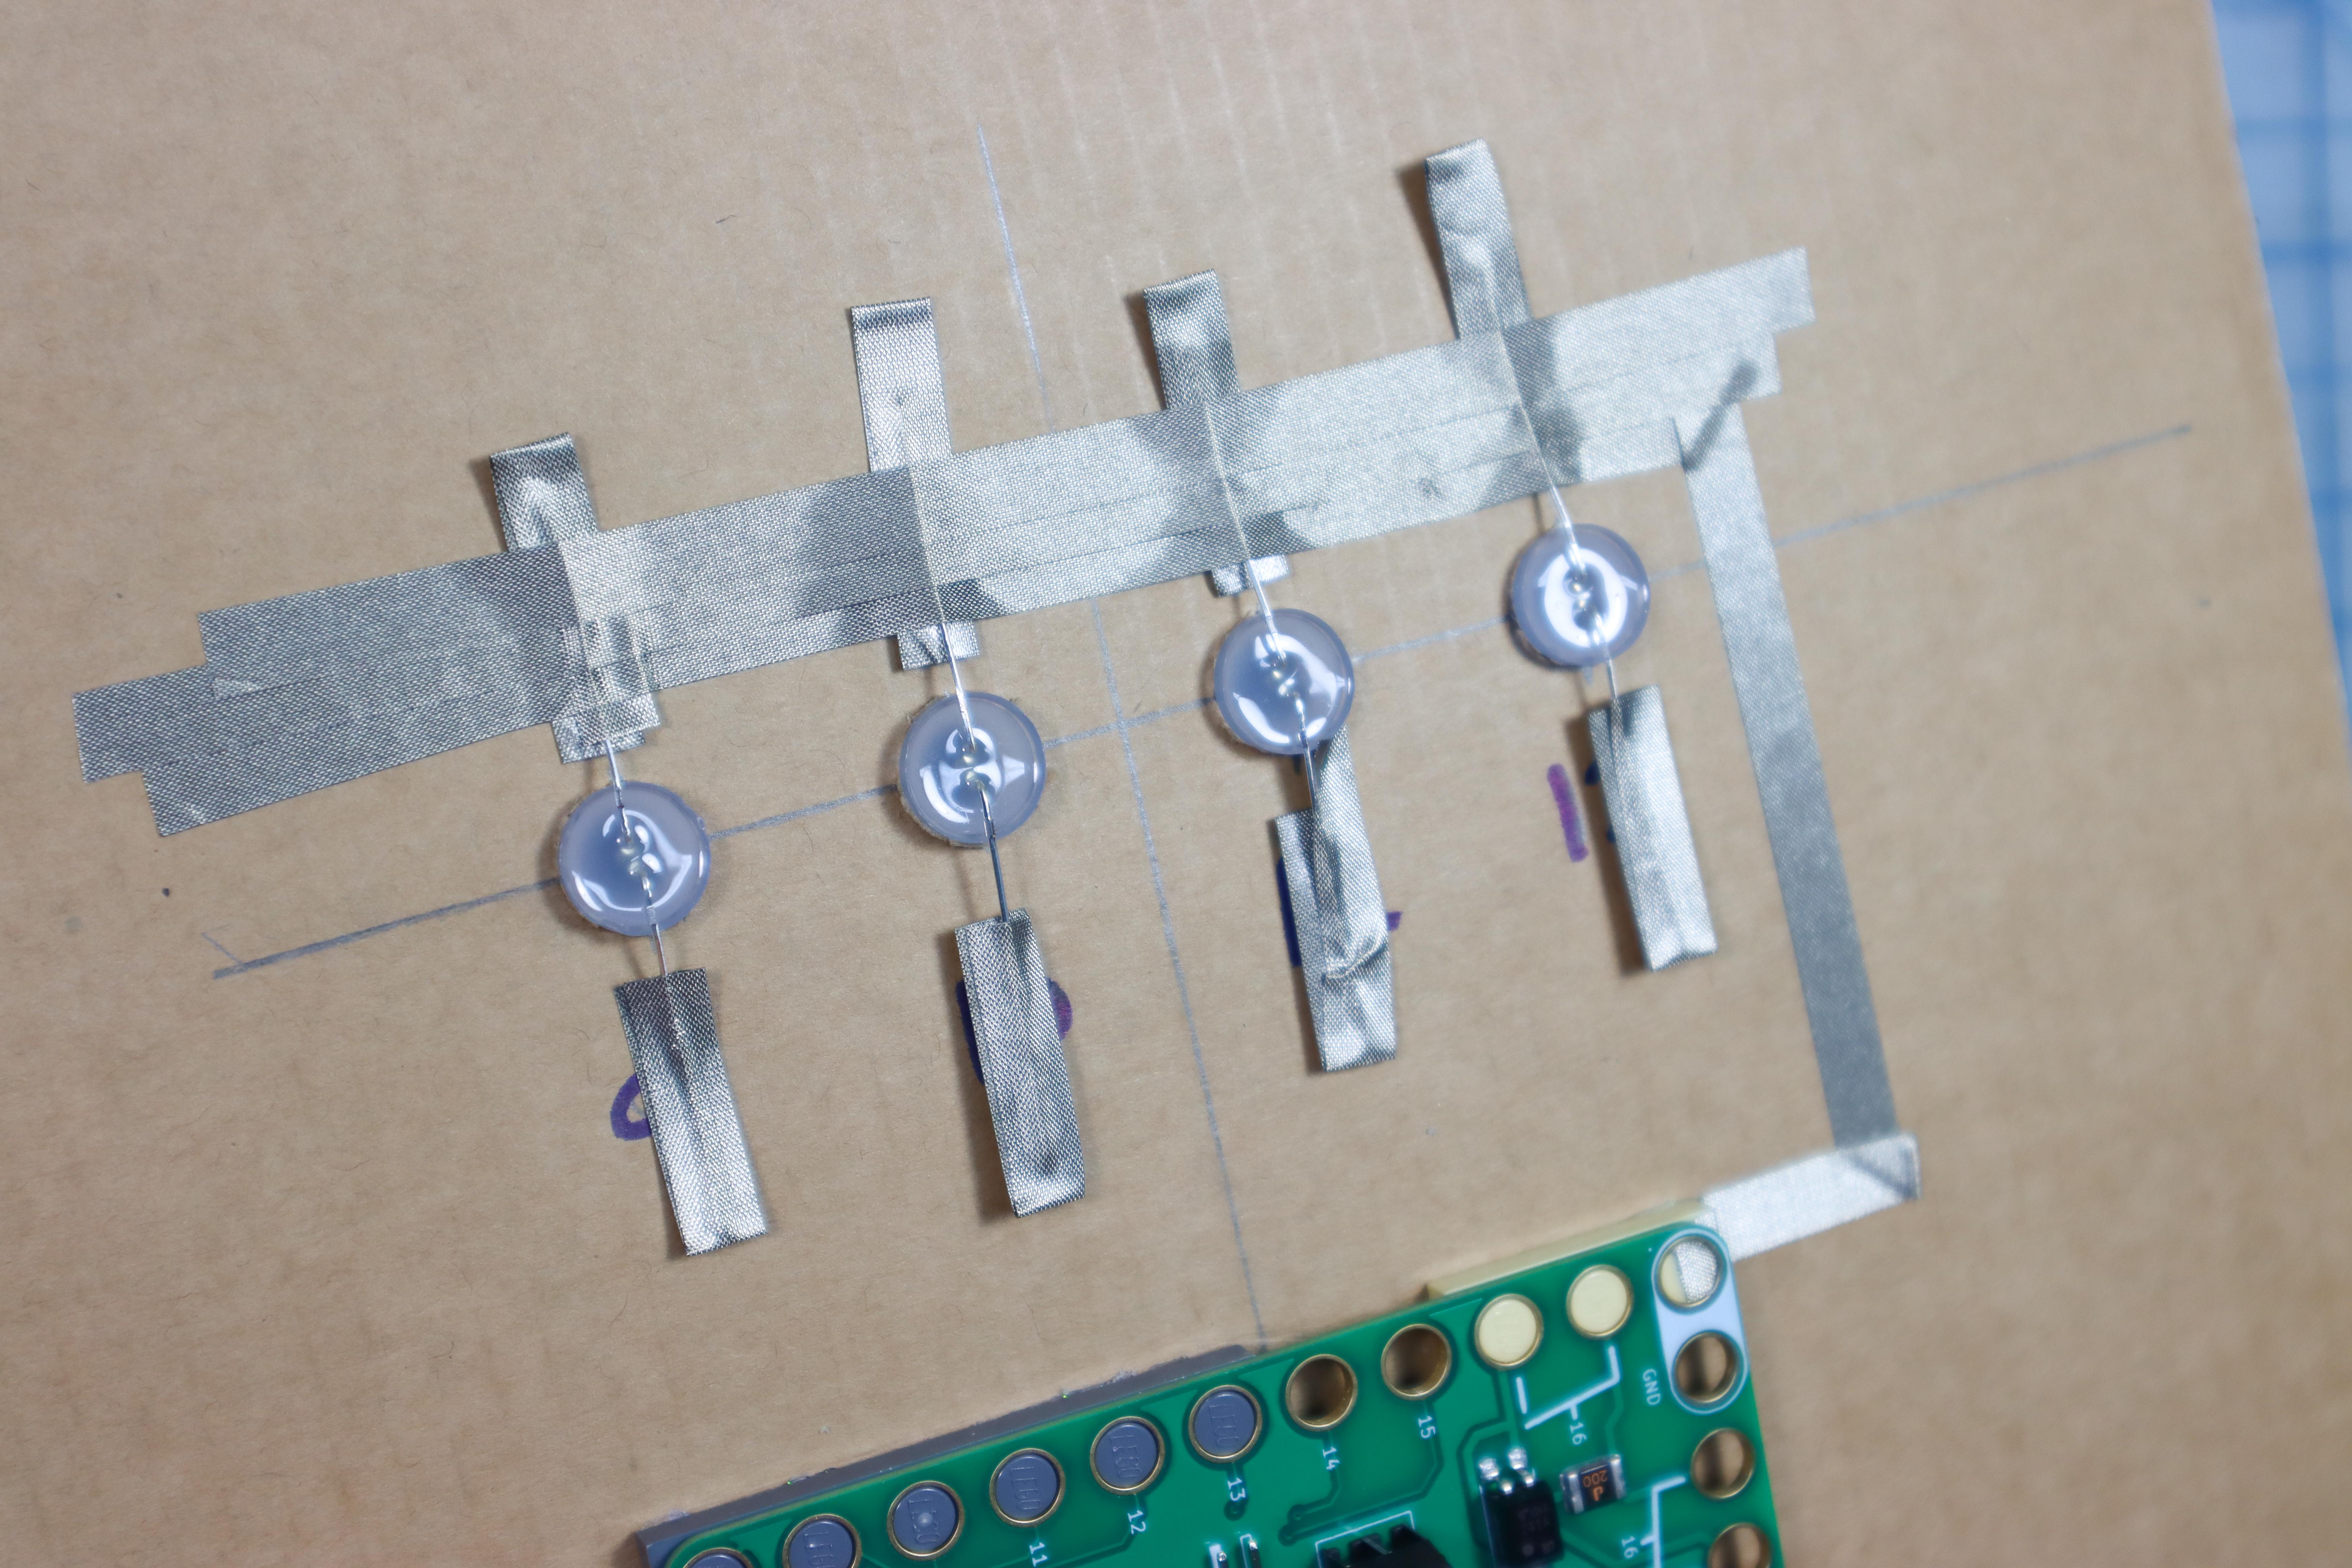
- Fold a piece of Maker Tape around the LED legs as shown.
- Connect a piece of Maker Tape to the Ground Pin and run it across the ground leg of all 4 LEDs. Add extra Maker Tape to secure it.
- Connect each positive leg of the LEDs to pins 9, 10, 12, and 13. Don't use Pin 11 as it is reserved for another process on the micro:bit.
Add the Micro:bit and Download the Code
- Insert the micro:bit into the Bit Board.
- Download code to the micro:bit, available here.
- This code will create an LED animation of the LEDs blinking in order every 1-4 seconds. In addition, one of the LEDs blinks quickly every 10 seconds to give it a very "robot is computing" vibe.
Embellish the LEDs
- Use the ring templates to add paper details.
Add a Battery Pack
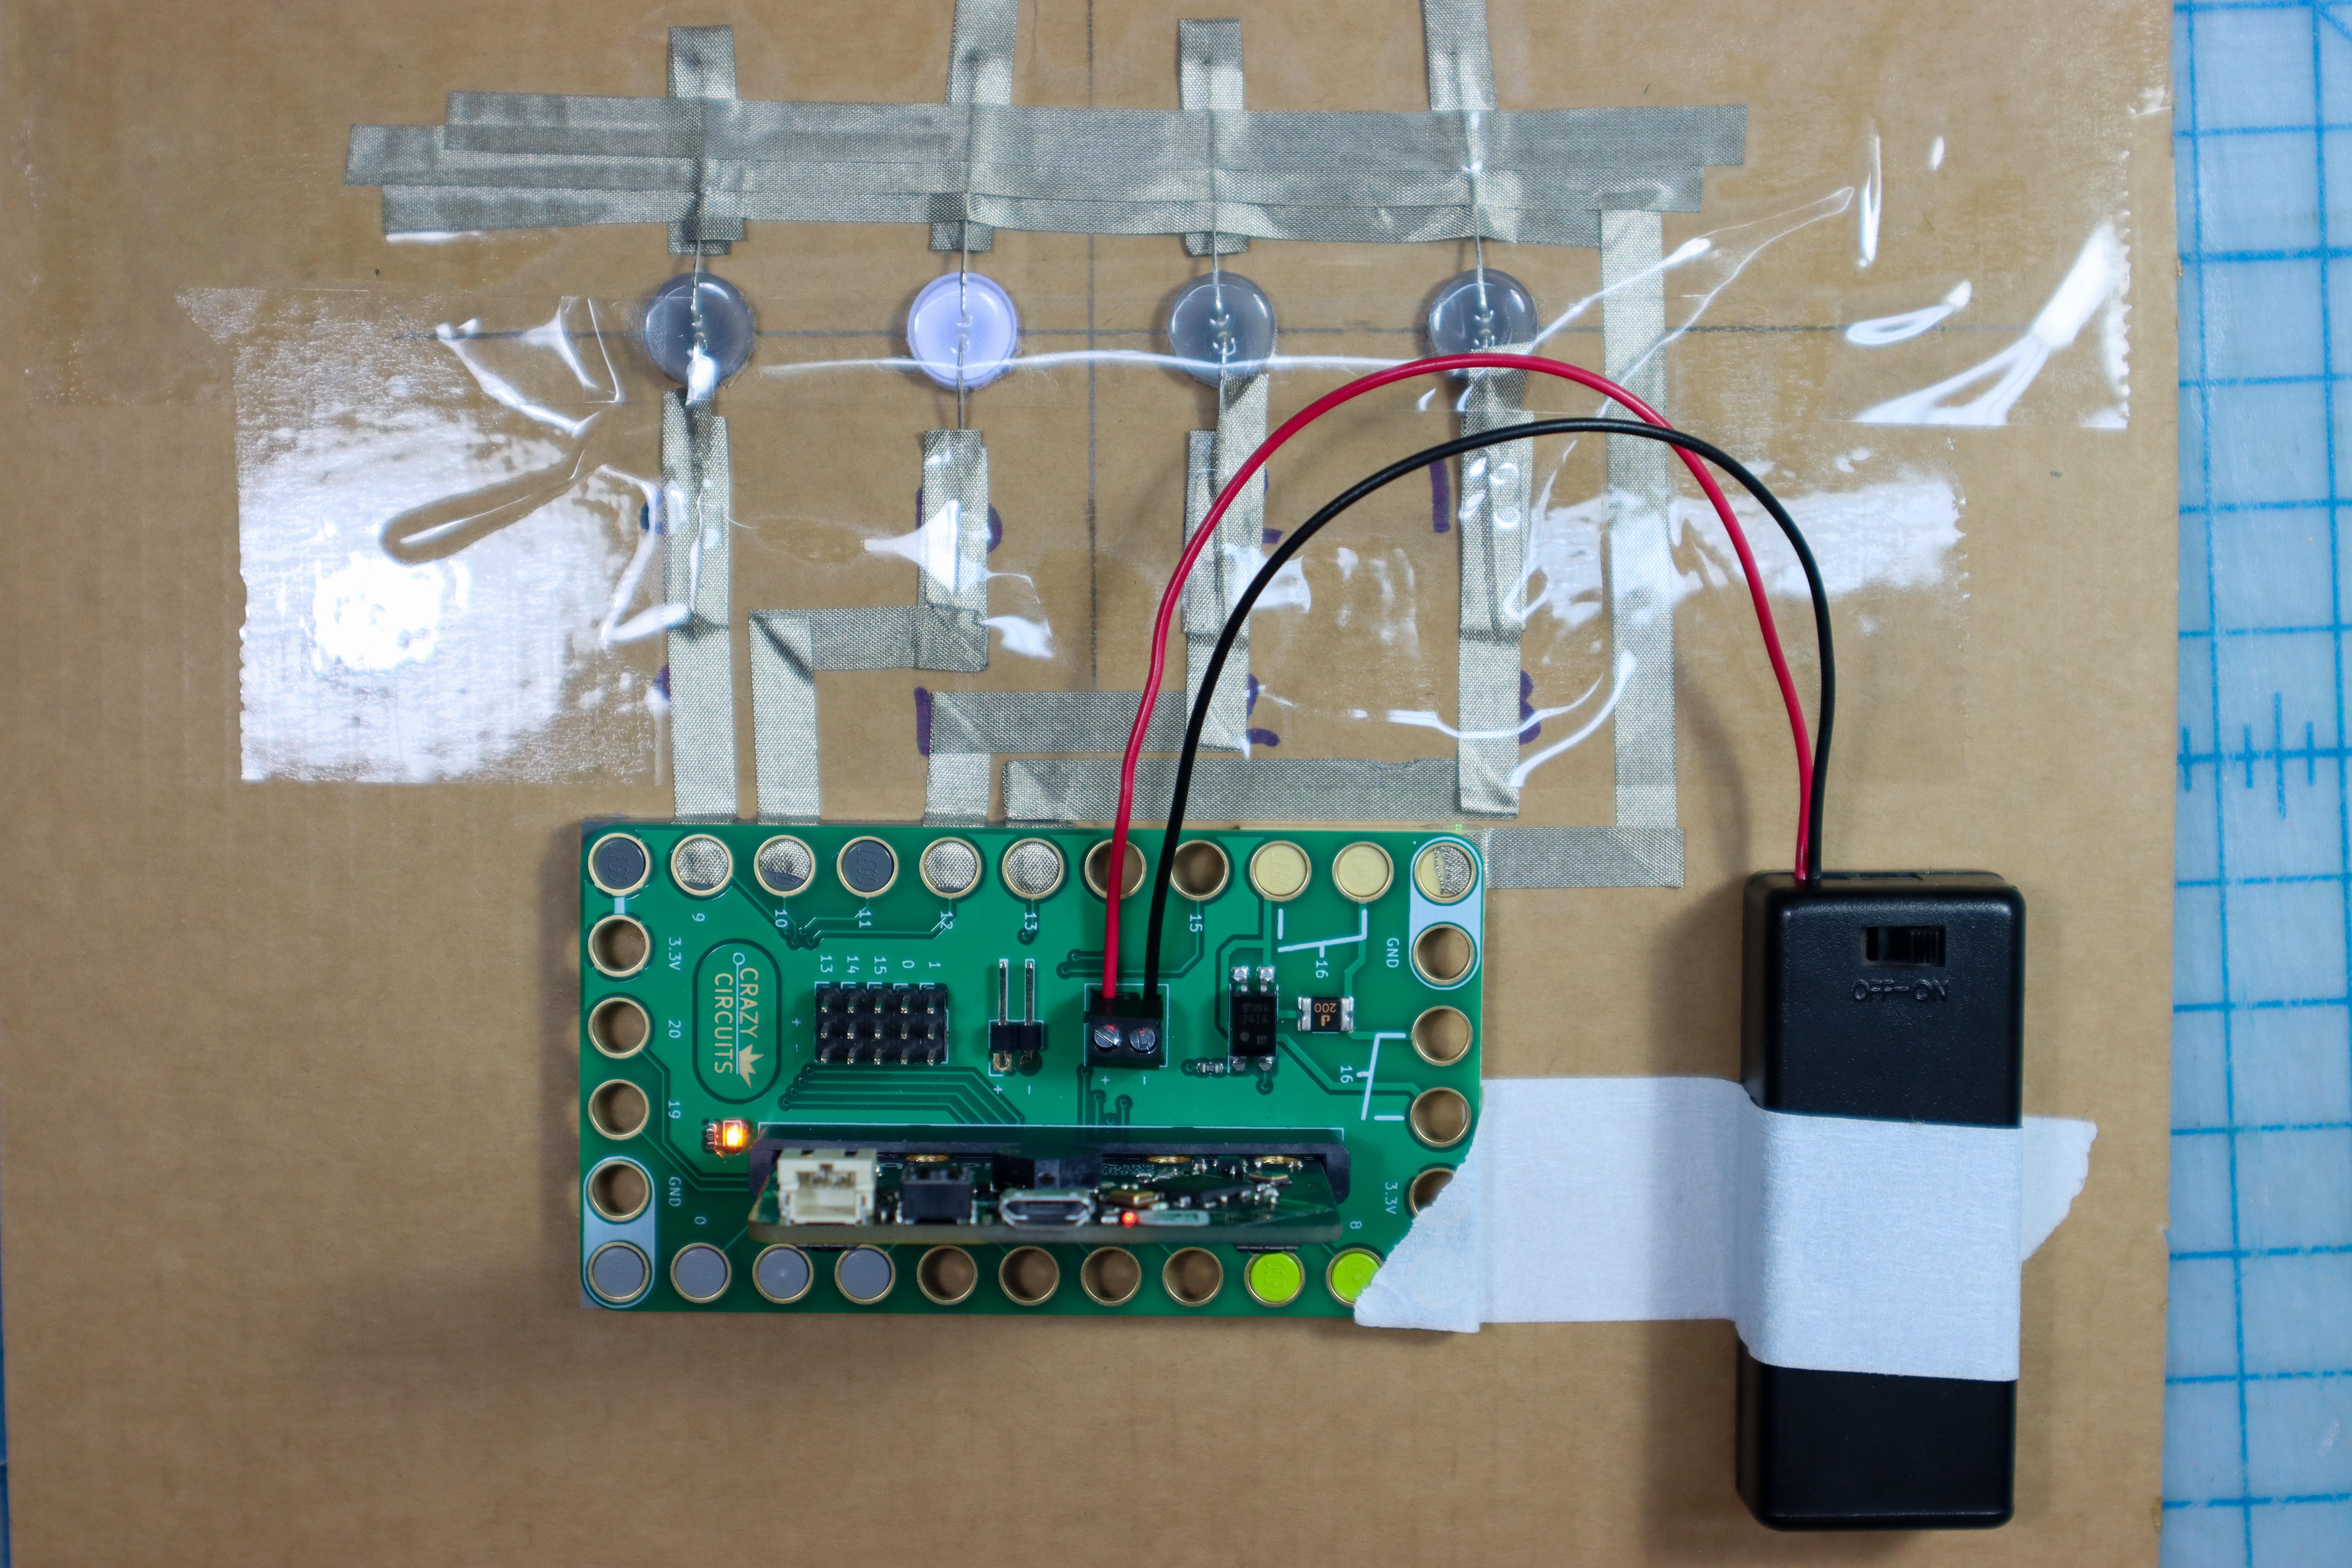
- Add a battery pack to make it portable.
- We also added clear packing tape over the entire circuit. When wearing a costume, it's easy to snag a loose piece of Maker Tape, so this is a good way to secure it while still being able to see the circuit.
Maker Tape Circuits Inside a Costume:
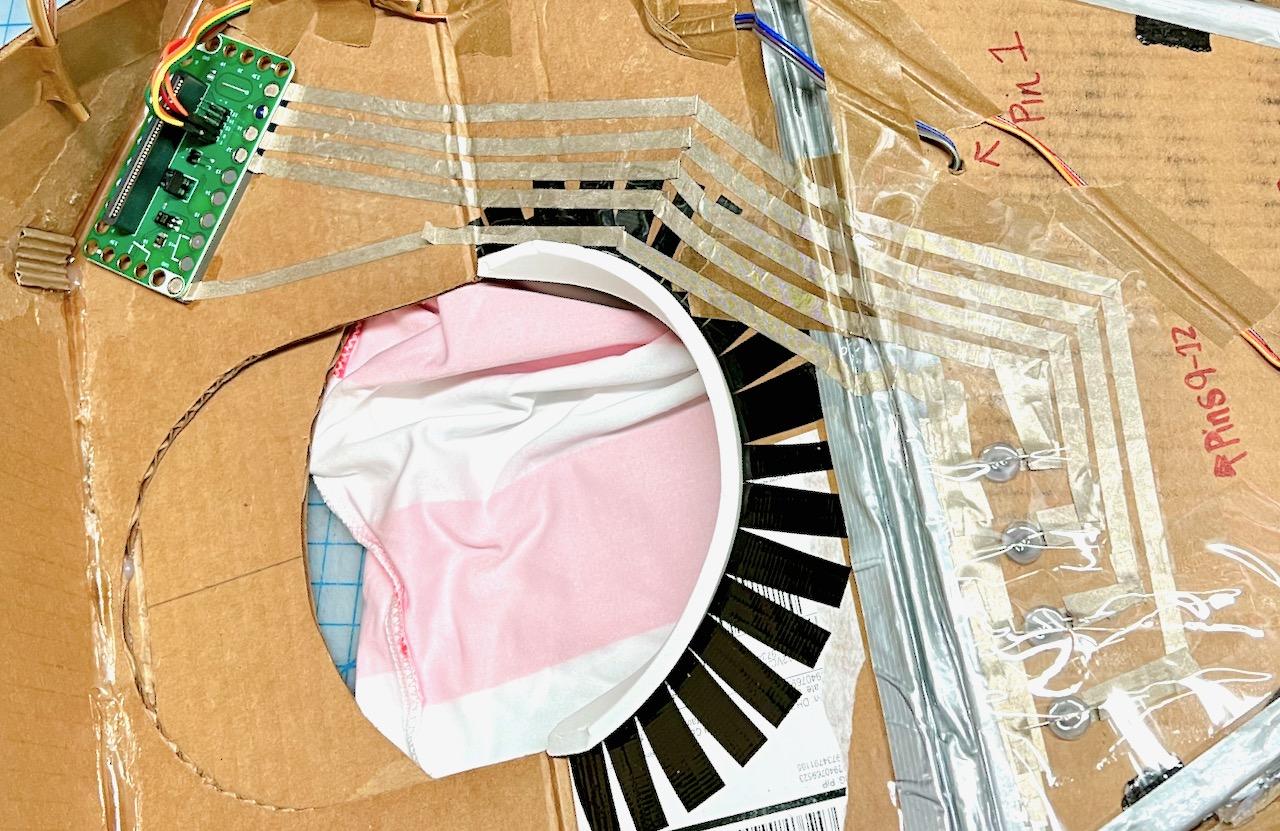
- In our Sally Servo costume, we ran the traces all the way from the front to the back of the costume. This gave us the chance to place the micro:bit in a comfortable spot for the wearer.
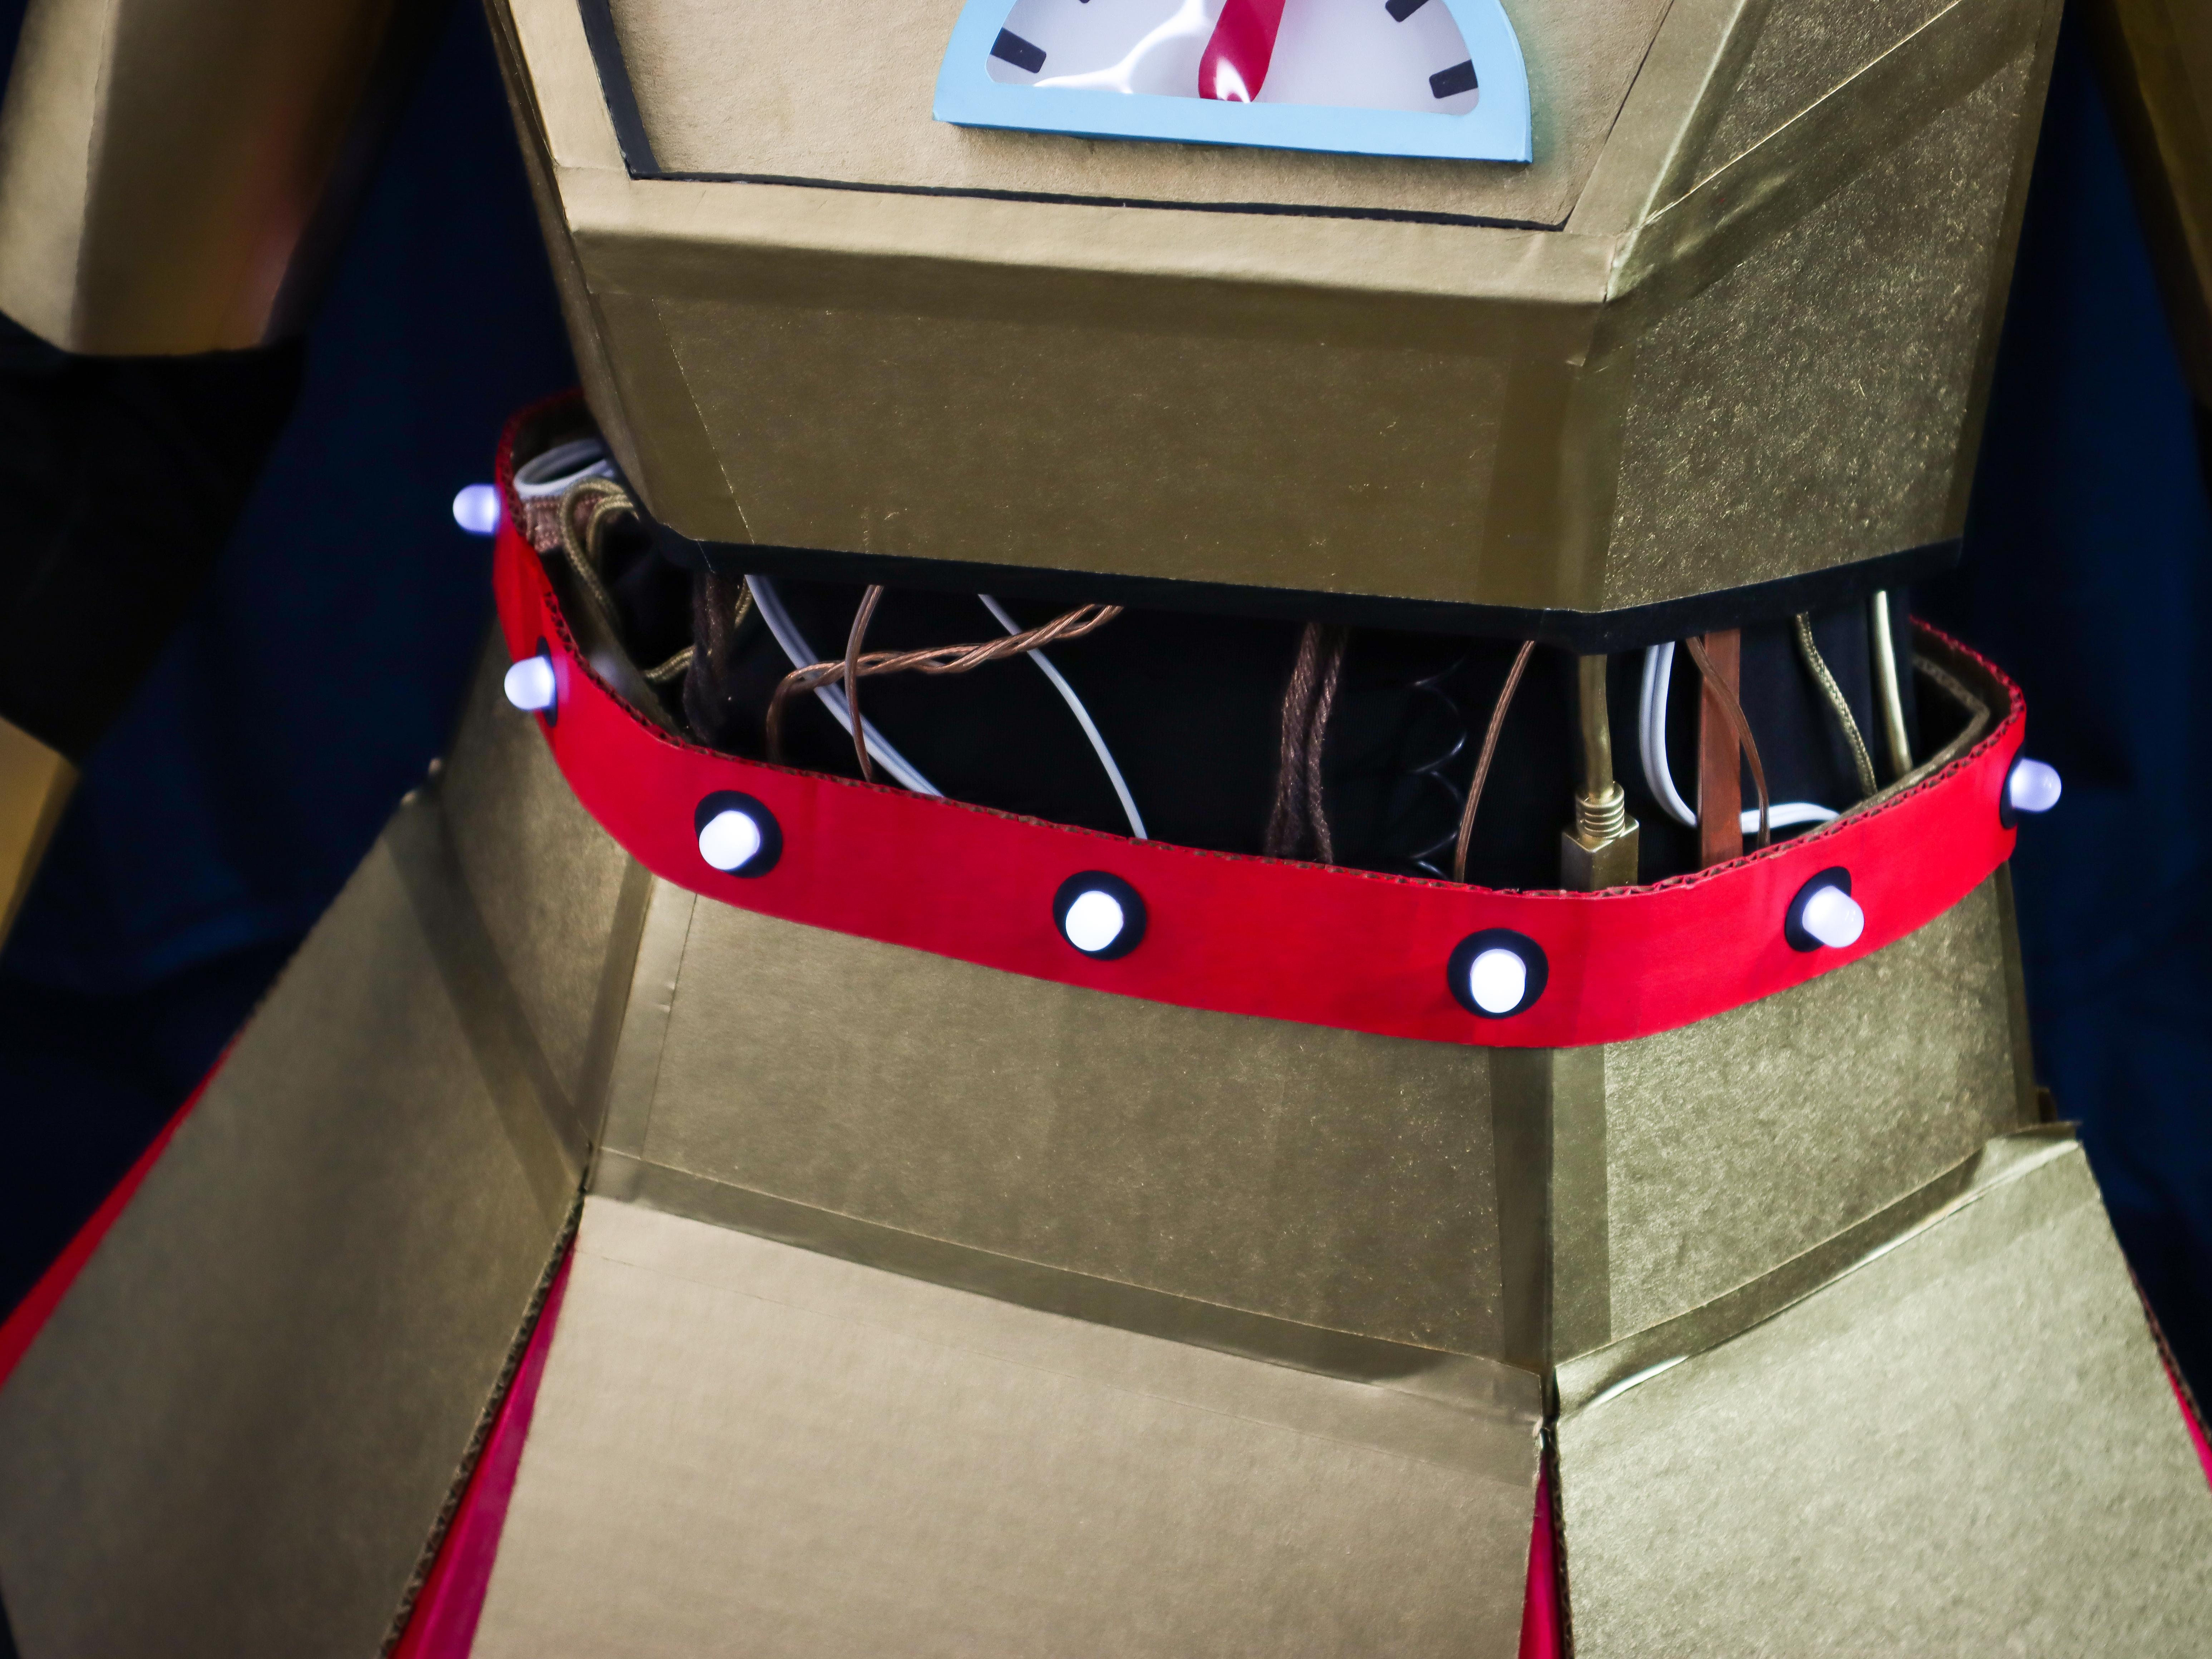
ROBOT FEATURE #5: LED BELT
Make a light-up belt like the one Sally wears. This is the simplest way to add electronics to your cardboard robot costume - no coding required!
Supplies:
Jumbo 10mm Diffused LED, Maker Tape, Crazy Circuits Coin Cell Battery Holder, CR2032 Battery, Cardboard, Cardstock
Prepare the Belt Strip
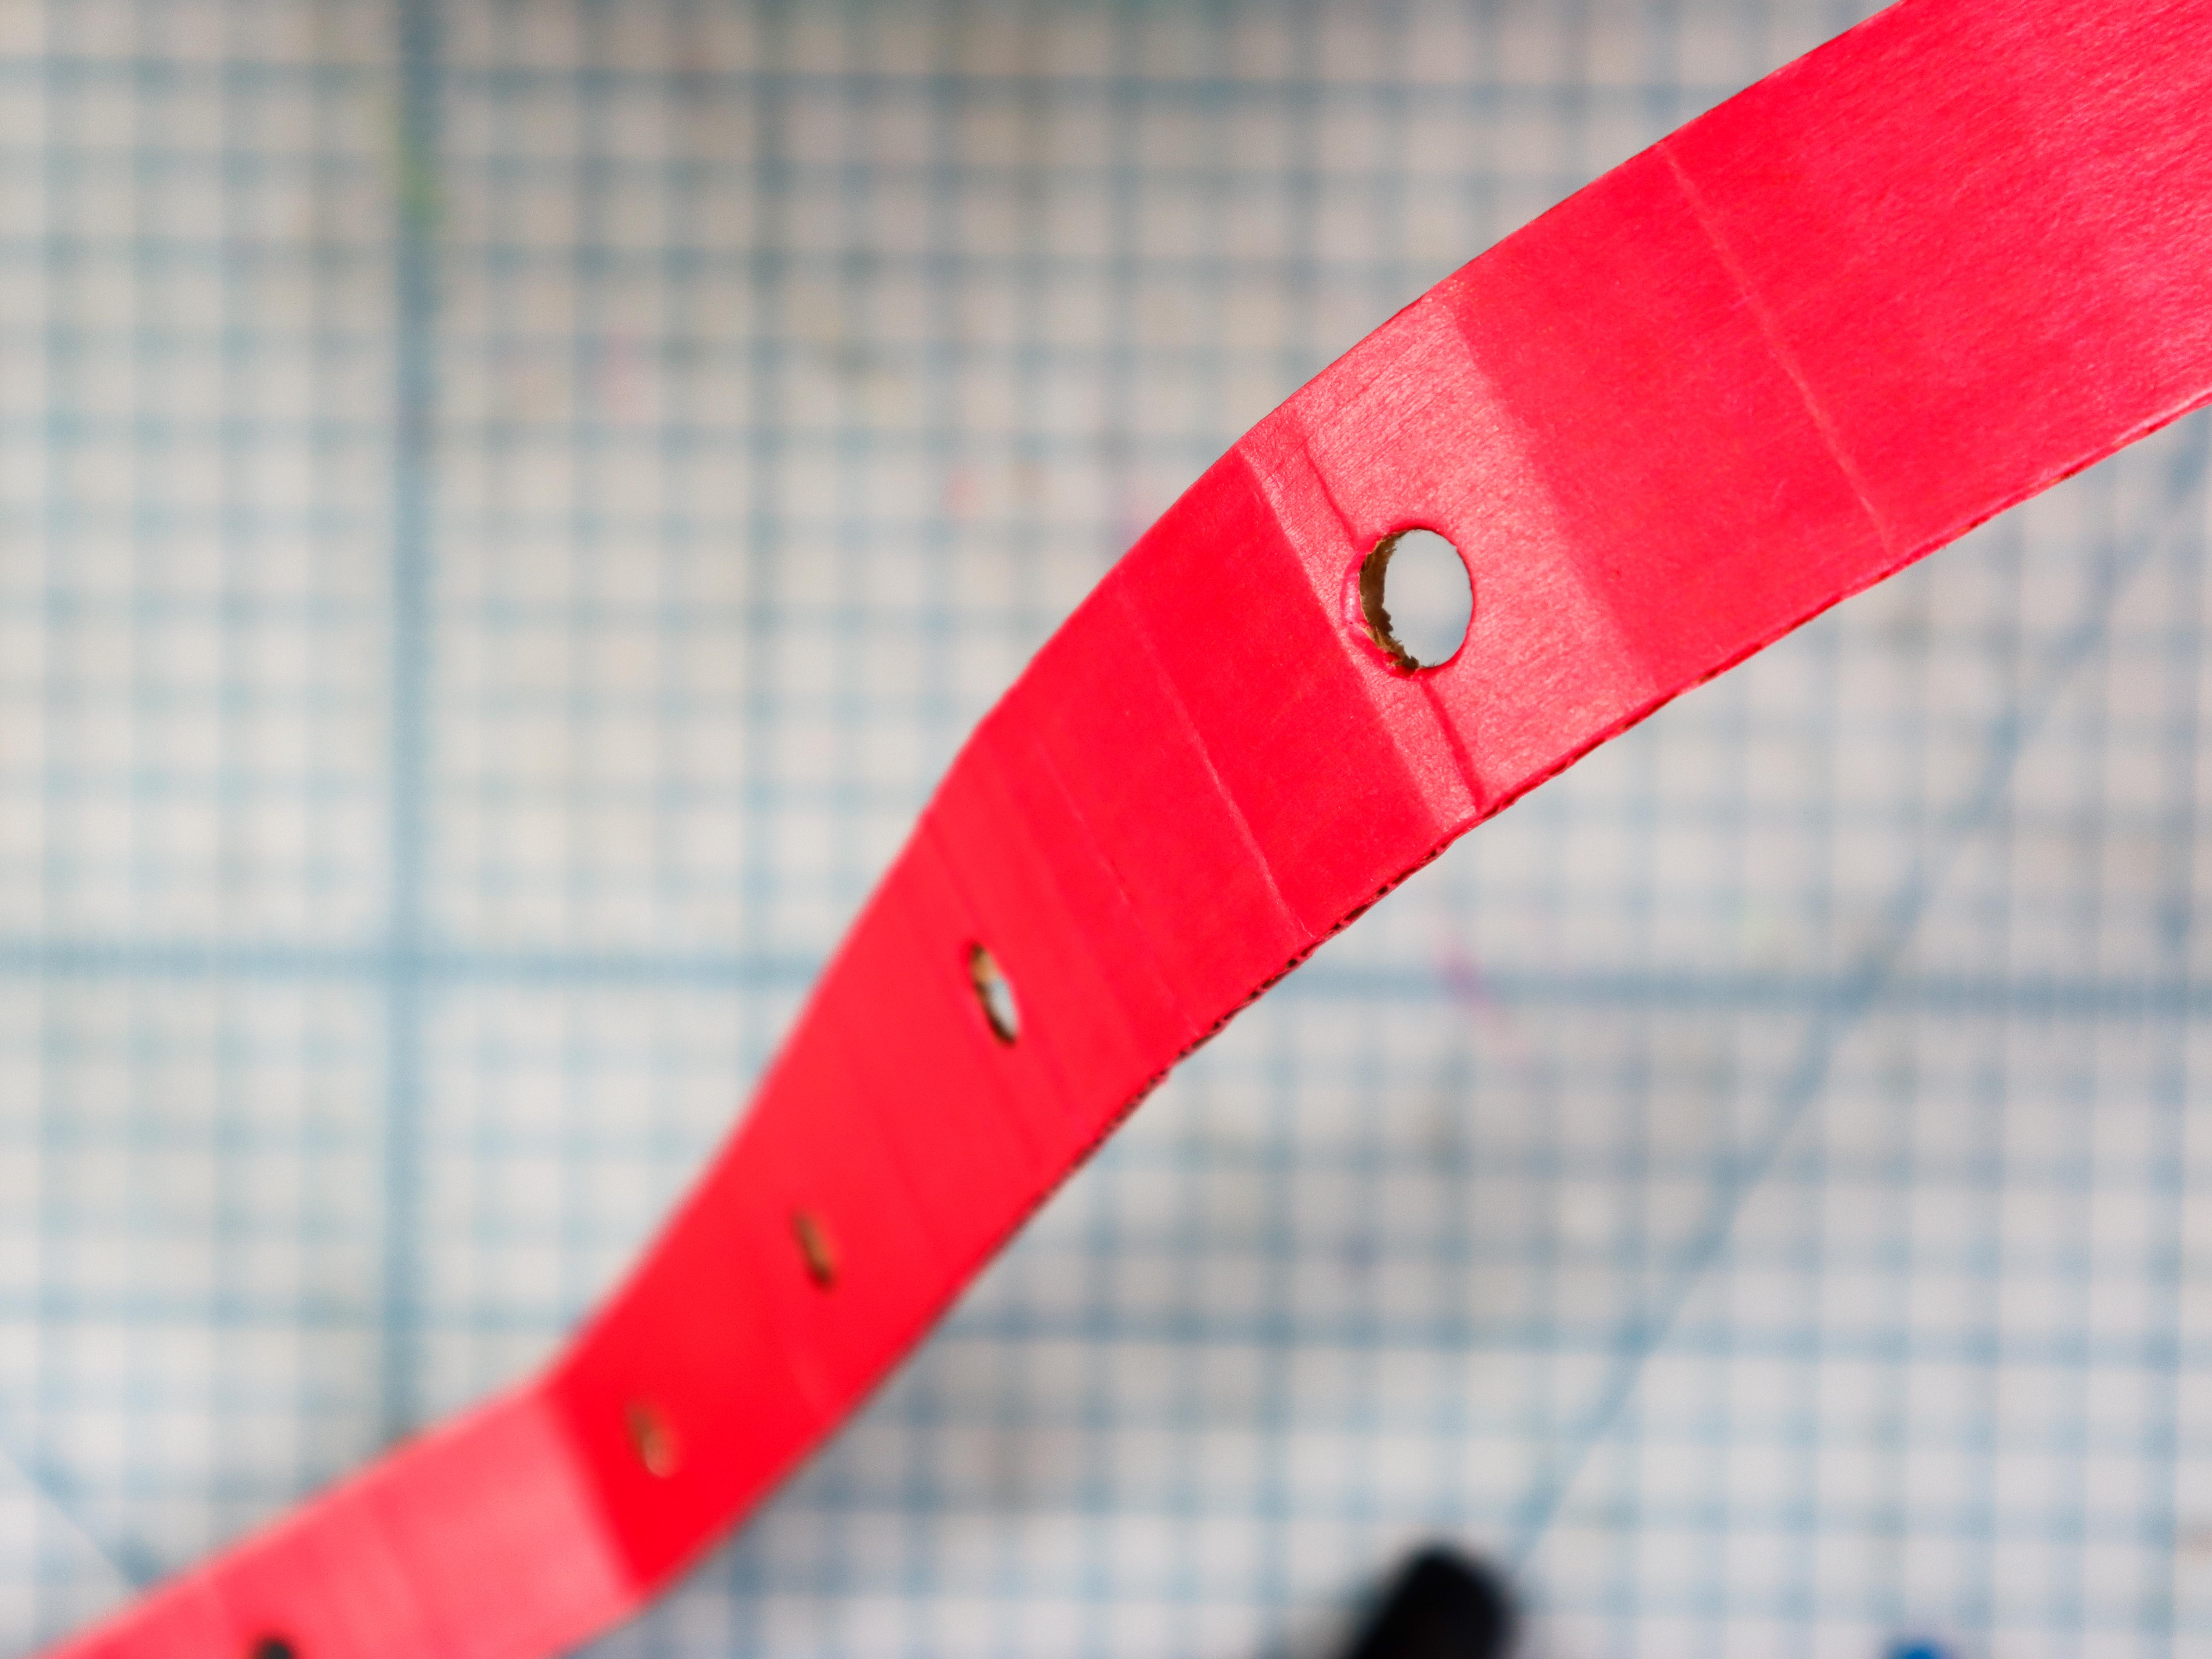

- Cut a long length of cardboard about 1.25 inches wide and as long as it needs to be to fit around the robot's waist.
- Cut a 10mm hole from the belt every 2.5 inches using a utility knife. Make sure the 10mm LED fits through the hole.
- If you plan to paint the belt, do so before moving on to the next step.
Add "Rails" of Maker Tape
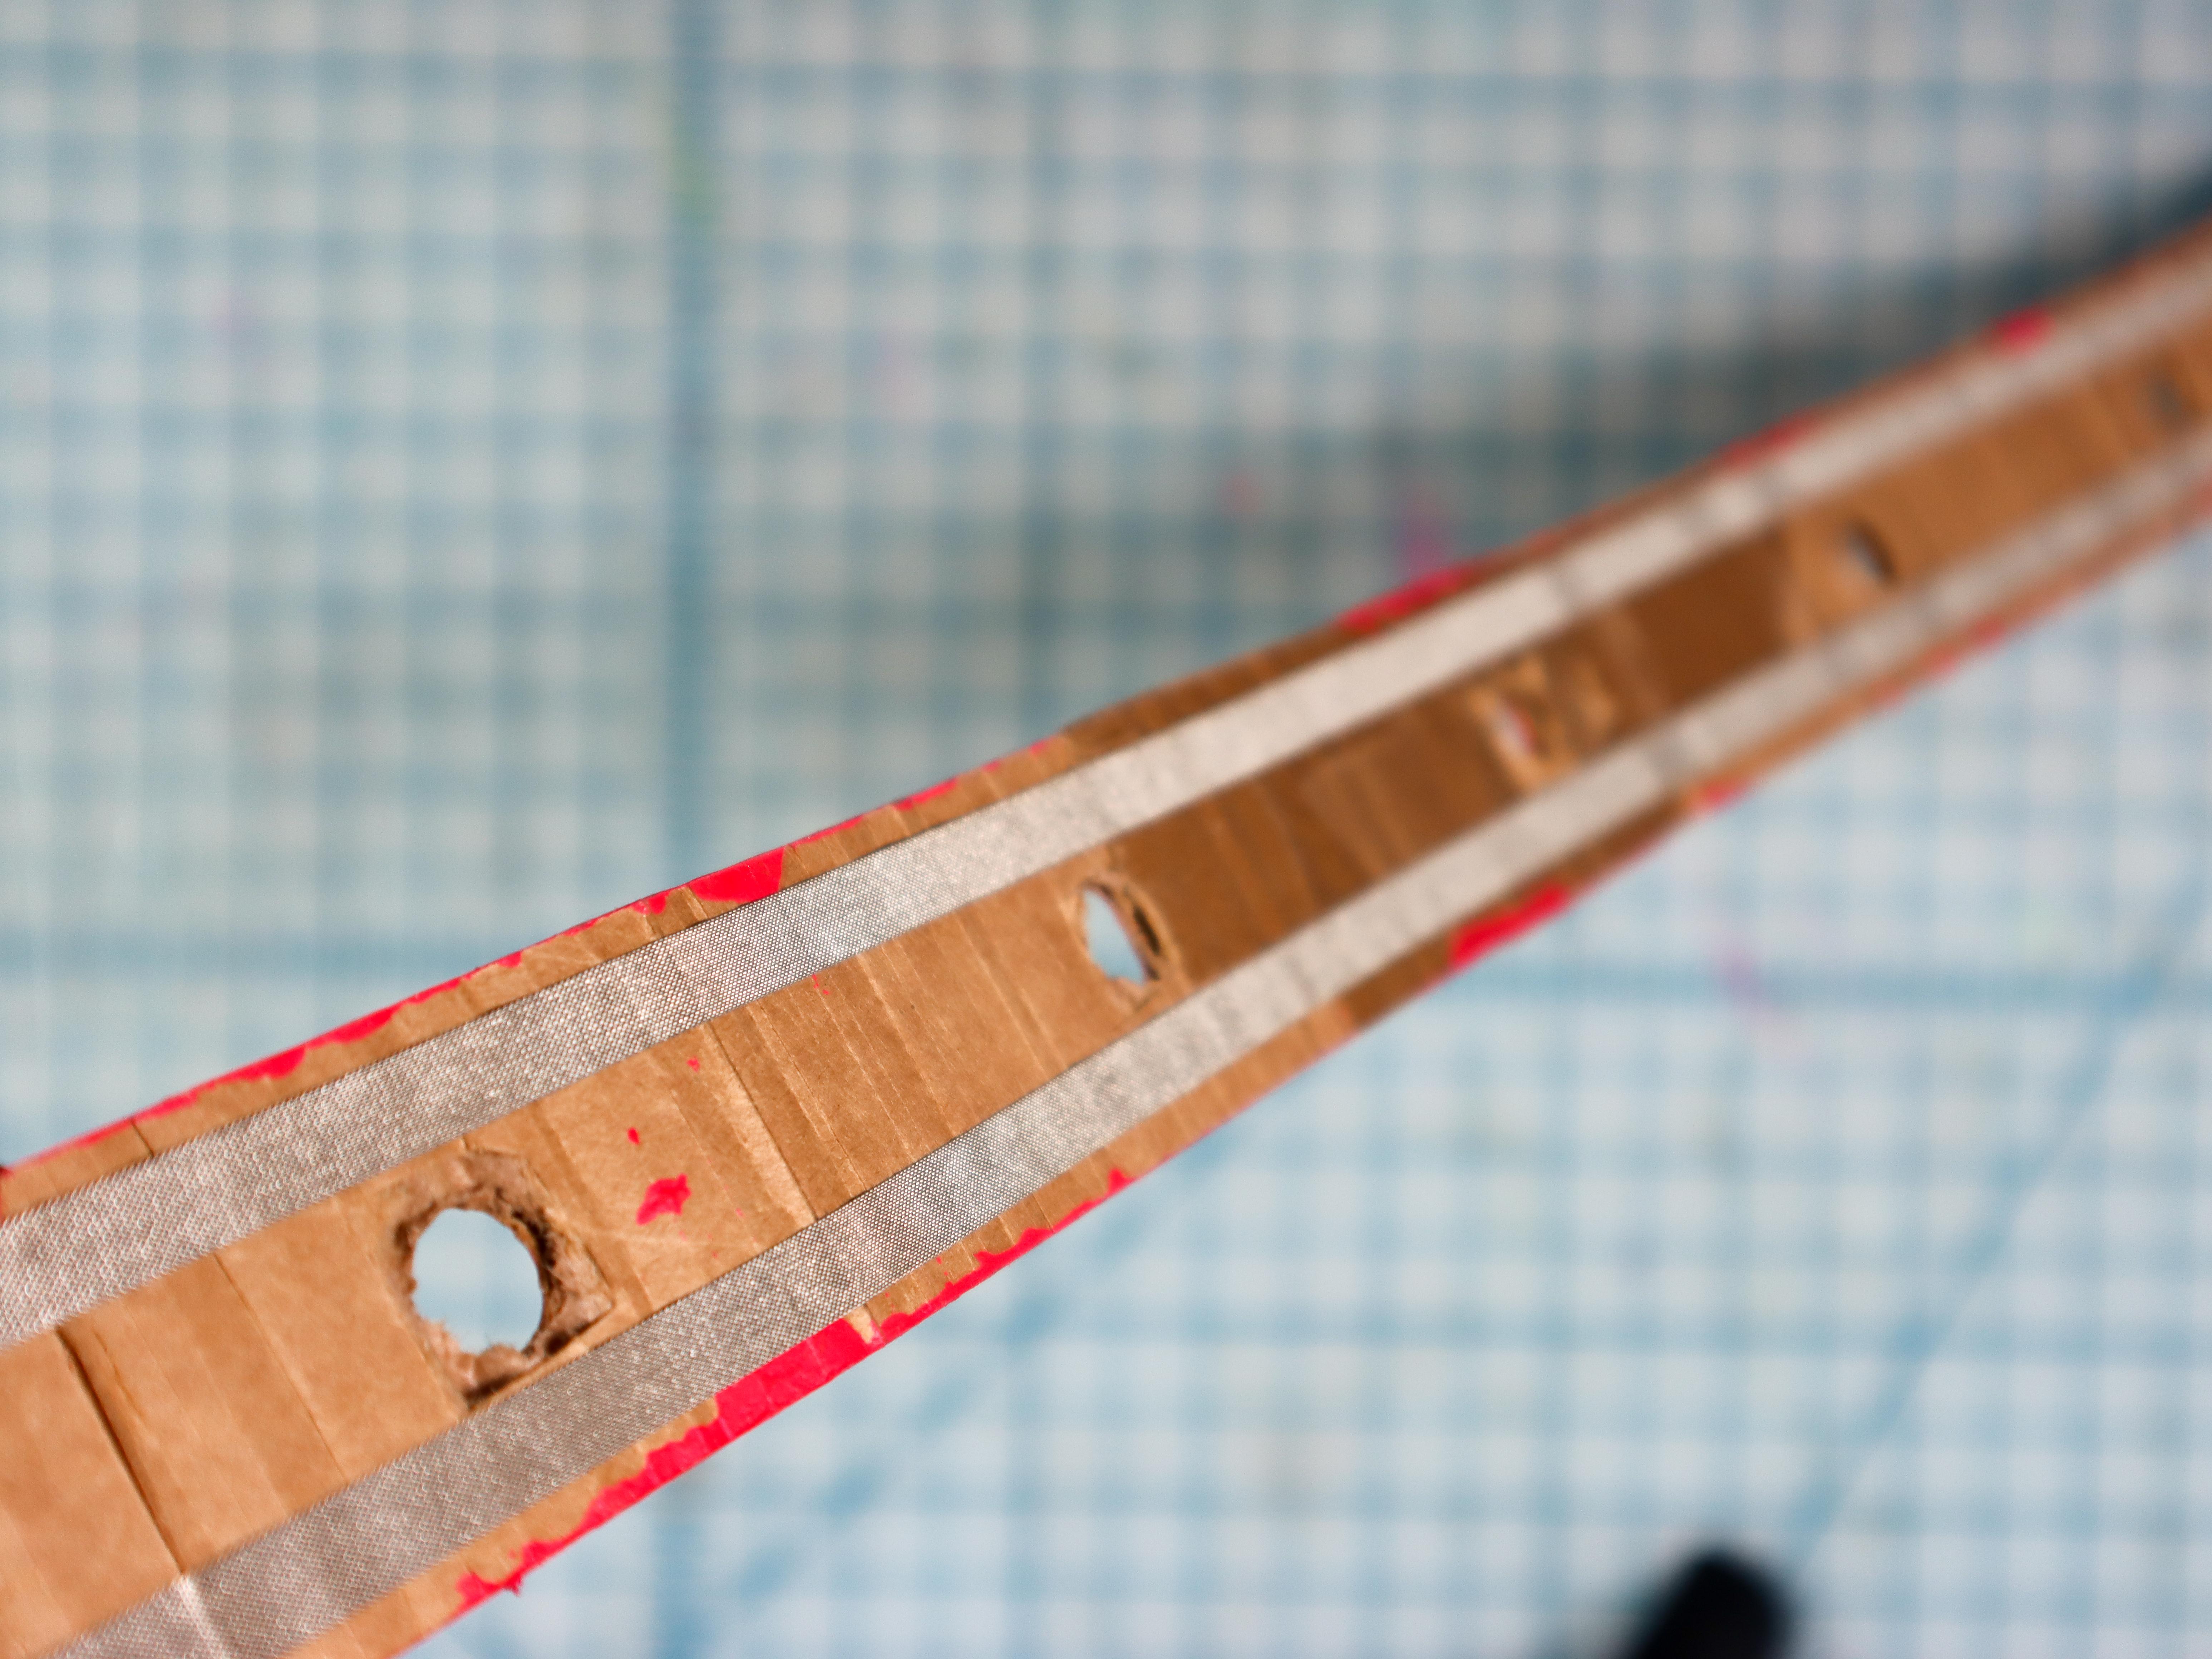
- Adhere two strips of Maker Tape to the back of the belt between the edge and the holes. Make sure that the two pieces don't touch each other.
Connect the Battery
- Use a piece of foam mounting tape to place the battery pack at the end of the belt. Double-check that the positive hole will touch one of the rails of tape, and the negative hole will touch the other.
- Thread a piece of maker tape through the positive hole and attach it to the corresponding rail of tape. Then, repeat the same step with the negative hole.
- Insert the CR2032 Battery.
Test and Place the LEDs
- Test the LEDs position by spreading the LED's legs and connecting it between the two pieces of Maker Tape. If it lights up, you're good to go! If it doesn't light up, turn it around.
- Now that you're certain that you know which way to connect it, place the LED through the hole.
Zig Zag the Legs
- Tuck the LED legs into the belt by folding them back and forth as shown. We've found that this makes a more reliable connection to Maker Tape than cutting the legs.
Add Maker Tape to Secure
- Now, add an extra piece of Maker Tape on top of the LED legs. This should "sandwich" the legs in between two pieces of Maker Tape and the LED should light up!
Repeat
- Repeat the previous steps until you have all the LEDs attached to the belt.
Accessorize With the Belt

- For Sally Servo's costume:
- We used hot glue to attach the belt to the skirt piece.
- We put the seam at the back to make it less visible and left the end accessible to change the battery.
- We added black paper washers around the LEDs to add detail (see template).
Downloads
ROBOT FEATURE #6: SOUND REACTIVE LED ROBOT MOUTH
Make a sound-reactive LED robot mouth like Sally's. When you talk inside the costume, the robot looks like she's talking too! Adding a sound reactive mouth will really make your robot costume come alive!
*This part of the project requires soldering, but is simple to code and build.
Supplies:
micro:bit, Crazy Circuits Bit Board, 2 AAA Battery Holder, 60 LED/meter Neopixel Strip, Cardboard, Rhinestone Sheet, Jumper Wires
Plan the Mouth Shape
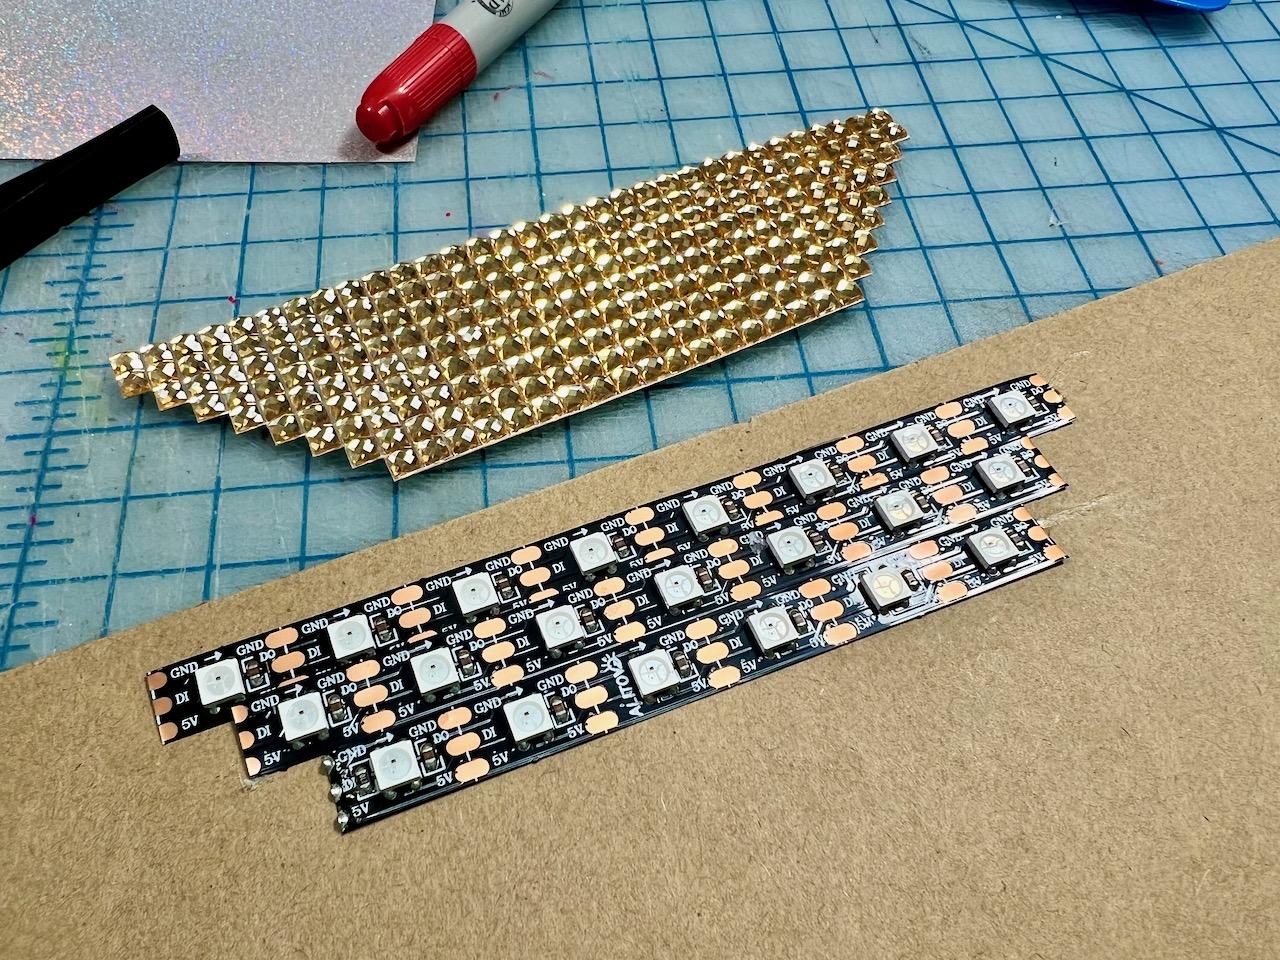
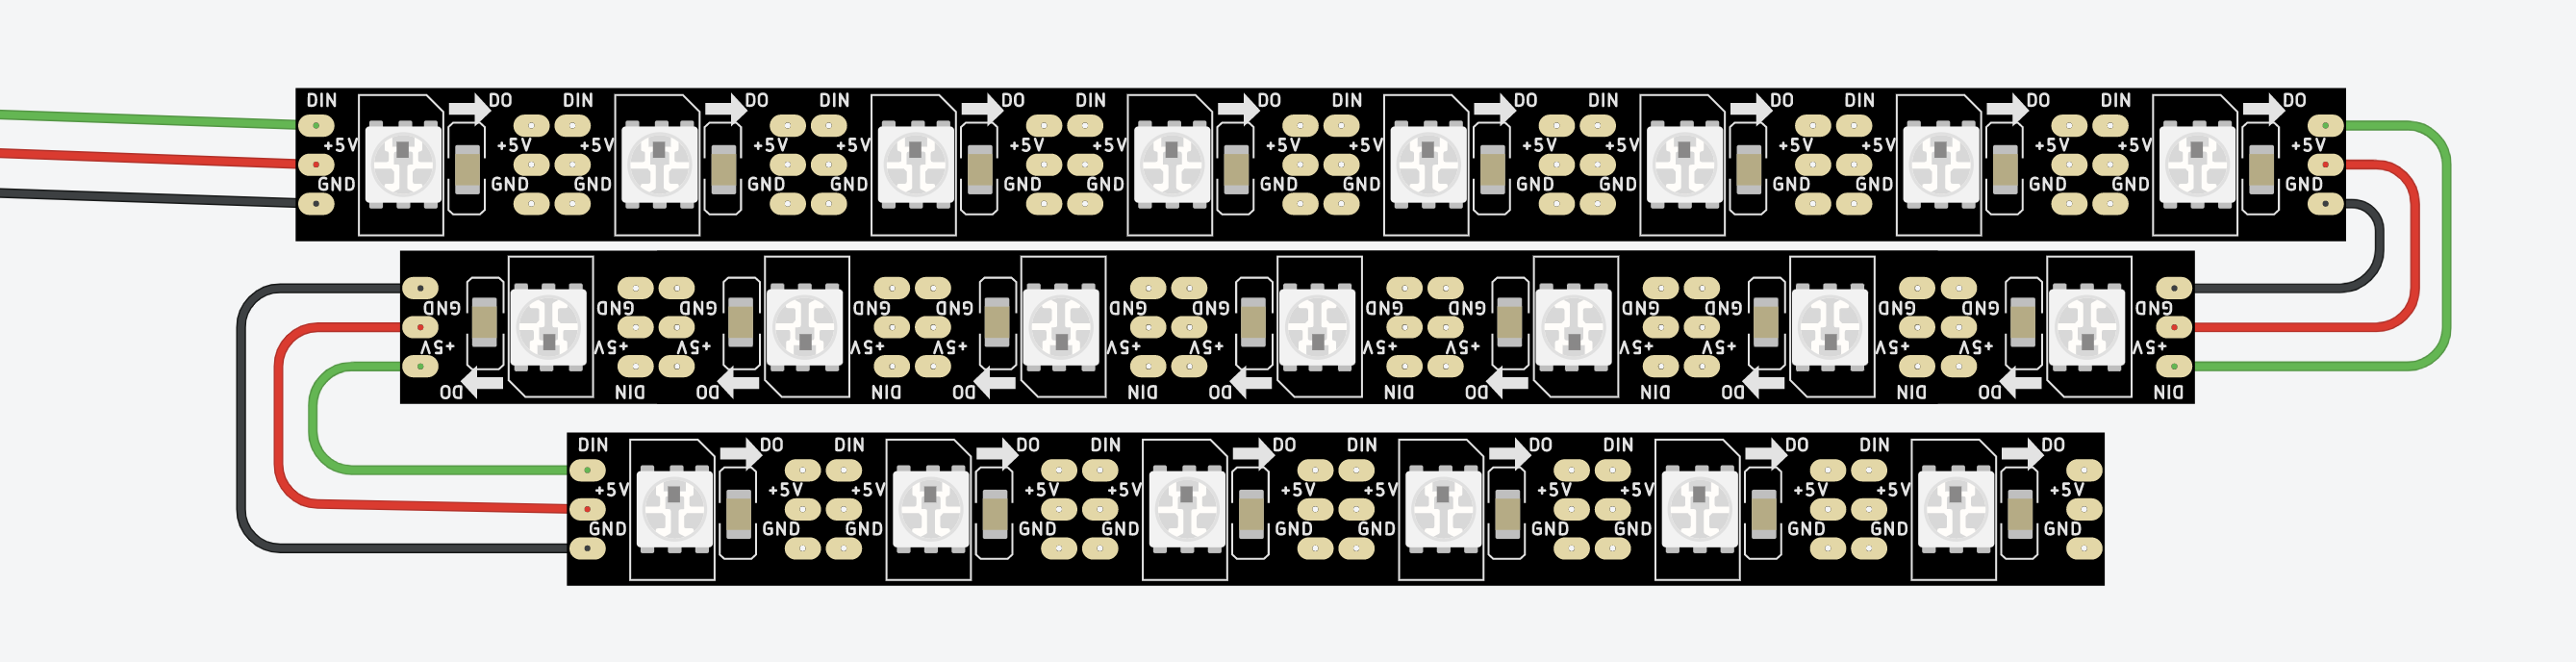
- Plan the mouth shape. We used three rows of LEDs, with 8, 7, and 6 LEDs each.
- Glue the LED strips to a piece of cardboard and solder the rows together as shown. (the order of wires may be different depending on the brand of LEDs you have)
- Tips:
- Use female jumper wires to start the first row to make it easy to connect to the Bit Board.
- Remember to turn the middle row upside down so that you can zig-zag the rows and keep the data flow.
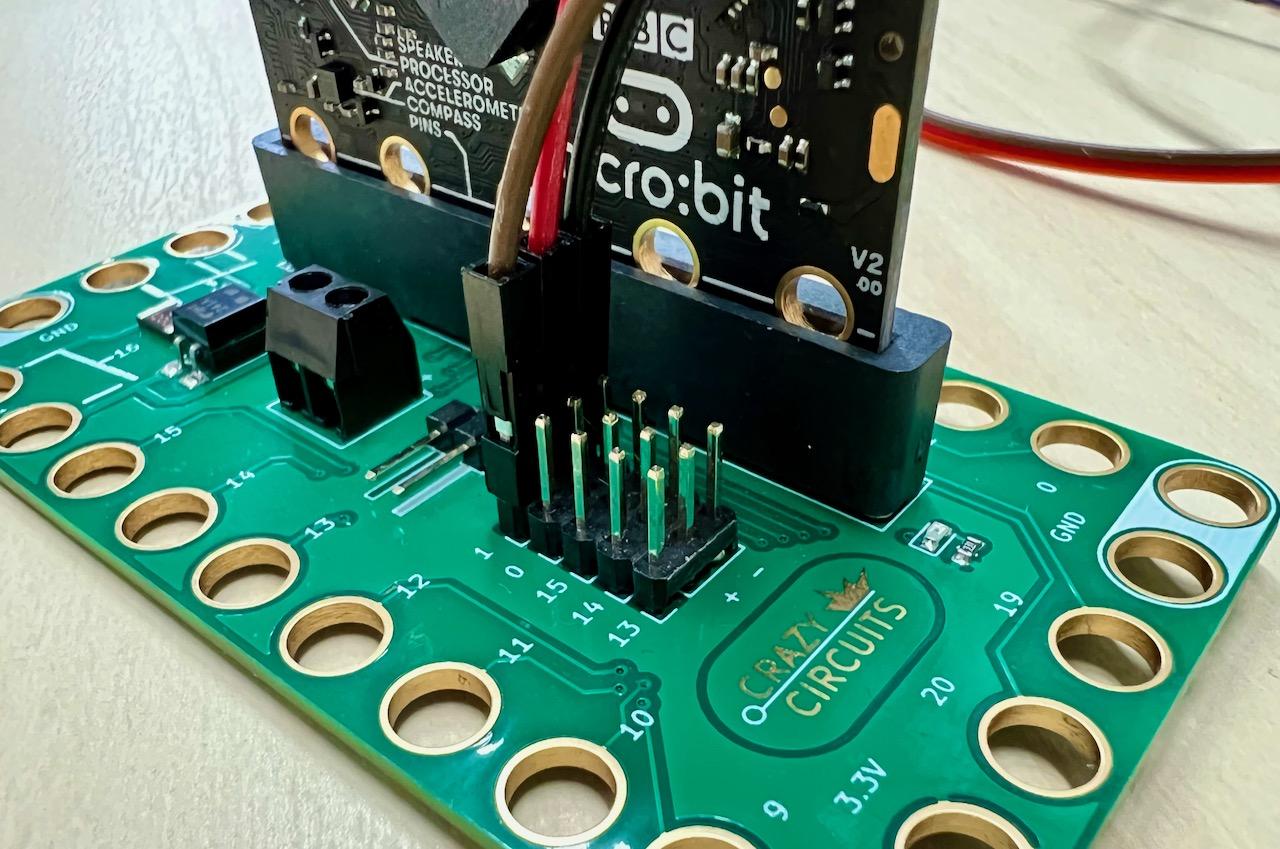
Connect the LEDs
.jpeg)
- From the LED strip, connect the Data (DI), 5V, and GND wires to pin 1, +, and -, on the Bit Board.
- Place the micro:bit into the Bit Board.
Code the LEDs
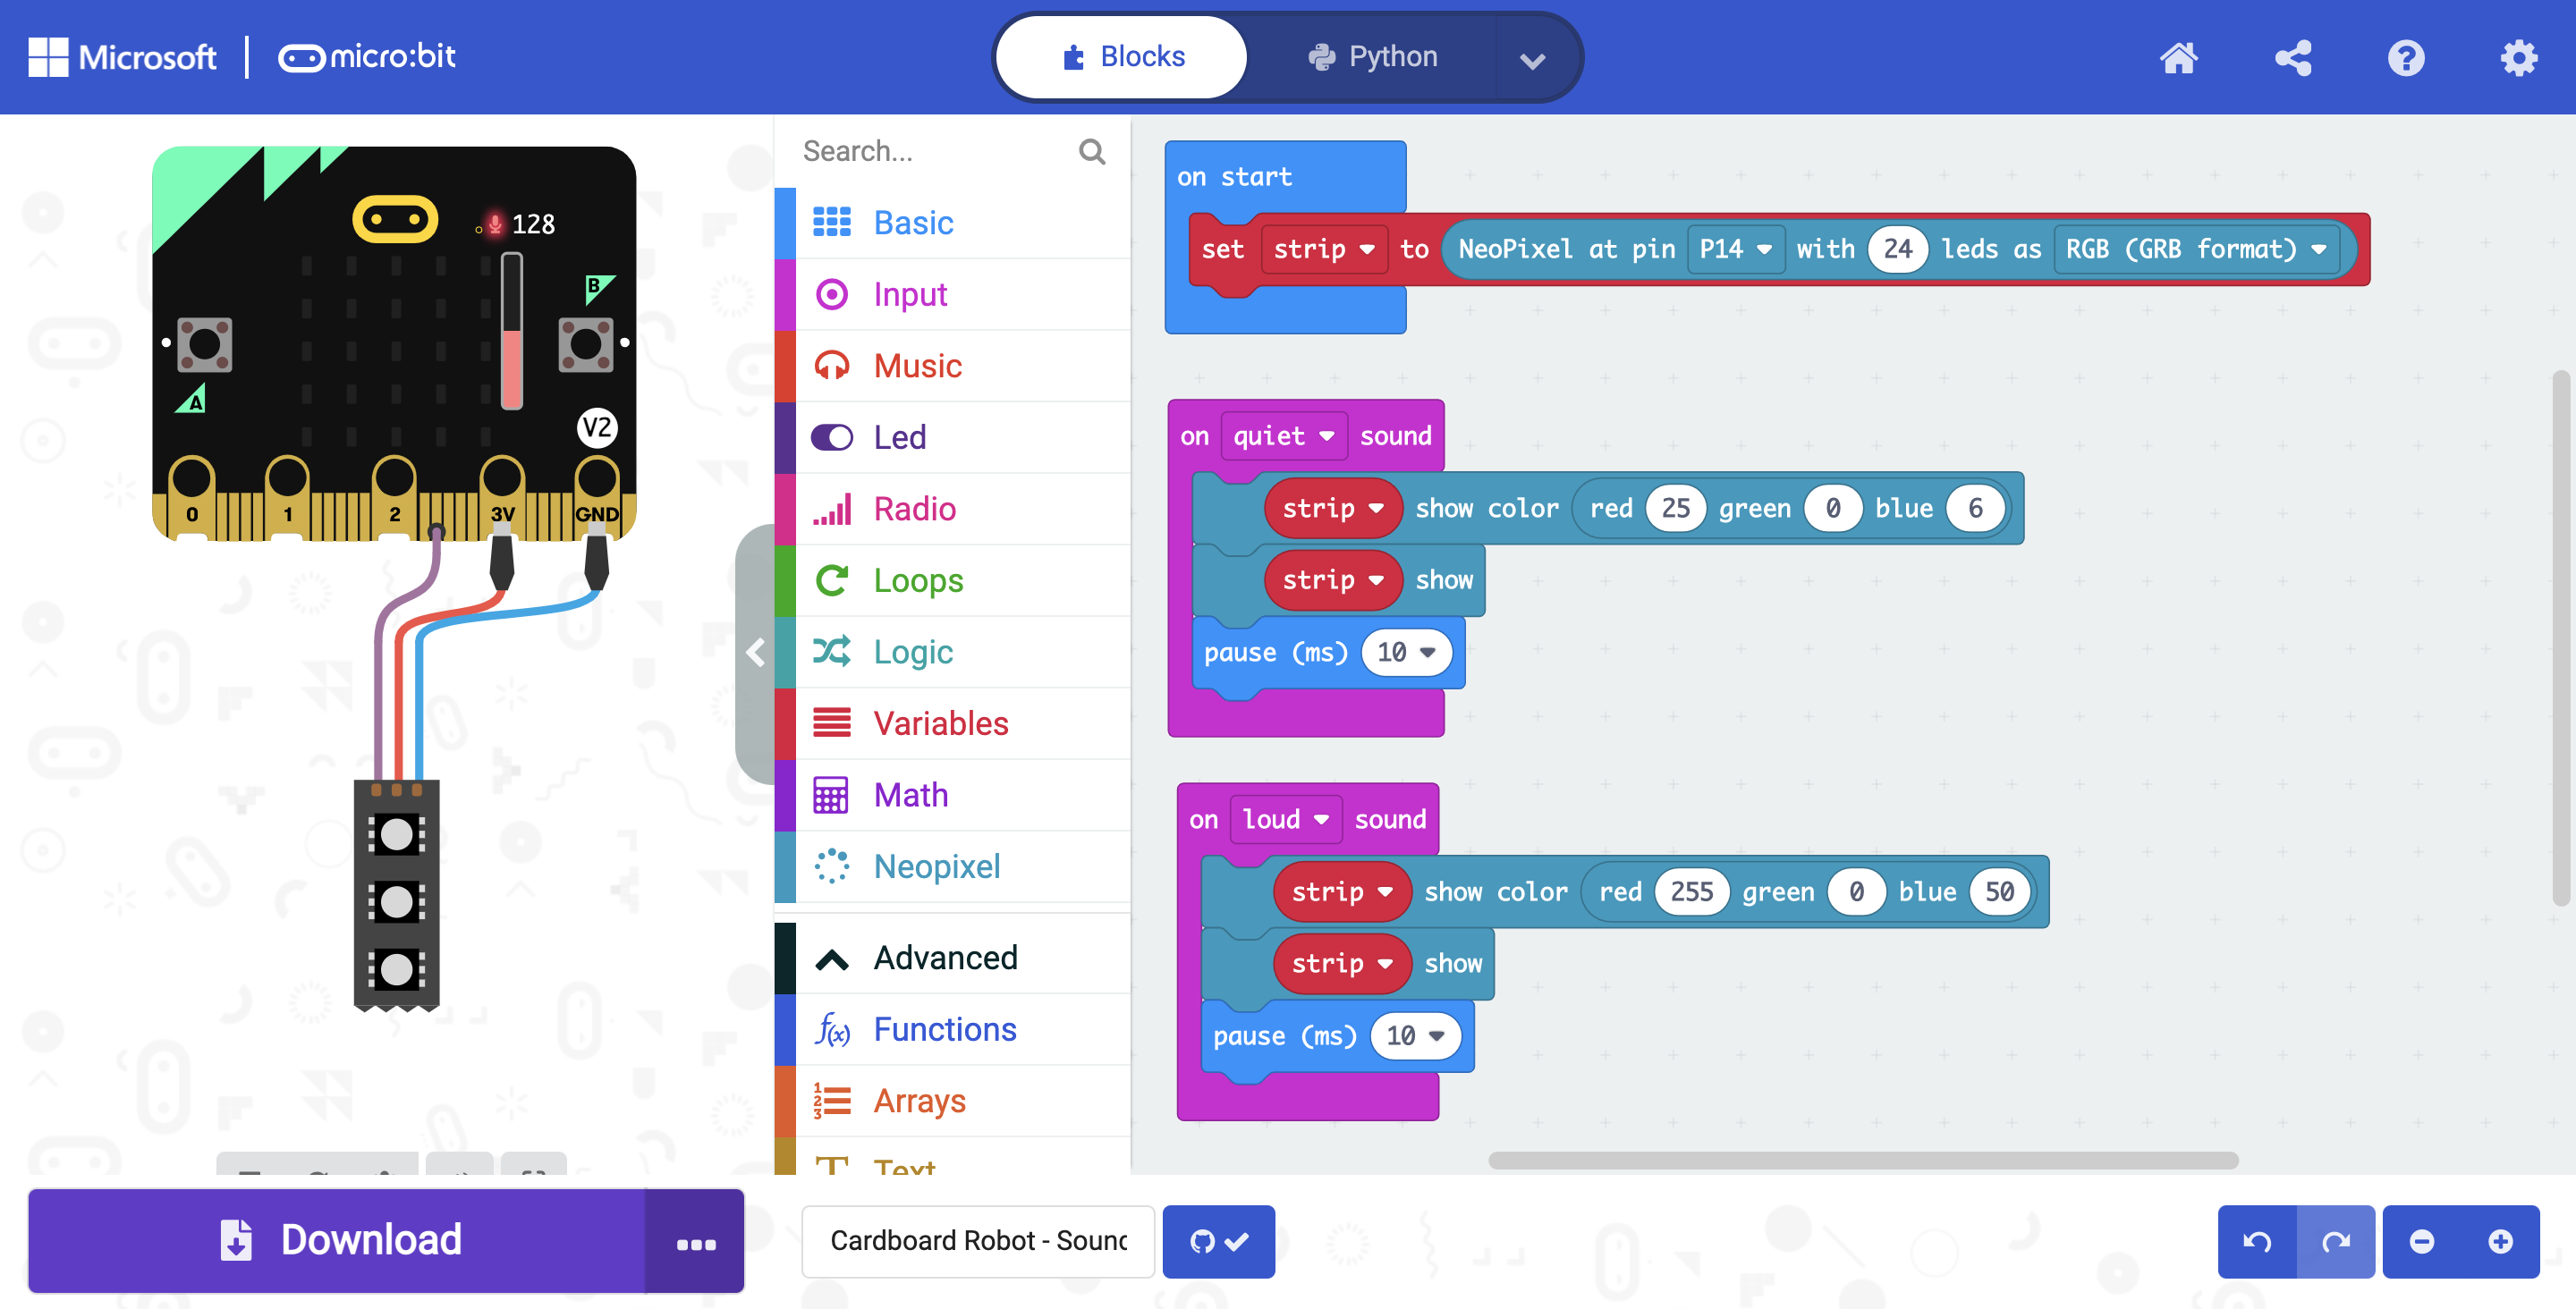
- Upload the code, available here.
- When there is only a small amount of noise, the LEDs are barely on, but with a loud noise, the LEDs shine brightly. In normal room volume, this will make the robot look like she's talking whenever the person wearing the costume is talking.
Make an LED Rubbing As a Template
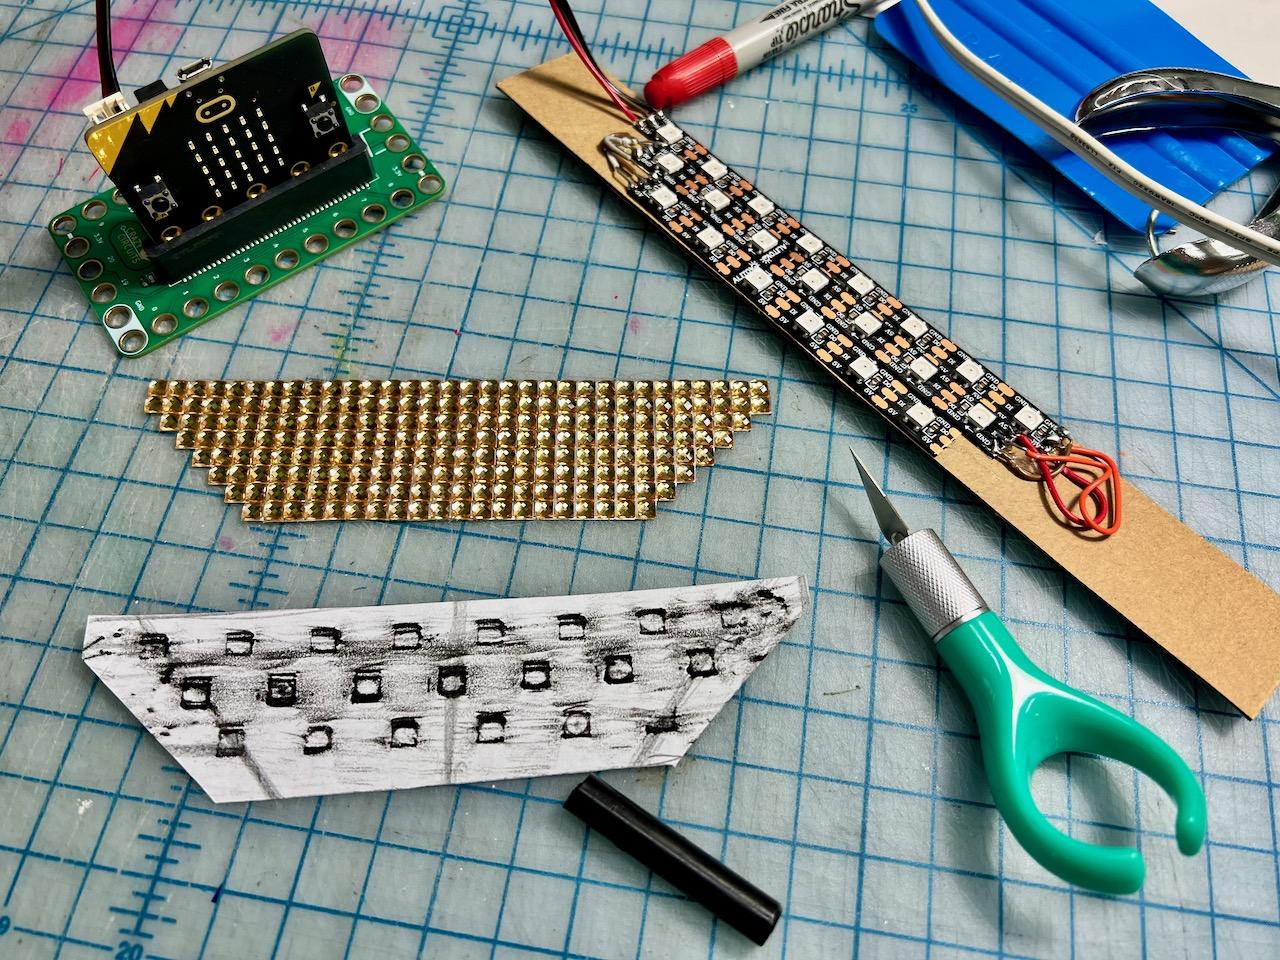
- Make a rubbing of the LEDs with a crayon and a piece of printer paper. This will create a hole punching template for the correct spacing of the LEDs.
- Cut out the template.
Poke the Holes
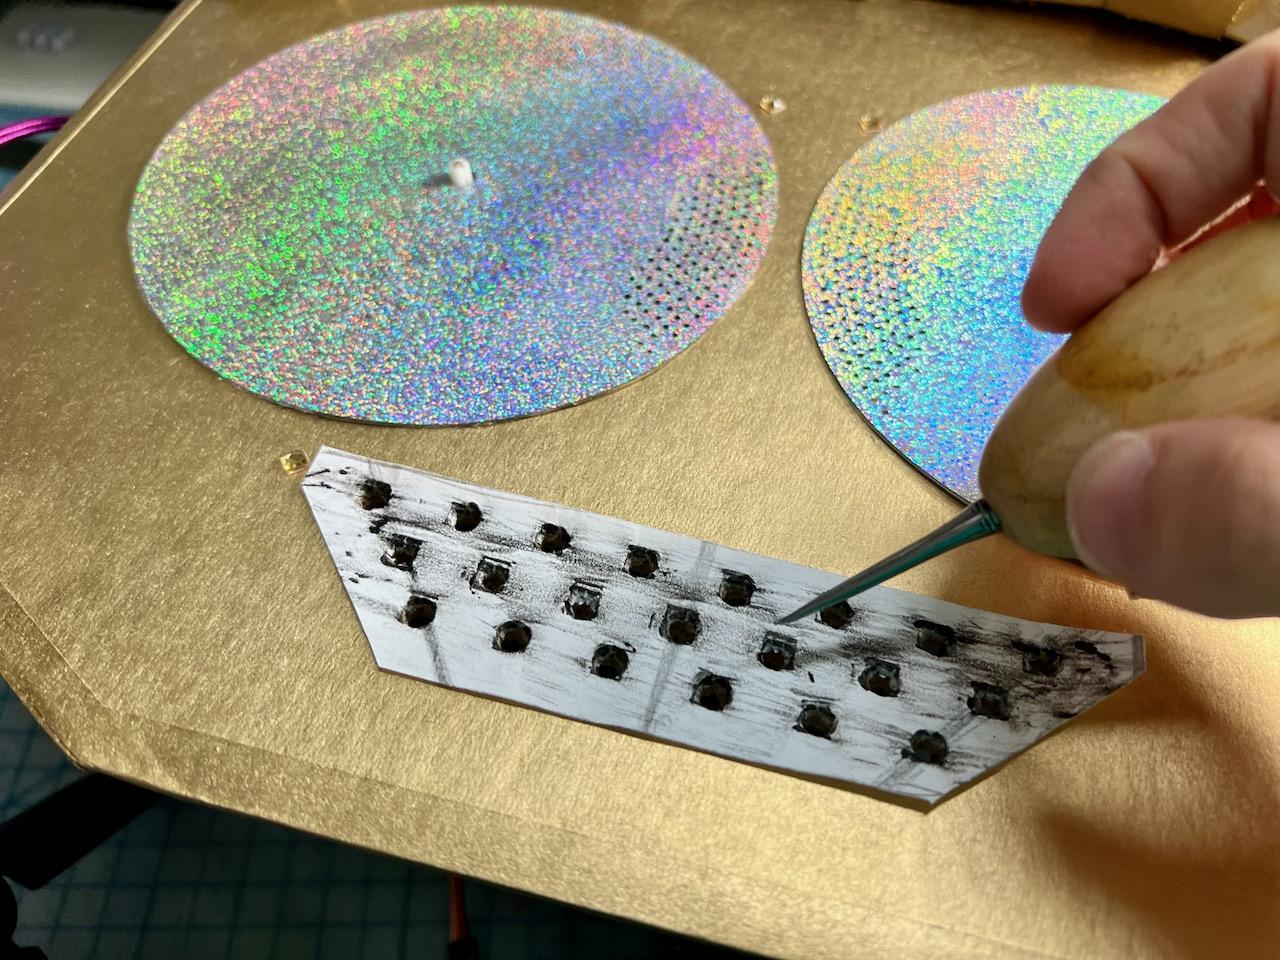
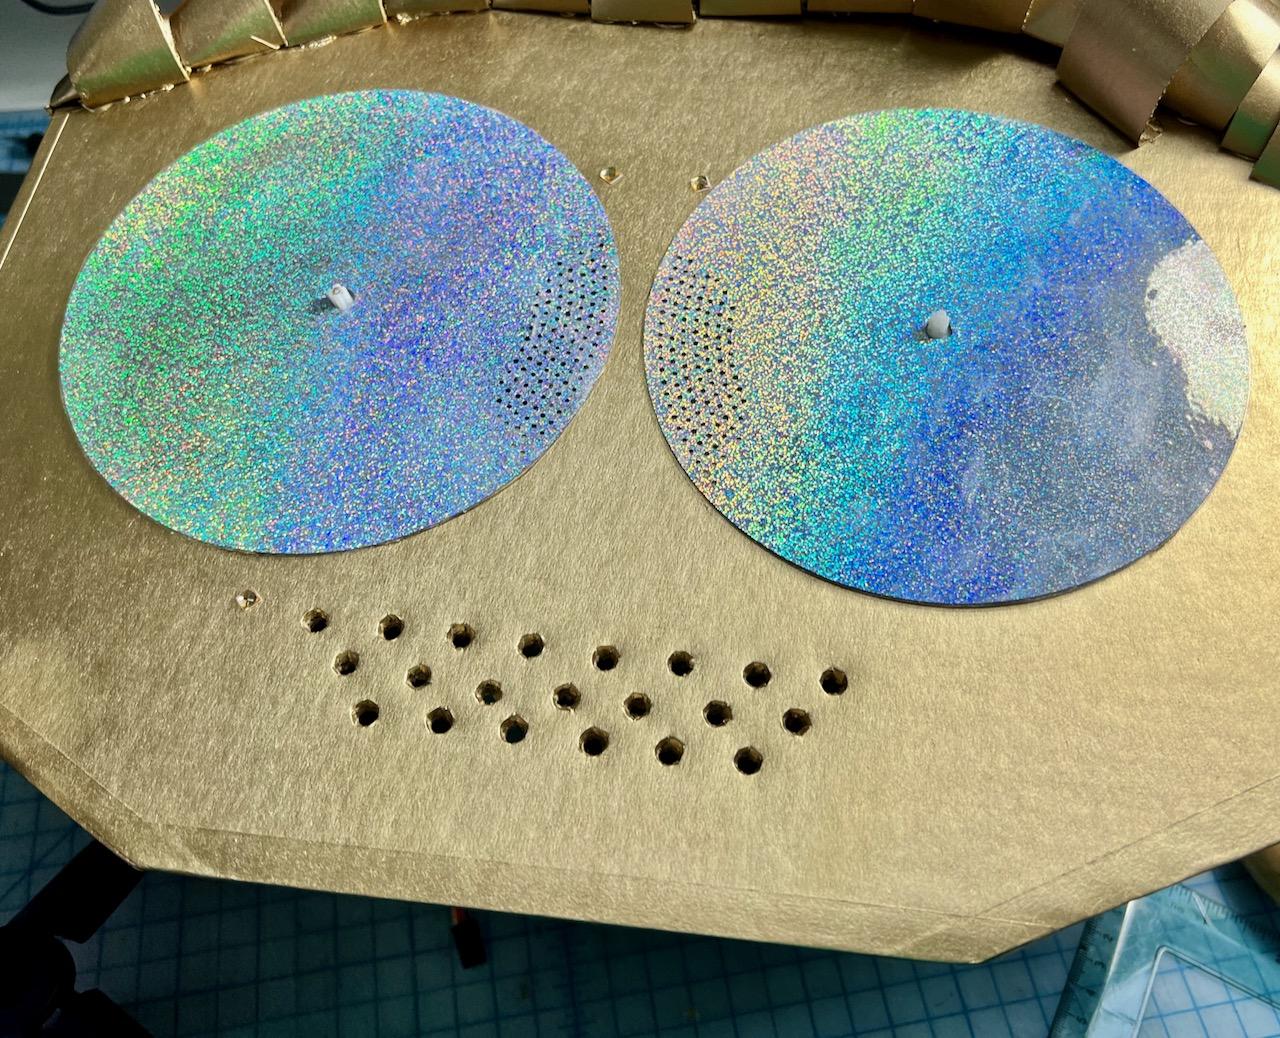
- Place the template where the mouth goes. Use an awl to poke each hole.
- Alternate: If you don't have an awl, you can cut out a large hole that surrounds all of the LEDs.
Tape the LEDs Behind the Holes
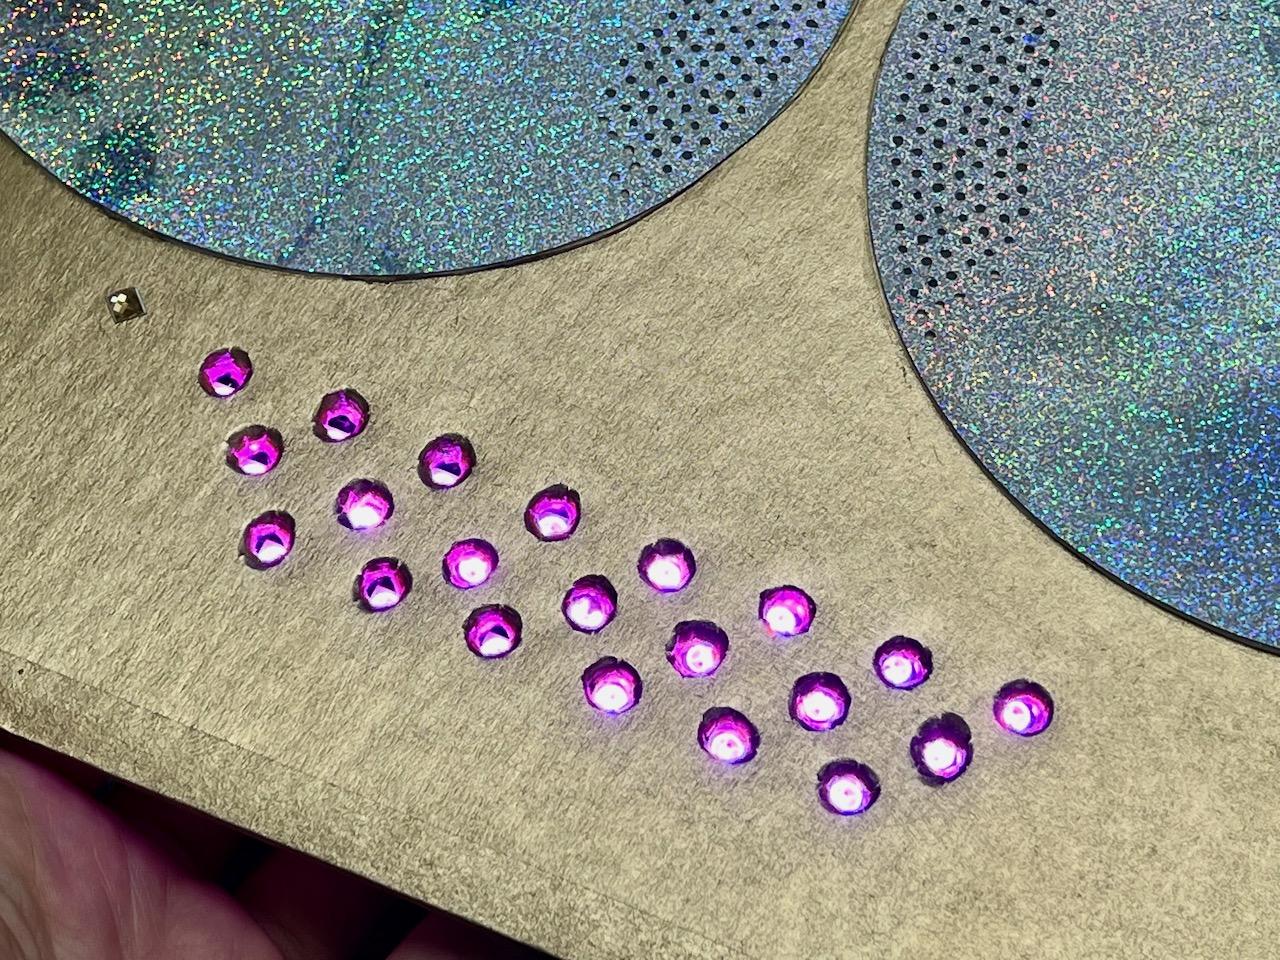
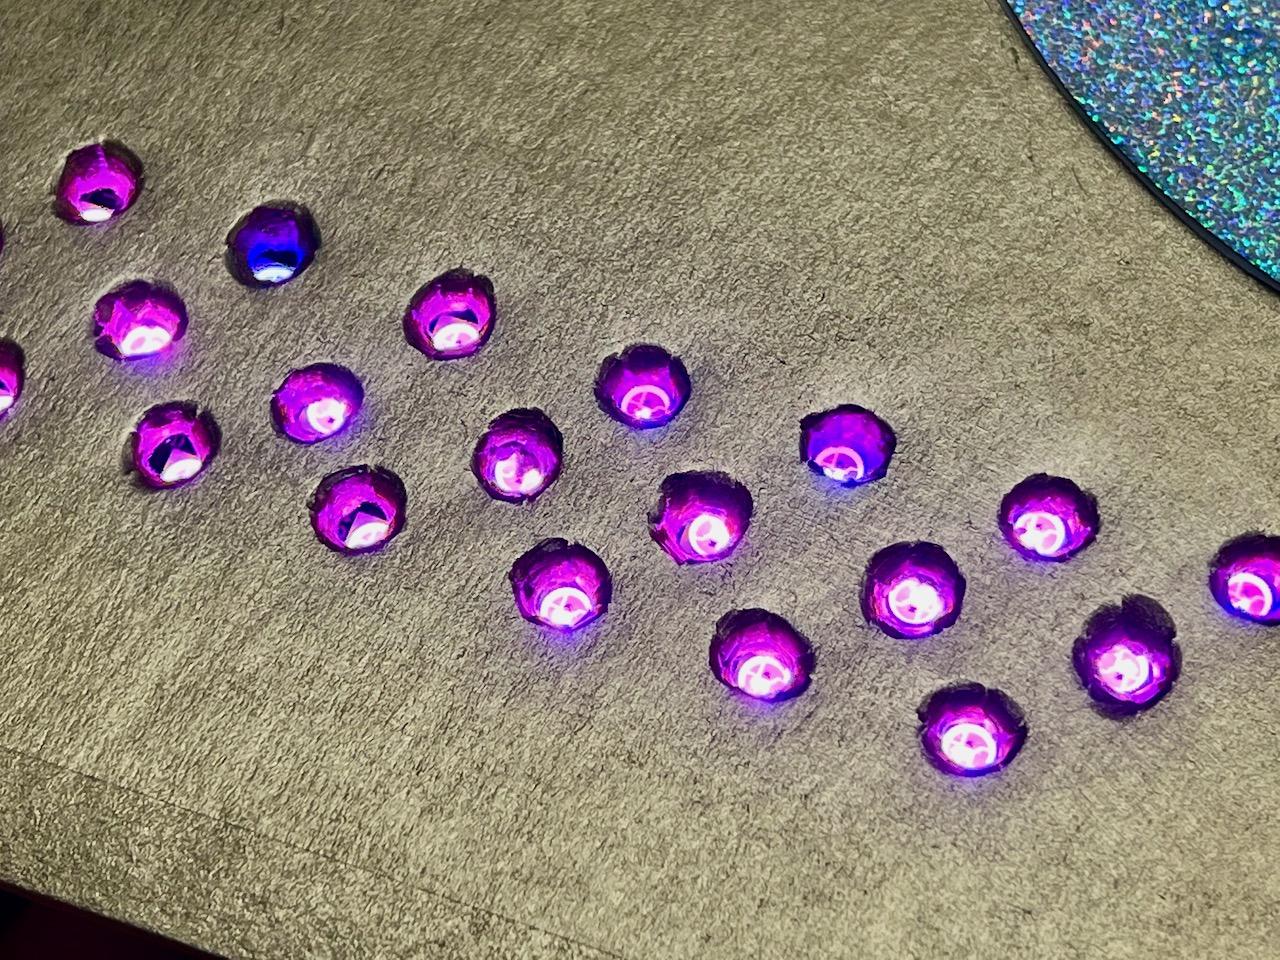
- Use strong tape or hot glue to position and attach the LEDs (and the cardboard they are glued to) behind the holes.
Add Rhinestones
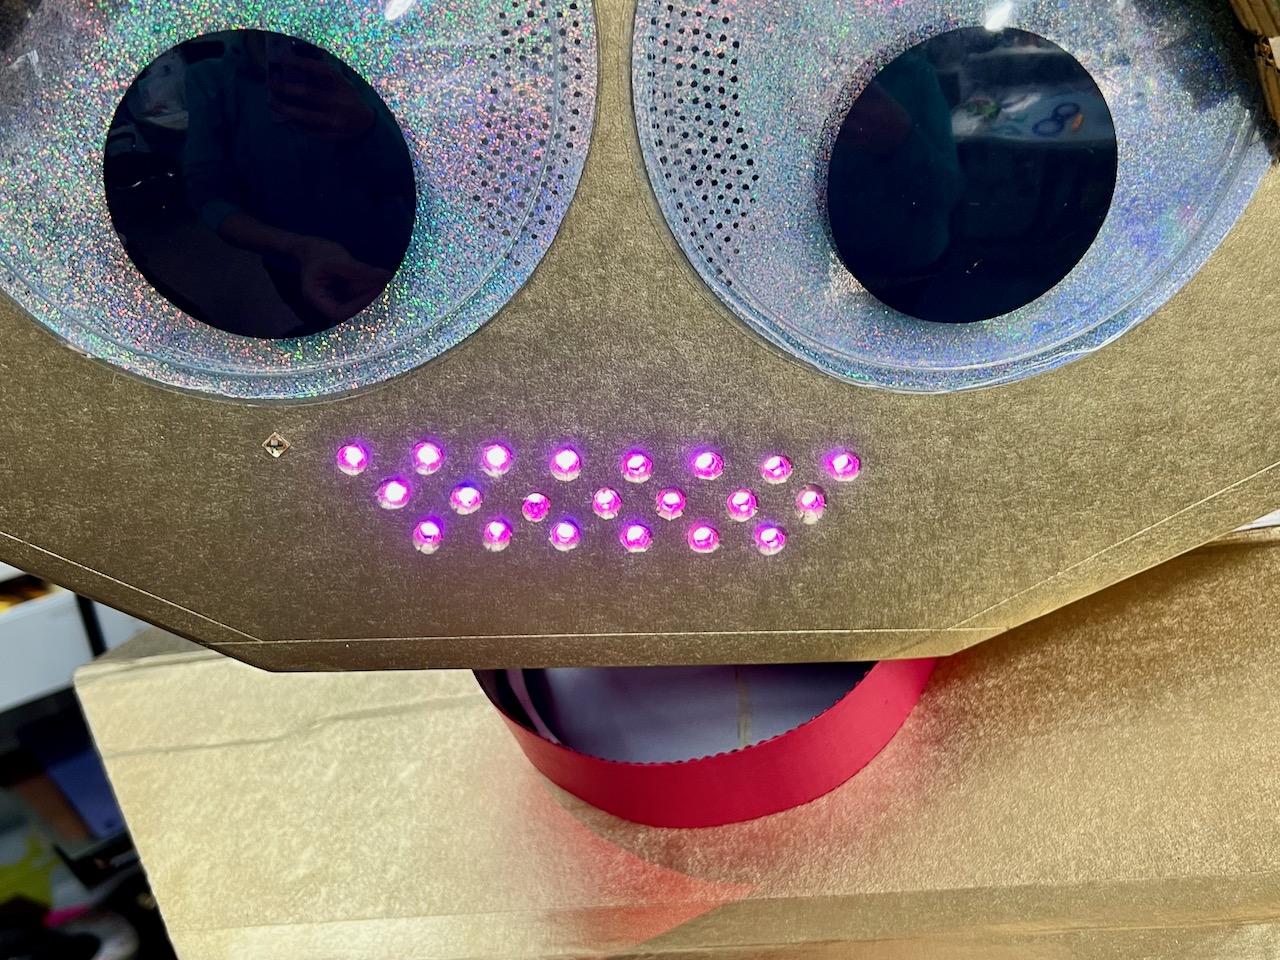
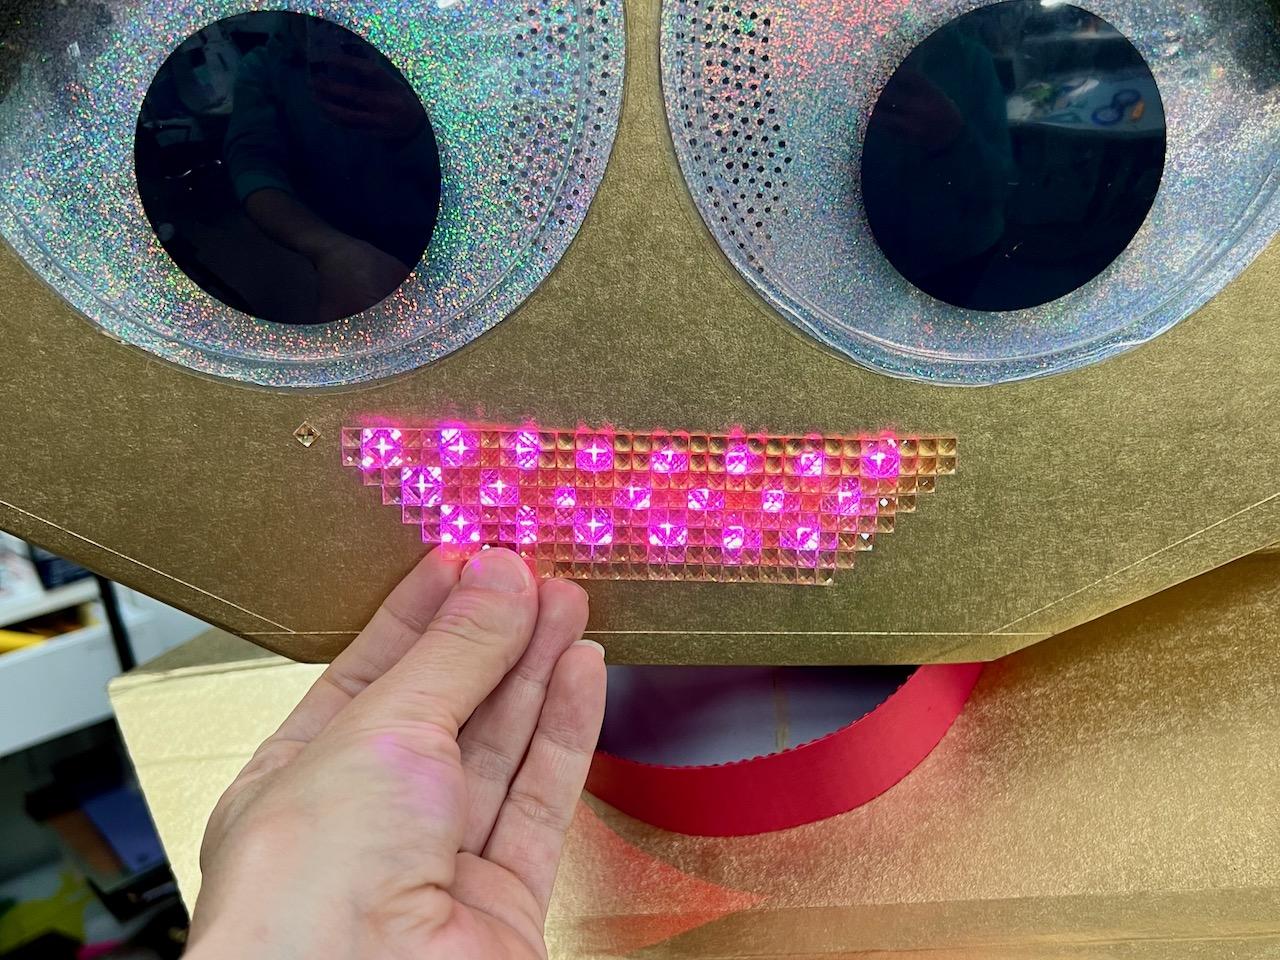
- Cover the mouth with a sheet of rhinestones, cut to the shape of a mouth. Remove the mirror backing sheet if you'd like to see the LEDs shine brighter.
Connect a Battery

- Connect a battery pack to power the circuit on the go.
- To incorporate the mouth into Sally Servos Costume, we taped the LEDs in place, then stowed the microbit off to the side away from the wearer's head.
Put It All Together


- We hope that these projects inspire you to make a REALLY ROBOTIC cardboard robot costume!
HAPPY HALLOWEEN
