4Duino LED Brightness Control
by 4D Makers in Circuits > Microcontrollers
1223 Views, 3 Favorites, 0 Comments
4Duino LED Brightness Control

In this project, we will learn how to control the brightness of LED via an I/O port (with PWM output capability) and a touch display slider. The 4Duino resistive touch display is used as a means for a graphical interface to control the intensity of the LED. Since the 4Duino itself has an LED on pin D13 with PWM output capability, you may use the LED to conduct this project for convenience.
You can visit 4Duino Projects for more info and creative stuff. :)
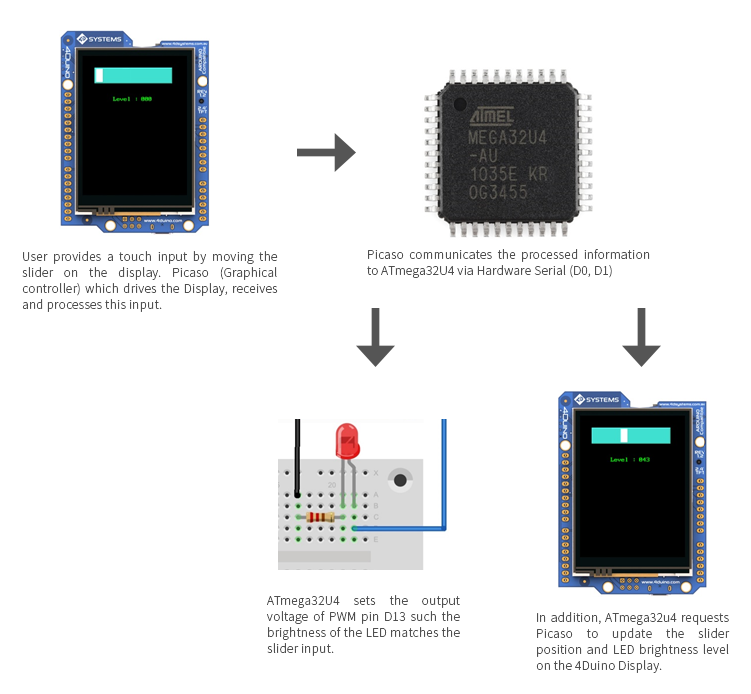
How It Works

Components
- 4Duino
- LED
- 220Ω Resistor
- Jumper cables
- Micro USB cable
- Breadboard
Build

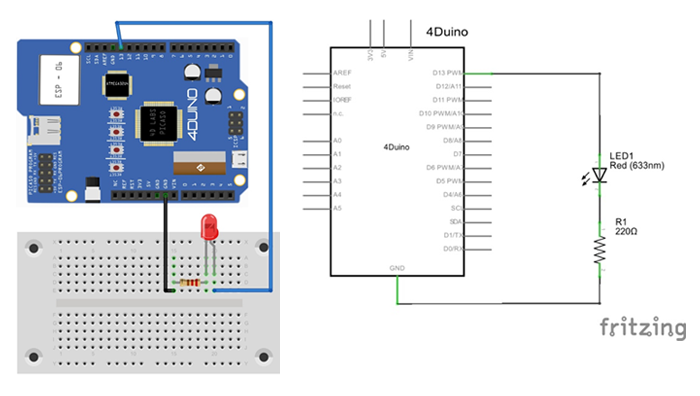
Build the circuit as shown in the following diagram and schematic.
Program
Workshop 4 – 4Duino Basic Graphics environment is used to program this project.
This project requires the Arduino IDE to be installed as Workshop calls the Arduino IDE for compiling the Arduino sketches. The Arduino IDE however is not required to be opened or modified to program the 4Duino.
- Download the file indicated in this step
- Open the file using Workshop 4.
- Connect the 4Duino to the PC using µUSB cable.
- Then navigate to the Comms tab and select the Comms port to which the 4Duino connected.
- Finally, go back to “Home” tab and now click on the “Comp’nLoad” button.
Downloads
Demonstration

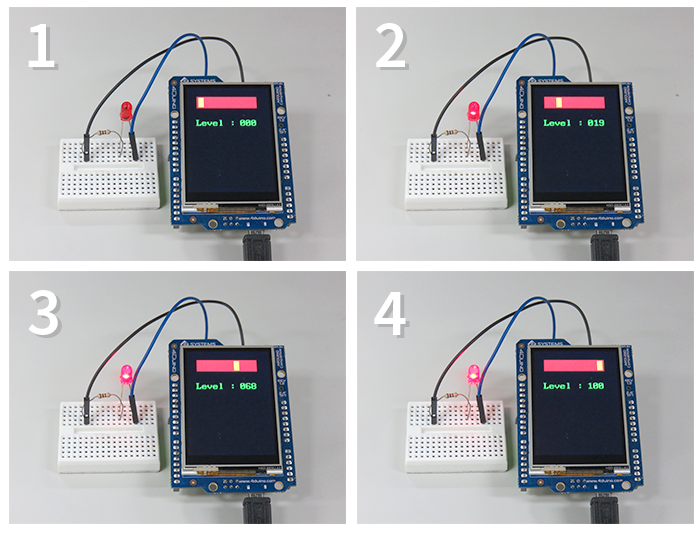
Now using the touch slider on the 4Duino Display, you can control the brightness of the LED.
You can add more LED and use it in your creative projects.
ENJOY !!! :)
More Projects
For more projects, you can visit 4Duino Projects.
Thank you !!!