3x1 Folding Chalkboard Tray


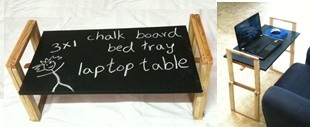
I have kids and I have a husband with a laptop...so i wanted to make a table to cater to all their needs.
What You Need


Print out the cut list and go shopping if you don't have these stuff at home.
In addition... you would need ....
Bolts and wing nuts with washers
Black vinyl.
Screw nails
i have used a pantry door that i had. I'm sorry but i don't have the steps.. covering the door with black vinyl.
I have used 3/4" thick wood for all except for 2 of the 12" slats and the long pressure bar.... but you could go with 3/4" for all if you like
The Pressure Bar.


To hold the legs firmly i add a pressure bar about 4" longer than the length of the table so about 31" long. drill a hole right in the center of the table from all 4 sides...
then another 2 more on either side..about 1.5" apart.
then another 2 more on either side..about 1.5" apart.
Bed Tray


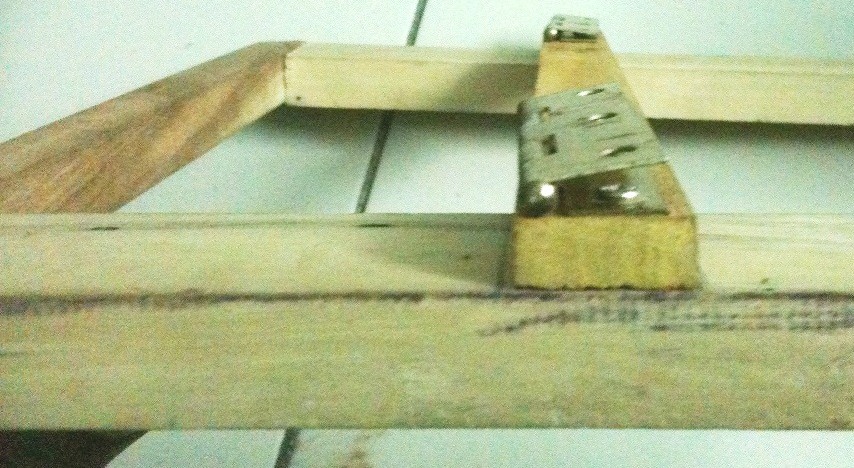
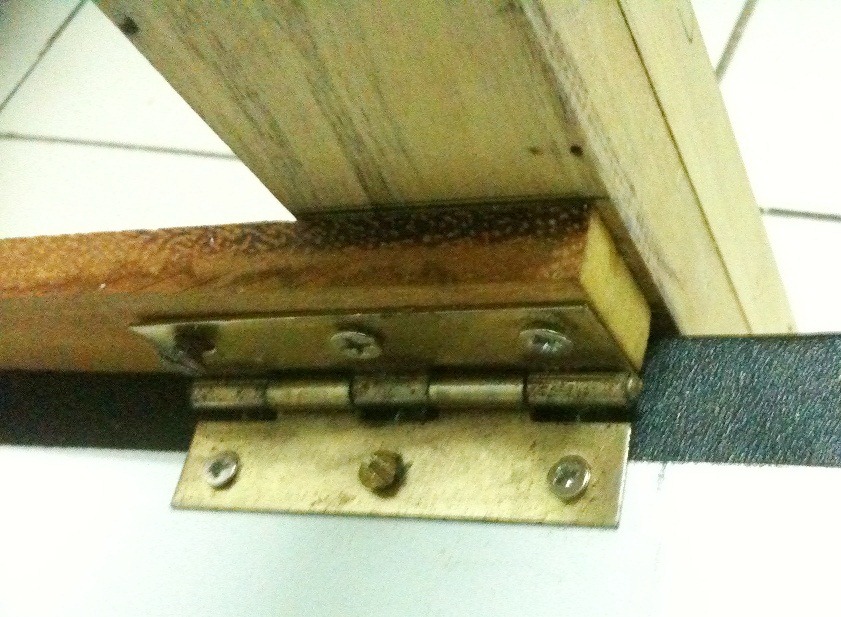

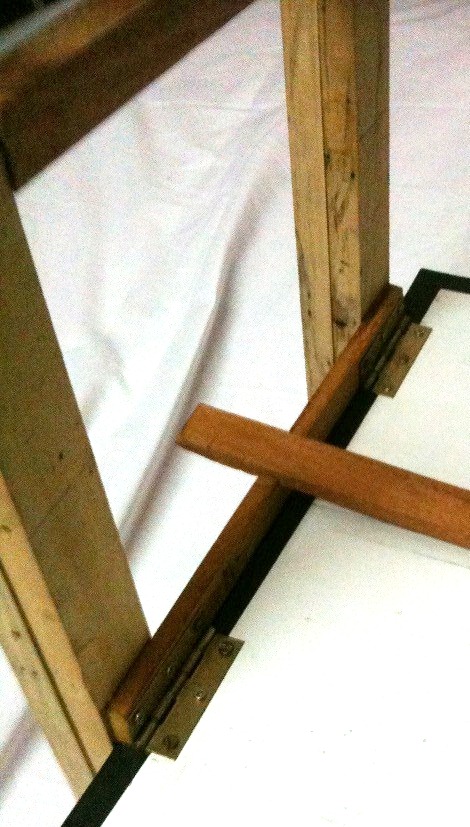


Cover your plywood with black vinyl.
Follow the diagram and make two arms for the table. use screw nails and glue so it would hold strong. from the bottom...that is C measure 10 inches and glue the 1/2"x1"x12" (B). now..mark and screw hinges..so that it's aligned with the top of B..refer pictures.
Now turn the table upside down and fix the arms of the table. close the legs and fix the pressure bar.
If you open up... your bed tray is done...or almost done.
your table will stand firm now...but to avoid the risk of it suddenly folding up on you...do the following steps...i think it's very important.
Mark where the pressure bar meets the arms when the table is open and standing. mark it on both sides.
Cut the thickness of the wood halfway...see picture. Now when you open it'll move to the cleat and be secure...to close...just push down the pressure bar and it'll close.
Your bed tray is done....and it's very firm :-)
If you decide to stop here...give your kids some chalk and let them have some fun. :-D
Laptop Table


Clamp the remaining legs aligning with the floor and drill at the bottom. drill the hole slightly smaller than the bolt...so you have to use some serious manpower to (i used a pliers) twist the bolt through..so it would be firm and not just go through. use washer and wing nut to secure.
You should have 2 square dowels (A) remaining...cut and drill according to the diagram. before drilling...measure and drill from the ends the half width of the legs.
Place the dowels across the legs ...drill and secure with one screw on each side. .and secure.
you are done...now you can move from bed tray to laptop table in under a minute.
The Transformation!


Watch and see how in under a minute i change from a bed tray to laptop table...
i would love to do it without a any tools...but cant figure out how...thought of a knob like screw for the legs...but was wondering about the sway.
BTW...the bed tray doesn't sway...but the laptop table sways a bit..but still it's very secure and no chance of toppling over because of the cleats.
open the arms and get your bed tray.
unscrew one screw on both other legs halfway...lift the bar and move sideways.
push the outer legs outwards...turn upside down and secure the screws again on both legs...it's that simple
Hey...please don't forget to rate and vote.
How to Make a Tool Free Transformation
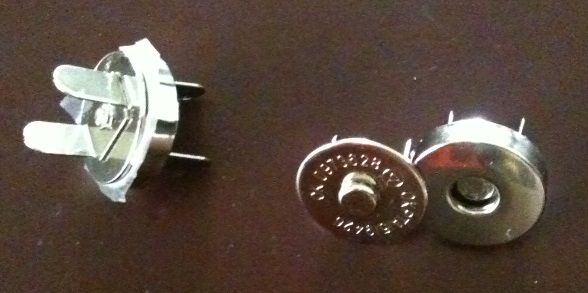


Okay...now I've made it to a tool free.... transformation
I've bought magnetic snap buttons...these are usually used in handbags.
fix it on one side of the leg and the swirling arm. and you are done.
The other way is use a screw as a dowel...make the hole on the leg slightly bigger..so when you pull the arm..it'll come off and then when you push it back on it'll be firm.
now...you have a tool free laptop table , bed tray and chalk board table!