3d Printed Video Game Themed Clock Using Tinkercad
by Hmcbart1 in Workshop > 3D Printing
683 Views, 3 Favorites, 0 Comments
3d Printed Video Game Themed Clock Using Tinkercad
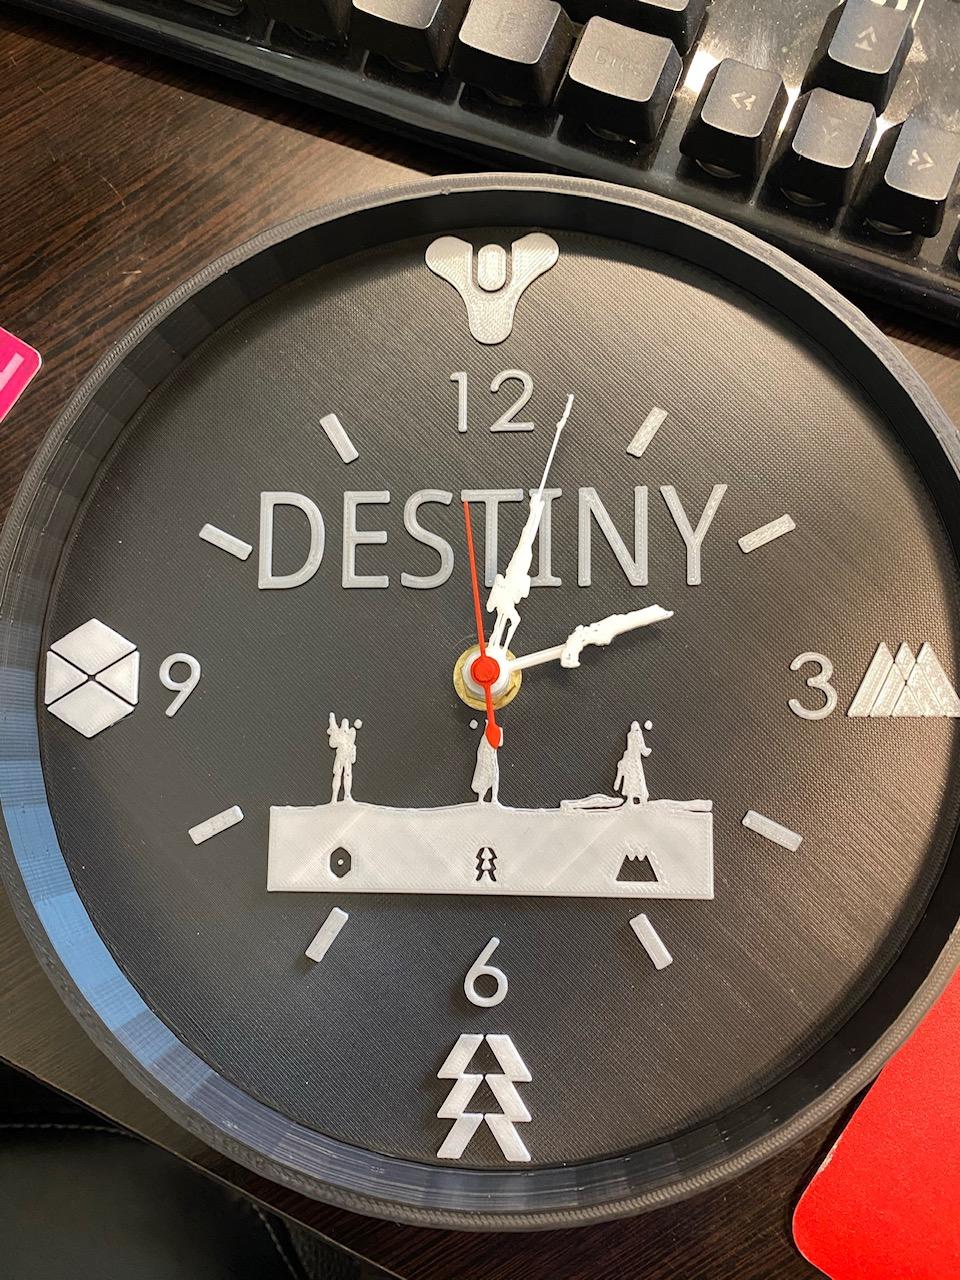
I love videogames and I love to make things. After seeing a clock online based on a Video Game I enjoy playing, I said to myself, "self, you should make something like that" to which self replied, "ok, get off your butt and go do it".
So this instructable will walk you though creating your own clock. Mine was based off of a video game I play a lot, but really you can create it based on any theme you want. You will need to download additional PNG files to make it different than I did.
*not included are the 100 extra steps it took to figure out how to download and convert images. The video of me yelling at the printer after it didn't correctly stop to change the filament color like I told it to! It never listens.
Supplies
Needed:
3d Printer (I used an Ender 5 Pro) PLA filament (I used black and white)
3/8 inch Mini Quartz Clock Movement (bought at Hobby Lobby for $7.99, but you can get them anywhere)
Model or super glue
www.tinkercad.com - Free and extremely simple to use even for a novice like myself. It even works on this old laptop which is awesome.
Websites used to convert files - If you have the correct software you will not need the websites listed below. I however am cheap and have a very old laptop unable to run the software needed to convert the files to different formats
anyconv.com - Free online (convert files from SVG to STL)
freeconvert.com - Free online (convert PNG files to SVG)
3d slicing software - I used PrusaSlicer for this project
Figure Out the Theme of Your Clock
I will be using the theme I chose for this instructable, but your own design can be anything you want.
What Size Do You Want and Can You Make.
Based on the 3d printer I own, the max size I could do was 220mm diameter, but I went a little smaller with 190mm to make sure it fit. If you have a larger printer, you can go bigger.
Download and Convert Images to Use for the Theme





I used google images to find PNG files that could be turned into STL files in tinkercad. Images that are silhouettes are best. You arent going for major detail on the images, just the outline.
This is where you use the online tools to change the PNG files into a format that can be used in Tinkercad for 3d models. The process is simple, you just upload the image to the website and download the new file and add to your folder to build the clock.
Open Up Tinkercad
If you haven’t already, go ahead and create your account. You will be able to save the projects you are working on within tinkercad to be used later. There is also a ton of user created content you can browse and use.
Create the Clock Face
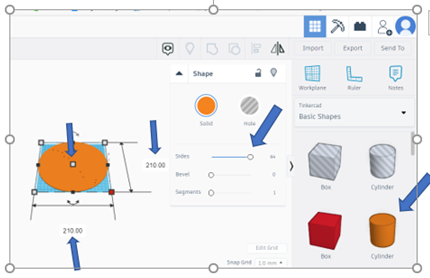
Use the solid cylinder as your base for the clock. Drag the image onto the work plane and resize it to your specifications. I used 3.2mm for the thickness of the clock and 190mm for the diameter. You can adjust the size by changing the number in the spots below after clicking the white boxes on the corners or center of the object. I also adjusted the sides to 64 to make the circle smother.
Import Images for Clock Face
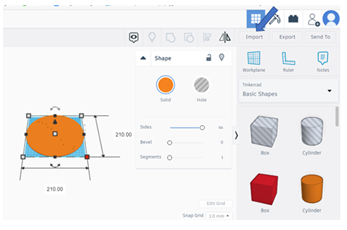
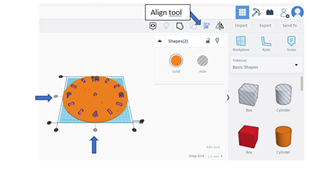
After importing adjust the size to suite your clock face. I went with 18mm diameter and 1.6mm thick. Then you drag the image on top of the cylinder you previously created. Don’t worry about lining them up perfectly by hand, tinkercad has a took to help with this. You drag a box around both objects and then click the align tool. Then use the dots around the objects to line them up perfectly.
Group Objects
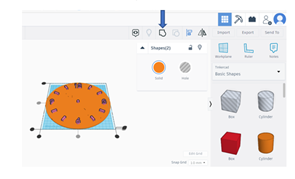
Drag a box around both objects and then click the Group objects button to combine both pieces into 1.
Add More Images for Your Theme
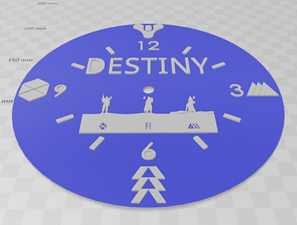
Repeat steps 1 – 3 for each image you want to add. Place them anywhere you want on the clock. For mine, I placed 4 images at the 3,6,9, & 12 o’clock positions and added another just below the 12 o’clock position and just above the 6 o’clock position.
Group Objects
Here you will want to drag a box around all the new images you added to your clock face. Then click the Group button as before to combine them into 1 object.
Make a Hole
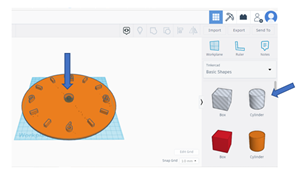
To do this you simply drag the clear cylinder onto the clock face and place near the middle. You need to adjust the size of the new cylinder the size the clock will go into, approximately 11.5mm.
**Remember you don’t have to be exact on centering the cylinder because tinkercad will do the hard part for you by aligning it perfectly in the center. Just repeat the steps above to align it.
Export and Save
Export and save to your clock folder. I export it as a .STL file to be able to upload to the slicer software.
Make the Clock Bezel
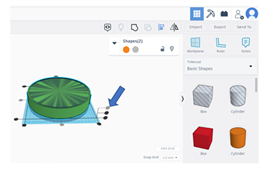
Using tinkercad you will start a cylinder.
You will follow the instructions from steps 1 & 2. To drag the new object onto the workplane. You will need to adjust the size to be slightly larger than the clock face you just created. You will be using 1 cylinder object and 2 cylinder hole objects for this step.
The solid object will need to be resized to slightly larger than the clock face. 198mm diameter and 34mm thick.
The first cylinder hole object will need to be resized to 188mm and 13mm thick
After you have sized the cylinders, move them both on the workplane. Using the align tool from earlier you will center both objects on each other. When aligning these 2 objects you will also want to make sure the cylinder hole is at the top level (remember it was only 13mm thick compared to the solid cylinder at 34mm thick. Then using the Group button combine these 2 objects into 1.
Add the Lip for the Clock Face to Sit On
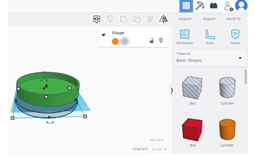
Drag a new cylinder hole onto the workplan. Adjust the size of the diameter to 190.5mm and the thickness to 22mm. This new cylinder hole will go underneath the newly combined object. Using the align tool as before, center the 2 objects and align the new object with the bottom of the other. This creates a wider opening for the clock face to drop into.
Export for Printing
Export the new object and save in file to be sliced and printed
Upload to Slicer and Print
I used a 75% infill for both pieces. I used the stock settings in prusaslicer for speed. I added a pause at height to change the color of the filament from black (for the base) to white (for the clock face images).
Putting It All Together
Add a small amount of super glue or model clue to the inside lip of the bezel. Fit clock face into bezel and press to let glue cure.
Add clock parts to new clock face. Follow directions on package to install the clock.
Admire and smile at your work....don't forget to add batteries to clock!!1
Extra Credit

I wanted to keep my clock in the theme of the video game I play so I designed the clock hands to be weapons from the game. Using the same steps outlined above, I created a hand cannon hour hand and a sniper rifle minute hand. I used the new hands in place of the ones that came with the clock. The .STL files are included with the others.