3d Printed Earrings and Pendant Set (designed in Tinkercad)
by 3DPrintBunny in Craft > Jewelry
1192 Views, 6 Favorites, 0 Comments
3d Printed Earrings and Pendant Set (designed in Tinkercad)
![20210215_122215.jpg](/proxy/?url=https://content.instructables.com/FKX/6LCA/KL55TDKZ/FKX6LCAKL55TDKZ.jpg&filename=20210215_122215.jpg)
How to create and print a beautiful pendant and earrings set using Tinkercad and a 3d printer
Start Creating Your Earrings
![pic1.png](/proxy/?url=https://content.instructables.com/F7U/3WS3/KL55TDL5/F7U3WS3KL55TDL5.png&filename=pic1.png)
![pic2.png](/proxy/?url=https://content.instructables.com/F14/H4TL/KL55TDL6/F14H4TLKL55TDL6.png&filename=pic2.png)
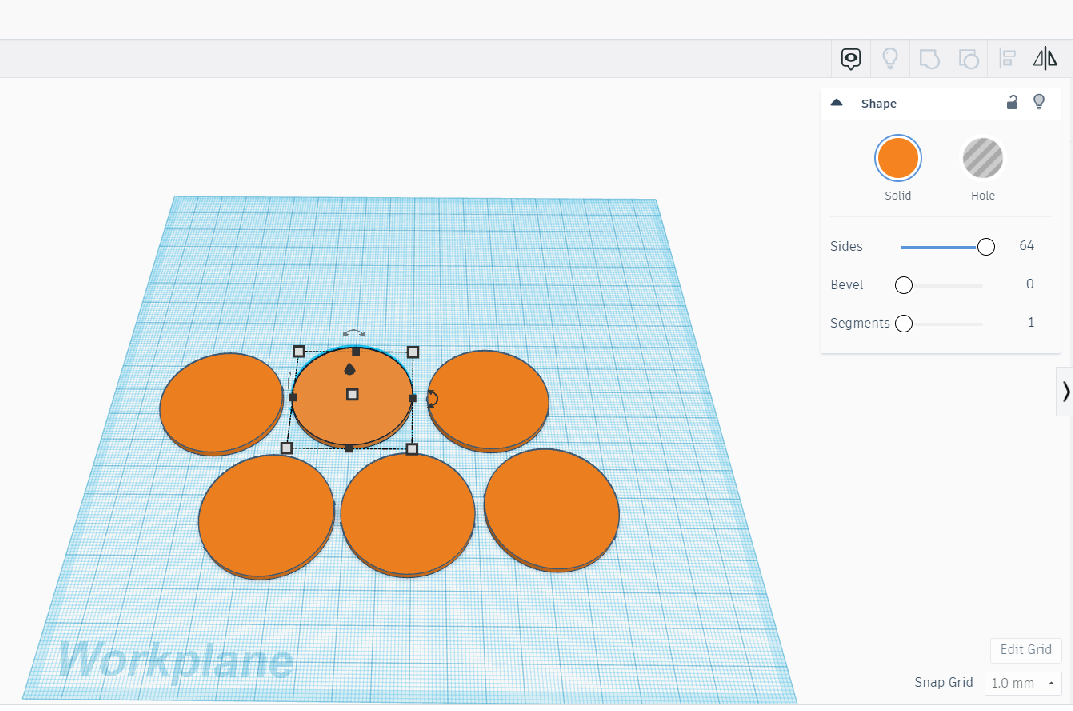
Using the cylinder shape in Tinkercad create 6 identical cylinders 40x40mm and 2mm tall.
Rotate the cylinders 90 degrees so that they are standing on their ends.
Rotate cylinders by 30 degree increments
Continue Shaping the Earrings
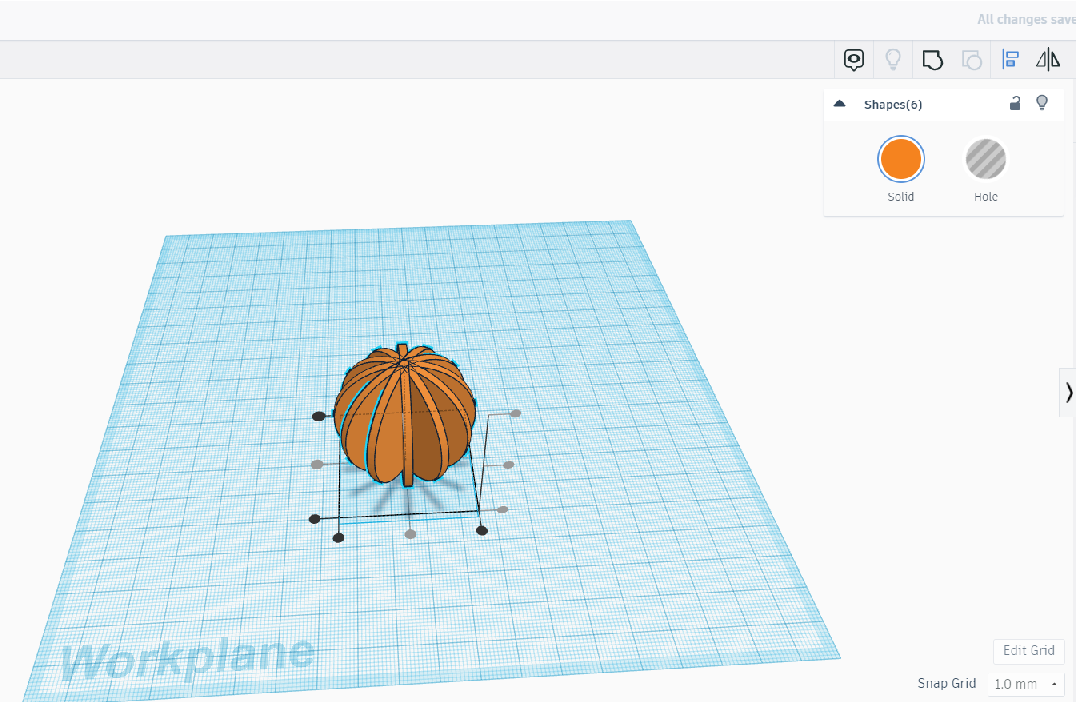
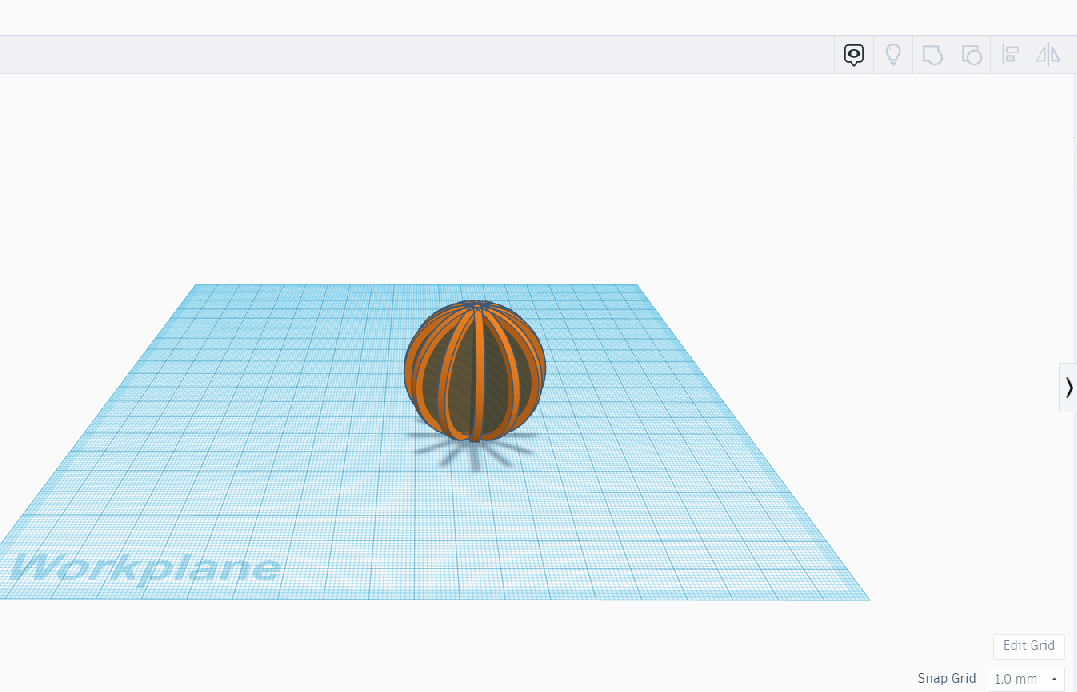
![pic3.png](/proxy/?url=https://content.instructables.com/FTR/R78E/KL55TDL7/FTRR78EKL55TDL7.png&filename=pic3.png)
![pic4.png](/proxy/?url=https://content.instructables.com/F7F/9TJW/KL55TDL8/F7F9TJWKL55TDL8.png&filename=pic4.png)
Create a โholeโ sphere 36mm diameter.
Align this with the cylinders and group
Add the Detail
![pic5.png](/proxy/?url=https://content.instructables.com/F3I/Q9WQ/KL55TDL9/F3IQ9WQKL55TDL9.png&filename=pic5.png)
![pic6.png](/proxy/?url=https://content.instructables.com/FAT/RL9F/KL55TDLA/FATRL9FKL55TDLA.png&filename=pic6.png)
![pic7.png](/proxy/?url=https://content.instructables.com/FWB/JI29/KL55TDLB/FWBJI29KL55TDLB.png&filename=pic7.png)
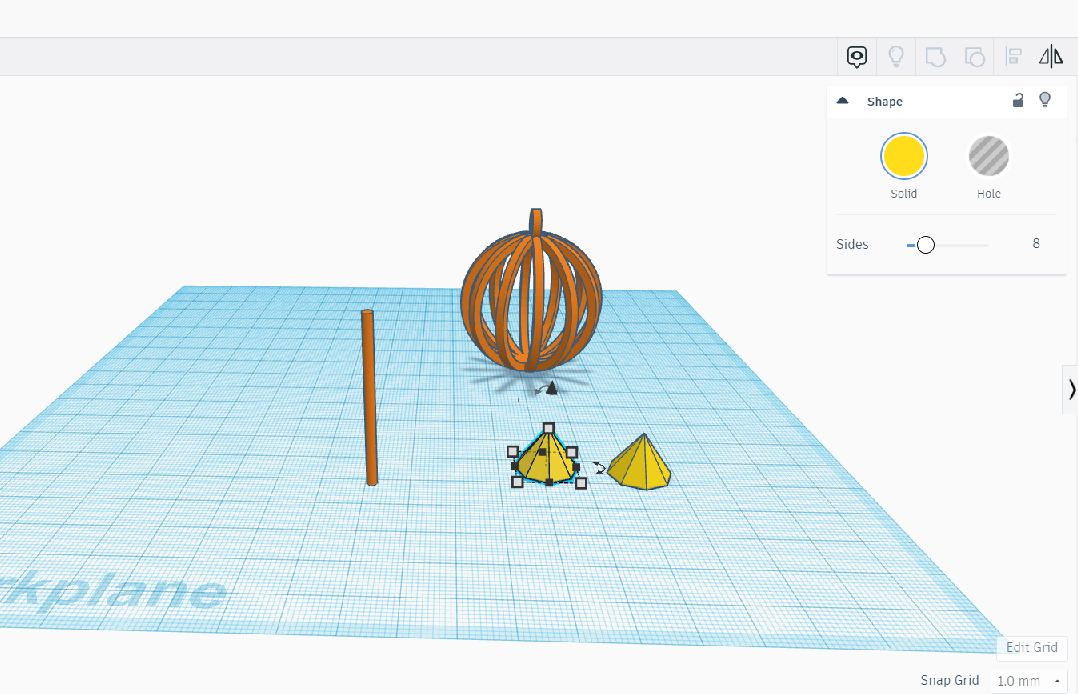
Create a cylinder 2mm diameter and 40mm tall
Create two pyramids with 8 sides, 10mm tall, flip one so that it is upside down and group the two together to create a diamond shape.
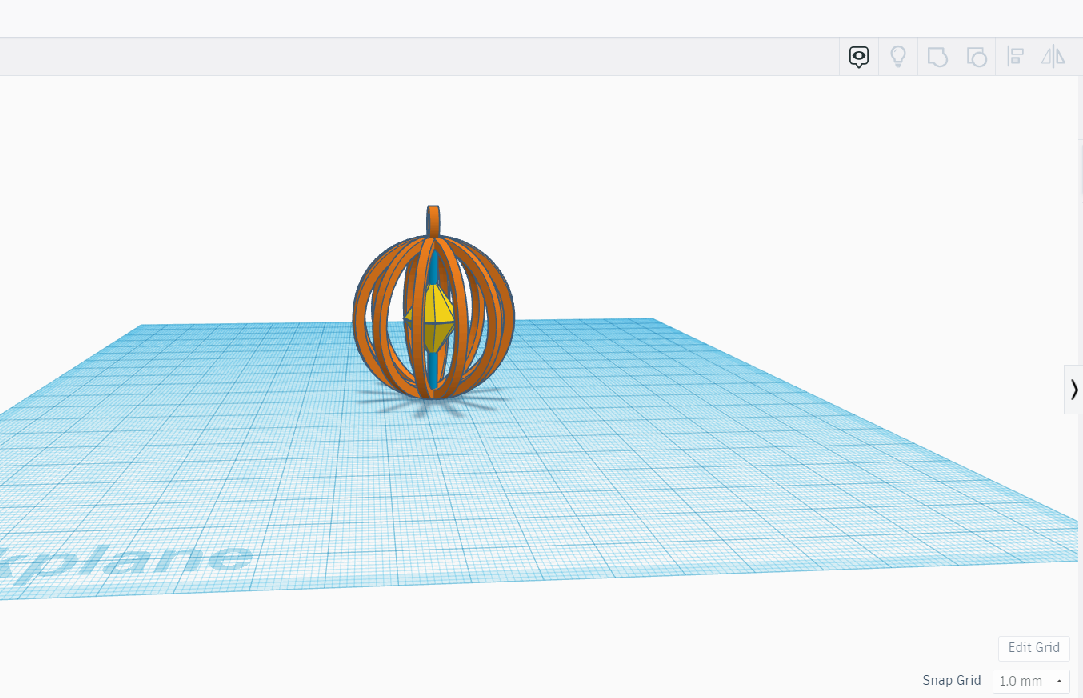
Align these shapes with the hollowed sphere and group
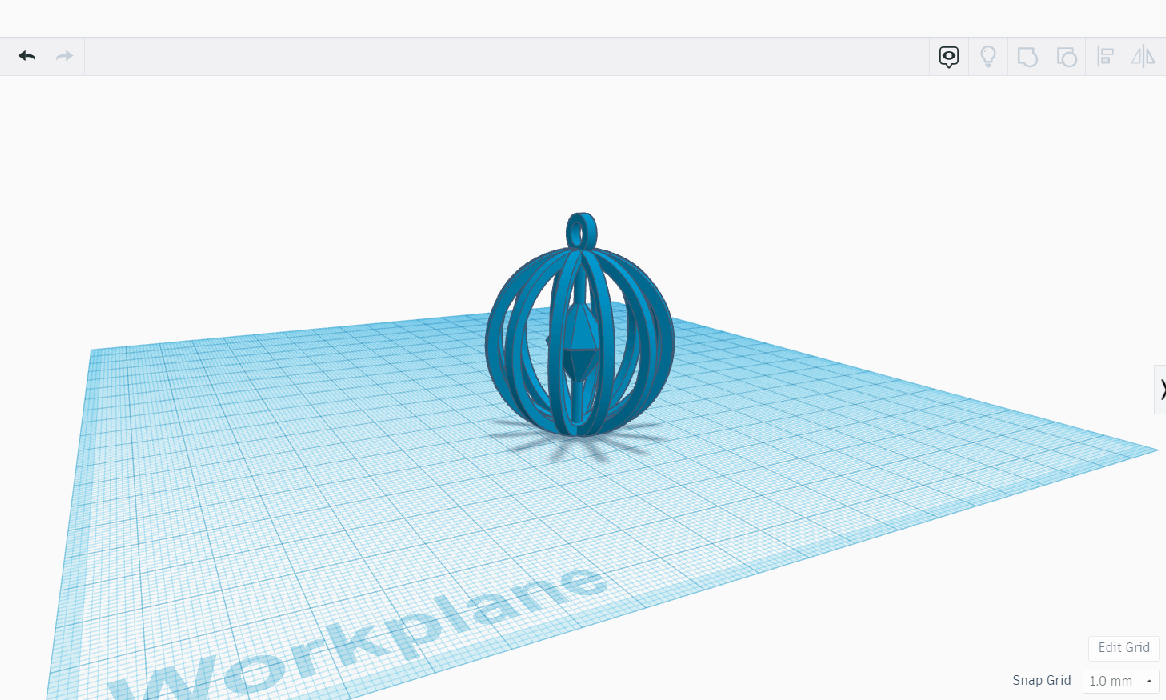
Create a small ring shape using the pre-set shapes and centre it at the top of the model, group everything and export as an stl
Create the Pendant
![pic9.png](/proxy/?url=https://content.instructables.com/FZJ/JPLP/KL55TDL2/FZJJPLPKL55TDL2.png&filename=pic9.png)
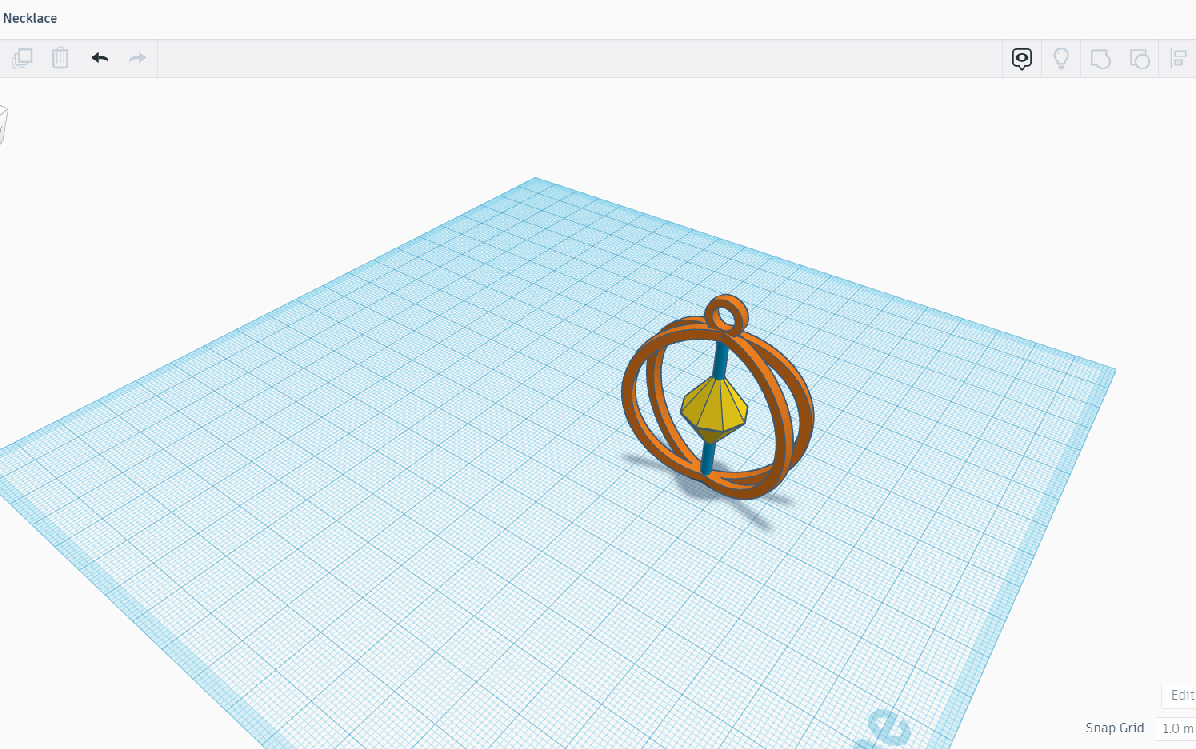
Create the pendant using the same technique but using only two cylinders at the beginning
Slicing Your Jewellery
![pic8.png](/proxy/?url=https://content.instructables.com/F1U/57HI/KL55TDLC/F1U57HIKL55TDLC.png&filename=pic8.png)
![pic10.png](/proxy/?url=https://content.instructables.com/F07/HXYJ/KL55TDL3/F07HXYJKL55TDL3.png&filename=pic10.png)
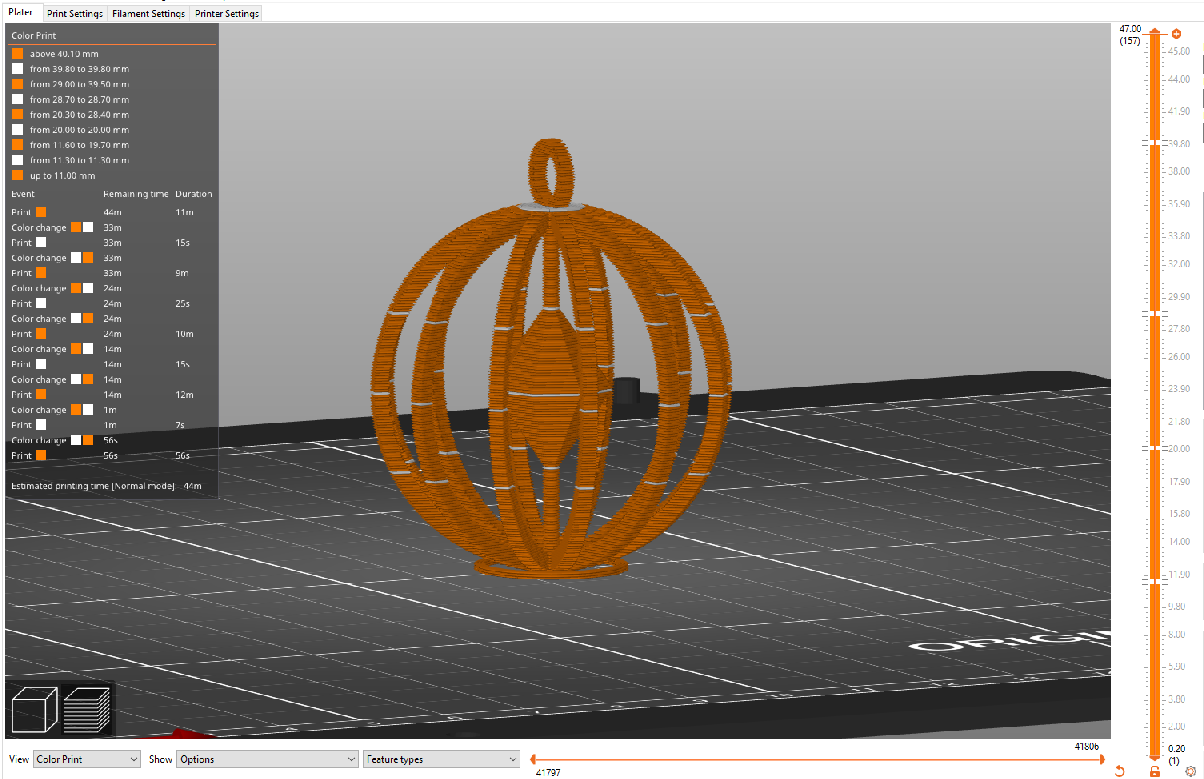
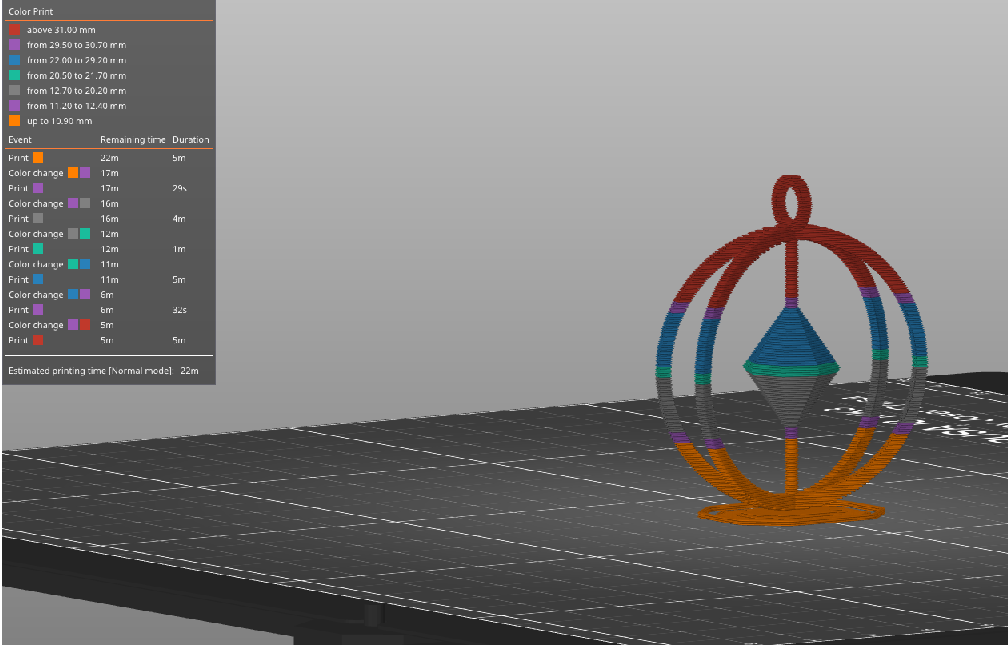
Slice your earrings and necklace, adding variety by including colour changes through the print
Print Your Jewellery
![pic11.jpg](/proxy/?url=https://content.instructables.com/F82/TO92/KL55TDL4/F82TO92KL55TDL4.jpg&filename=pic11.jpg)
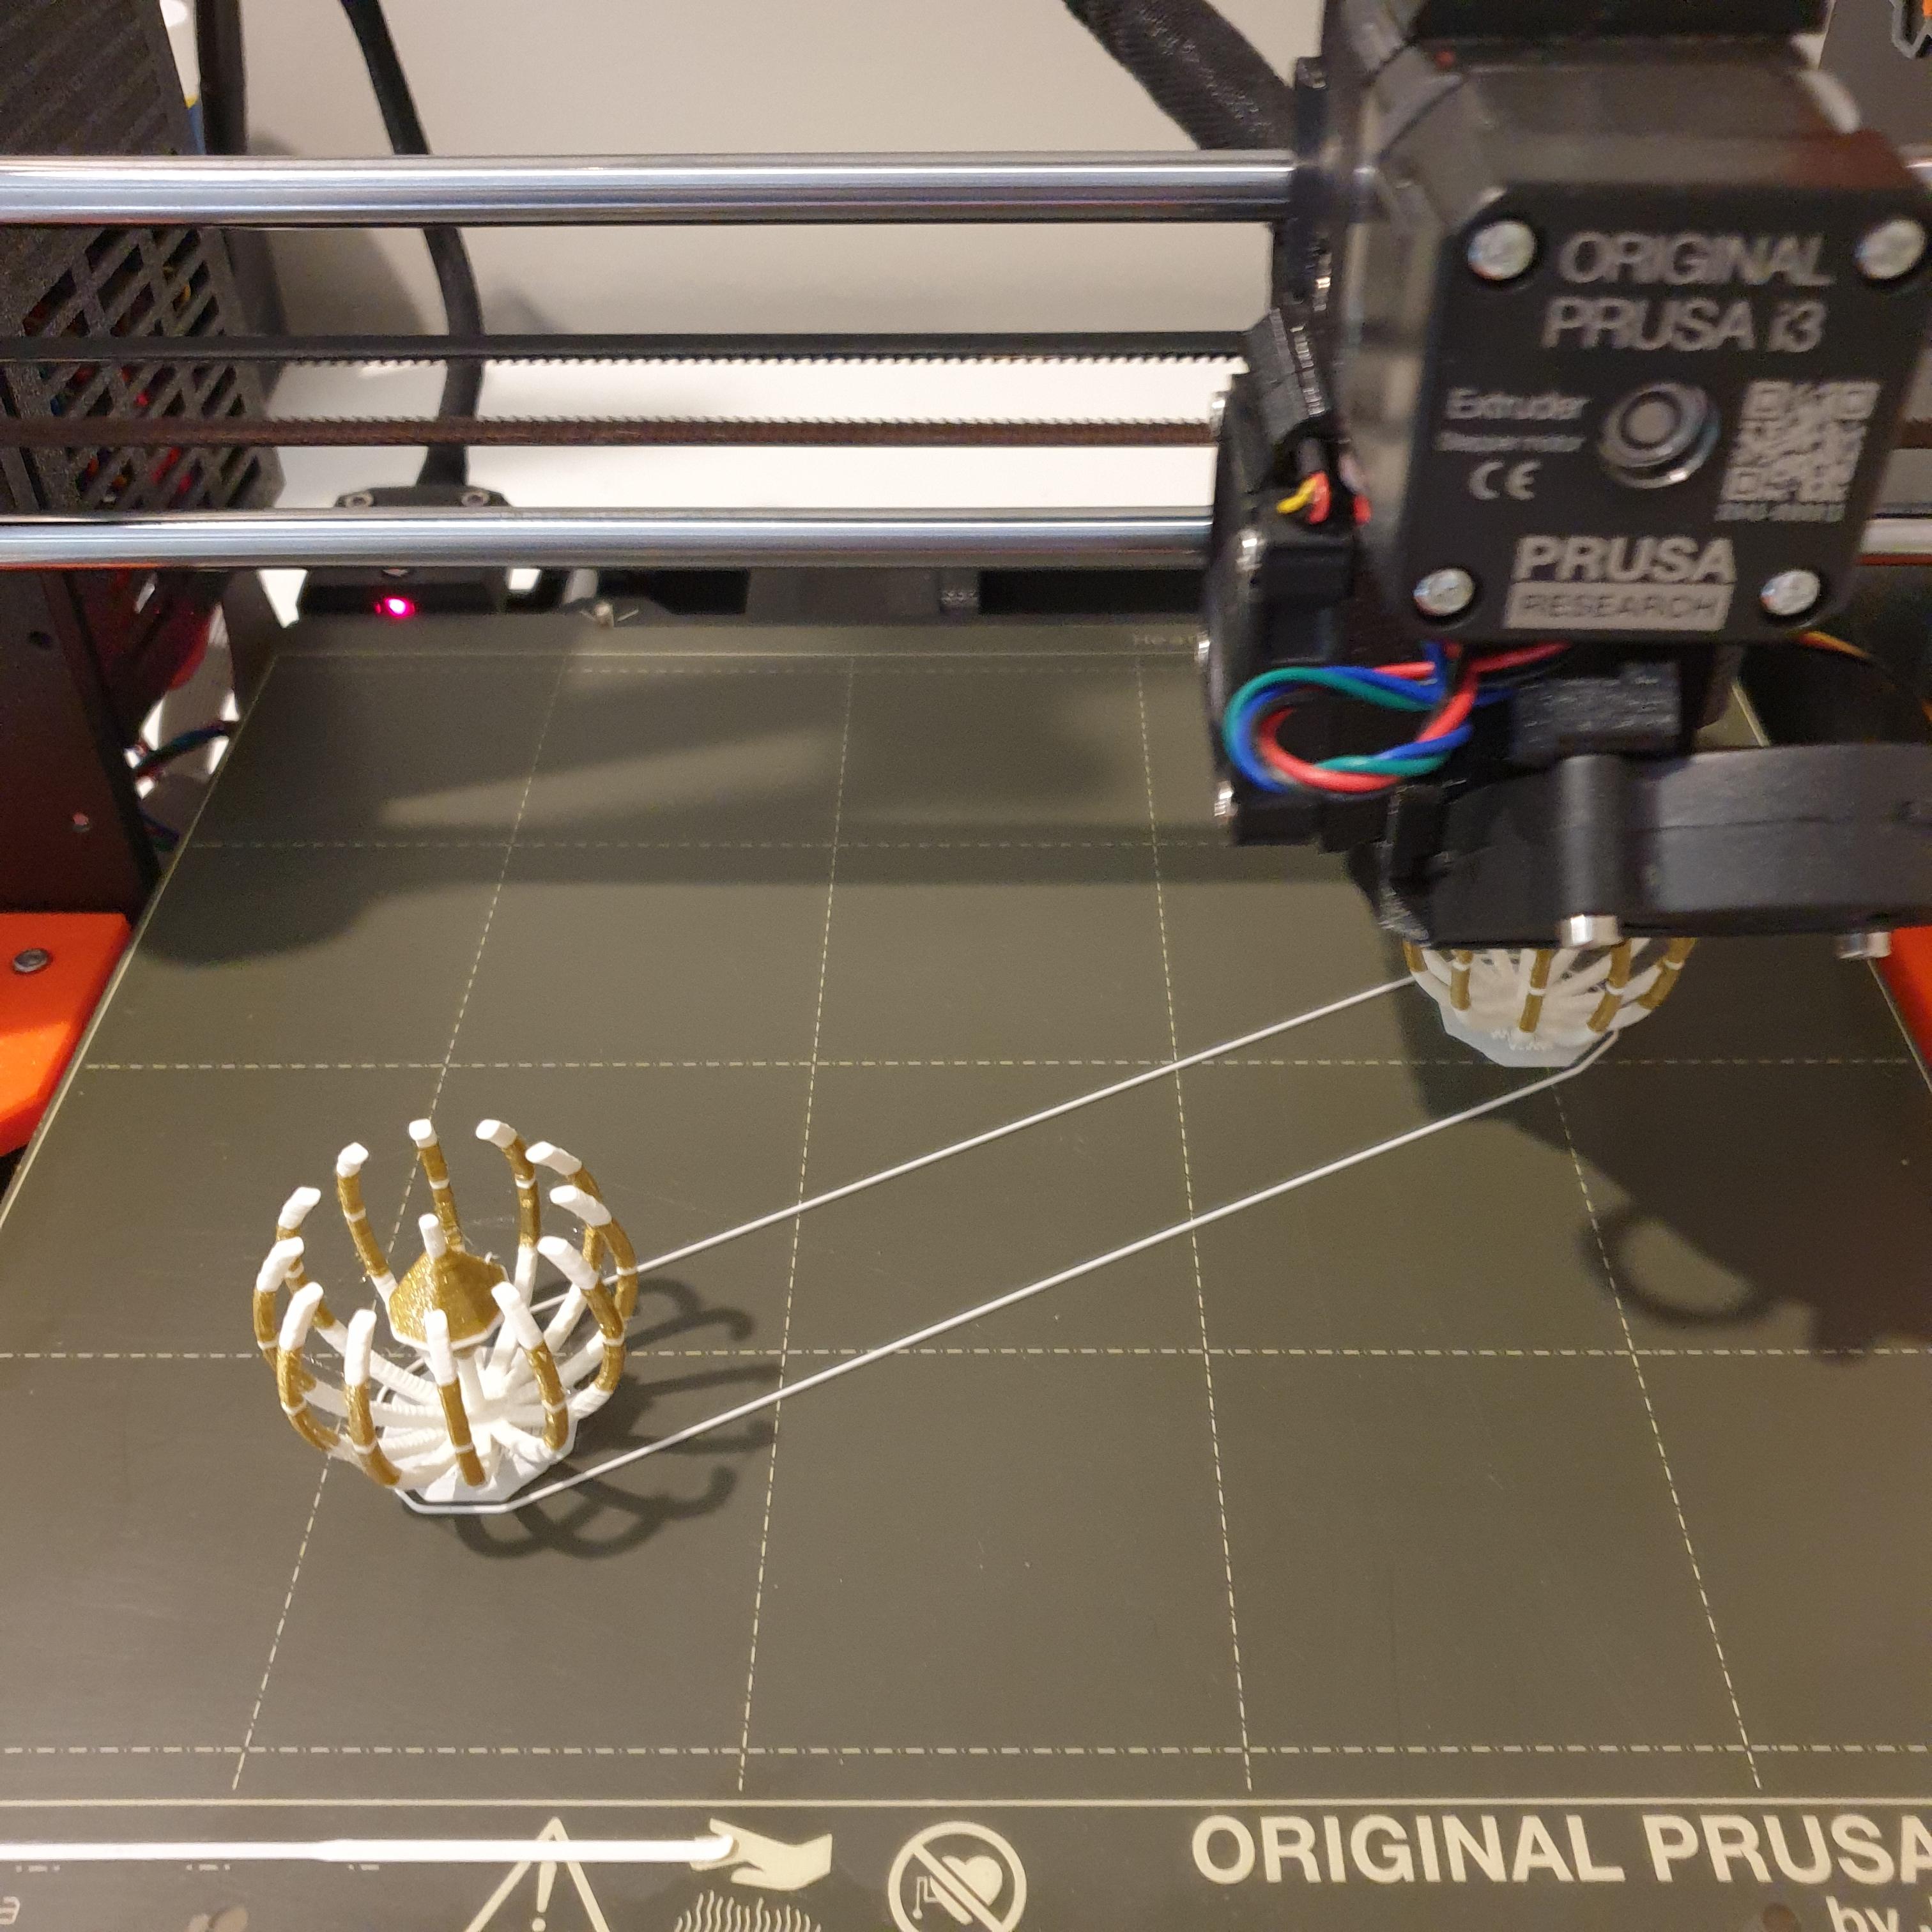
Print your jewellery
Both models print without supports, but I used a raft for extra stability
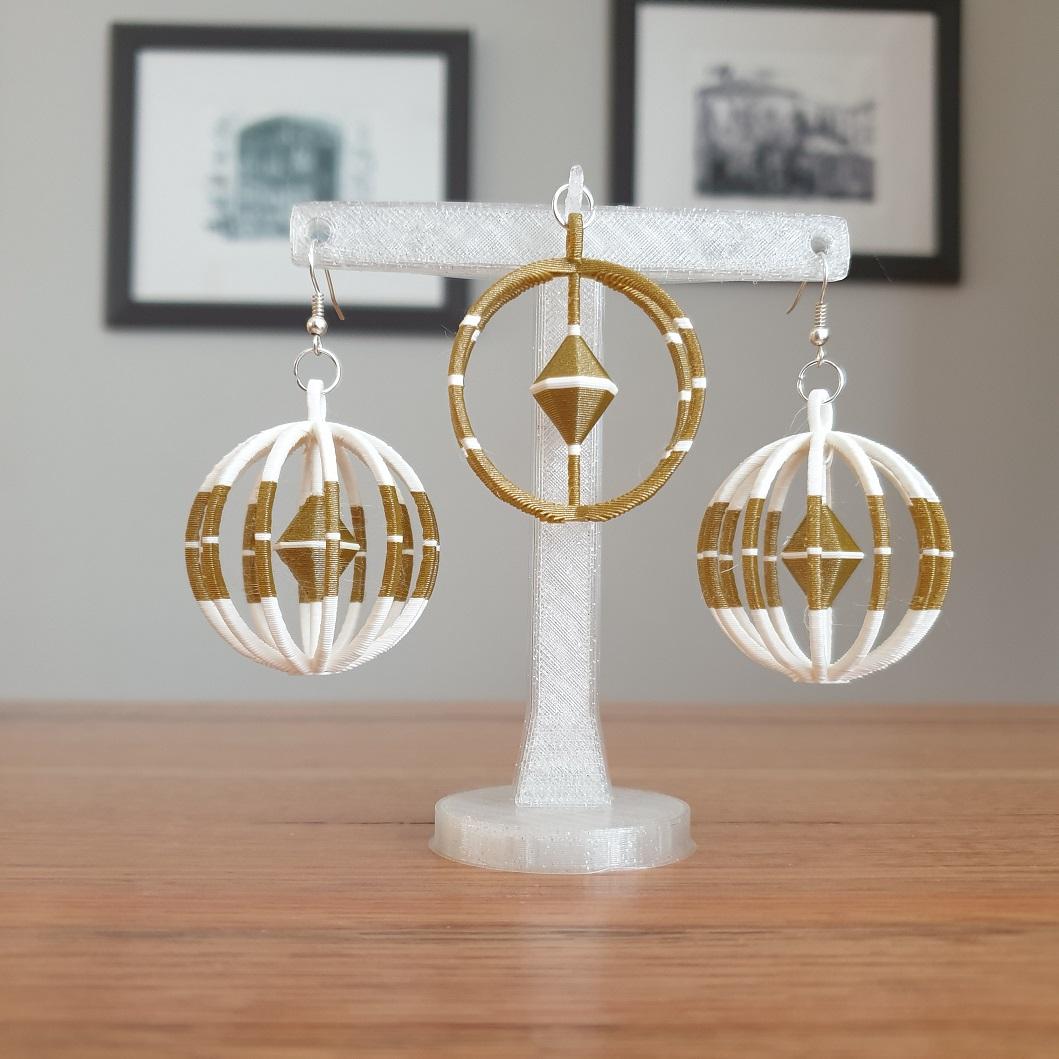
Enjoy Your Creation
![20210215_122215.jpg](/proxy/?url=https://content.instructables.com/FD6/RP8Q/KL55TEBE/FD6RP8QKL55TEBE.jpg&filename=20210215_122215.jpg)
![20210215_122348.jpg](/proxy/?url=https://content.instructables.com/FS2/E273/KL55TDL0/FS2E273KL55TDL0.jpg&filename=20210215_122348.jpg)
![20210215_121912.jpg](/proxy/?url=https://content.instructables.com/F03/LBRB/KL55TDL1/F03LBRBKL55TDL1.jpg&filename=20210215_121912.jpg)
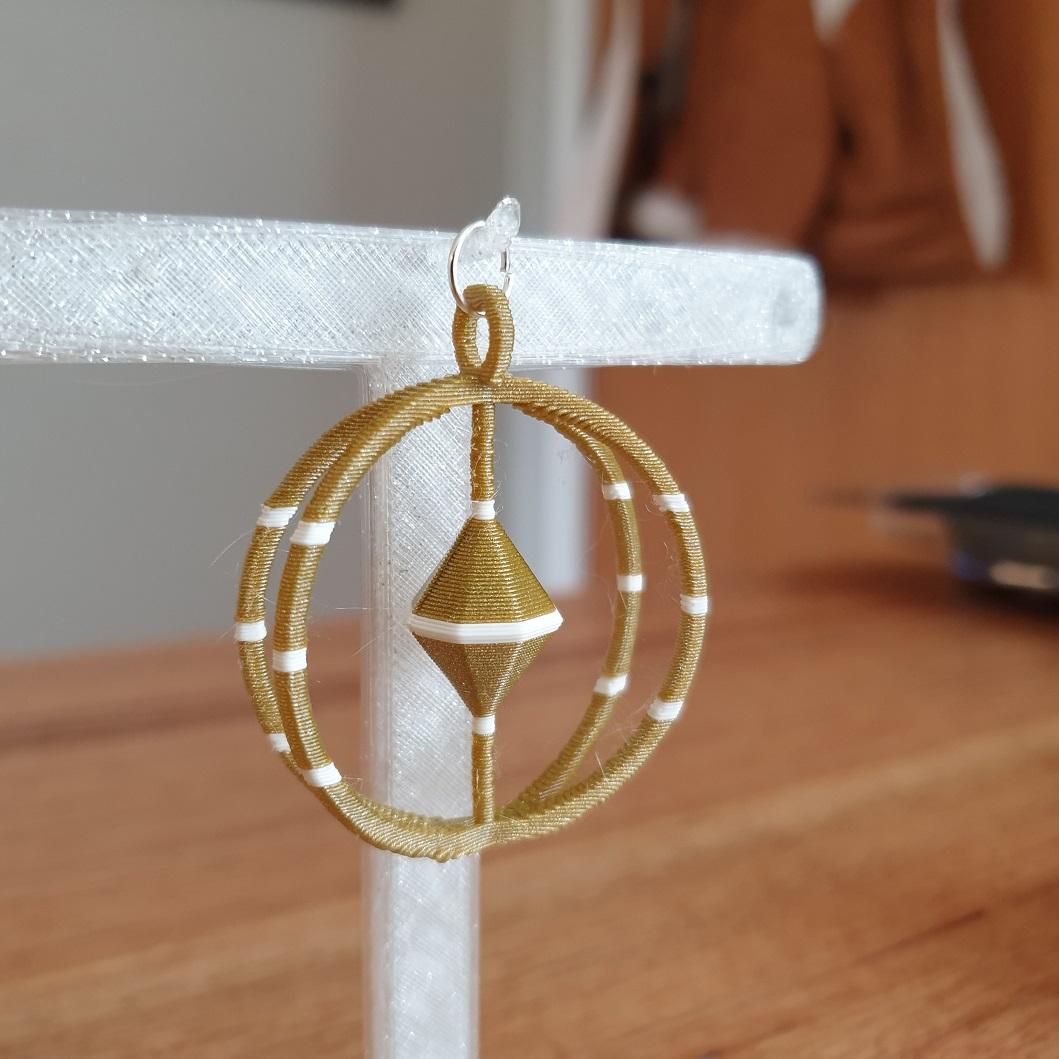
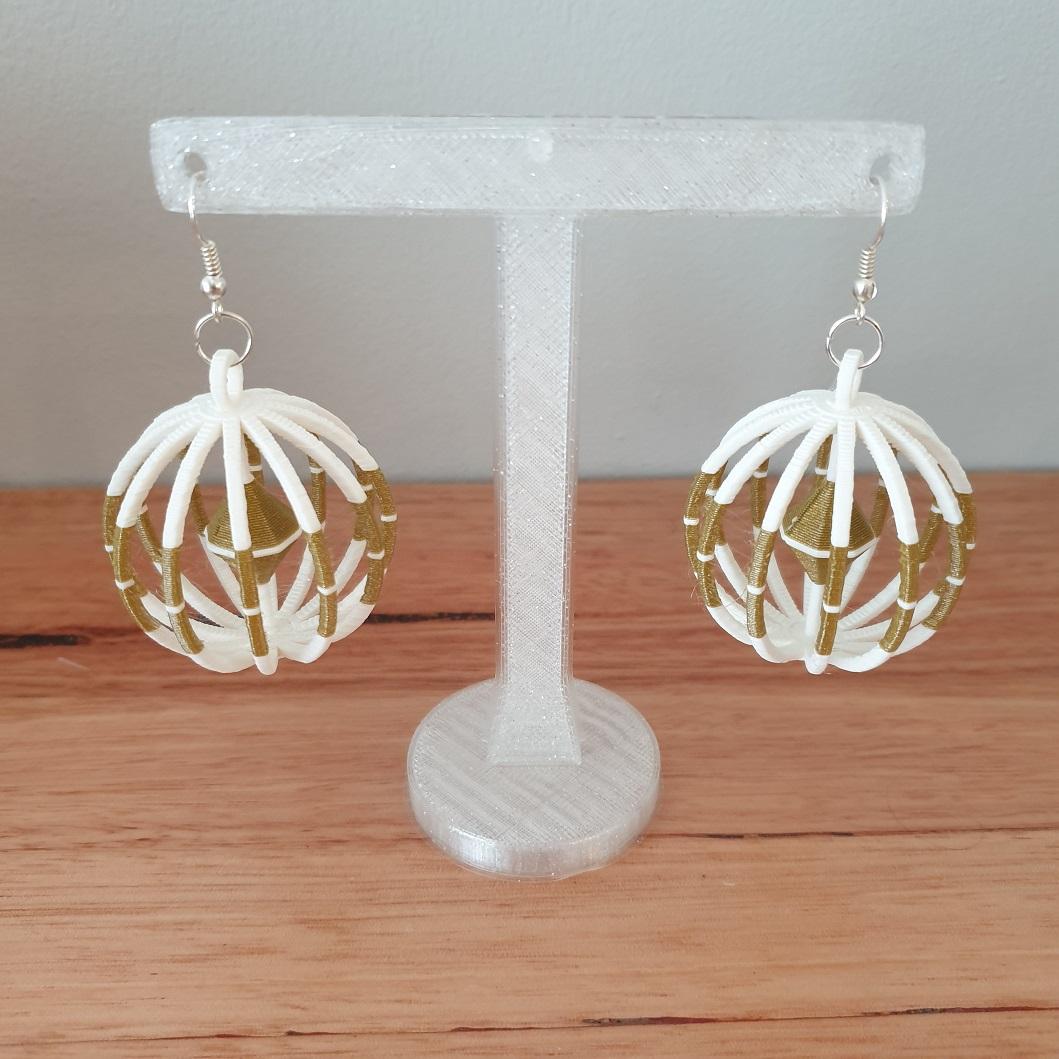
Ta Da, a beautiful pendant and earrings set to wear or give as a gift ๐
@3DPrintBunny