3D Printing on the Cheap
by youknowwho4eva in Workshop > 3D Printing
49137 Views, 177 Favorites, 0 Comments
3D Printing on the Cheap
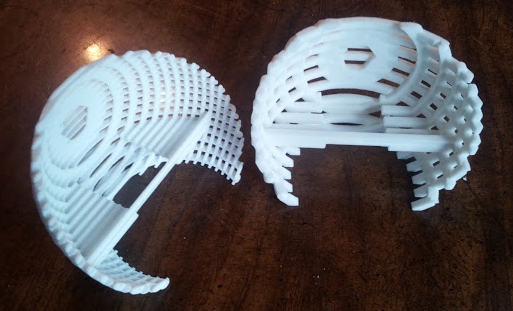
As some of you may know, 3D printing is getting cheaper, but it's still expensive. And most prices for prints are based on volume. So how do you cut the volume of your print to make it cheaper? You can make it hollow (if you don't know how, I'll show you my method) which can take a lot of price out. But I have an item that at it's cheapest was about $43. If you want to make an item that sells, that's a little pricey for an impulse buy. So how do you cut out even more volume without a lot of manual work? Well I used a tool in a way it's not exactly meant to be used. I'll show you how to use 123D Make to cut as much volume out of a model as you'd like.
What you'll need:
Computer with 123D Make (free!!)
Blender (the modeling program, not the smoothy maker. Also free!!) - optional
A 3D model (If you don't know how to make one, you can easily find one for free online)
A 3D printer or printing service. I'll be using Shapeways in my example as I'm most familiar with them.
Filler - Anything that you can fill your model with. I'm thinking colored wax would be awesome - optional
Please note, if you'd like to make an even cheaper prototype, check out my instructable on prototyping on the cheap.
Optional Hollowing Step
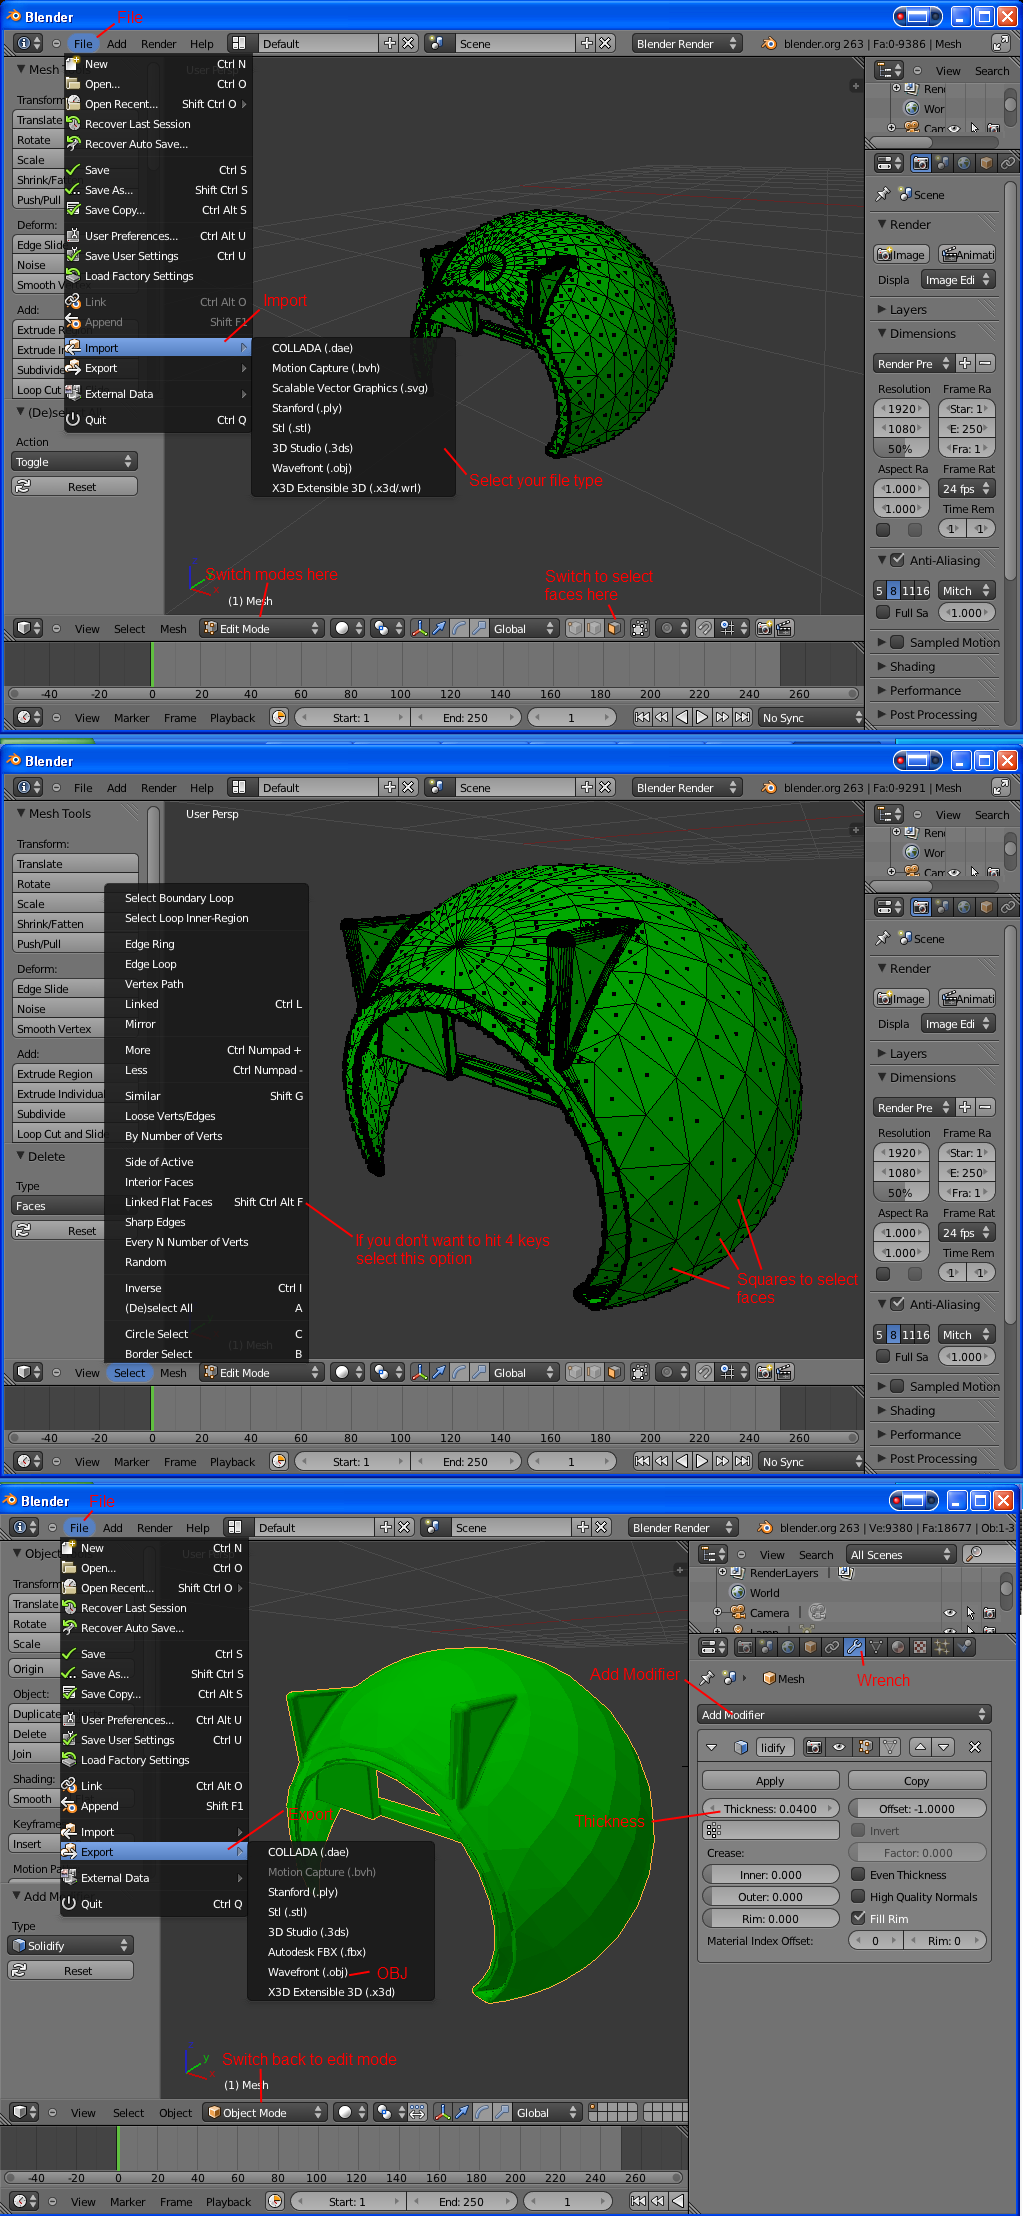
A big key to limiting the price of your 3D print is making your item hollow. To do this I use Blender. I'm terrible at Blender, and every time I get used to doing something, they update it. But this method works for me. I'm going to write this for someone that has never used Blender before.
Right click the cube that pops up when you open Blender. Hit the Delete key and click Delete on the popup that comes up. File>Import your model. Right click your model. At the bottom of the window will be a select box that says Object Mode. Click it and select Edit mode. Hit the A key to deselect all. Now at the bottom of the screen there are 3 boxes that have cubes. The first box is selected with a point on the corner of the cube. Got to box 3 (the one with a face of the cube highlighted) and select it.
Almost there, now zoom into your model and select any face where you are making your opening. Right click the square in the center of the face to select it. If the face is part of a flat surface that you wish to make the opening, hold Ctrl, Alt, Shift, and press F. This will select all linked faces on that plane. Hit the Delete key, this time there will be more options other than just delete. This time click Faces
Switch back to Object Mode, and right click your model again. On the right side are a set of tools. Click the wrench (When you mouse over, it says Object Modifiers). A drop down will appear that says Add Modifier, Click that and select Solidify. A new box will pop up, click inside the Thickness field and set your thickness to the minimum thickness allowed for your material. For my example, we're aiming for Shapeways WSF which has a minimum thickness of .7mm. This is a larger model, so to be on the safe side we'll aim for 1mm. Which to be even safer (and because I use inches) I'll use .04 inches. Note that Blender units are what ever your imported model is. Click Apply, then File>Export your model as an OBJ.
Import Into 123D Make
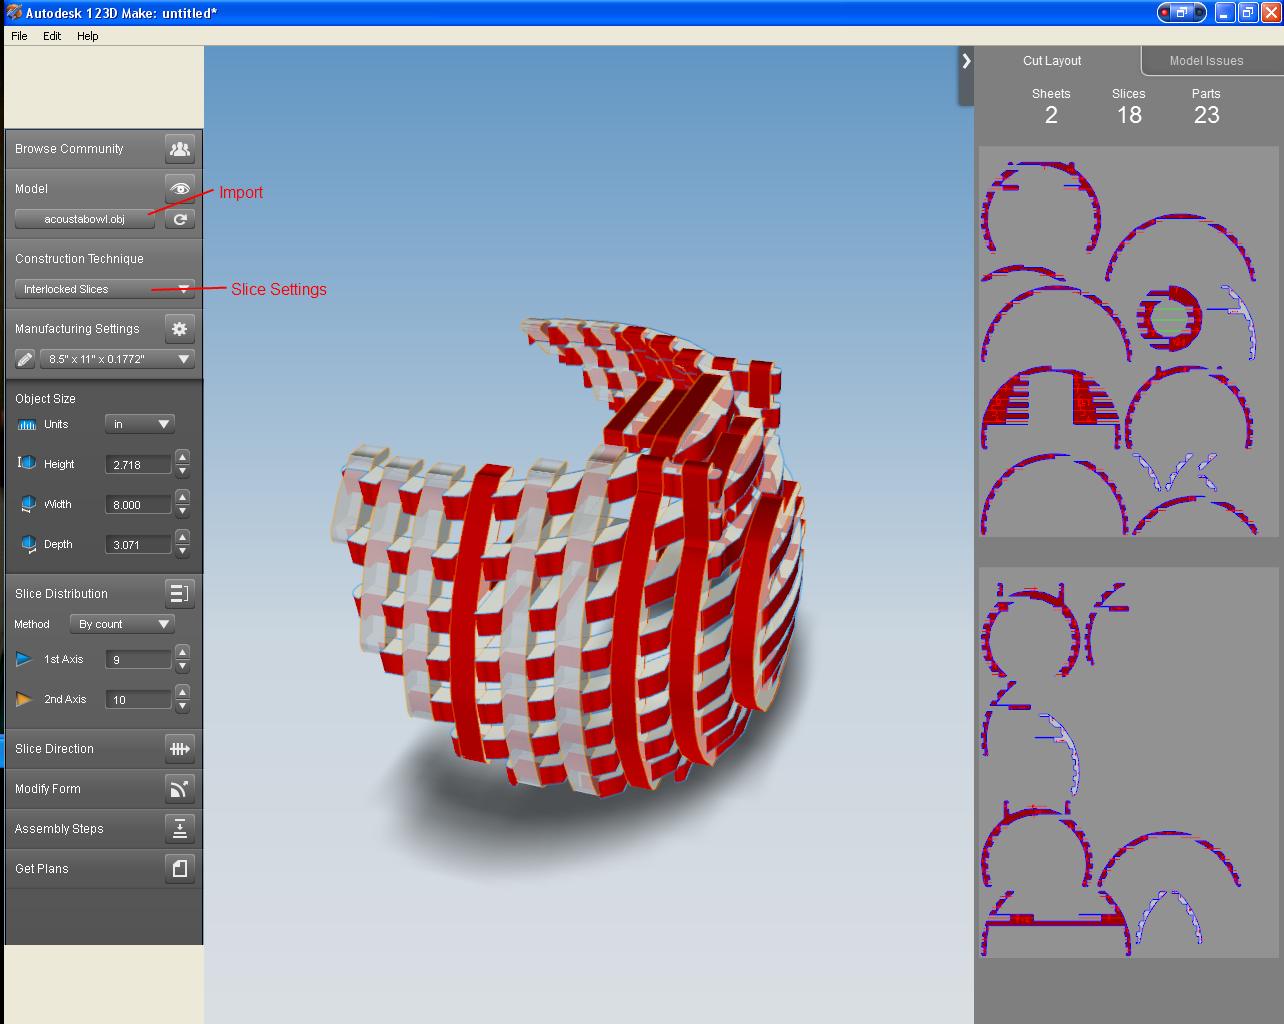
If you went through Step 1 you already have an OBJ. If not, you'll need an OBJ for this step. As long as it's an open file type you should be able to import it into Blender, Netfabb, or Meshlab (all free programs) and be able to export it out to OBJ. Now that you have your OBJ open up 123D Make and import it. There is a button on the left that says Import..., click that and select the file. Once it's uploaded, you'll be able to select your Construction Technique. Play with them all, see what looks best and works for you. For my example, I used Interlocked Slices. Now you can set up your material.
Setting Materials
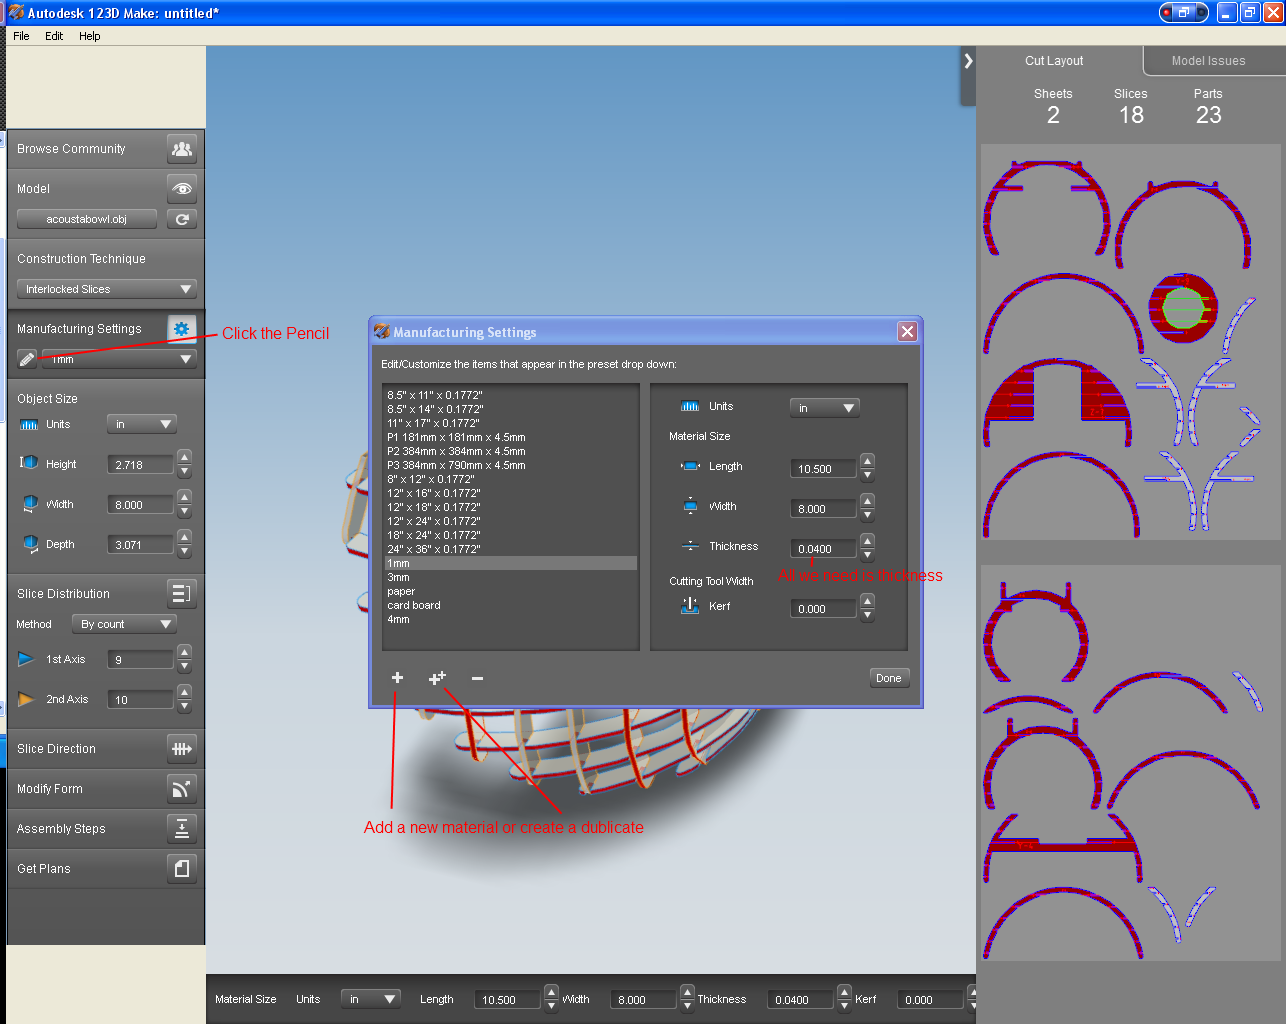
Now we have to set our material. Click the pencil under Manufacturing Settings. A menu will pop up with different preset materials. You can either select an existing material by right clicking, then create a duplicate with the double pluses, or just click the lone plus to make a new material. Set your units, and set your material size. The only piece that matters to us is the Thickness. Set this to the minimum thickness of the material you are printing with. If you didn't go through the optional hollowing section, for my example I'm aiming for Shapeways WSF material. The material has a minimum wall of .7mm. This item is a little big and I want it to be a little sturdier, so I'm going to aim for 1mm. Now because I use inches and to add a little bit of thickness, I'll round that up to .04 inches. Now that you have your material set up, hit done. Now select your new material from the drop down list, next to the pencil under Manufacturing Settings.
Export 3D Mesh
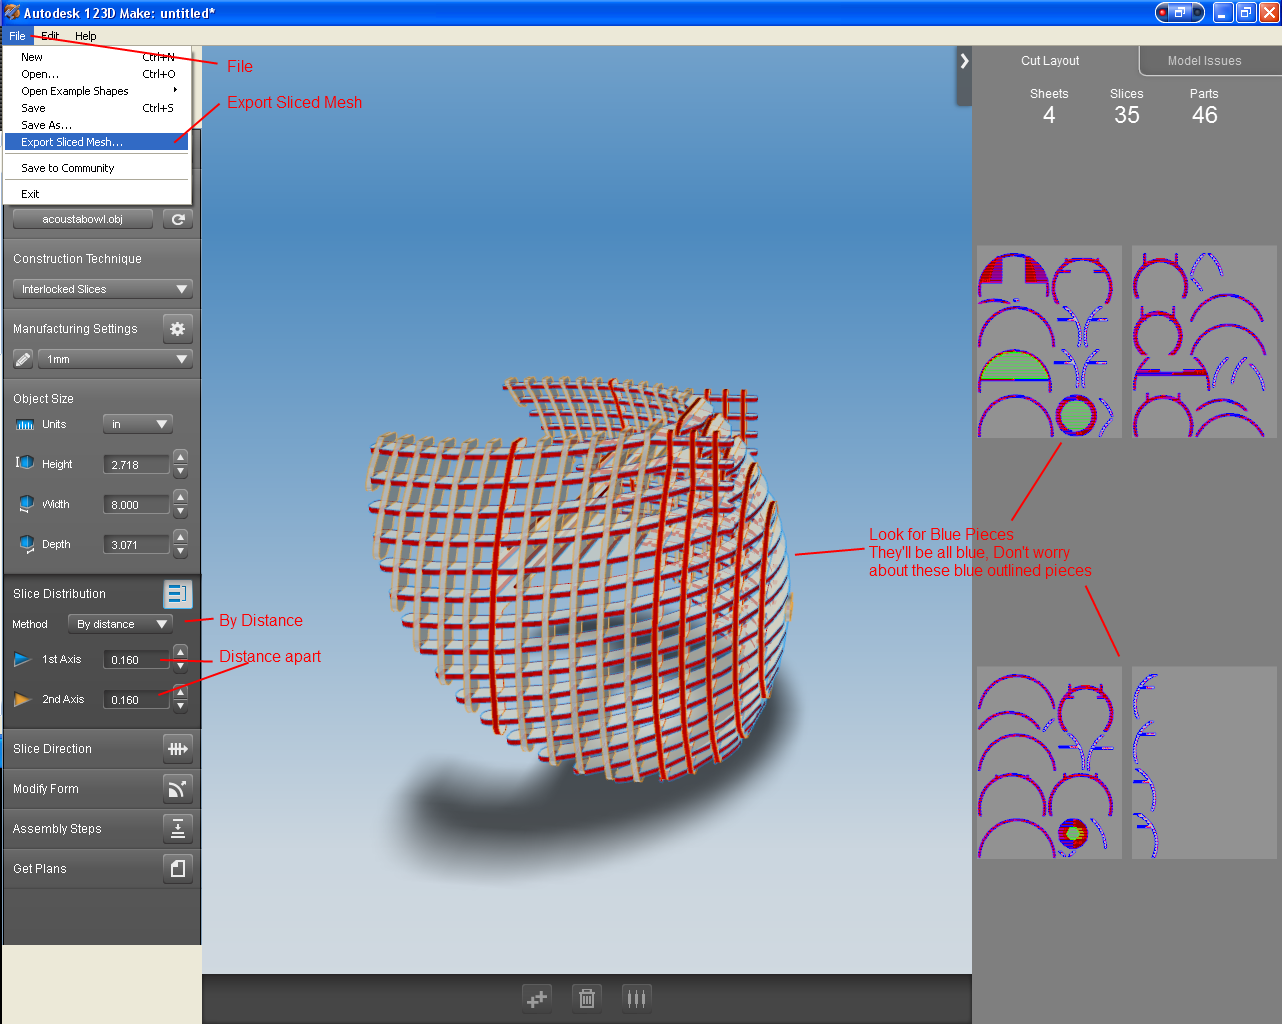
Now, if you read my Prototyping on the Cheap Instructable, your probably thinking this is the same thing! Well now we're going to change things up, to setup for printing in 3D. On the left side of the screen you'll have a Slice Distribution box. Currently the method is set to By count. Which you can use, but I want to make sure my slices are a set distance apart (greater than the minimum for the material but also not giant). So I'm going to switch from By count to By distance. Key thing to note here, the distance is NOT the distance apart. Don't believe me? Set the distance to the same as the thickness of your material. There will be no gap. The distance is an offset from the previous piece. For WSF the minimum gap is .5mm. That's fine and dandy, but I won't be saving much in material with that small of a gap. Lets go with 3mm. Remember I'm a lazy American here so I'm going to say 3mm is about .12 inches. Don't forget we have to add the thickness of our material as well. Mines set to .4 inches so I'll set the distance at .16 inches. Now do a visual inspection of you model. The slice profile will show you pieces that are floating without touching anything by making them Blue. The Red Pieces are pieces that would or could have issues when cutting it out. Seeing we're printing, not cutting, ignore the red. Now it's as easy as File>Export Sliced Mesh
Upload Your File
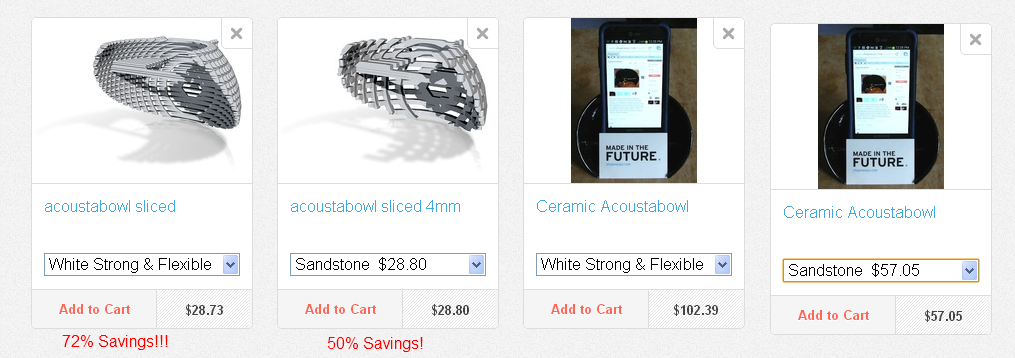
Now you have an OBJ file from 123D Make, you can take it back into a modeling software to edit it up, or can go ahead and upload it. There are several sites that offer 3D printing services. Google it, find the one you like best. I don't want to show bias so I'm not going to show how to upload your parts. I will show you an example of the price savings though through Shapeways as they are my printer of choice, and to show that using this works. You'll see that a non-sliced model in WSF is $102.39!!! Wow pricey for an acoustic stand for a phone (which is what my item is). You'll see I have 2 different versions of the sliced model up. One is designed for Sandstone which requires 3mm walls, and one designed for WSF as I've shown you how to produce. With this technique the one designed for Sandstone is $28.80, and the one designed for WSF is $28.73. These models are not hollowed like I showed in the Optional step 1. Doing that would make them even cheaper!
Final Product
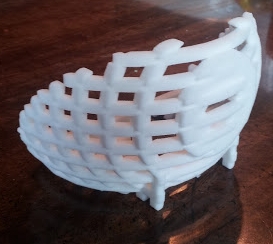
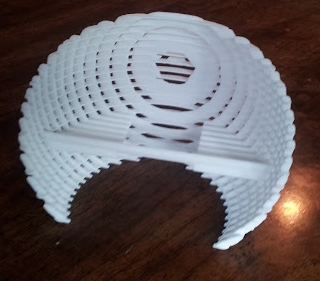
After printing, you have your final product, ready to be filled, surfaced, coated, etc. What ever you feel like doing. I'm going to try to fill my models with some wood filler. May go with something clear though, as they look really cool sliced up. Have fun with your discounted prints!