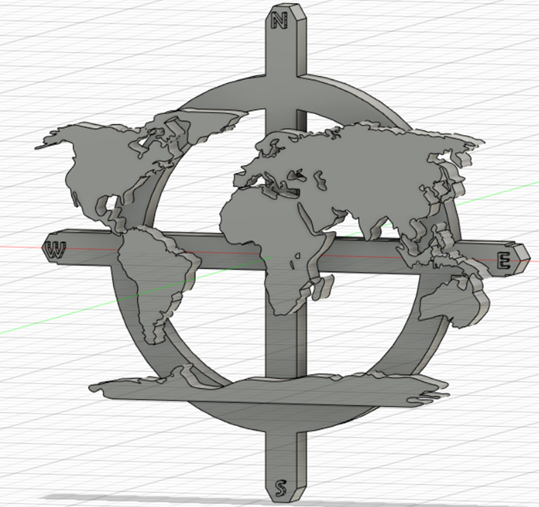
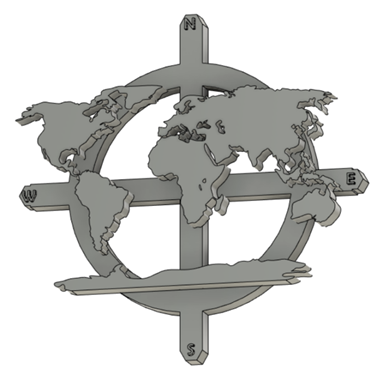
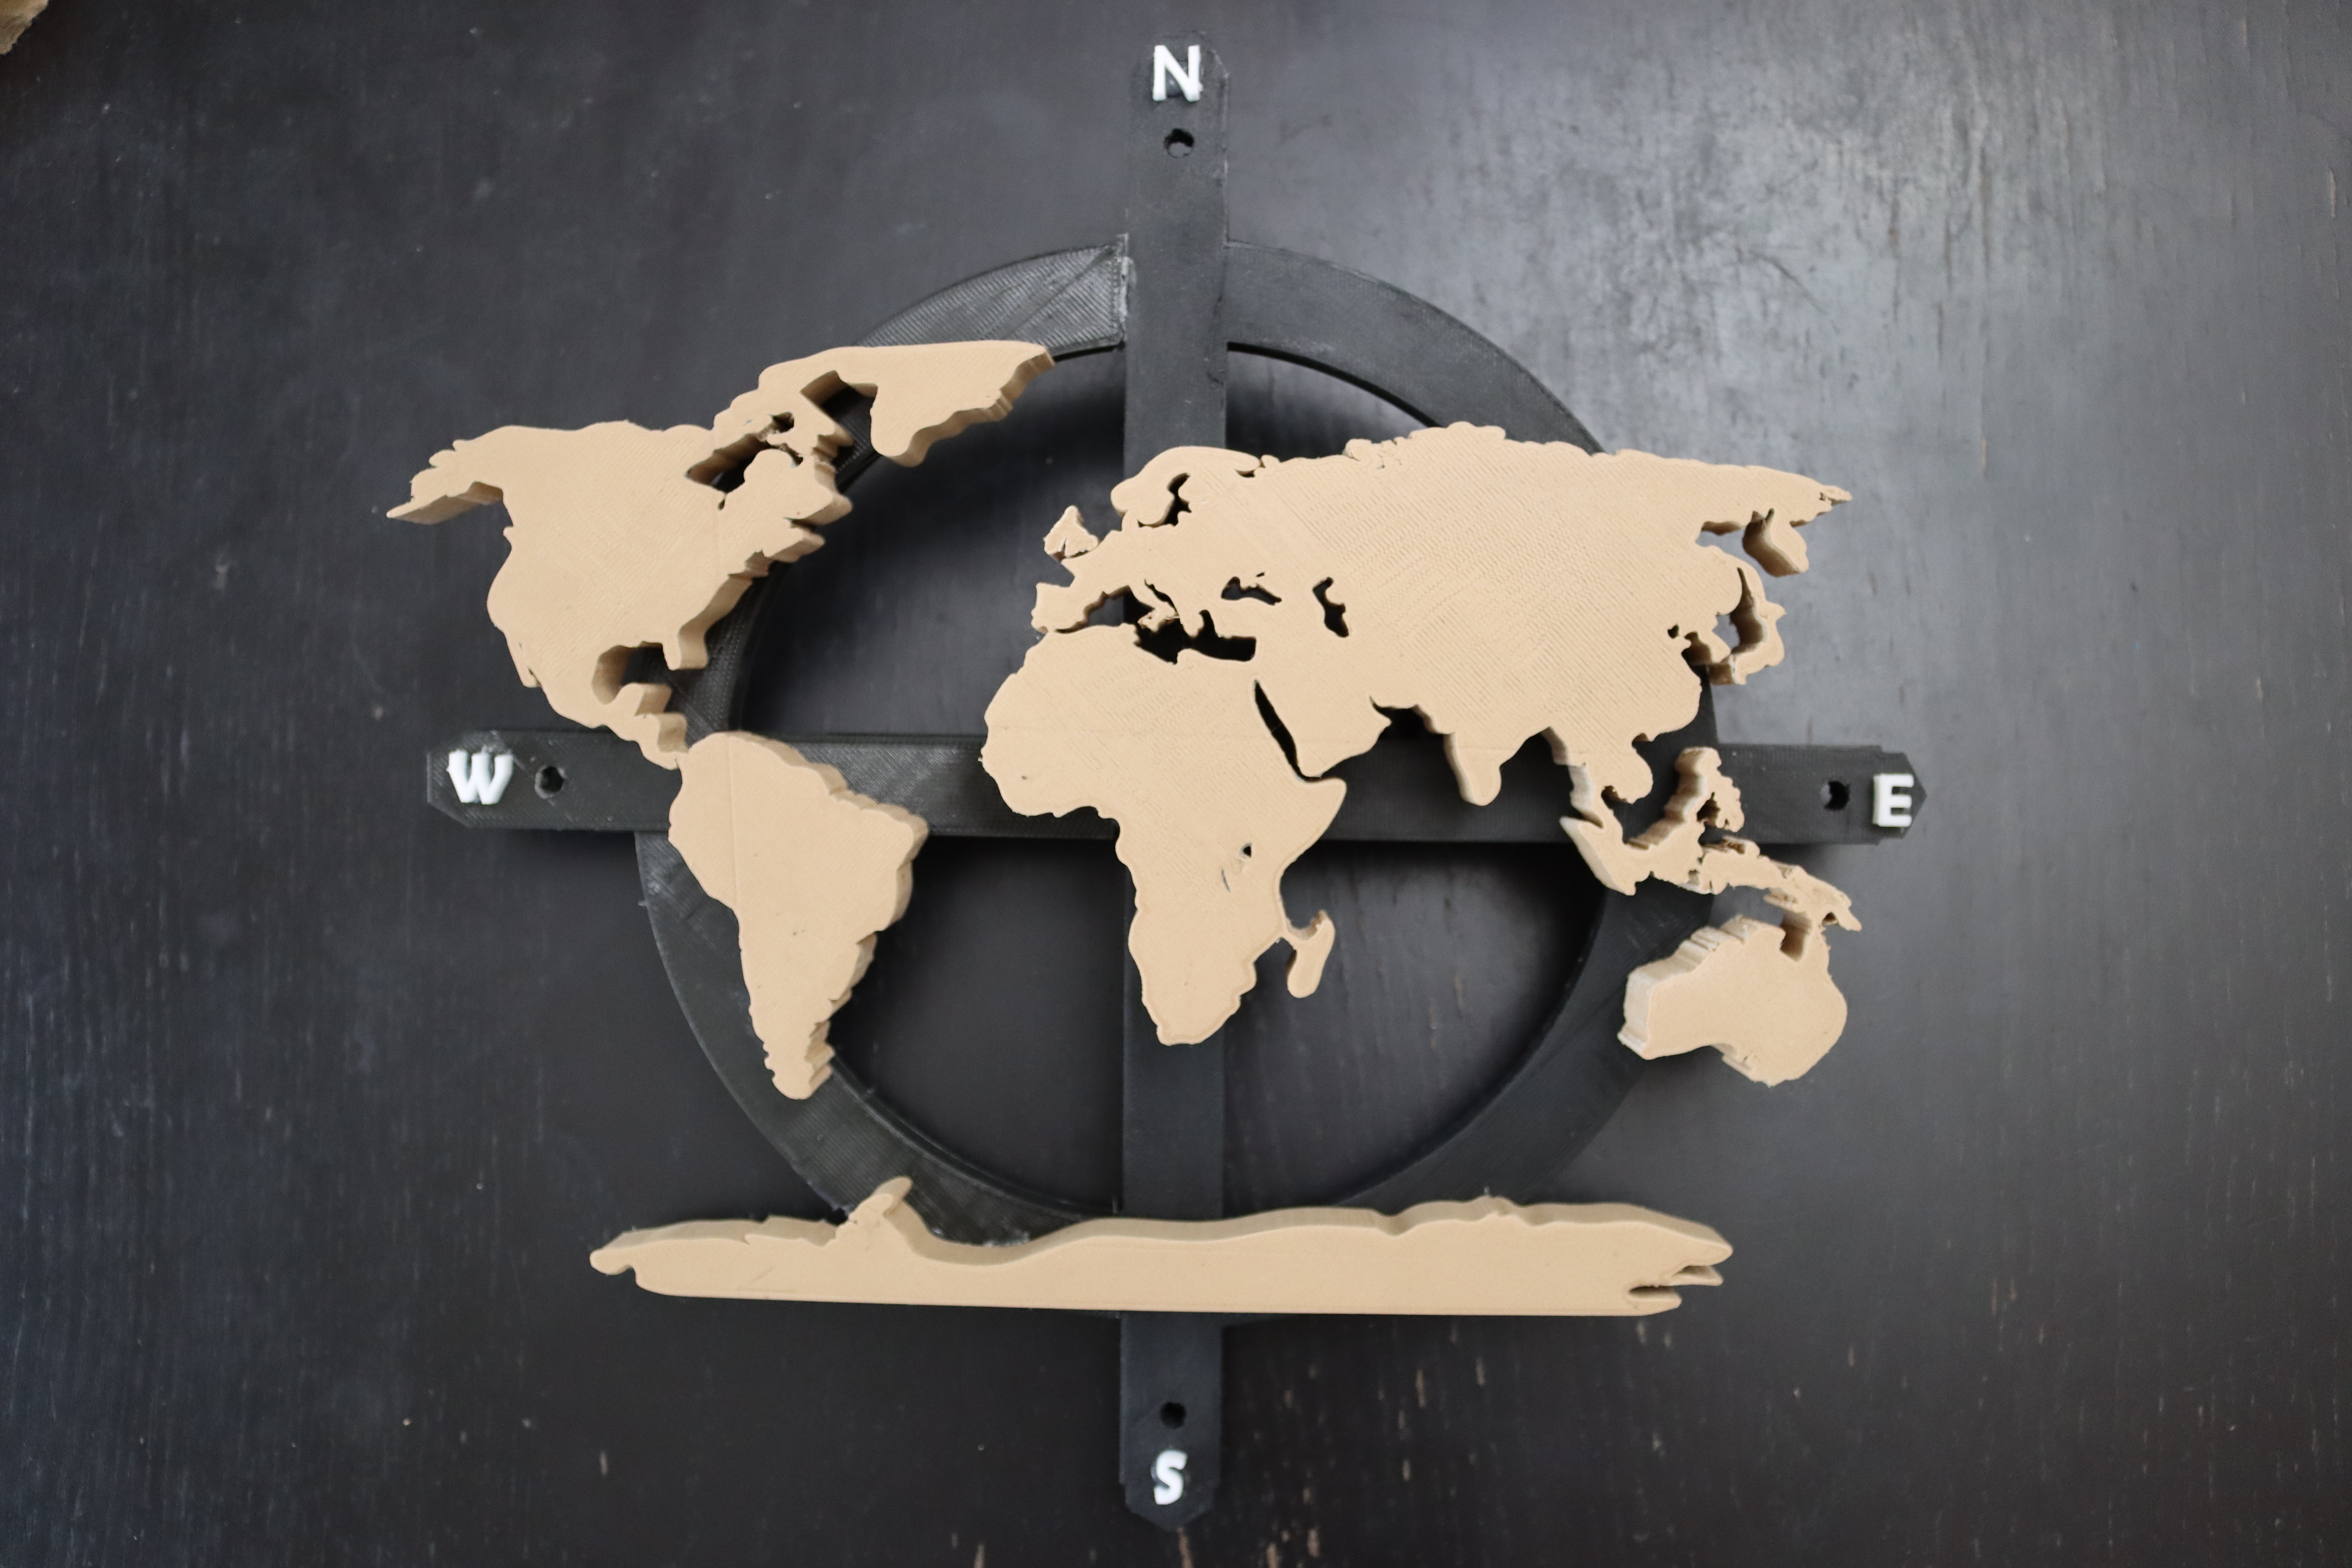
3D Printed World Map Wall Art (Made in Fusion 360)
by Charles Projects in Workshop > 3D Printing
4887 Views, 46 Favorites, 0 Comments
3D Printed World Map Wall Art (Made in Fusion 360)
I am always delighted with any kind of world map. Why do not I make a world map with 3D printing? Therefore, I participate in this contest to create a world map art wall with some lights effects. I do not have any sophisticated electronic things, but I want my world map art wall is prettier with some lights. So, I make up my mind to use the glowing circuit, which is provided in Tinkercad. I want to share my project, so others with a little background of electronics and circuits can make things beautiful. No more further ado, let's get started this project.
If you want to download the design, click Cults3d.
Disclaimer:
This is only for fun wall art project. Some small islands are excluded in this project, because I want to make a simple world map art wall. If you want to add them, feel free to add it in your design.
Supplies
Computer
Fusion 360
Tinkercad
3D Printer Dremel 3D40
3D slicer Dremel Digilab
PLA Filament (Wood, white, see-through-blue, and Black)
Hot Glue
Black spray paint
Sandpaper
Phillips Screwdriver
4 LEDs
4 Coin cell batteries- CR2032
Lip Balm
Alcohol 70%, for cleaning after sanding
Preparation for Map Sketch
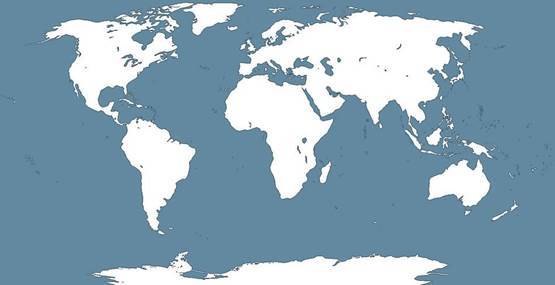
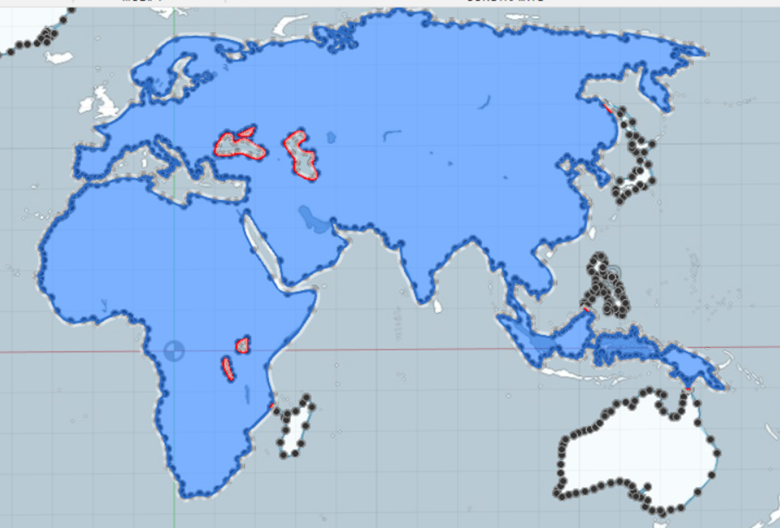
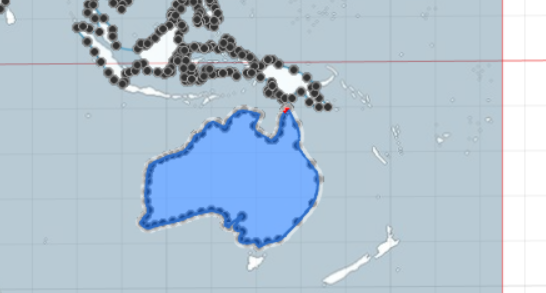
When working with Fusion 360, it is very easy when you use a sketch. You can sketch by hand with your imagination or you can sketch by tracing the image. For this project, I choose to make sketch by tracing the image that I found in Google search. Click here for the map's image.
Sketching the Map-Pt.1
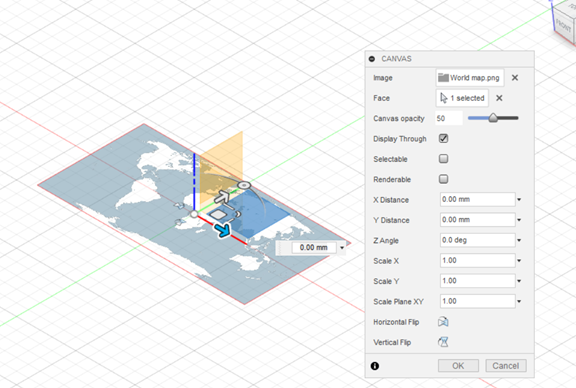
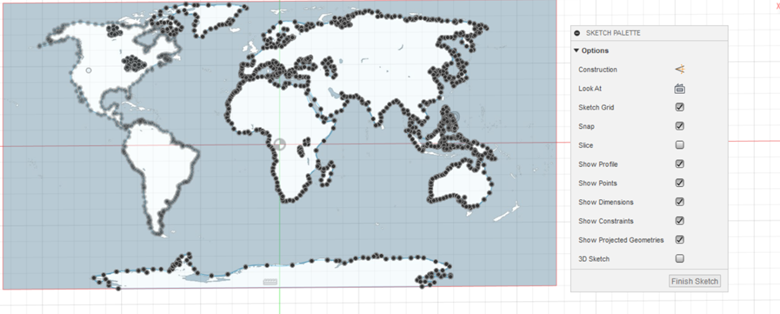
For drawing the sketch of the world map, save the previous image to .png or .jpg file. Open Fusion 360, insert canvas. Select the image of the world map and click the plane. Play around with the option in canvas. Usually, I only change the canvas capacity. Leave others as it is.
Sketching the Map-Pt.2
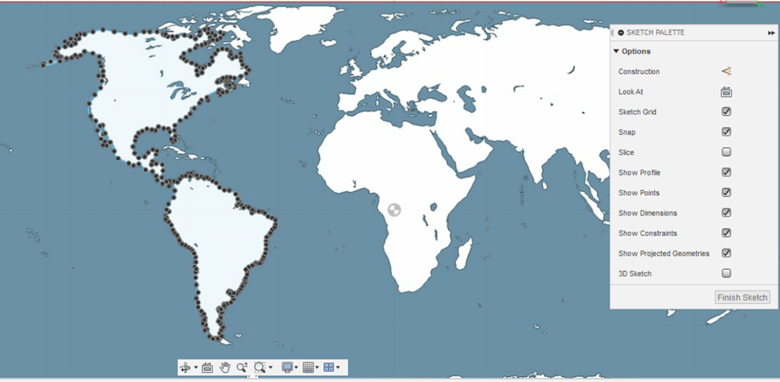
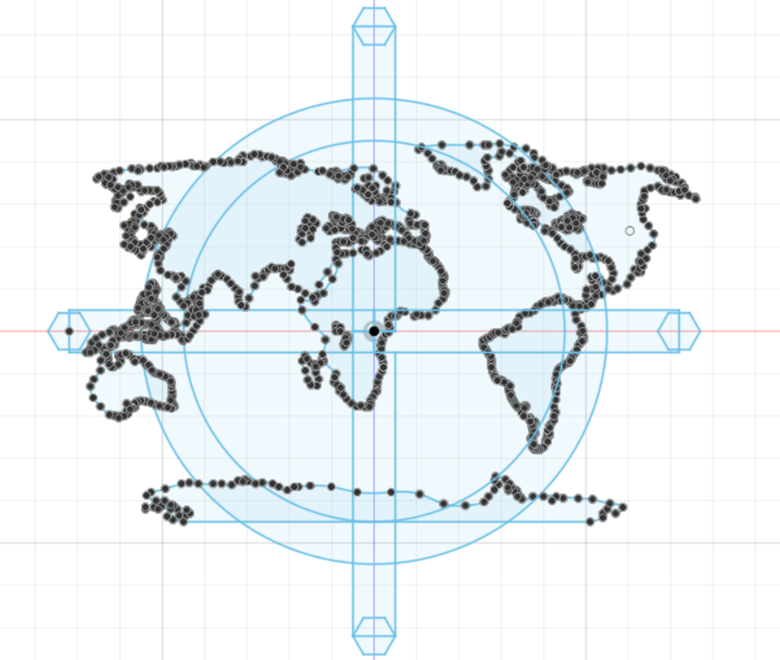
Click create sketch and select the plane. By using fit point spline, just trace all the coastlines of every continent one by one. Make sure all the points should be connected.
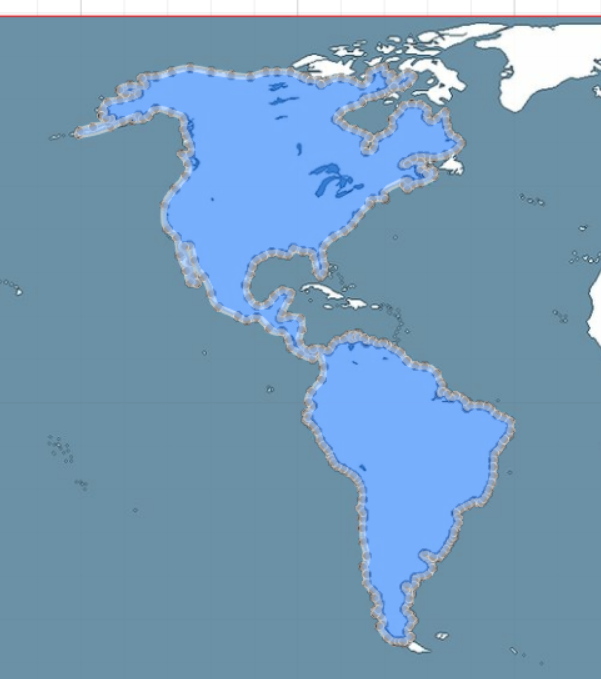
Sketching the Map-Pt.3

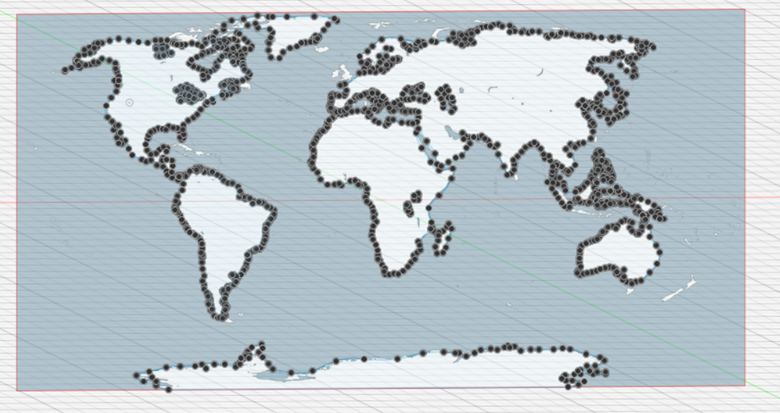
Sketch it for all the continents from the map. Finish the sketch.
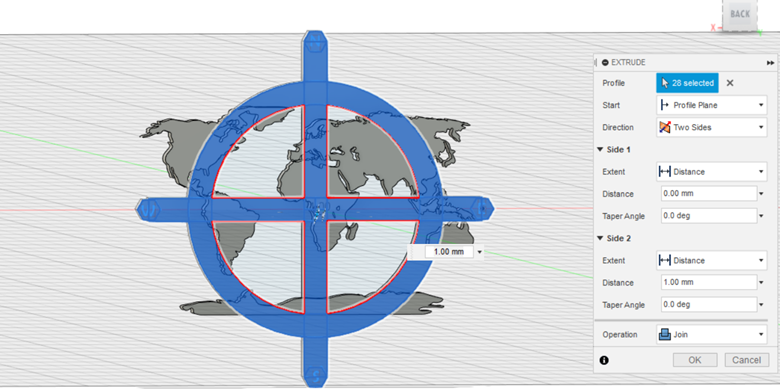
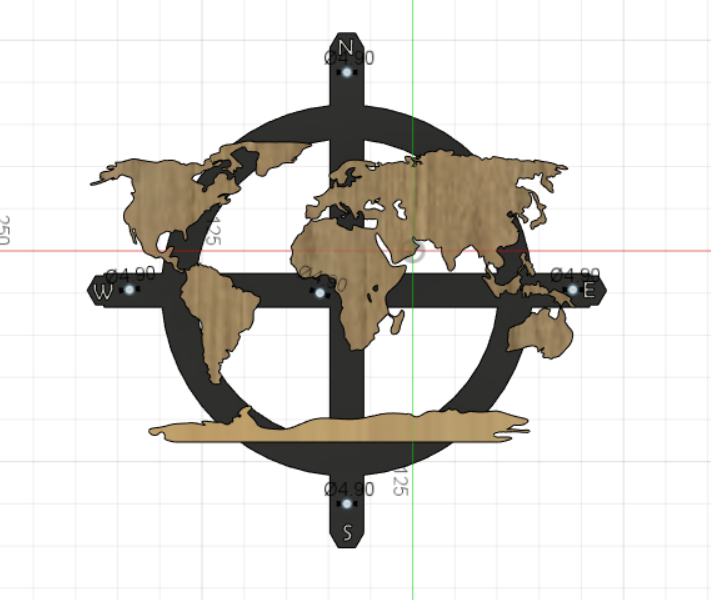
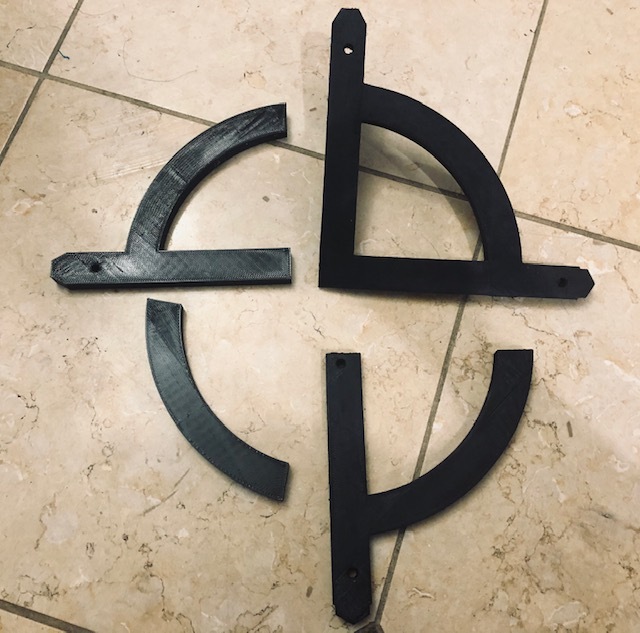
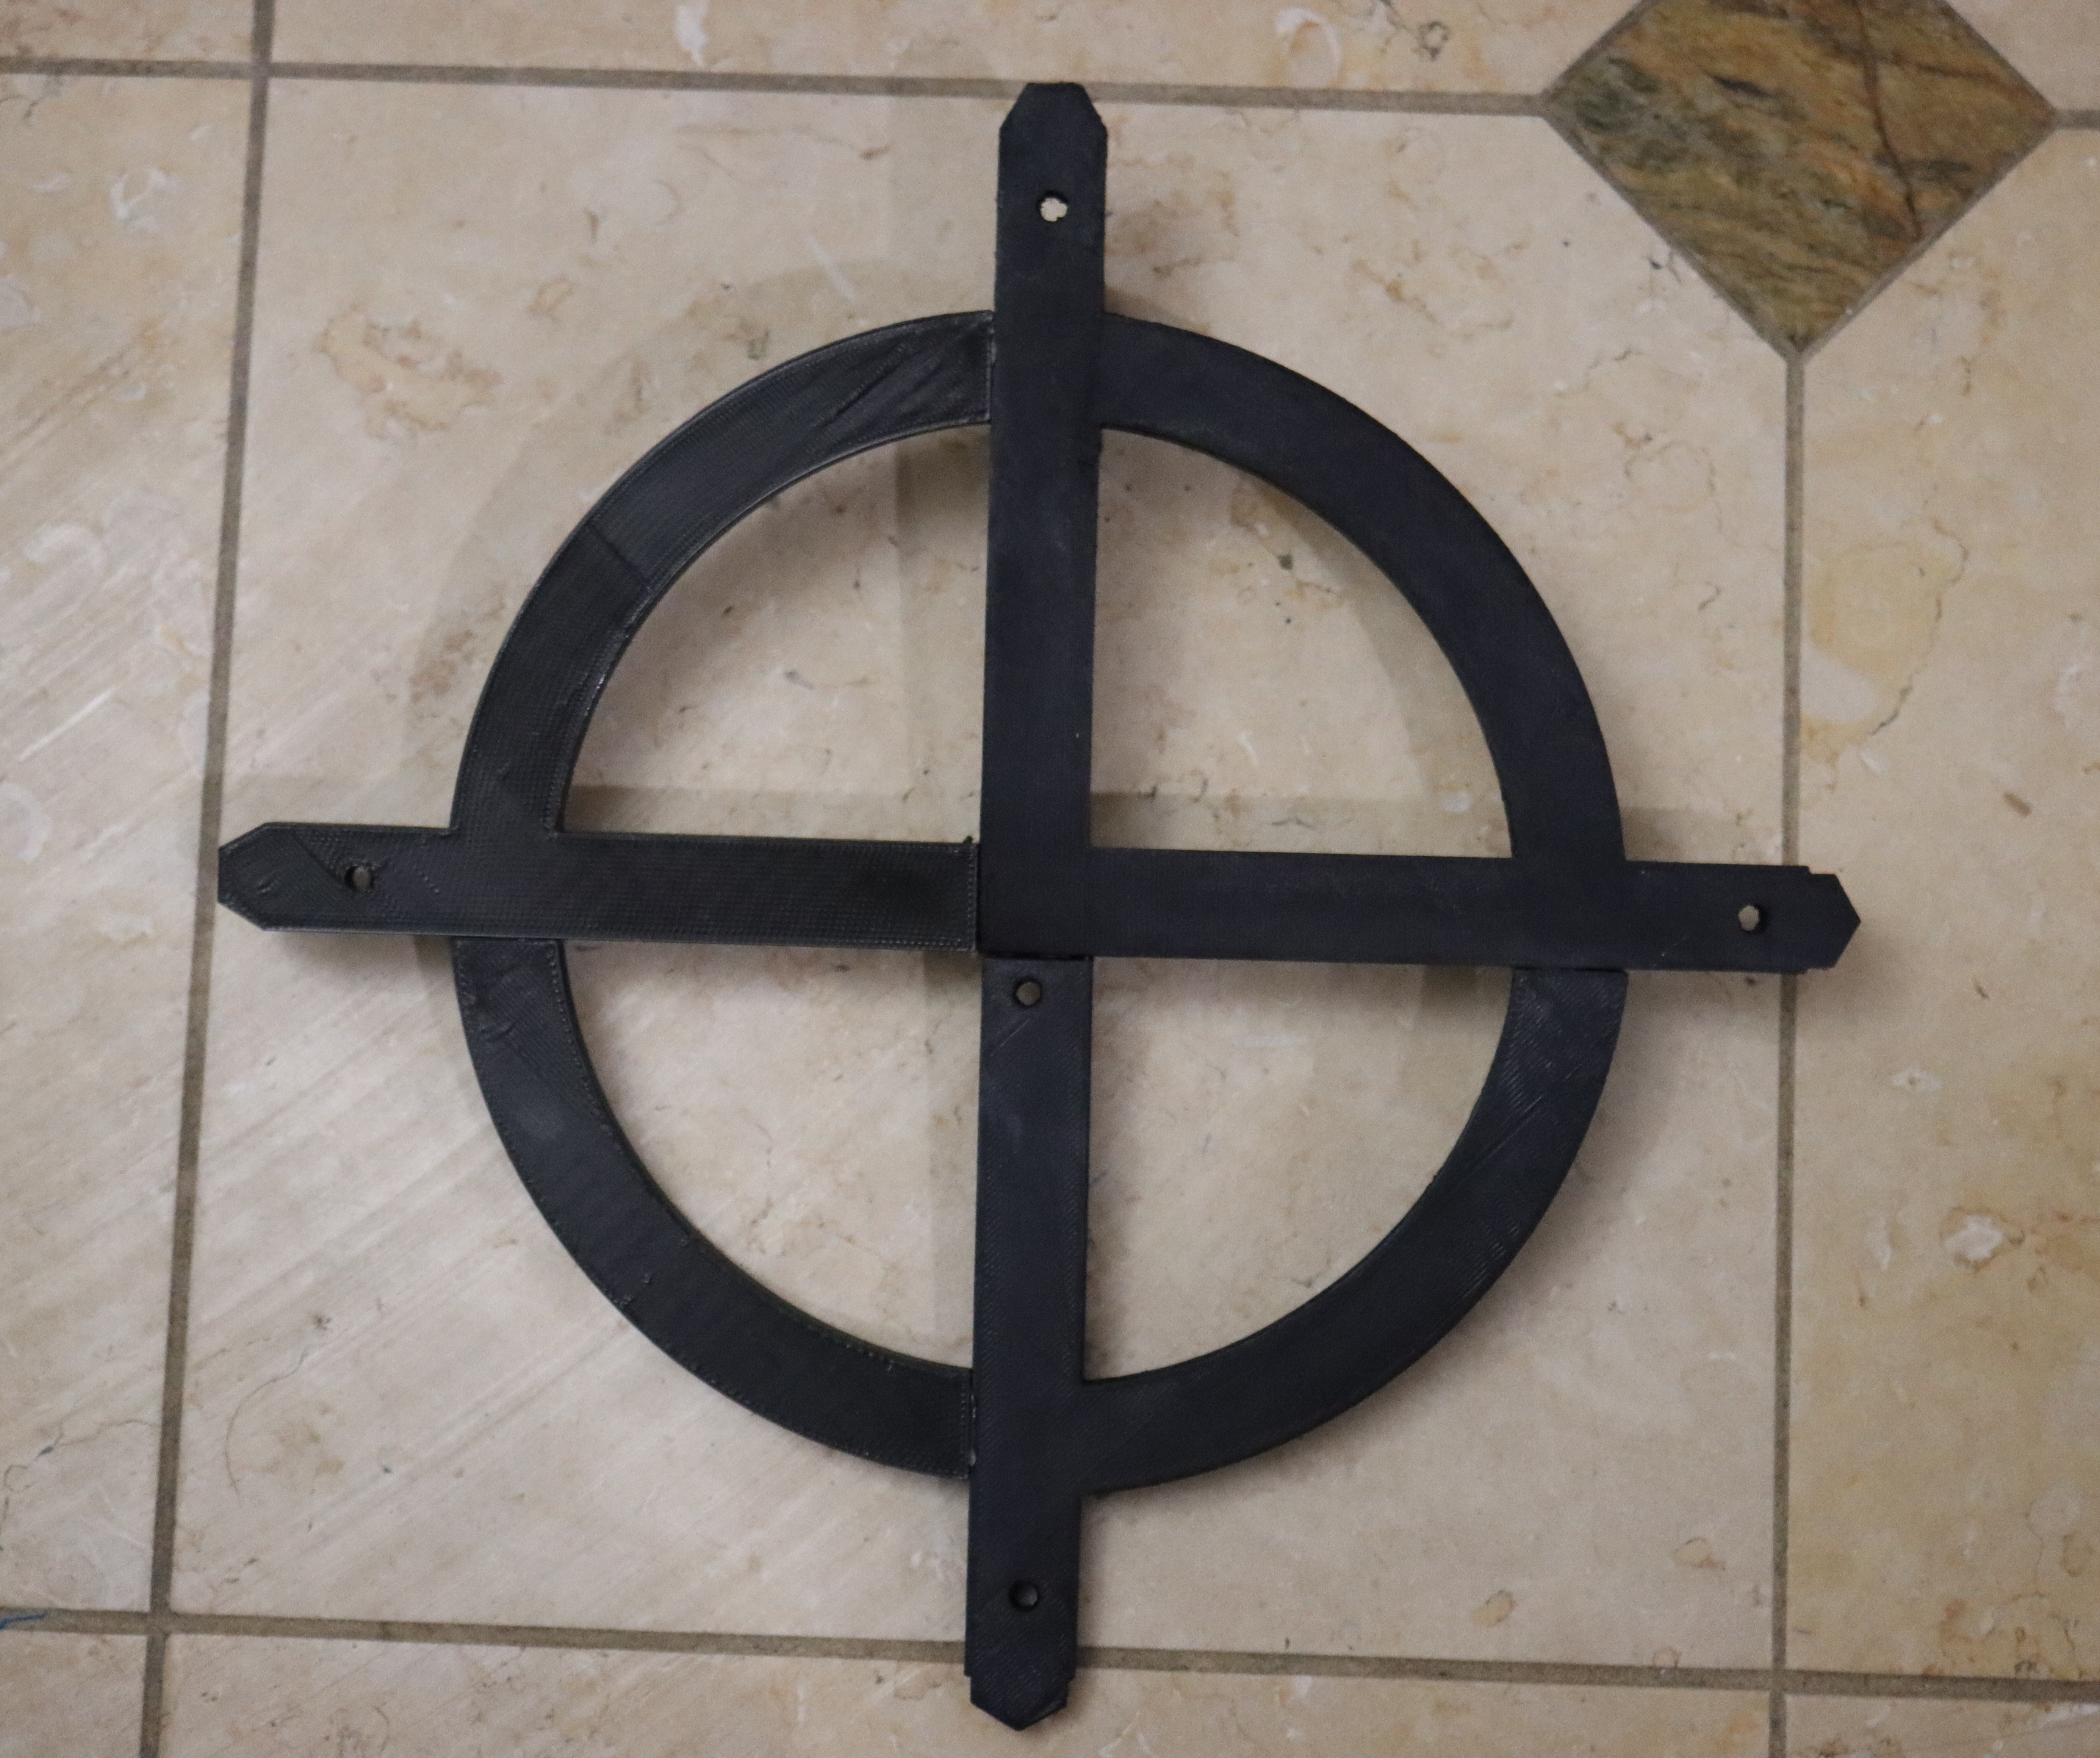
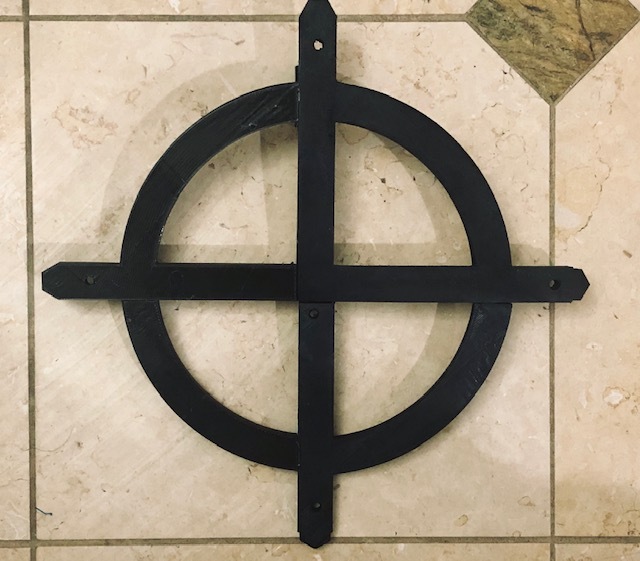
Sketching the Cardinal Direction-Pt. 1

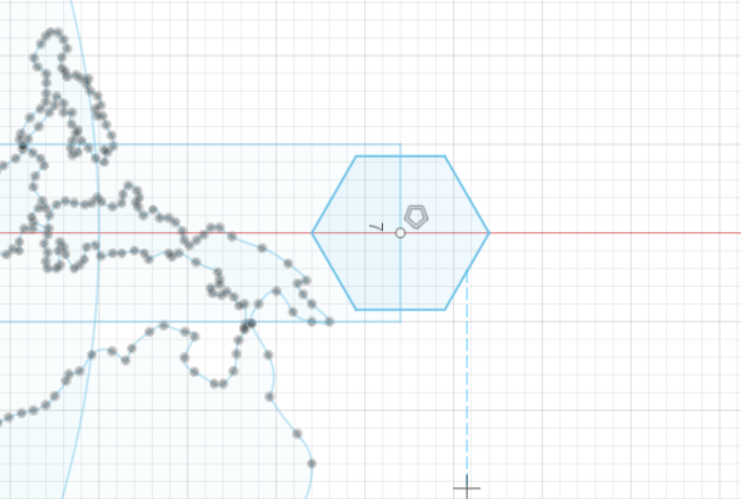
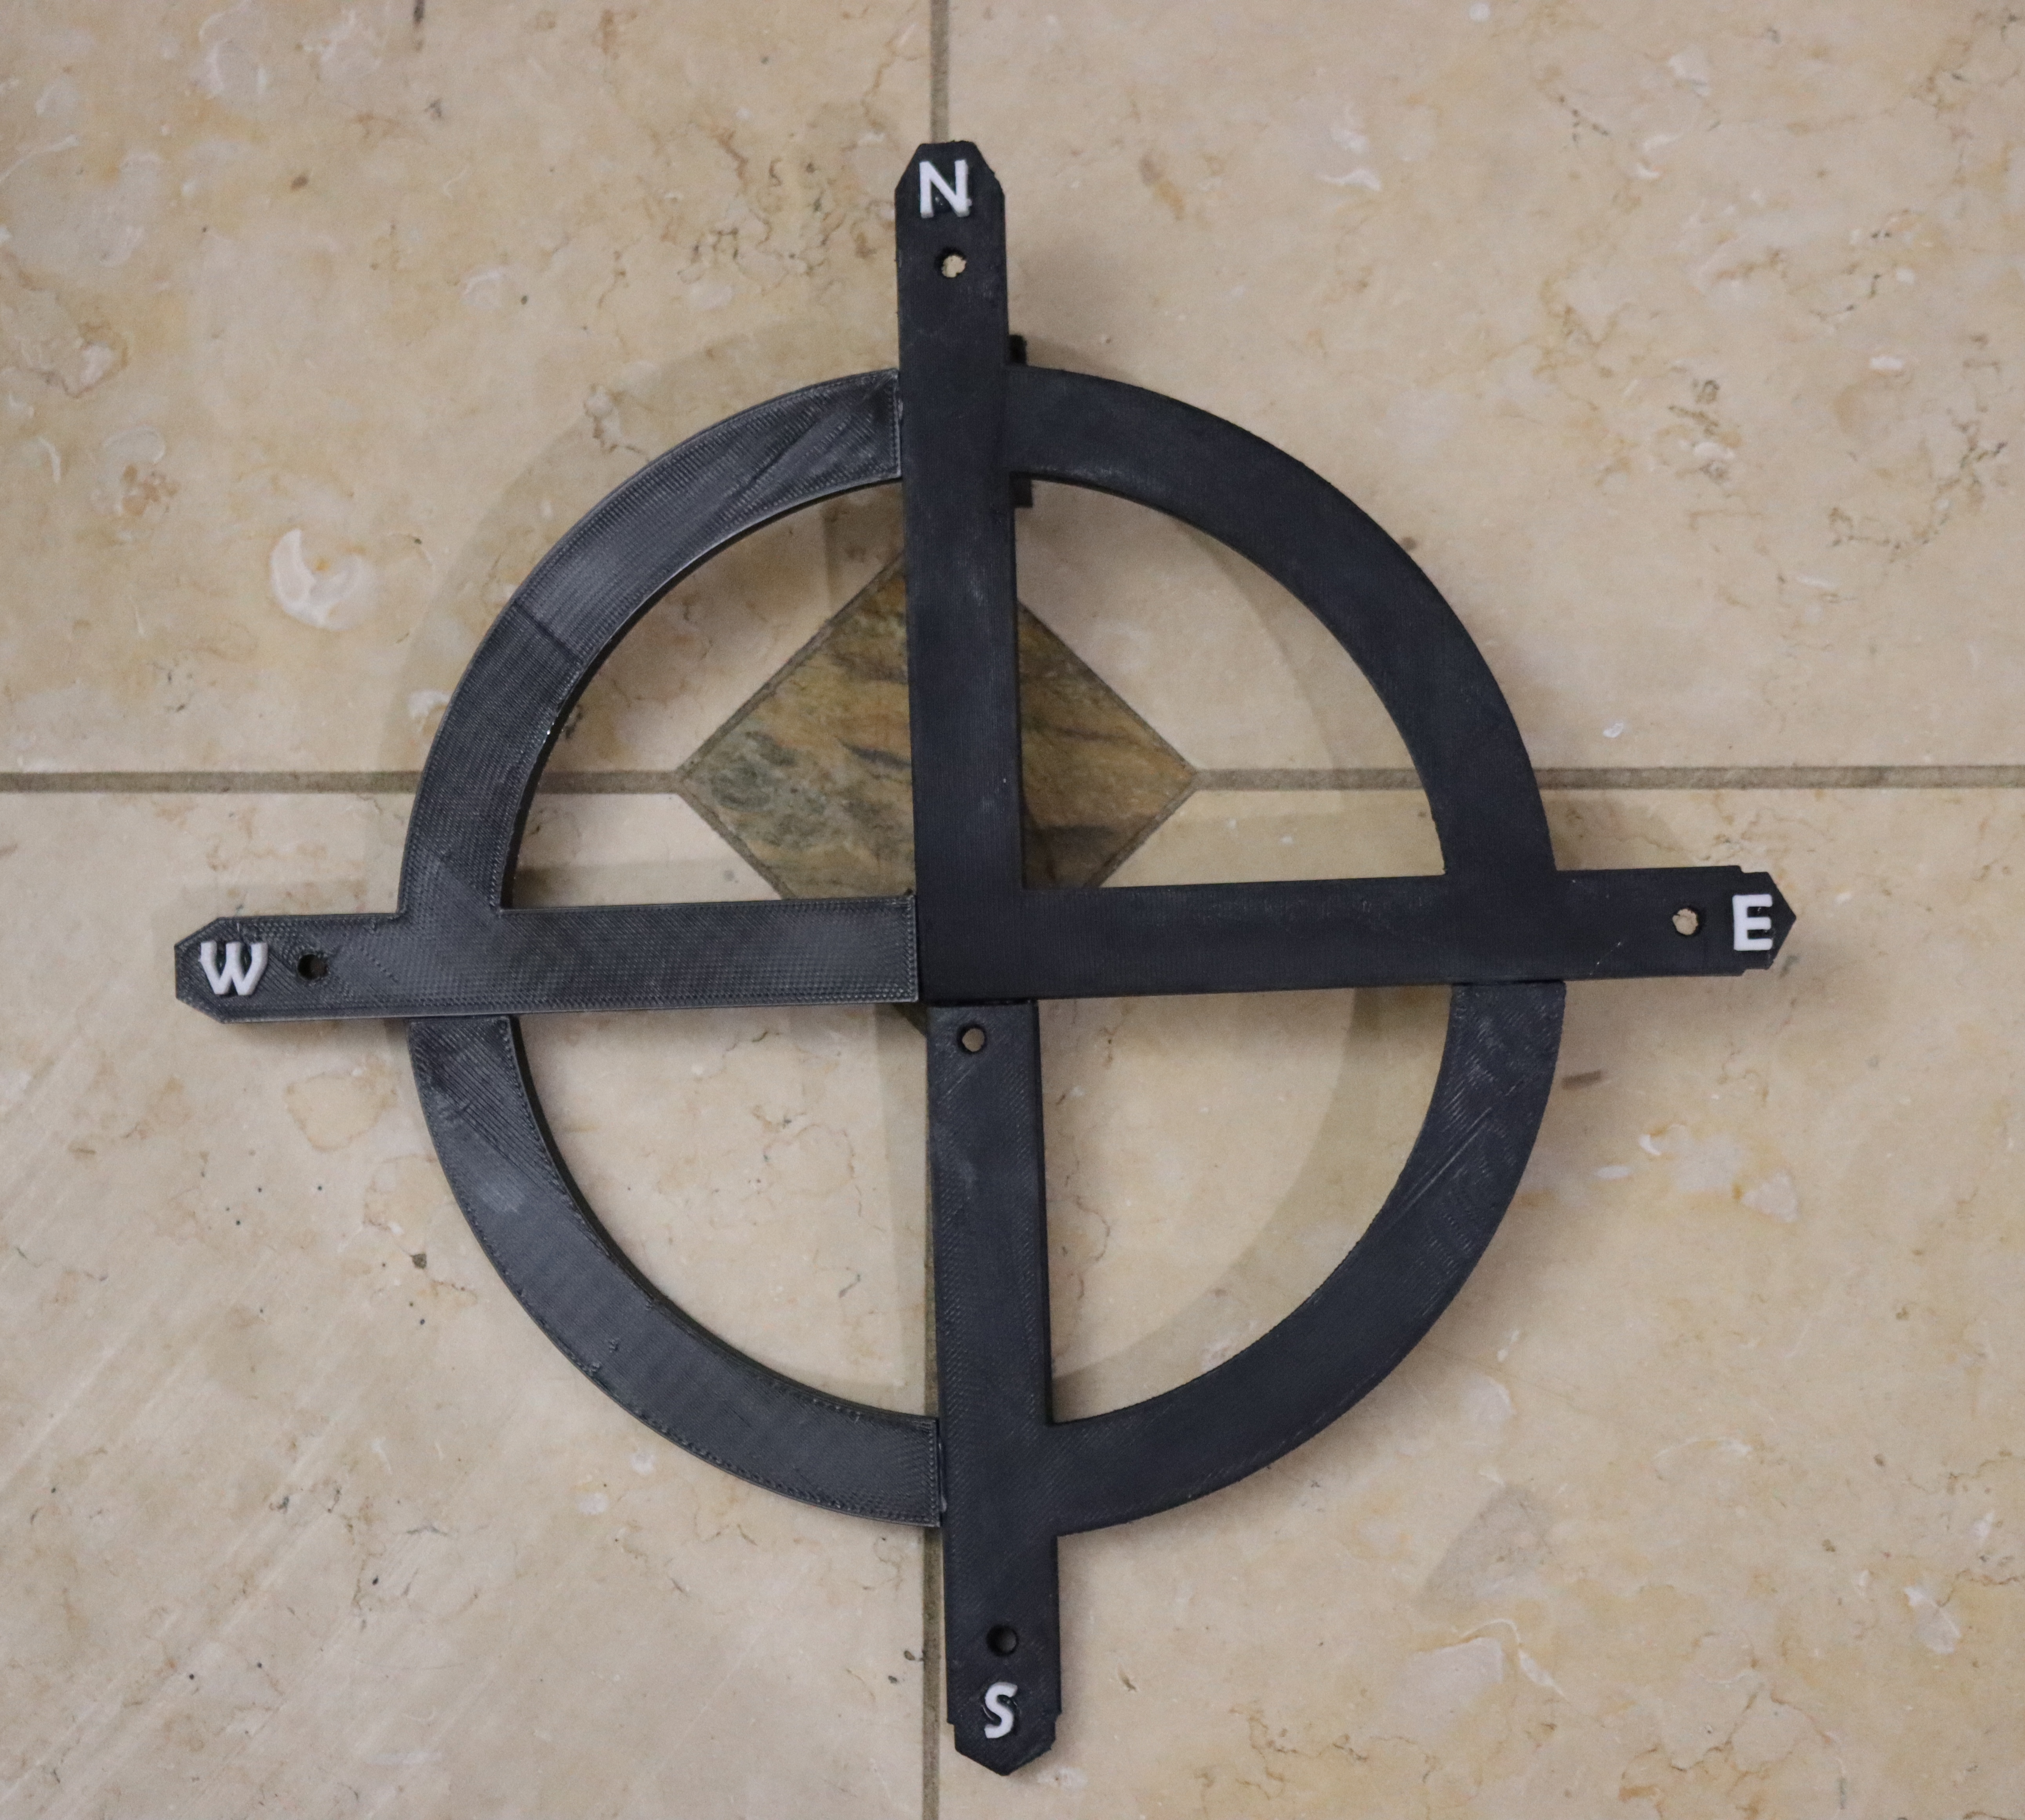
Next, create the cardinal direction in the sketch area. To create this, you need to make lines and center diameter circle. Draw it as shown in the picture. Also, you need to make some details for the base of cardinal direction's name, use a polygon with 6 sides or hexagon. For drawing this, click create and select inscribed polygon. Enter 6 for the number of the polygon's face. Duplicate 4 times for each of the cardinal directions' names, which are West, East, North, and South.
Sketching the Cardinal Direction-Pt. 2
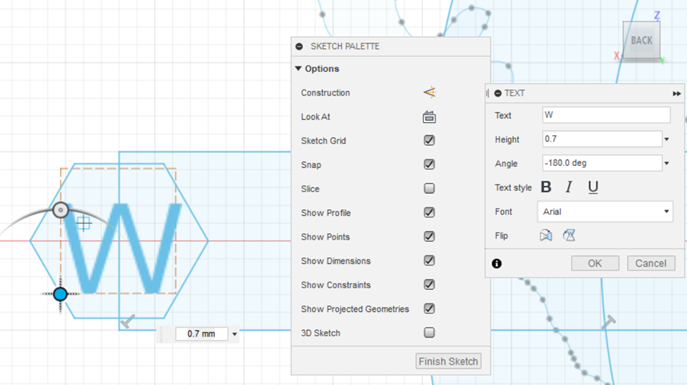

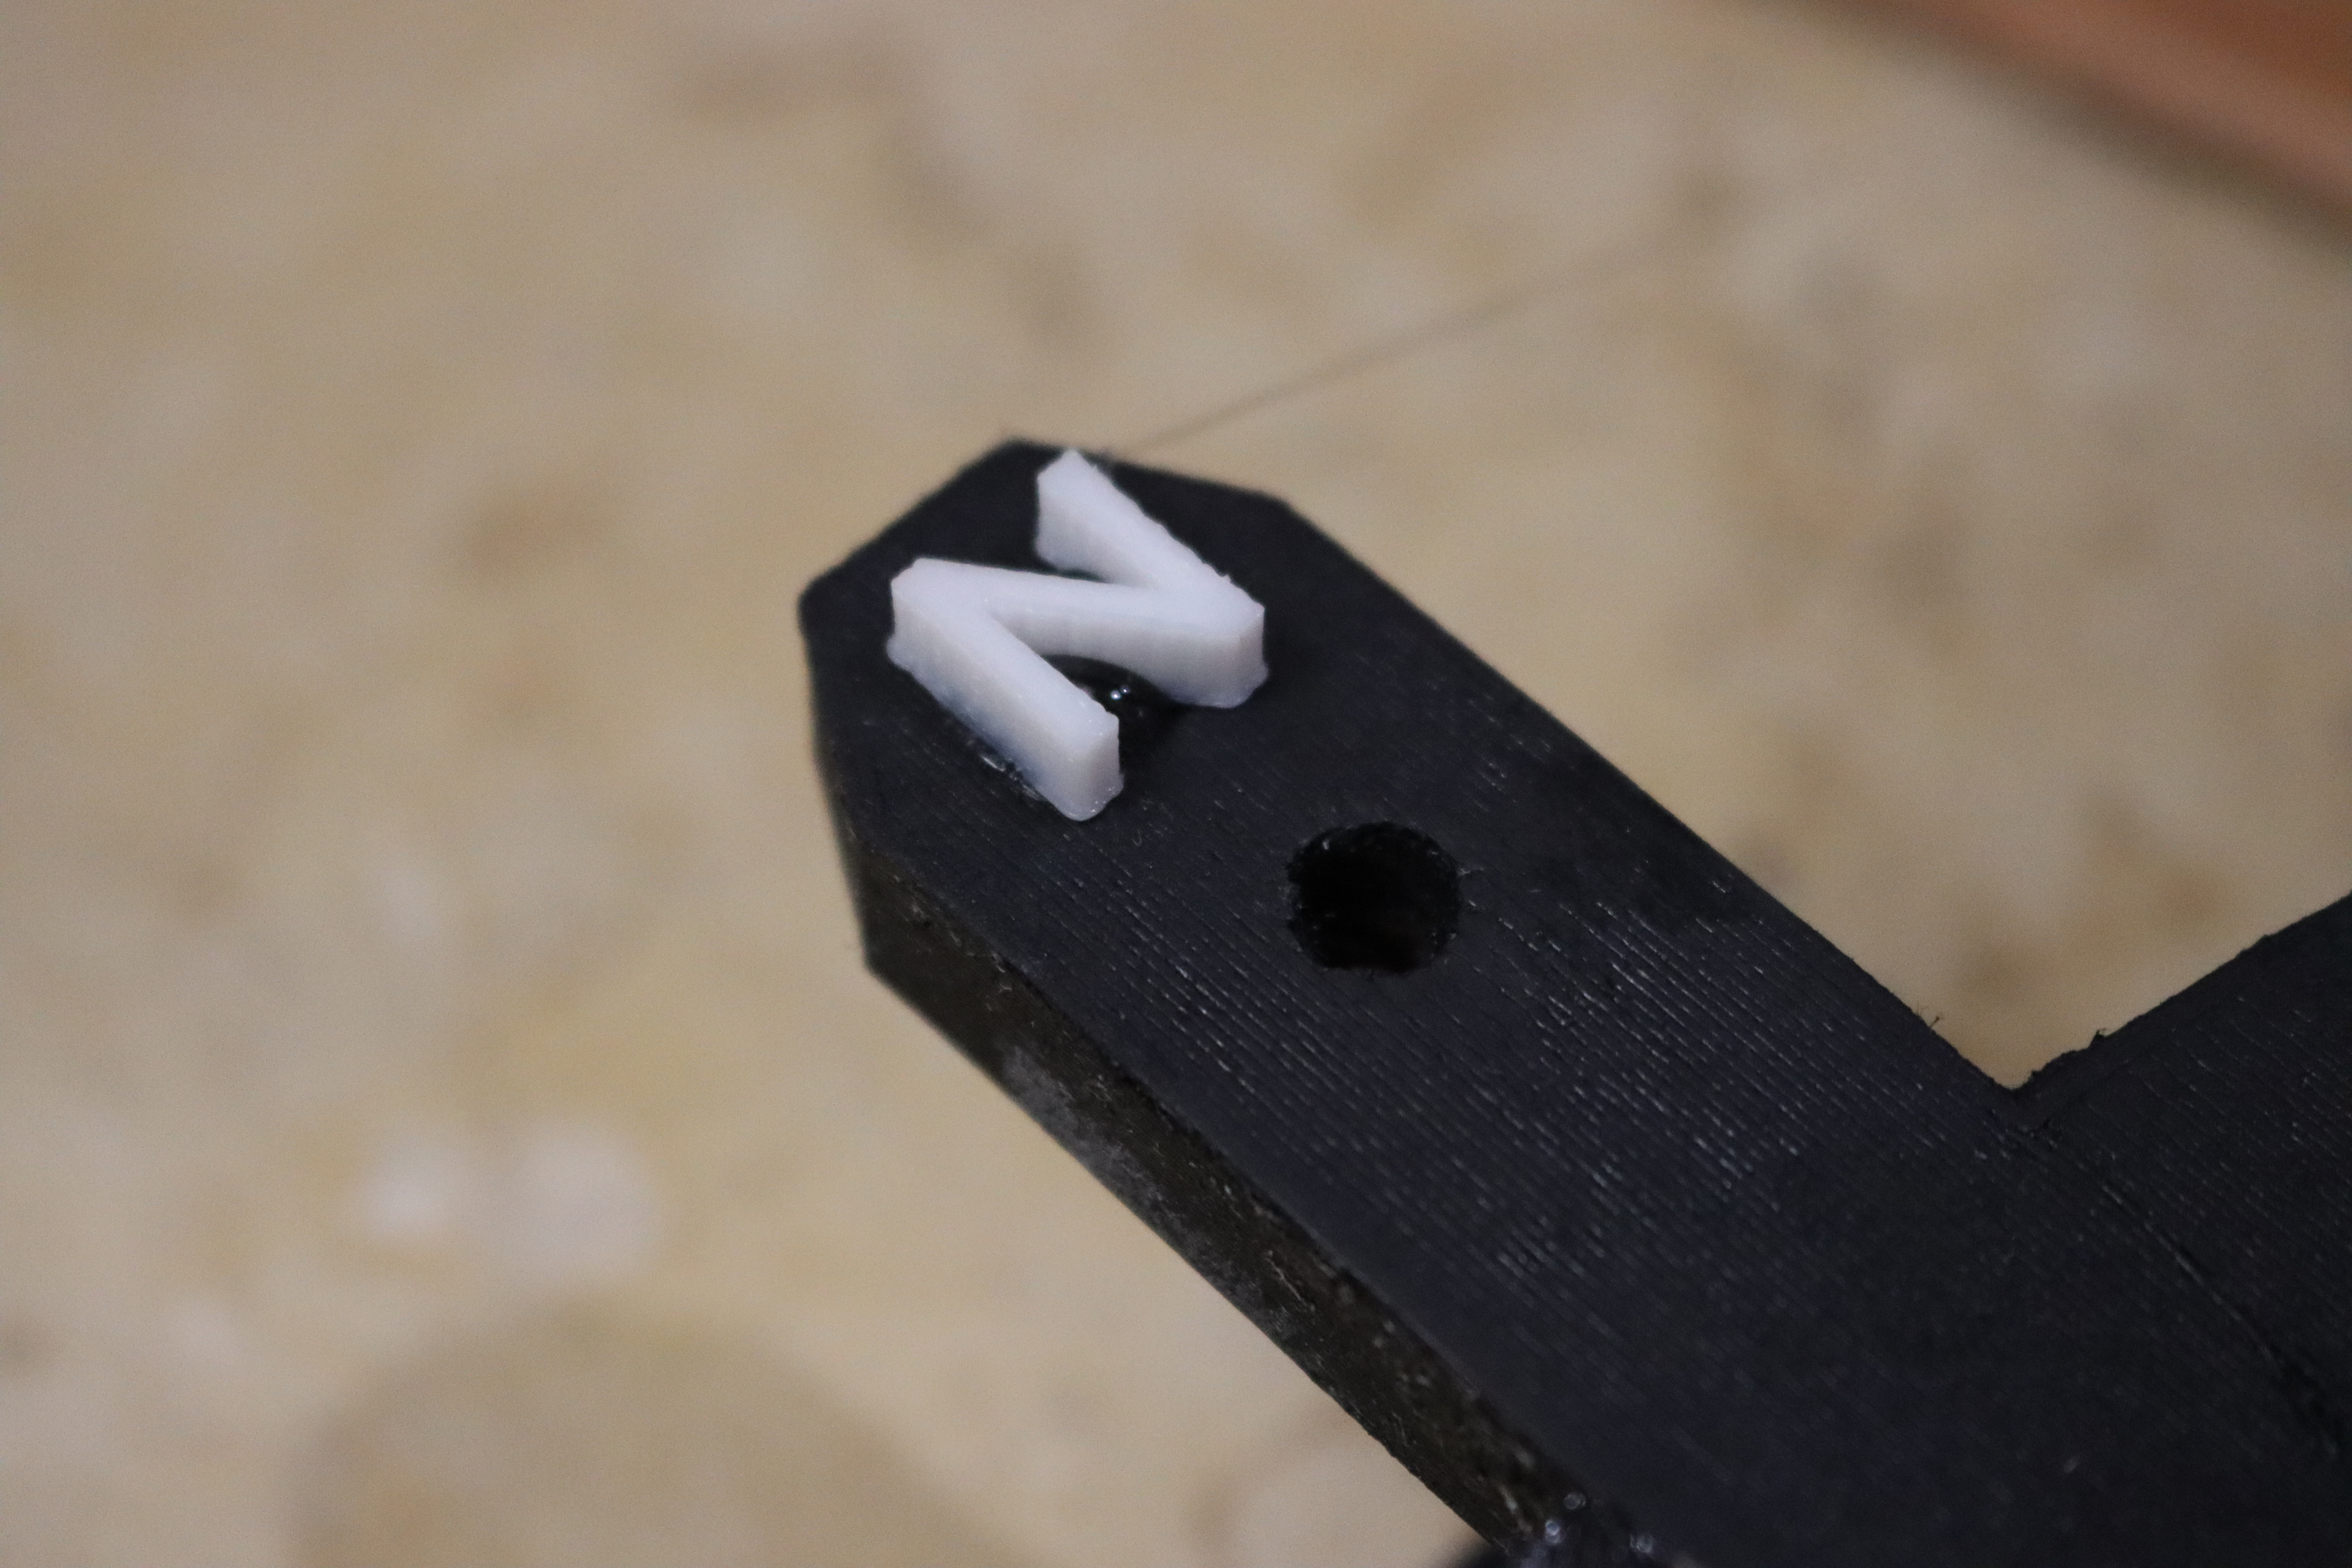
You need to add a letter for cardinal direction. On the top of the base, click create and select text. Input the text W for West, E for East, N for North and S for South. Change the height of text, so that the text fits with the base.
Extrusion-Pt. 1
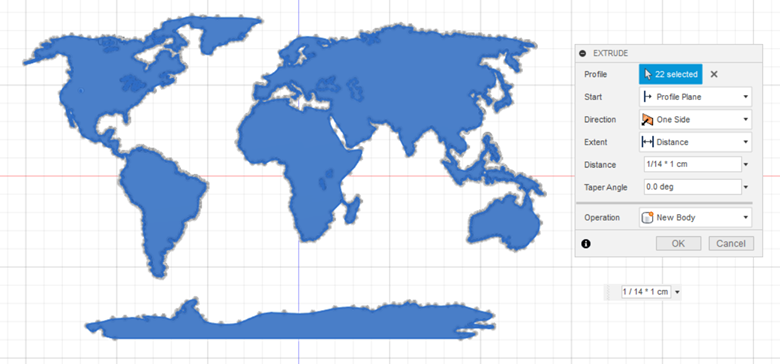
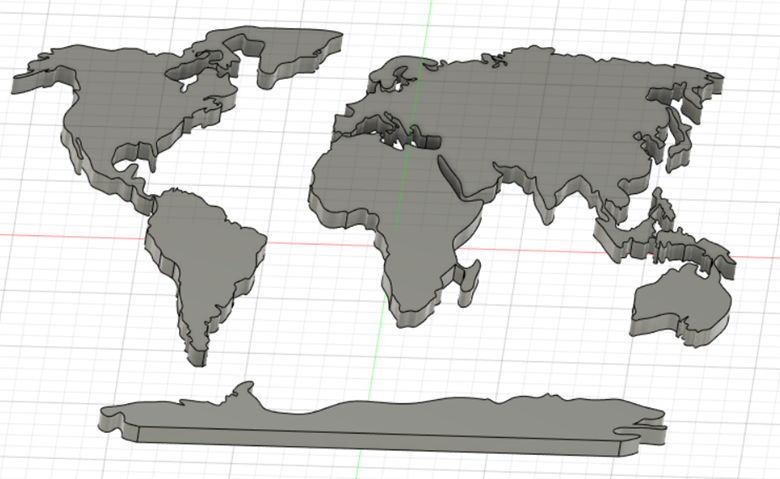
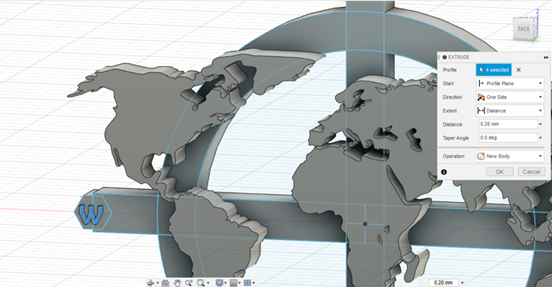
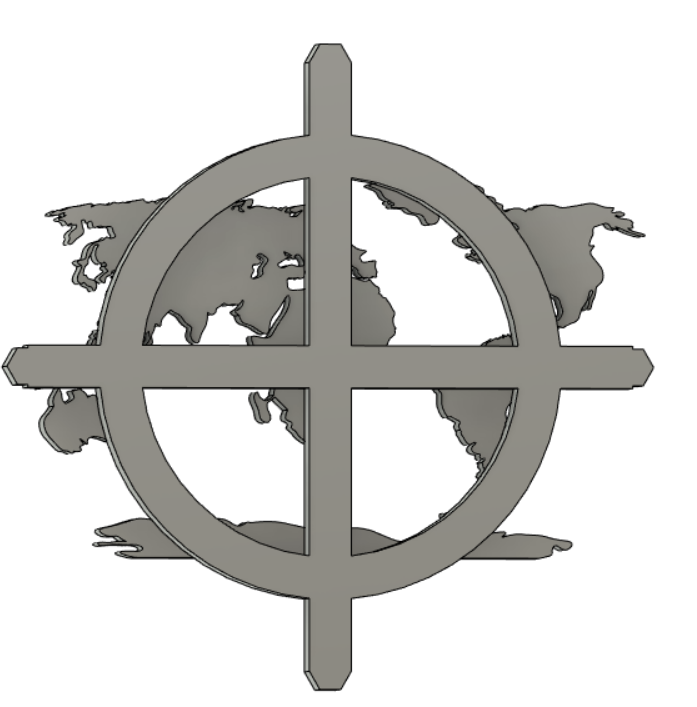
After finishing all the sketches, extrude all of them with the same depth or distance at once.
First, extrude all the continents. Next, the cardinal directions. Lastly, the cardinal directions' names one by one.
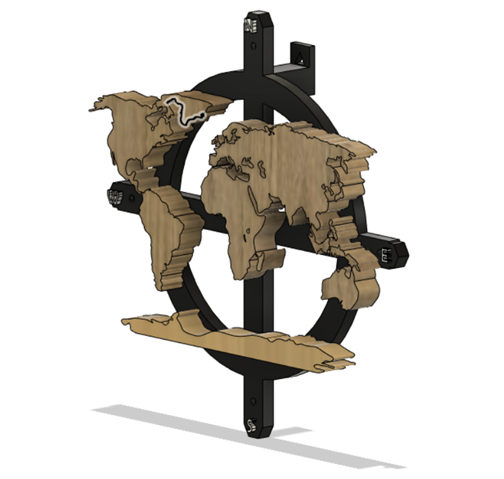
Rendering
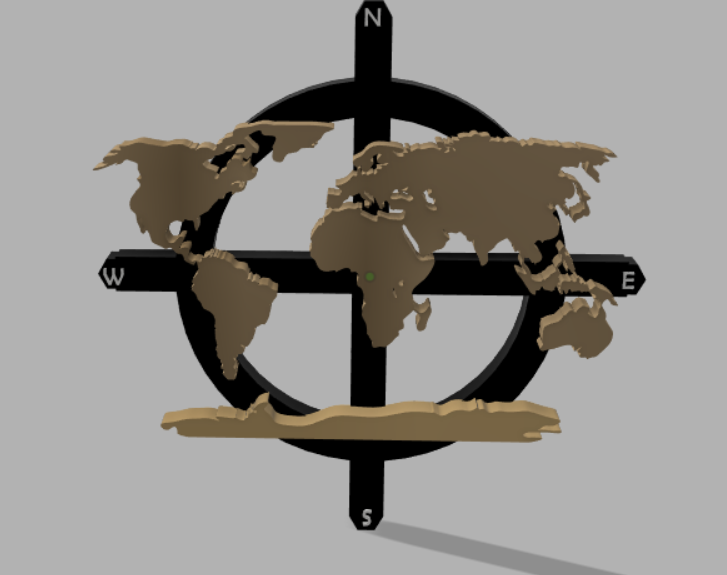
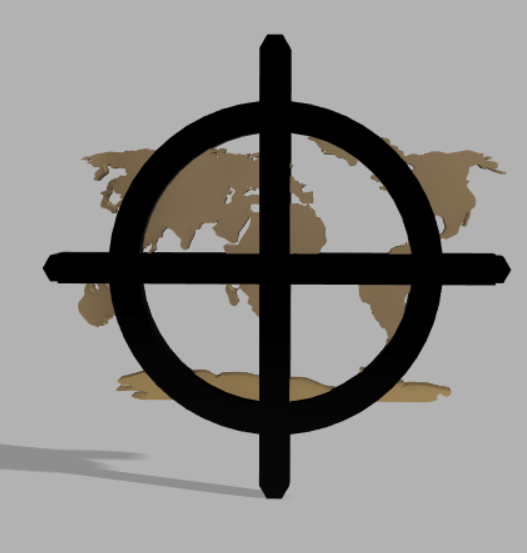
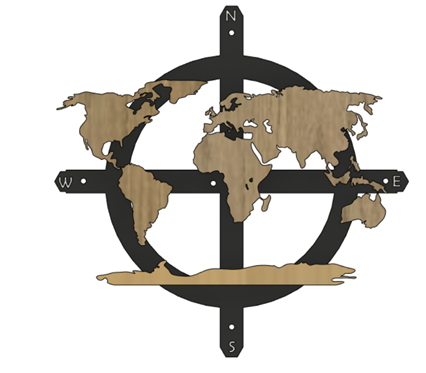
After finish with the 3D models, render the model in Fusion 360. I used wood and paint textures in rendering. The result is very nice.
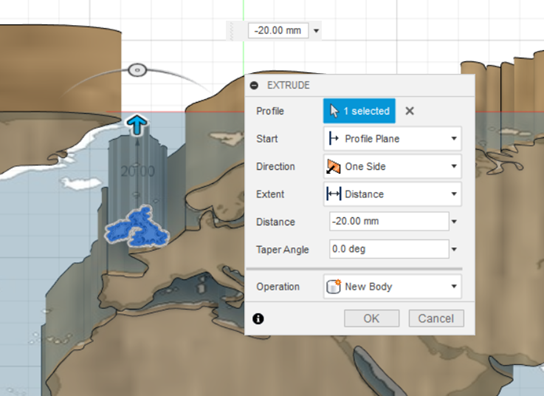
Holes for LED
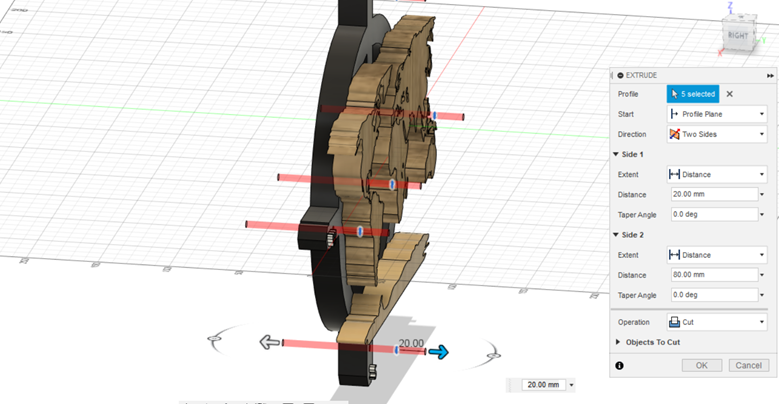
Later, create 5 holes for LED light. Use center diameter circle in sketch and extrude it by choosing the operation cut.
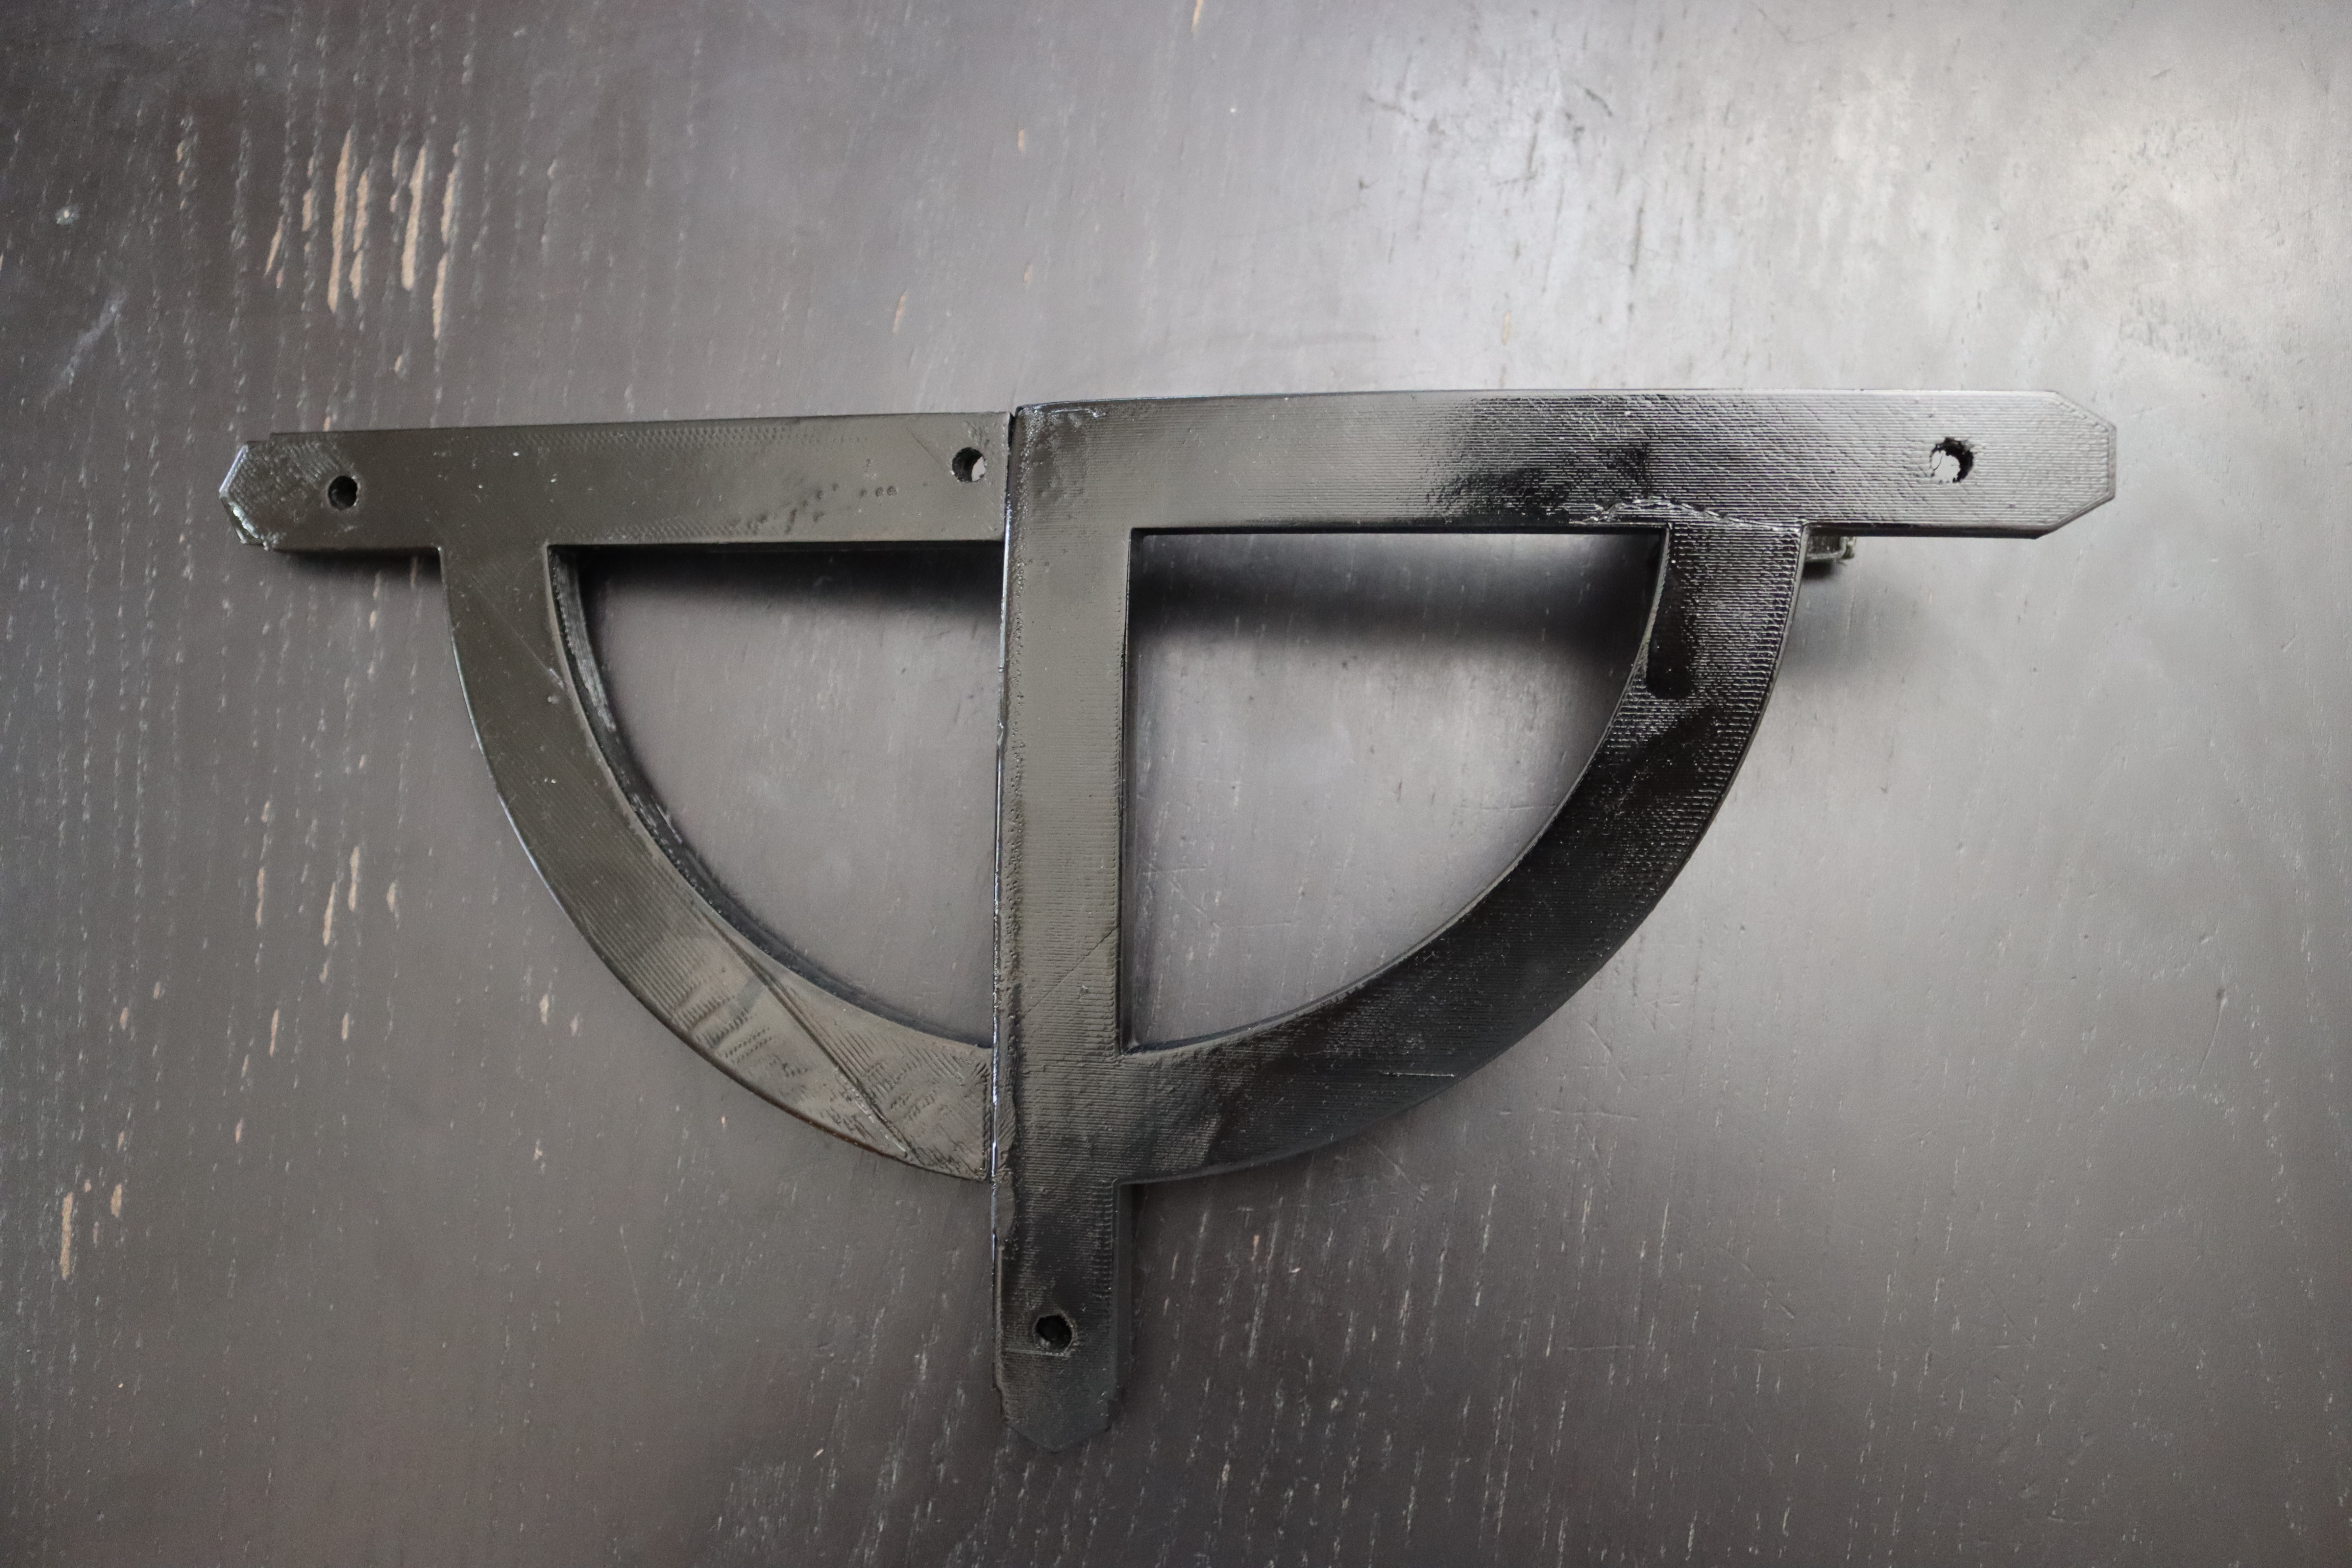
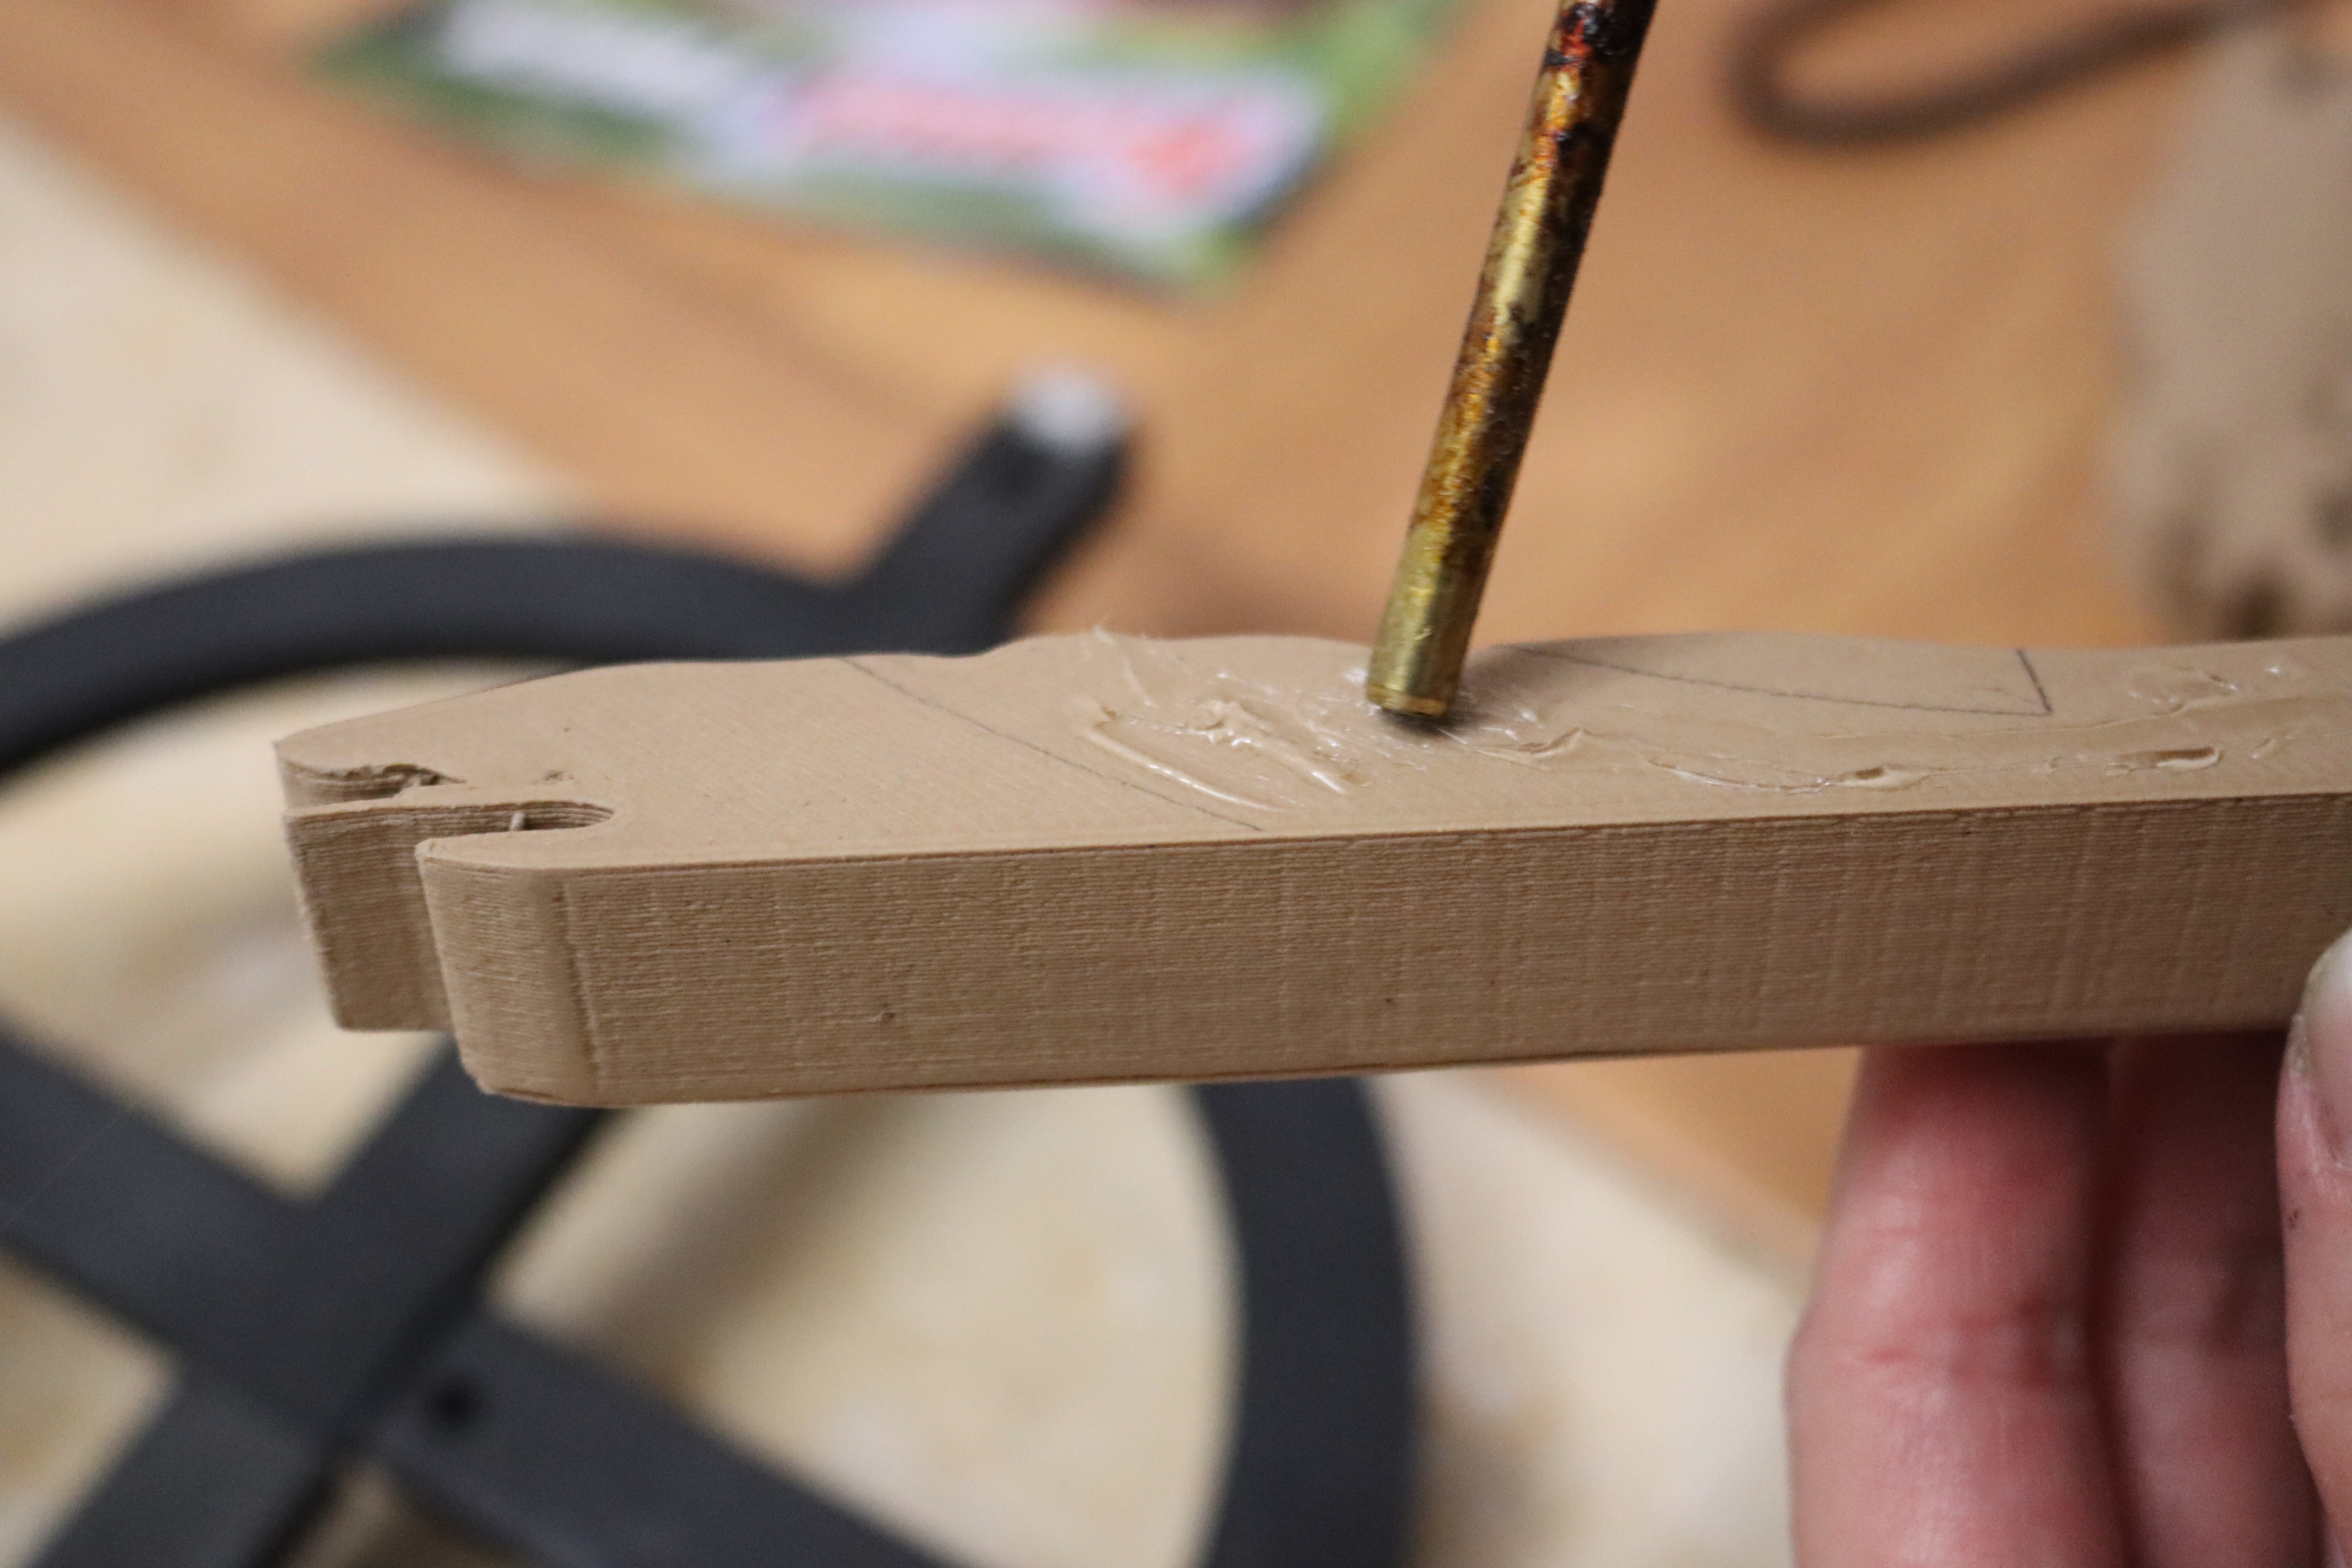
Hook
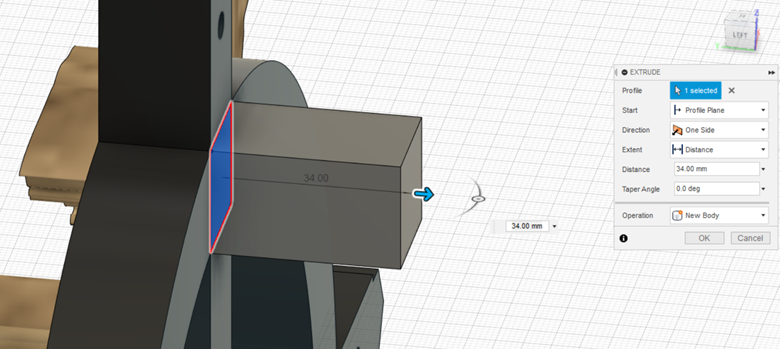

Next, we need to create a hook for this world map art wall because we have to hang it on the wall. For making a hook, use rectangles in the sketch area and extrude them. See the picture for more clarification.
Finish With 3D Modeling
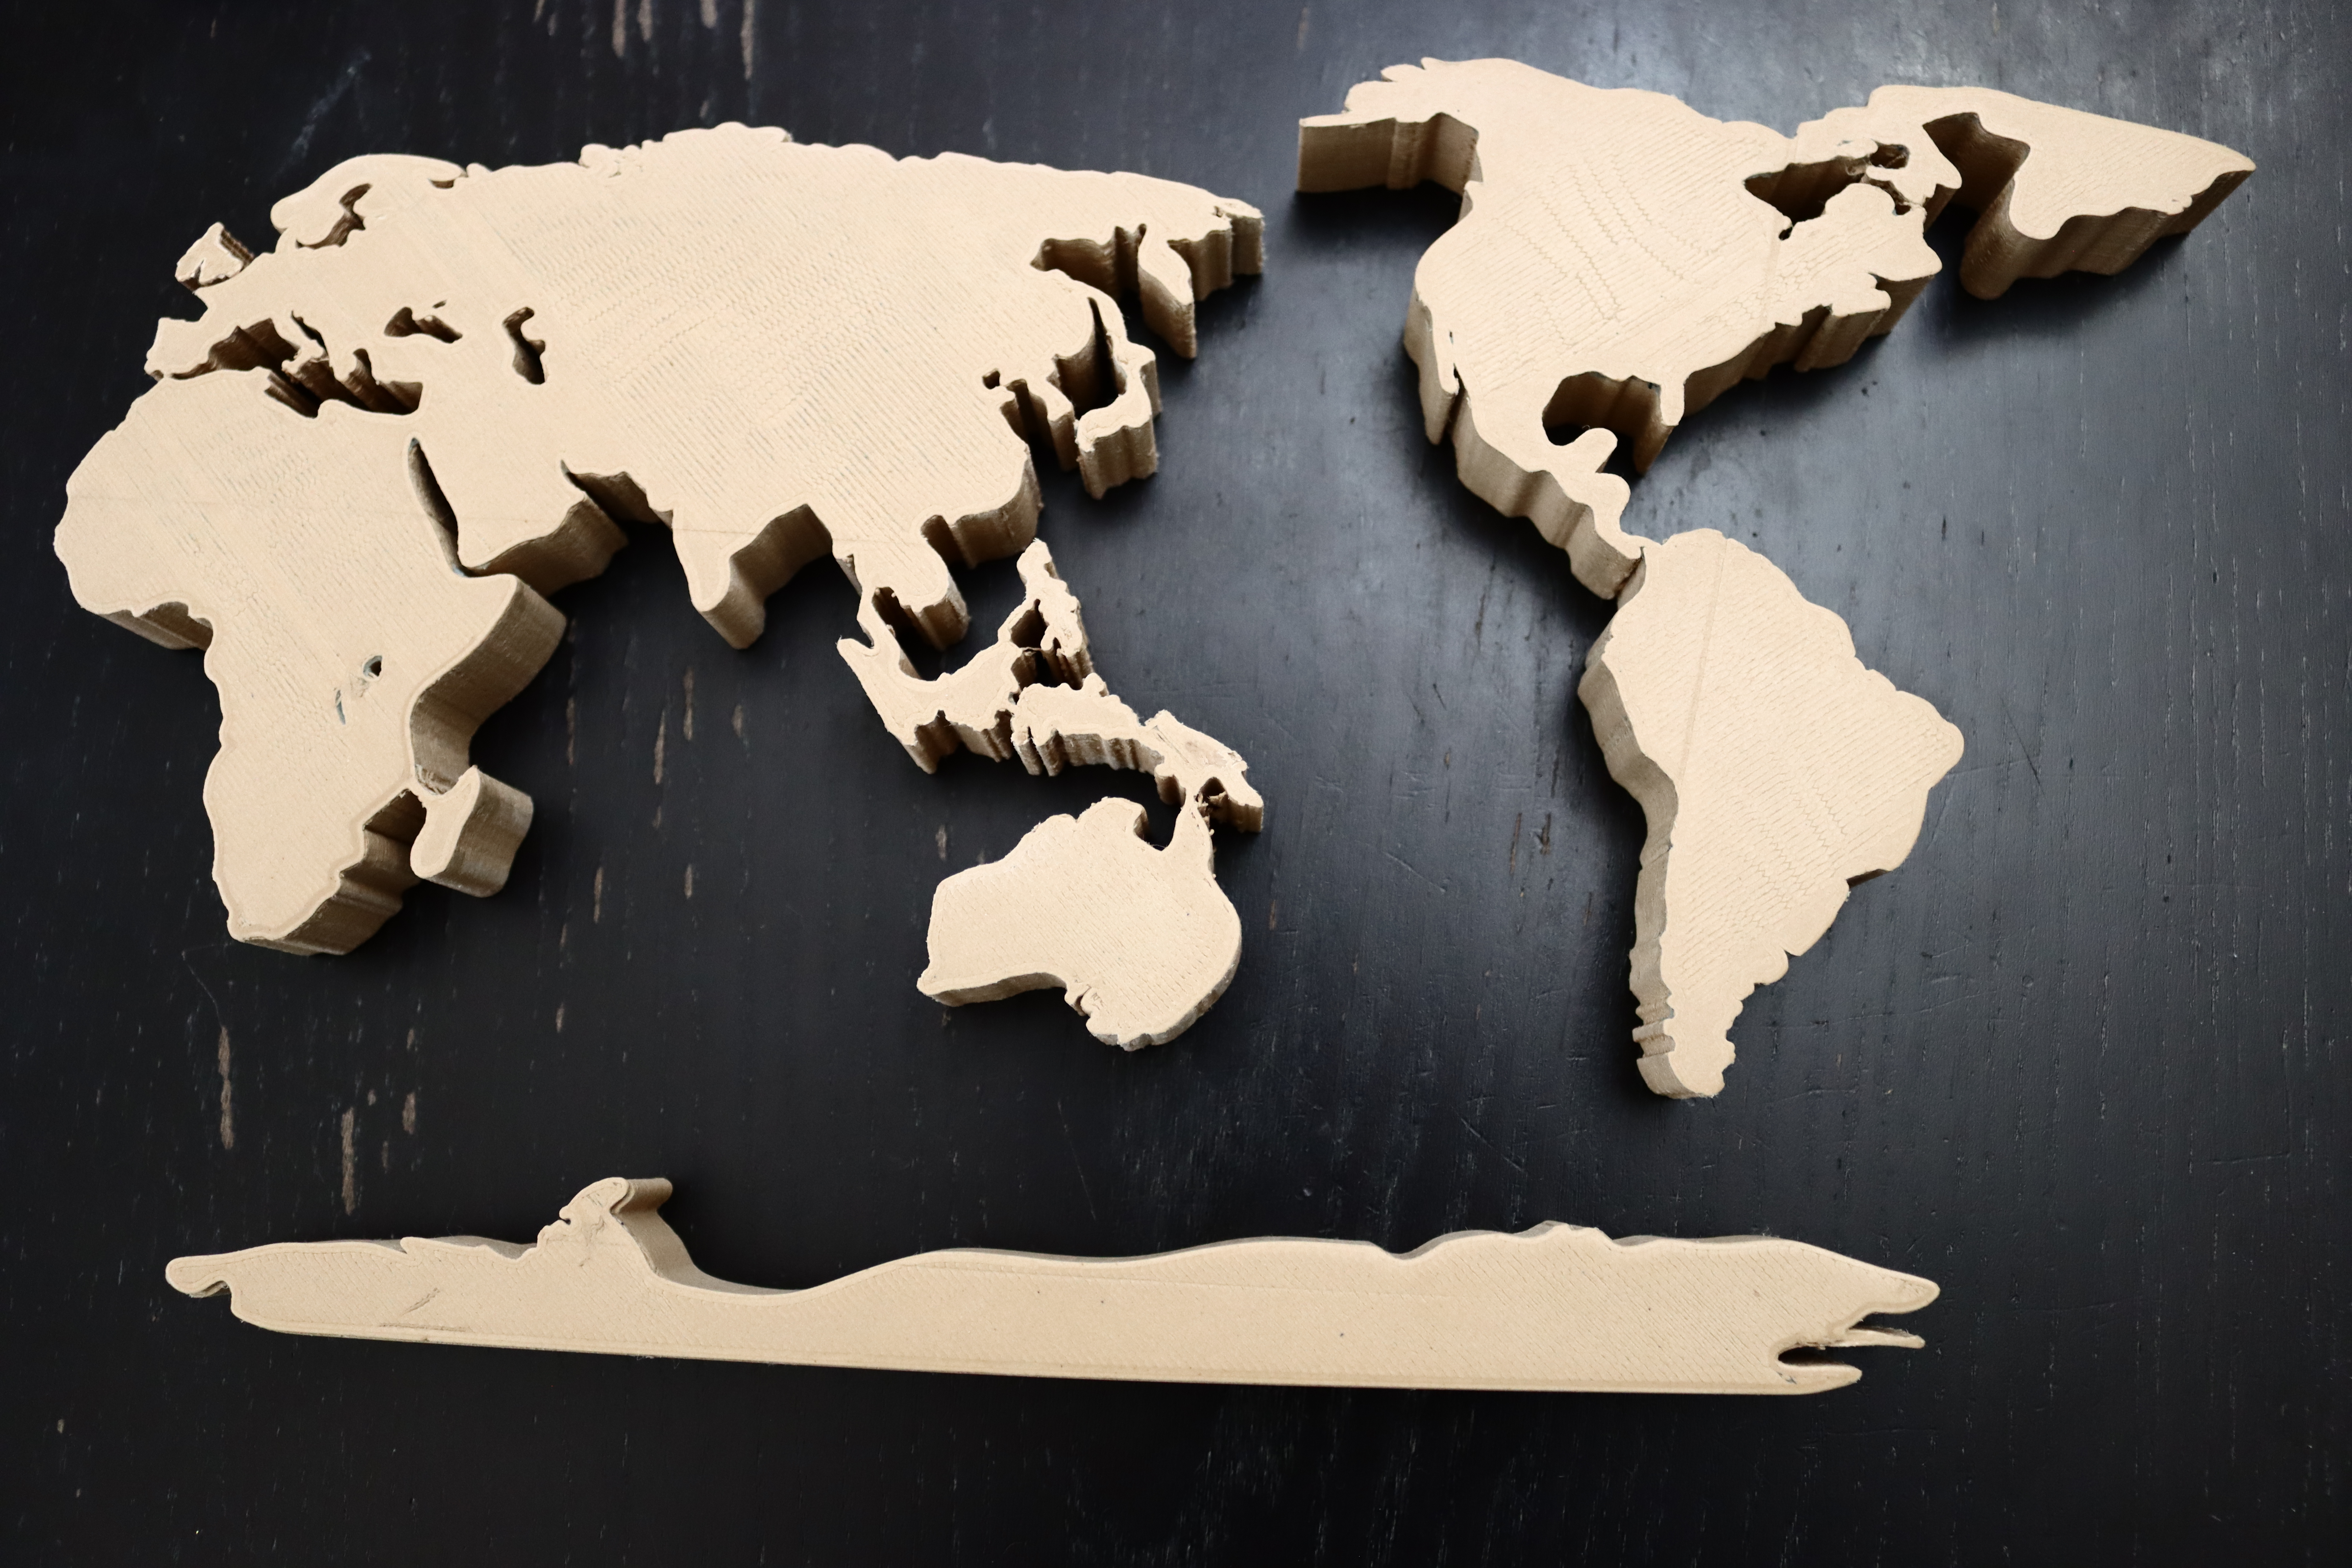
Remember, you have to scale the model into the size as you desire. My overall size is about 31 cm x 31 cm x 3 cm. You have completed your 3D Modeling of the world map art wall. Now it is time to print all the parts one by one.
Printing
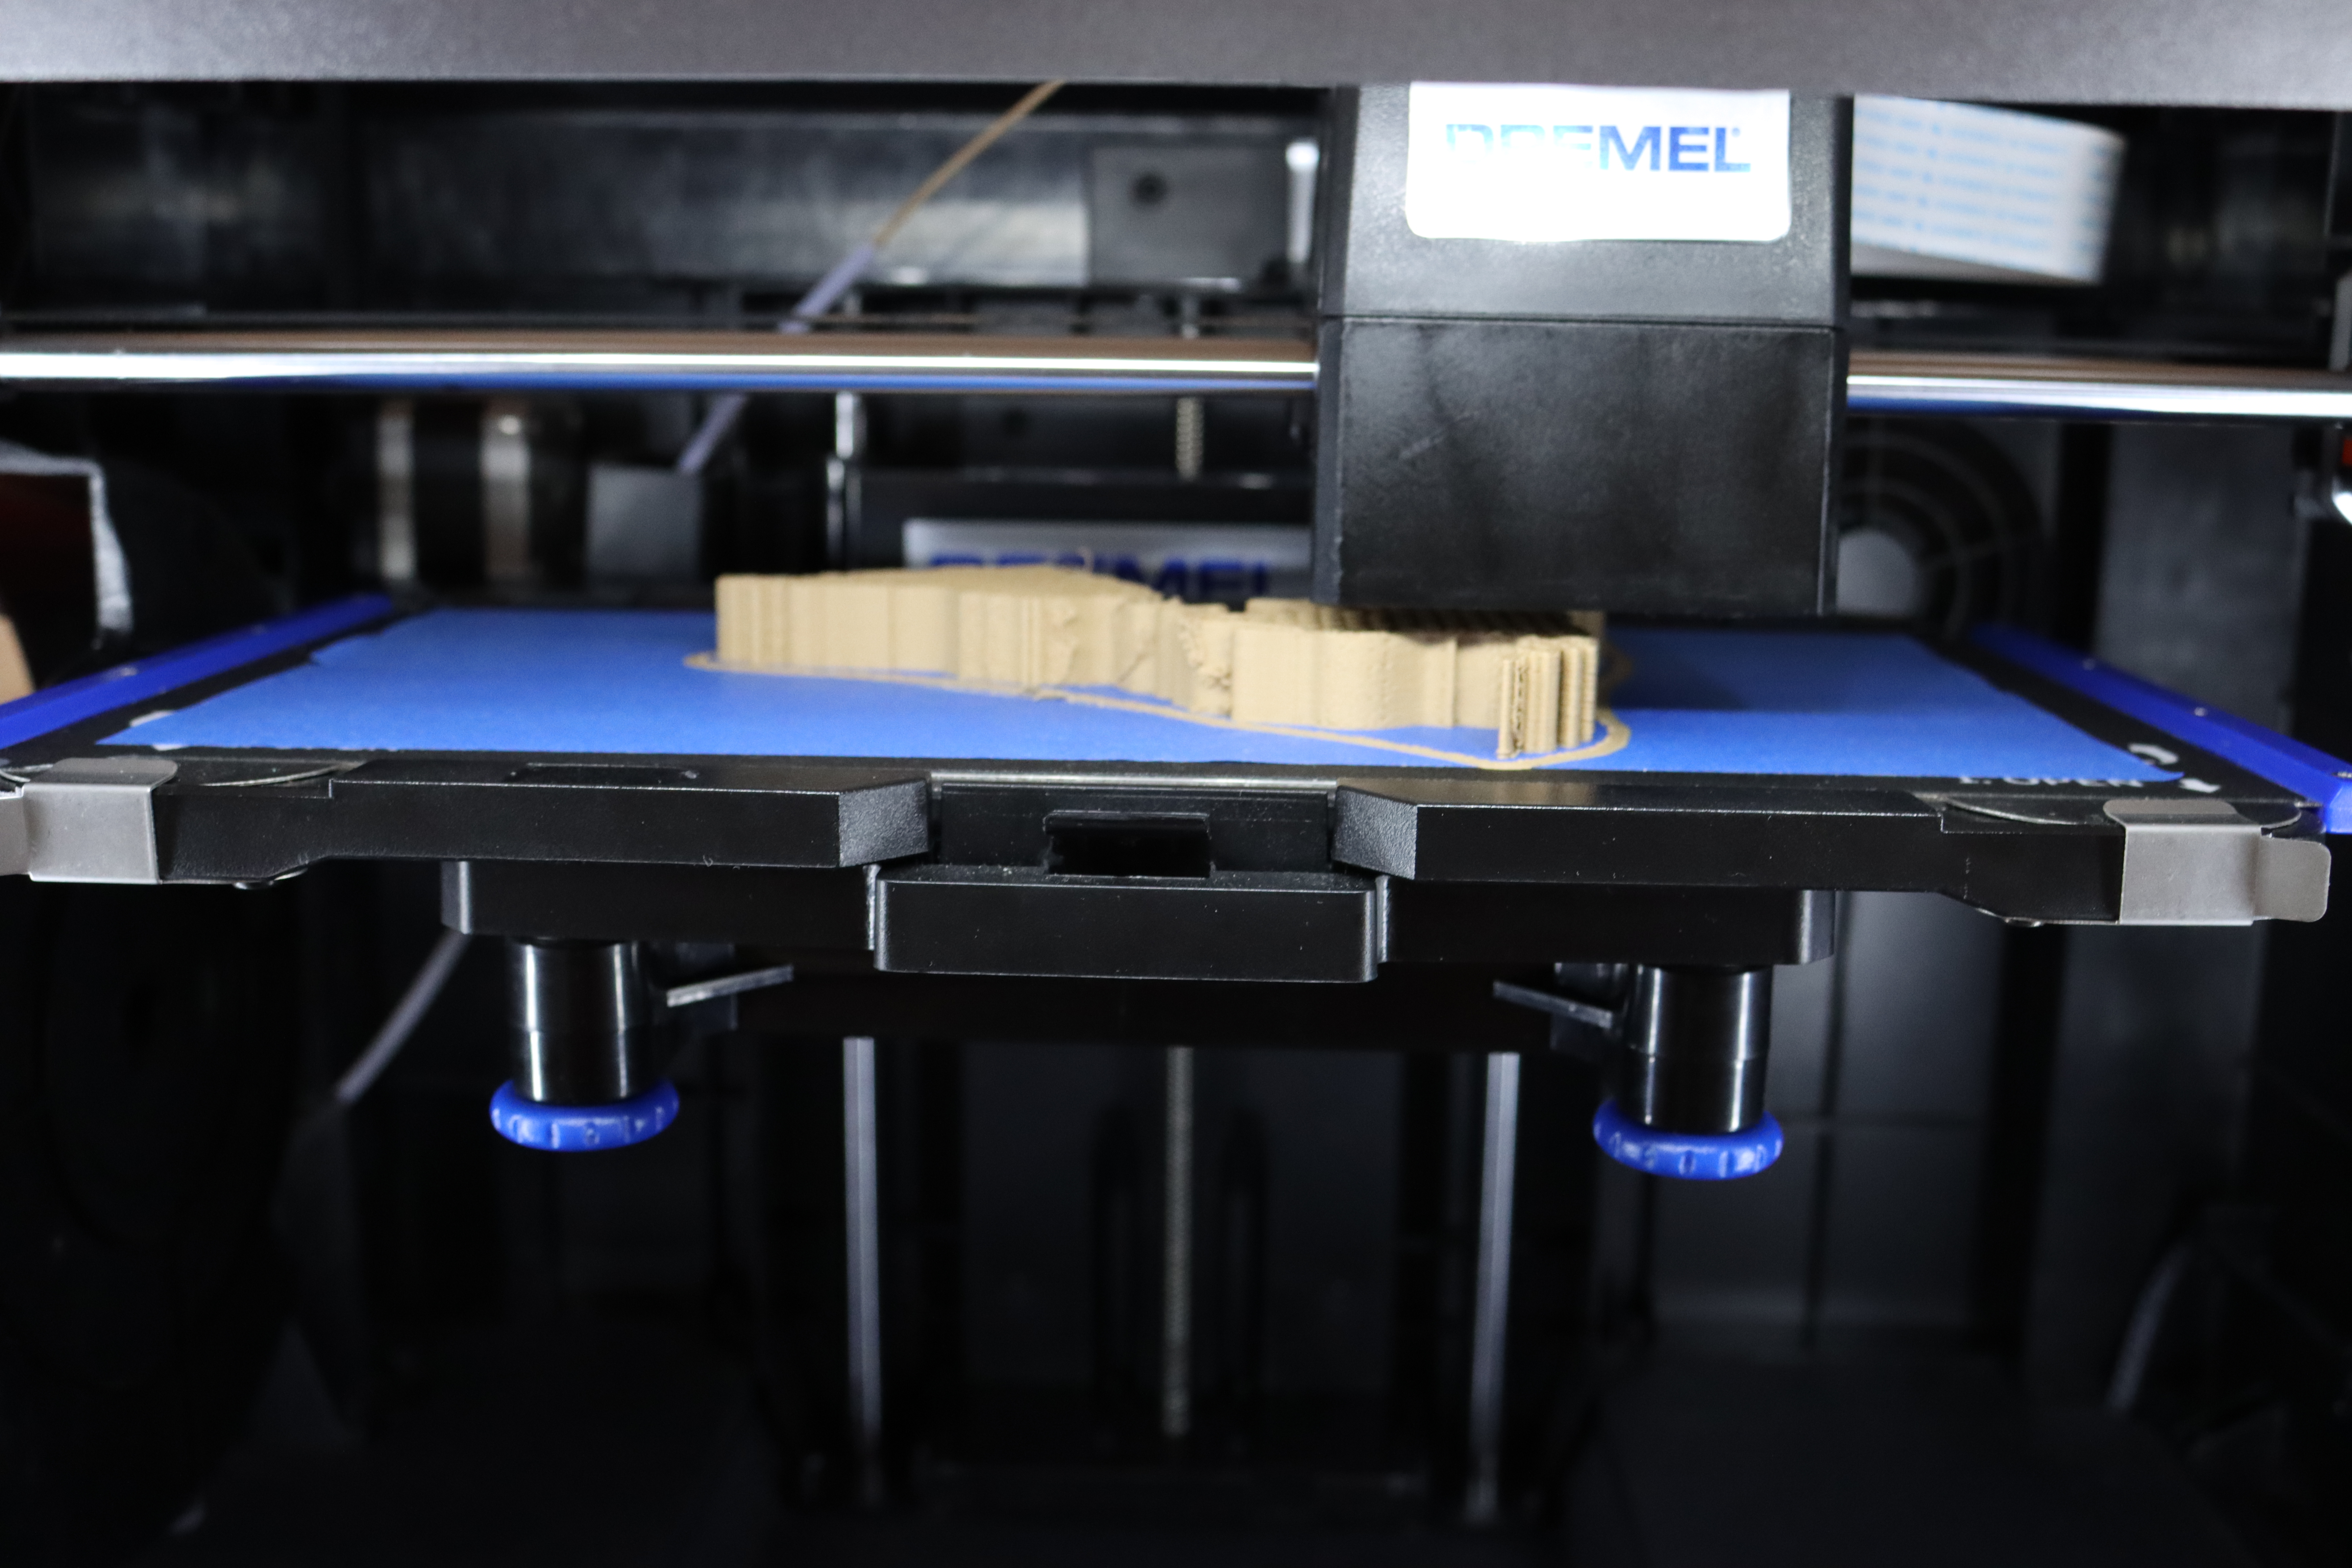
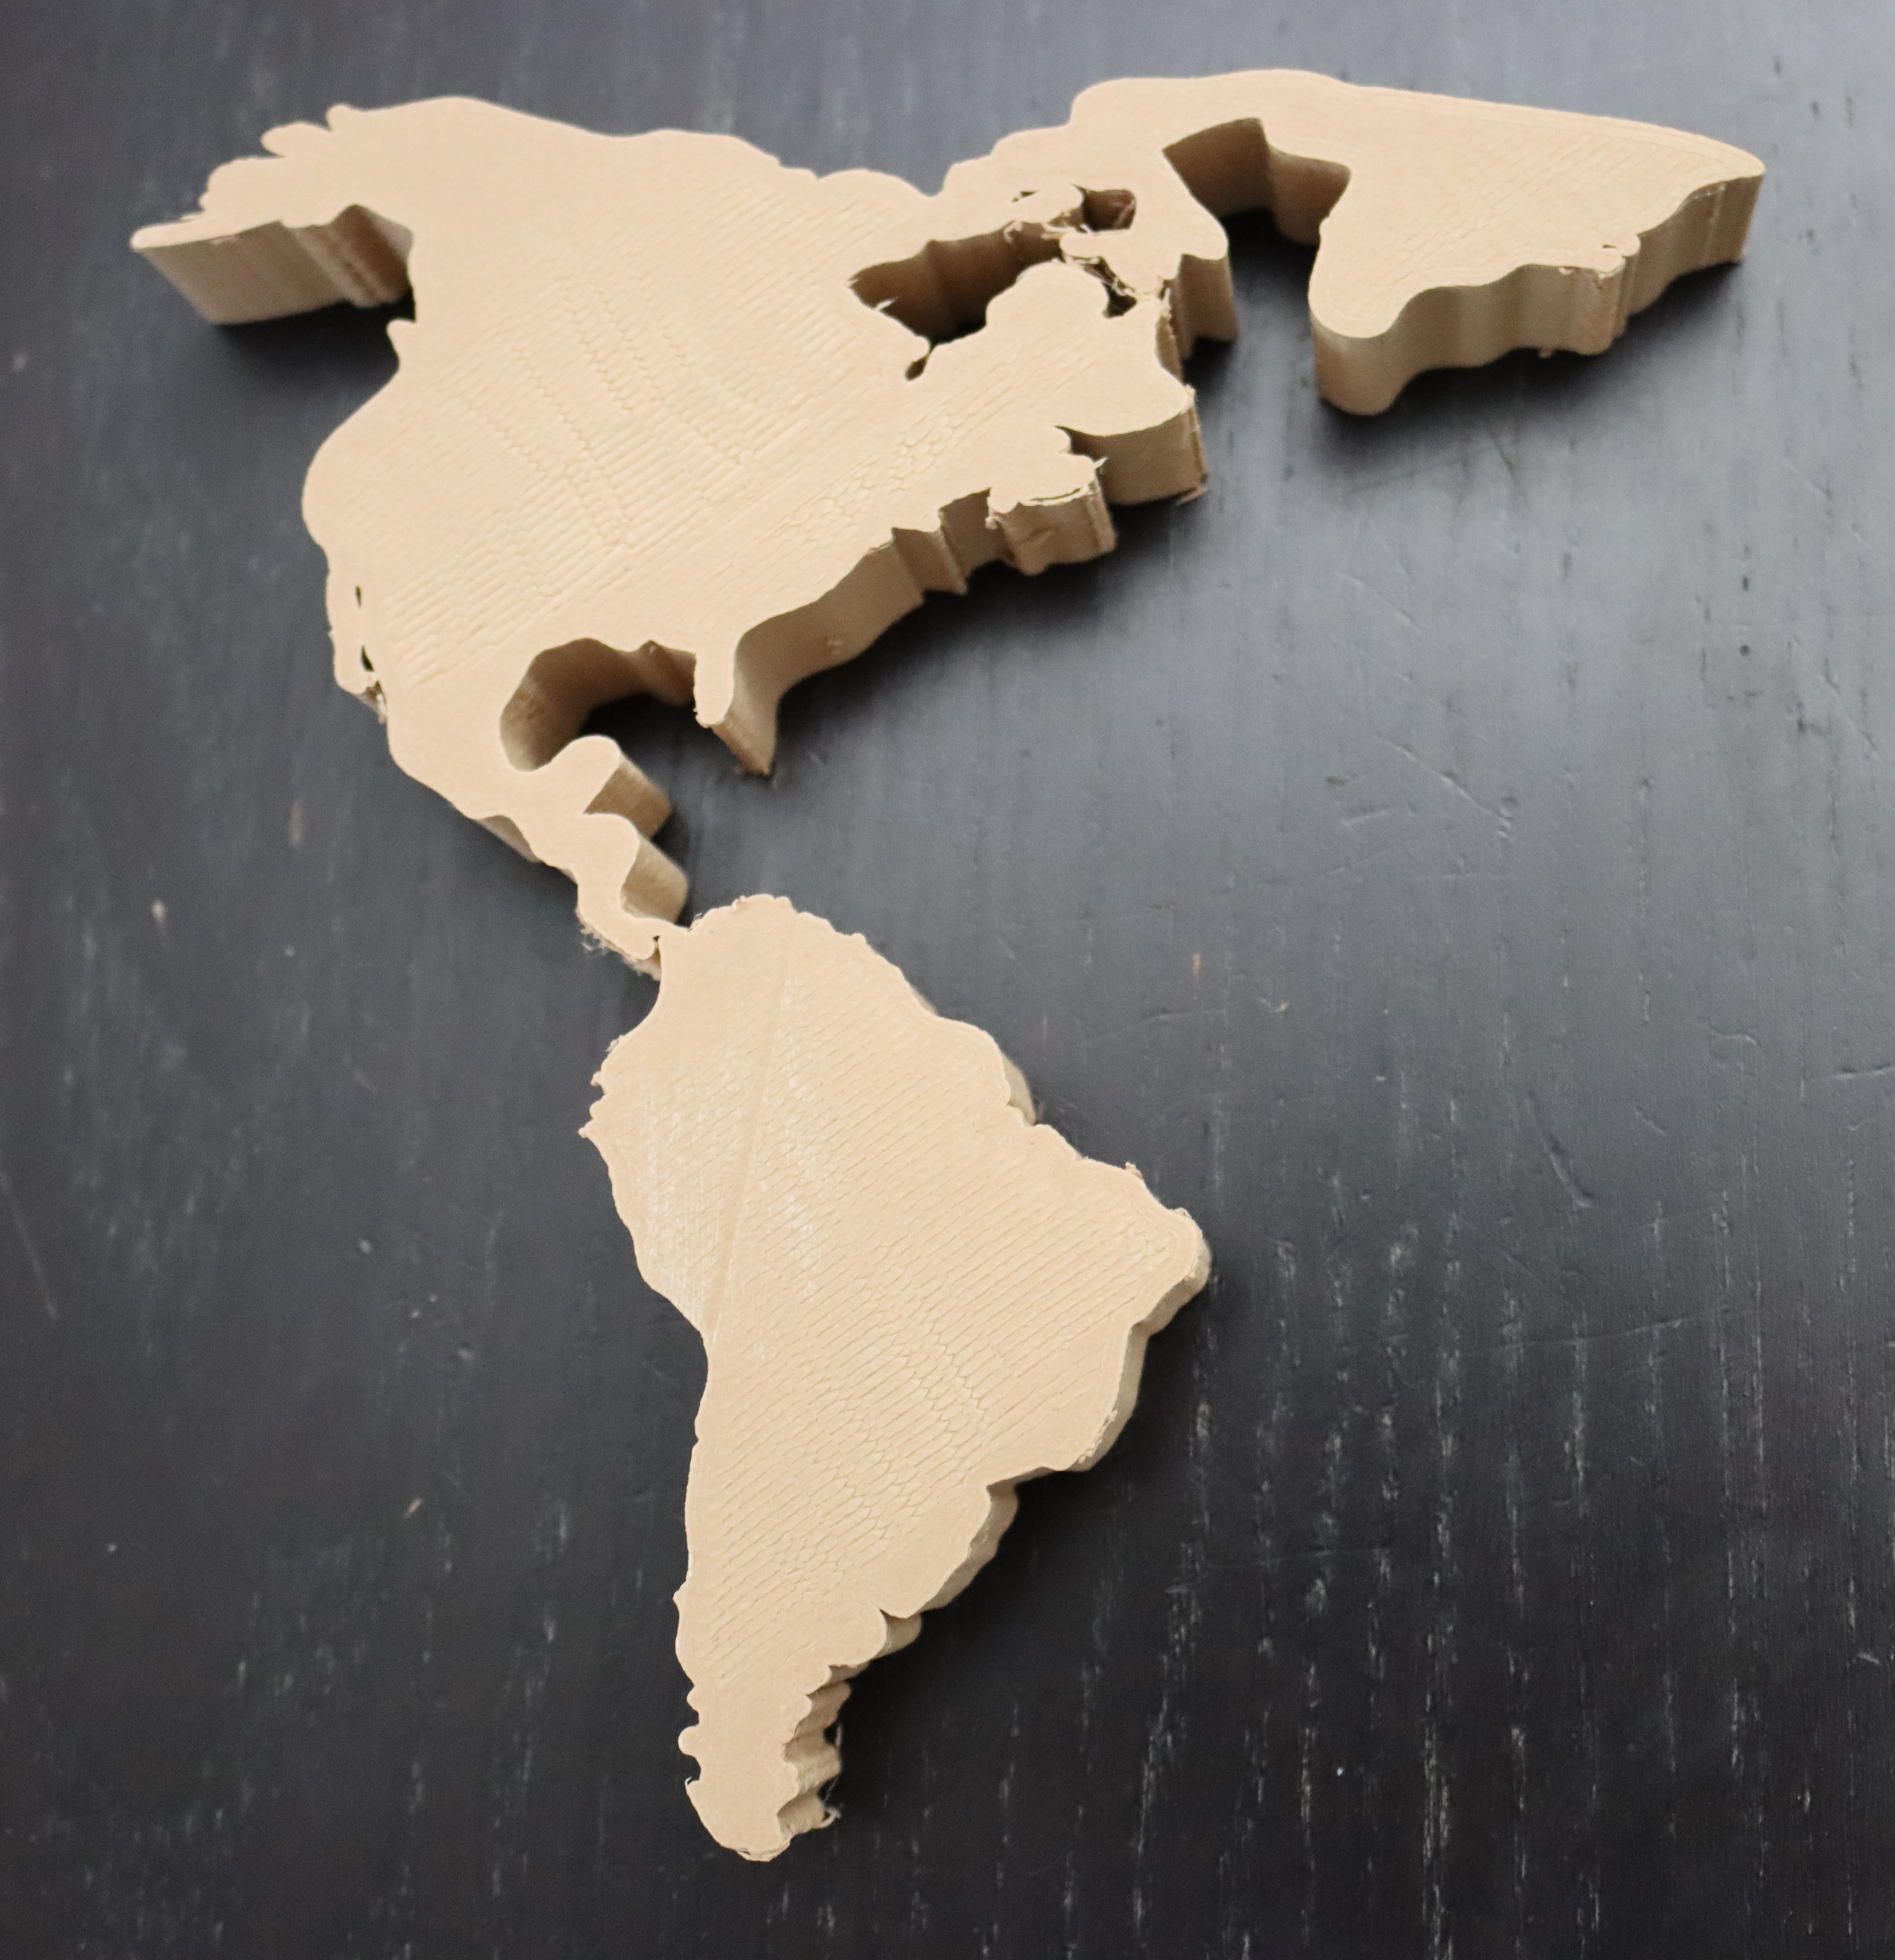
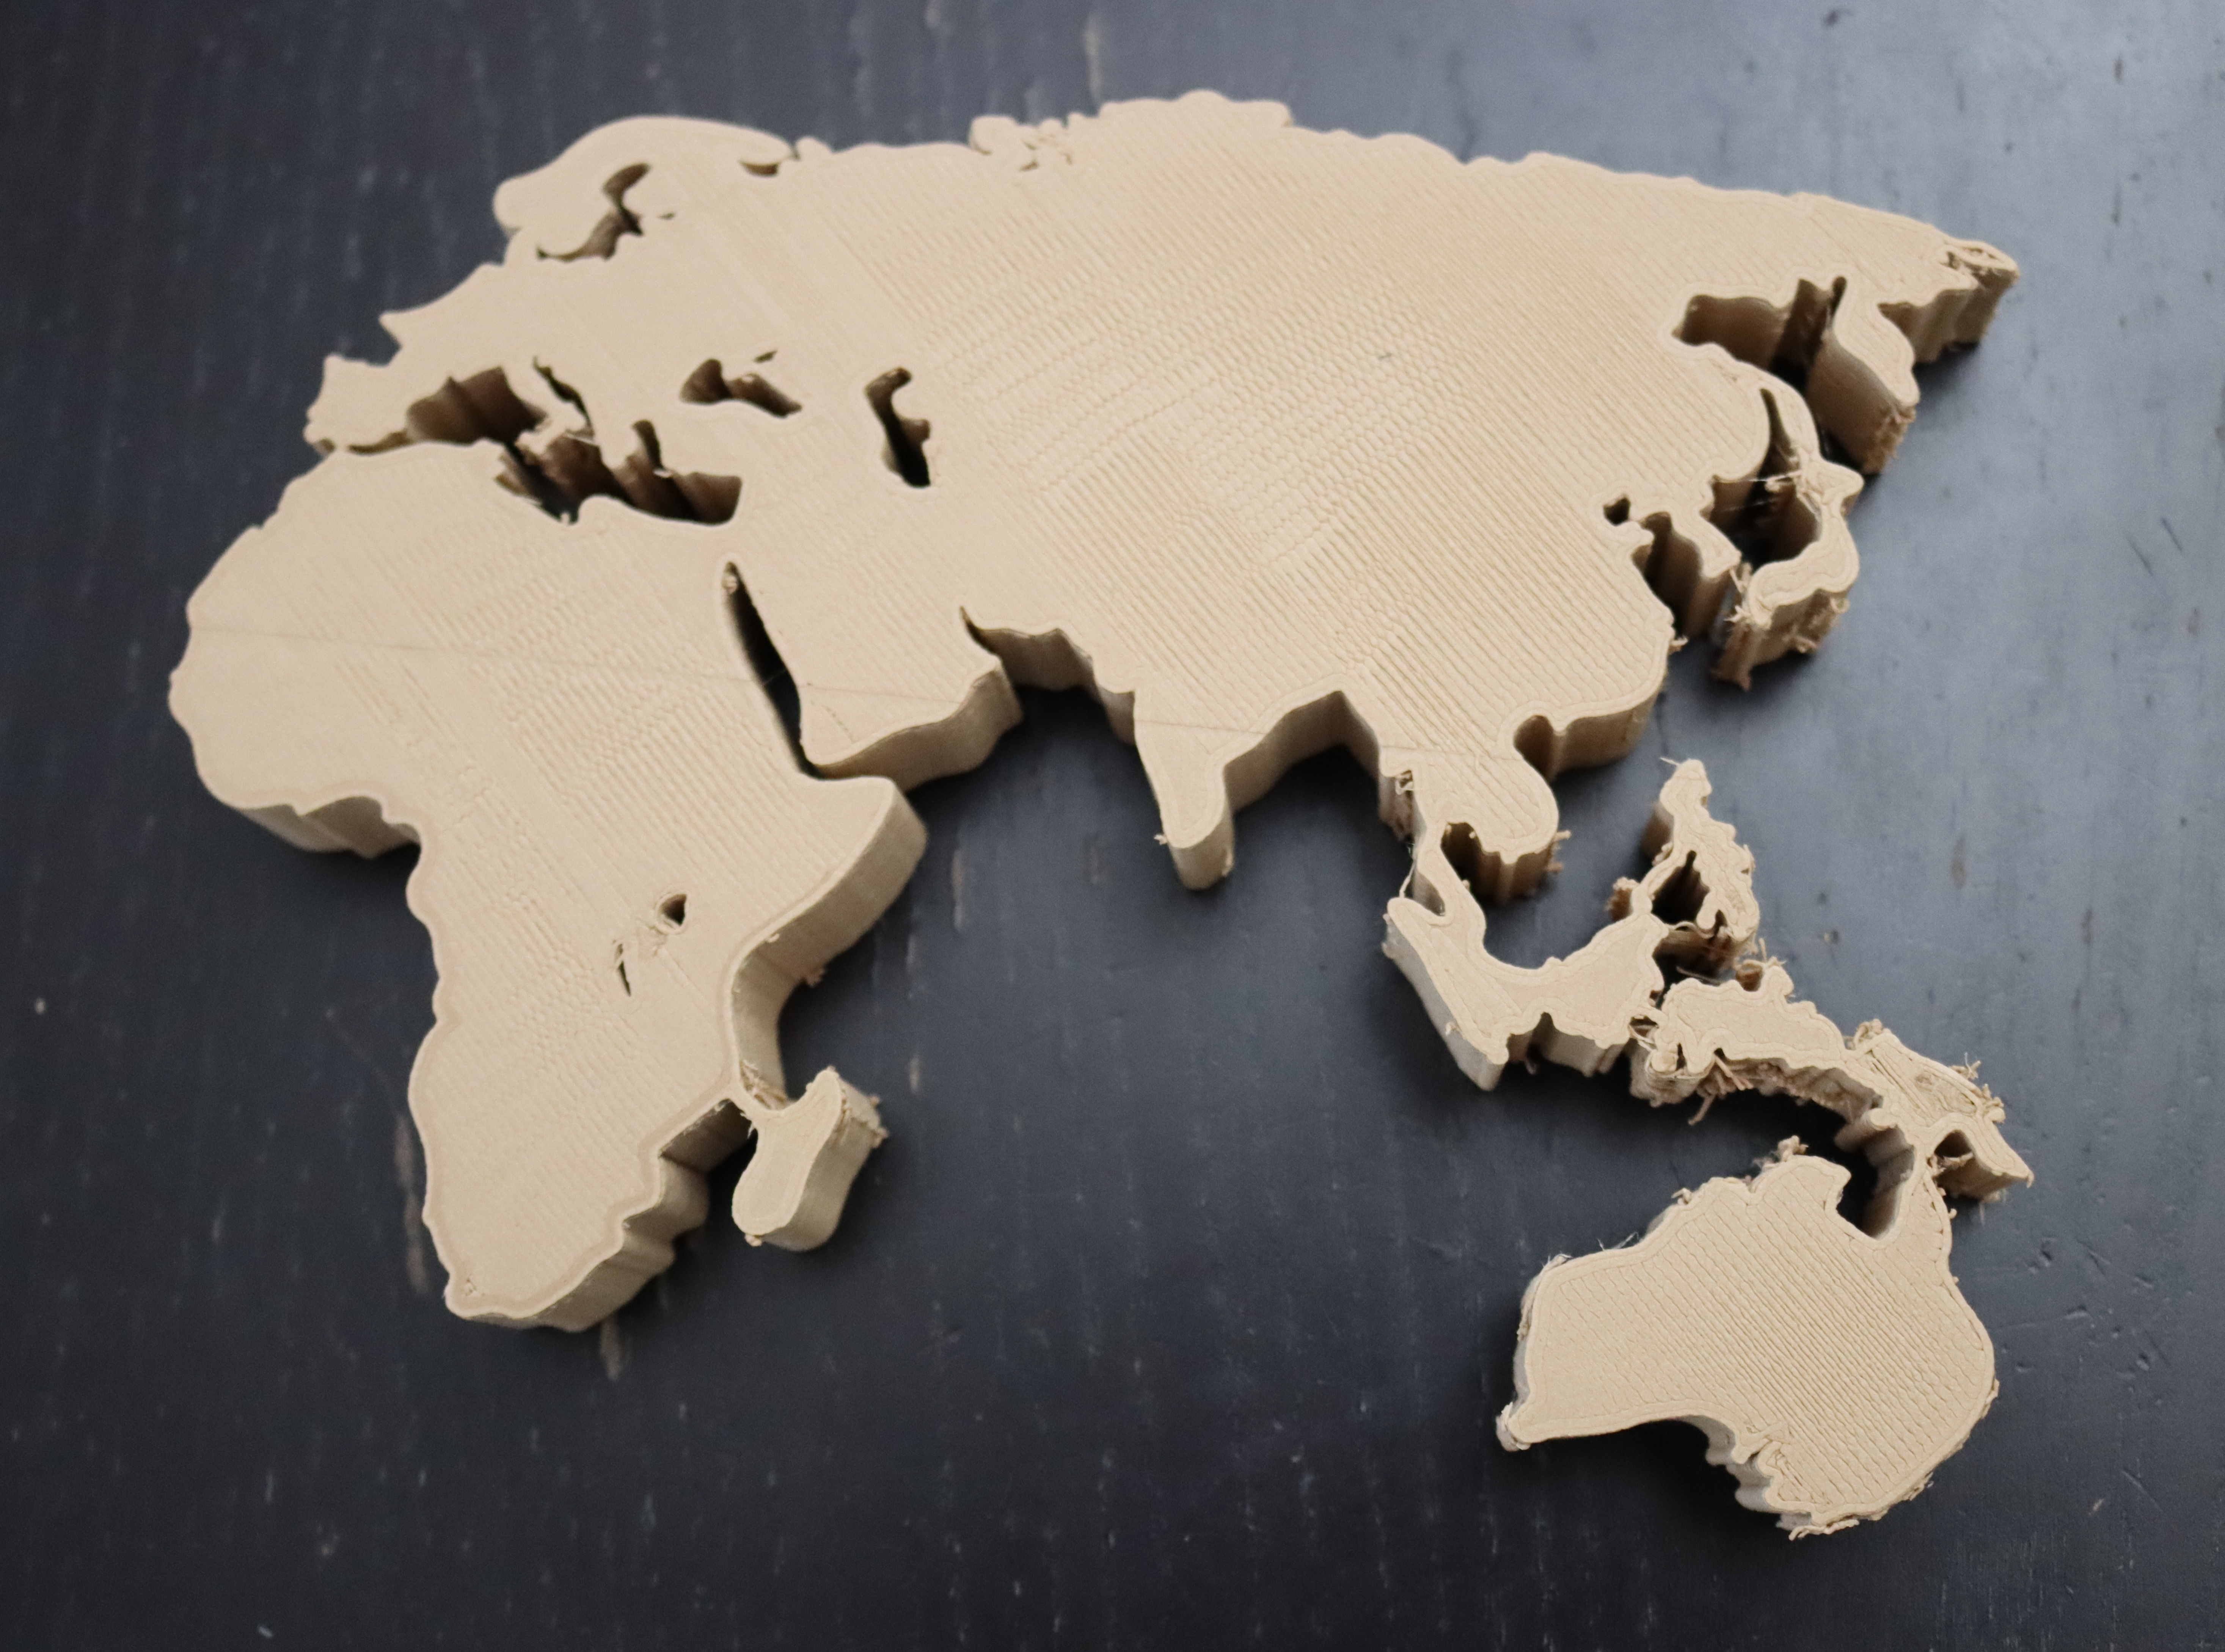

Save all the 3D models to .stl file. Print them one by one. Total printing is about 11 hours 11 minutes and used 102 meters of filaments.
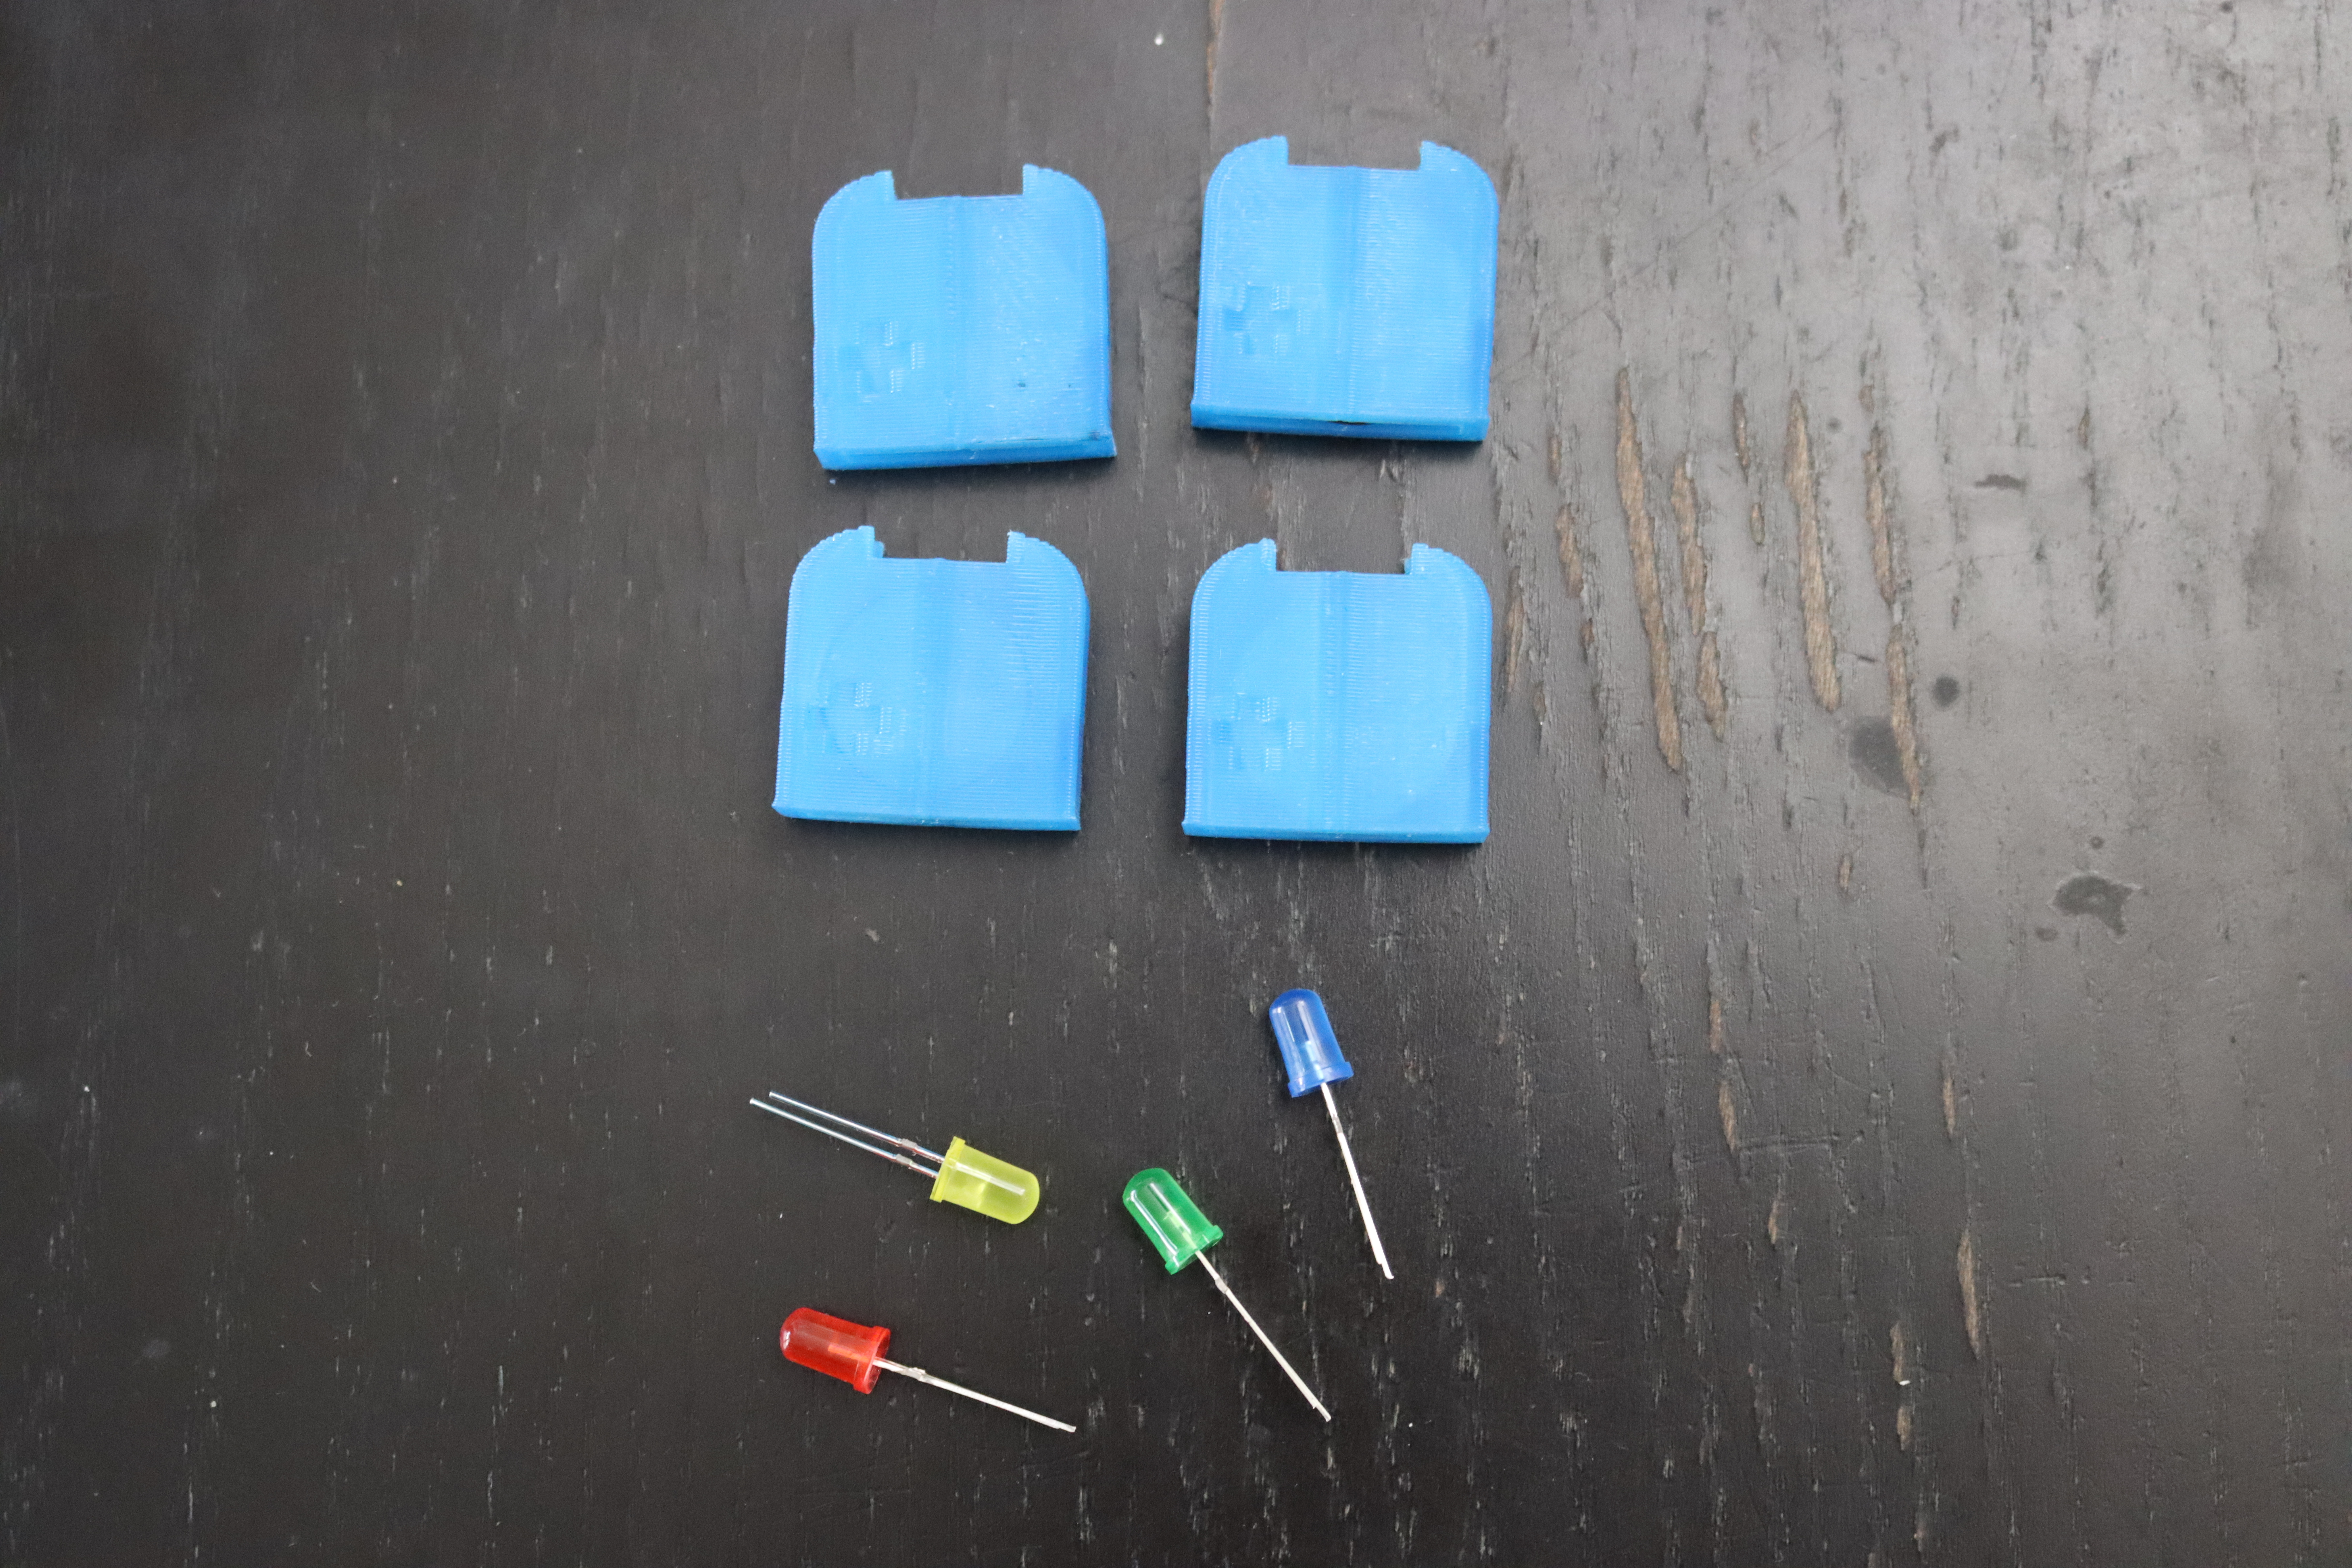
For all the continents, I printed with medium quality, no support, raft, and 20% infill and for the Cardinal direction, I used high speed, no support (unless the one with the hook), no raft, and gradual infill. Because the Cardinal direction is larger than the printer's bed for printing at once, I divided it into three parts. Moreover, for the light effect, I used 5 LEDs and glow circuits from Tinkercad, but I made some modification for the glow circuit. I print 5 for the glow circuits.
After Printing
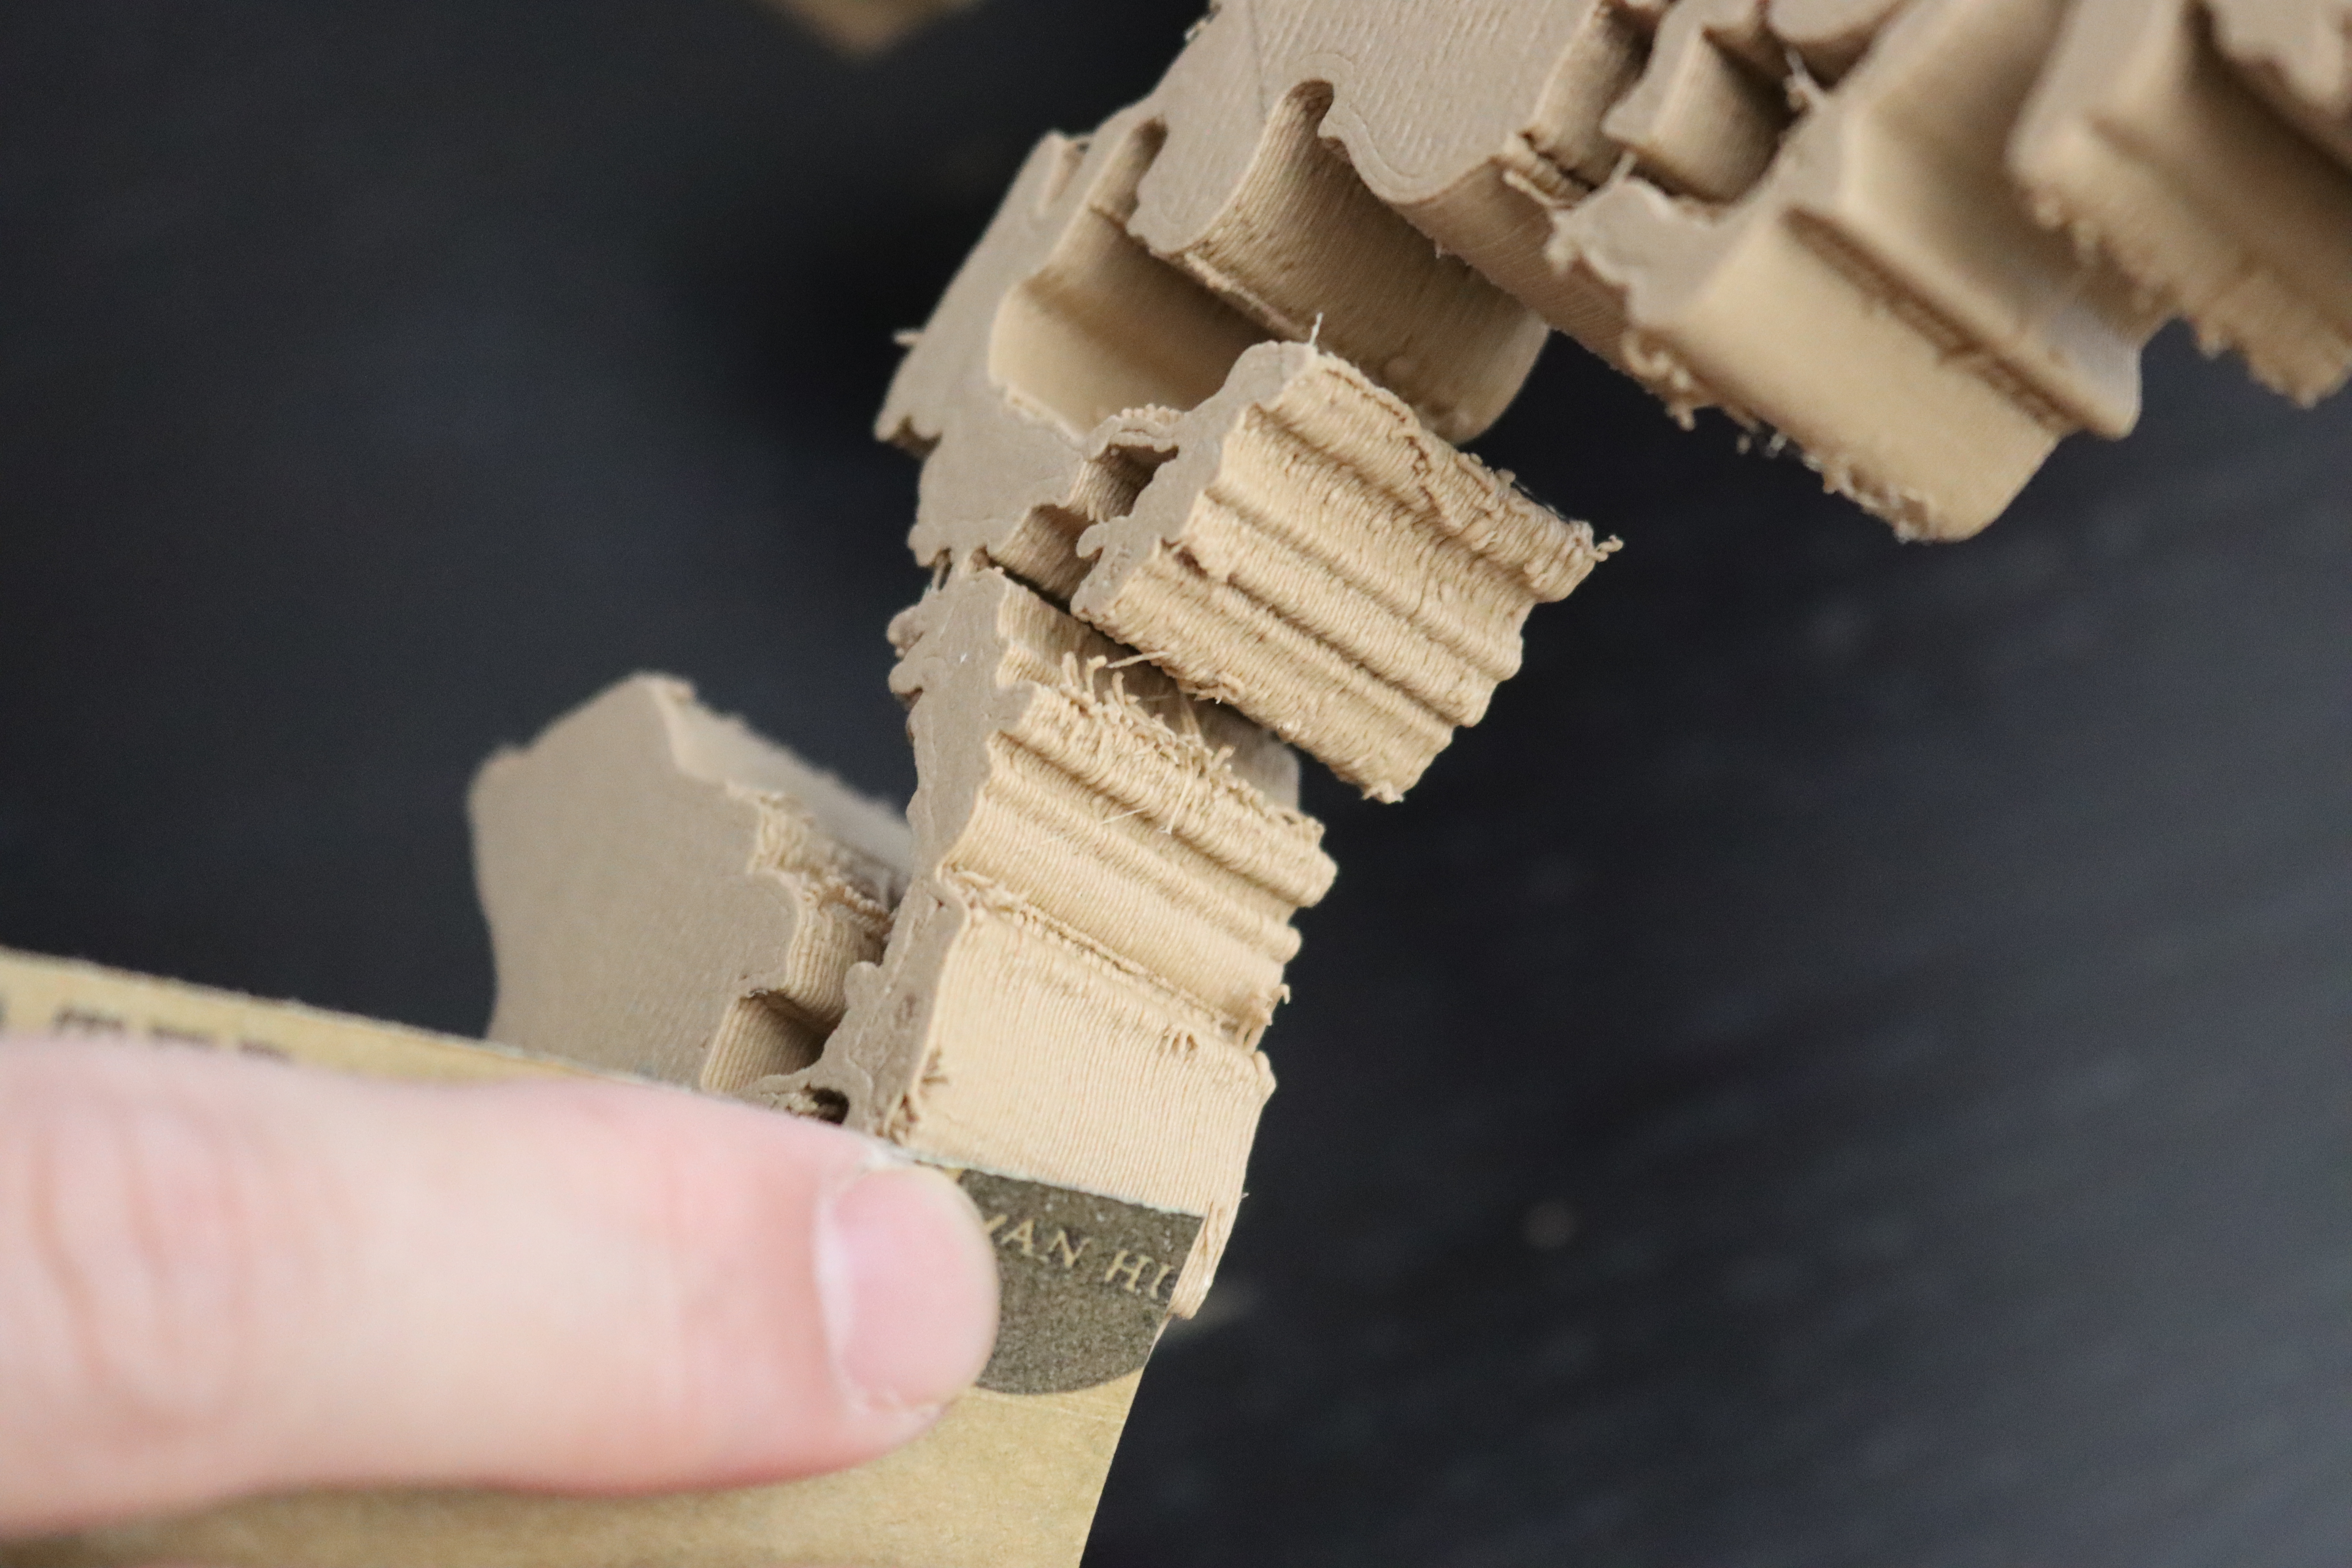
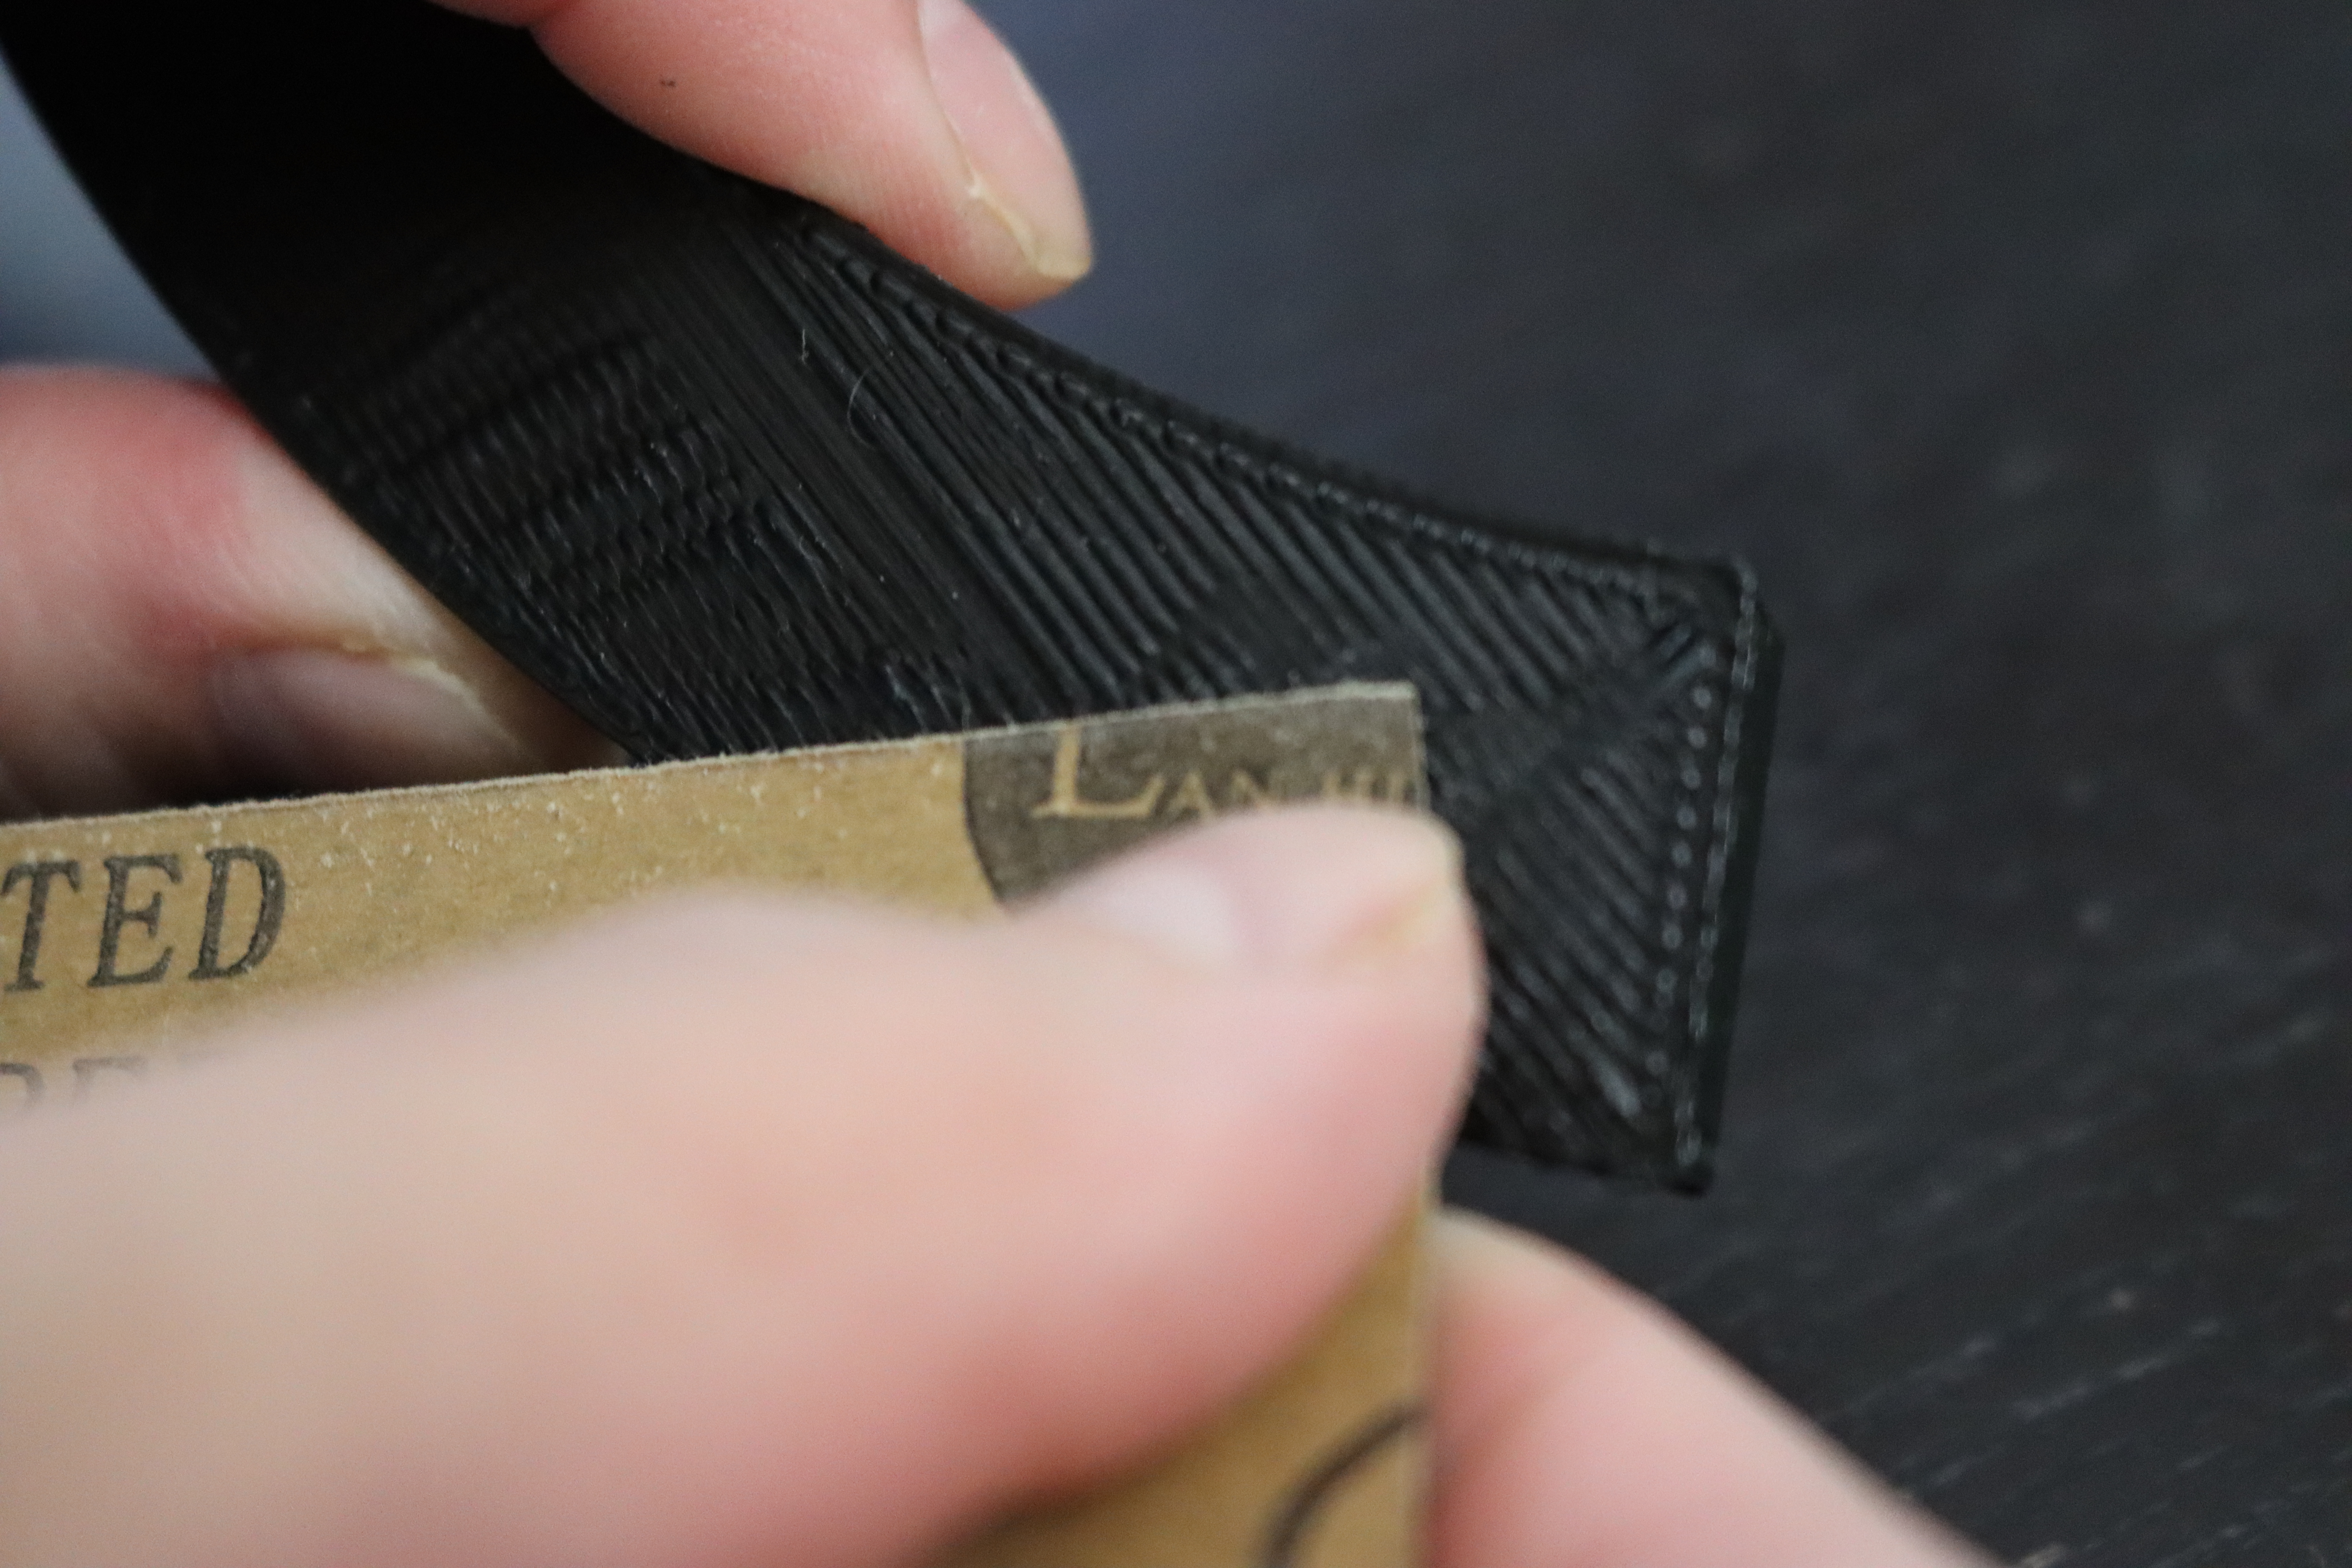
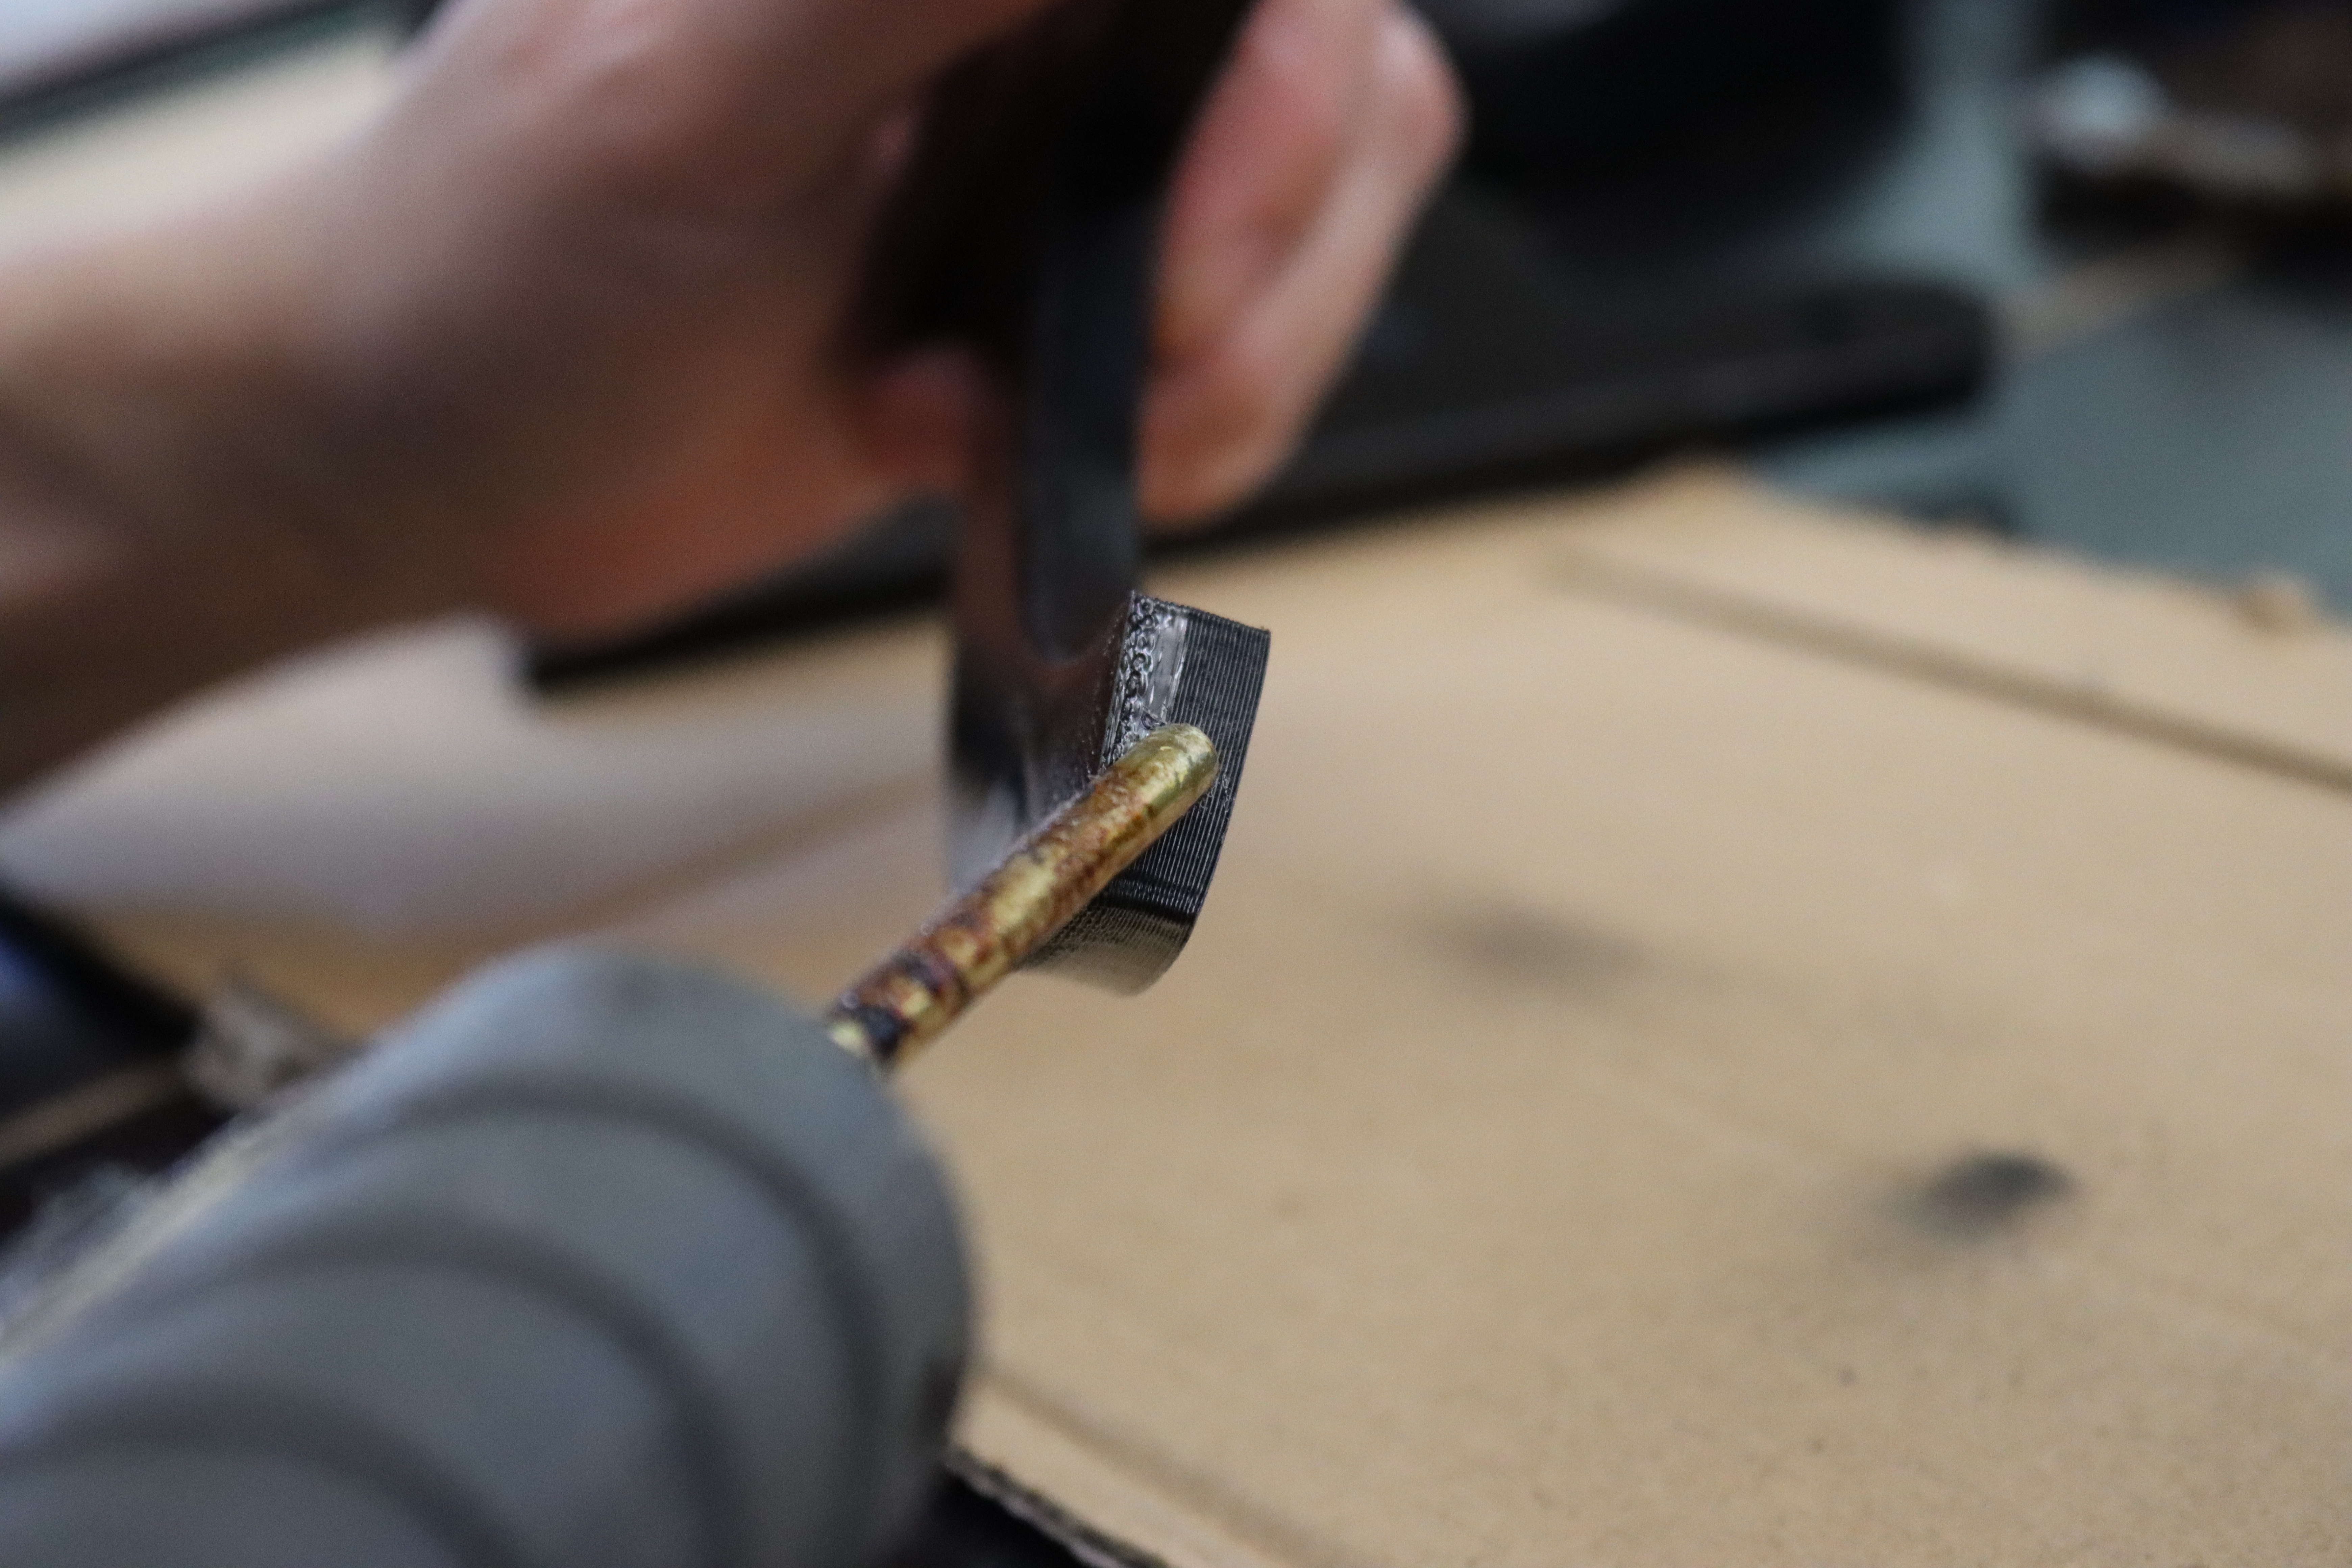
You will notice that most of the edges of your continents are rough and messy, especially tiny ones. Therefore, we should smooth them by using sandpaper. We should be patient when smoothing 3D models. Sand them in a circular motion by using sandpaper from no. 240, 300, 400, 600, 800, 1000, 1200, 1500, and 2000 respectively until you get the smooth surfaces. After sanding, apply lip balm to the surface of continents. By doing this, the continents will be glossy. After sanding the cardinal direction, wipe the surface with alcohol. After it dries, spray it with black spray paint. I used support only for printing the hook. Remove the support after printing.
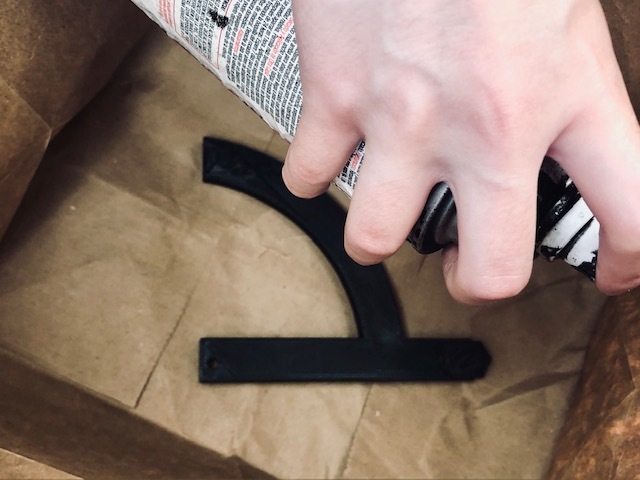
Some Mistakes in Printing
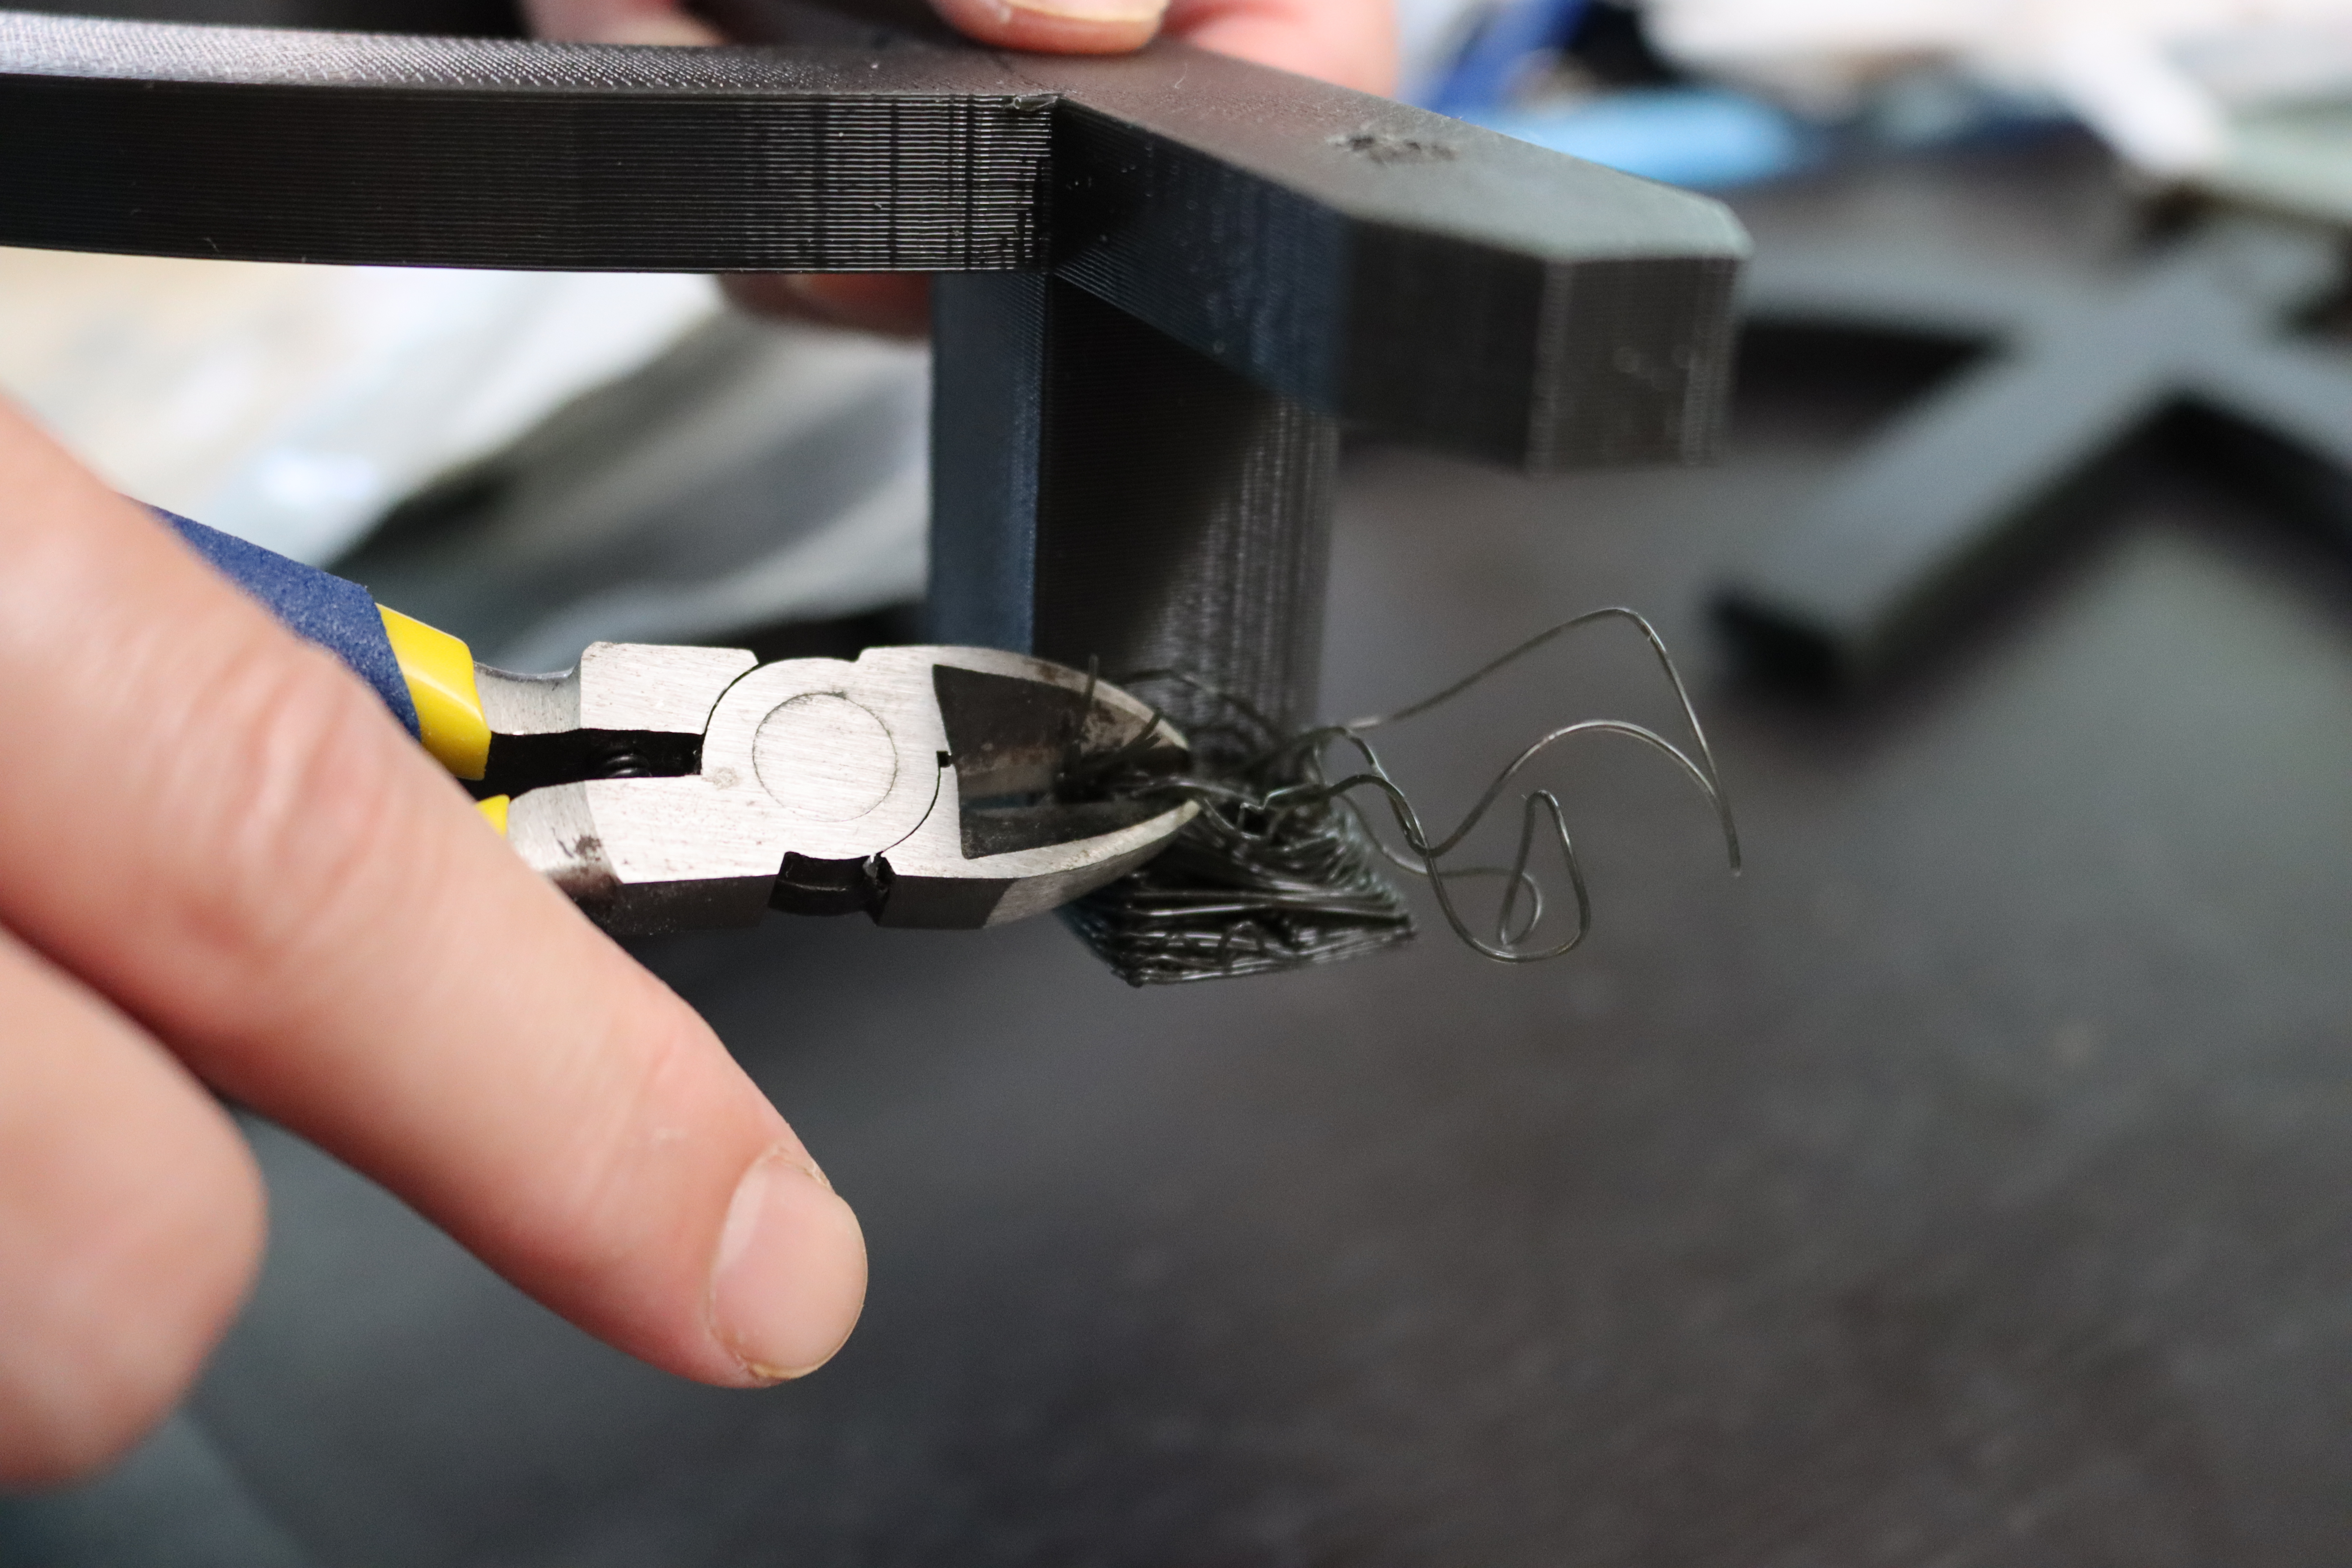
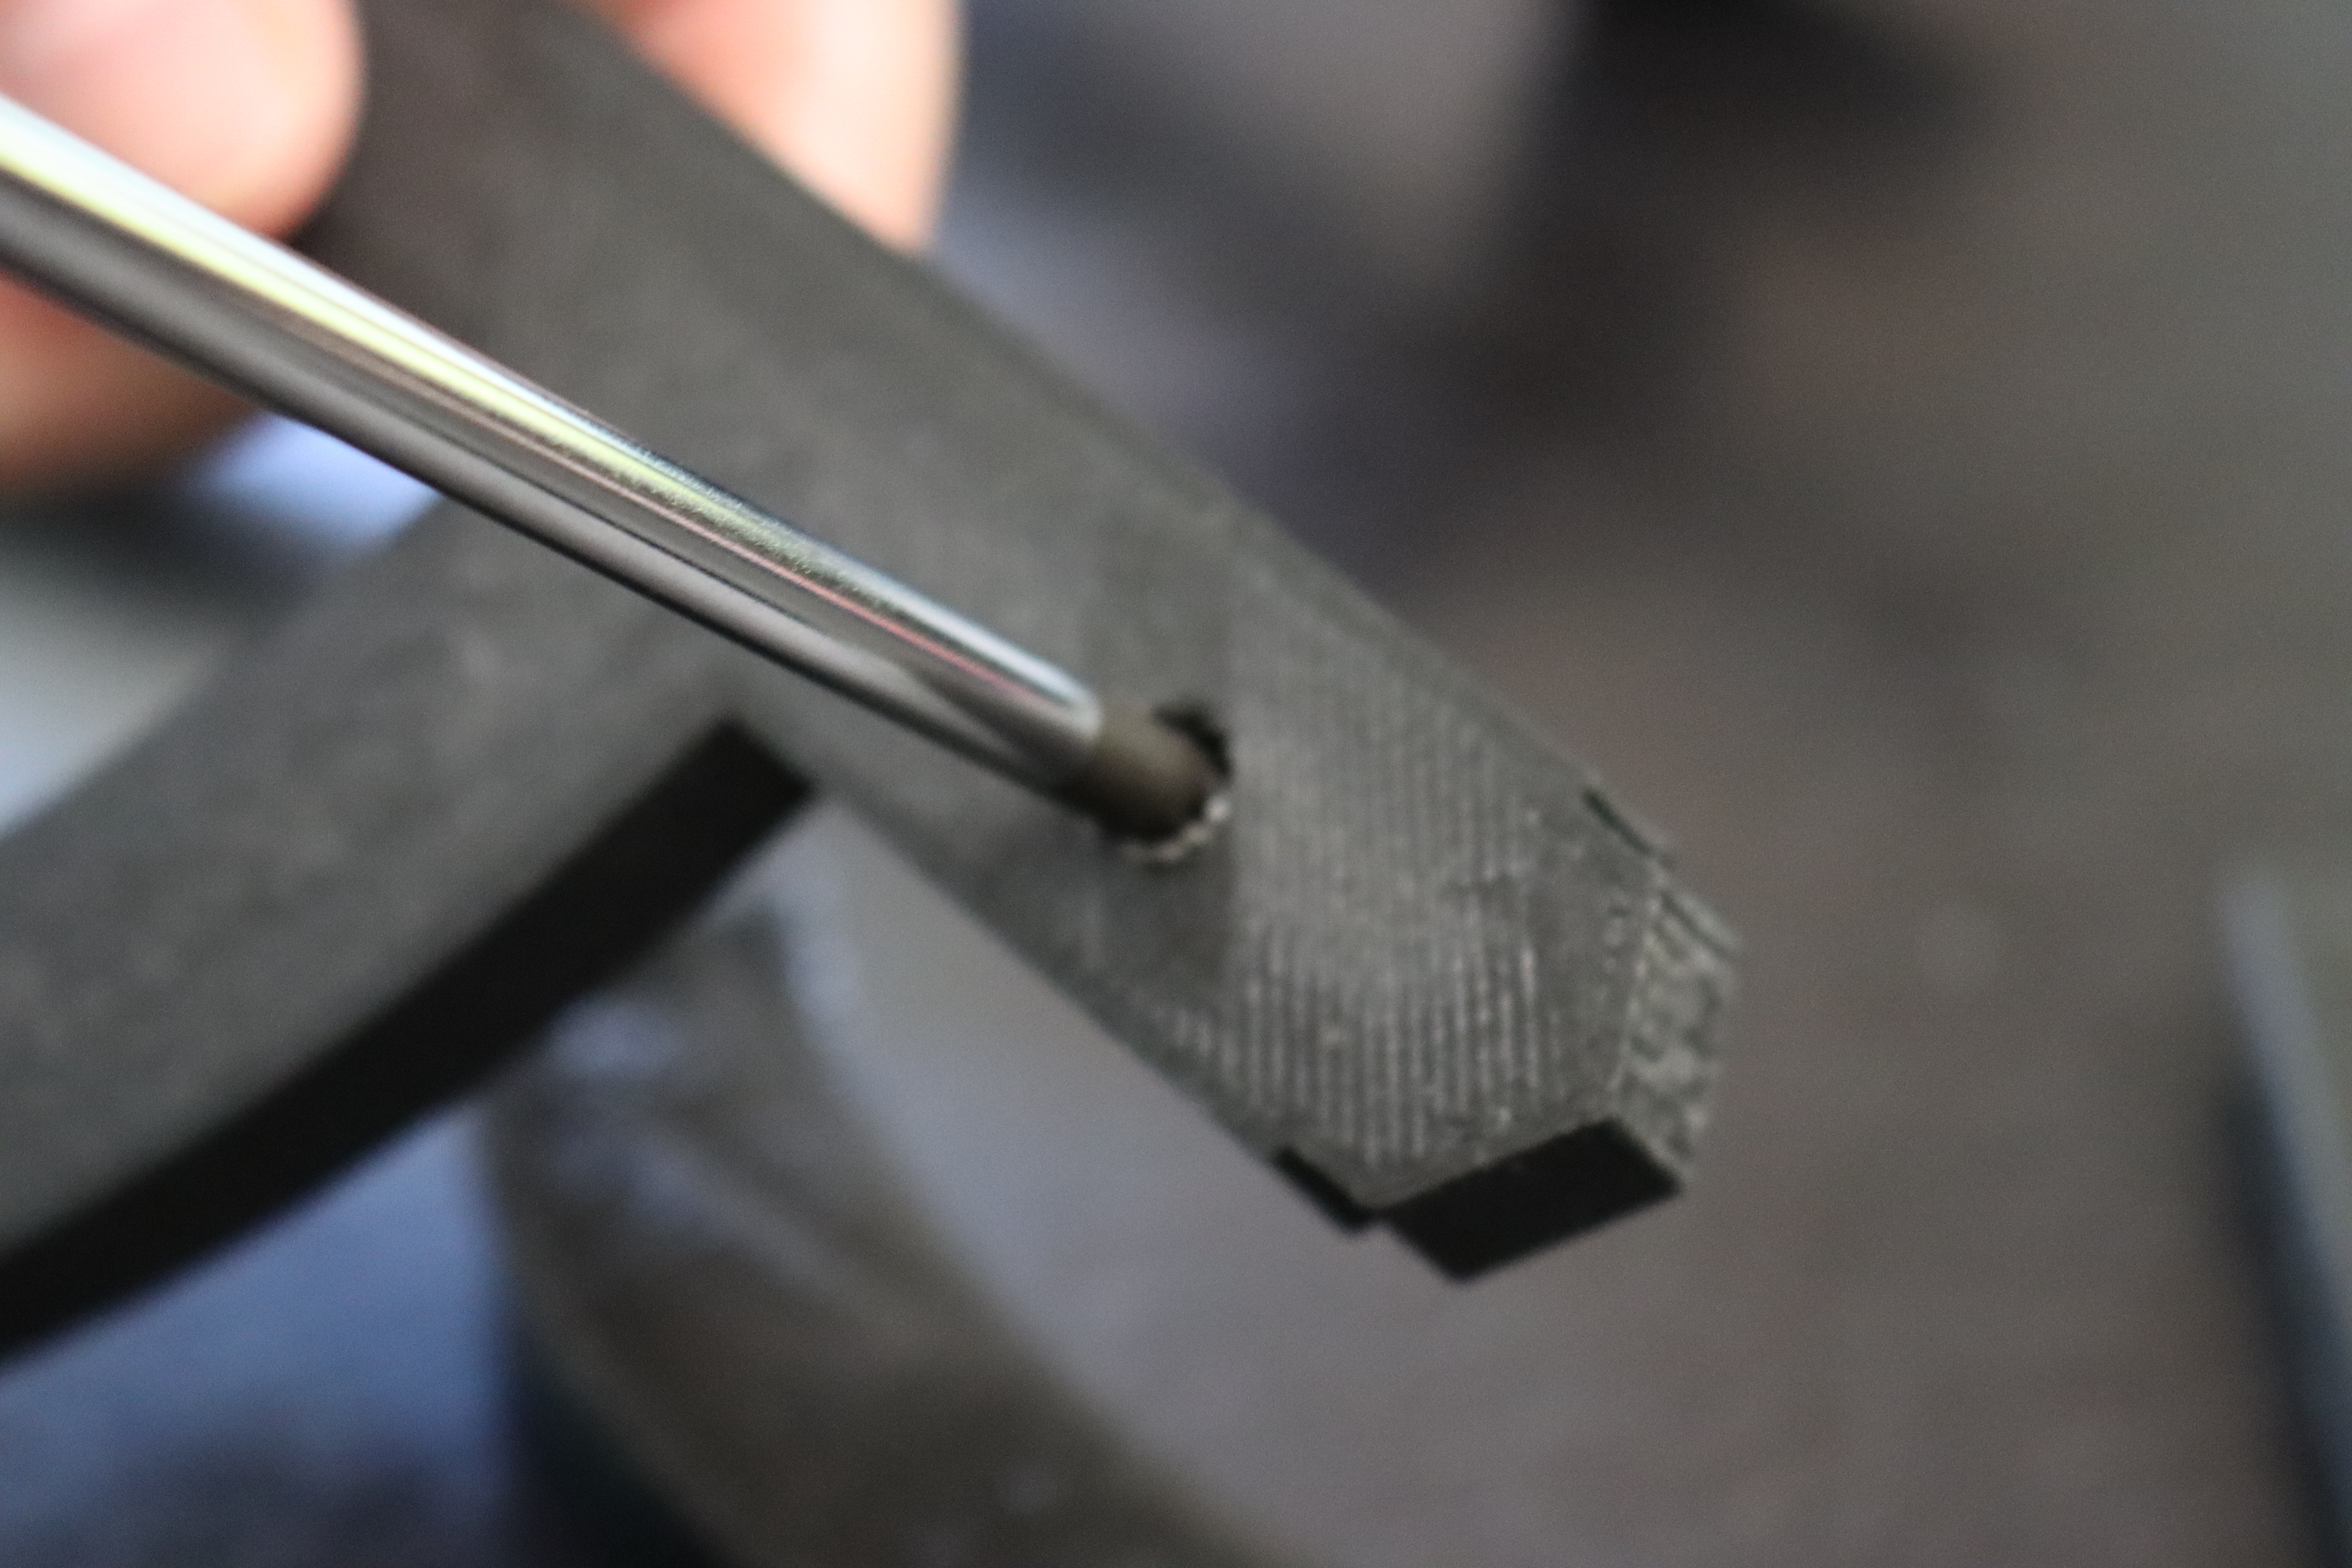
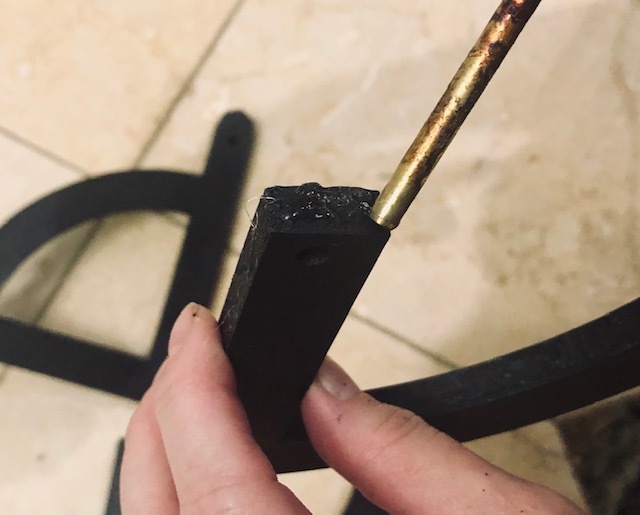
Do not worry if you have some errors and mistakes in 3D Printing. I have the same experience, too. When printing the hook, because it is an overhang part, I already used support. Turnout, the support is not printed and become messy (See picture 1), so I have to cut and sand it until it smooths. Also, there is another mistake in my printing. The holes for LEDs are too small to insert the LED. I think it is smaller about 2 mm, so I use a Phillips-head- screwdriver manually to make the holes larger. Last mistake in my printing is that I planned to use 5 LEDs for lighting my world map. Turnout, the hole in the middle is failed to print. Therefore, to overcome this mistake, I covered it with the continent when gluing.
Assembles- Pt. 1
Now it is time to assemble all the printing result. First, glue all parts of the cardinal directions one by one.
Assembles- Pt. 2


Then, glue the cardinal direction's letter to the pole with the correct direction.
Assemble – Pt. 3
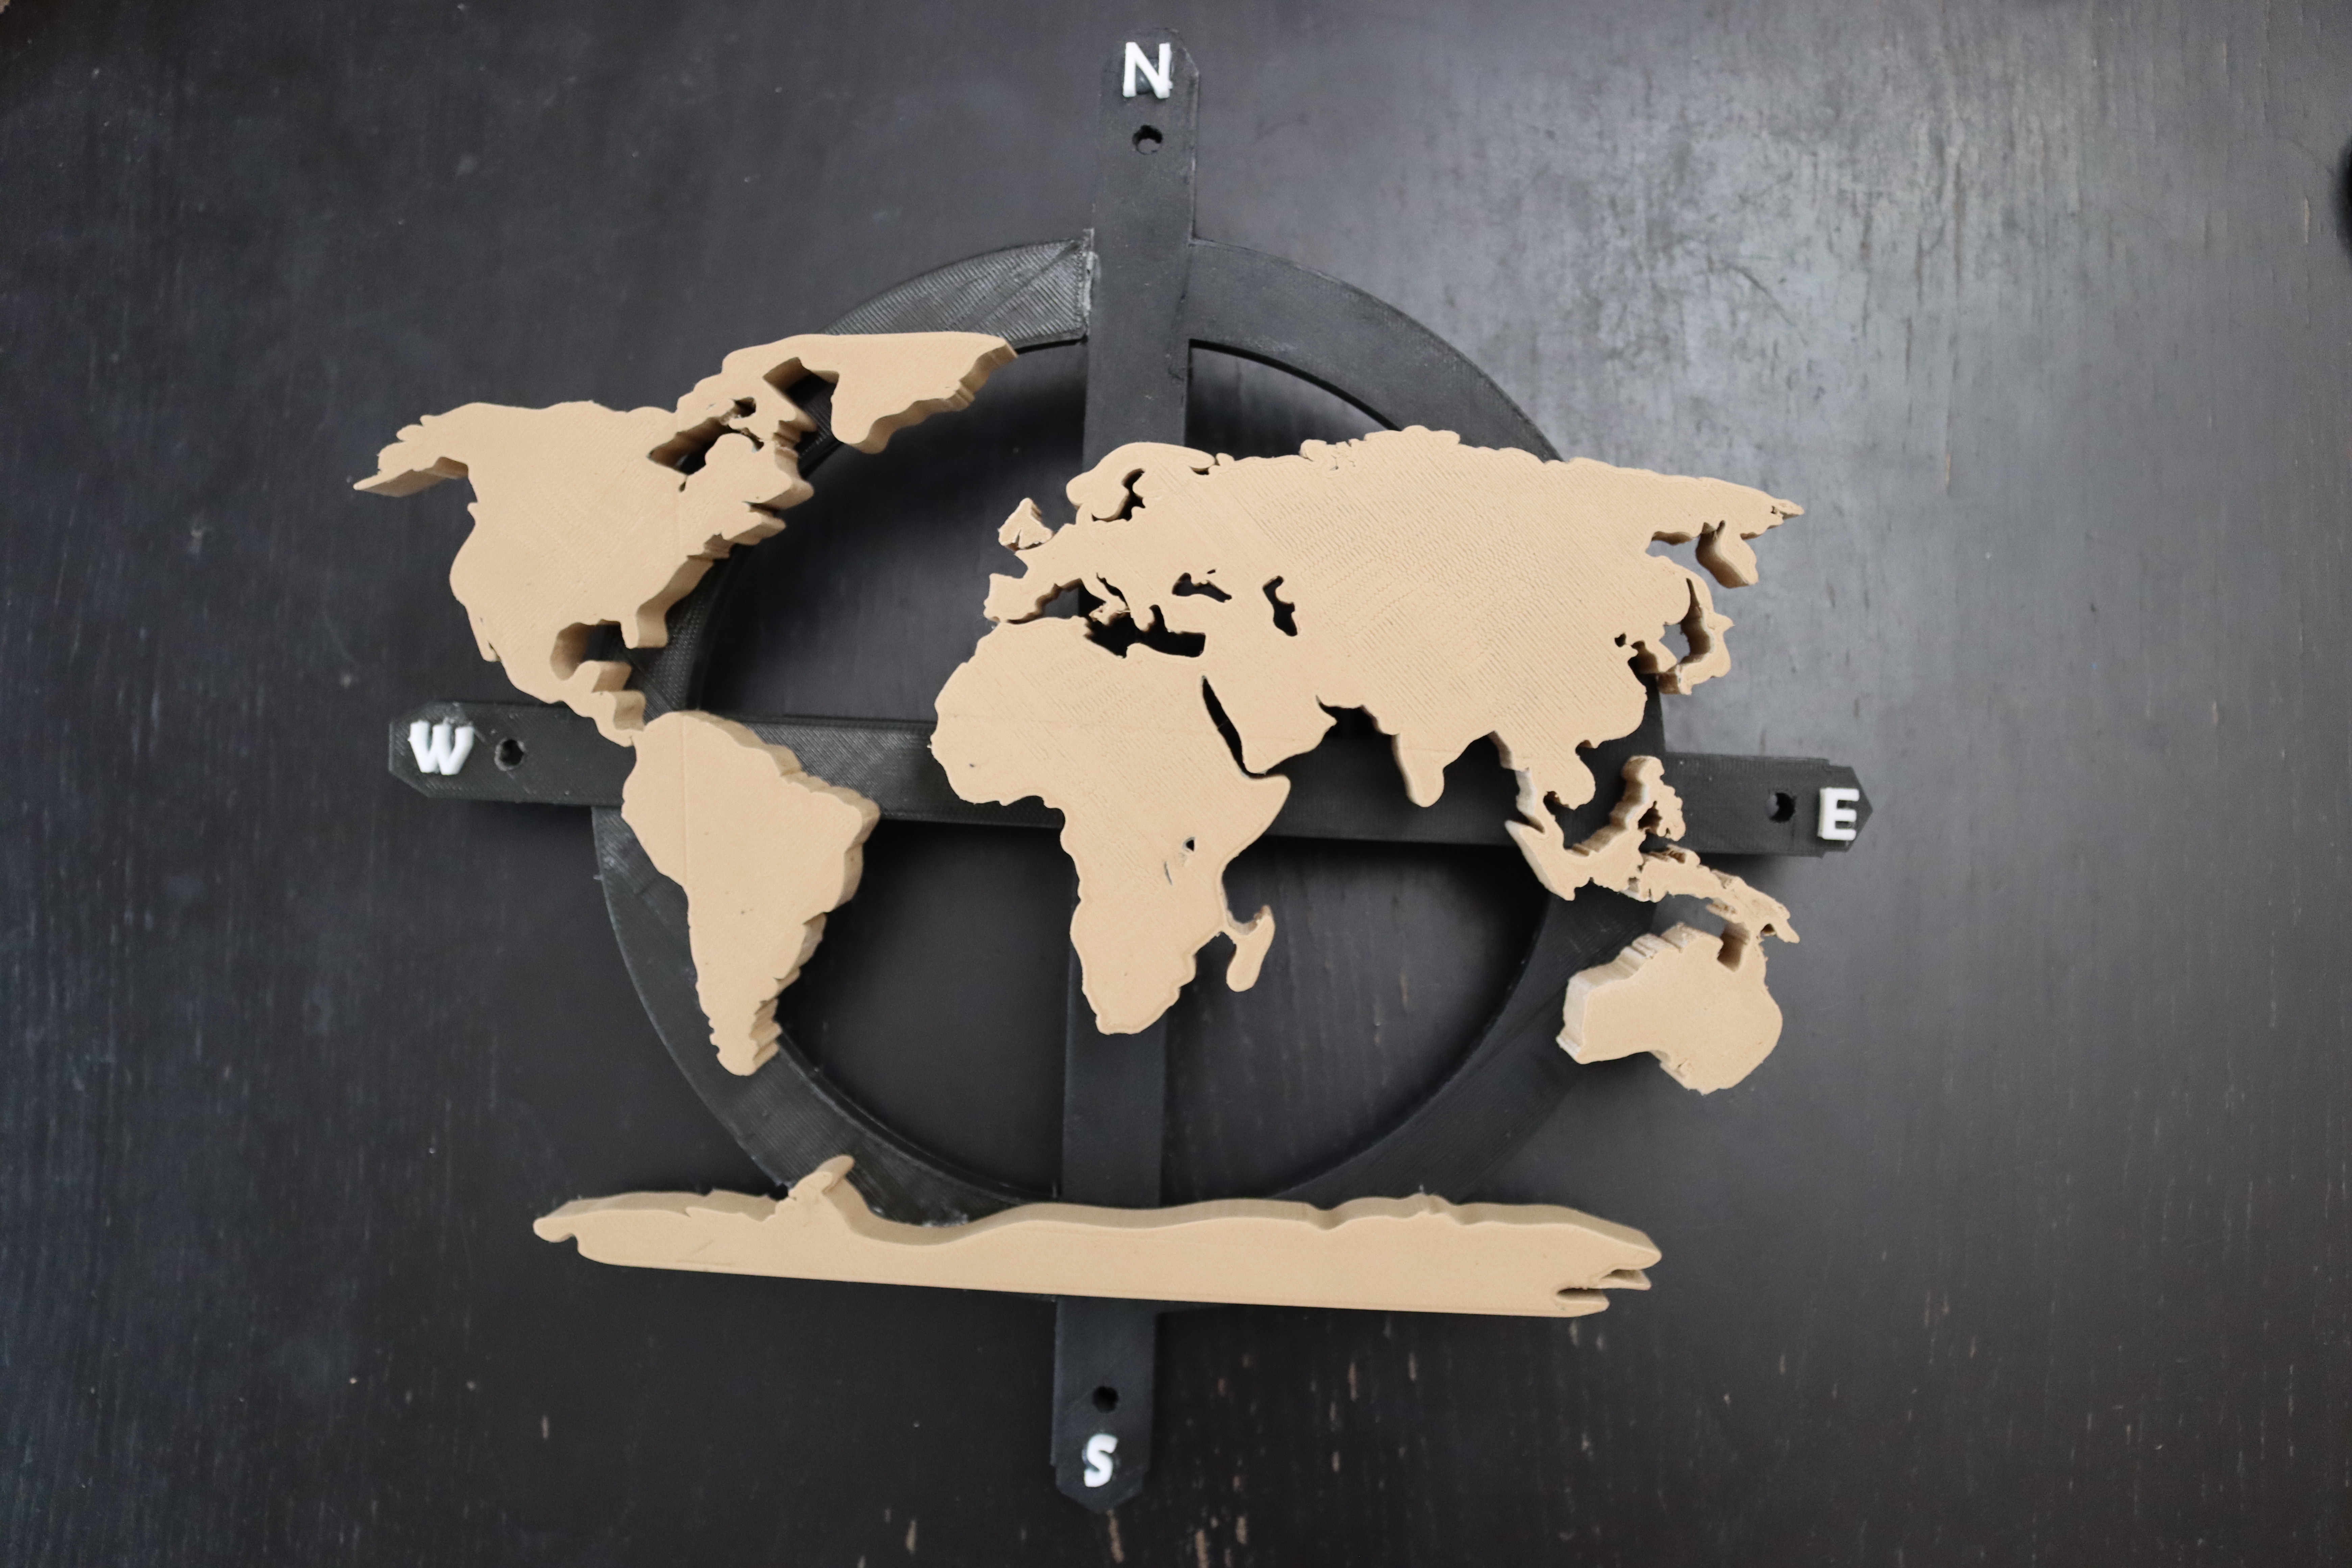
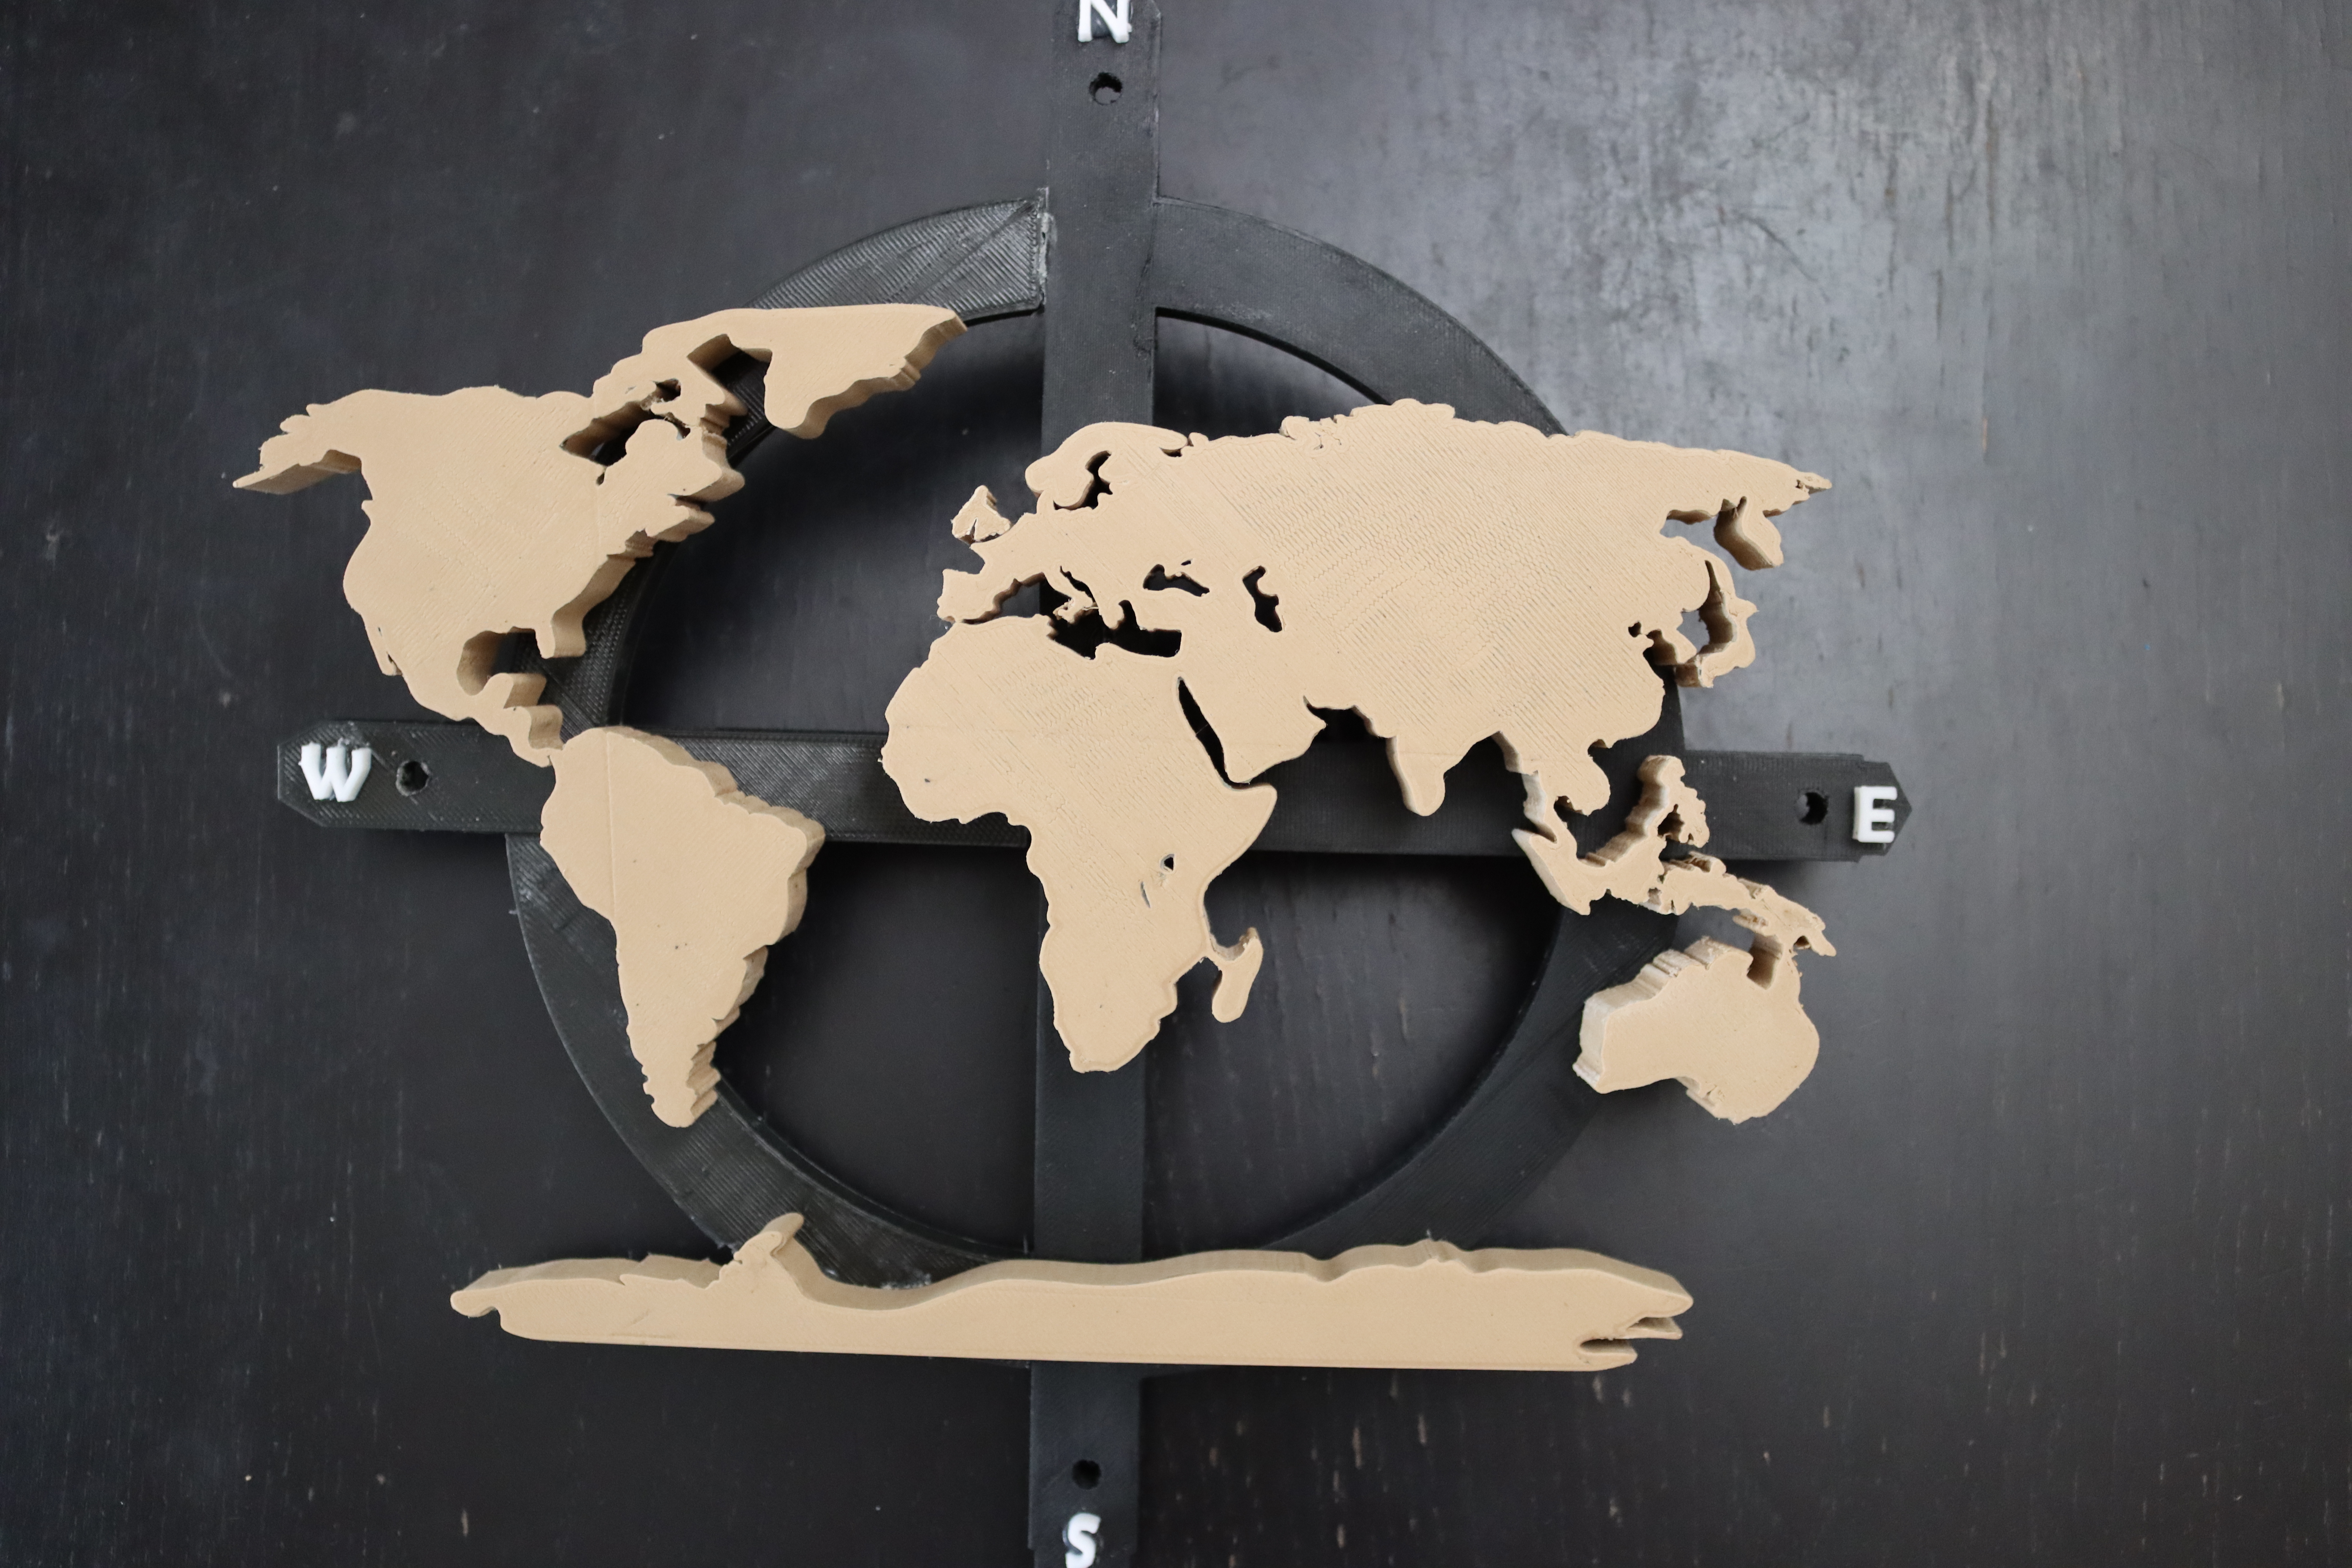
Glue continent one by one to the pole.
Assemble- Pt. 4
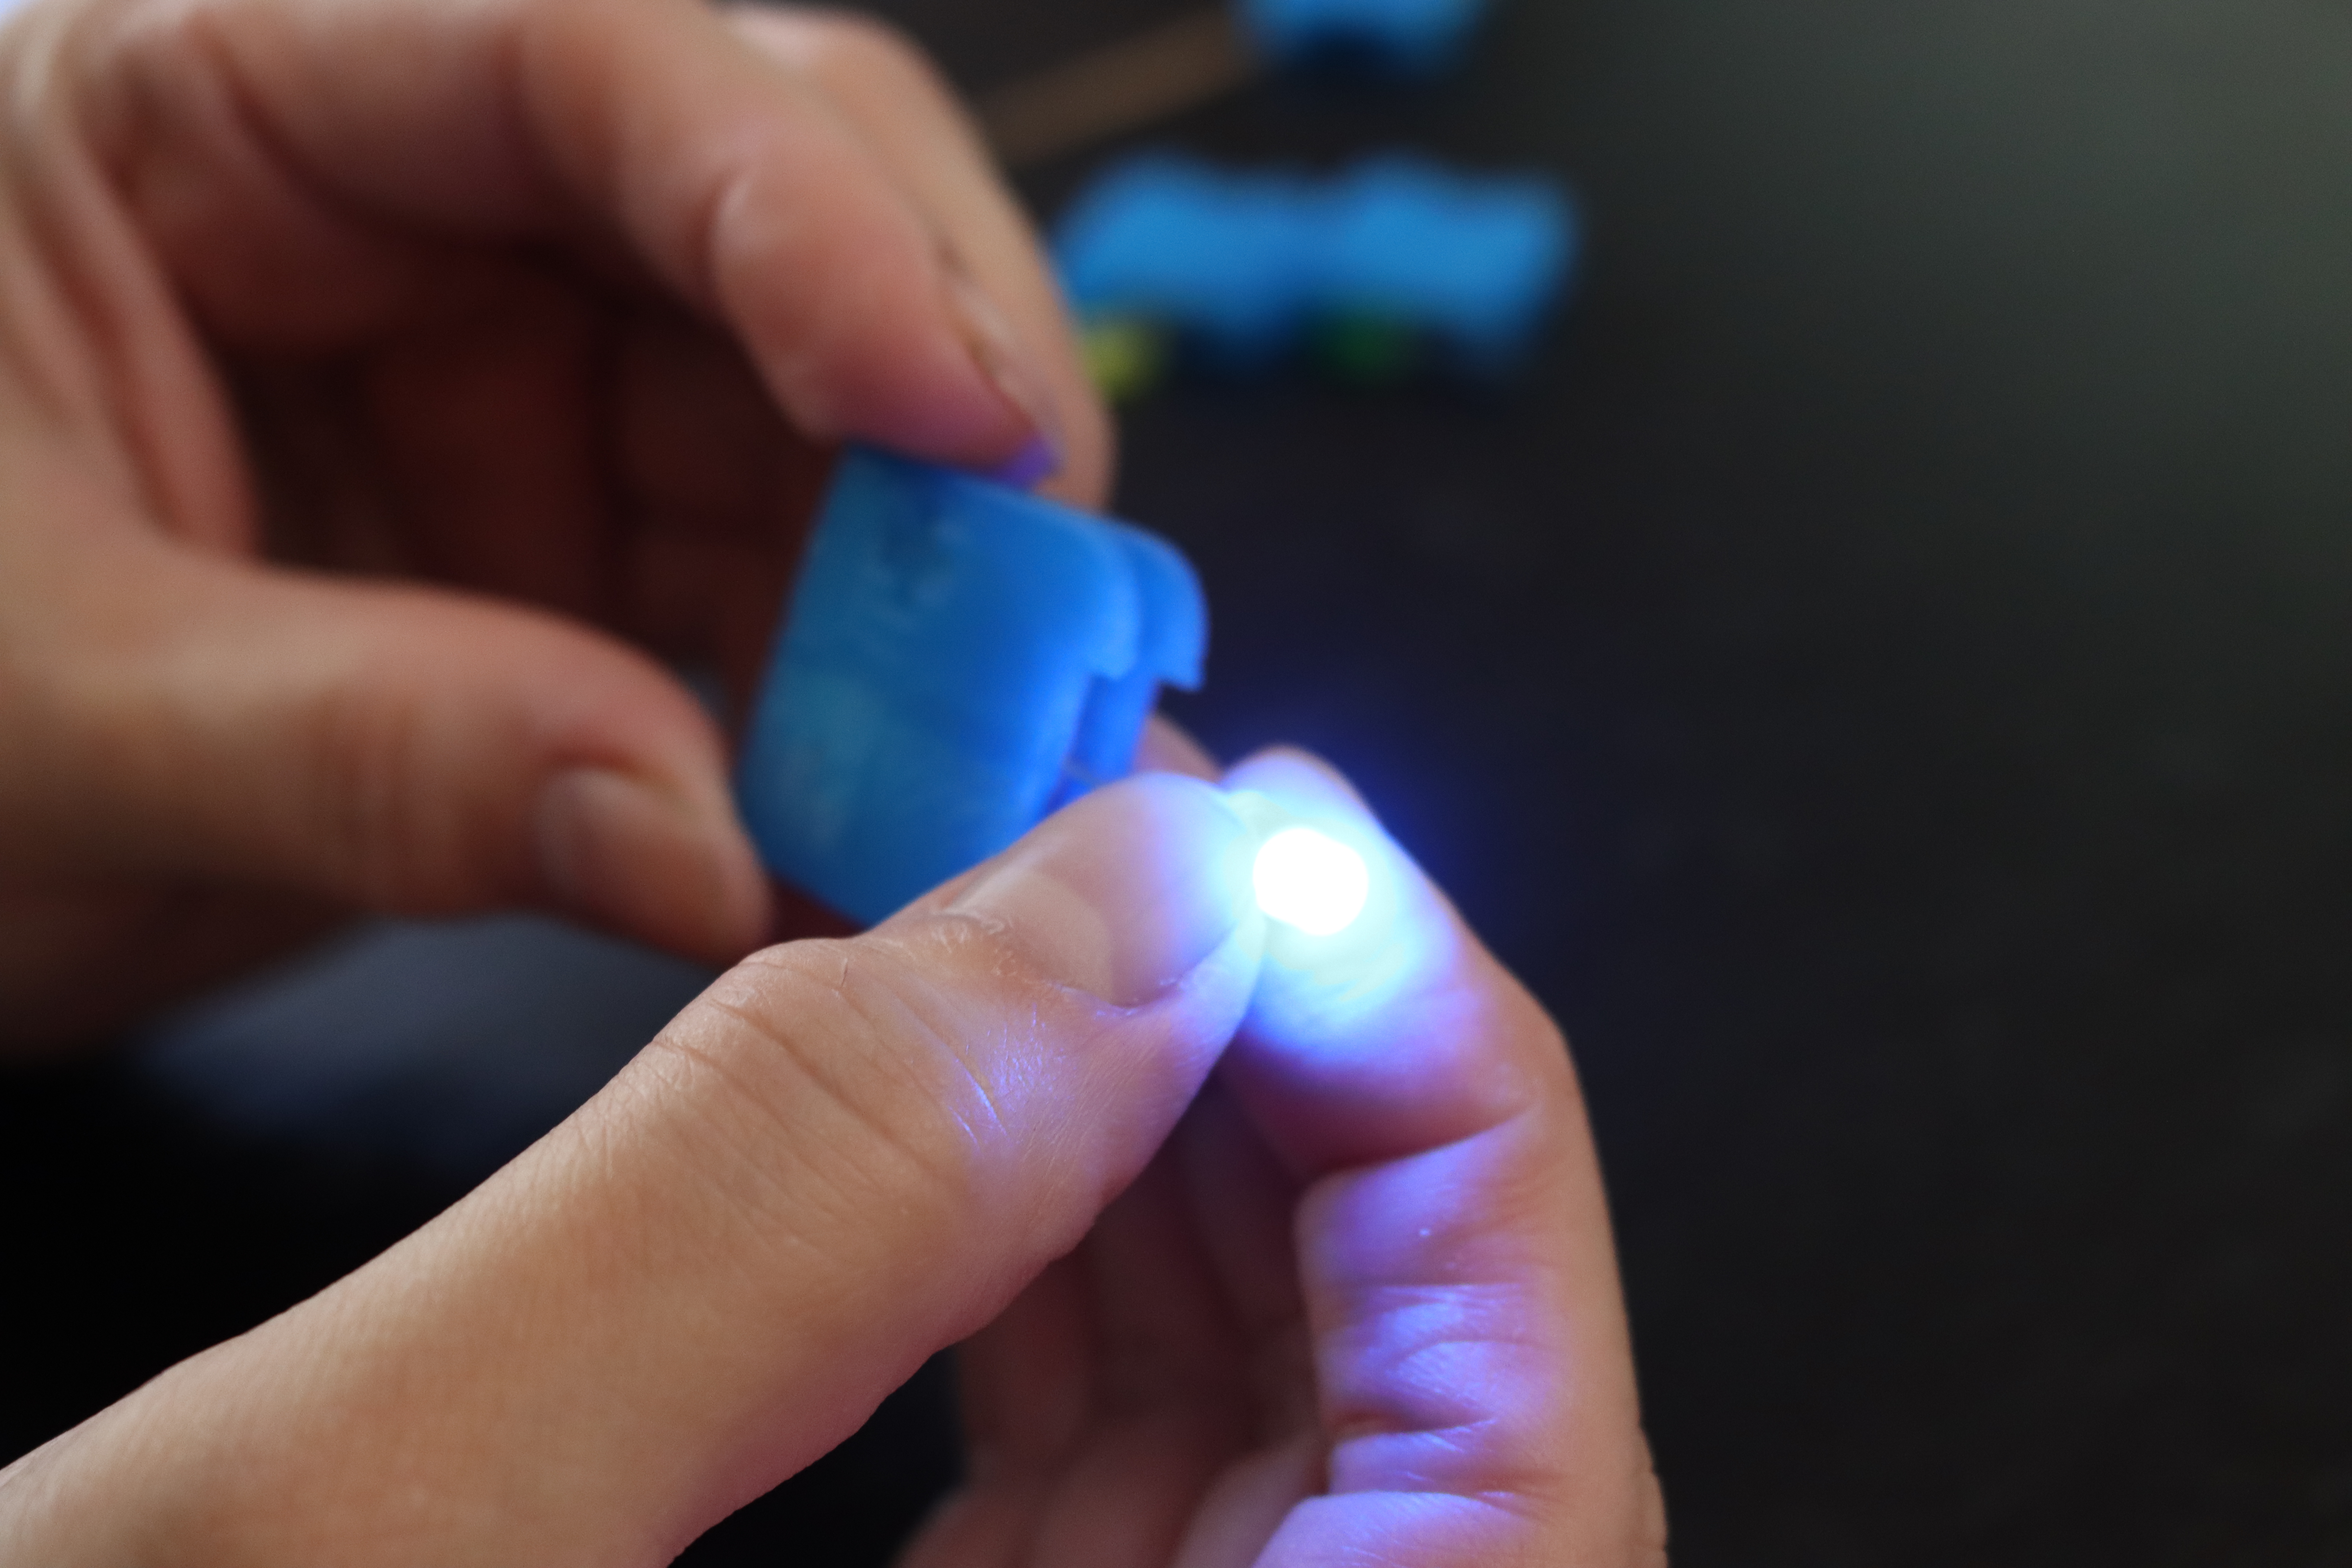
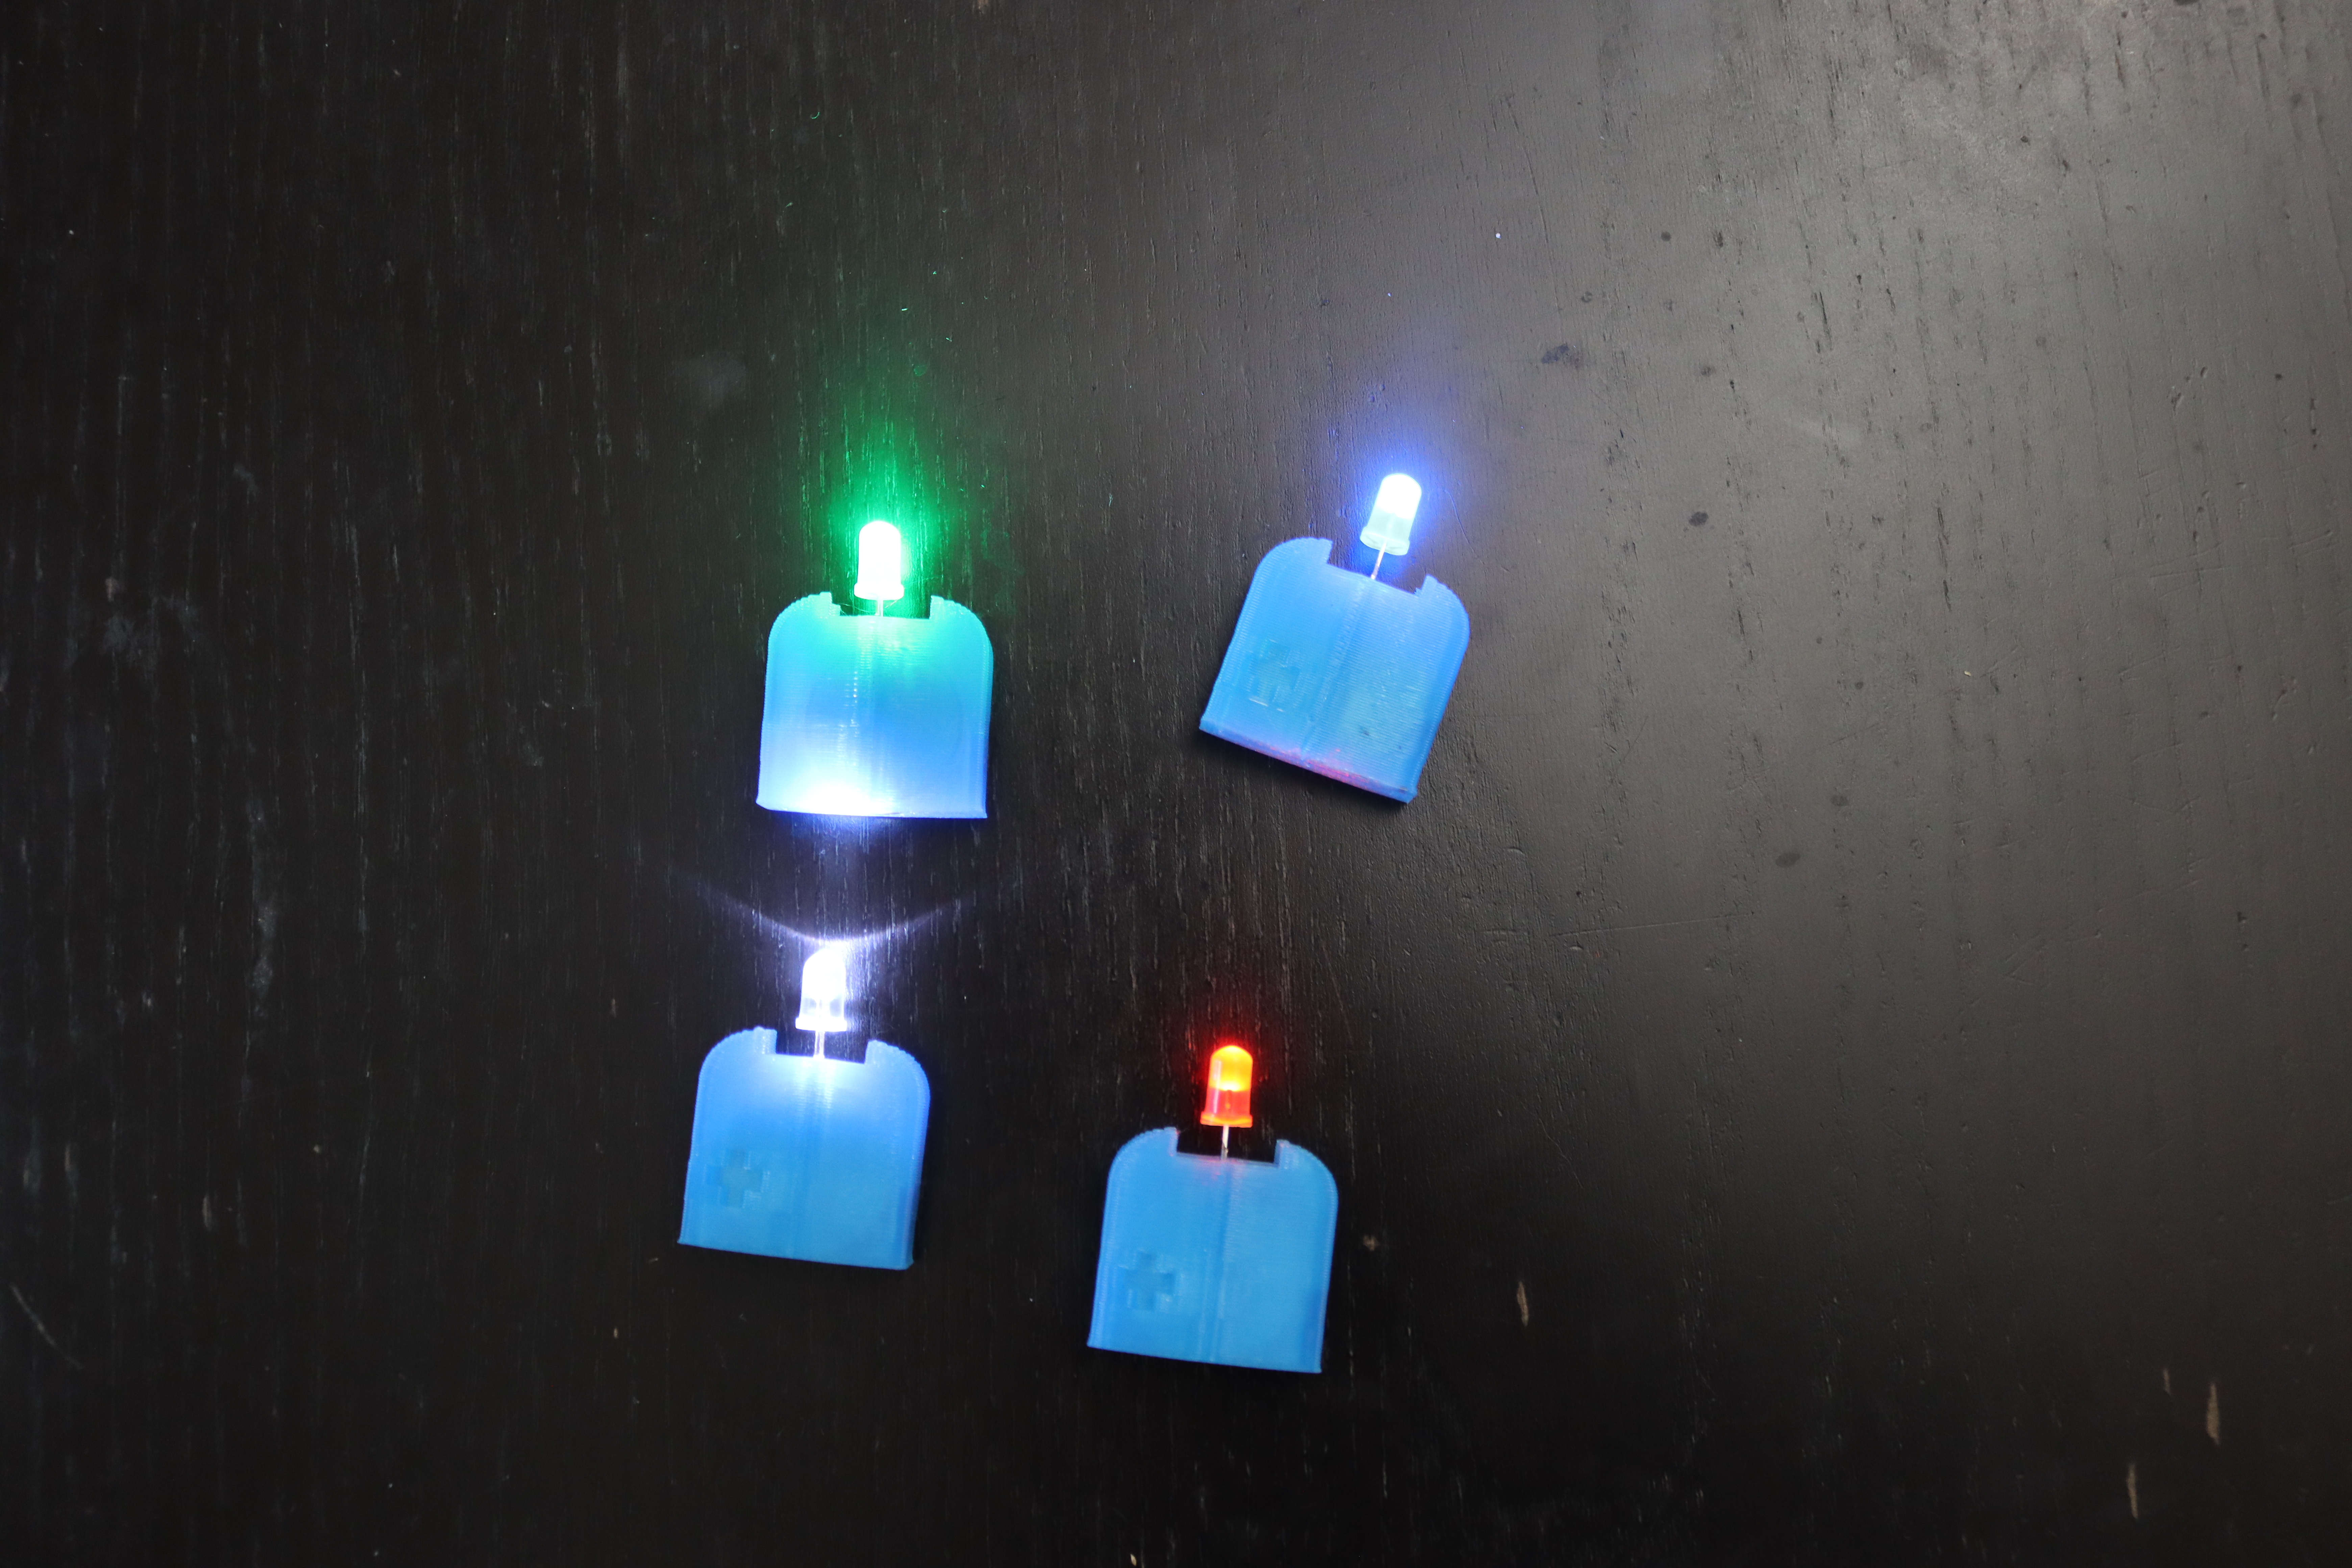
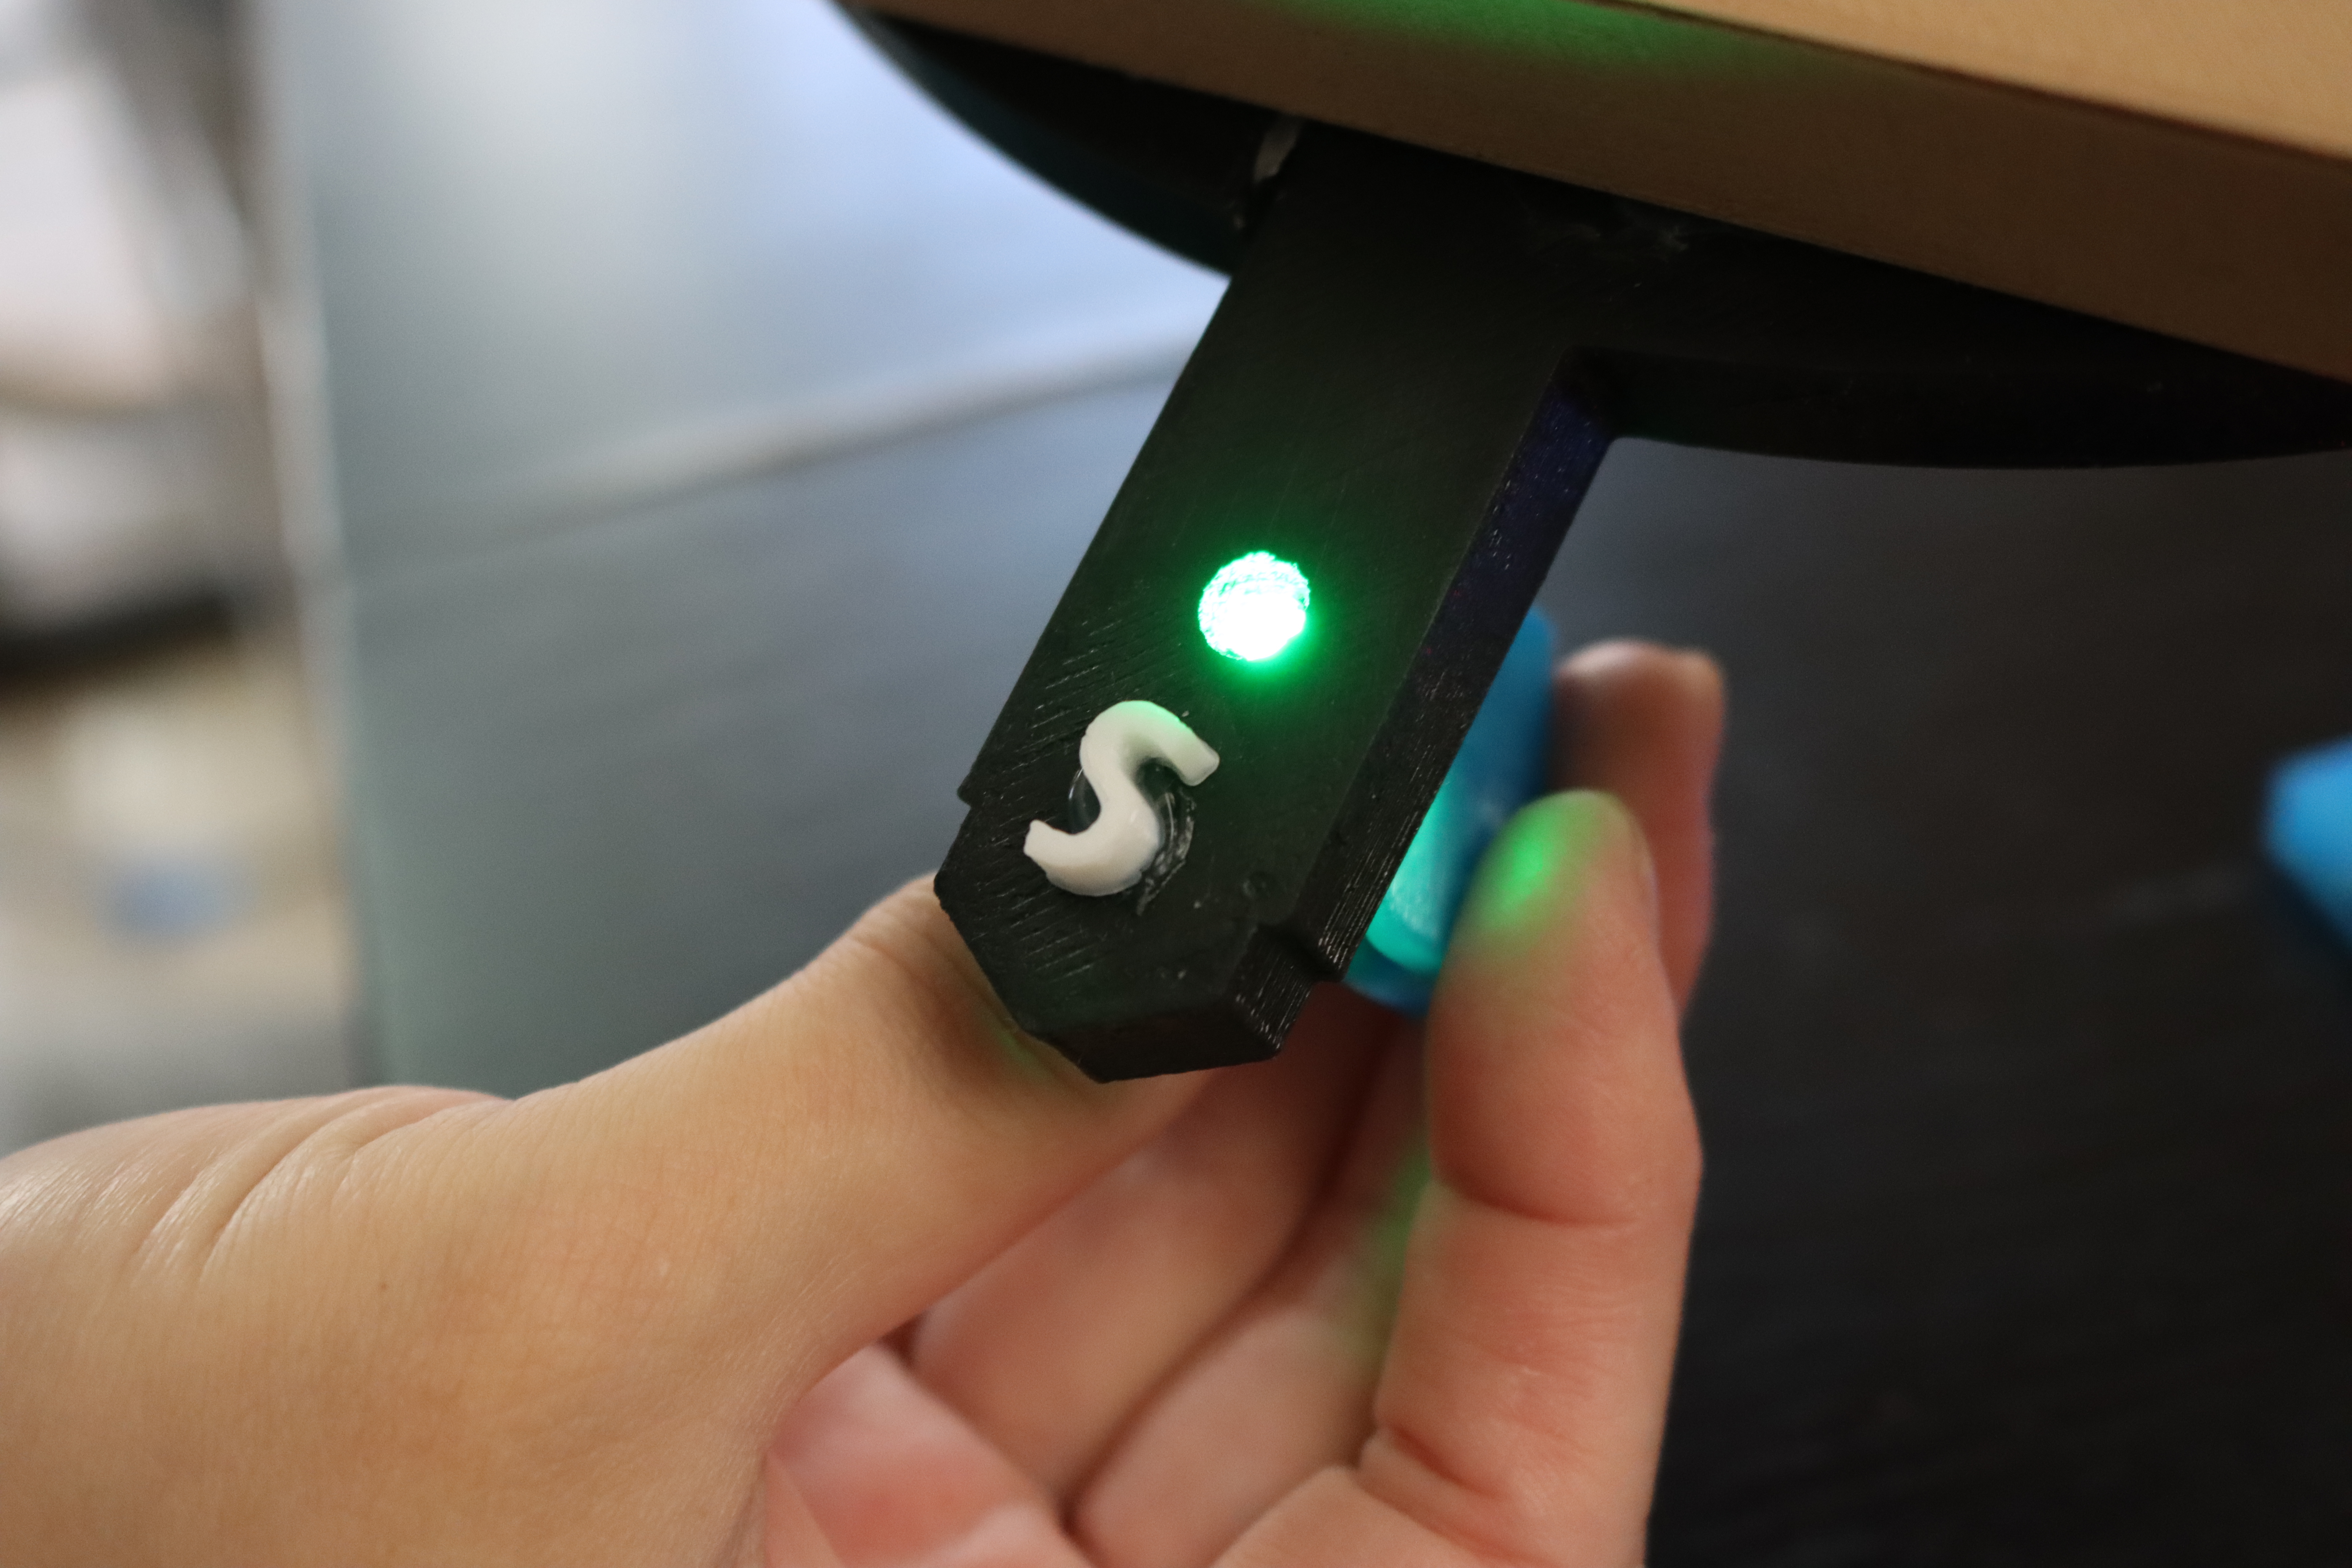
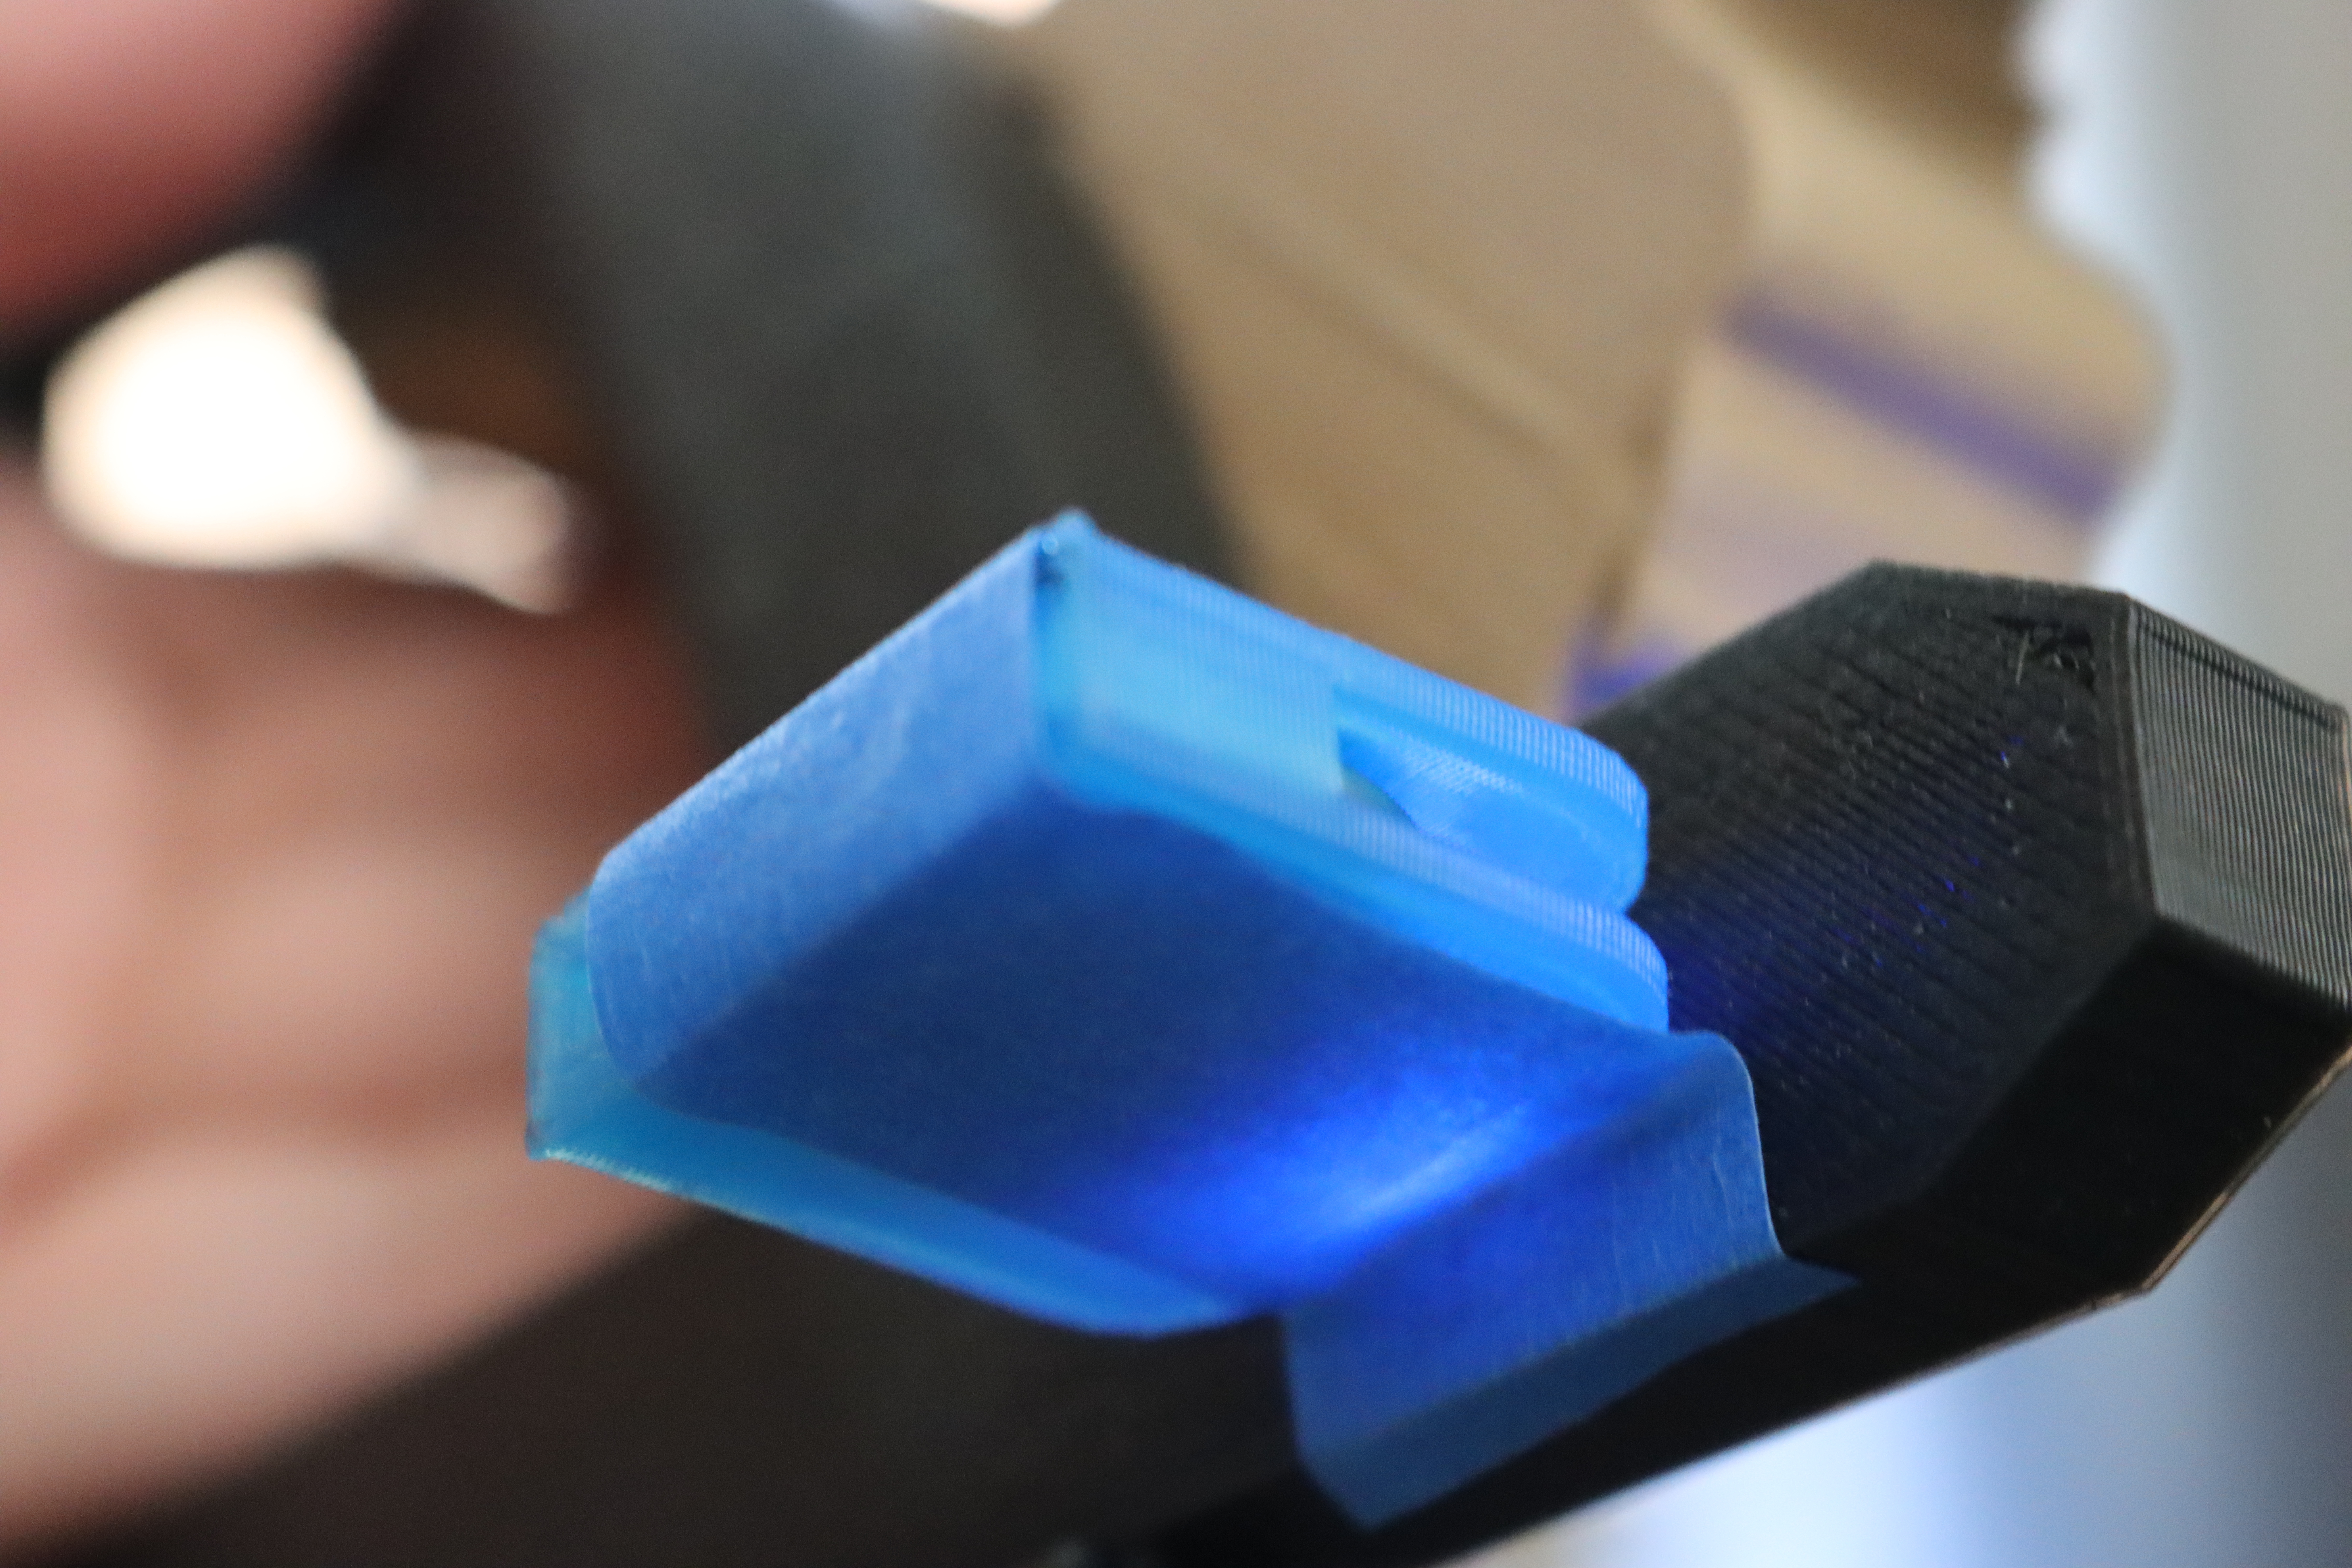
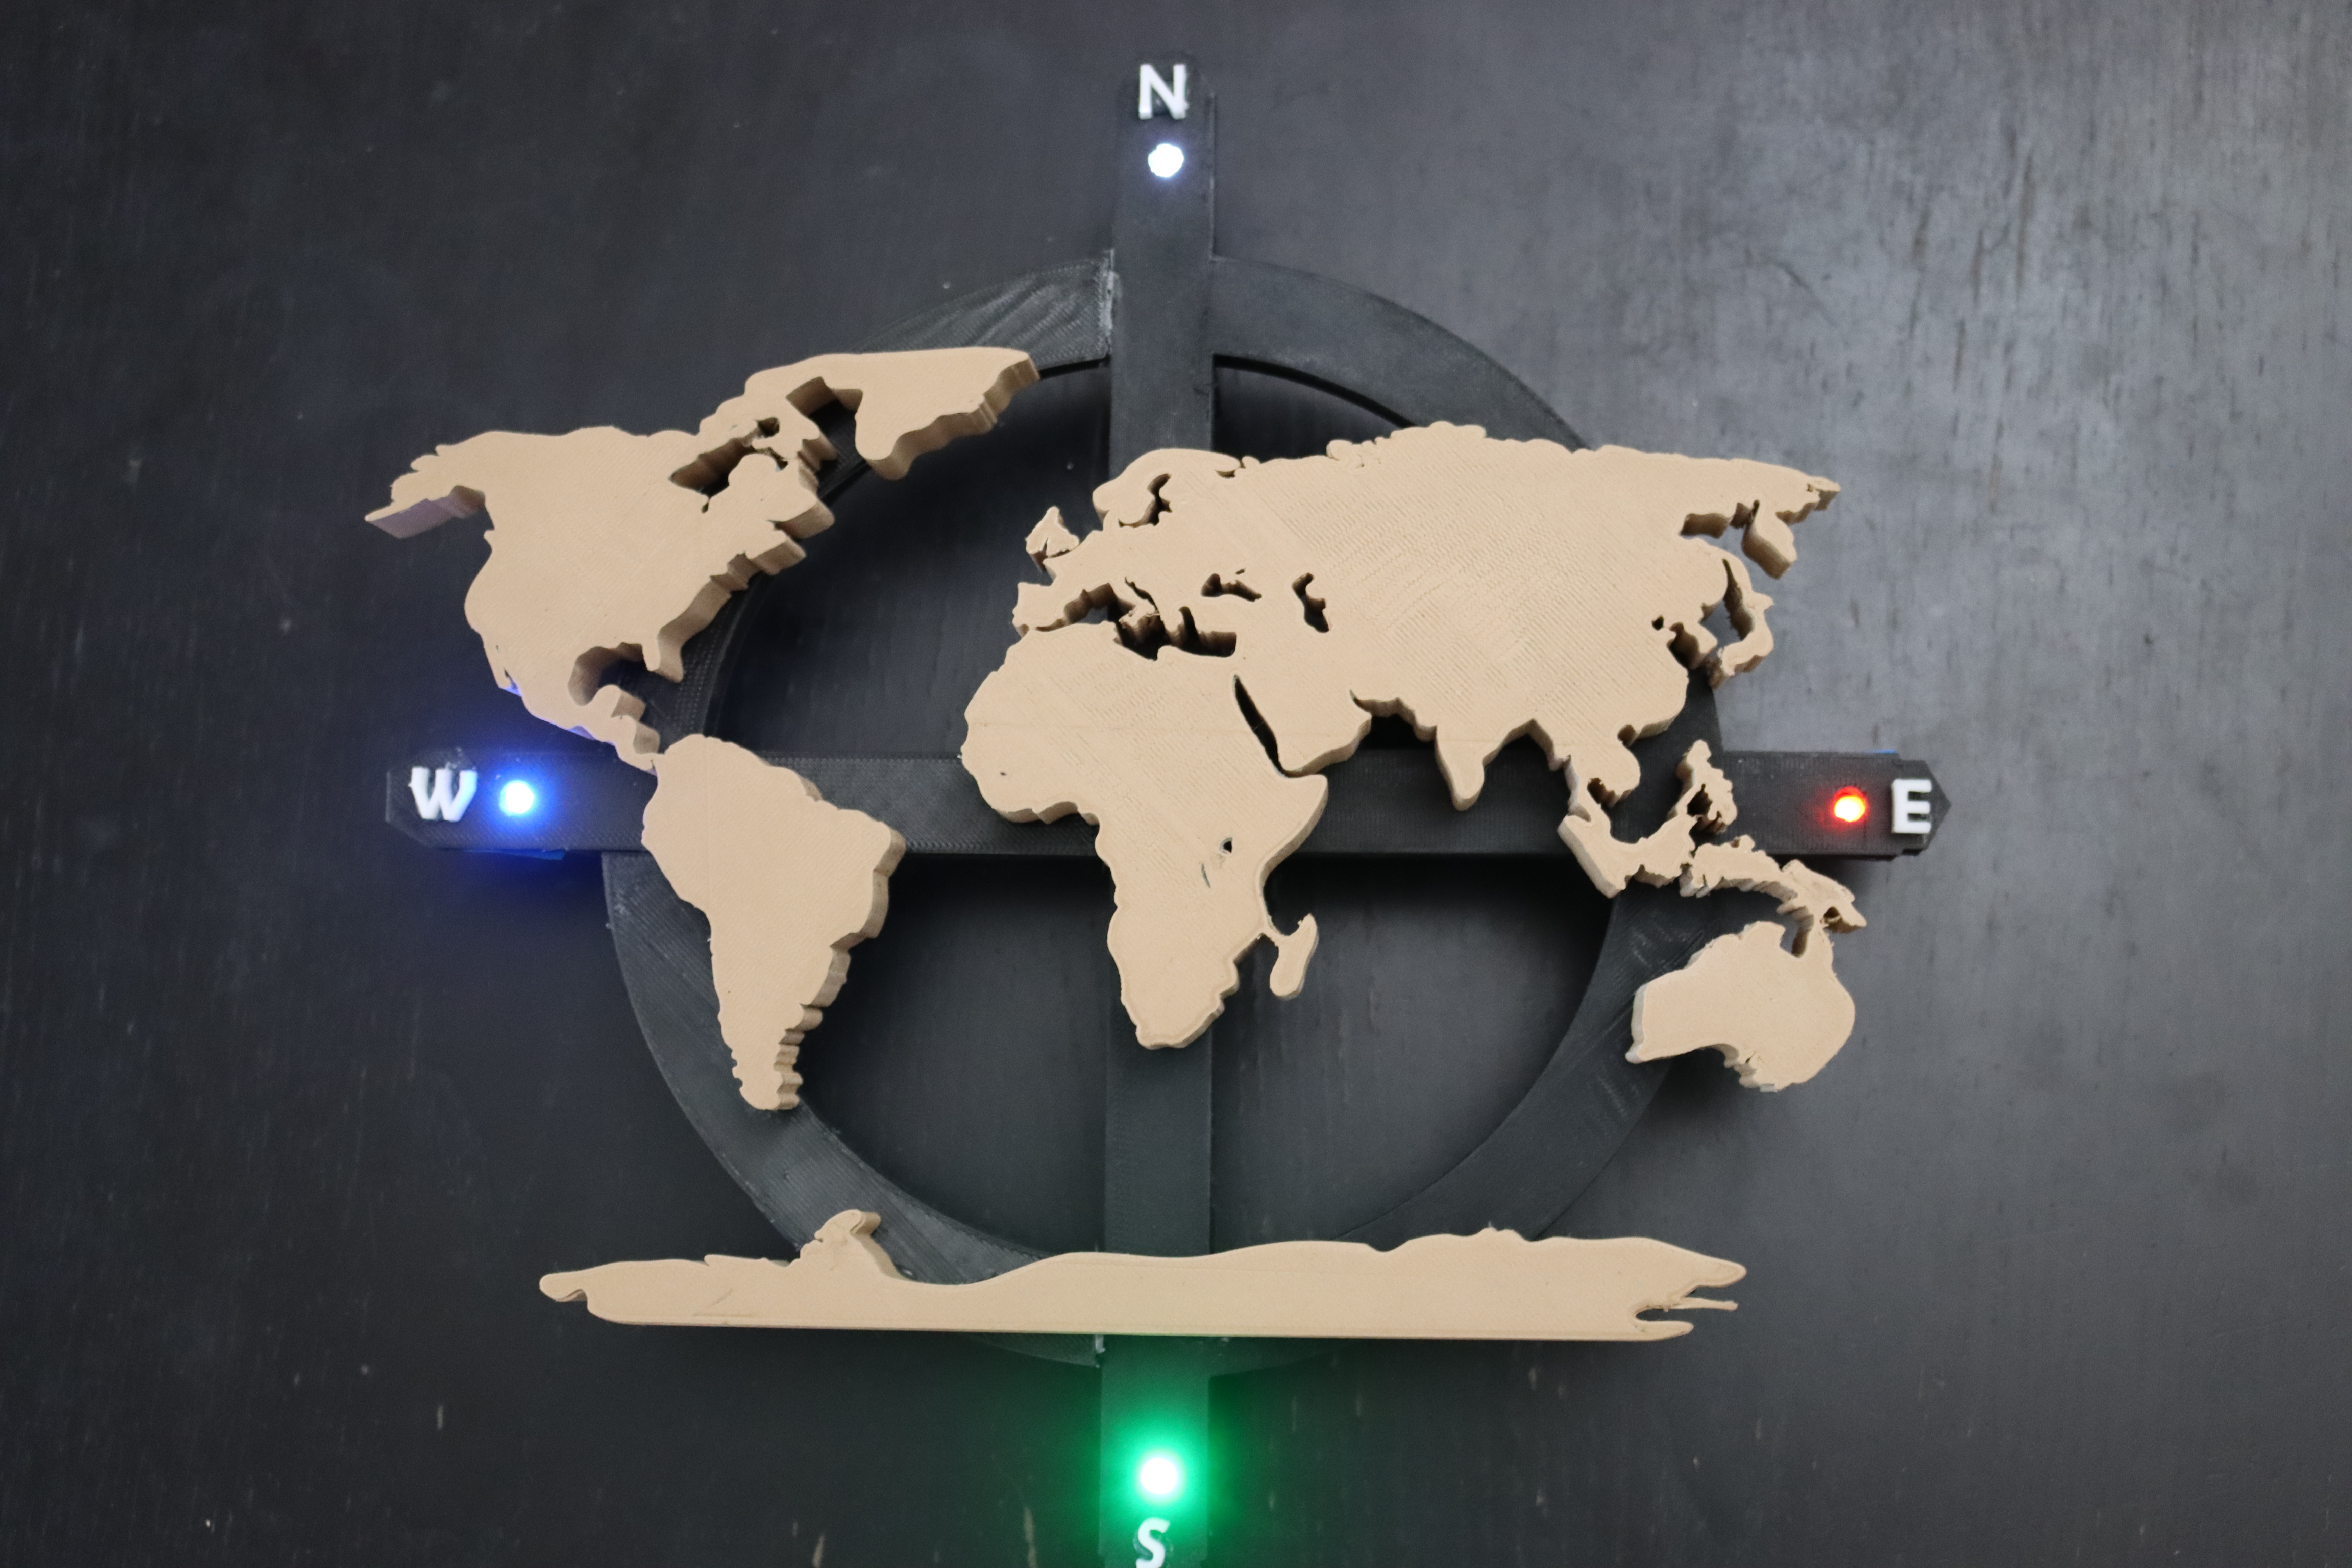
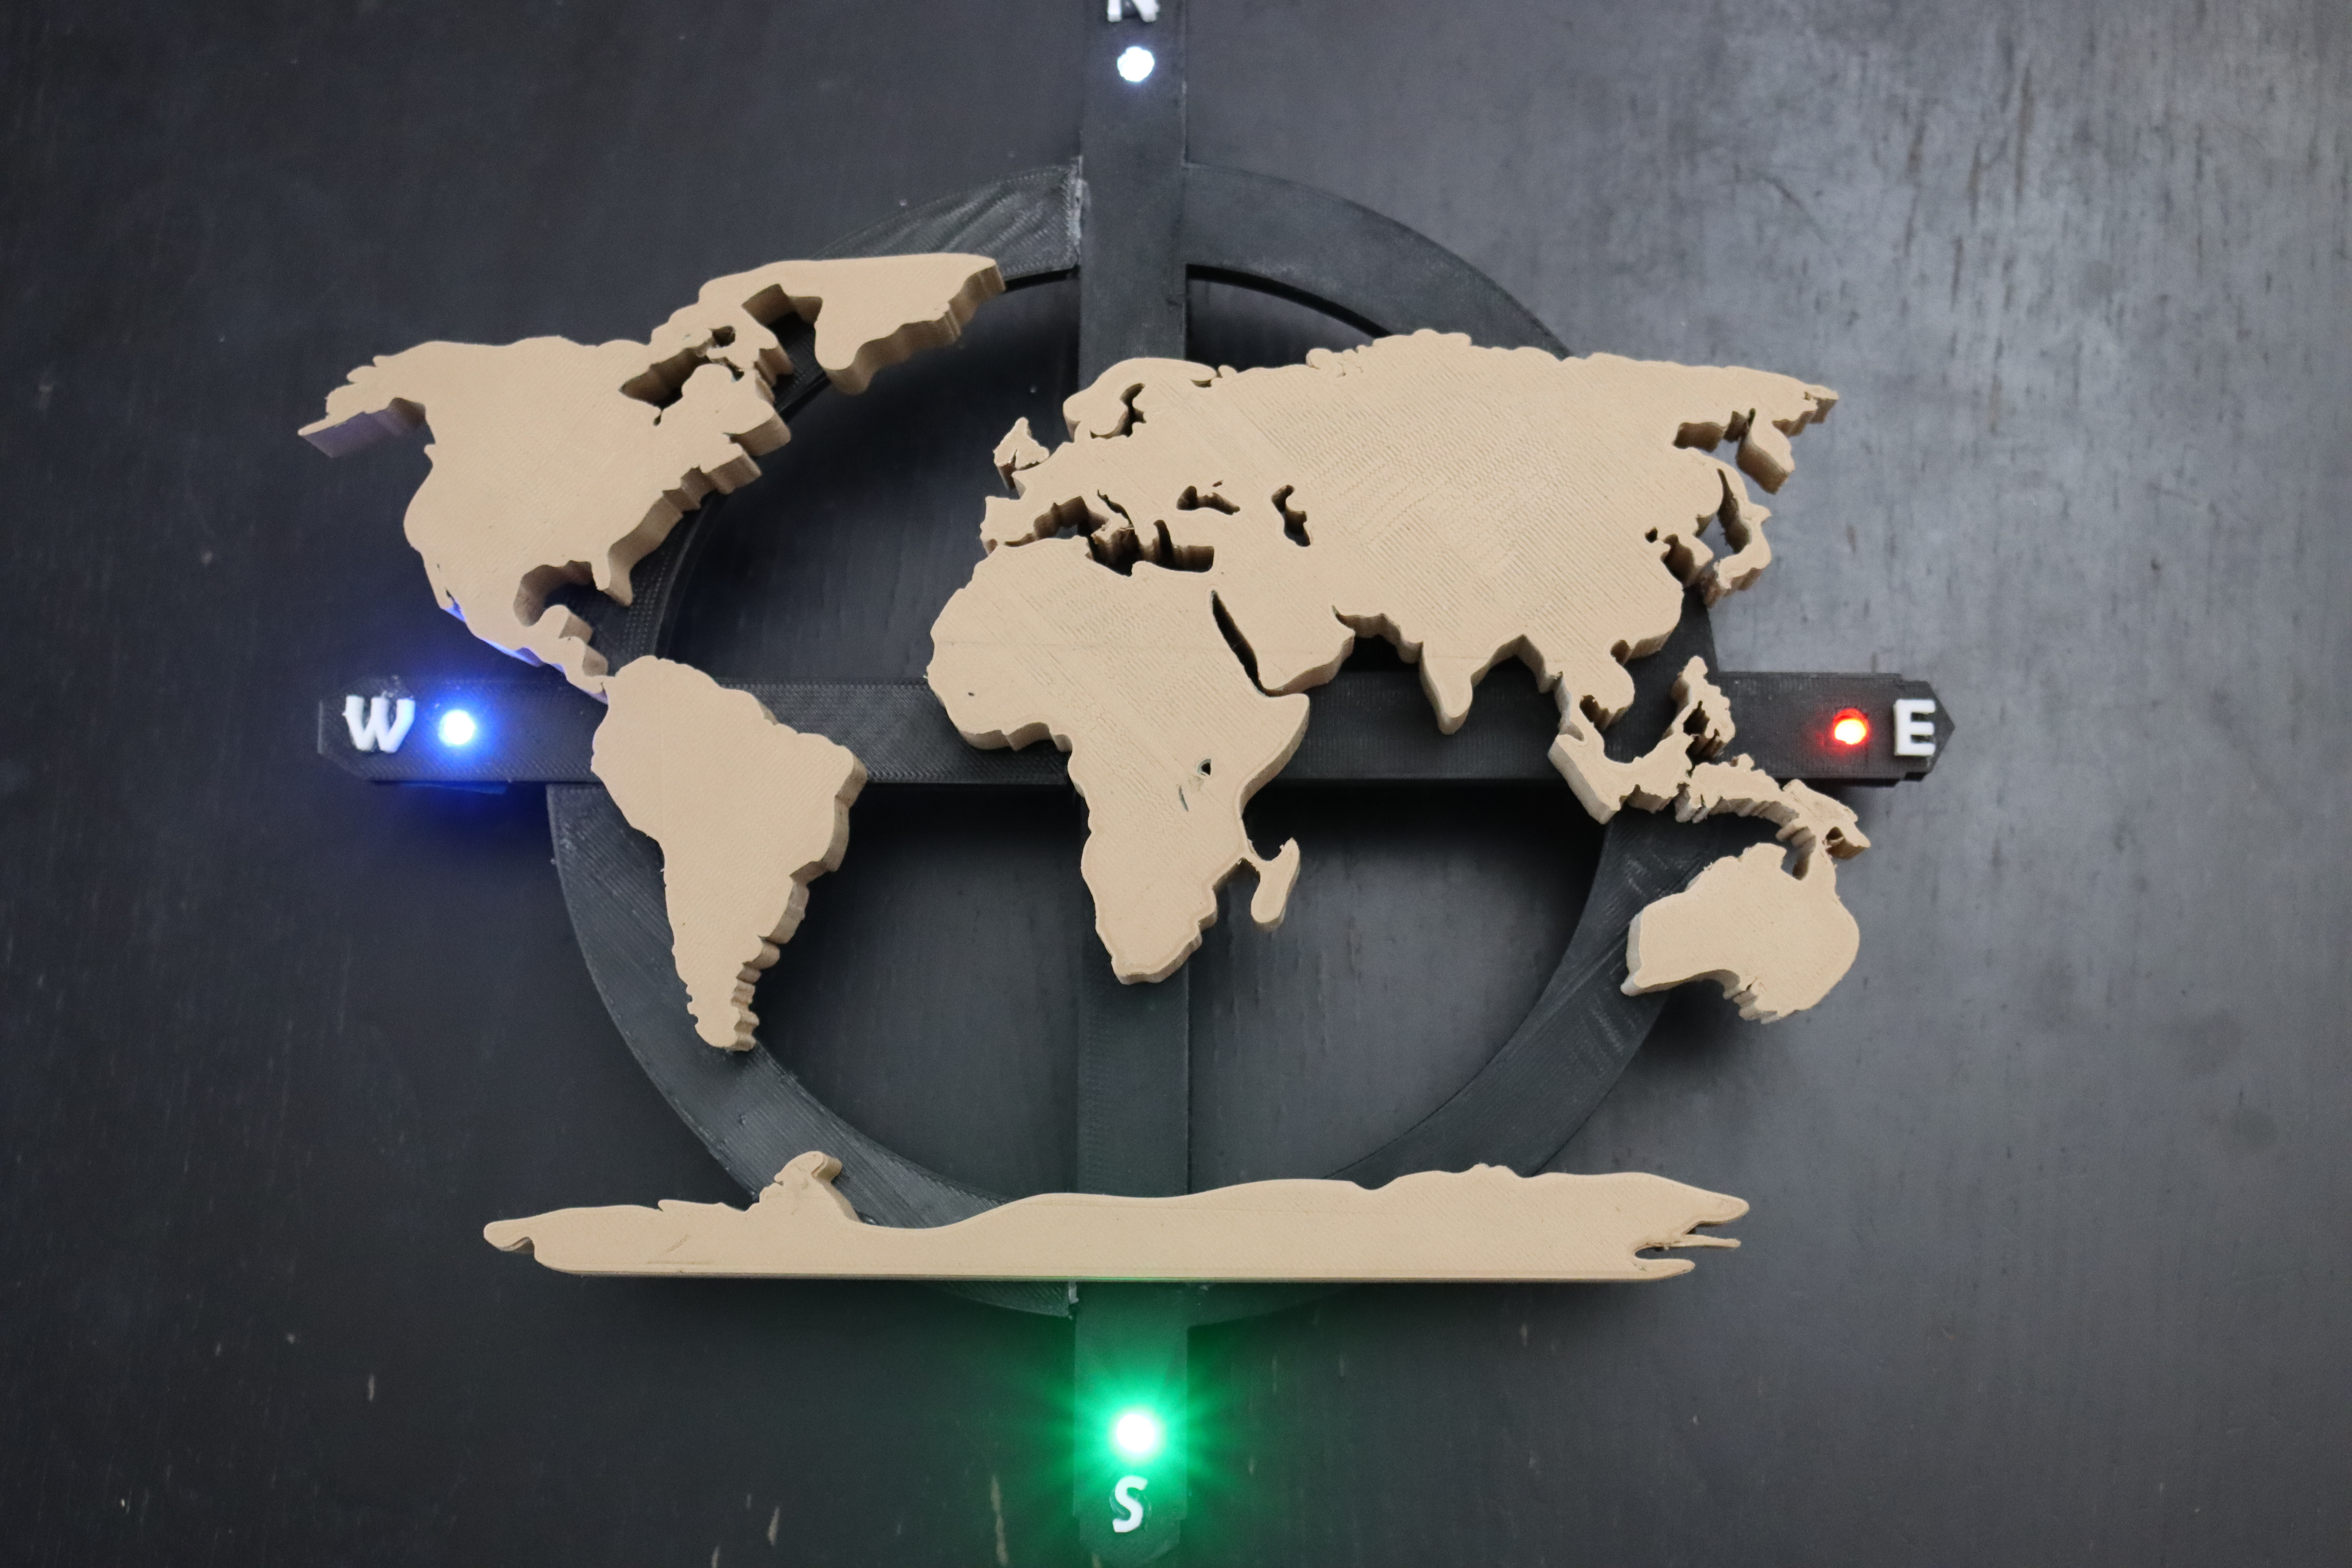
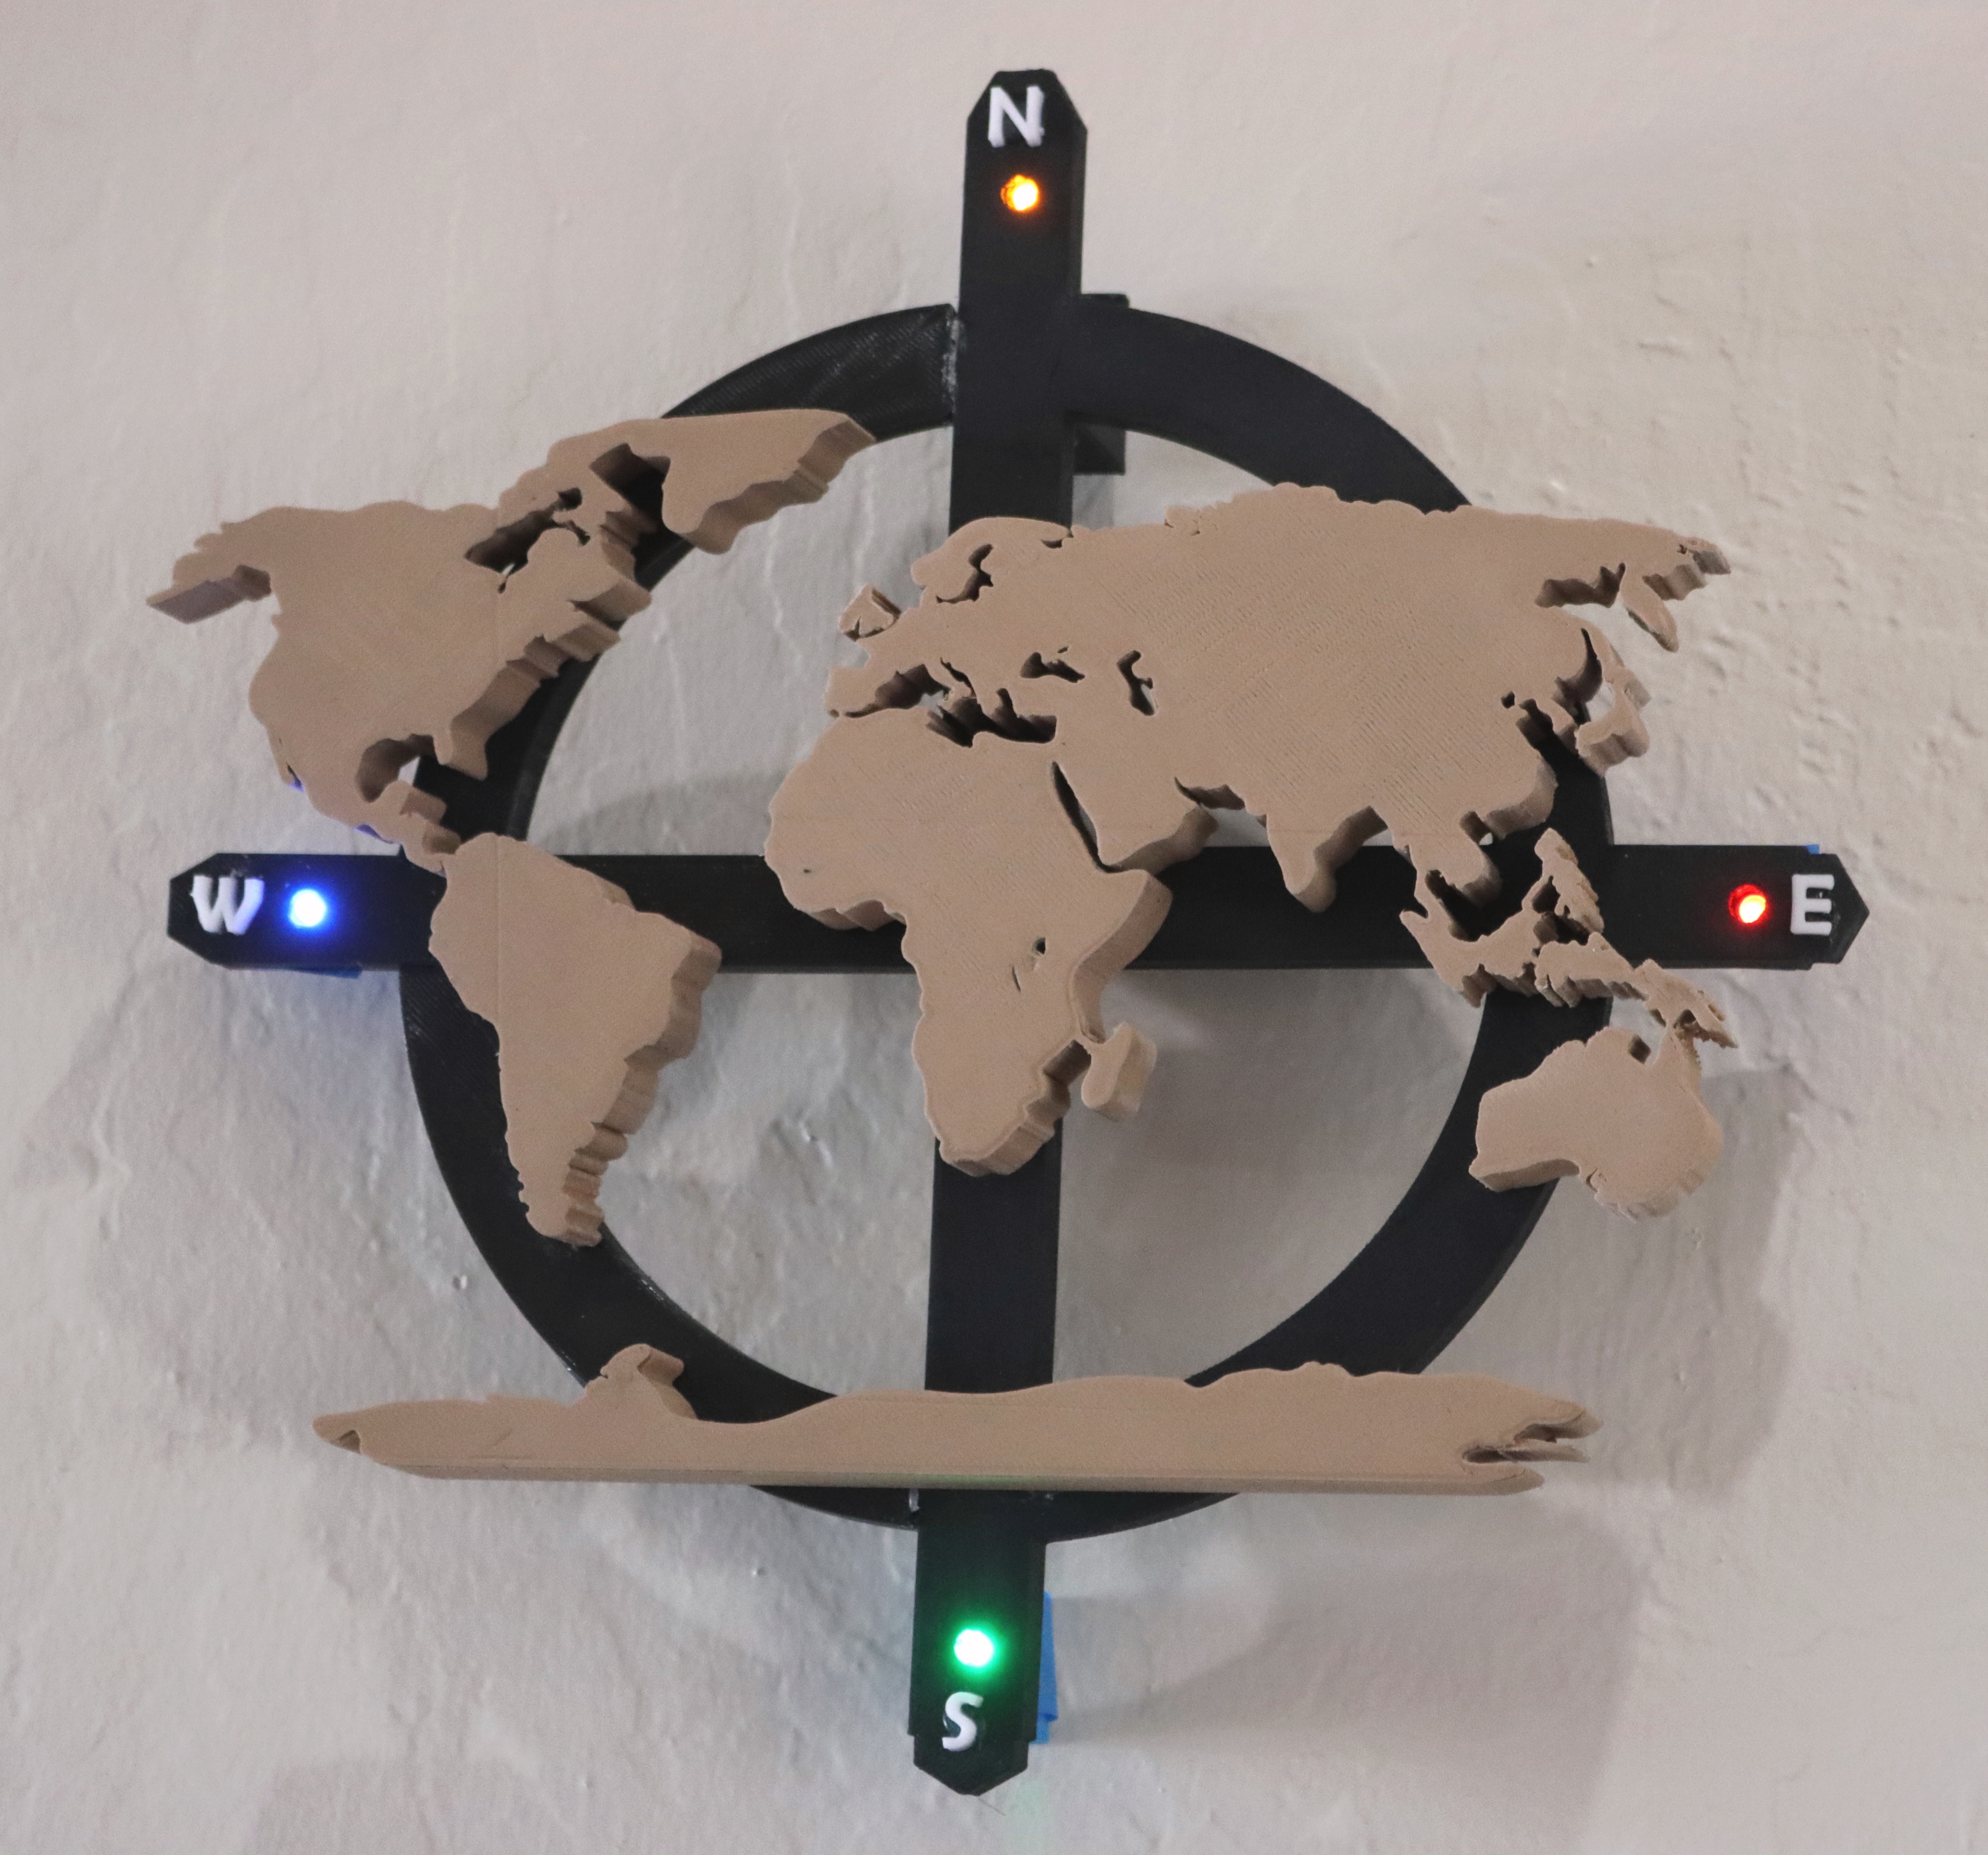
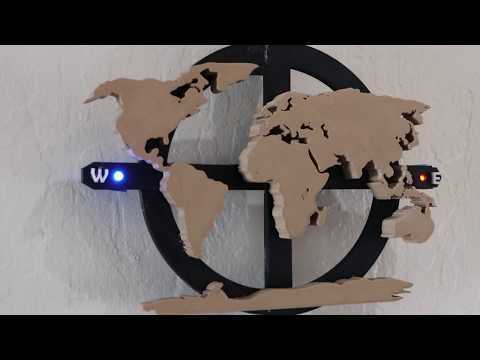
Take the glow circuit that you already printed before. Input the coin cell batteries and LED to the glow circuit. Just remember, cut a little bit the LED length, but keep the positive side longer than negative one. Attach the glow circuit to the map. Secure it to the pole by using painter tape.
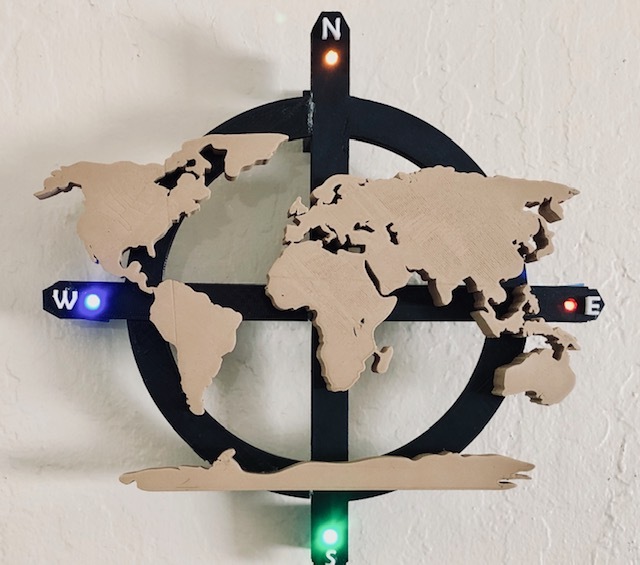
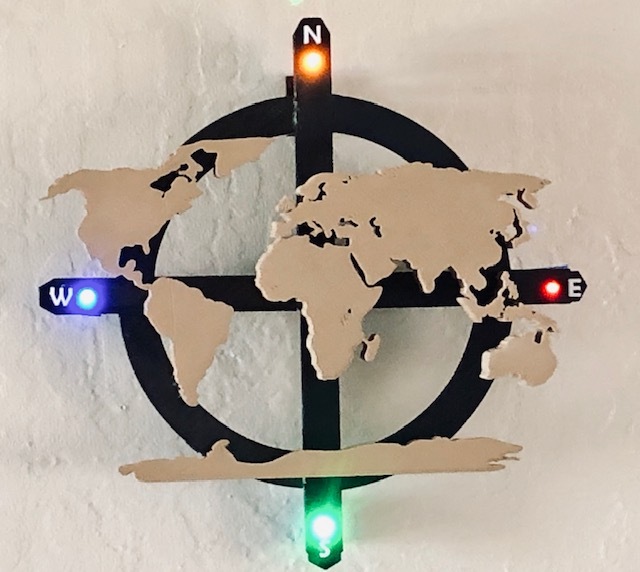
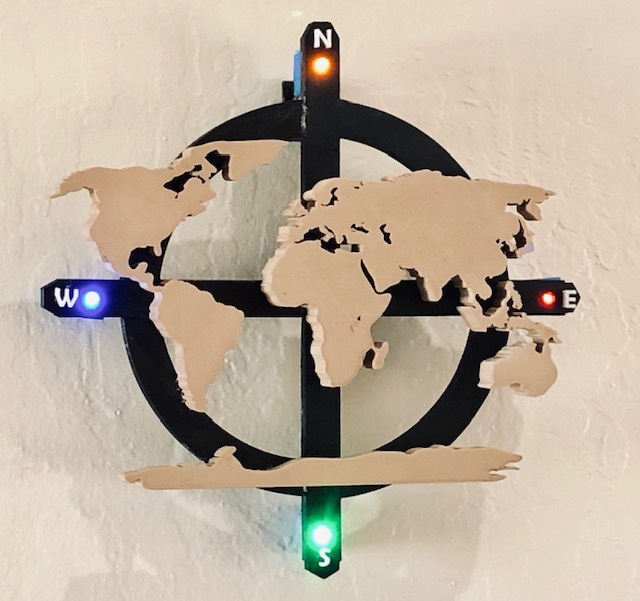
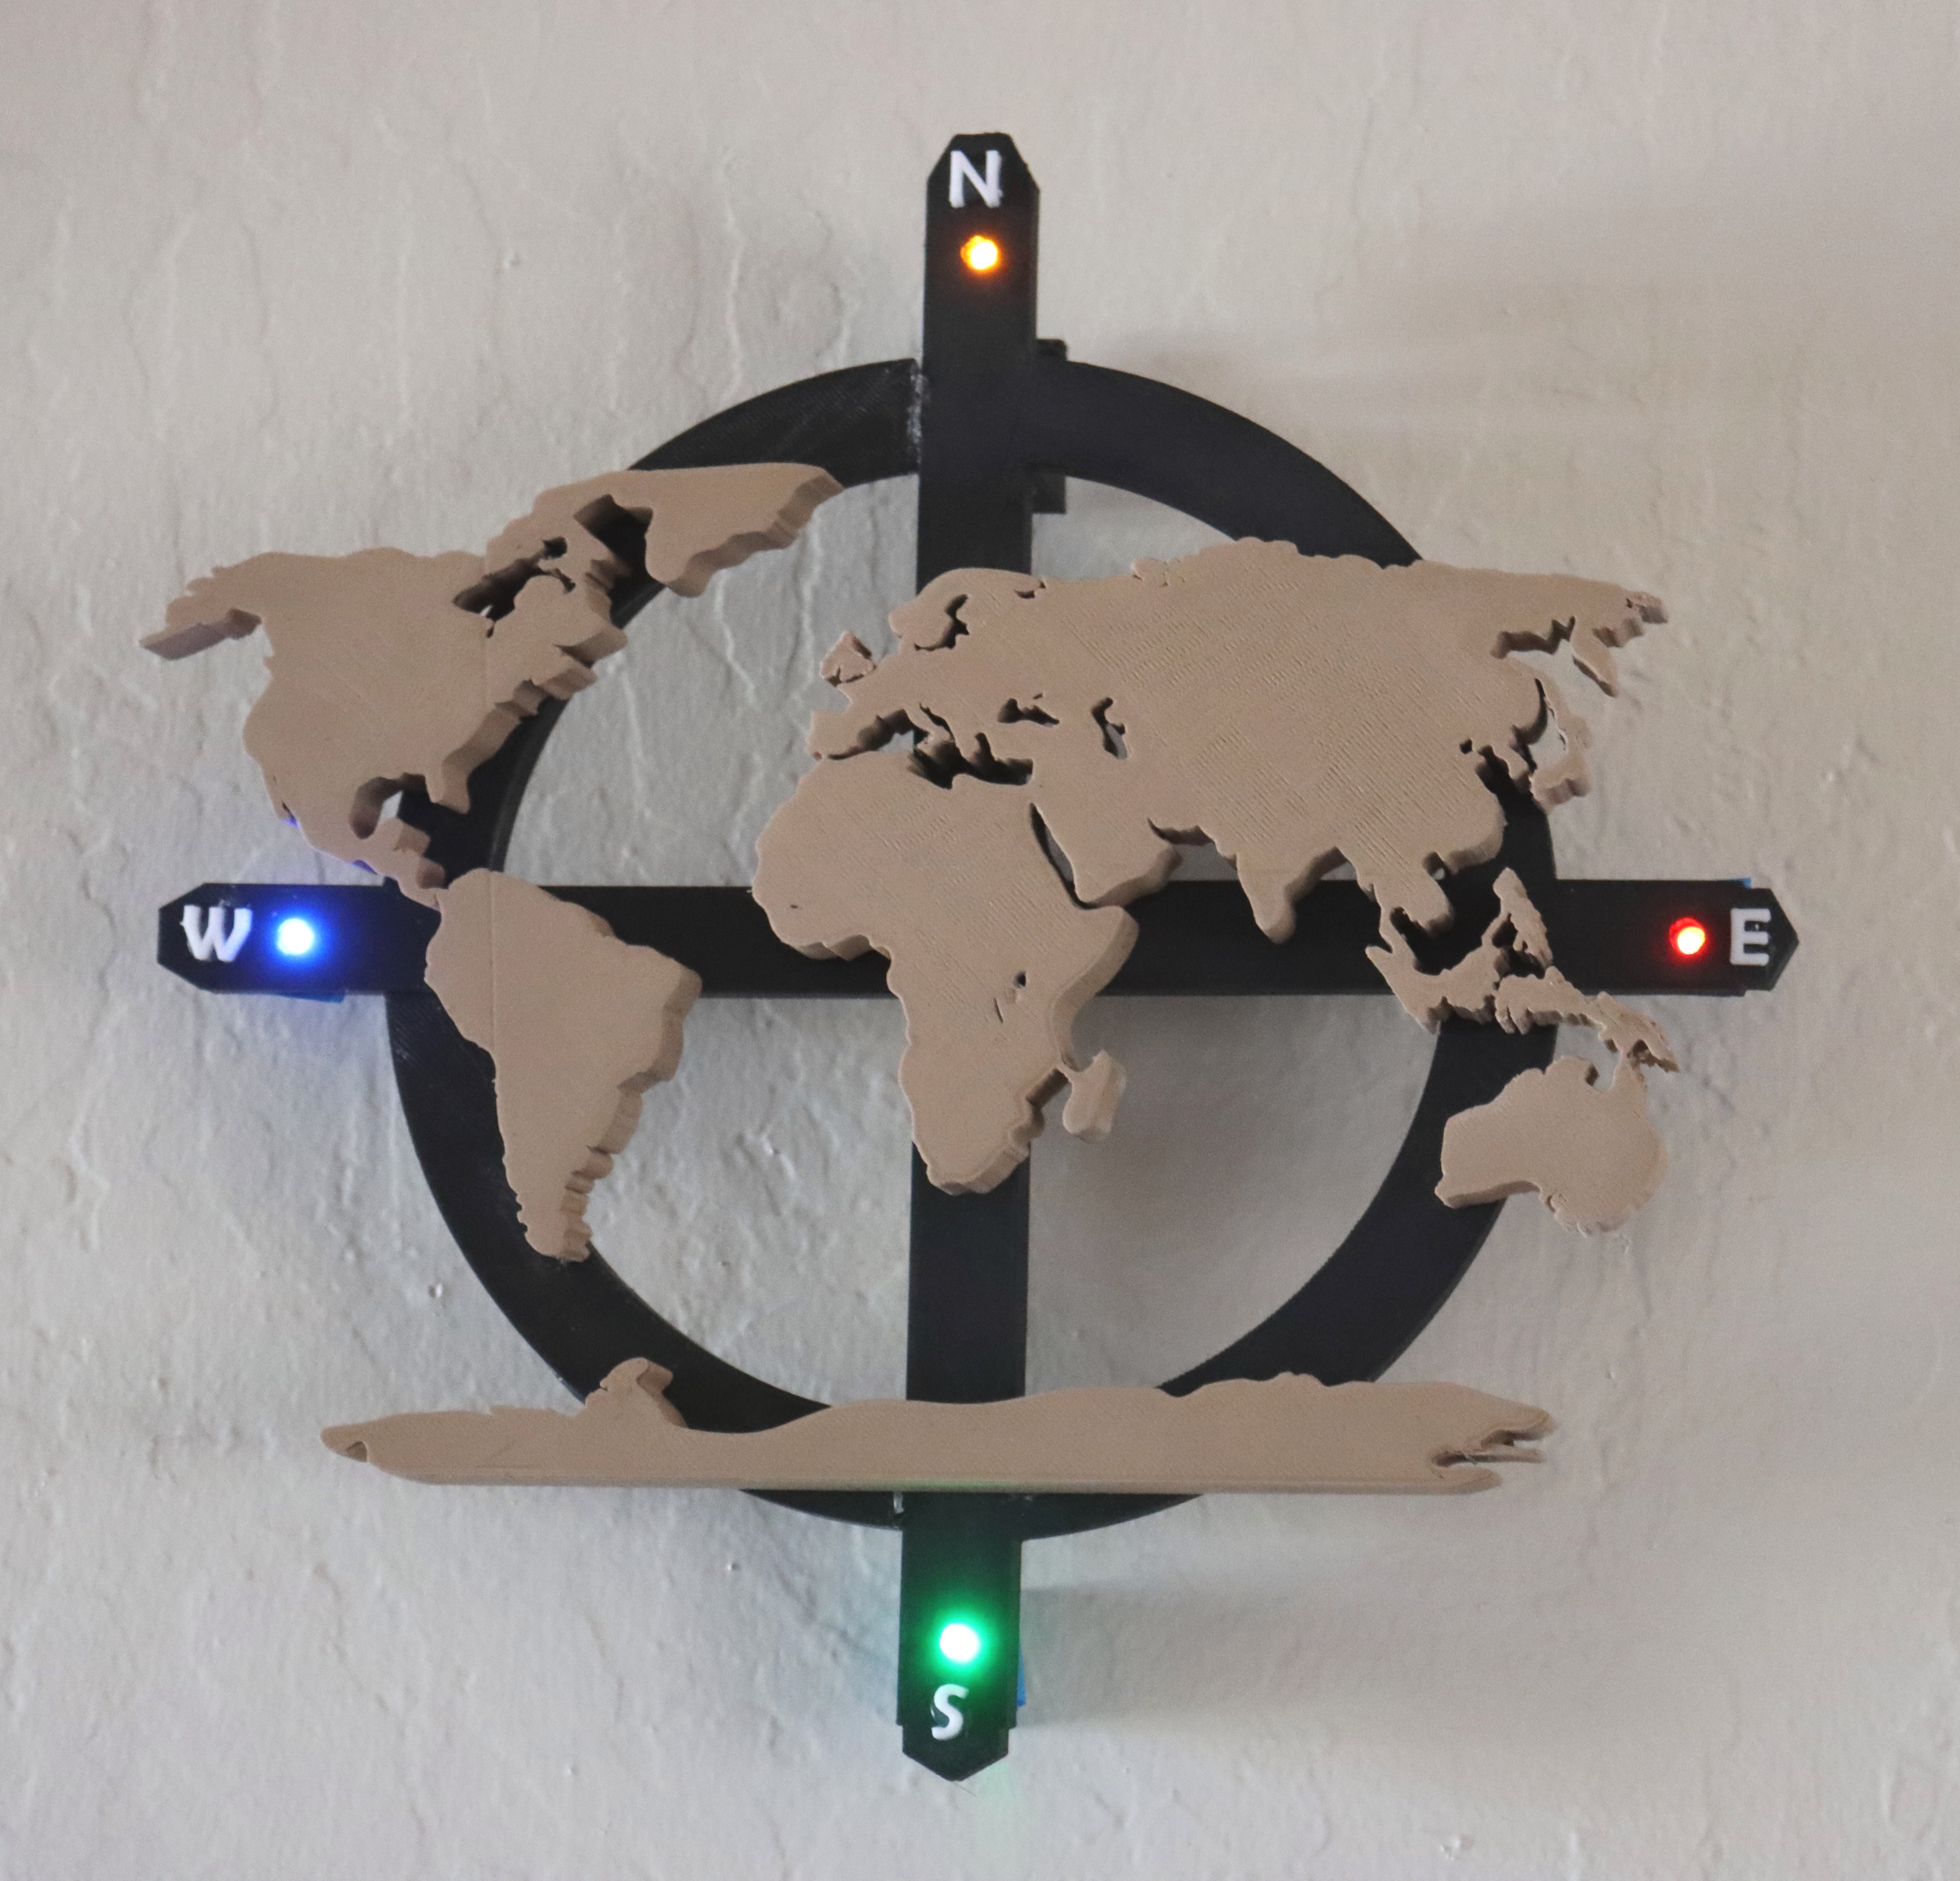
Finished

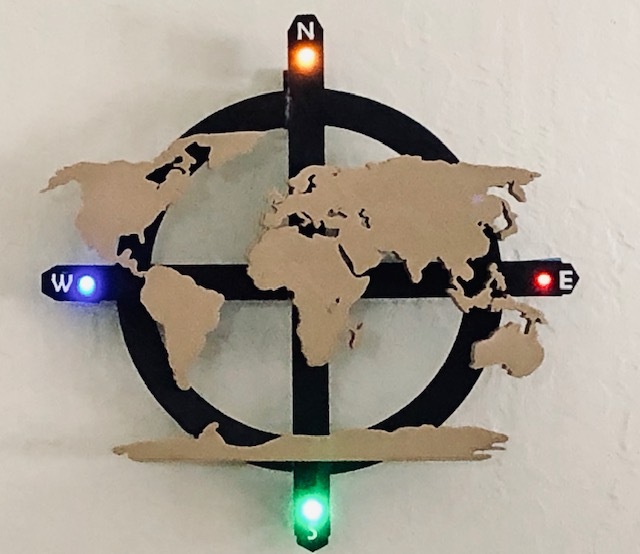
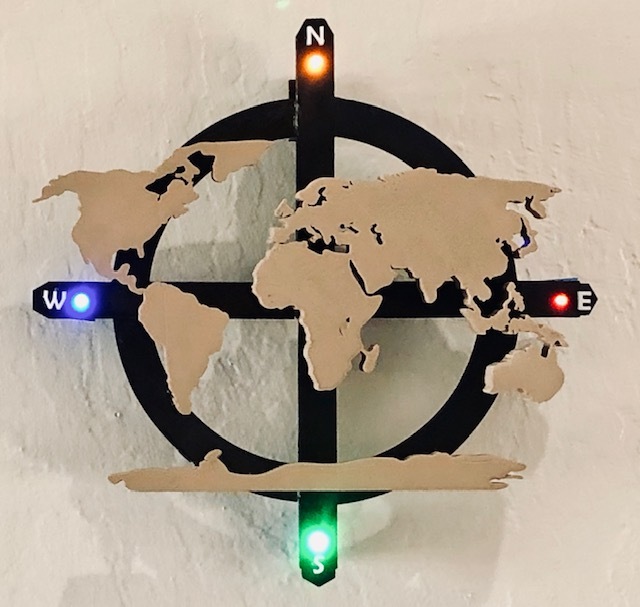
You are finished making 3D Printed World Map wall by using Fusion 360 and light.
For better result, hang it to your wall. Thank you for reading my instructable. I hope you like it. See you in other creation. Enjoy!
For more project idea, visit 3D Printing Center.