3D Printed Painter's Pyramids - Project for Beginners
by Great Lakes Makes in Workshop > 3D Printing
5351 Views, 36 Favorites, 0 Comments
3D Printed Painter's Pyramids - Project for Beginners
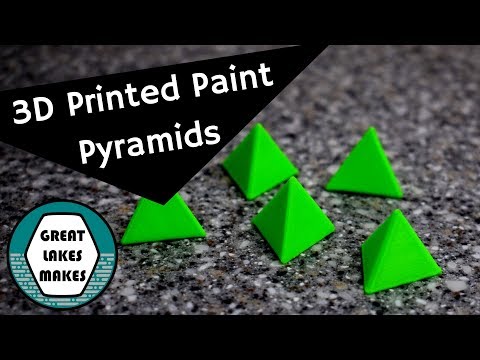
This is a simple project to get started with using Fusion 360 and 3D printing something useful. I use these supports for all sorts of finishing: spray paint, oiling cutting boards, lacquer and polyurethane - anytime you've got to finish all sides and keep the workpiece off the table.
There are a lot of designs for these paint pyramids out there, but I opted for designing my own for a few reasons. Mostly, a lot of the designs out there have a square base, like the actual pyramids in Egypt. My design has an equilateral triangle as the base, and is shaped as a true tetrahedron. All the edges are the same length and the there is no 'bottom' so using them to support your work is easier.
I've posted the STL files for download Here
Modeling a Tetrahedron in Fusion 360
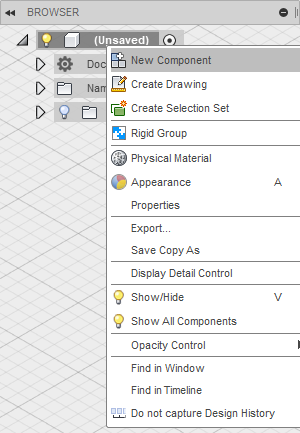
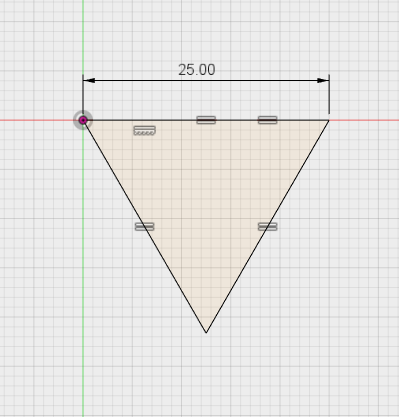
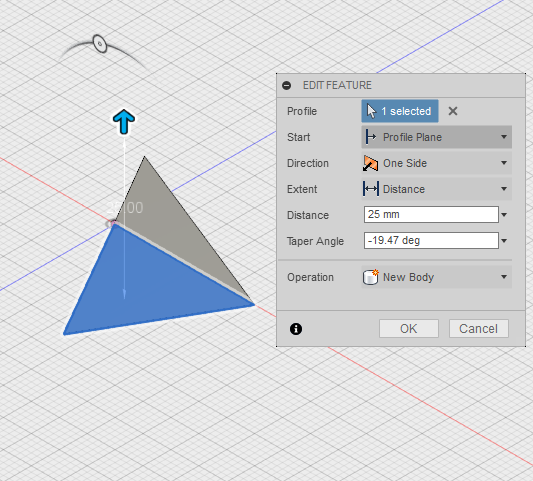
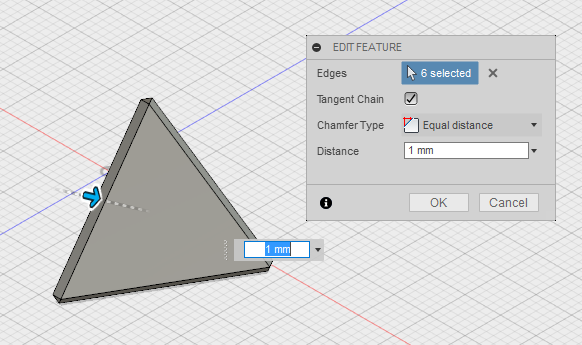
Building the model in Fusion 360 is very simple, just a few steps to complete. The only critical dimension is the taper angle during extrusion, in Step 4. Everything else is up to you, and is easily scaled to make a bigger or smaller support. Read some more detail here.
Here’s how to do it:
- Create a new component
- Sketch an equilateral triangle, I used 25mm
- Extrude the shape with a taper angle of -19.47 degrees
- Chamfer all edges by 1mm
- Save your file and export to Cura
Begin by right clicking and creating a new component. Then start a sketch on the XY plane. Using the line tool, draw a triangle. Size and shape doesn't matter now, we'll clean that up. Using the 'Equal' constraint, set all three lines equal. This creates an equilateral triangle without using numerical constraints on the angles. Finally, right click on one of the lines and add a dimension. I used 25mm, or about 1 inch. This will set the overall size of your paint pyramid. Click 'Stop Sketch' to exit.
Now, we'll turn that 2D sketch into a 3D model. Click on 'Extrude' and select the triangle shaped sketch. Looking at the 'Edit Feature' dialog box we have a few options. Distance will change how long the extrusion is. For this model, as long as you enter a value greater than 25mm, you'll get a perfect tetrahedron. The critical dimension is the Taper Angle. The value we need to make a tetrahedron is the inverse cosign of (-1/3). Enter -19.47 into the taper angle.
Finally, clean up the edges. I find adding a small chamfer or fillet on the outside corners makes for a better 3D print. Without the chamfer the printer pauses at the corners and over-extrudes a small bulge on the outside faces of the corner. Click 'Modify' and add a 1mm chamfer to all six edges.
That's it, save your model and export it to Cura or whatever slicing software you prefer. I printed these in PLA, with a layer height of 0.13mm, a shell thickness of 1.2mm and 0% infill. The benefit of this design is that it is self supporting, so you don't need any infill to produce a high quality and strong print.
Overview of Cura Settings
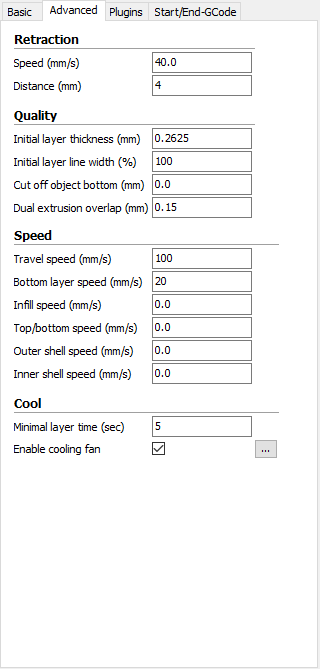
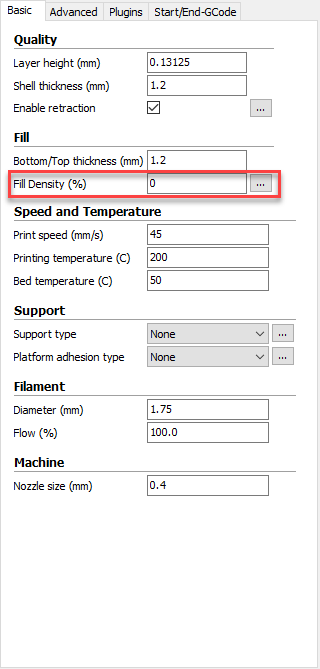
Cura can be an intimidating piece of software for new users. Here are some quick tips to getting your model sliced, positioned, multiplied and ready to print. Theses slicer settings are what I use on the Monoprice Select Mini 3D printer using Cura 15.04.6. Read more about Cura settings here.
Under Quality, the two settings are Layer Height and Shell Thickness. Layer Height controls how many separate slices are made in the part and is the single biggest driver of print time. For most prints, I use 0.13125mm, but 0.175mm would be good for this part as also. Shell Thickness tells the printer how many lines to print around any feature. It's best to use a value that is a multiple of the nozzle diameter. Here, I'm using a 0.4mm nozzle, and printing three layers around the outside (3 x 0.4 = 1.2) so the shell thickness is 1.2mm.
The Fill section has two settings also, Bottom/Top Thickness and Fill Density. The Bottom Thickness value is how thick the solid surface touching the build plate is. In some parts, it may be helpful to make the bottom thicker or thinner than the sides. For these paint pyramids, I want all the surfaces to be equal, so use 1.2mm again. Most 3D printed parts are hollow, or mostly hollow, and that's controlled with Fill Density. For most parts, a value of 15-20% is sufficient to build a framework inside the part to support it. These paint pyramids were specifically designed to be hollow, saving print time and material, so a 0% Fill will work just fine.
Manipulating Parts in Cura
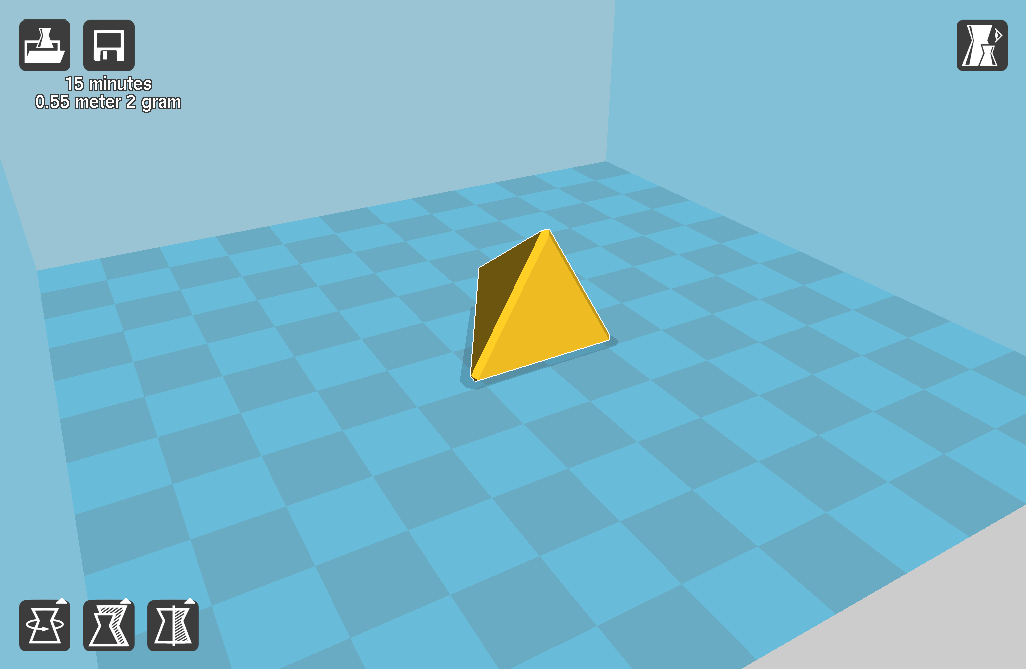
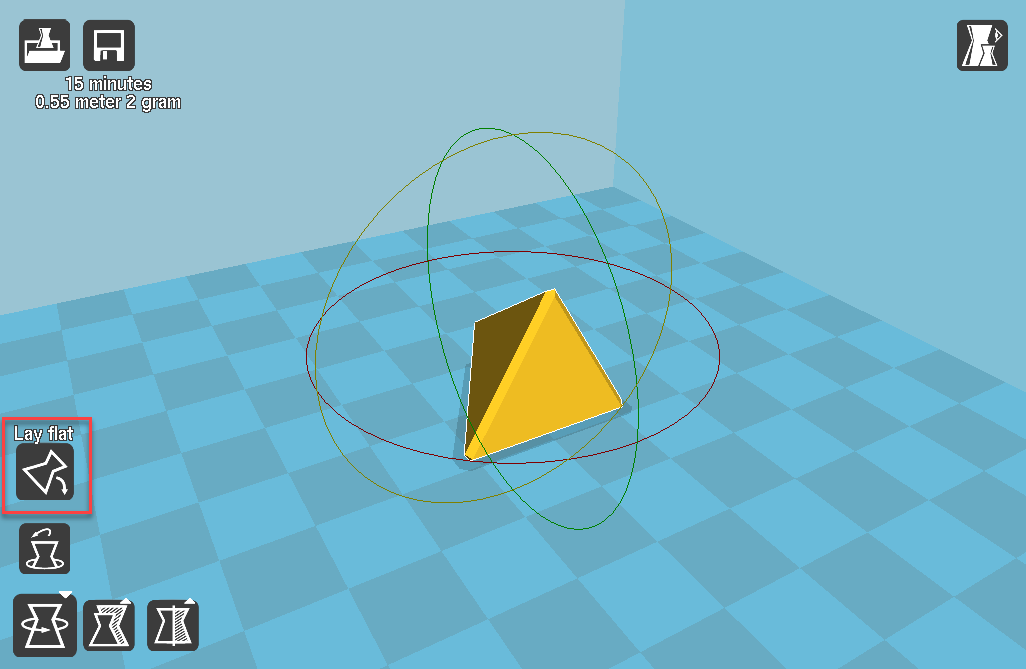
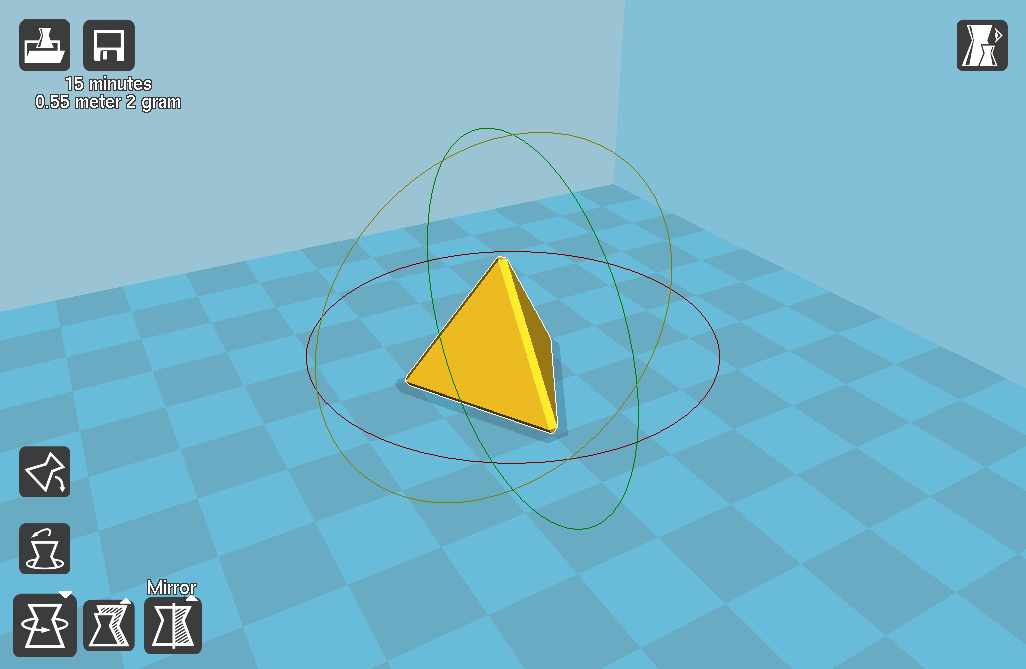
You might notice that parts imported from Fusion 360 don't always come in sitting flat on the build plate. Fortunately, Cura offers a quick solution under the Rotate menu. Click on the part, and select Rotate in the bottom left corner.
With the part and the Rotate function selected, click the 'Lay Flat' option.
The part will snap flat onto the build plate, allowing the print to use no support on the outside, and no fill on the inside.
Printing Multiple Parts in Cura
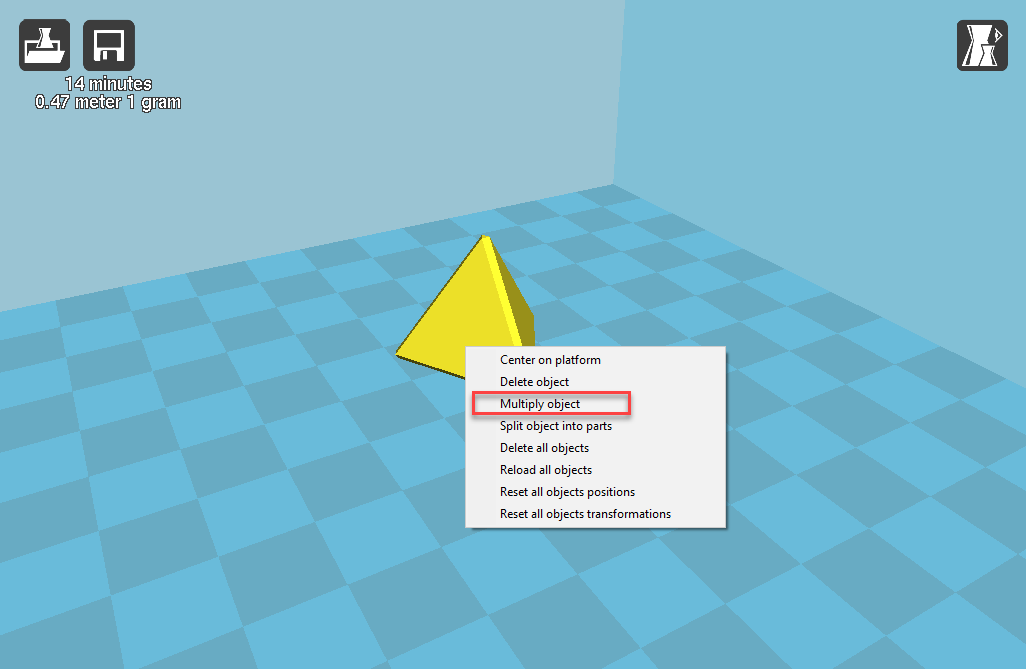
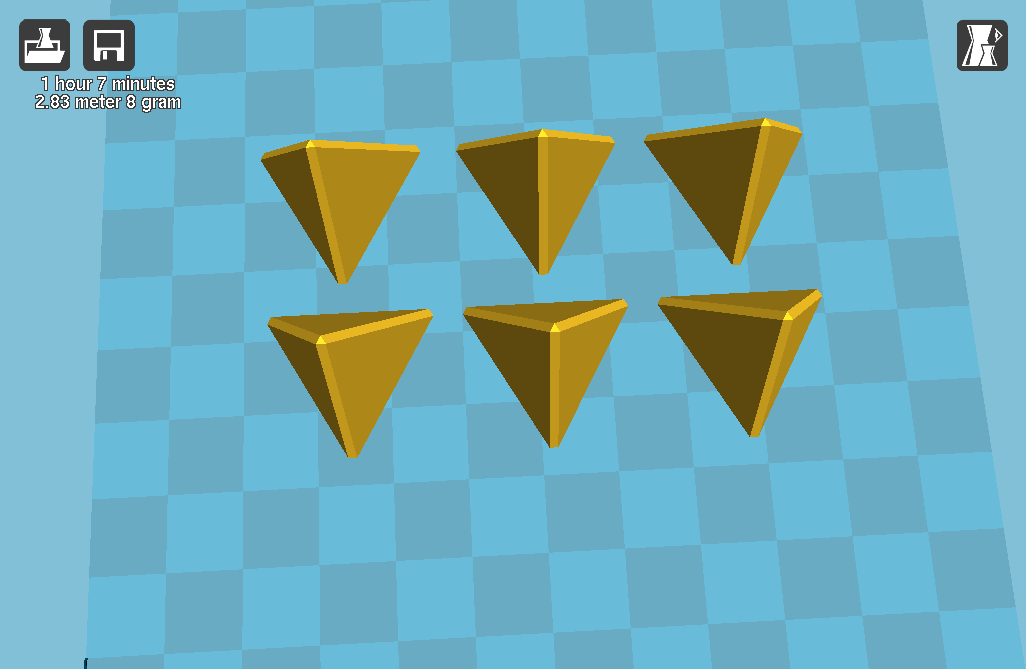
Often, it's useful to load the print bed as full as possible with multiple parts, and leave the printer to run overnight. We can use the Multiply Object function to print more than one part.
Right Click on the part in the print bed window and select 'Multiply Object'. A window will pop up asking how many copies do you want. Remember this is copies, not total parts, so if you enter 6 there will be 7. I entered 5 copies, to print 6 parts.
The Finished Product
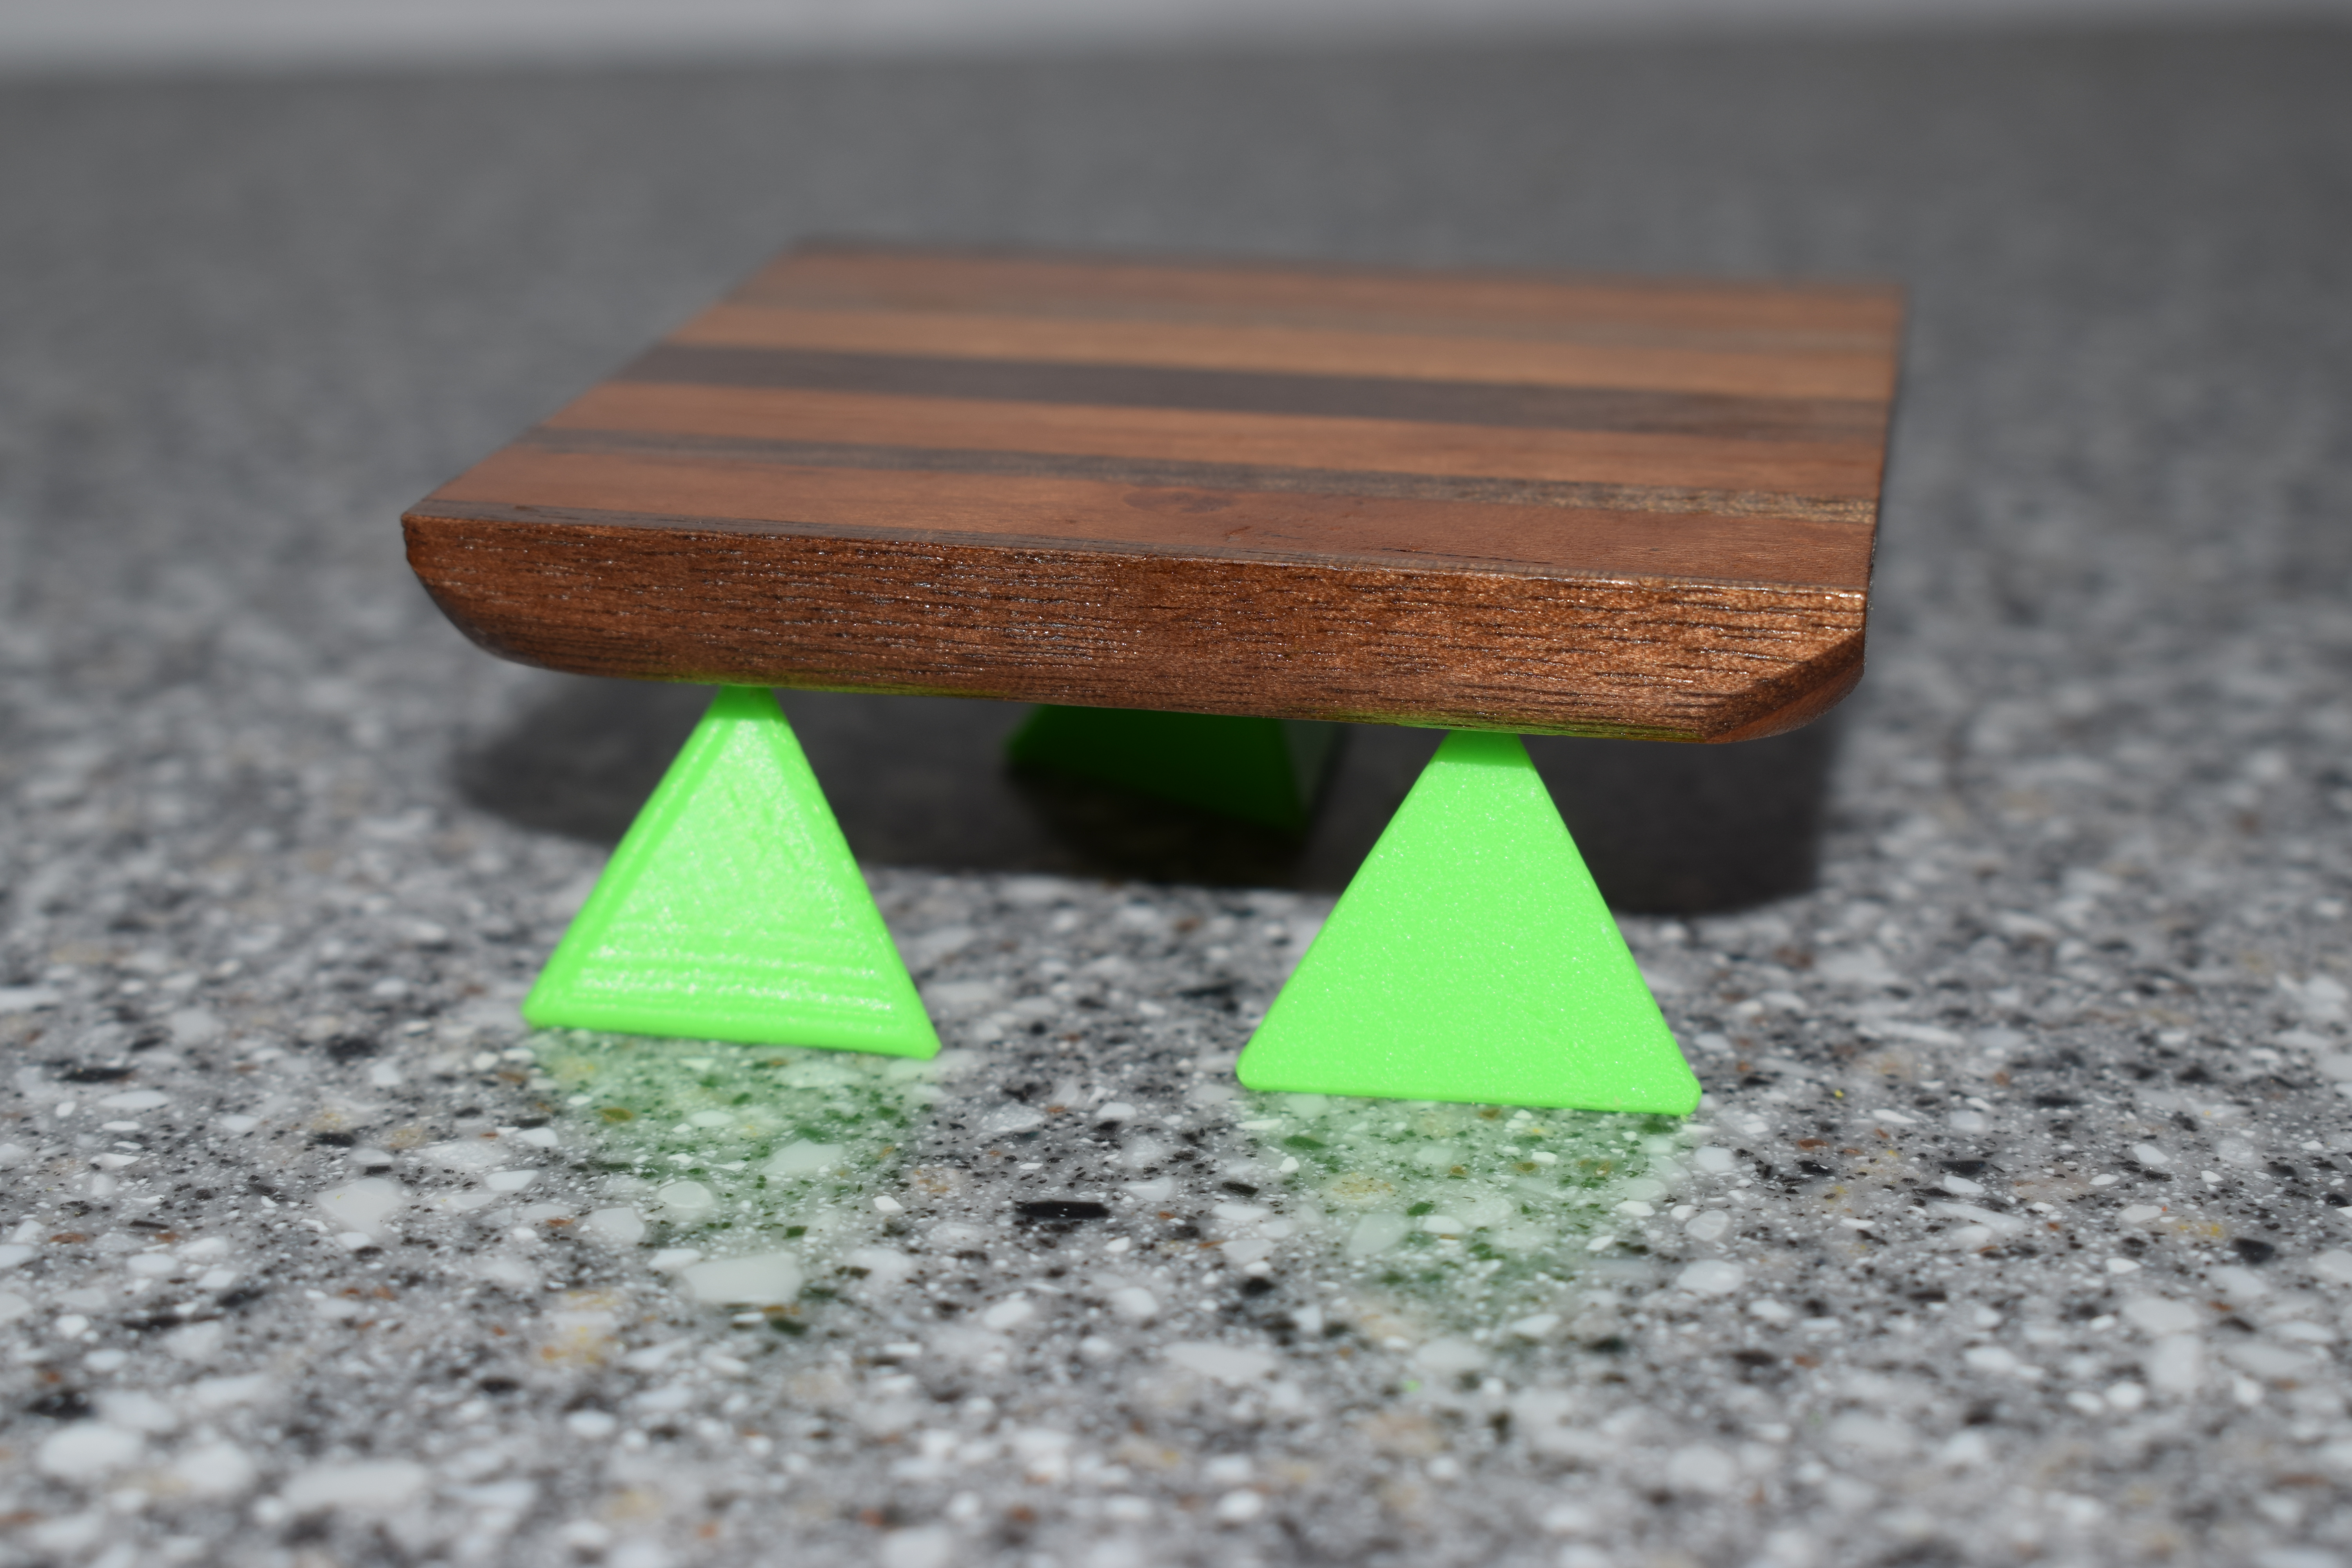
That's it, printing 6 of these paint pyramids with the Cura slicer settings shown above took just over 1 hour to print. Not bad, considering a 10-pack from Rockler costs about $8; I never seem to have enough of these when it comes time to finish woodworking projects.
-------------------------------------
You can also find me at:
YouTube (all my DIY videos)
Instagram (What I'm working on @greatlakesmakes)
My Website (Geek out on some engineering know-how)
Facebook (be my friend?)
-------------------------------------