3D Printed Multi-Angle Drill Guide
by Kartik_Nanduri in Workshop > 3D Printing
9897 Views, 127 Favorites, 0 Comments
3D Printed Multi-Angle Drill Guide


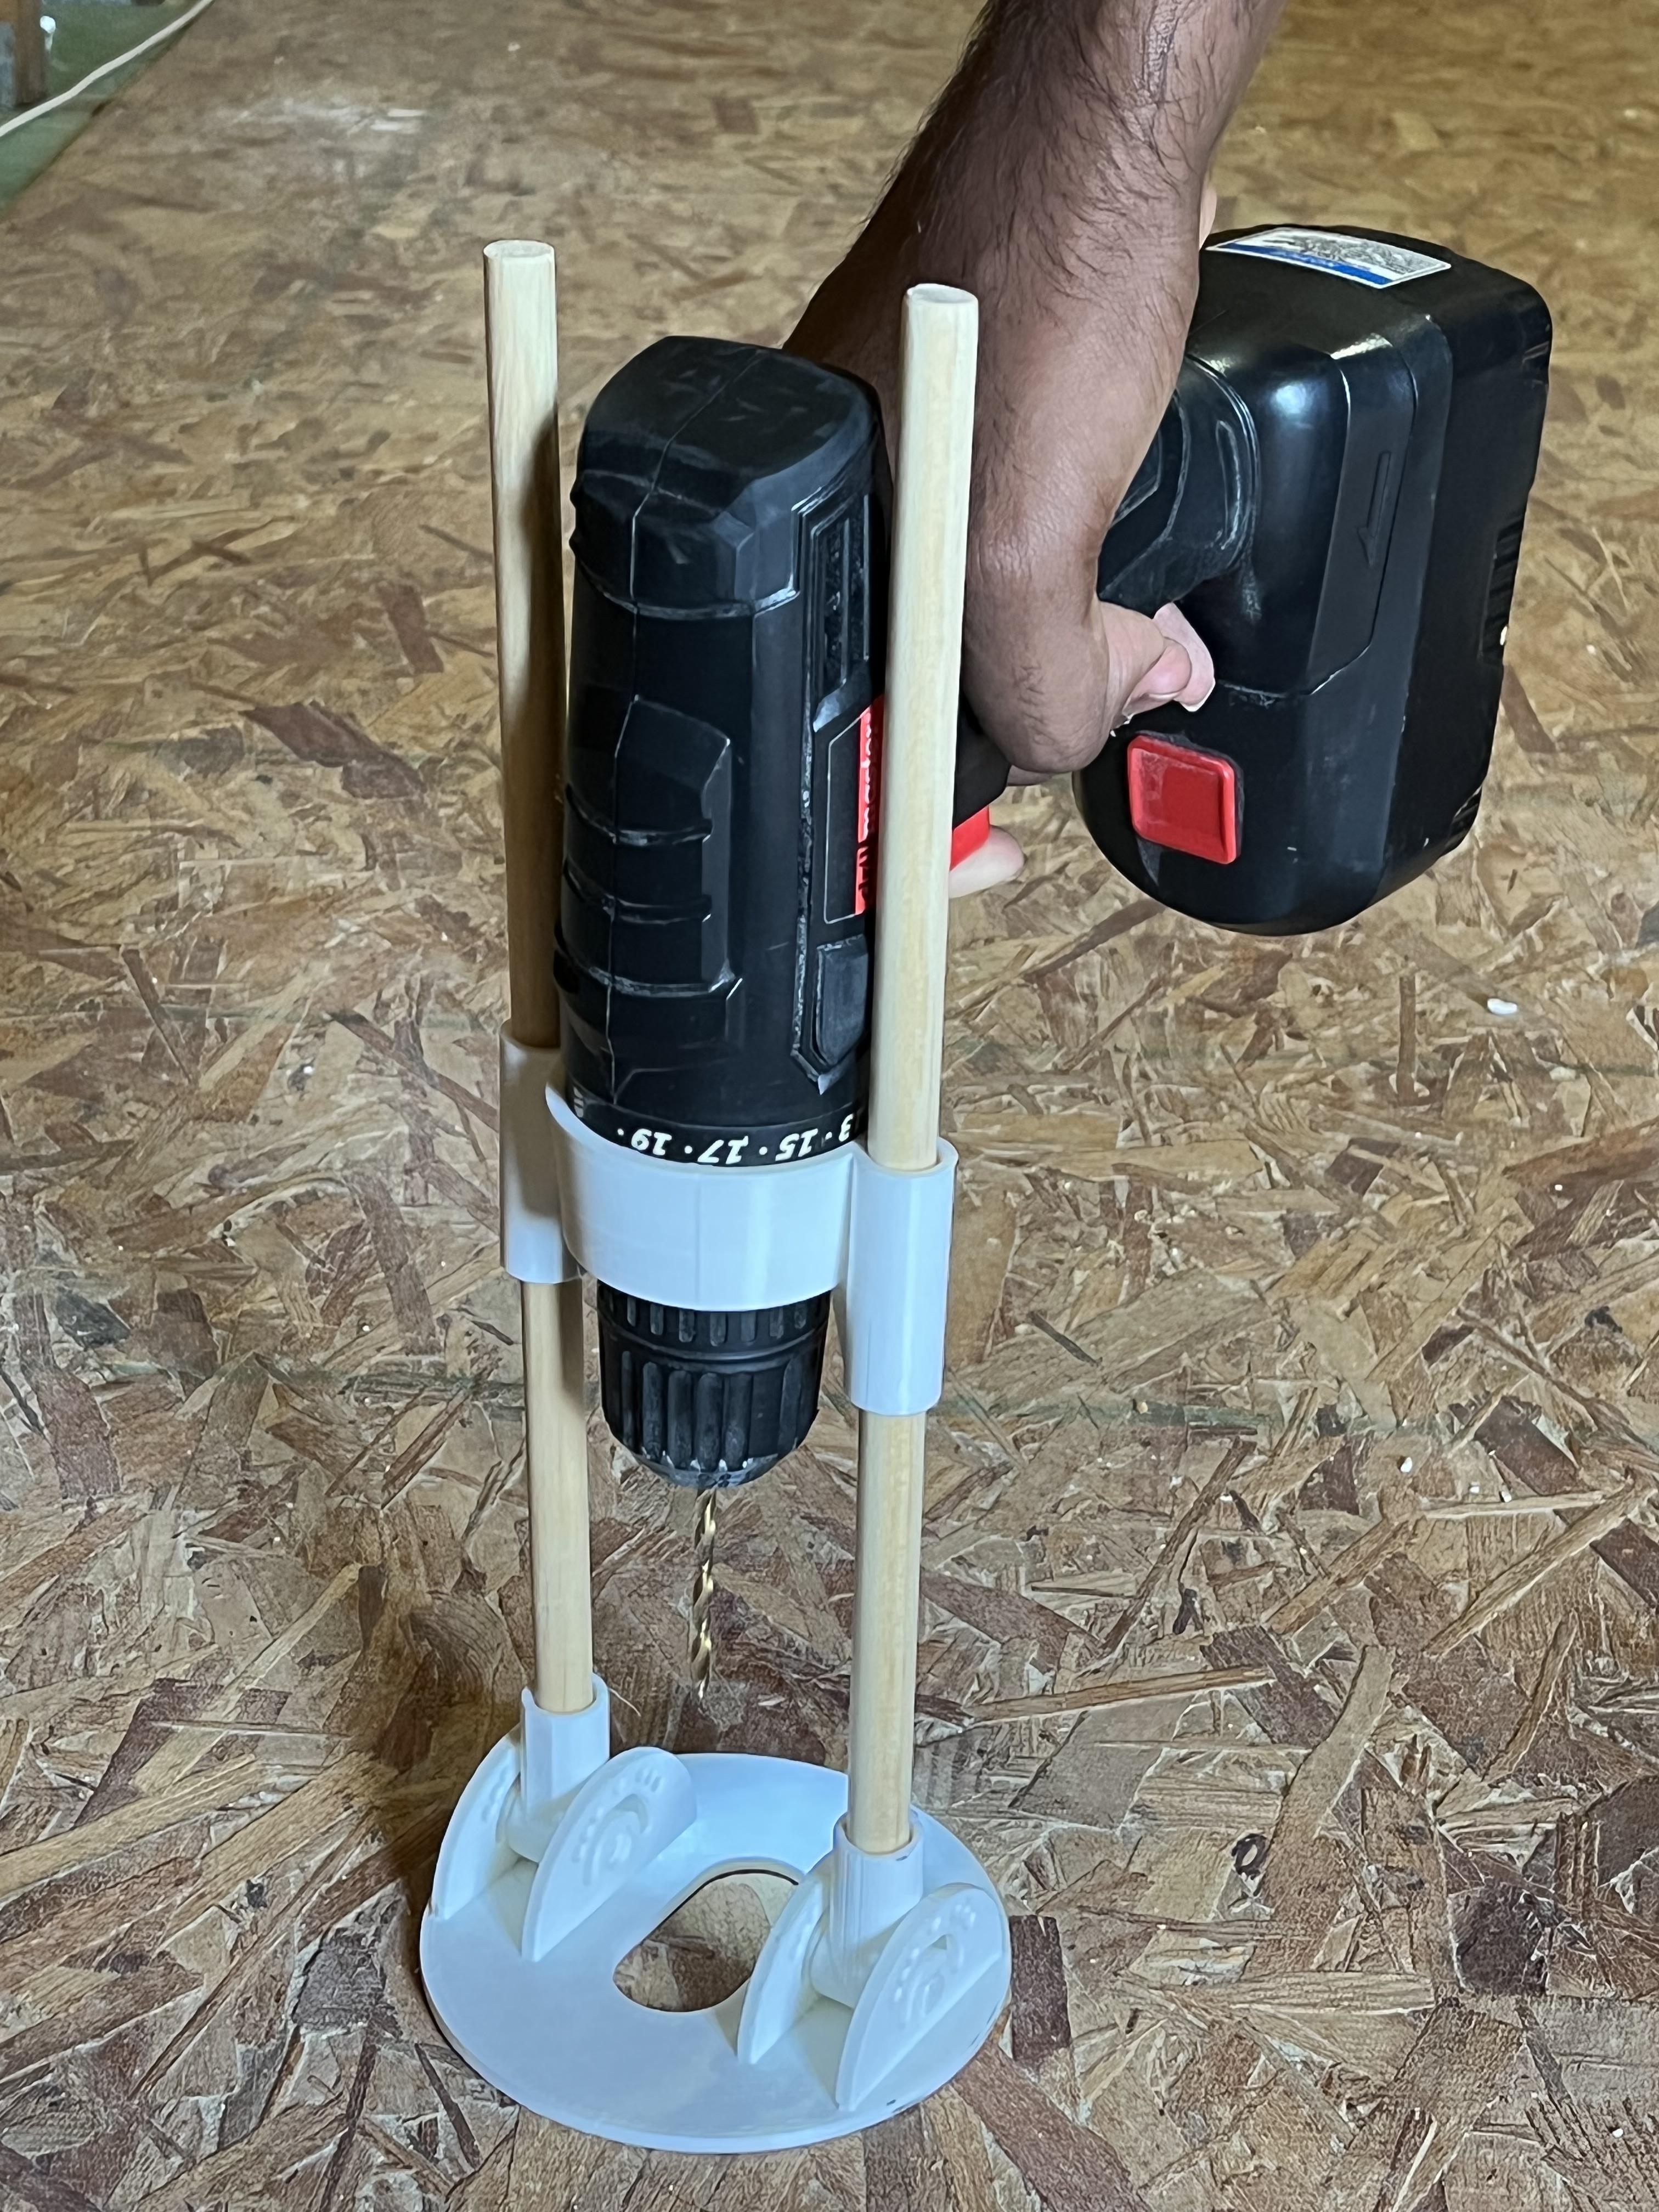
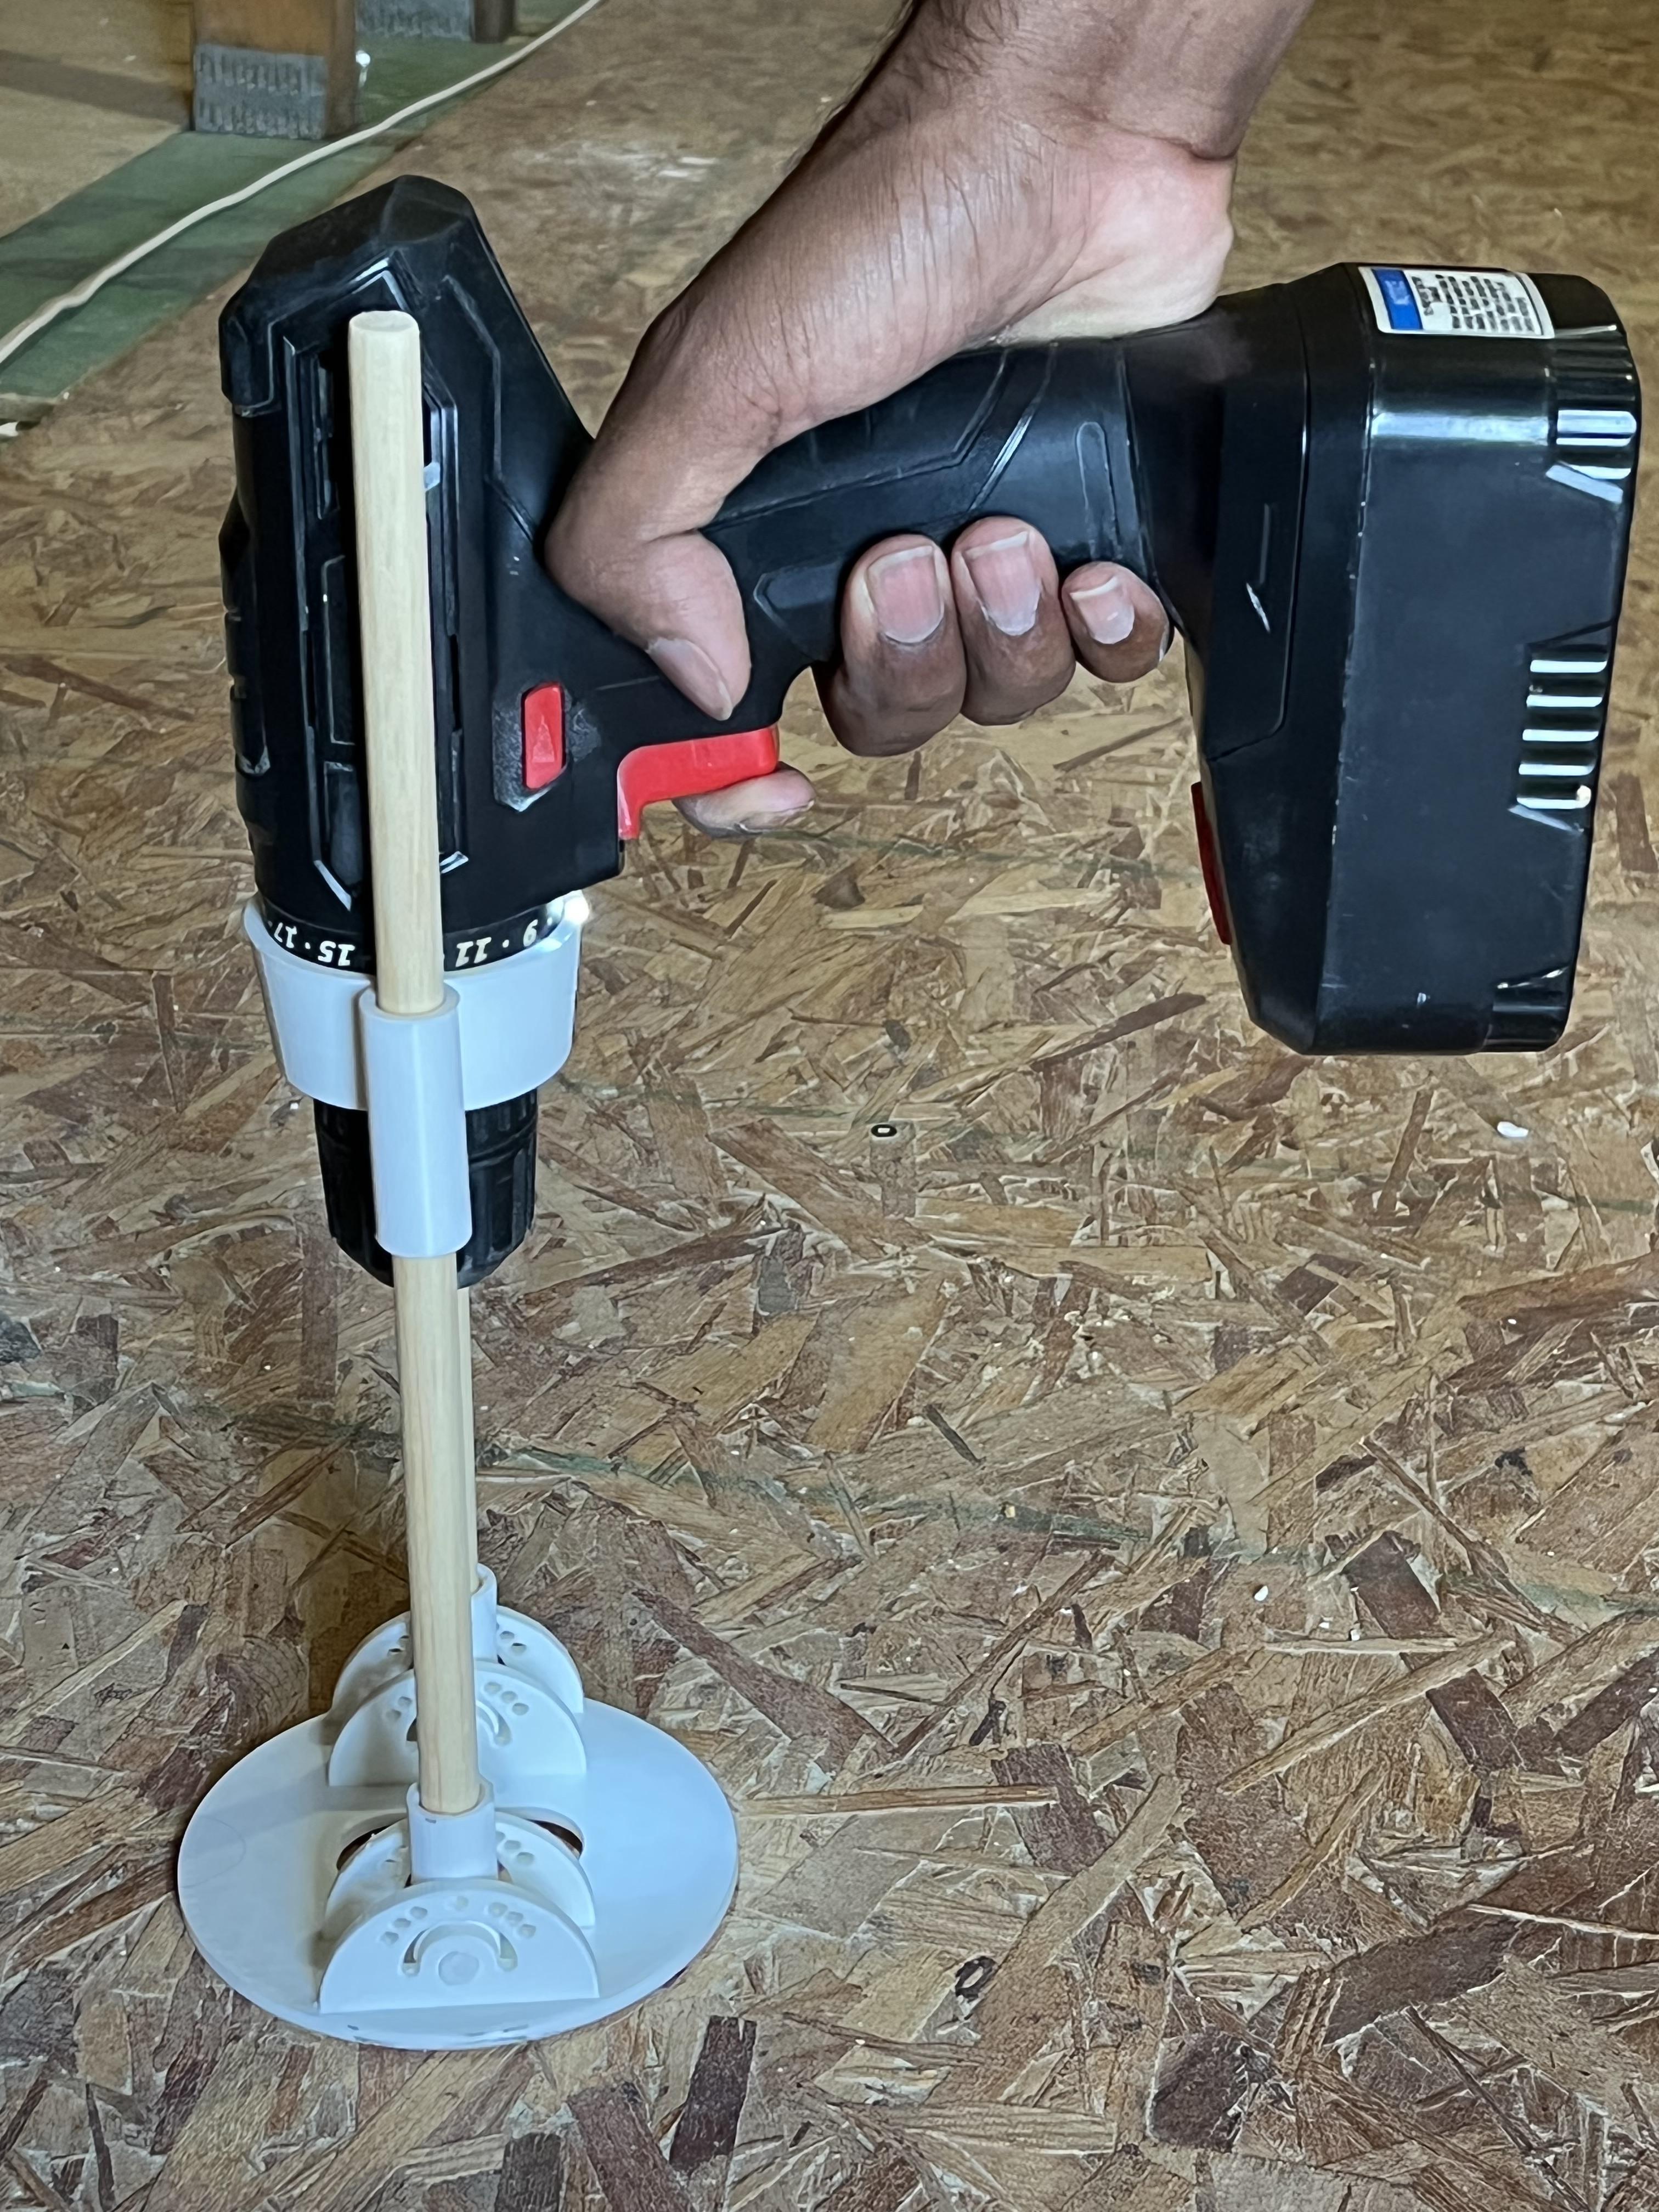
Drilling straight on flat surfaces can be simple. Drilling in angles on flat or angular surfaces can be daunting sometimes. It would be helpful to have an accessory to make drilling easy. I have made a Guide to put on a drill that will ensure making angled holes accurately. The guide allows the user to make holes at 30,45-,60, or 90-degree angles to the surface. A set of premade slots on the device lets the user adjust the angle as needed. The device can be used on many materials at any orientation, like on the floor, a wall, or even the ceiling. The user just must insert the drill into the device, position the device in the place where the hole needs to be made, and snap the device into the angle you want, then dill the hole. The accessory has three components a guide that goes on the surface, a drill sleeve that goes on the drill and a pair of wood dowels that connects both parts. The guide and drill sleeves are 3D printed and dowels are made from wood. The device is lightweight, at around 110 grams, and can be used very easily.
Supplies
Materials :
3D printer with at least 12cm x 12cm x 5cm Printable area
Approximately 150g of plastic Filament - Preferably PLA or ABS
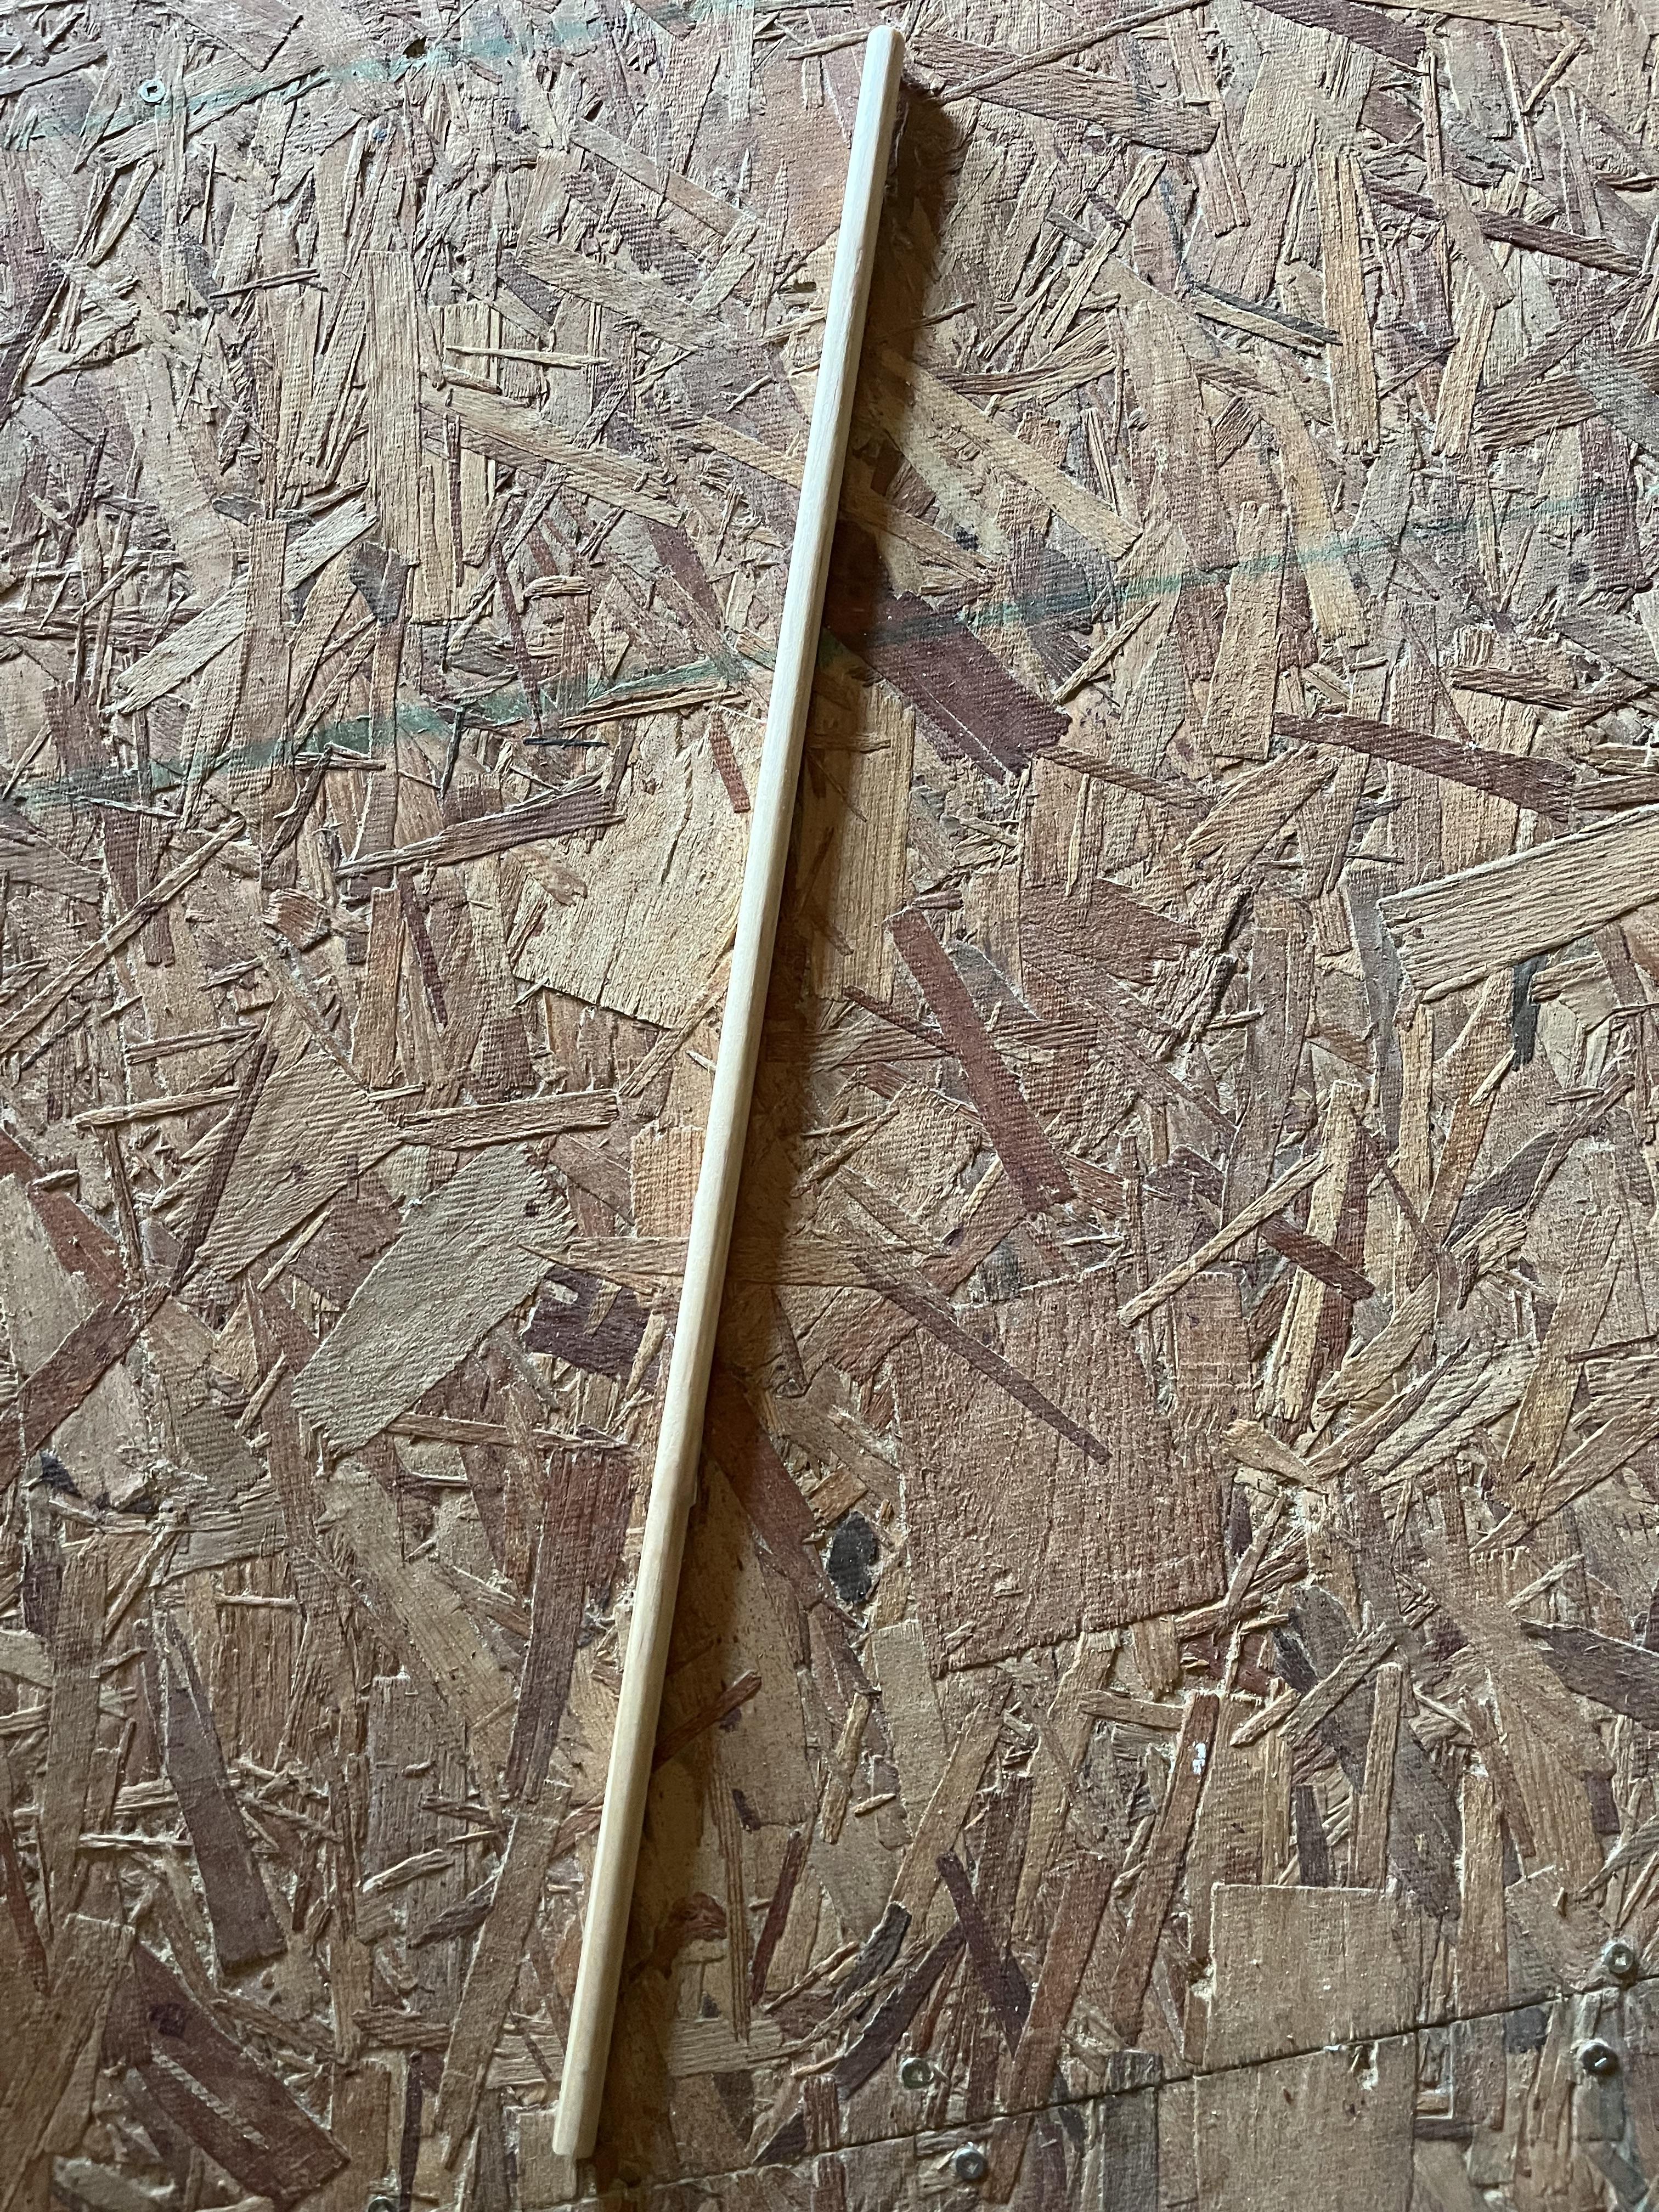
At least 2 Feet of 7/16 diameter wooden Dowel
Hot Glue
Design
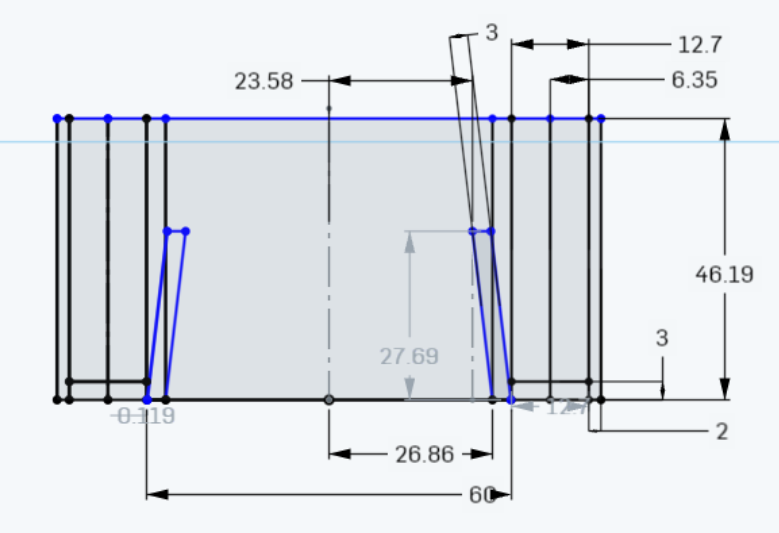
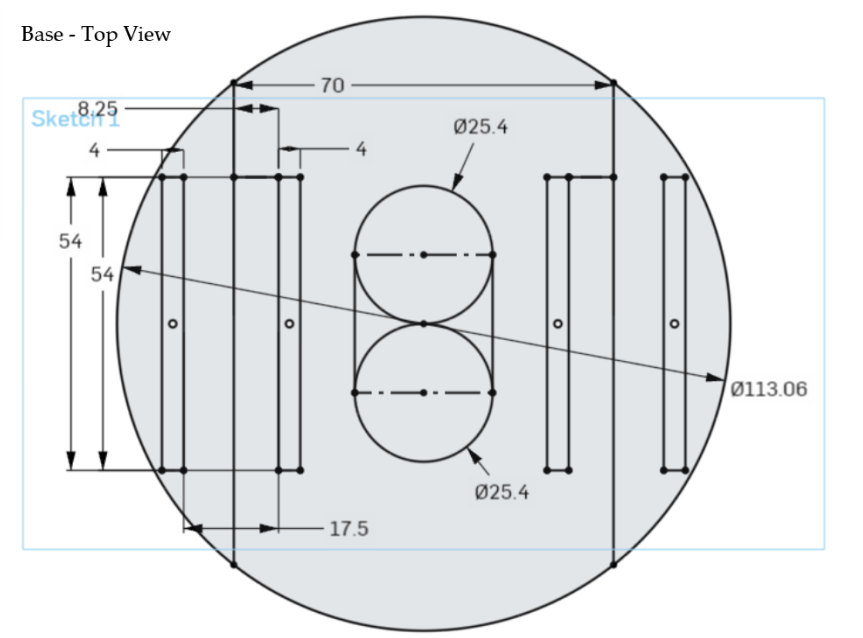

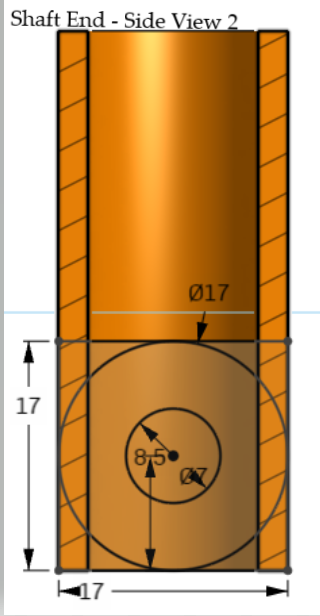
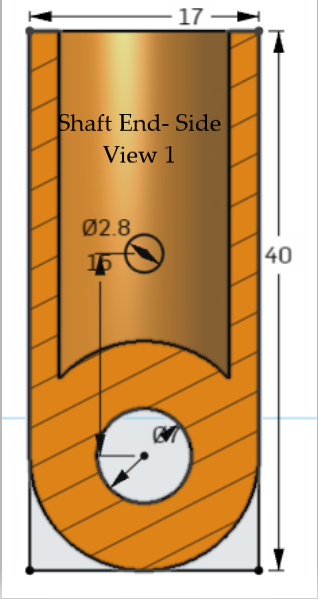


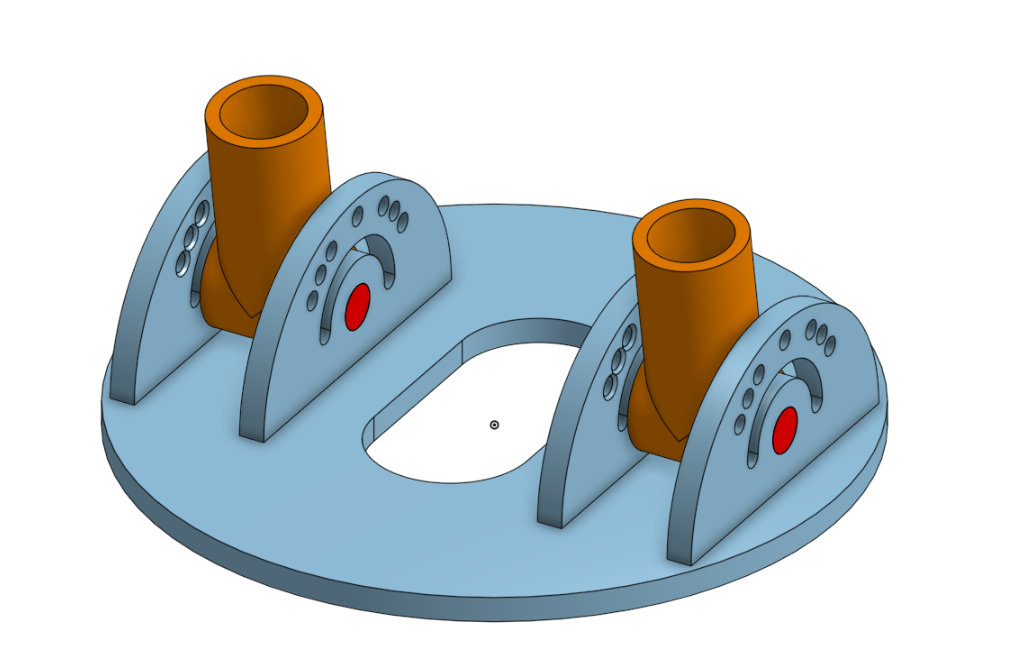
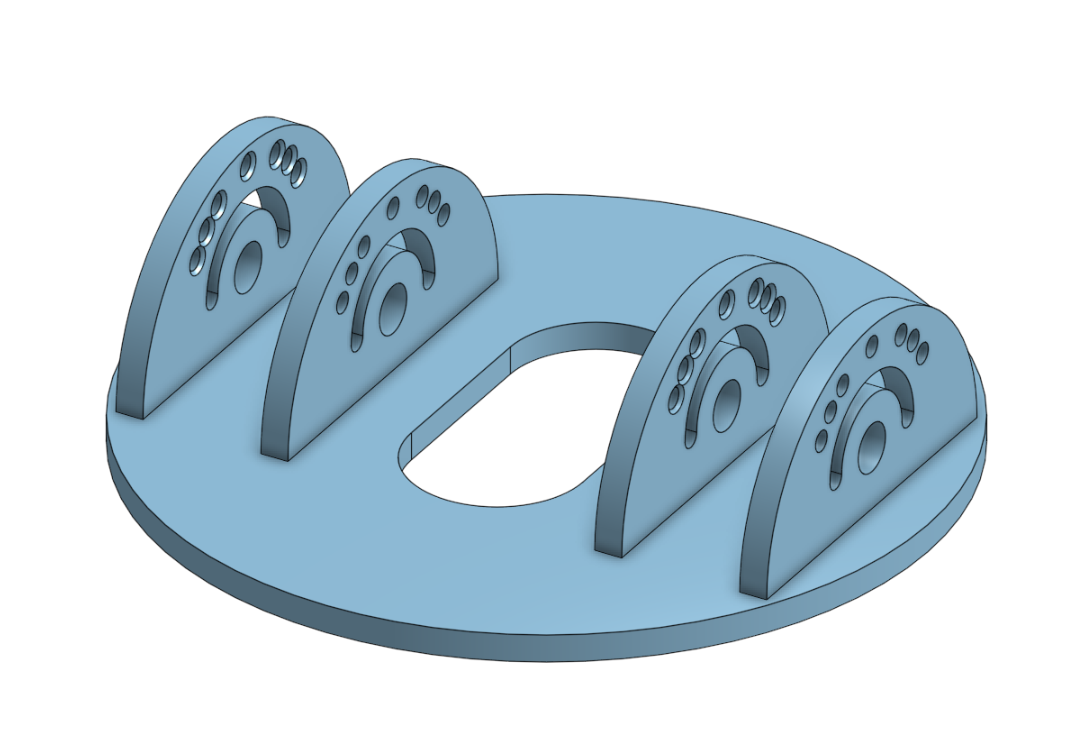
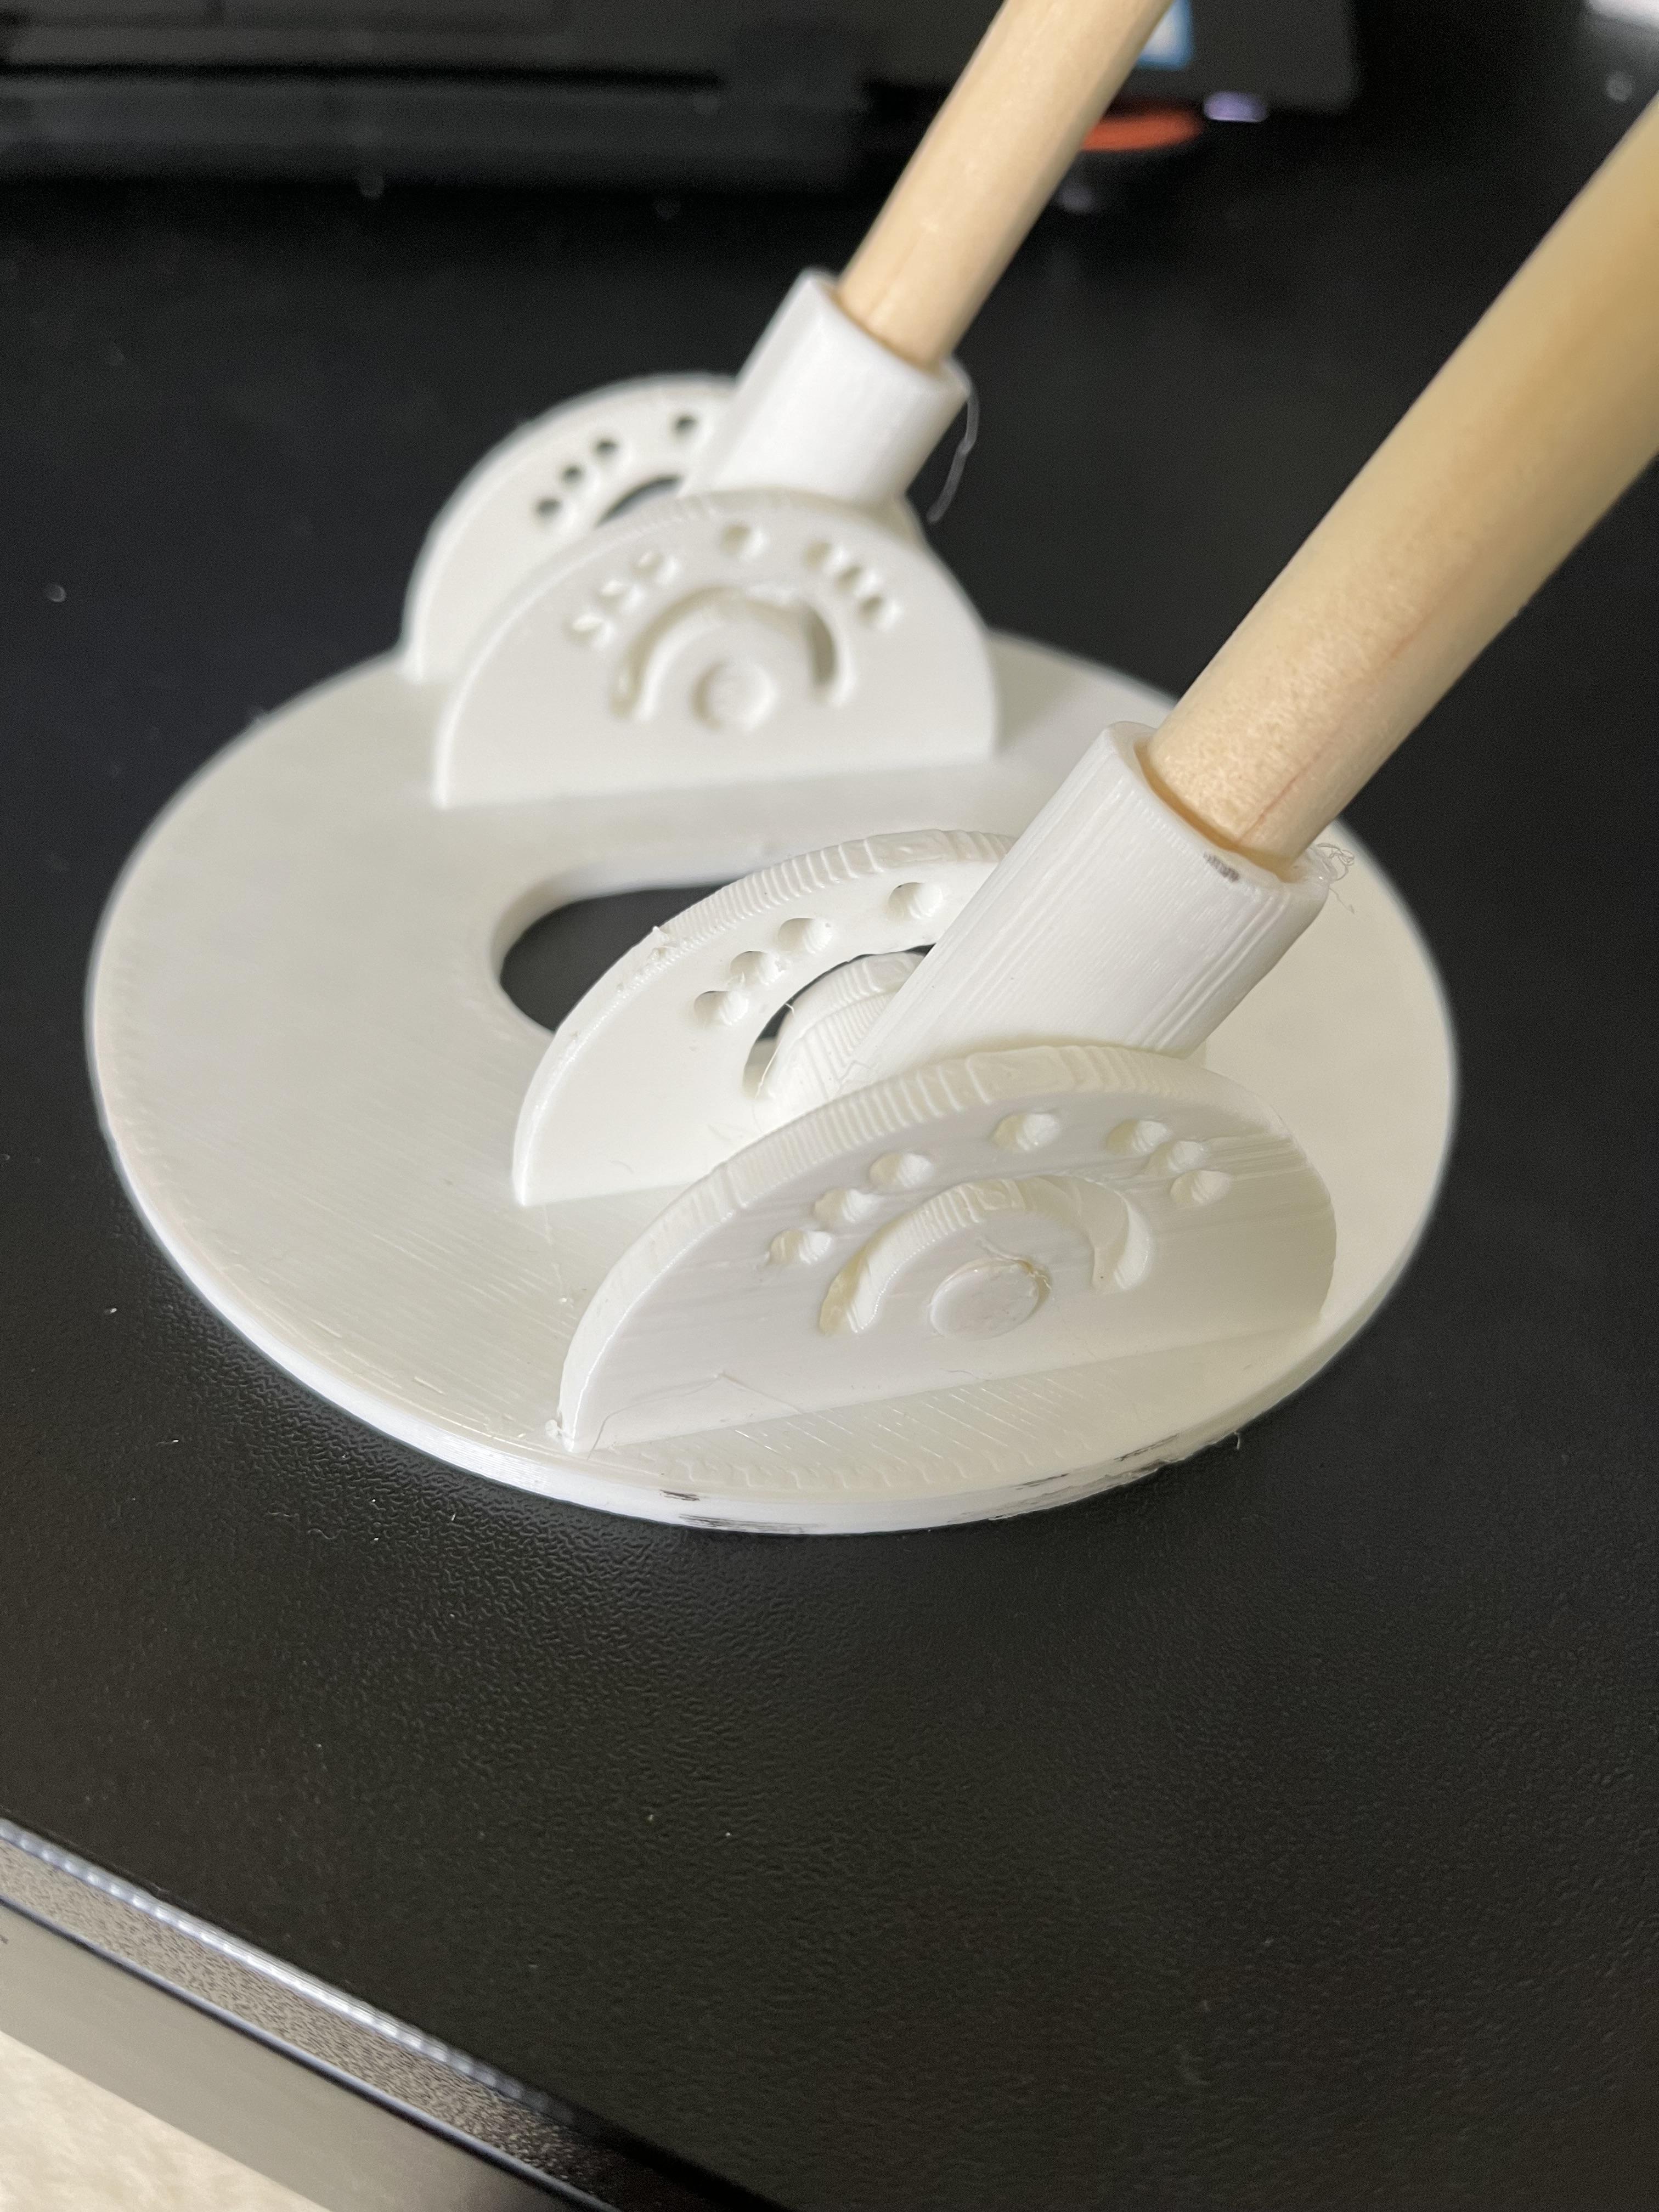
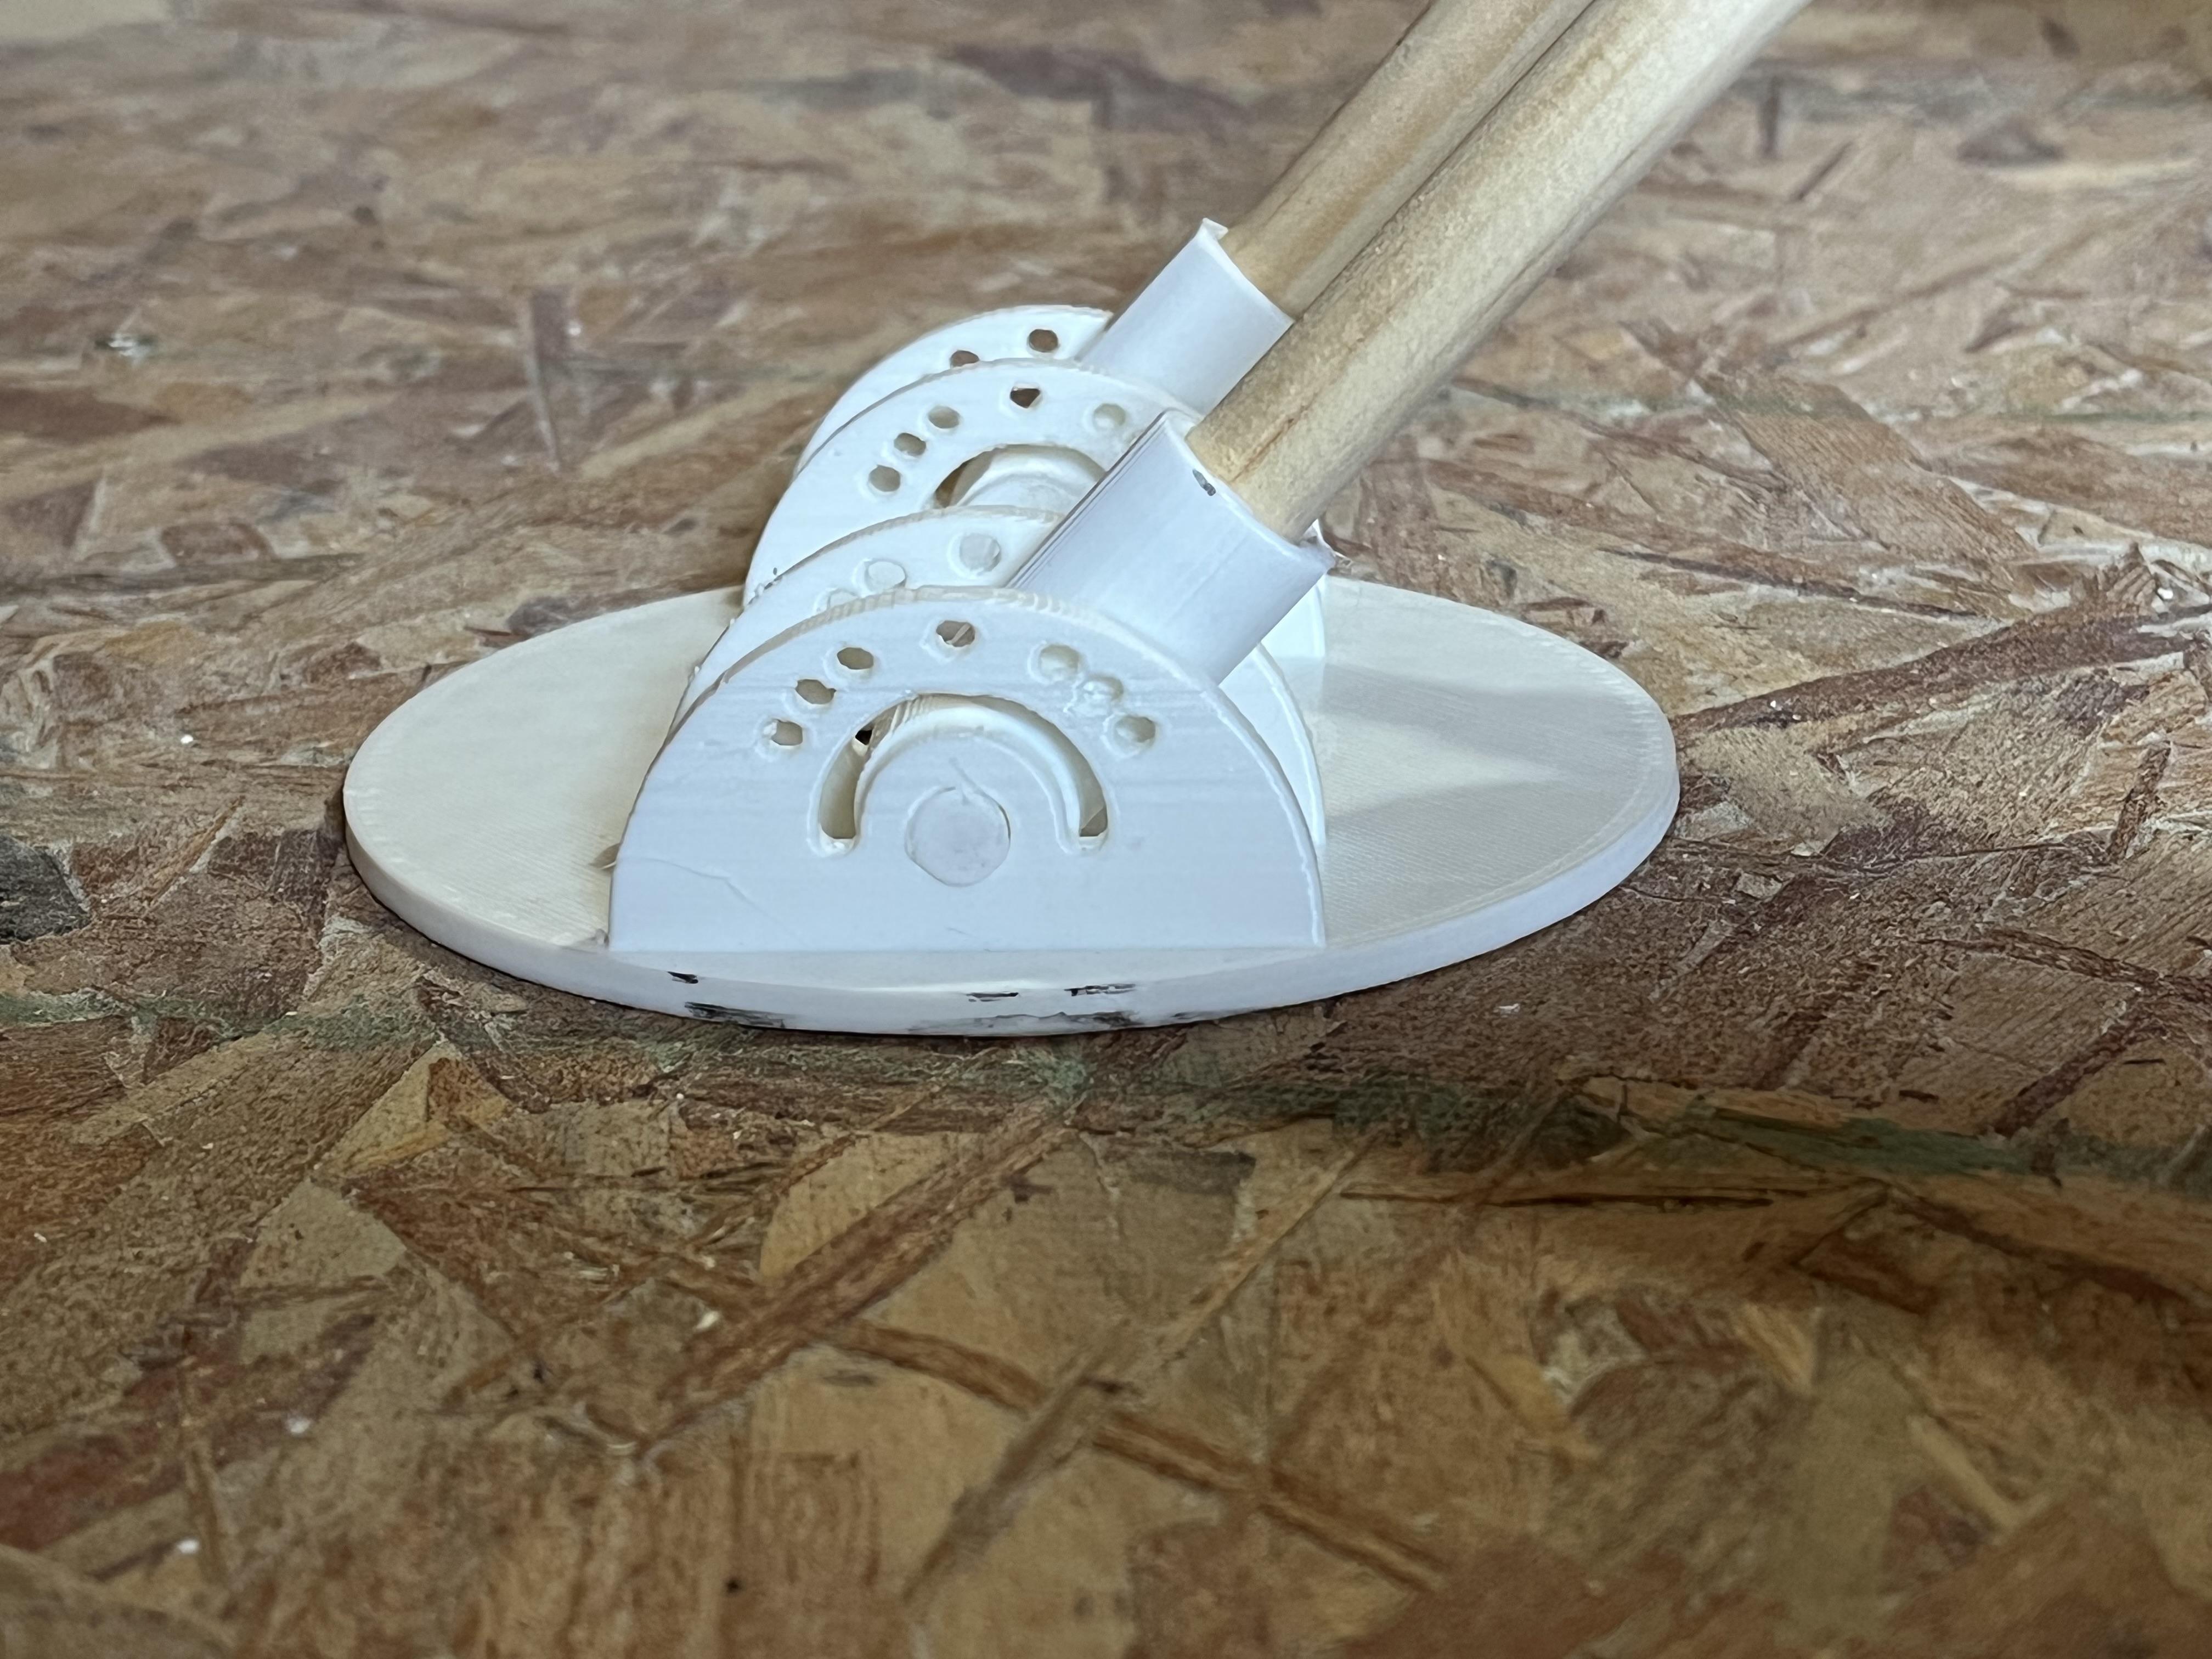
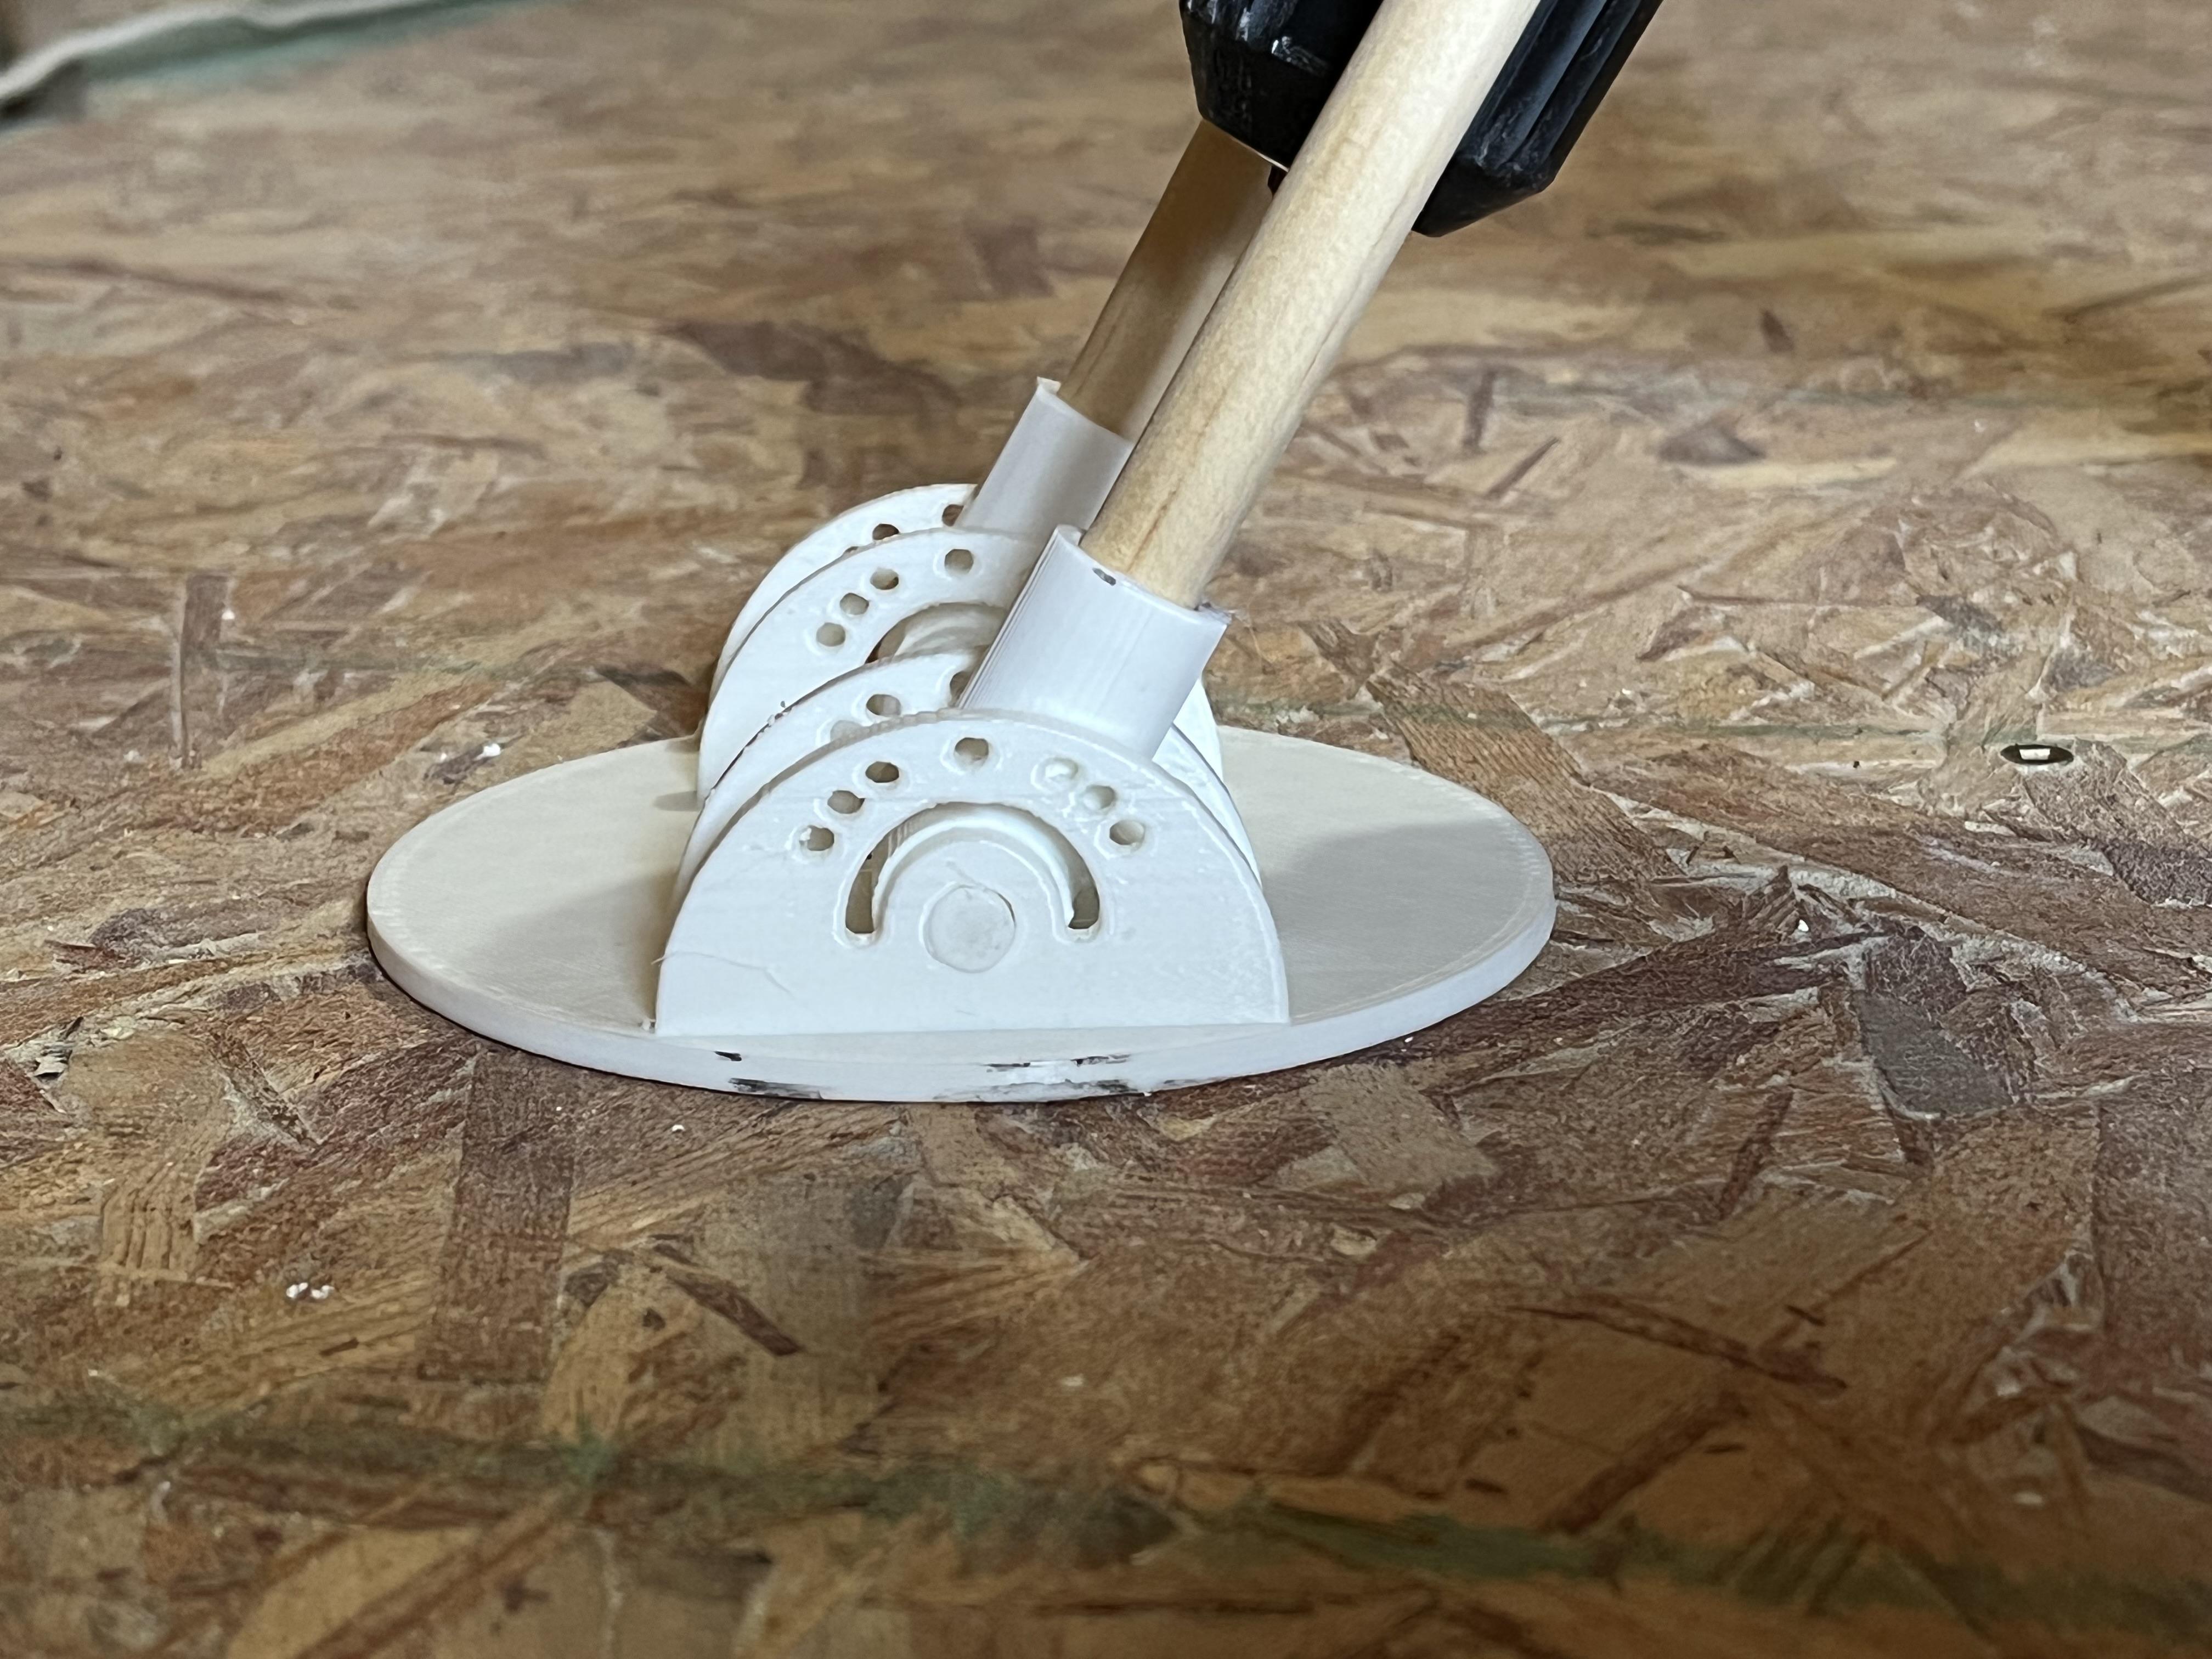
The device has 2 primary components. The base has a hole for the drill bit to go through and insert slots, where the shaft will be connected. the shaft is attached to the base with the shaft end, shown in orange, and attached to the blue base with the red pin, which connects the shaft end with the base using friction, and acts as a pivot point for the drill.
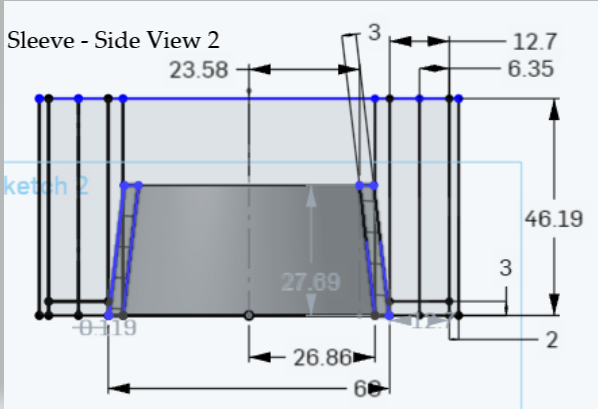
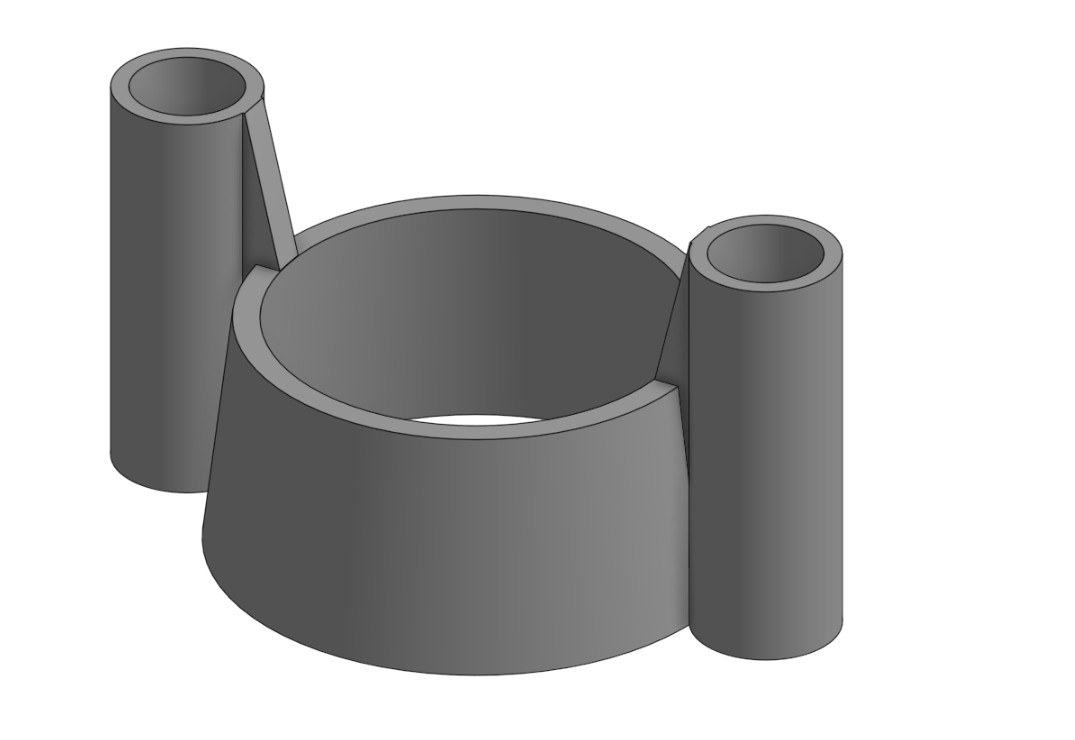
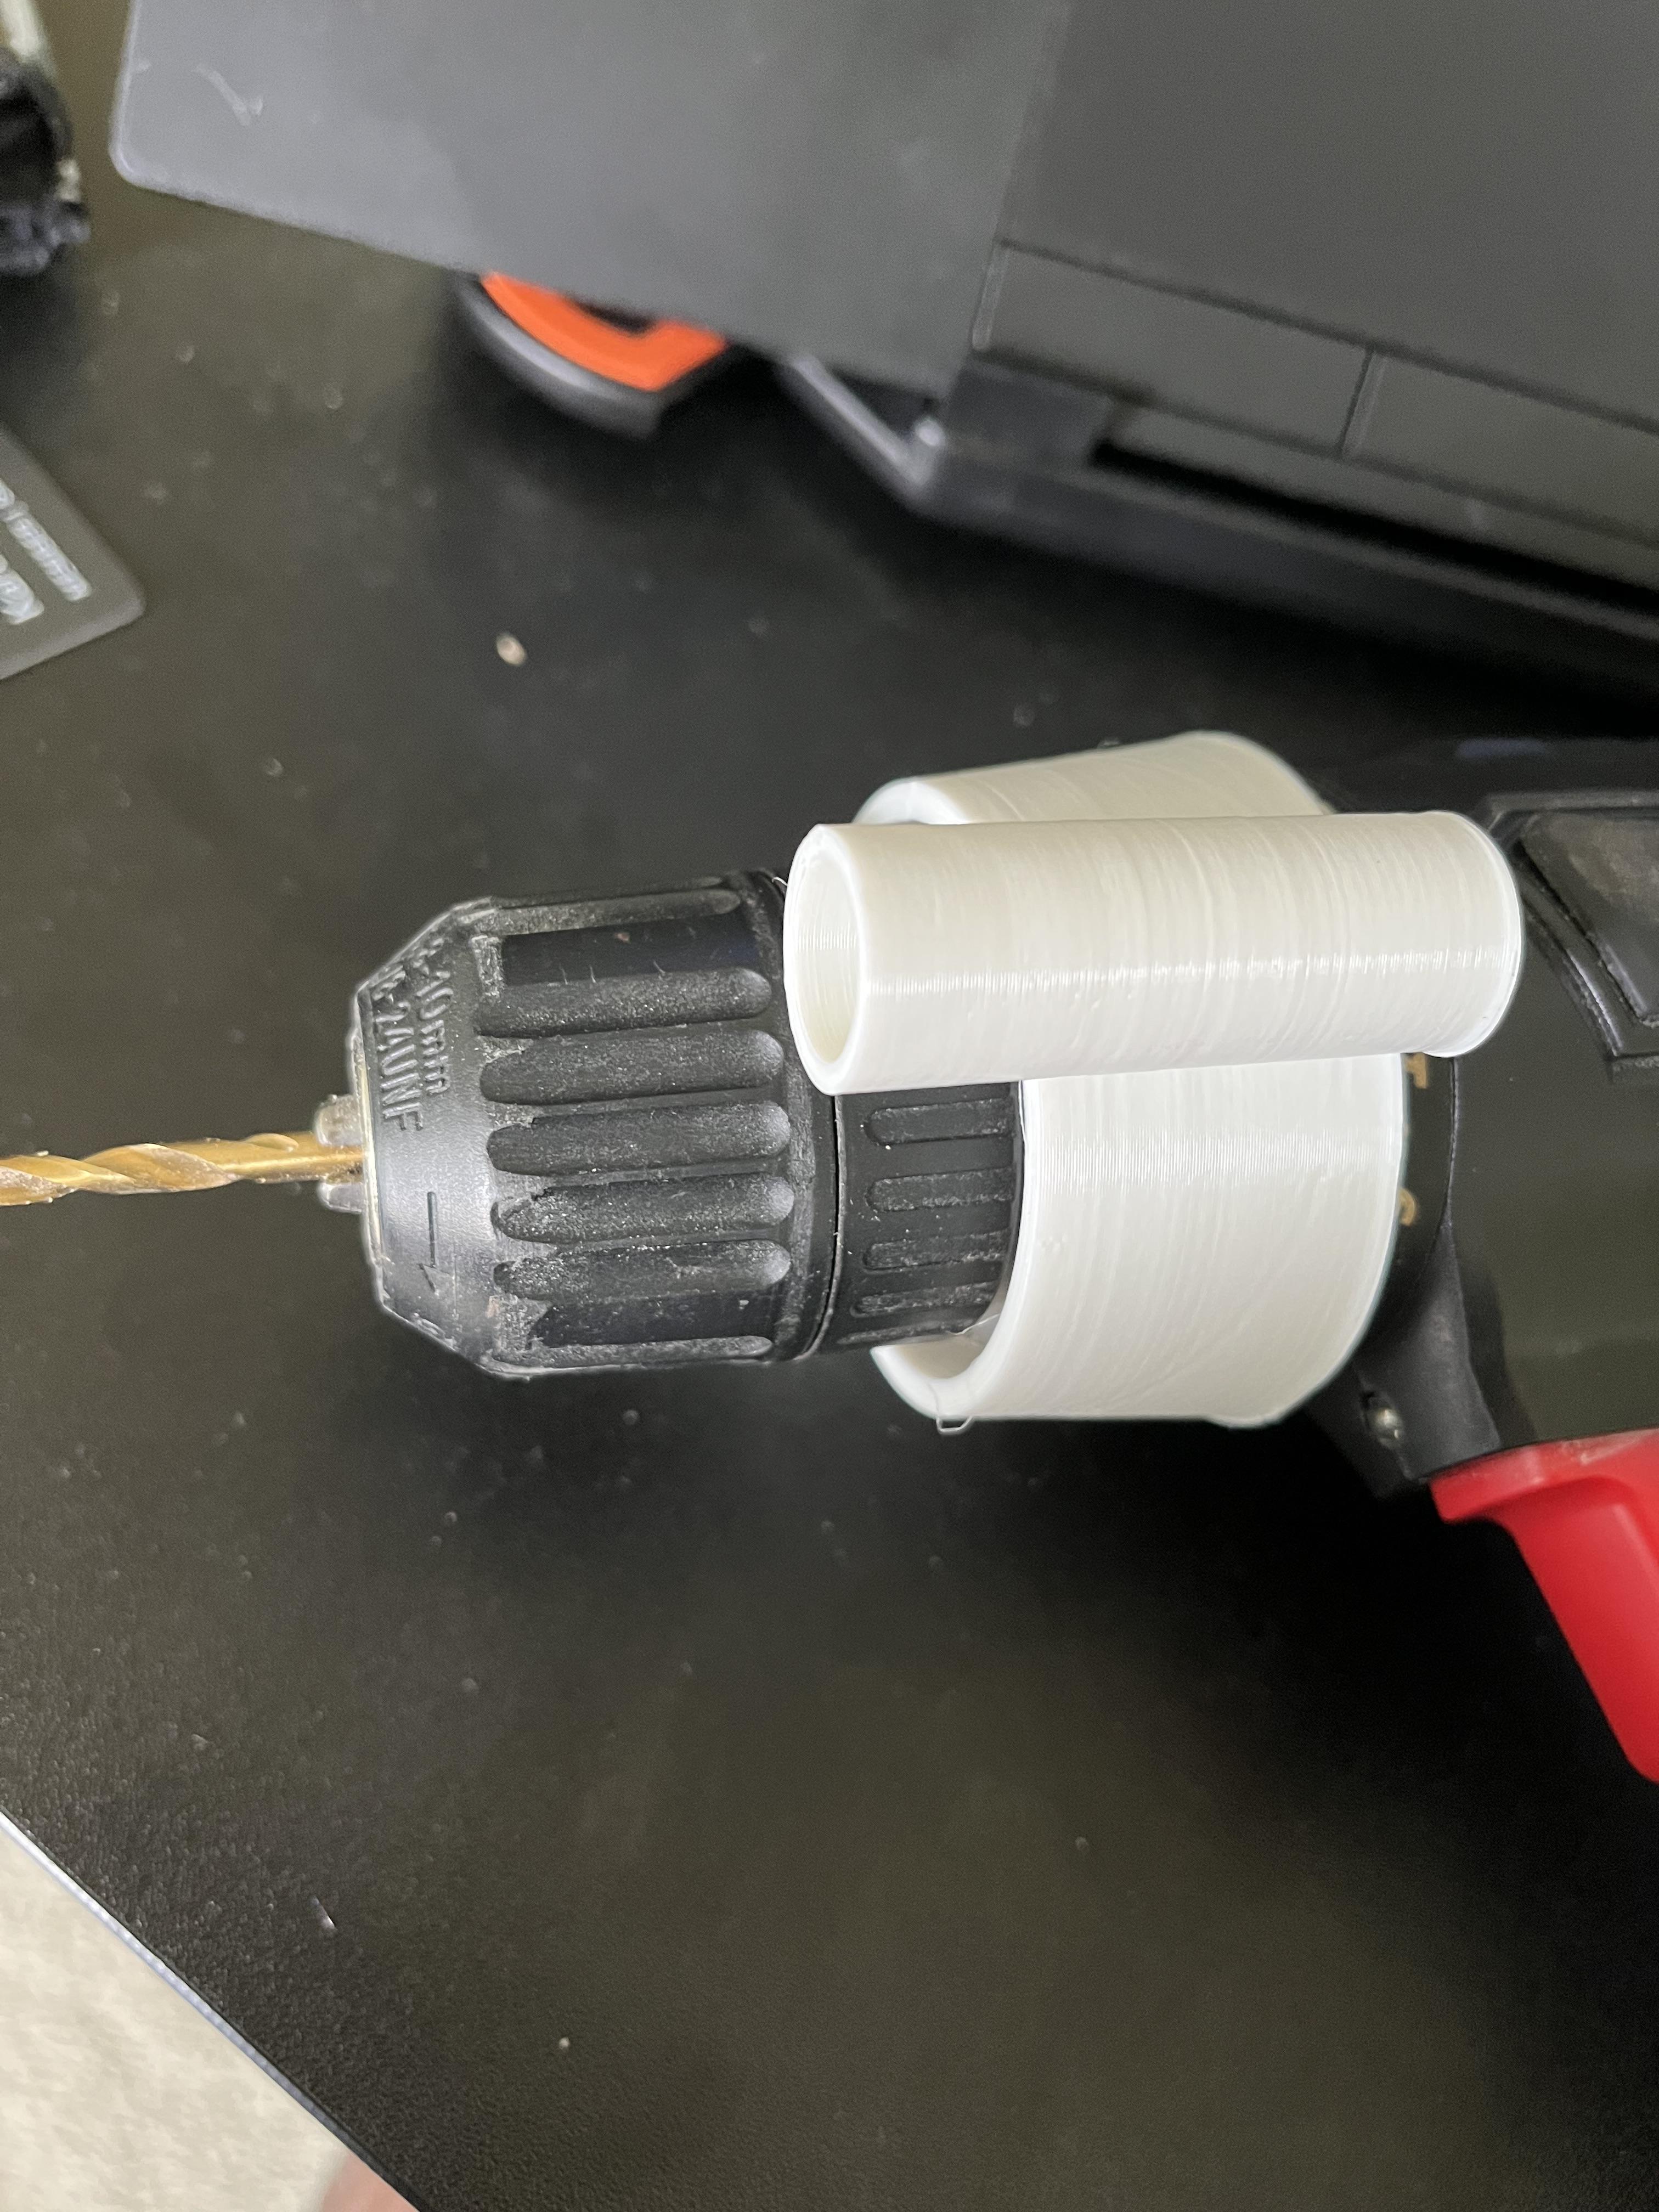
The drill sleeve, colored in gray, has a cone-shaped section that snugly fits over the non-rotating part of the drill. it has to holes beside it for the shaft to go through, so the drill can easily but securely slide up and down. The holes are spaced so that a 7/16 Inch dowel can cleanly fit through them into the shaft end. I took all measurements with a caliper so that the parts will fit my drill exactly as intended
Print Parts
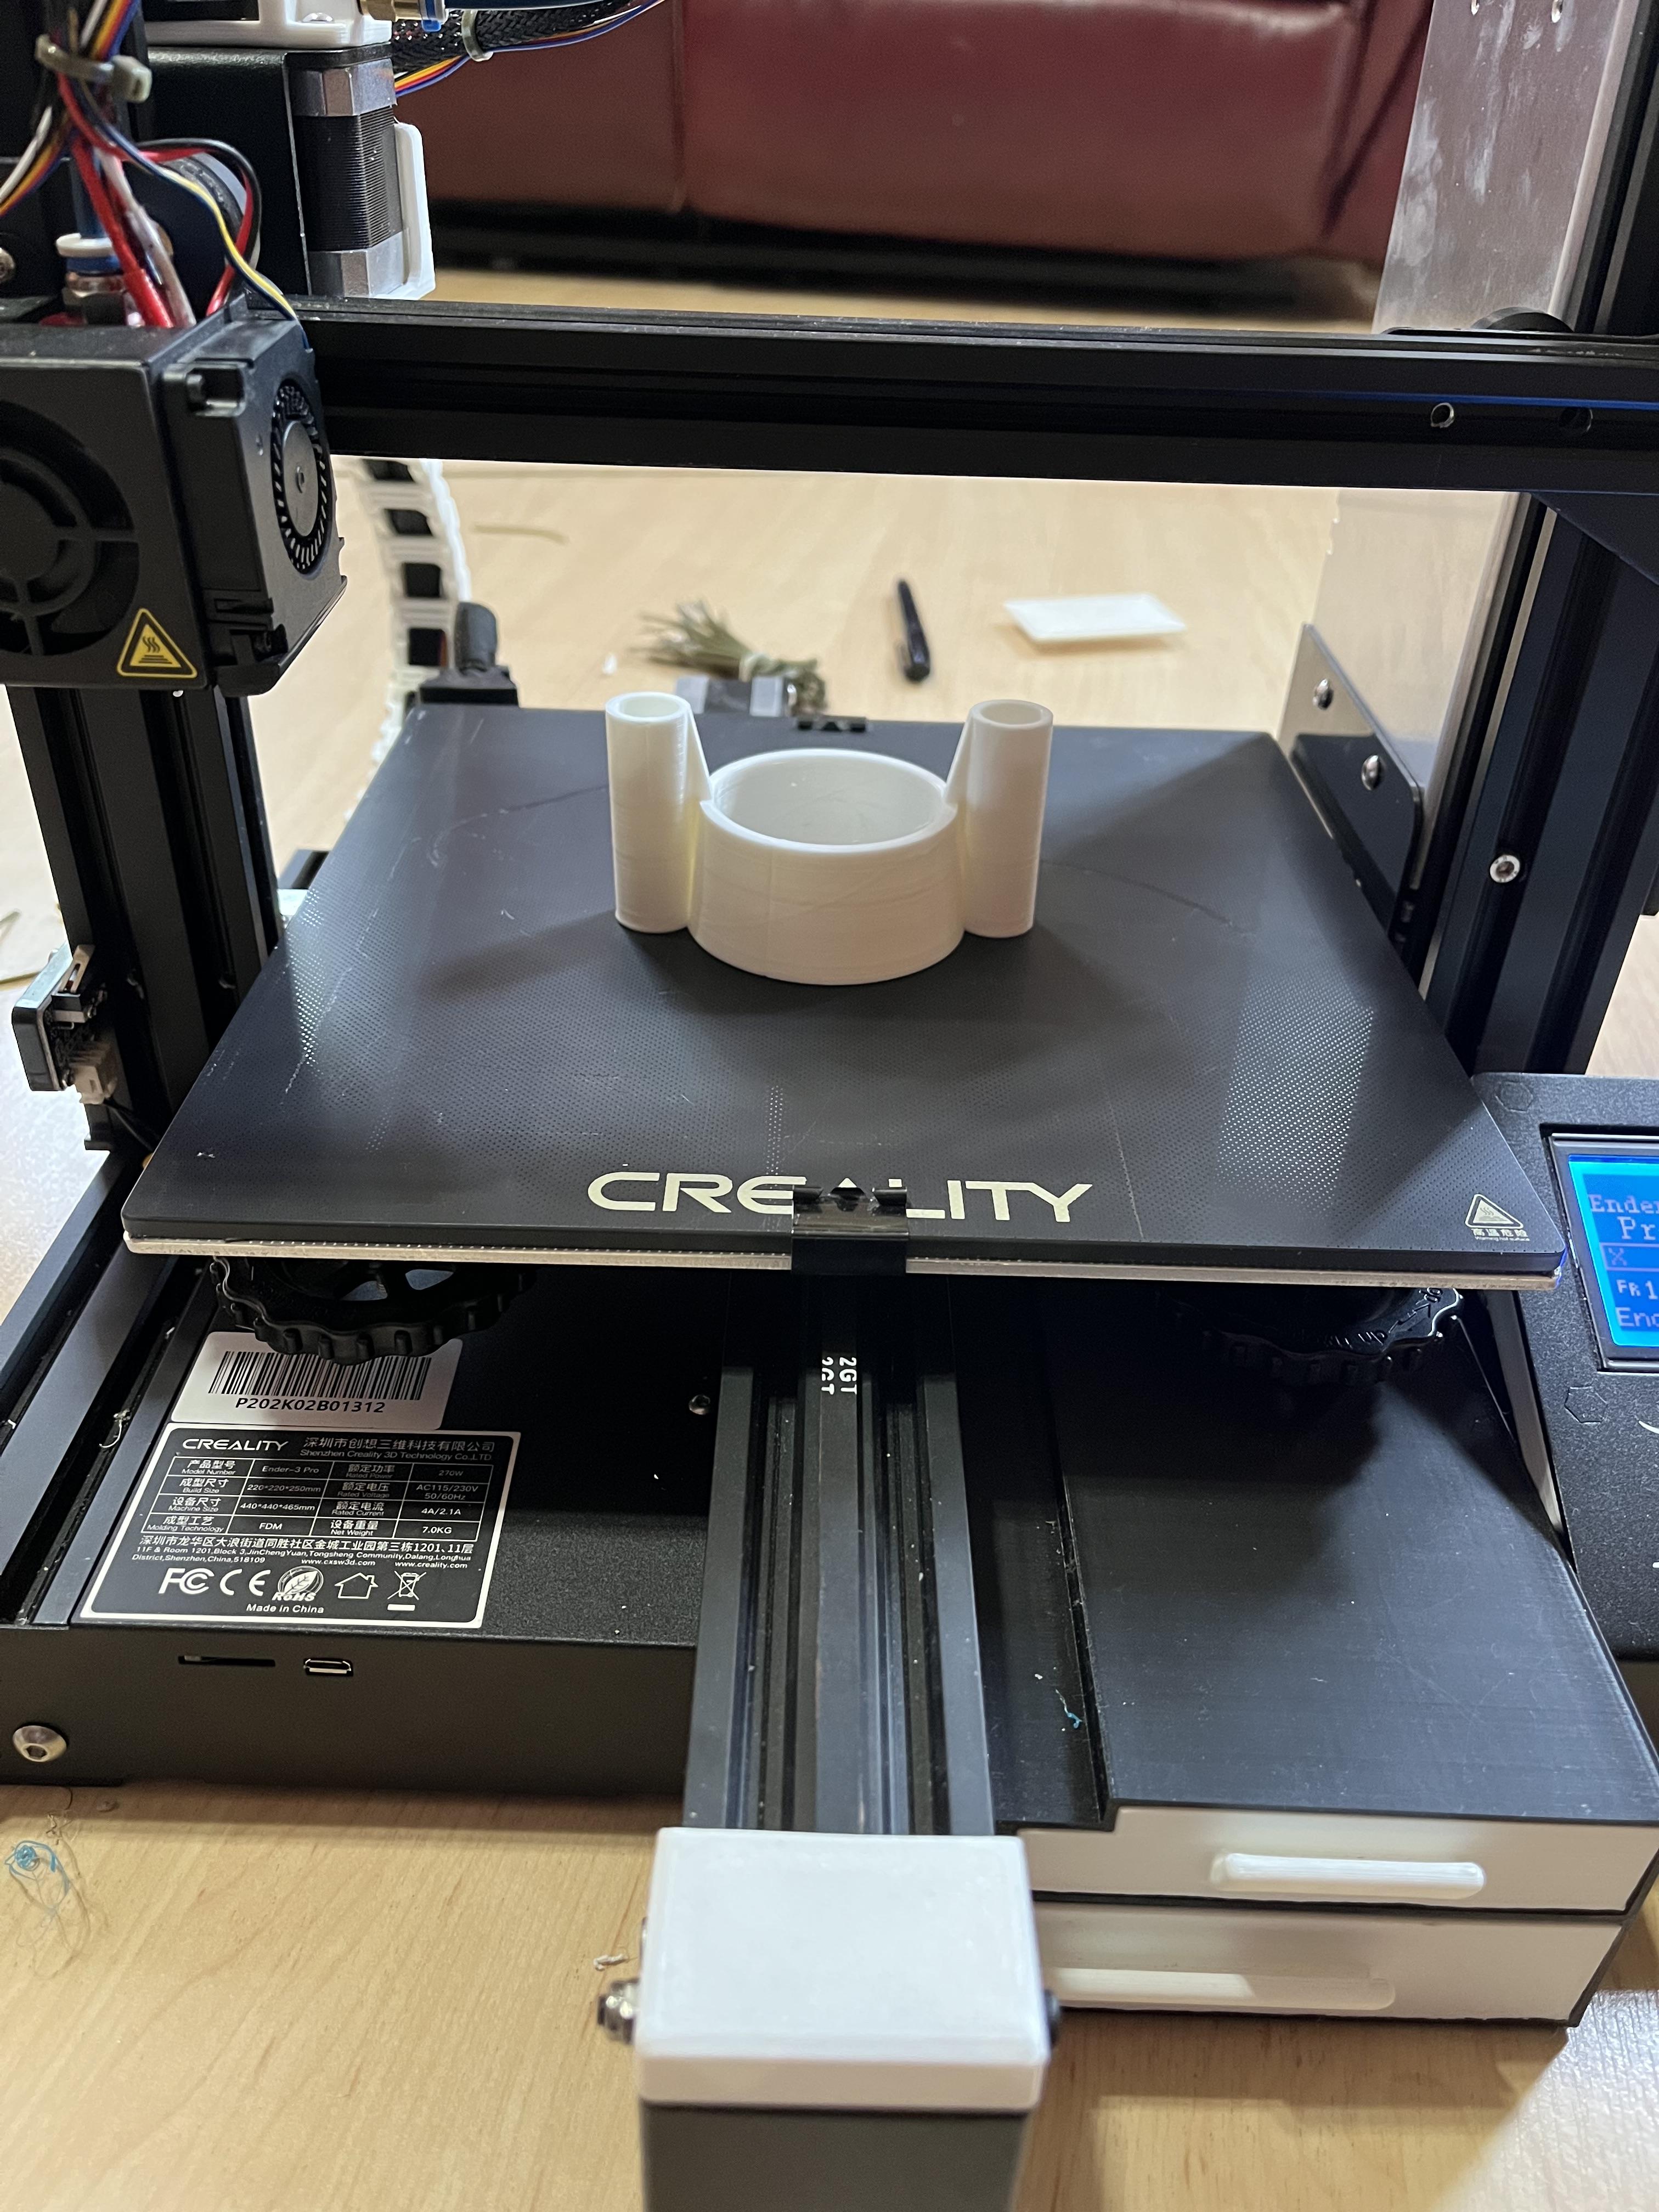


Print all parts using the 3D printer and the filament preferably PLA or ABS. The list includes 1 Guide (a base, two connector sleeves, two angle adjusters) and 1 drill sleeve. The minimum print settings will be, Layer Height: 0.2mm, Walls: 3, infill: 25%. The printing will take approximately 7 hours and will need an added around 20 minutes of cooling. It is important to wait until they are completely
Assembly


.jpg)

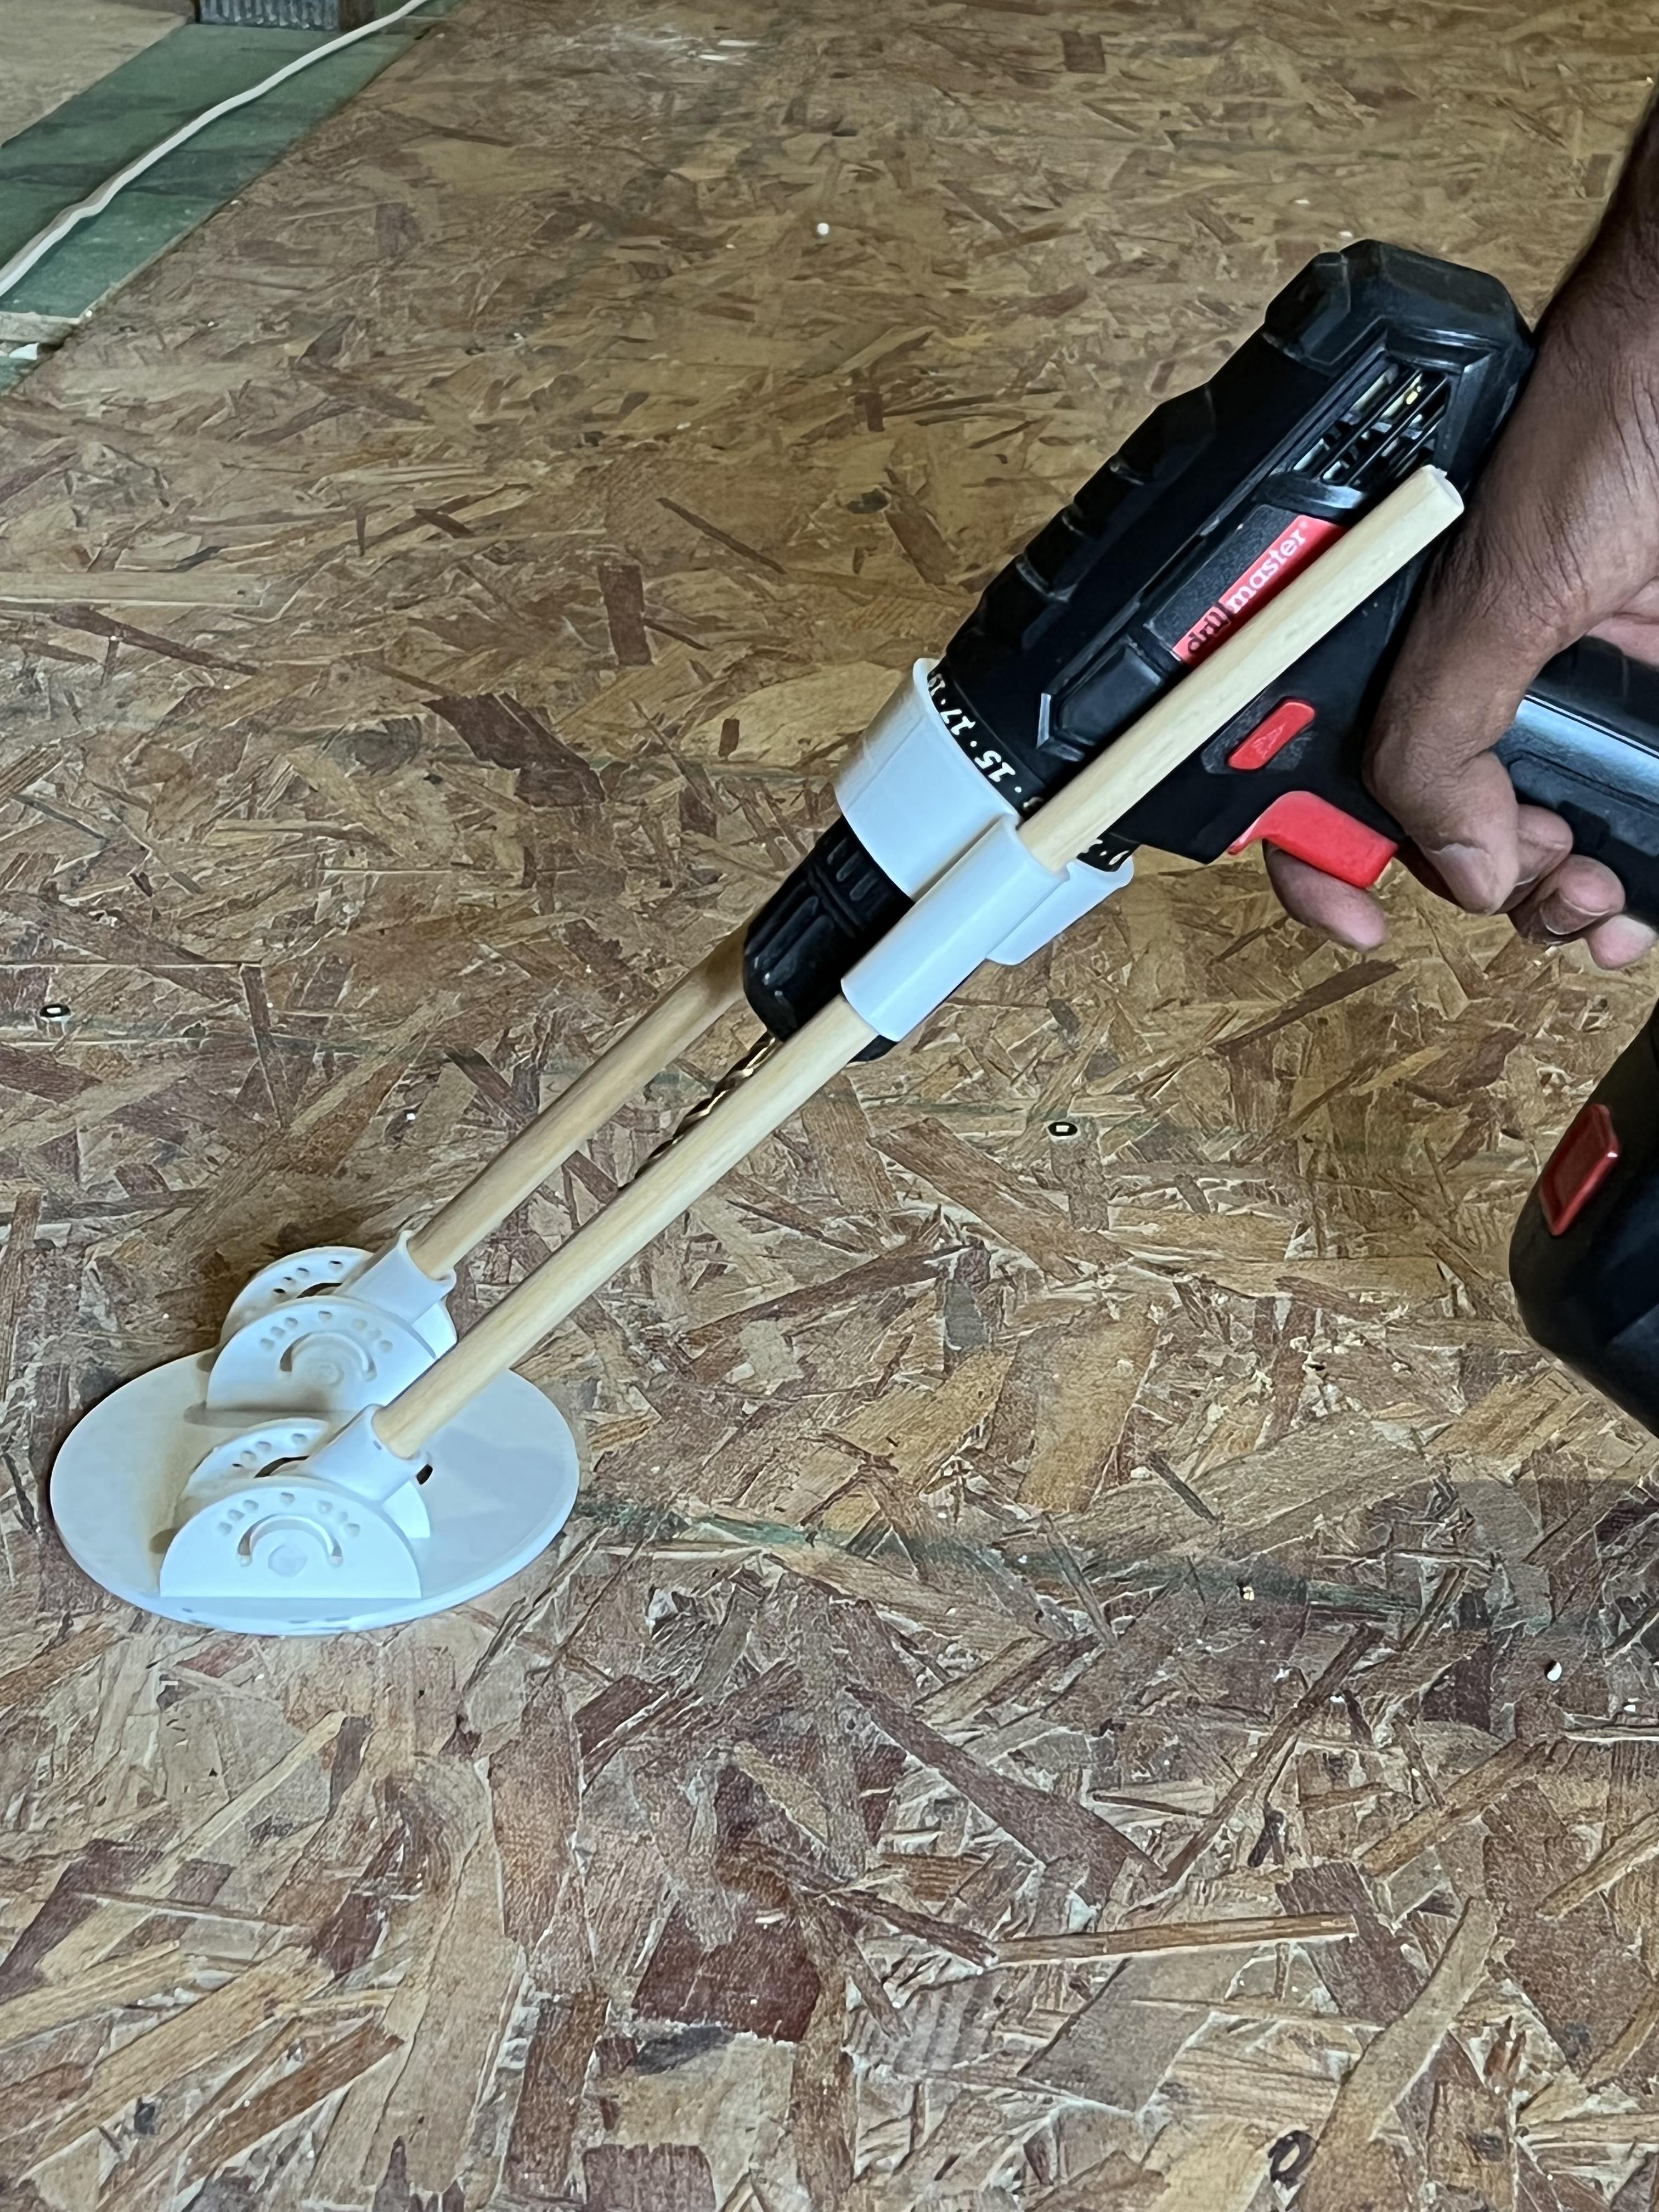
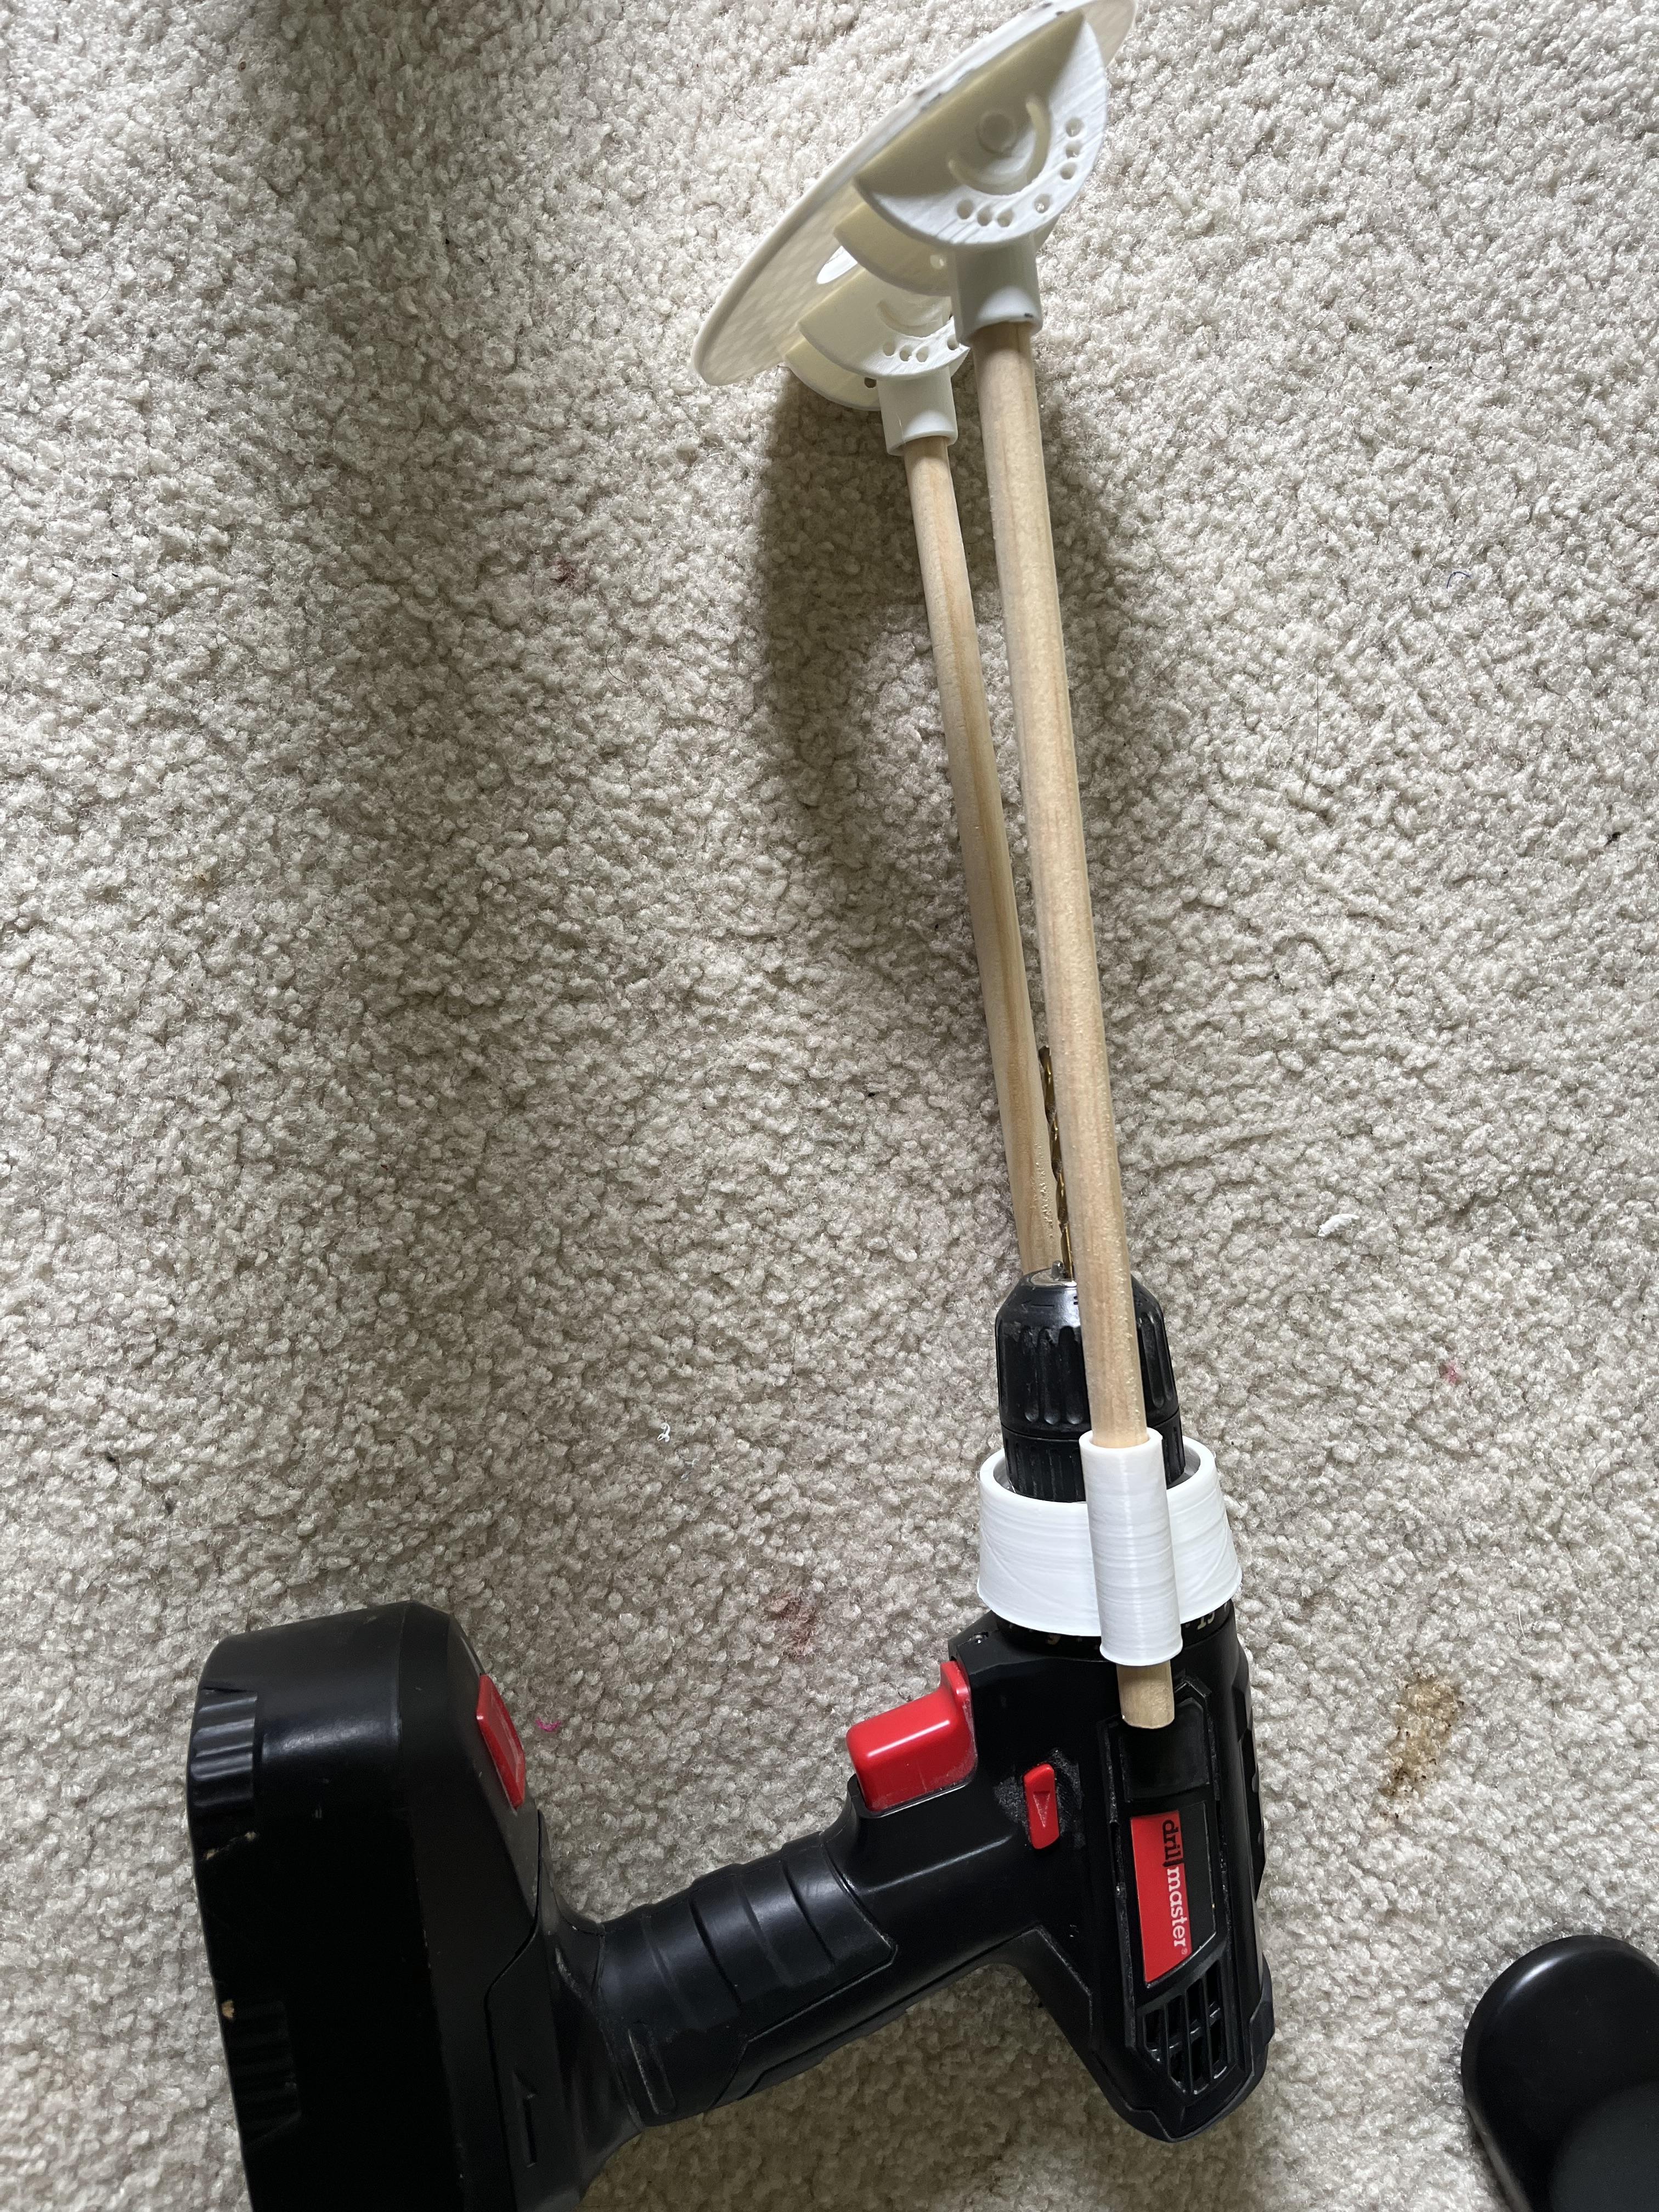
After removing the printed parts from the Build Plate, first, insert both Shaft End into the guide base as shown above. Then, use the Pin to secure the Shaft Ends as shown above to create the pivot point. Then using a saw, cut the dowel into two 1-foot-long pieces. Use hot glue to secure them into the connector sleeves. then insert the middle hole onto the Drill and send the 2 dowels through the outer holes on the sleeve as shown. This completes the assembly.
Use
.jpg)
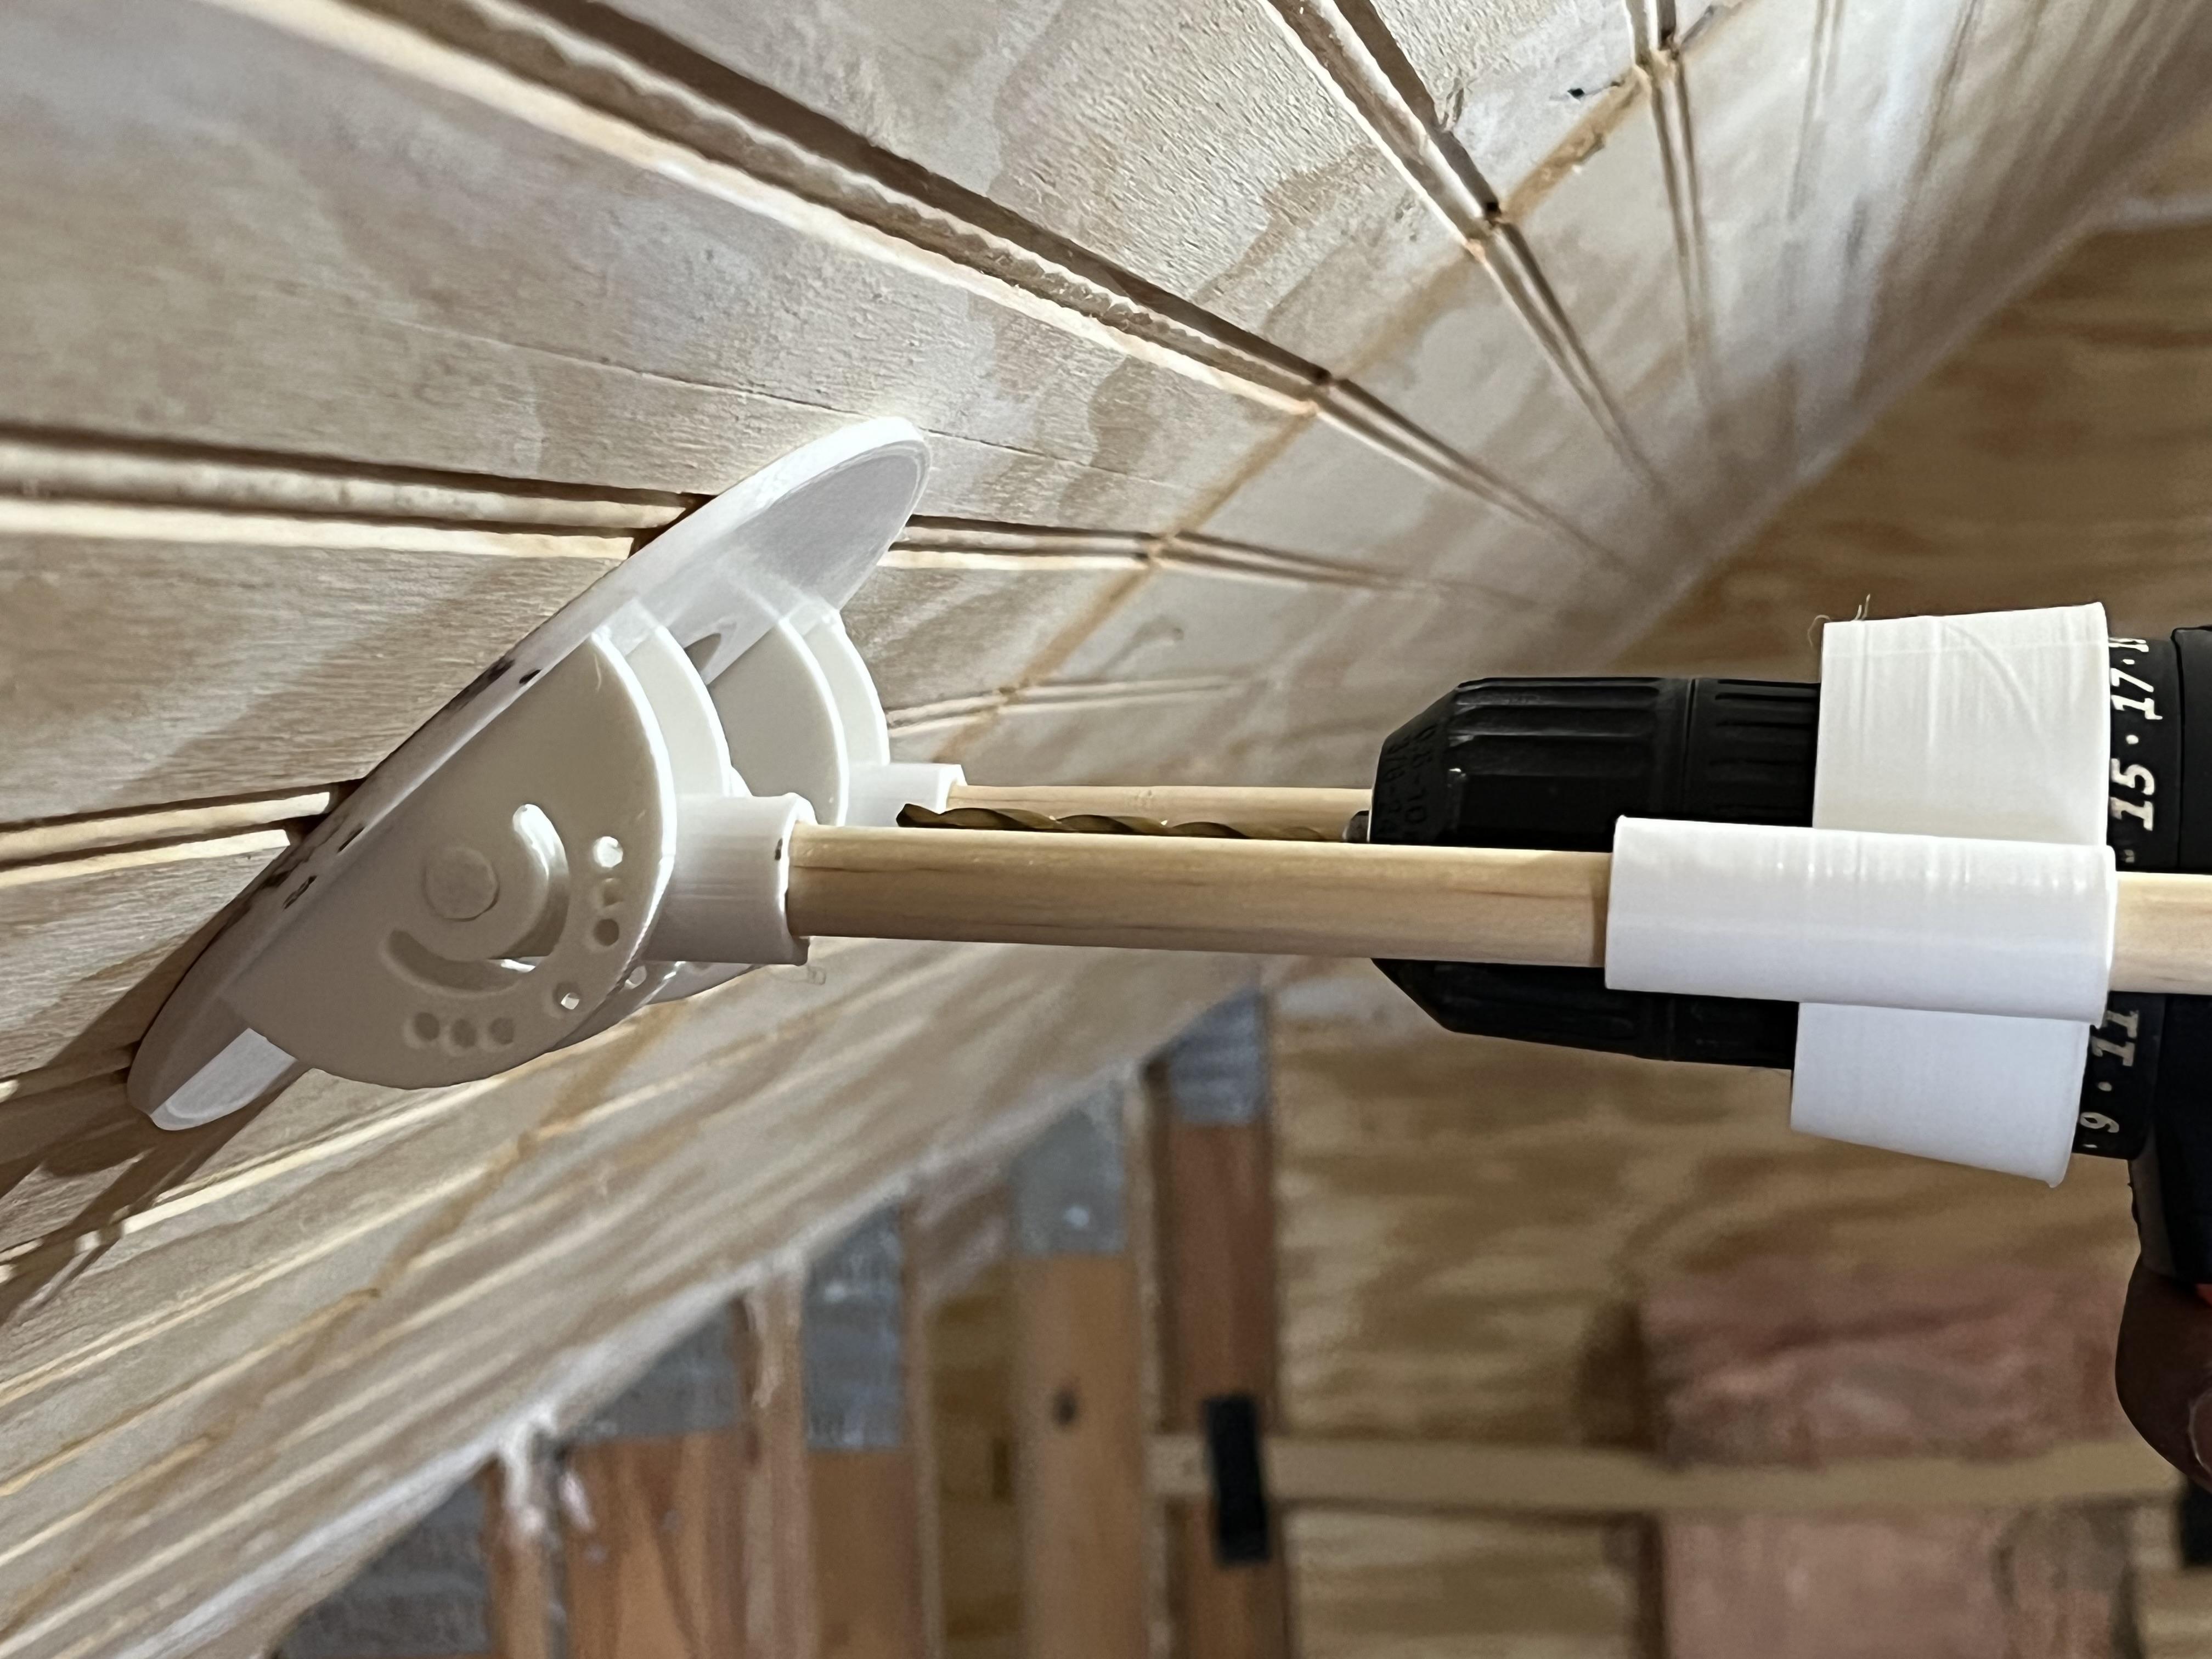

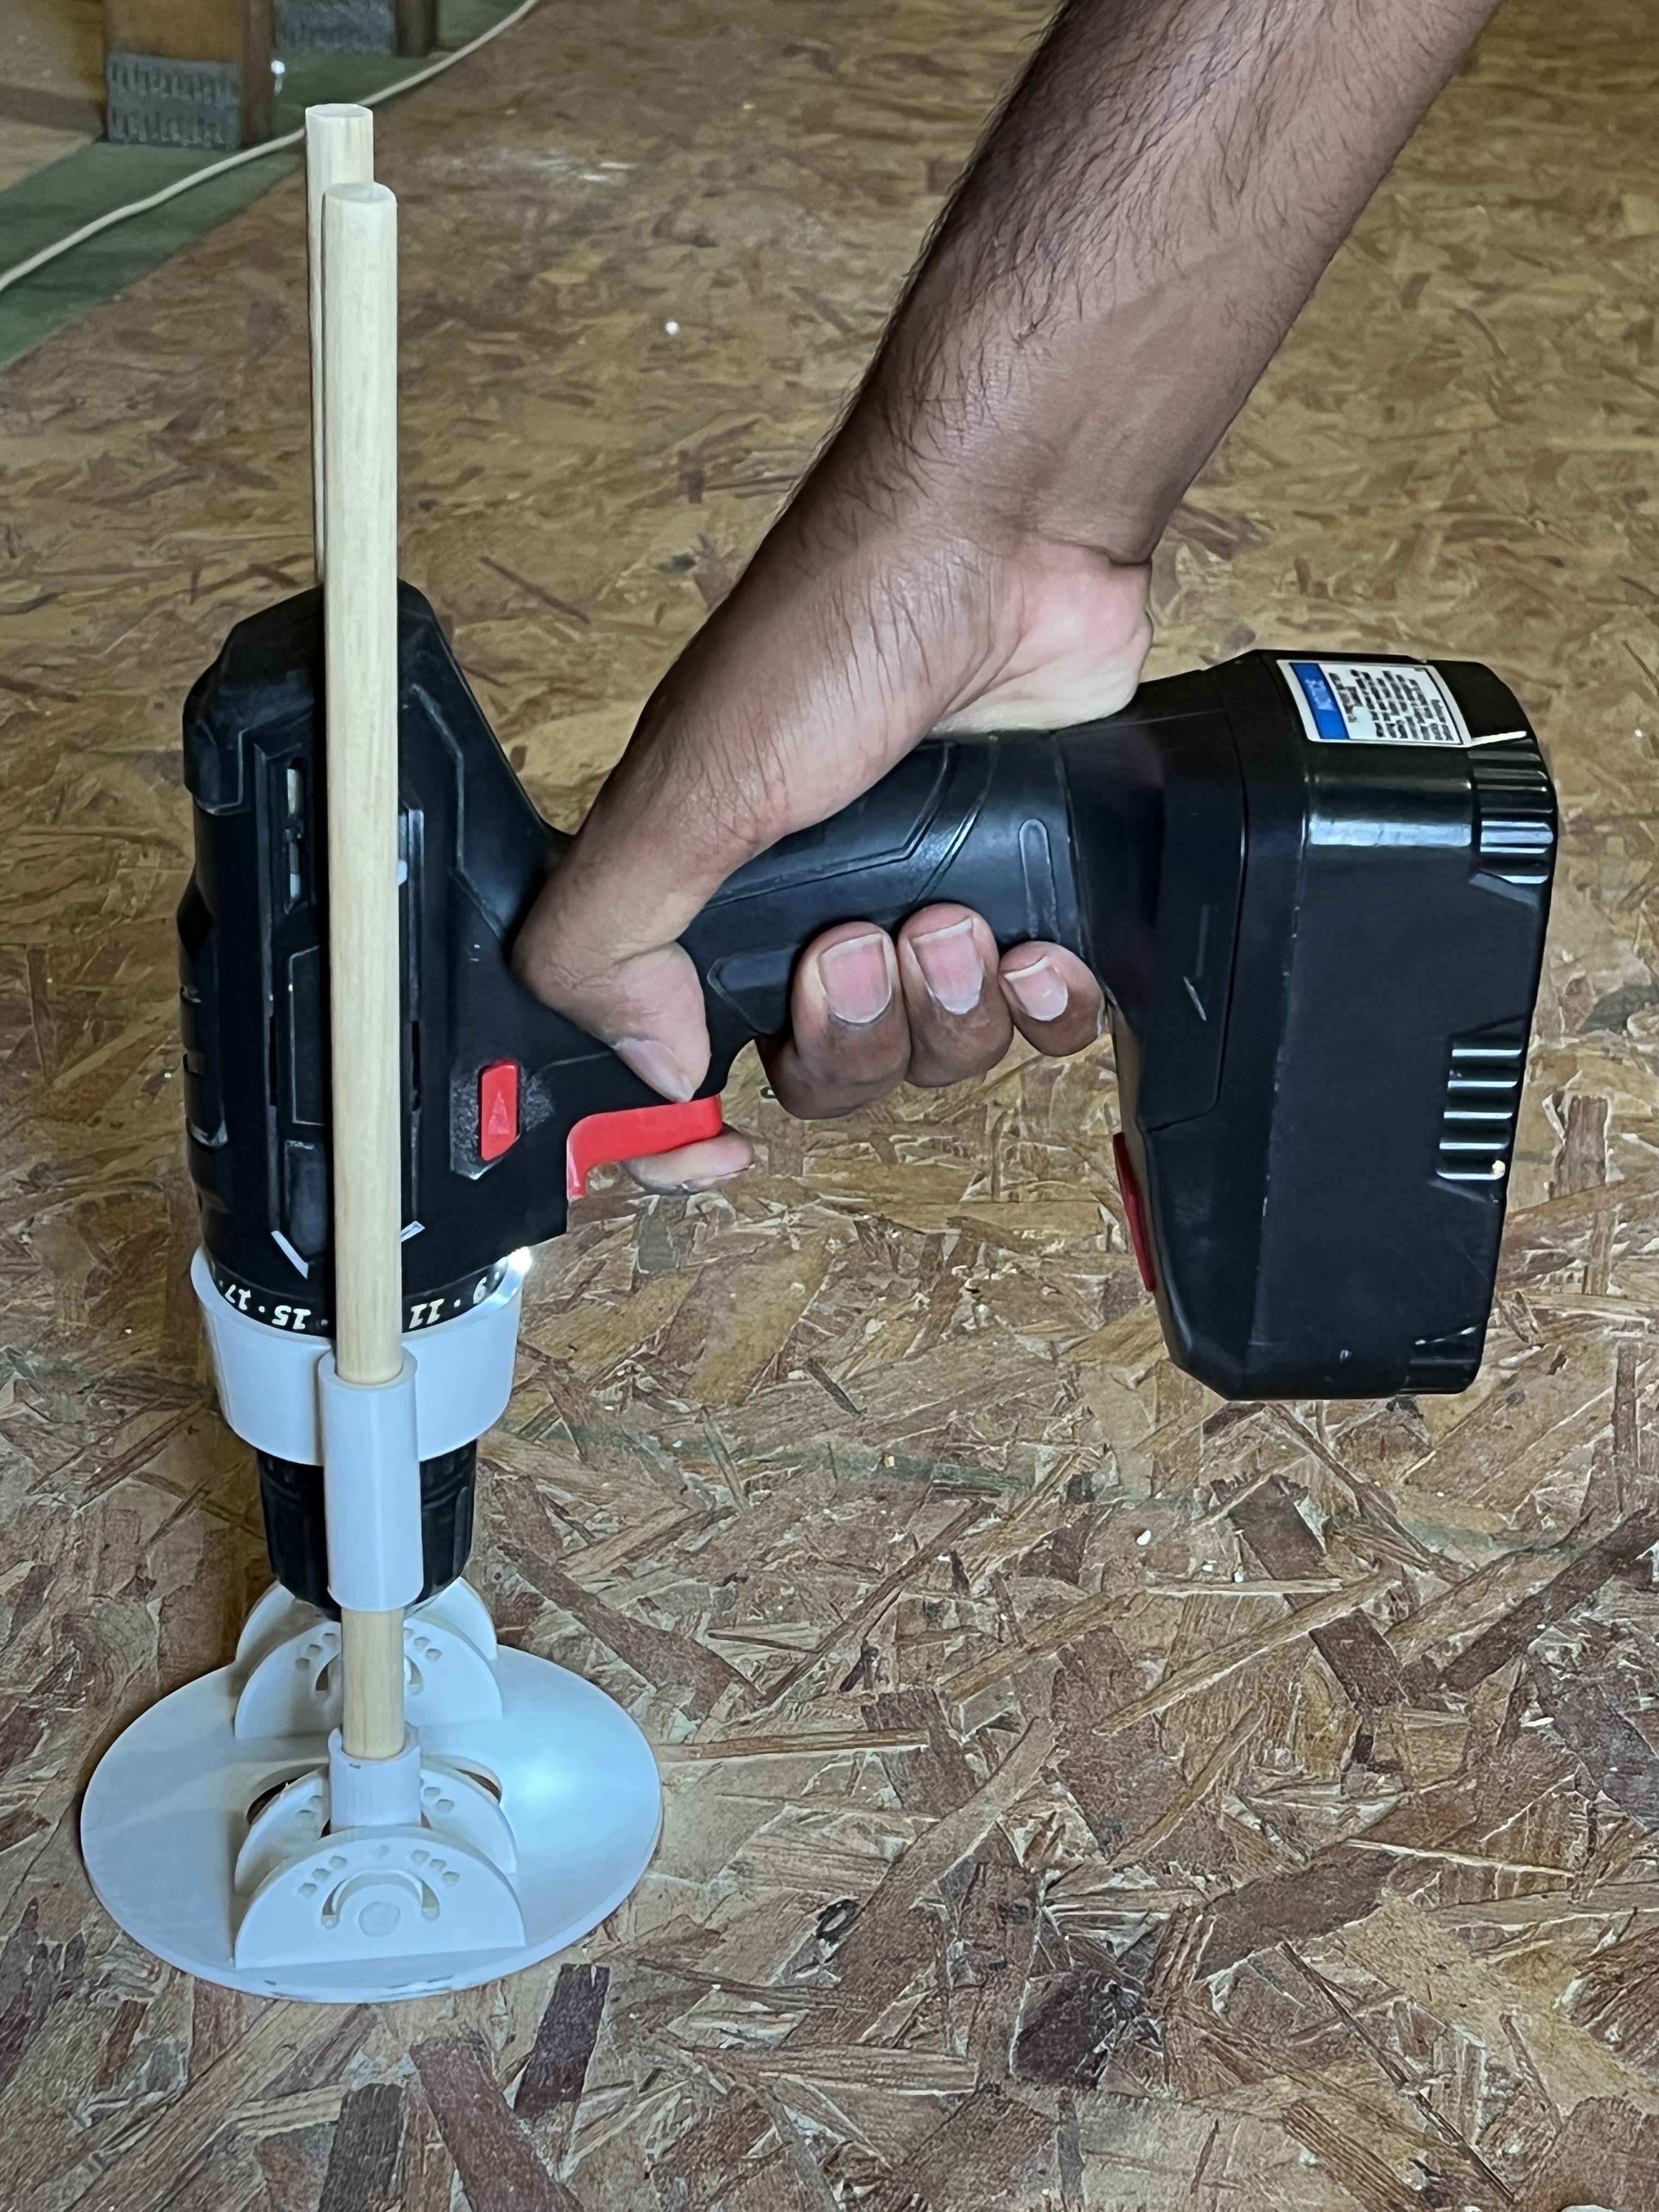

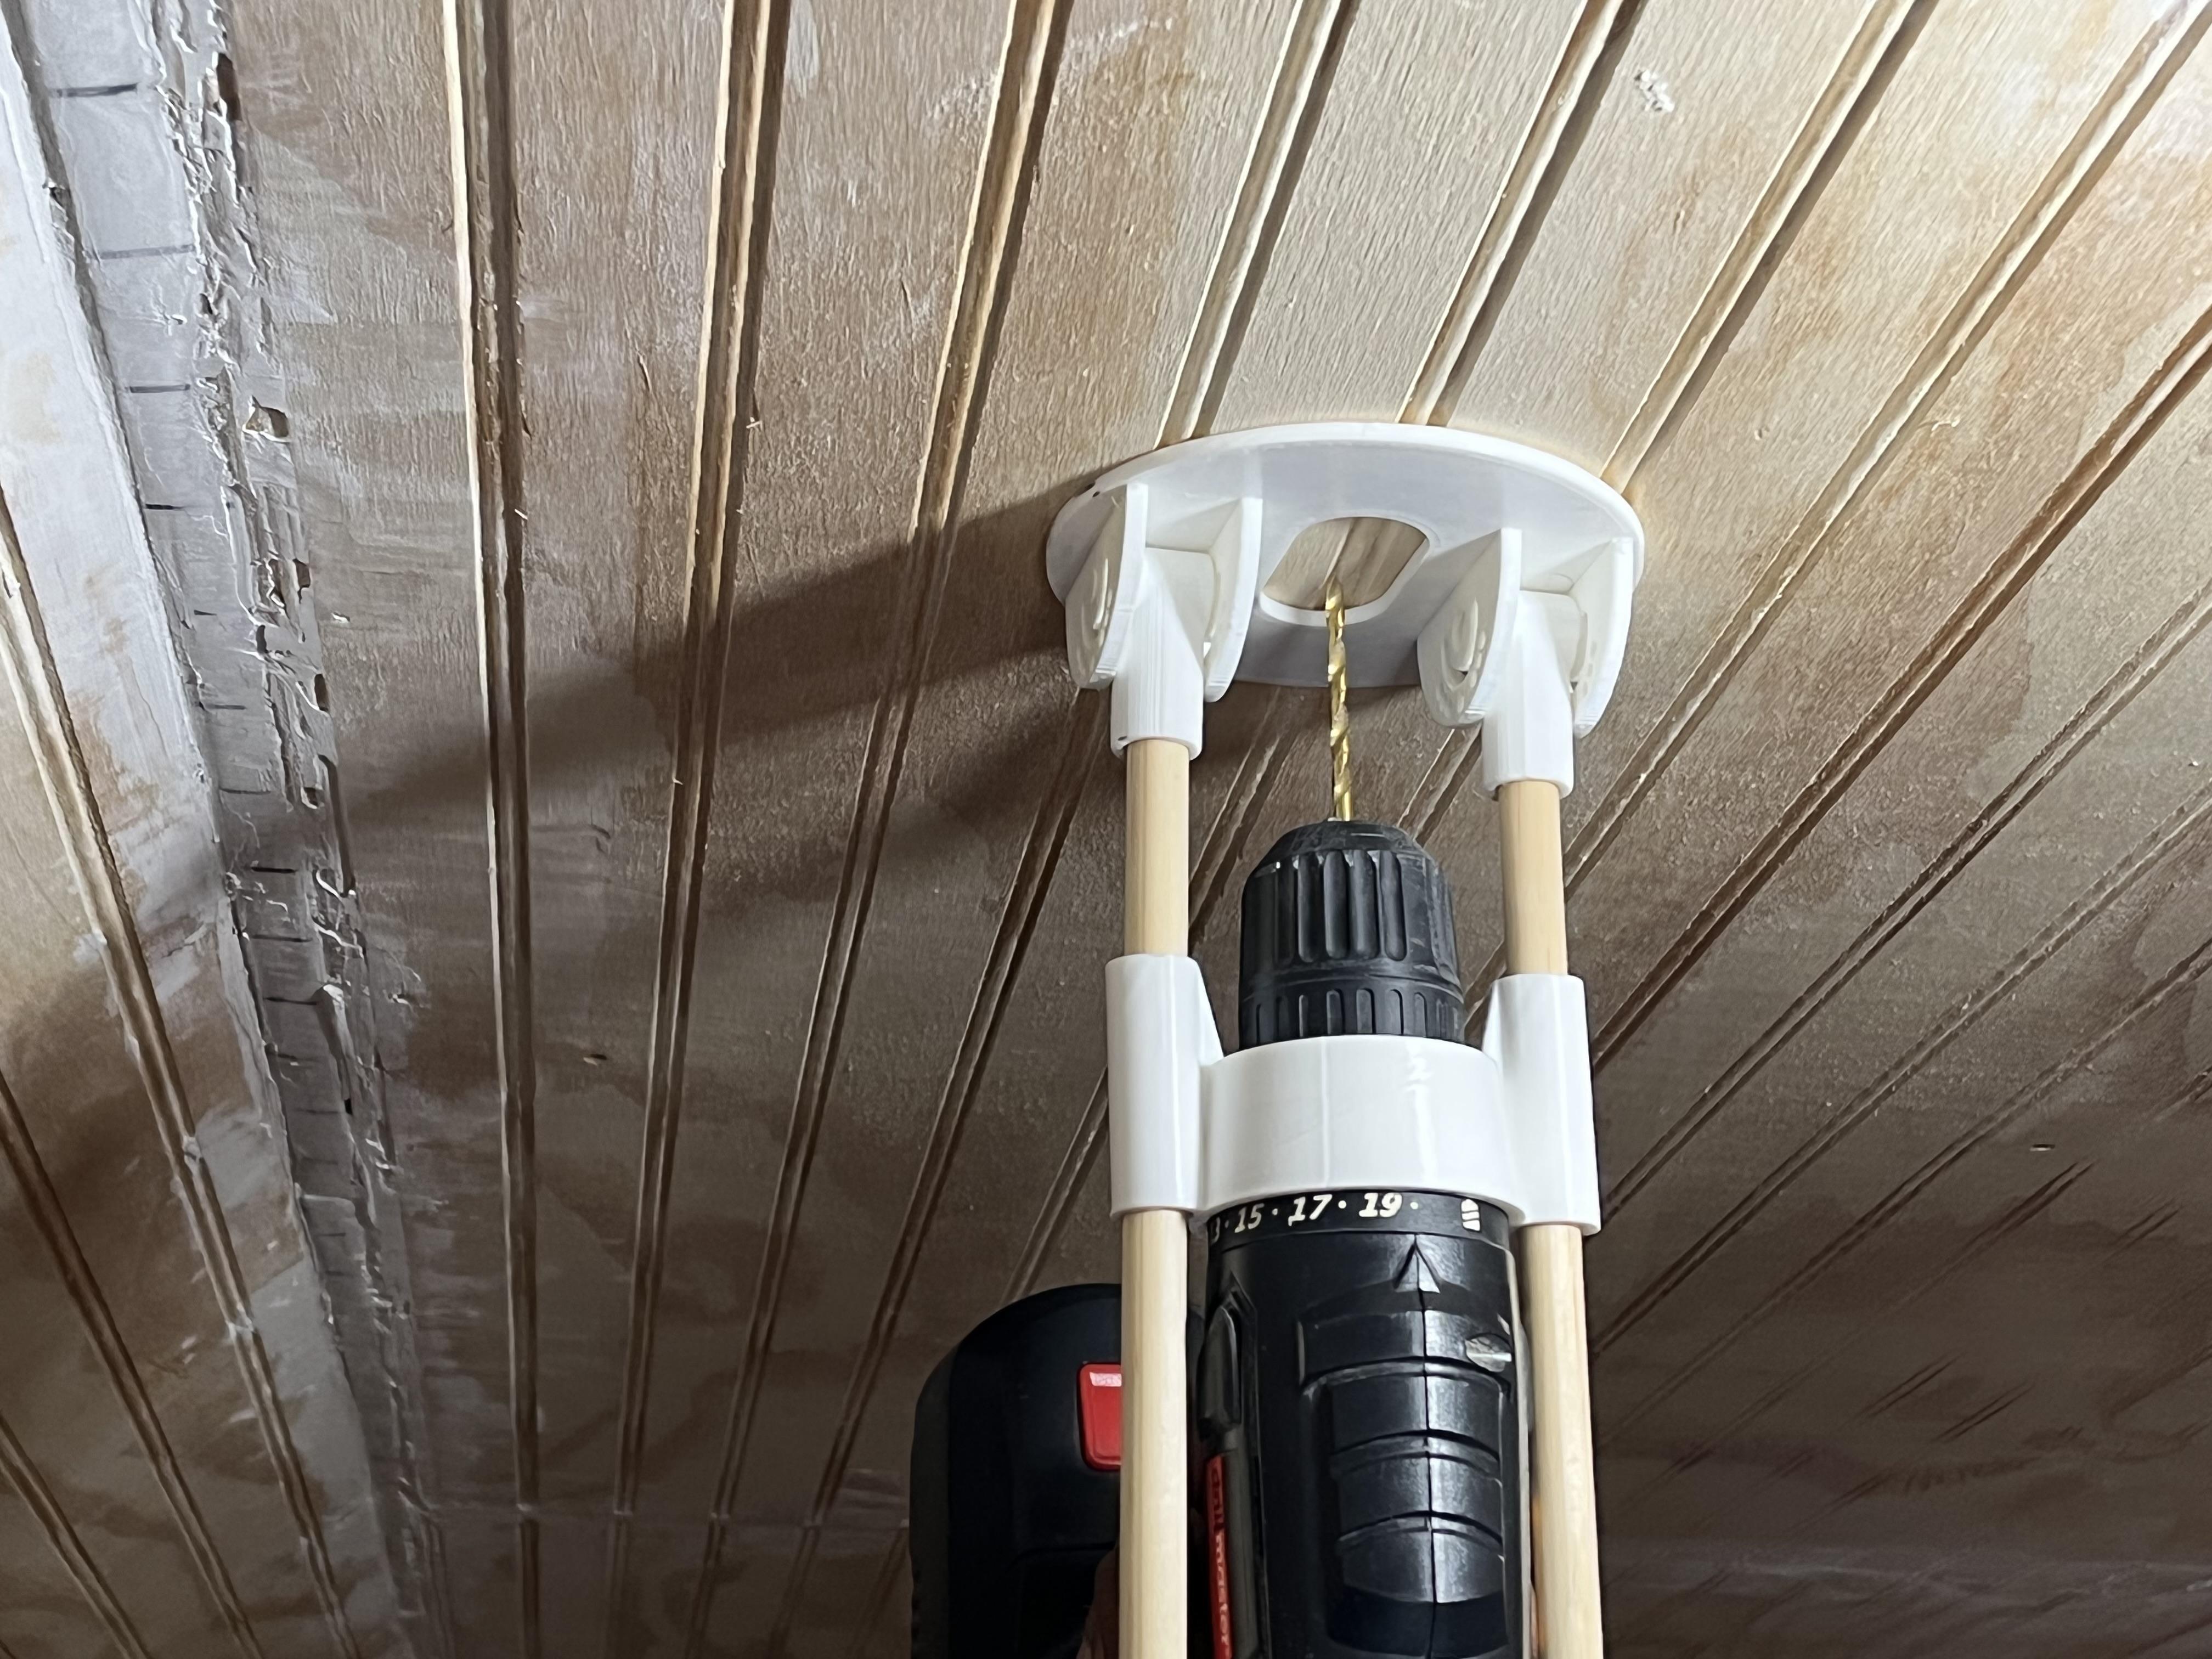
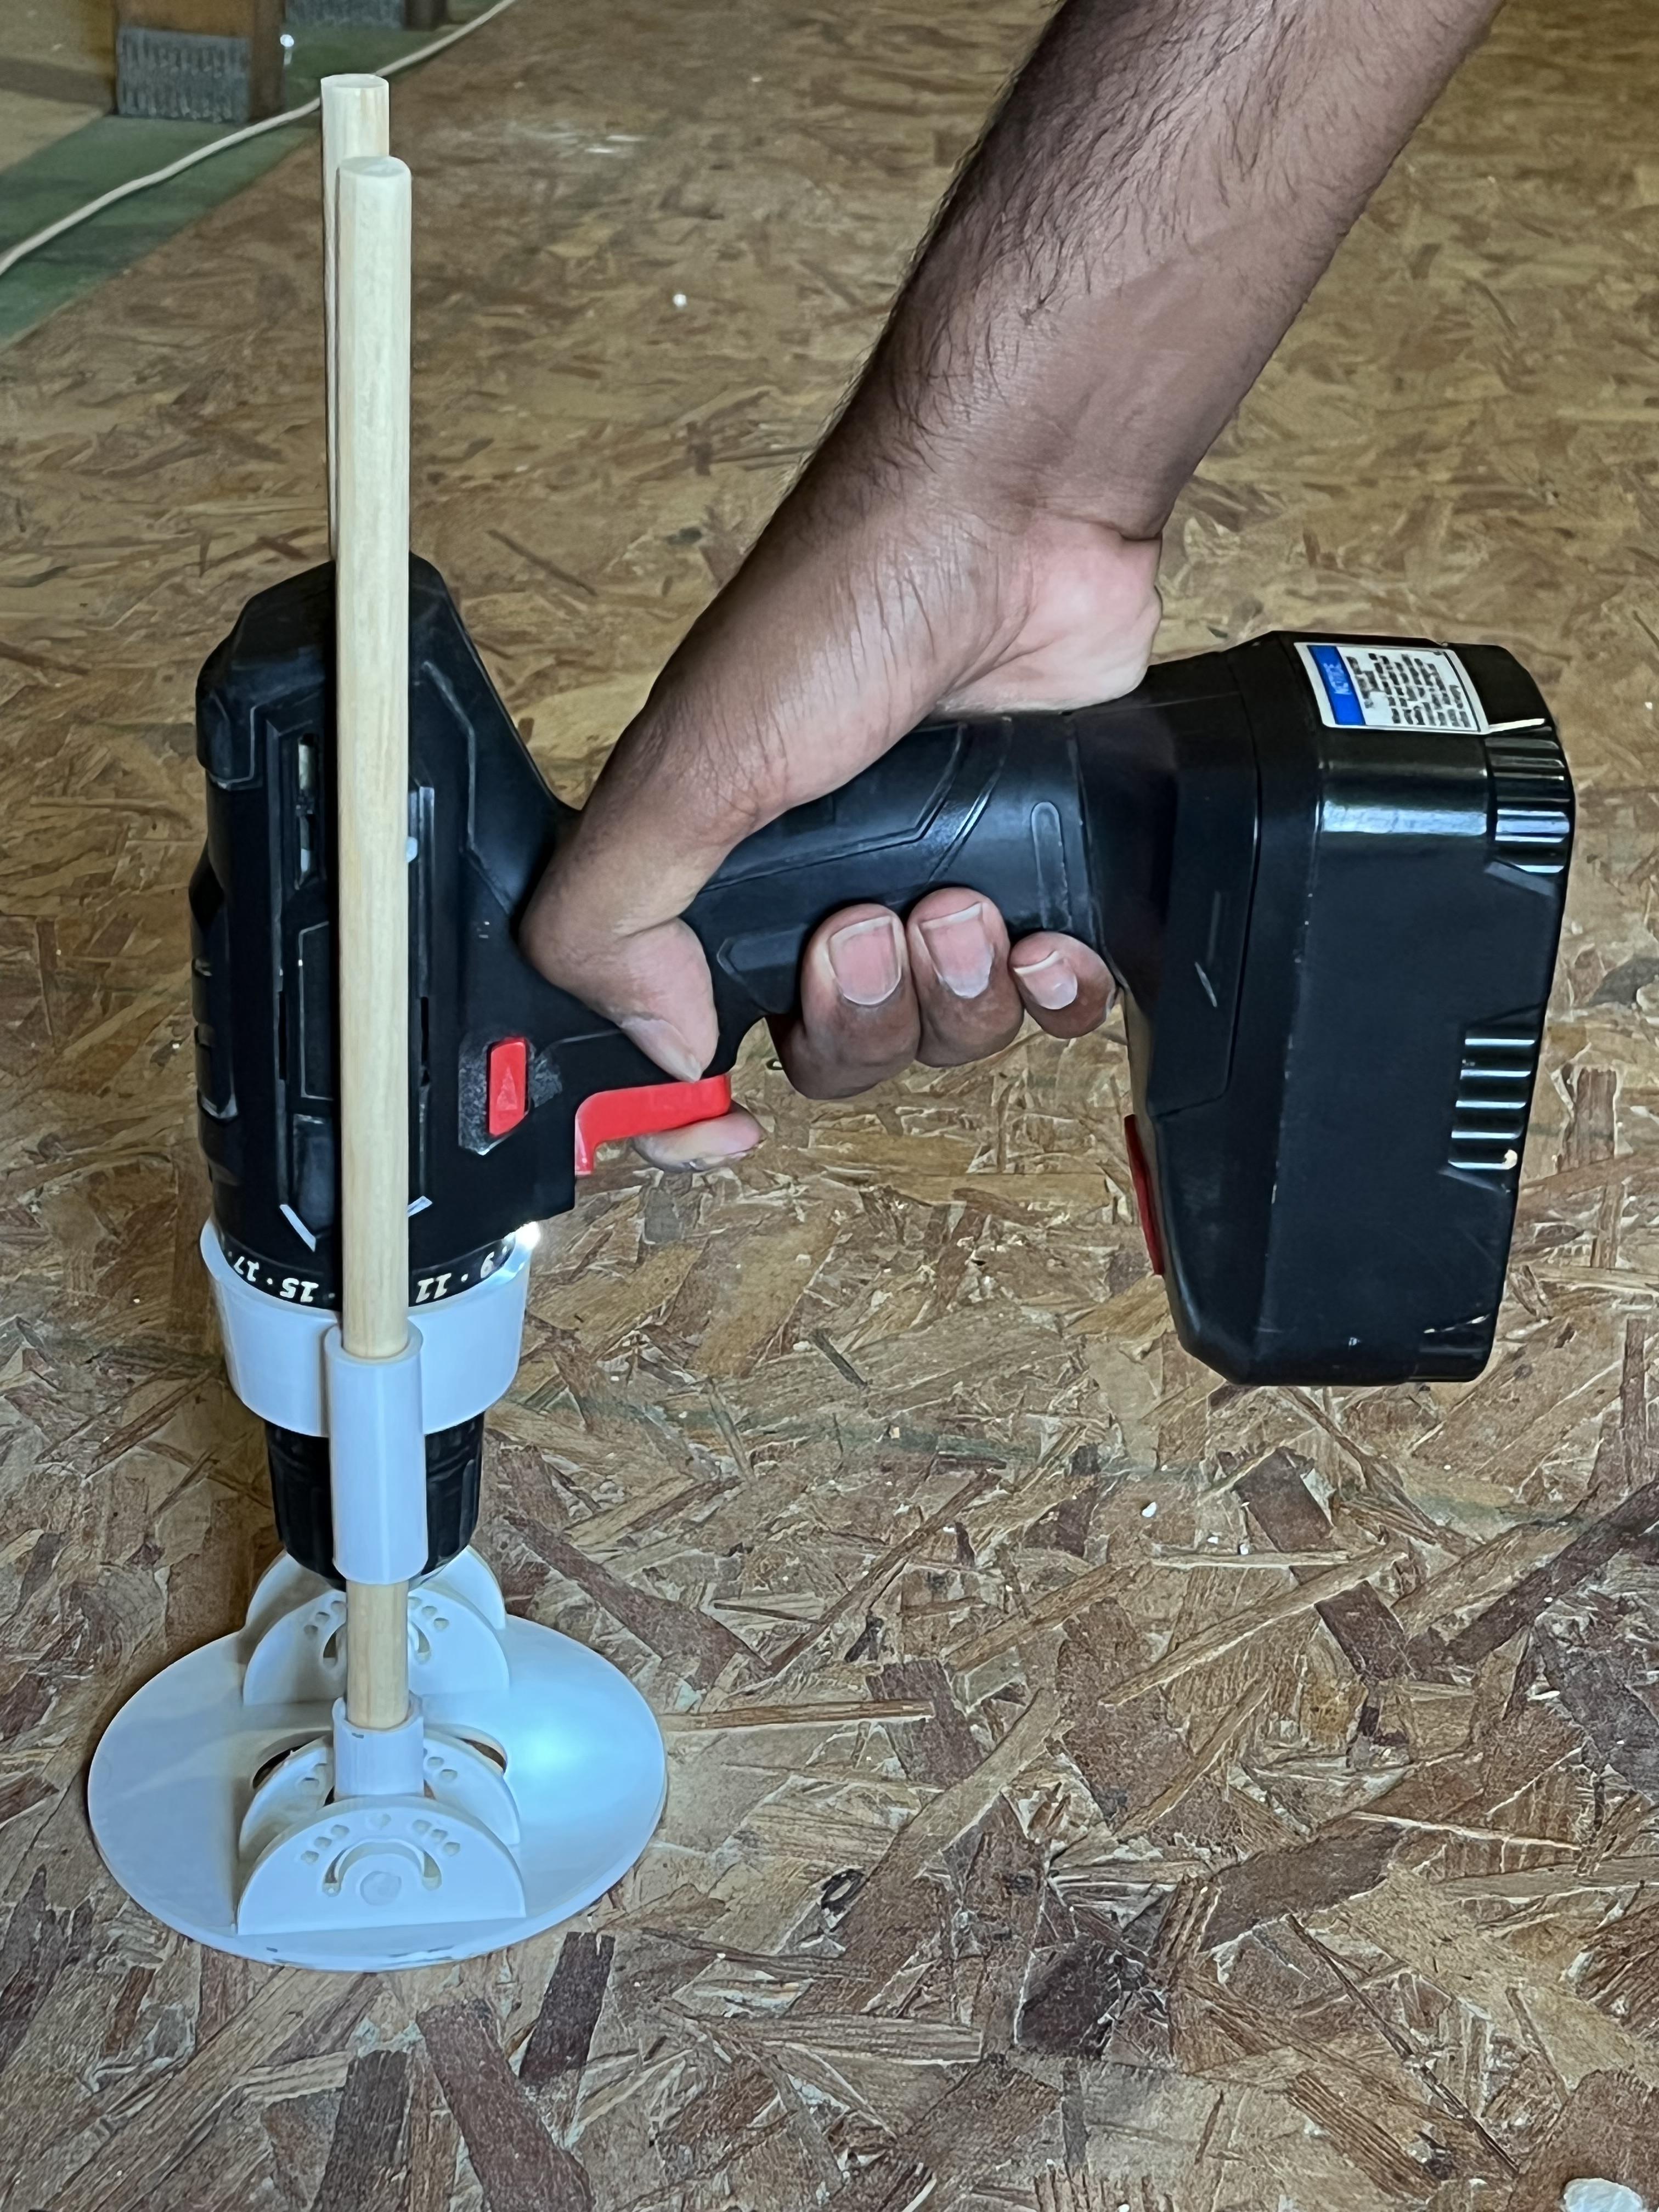
To use the device, simply position the device onto the intended plane and slide the drill on the dowels toward the plane. then once you have ensured that the drill will contact the intended place, slide it back, turn it on and push it forward, drilling into the plane.