3D Printed Moon Clock
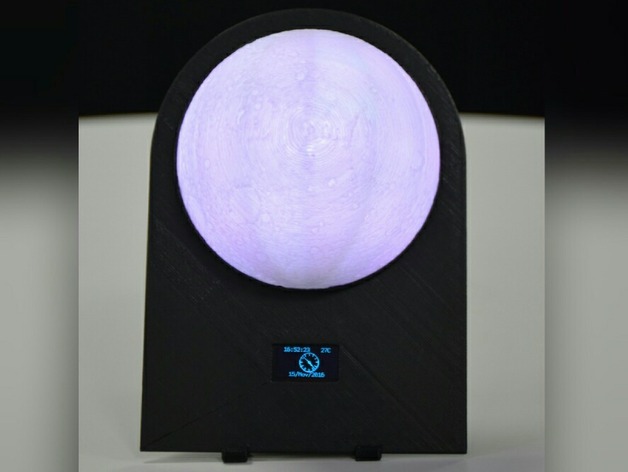
This is a step by step guide to make a 3D printed Moon Clock. This project is really fun to make and the final result will really surprise you because of its awesome effects. :)
Step 1: Required Parts and Tools
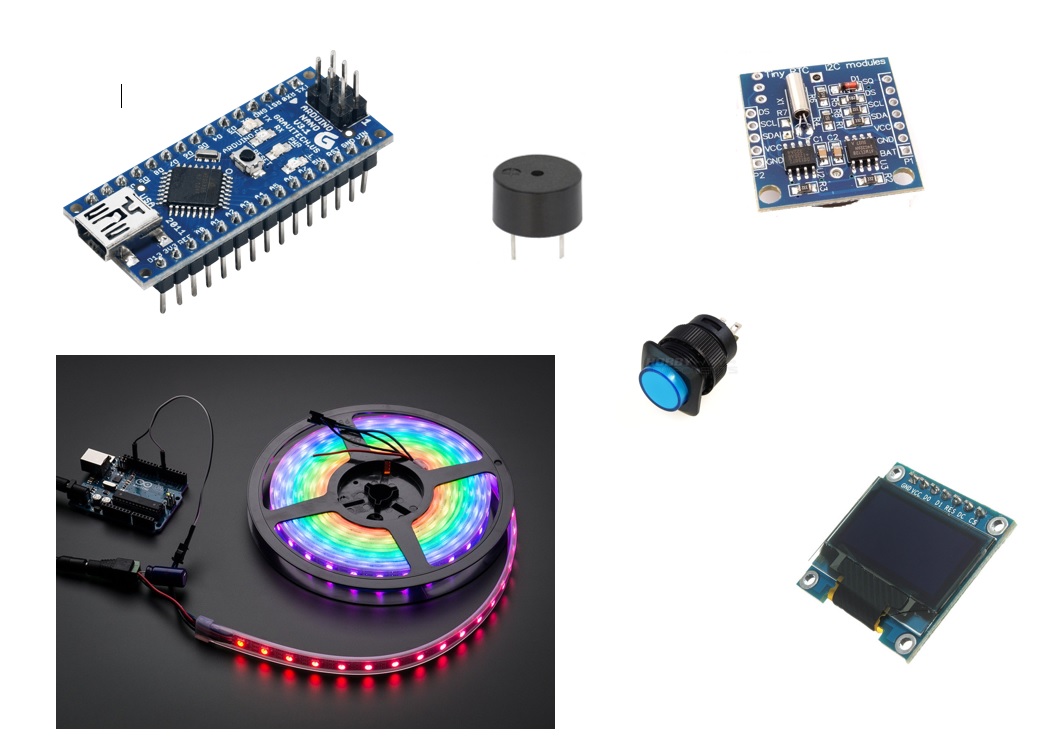
Parts List:
◦Arduino Nano (ATmega328)
◦0,96'' OLED 128x64 with SSD1306 chip
◦Neopixel or APA102C (18 LEDs from a 60 pixel per meter strip)
◦Tiny RTC (DS1307 real time clock + 24C32 EEPROM)
◦Buzzer
◦3 Push Buttons ('Normally Open' Push Buttons)
Tools:
◦Computer with Arduino software
◦3D Printer
◦White and Black 3D Print Filament
◦Soldering Iron
◦Glue Gun
◦Wire stripper
◦Cutter
◦Wires
Step 2: Print the Parts
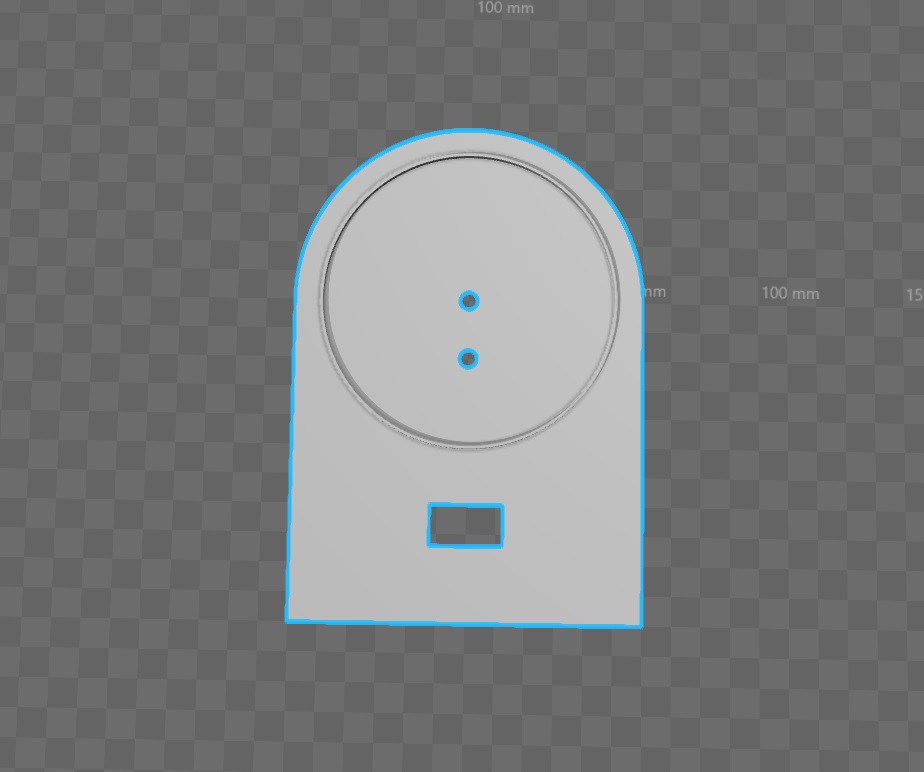
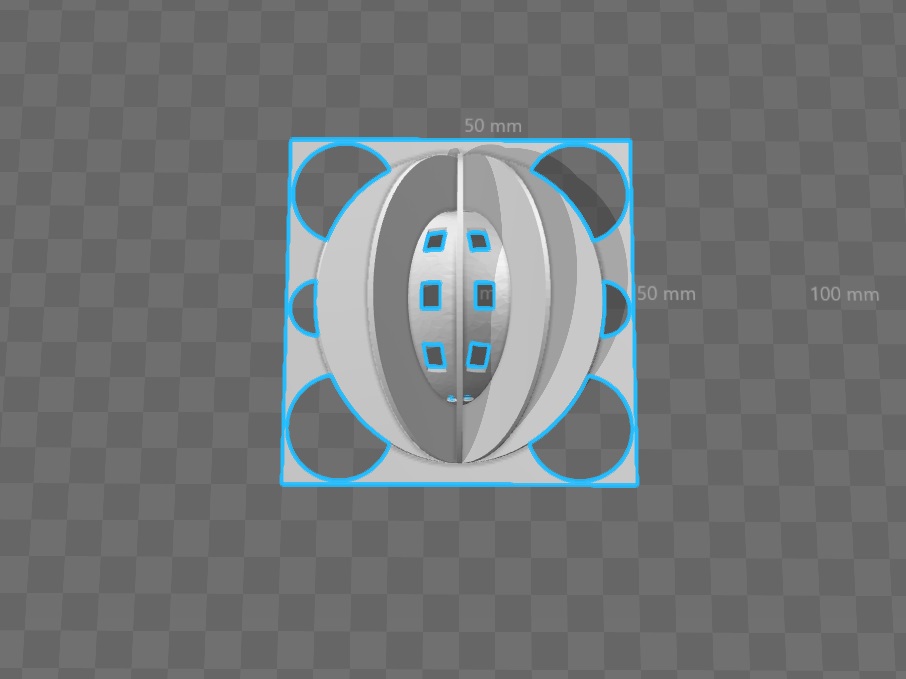
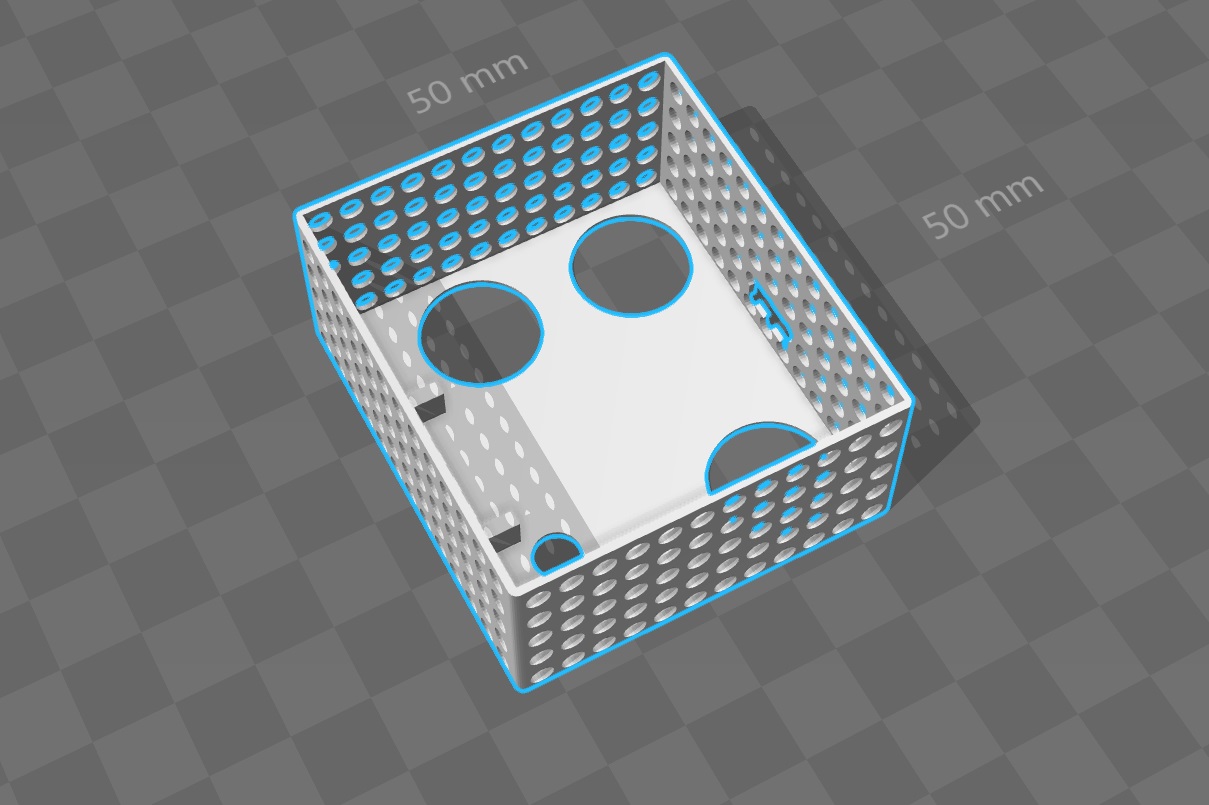
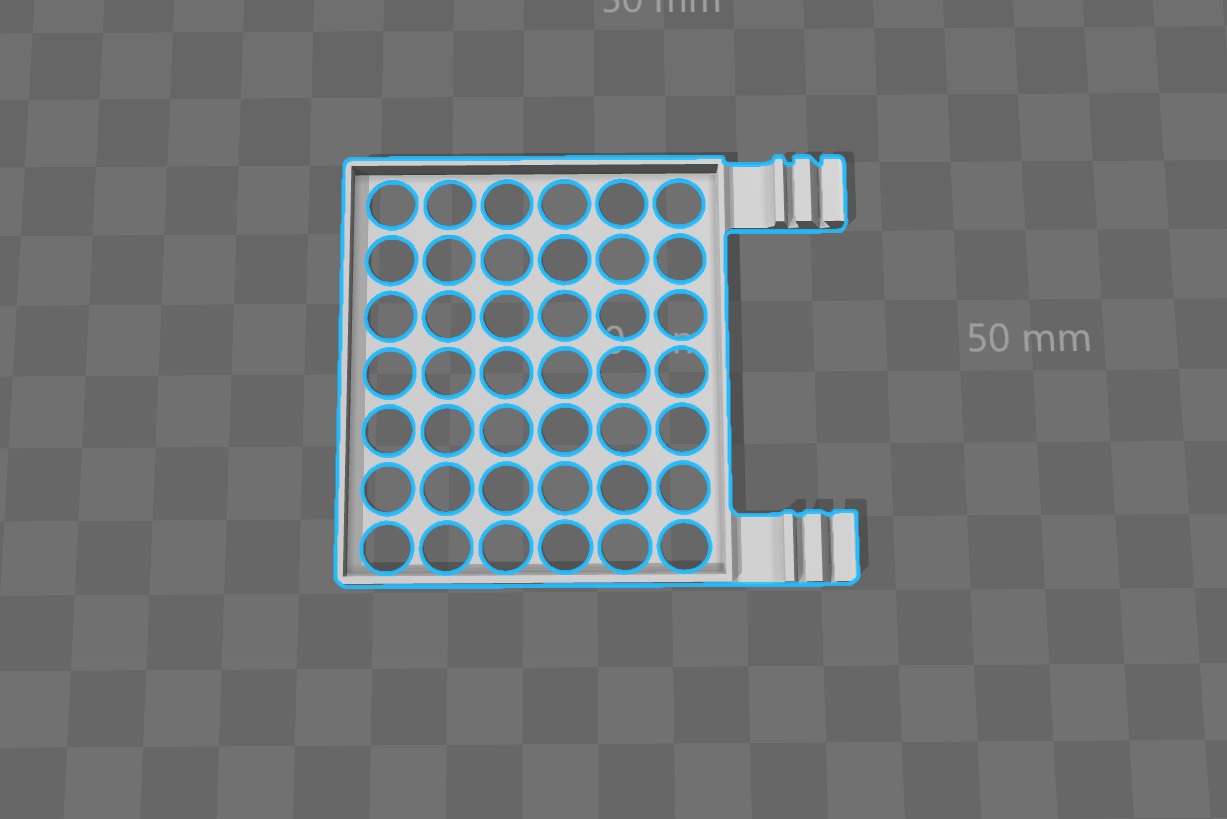


For this step you'll need black and white 3D print filament. The white filament is used to print the moon model. Use the black filament for the rest of the models.
The total amount of filament required will be 79 grams. The 3D models of the clock are downloadable at: http://www.thingiverse.com/thing:1891599/#files
Last link includes a full moon 3D model, but this project requires a half moon 3D model. Find the model at: http://www.thingiverse.com/thing:1929844/#files
Step 3: Build the Circuit
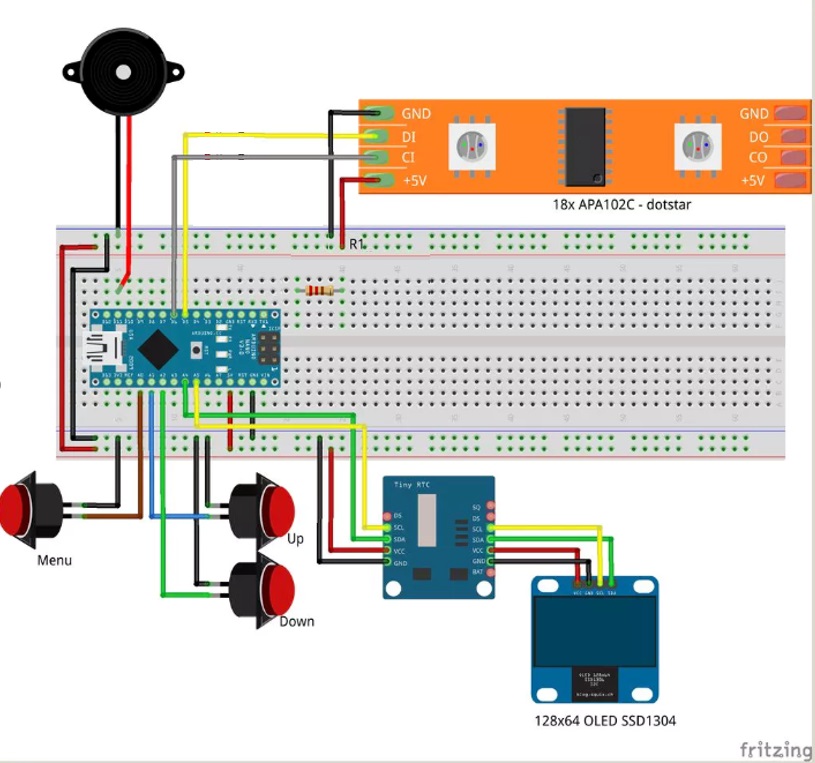
Build the circuit. Strip the wires and solder them to the buttons, the buzzer, the led strip, the RTC and the Led screen. Both the RTC and the led strip contain two wires that need to be soldered to the Arduino Nano.
Step 4: Cutting the LED Strip

It's recommended to use a strip of 60 pixels per meter. Cut the LED strip into six pieces of three LEDs each. Solder the six pieces together and follow the arrow on your LEDs. Once soldered the LEDs must be glued into the moon support model.
Step 5: Run the Code
Open your Arduino software and make sure your Arduino Nano board is selected (or your code won't work). In case the clock still doesn't work, try selecting another processor. The code is found at the following link: https://github.com/G4lile0/Arduino_3dprinted_Lunar...