3D Printed Monster From 2D Drawing in 123D Design
by BarbMakesThings in Workshop > 3D Printing
18127 Views, 67 Favorites, 0 Comments
3D Printed Monster From 2D Drawing in 123D Design
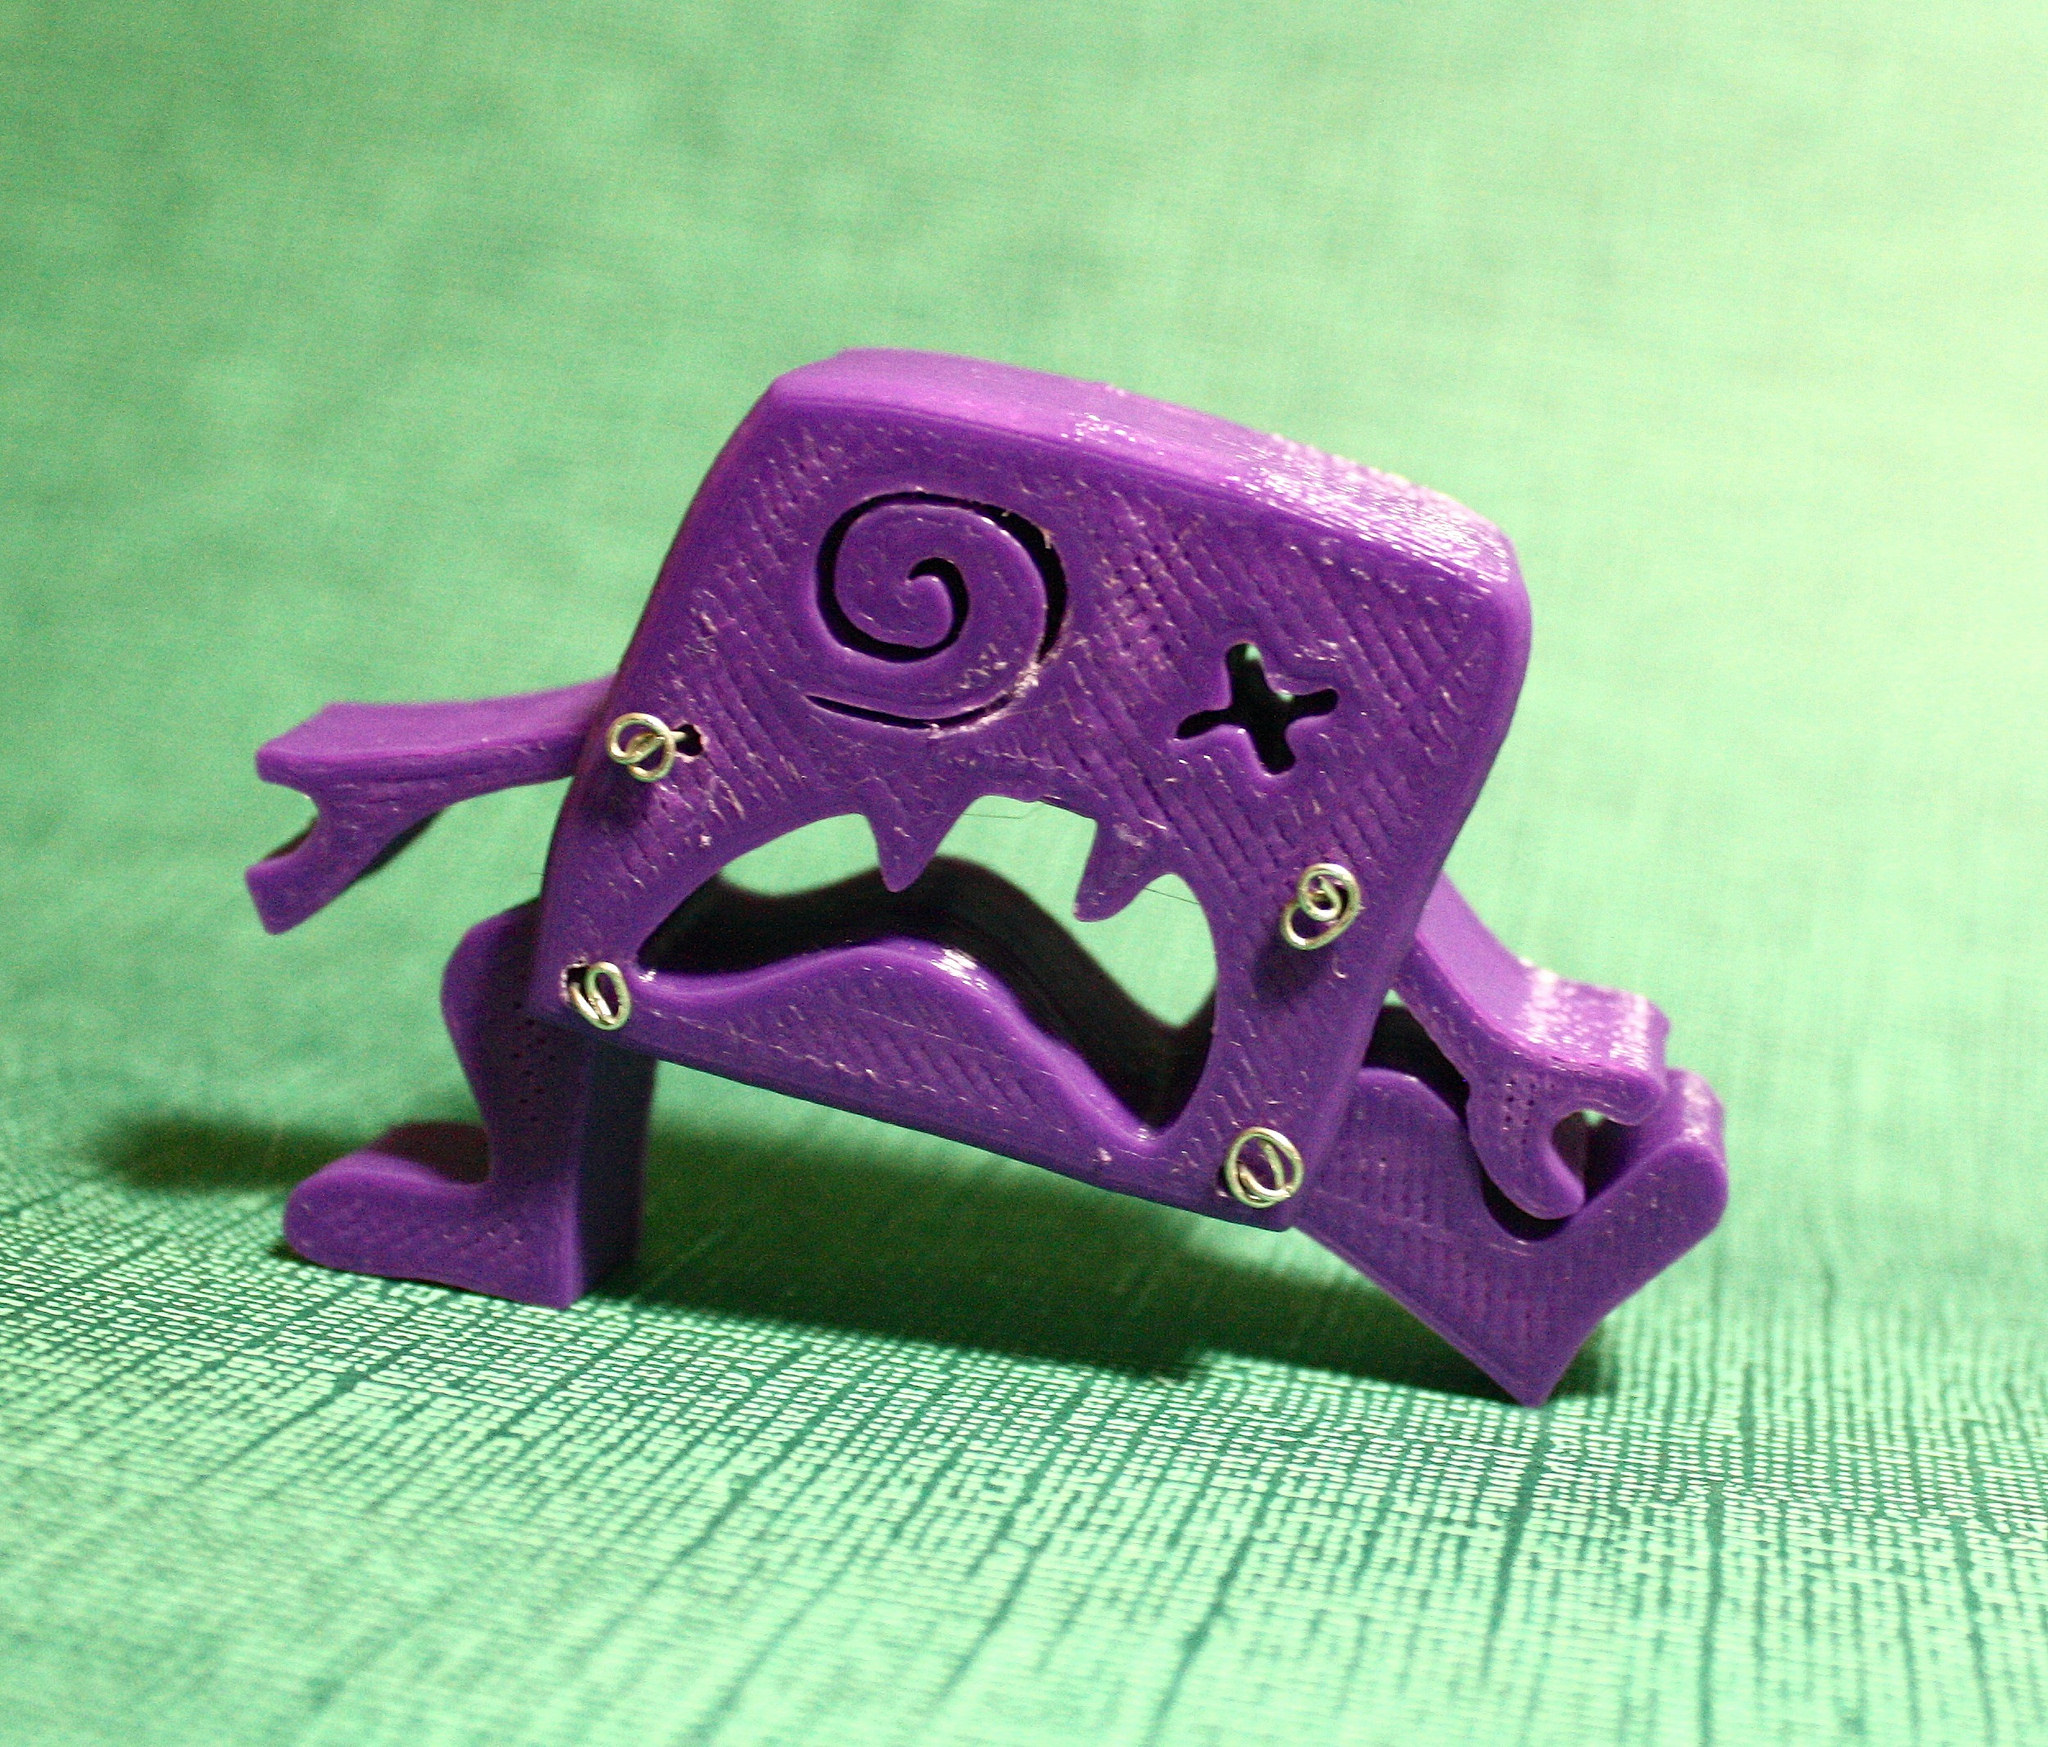
3D printing is super fun. So is drawing. Want to translate a sketch into an articulated creature? Keep reading to find out how!
Software and Materials
For this Instructable, I'll be using Autodesk's (free) 123D Design for the 3d modeling, though you can use the software of your choice. For converting a drawing into a format that 123D Design can use, I typically use Adobe Illustrator (not free) or Inkscape (free). You can use any software that will convert a drawing into an SVG file (Scalable Vector Graphics).
A list of vector graphics editors can be found here: en.m.wikipedia.org/wiki/Comparison_of_vector_graphics_editors
You'll obviously need access to a 3d printer and filament, as well as either wire, wire cutters, and pliers, or a hot tool (like a hot glue gun or soldering iron) to make pins from 3d printer filament. I used a Bukito printer and Prototype Supply PLA filament, which is my favorite.
Preparing Your Drawing for the 3D Modeling Software
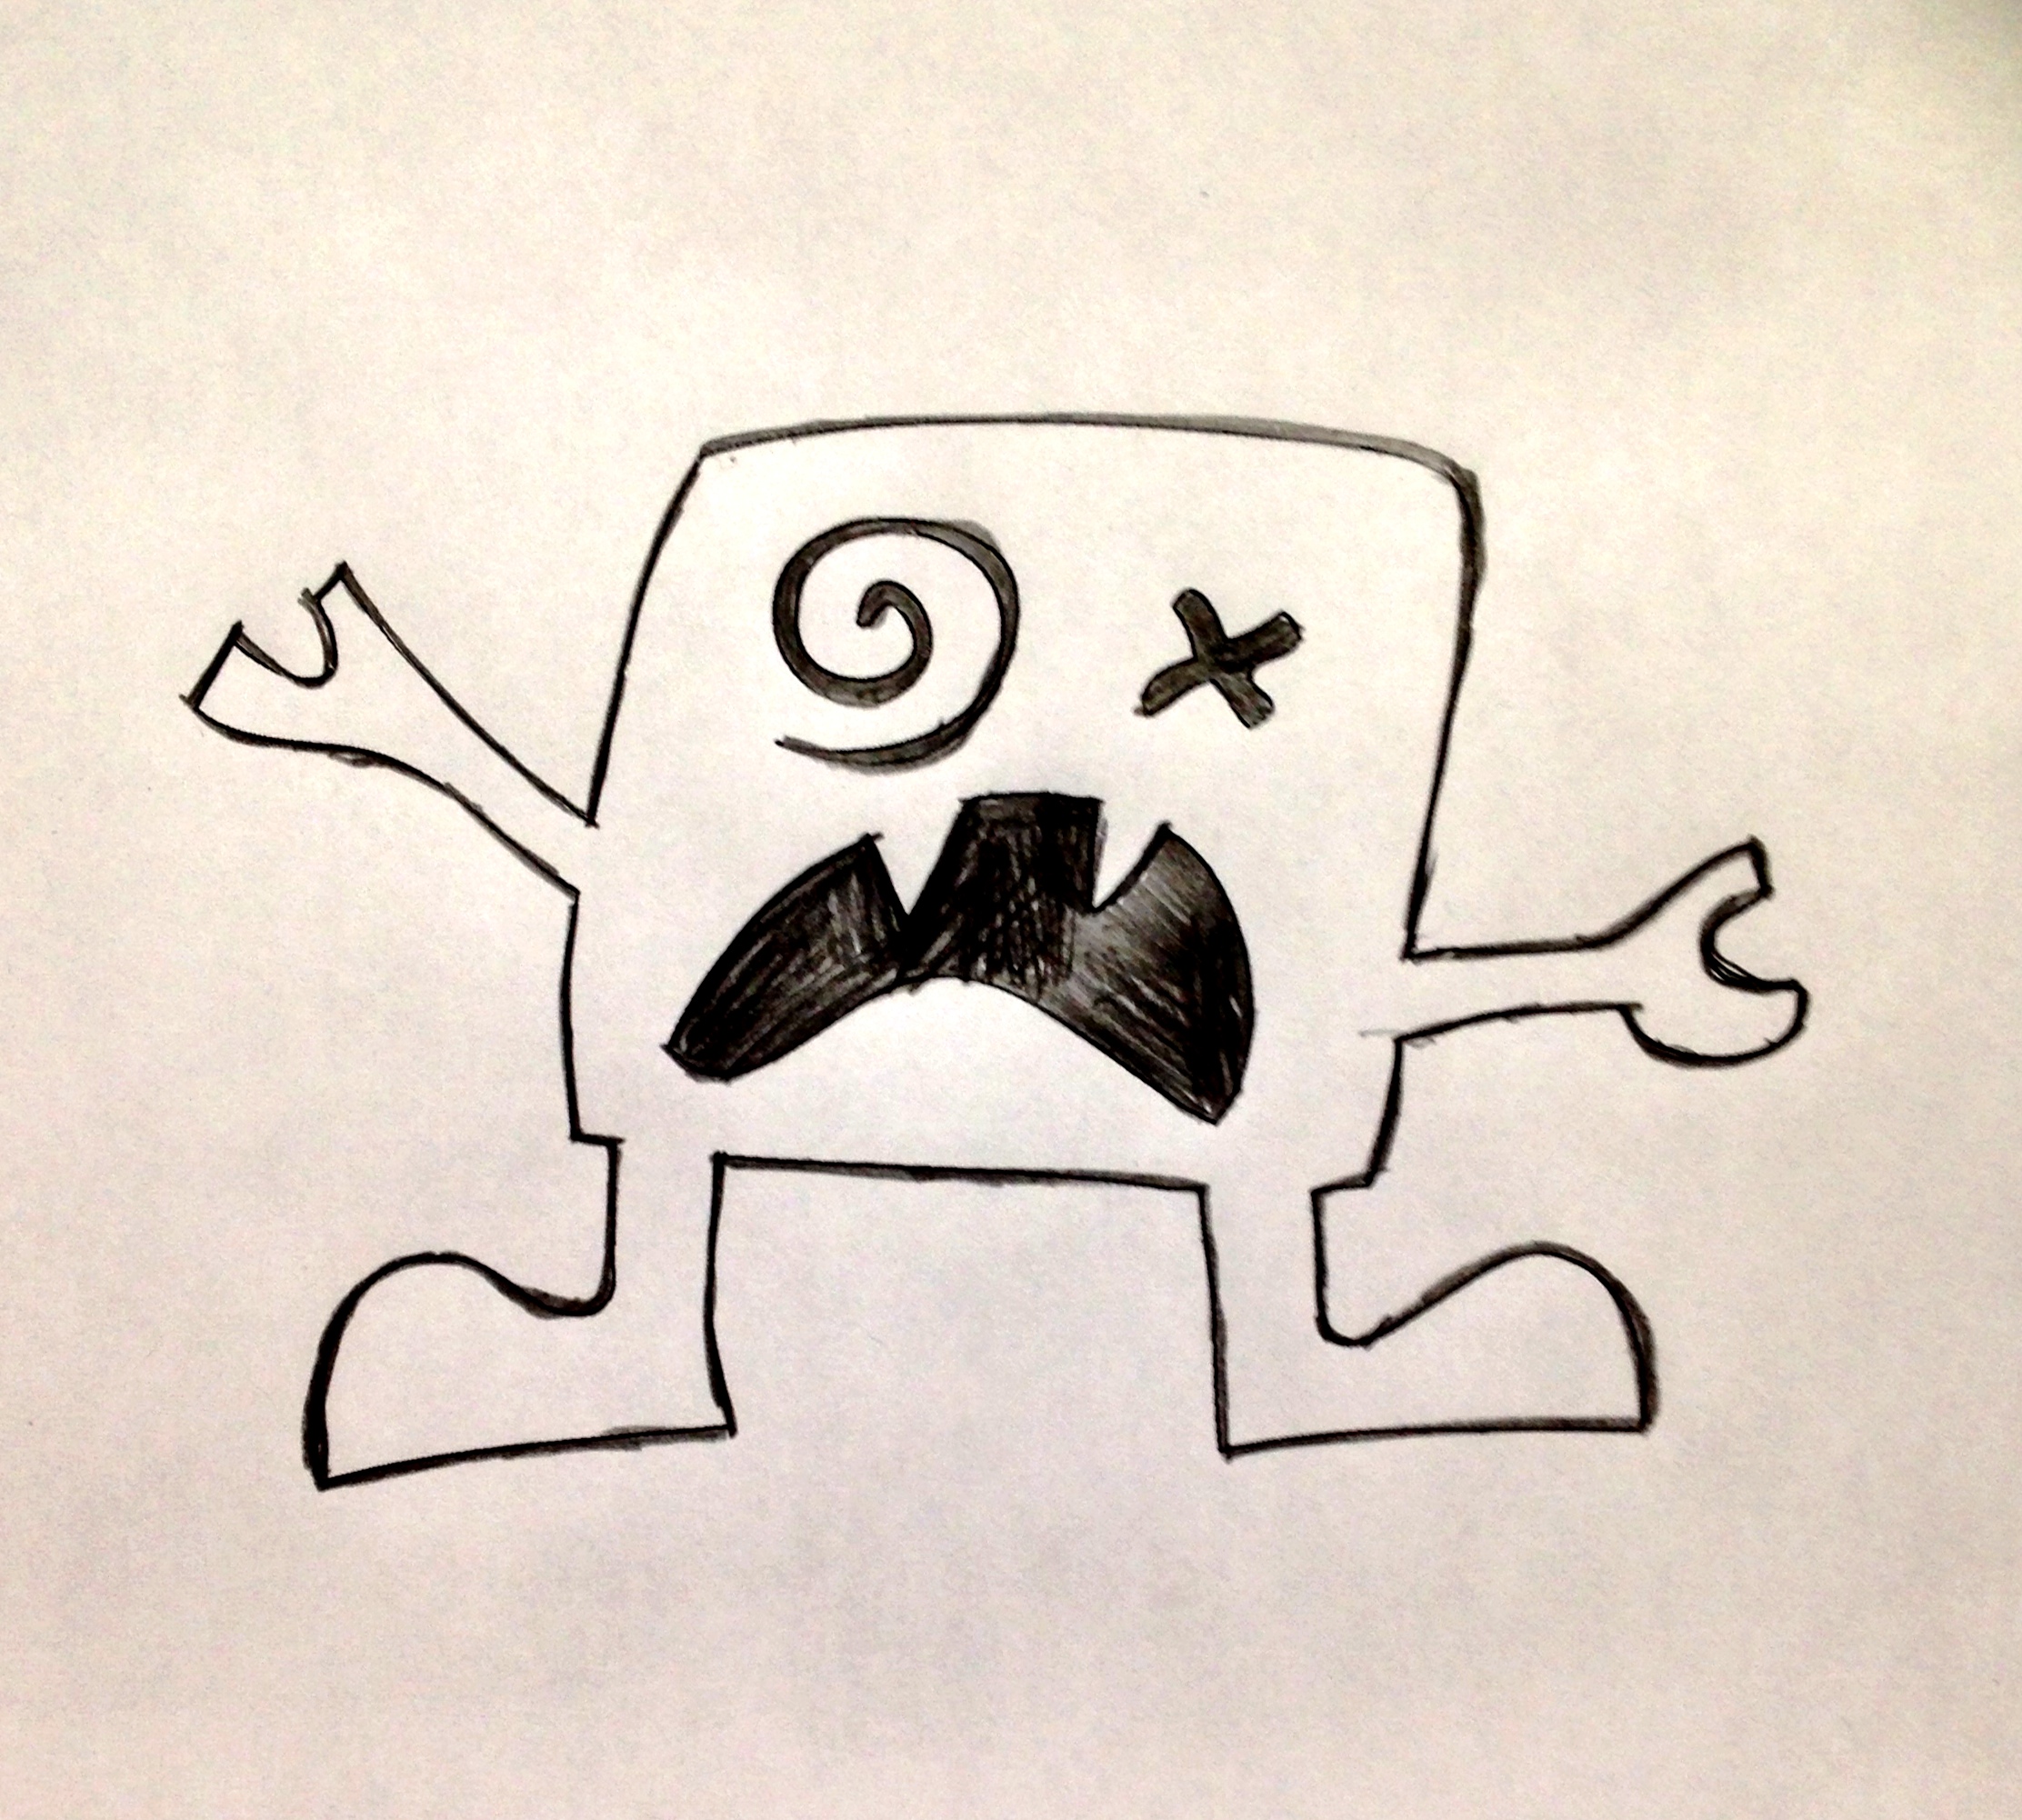
Assuming you've drawn your creature by hand, you'll want to scan it. You can use a regular scanner, a clear digital photograph, or a scanning app for your mobile device such as TinyScan. If you've done your drawing on a computer (especially if you've done it in a vector graphics editor), you're a step ahead of the game.
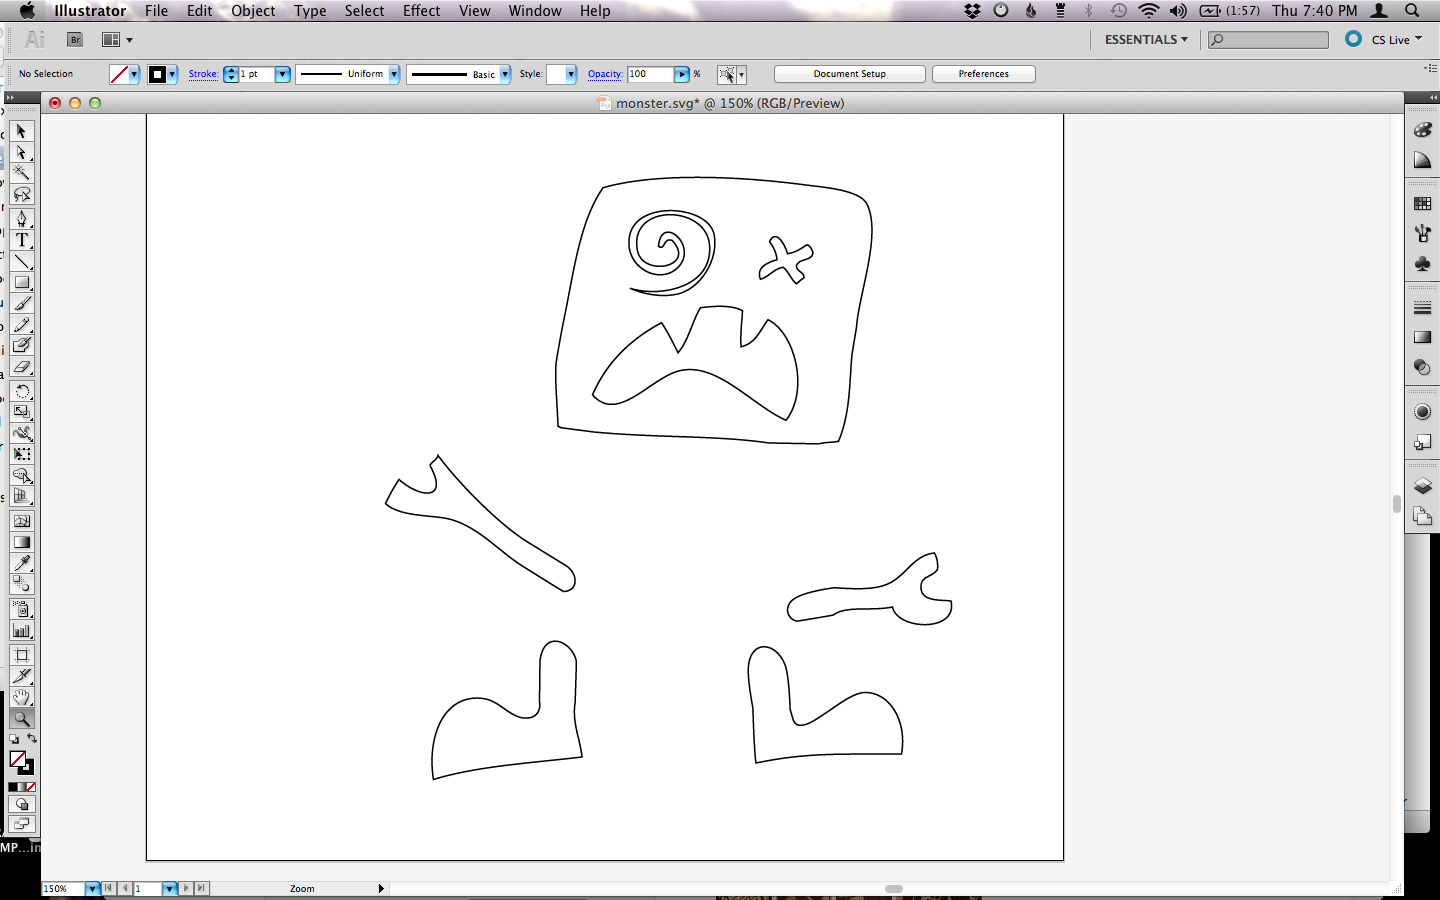
Once you have it on the computer, import it into your vector software. You can use a pen tool to trace the lines, or rebuild it with shapes, OR, if you're using Illustrator like I did, you can use Live Trace, which can be quicker and easier.
If you want to make your creature articulated (arms and legs that move), you'll need to separate them from the body.
It will make your life easier if you simplify your vector sketch to single lines and get rid of any extras. You can also use Edit > Path > Simplify to give your sketch even fewer points. The more complicated the shape, the more the software is likely to get bogged down.
Once you've got your vector drawing how you want it, export it as an SVG file (the arms/legs/tentacles can be saved in the same file) and pop over to 123D Design...
Importing to 123D Design
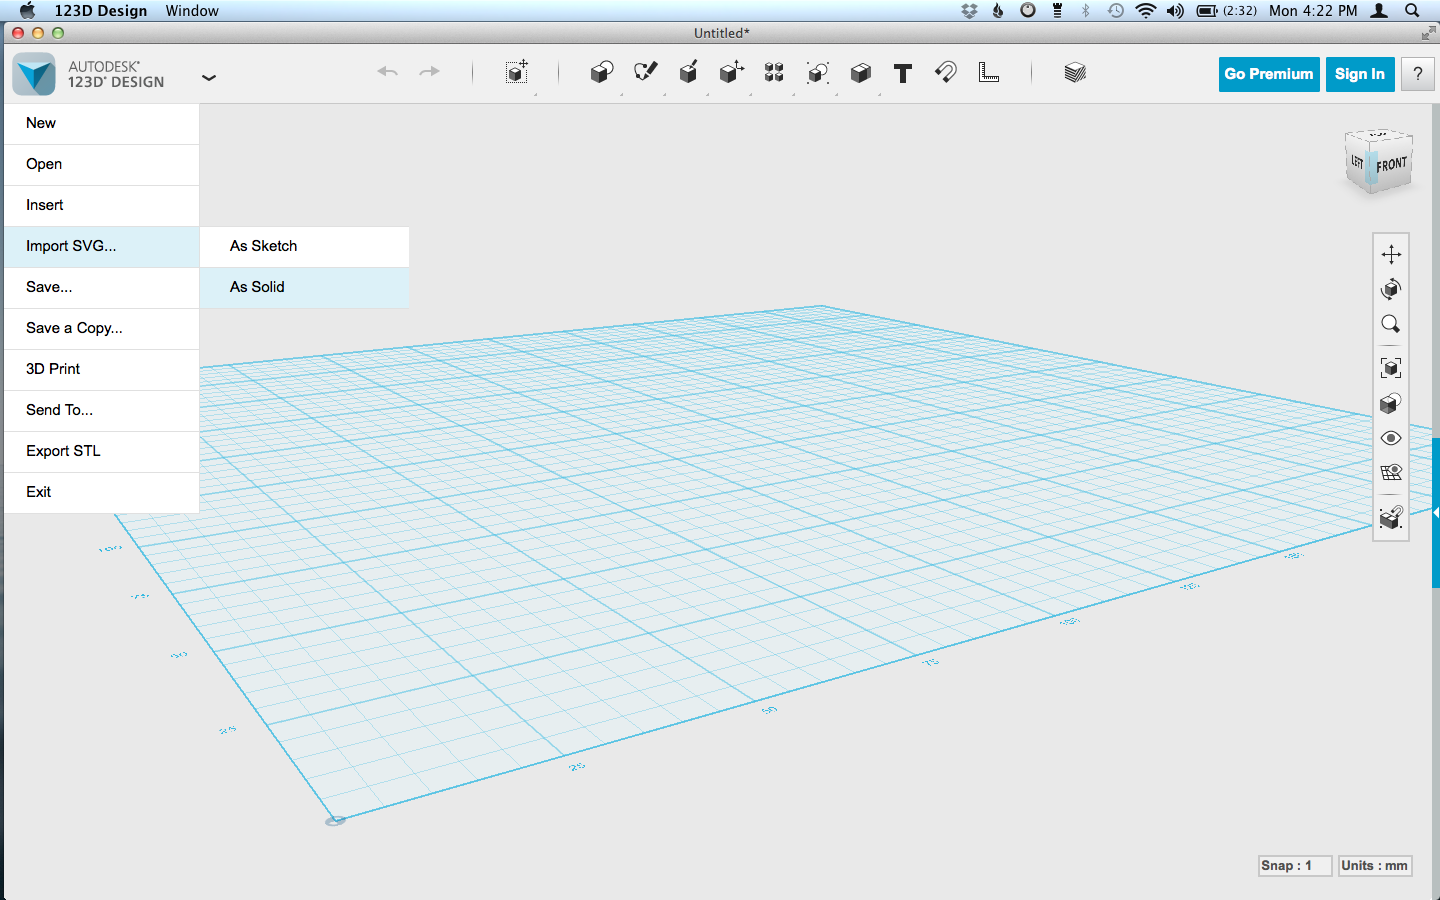
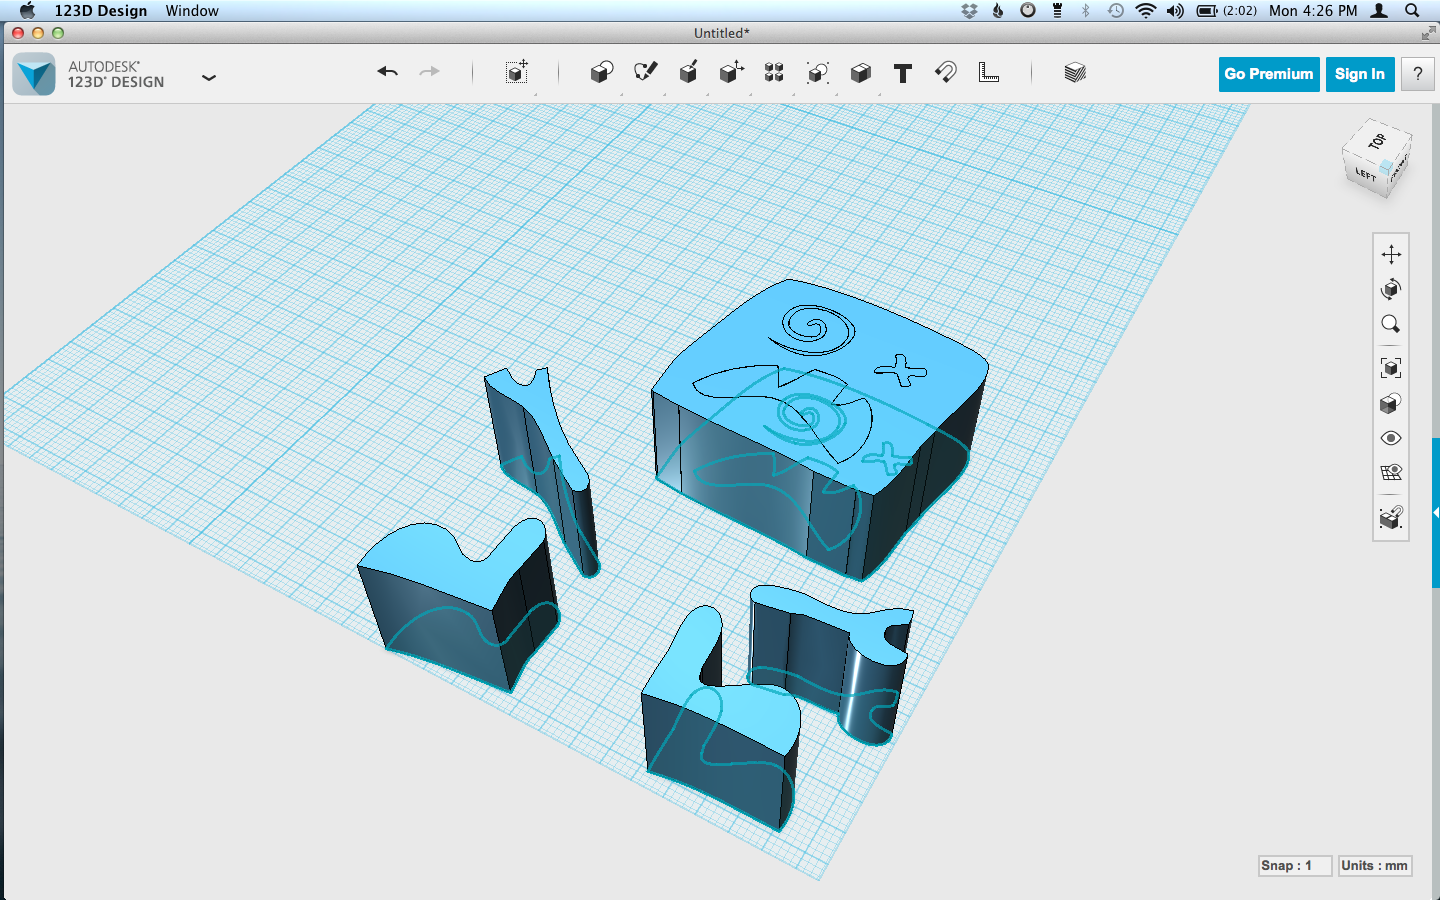
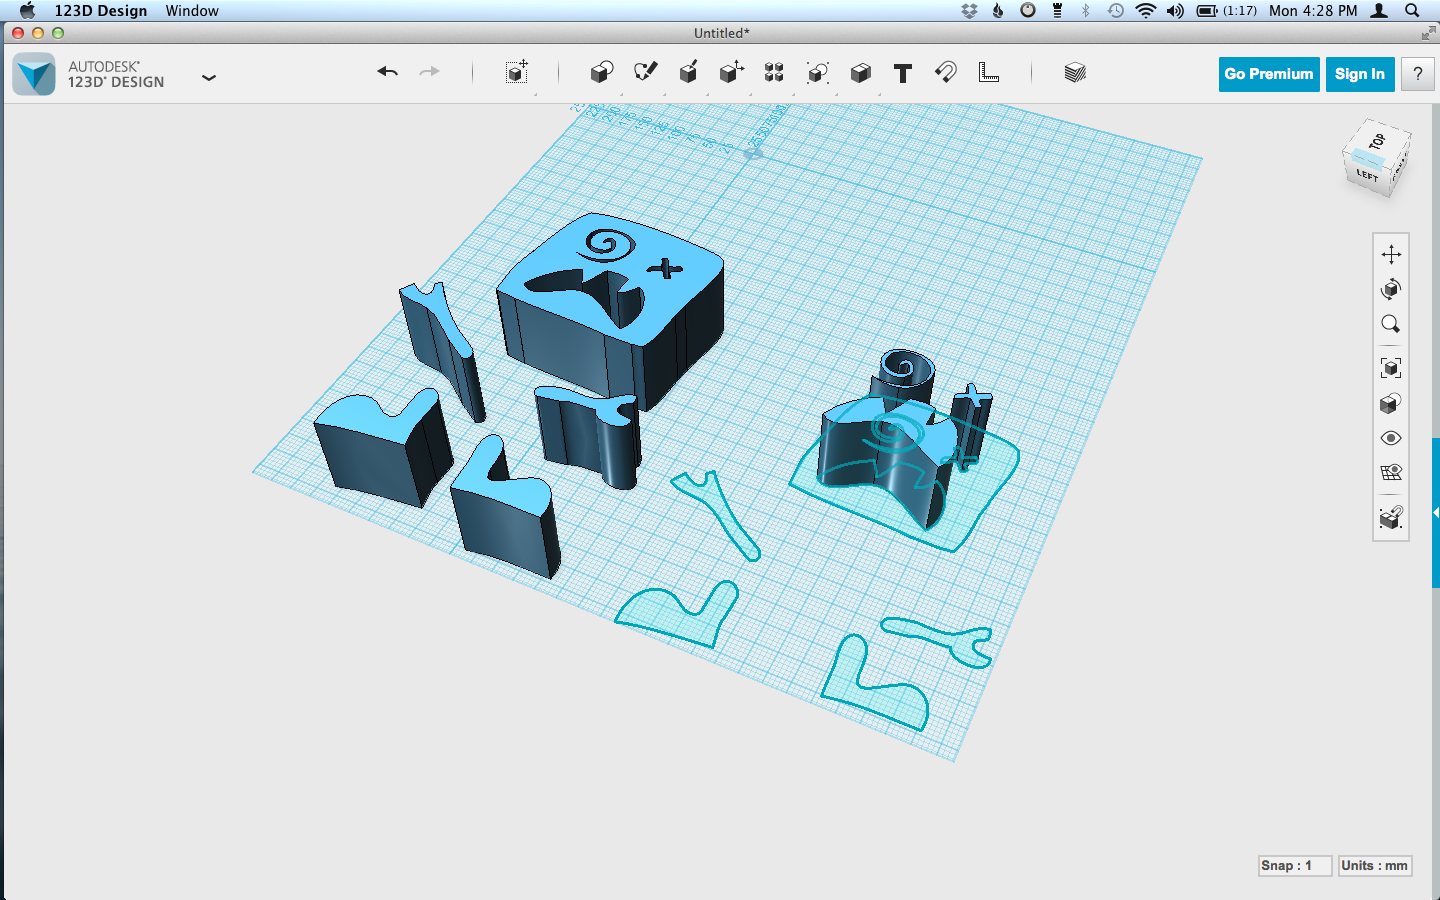
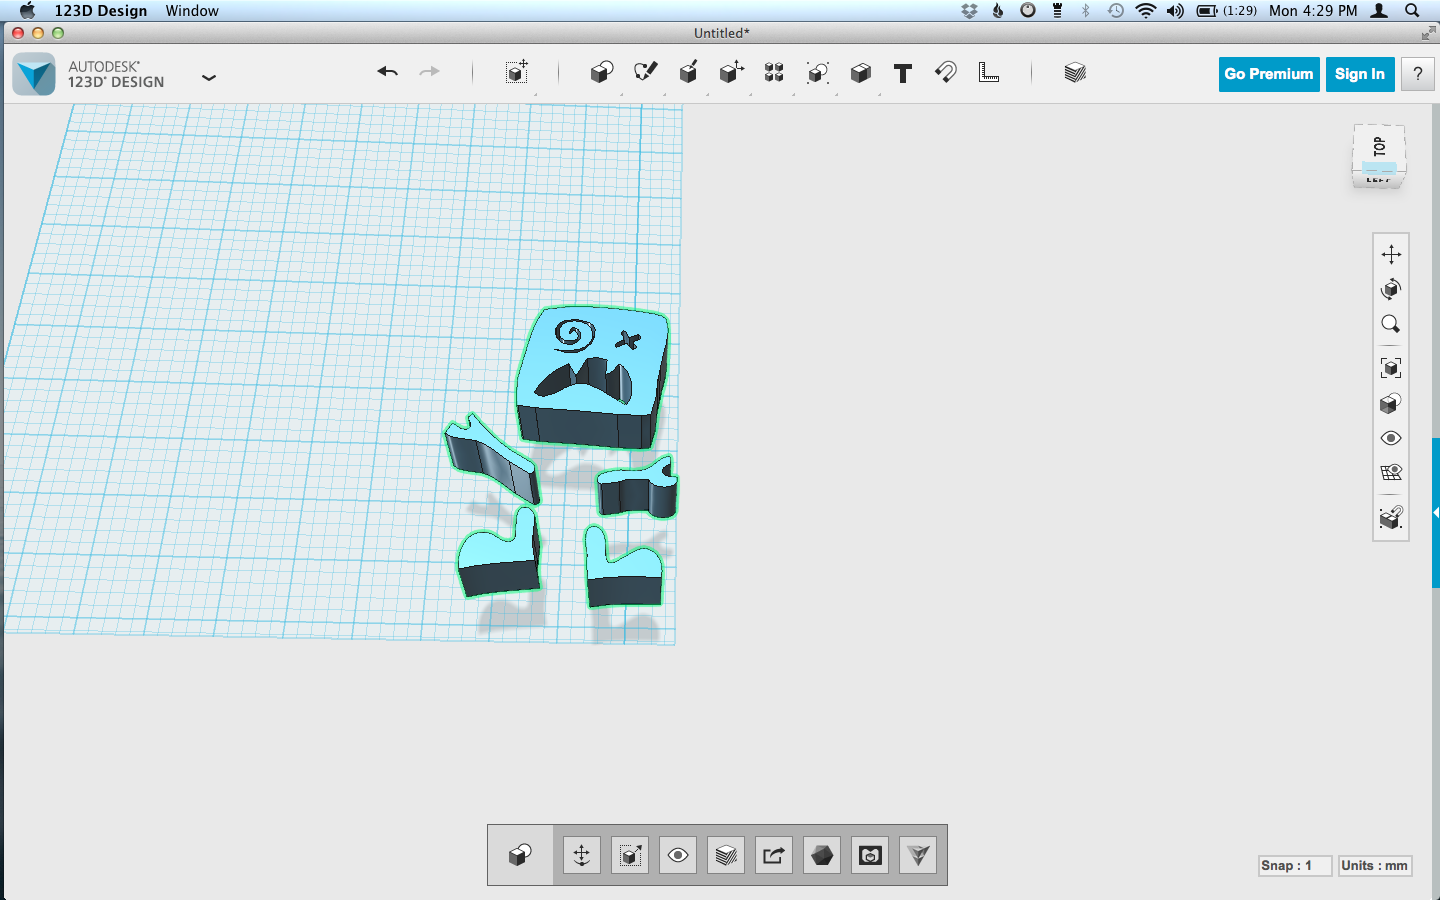
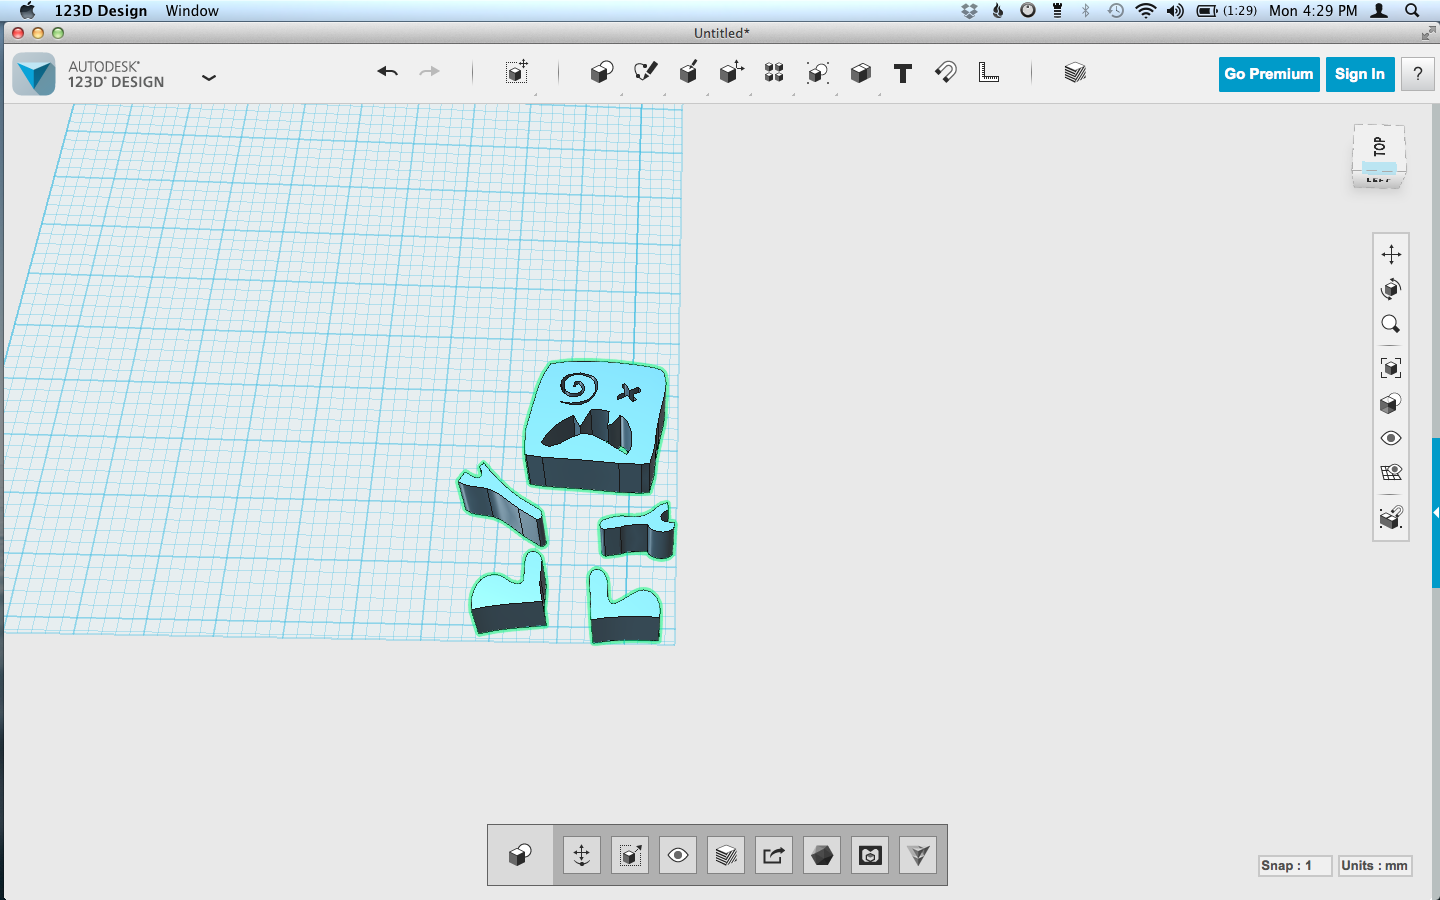
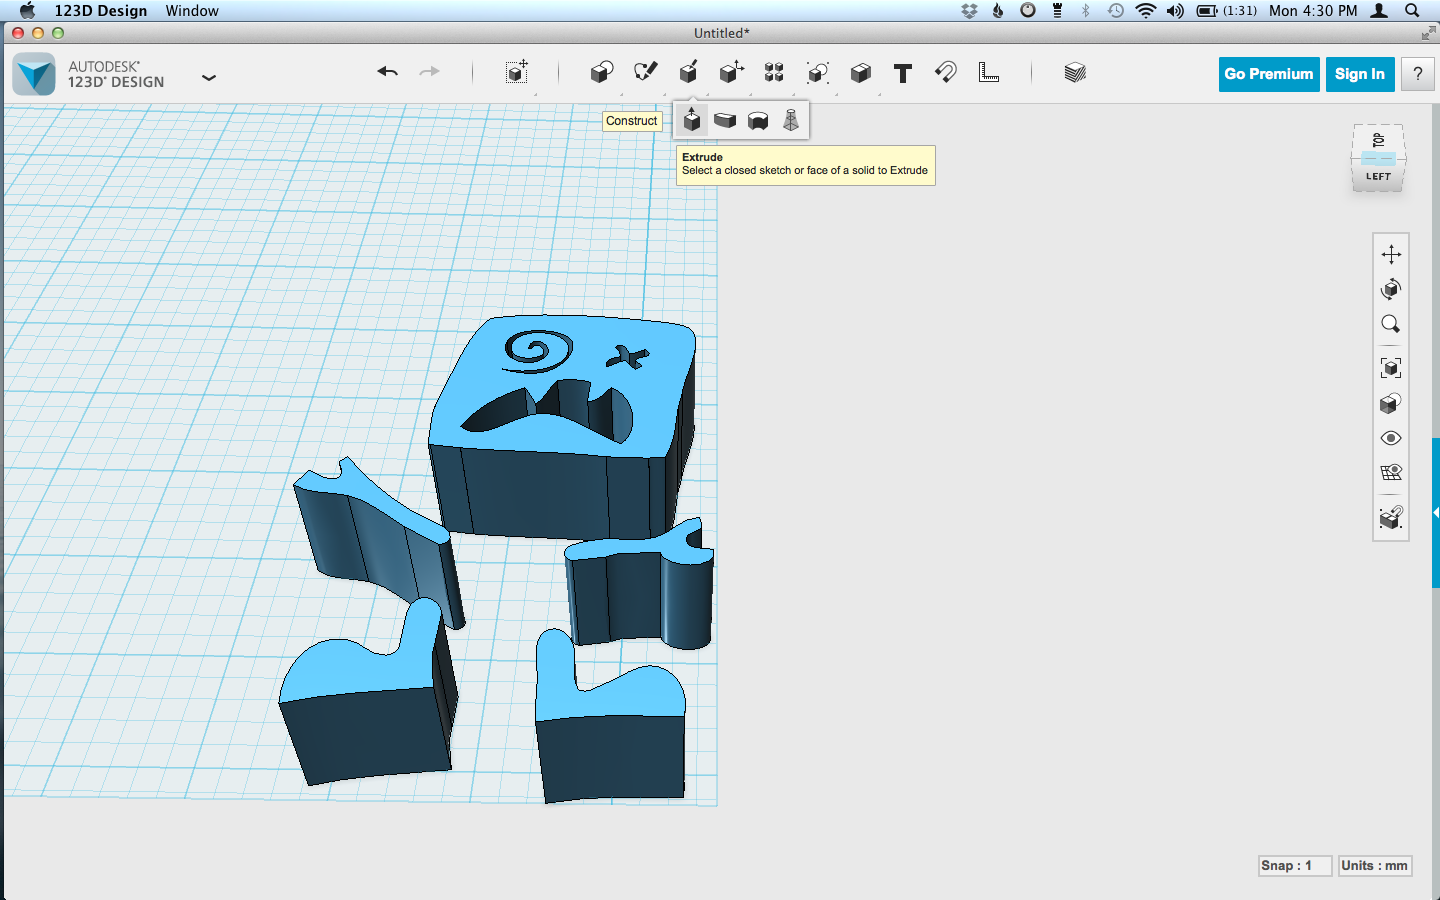
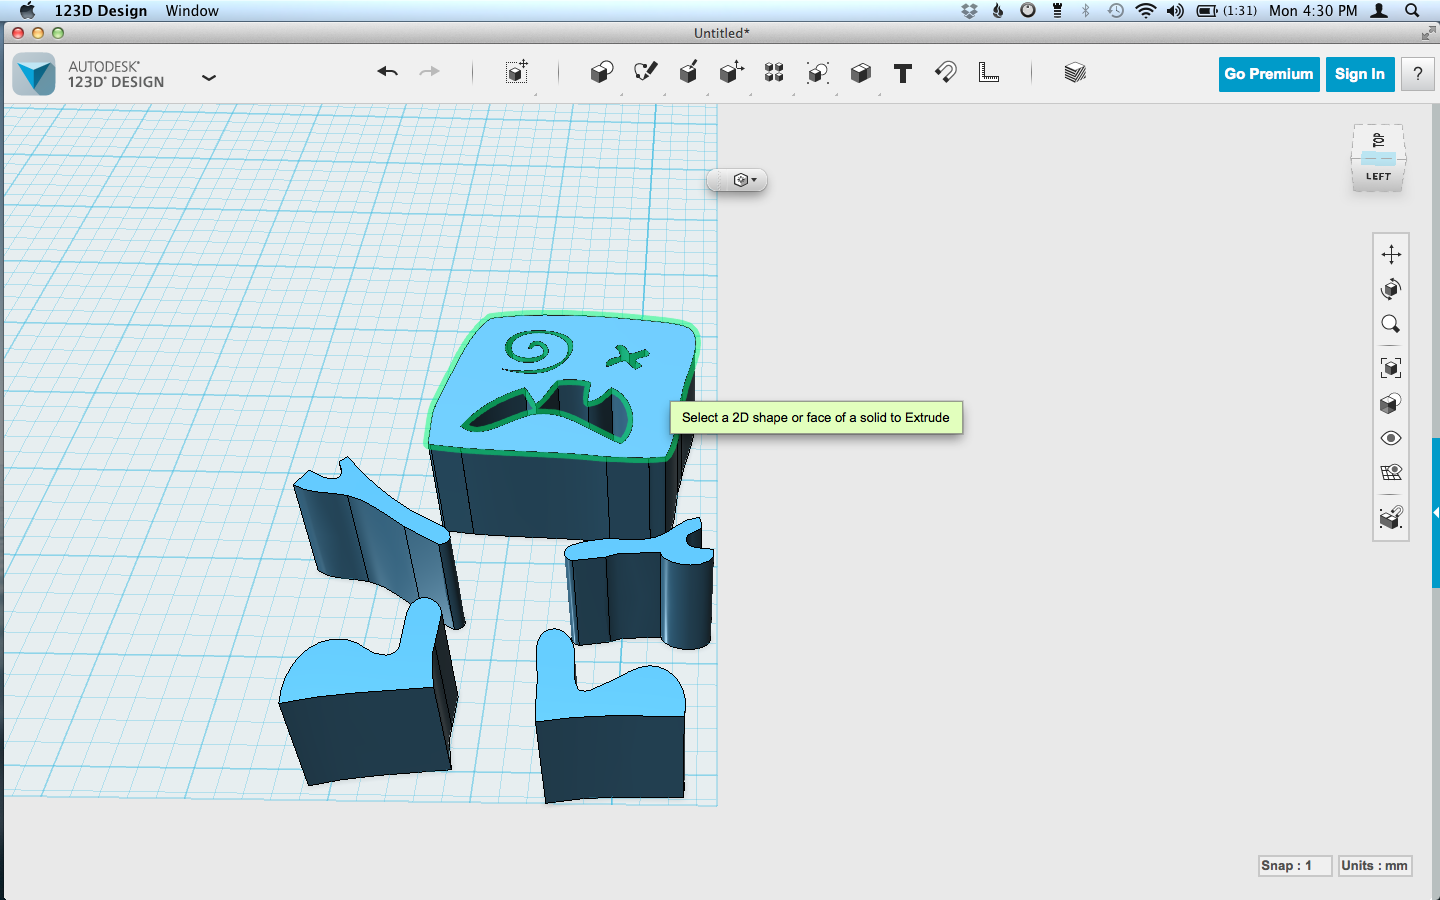
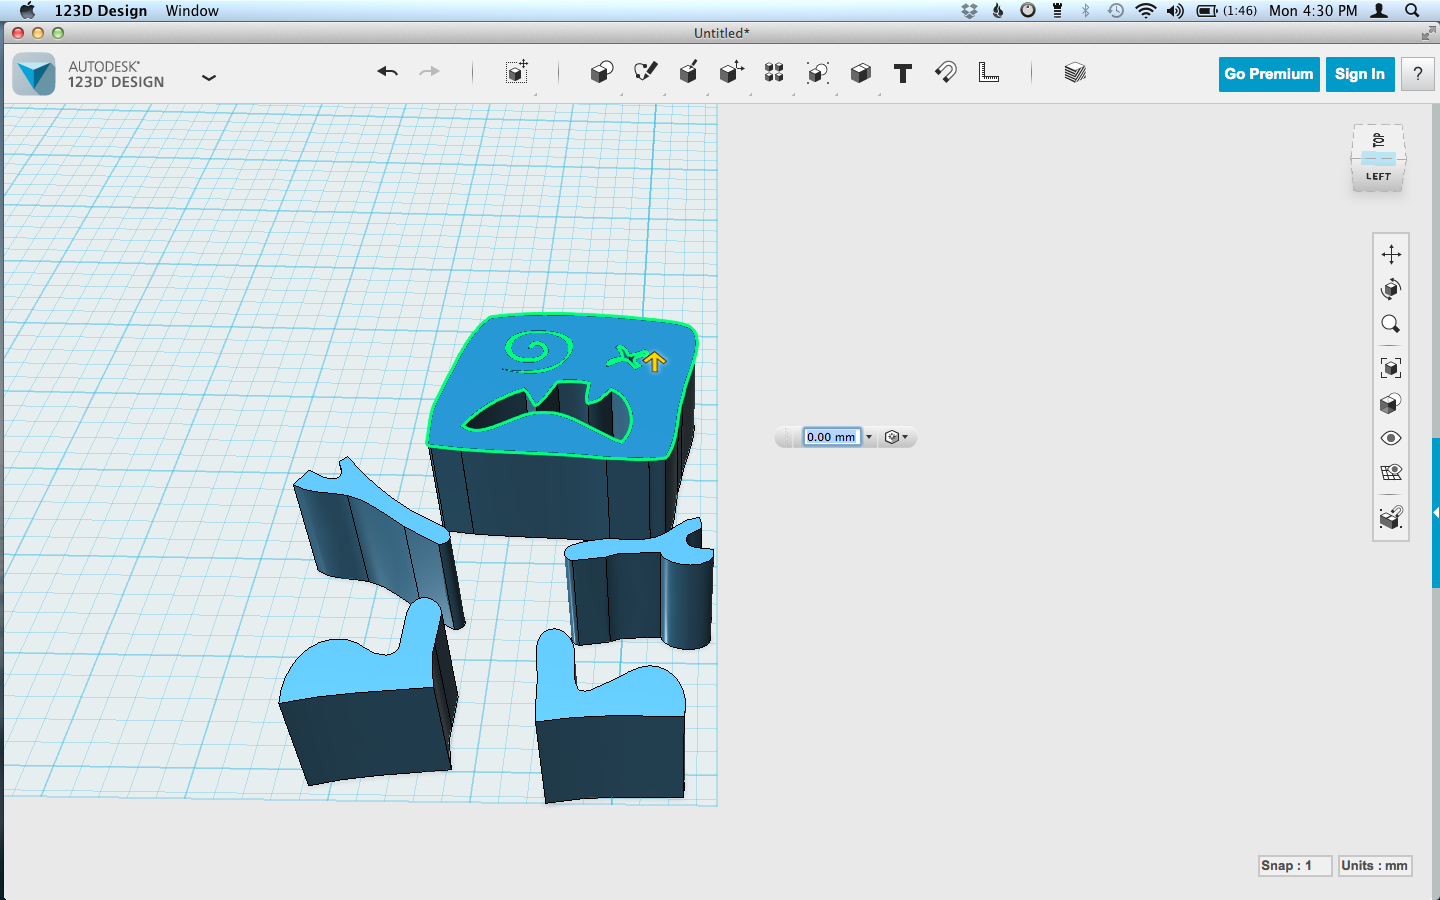
In 123D Design, go to the menu and click Import SVG. It will give you the option to create a sketch or solid. You can do either, solid will start you off with a 3d shape that is an extrusion of your vector shape, sketch will make the shape which you can then extrude into a 3d shape.
When you import the SVG, you may wind up with an extra sketch or filled bits that you don't want. Move what you do want to the side and delete the extra. You'll also want to check how big your monster is. It can come in pretty huge depending on how large your scan was. Resize and use 'd' to drop the resized shapes onto the grid.
Now, more adjusting! Extrude and Push/Pull are your friends here. Use them to make the body shape the height you want.
Imported, adjusted... on to editing for the limbs.
Articulated Limbs
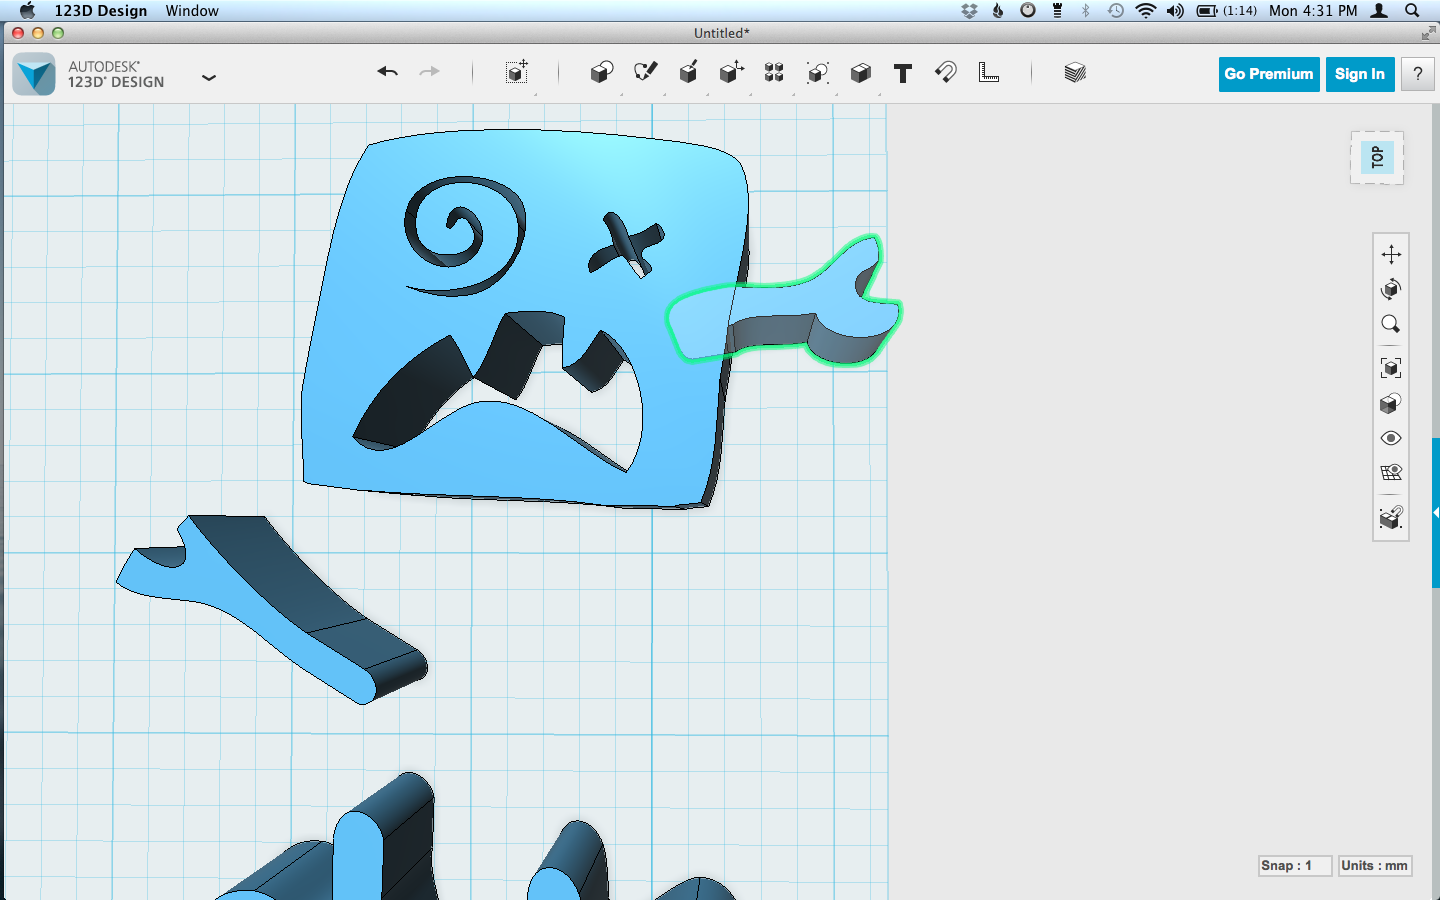
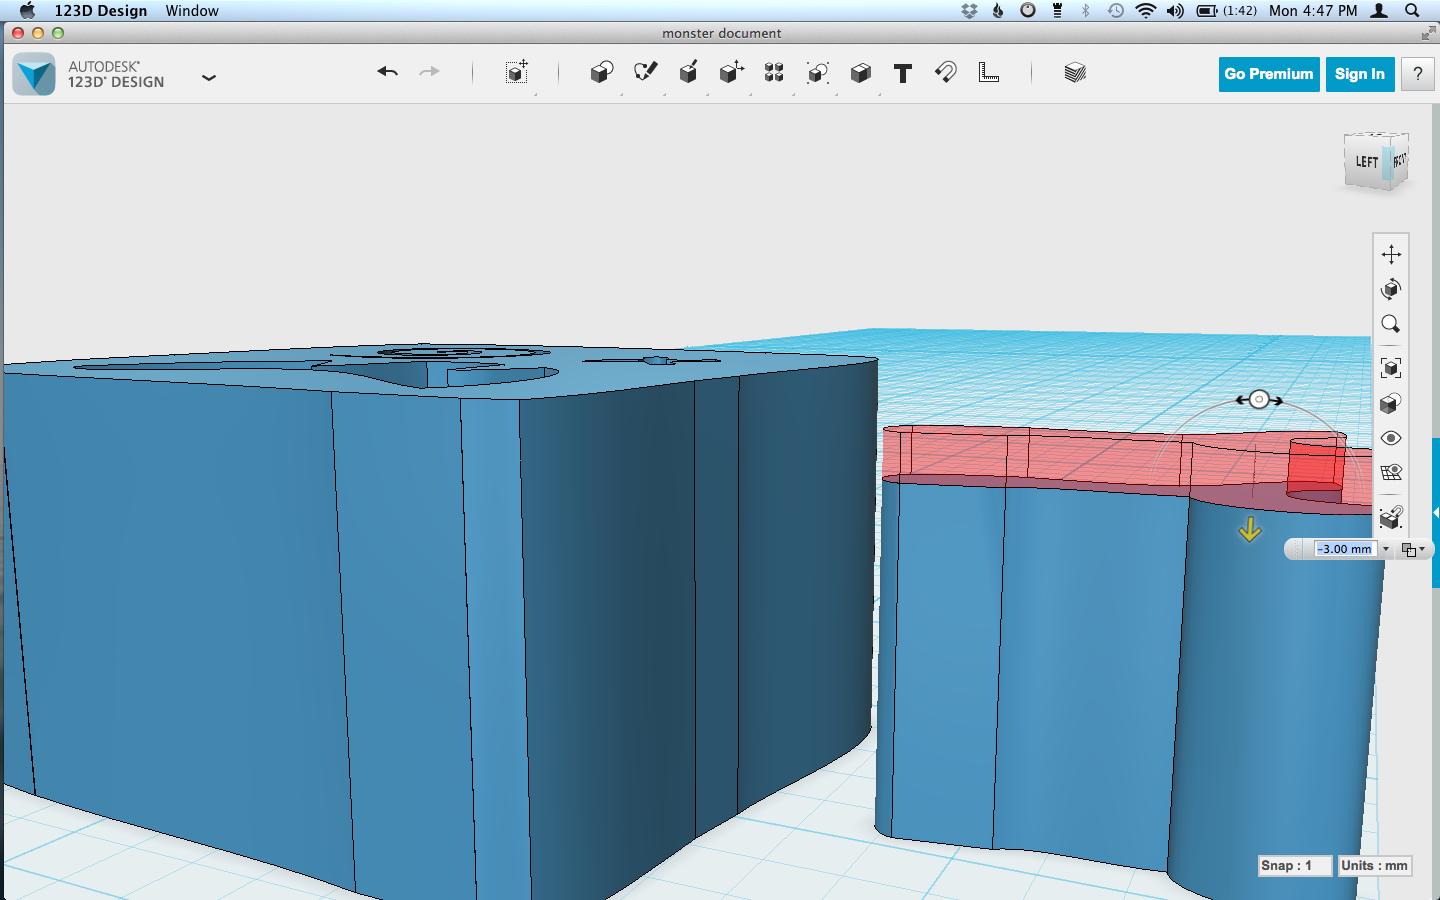
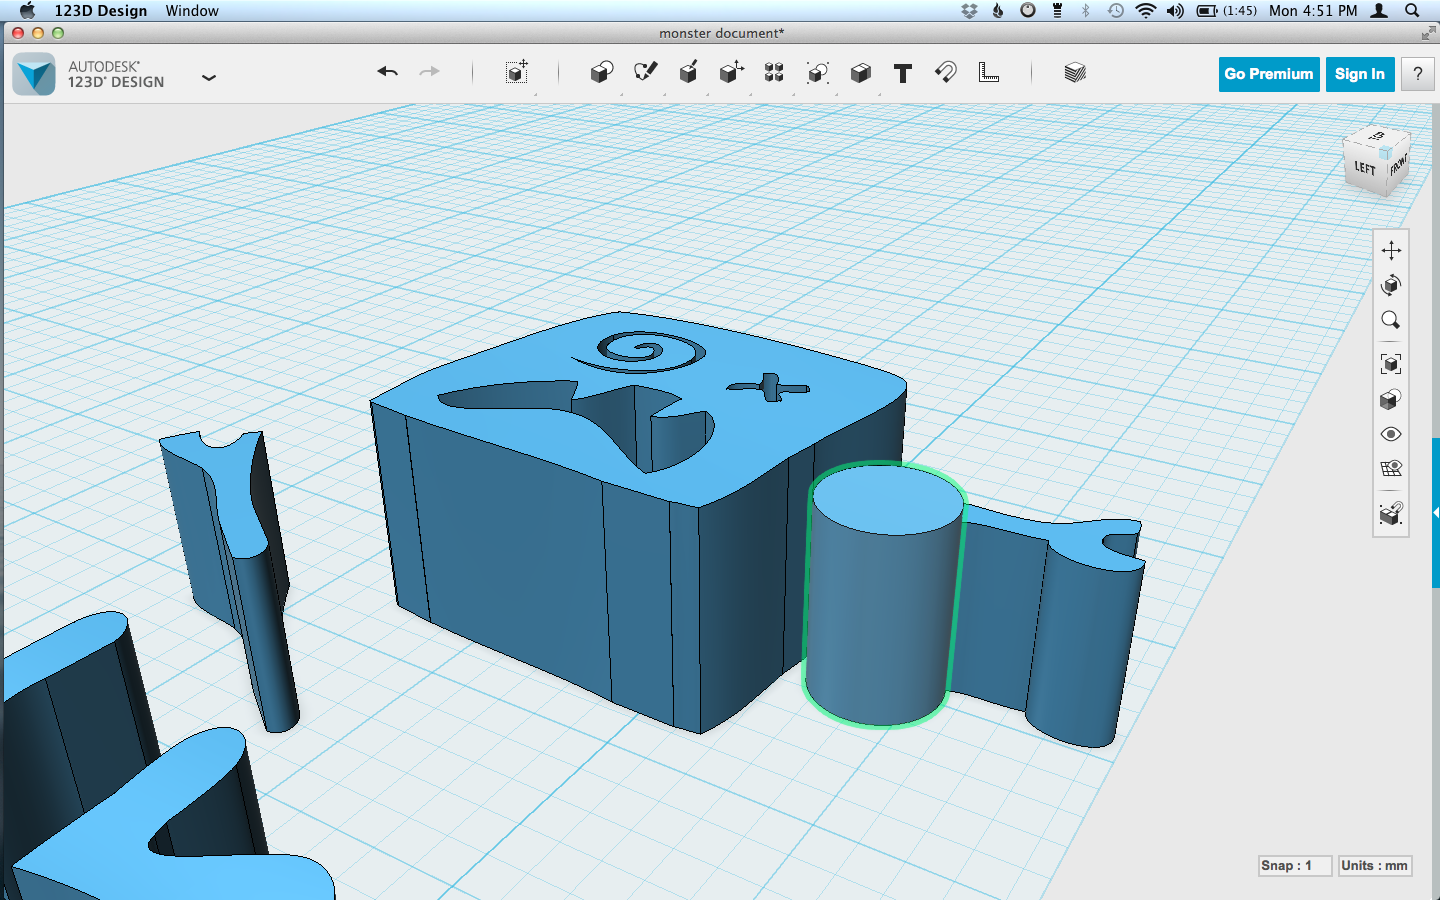
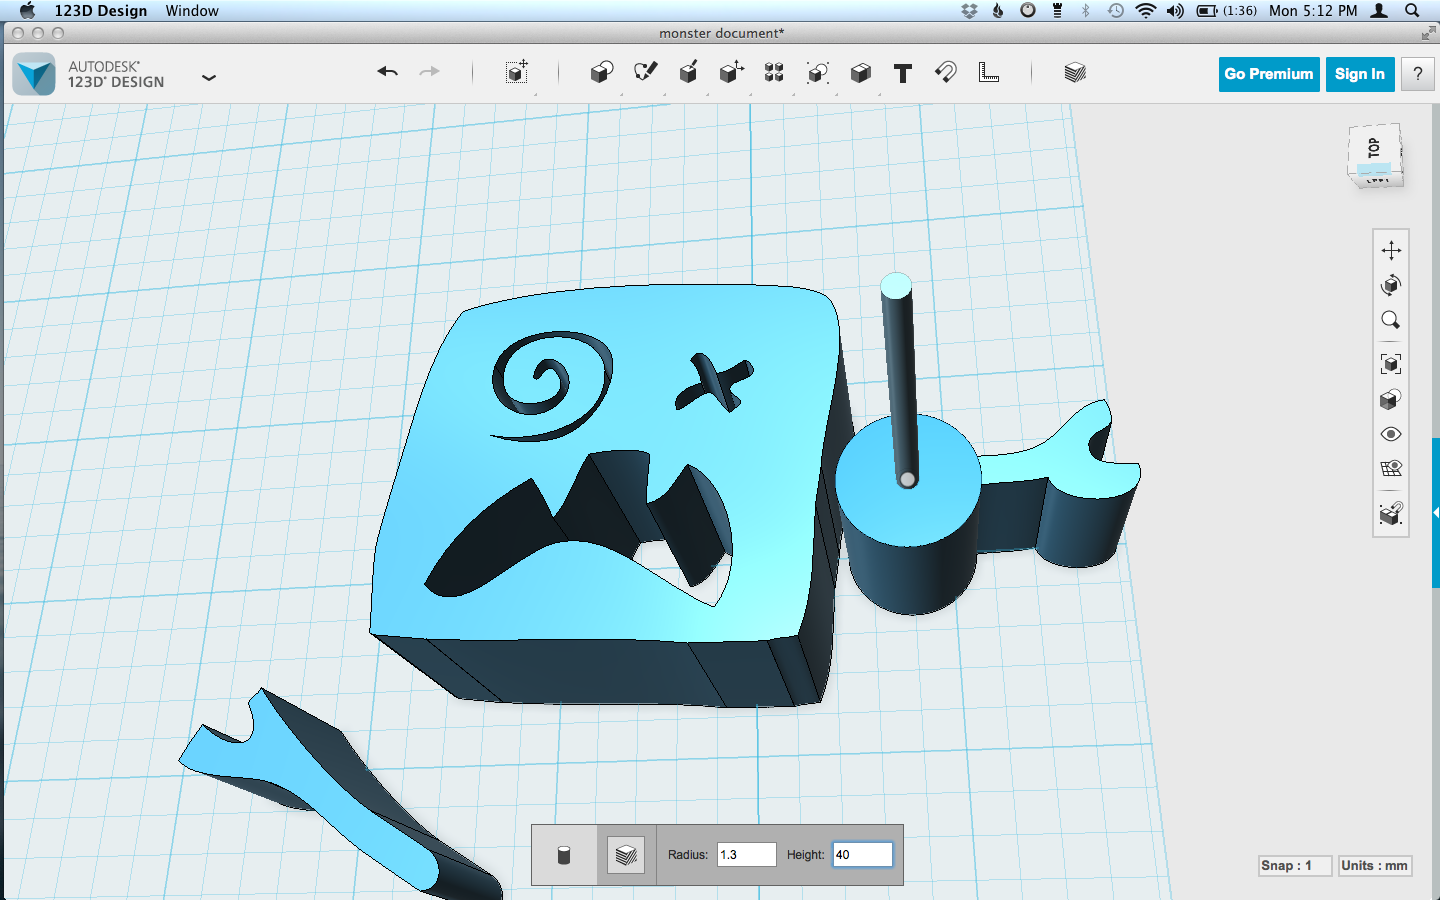
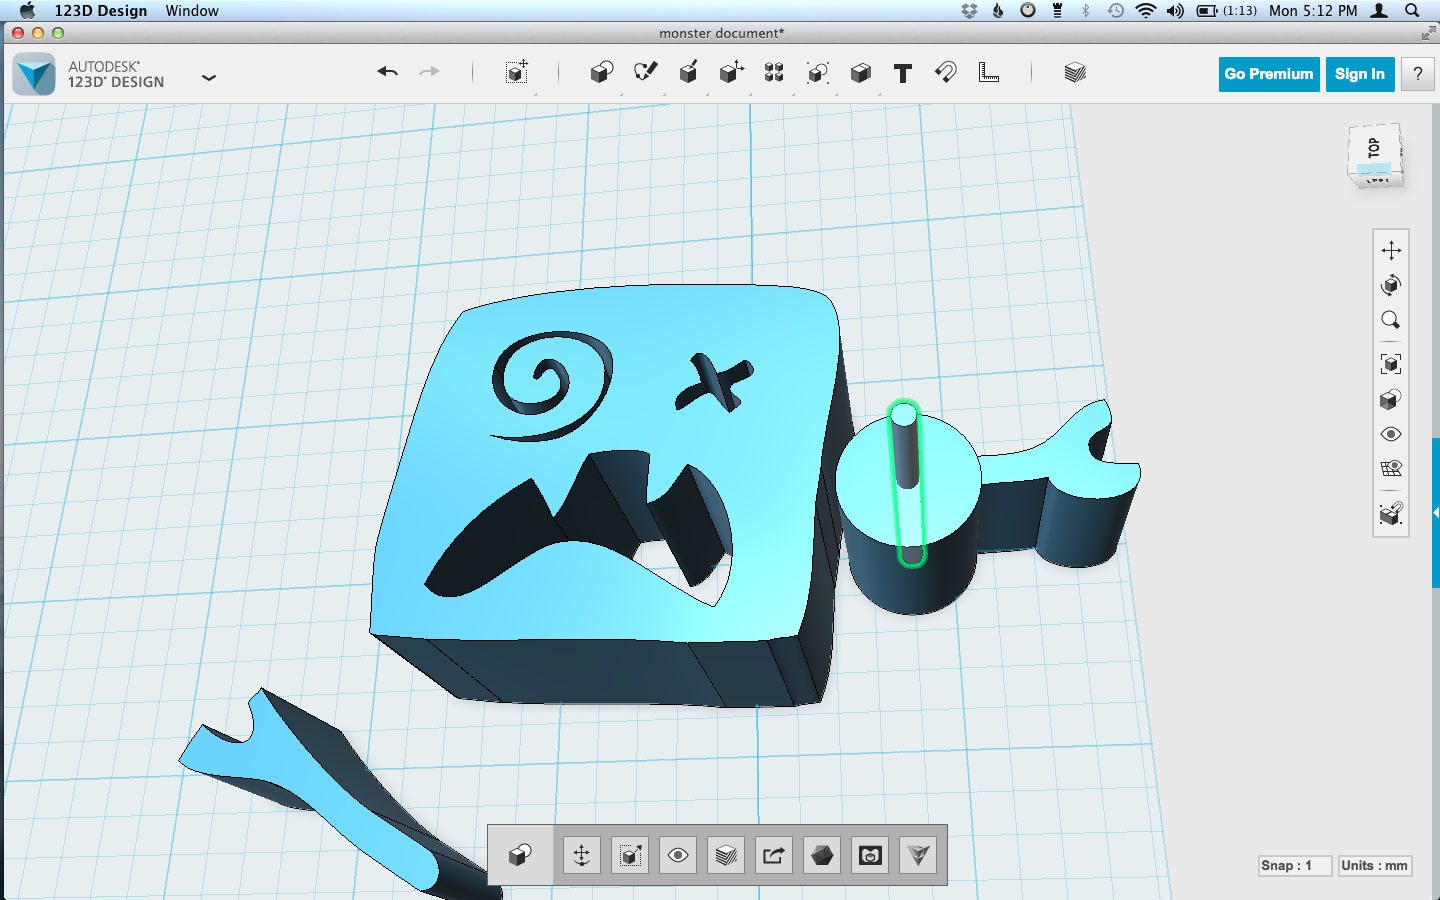
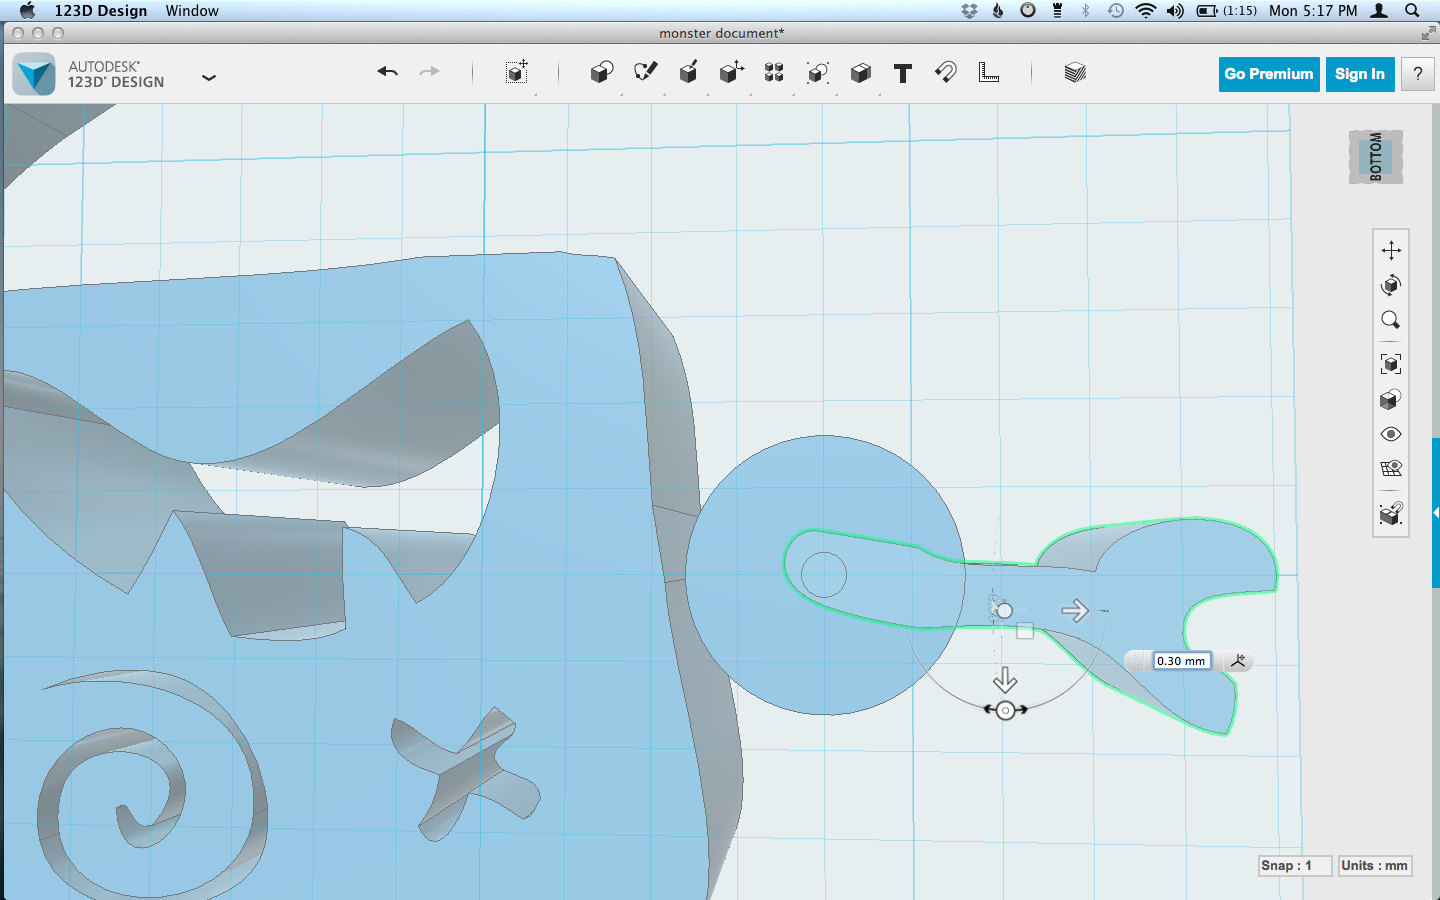
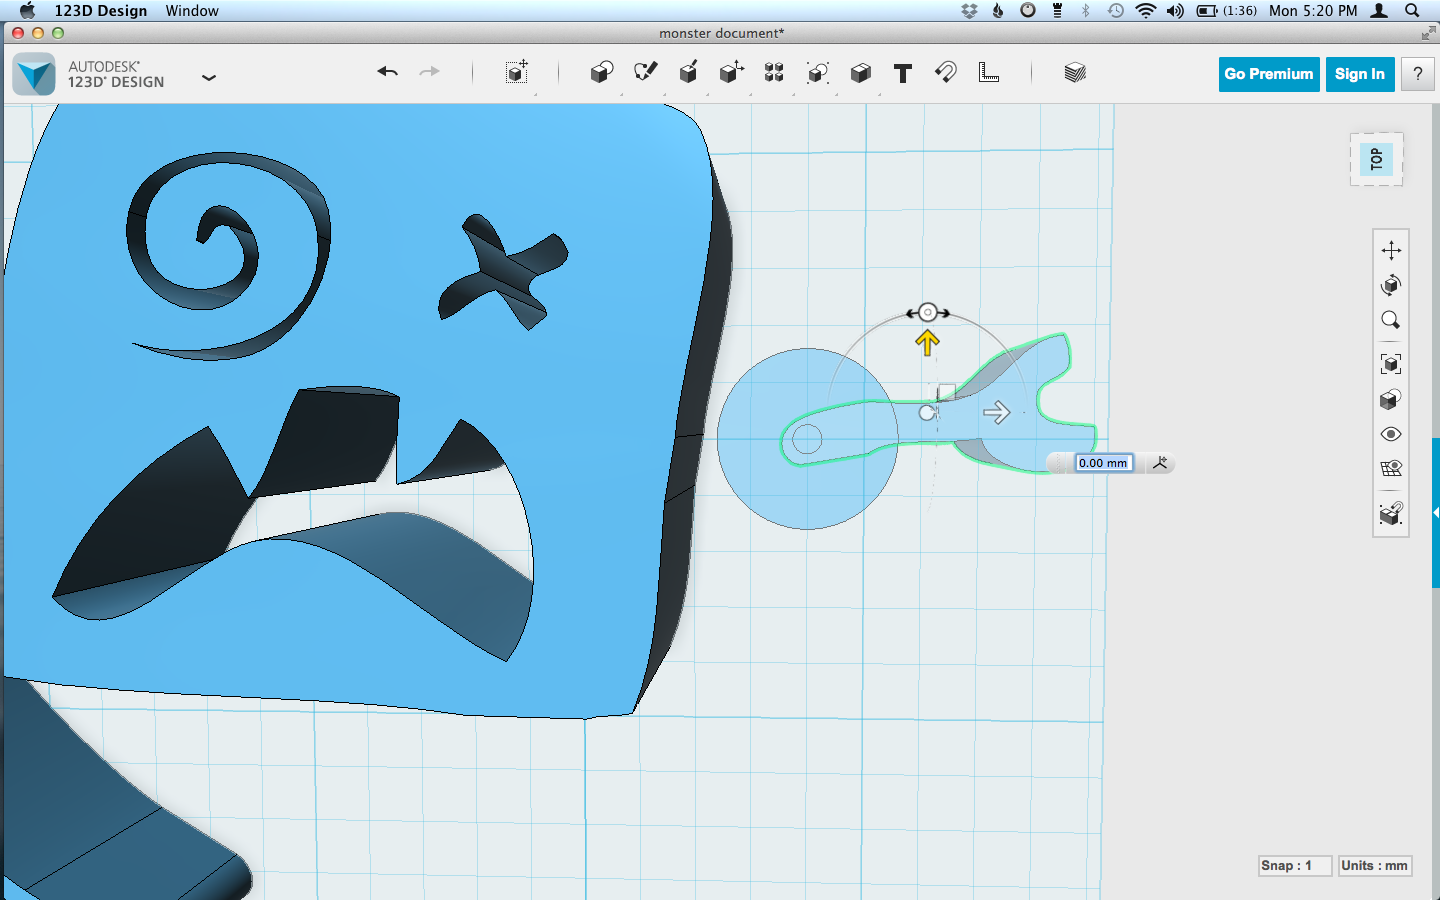
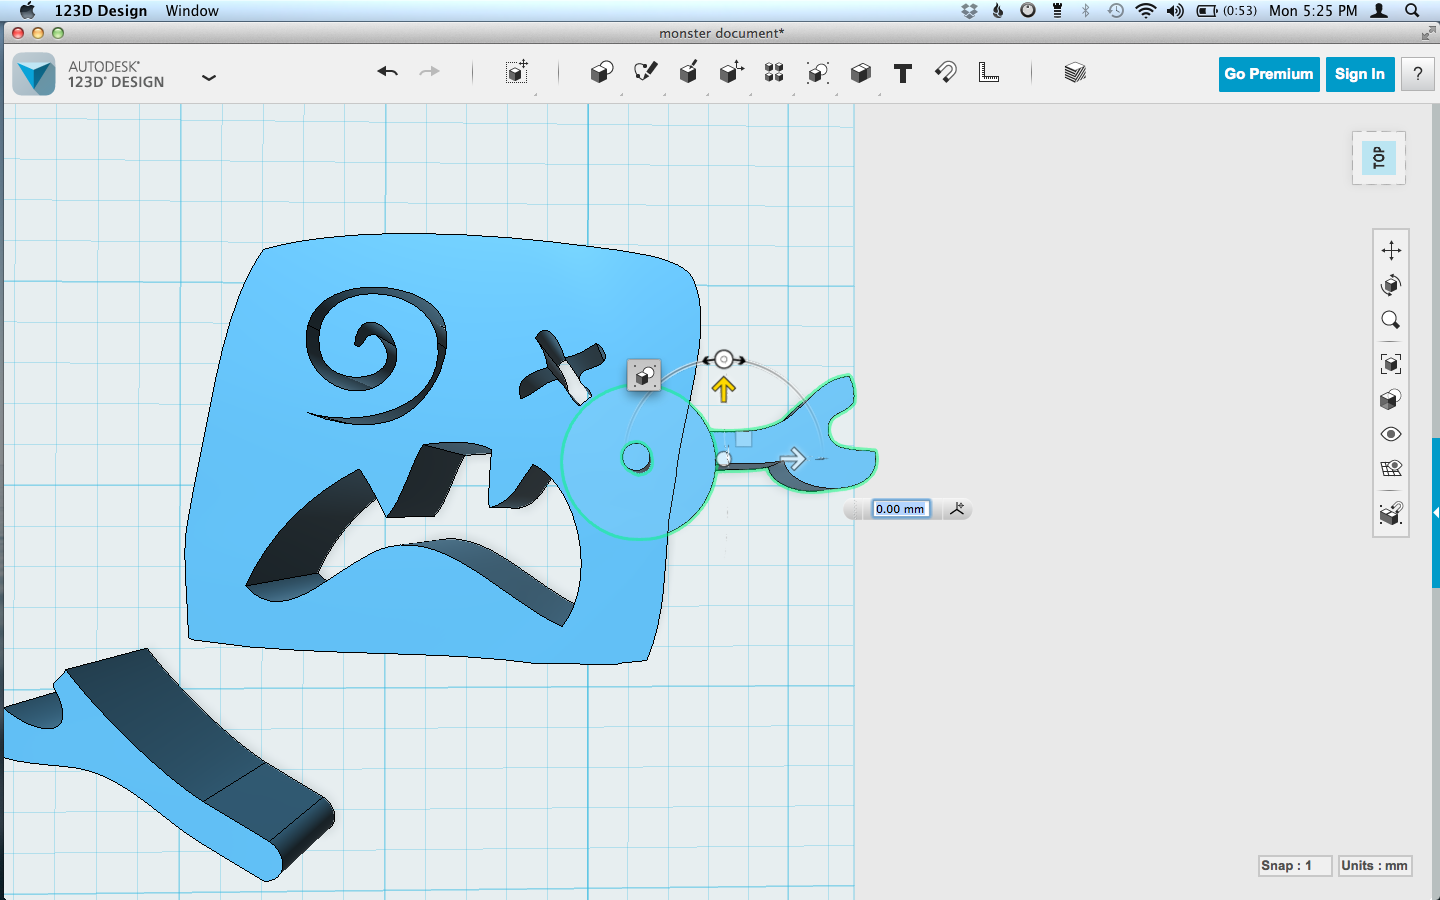
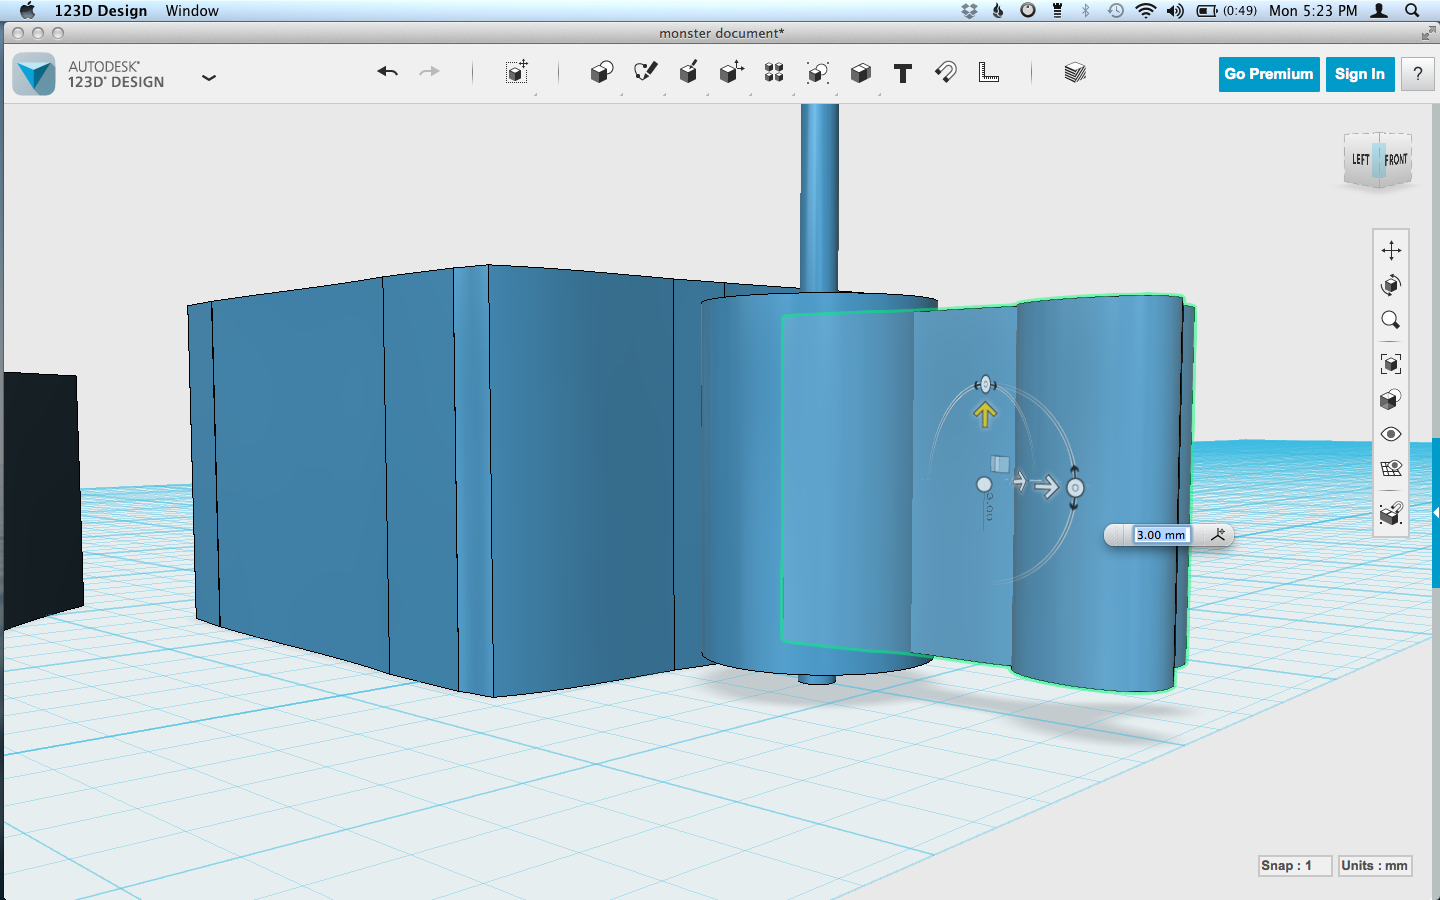
I've detailed some body joints in a previous Instructable, the hinge joint we're using here for the limbs allows them to move along just one plane, and is super simple.
The articulated body parts will be separate shapes and need to be just a bit shorter than the body. You can move them next to the body shape to check the size. There should be at least 3 or 4mm above and below the arm/leg, so 6-8mm shorter. Experiment. Perhaps larger or smaller would serve your monster better.
Create a cylinder a couple millimeters taller than your arm/legs. This will be the shape you use to cut out the opening where the moving parts will attach. The diameter of the cylinder should be about three times larger than the widest part of the end of your arm/leg/whatnot so that it has room to turn and can still be far enough from the edge.
Move the arm so that the spot where you want the hole is aligned pretty close to the center of the new cylinder.
You'll also want to make a thin cylinder to serve as the axle hole for your arm/leg/severed-head. The radius of this will vary based on what material you use for the axle. I like using wire or 1.75mm filament (I'll show you how to make easy pins from 3D printing filament in another step), and 1.3mm radius is a good size for that. The cylinder should be taller than the total size of your monster. It doesn't matter how much taller, just so that it goes all the way through.
Centering the cylinder is easiest if you create it on top of the larger cylinder. Mousing around from above, you'll find that it wants to snap to the middle. Create the cylinder and then you can then drop it to the platform using the 'd' key.
Mouse over the arm/leg/chainsaw and make sure that the cylinder is centralized on the end of the arm, with enough space on the arm to make it a hole in the arm, and not just take a bite out of the side. It can be tricky to check, unless you look at it from beneath the plate (or select all of those parts and hit spacebar to flip them beneath the plate. Spacebar again will bring them back). Adjust the location or size of the limb as needed.
Group the arm, large cylinder, and small cylinder together, then shift the group to intersect with the body. The small cylinder should be far enough from the edge so that it can form a proper hole. Once it's in place, ungroup them.
Finally, you'll need to align the parts vertically. The large cylinder goes midway up the side of the body, the limb goes midway up the side of the large cylinder. The tall cylinder still needs to go through everything.
Making Holes
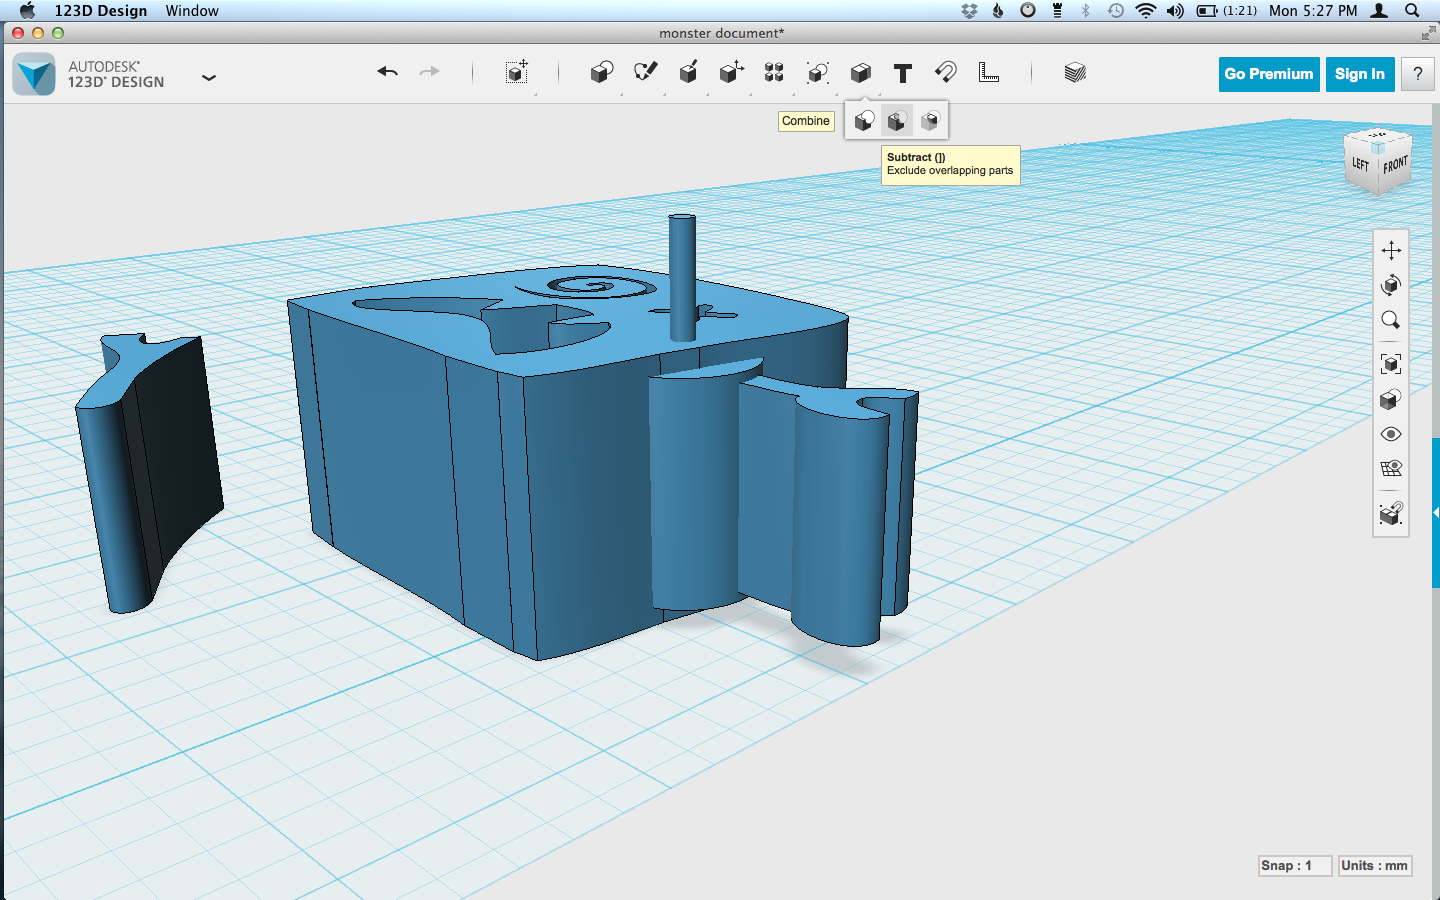
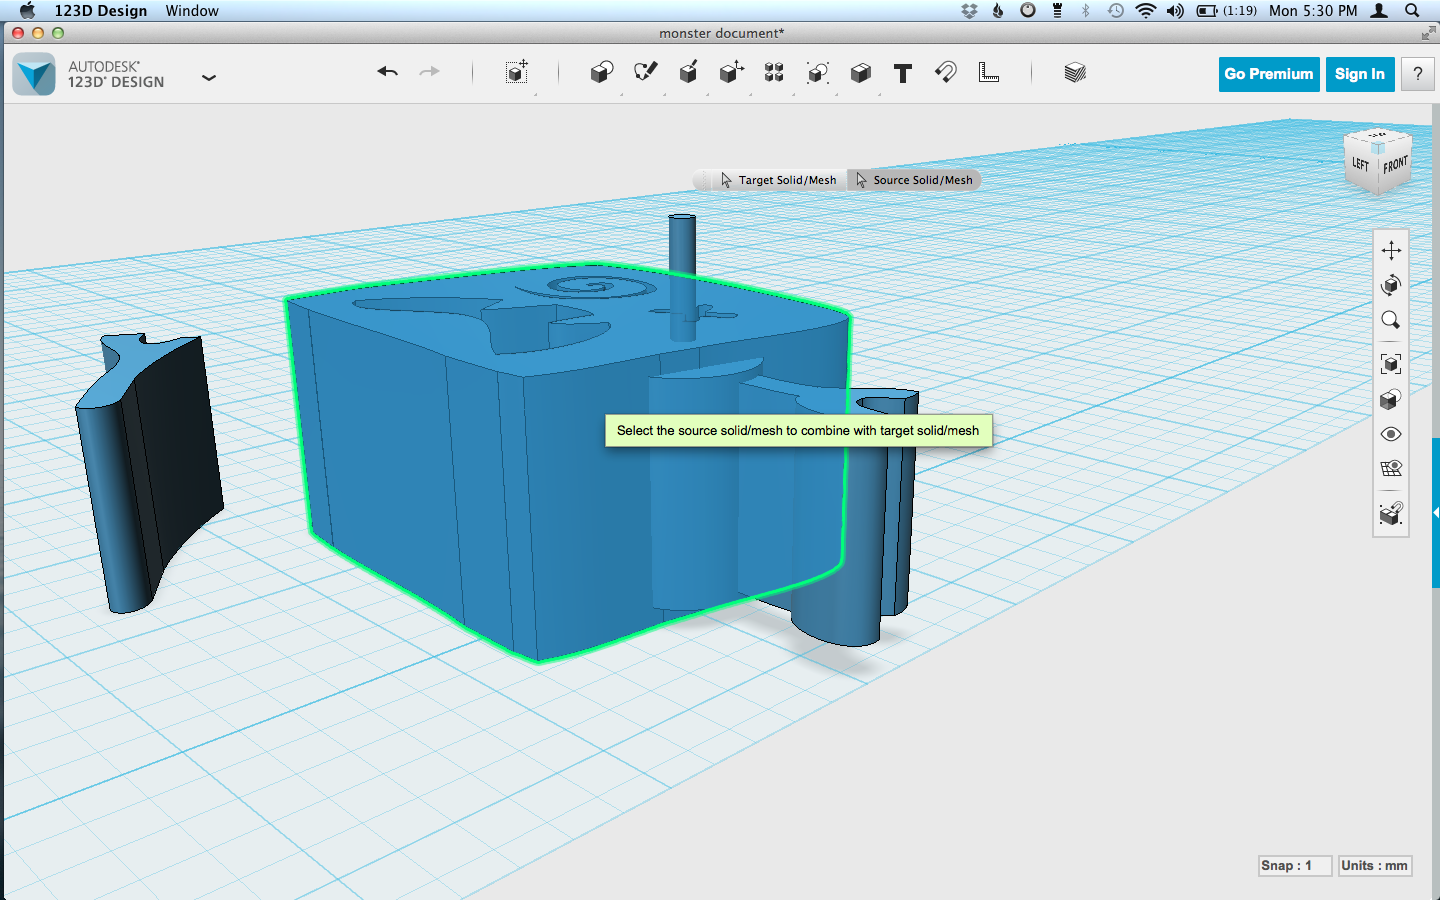
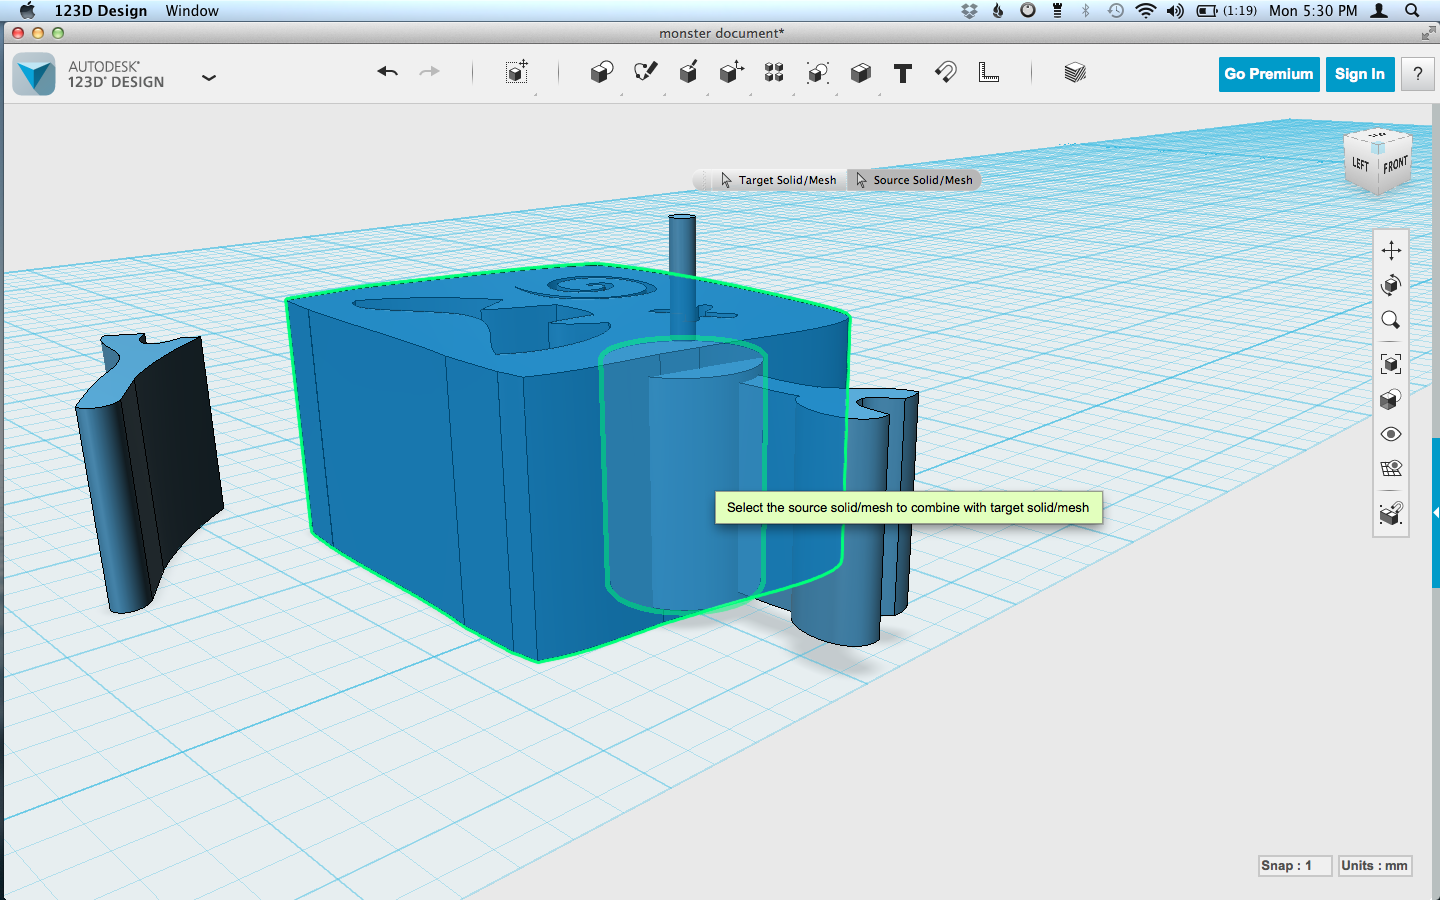
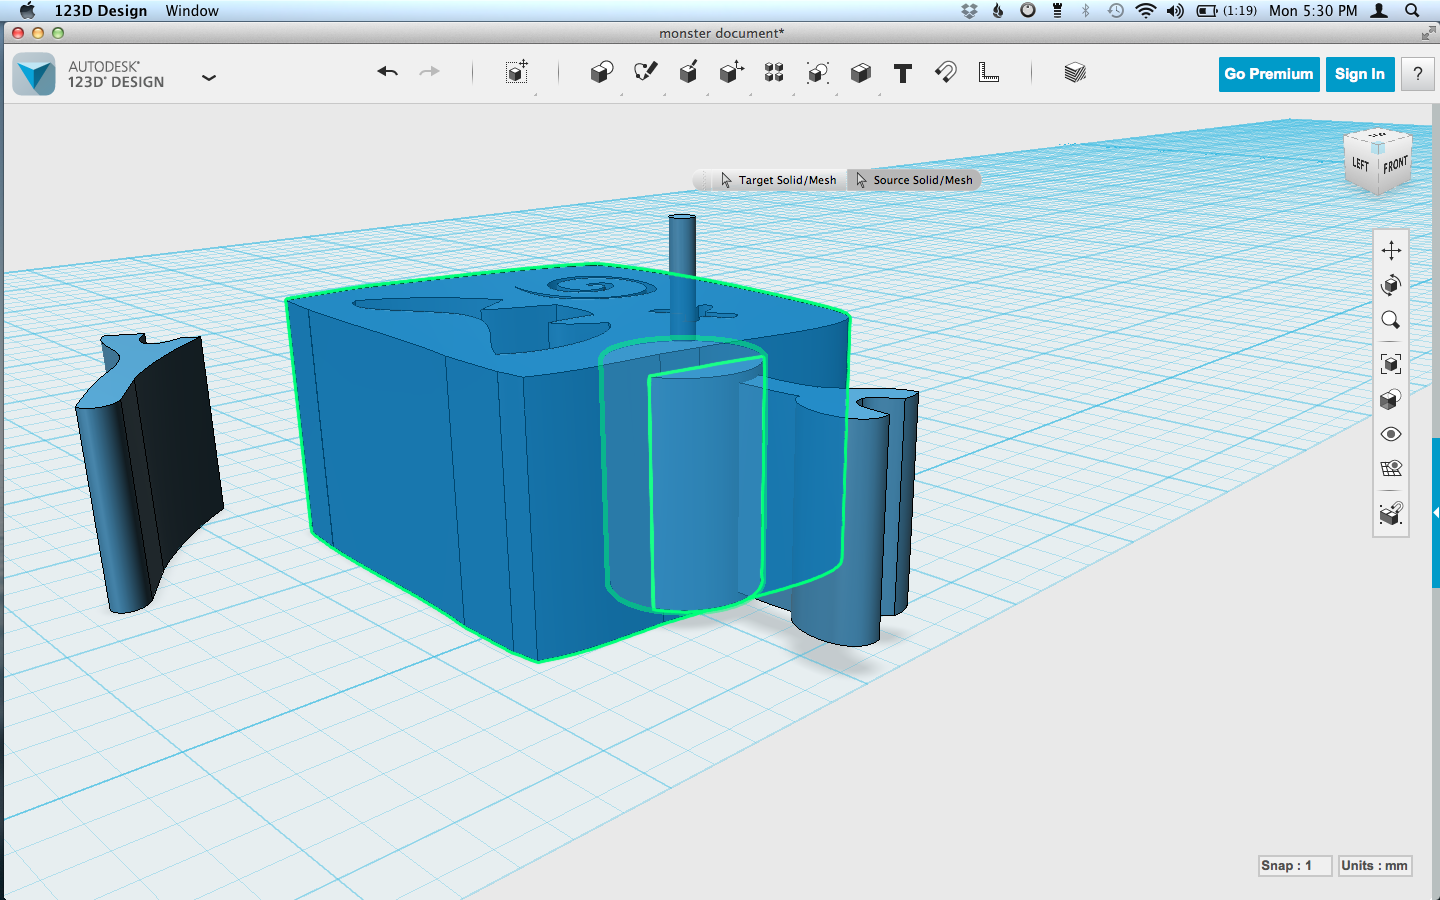
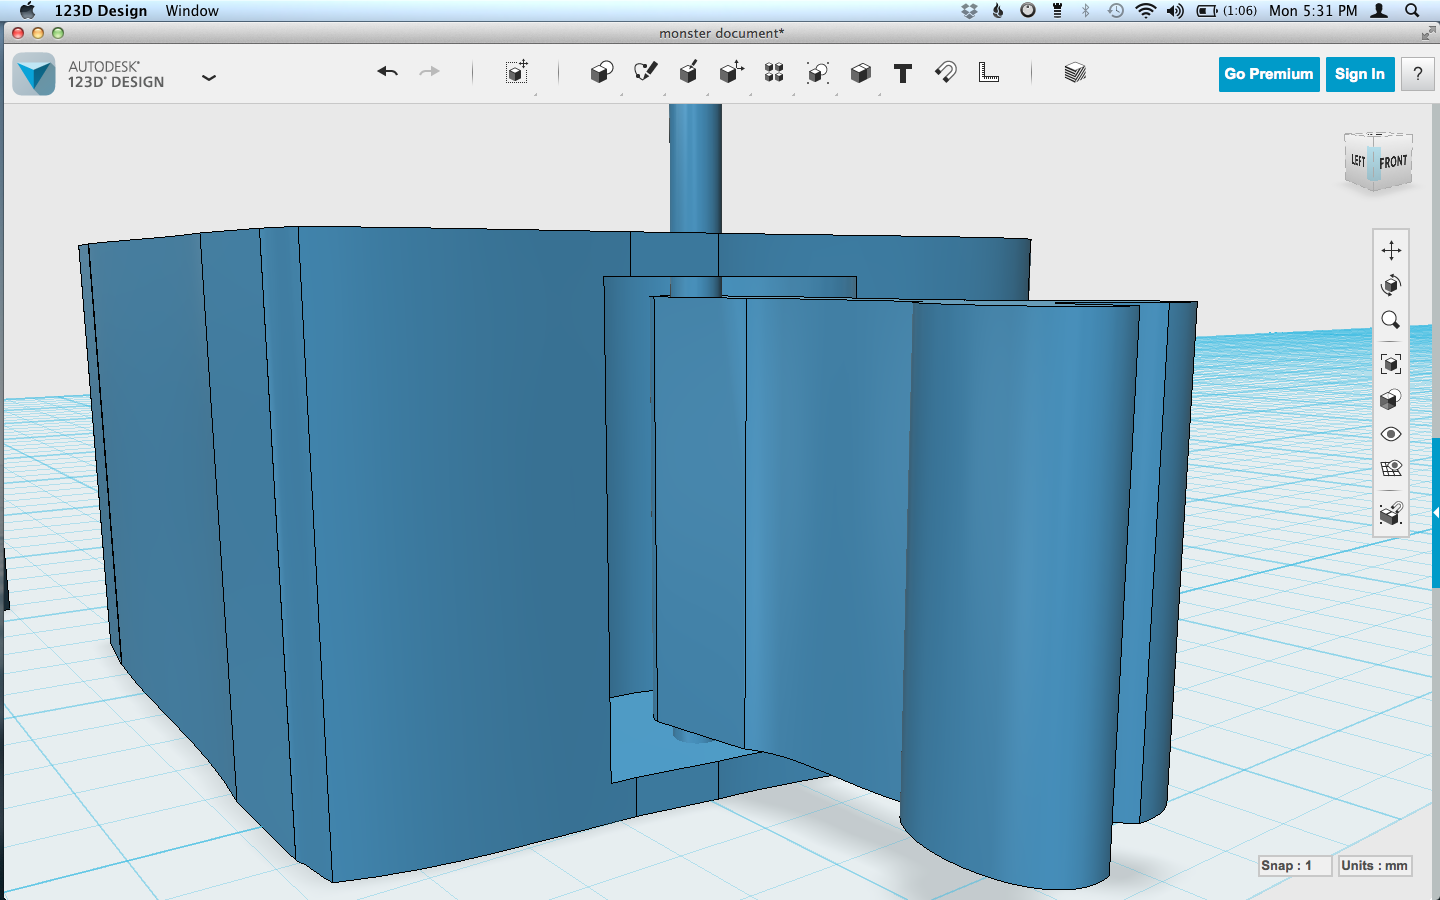
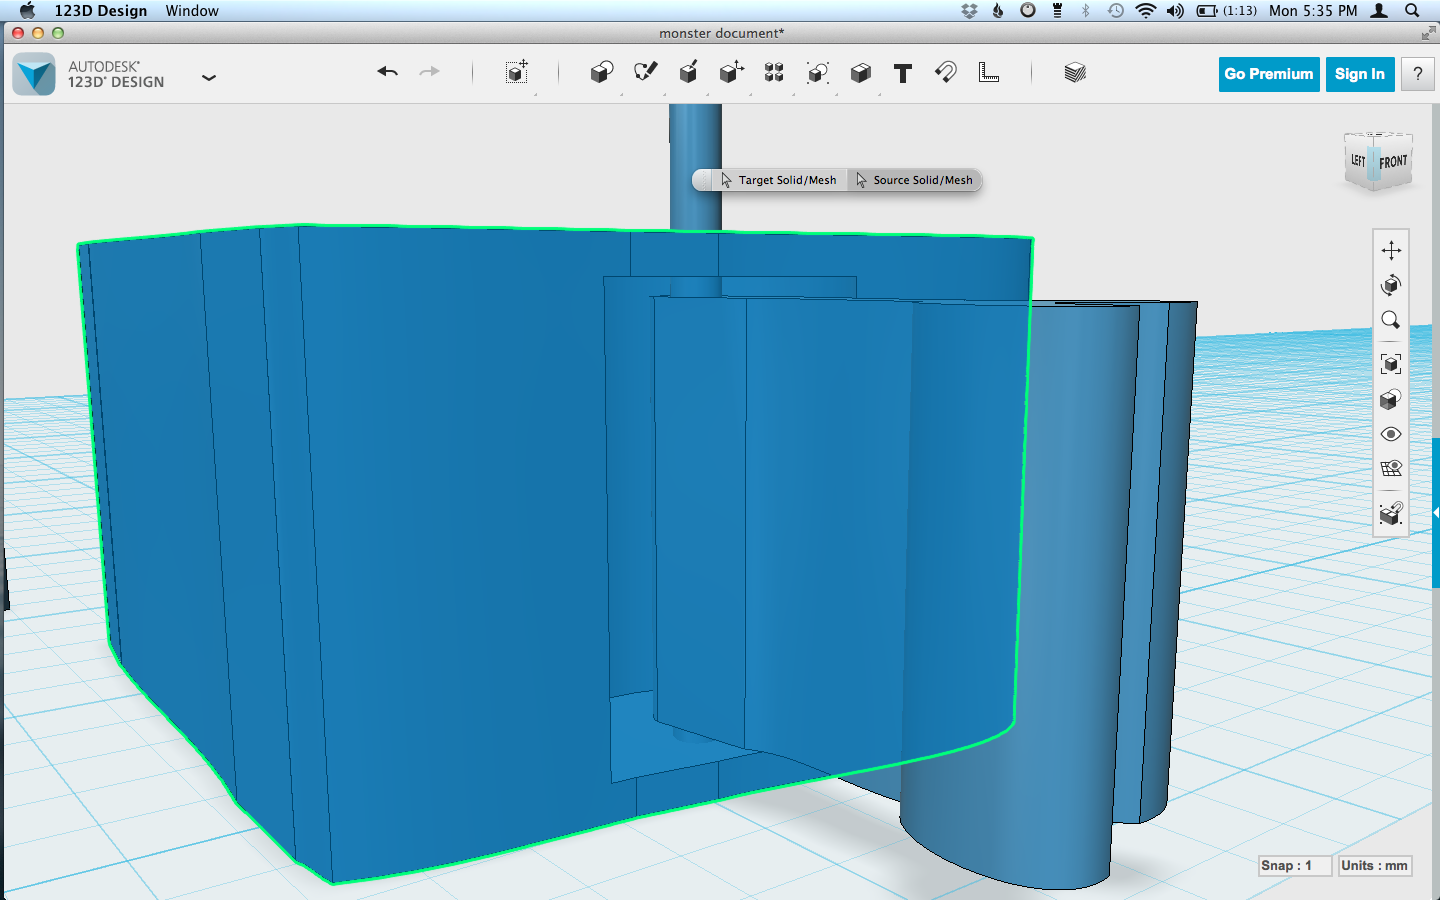
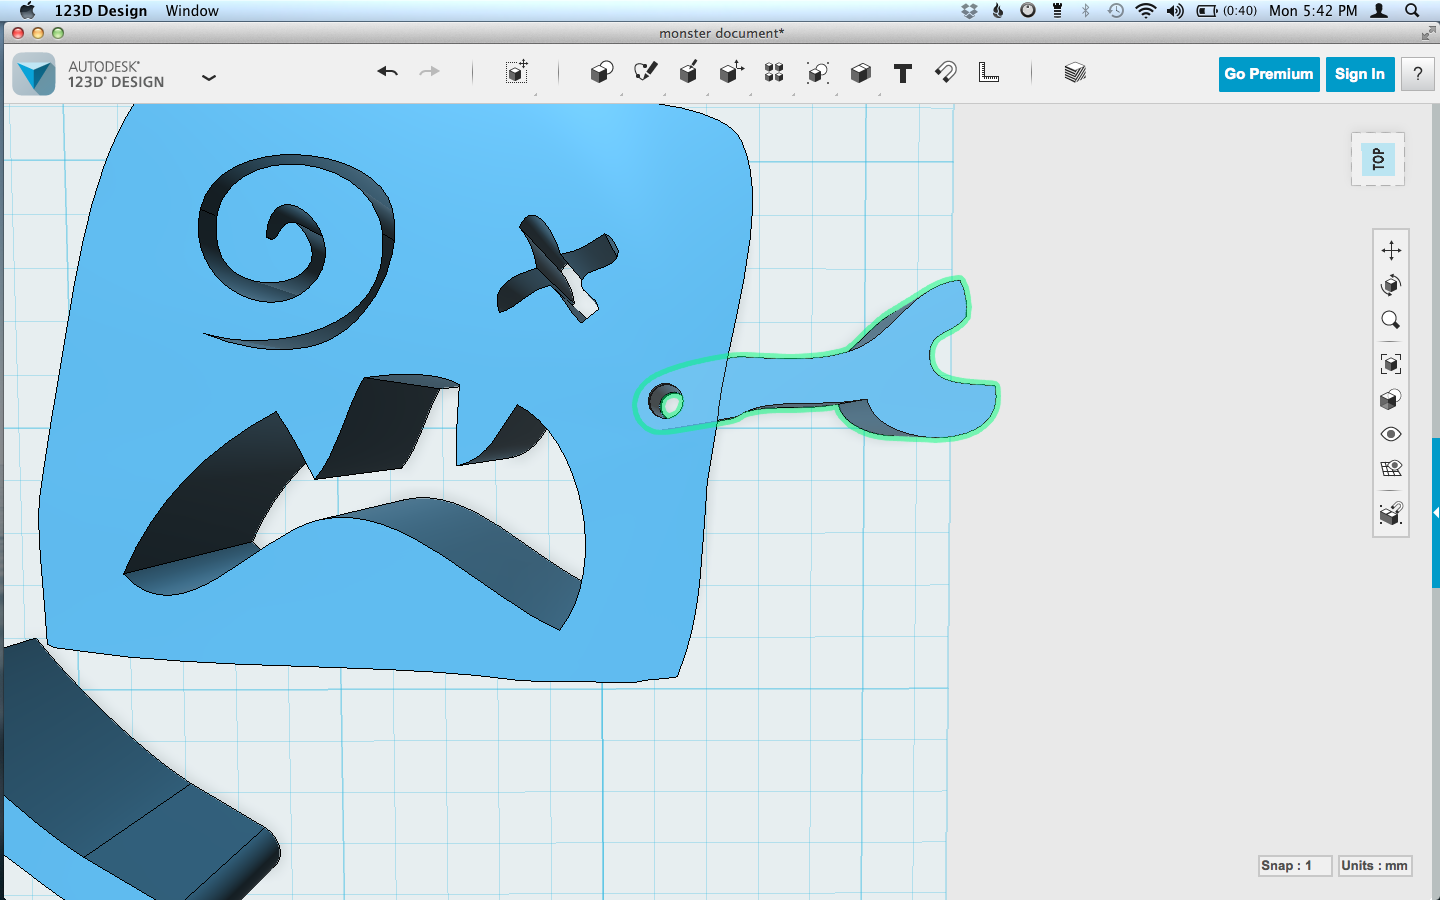
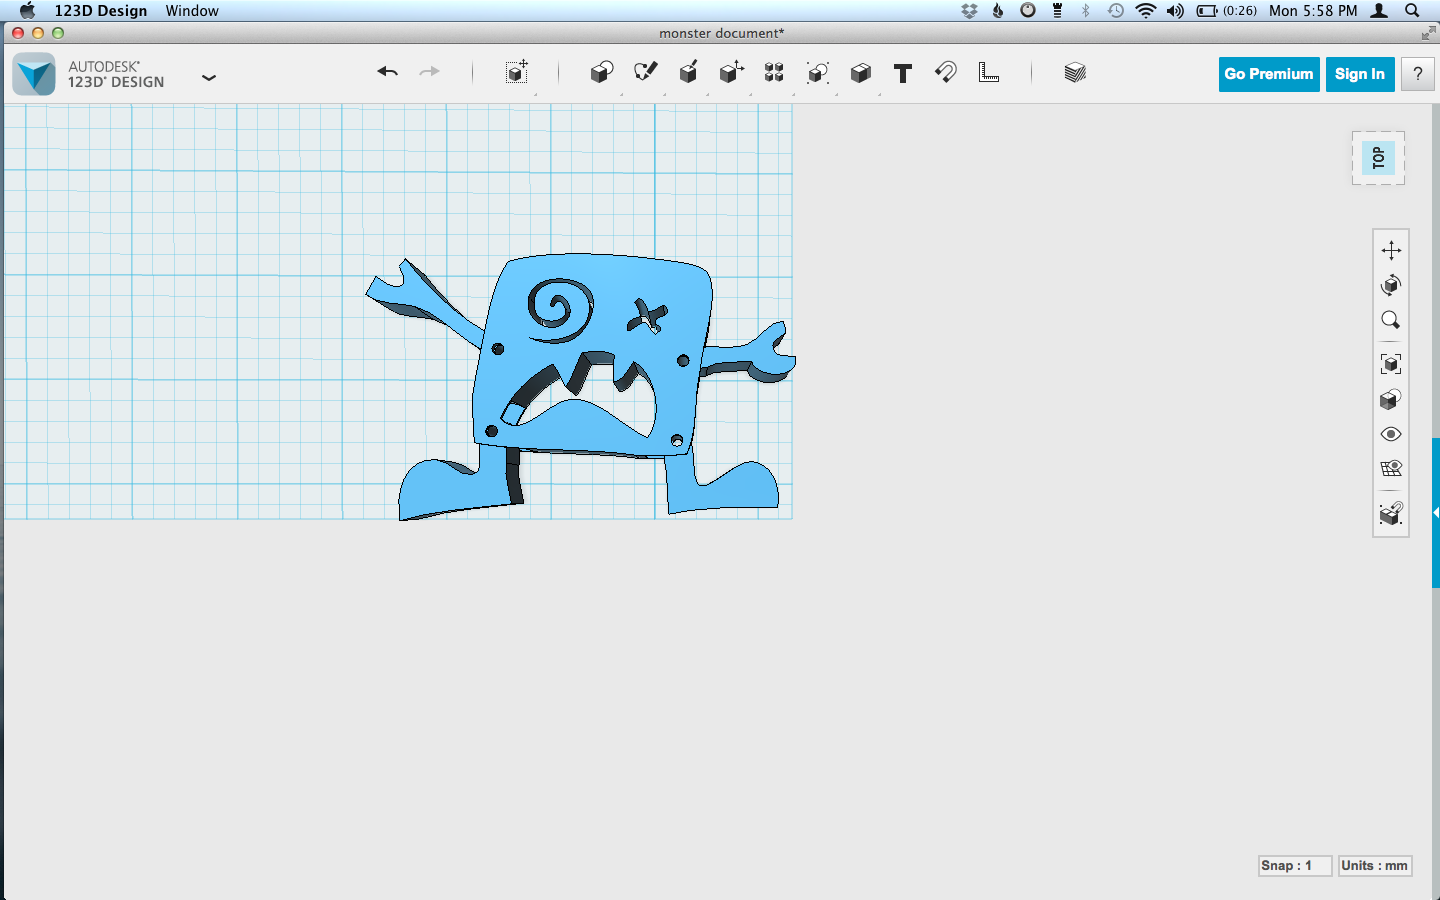
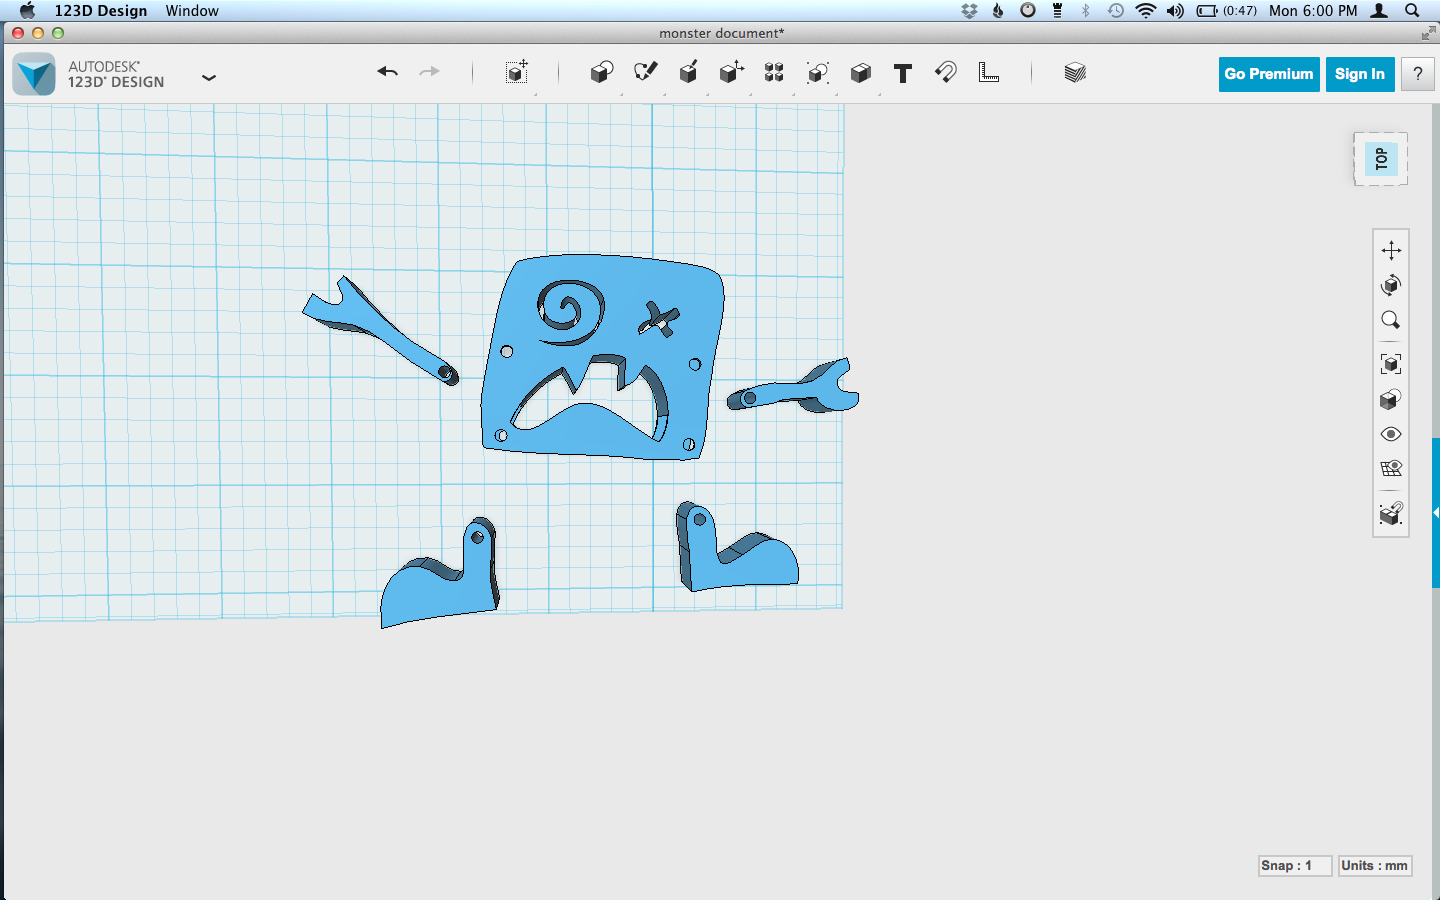
First is to cut the large cylinder shape out of the body. In the combine menu, choose subtract. First select the body (target), then the large cylinder (source), and hit return (or enter, or whatever your keyboard likes). It should give you a nice chunk out of the side of the body, centered so that there is still body above and below it. The arm and small cylinder should still be there. If the hole reaches the top or bottom of the body shape, undo and make sure the large cylinder is centered vertically.
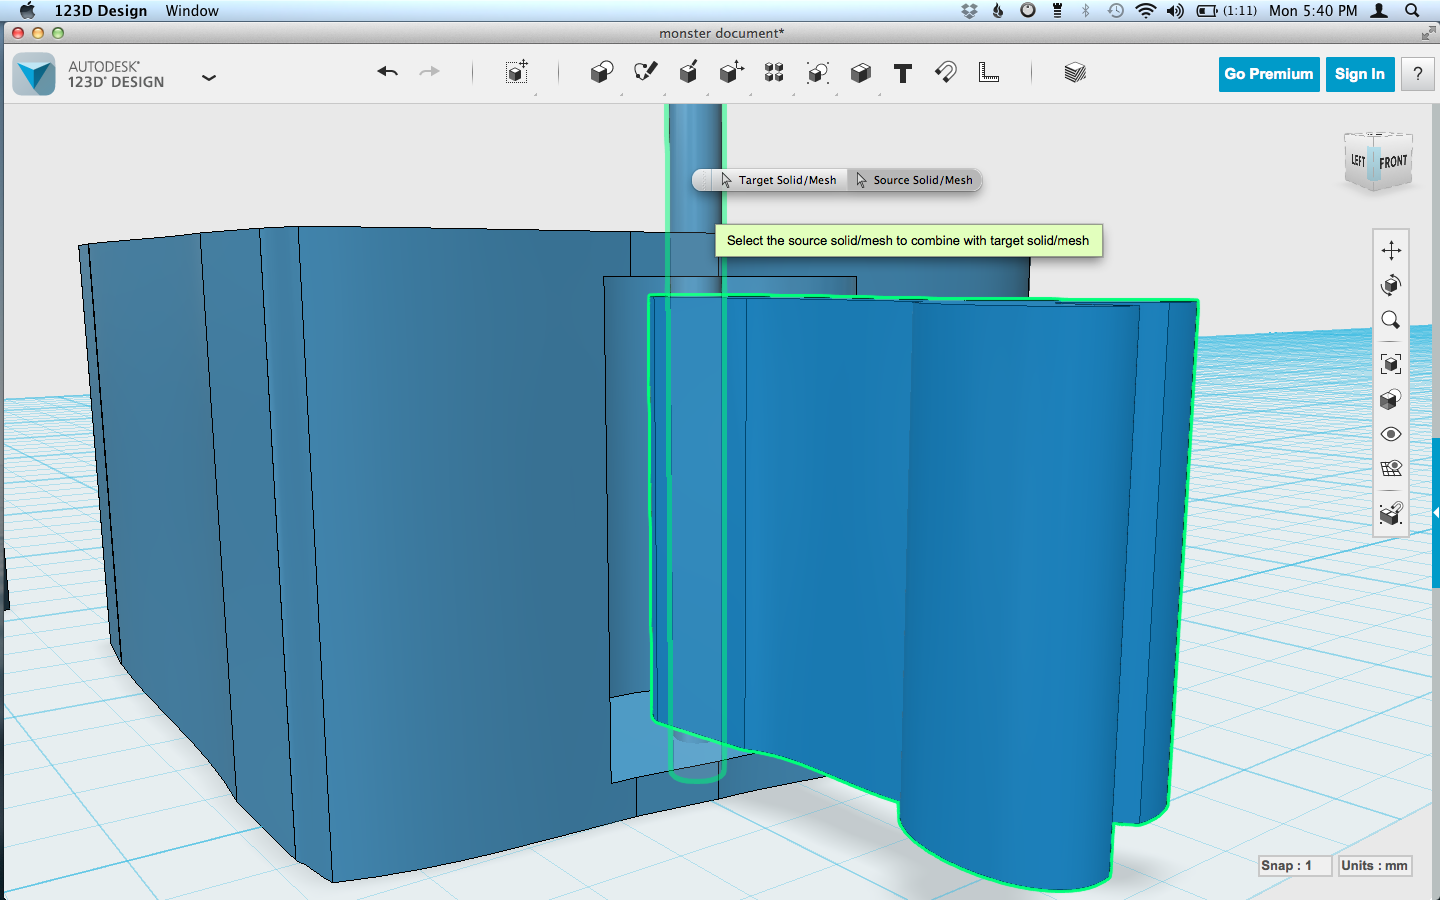
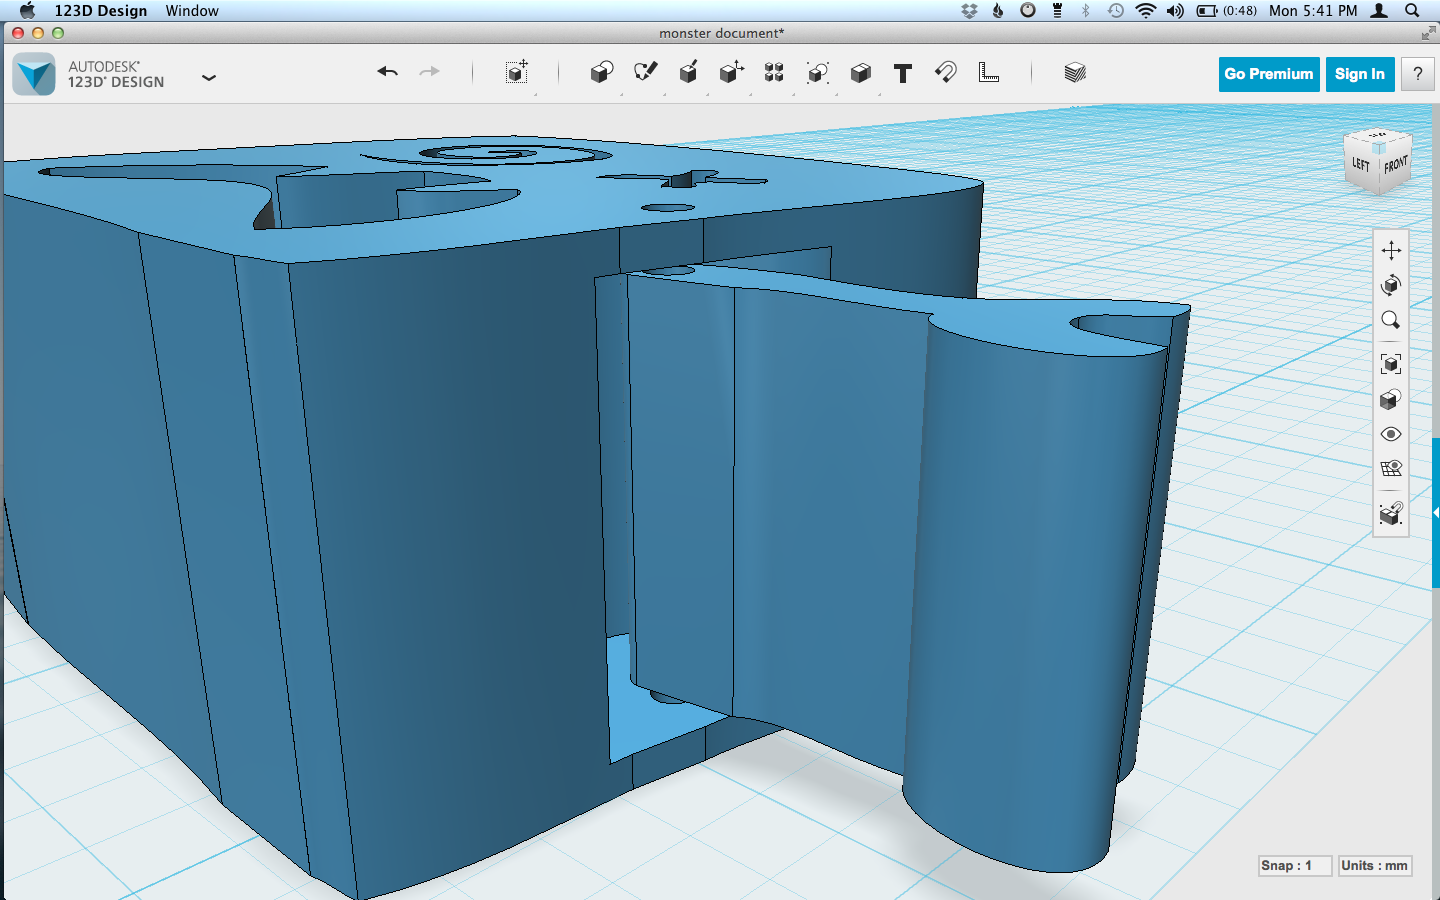
Next you'll want to make the holes for the hinge axle, which is what the thin, tall cylinder is for. There are two parts that we want to make holes in, so select the tall cylinder, copy and paste, then just hit return or click off of the shape. This makes a duplicate of the shape in the same place. Go to Combine > Subtract again, and select the body, then select the tall cylinder as Source. Hit return. It'll look like nothing happened, but that's because we made a duplicate of the tall cylinder. Repeat the process for the arm, and tada, you'll have holes that go straight through the body and arm.
Repeat for all other limbs, then move all the limbs away from the body and drop them to the plate ('d'). Export the STL, and you'll be ready to print! If you'd like, you can play around some more with your shapes, perhaps add some Fillet or Beveling, add lightning hair, customize it some more.
Print!
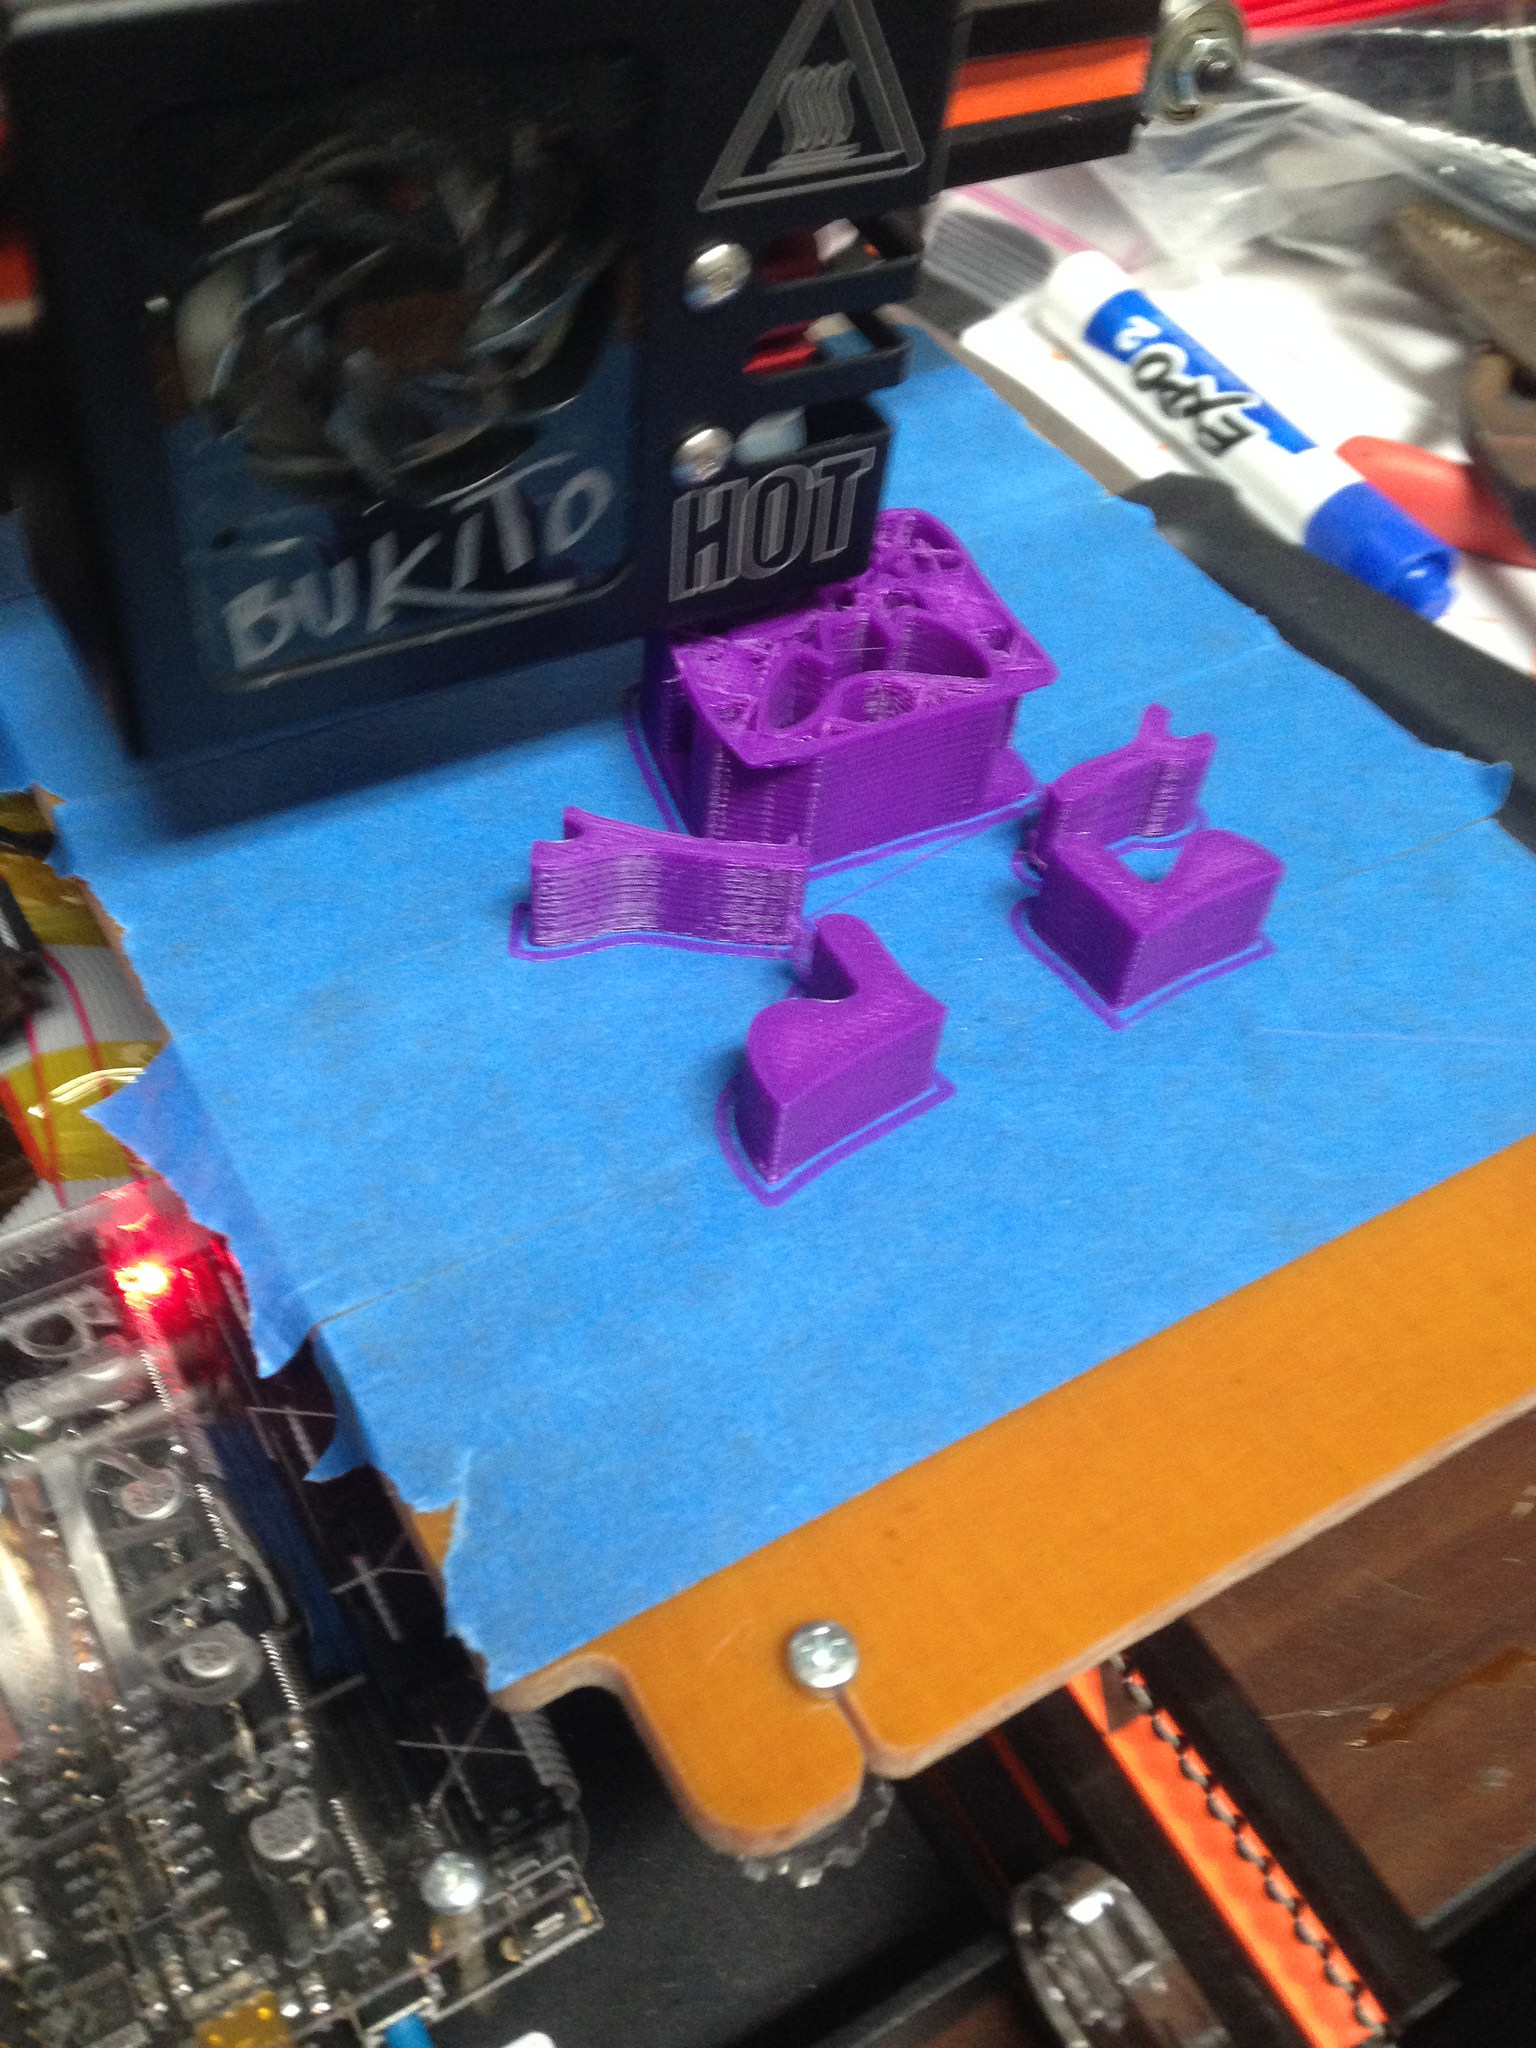
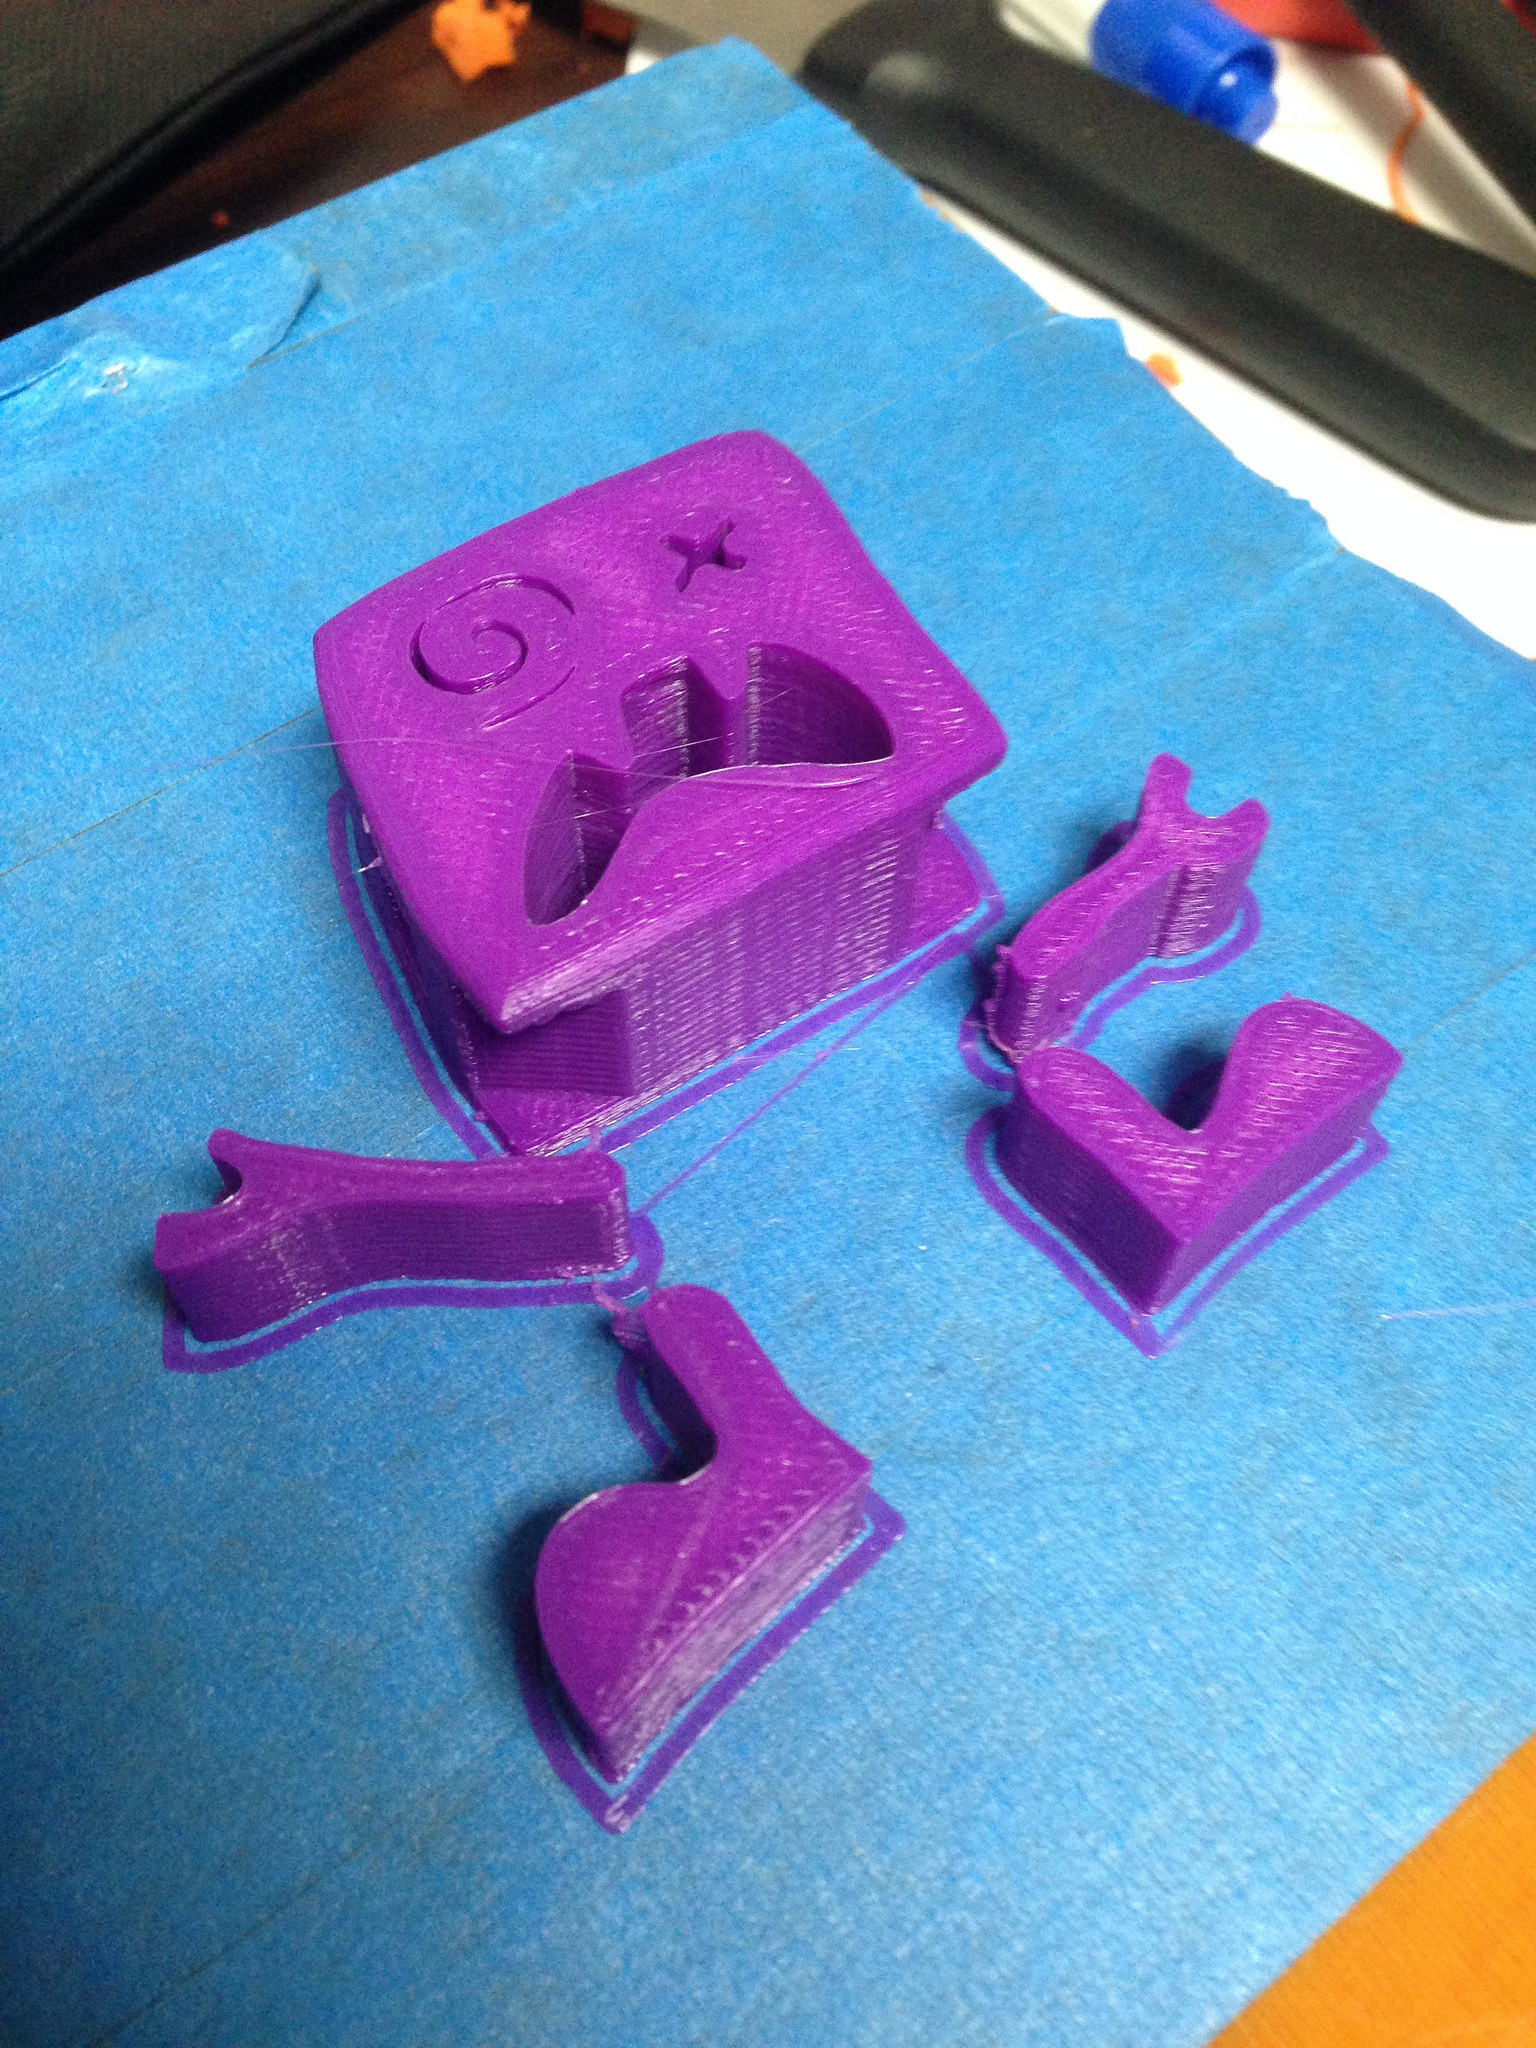
Print it! The steps from here will vary based on your printer and its software. Or you can send it off and have someone else print it. There are some pretty severe overhangs for this, so you're likely to need supports.
Attaching Your Arms/Legs/Claws
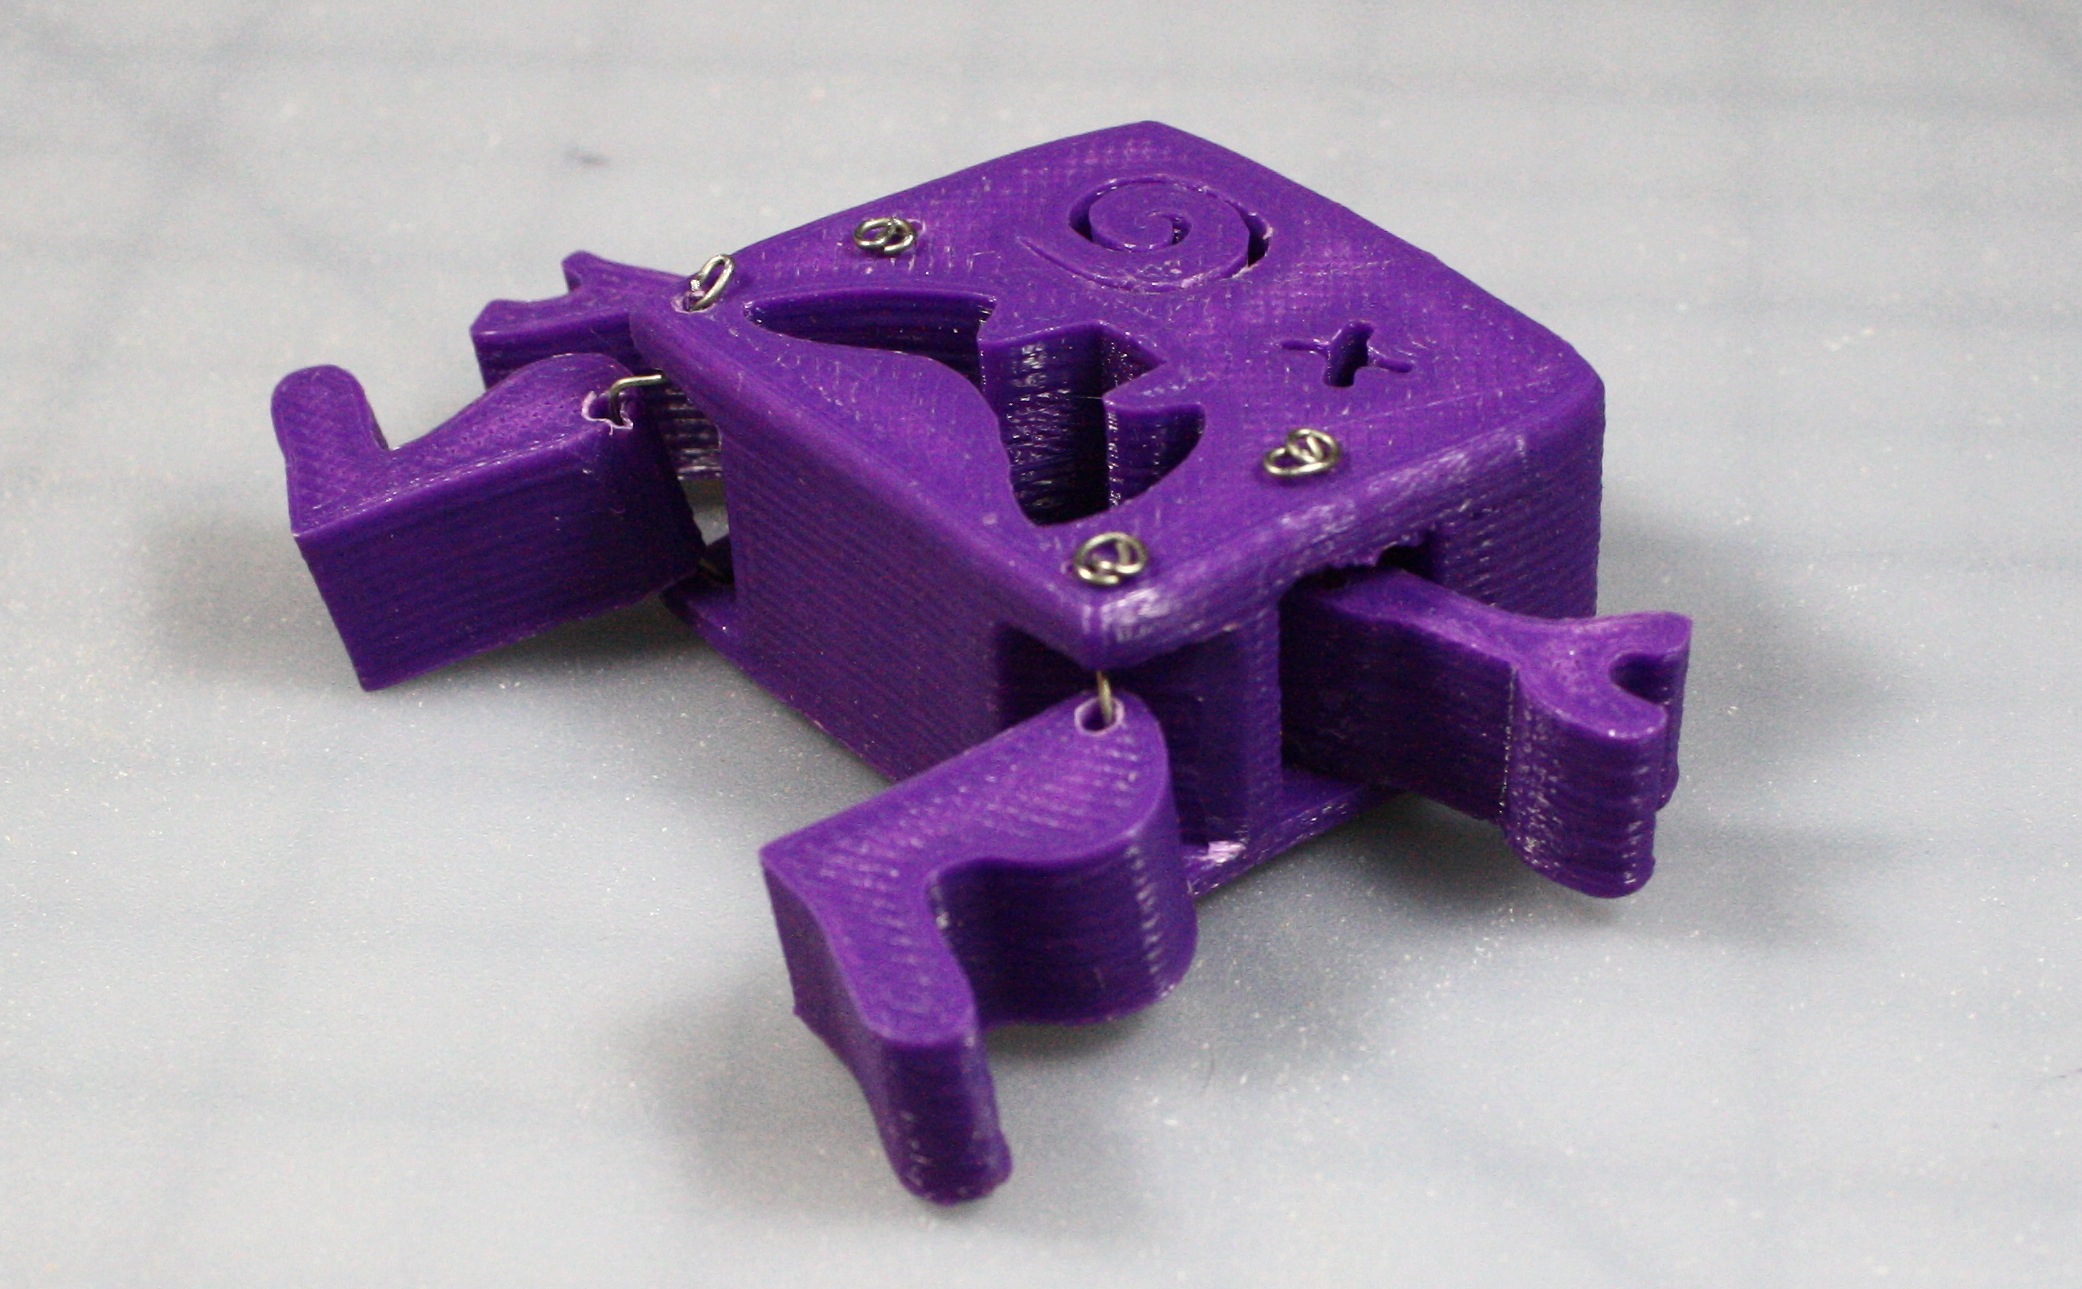
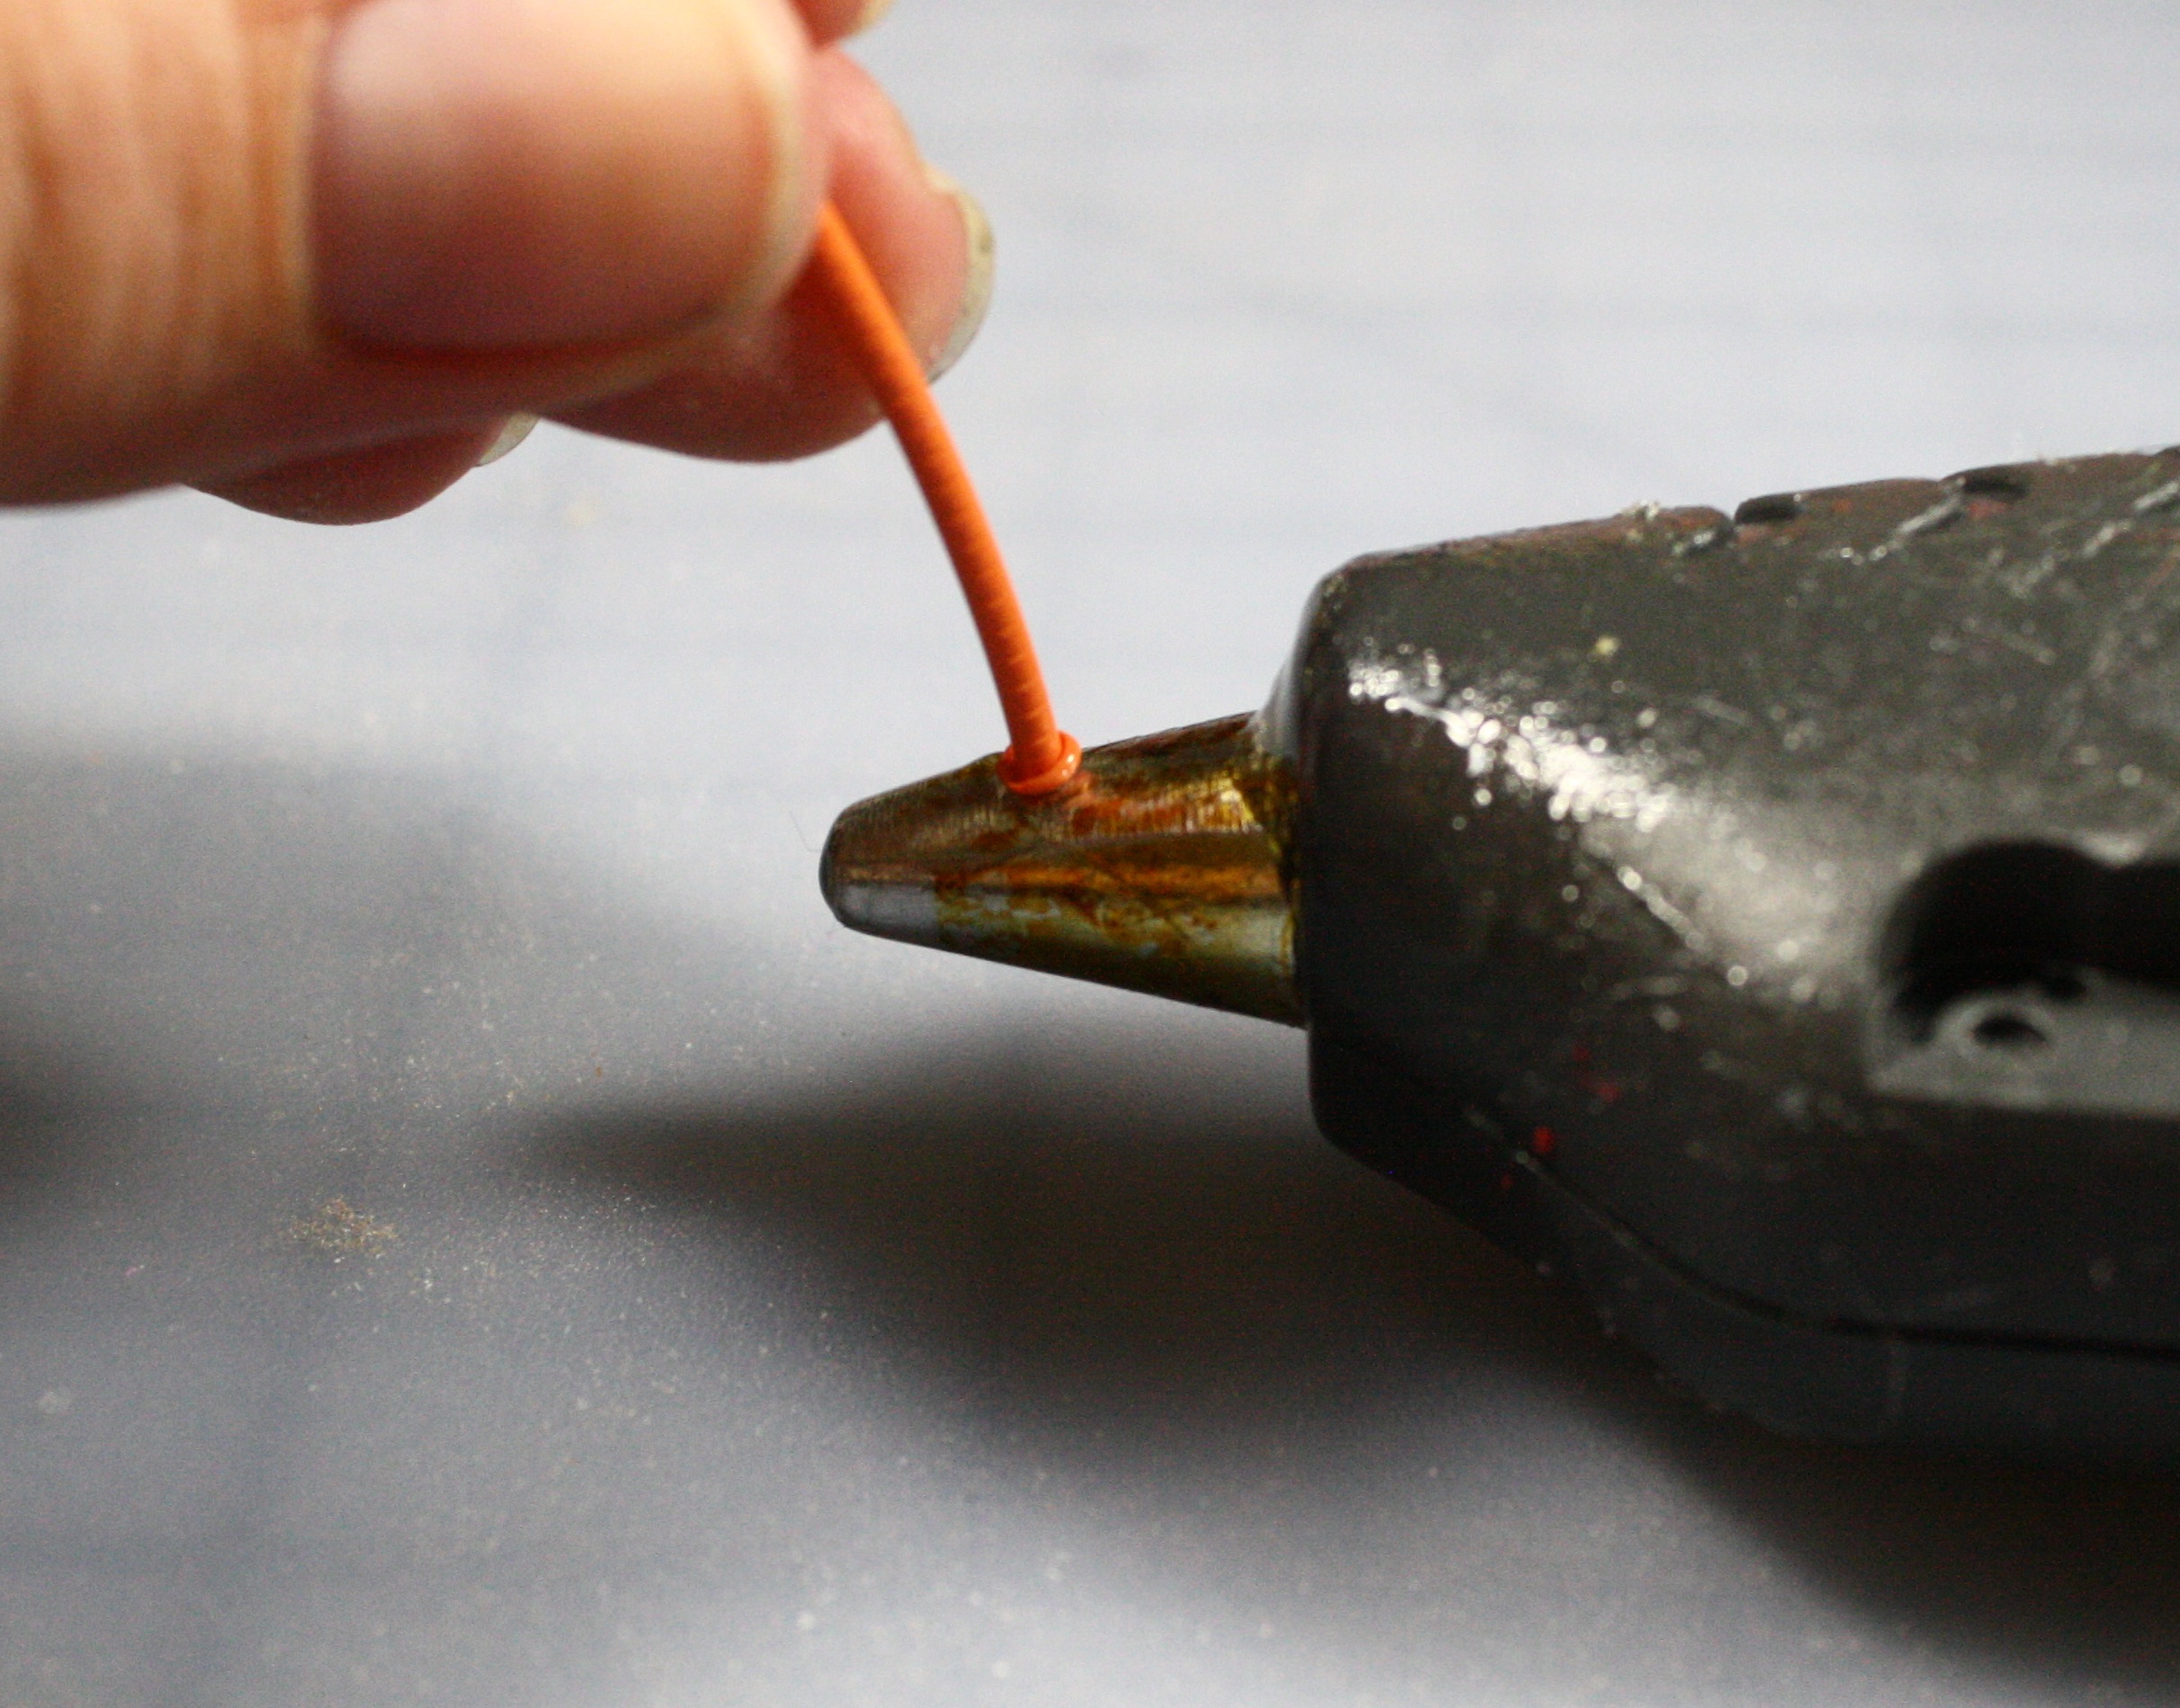
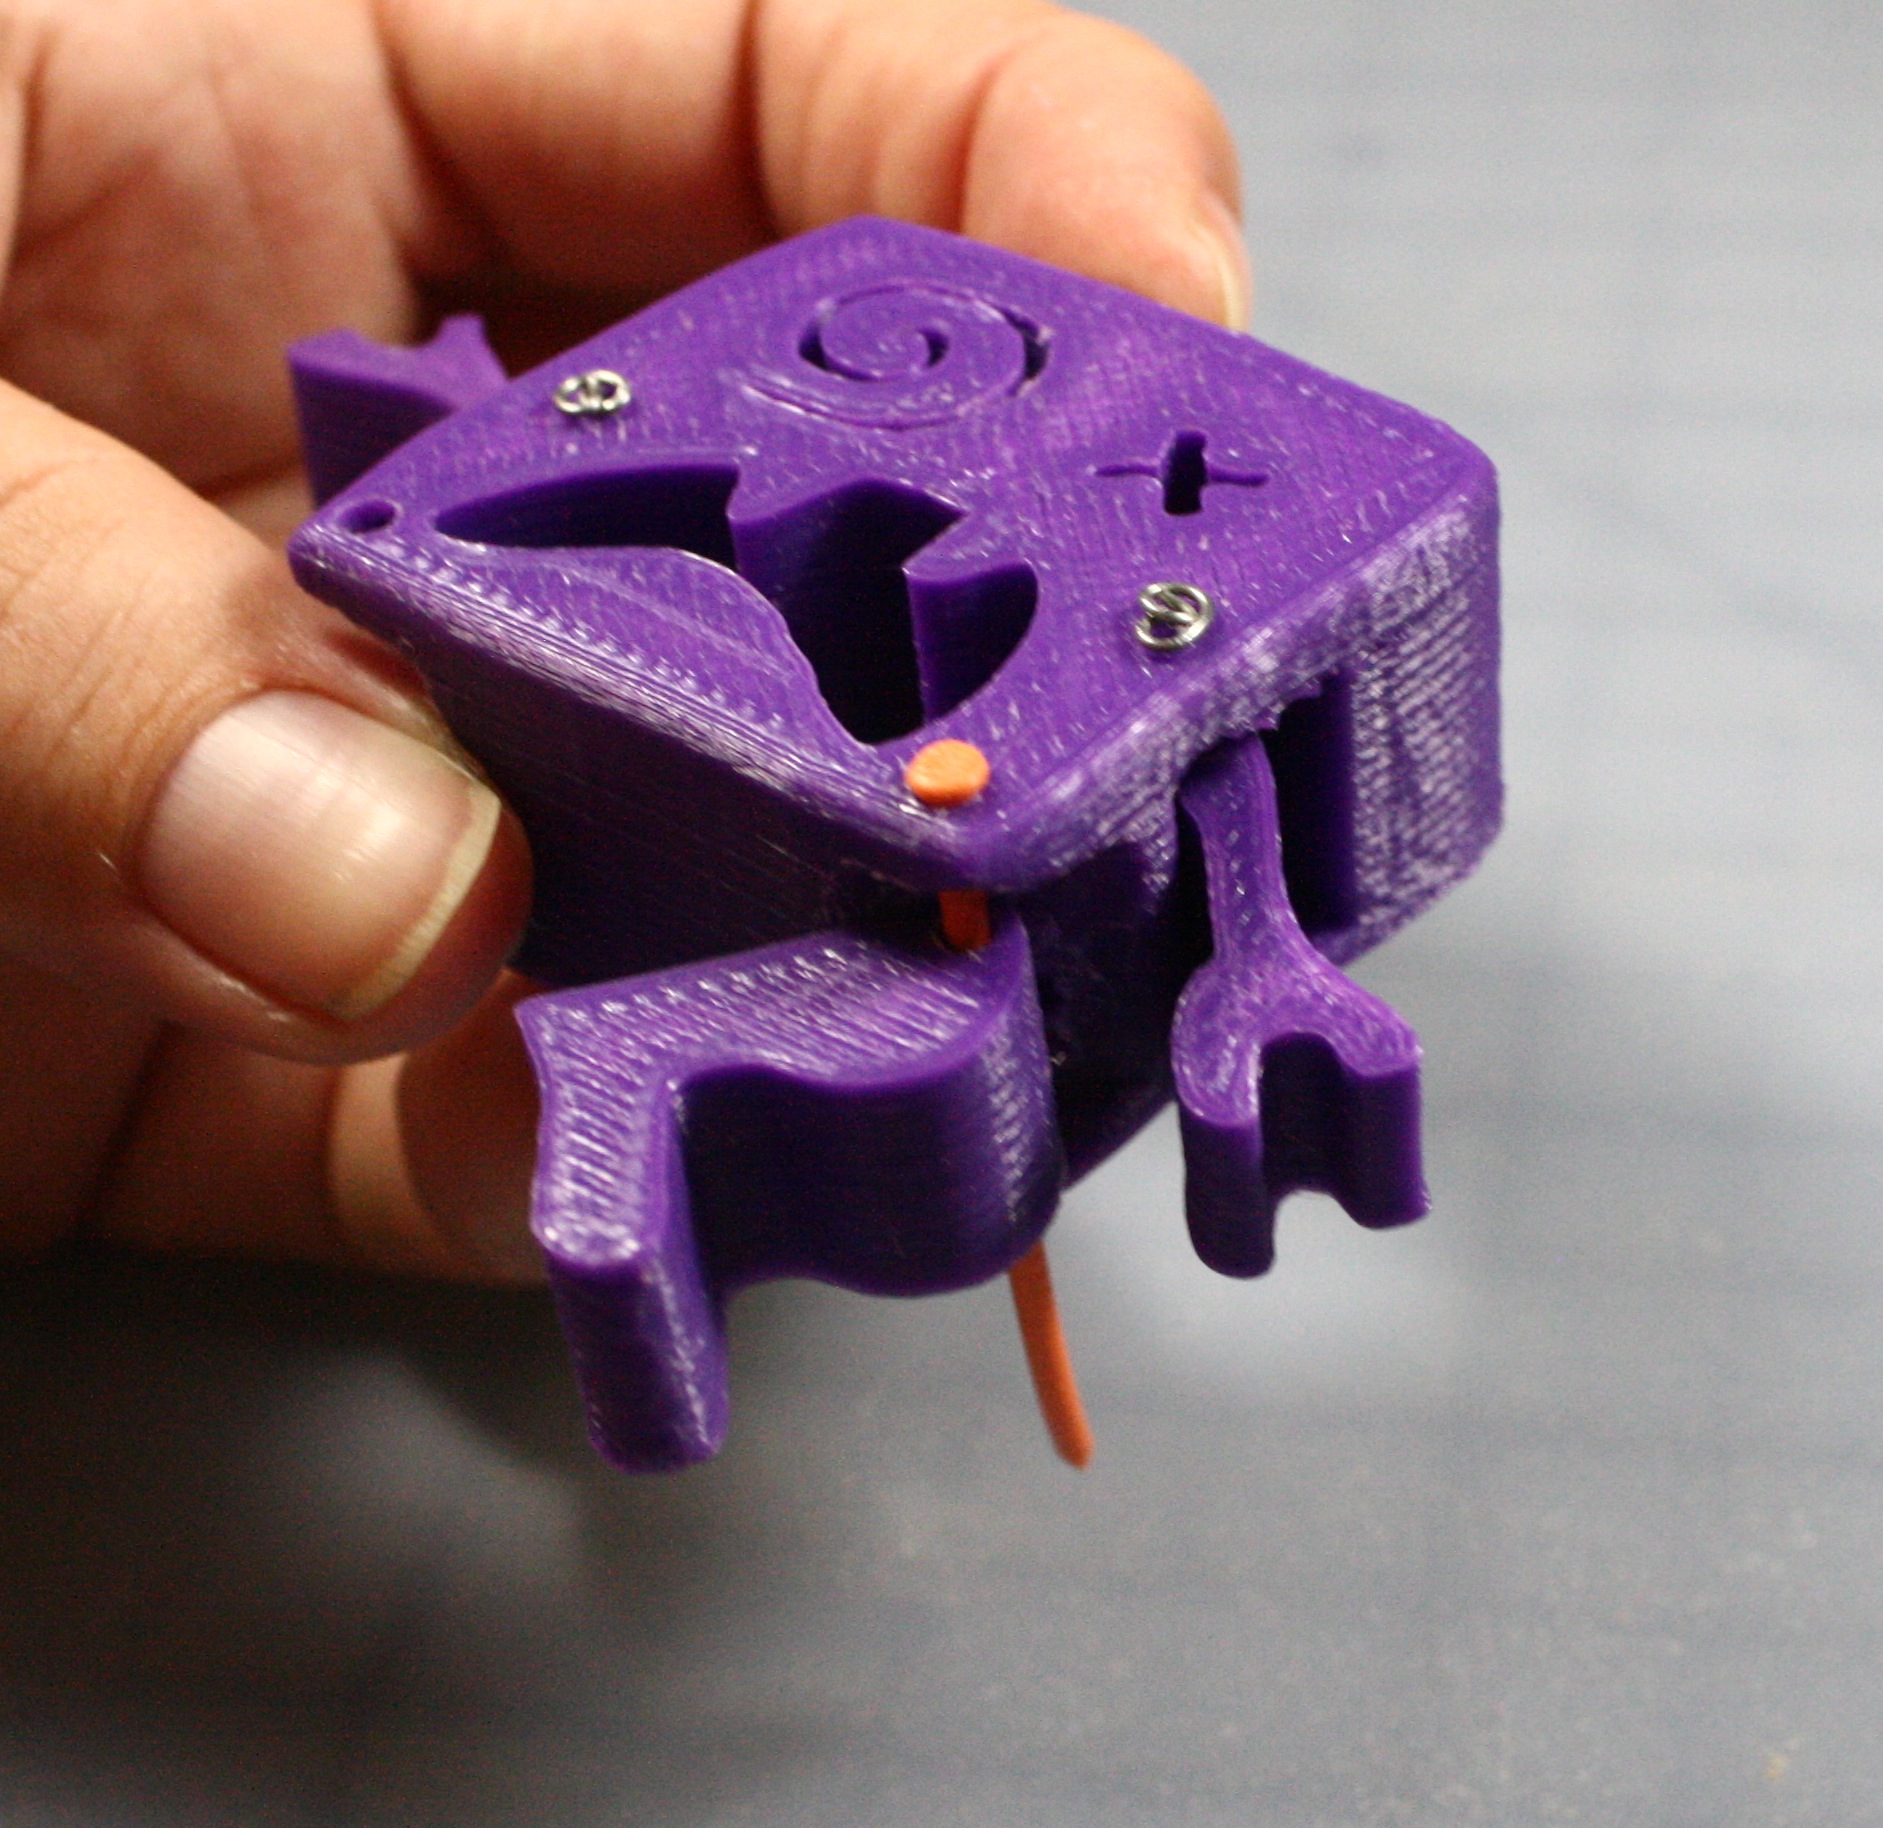
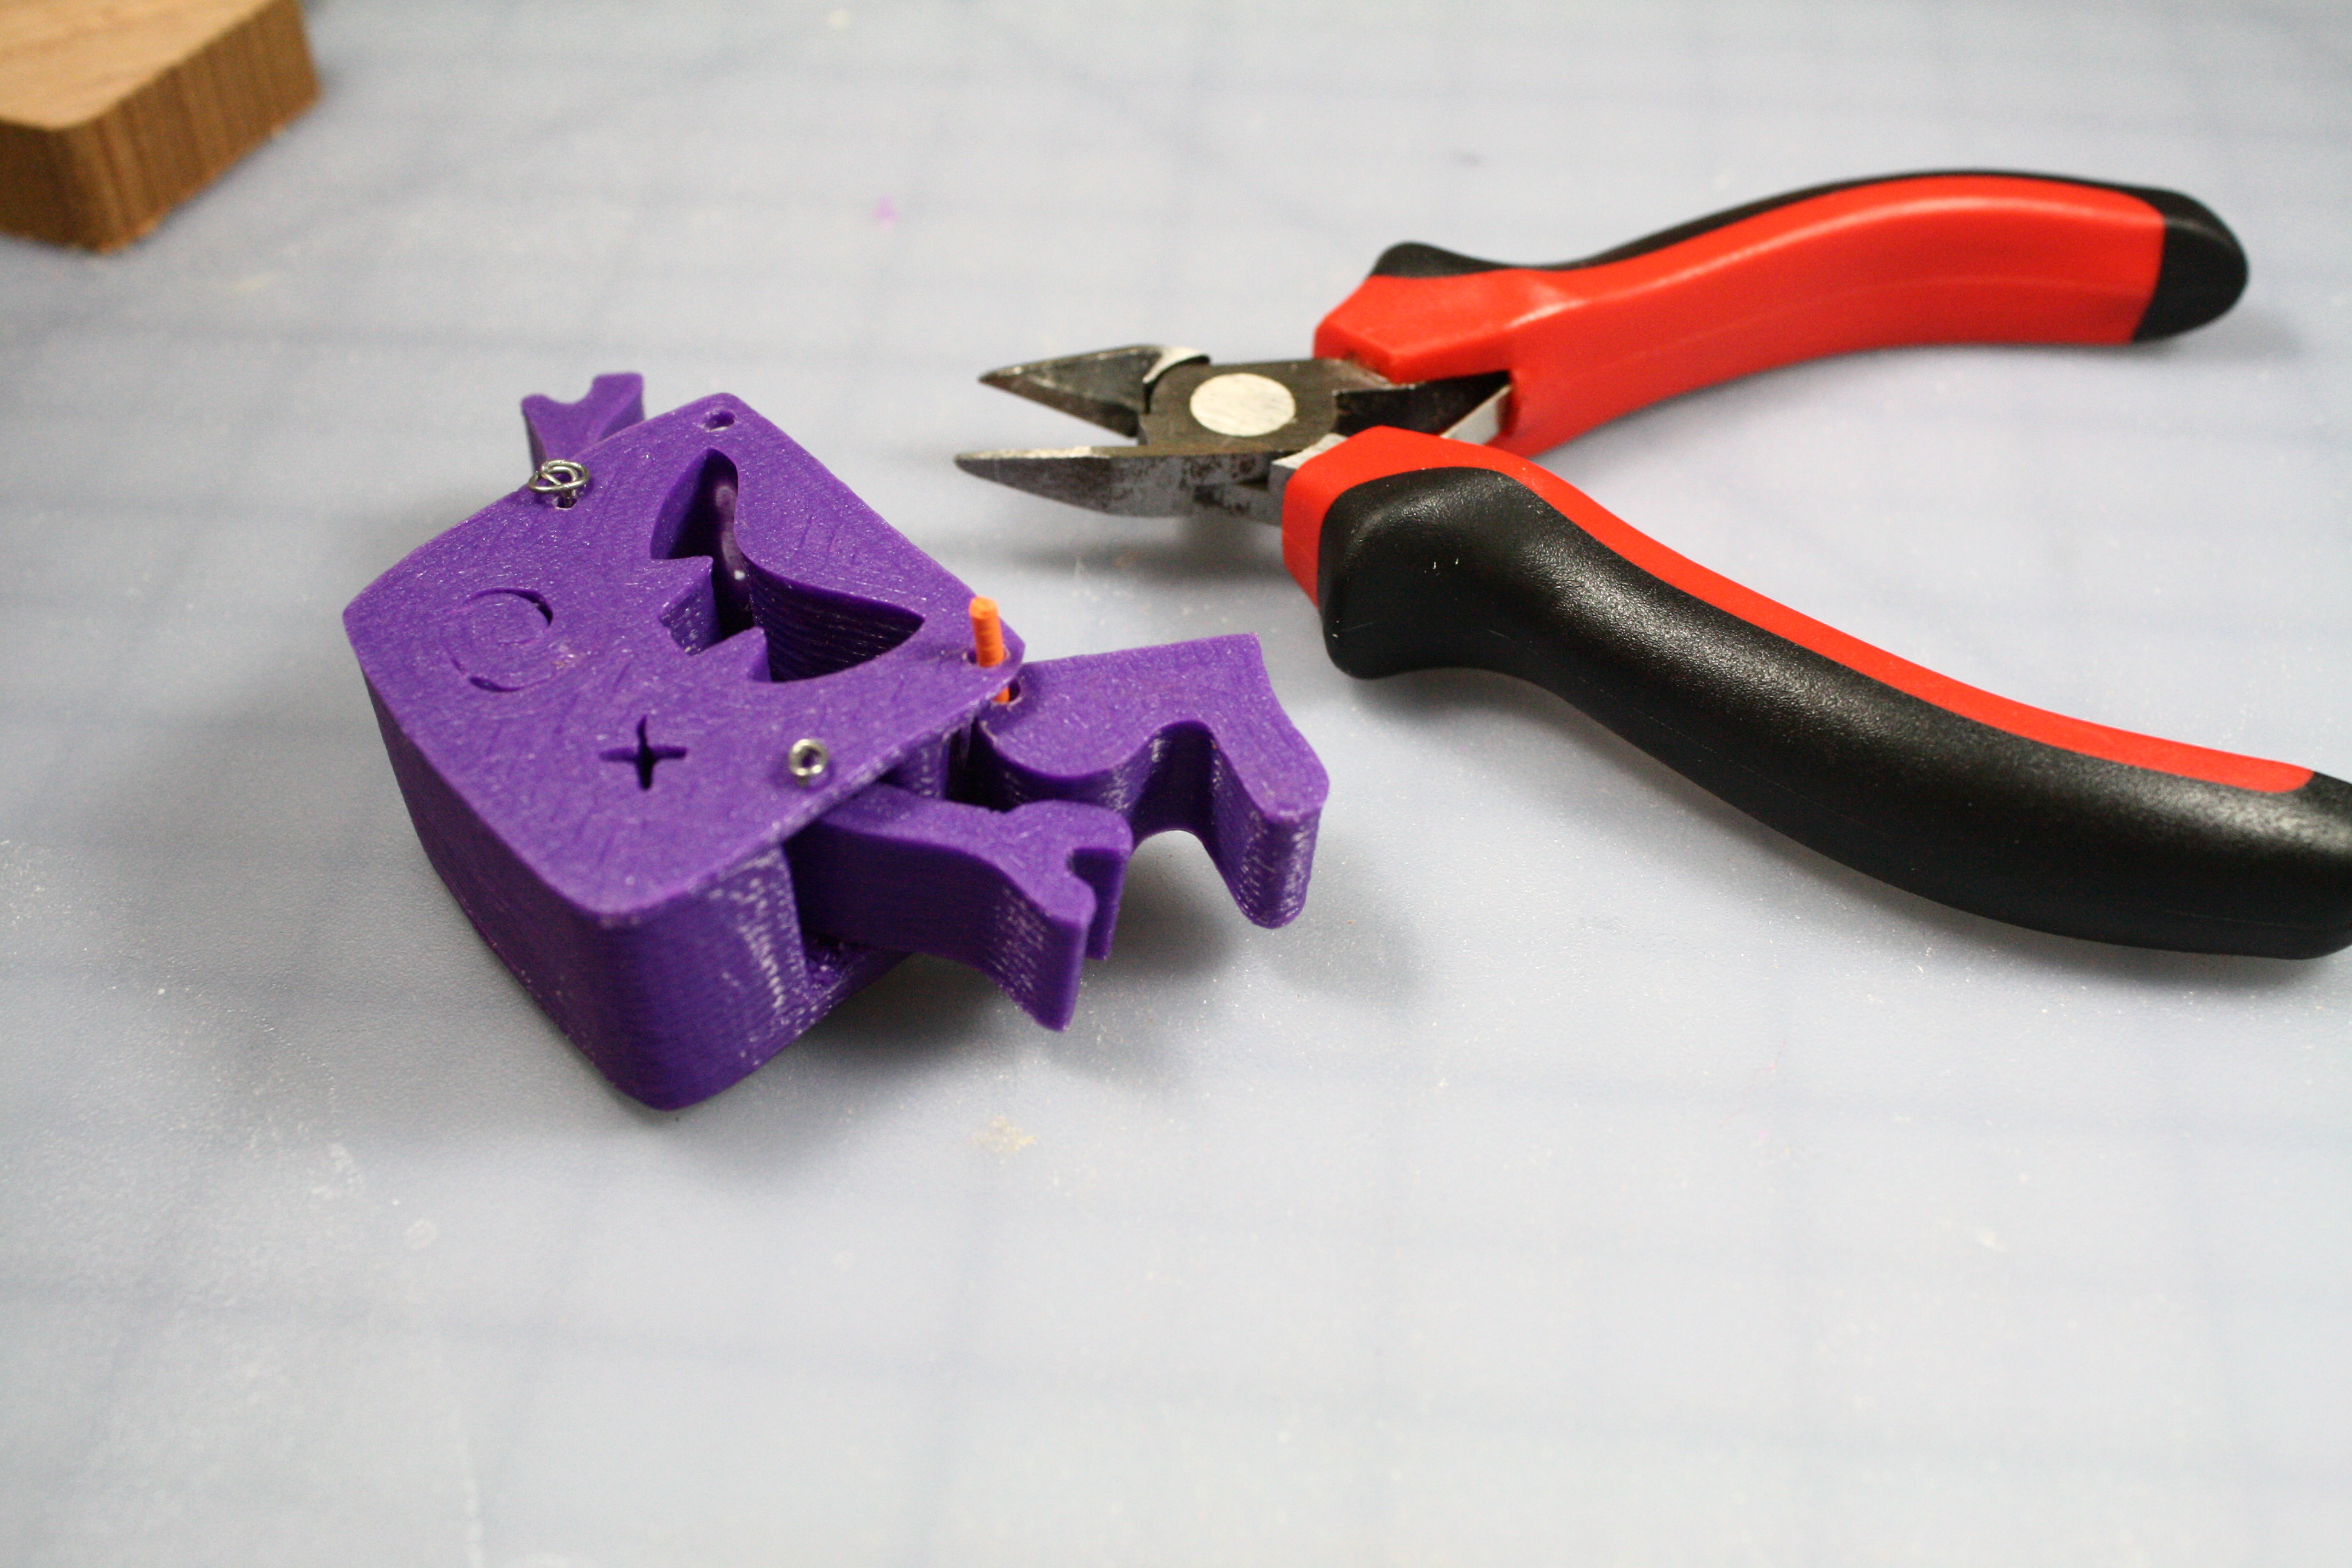
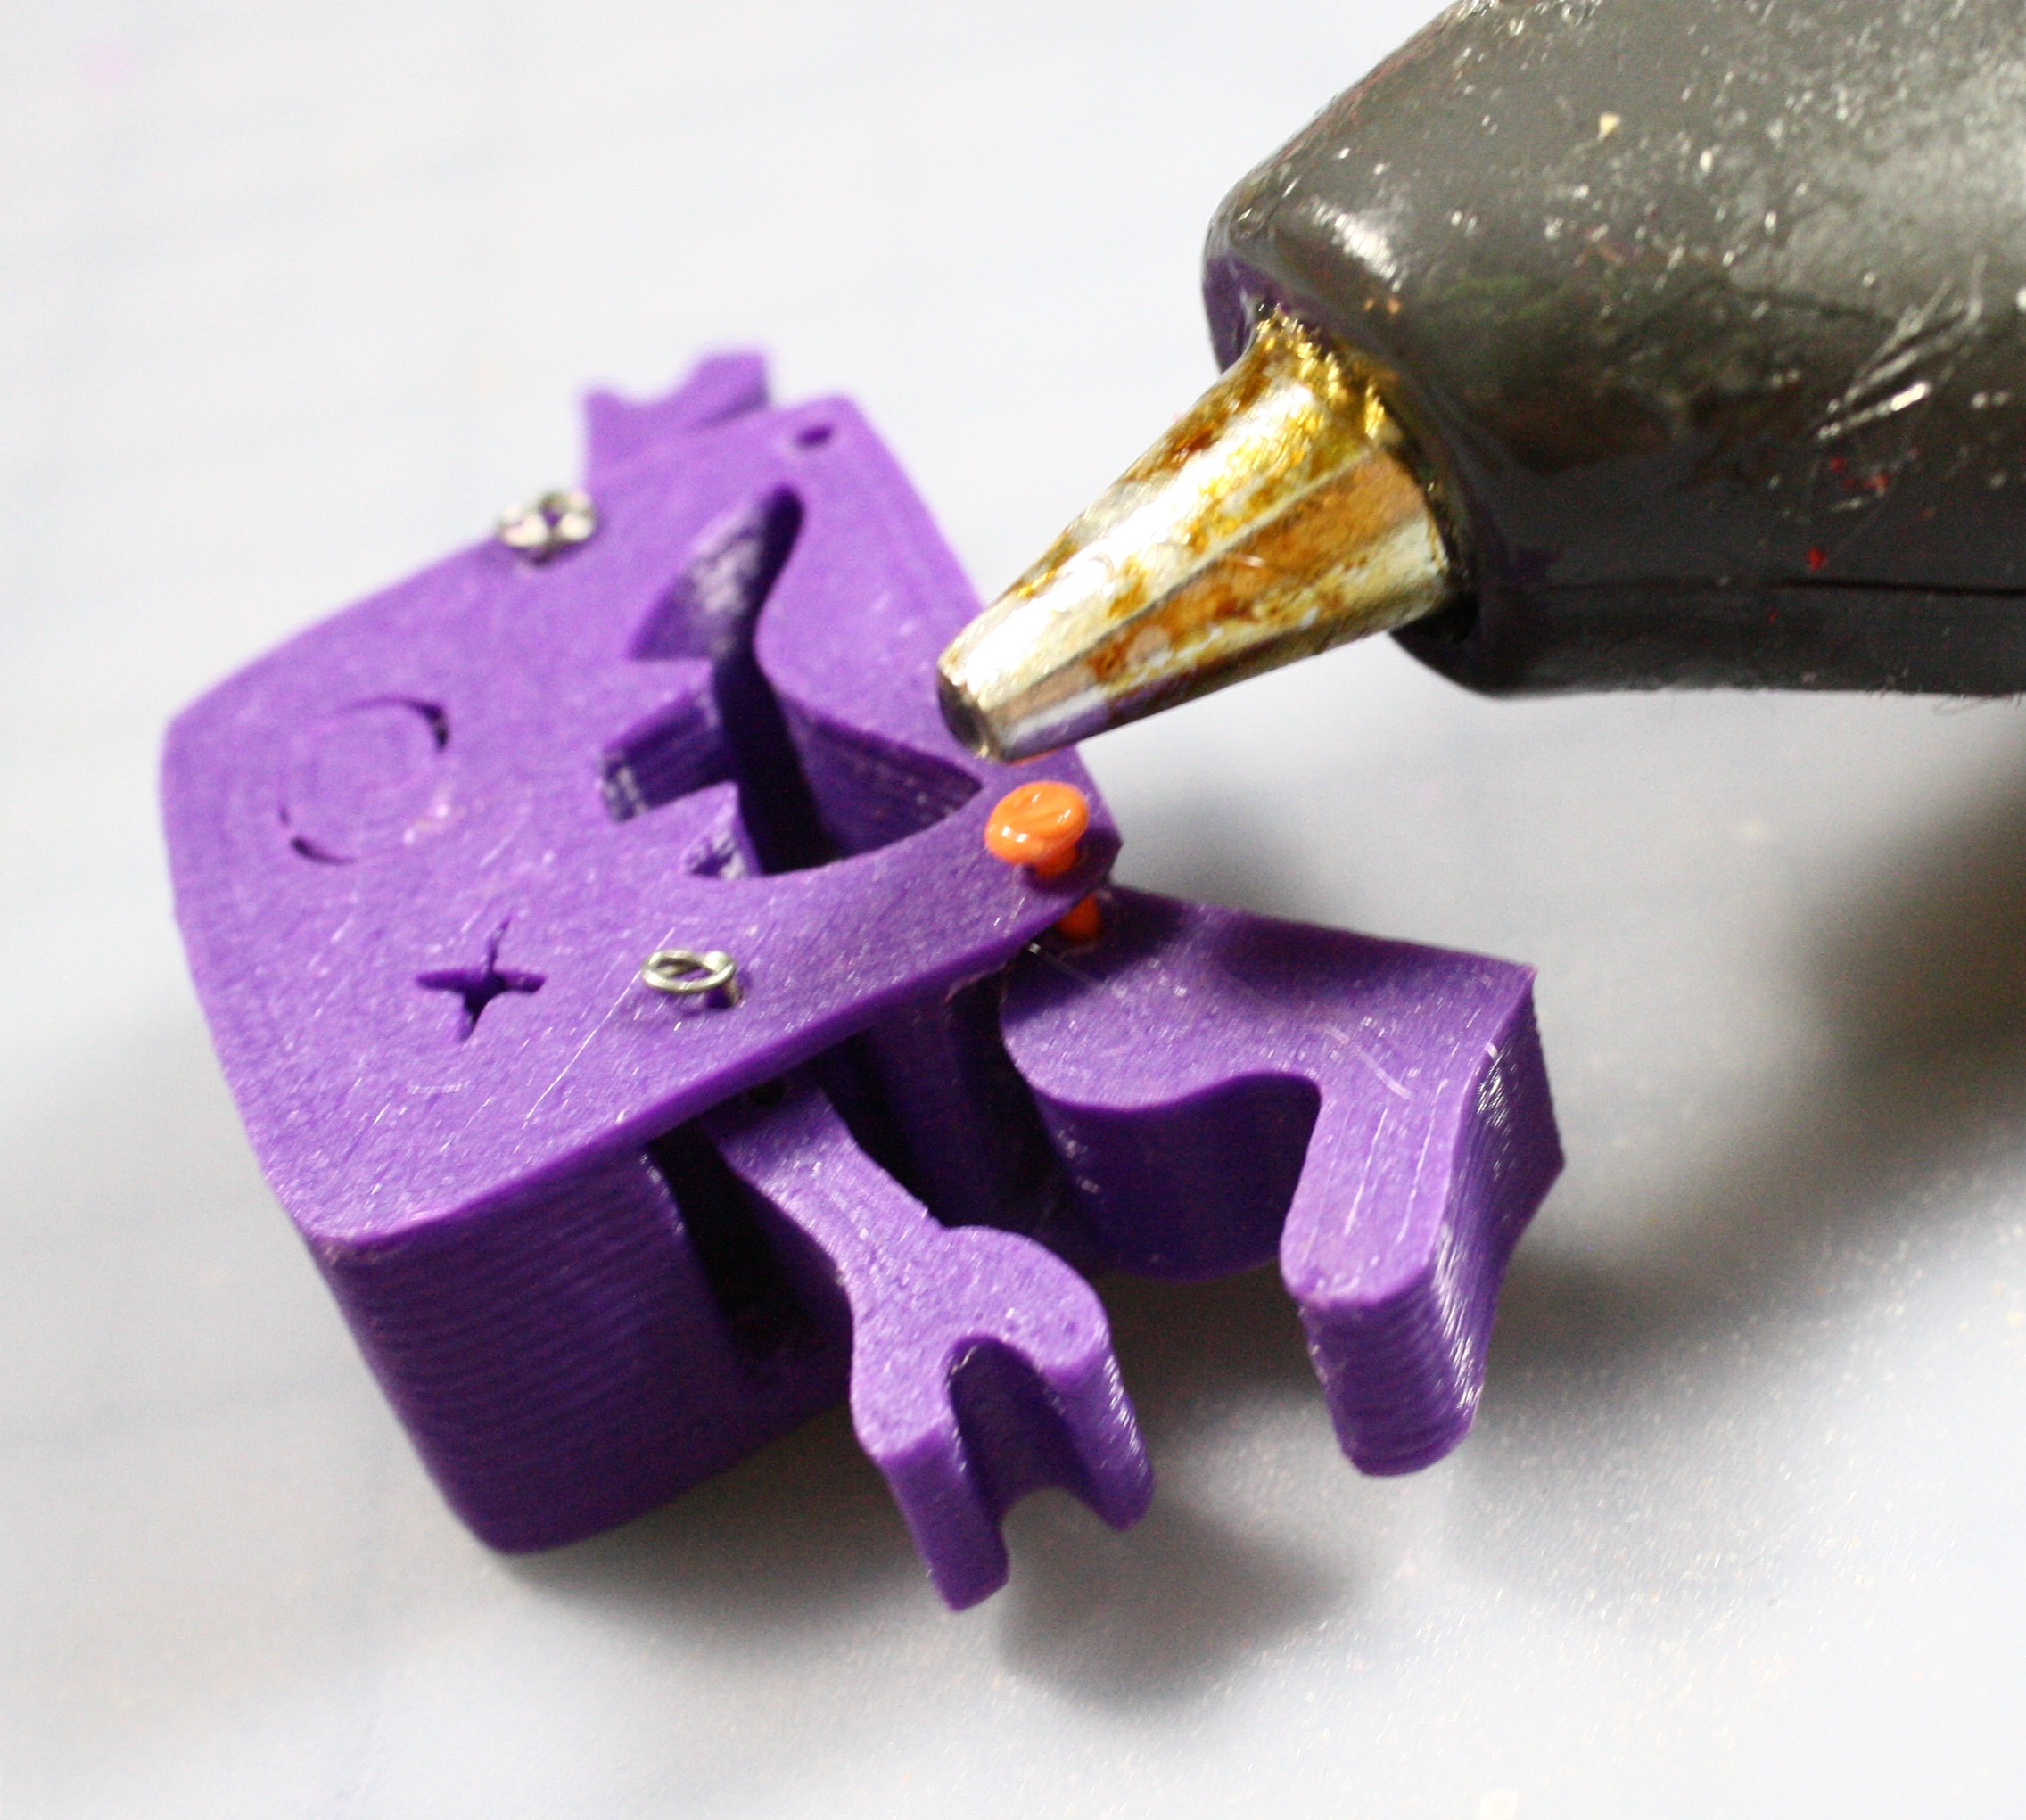
There are many materials you can use to attach your monster's limbs to its body. My two favorite are wire (which you can curl and twist any which way, as I've done in the pictures), and filament pins. Filament pins are something I used and detailed in my last Instructable about Four-Bar Linkage Mechanisms for Artbots. Here's a link to the filament pin step and all its photos. Long story short: you use a hot glue gun to melt one end til it's bigger than the hole, slip it in, trim it down, and melt the other side. It works rather well, and it's probably my favorite method, as undisturbed filament is often stronger and smoother than printed. It's also quicker.
TADA!
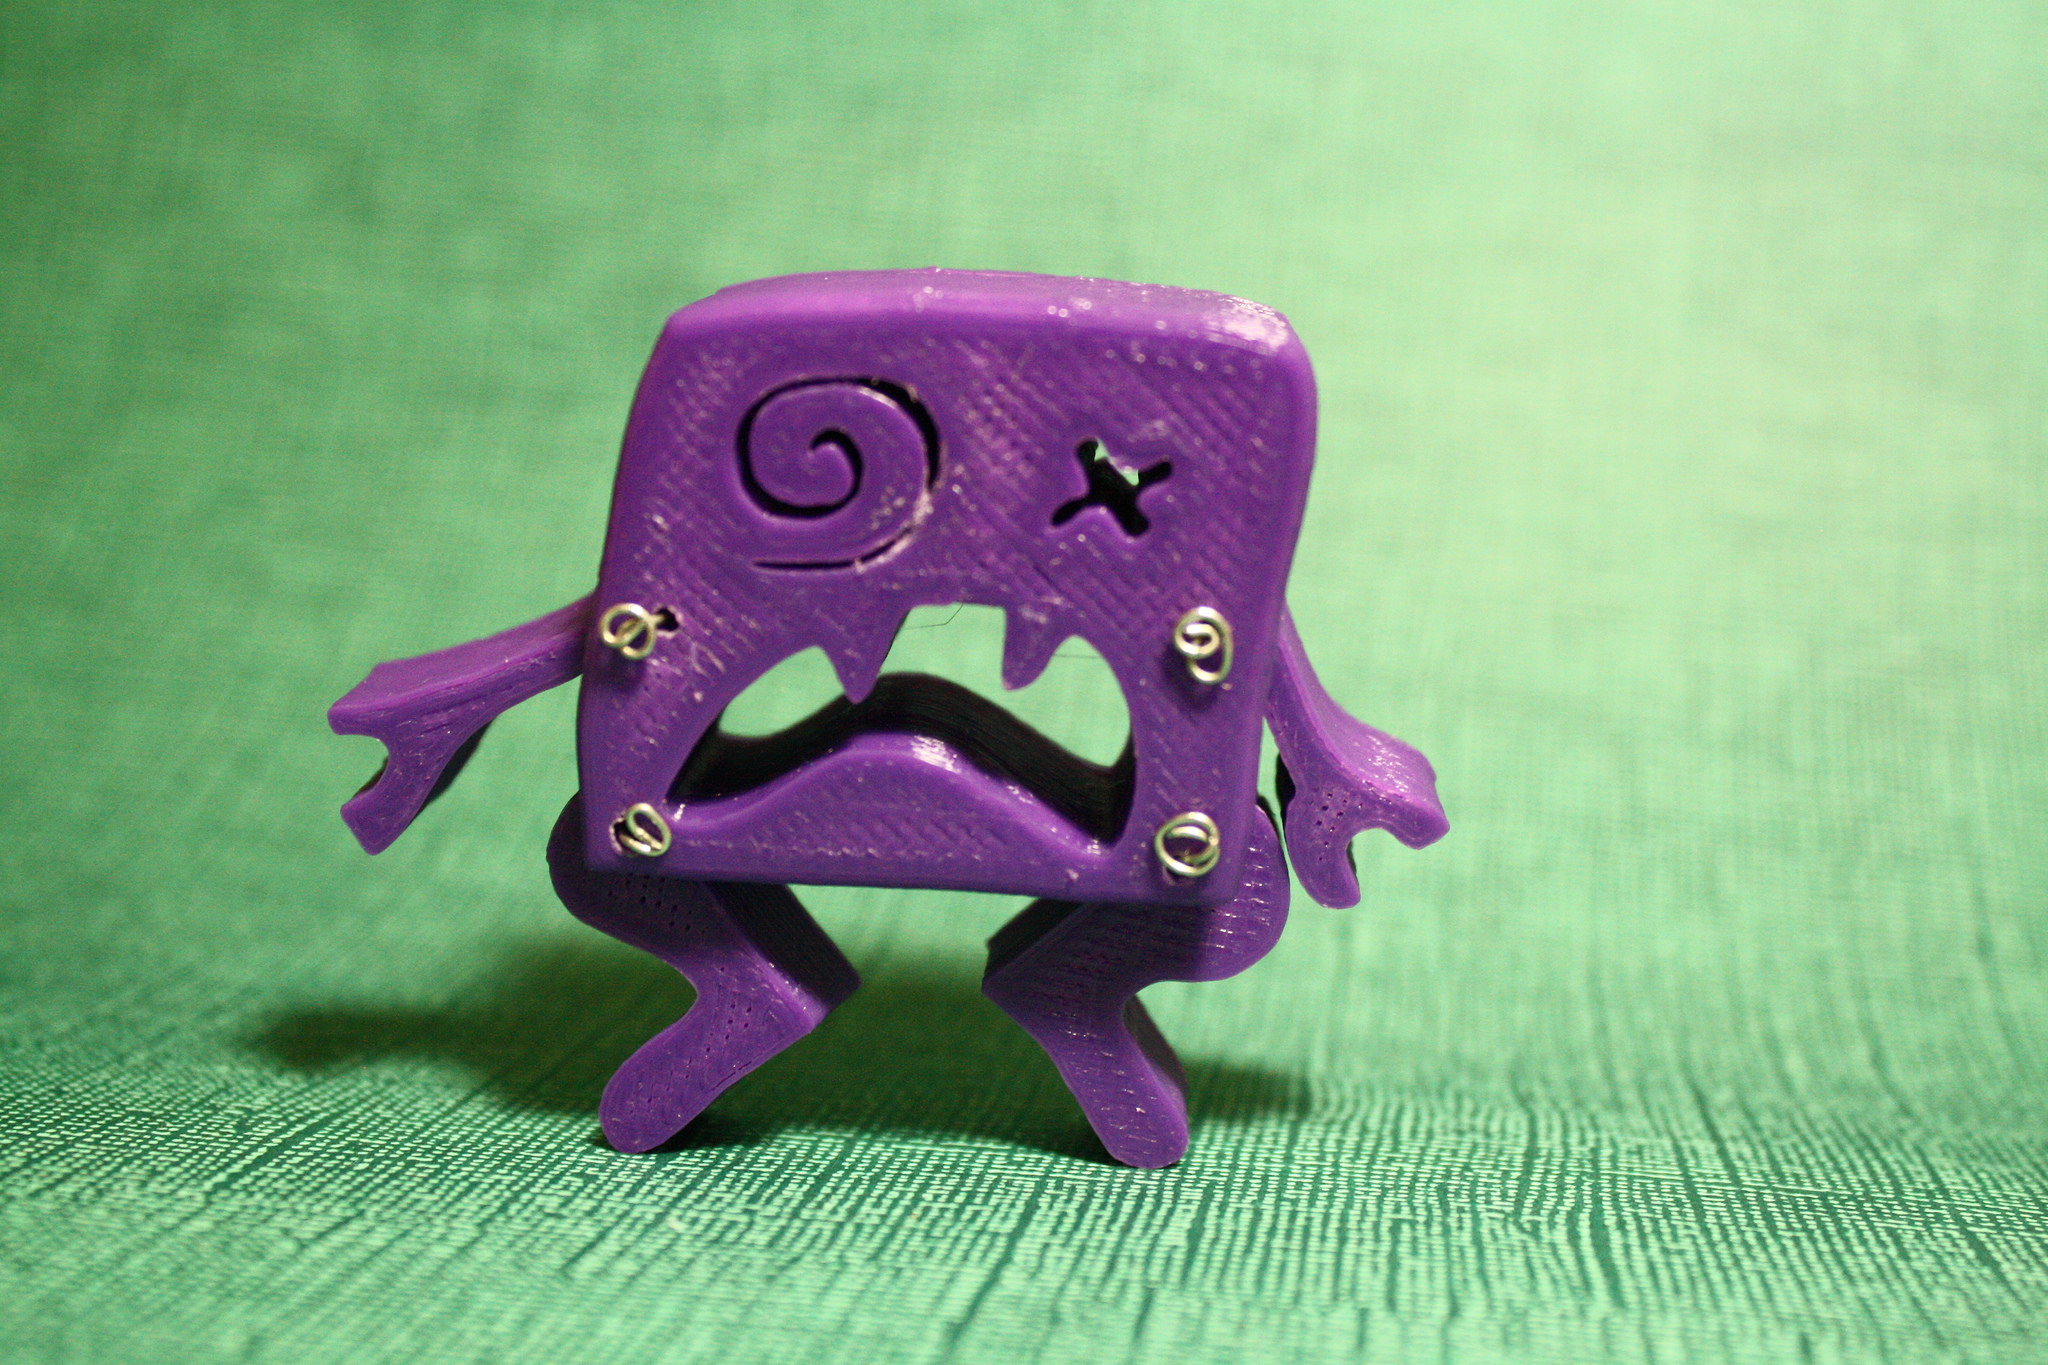
Play with your new monster, decorate it more, hang it around for decor. Perhaps make some hollow ones and put them on a string of lights for light-up monsters. Whatever you do, share pictures!