3D-Printed Loom Knit Scarf
by elizabethwebb in Craft > Fiber Arts
5963 Views, 61 Favorites, 0 Comments
3D-Printed Loom Knit Scarf
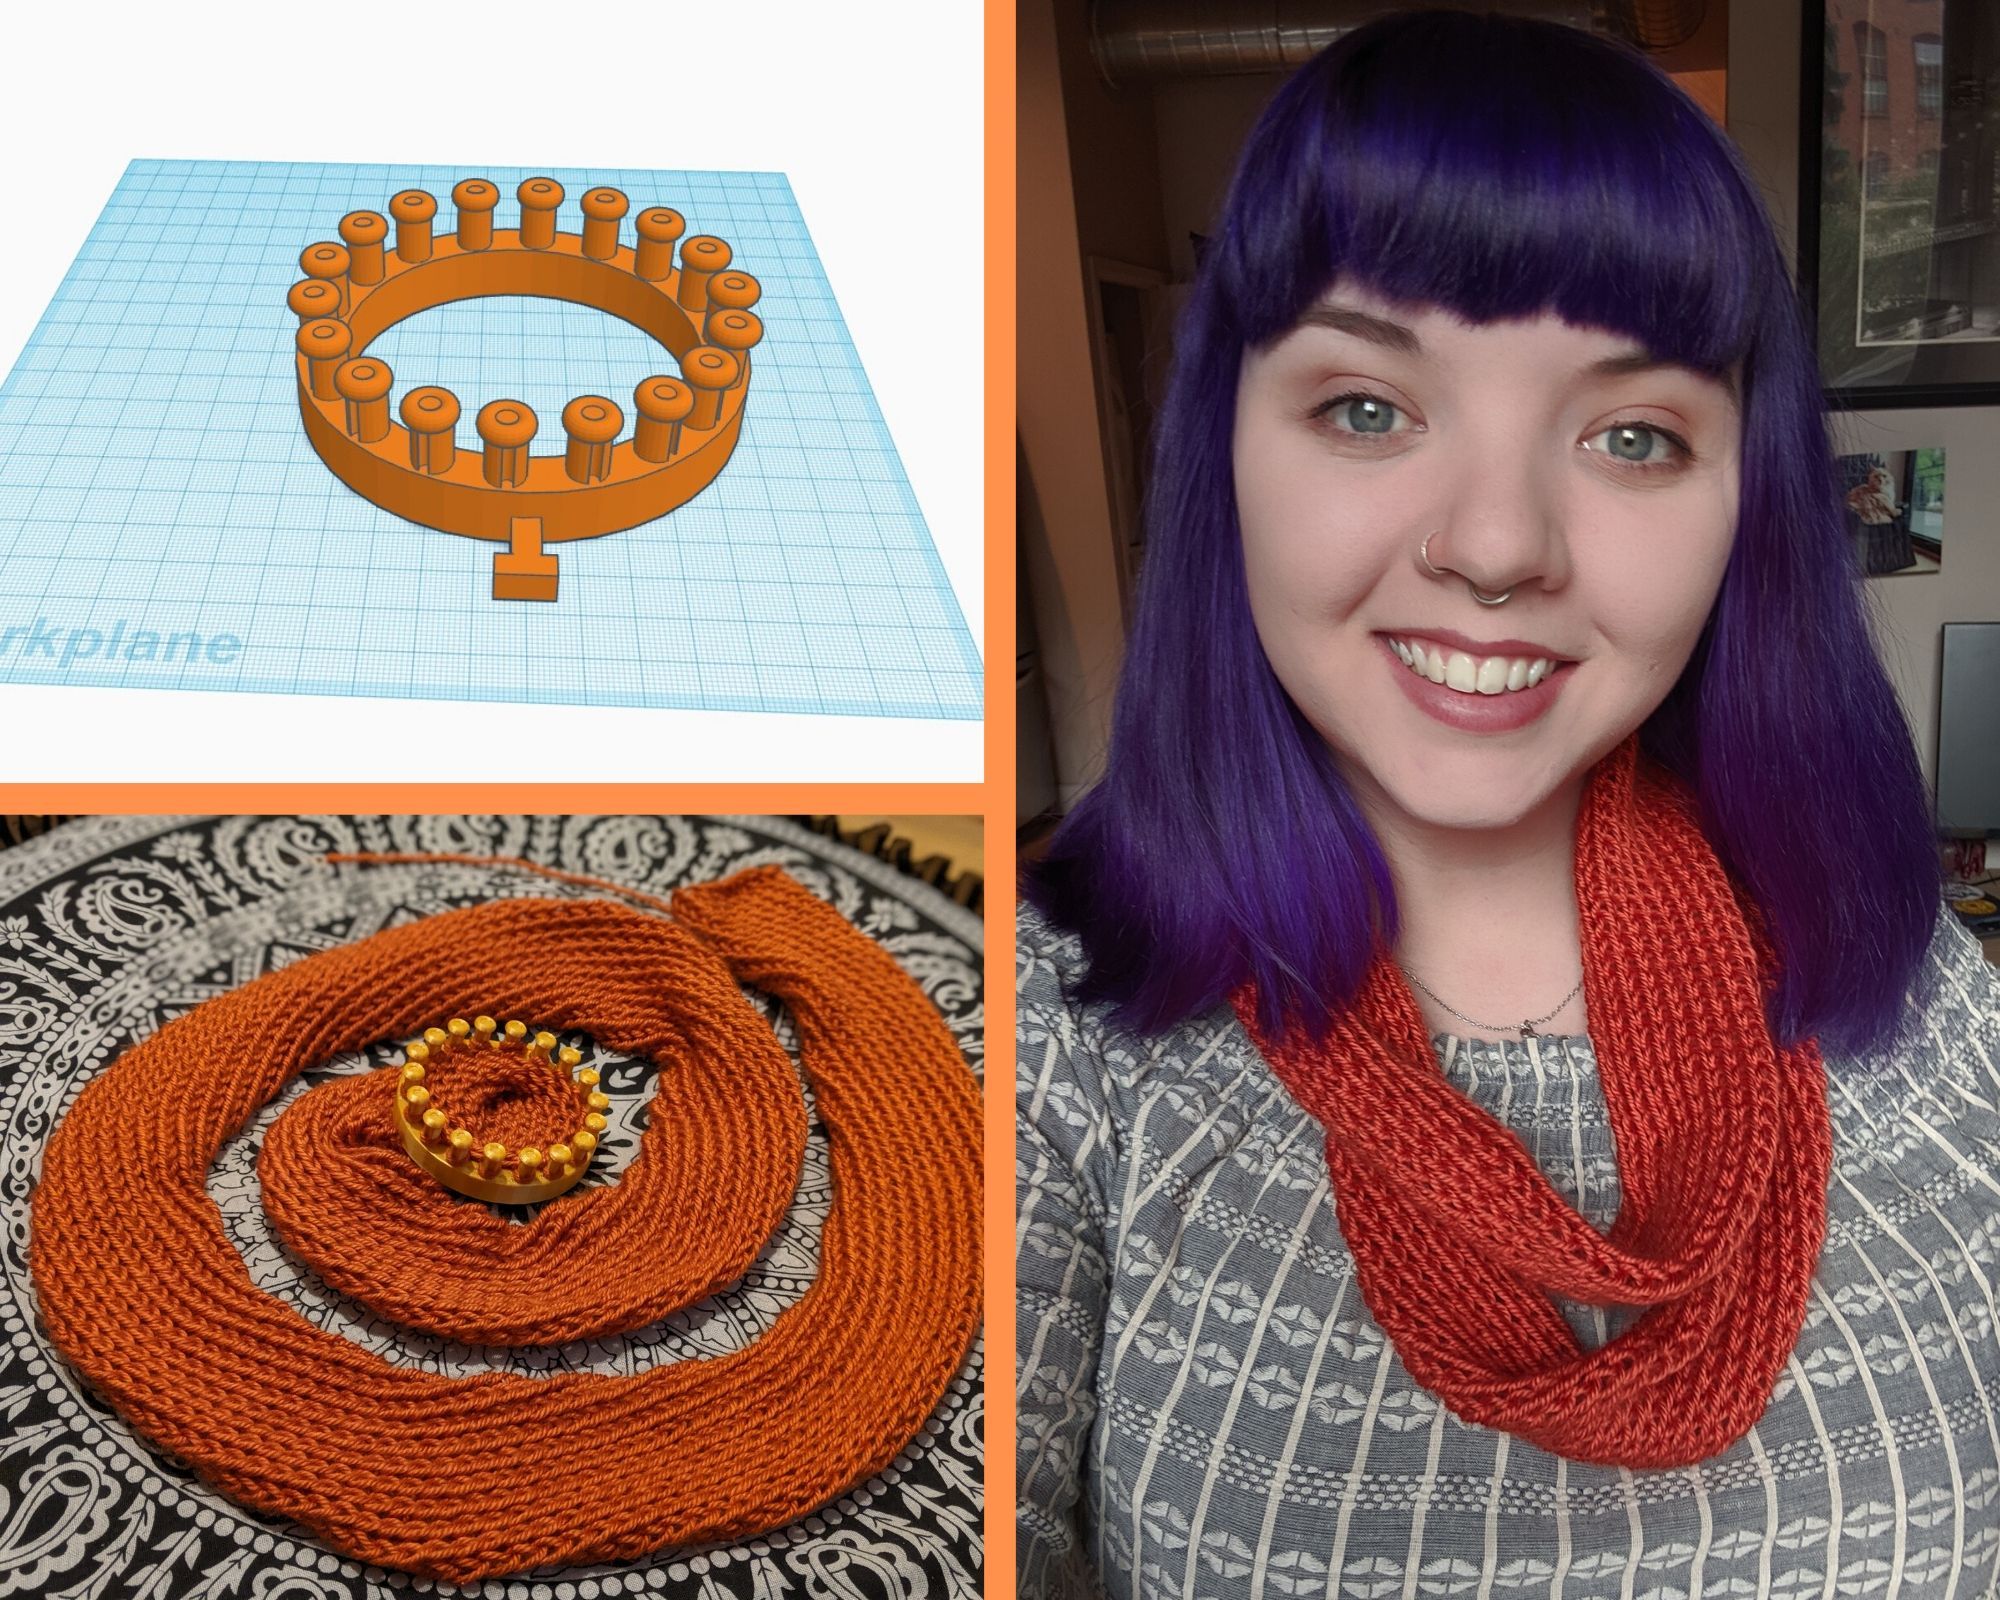
I was trying to think of an idea for the multi-discipline challenge but was coming up short for a long time. I knew I wanted to combine fiber arts with 3D printing. Finally, I came up with the idea to 3D print a small knitting loom to knit an infinity scarf.
This knitting loom is pretty nifty because it's not just for looped infinity scarves -- it can also be used to make flat scarves, potholders, small doll hats, and more.
Supplies
- Tinkercad account
- 3D printer + filament
- Yarn
- Knitting loom tool (like this one)
- Embroidery needle
- Patience
Designing the Loom in Tinkercad - Part 1
If you'd rather like to skip the modeling part of this tutorial and get straight to printing, feel free to use and print my design. I've also uploaded the .stl here upon request.
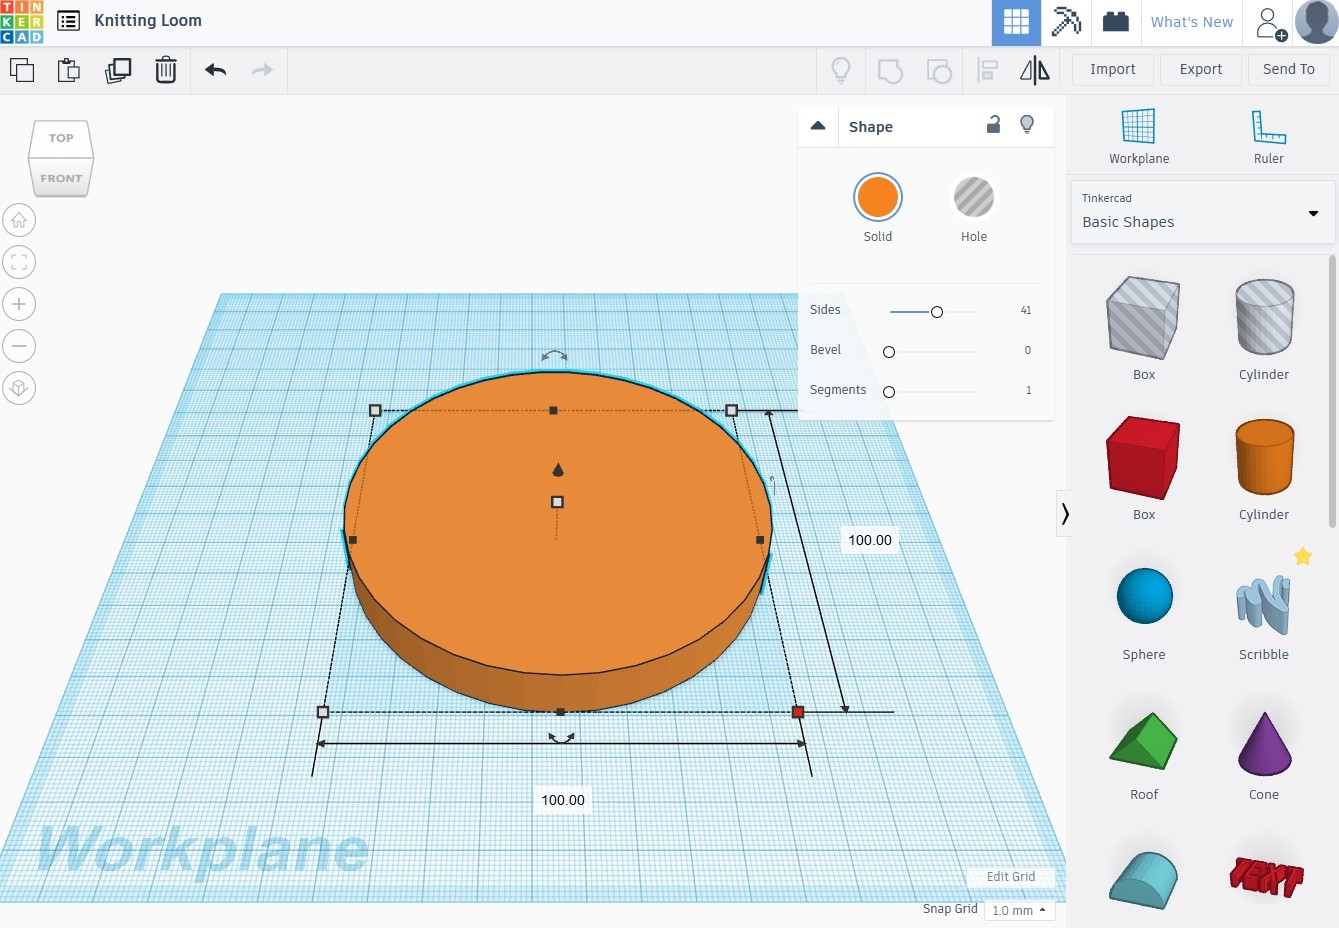
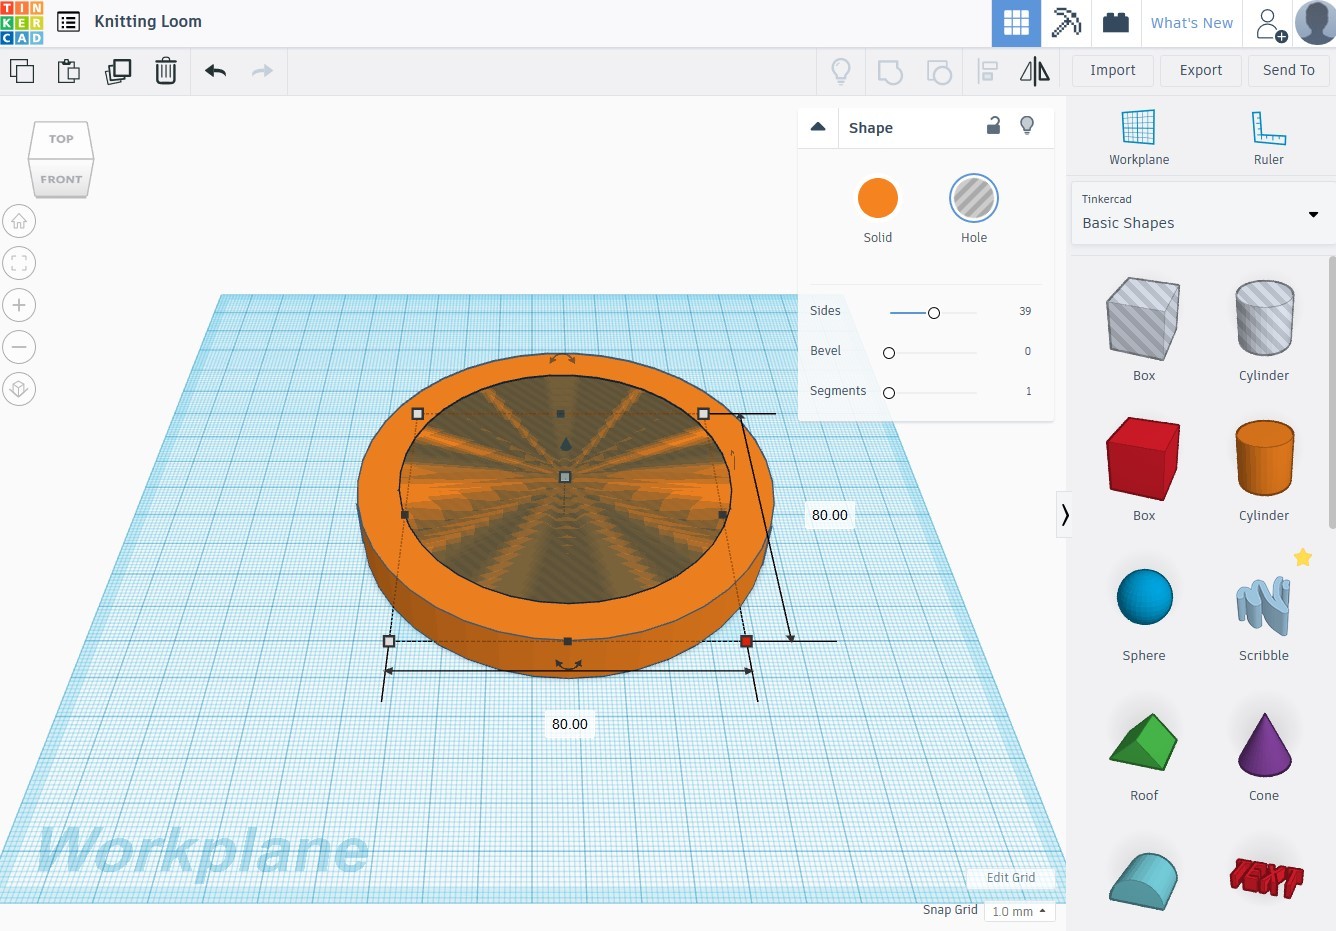
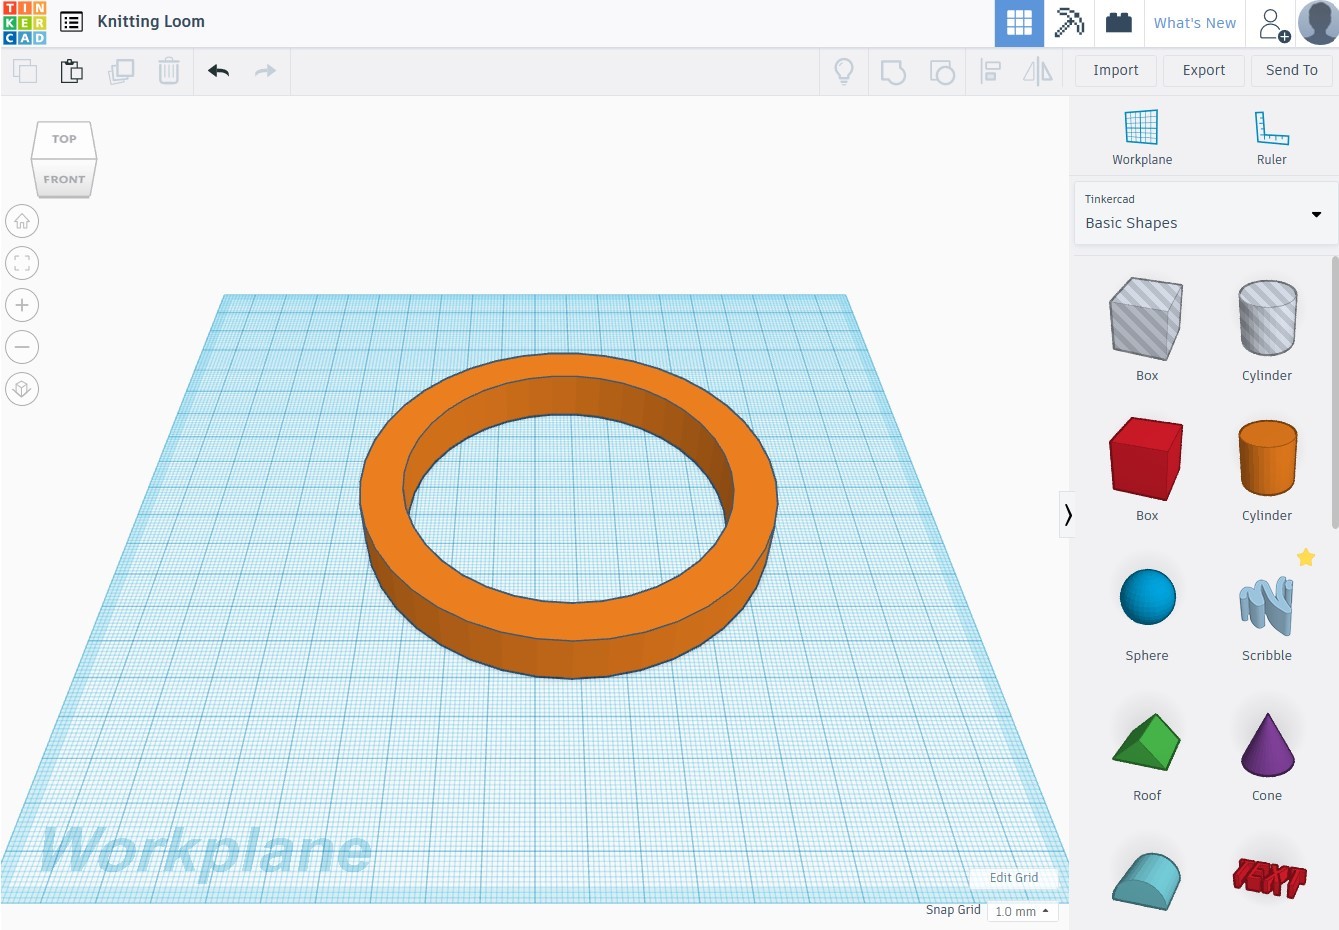
First we'll make the base of the loom. Place a cylinder onto the workplane that measures 100mm by 100mm by 13mm high. Place a hole cylinder measuring 80mm by 80mm inside the center of the solid cylinder and group the two objects together by selecting both and hitting the group button or Ctrl+G. This is your loom base.
Downloads
Designing the Loom in Tinkercad - Part 2
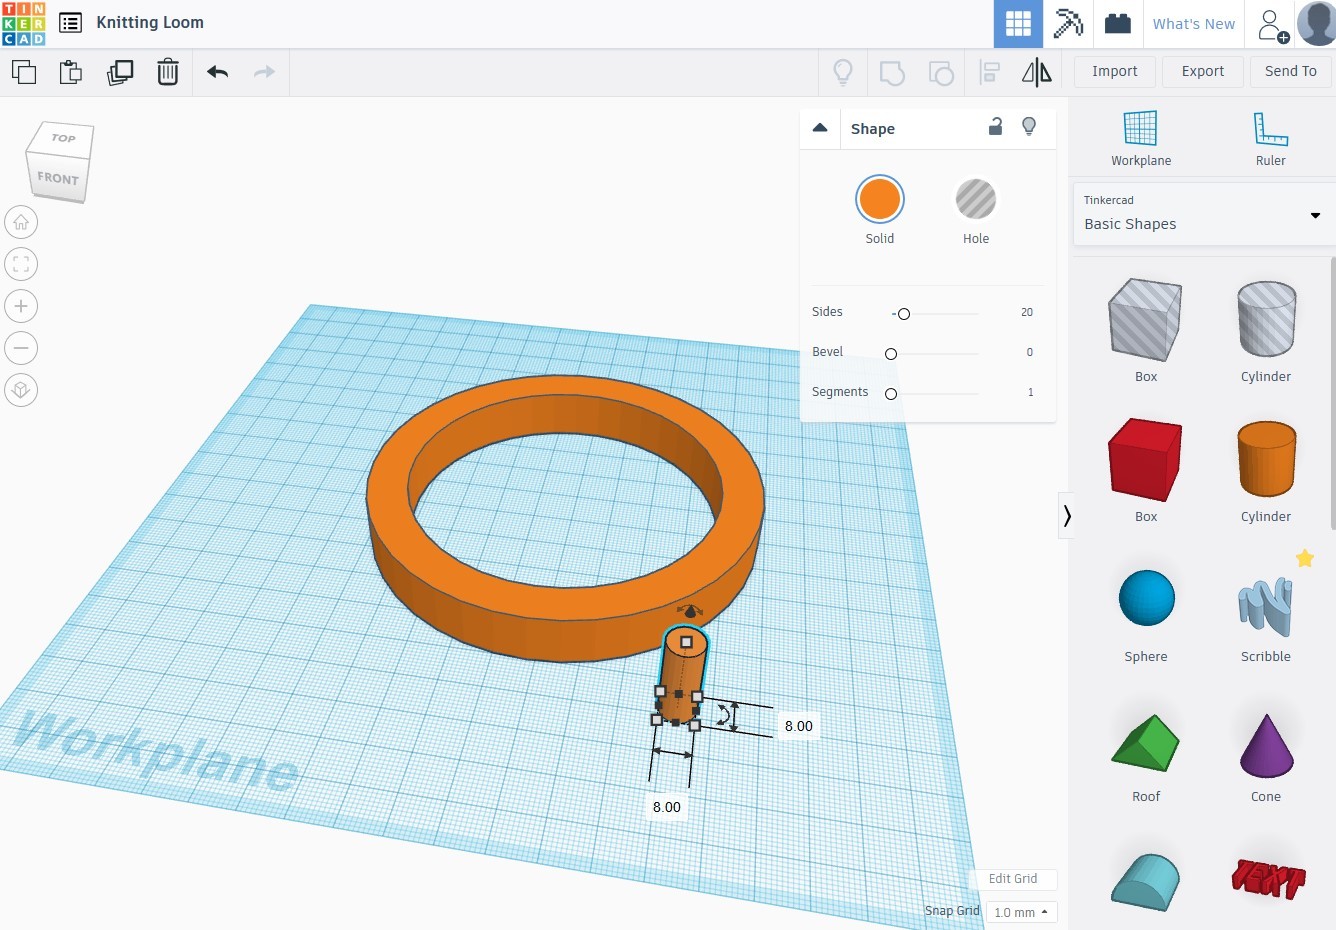
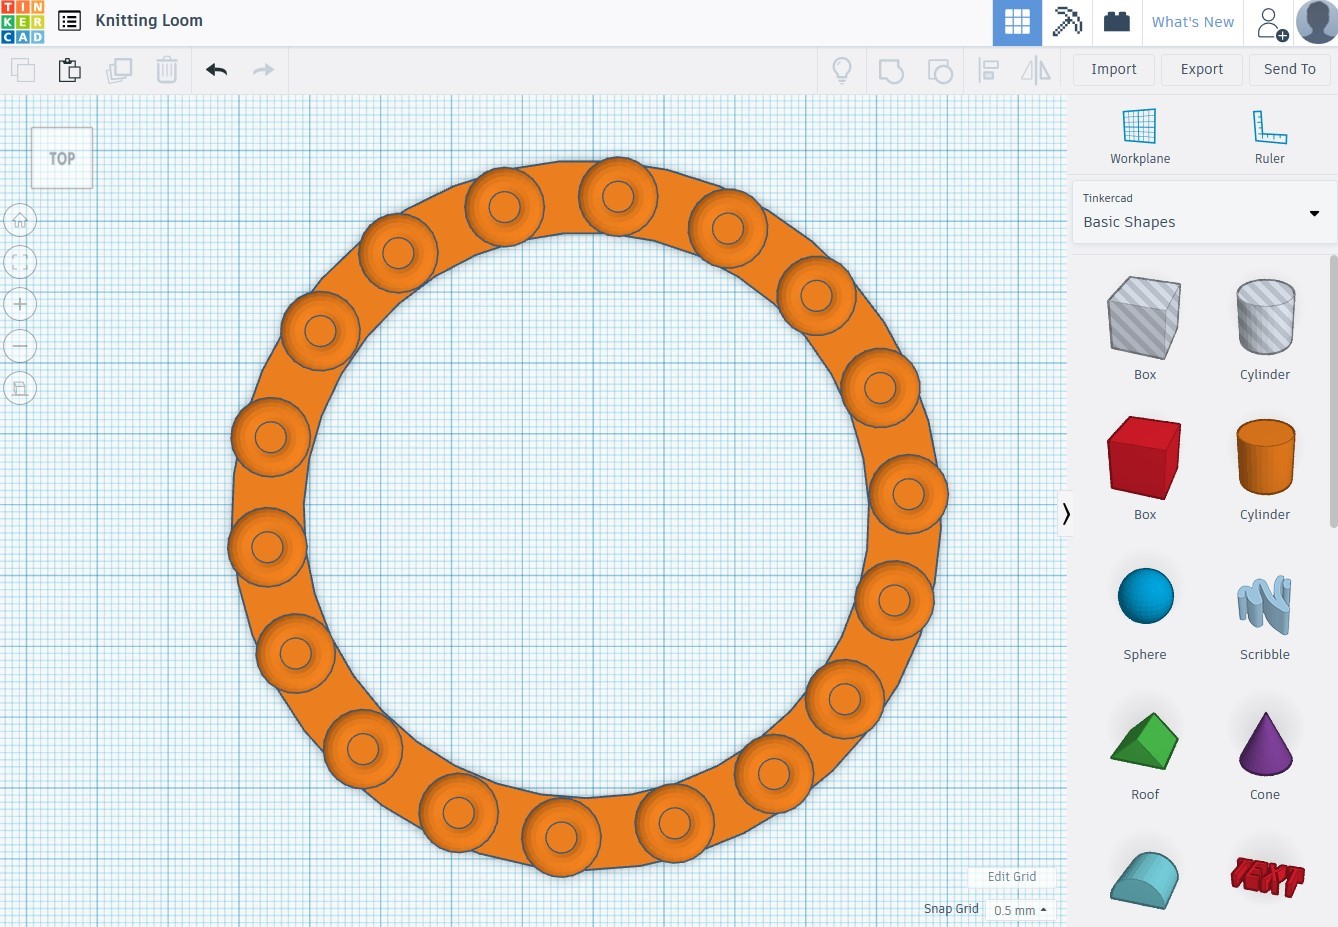
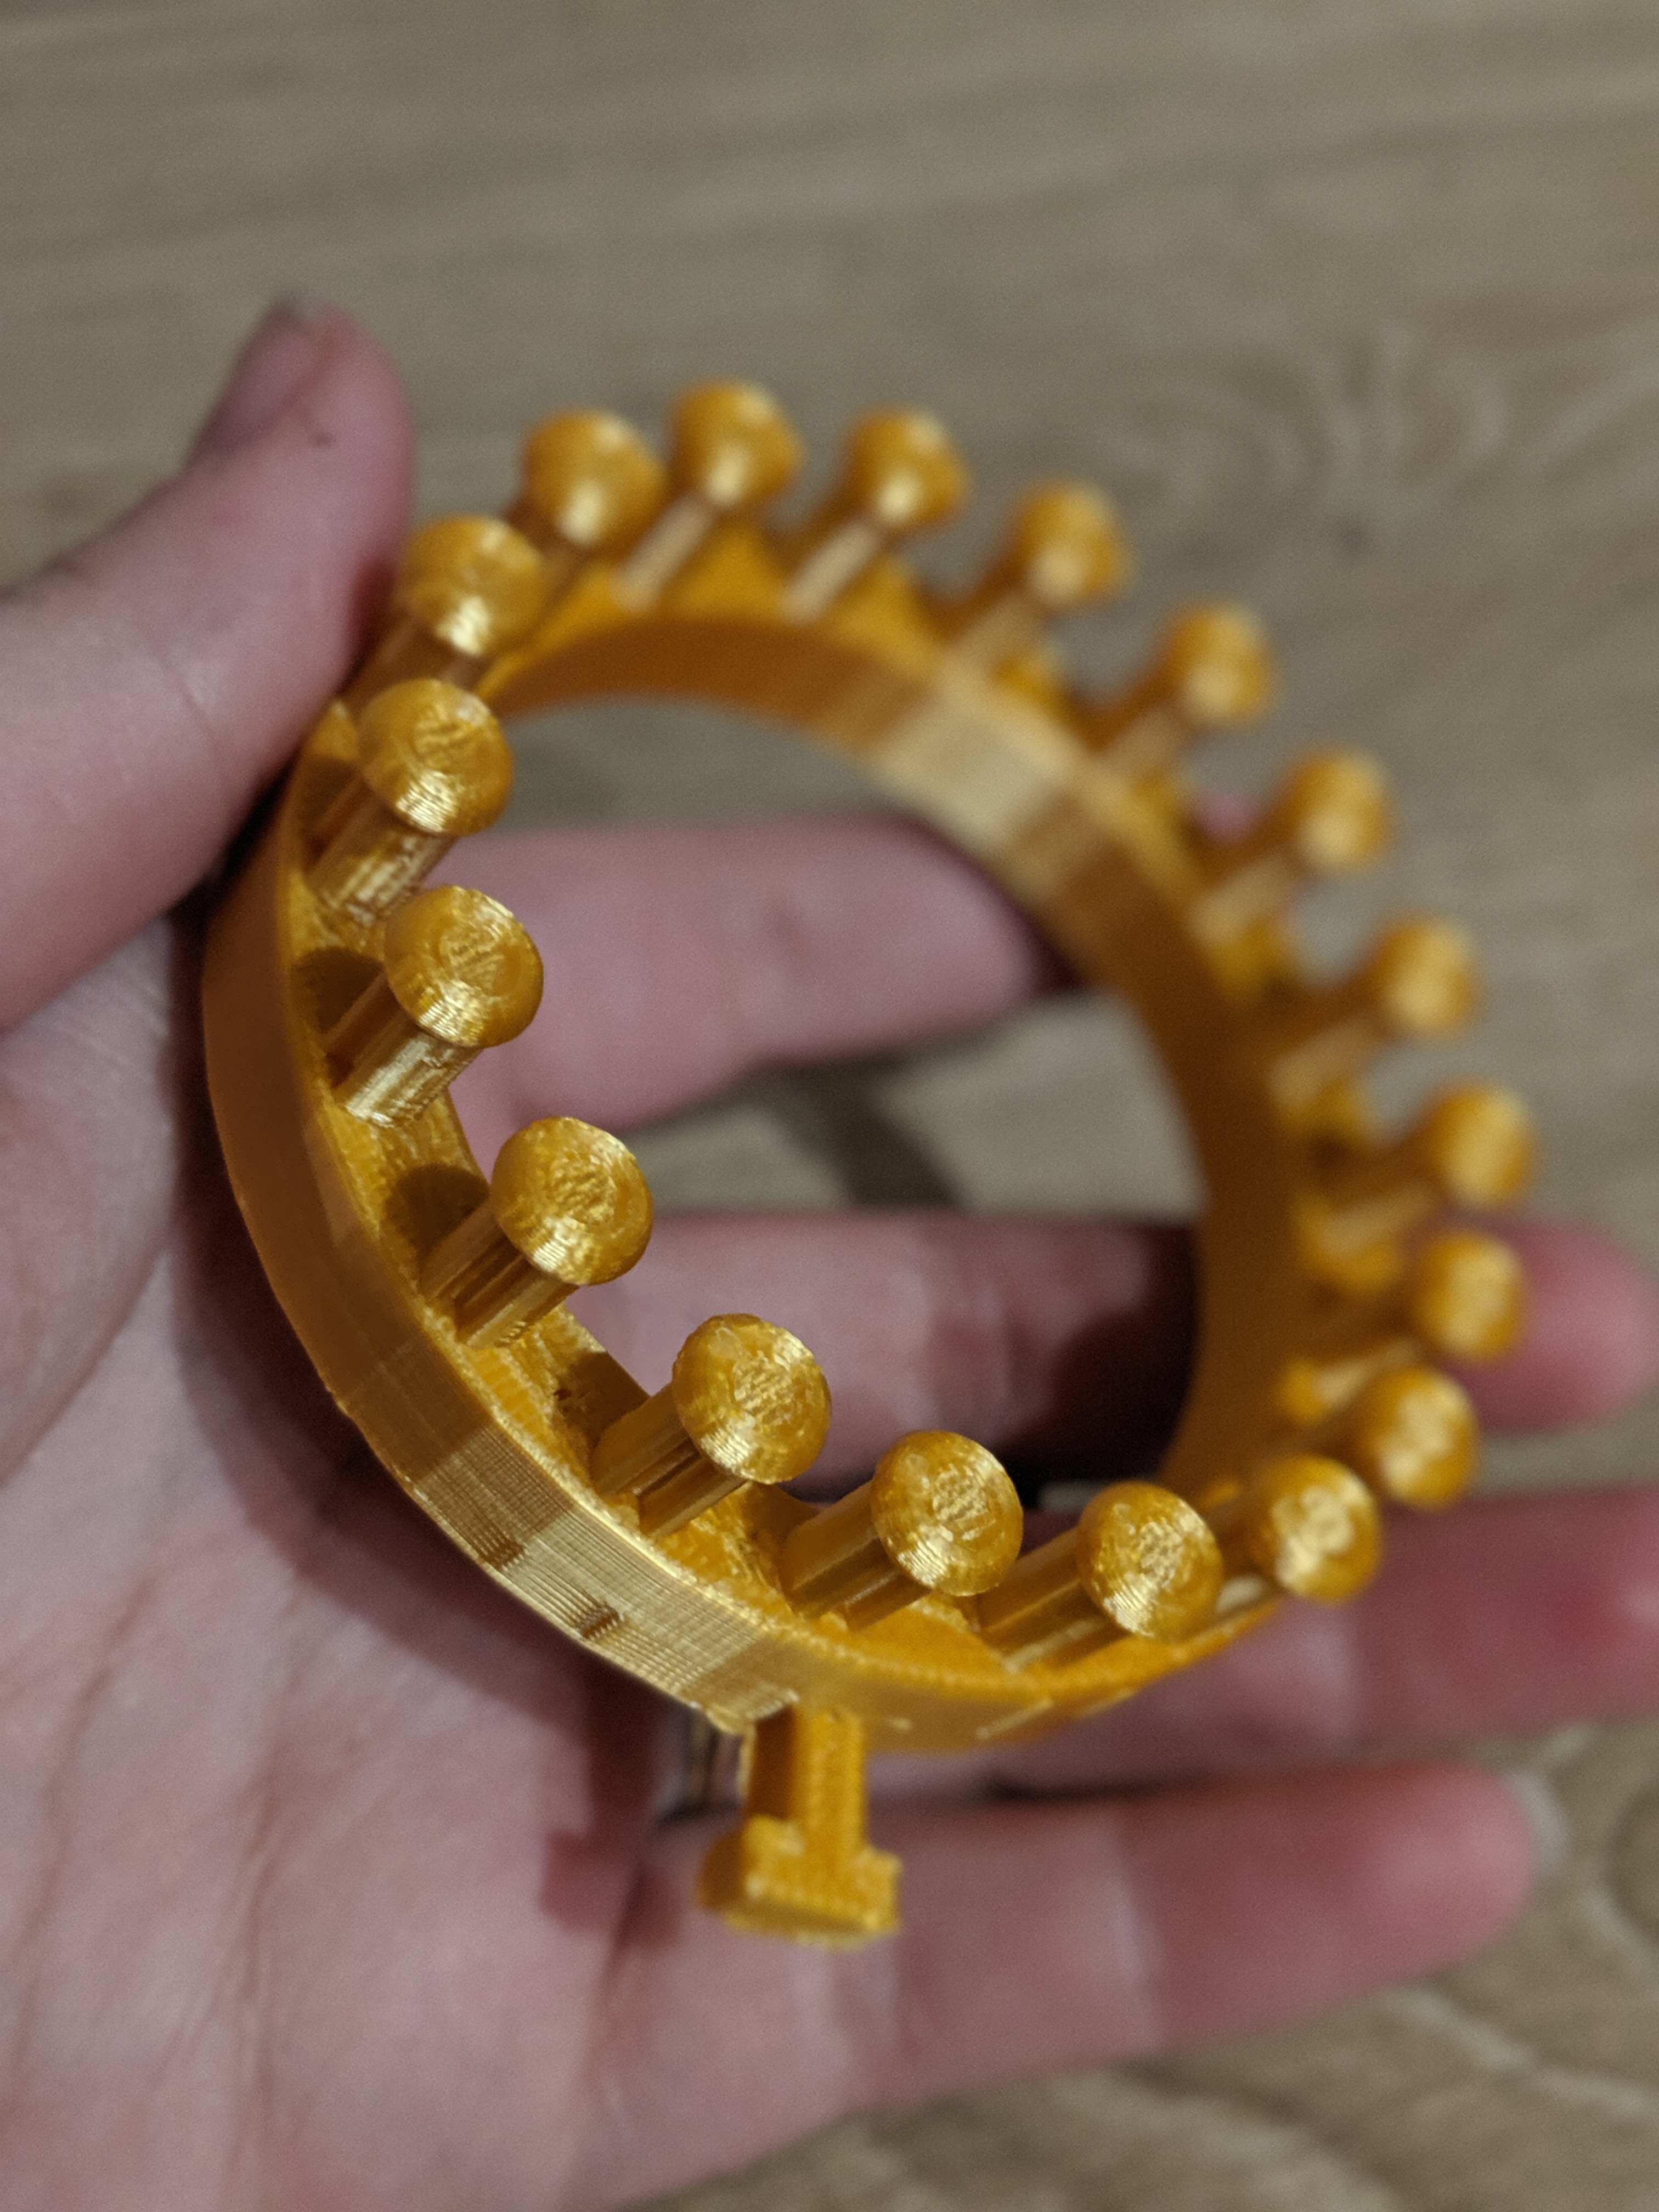
Now we move on to make the pegs for the loom. Start by adding a cylinder that measures 8mm by 8mm by 20mm tall.
Add in a hole cylinder that measures 3mm by 3mm by 11mm tall and placing it just on the outside of the peg you just created, just enough so only a half-circle is creating the notch, not the whole circle. Group the two items together by selecting both the peg and the hole cylinder and pressing the Group button or Ctrl+G.
Add a small (10mm by 10mm by 4mm high) torus/donut shape to the top of your peg. Group the peg and the torus together.
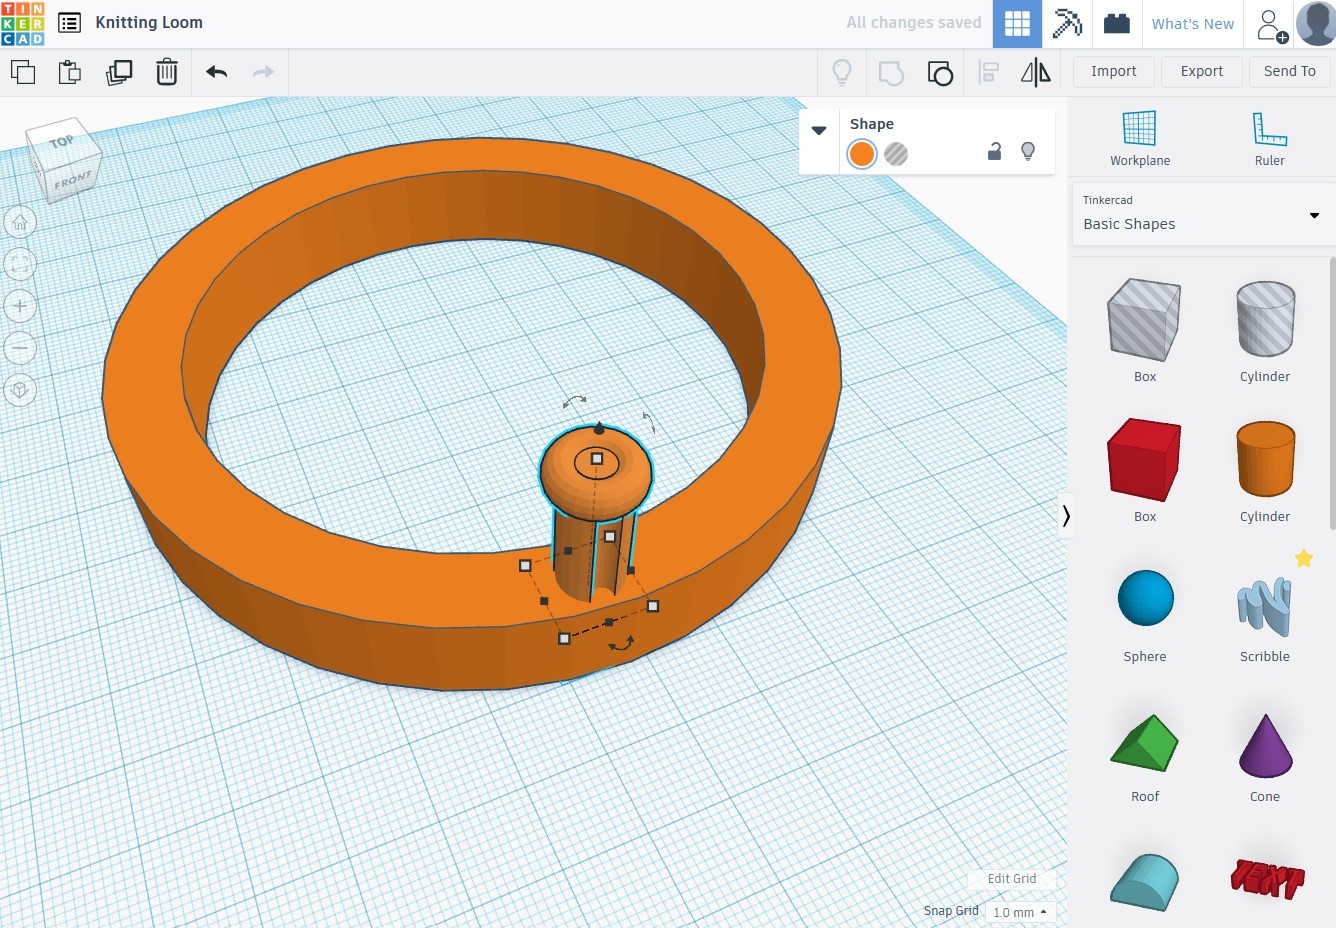
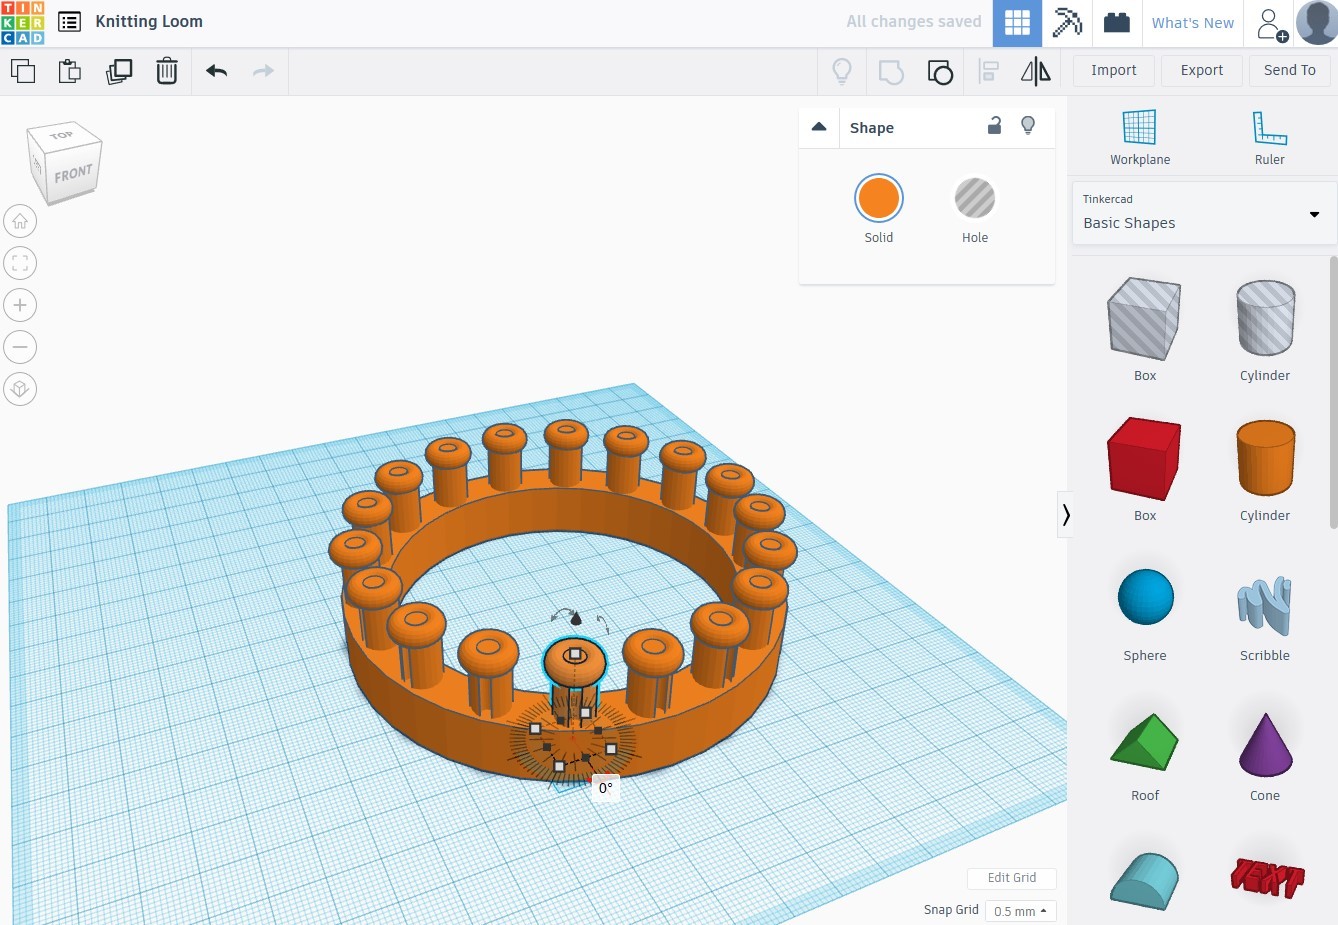
Place the peg on the base of the loom. Duplicate (Ctrl+D) your peg 17 times so you end up with 18. Place them evenly around the loom base, and rotate each peg so the notch is facing outwards.
Designing the Loom in Tinkercad - Part 3
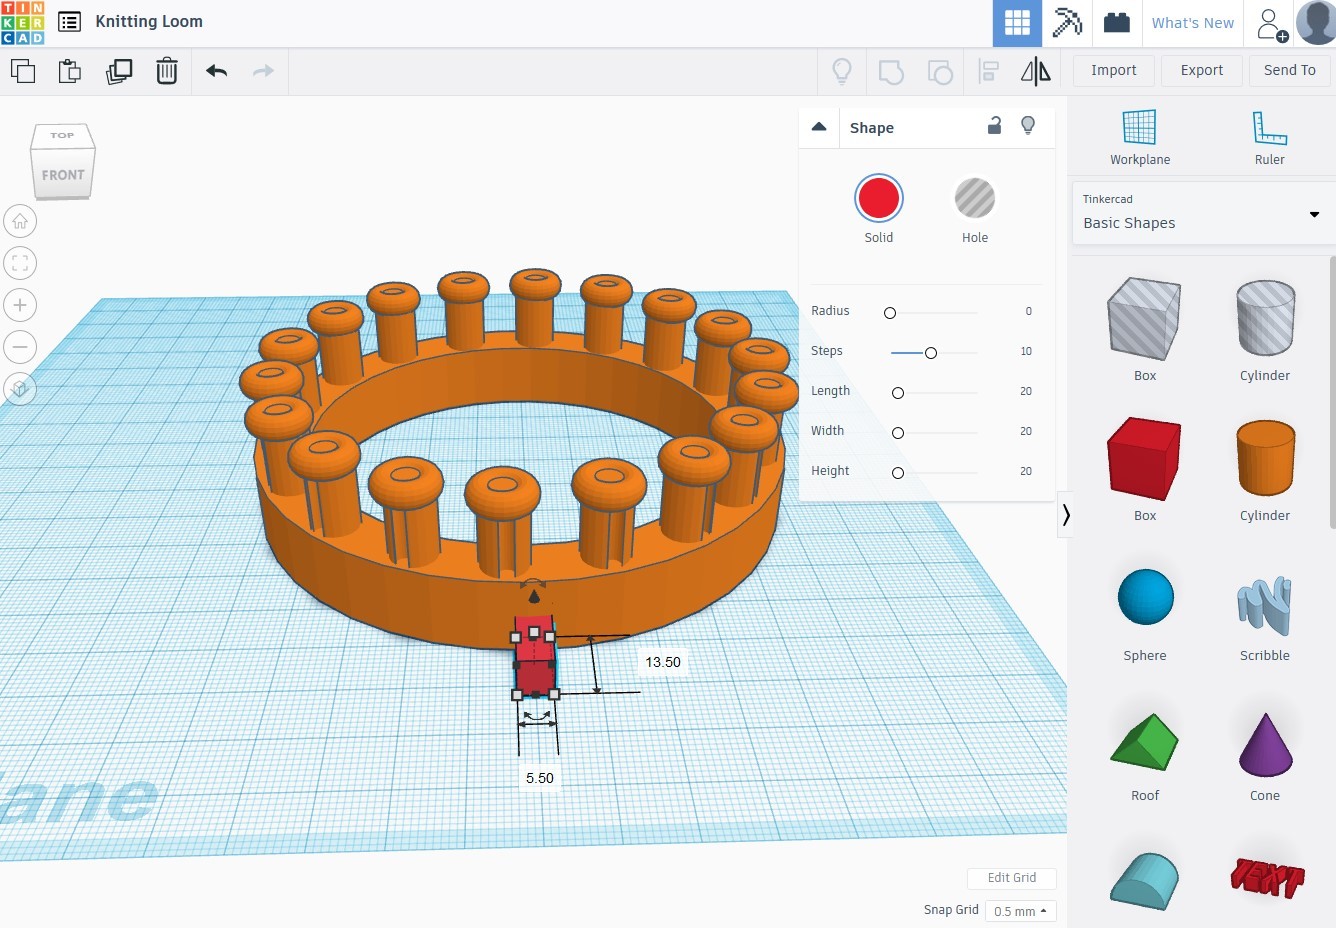
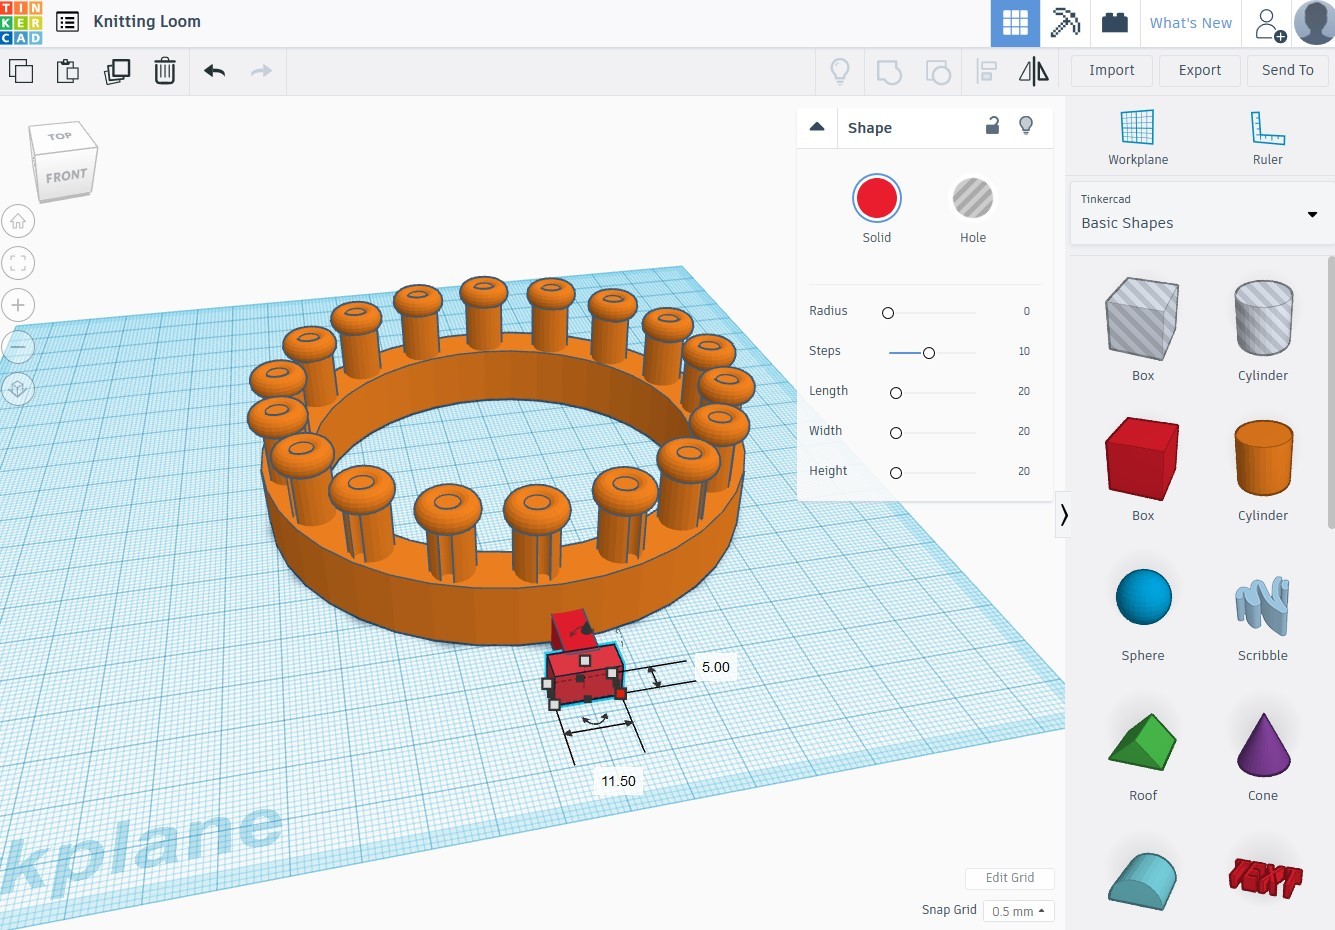
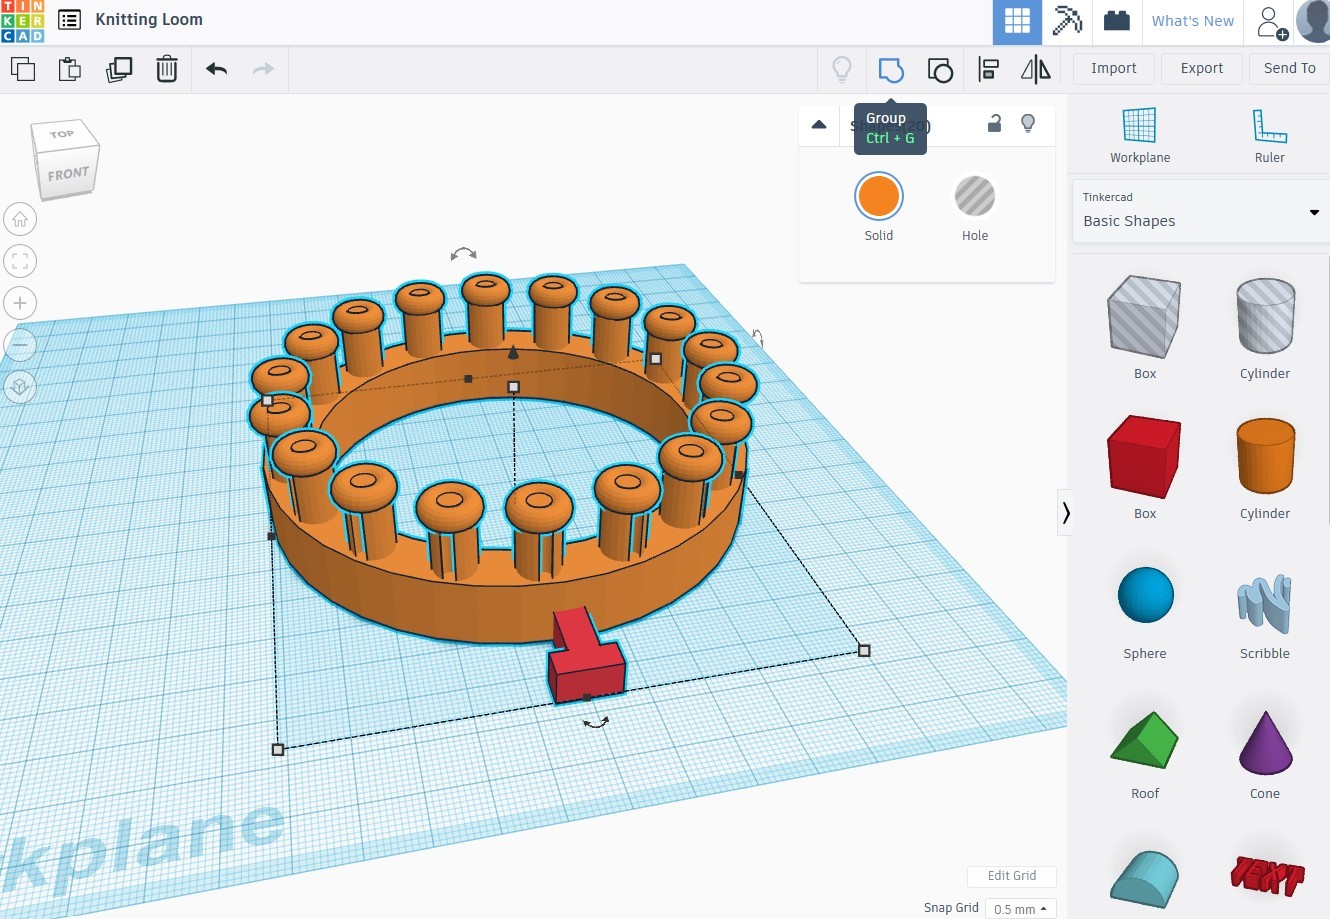
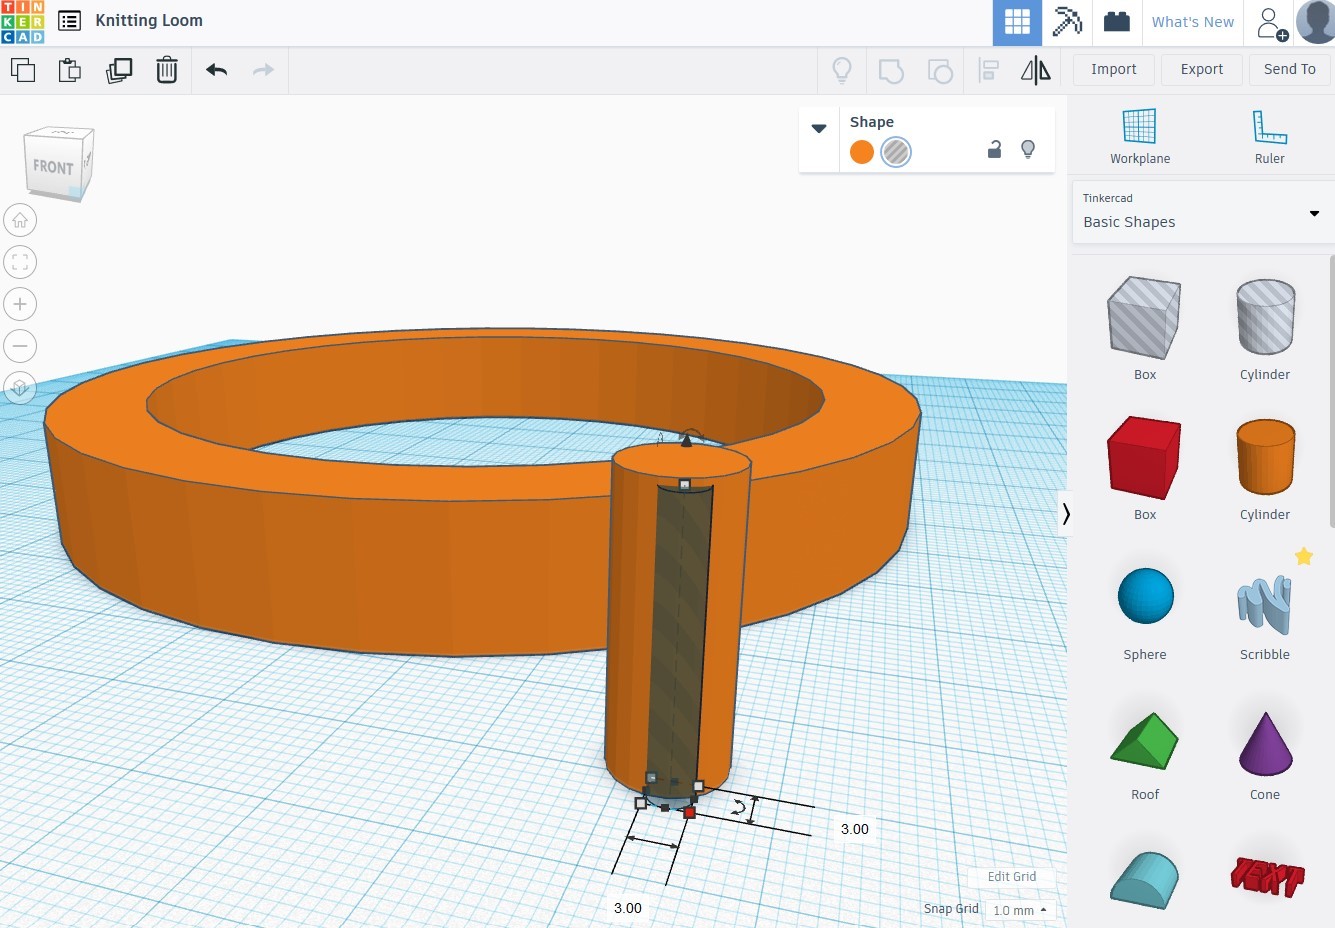
Here we'll make the outside peg, which is modeled differently than the loom pegs for printing reasons.
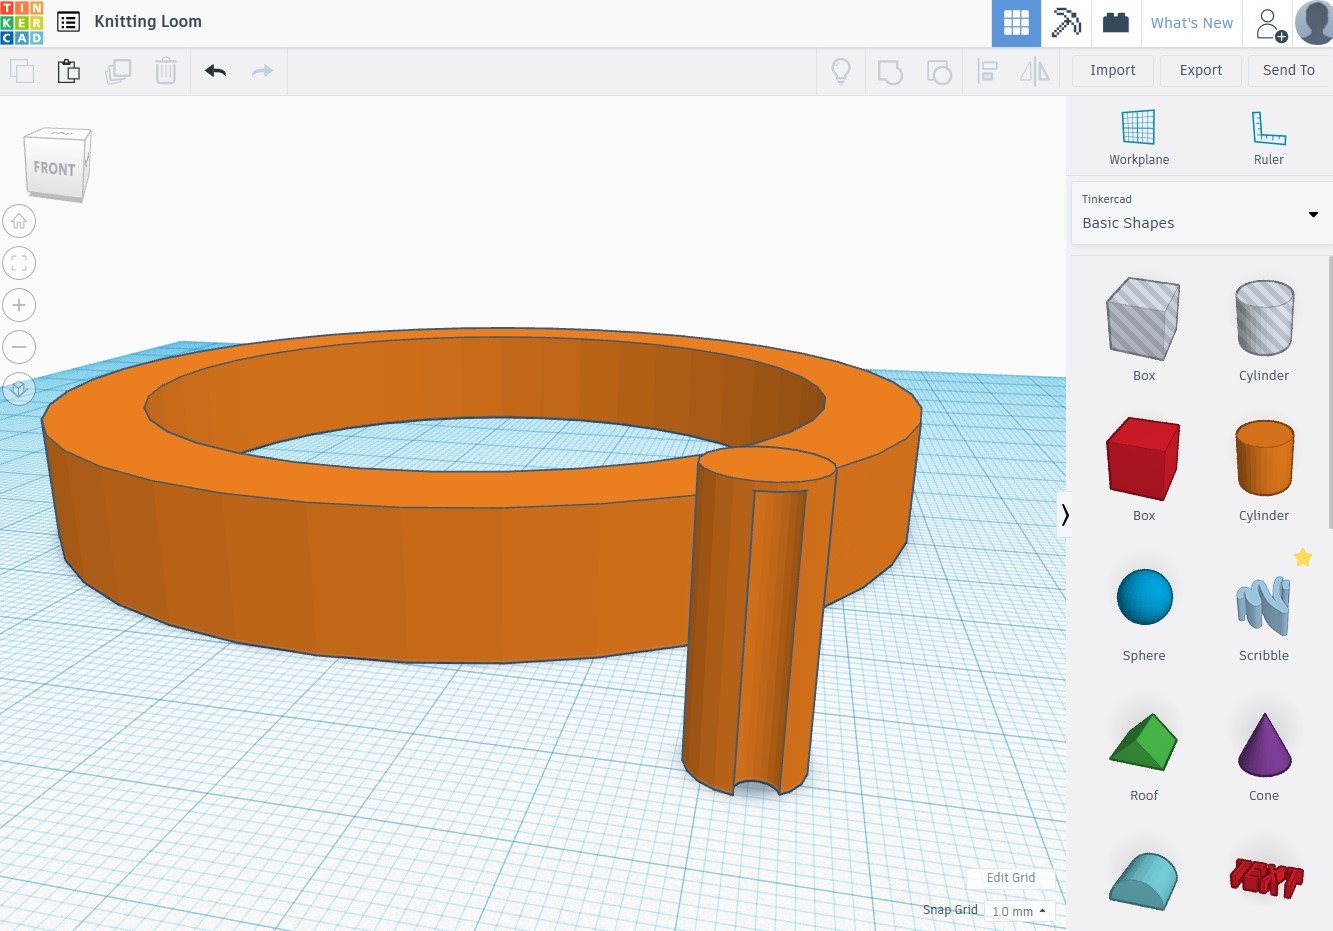
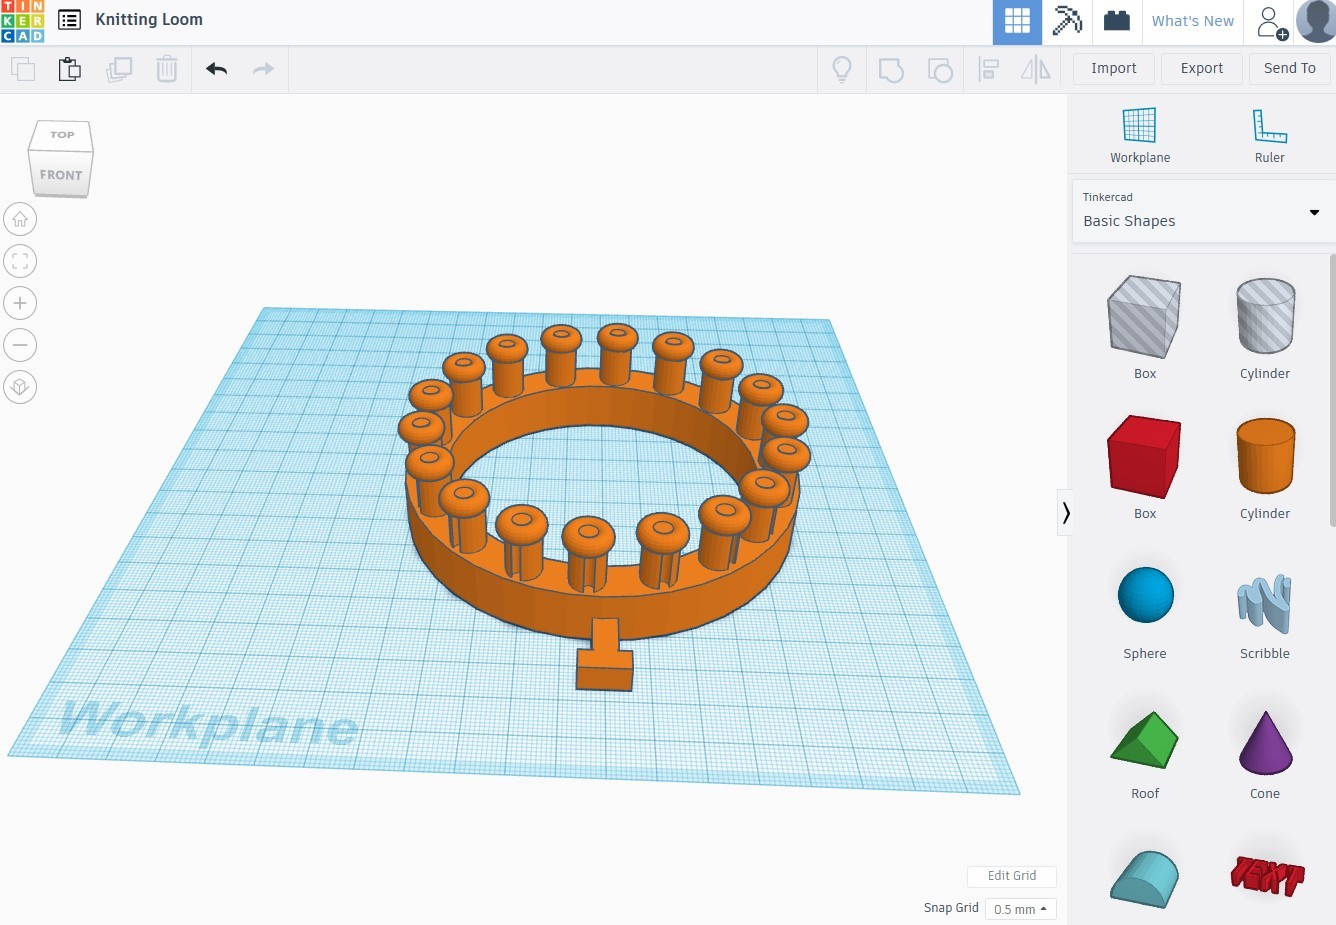
Place a box onto the workplane that measures 5.50mm wide by 13.50mm long by 6.50mm high. Stick it into the side of the loom. Add another box that measures 11.50mm wide by 5mm long by 6.50mm high and place it so it's making a flat T-shape with the first box you placed. Select everything you've modeled so far and group them all together by hitting the Group button or Ctrl+G. This is your loom! Now onto printing..
Printing
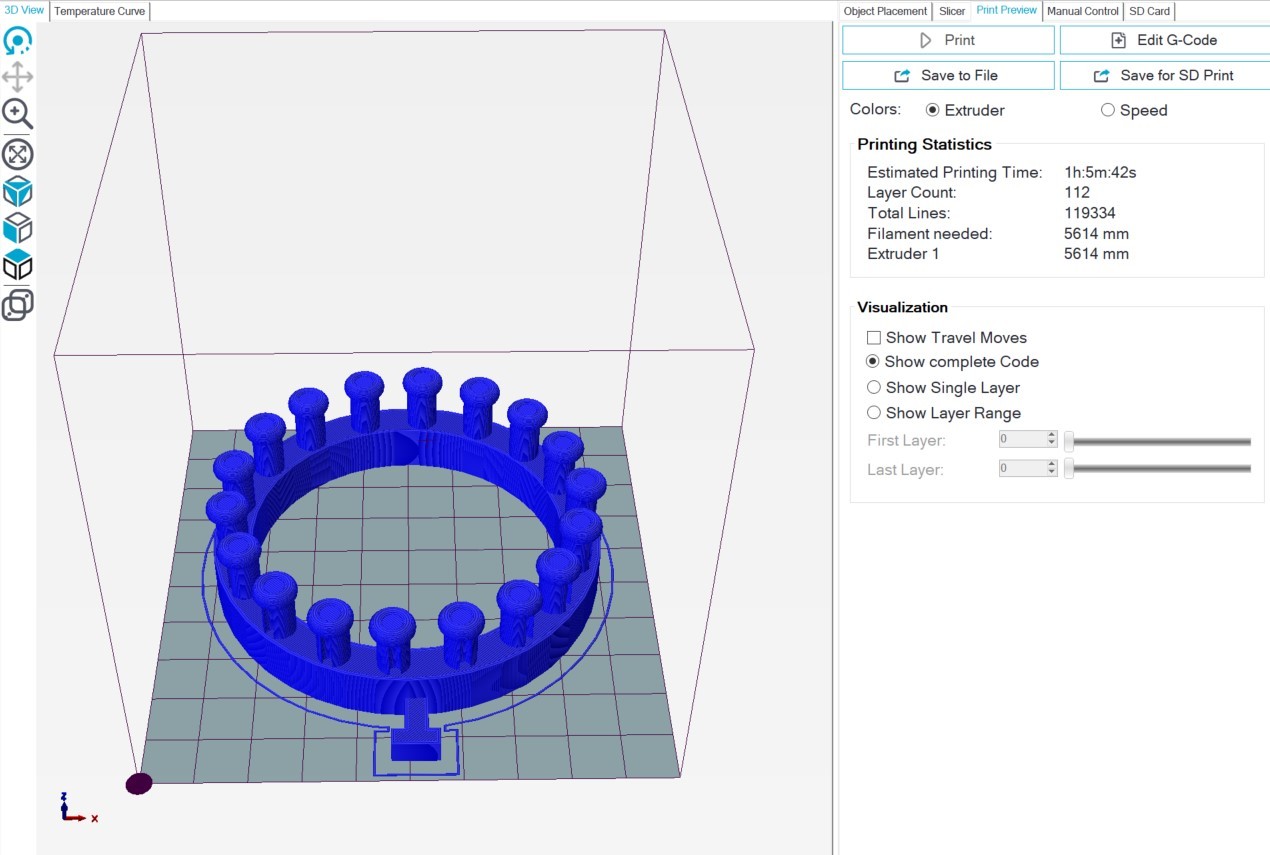
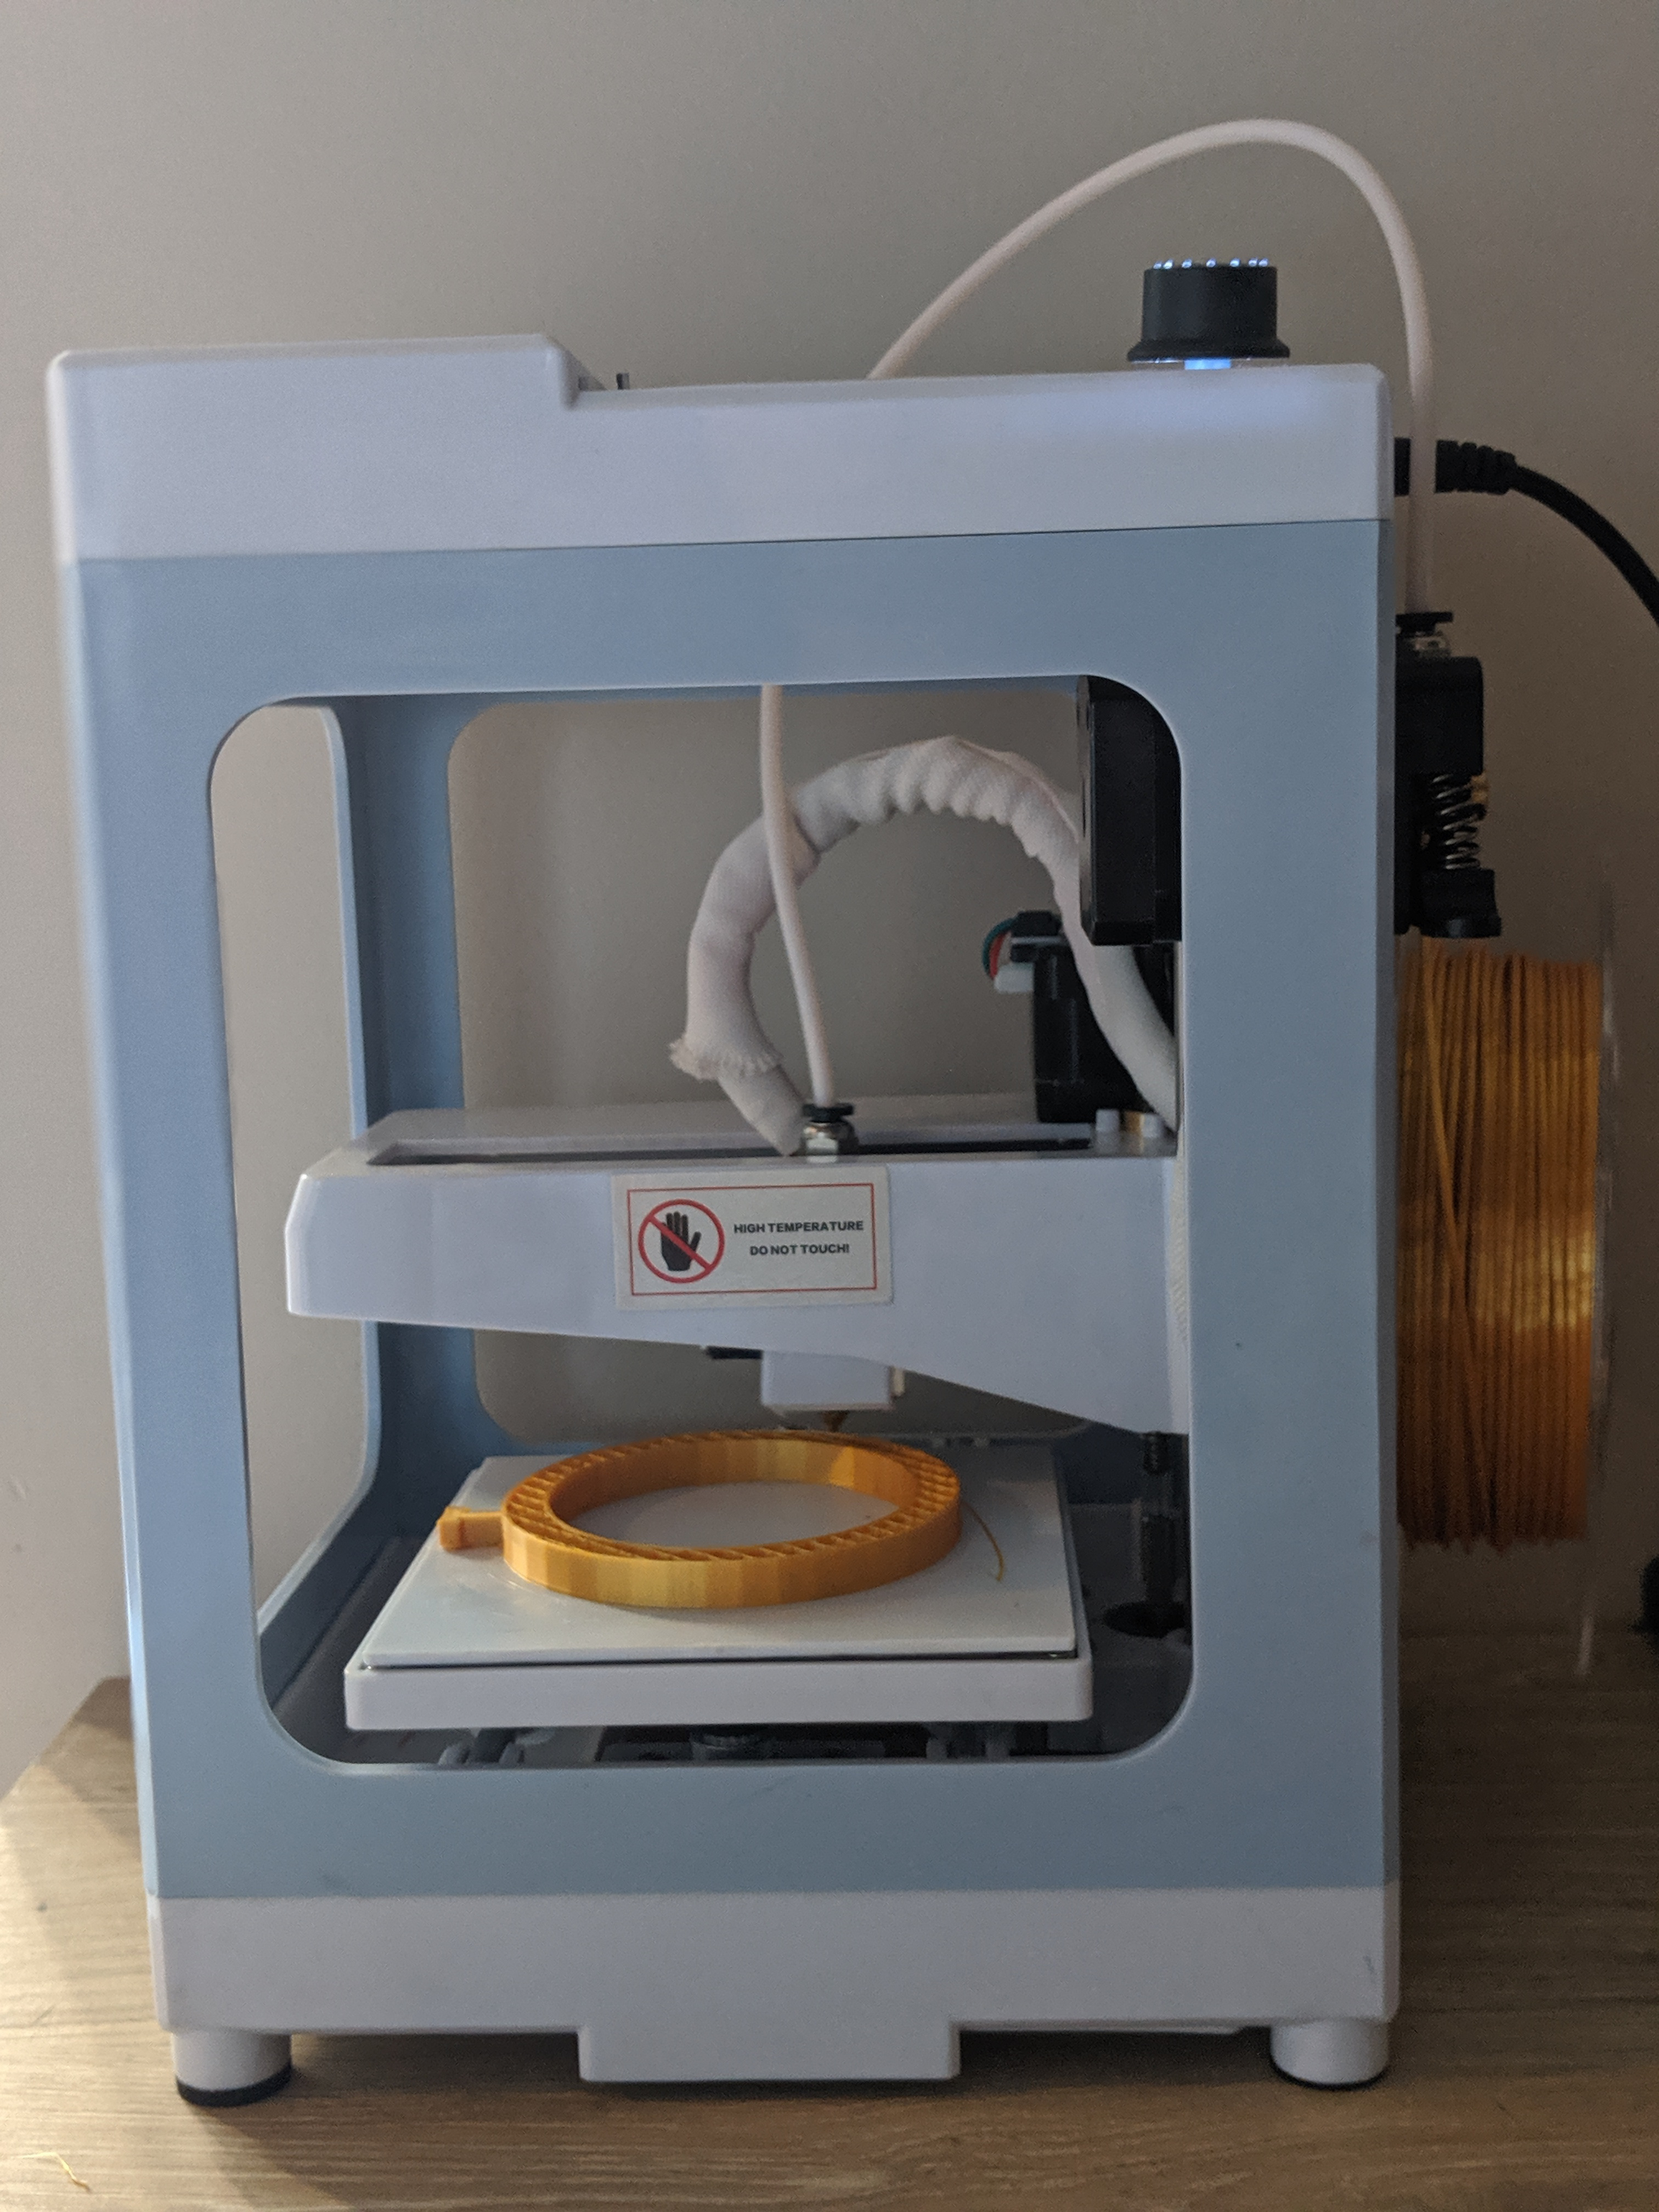
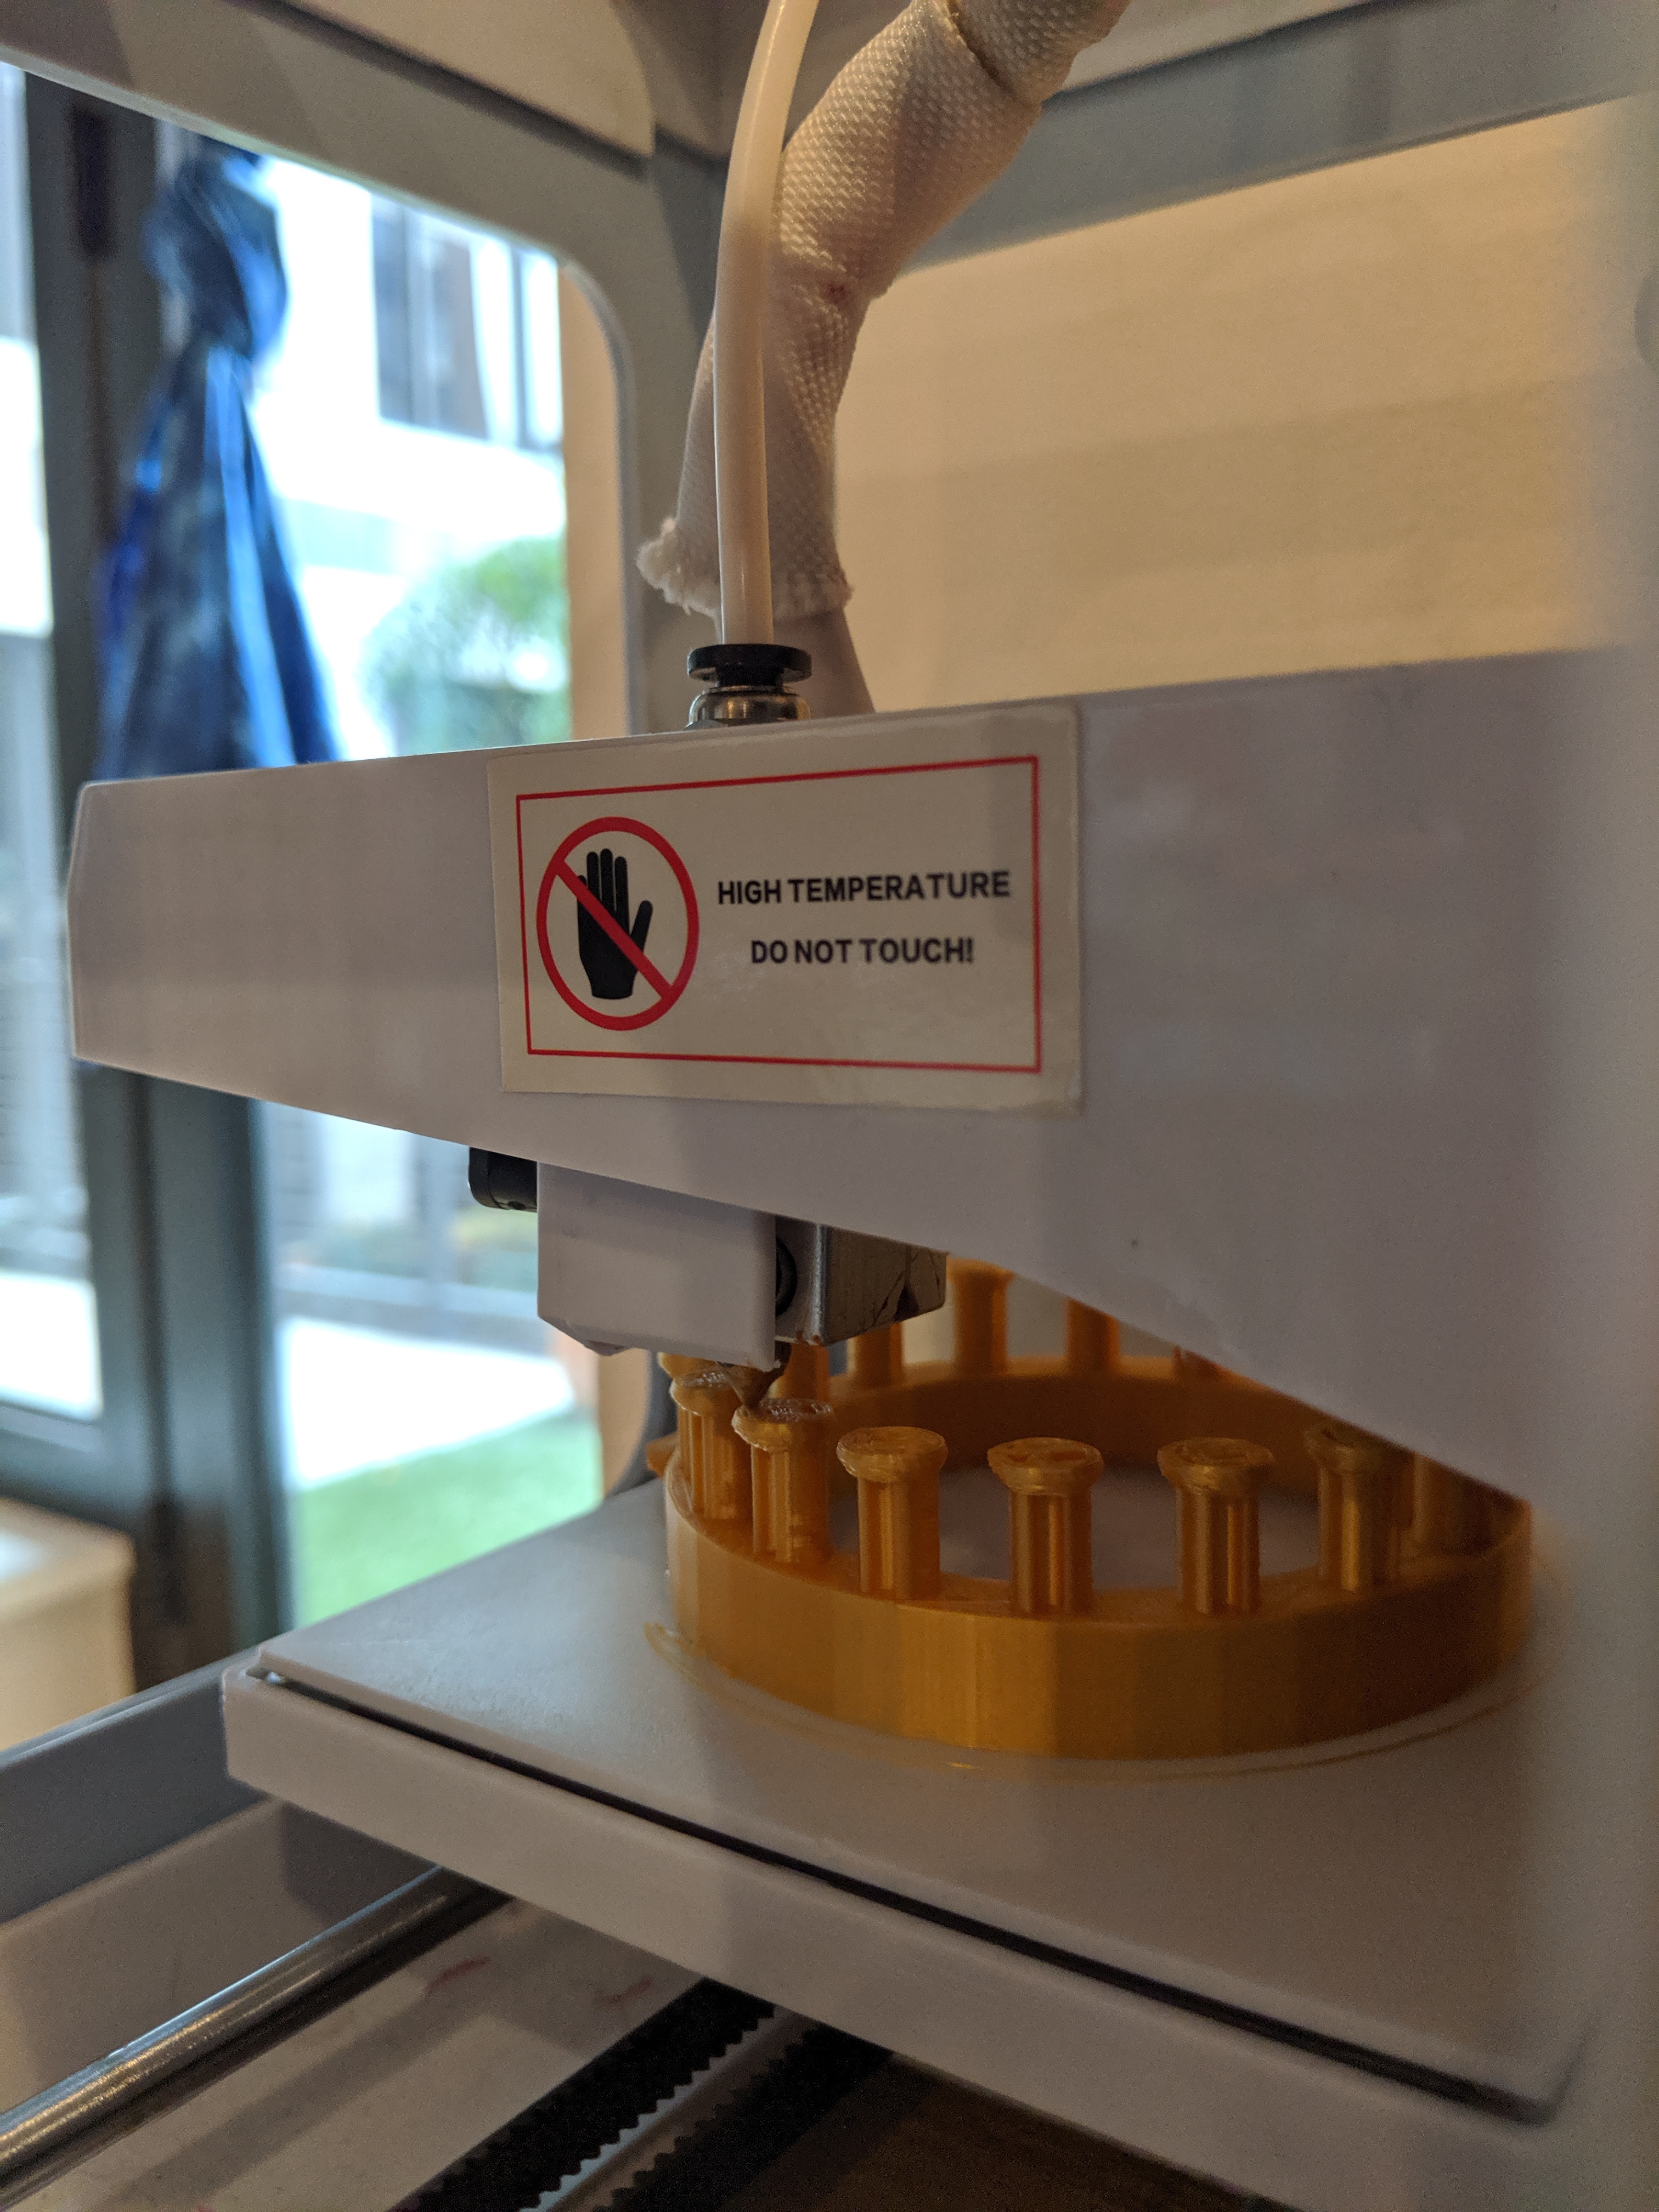
Use whatever #slicer you're comfortable with. You know your 3D printer better than I do.
My cheap, small printer took a little over an hour to print my loom. I was pretty pleased with the result!
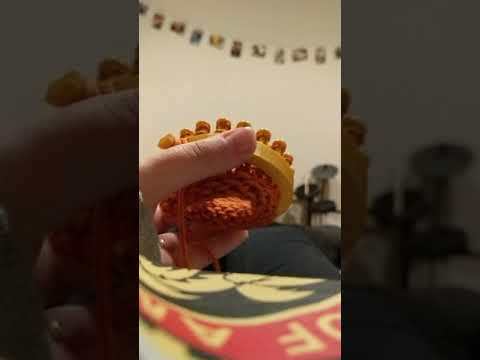
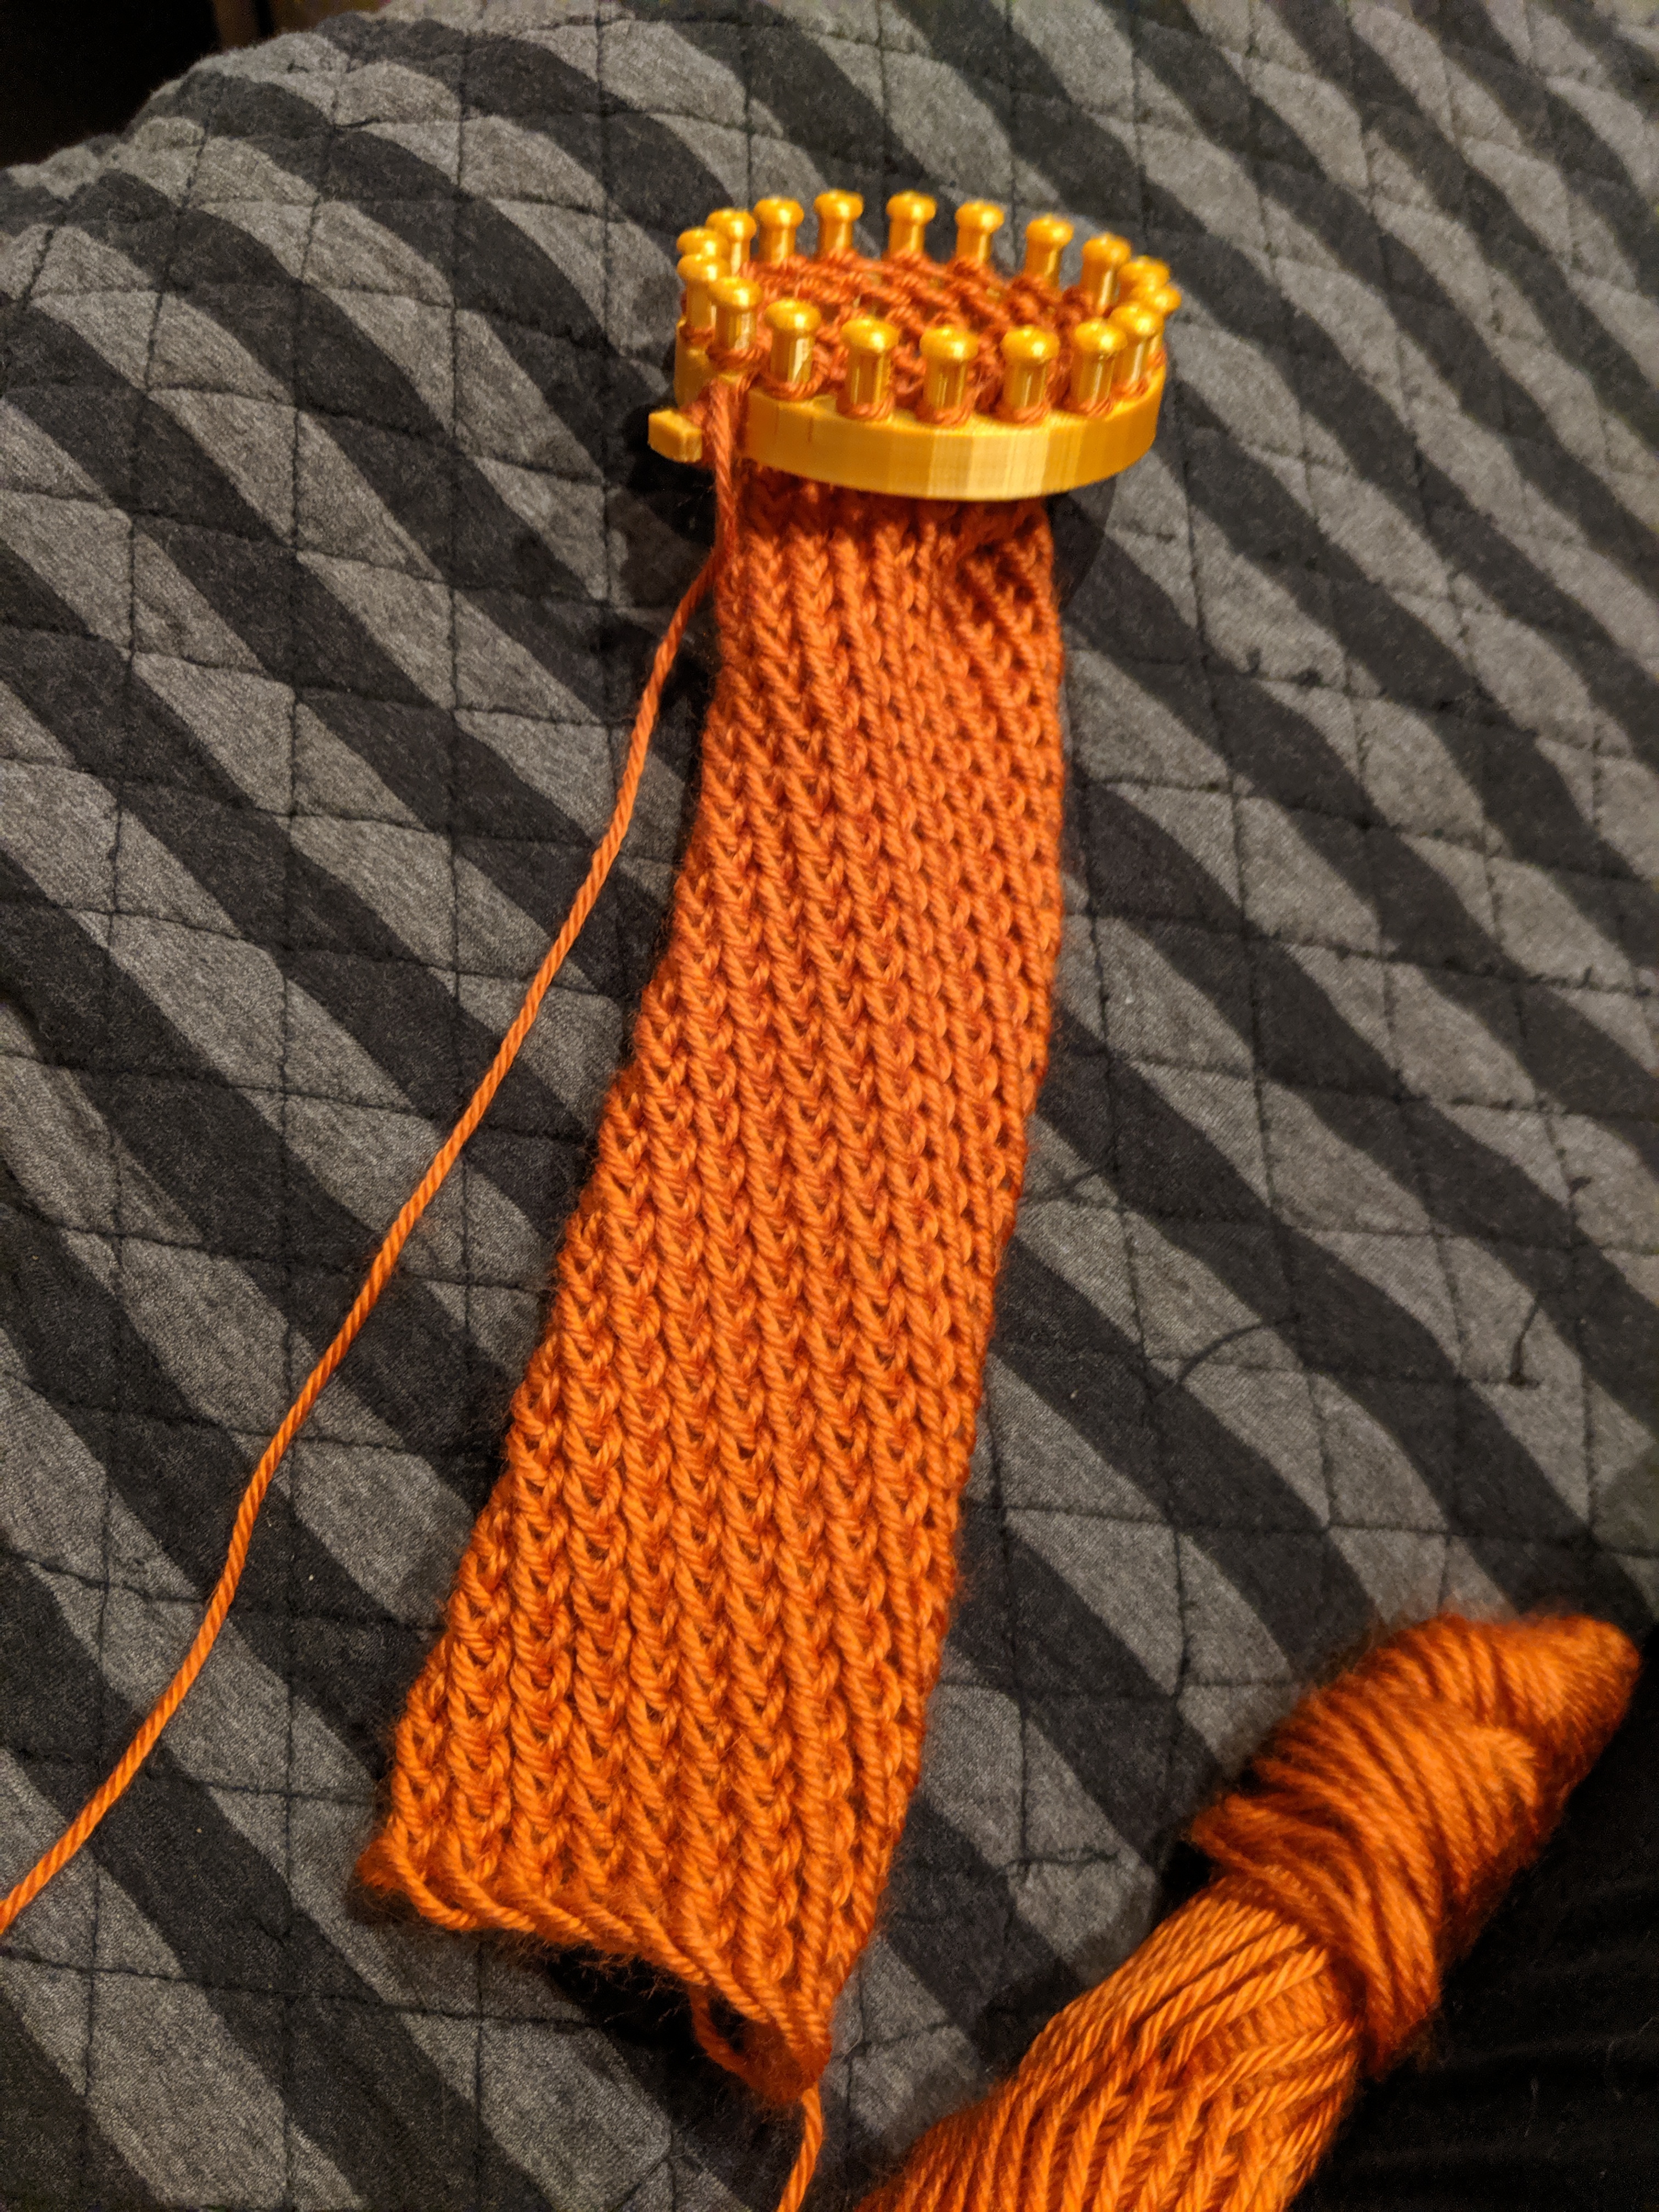
Finally: Knitting! (Kind Of)
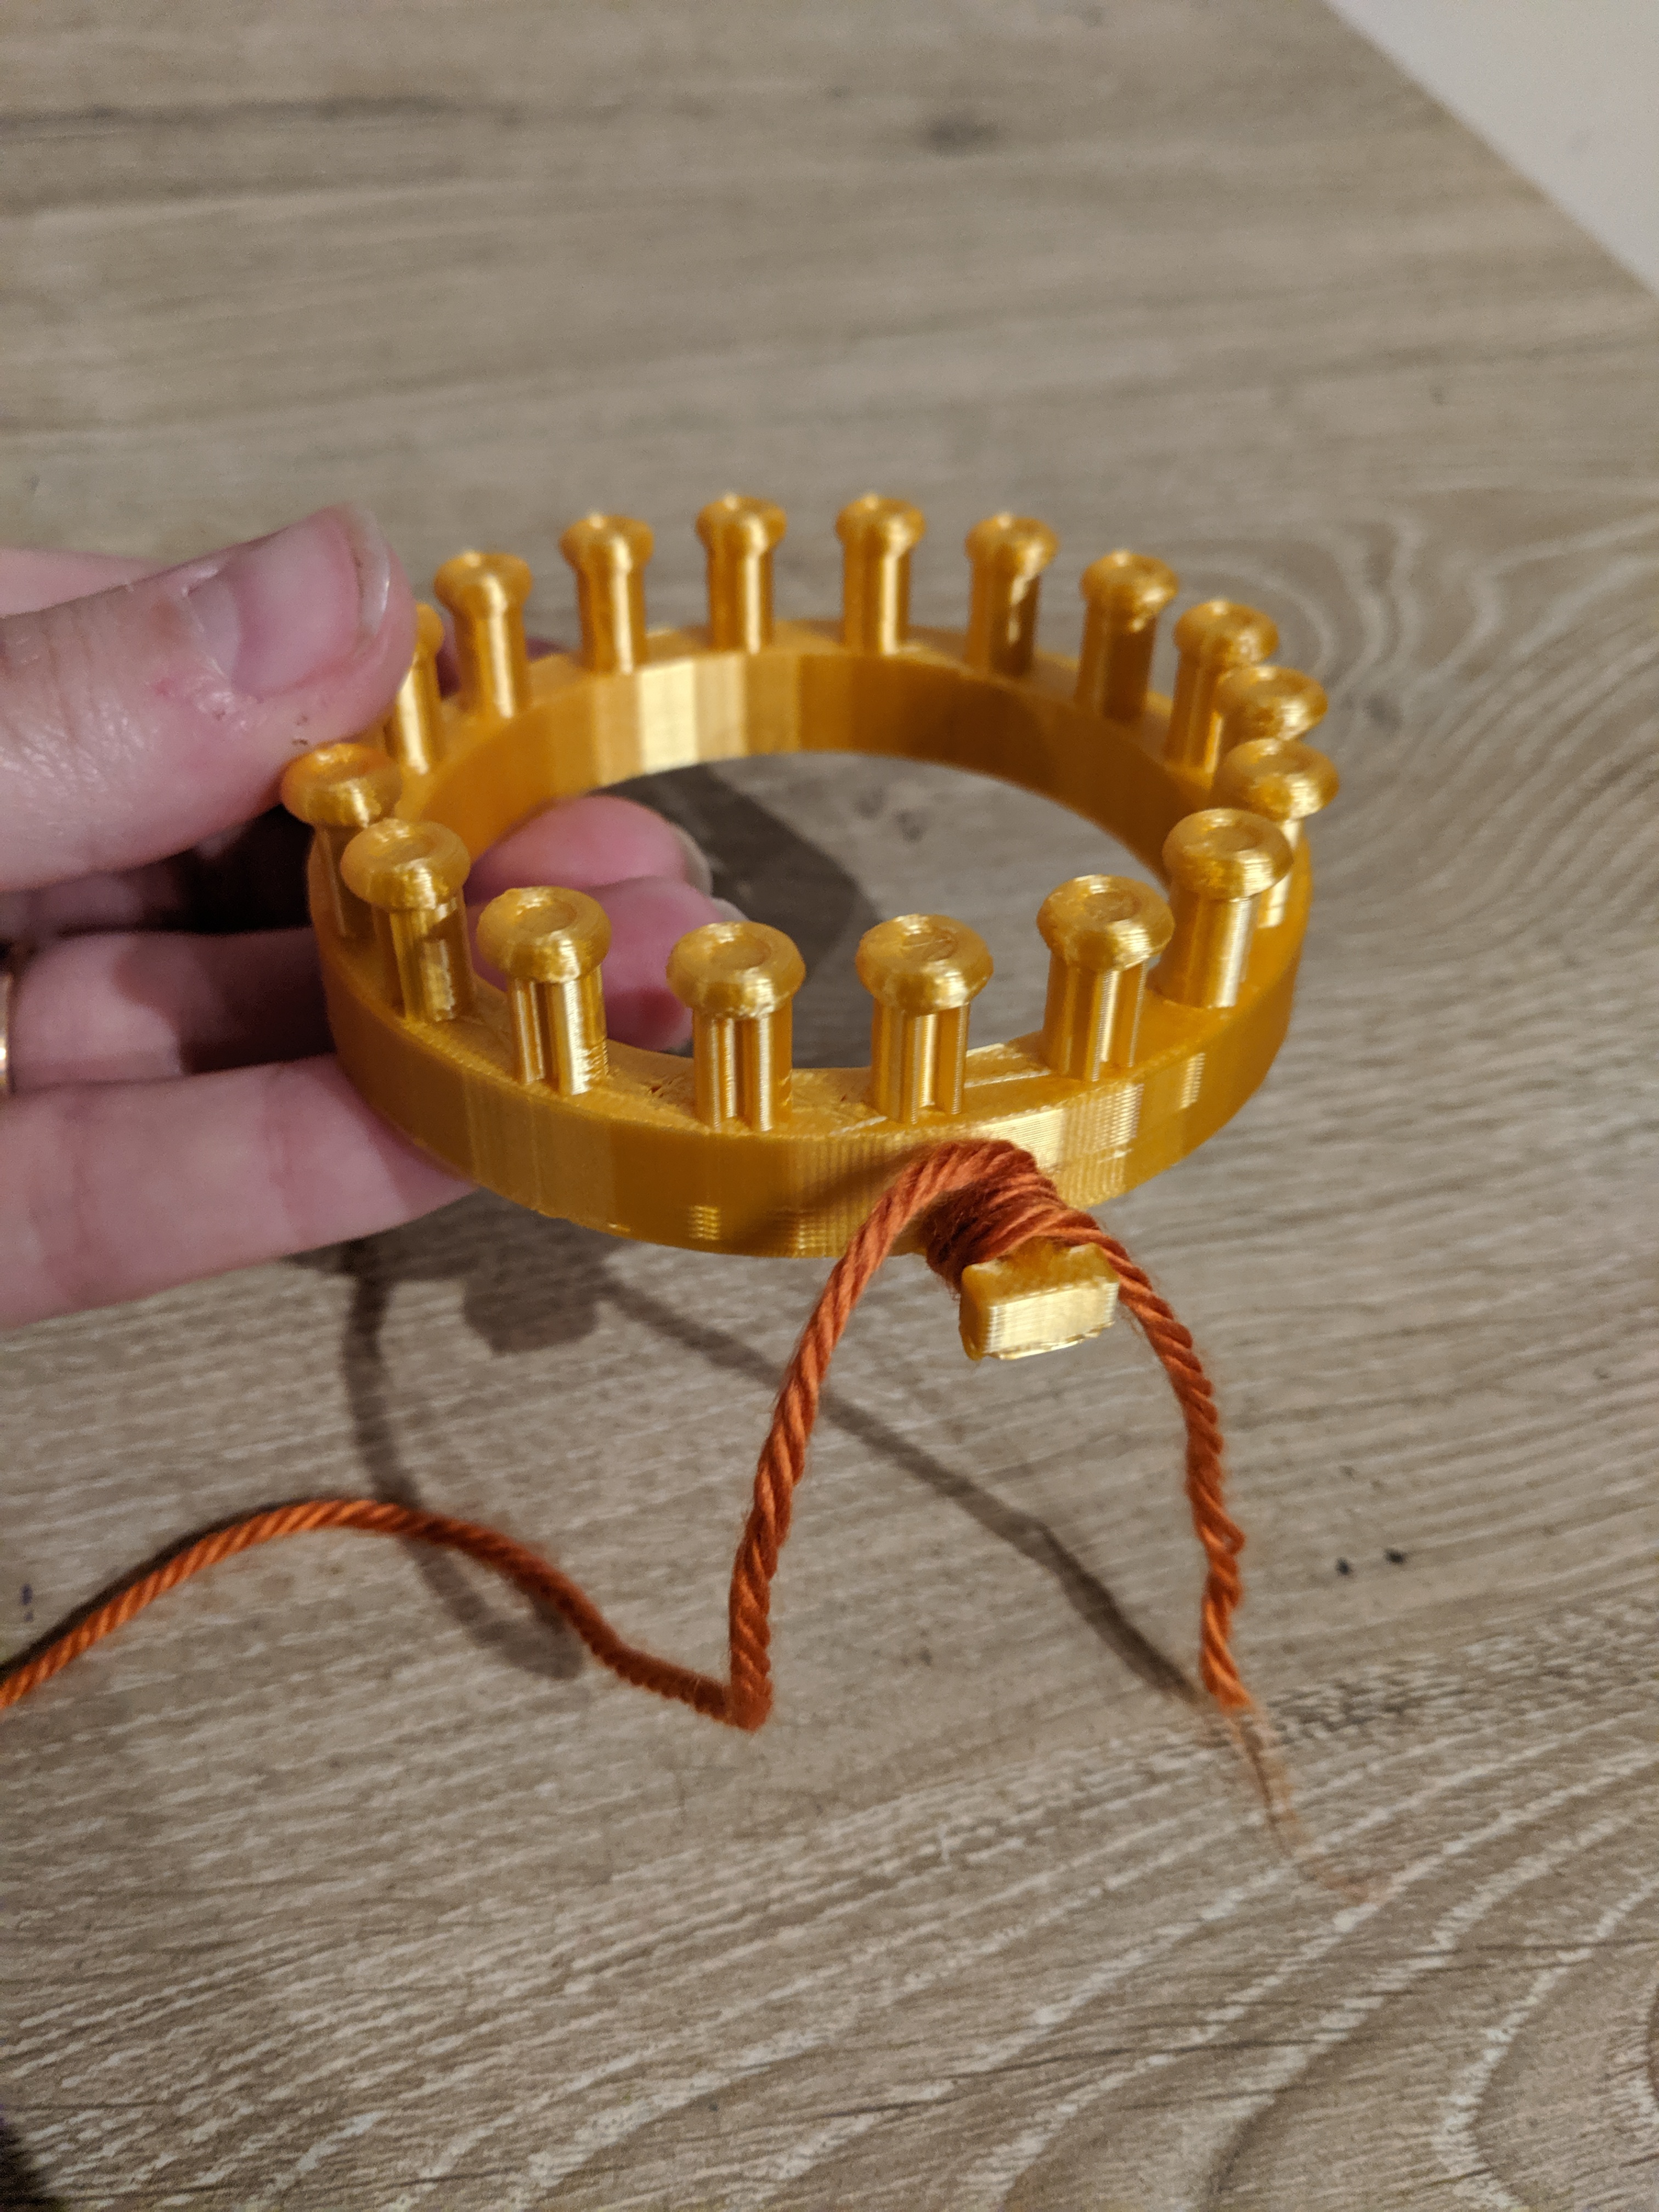
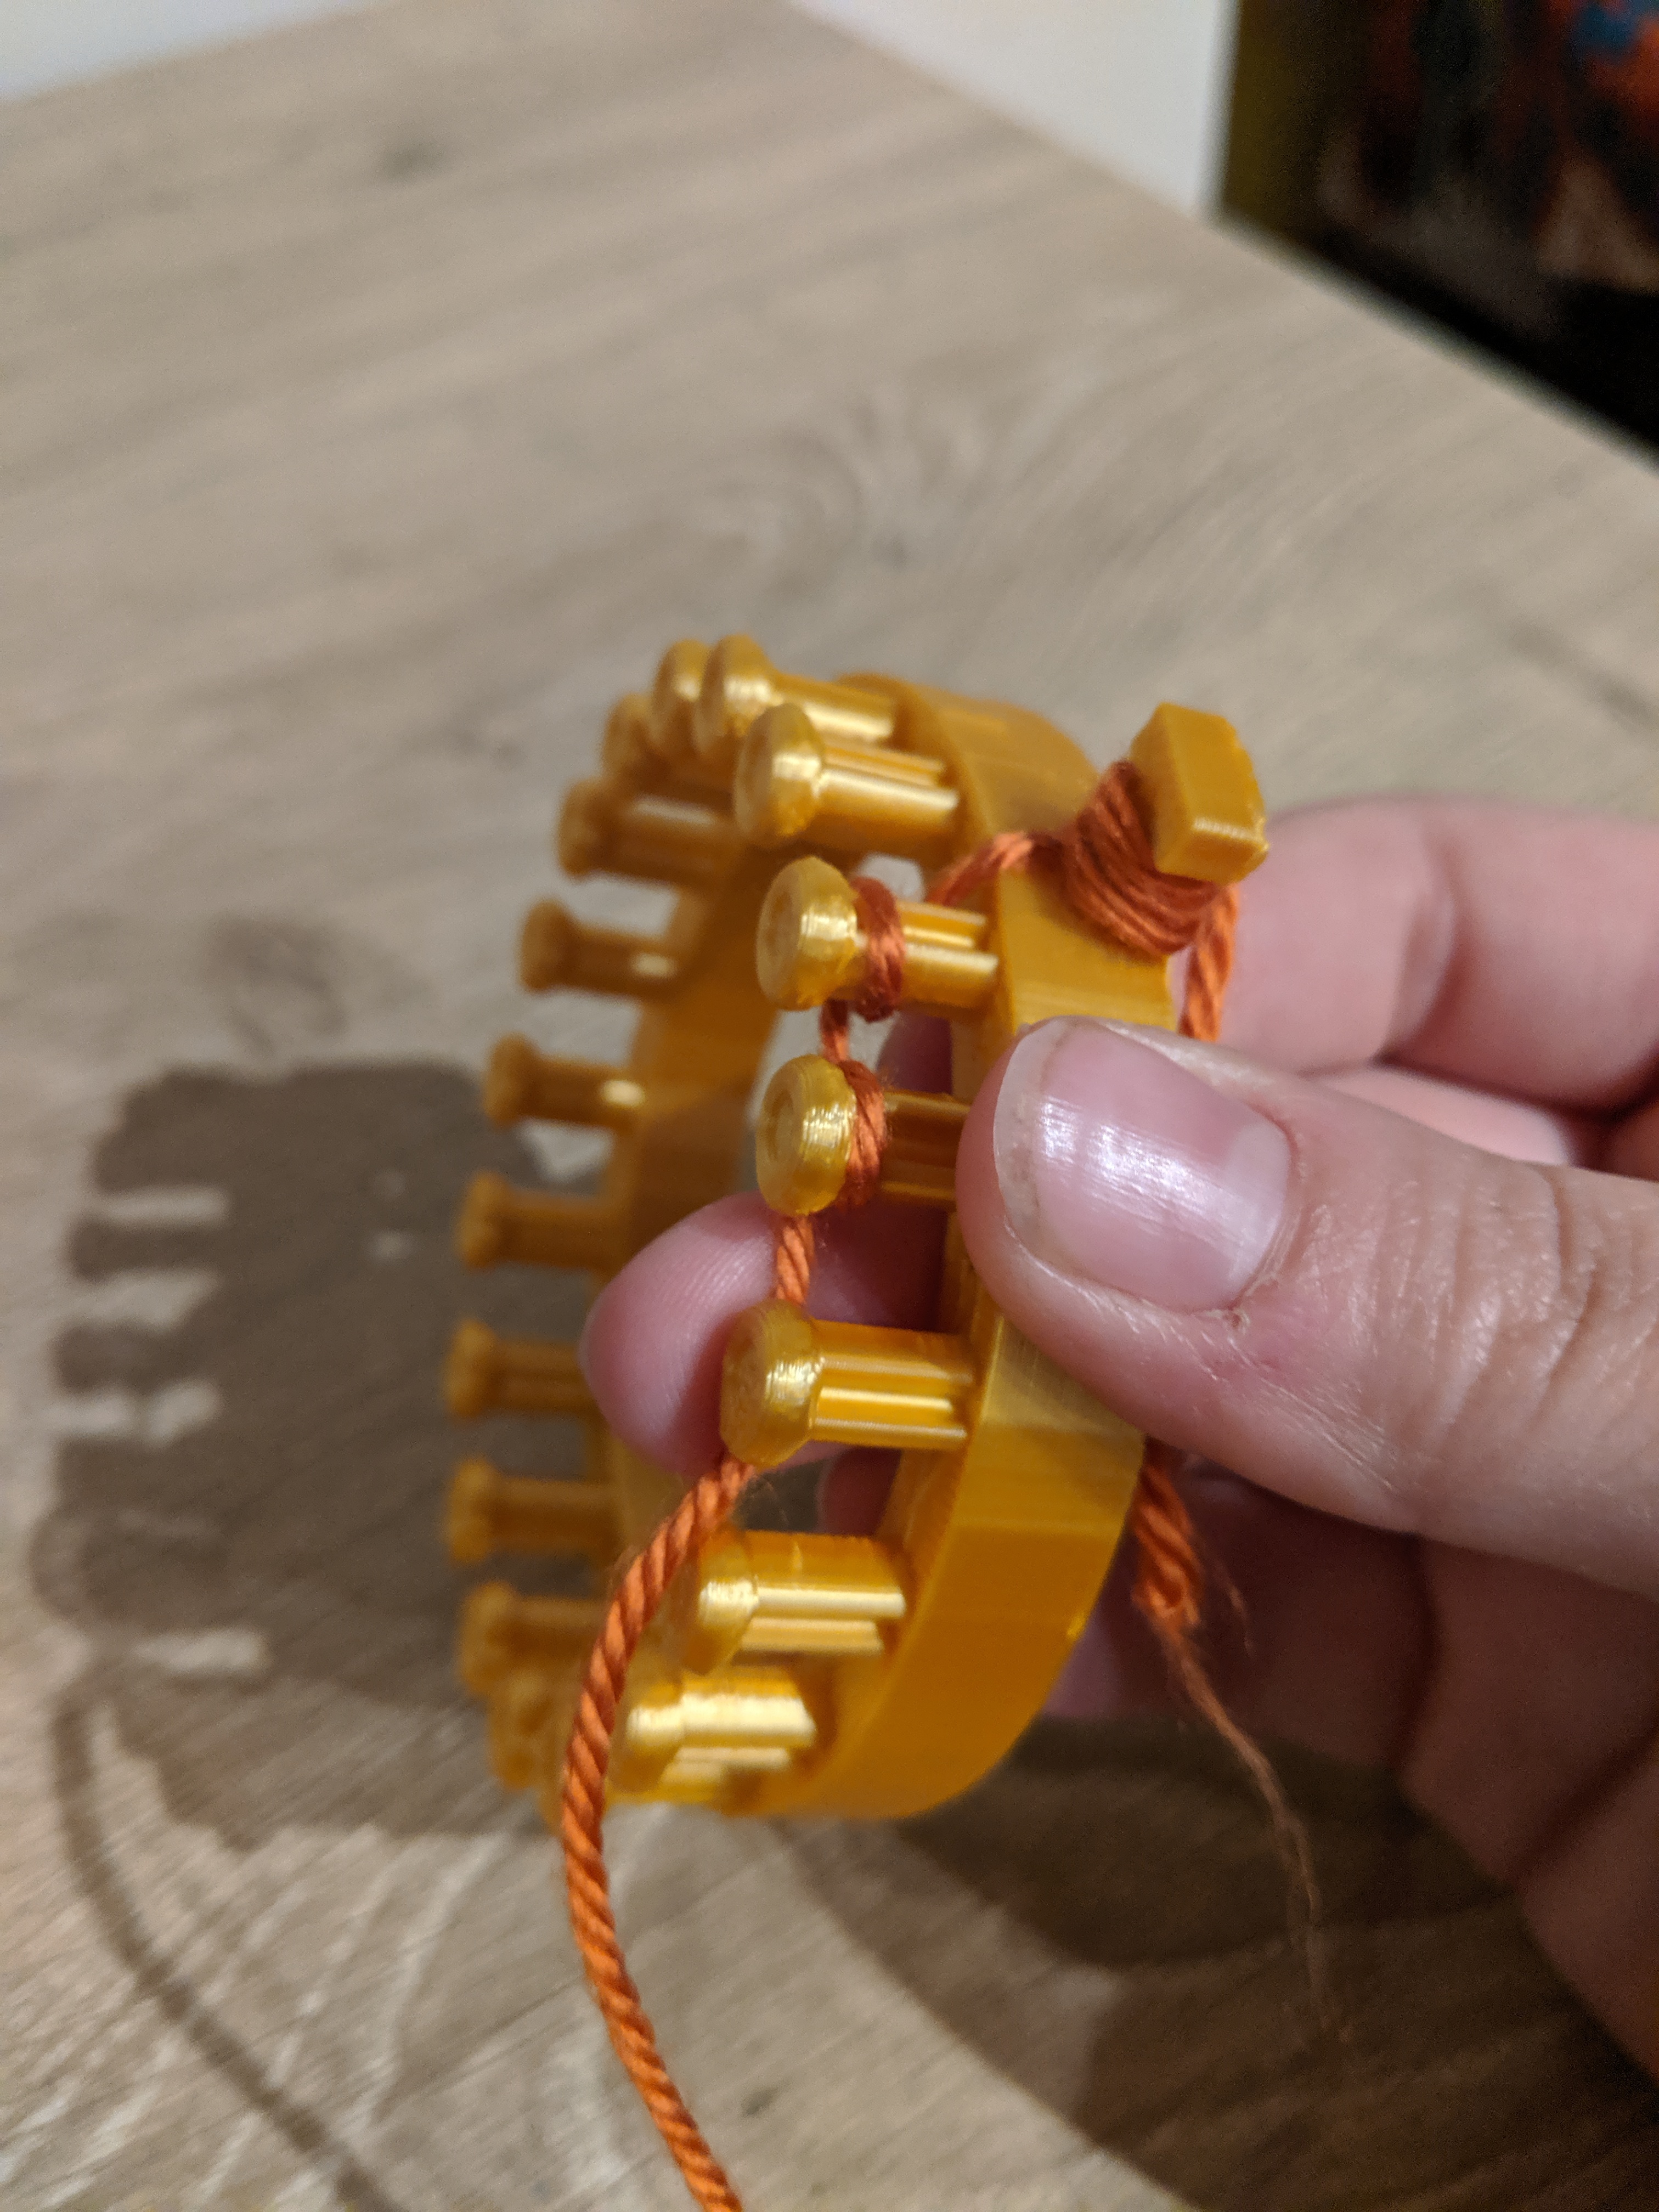
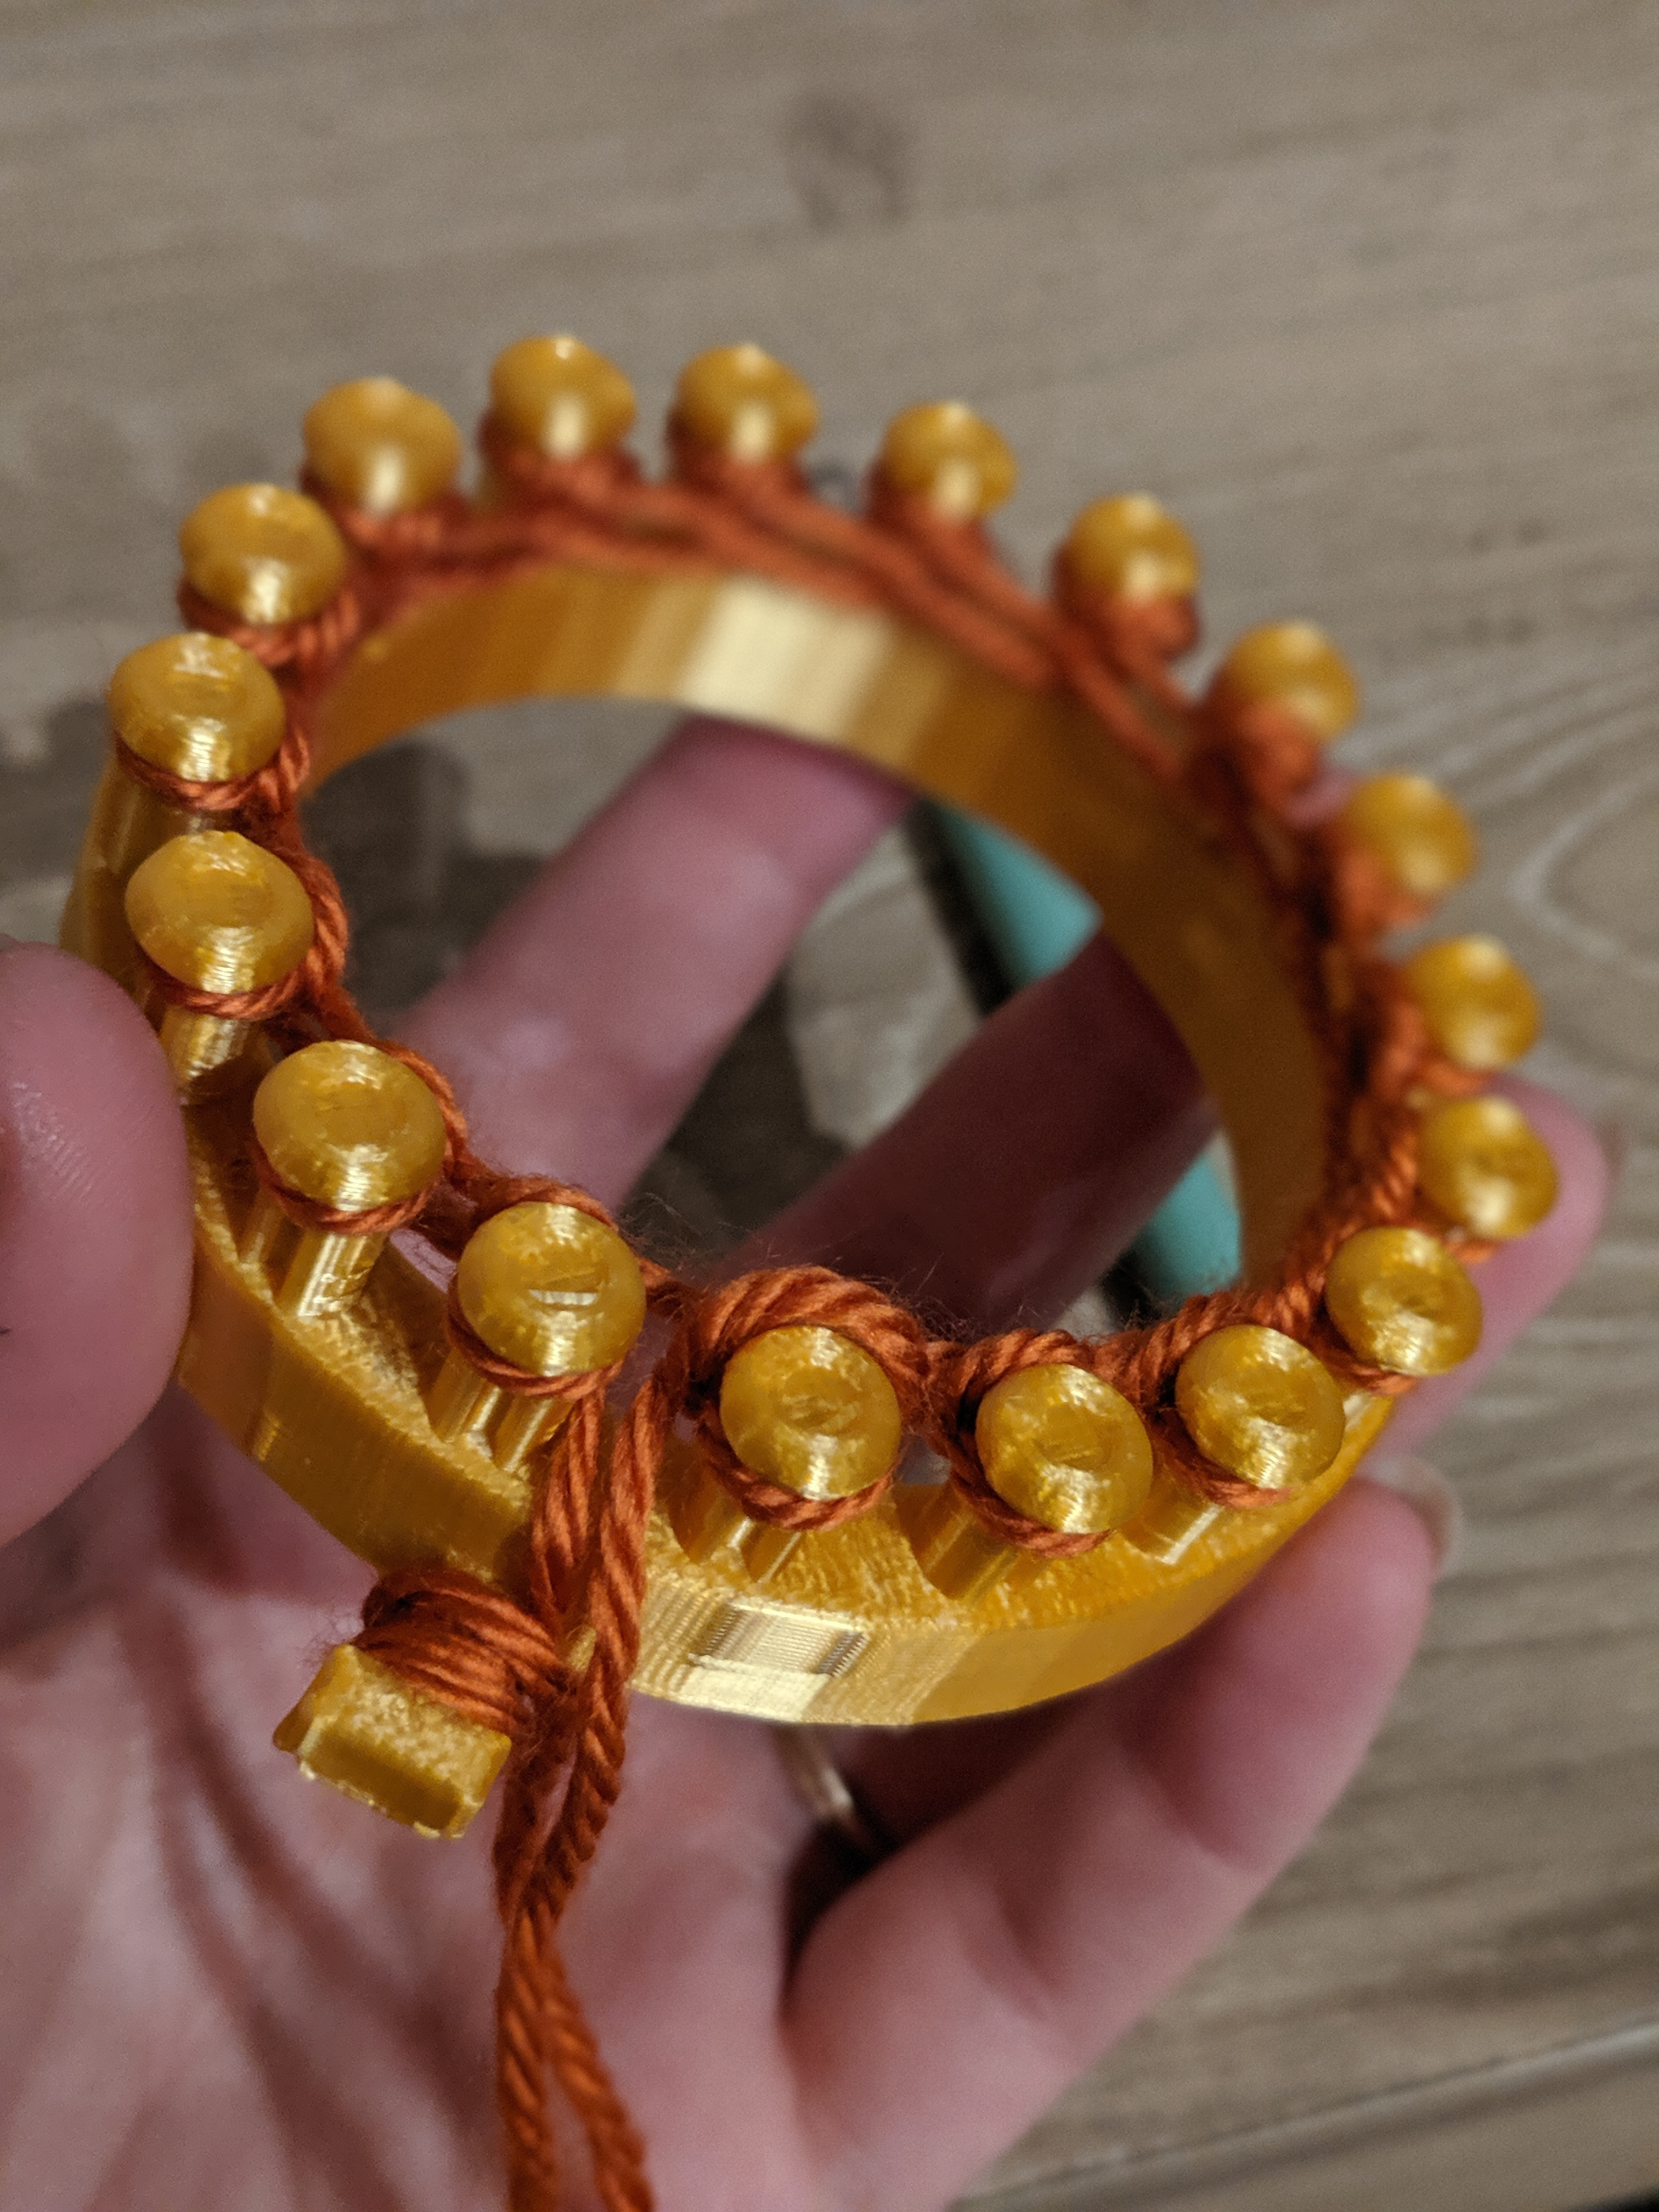
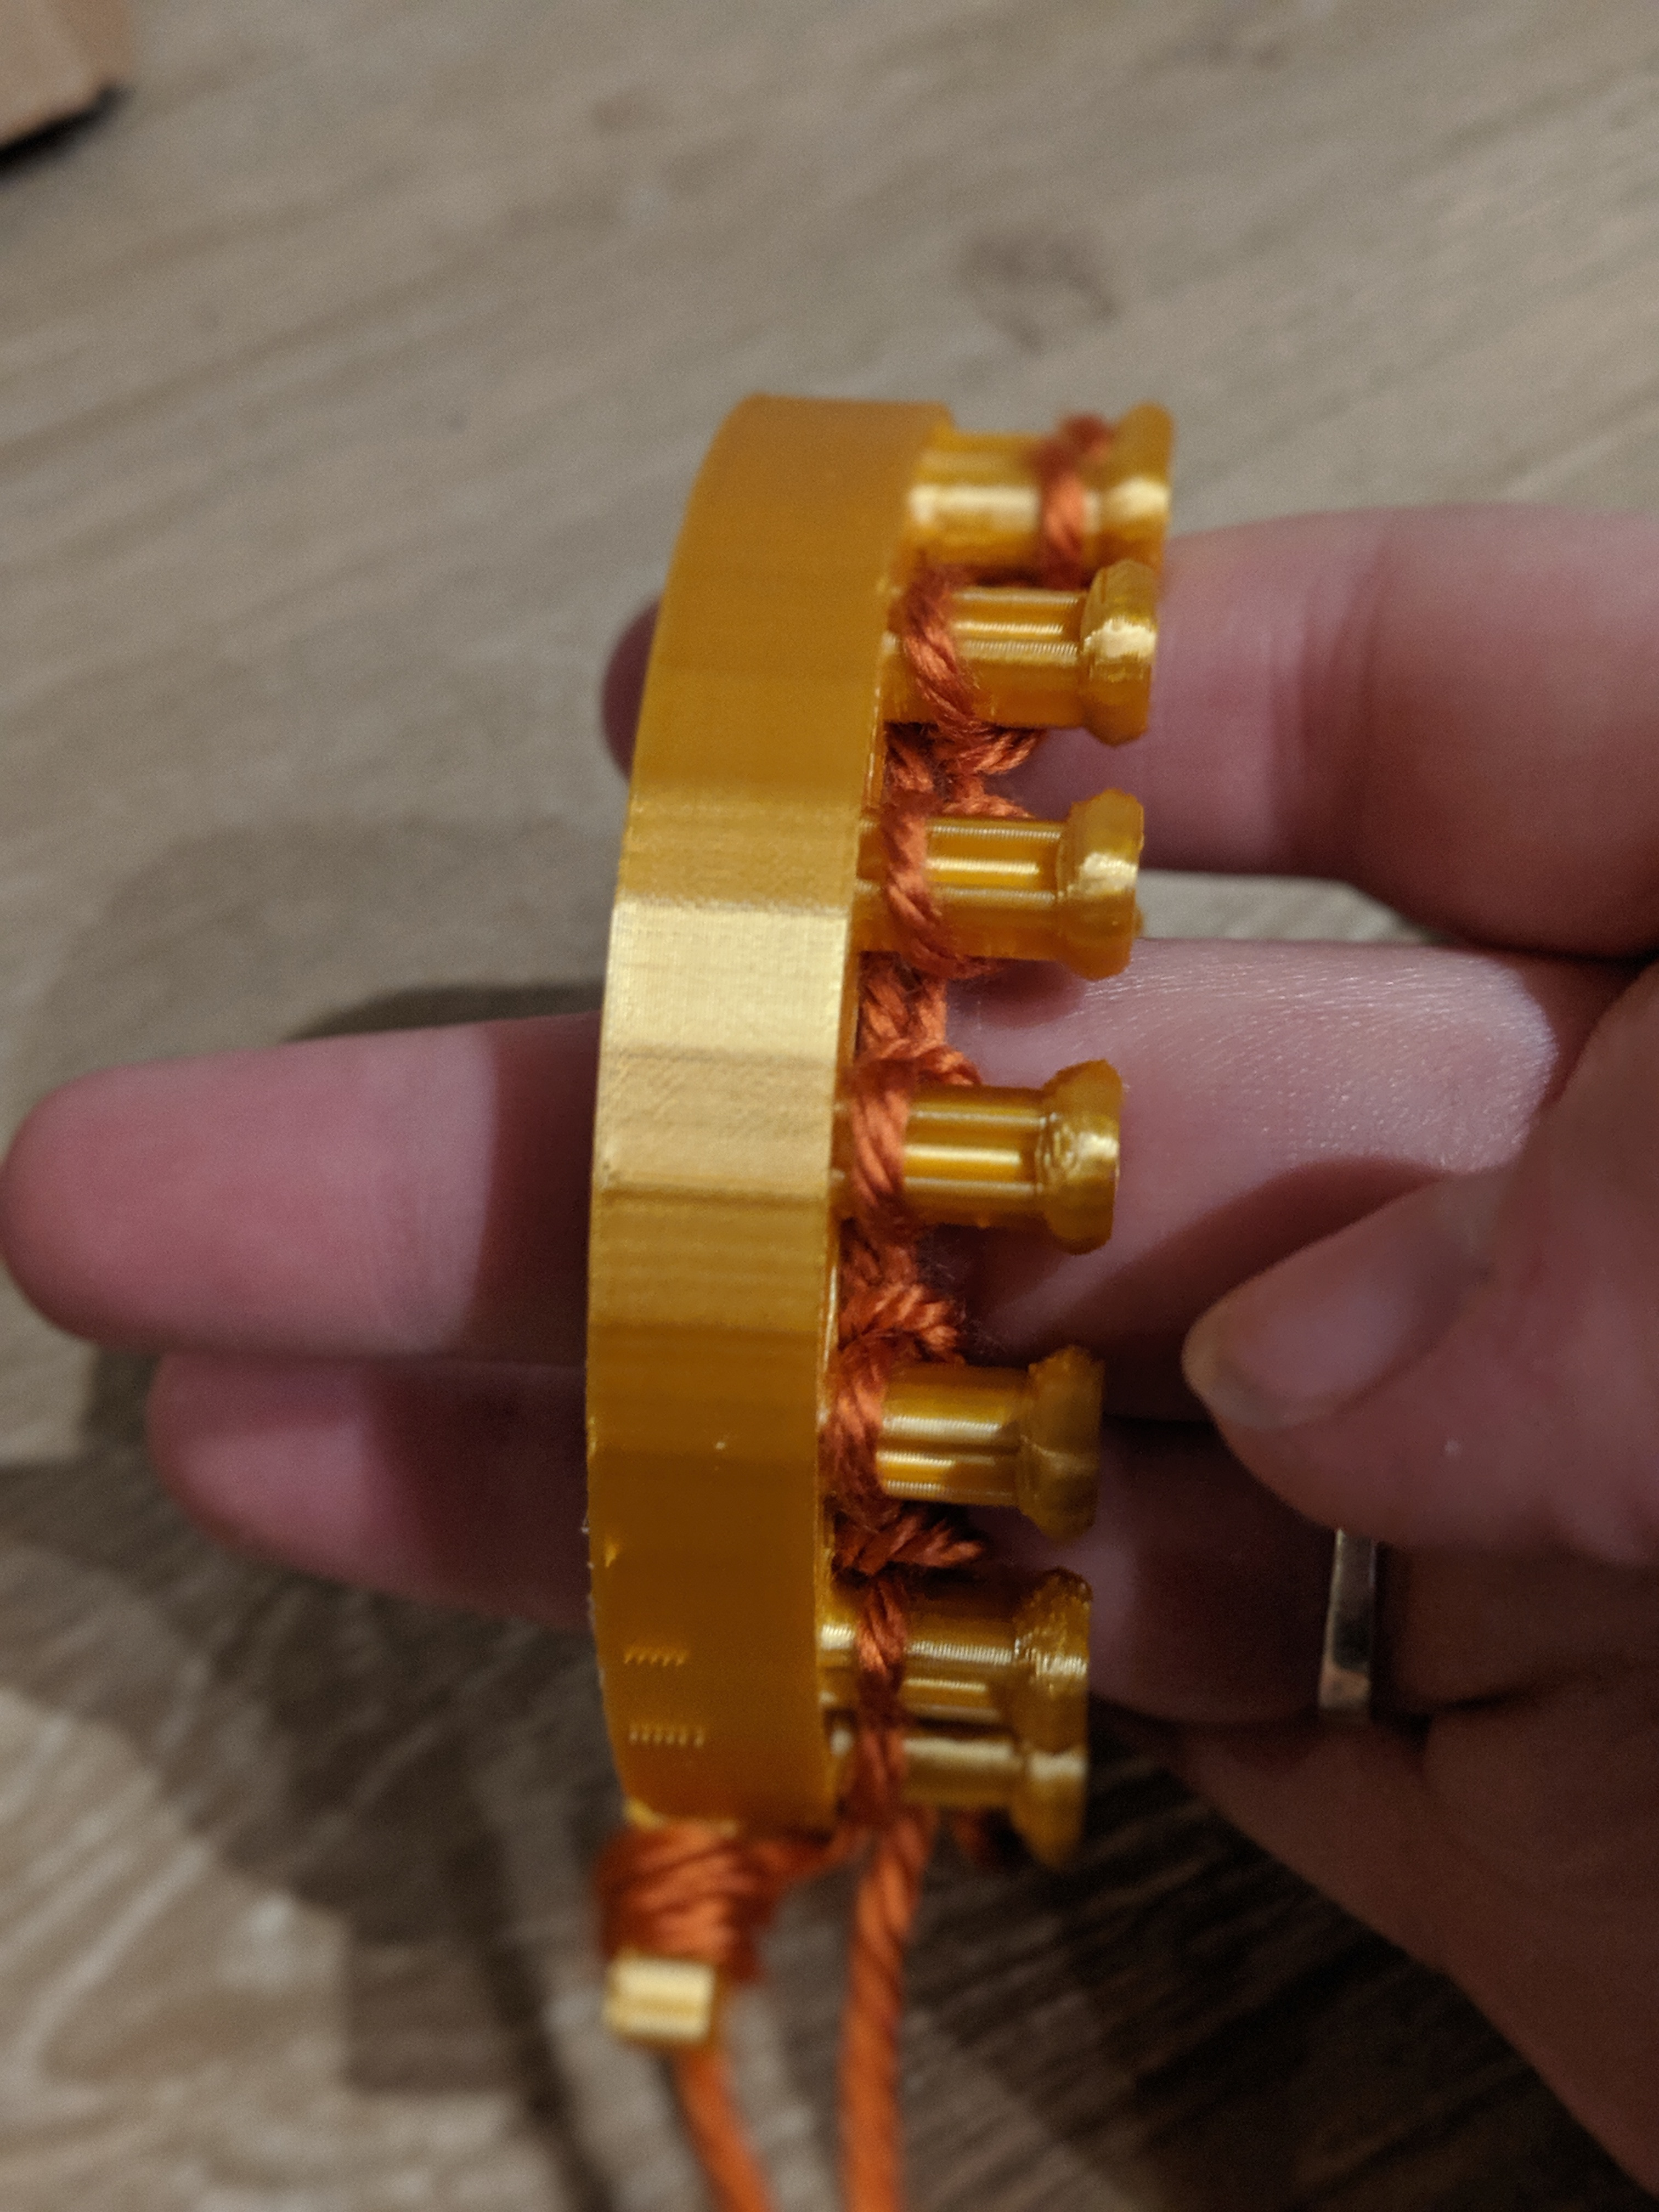
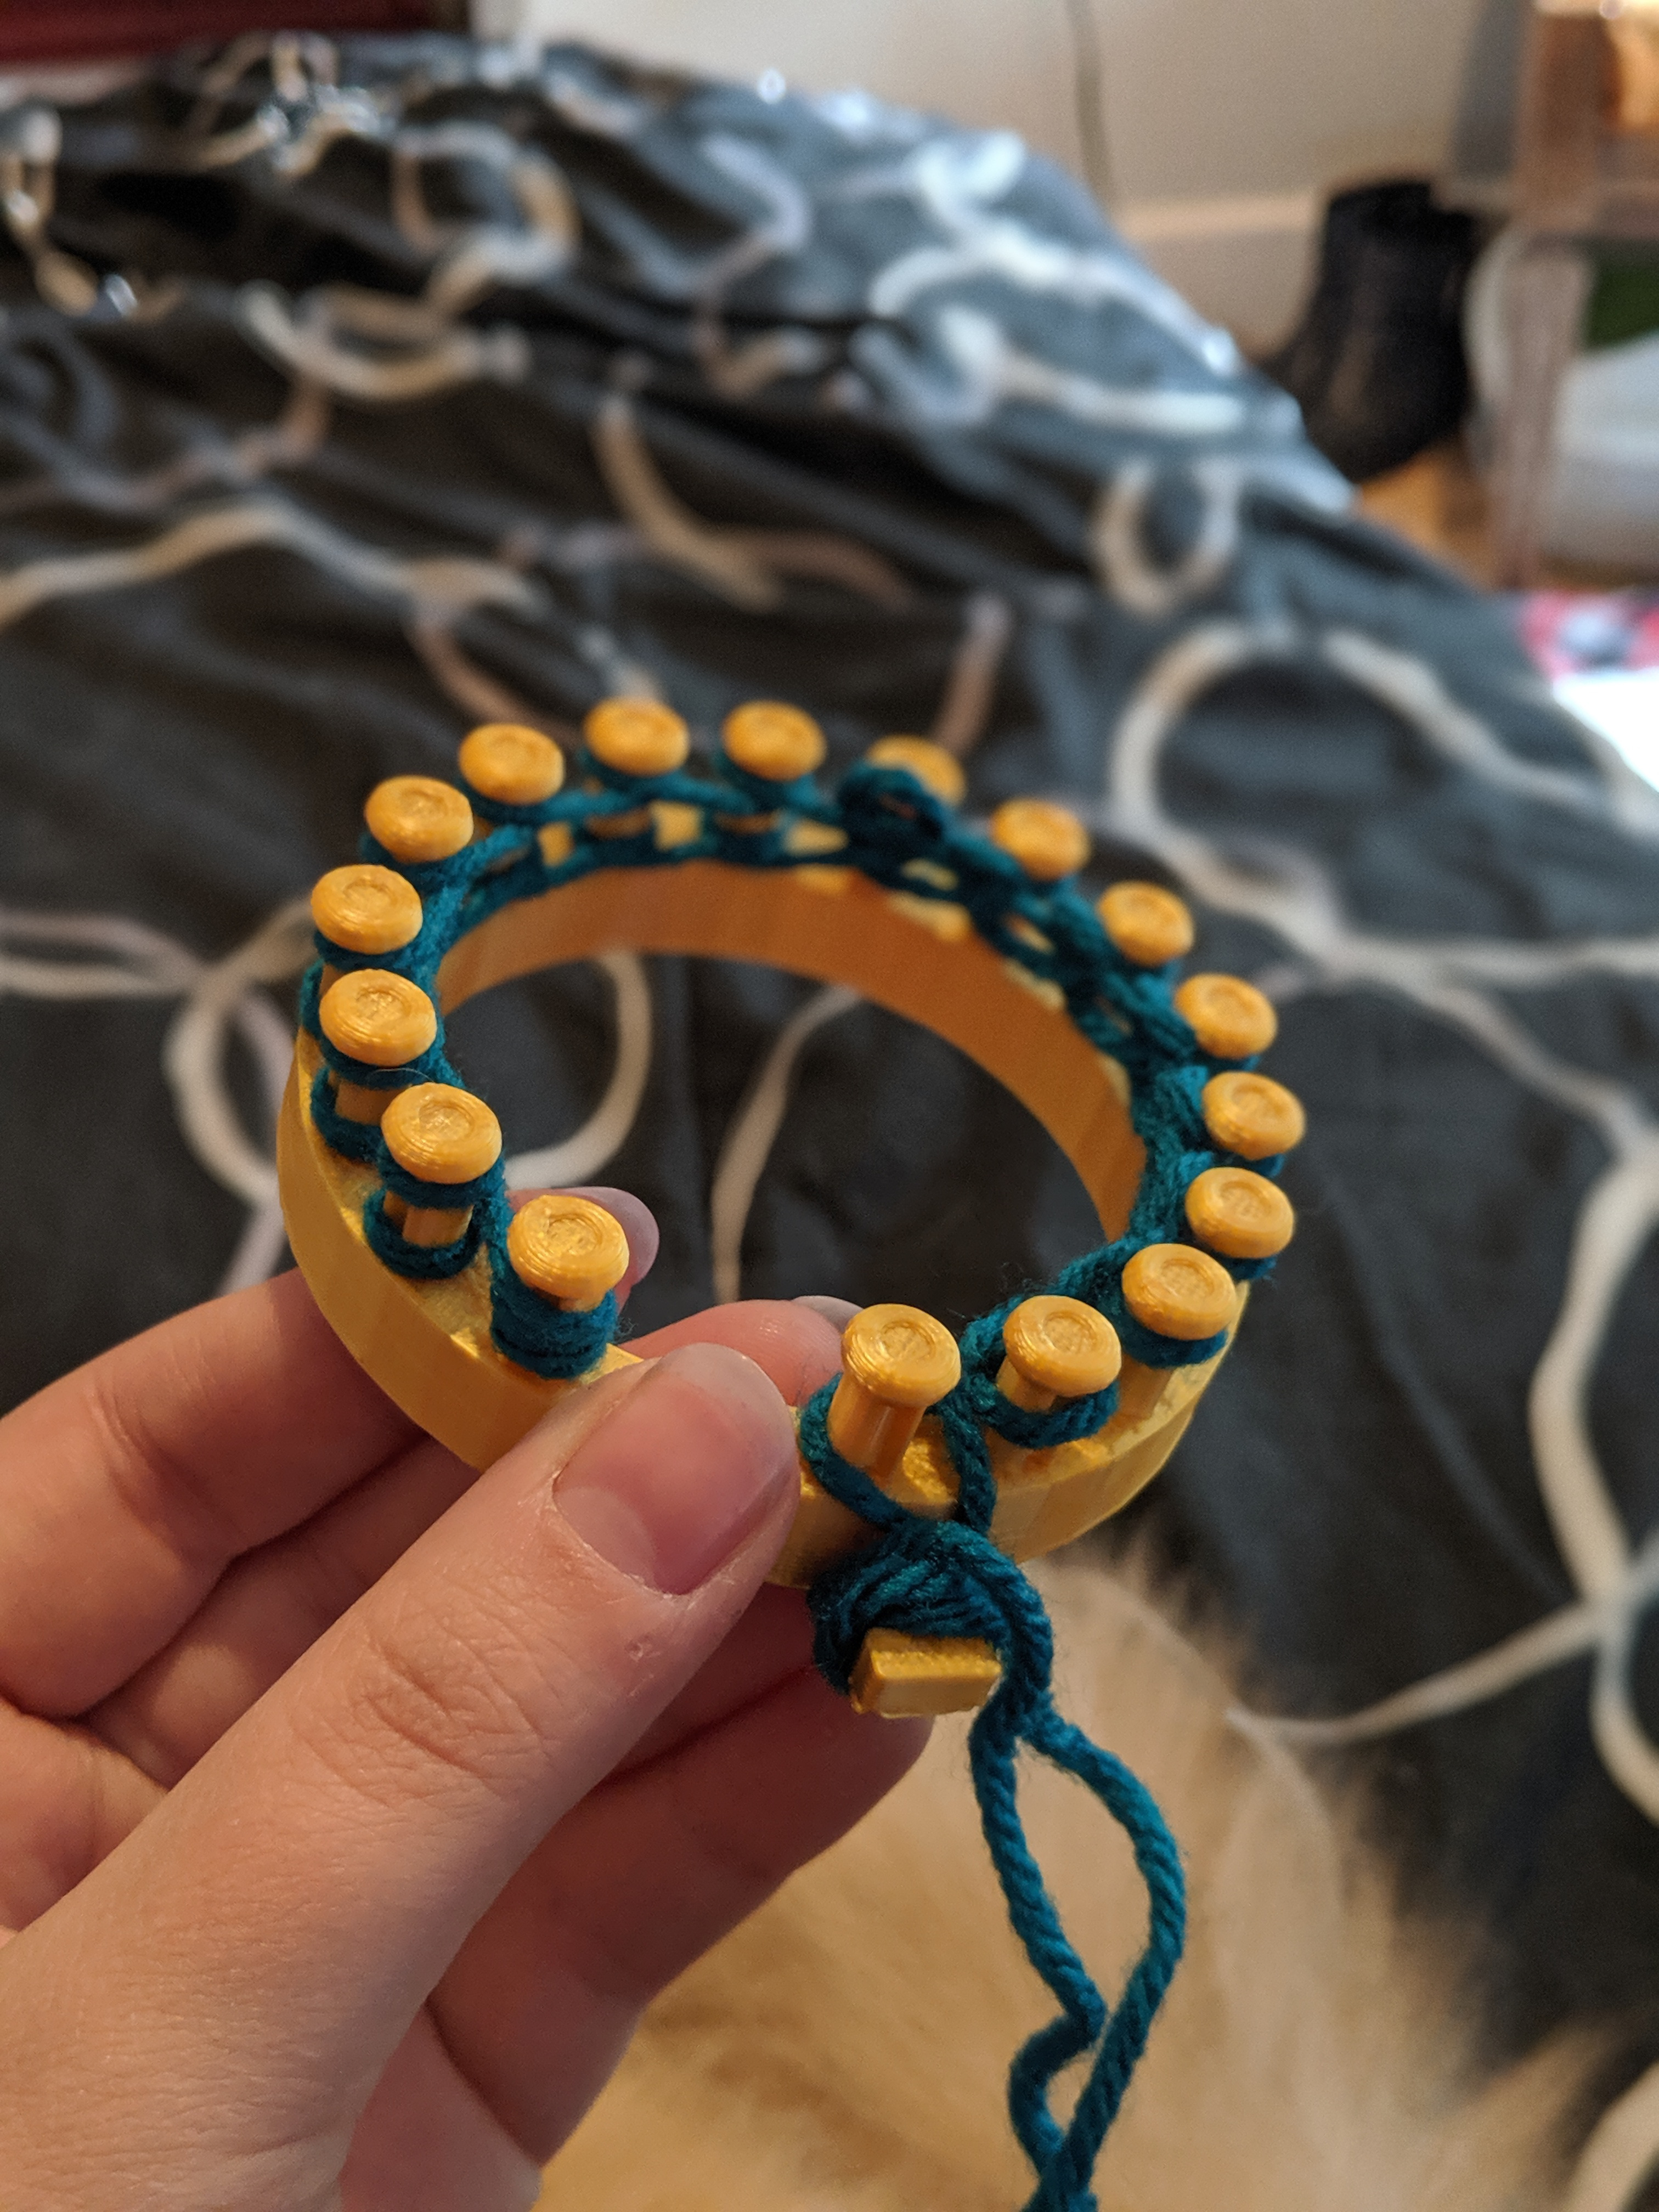
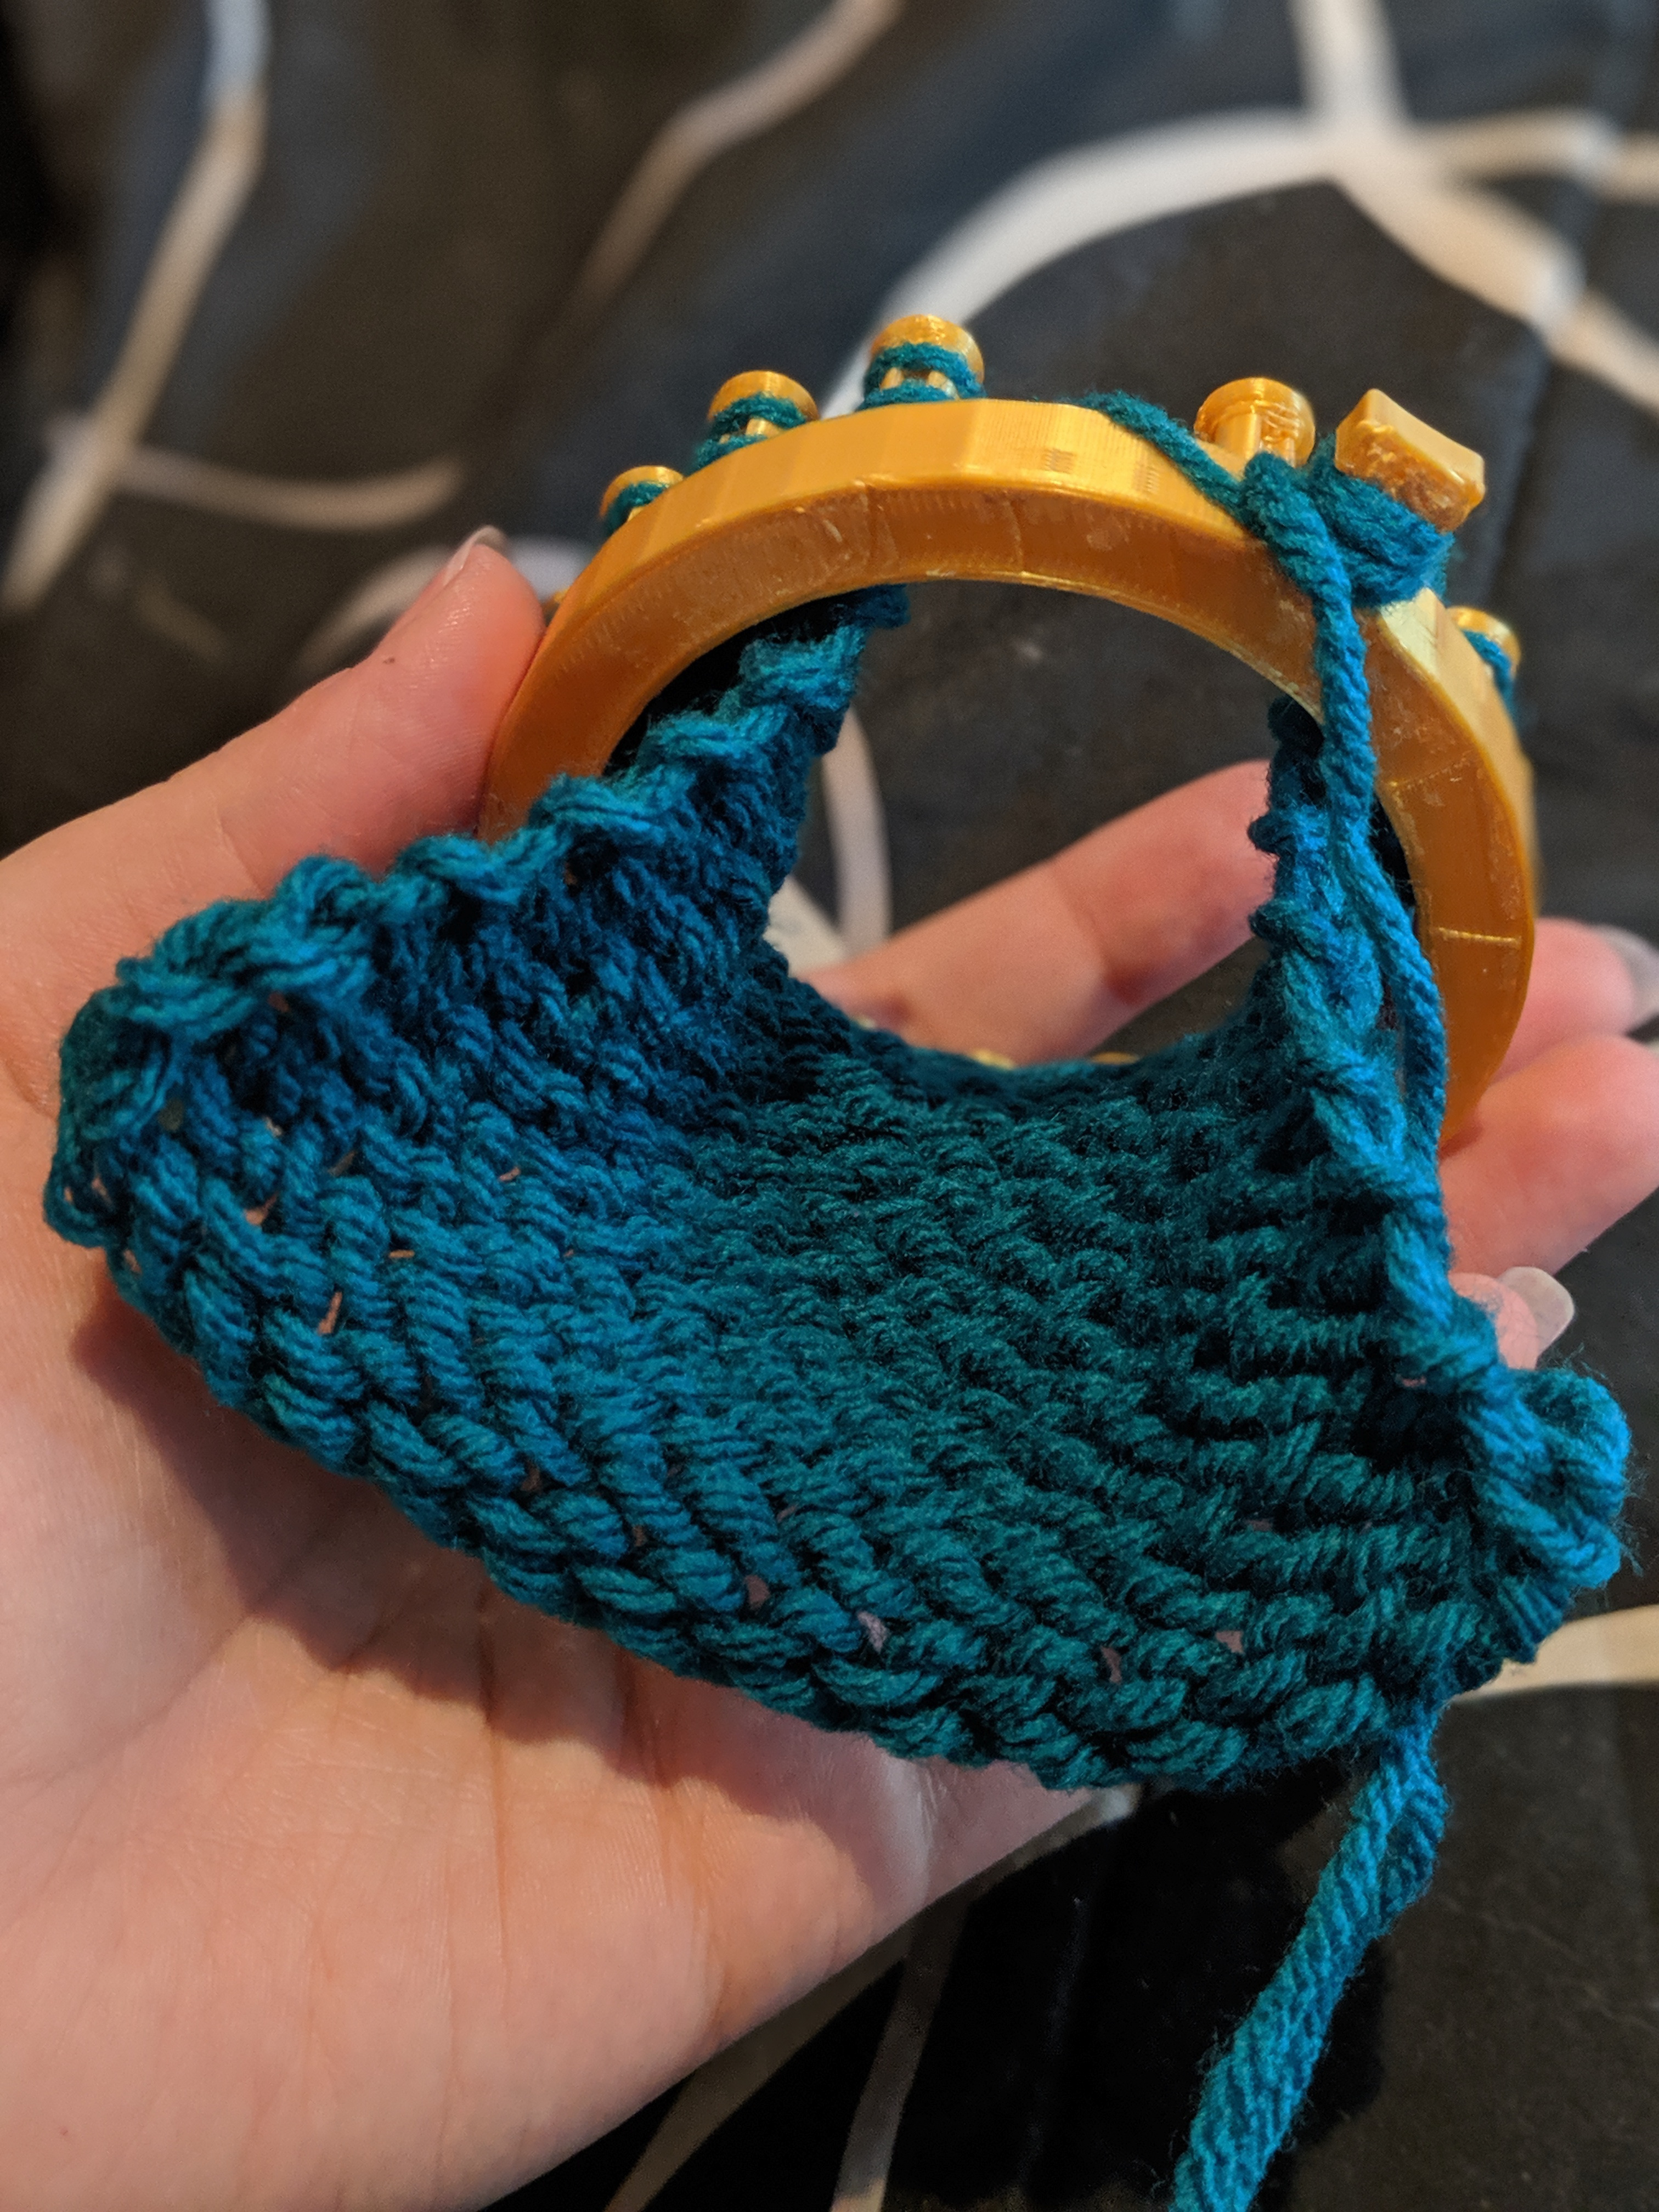
Picture one: First thing you should do is wrap the end of your yarn around the side peg a few times so your project won't come undone.
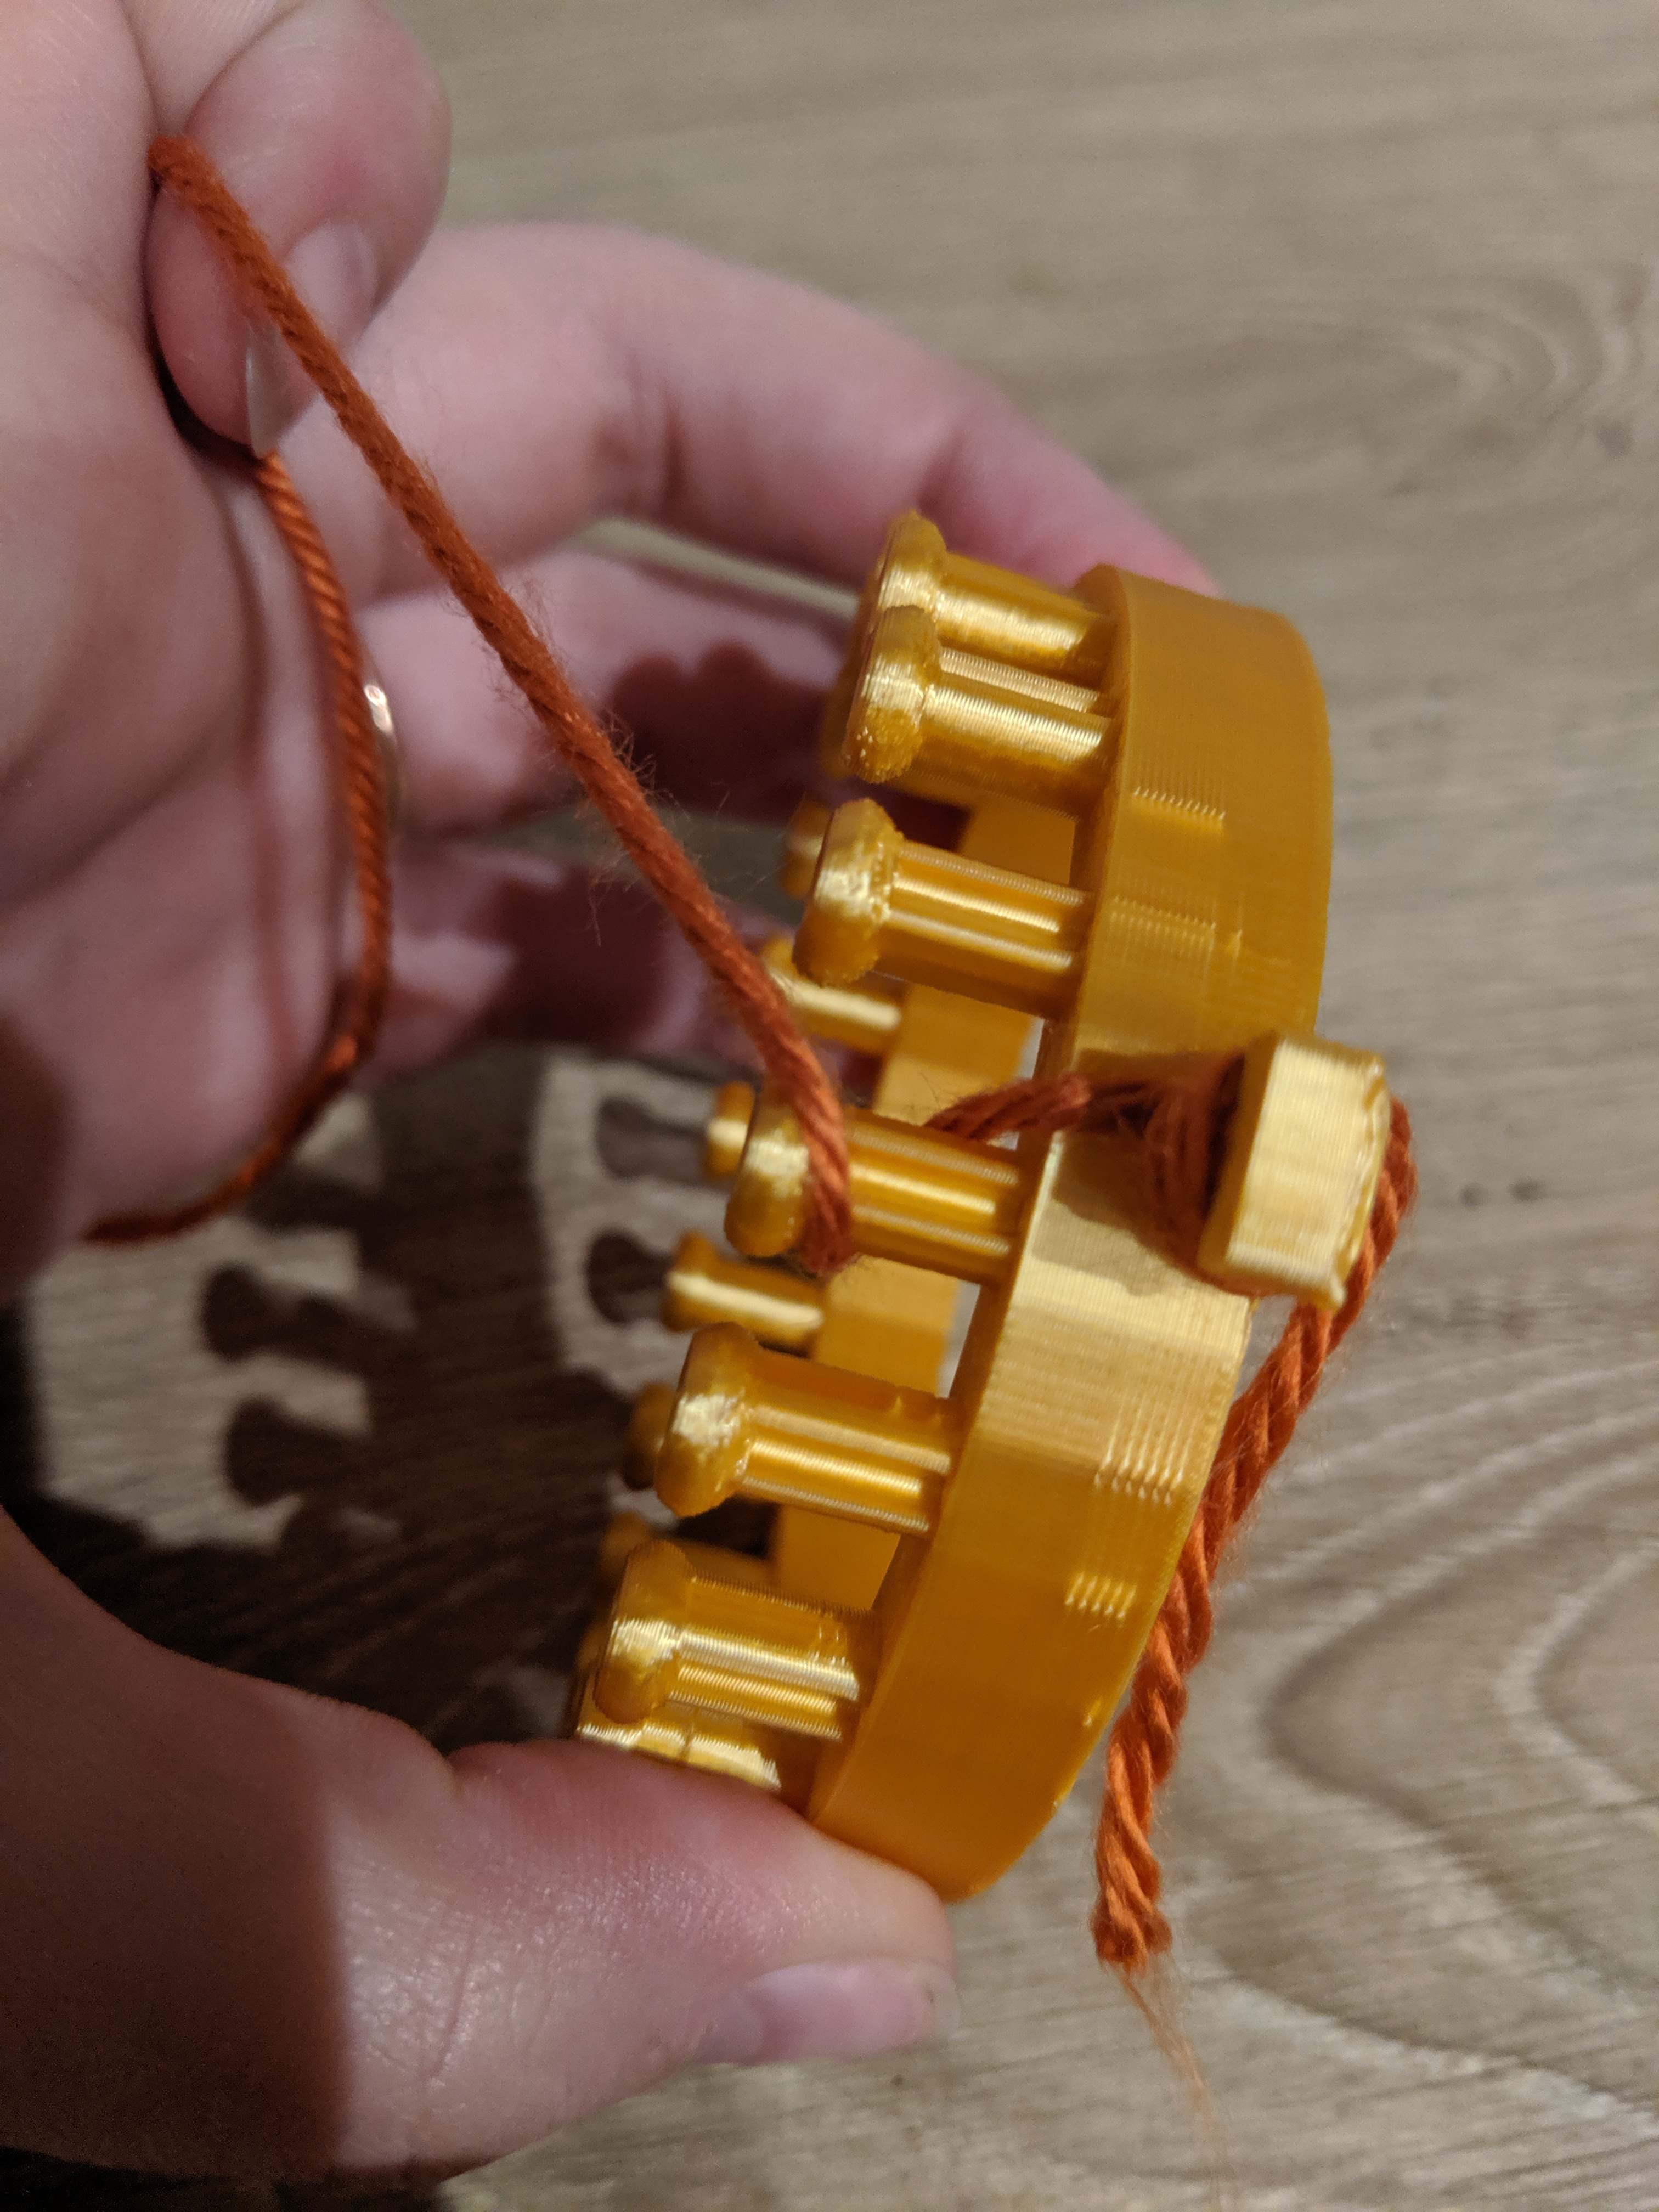
Pictures two and three: Then start wrapping yarn around each peg from the inside of the loom to the outside back to the inside and onto the next peg.
Picture four: Once you've wrapped around each peg, wrap the yarn around the side peg again to secure to yarn.
Picture five: Push down all of the wrapped-around yarn on each peg down to the bottom of each peg.
More Yarn Wrapping
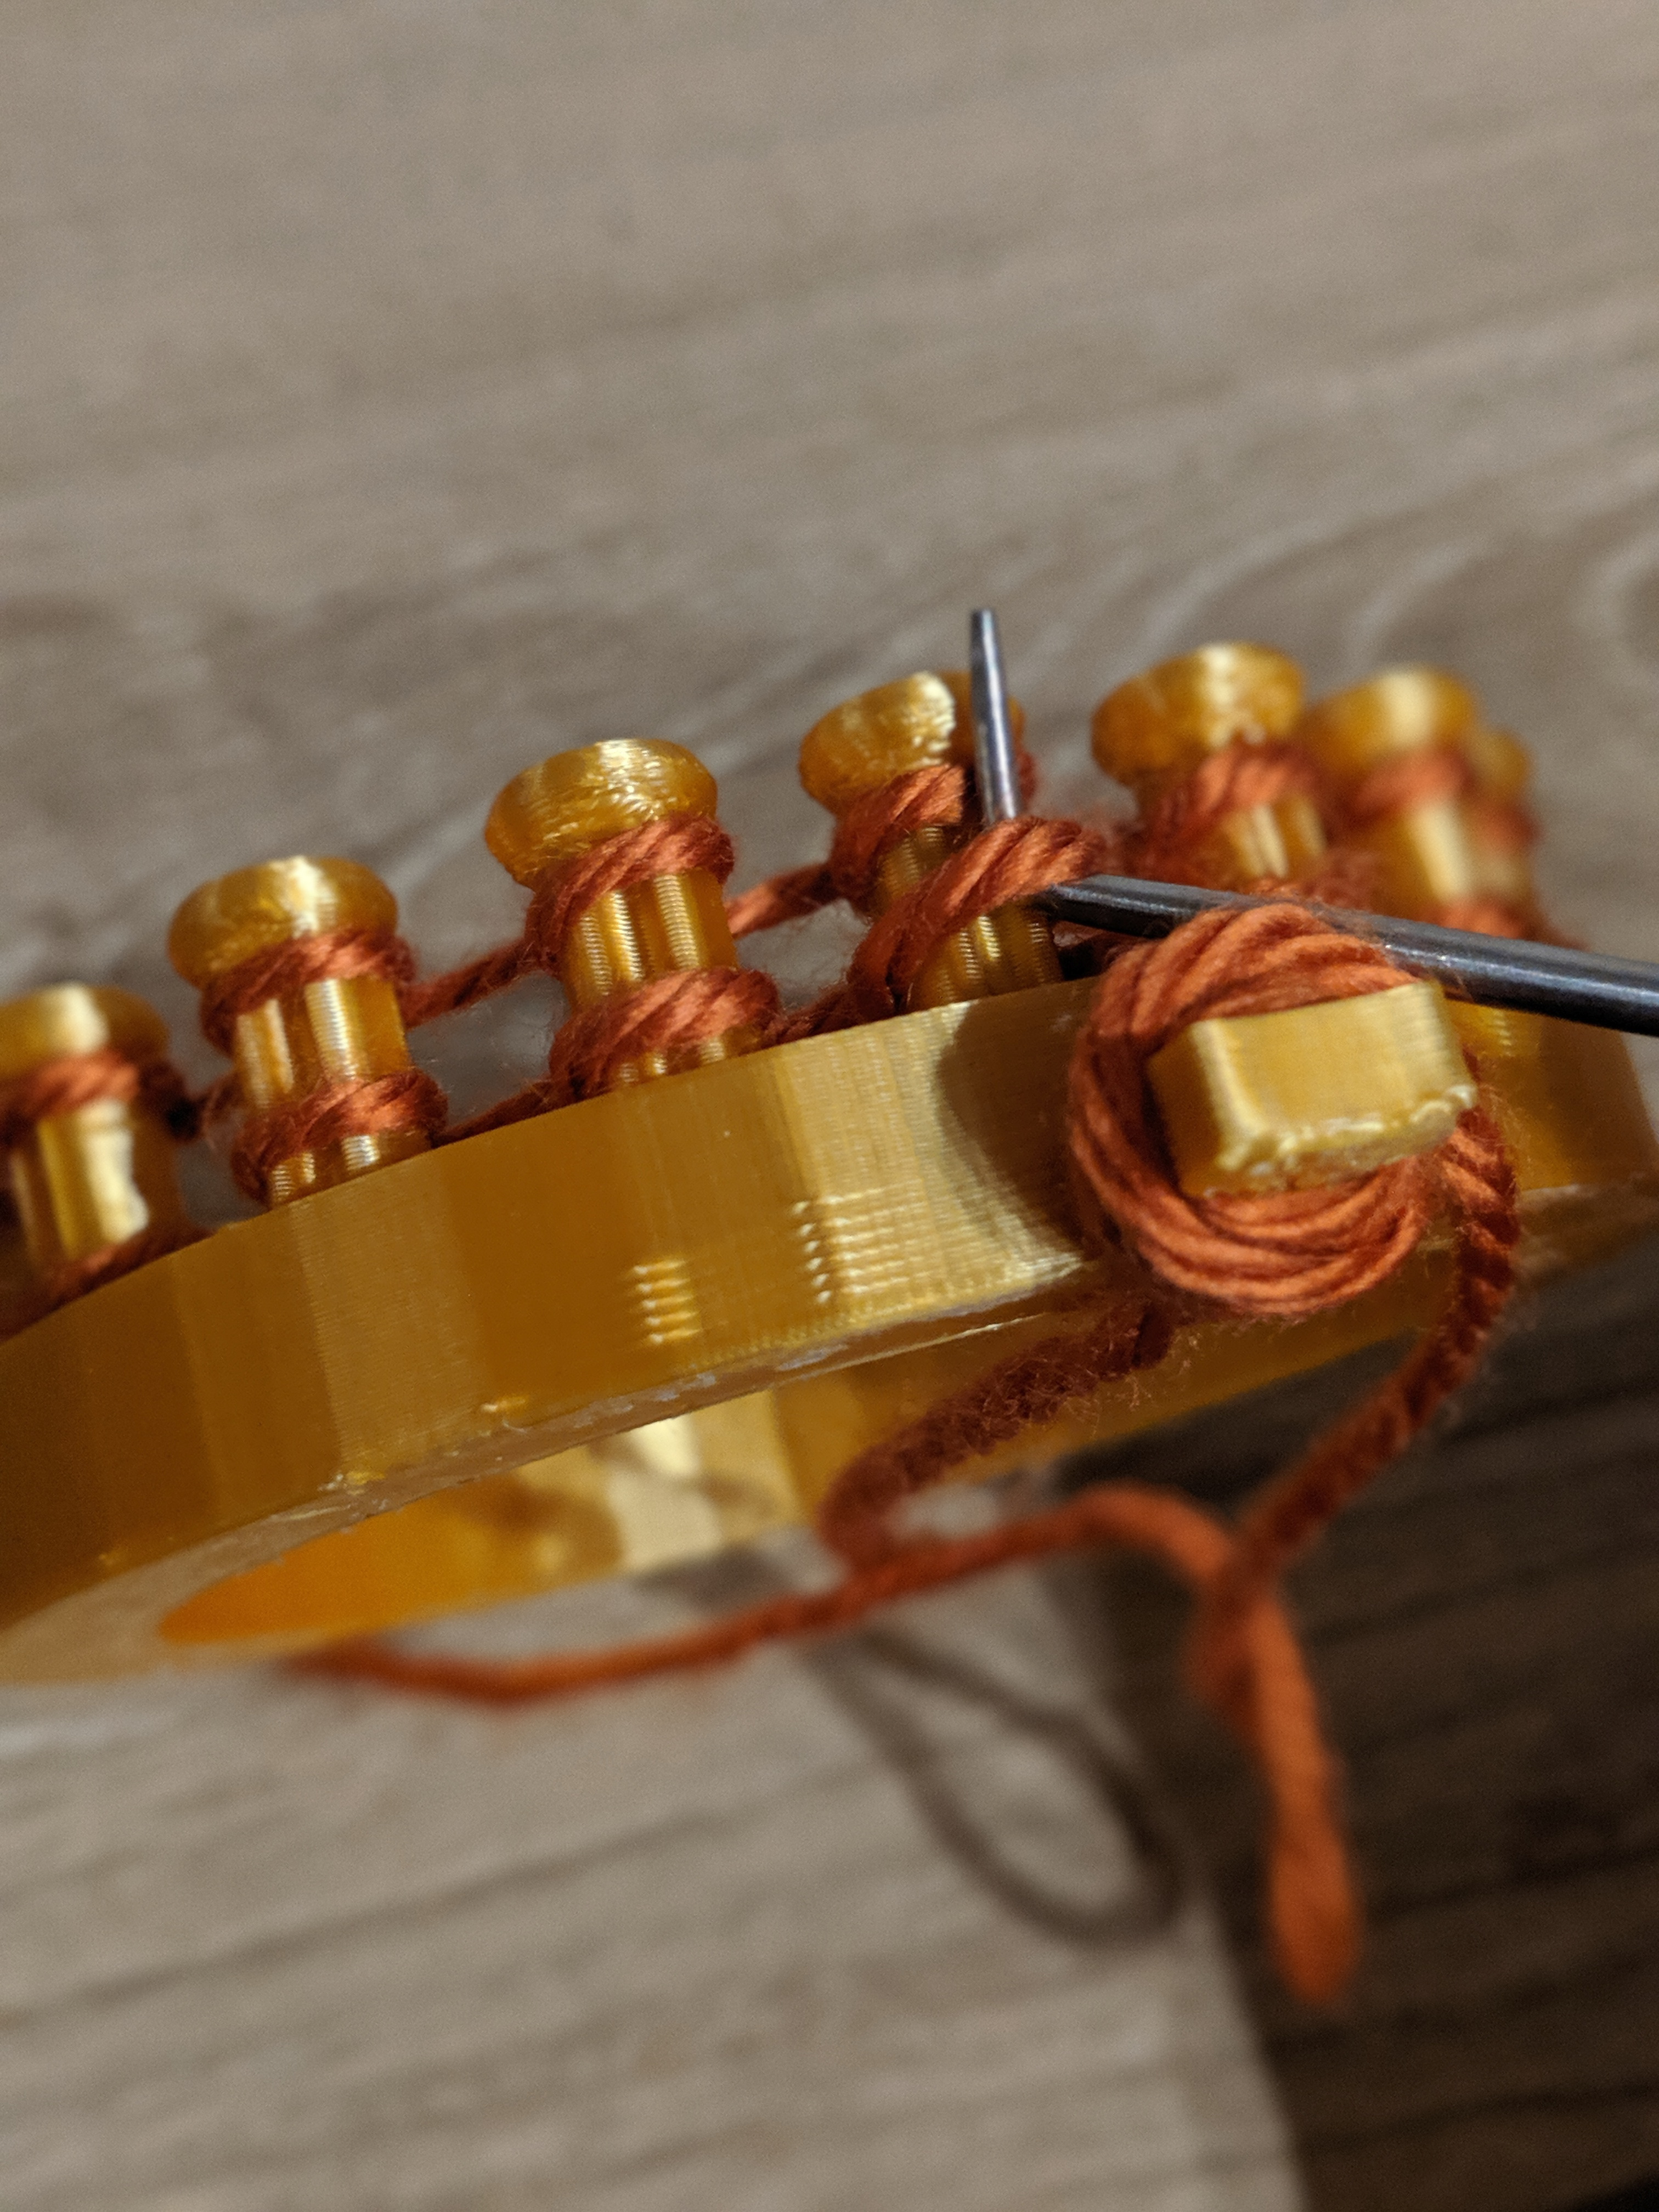
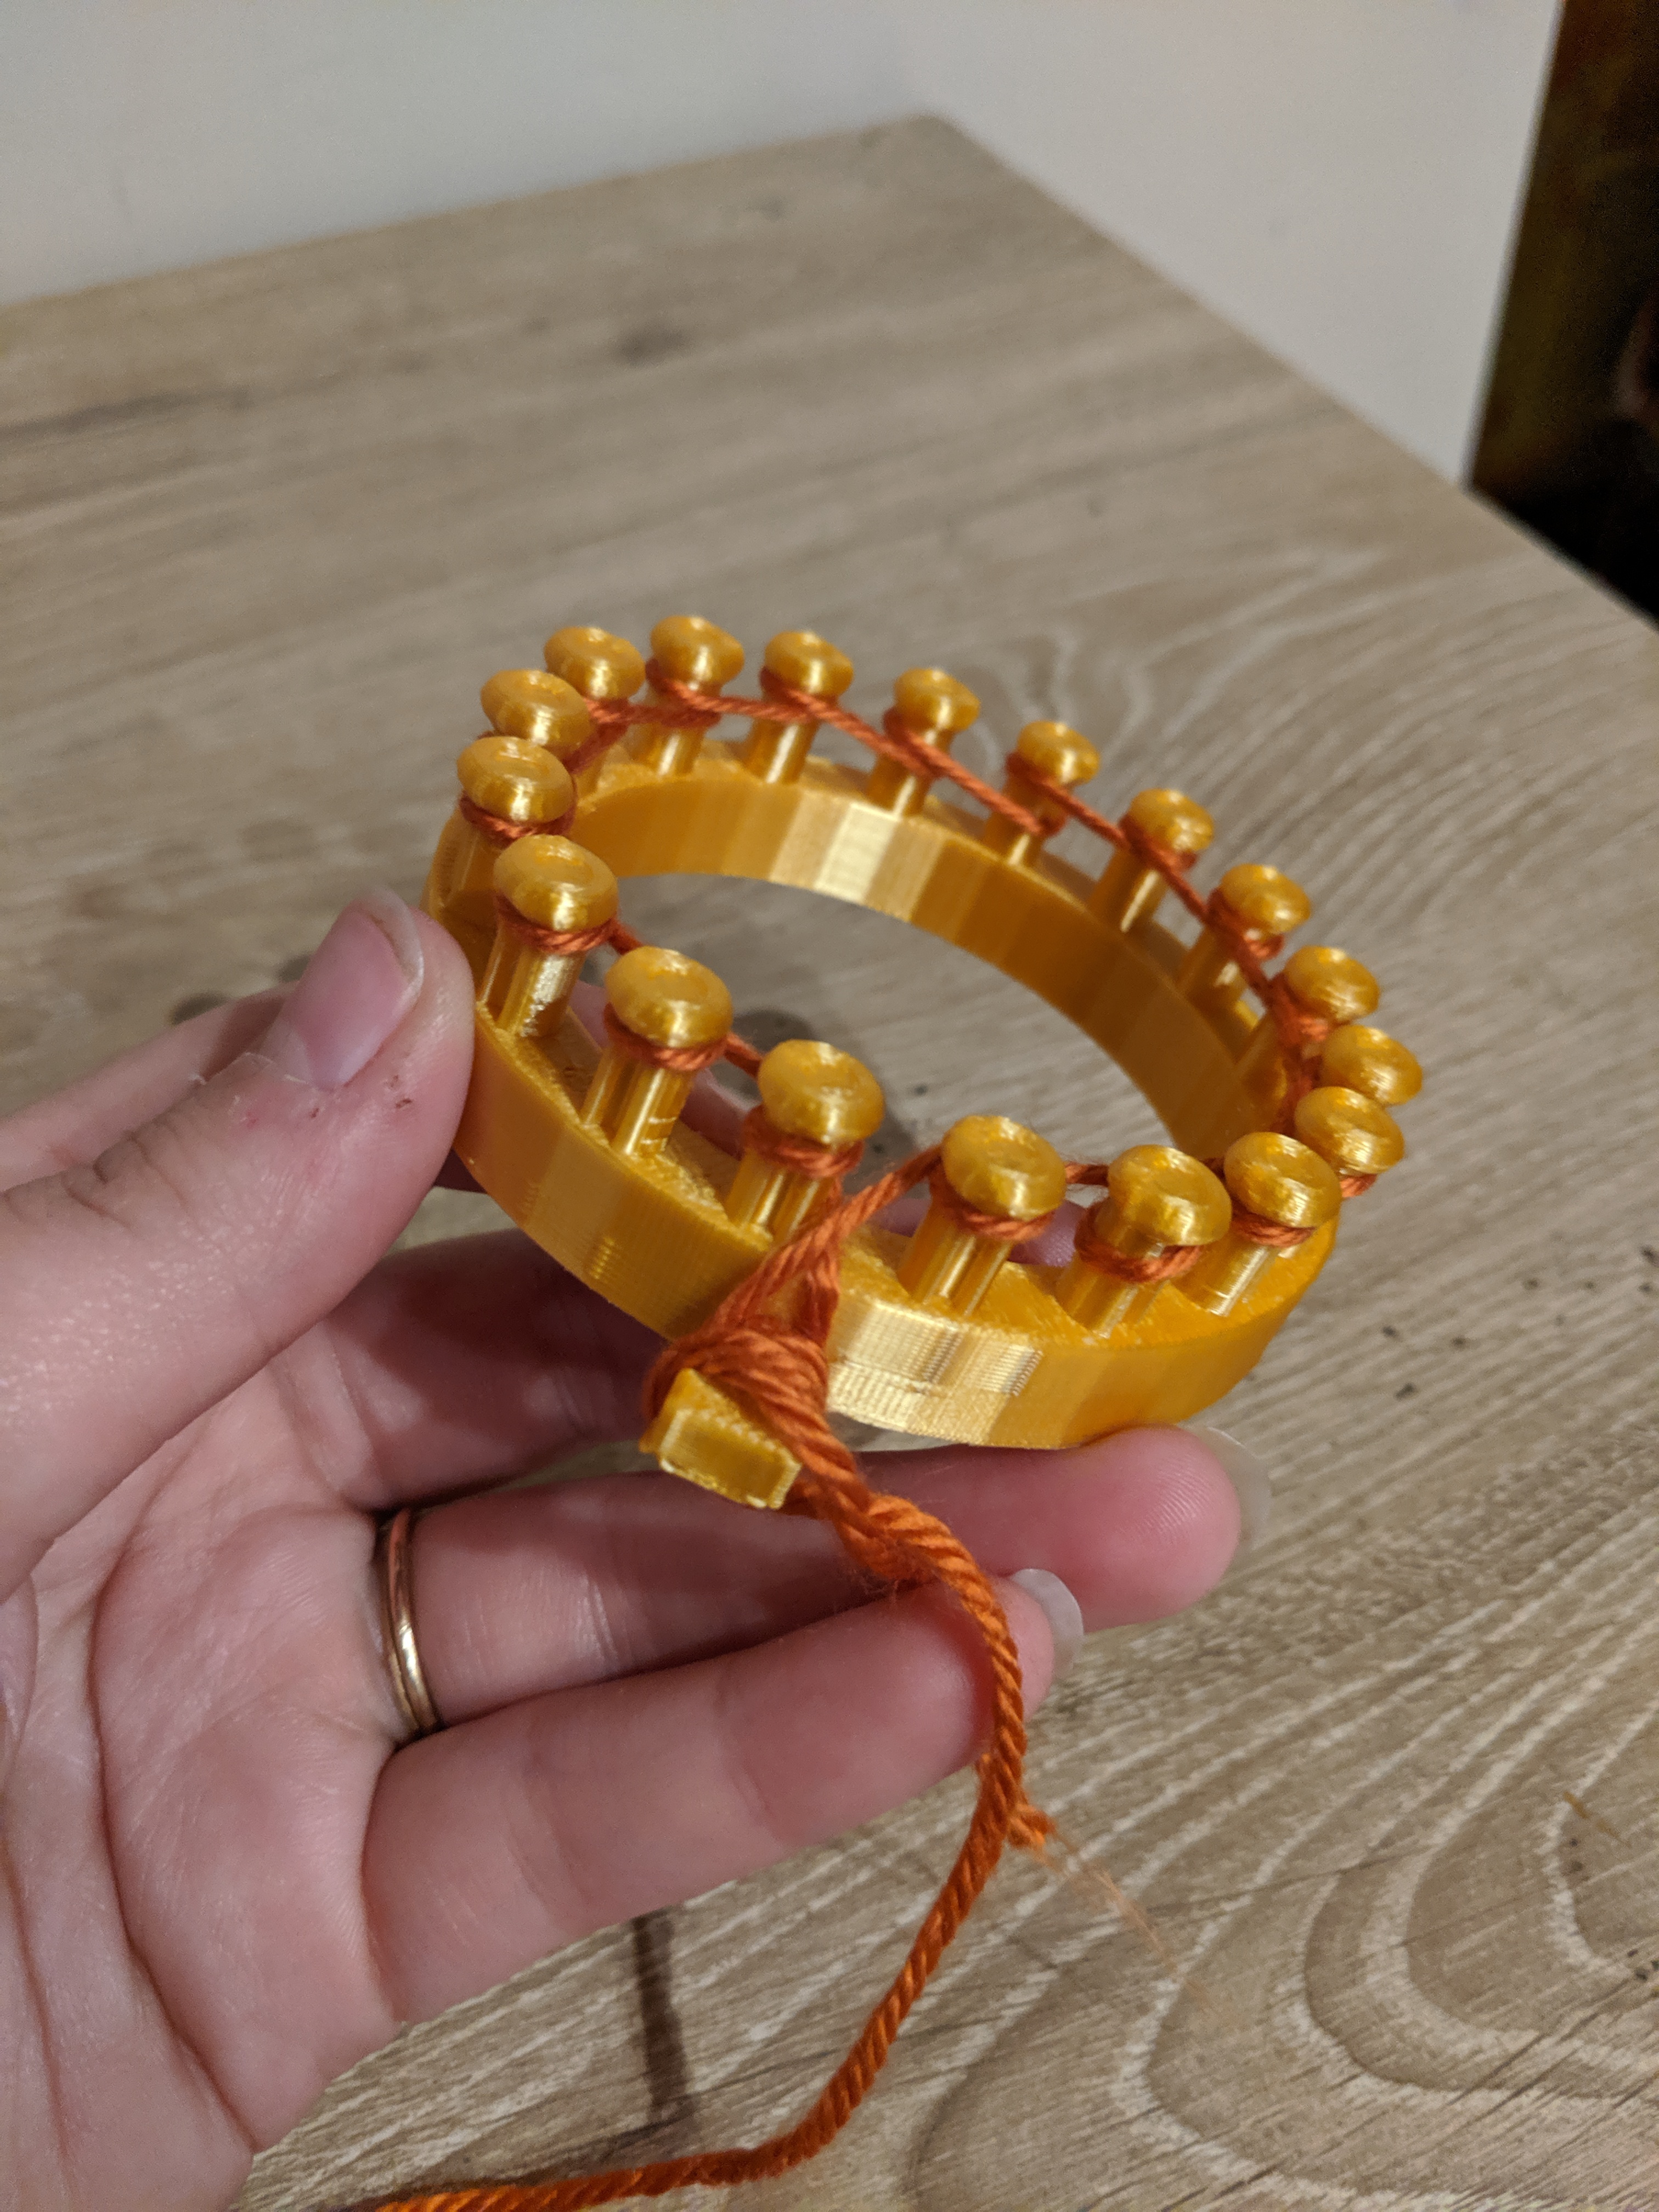
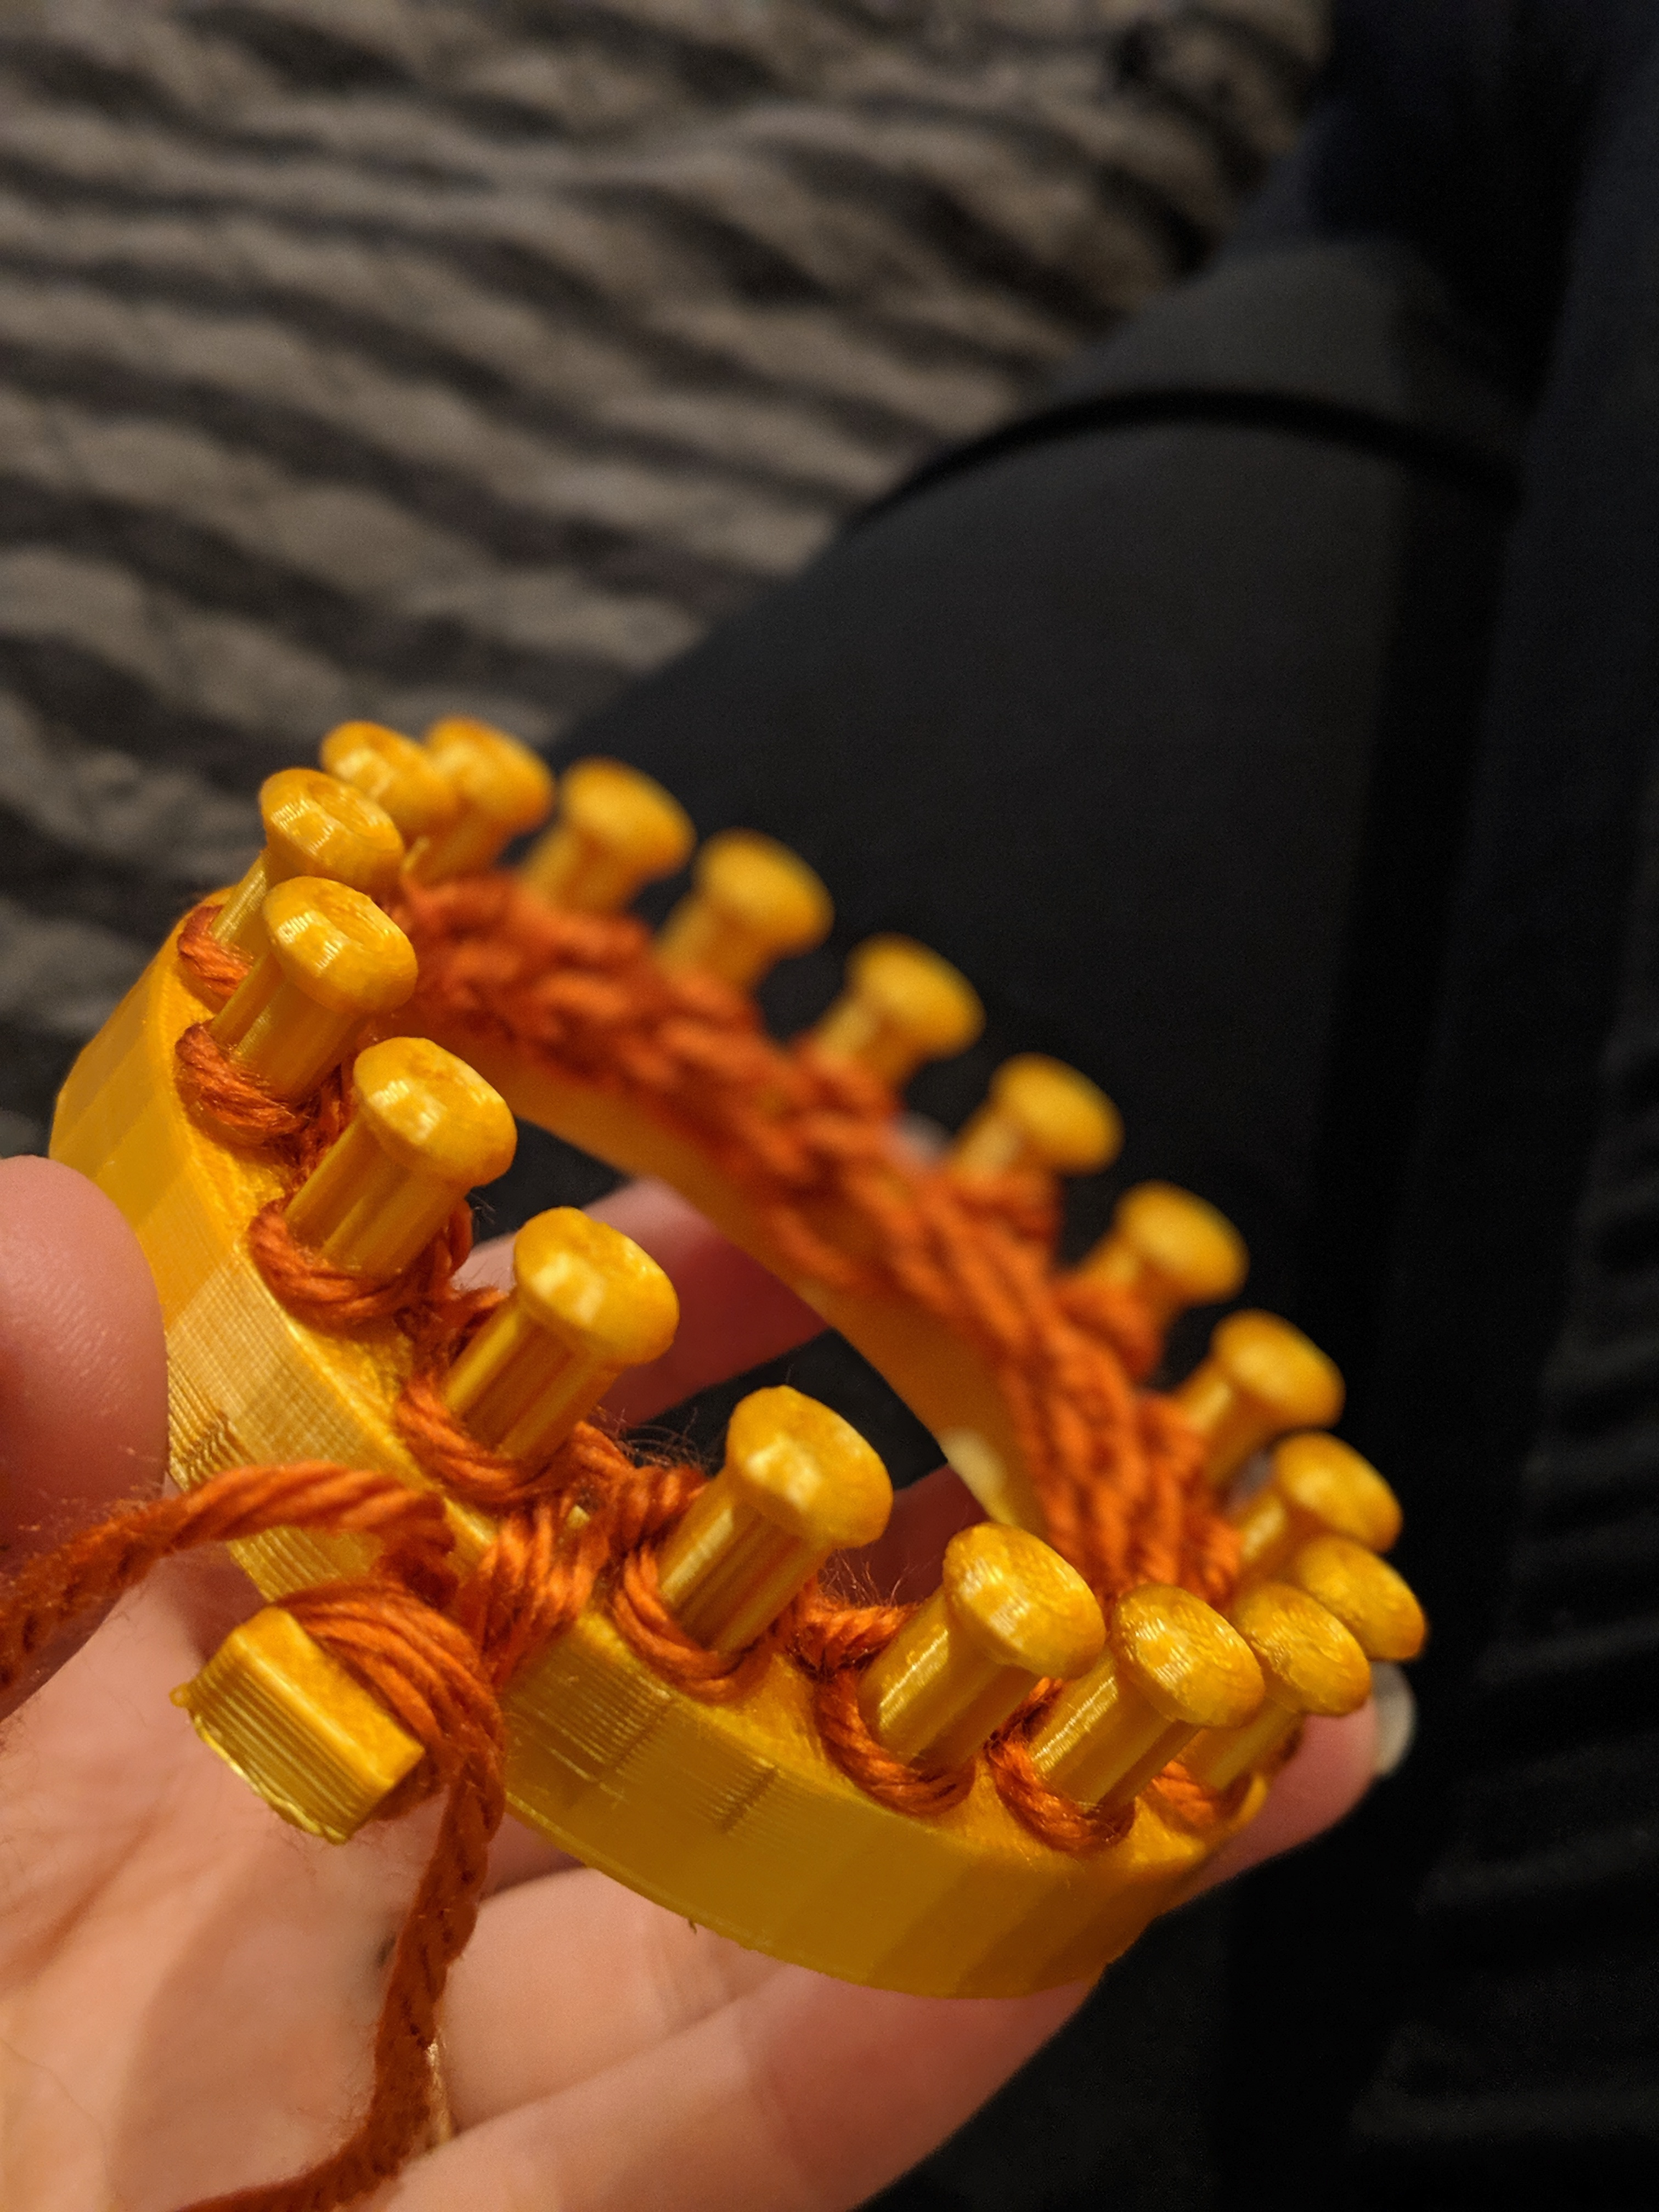
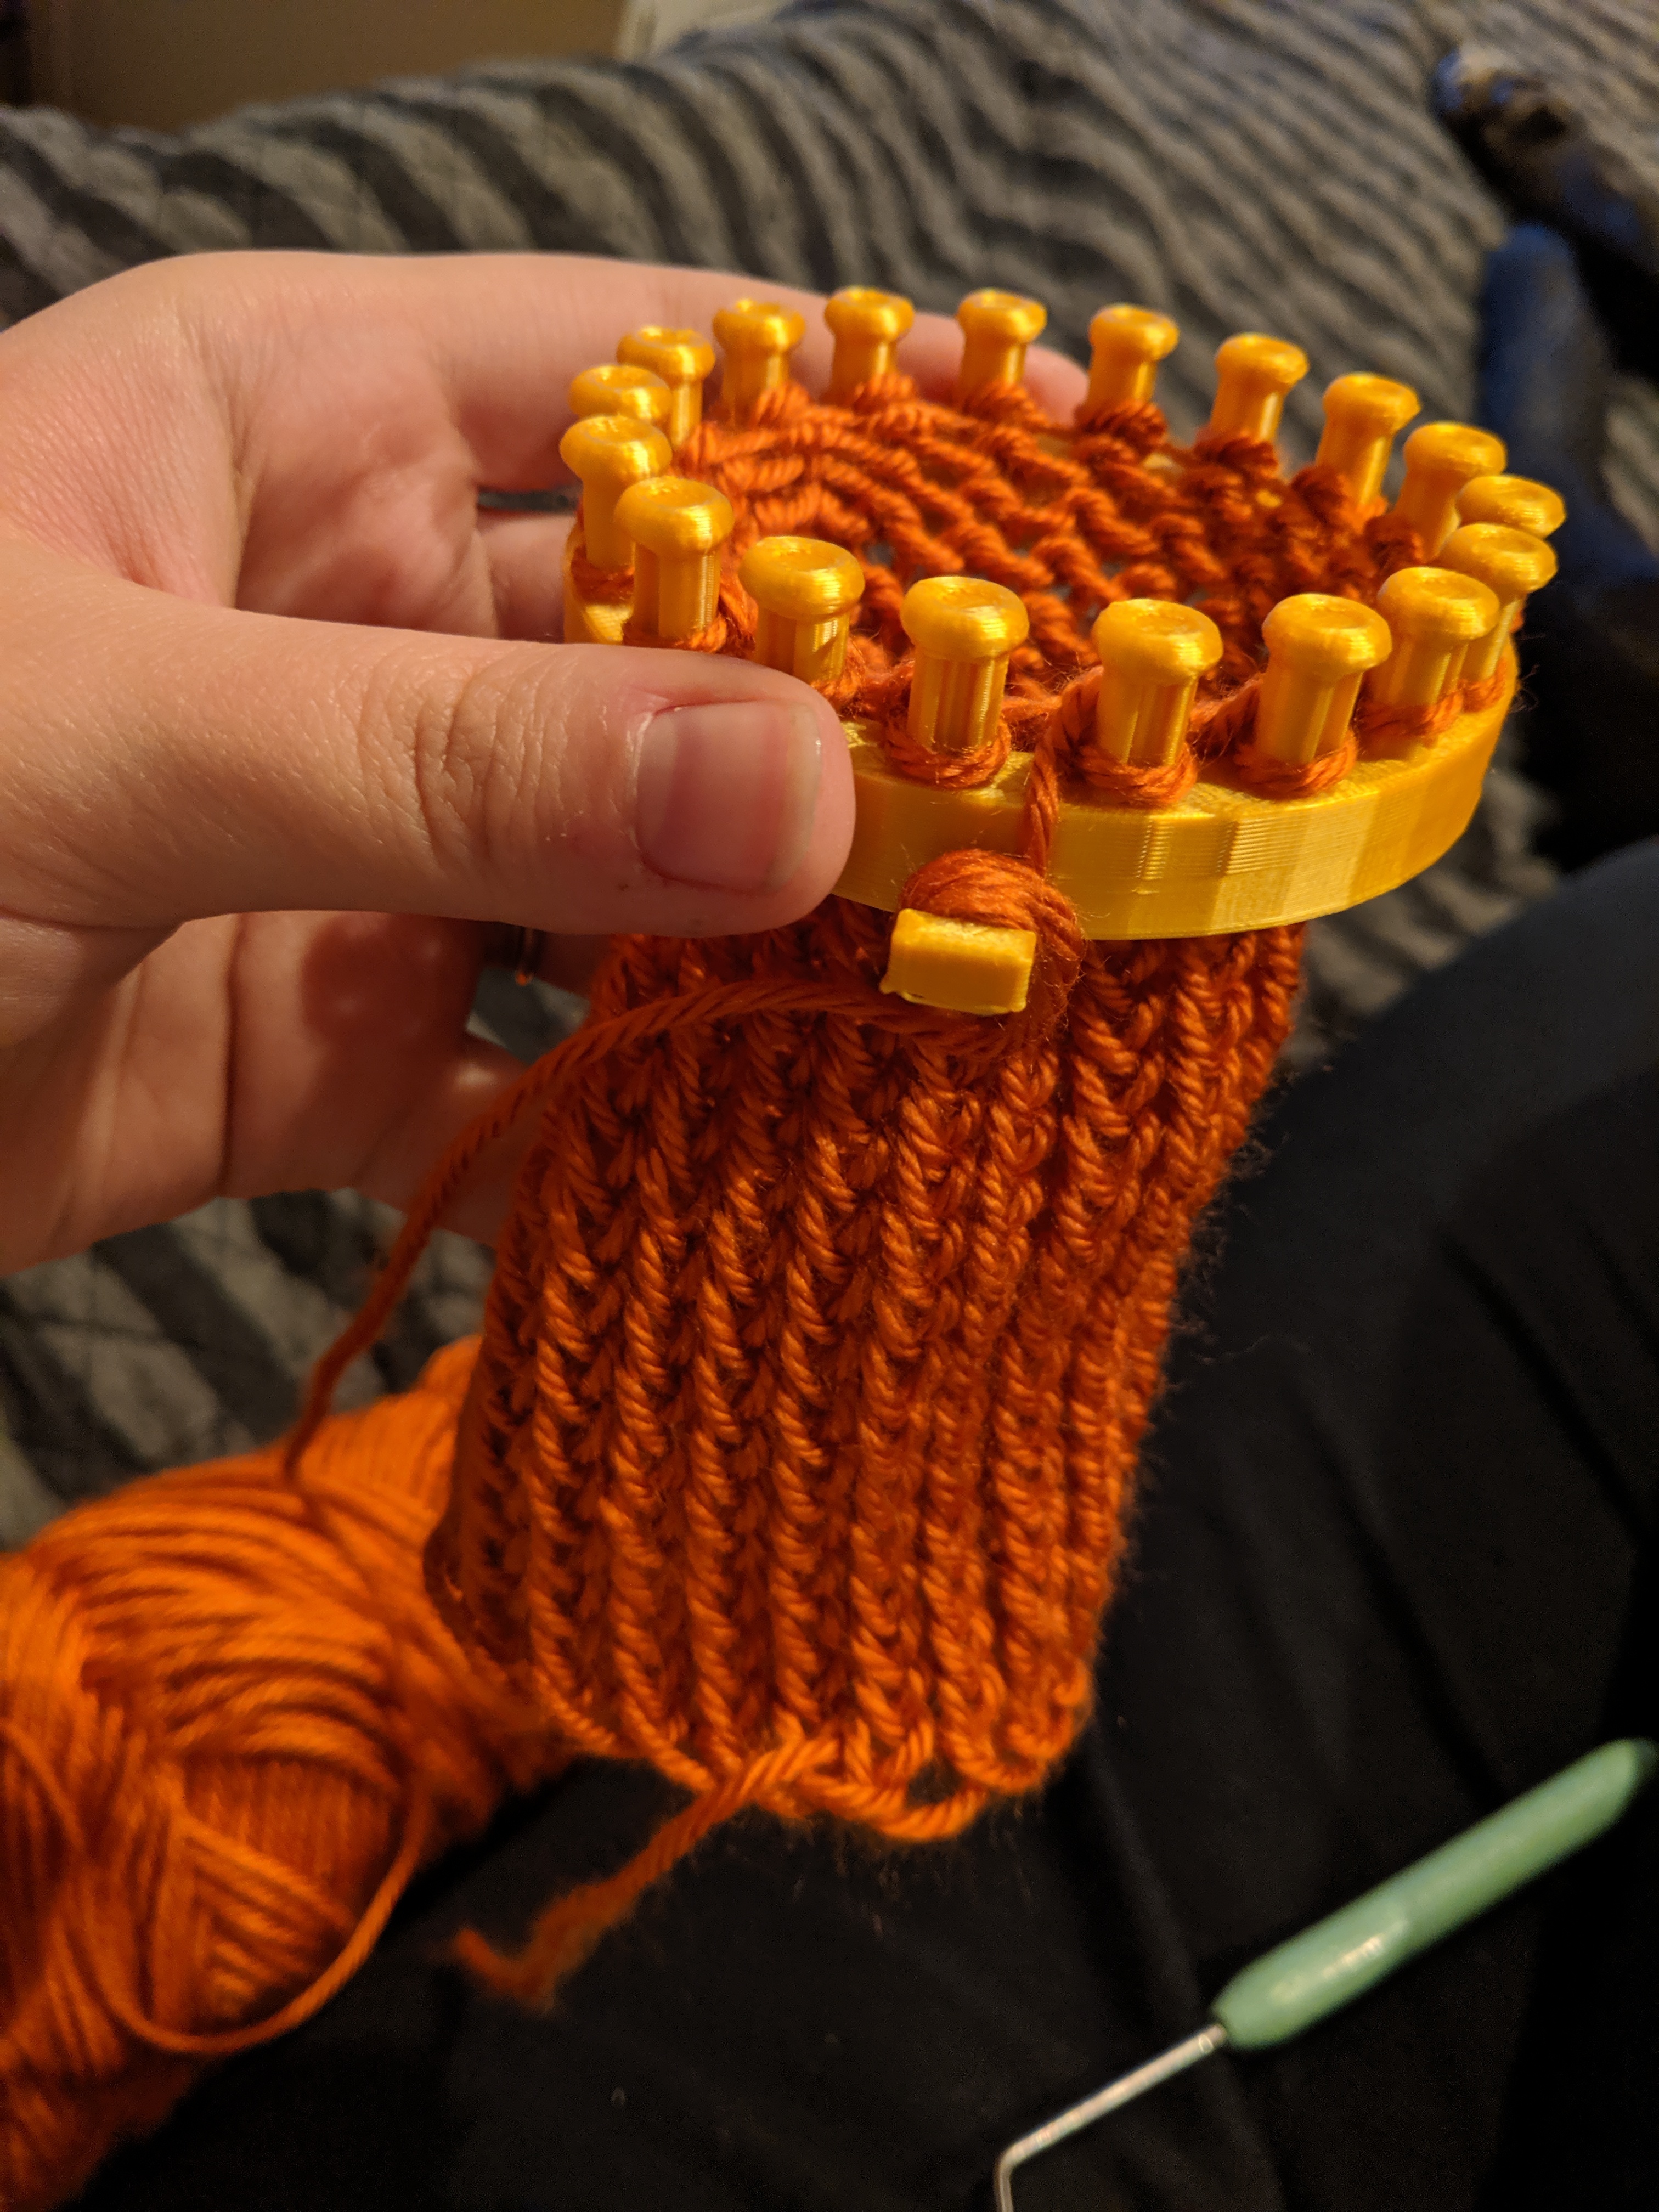
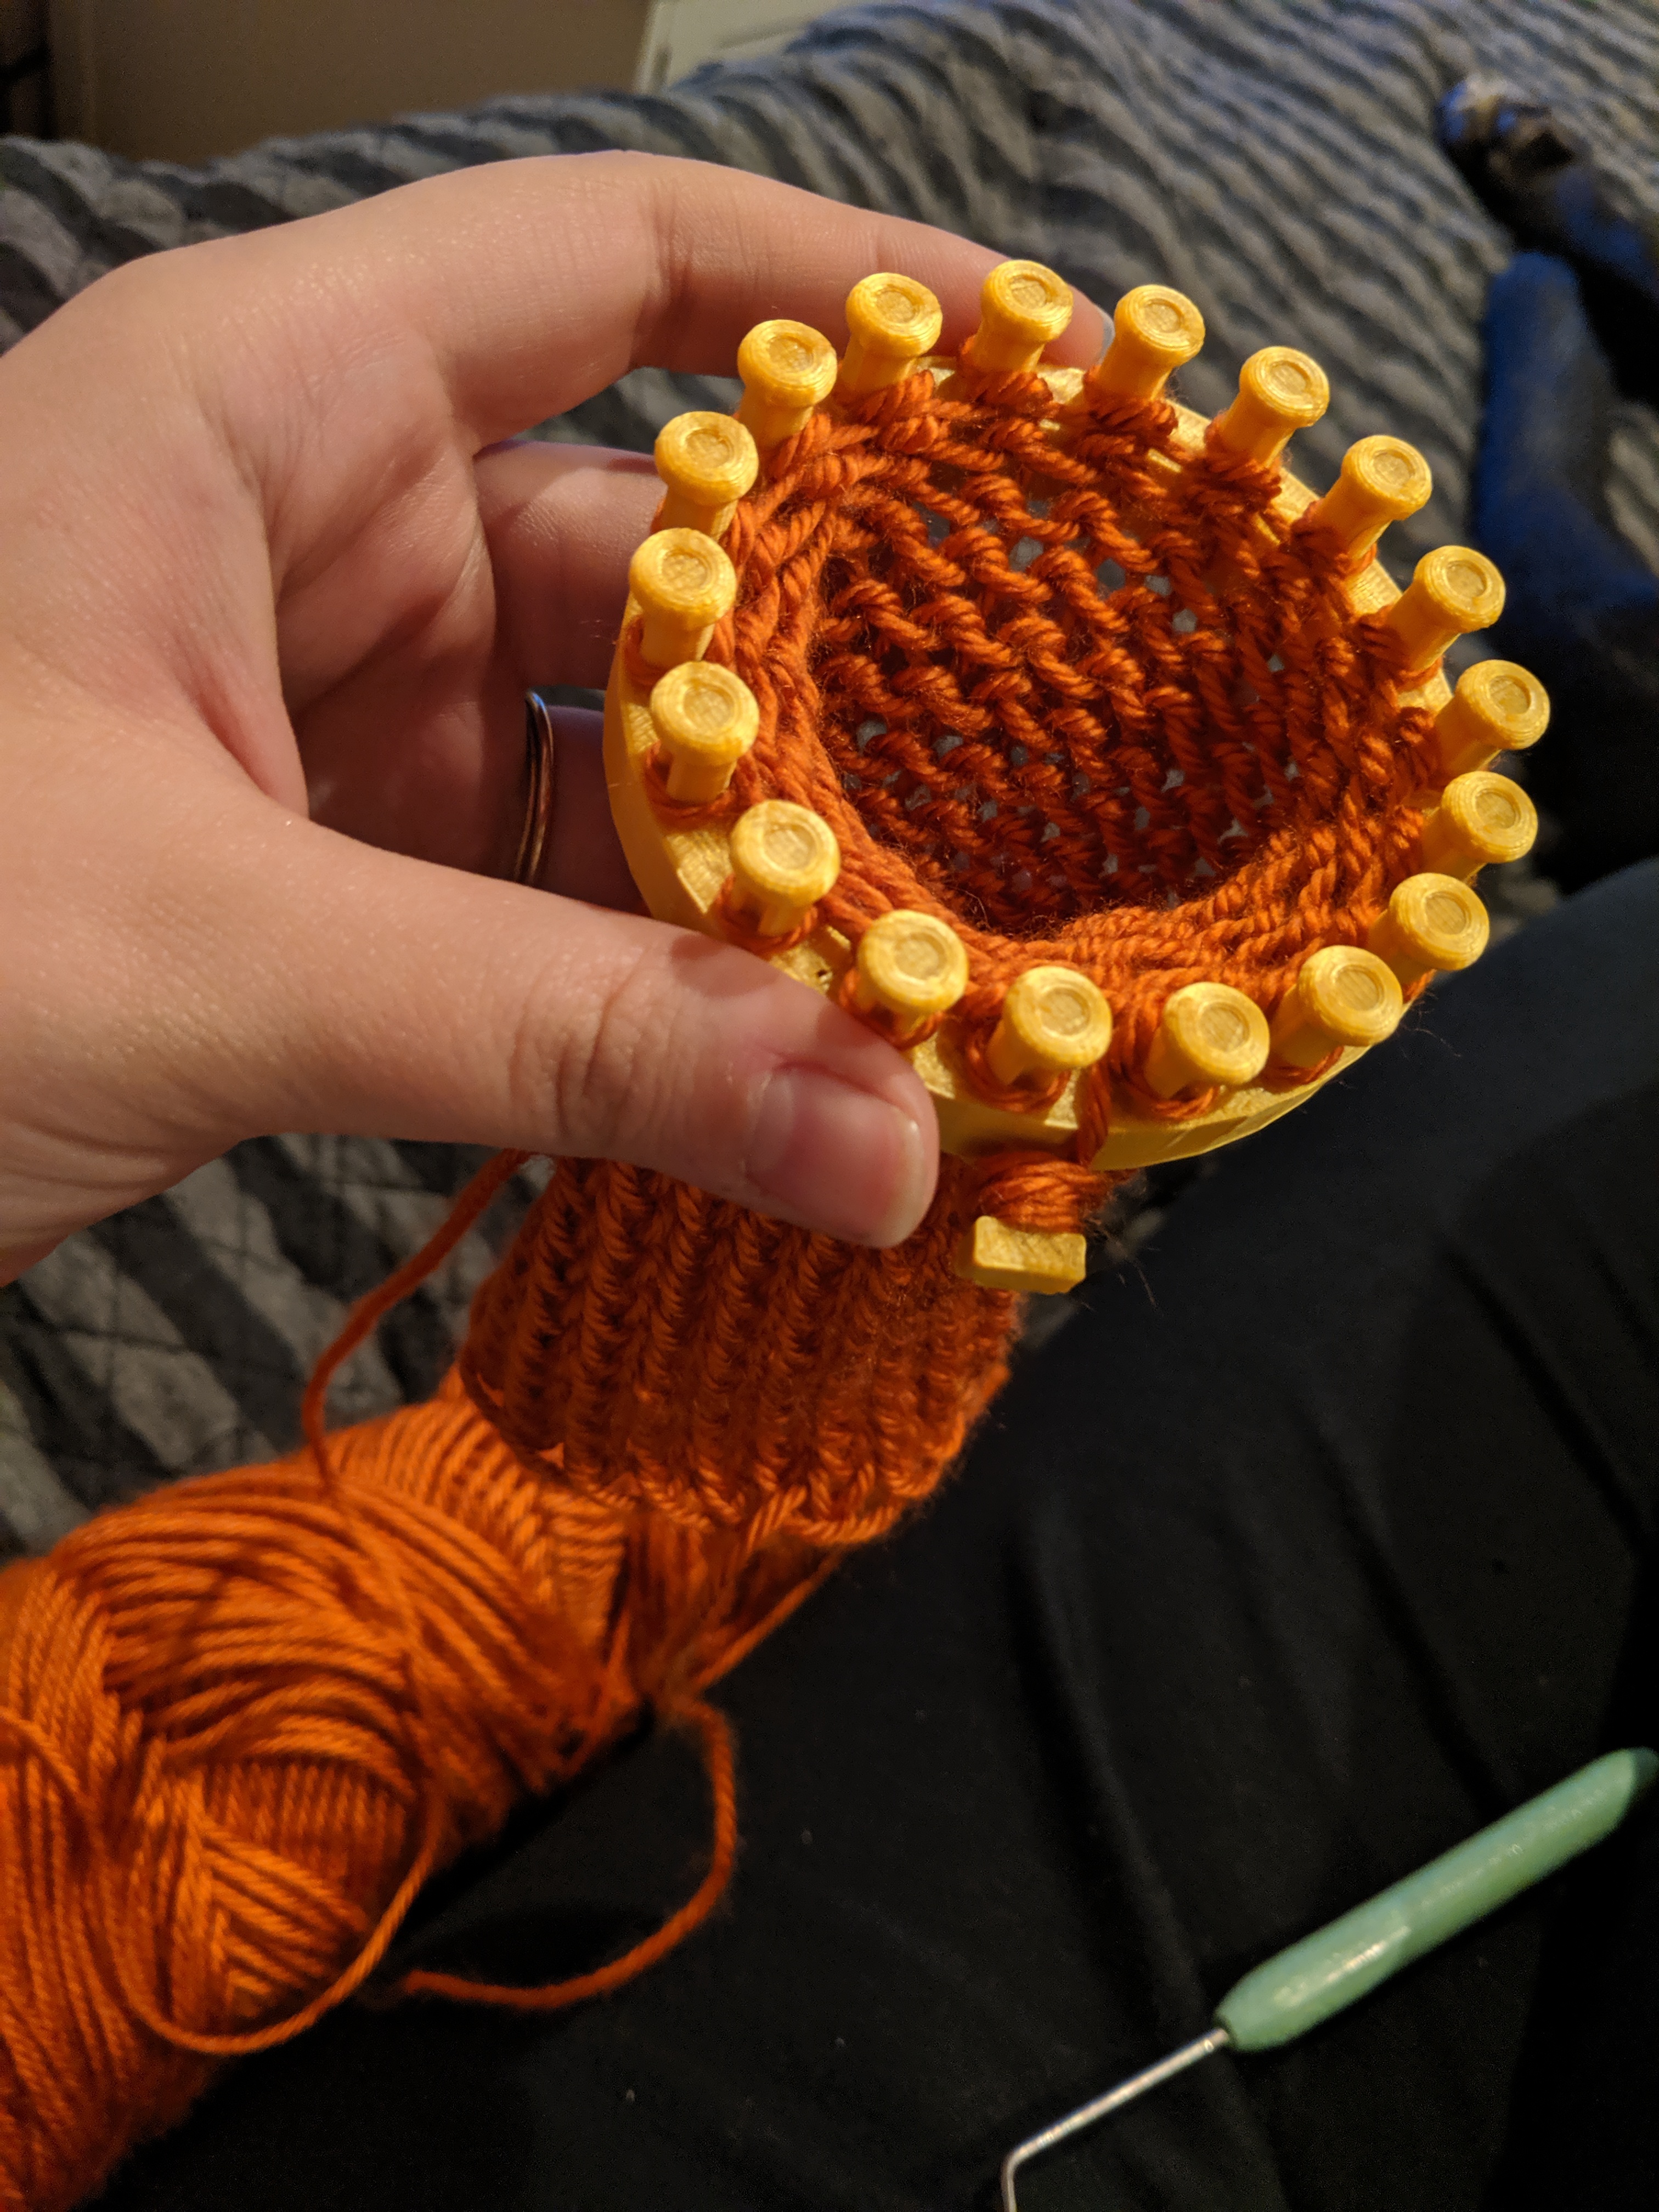
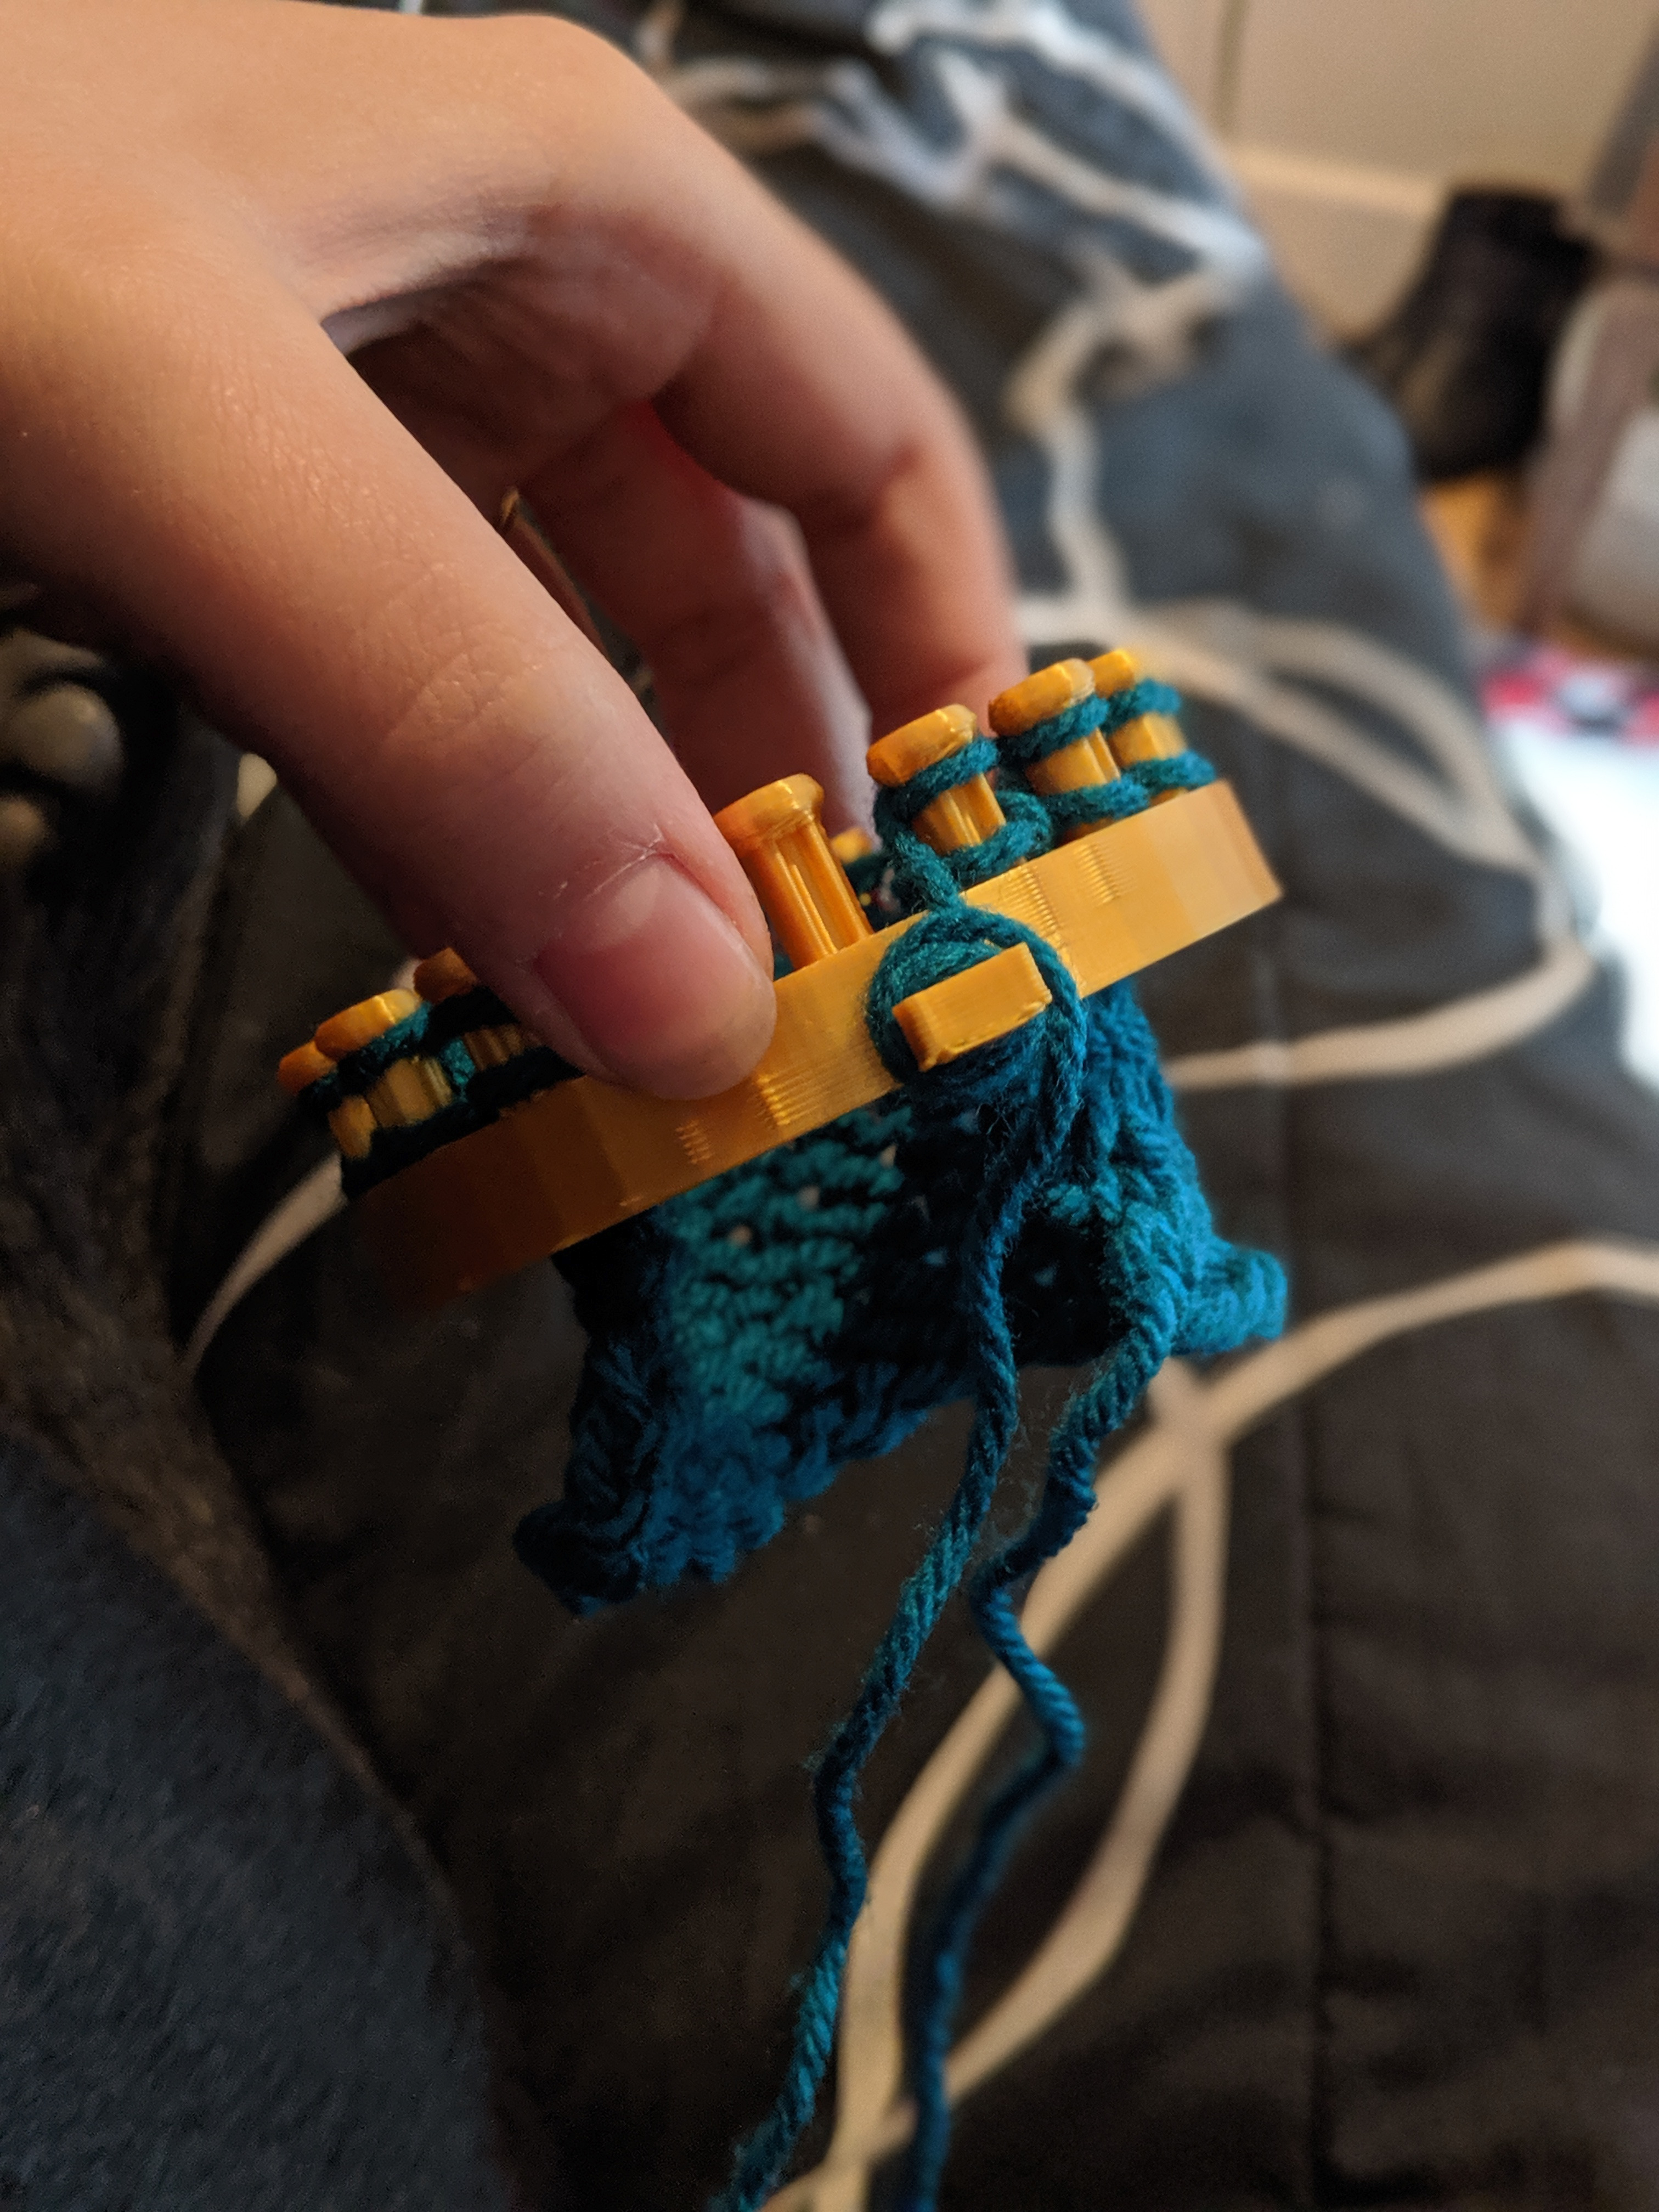
Picture one: Go around the loom again, wrapping yarn around each peg.
Picture two: Once you're done wrapping around each peg, wrap the yarn around the side peg to secure it.
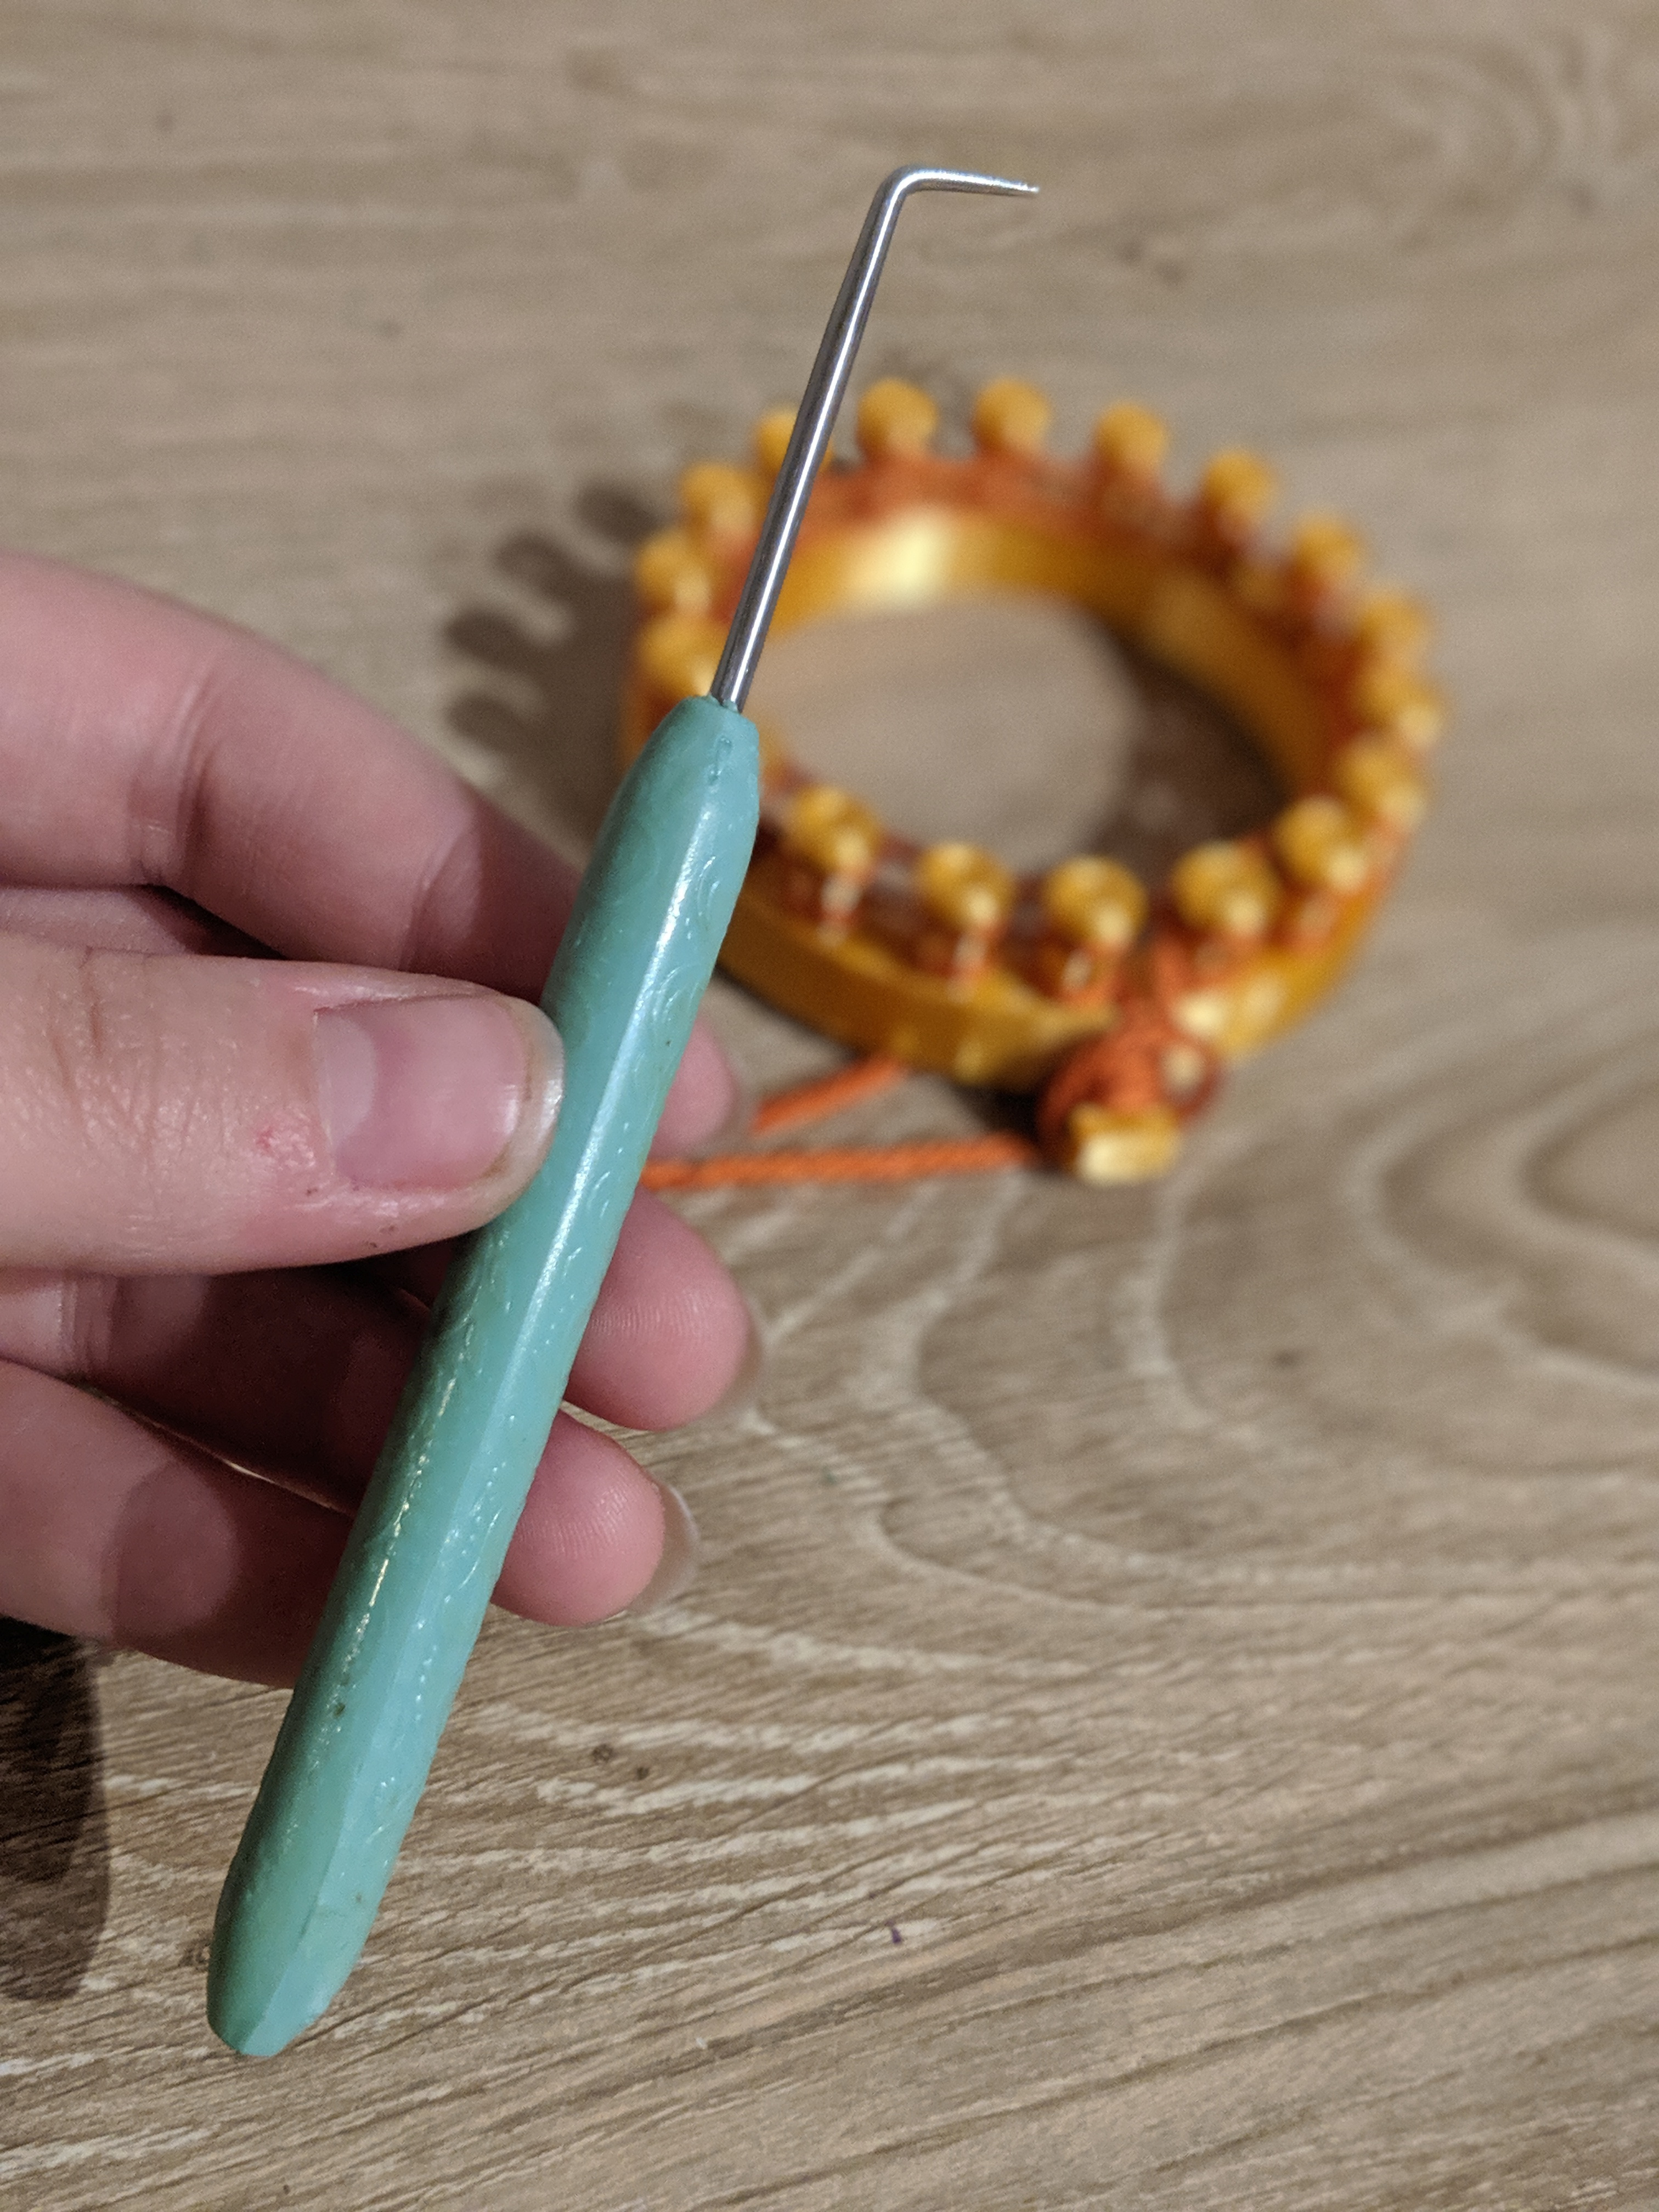
Picture three: Here's where you grab your knitting loom tool. They're very cheap, costing from $1-3 at craft stores or on Amazon.
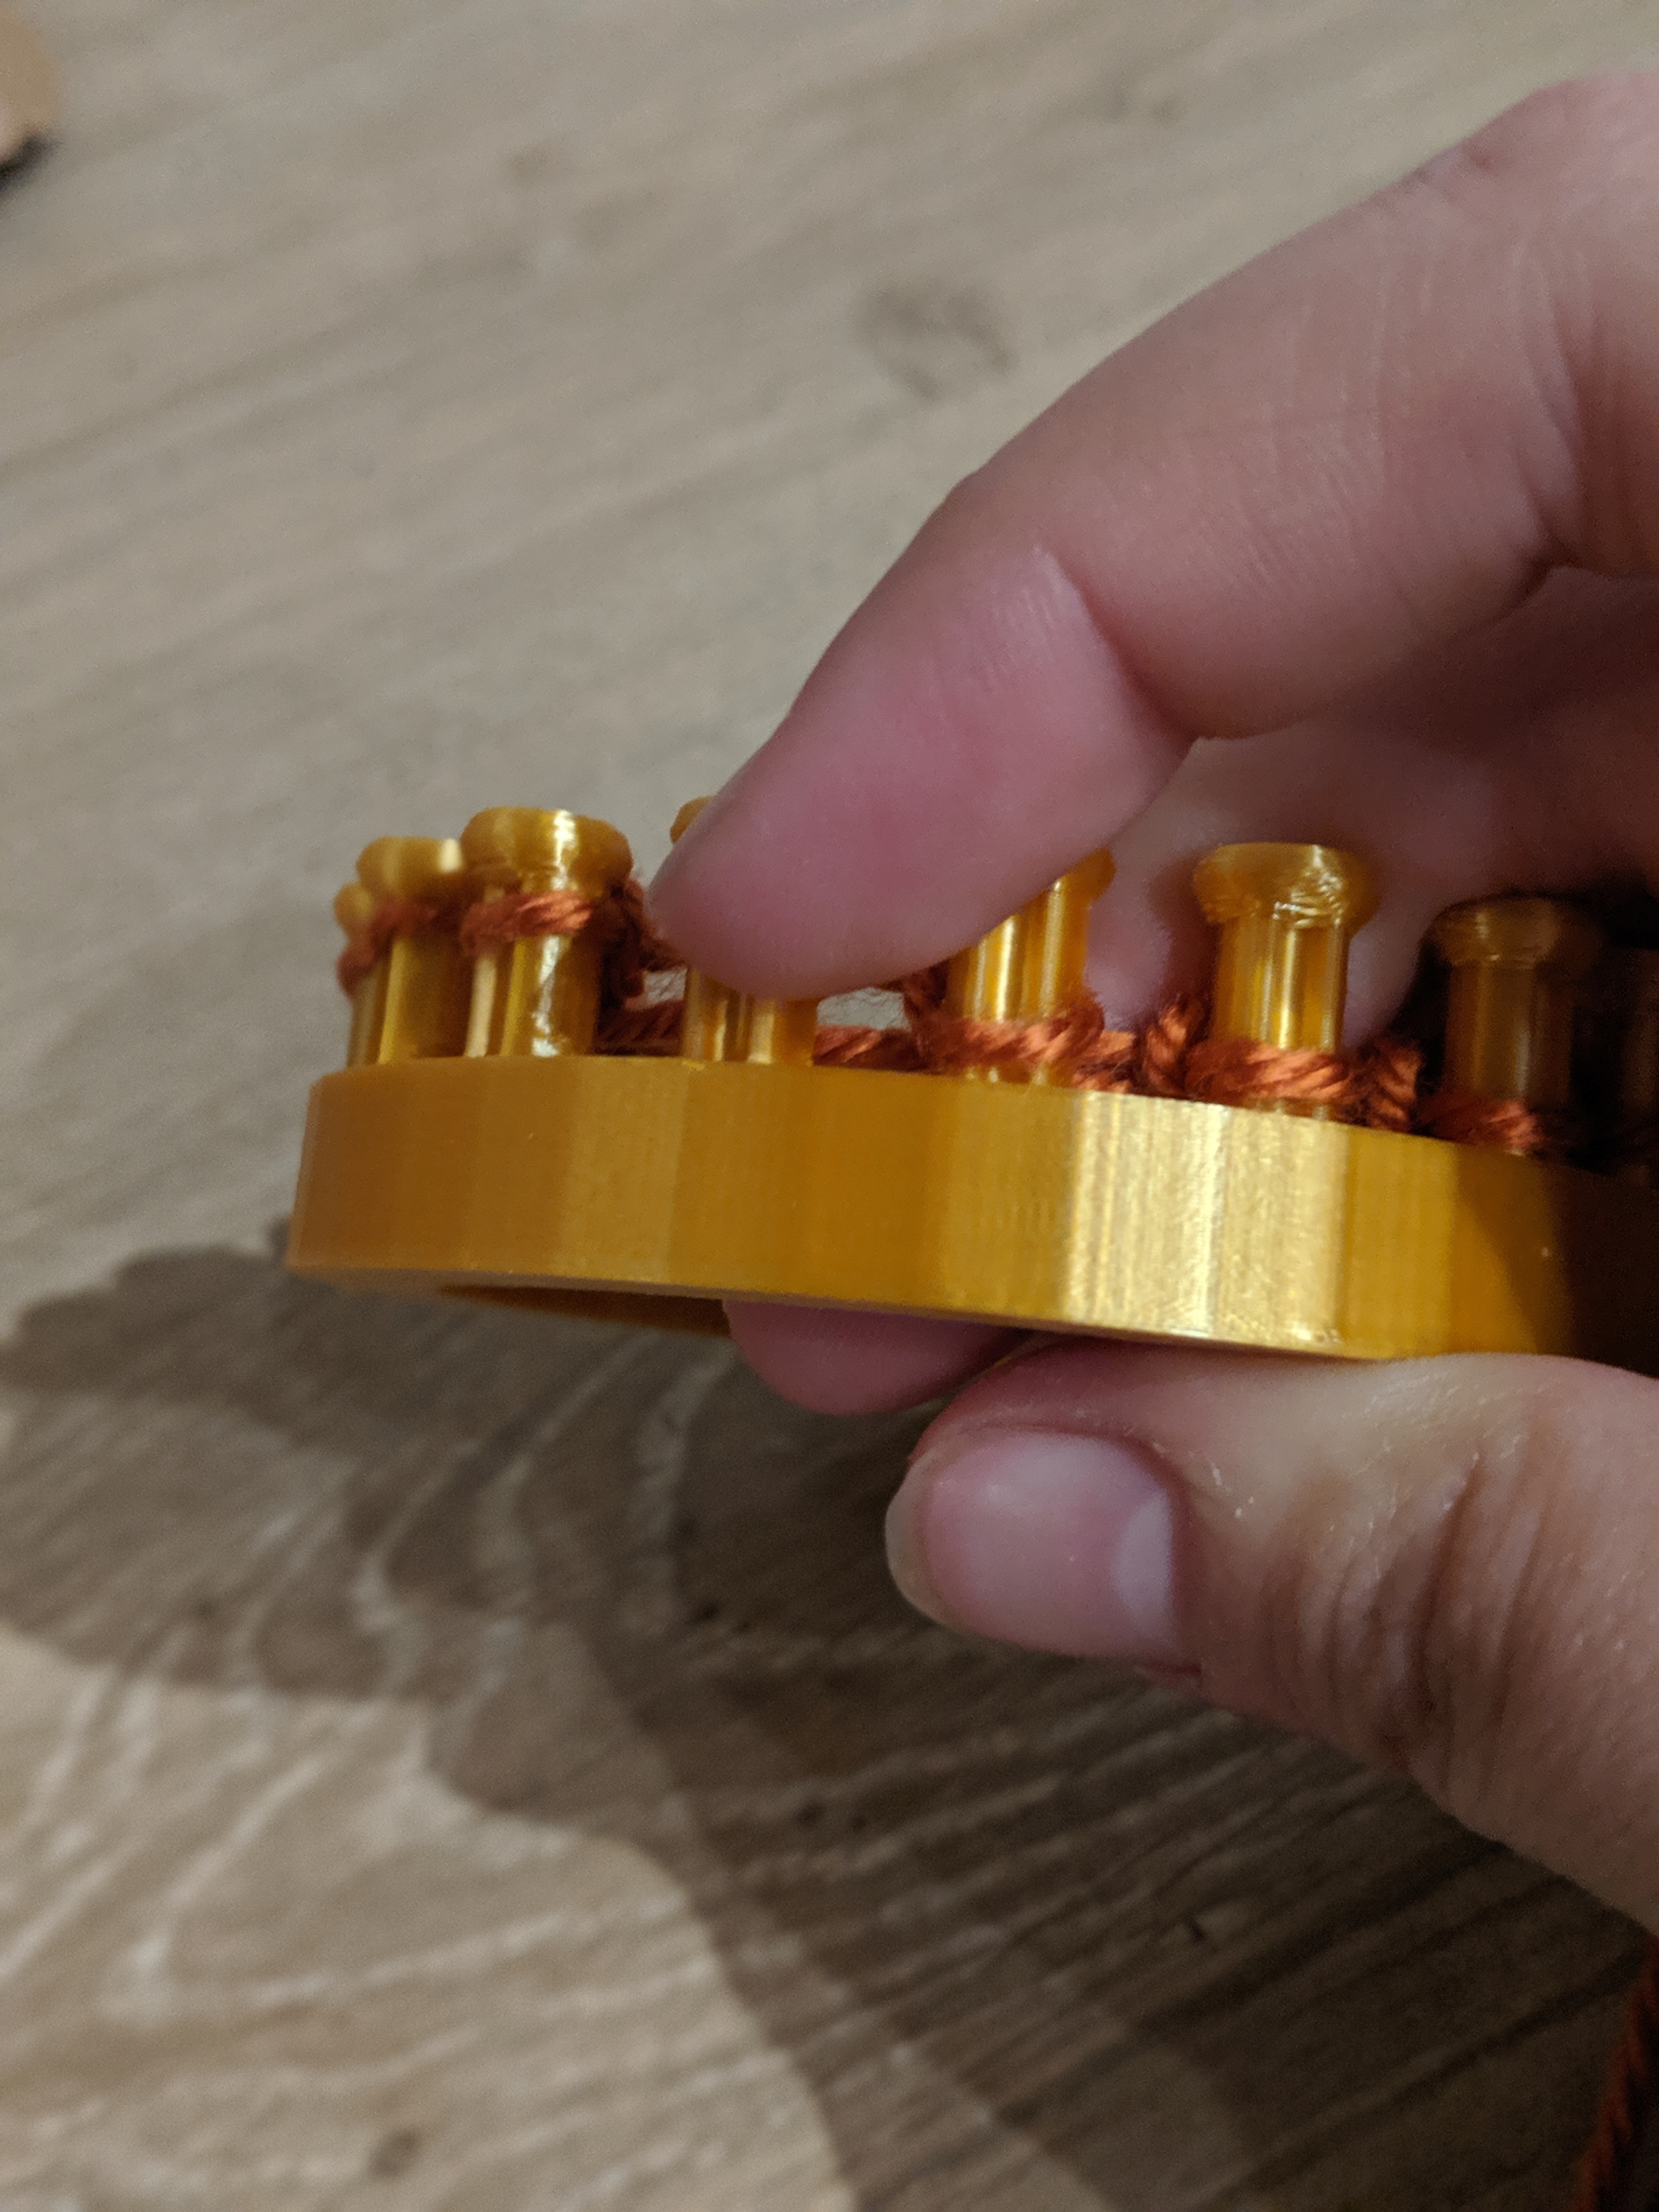
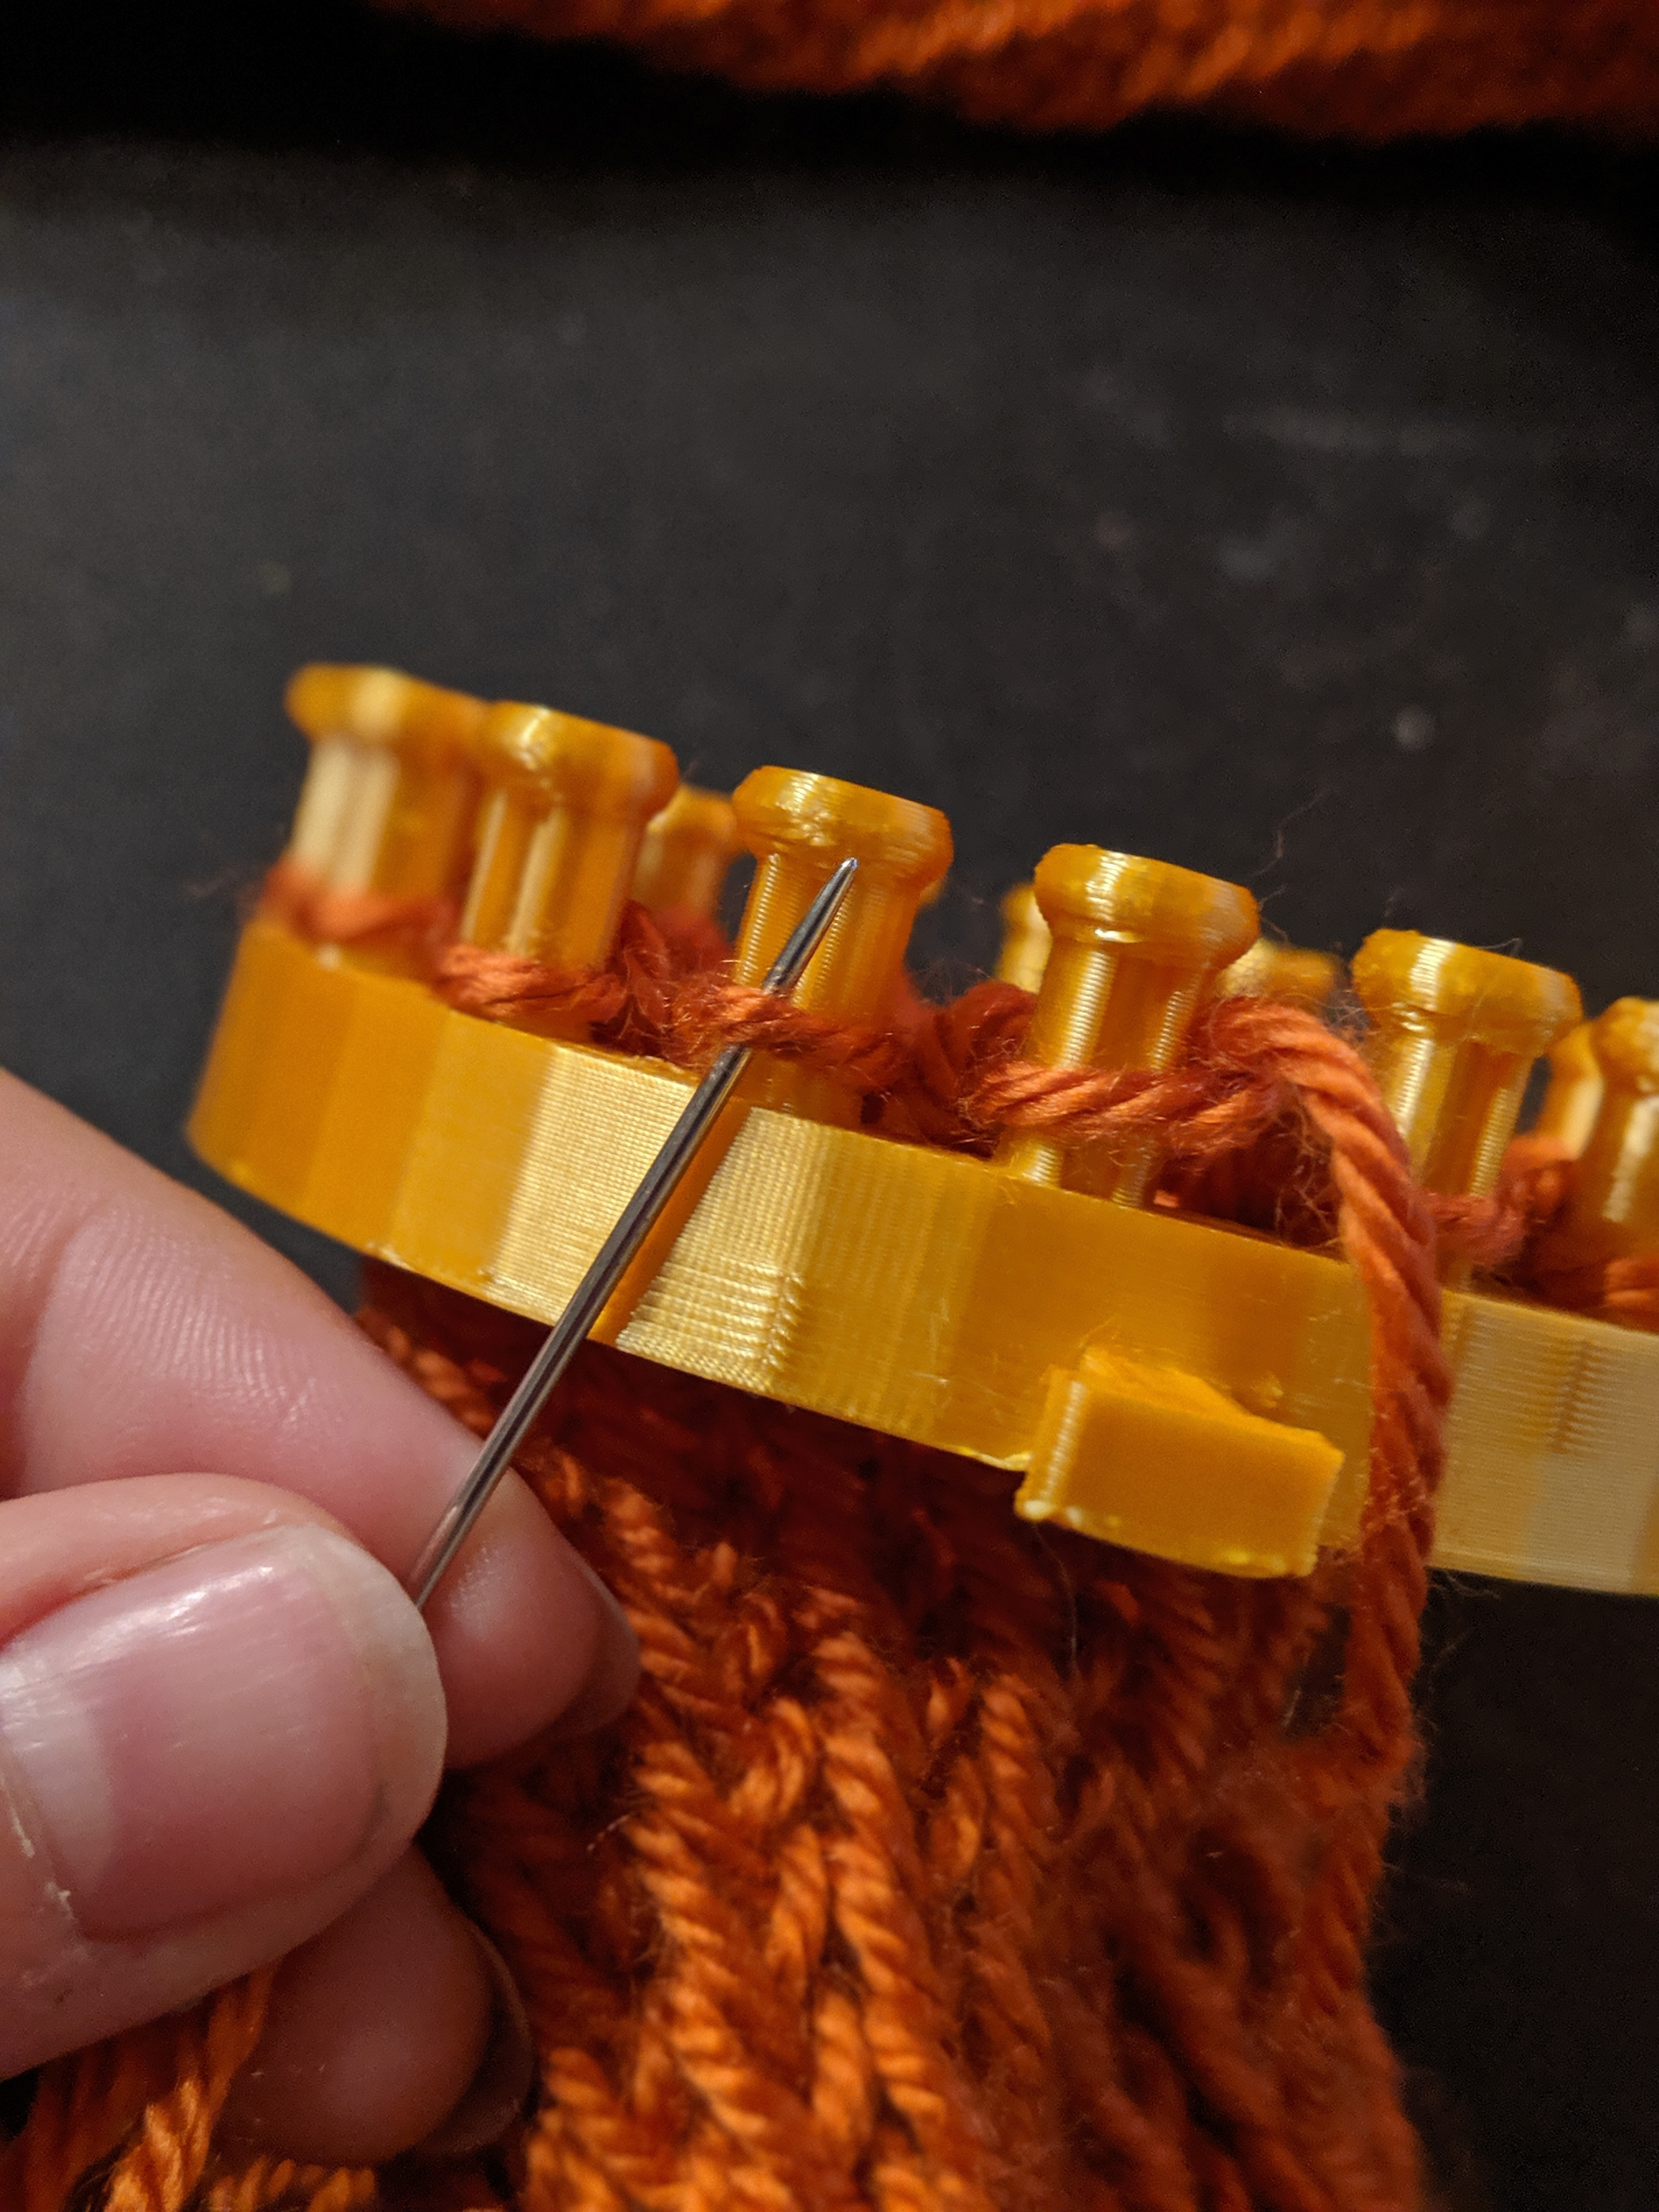
Pictures four and five: On your first peg, carefully pick the bottom strand of yarn with the loom tool, carry it over the top strand of yarn, and release. Repeat this step all the way around the loom.
Picture six: Once again, push down all of the wrapped-around yarn on each peg down to the bottom of each peg.
Now we start this all over again!
Keep Knitting...
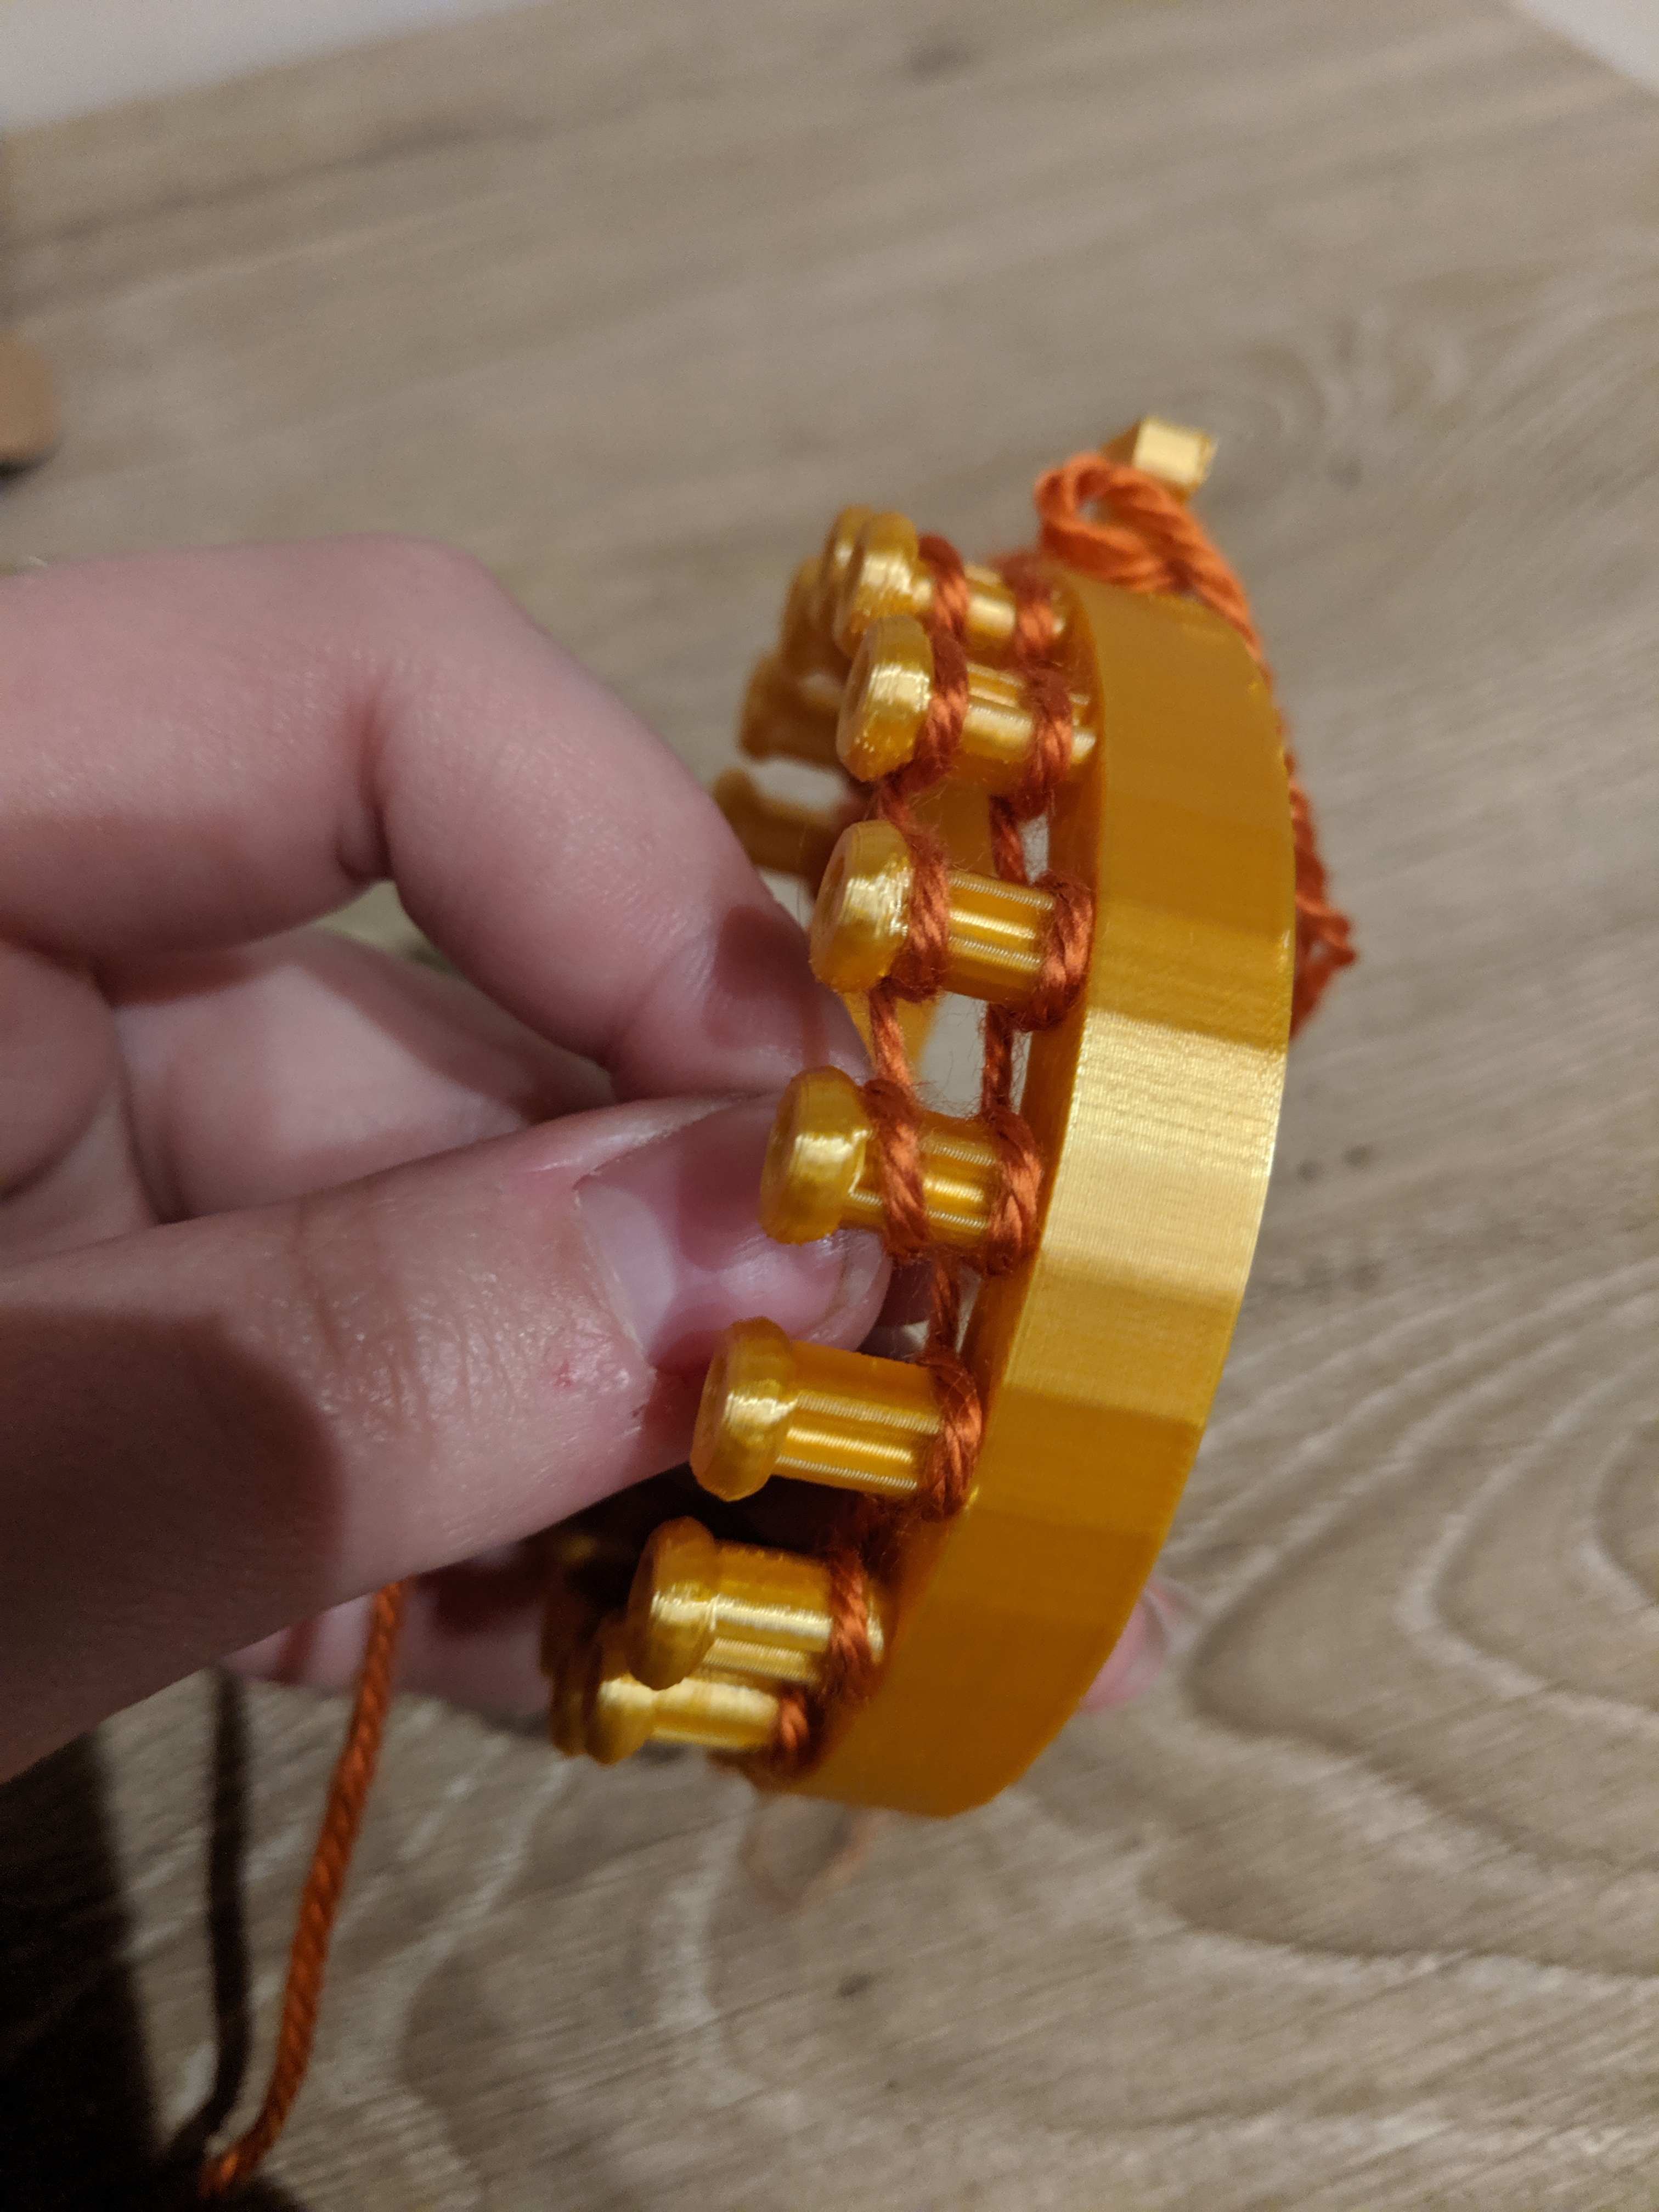
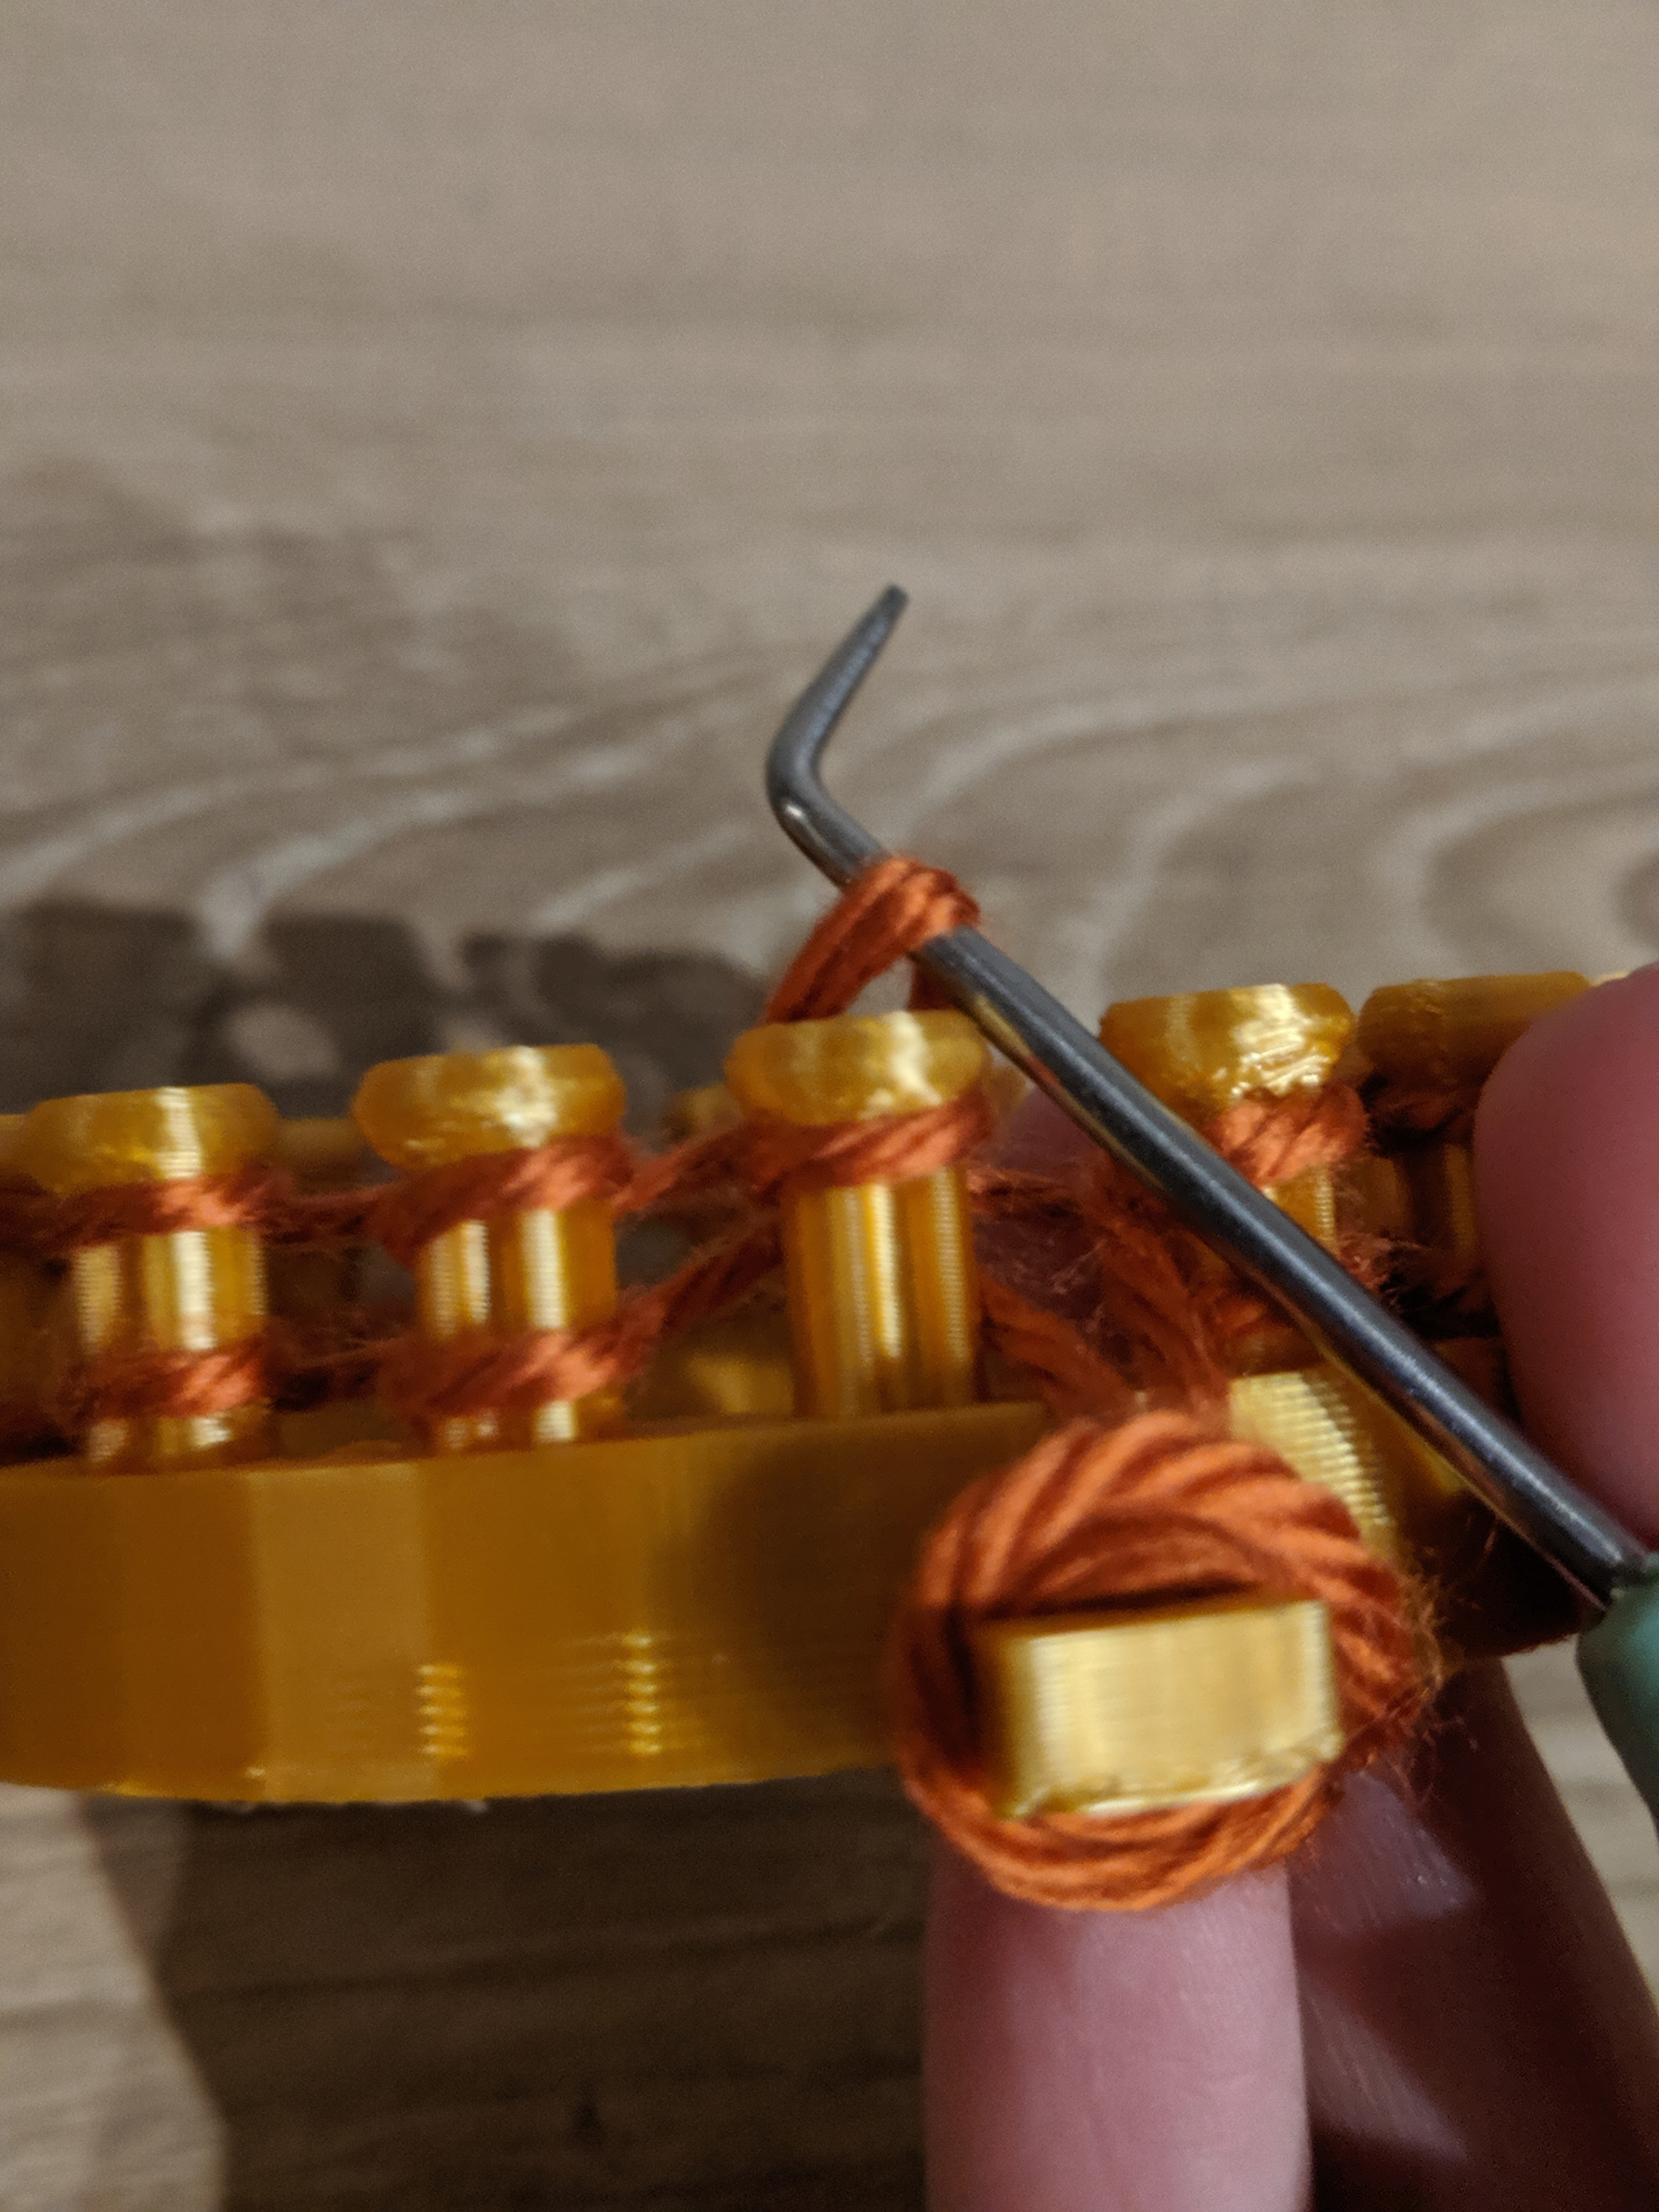
Keep completing the cycle of yarn wrapping, picking up and carrying the yarn over, and pushing down the yarn on each peg several times. At some point -- probably ten or so rows down -- you'll run into an issue where you'll need to take the yarn that's been wrapped on the side peg since the very beginning off (see pictures two and three). It will be secure enough now to remove it.
Keep Knitting Even More...
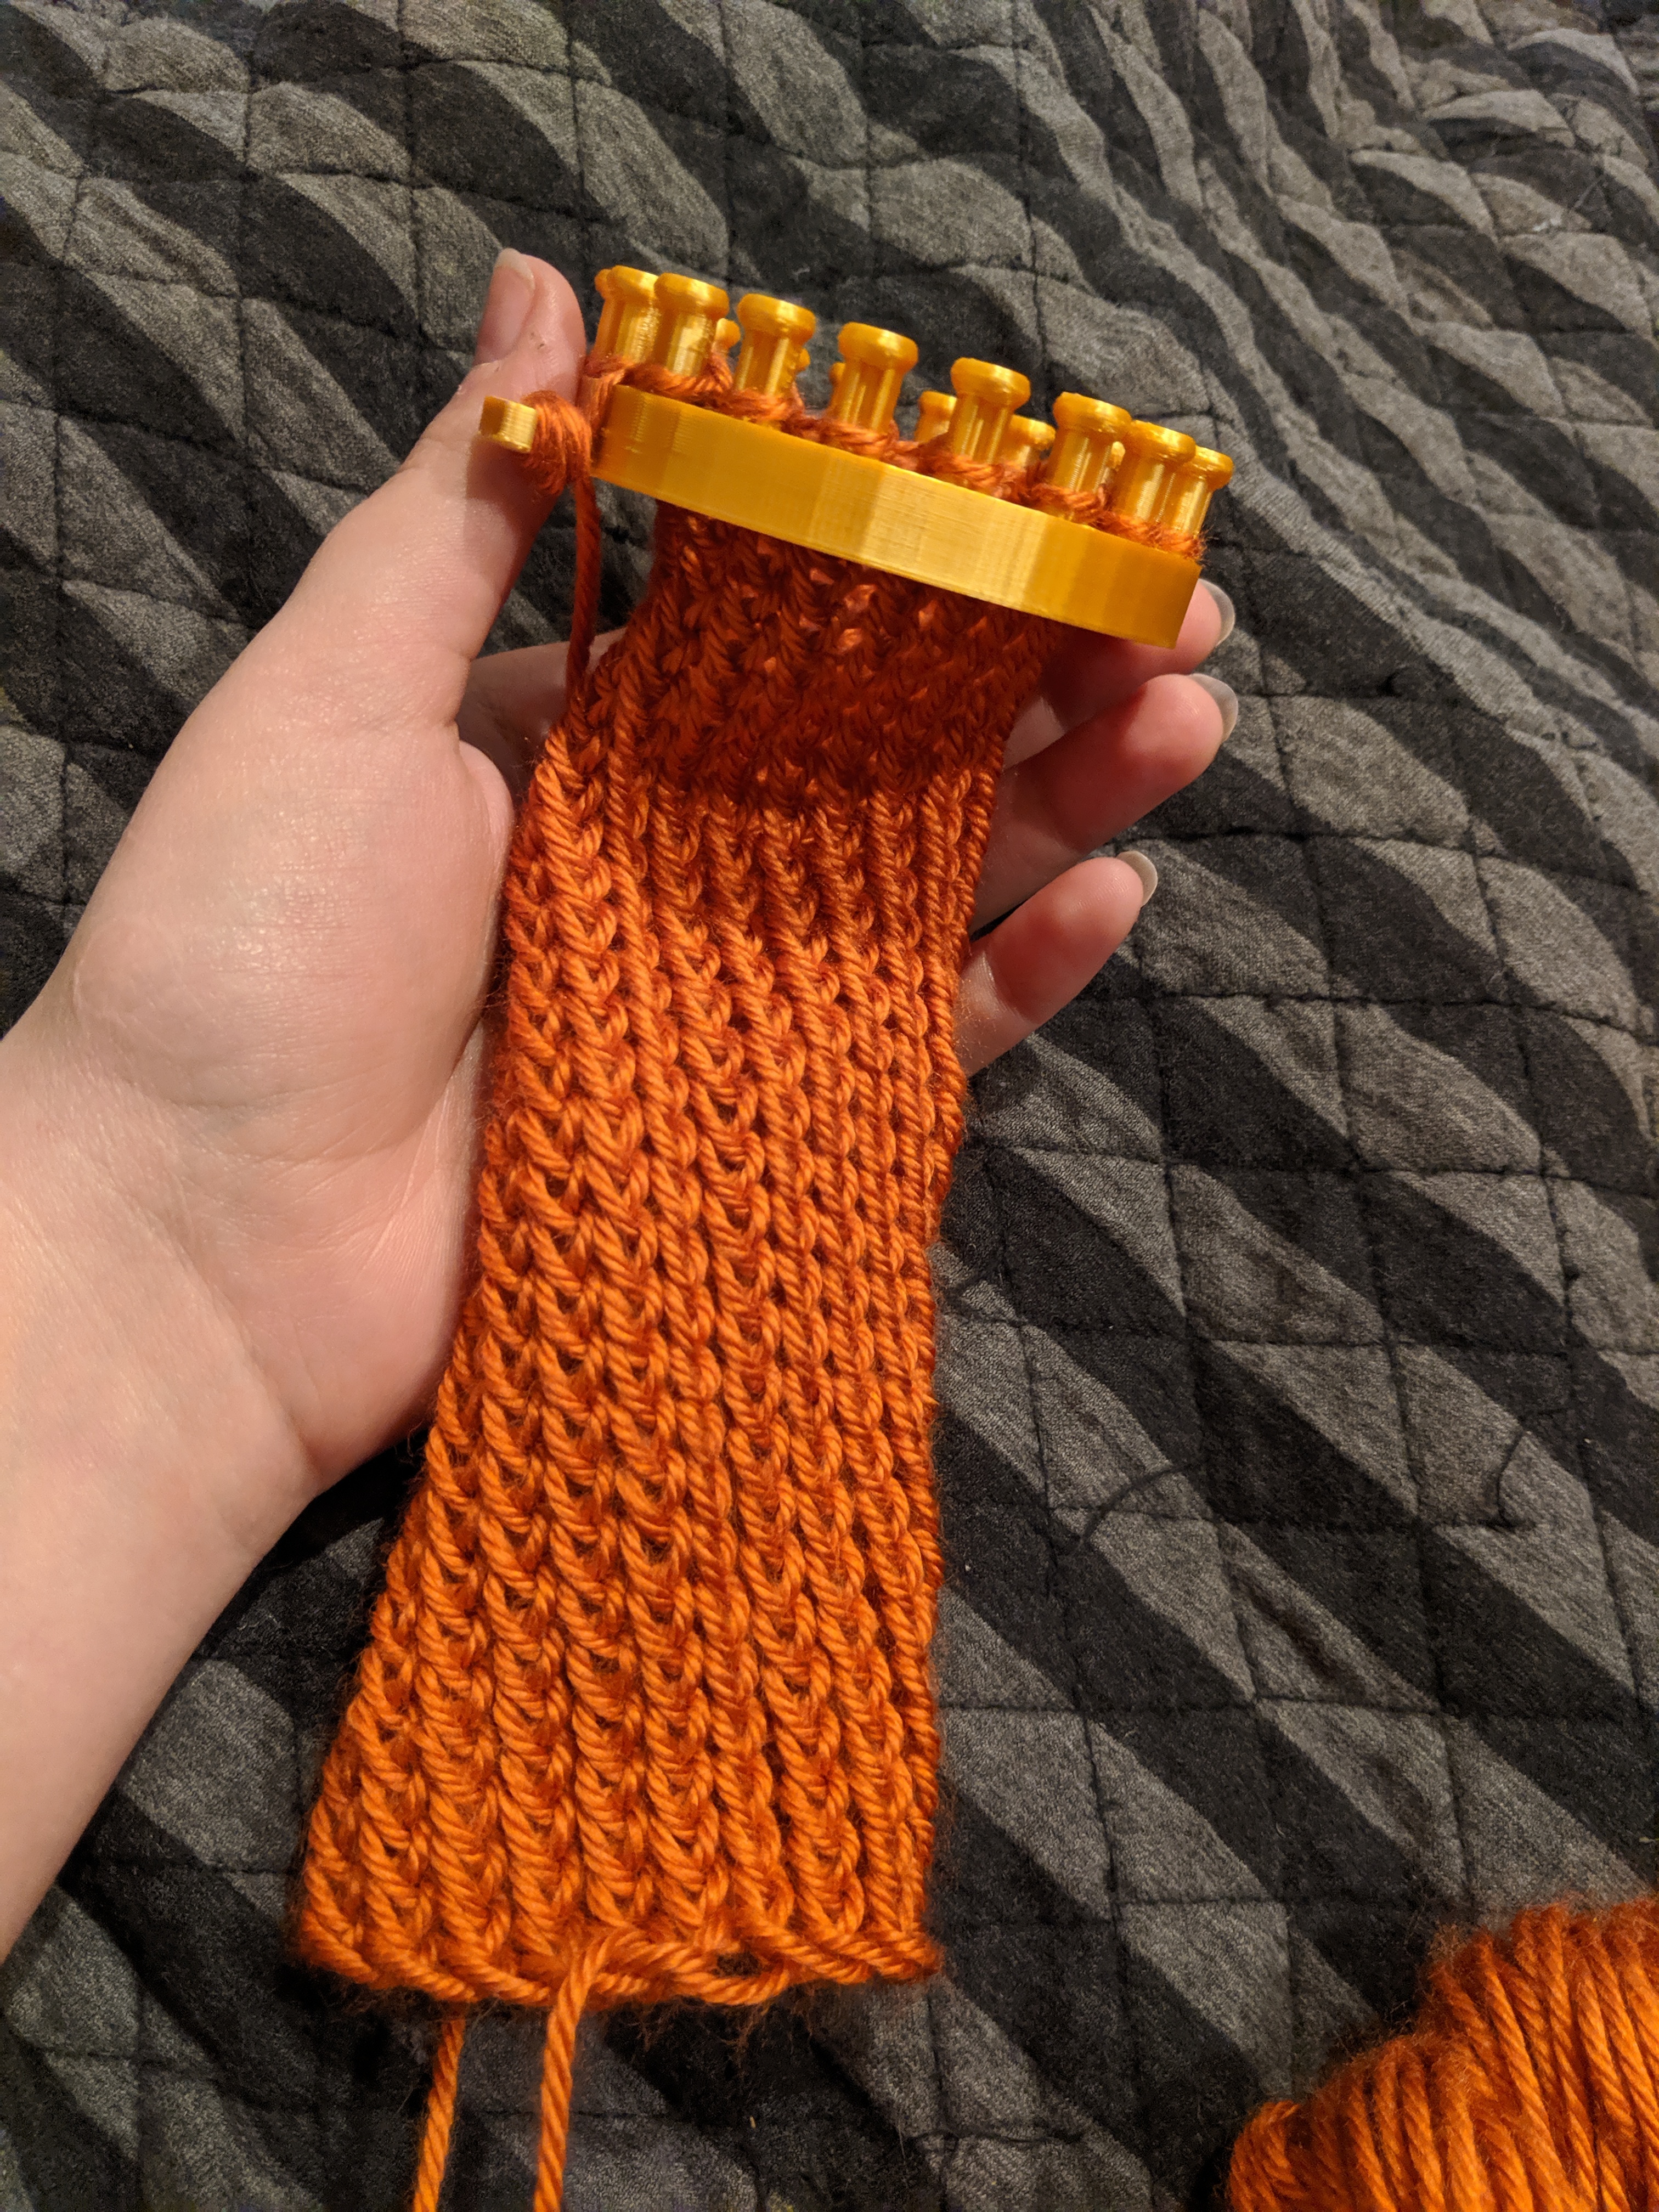
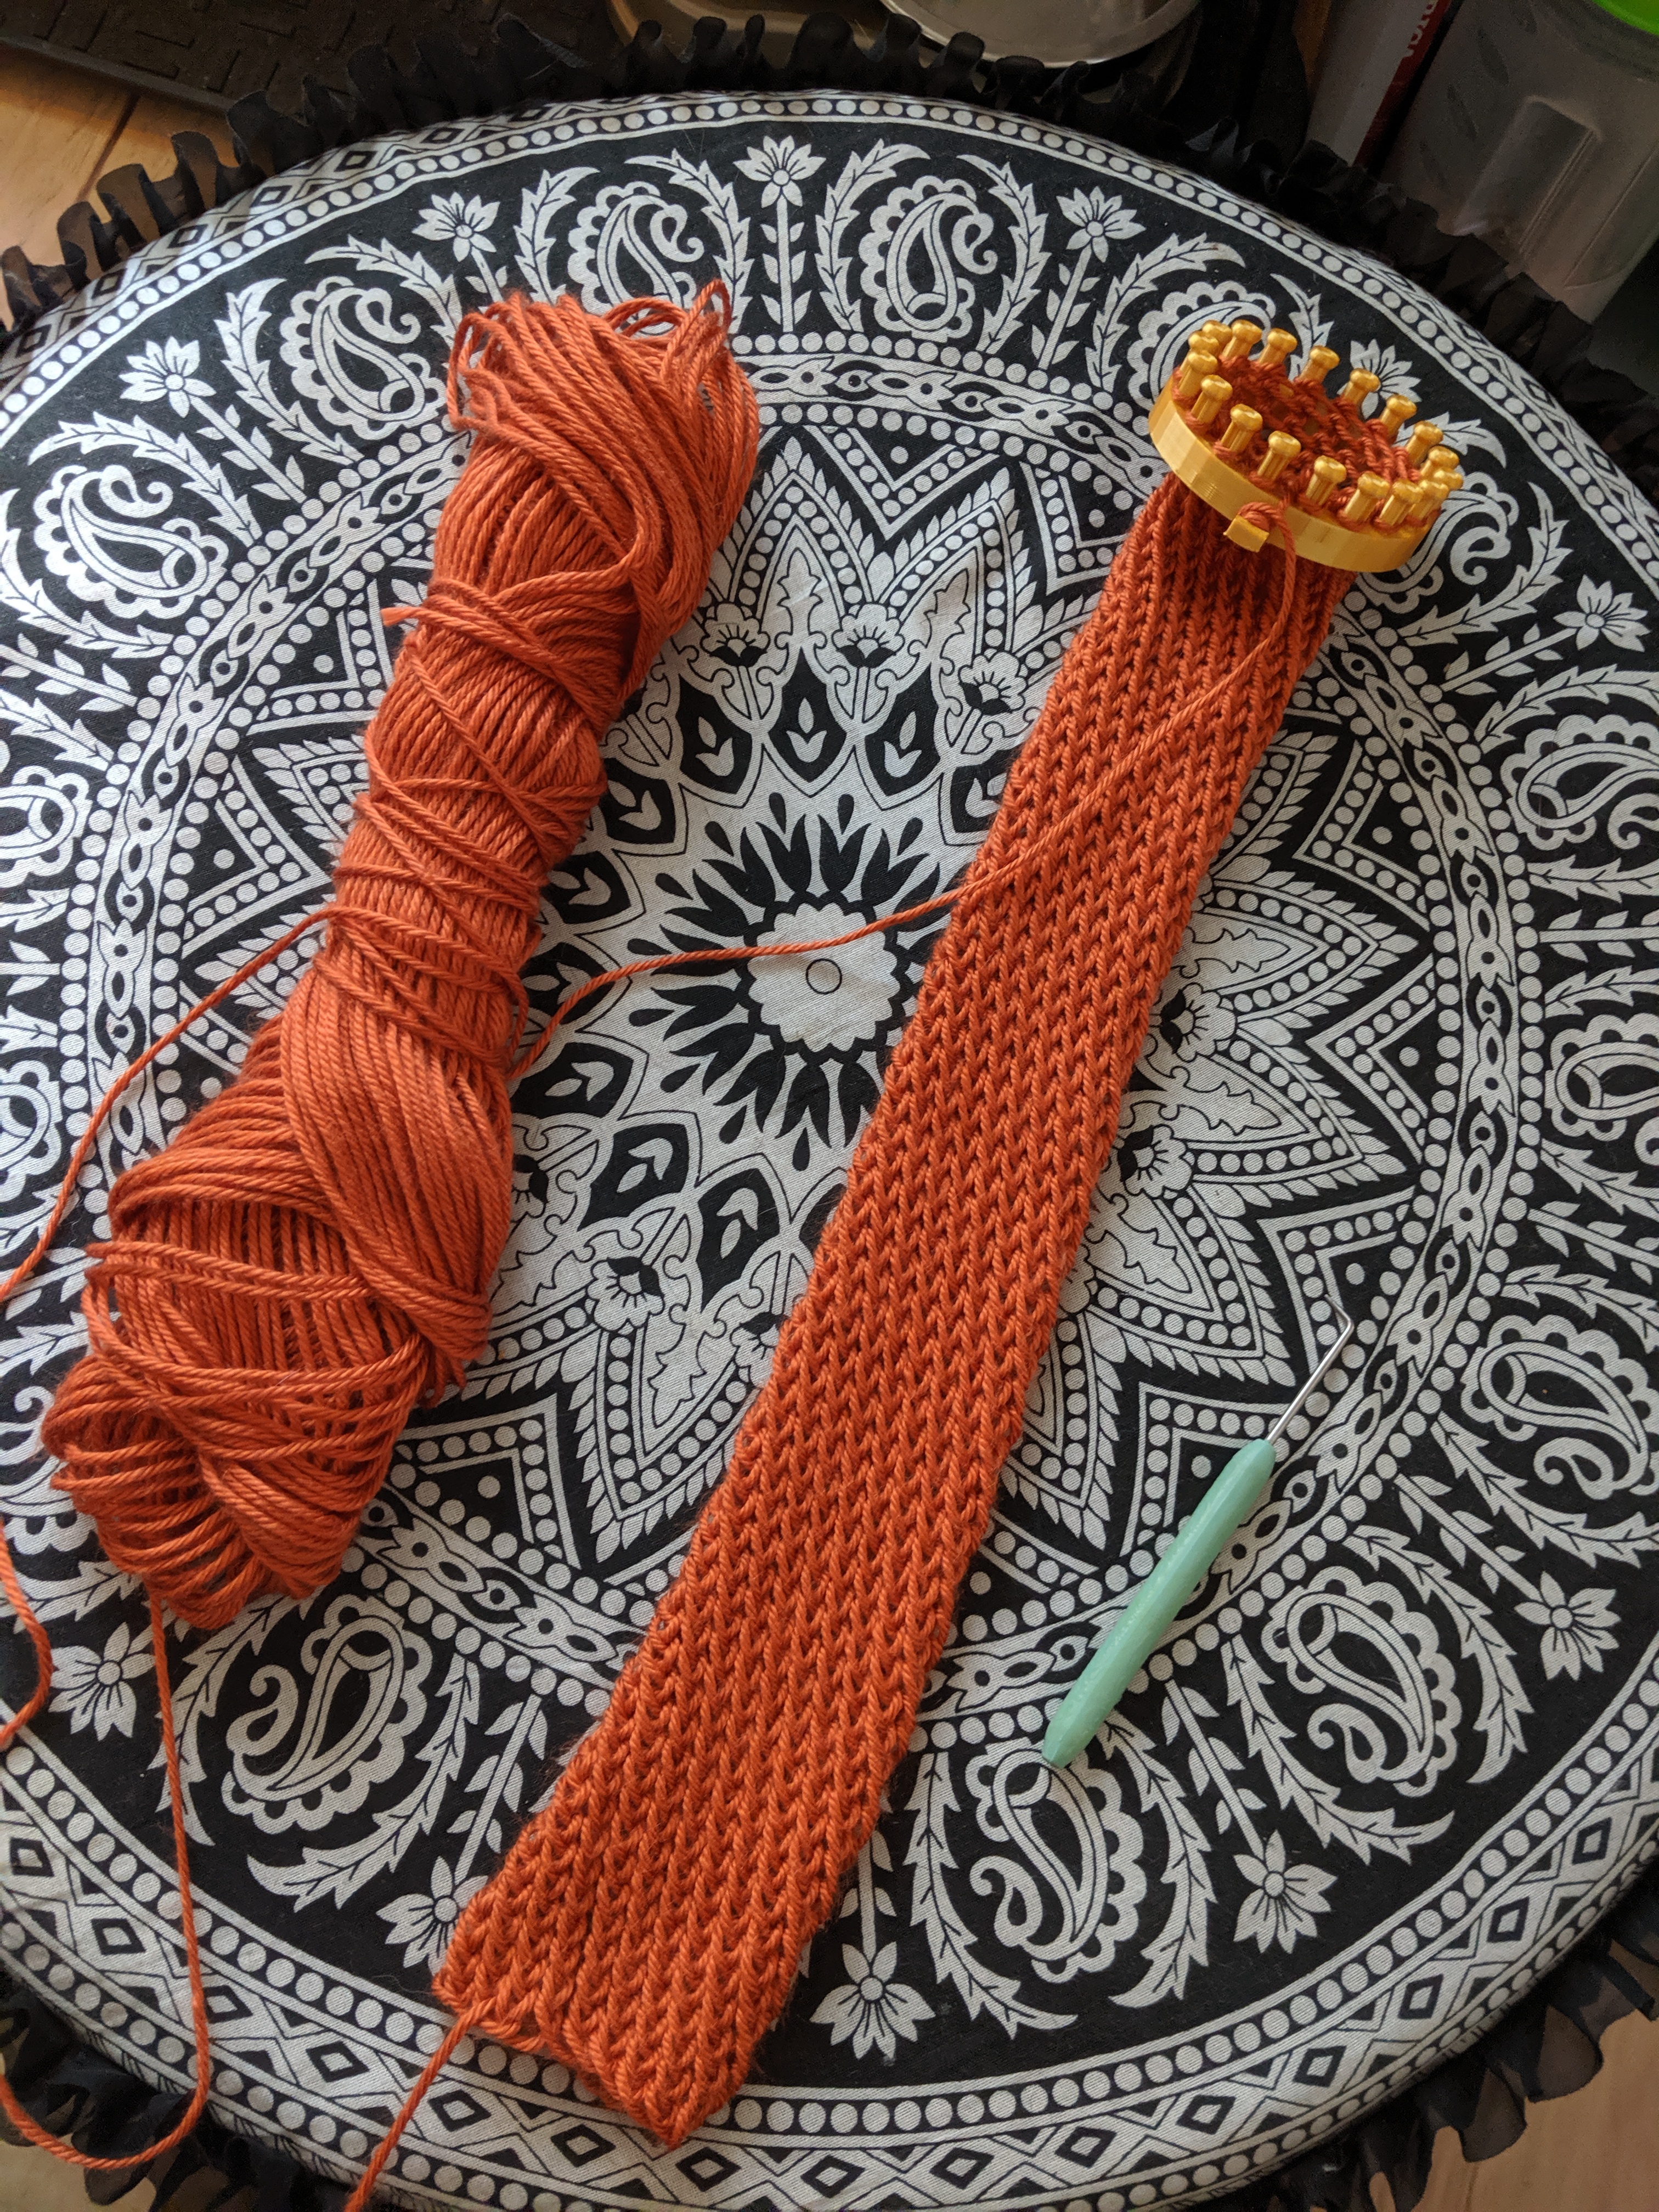
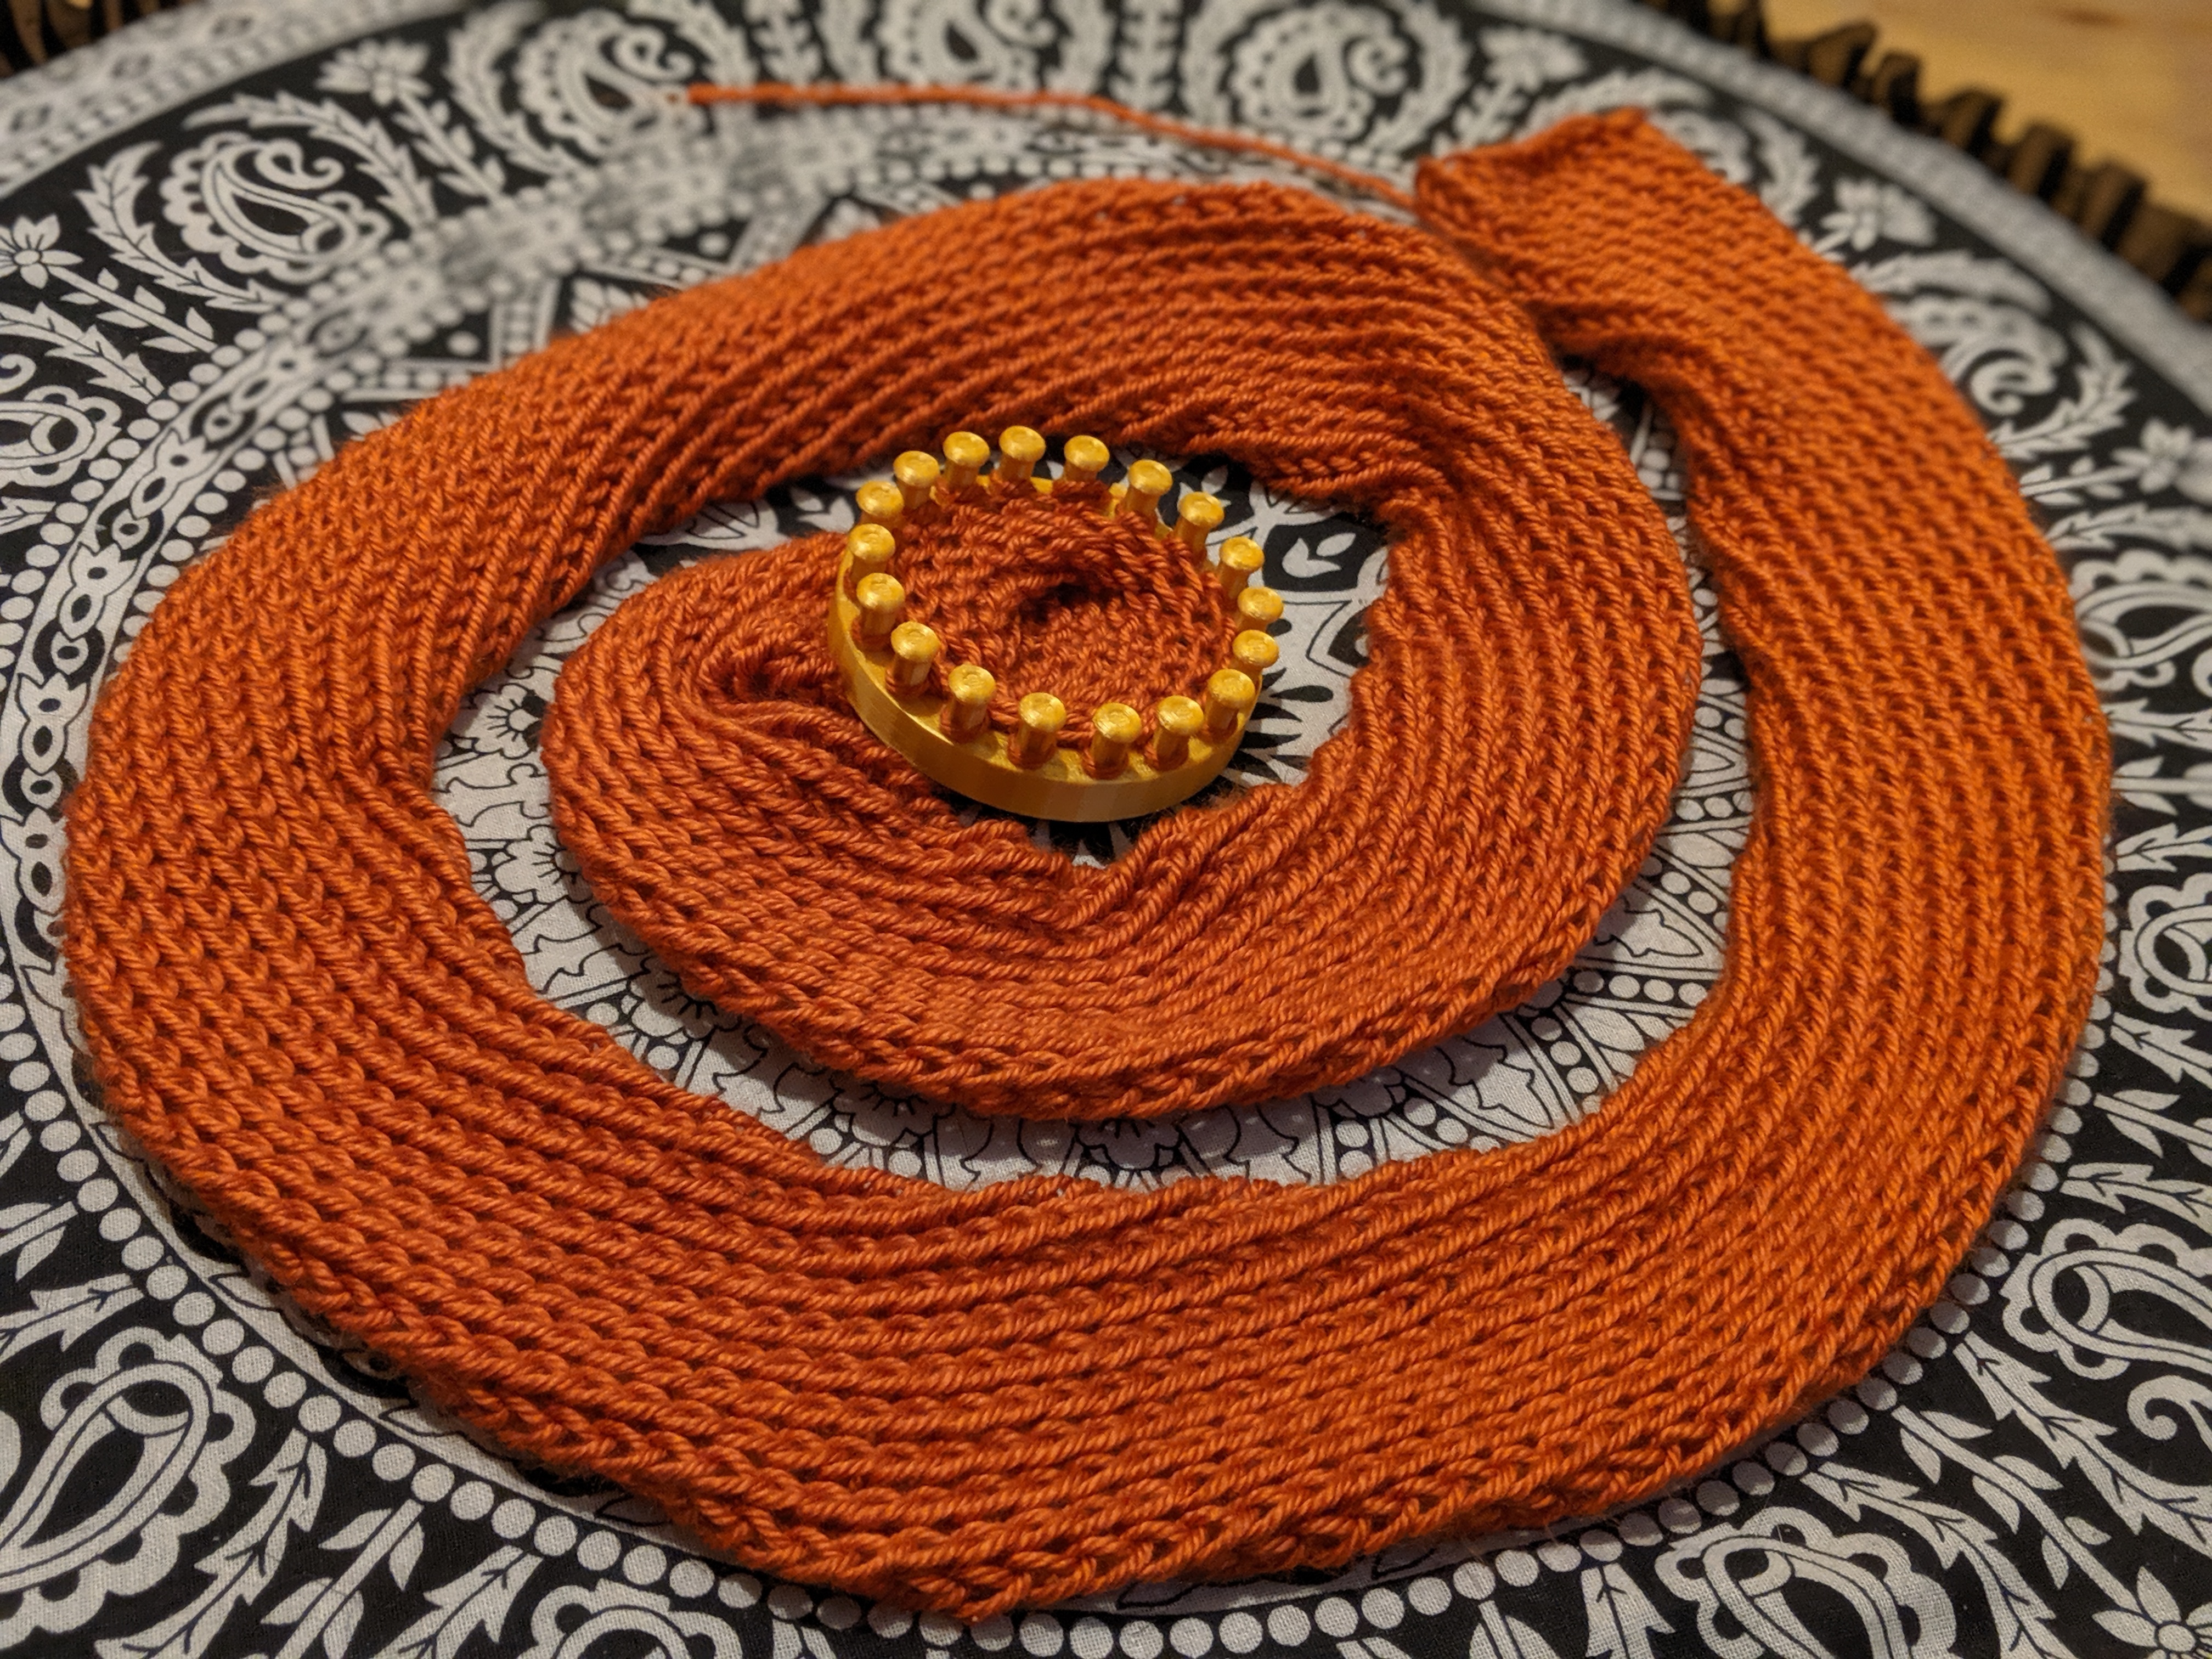
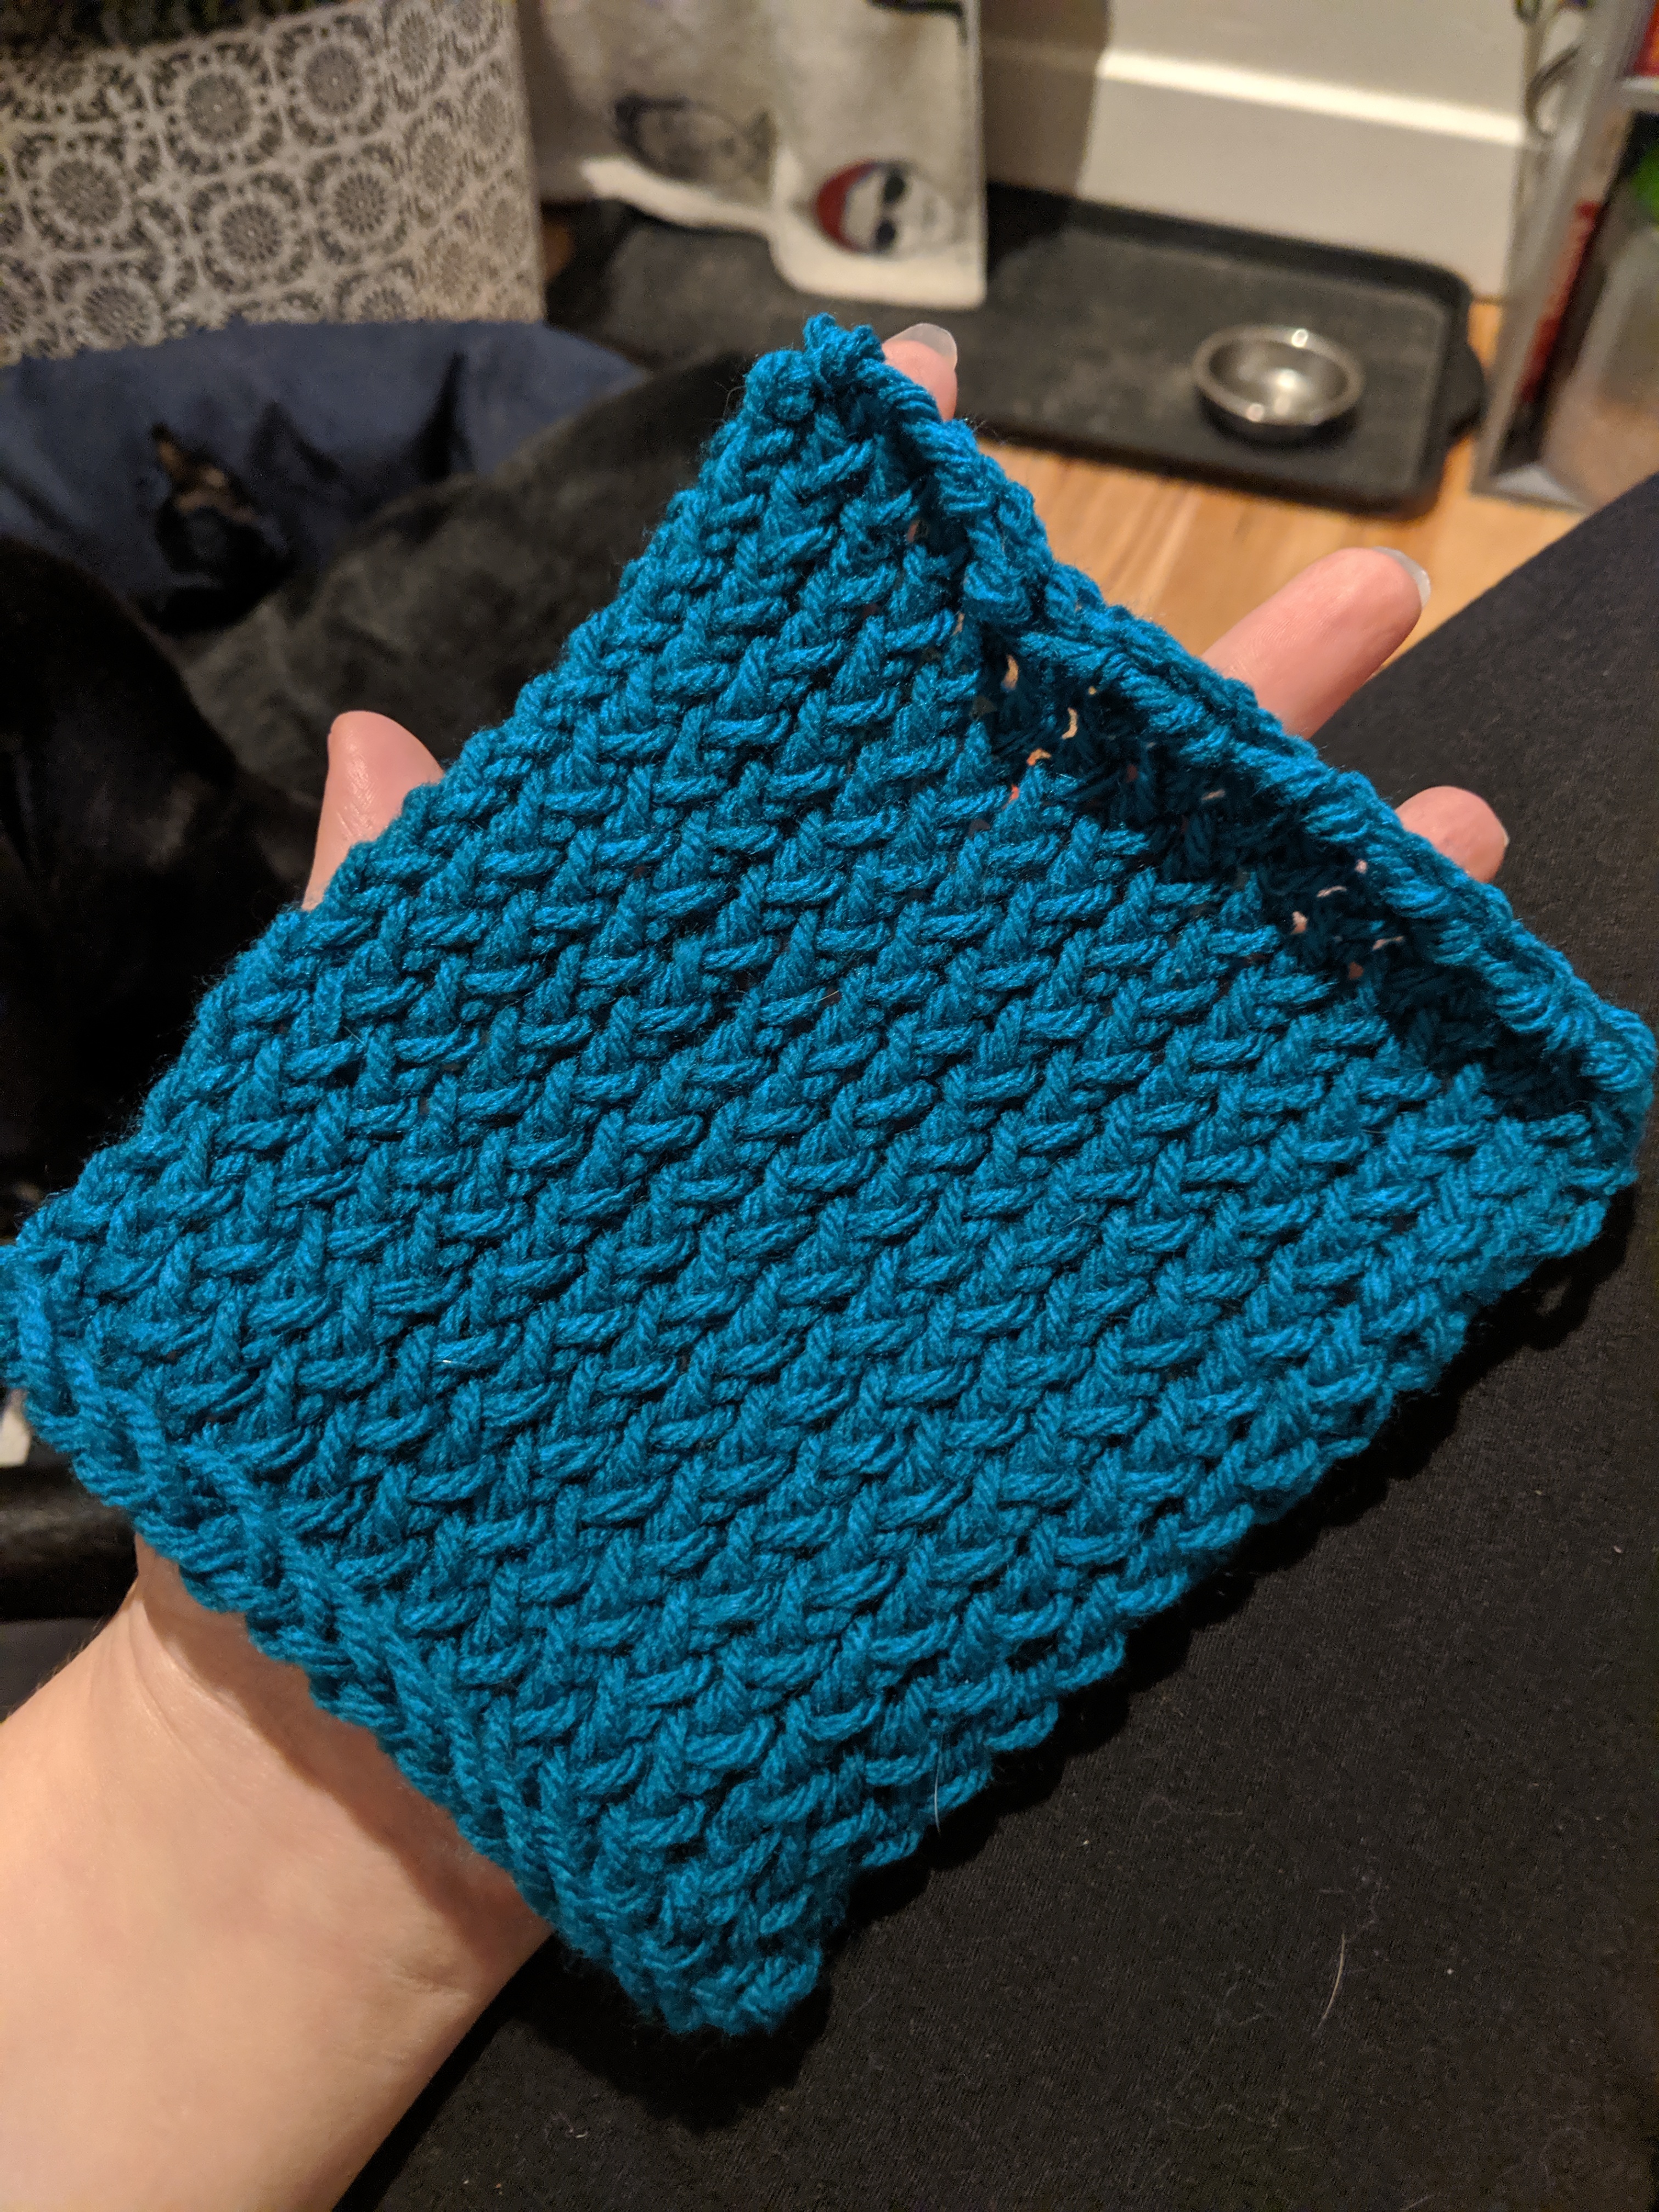
I love this part. I get into a groove where I can watch TV and almost not even look at the loom anymore. It's so addicting.
I probably used 3/4 of a skein of yarn, but that's only because I ran out. You could make your scarf as long or as short as you want. Just make sure you have about 10" of leftover yarn at least for the next step.
Casting Off
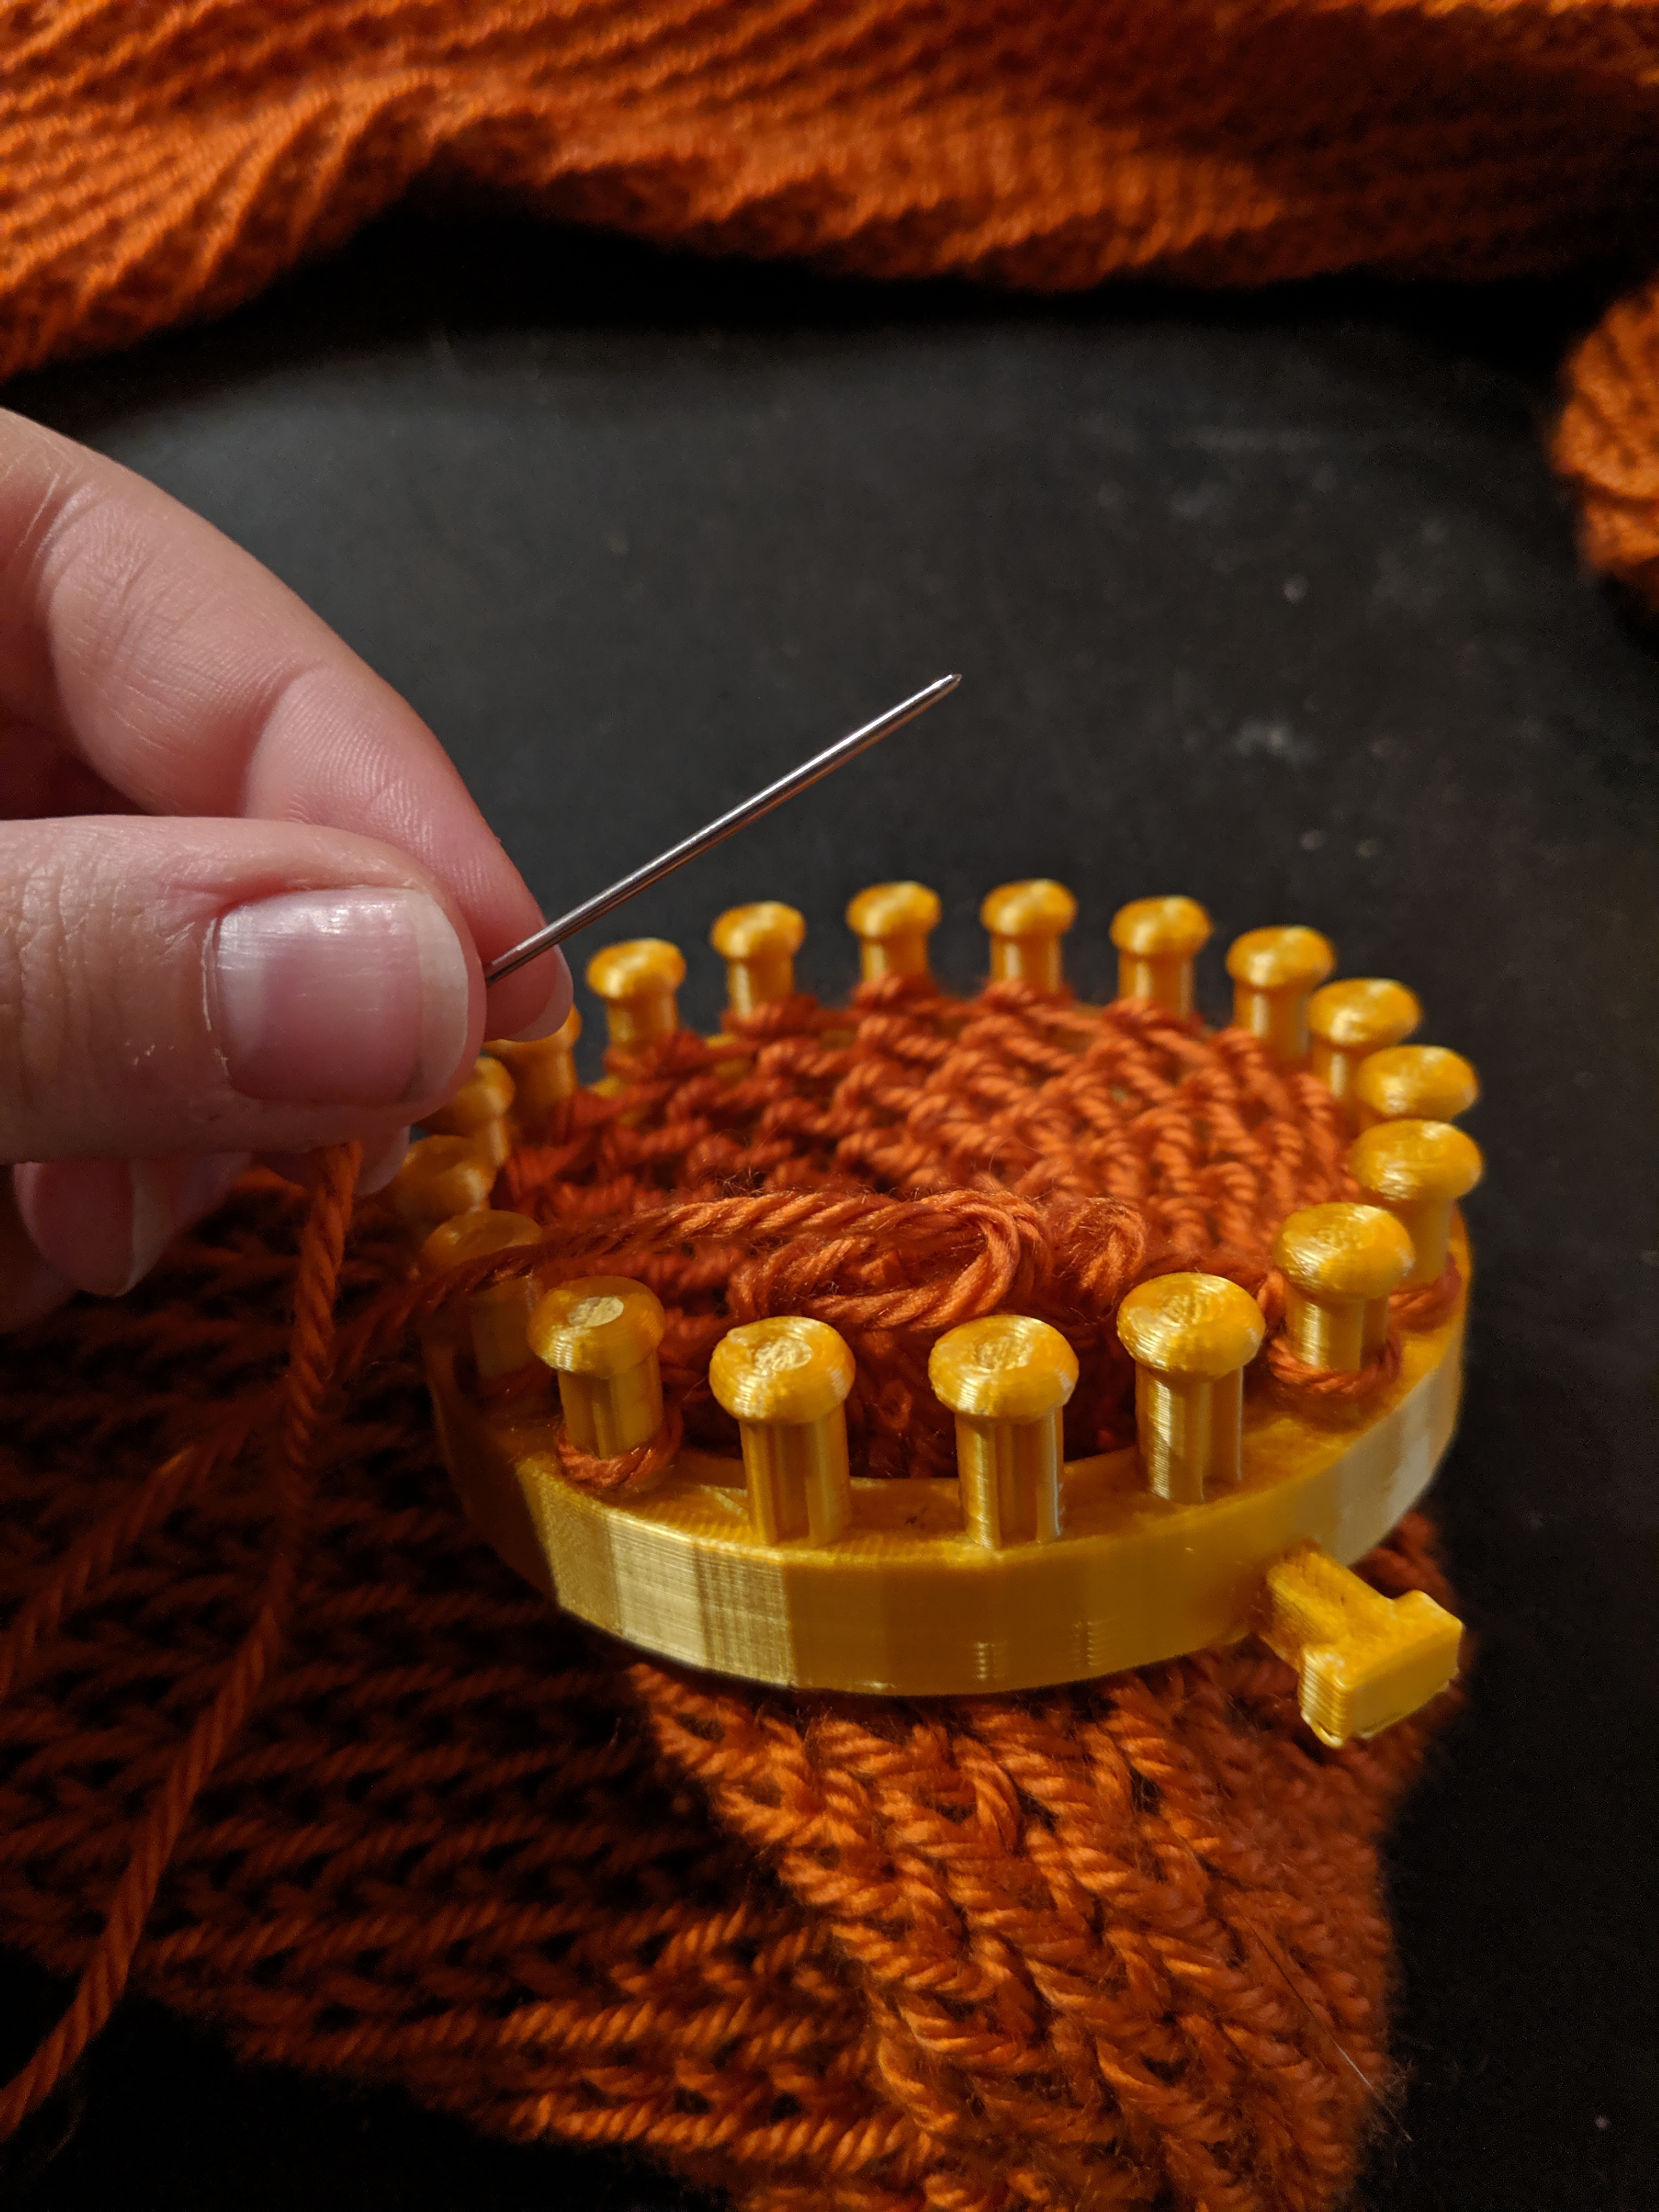
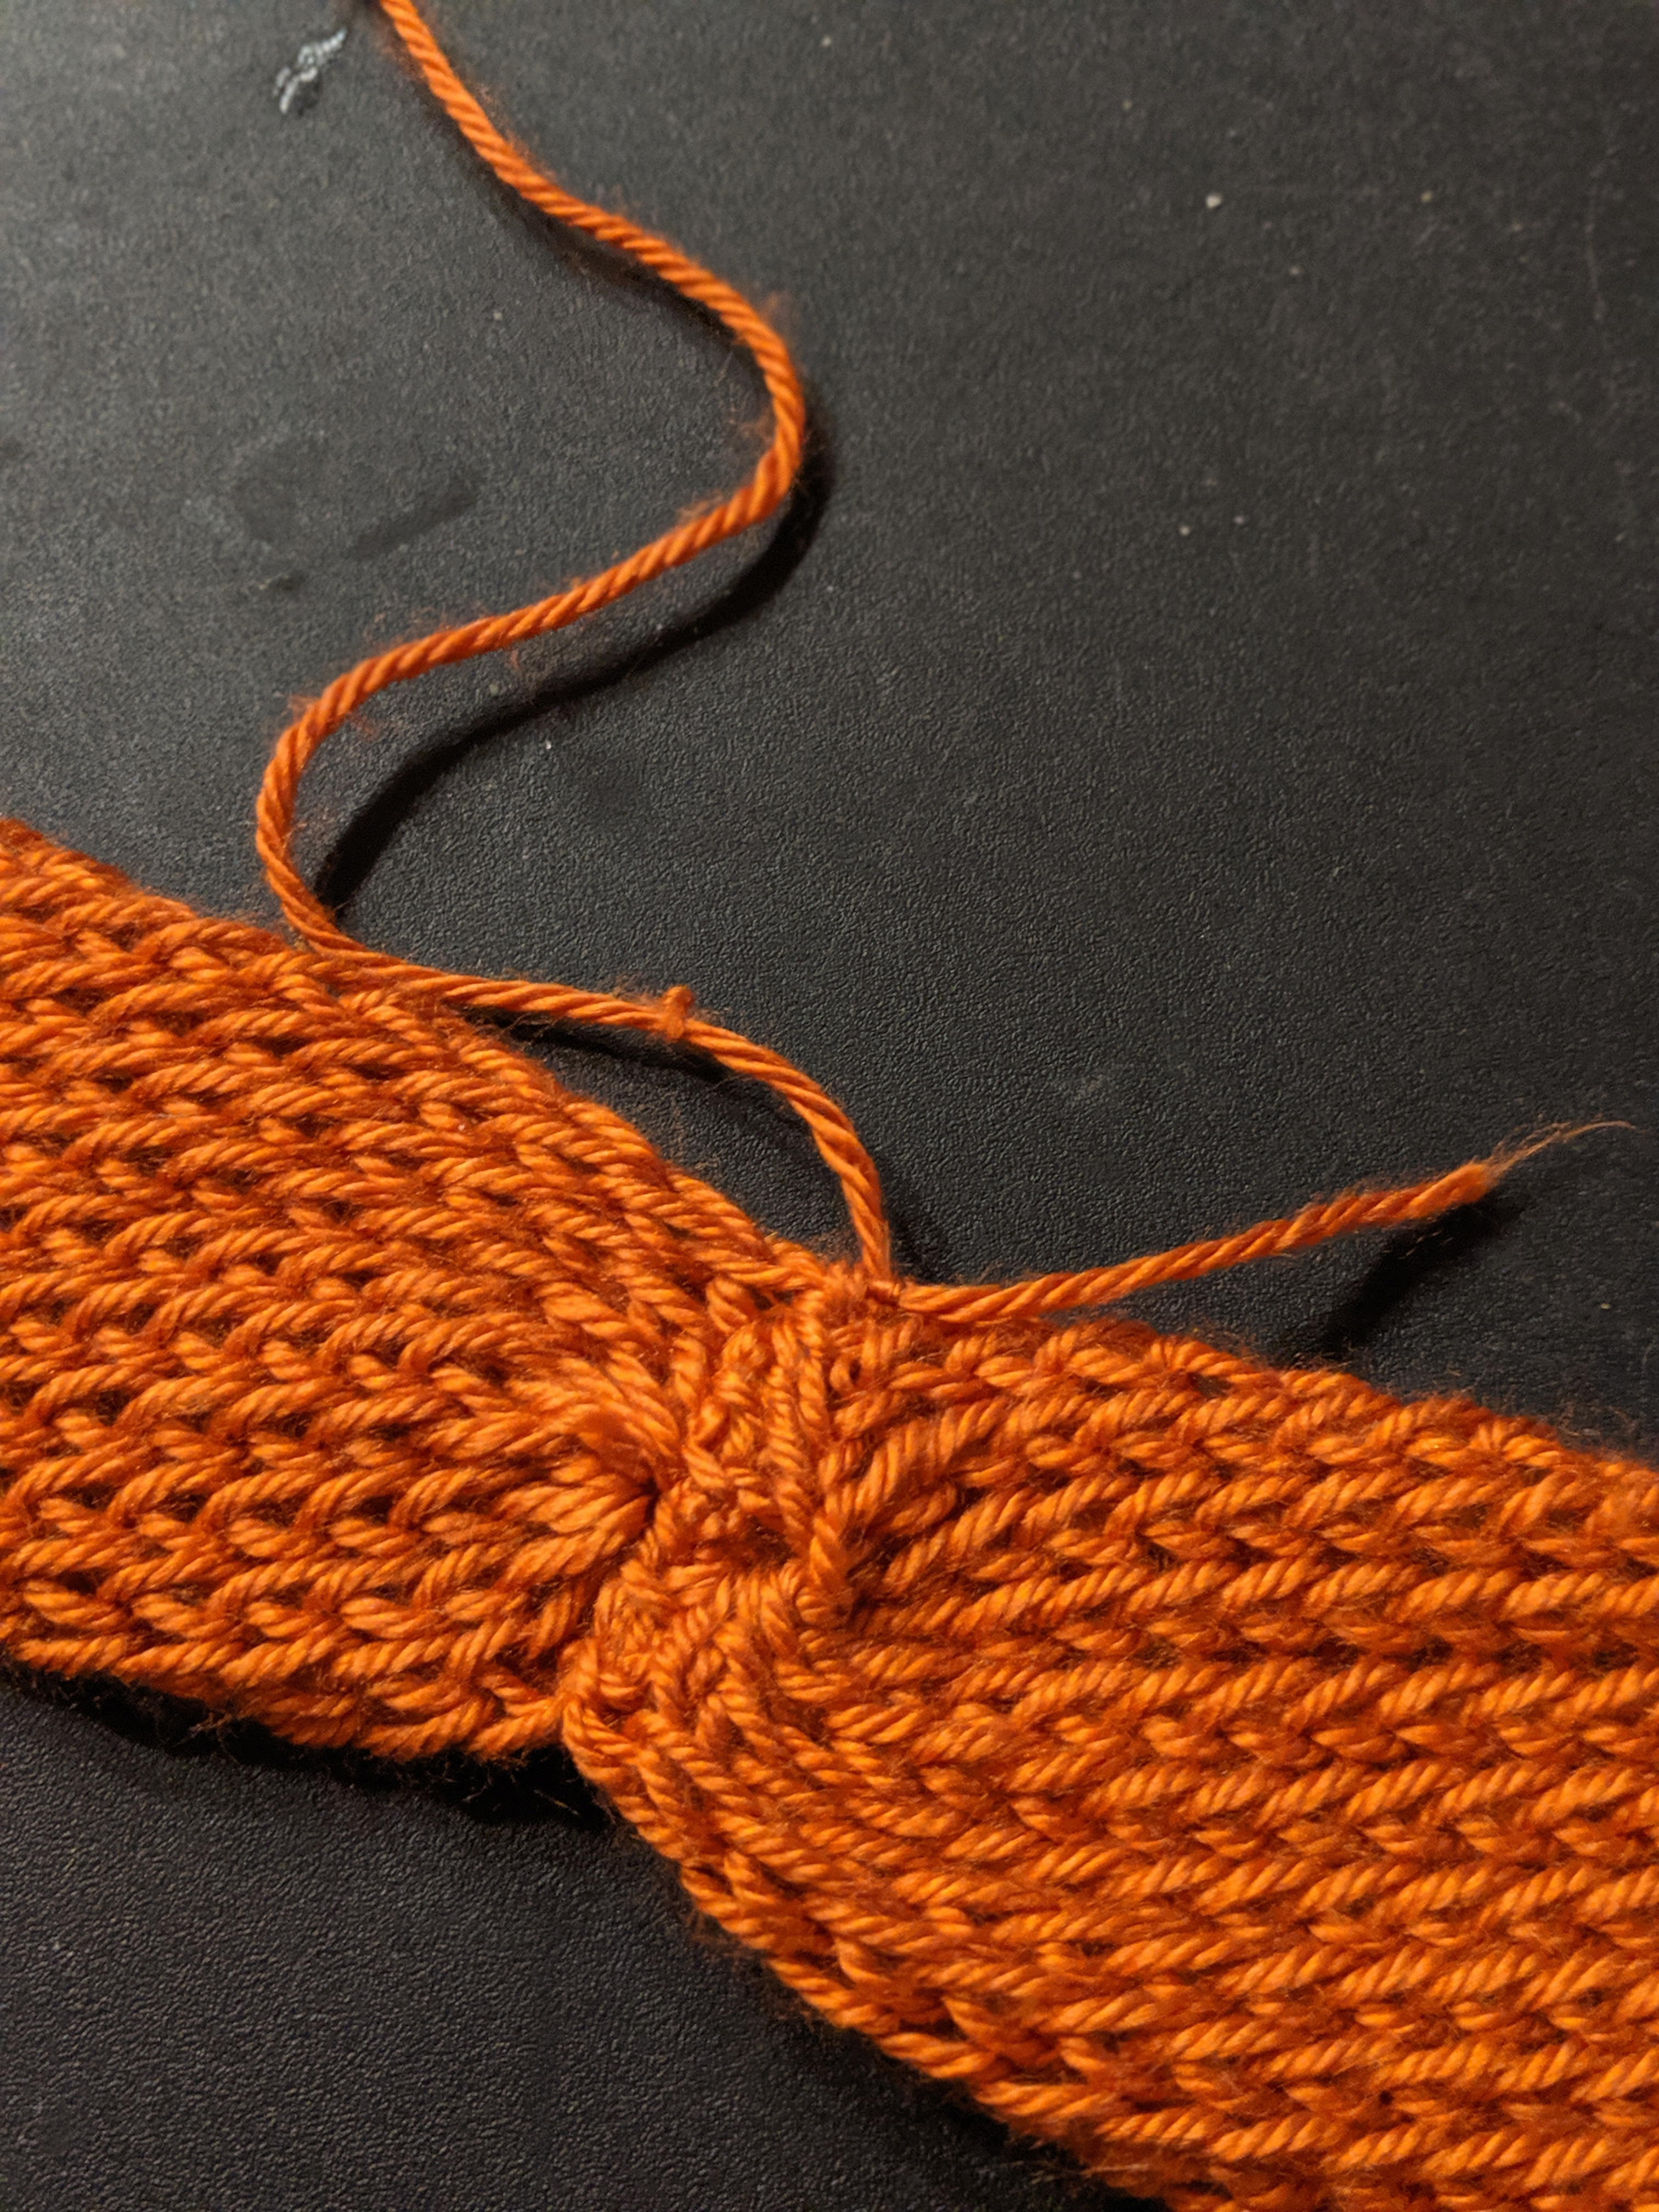
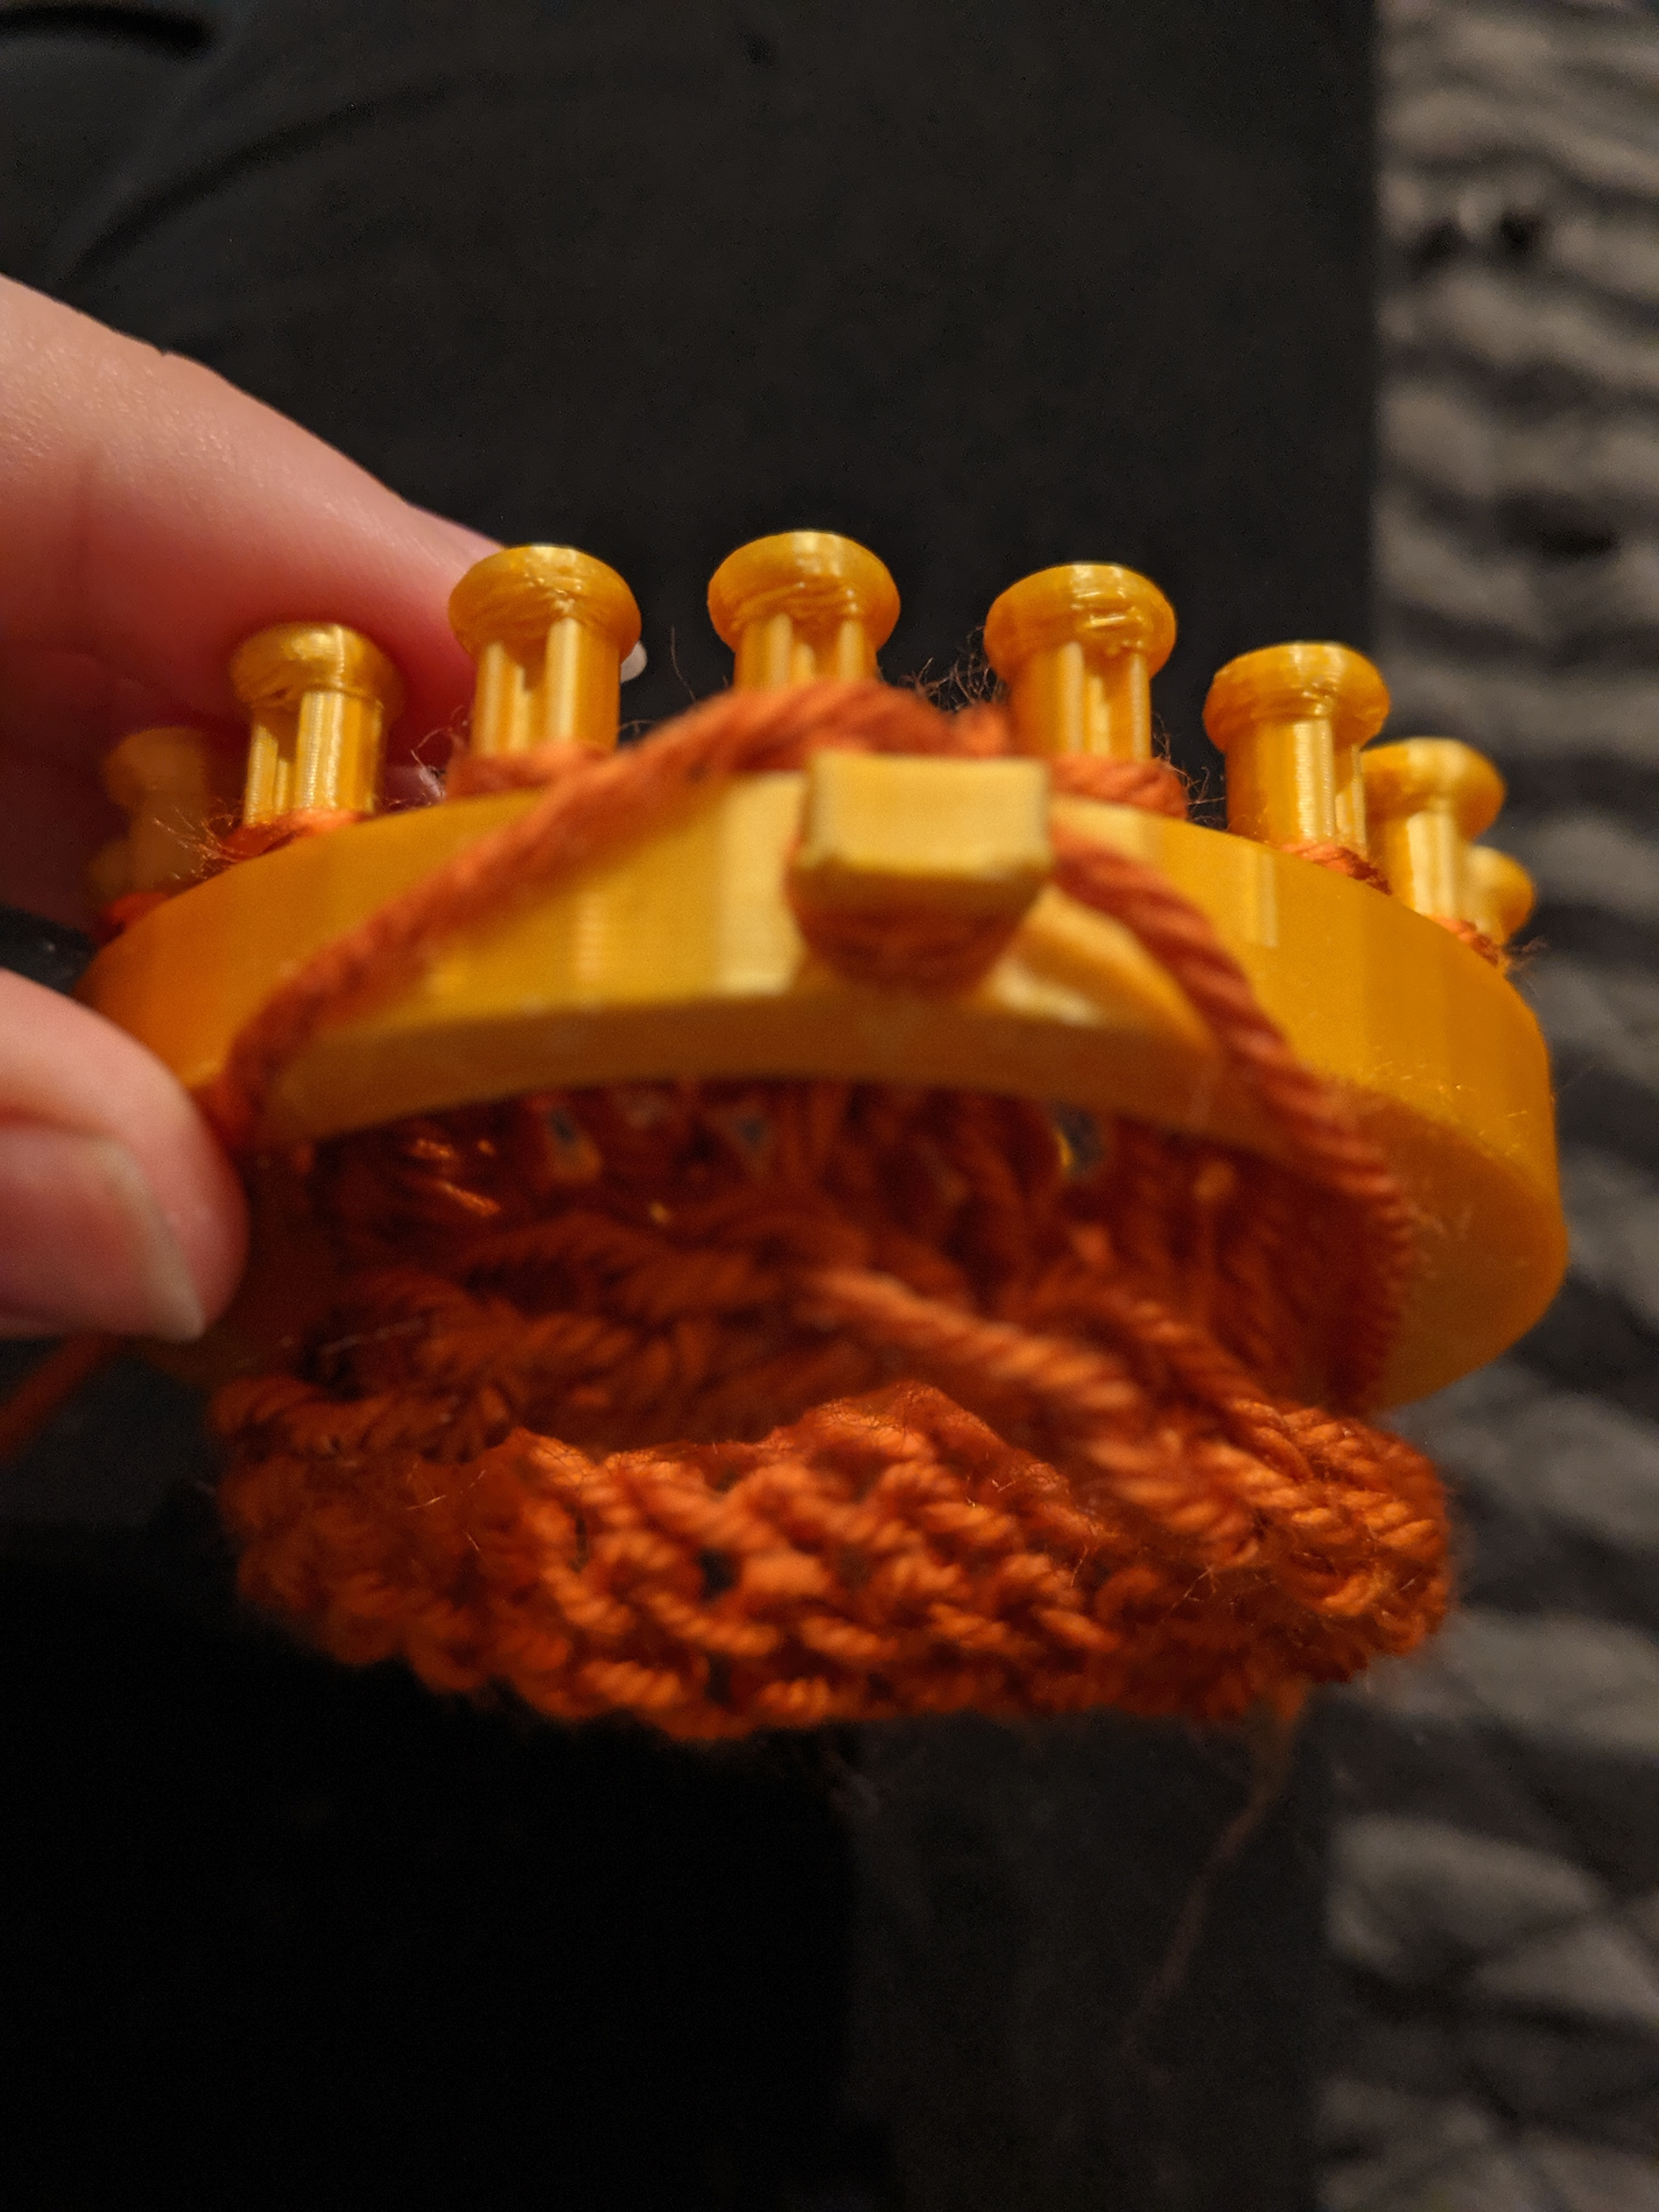
Picture one: When you feel your scarf is long enough, grab an embroidery needle and thread it with some of your leftover yarn.
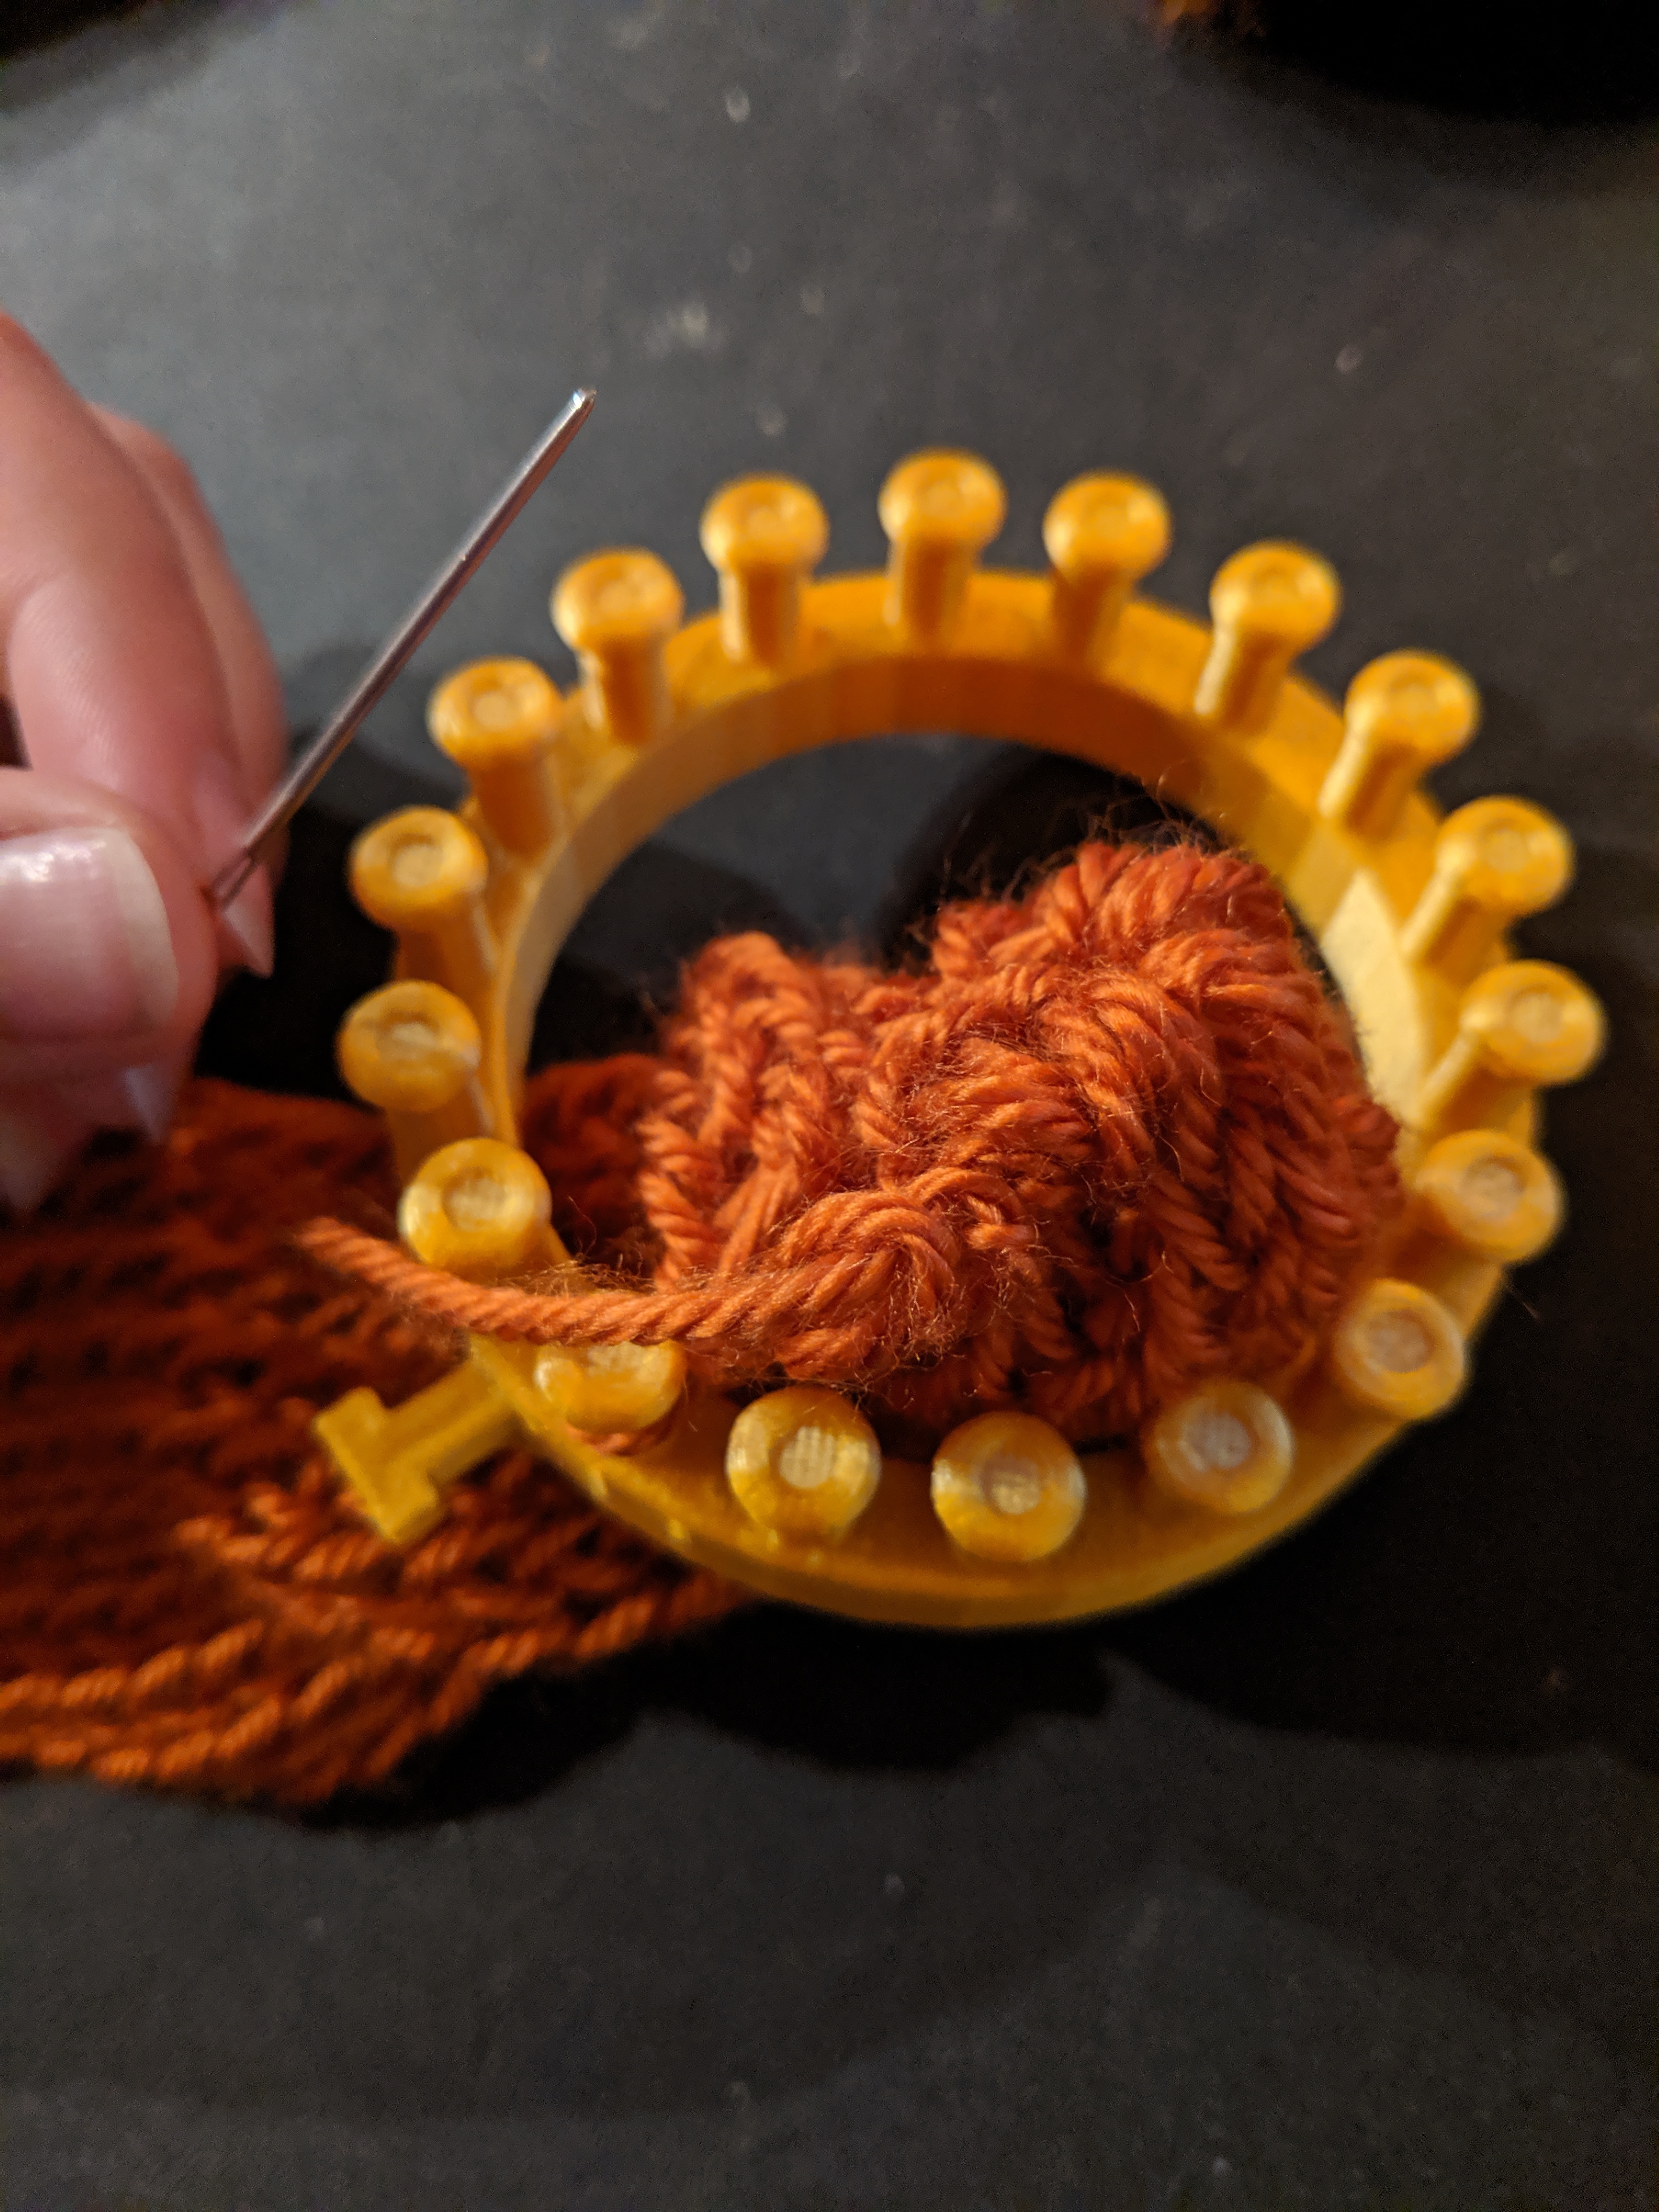
Picture two: Thread through the yarn loop on each peg and pull it off.
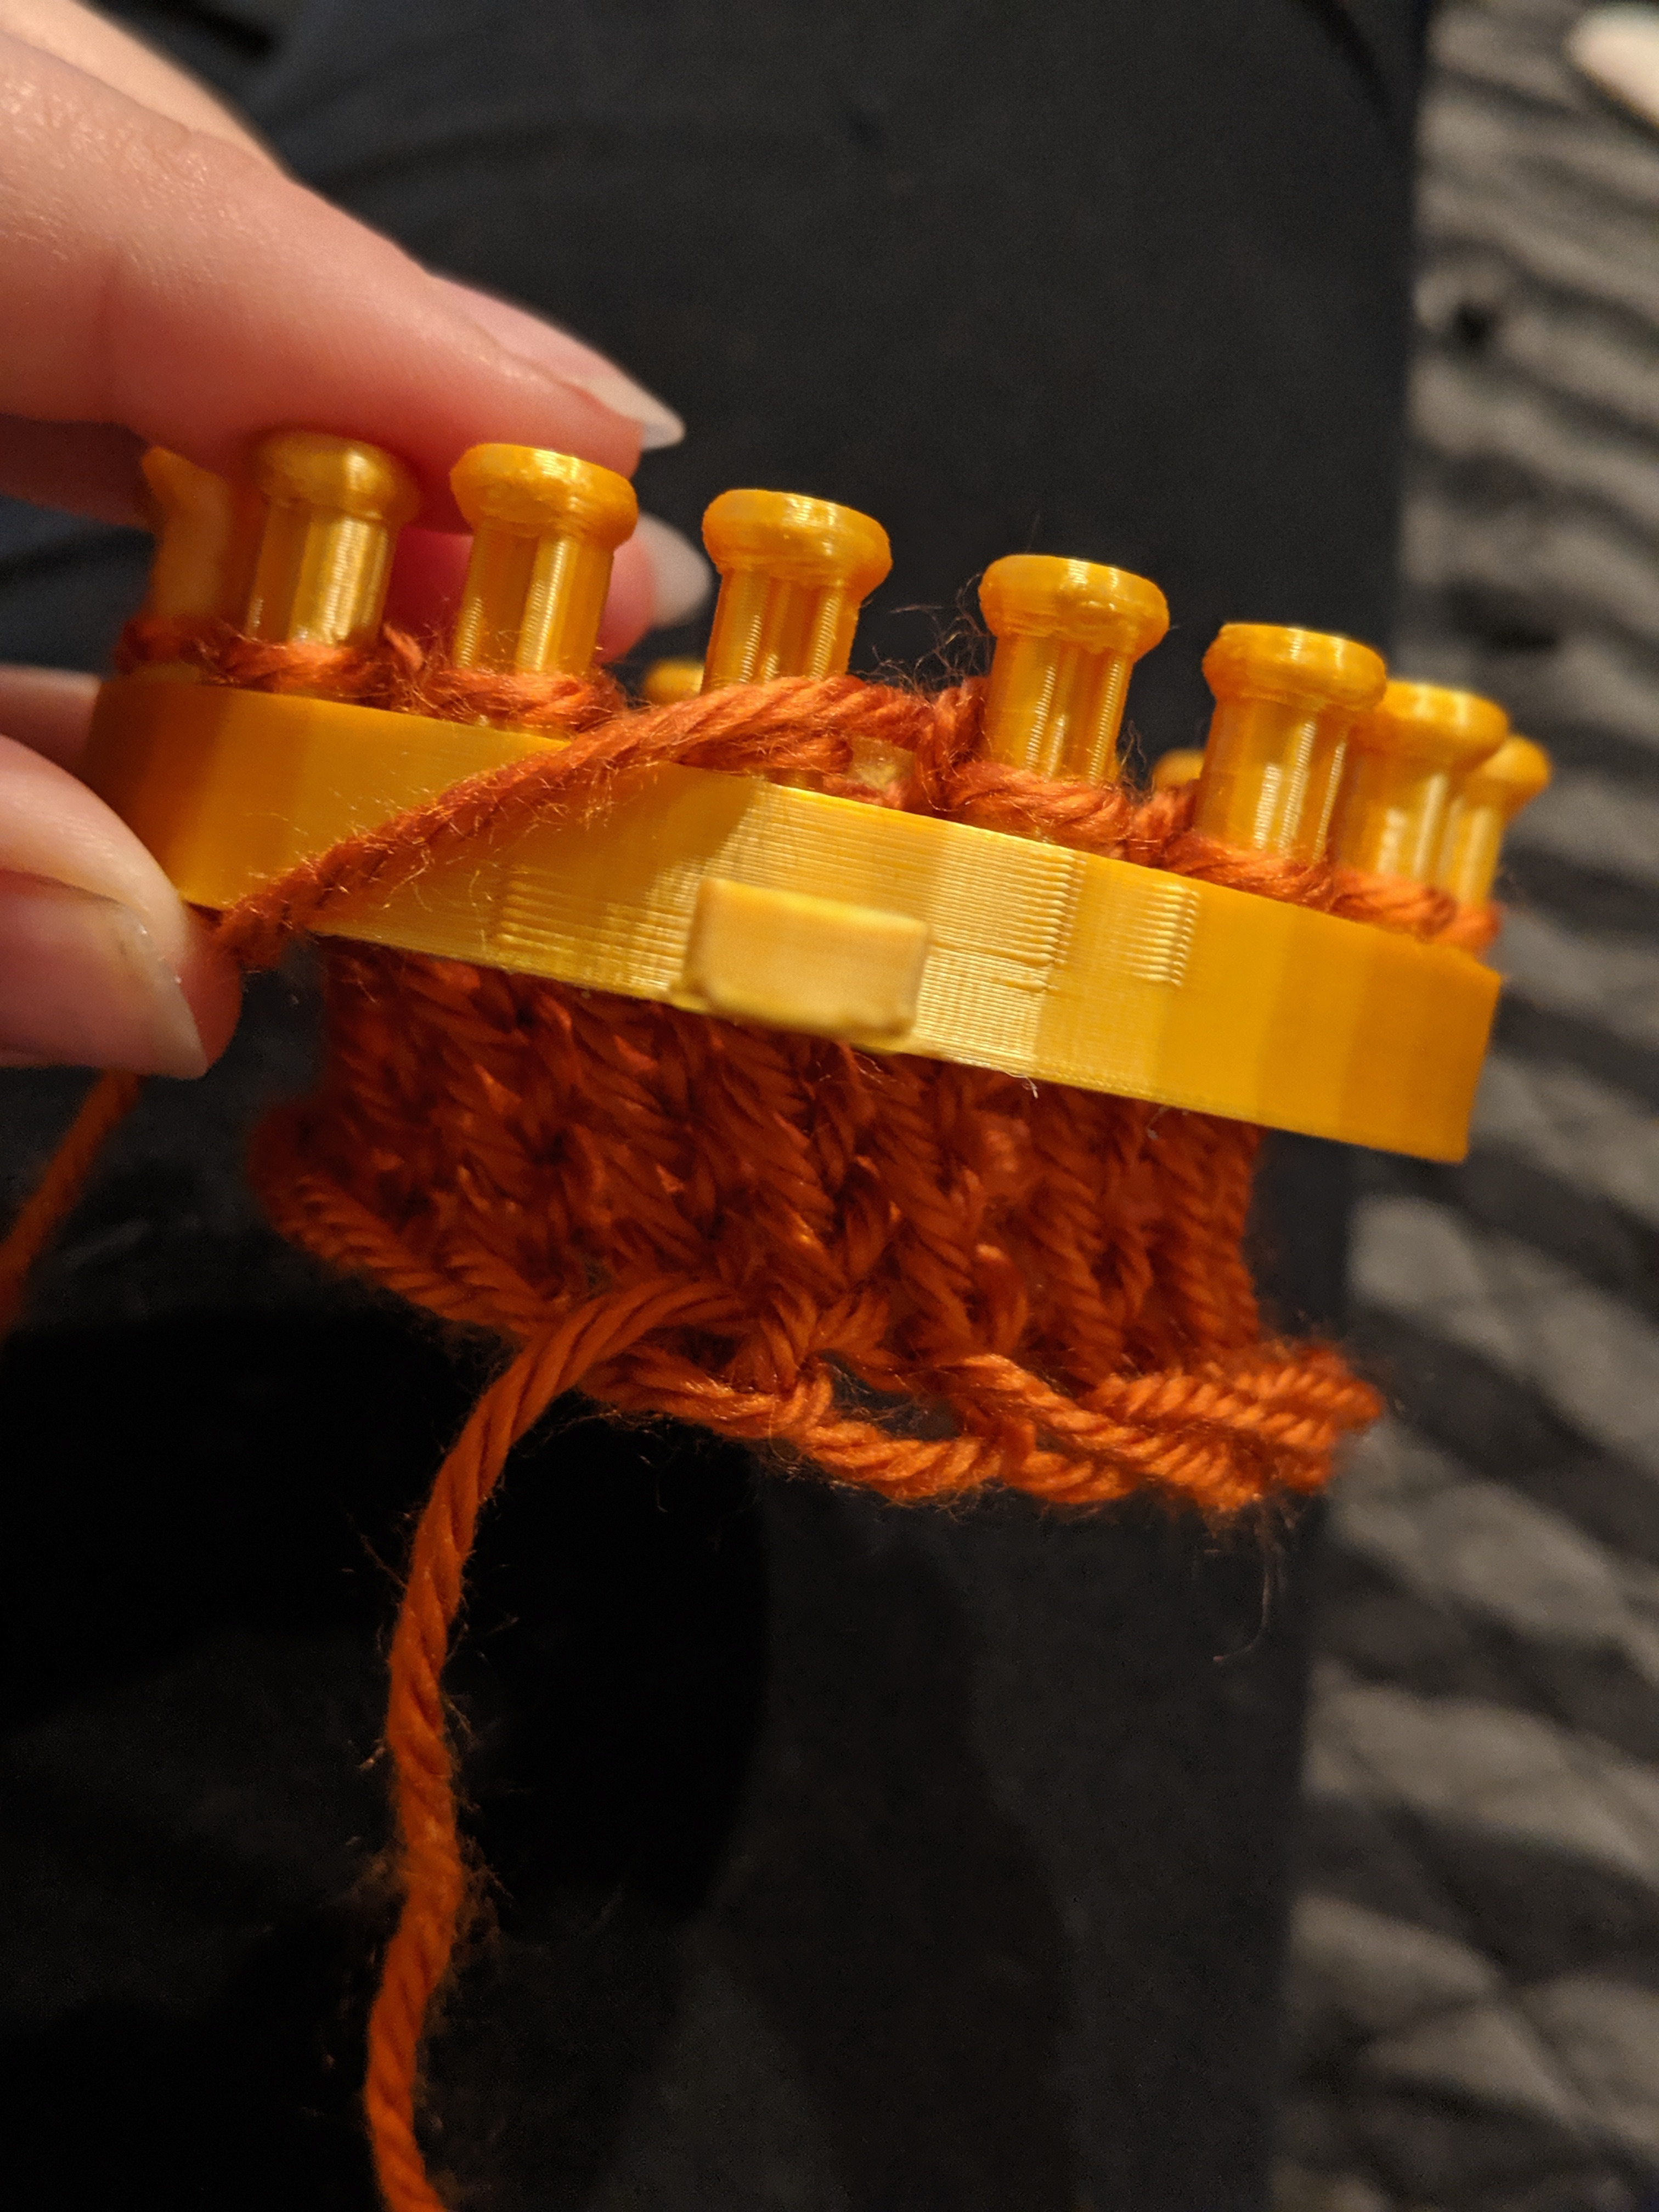
Picture three: This is what it should look like when you have successfully sewed through each loop and removed them from their pegs.
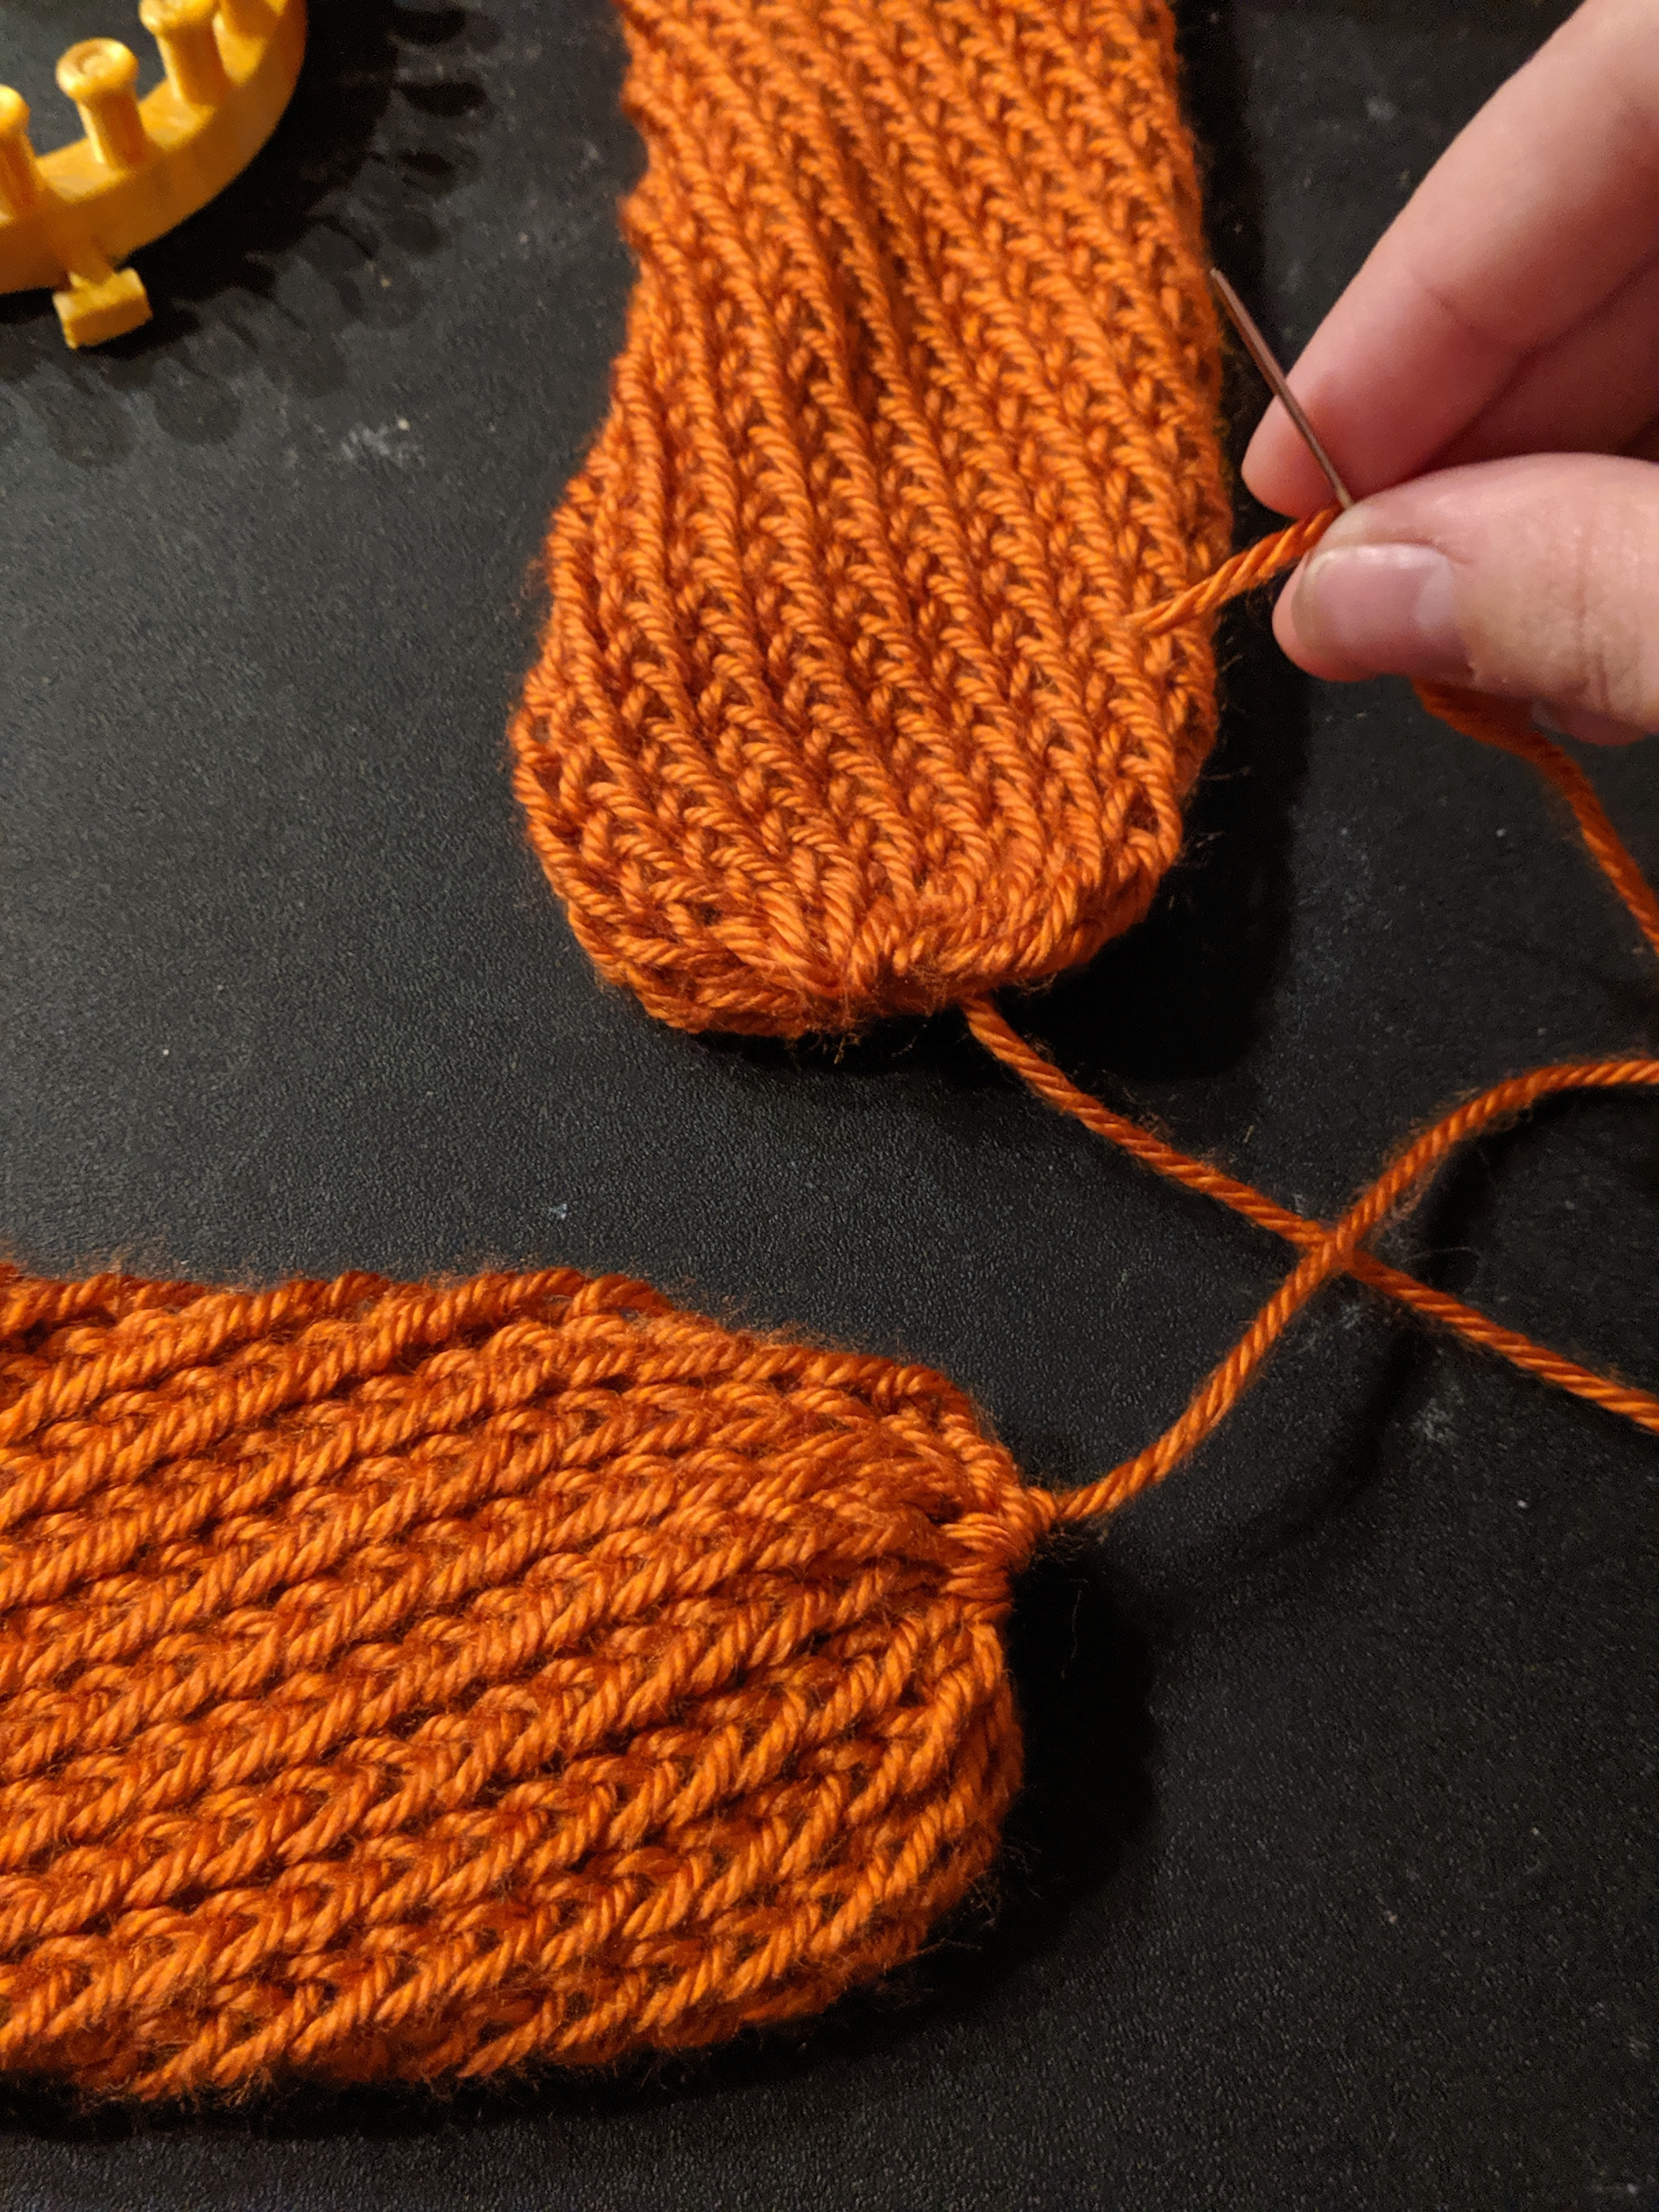
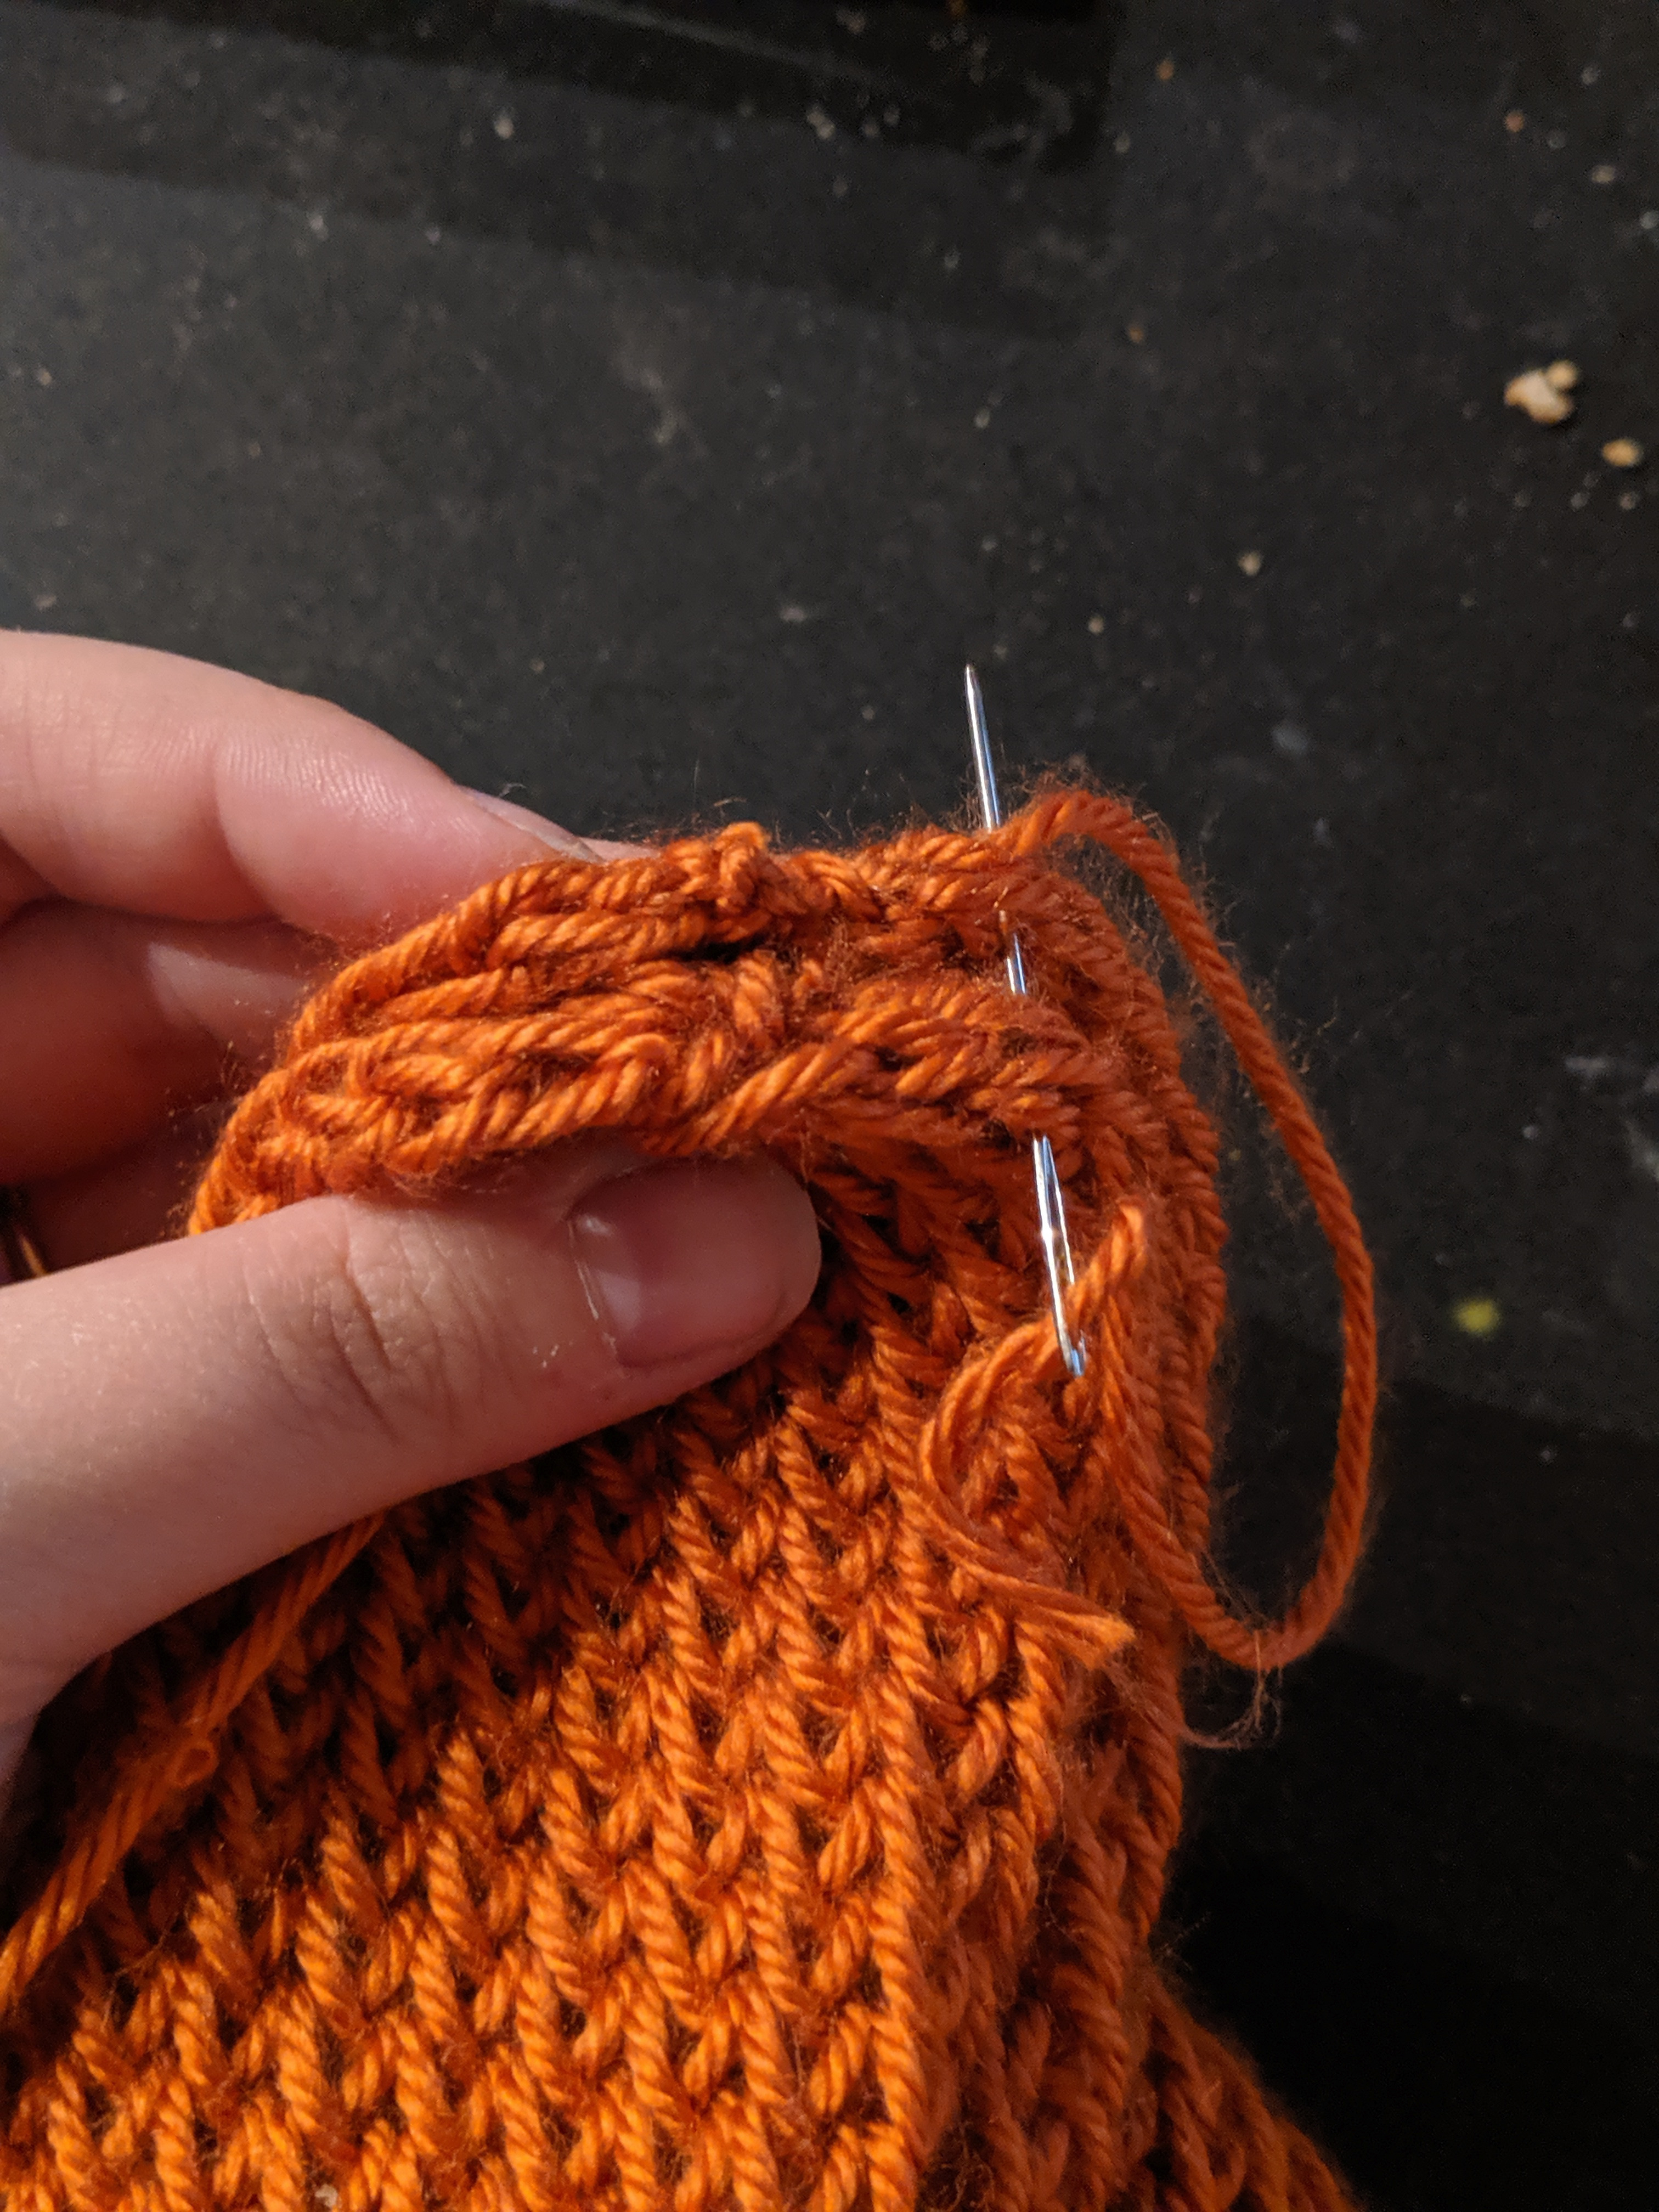
Pictures four, five and six: I chose to sew the ends together to make an infinity scarf, but you could also leave them (as long as you knot your yarn so it doesn't unravel) and tie some fringe on the ends.
Finished Scarf!

And that's all it takes to model a loom, print it on a 3D printer, knit the scarf using the loom, cast off and sew the ends together. It really isn't as complicated as it is to describe the process, I promise. :)
Making a Dishrag/potholder/etc.
Instead of going around every peg to make a tube, you can make flat things as well. To do that, you just have to skip the last peg, and go back and forth (clockwise and then counter-clockwise) instead of going continuously clockwise around the loom. But everything else is the same.
I plan on making two of these rectangles and crocheting around the edges to make a potholder. Alternatively, you could use cotton yarn and knit one rectangle and call it a dishrag. The possibilities are not quite limitless with this home-printed knitting loom, but they are vast!