3D Printed Headphone Hook
by Thomas Wong in Workshop > 3D Printing
1206 Views, 10 Favorites, 0 Comments
3D Printed Headphone Hook
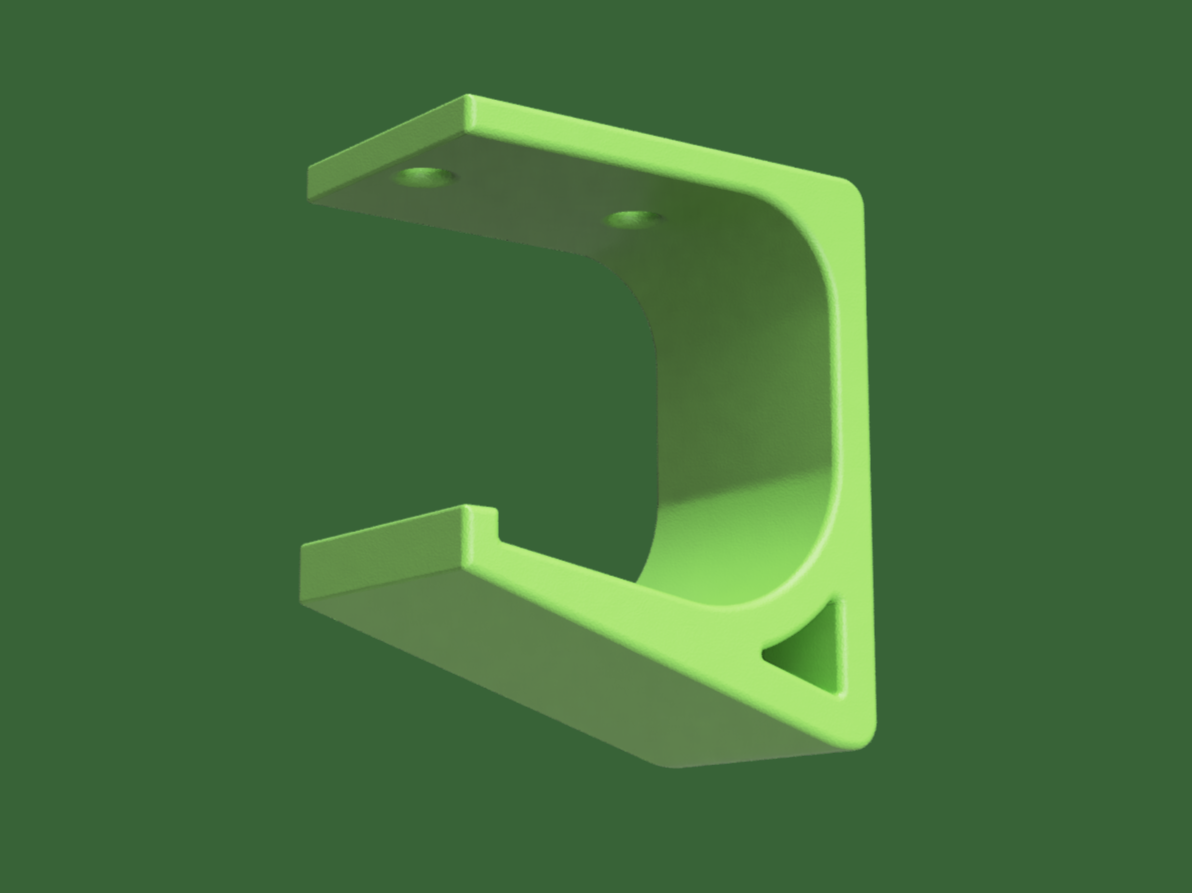

Hi all! Recently I designed and 3D printed this Headphone Hook using Fusion 360 for the underside of my desk. I was getting pretty tired of my headphones lying around on my desk or my bed, so I thought I'd take some time and design a dedicated hook for them to hang up on so they always have a place to be. Now they're always out of the way and I can grab them easily whenever I need them.
This was a pretty straightforward and beginner-friendly project that would be great for anyone looking to start 3D modeling and 3D printing.
If you'd like to print your own, I've made the STL of my model available for printing, or follow along to customize one yourself! I've also included an STL without holes, if you'd like to use mounting tape instead of screws.
Supplies
Very few items are needed for this project:
- A computer with access to Fusion 360
- A 3D Printer (I used a CR-10 from my college's American Society of Mechanical Engineers club, but any FDM printer would work fine. If you don't have one, check your local library! Many will have 3D printing services available for little to no cost.)
- A ruler
- 2 short wood screws for mounting (optional, see note)
- You'll also need the appropriate tools for screwing in the screws:
- Drill with drill bits
- Wrench with Phillips Head insert
NOTE: Don't want to use screws on the underside of your desk? Feel free to use double sided mounting tape! It's easier, plenty secure, and you don't have to worry about having a drill or wrench.
NOTE: Don't have a wrench with a Phillips Head insert? Use mounting tape or See step 10.
Initial Sketch

First things first: A sketch of the hook's profile. Using Fusion 360, I created a sketch on the right origin plane using a few different sketch tools: 2-Point Rectangles and Lines. Note the upper right corner, which is coincident to the origin. That helps keep things from moving unpredictably.
After the general shape was in place, I added dimensions to the sketch. This is a pretty forgiving project regarding dimensions, with only a few things that are important to keep in mind:
- Dimensions of the headphones. The gap on the left has to be tall enough for the band of the headphones to fit through, and the hook has to be deep enough from left to right for the band to sit in. I used a ruler to measure my headphones (in mm) so I had an idea of how big the dimensions needed to be.
- Thickness of the profile. If any part of the profile is too thin, the hook has potential to bend or break. In my experience, about 4mm or thicker is plenty for this kind of application.
Some features of the sketch include a small lip on the left to keep the headphones from falling out if bumped accidentally and a slight downward slope on the inside of the hook to help the headphones slide towards the back.
Once I was done sketching, I pressed Finish Sketch
Extrusion
Using the Extrusion tool, I extruded the profile by 30mm to create a solid body.
Filets

Filets are a great way to add visual appeal to parts without too much effort. They are used to add a round corner between faces of a part. Here, I used the filet tool 6 times between various faces to change the profile of the hook. You could also do this during the initial sketch of the profile, but I prefer to add filets to solid bodies instead of sketches.
After I did this, I noticed the bottom right corner looked a bit bulky, so I decided it was a perfect opportunity to add some more detail.
Cutting a Hole
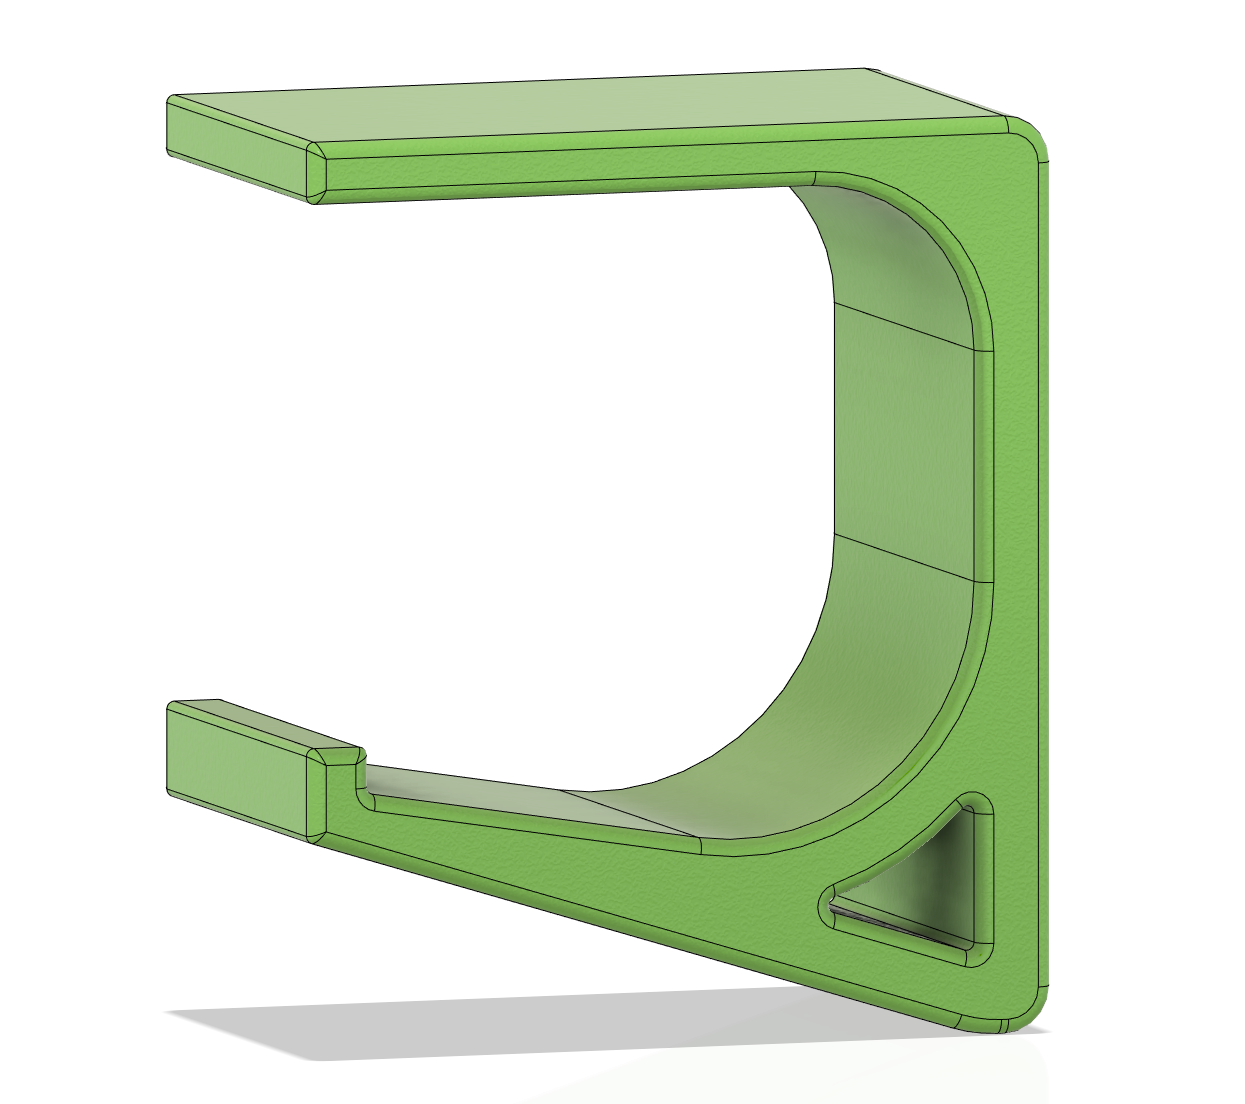
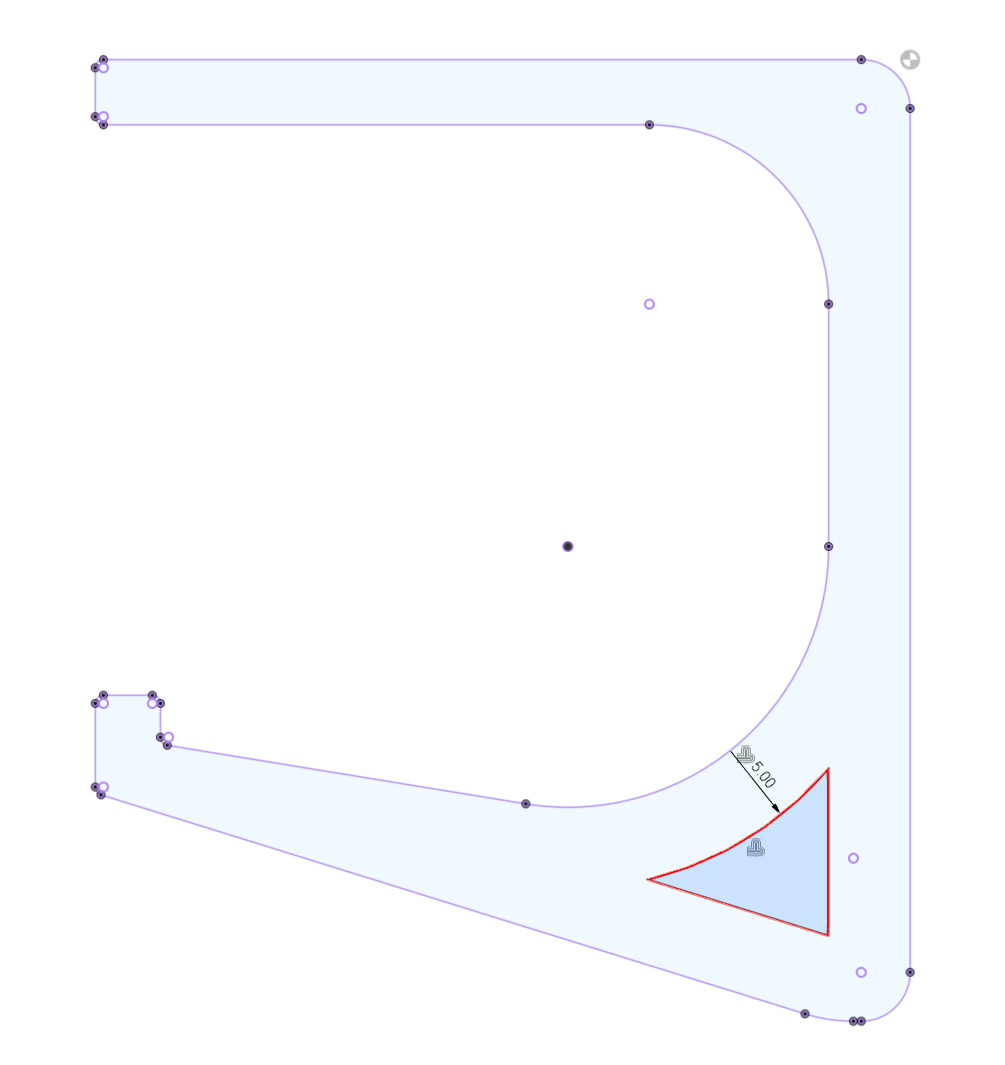
I thought it would be nice to cut a hole in the lower right, so I created a new sketch on the right face of the hook. Using the projection tool, I created an outline of the hook that I could work off of (in purple). Using the offset tool, I made another outline so that the hook would have the same thickness of 5mm around the hole (in red).
Using the extrusion tool again, I selected the hole's profile (in blue) and cut all the way through the hook. After adding a few more filets, the shape of the hook was finished.
NOTE: If you're not using screws to attach your hook, you're done modeling here. Congrats! Skip ahead to Step 6.
Adding Screw Holes
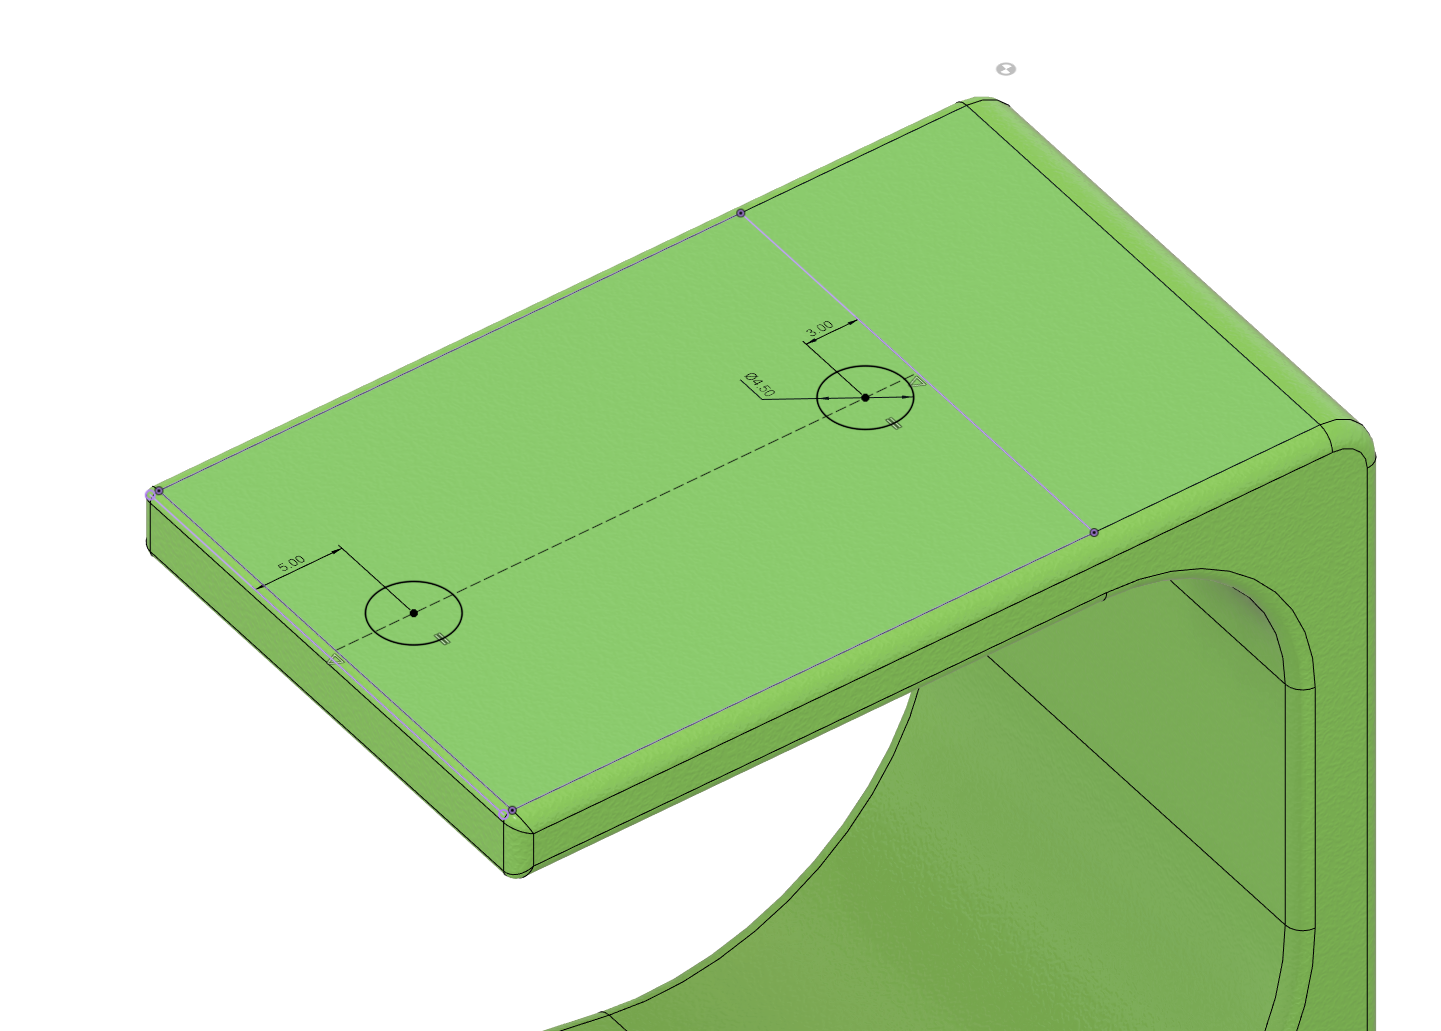
To add some holes for screws, I made another sketch on the top face of the hook. I projected the underside of the top of the hook to give myself a nice rectangle to base my dimensions off. A construction line between the midpoints of the sides of the rectangle helped make sure that the holes were centered on the middle of the hook. Using coincident constraints, I ensured that the centers of the circles were on the line.
The holes don't have to go in any specific place, but keep in mind:
- They have to be big enough for the shaft of a screw to fit through, but not the head.
- They have to be accessible from the underside of the top of the hook, so don't put them too far back.
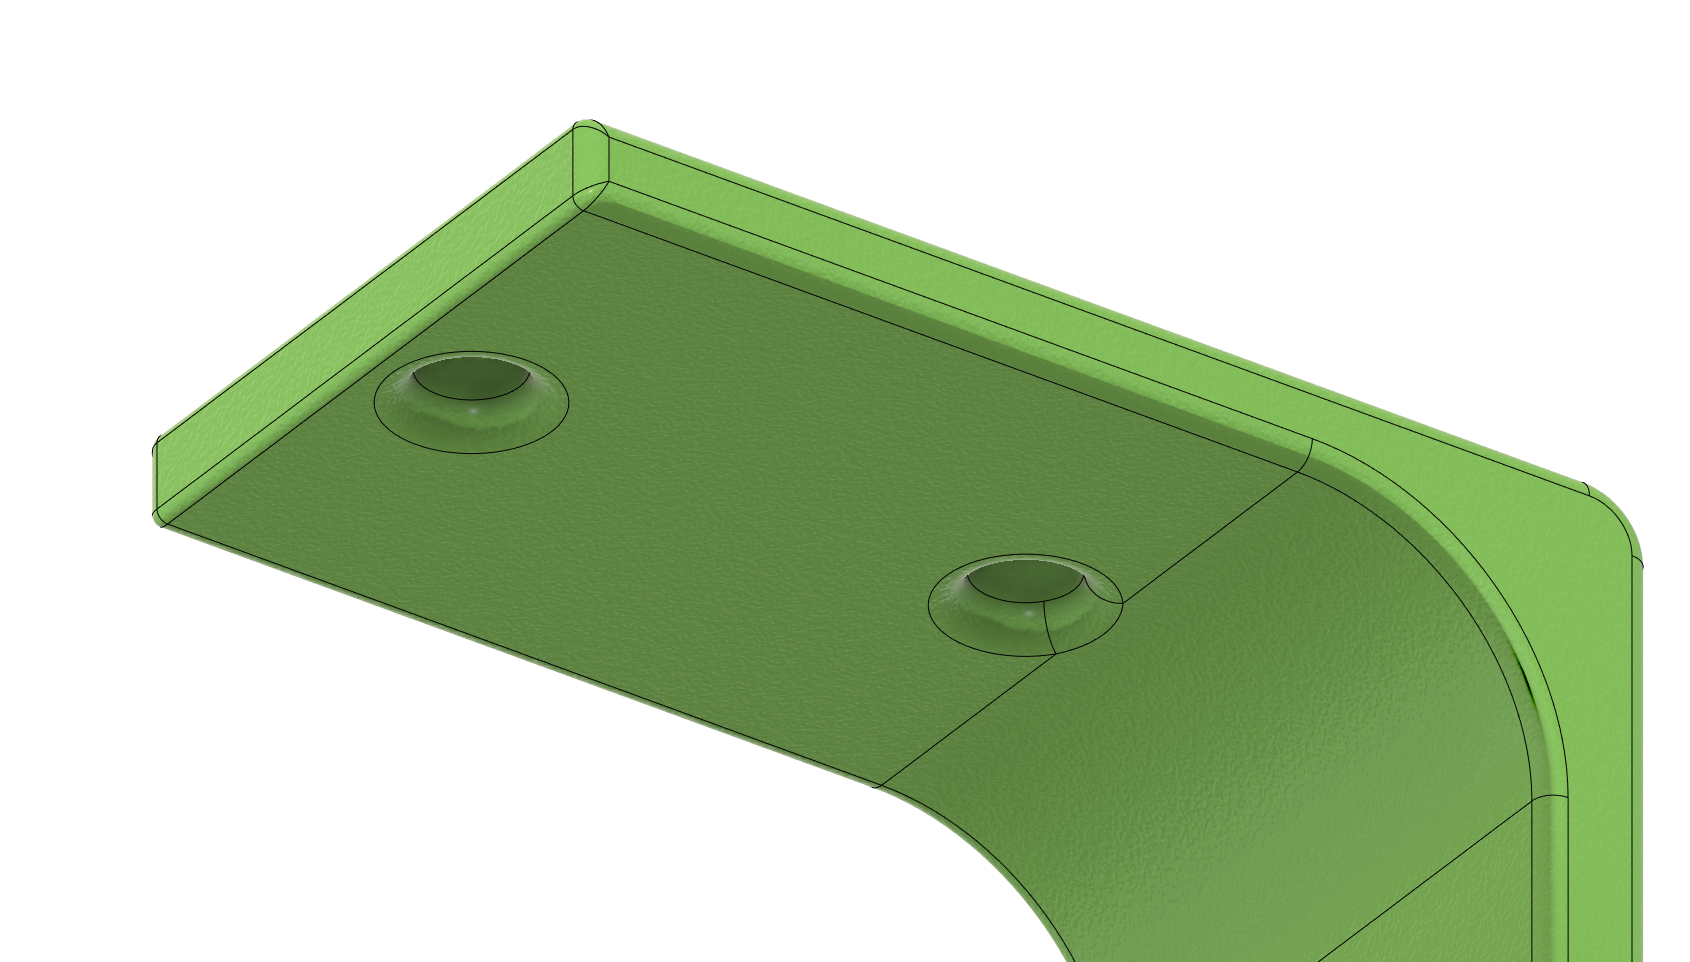
A few cuts with the extrude tool and a couple more filets later, we have the final shape of the hook.
NOTE: The filets on the underside of the holes are larger, which make room for the heads of the screws so that they can sit flush.
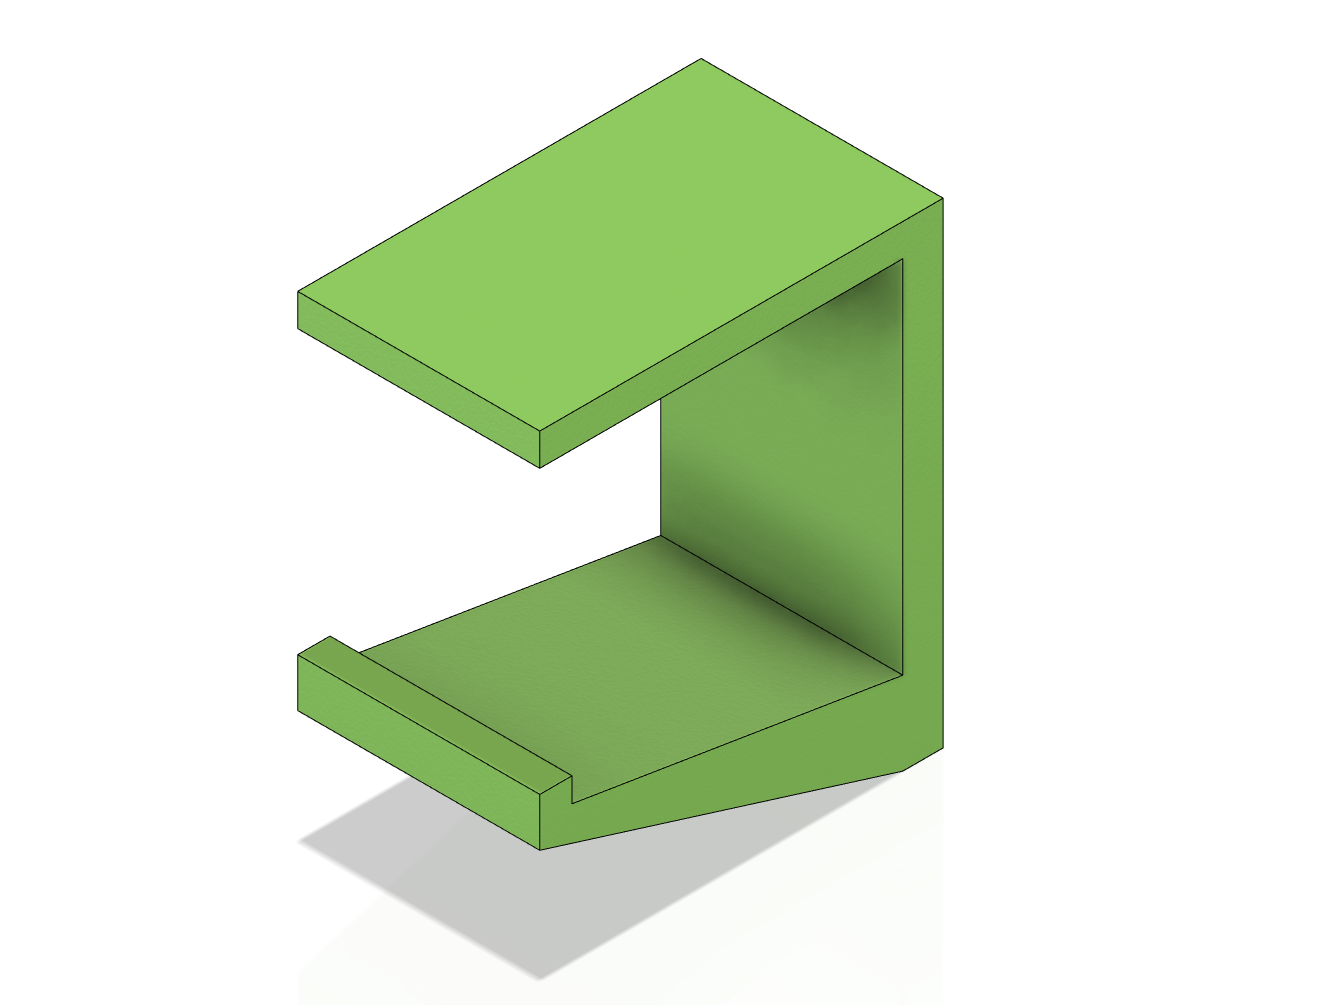
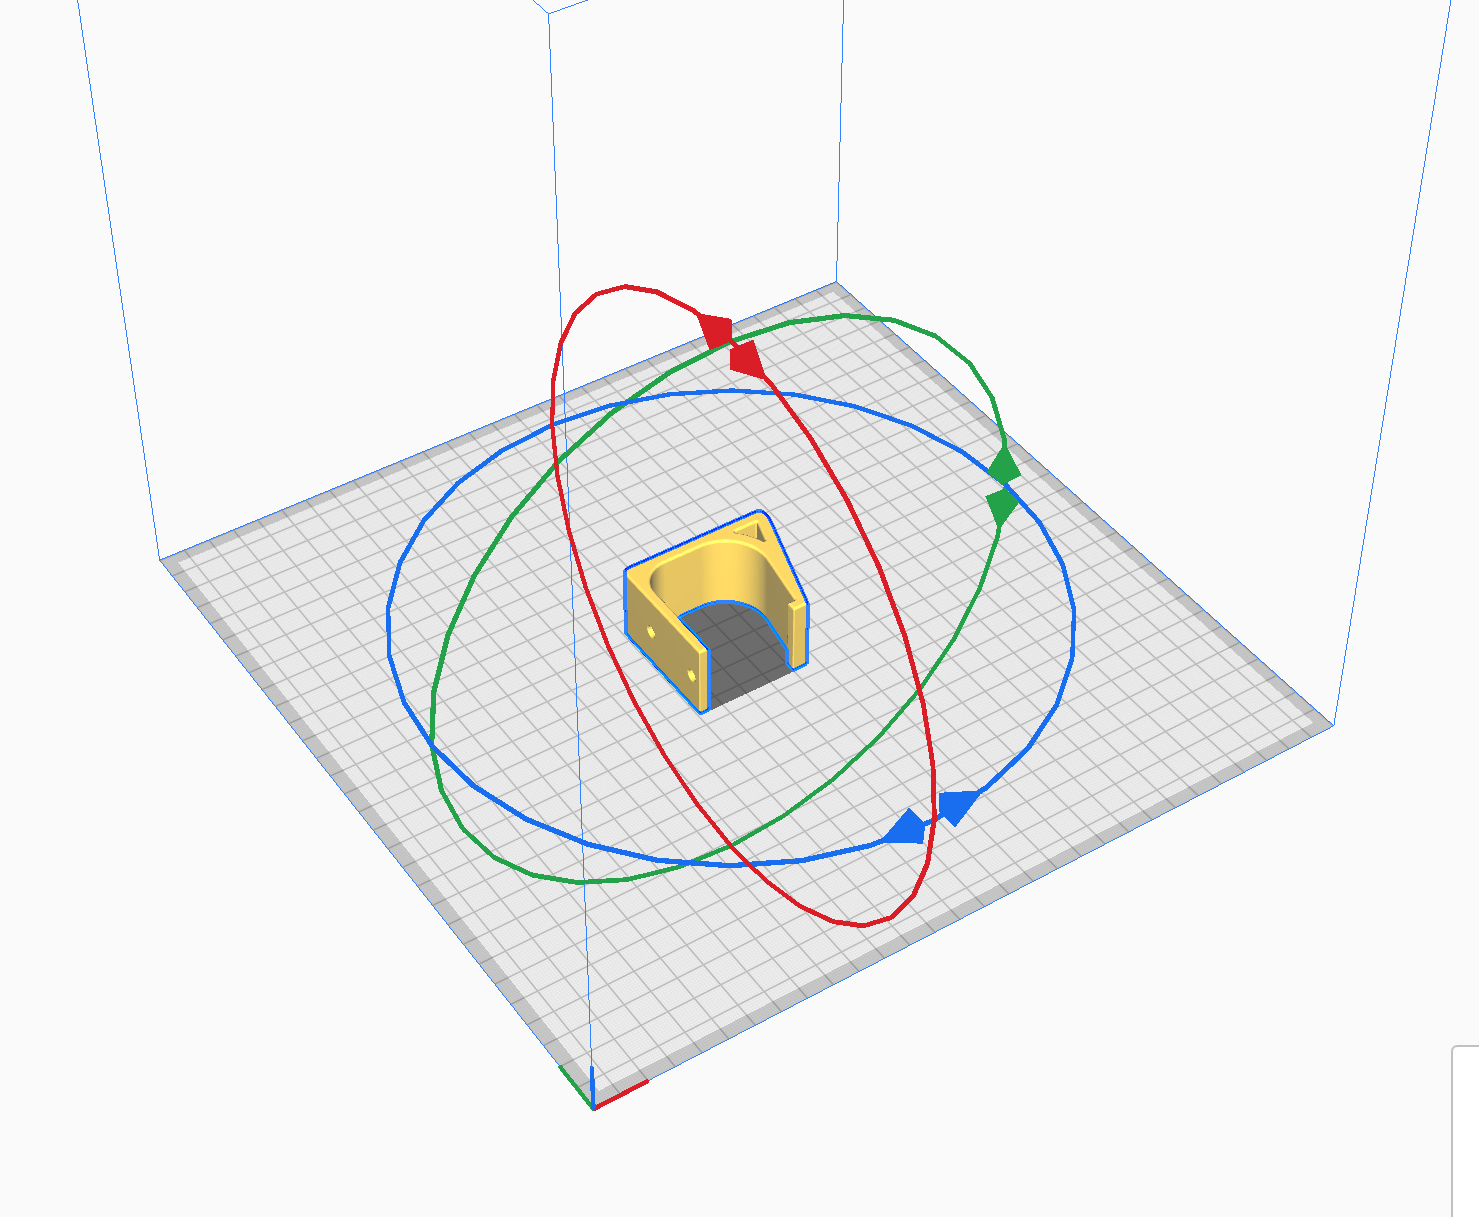
Finished Modeling
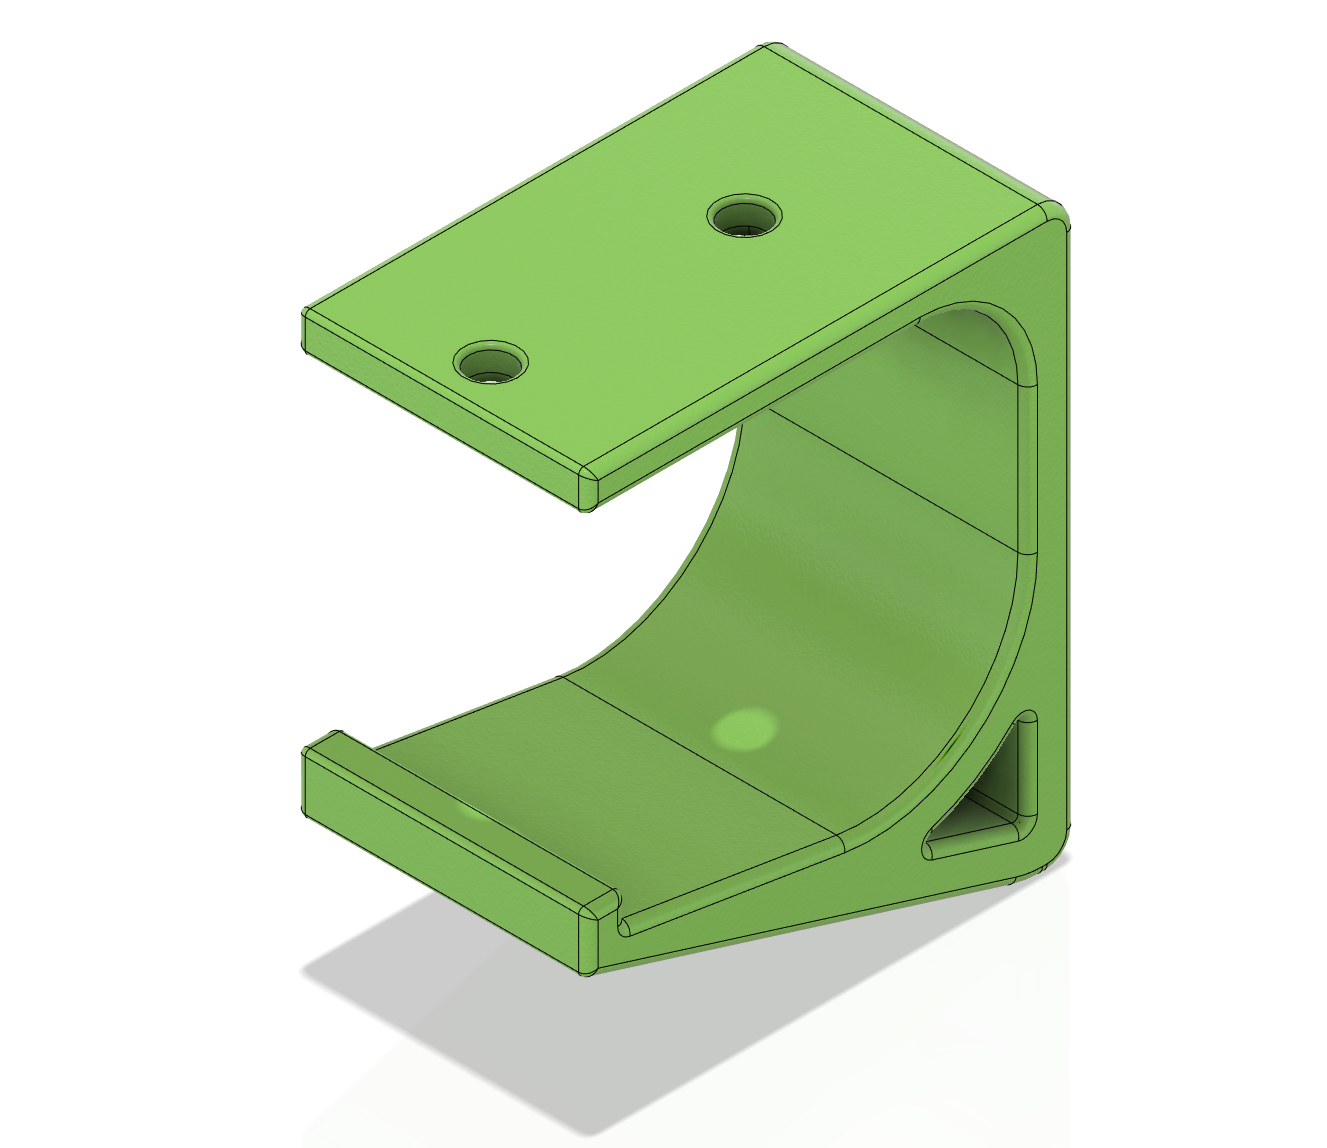
At this point, we're done modeling. Our hook should look something like this. Let's get printing!
Saving As Mesh
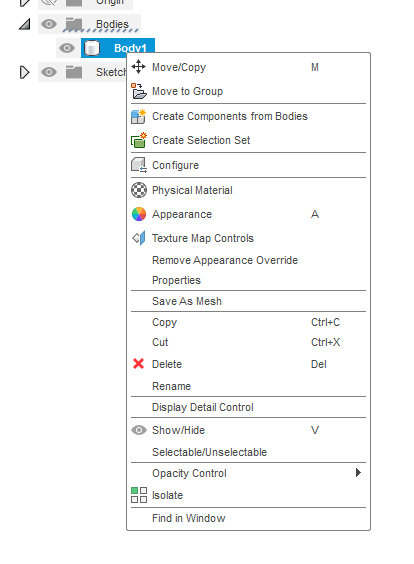
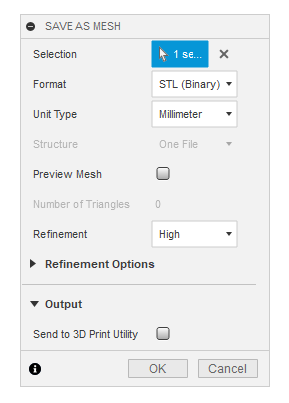
In the browser on the left, right click on the body of the hook and select Save as Mesh. On the right, a window will open with a few different options. Ensure that you're saving as an STL with Millimeter units. Click OK when done.
Slicing
NOTE: If you're getting this printed at your local library, you might not have to worry about this part! Often, all you have to do is supply the library with the STL file on a USB stick, and the library staff will take care of the rest. Once your print is completed, skip to Step 10.
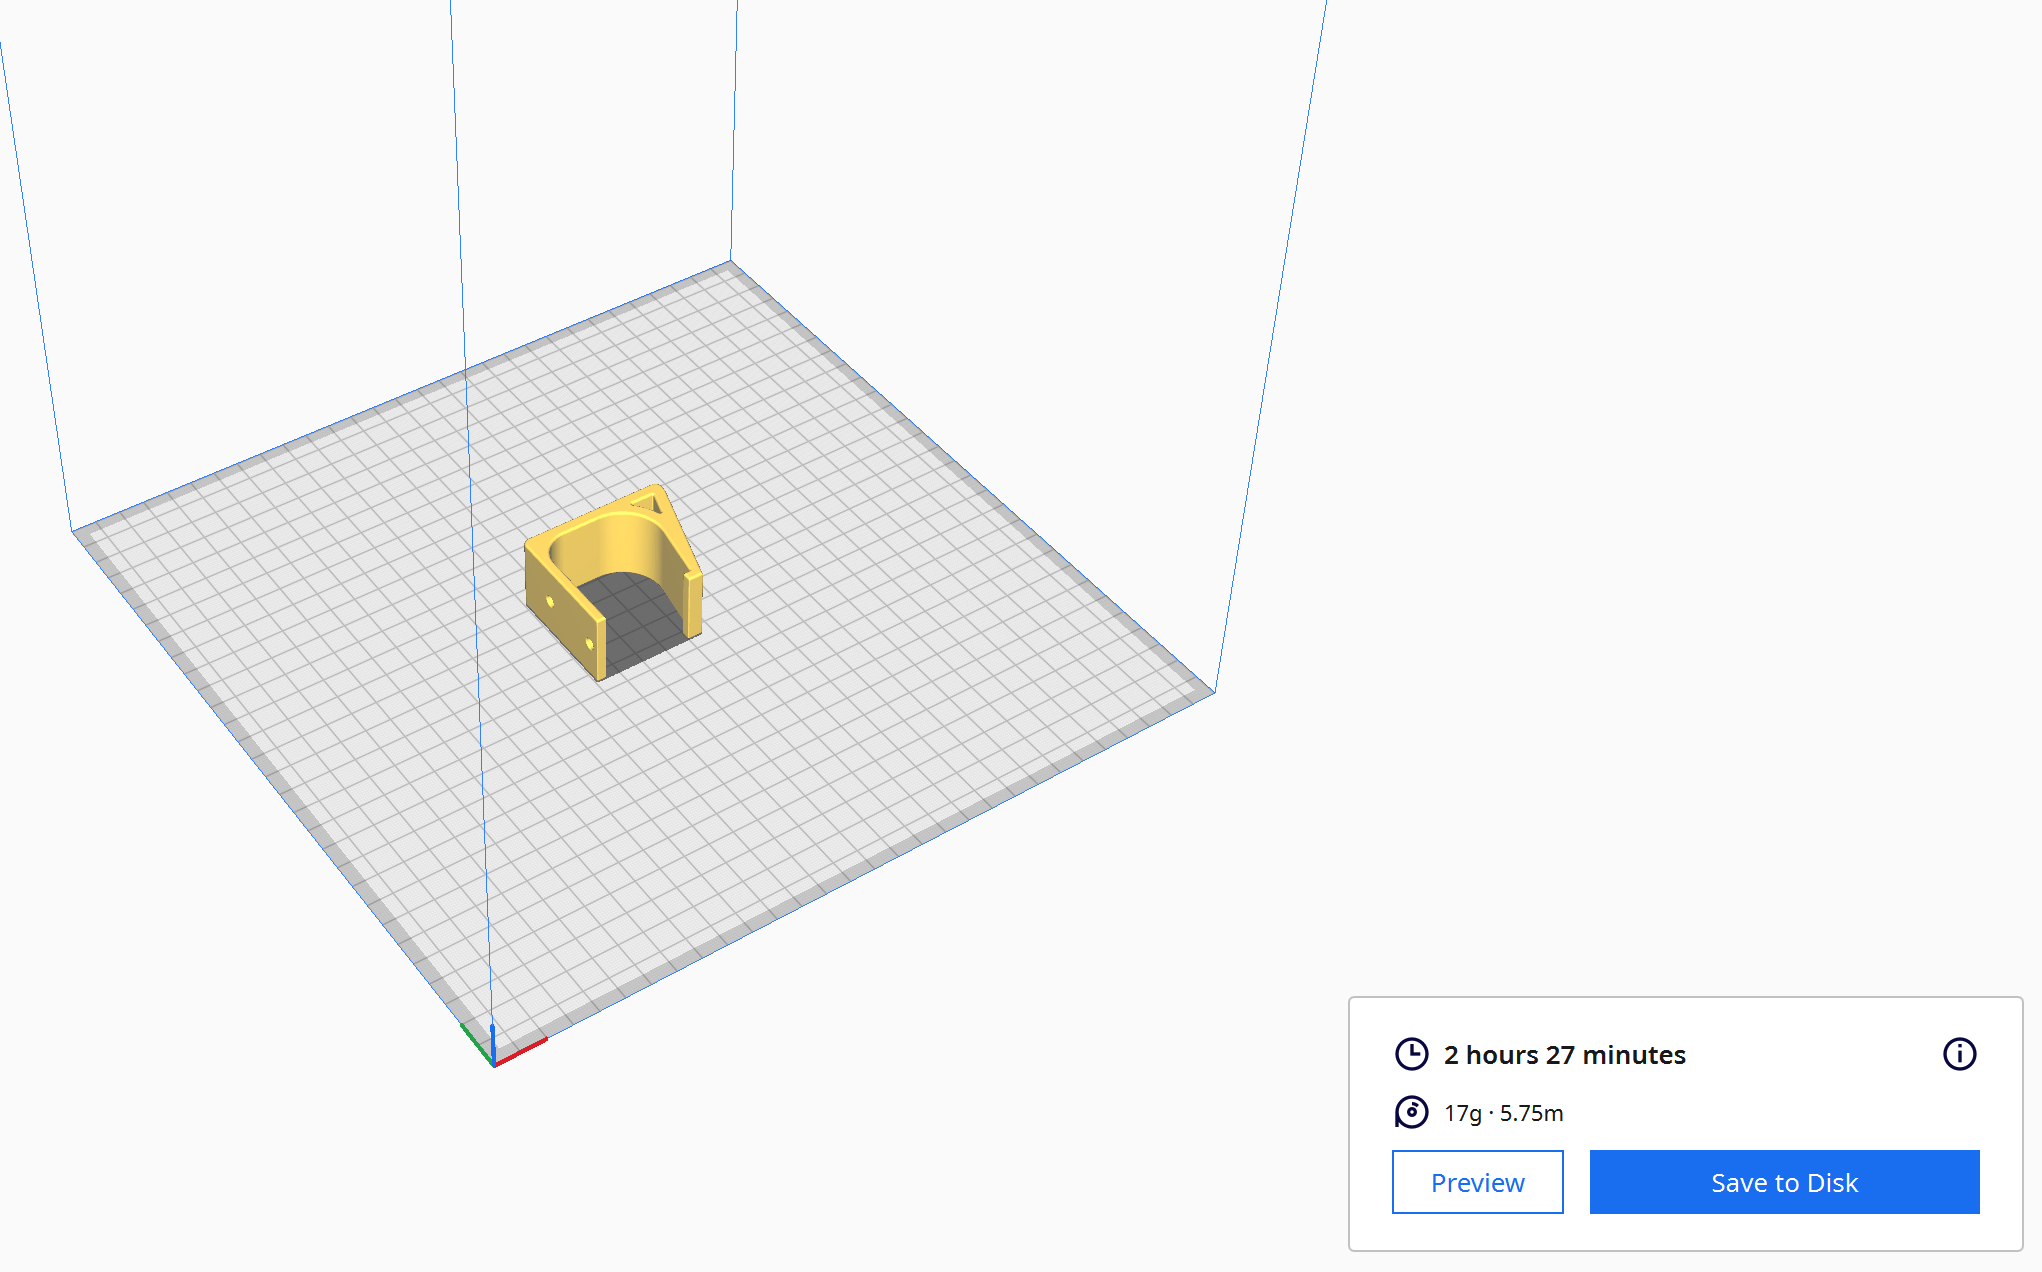
If you're printing this yourself, now's the time to import the STL into your slicer of choice. We're about to make a file containing gcode, the instructions that 3D printers use to print objects layer by layer. I'm using Ultimaker's Cura with the CR-10 default profile. You might have to adjust this part to your needs, as you might be using a different printer with a different slicer. Rotate the hook so that its side is facing the build plate and click Slice. The slicer will give you an estimated time until completion. Save the gcode file to your printer's SD card as necessary.
Print!
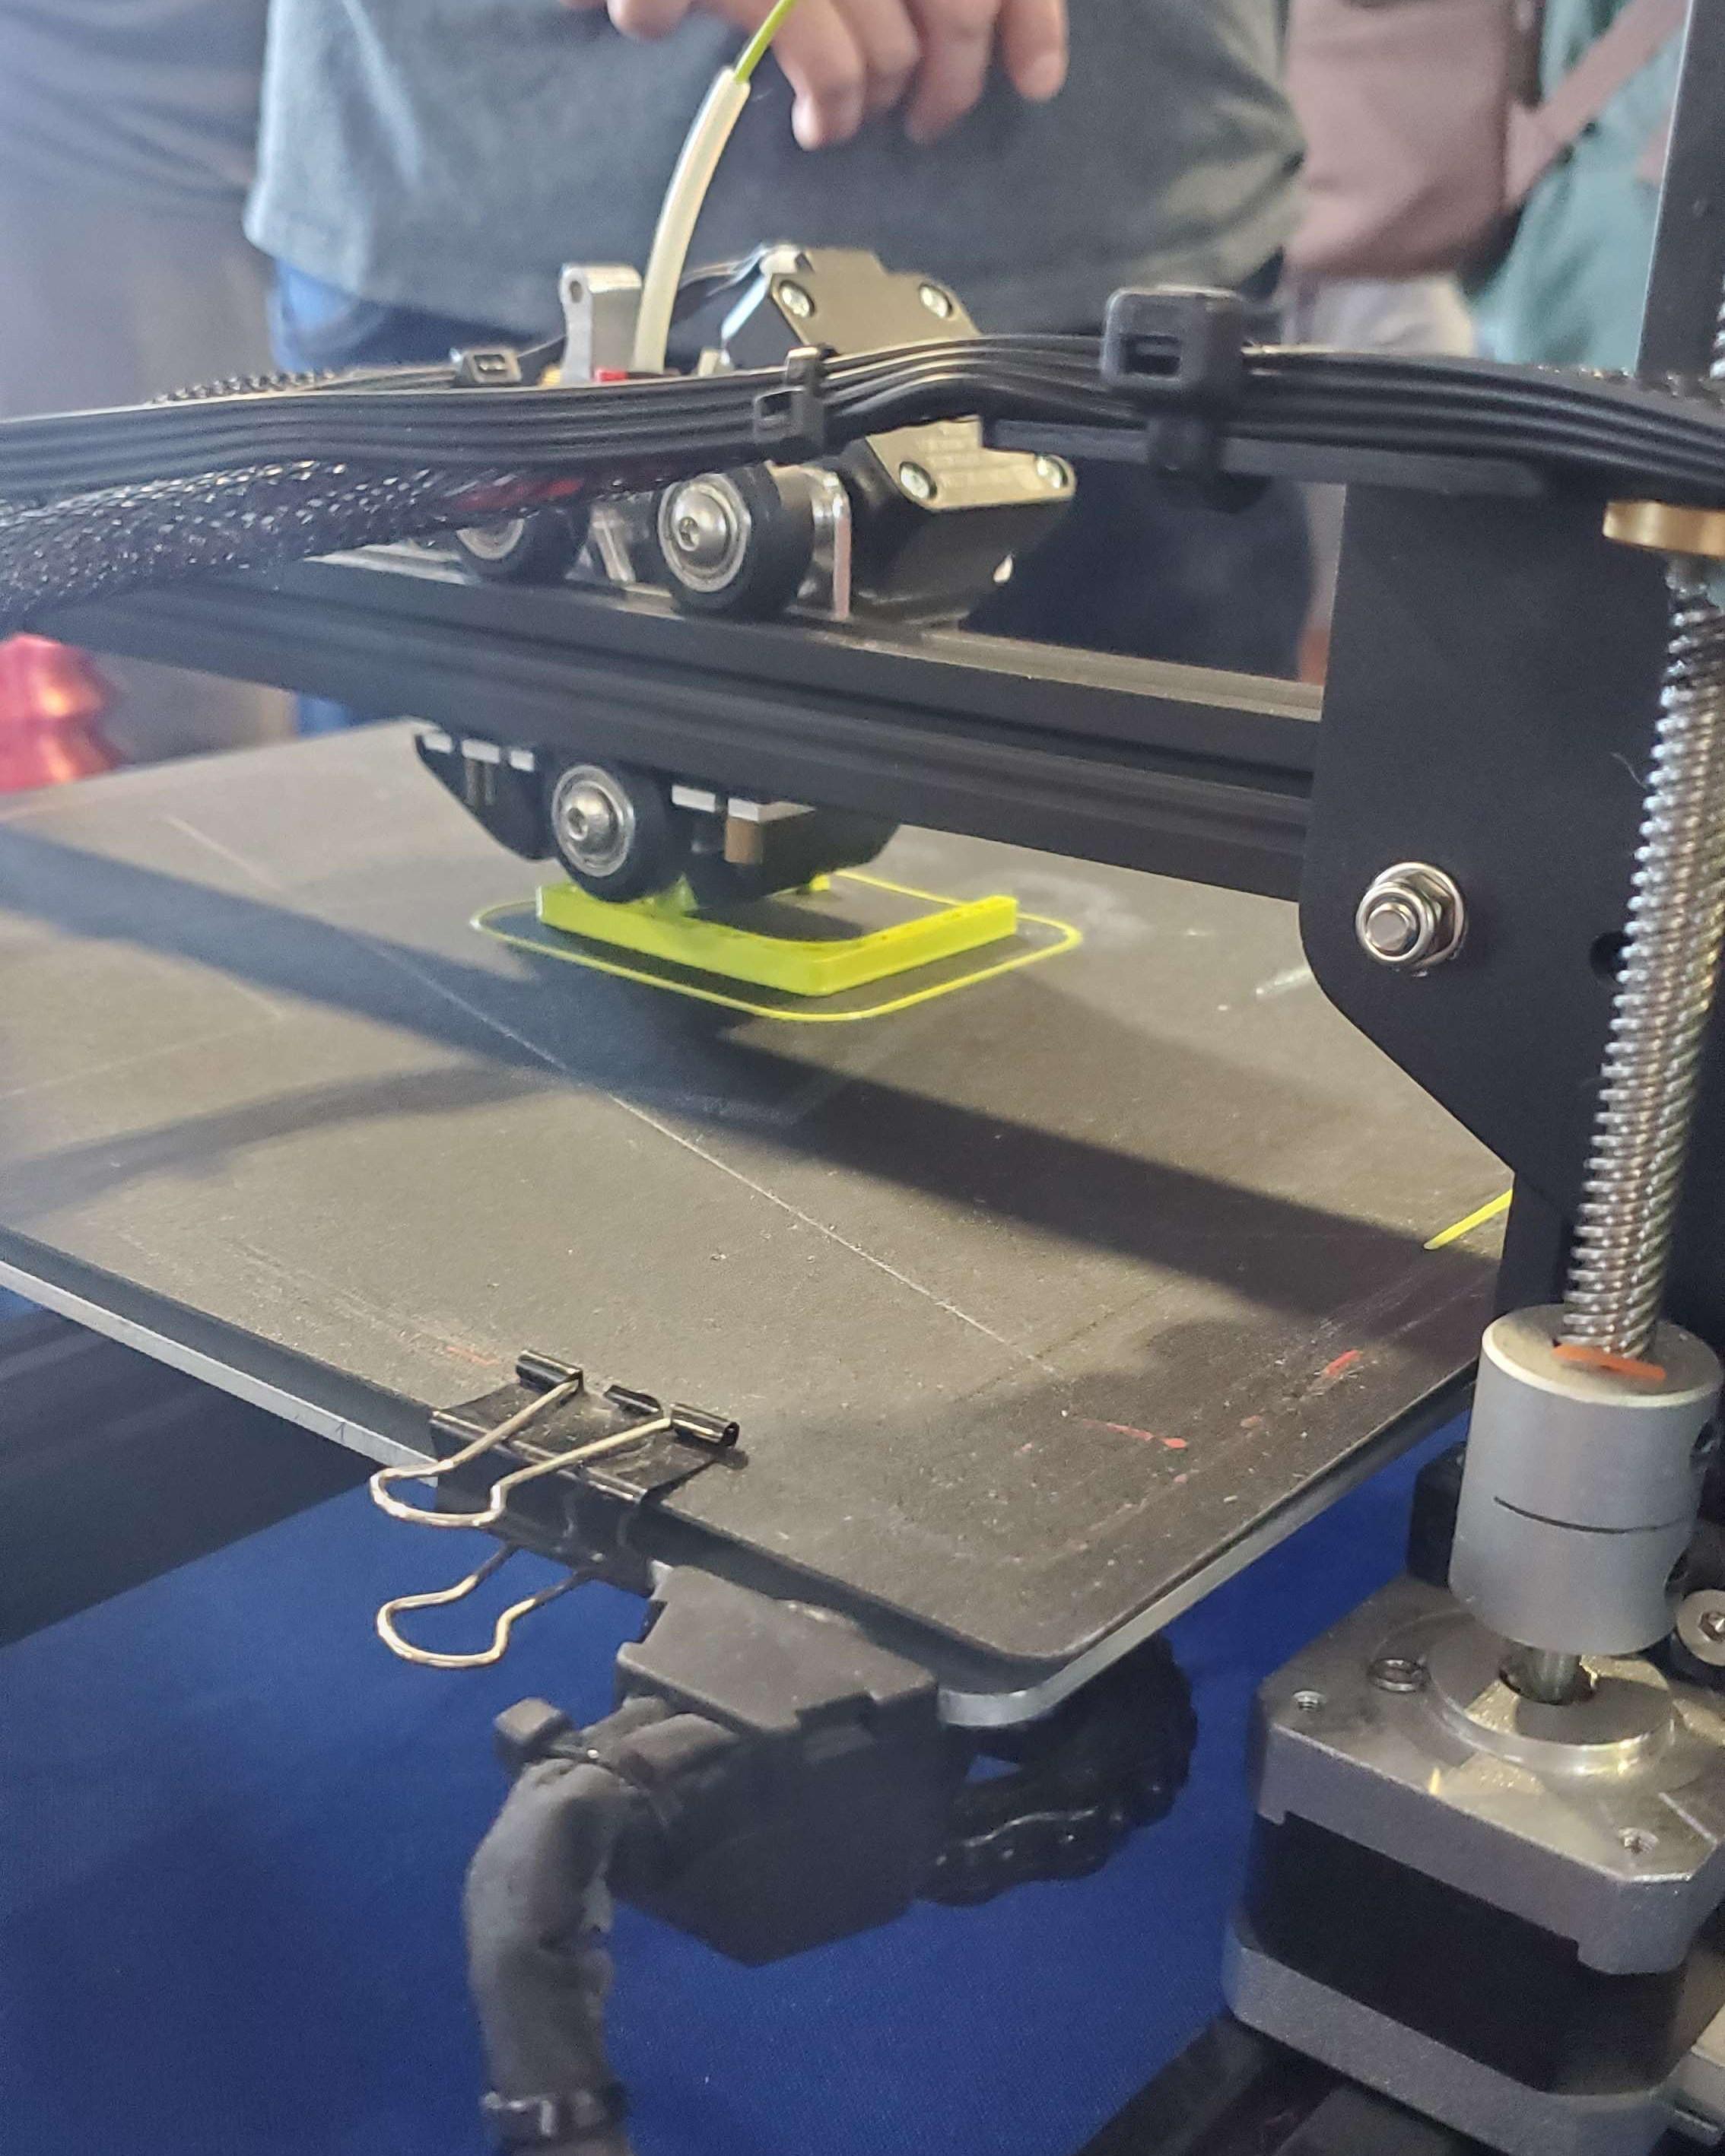
Print it!
Insert the SD card into the printer and navigate through the menu to the gcode file we just made, then select print. I used a bright yellow-green PLA for filament at 215C with a 60C bed.
Monitor the print's first layer to ensure it's sticking to the bed properly, then sit back and relax while the printer works its magic.
Once it's finished printing, allow the bed to cool and remove the part from the build plate.
This was actually printed at Mare Island's 2023 Makerfaire, so if you went, you might've seen this printing live!
Mount
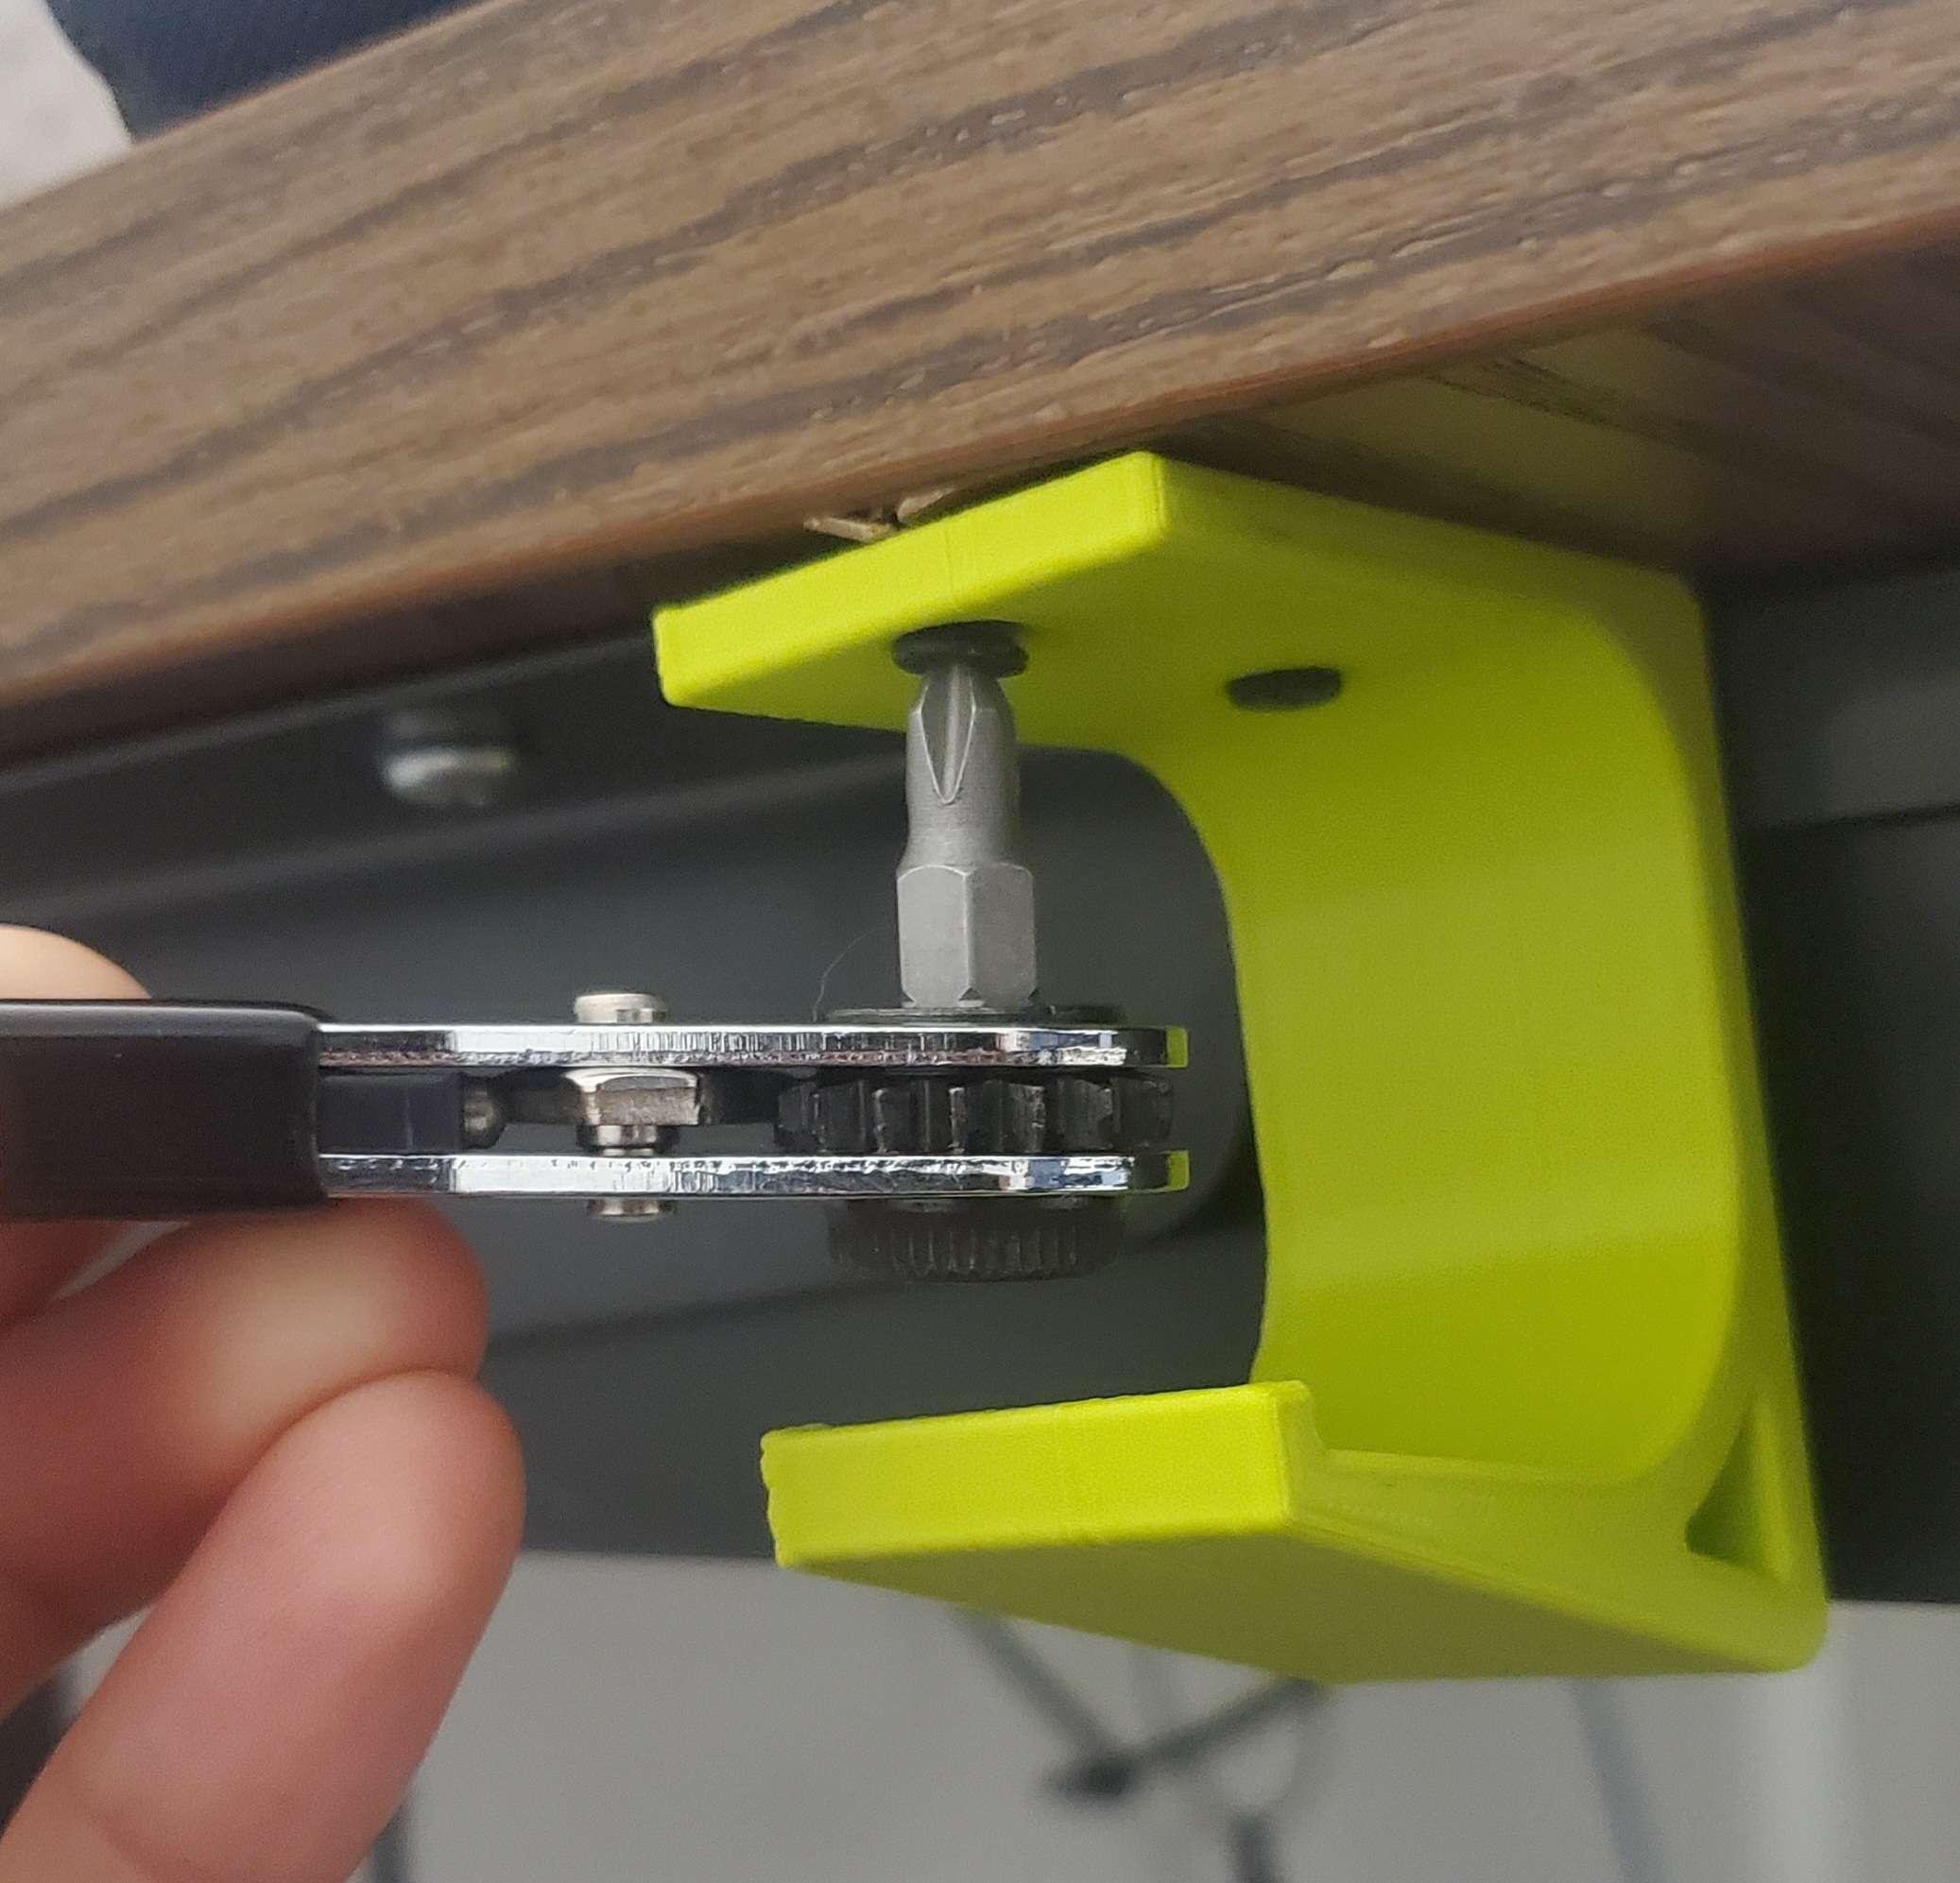
Almost done!
All that's left now is to mount the hook to the underside of a desk. If you're using mounting tape, cut a piece to length and stick it to the top of the hook, then stick the hook to your desired location under the desk.
I used screws, so I had to drill some holes into the underside of the desk, using the print itself as a template and a pencil to draw marks where the holes needed to go. Here's where that wrench with the Phillips head insert comes into play. Without it, it would've been pretty hard to access those screws.
NOTE: If you only have a screwdriver, you can make the holes for the screws go all the way through the part instead of just through the top. This makes room for the head of the screwdriver at the cost of additional holes in your print.
Finished!
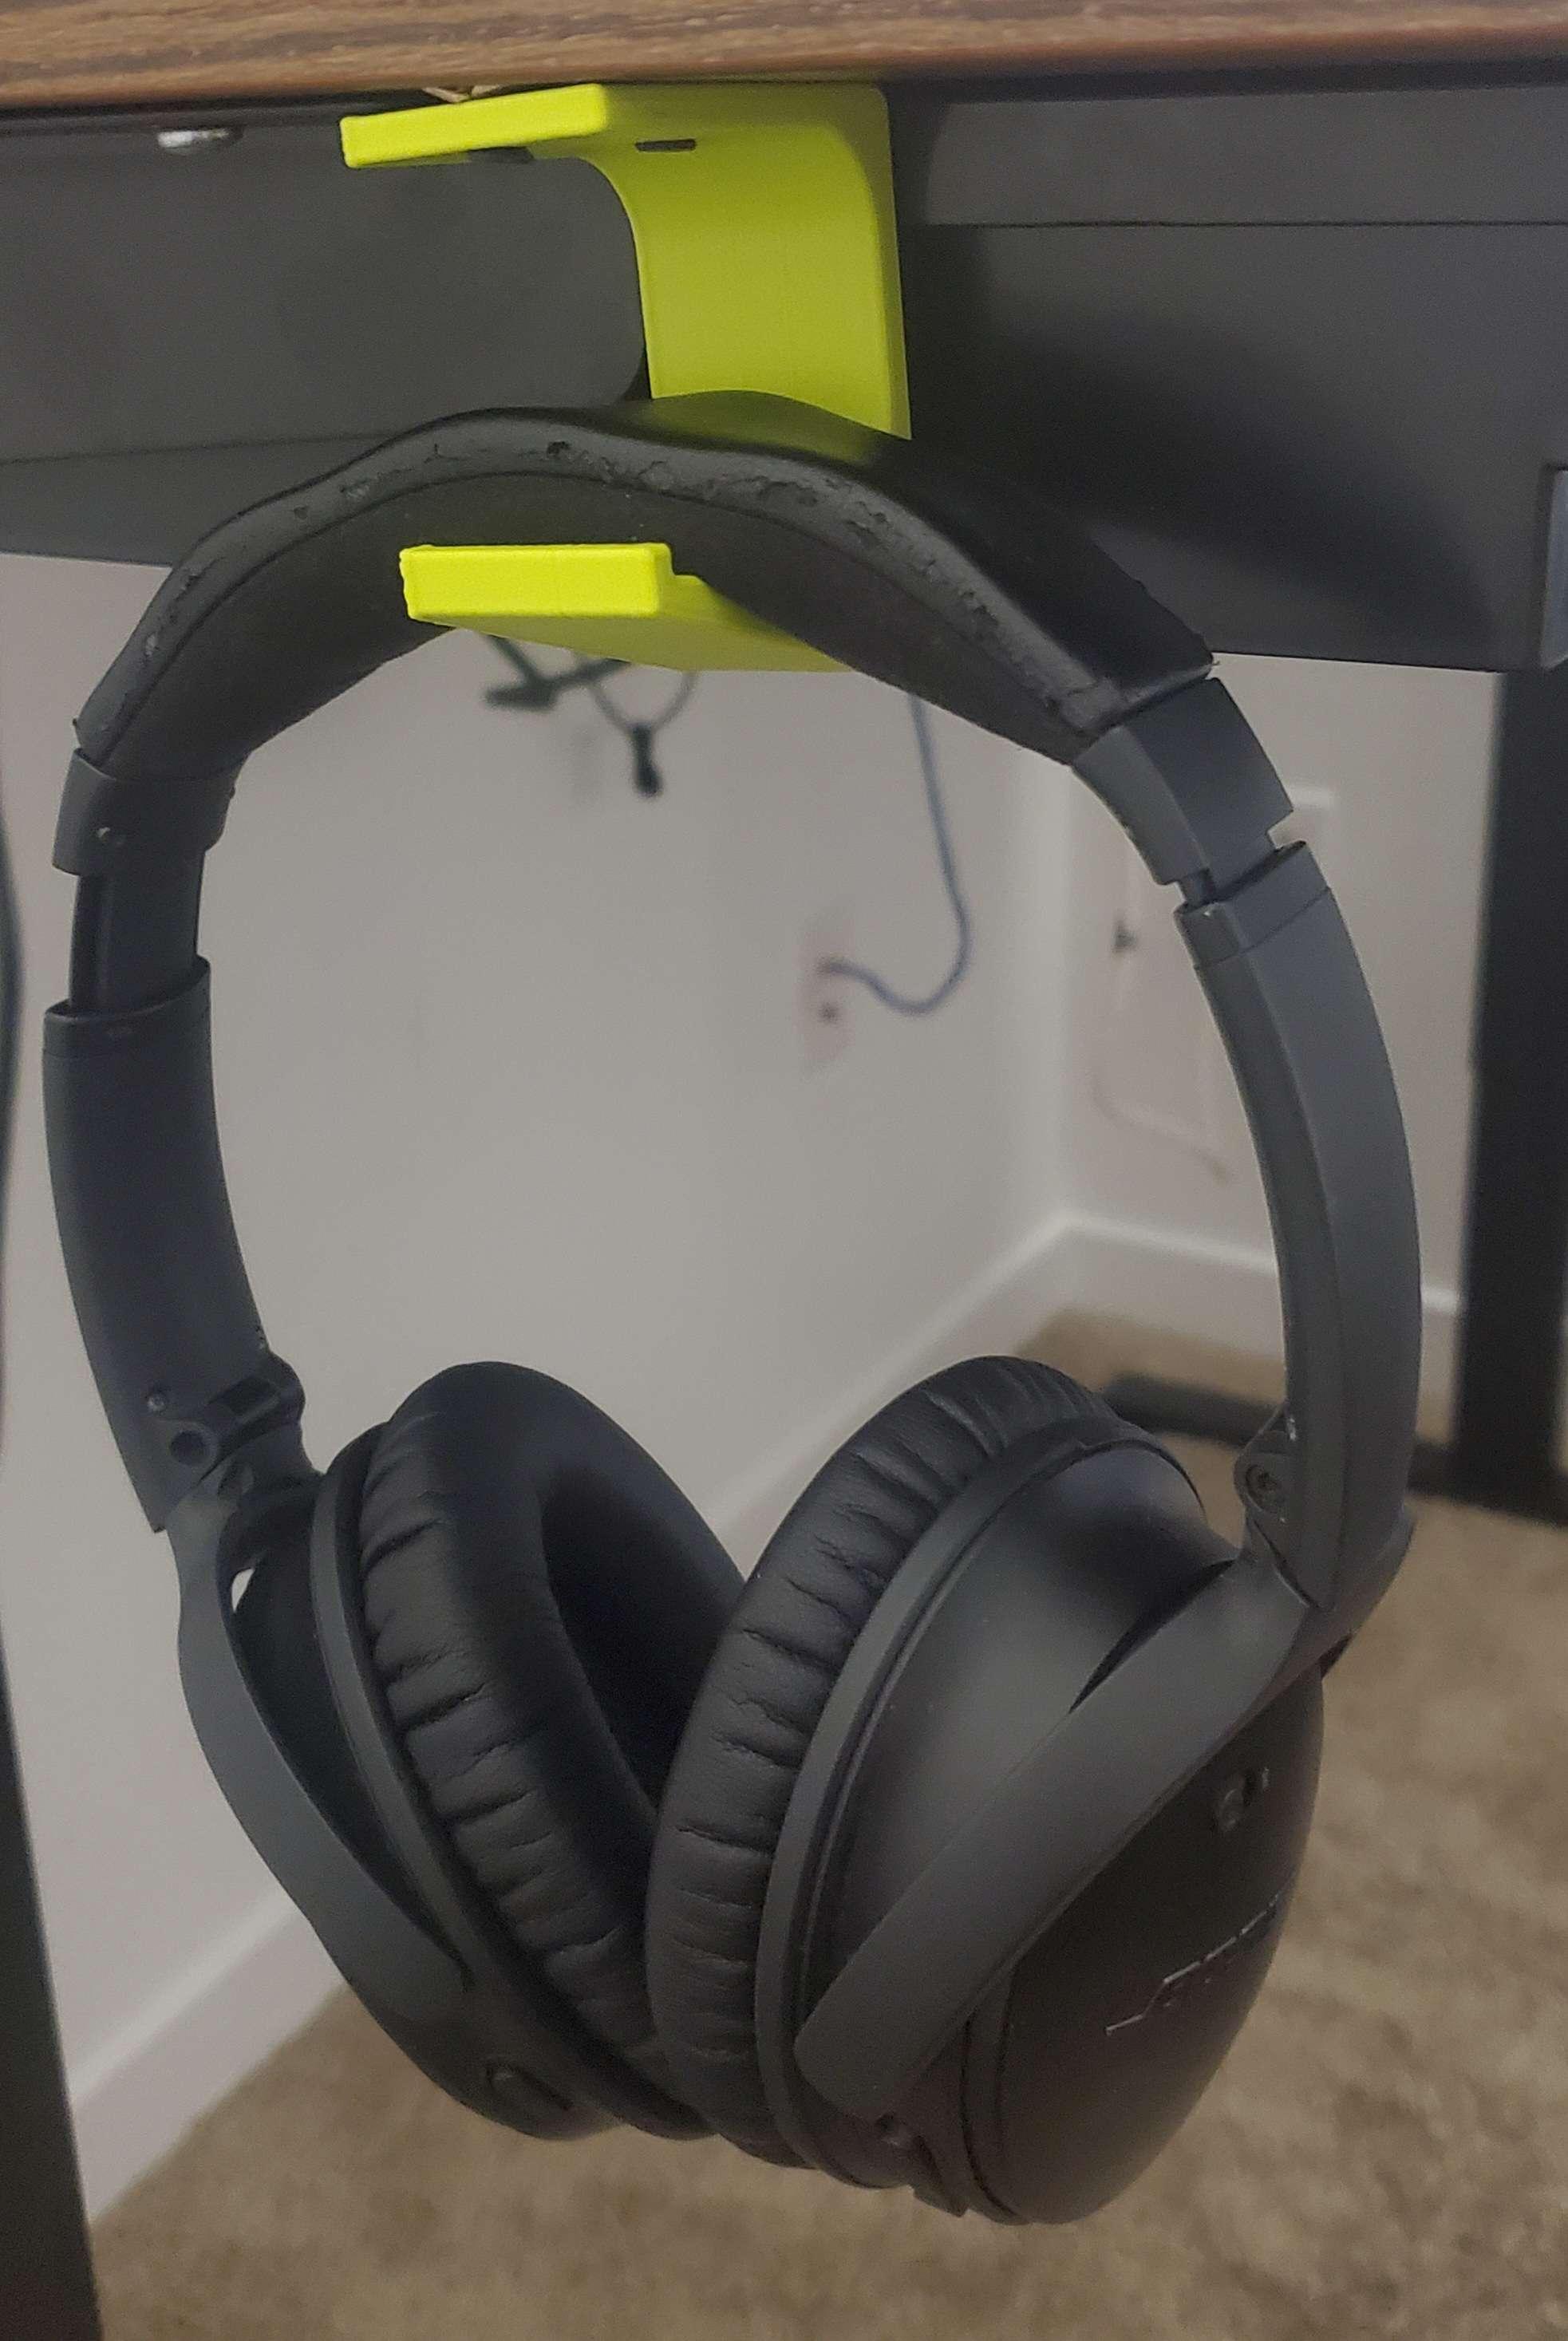
We're all done! Hang your headphones up and revel in the glory of your new custom hook.