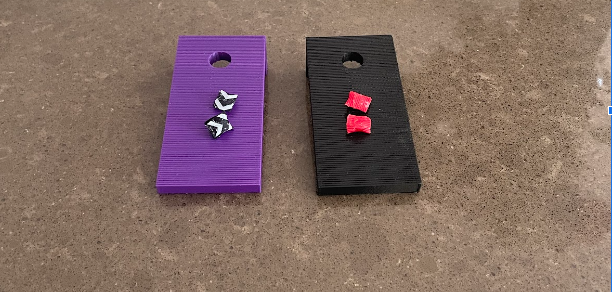
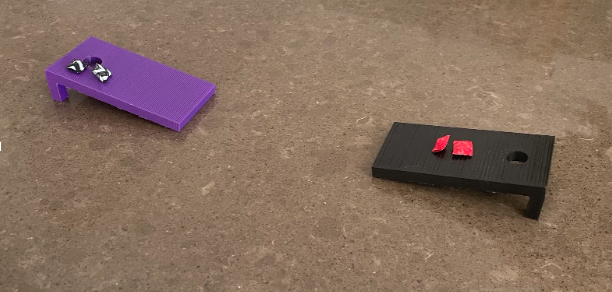
3D Printed Corn Hole
Growing up, corn hole was a game that was always brought out when the family would get together or at holidays. Coming from a competitive family, we always love to compete to see who could win by throwing square corn bags into a tiny hole on the board. So, when our engineering class was presented with the opportunity to build something and 3D print it, this game came to mind. This project was fun as I was able to use my creativity and personality in my own way. Since I have created other projects before this, I used programs that I've used throughout the year to design the mini corn hole game. For example, all year we have been working with a program called AutoCAD which can be used to 3D print objects. AutoCAD provided the tools I needed to make the right configurations and print it 3D.
Supplies
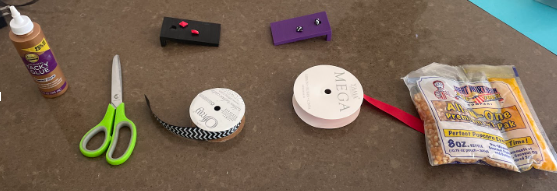
In this project the materials that would be needed are:
- Computer
- 3D Printer
- Ribbon (Cloth)
- Glue
- Scissors
- Popcorn Kernels
Design in AutoCAD
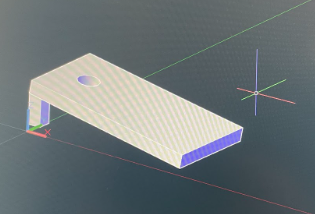
.png)
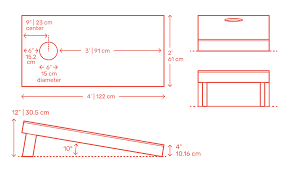
To start, open a program named AutoCAD. Here we are able to recreate a 1:1 scaled corn hole in the program. Although to do that we would have to use a set of commands. First, type in "units" Once you've selected units, you will see a set of options you are able to change. All we need to do on this tab is change the units to feet. Now, we are able to start the replica. Start by using the "line" command. using this command we are able to create the 4x2 foot base of the corn hole. Then put a 6" hole 9" inches from the top of the base. By using the command "extrude" we are able to make the 2D drawing into a 3D drawing. To create the hole we have to use the subtract command. To use this command the thing you are subtracting has to be extruded larger than the object that you are trying to subtract it from. Finally, all we have to do is build the supports. The supports can be made using the extrude and subtract command again. To start making the supports you can start off by making a rectangular prism 12" tall. Here is where it gets tricky. By using the copy and paste command we can have two corn hole bases. Now that we have two bases we can use one base for the subtract command so we have the exact angle the supports need to be cut. Then by connecting the supports to the base we end up having a complete 1:1 scaled corn hole.
3D Print
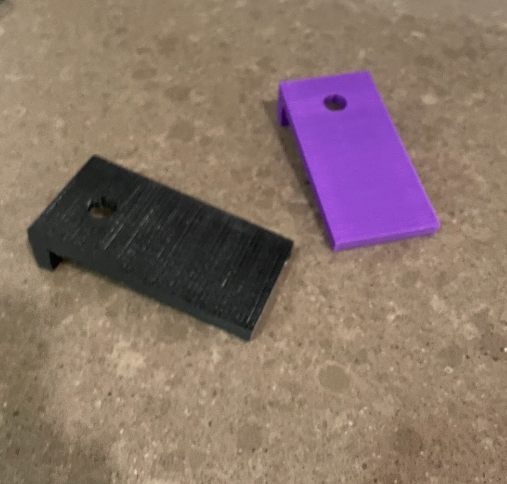
As shown to complete this step you will need a completed AutoCAD design and a 3D printer with filament. Be creative and choose what colors you would prefer. Then download an application called Maker Bot. With this application you are able to import the model you created and 3D print it. Also, when you import your model don't forget to change some settings. When printing change the model measurements to inches and add custom printer supports. Once all things are finalized select your printer and begin to print as it will take a couple of hours.
Bean Bags

Finally, all we need to do is construct the bean bags. To complete this section you will need ribbon or cloth, Scissors, popcorn kernels, and glue. First, start off by cutting the ribbon down to a size where you will be able to wrap 2-1 popcorn kernels. Then apply glue to the ribbon/cloth and kernels and squeeze tightly, then let the glue dry. After, wait for your mini 3D corn hole to be completed. Now you are able to keep it for yourself or gift it to someone.