3D Printed Badminton Racket
by mecinios in Workshop > 3D Printing
2530 Views, 5 Favorites, 0 Comments
3D Printed Badminton Racket
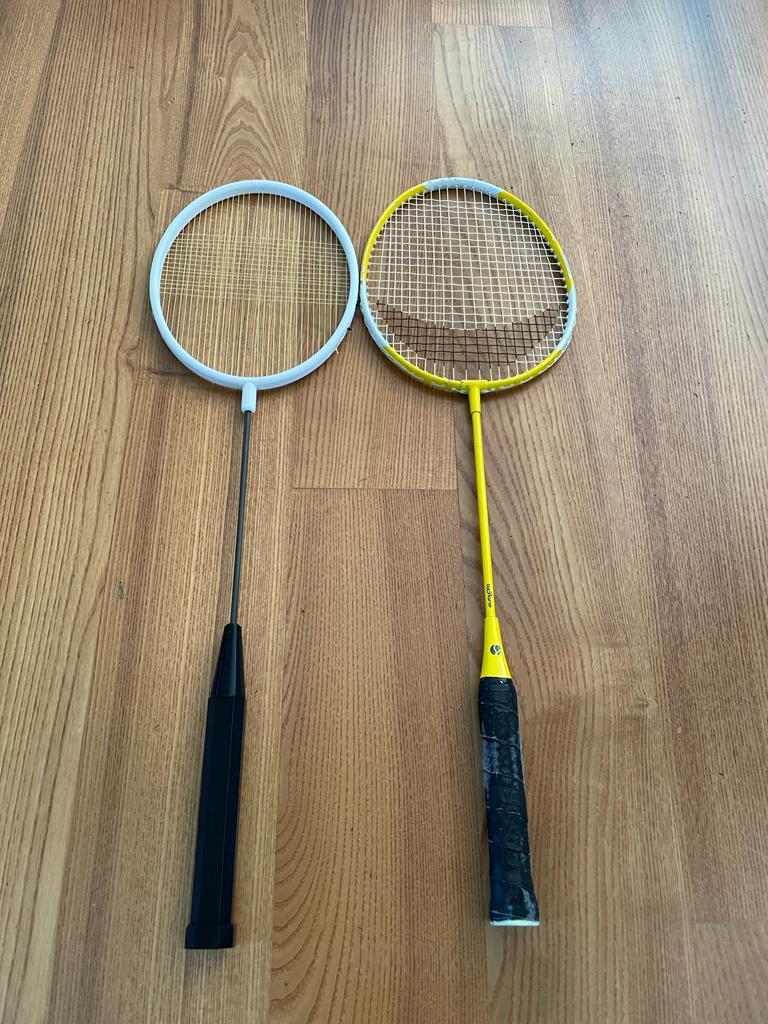
I've always liked making 3D printed working copies of everyday objects. This time I found myself recreating badminton racked I had to lying around.
Supplies
- 3D printer
- filament
- 260mm (10.2in) 5mm (0,19in) diameter carbon fiber rod (you can also use an aluminium one)
- 0.35mm (1.37in) fishing line
- fishing stoppers
- a needle (optional)
- superglue
Designing
I decided to copy the racket I already had in Fusion360. I will go step by step on how I did that.
Tracing Paddle Shape
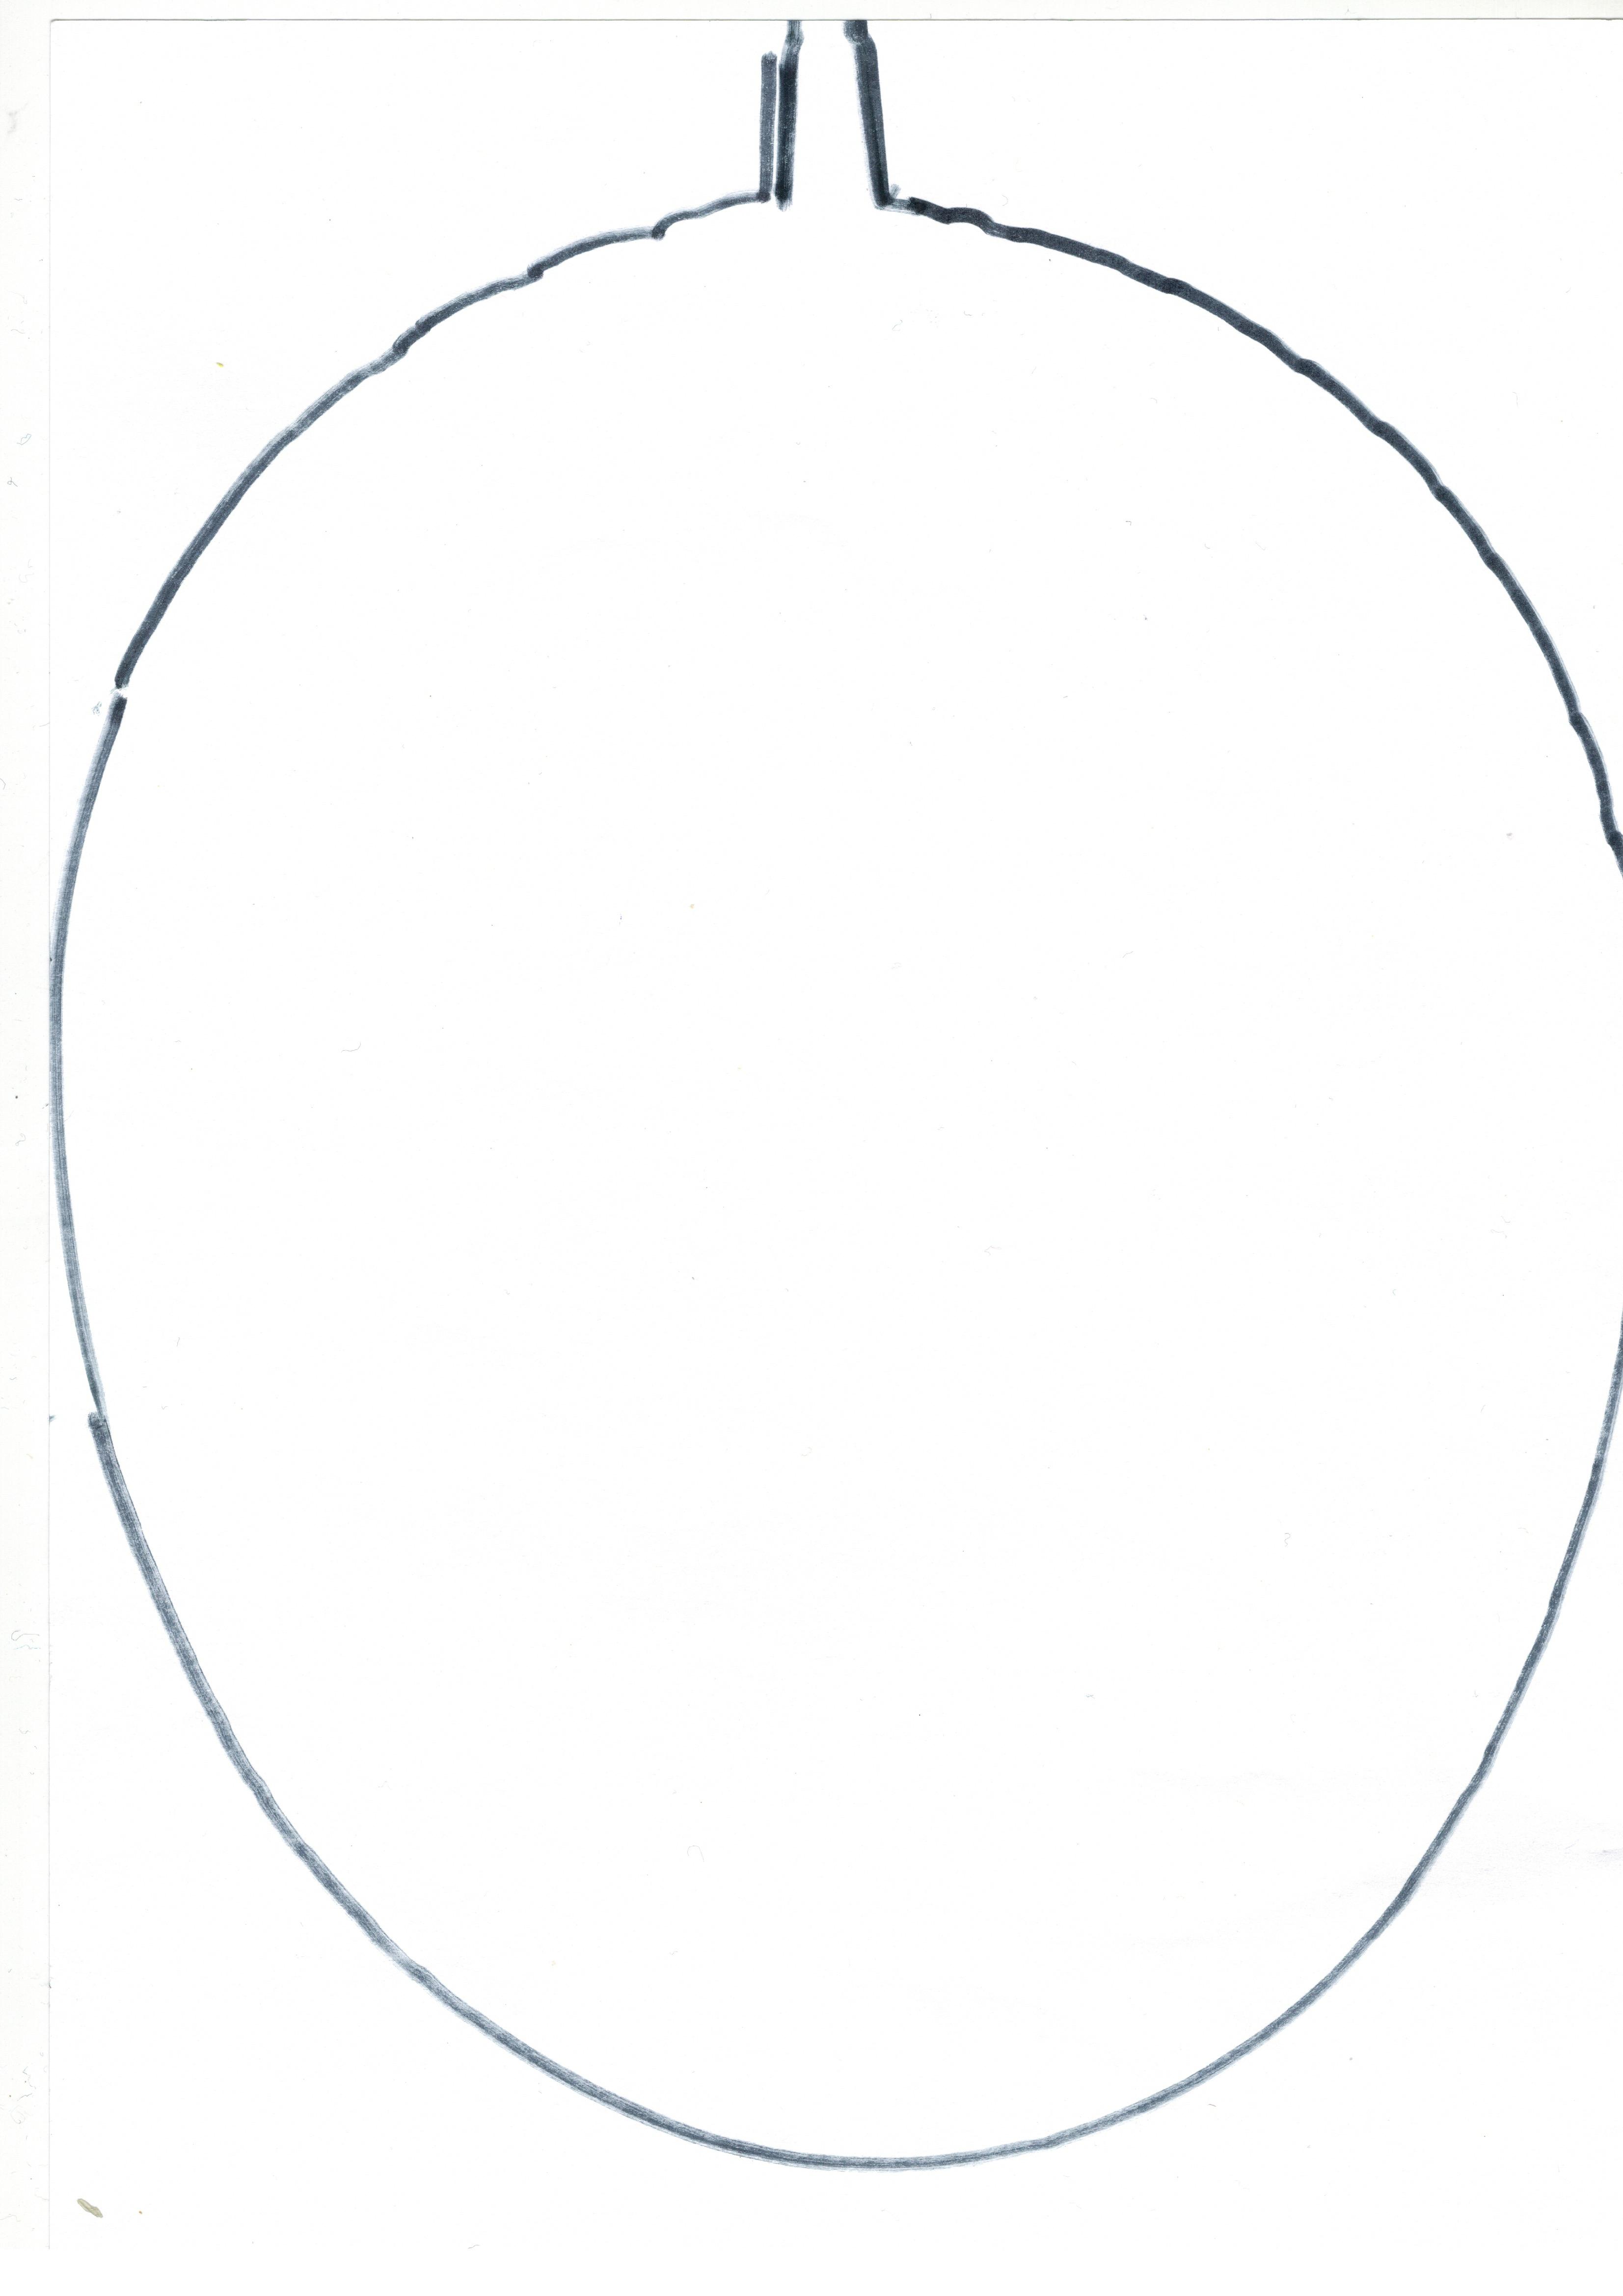

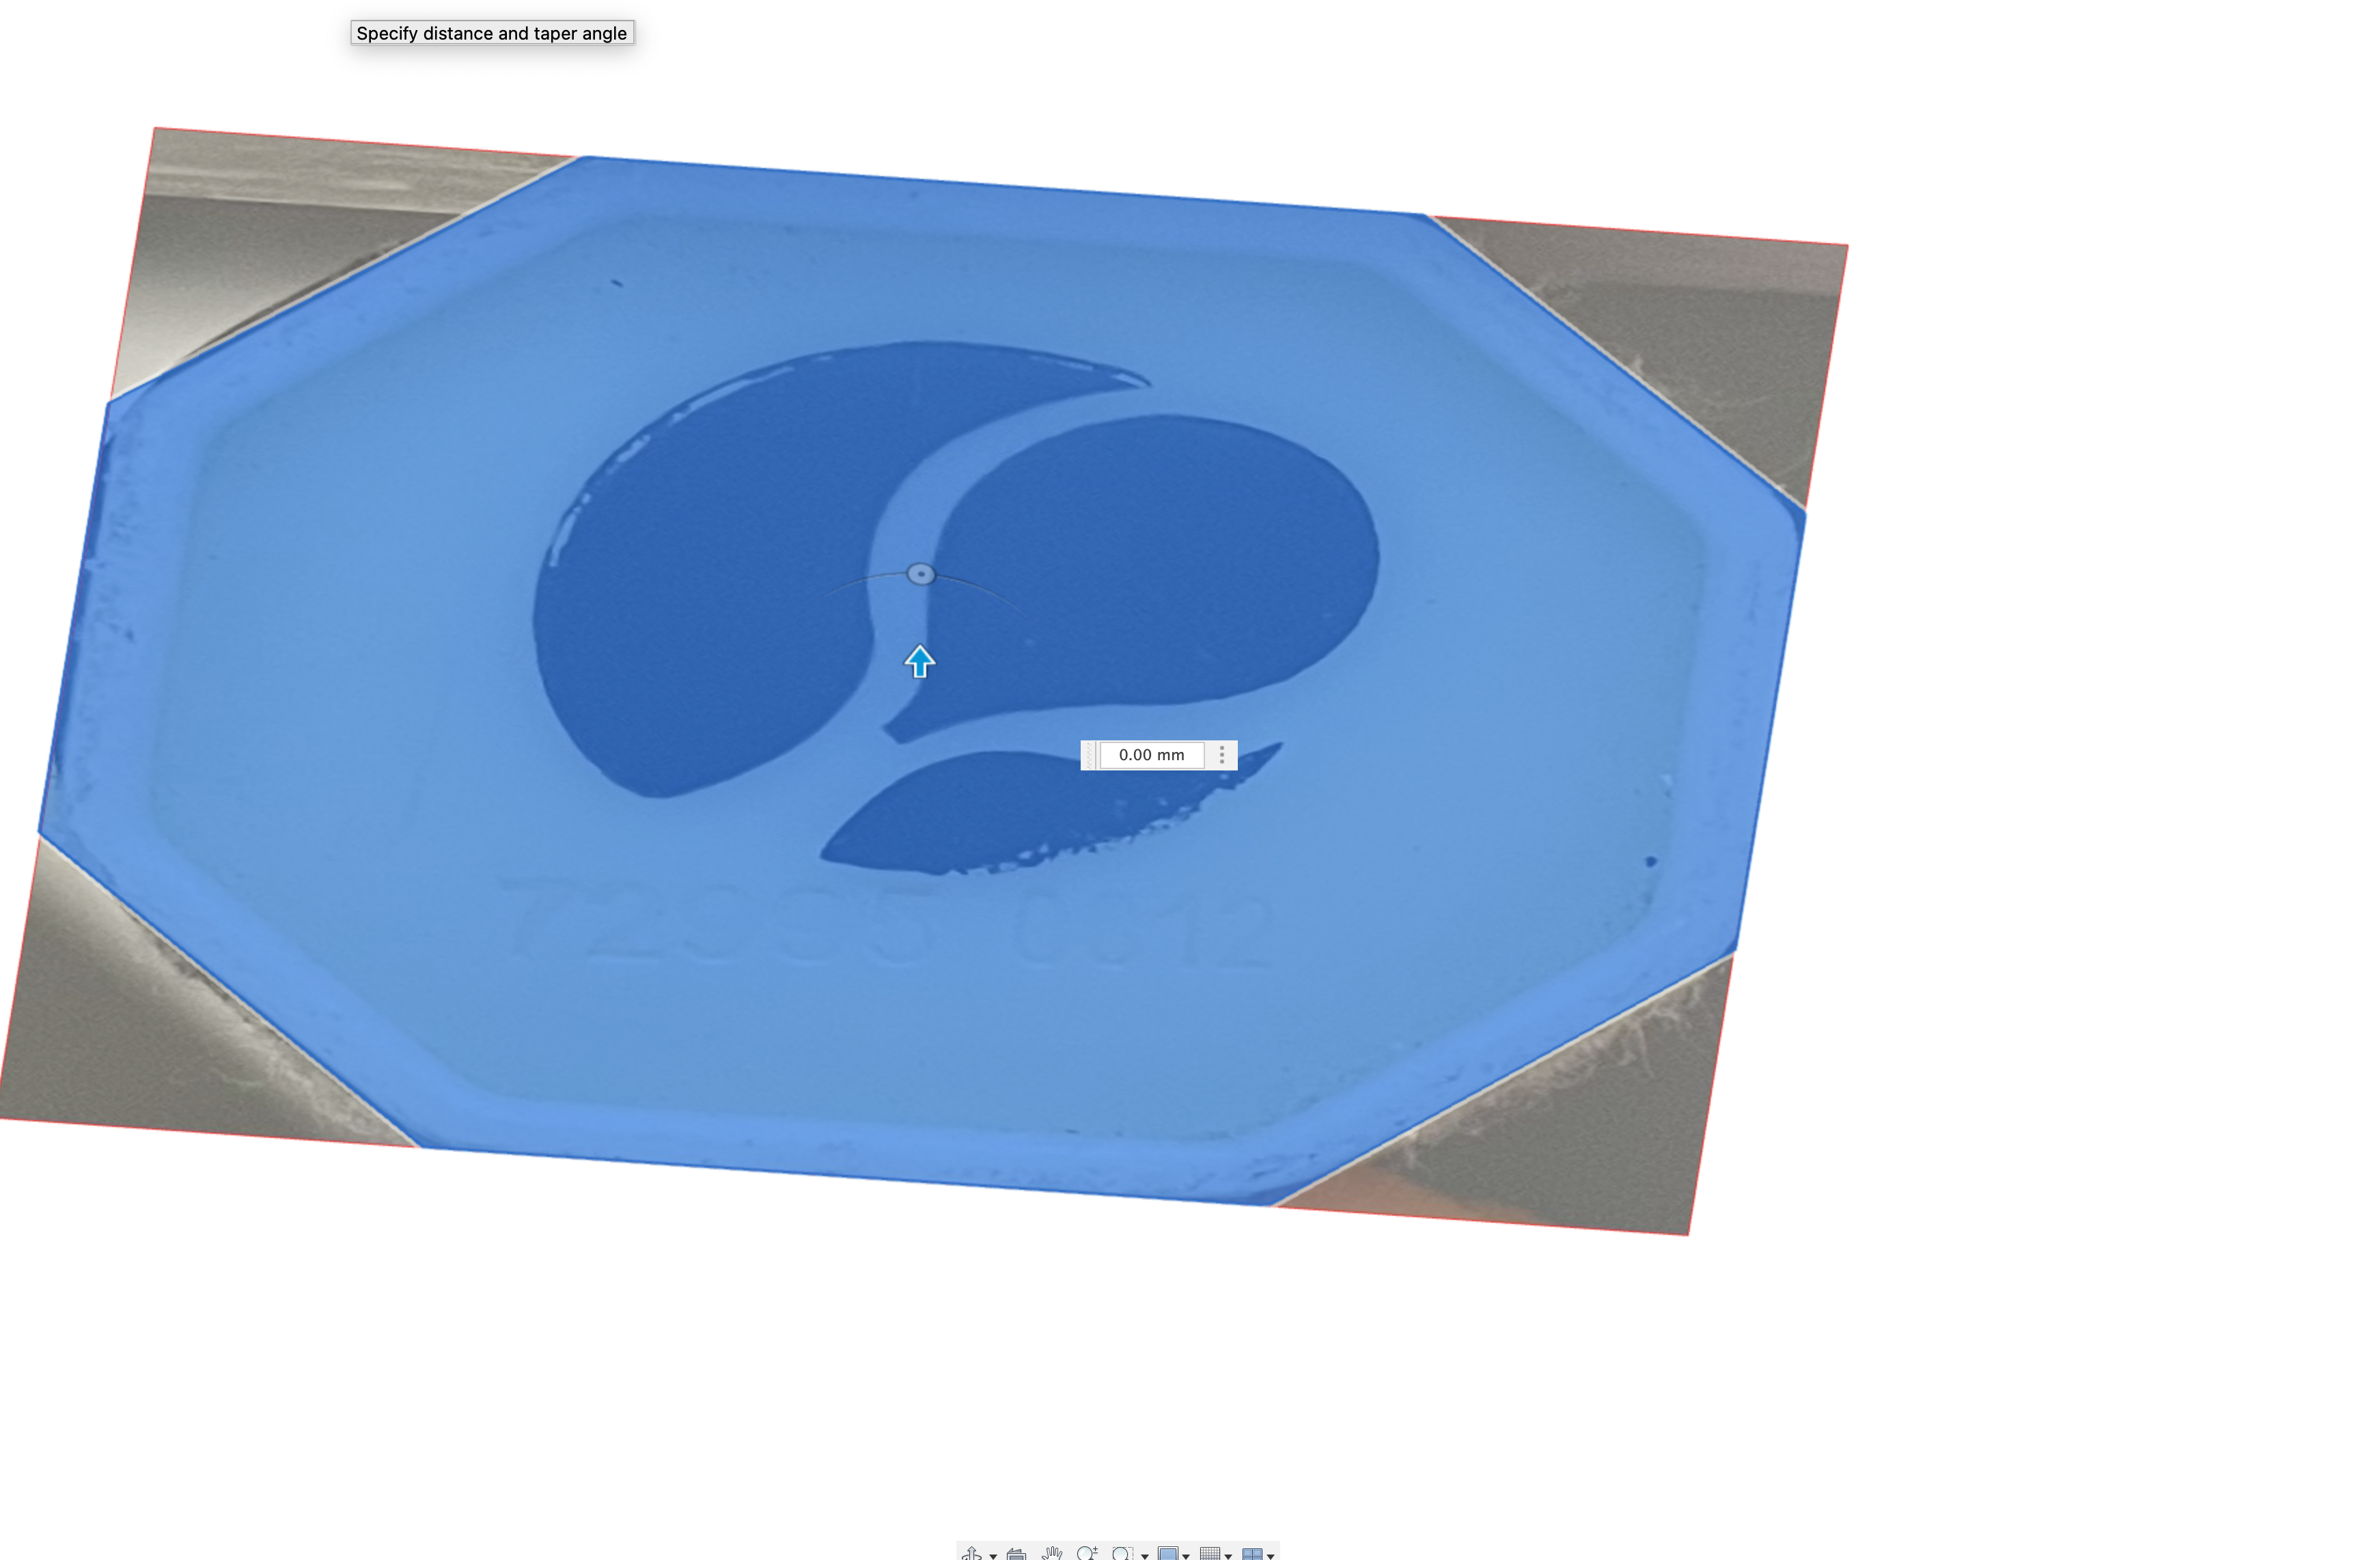
- Grab a piece of paper, and a marker to trace the shape of the paddle.
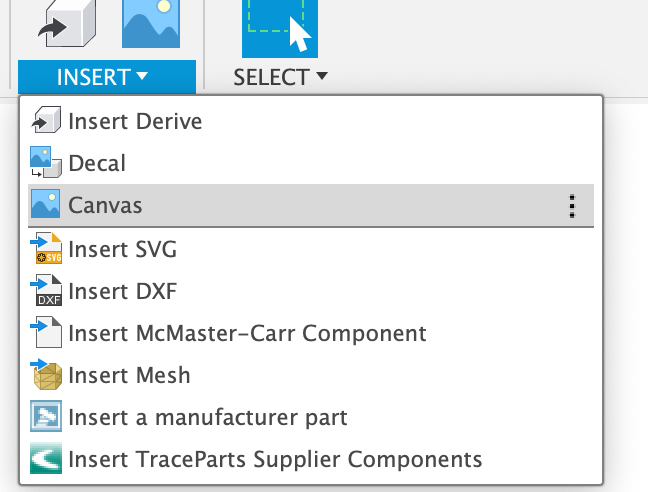
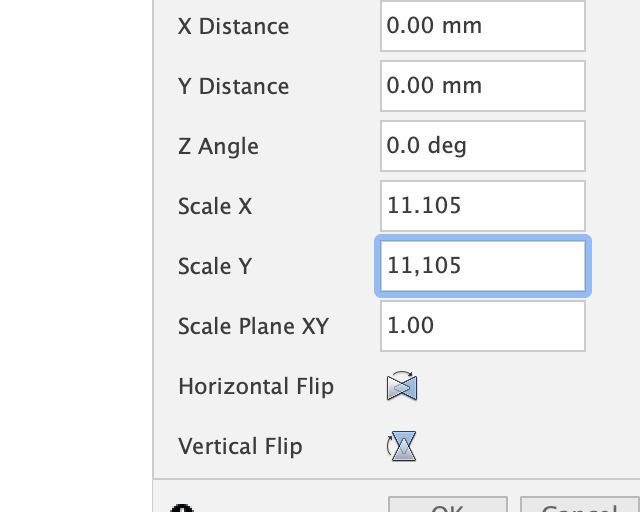
- Scan it and upload it to your computer and to Fusion360. Insert -> Canvas.
- After scaling the canvas up to the real size, create a sketch and draw an oval based on the shape scanned.
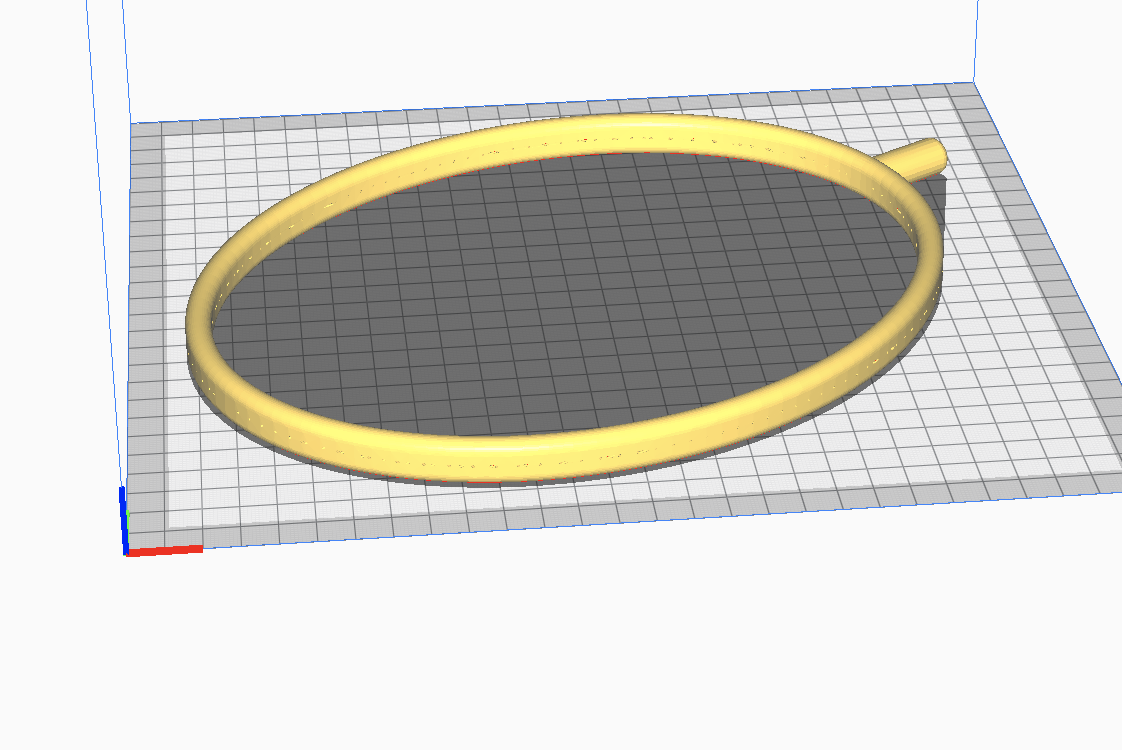
Designing the Ring
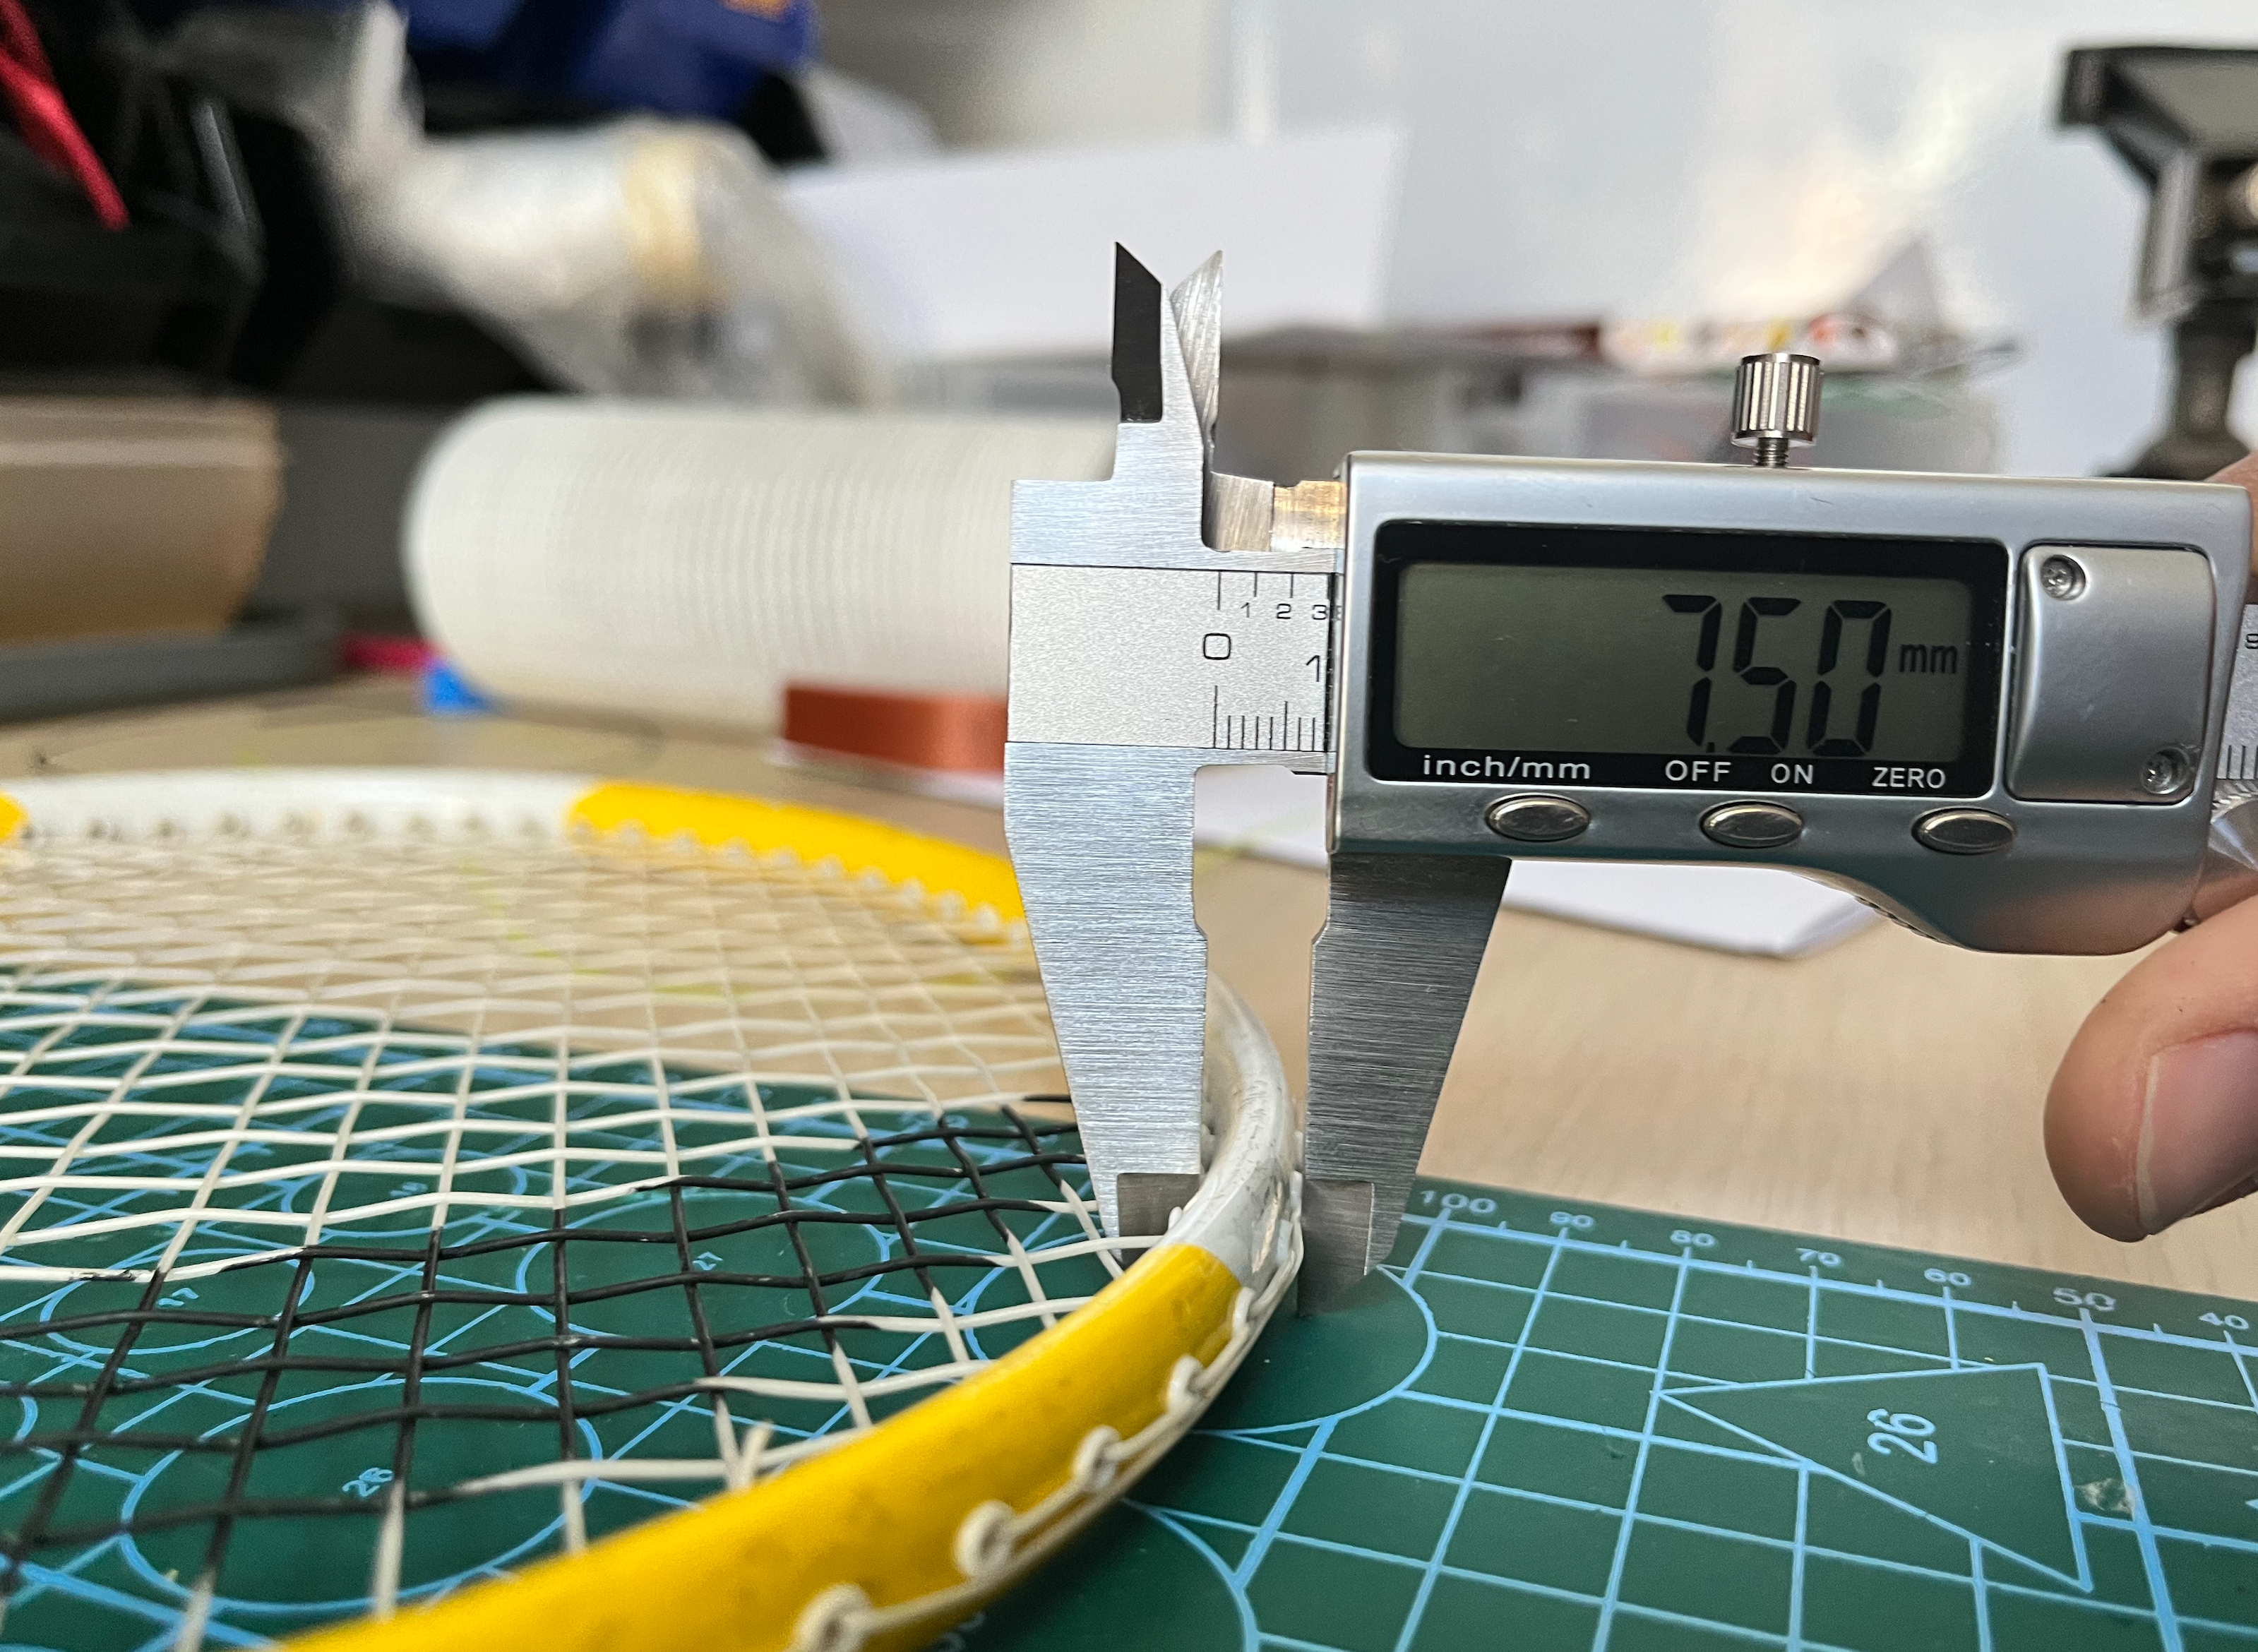
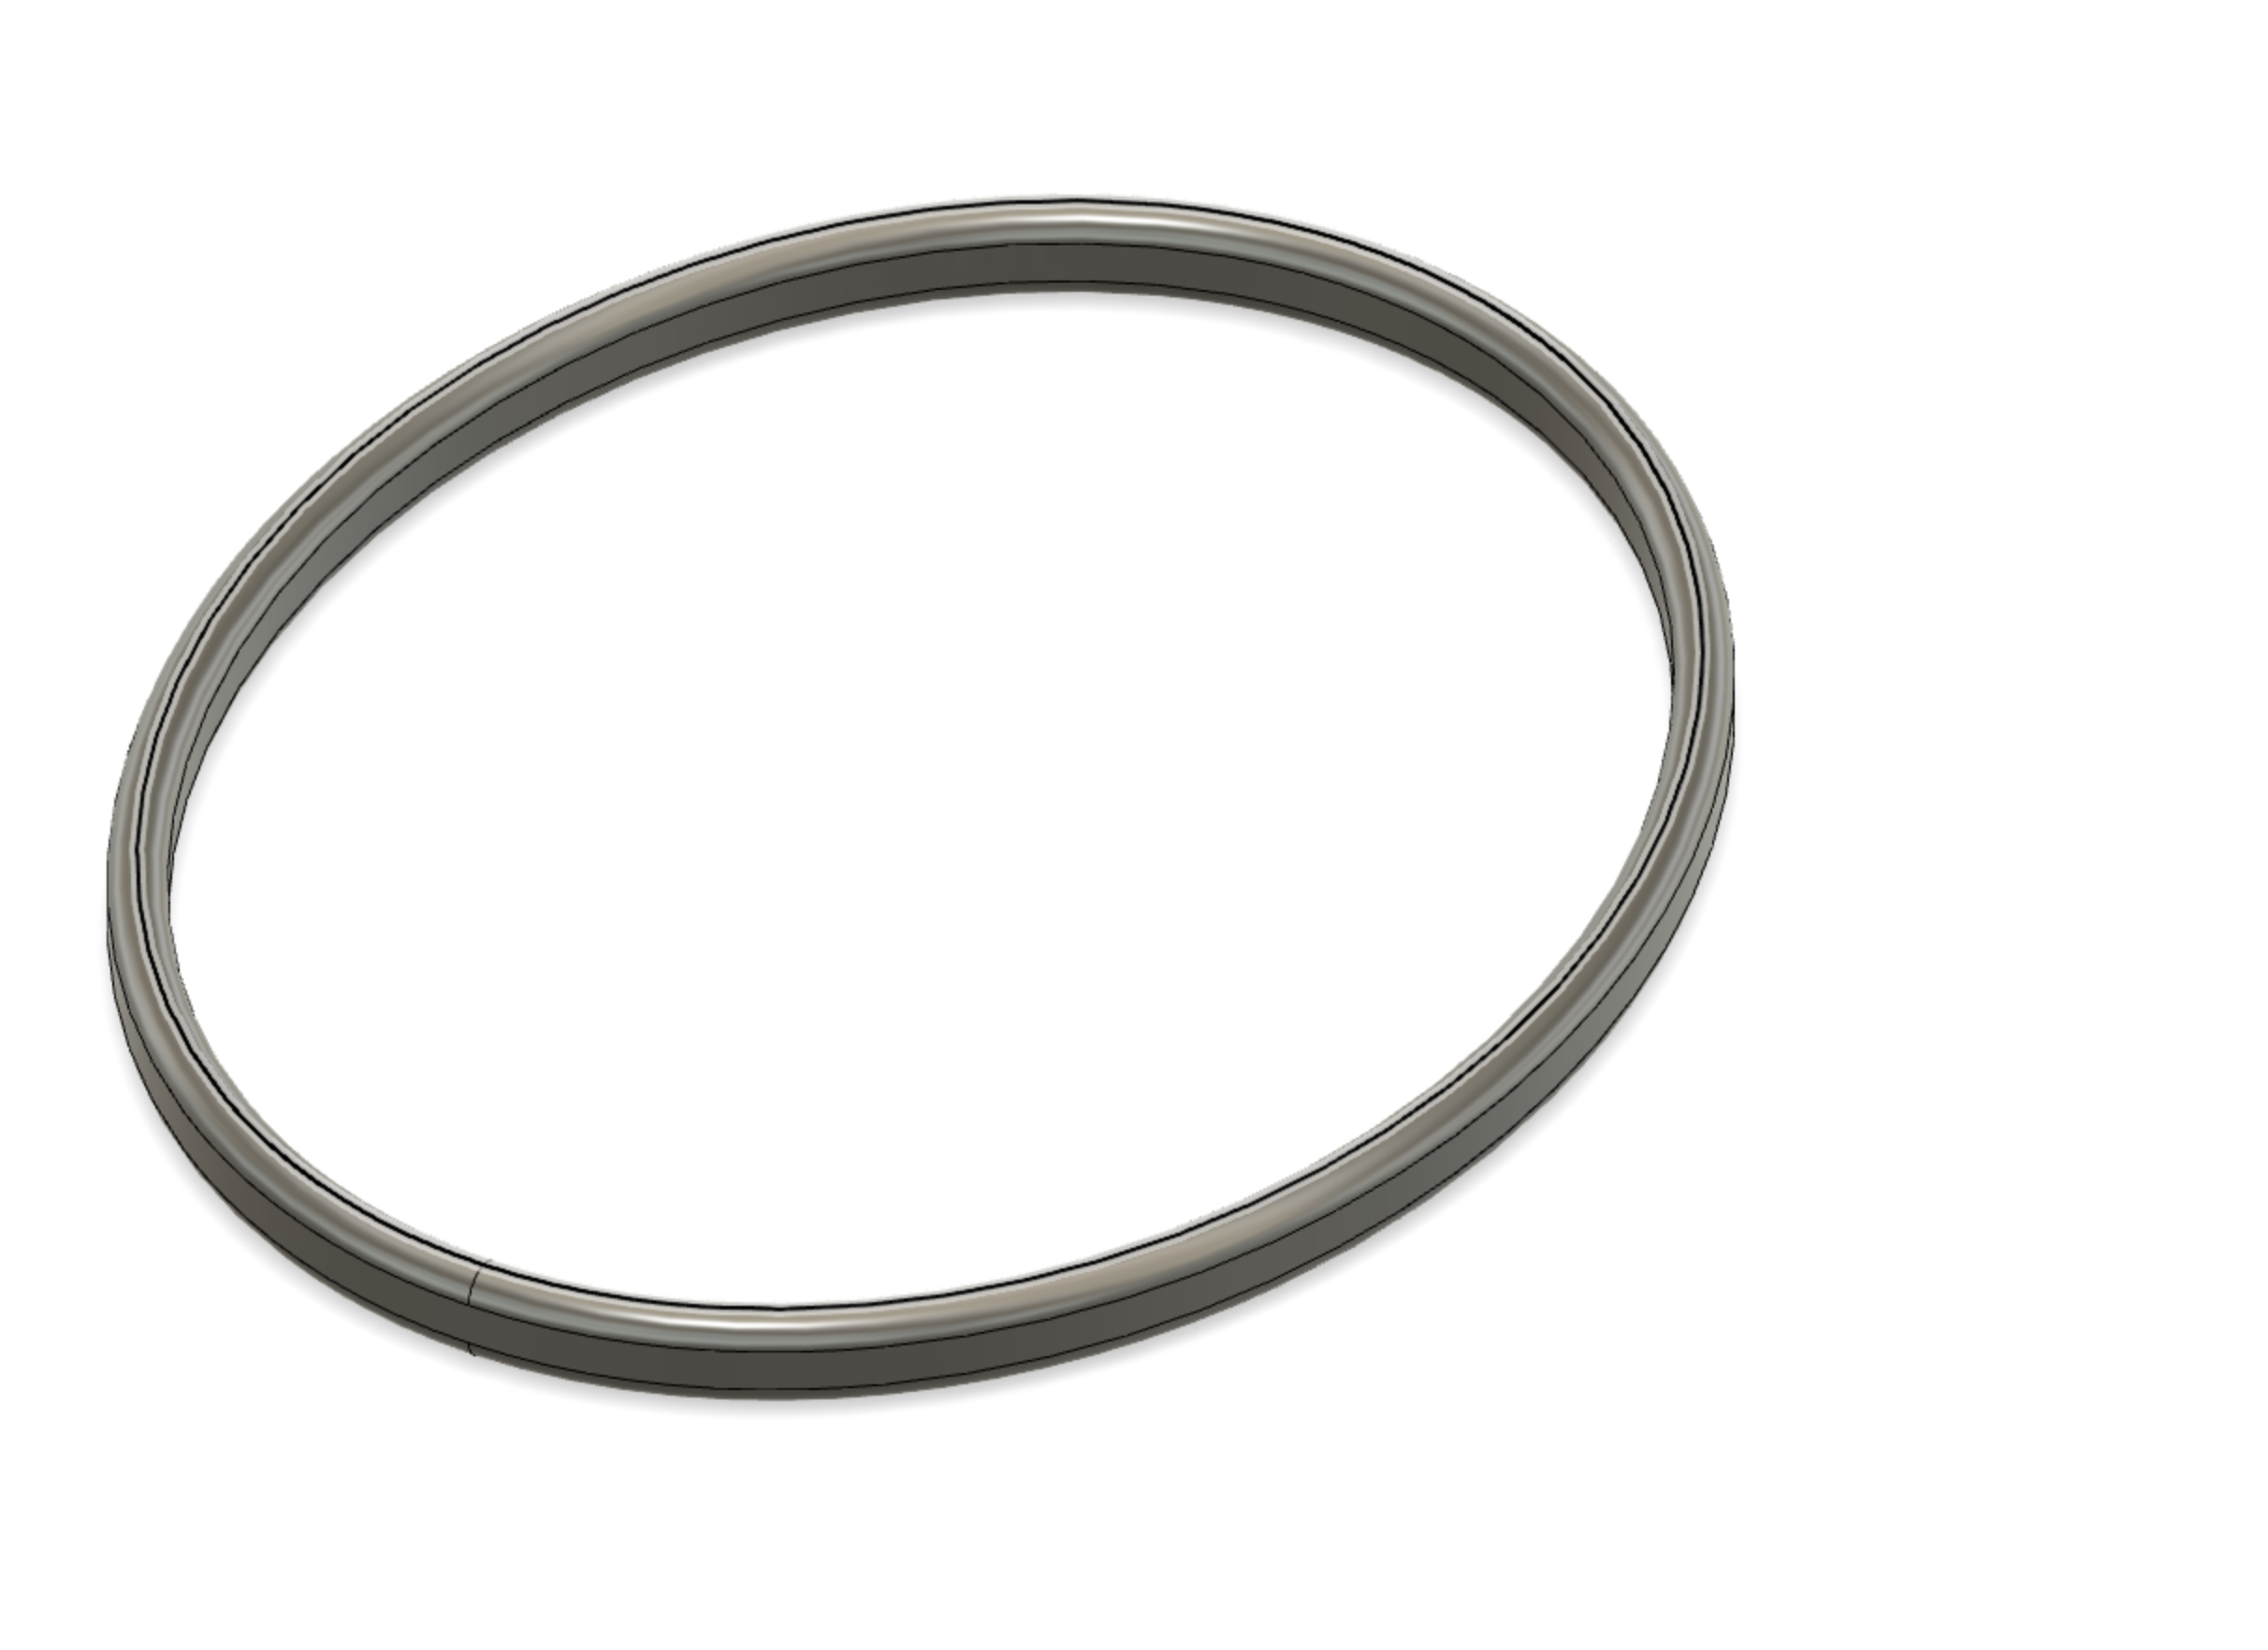
- Now, a 7.5mm (2.95in) offset needs to be made towards the inside of the oval.
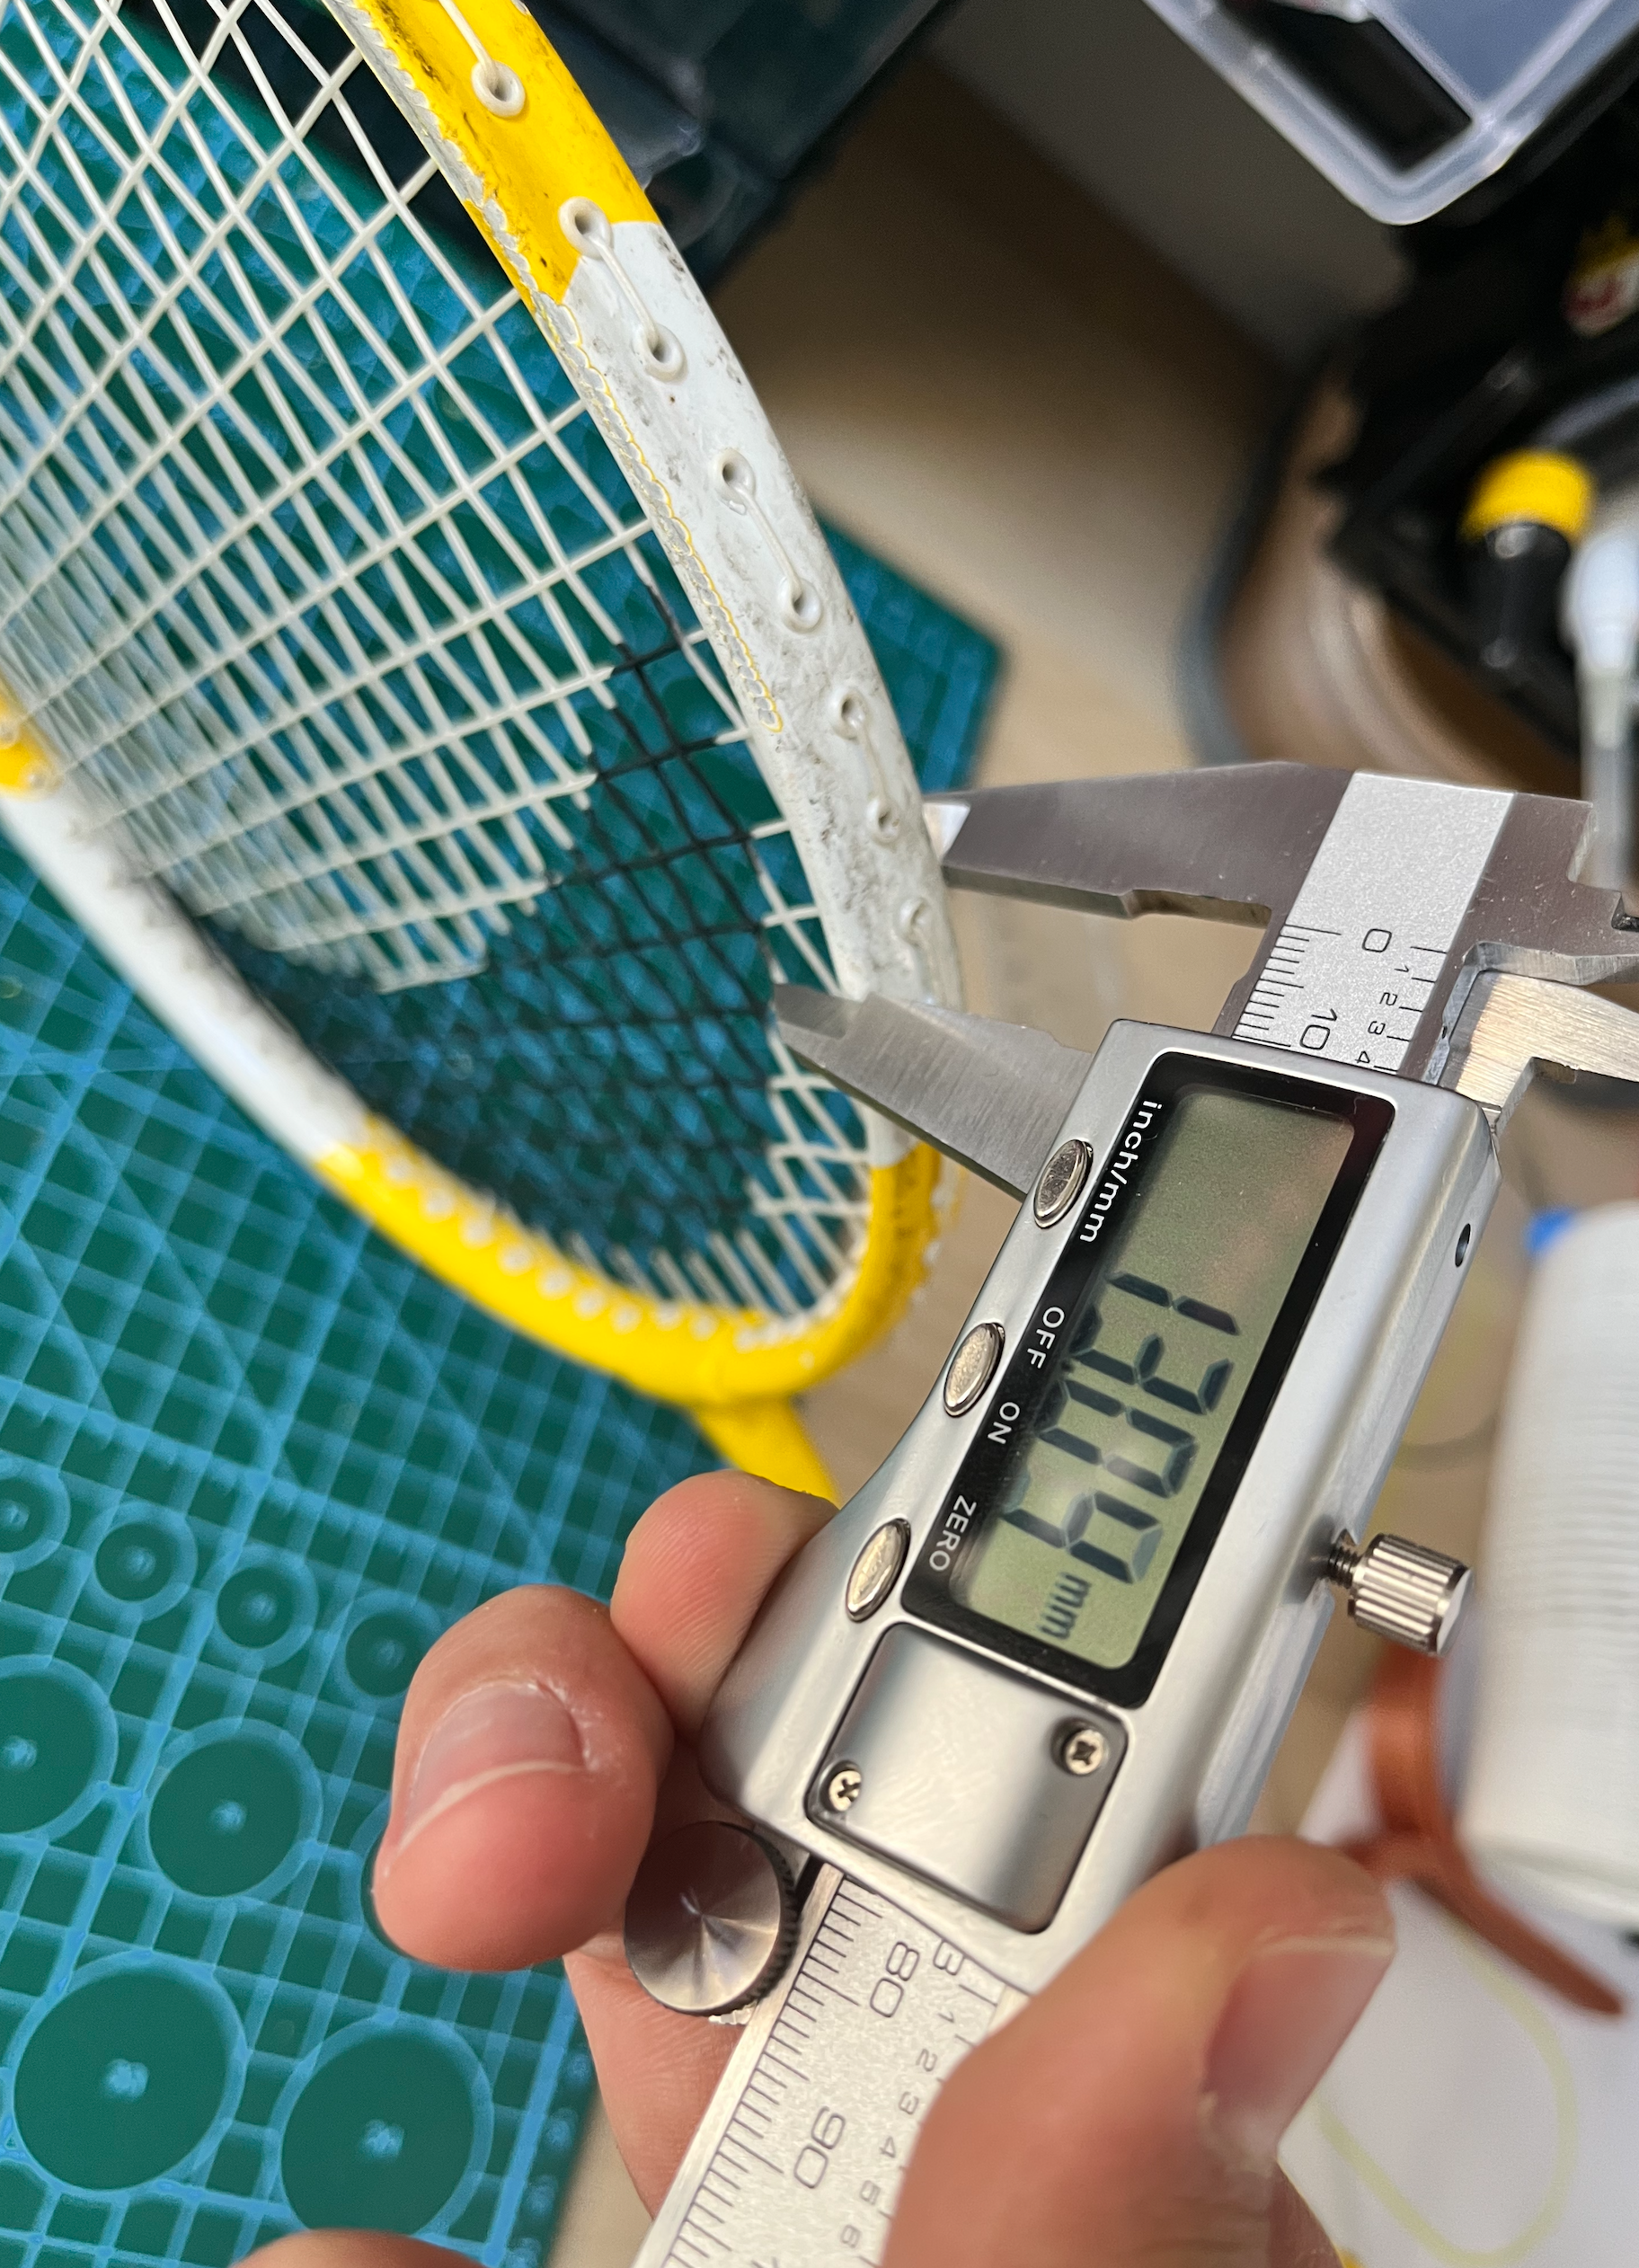
- Extrude 13mm (0.51in) - the height of the ring
- To make it a bit lighter and easier for the shuttlecock to bounce use a 3.45mm (13.58in) fillet to round up the edges
Adding Rod Mount
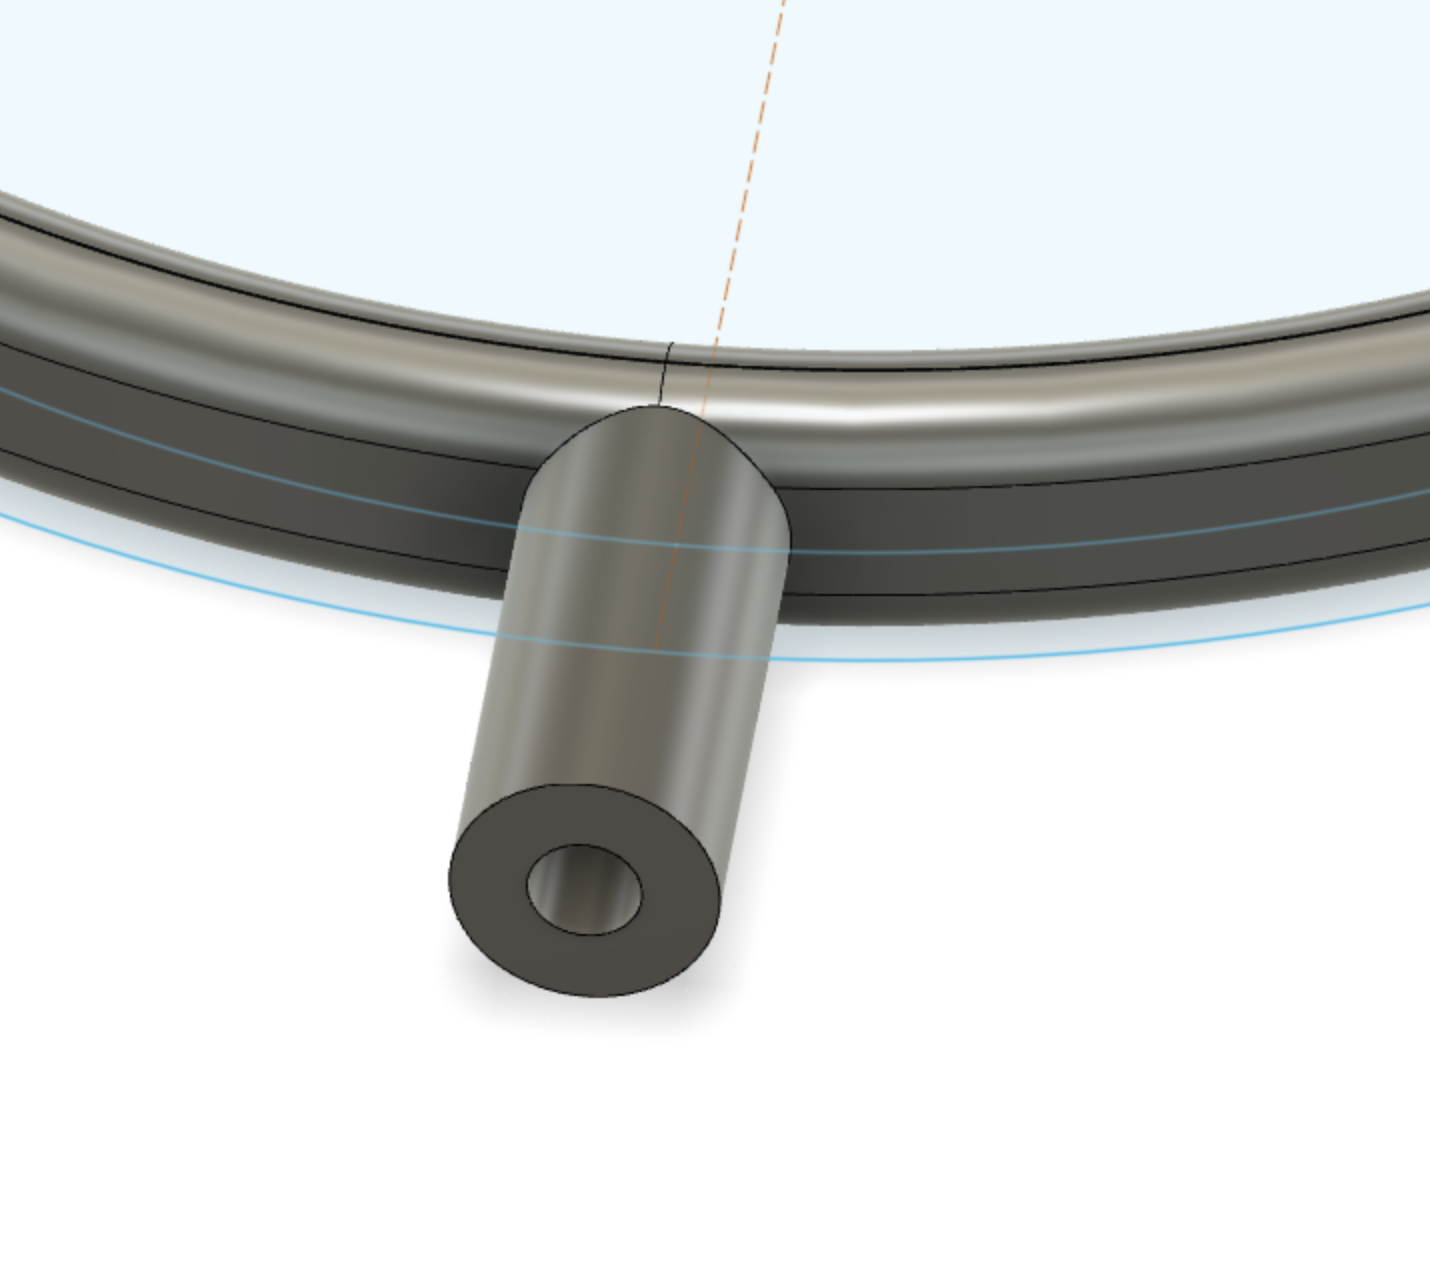
- Draw two circles, one with a diameter of 11mm (0.43in) and the other one in the center of the first one with a diameter of 5mm (0,19in).
- Extrude 26mm (1in) of the ring which arose as a result of drawing those two circles.
- Fillet to round up the edges
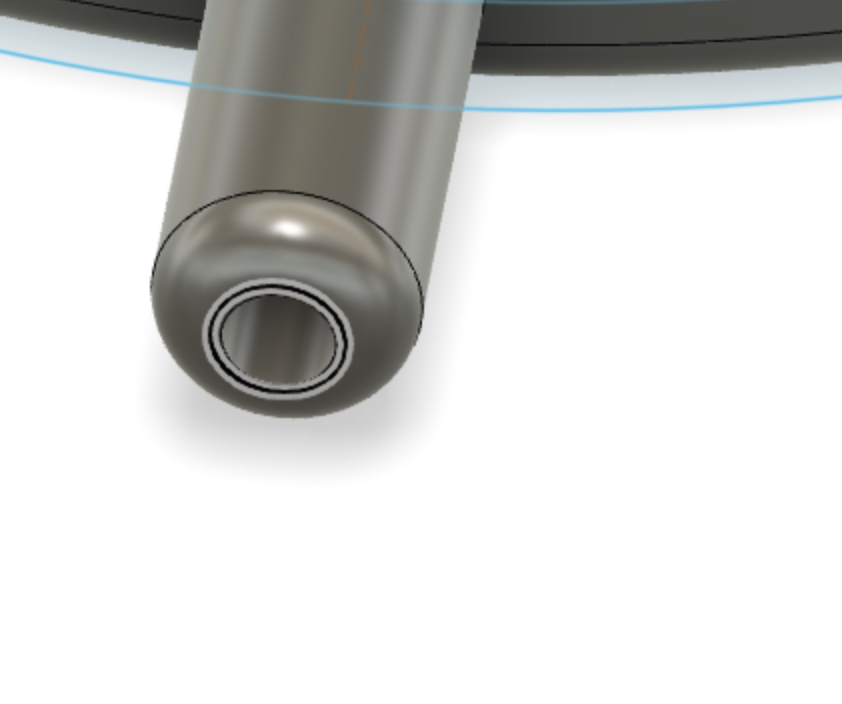
Creating Holes for Fishing Line

- Draw 0.8mm (0.31)(I found this size works best for a 0.35mm line and 0.4mm nozzle) circles every 5mm (0,19in) in both the front and side of the ring.
- Extrude symmetrically to create holes
The top part is done! :D
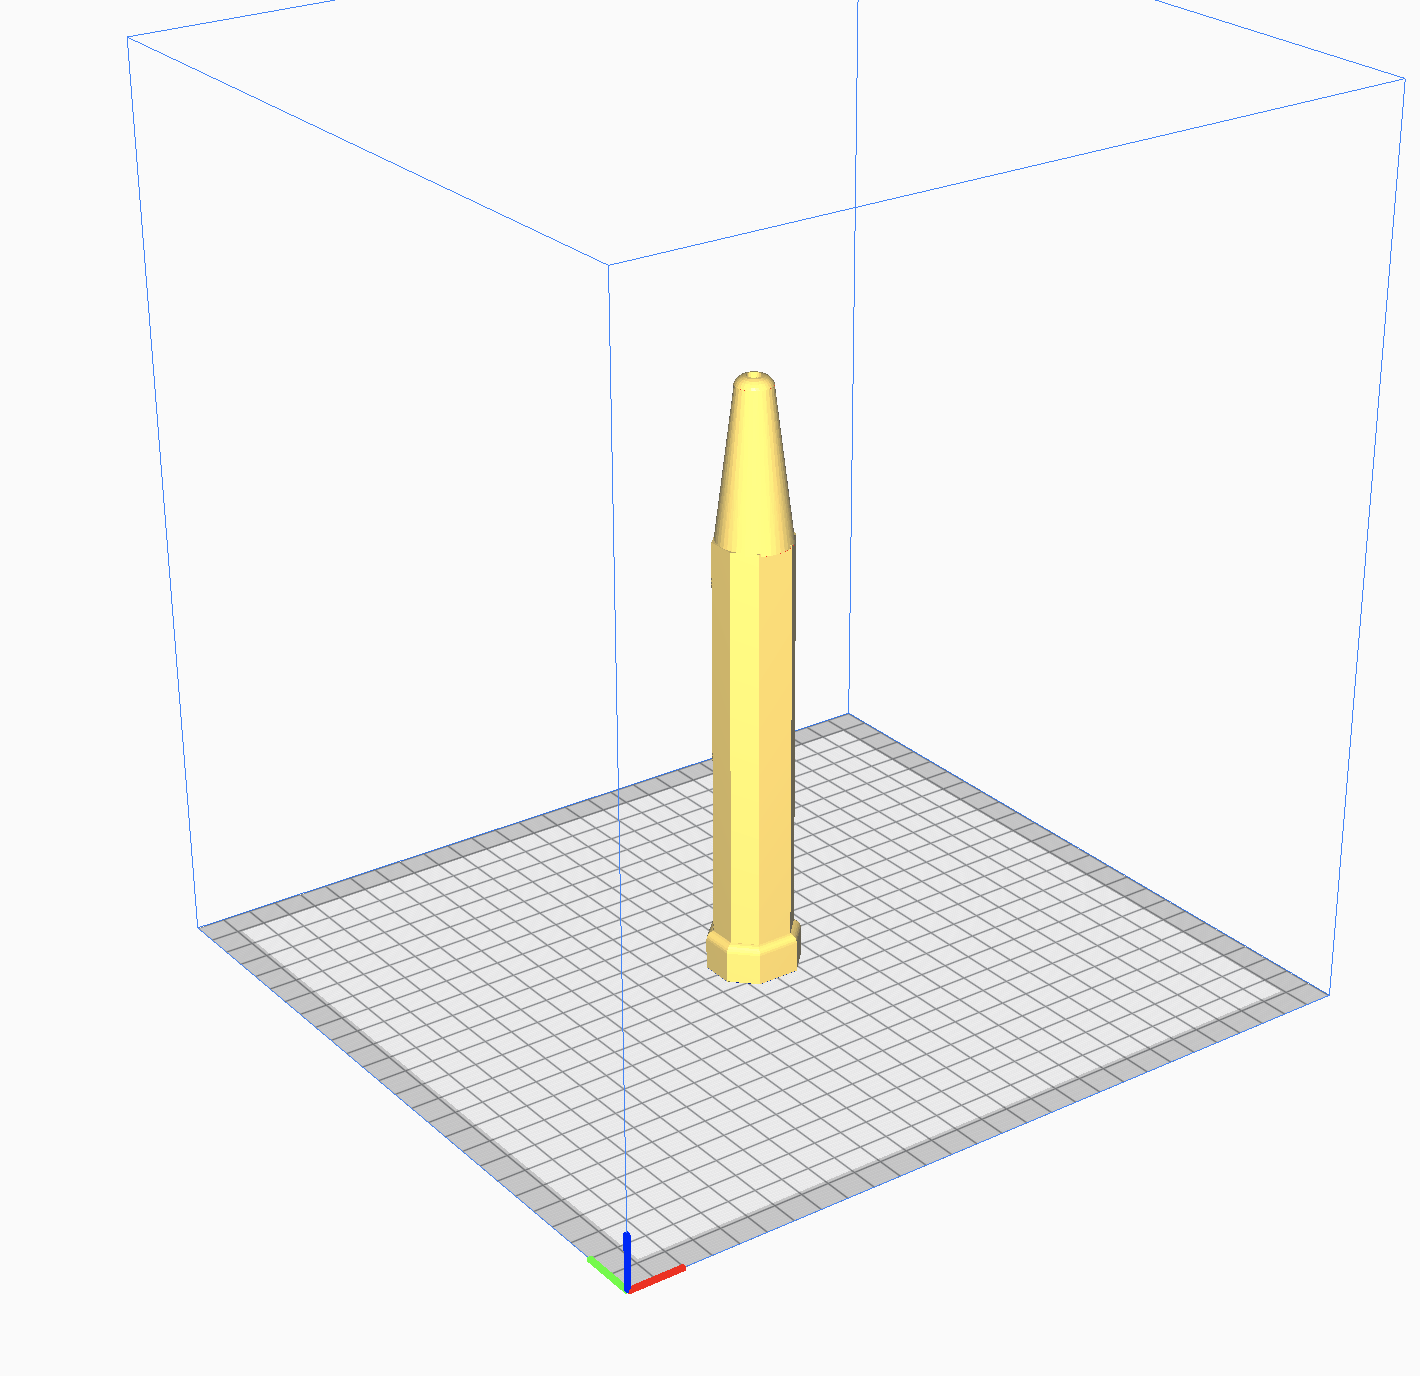
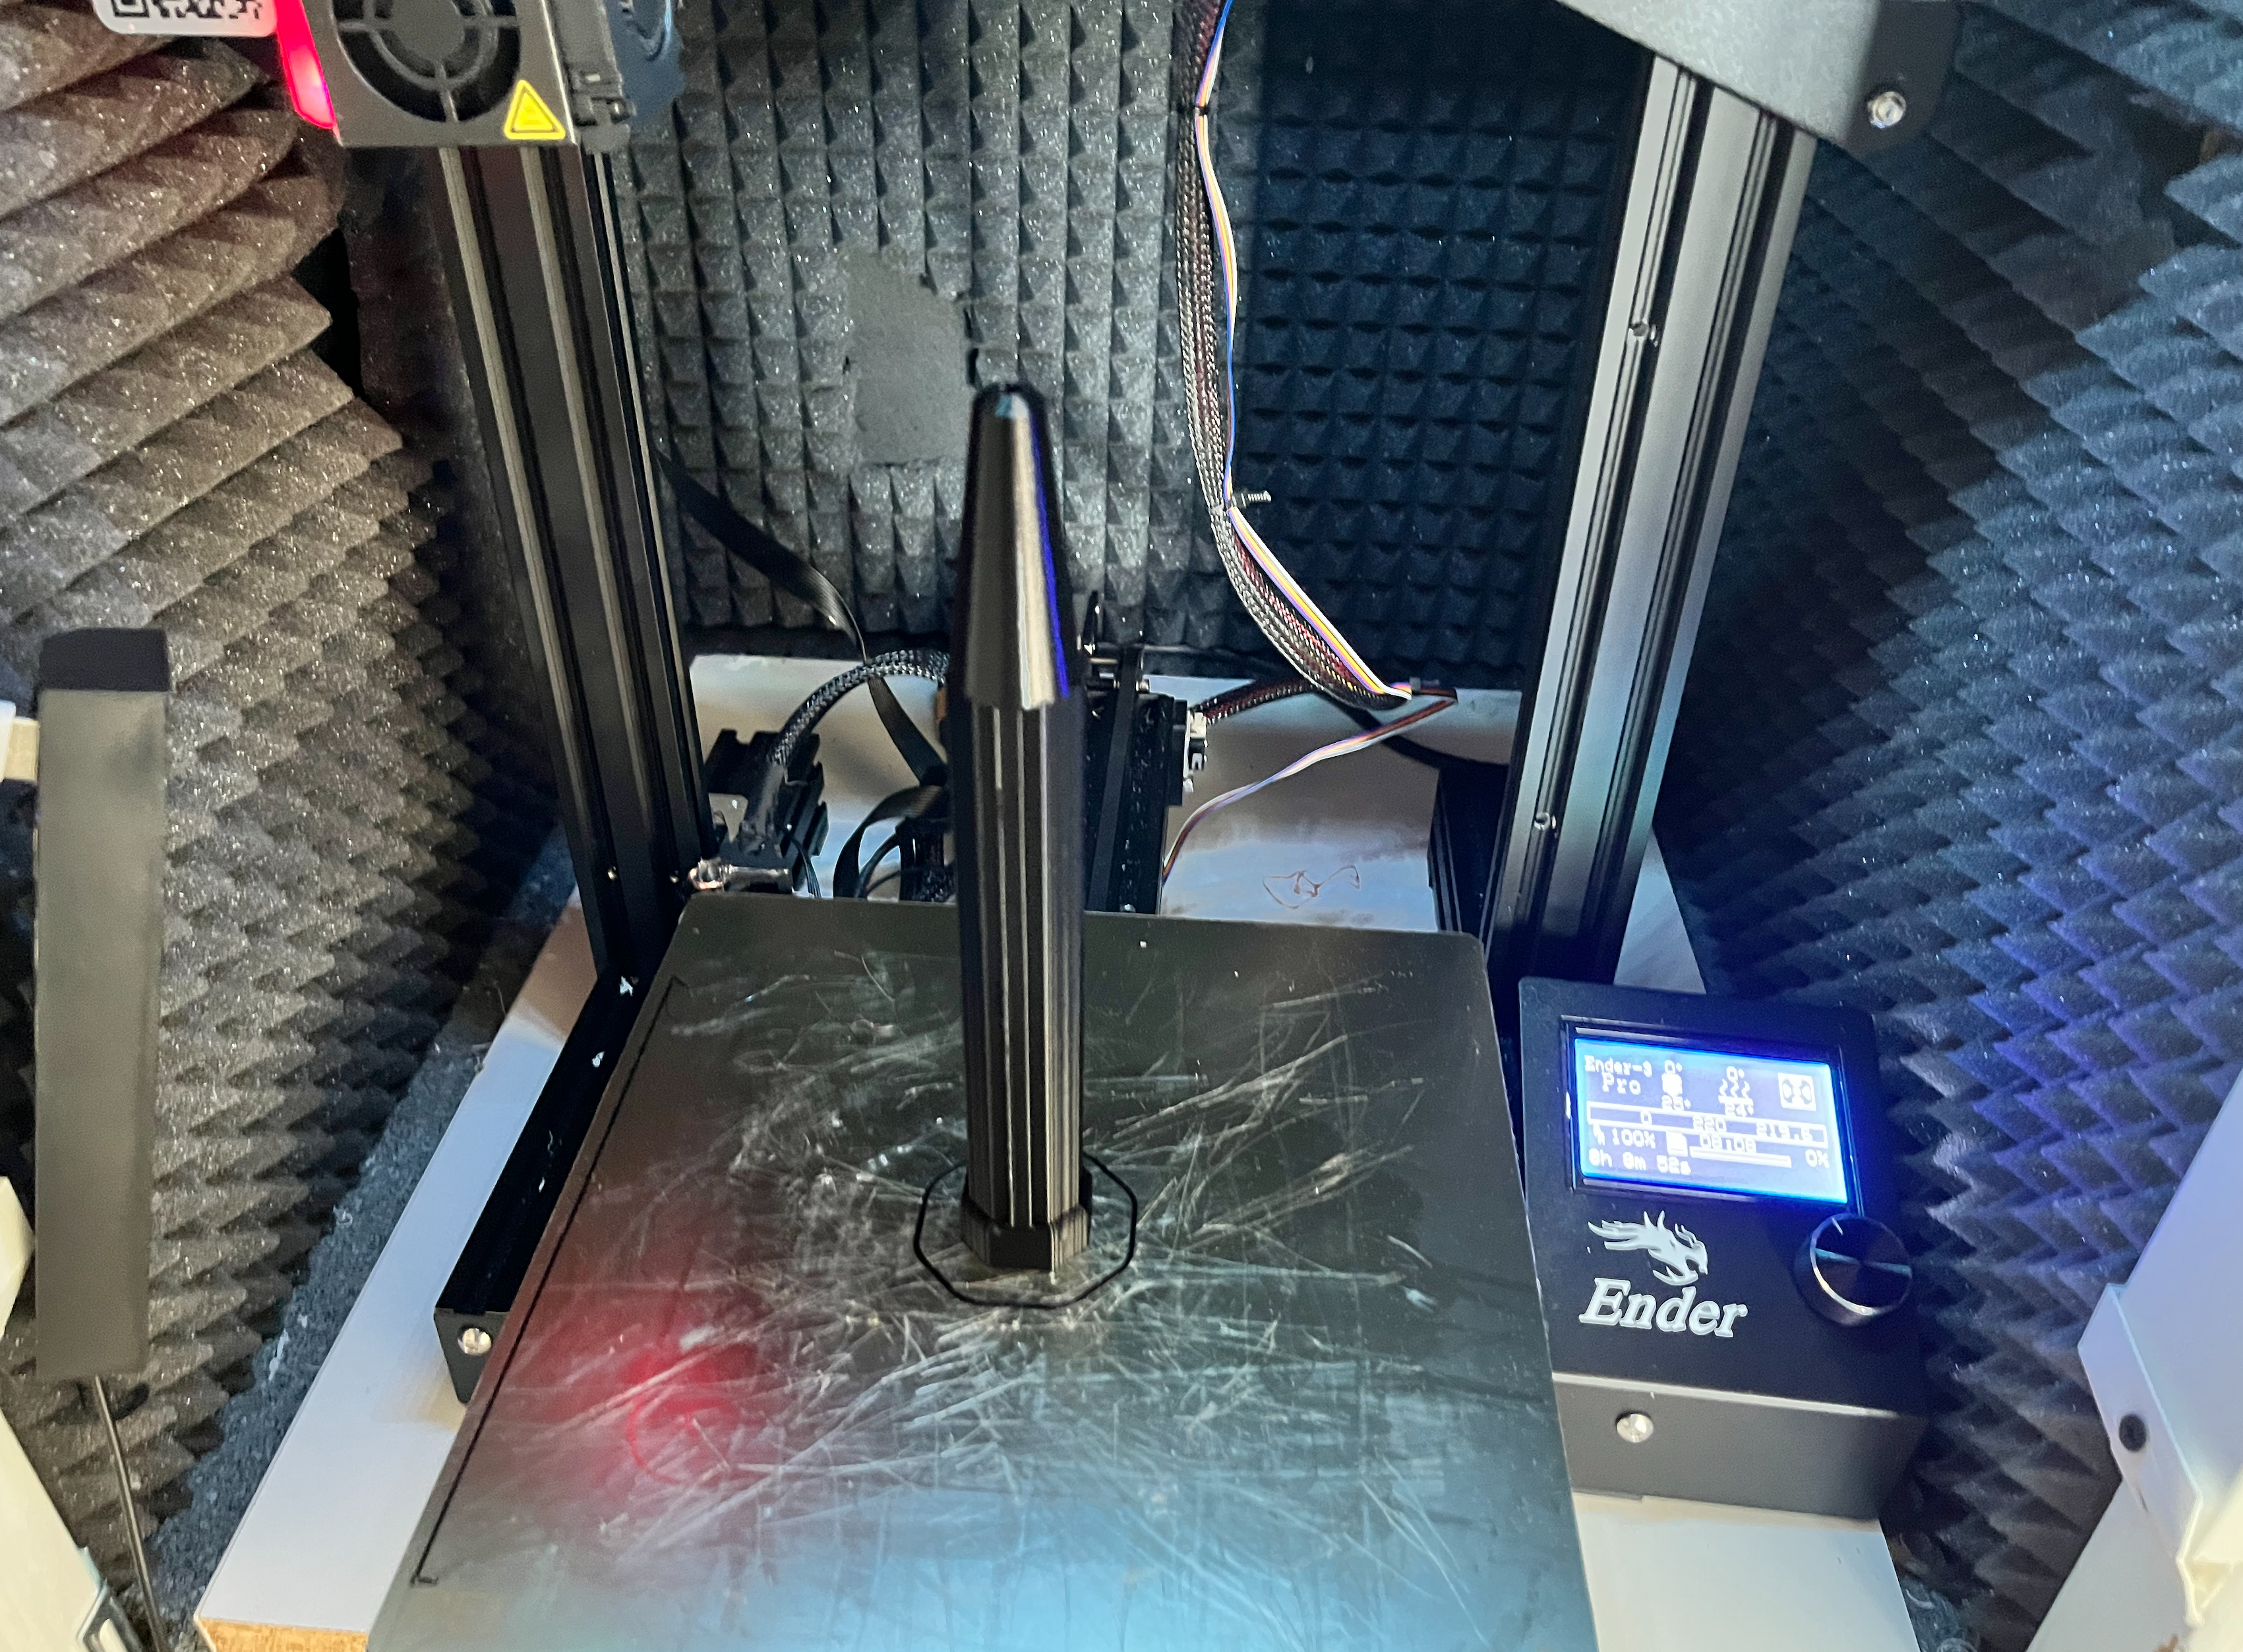
Designing the Handle

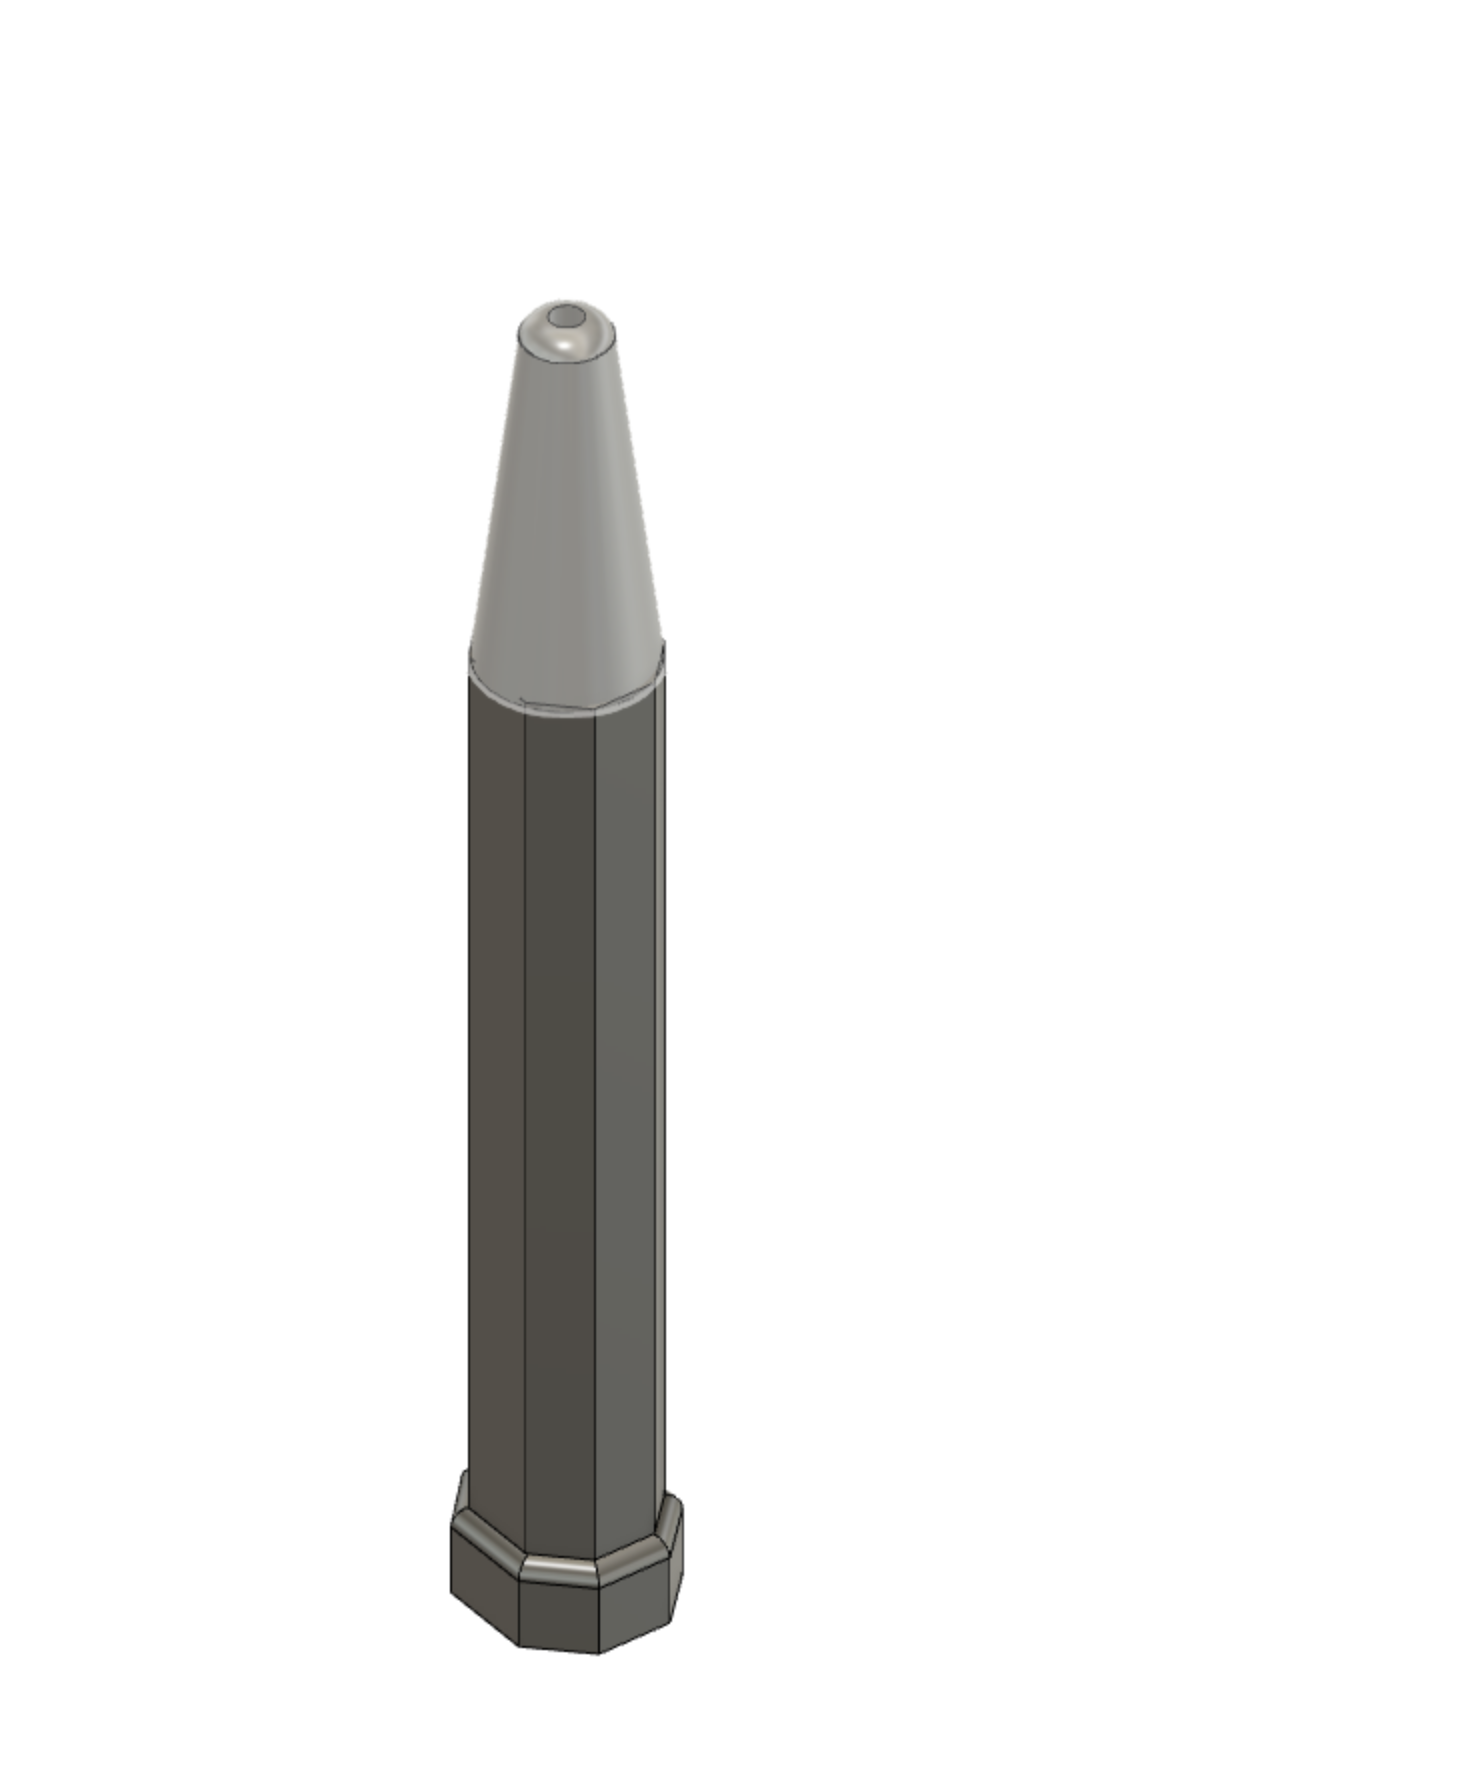
- Take picture of the handle from above (make sure the camera is level to the bottom of the handle.
- Insert -> Canvas
- Extrude 14mm (0.55in). This will create a thicker part at the end of the handle so that your hand doesn't slip off.
- Move -> Copy. Move 14mm (0.55in) to the top and scale down a bit.
- Fillet a bit so that it doesn't hurt your hand.
- Extrude to the top to make the handle 155mm (6.10in) long
- Draw a 5mm (0.19in) diameter circle and use Move for it to be 55mm (2.16in) above the existing part of the handle.
- Turn the view to the front and draw a shape to later Revolve.
- This will create a strong conic shape to which a carbon rod can be put.
Handle done!
Let's Print
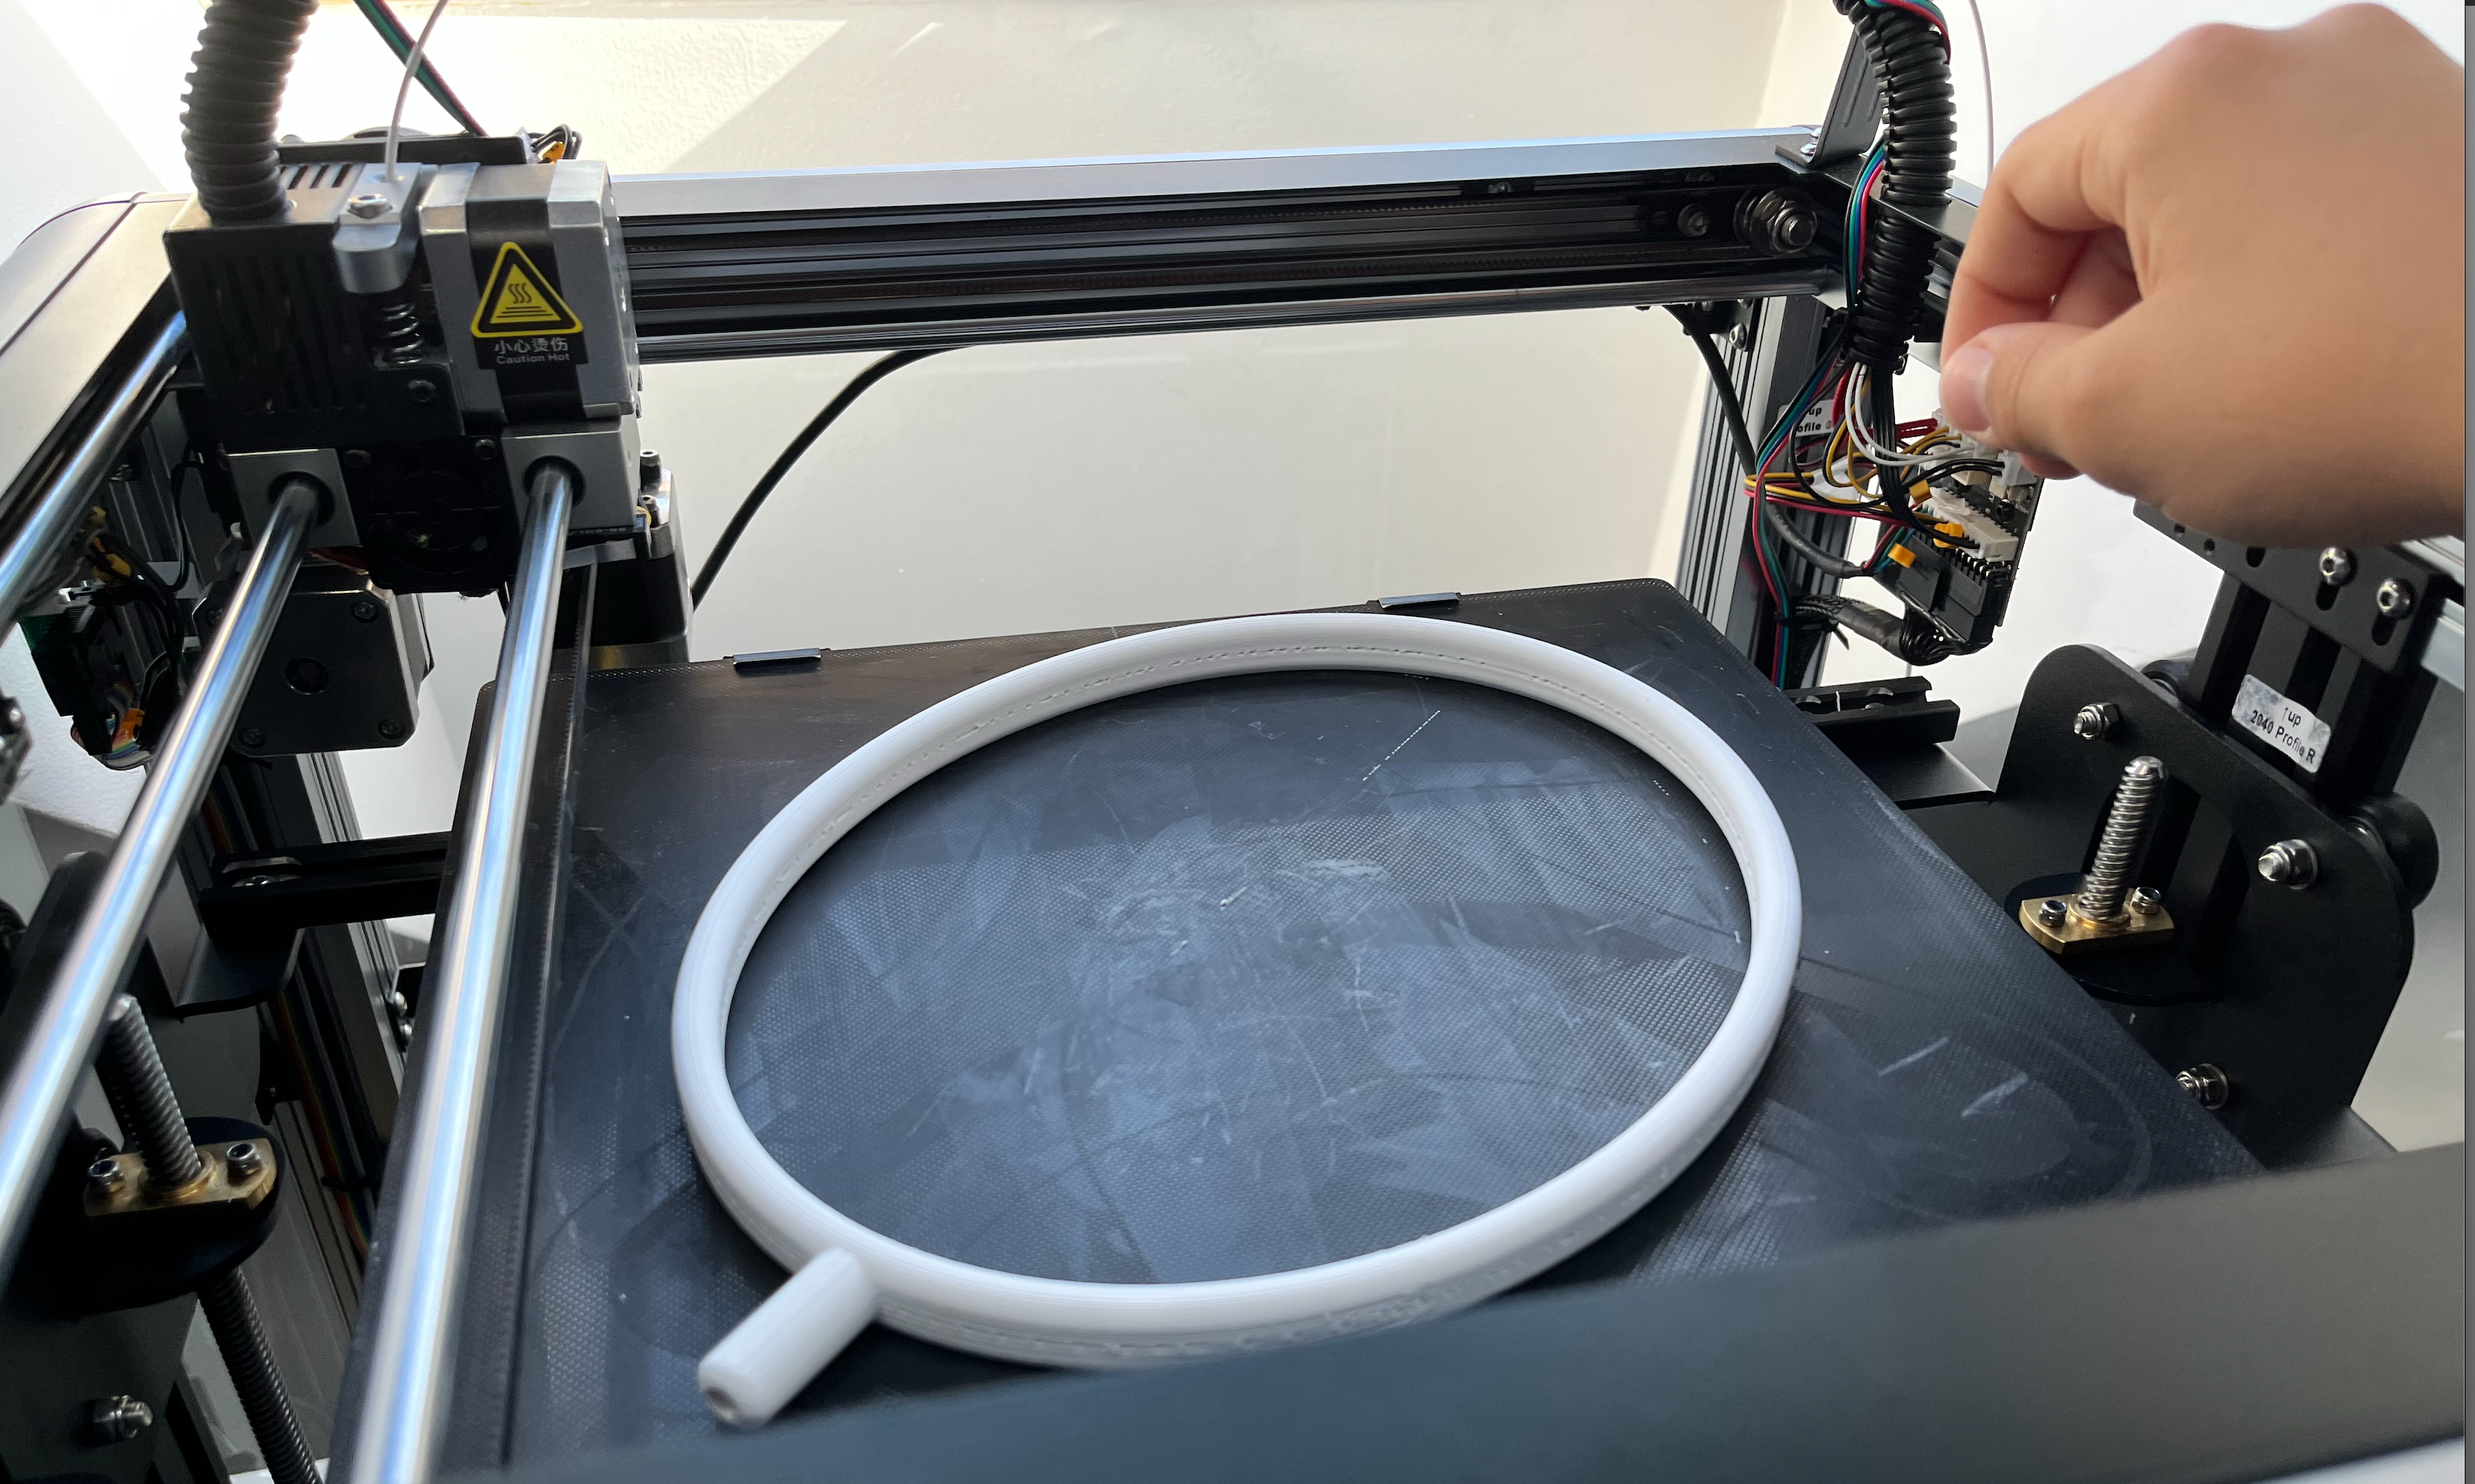
I used the following settings in my slicer:
- Layer height: 0.2mm
- Wall line count: 3
- Infill: triangles 50% (the parts have to be strong as they experience high G-forces when hitting the shuttlecock, especially the handle which can be printed vertically)
- Support: optional (better ring quality)
If the ring doesn't fit on your printer's bed, turn off build plate adhesion (skirt, brim, etc.)
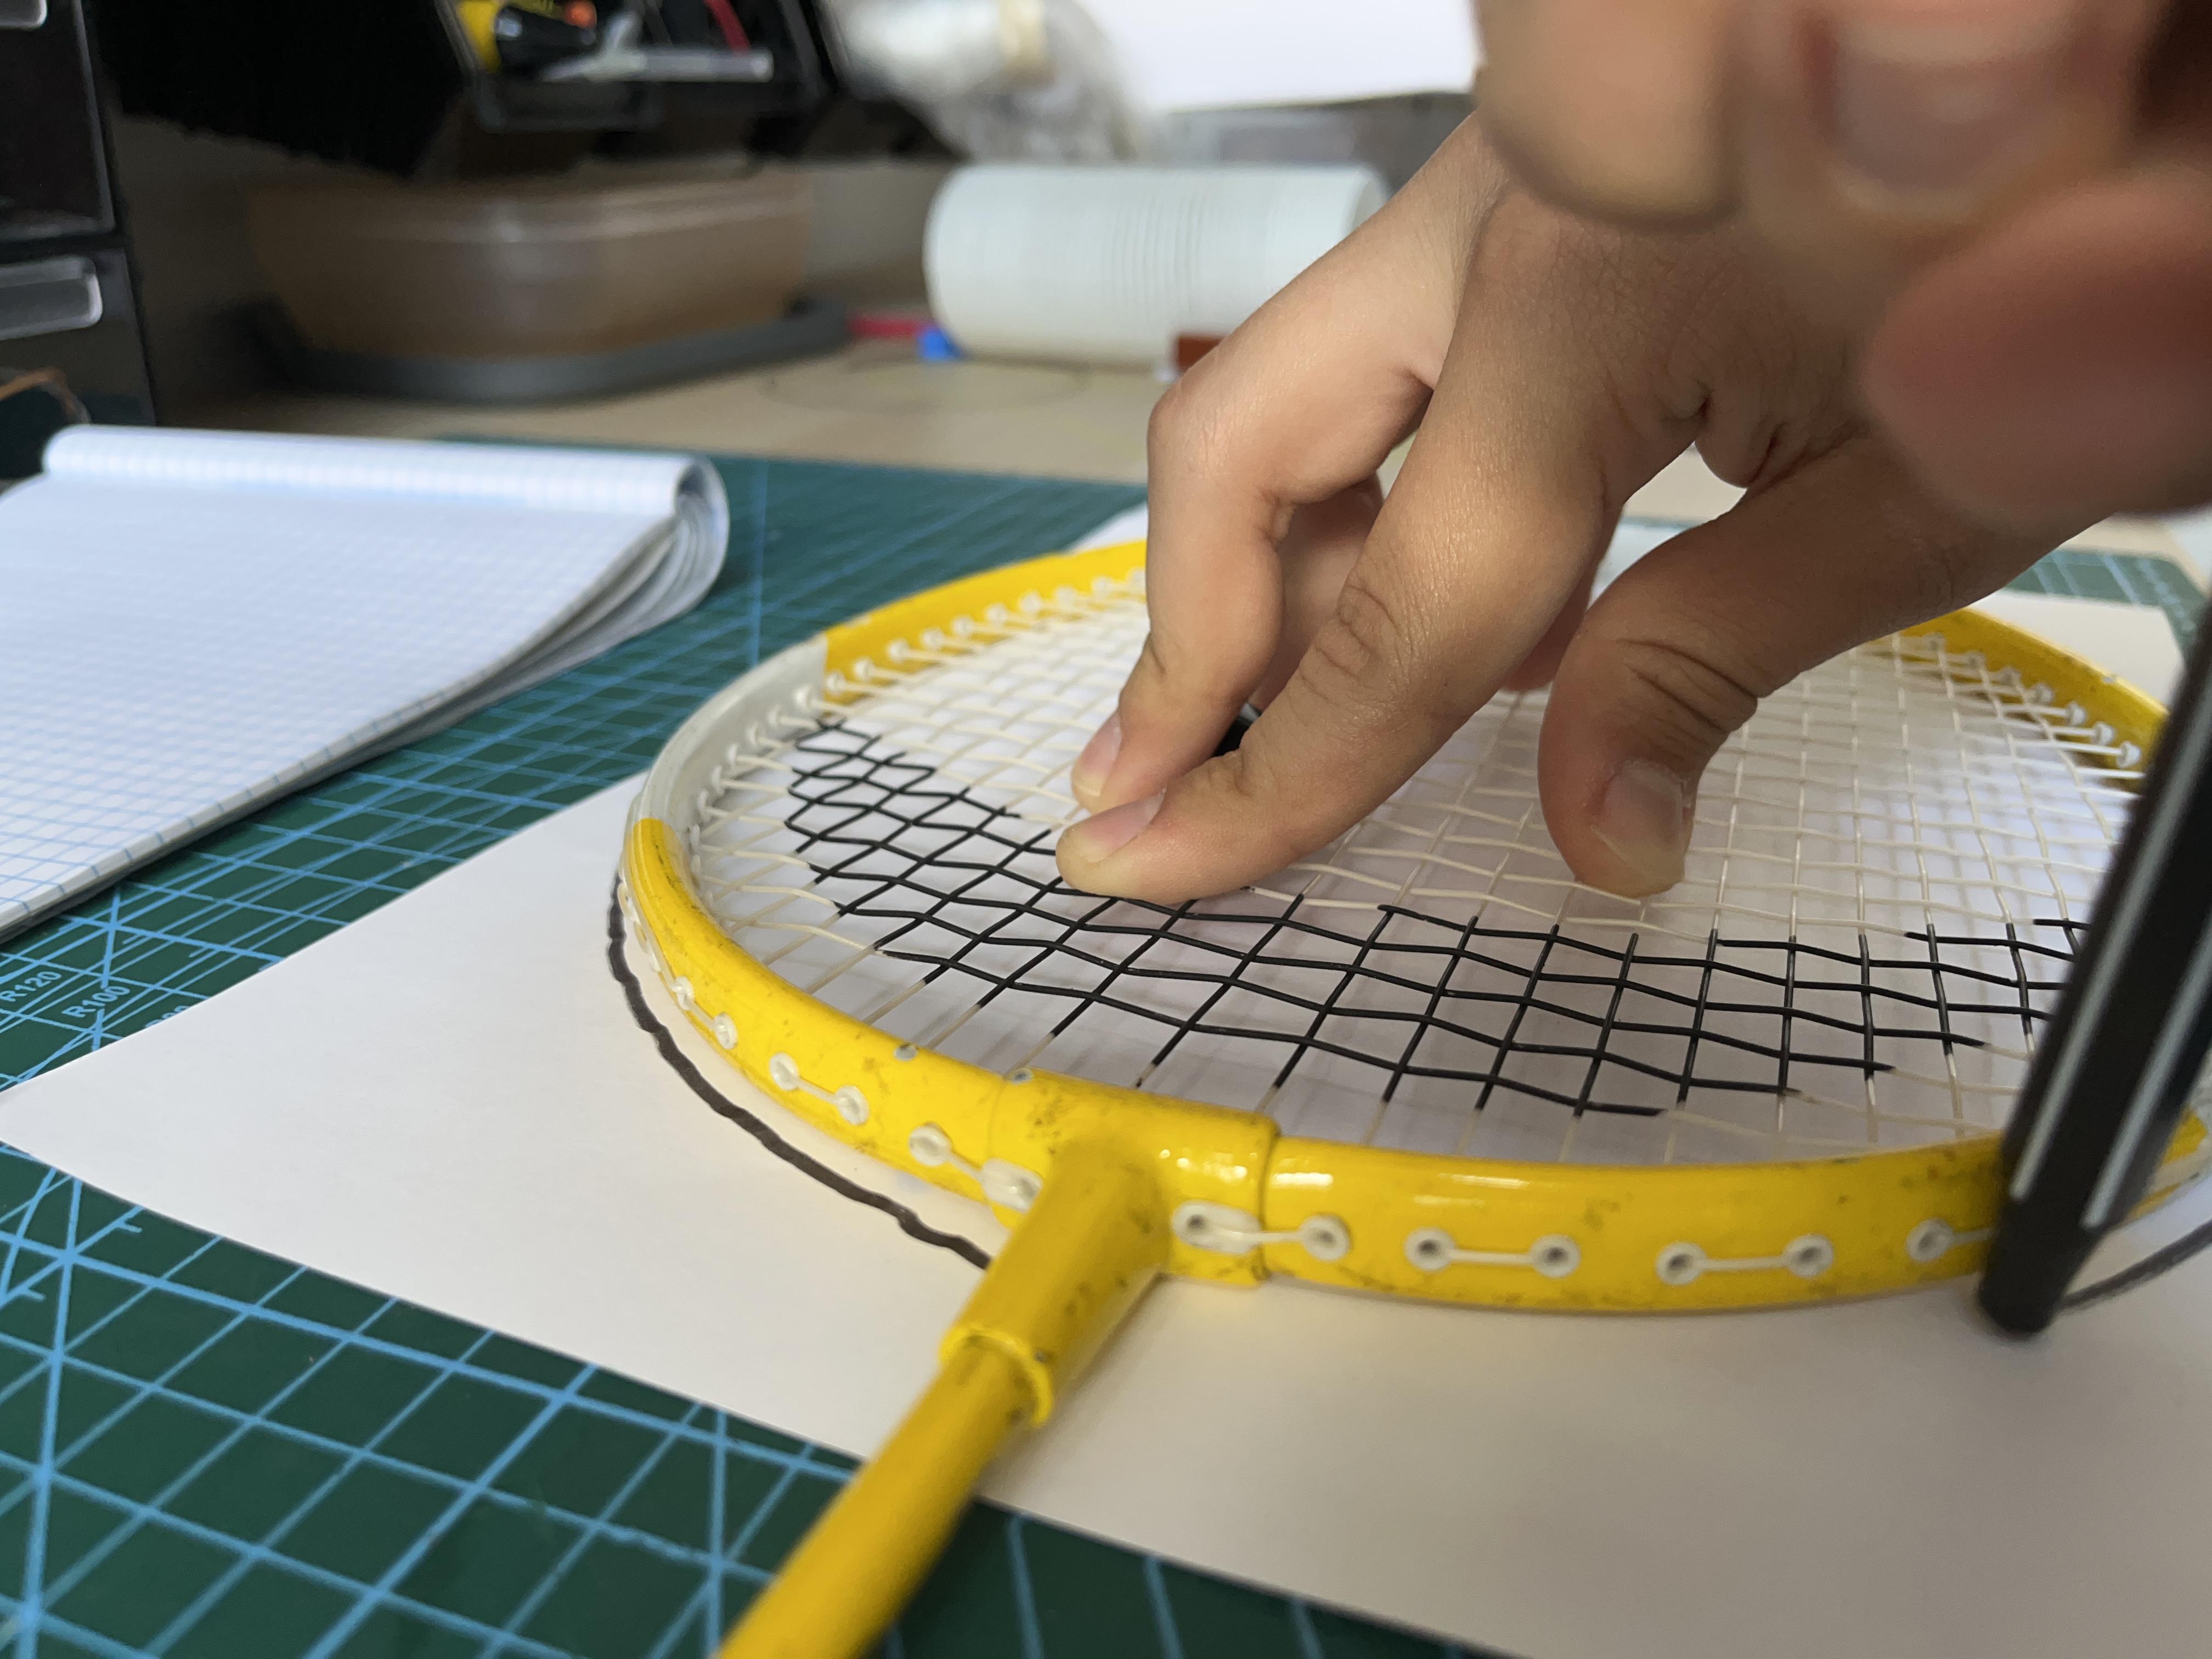
Putting Fishing Line Through Holes
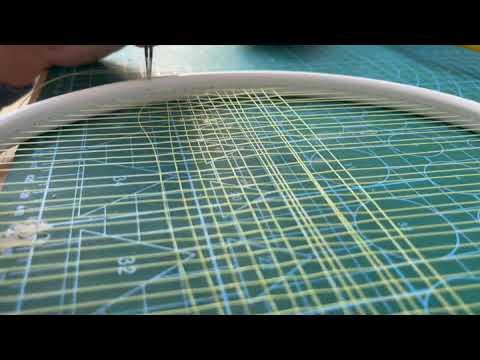
I'm sorry to say that but this is the most tedious and difficult part of the build.
- Start with vertical lines.
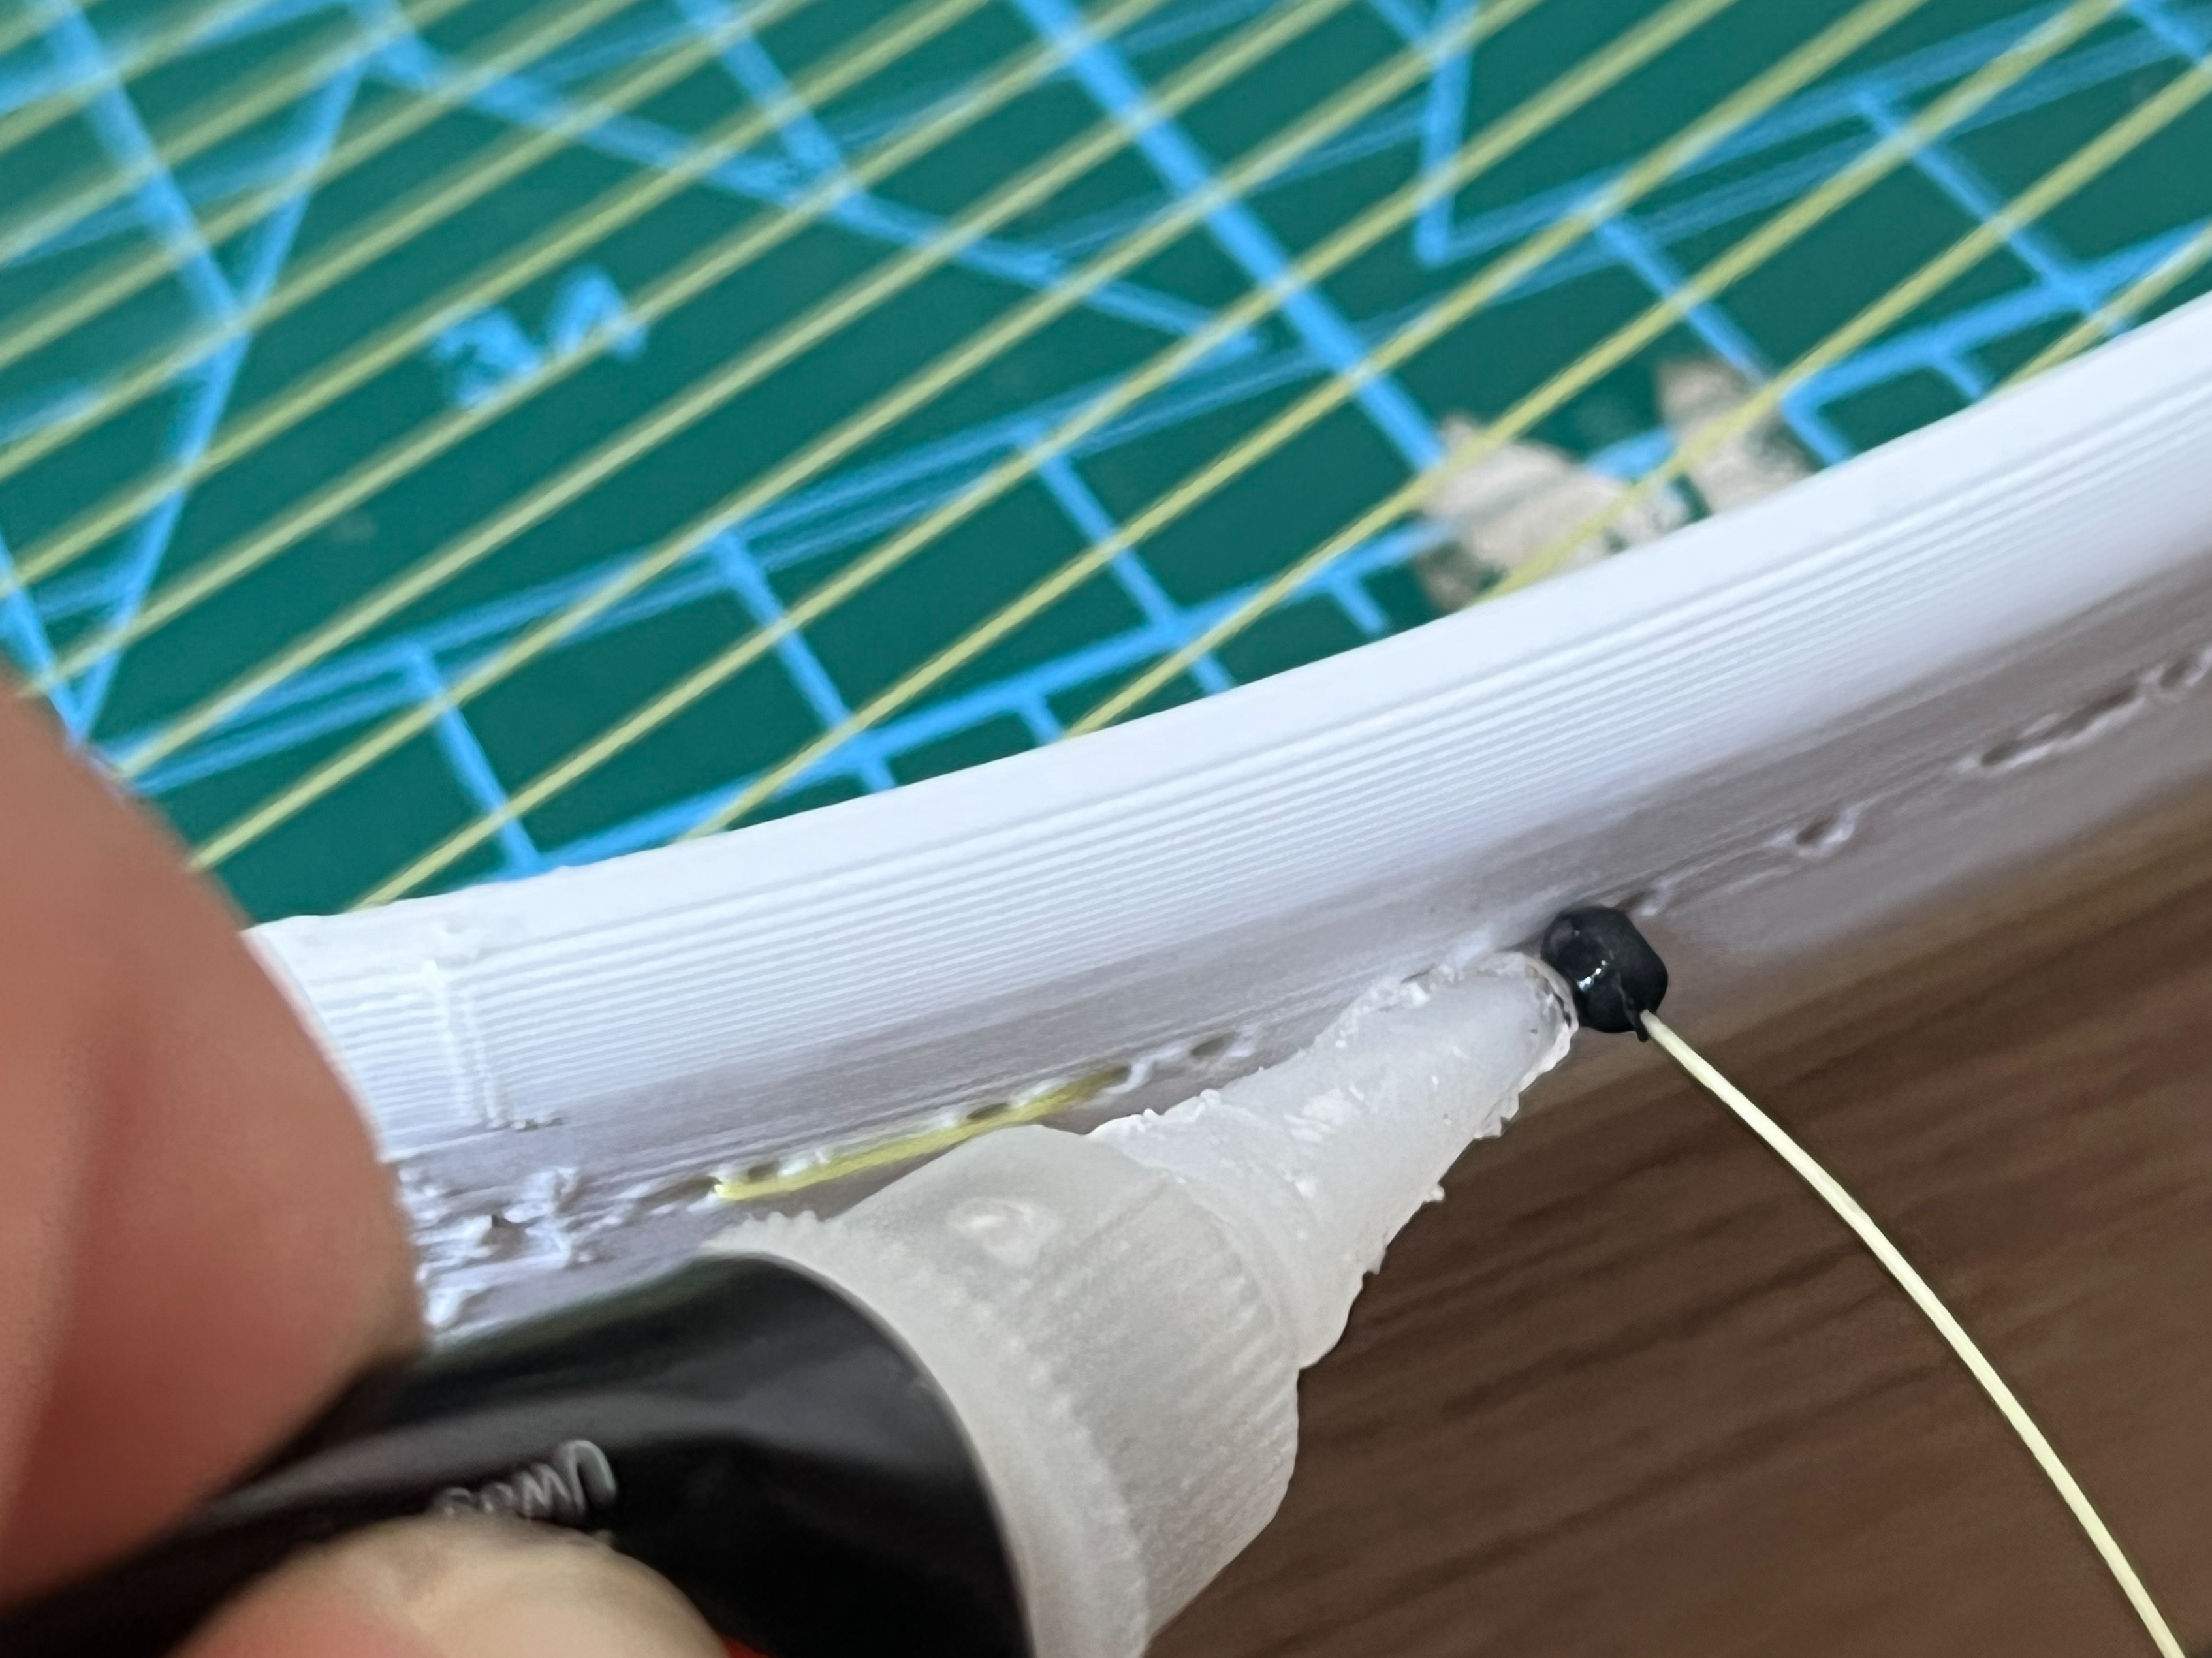
- Measure and cut about 6-7m (19.68 feet) of fishing line and use a stopper when putting through the first hole to keep the beginning of the wire in place. Use some super glue to make sure the wire won't slip when hit by a shuttlecock.
- Put it through each hole, a needle might be helpful.
- Now, horizontal lines. Put the wire through the first hole and use a fishing line stopper as well. Then go under and over and under and over the vertical lines over and over again until you reach the hole. You should be fine with just 15 of them in the center.
Tip: always turn the ring with the side facing you to see the holes going through. That way you'll know which holes are for vertical lines and which for horizontal ones. Use small pliers to maneuver the line.
- Remember to put stoppers at both vertical and horizontal lines' ends.
Carbon Rod
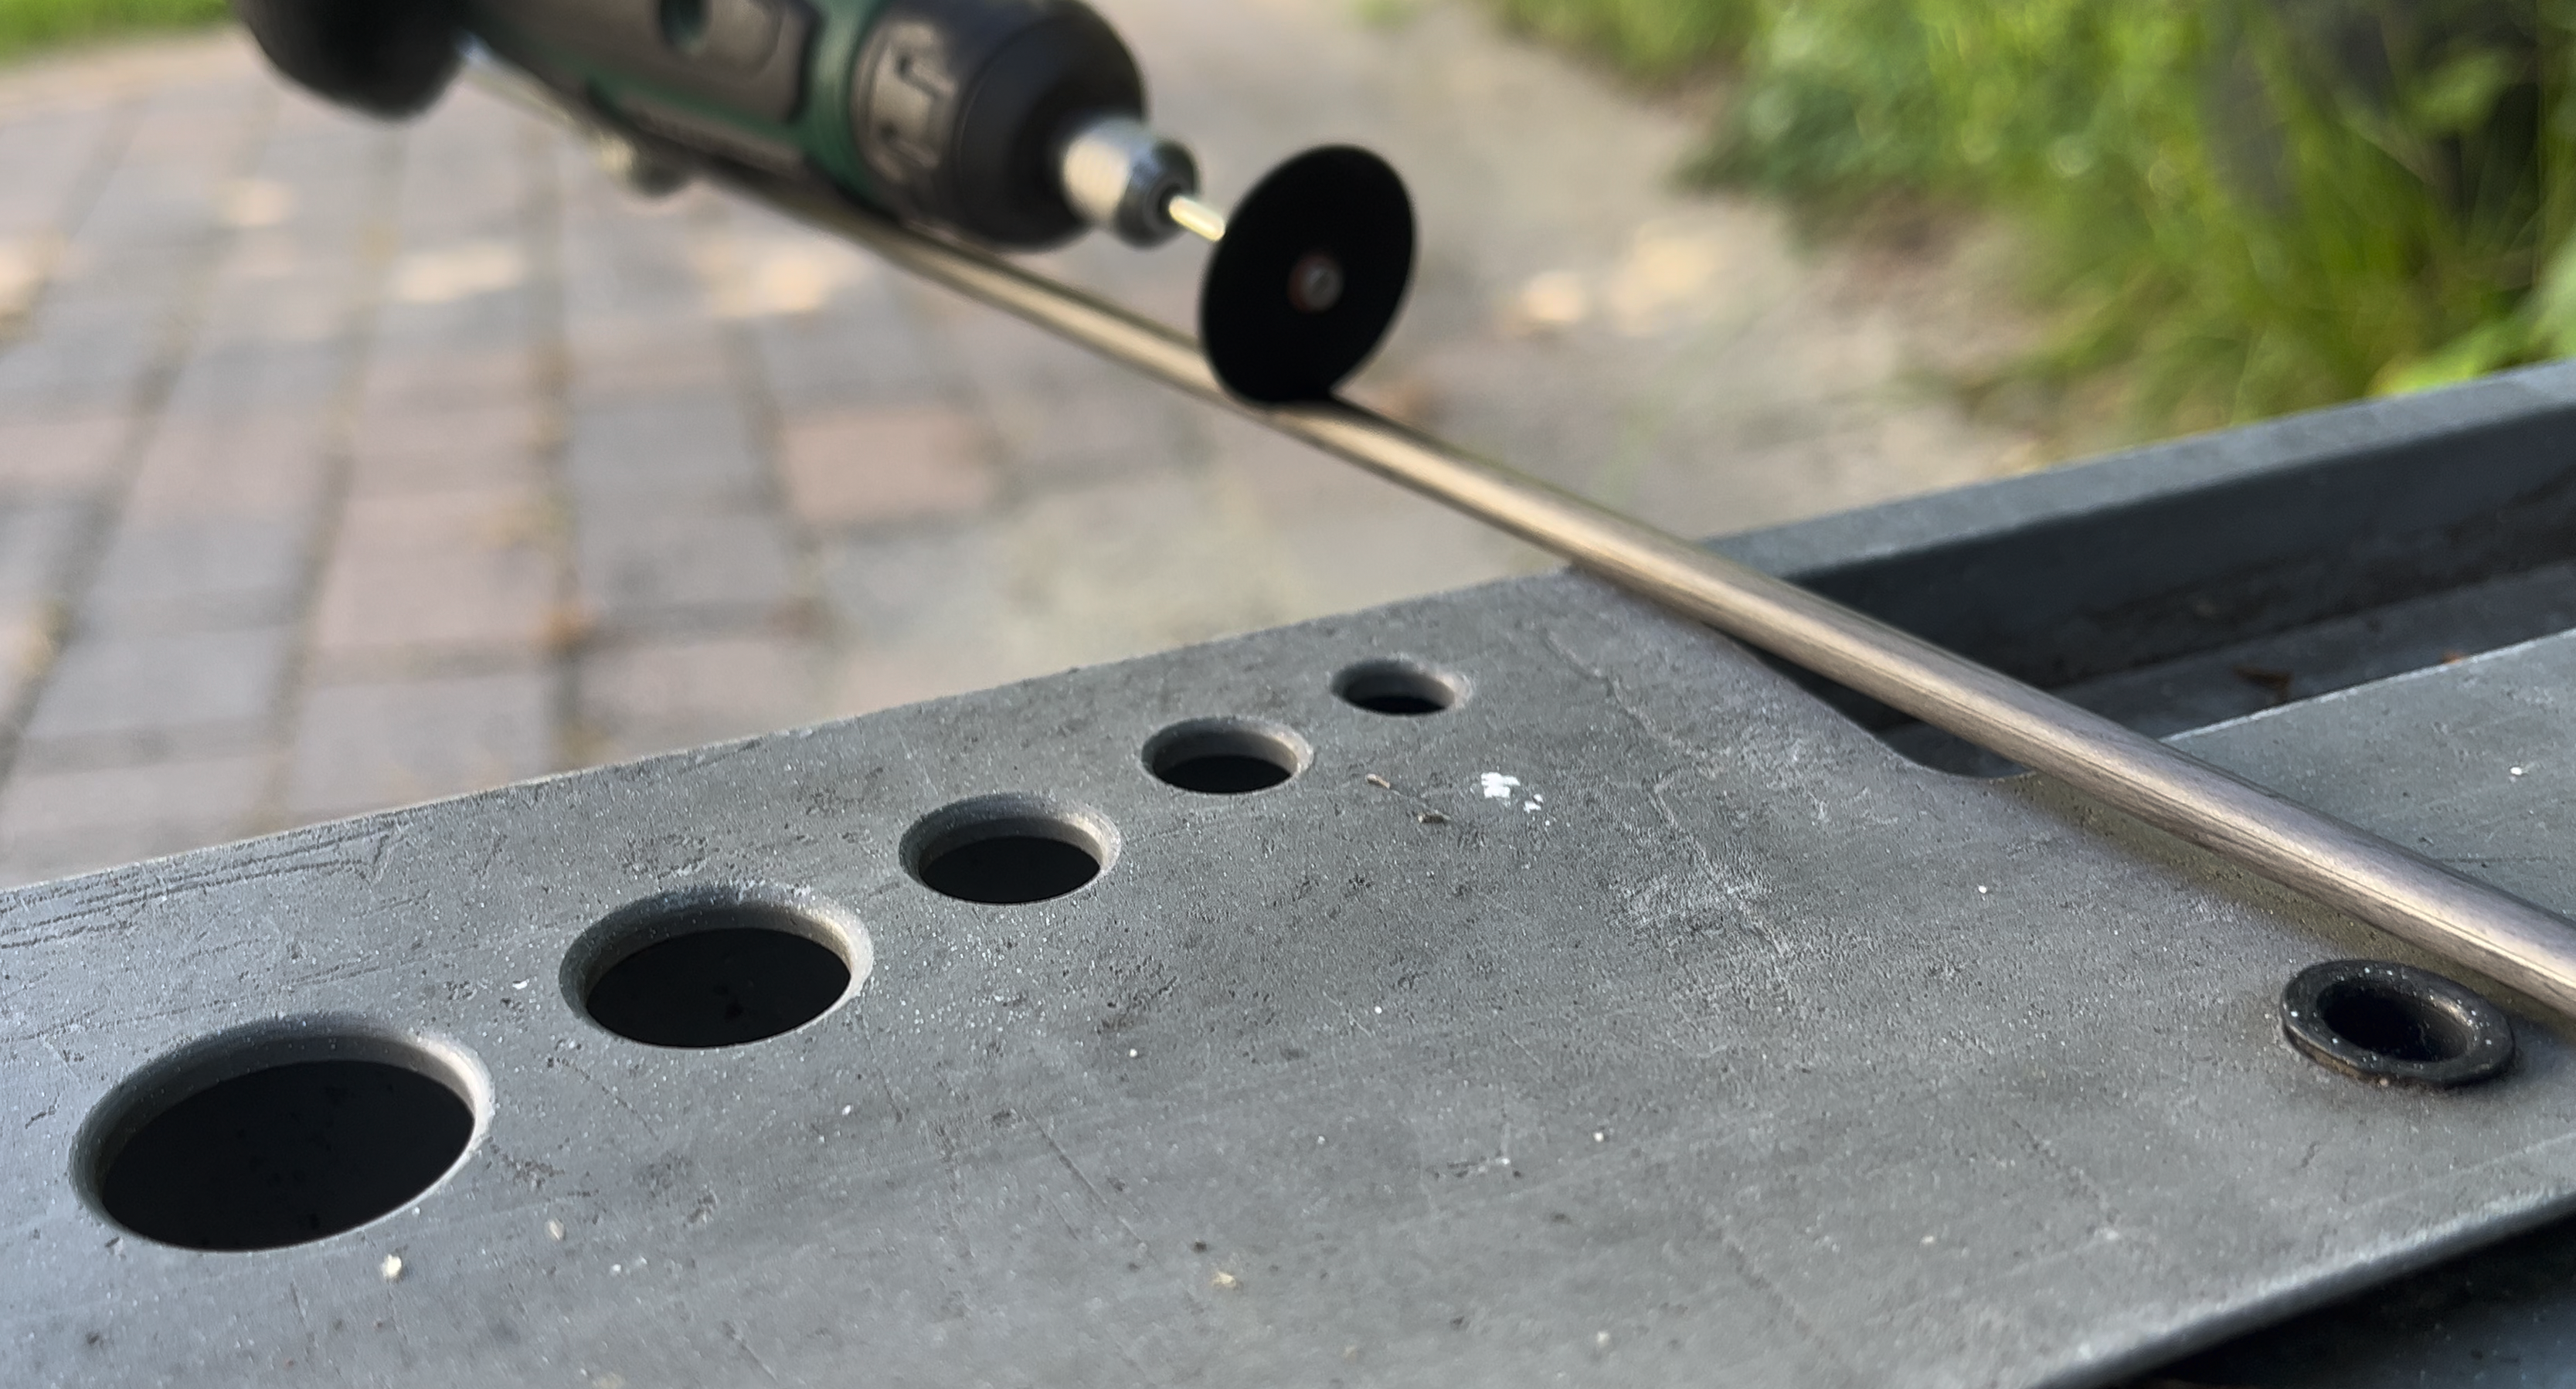
- Cut the carbon rod to 26cm (10.2in) in length. It's best to use a cutting wheel. Caution! Only cut carbon fiber outside or in a well-ventilated area. Wear gloves, facemask, and goggles.
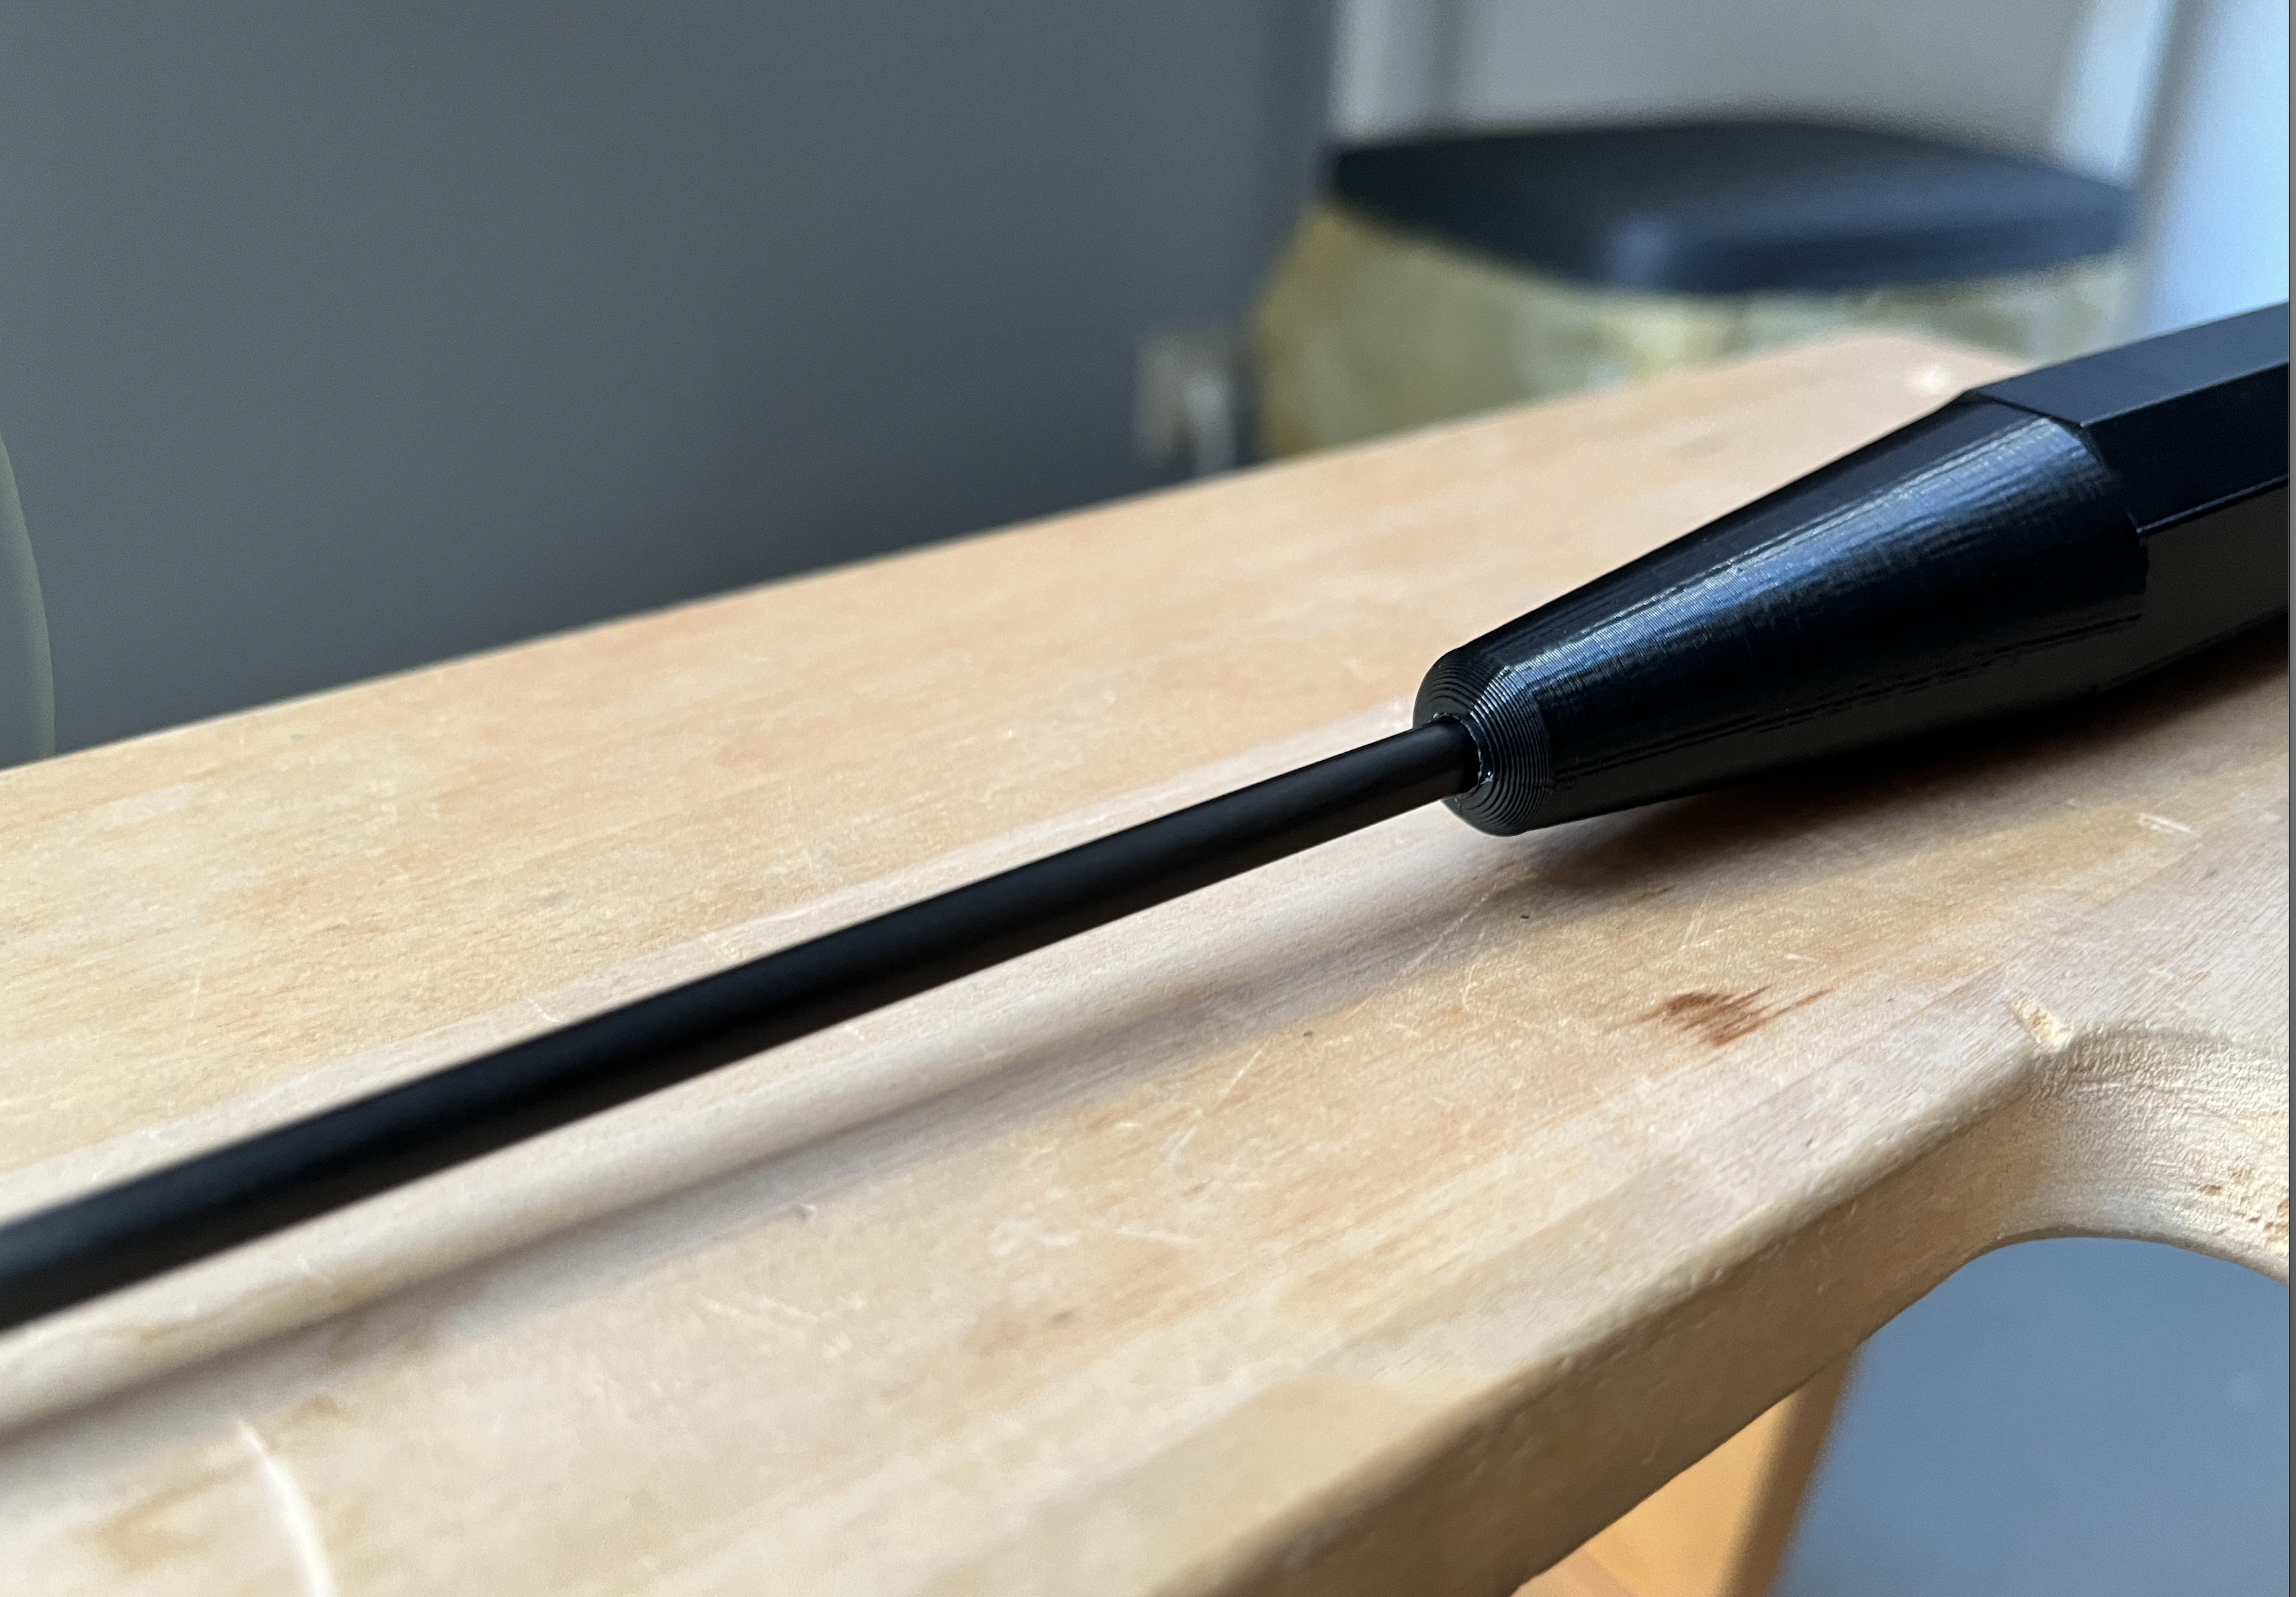
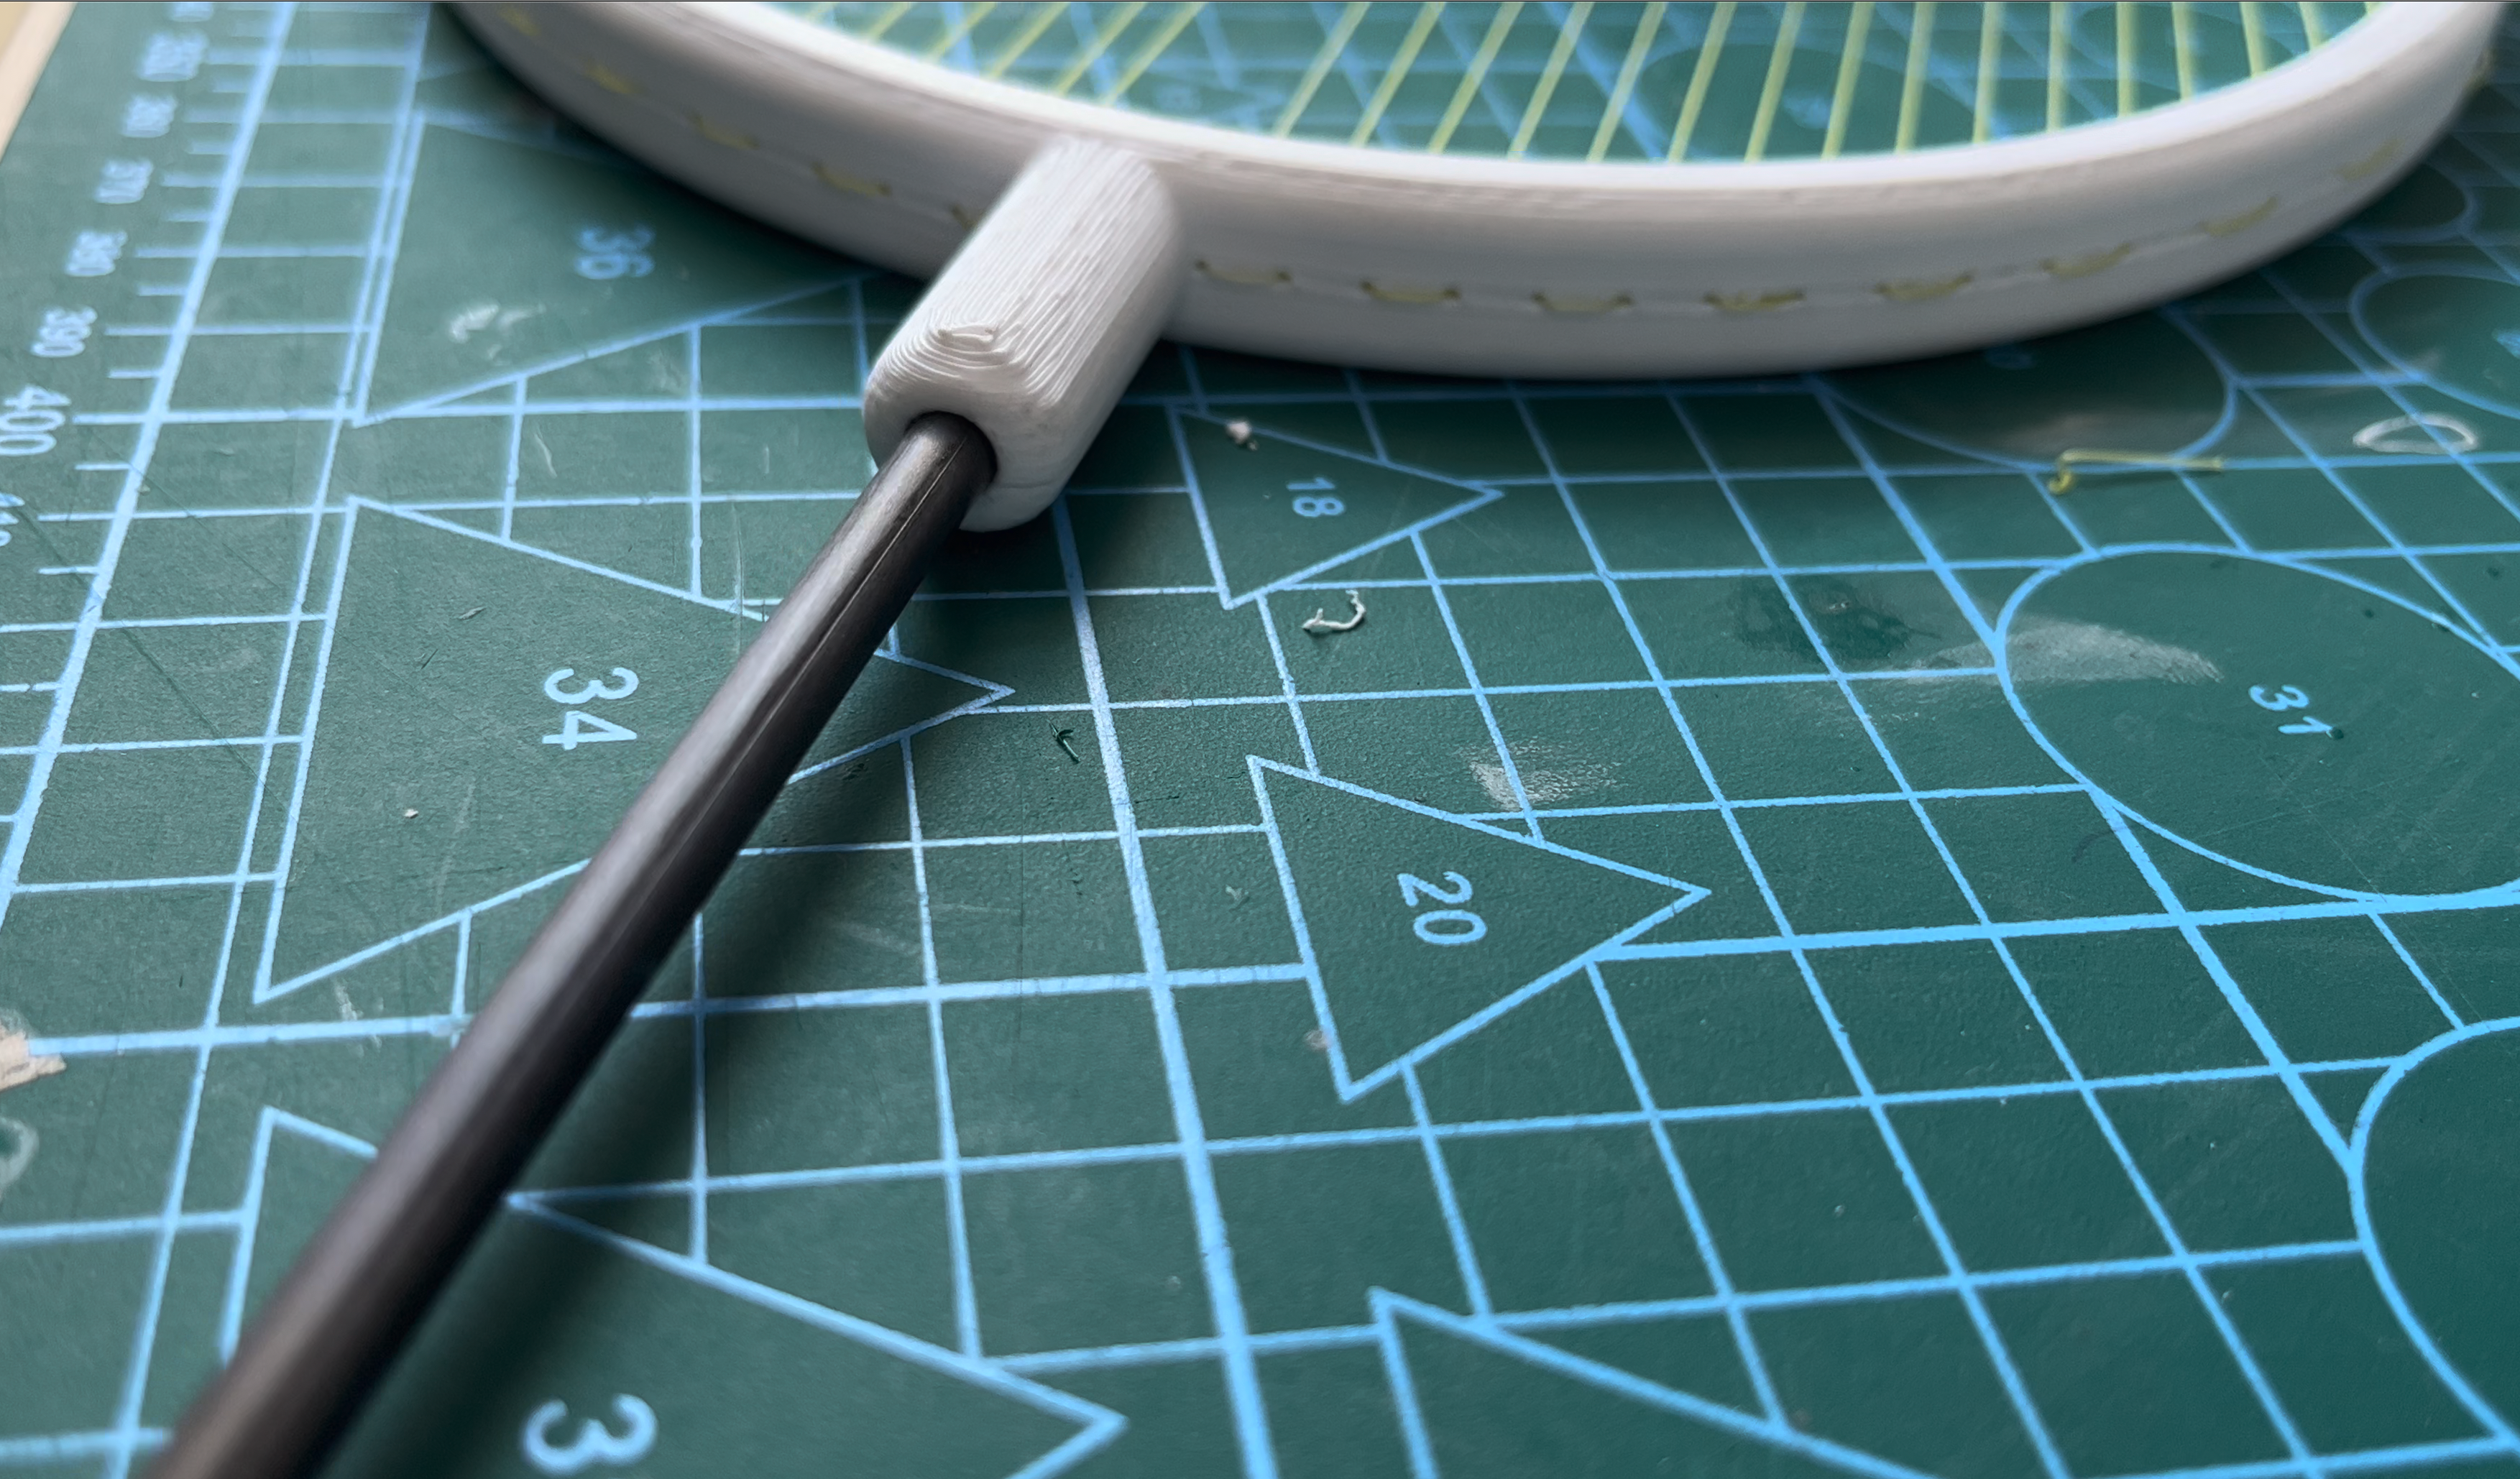
- Insert the carbon rod into the handle, and use some glue and a hammer to make sure it doesn't come off and hit someone when playing. Repeat for rod-to-ring connection.
You can use some tape for better grip but in my case, it wasn't needed.
Done! Let's Play
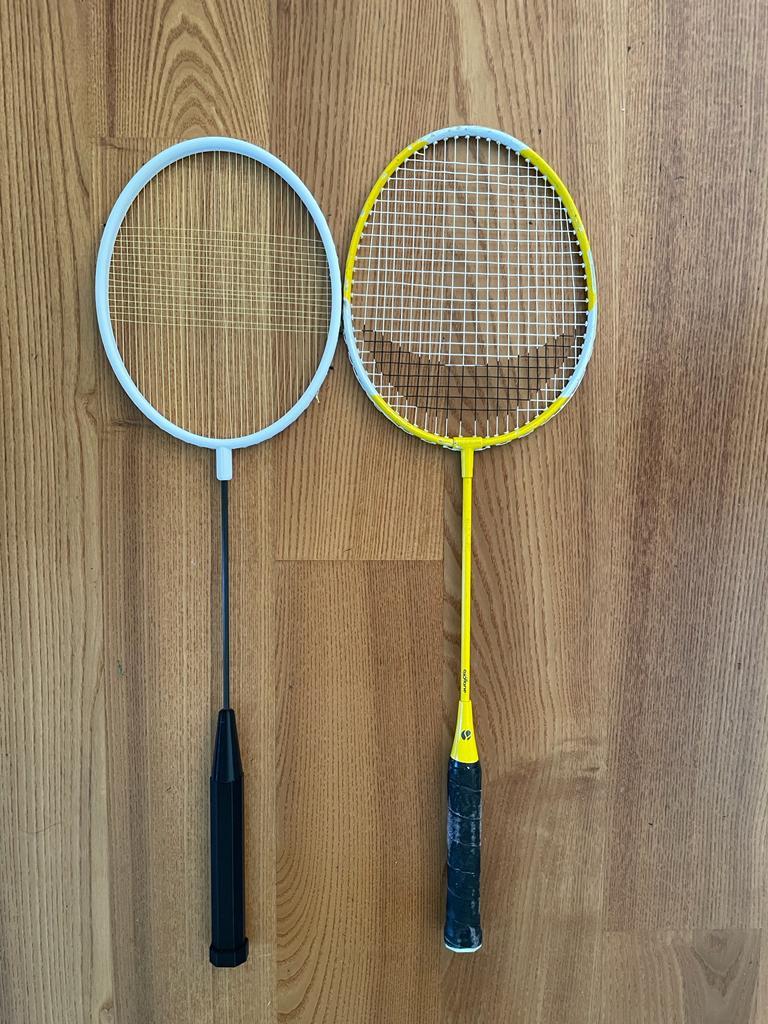

You've finally finished your 3D printed badminton racket! Congrats! Here's some footage of me playing (with me cut out :D)
My School
I'm currently enrolled in 5th High School in Bielsko-Biała.