3D-Printable Chess Set With Custom Board
by Anurag2302 in Design > Art
588 Views, 3 Favorites, 0 Comments
3D-Printable Chess Set With Custom Board
Hello! The mighty people of instructables, ever wondered what to do with the leftover filament for your 3D printer? here's an idea, let us go ahead and design a chess set which we can print and play with in real life! We wont be making a boring ol' conventional chess set, we shall add our own twist to it. This is a really cool, productive and innovative way to use that leftover filament, isn't it?
Supplies
1. Basics of TinkerCAD
2. A lot of patience
3. A full mug of coffee
4. Some good music
5. Knowledge of every chess opening ever (just kidding.....unless....)
Step 1
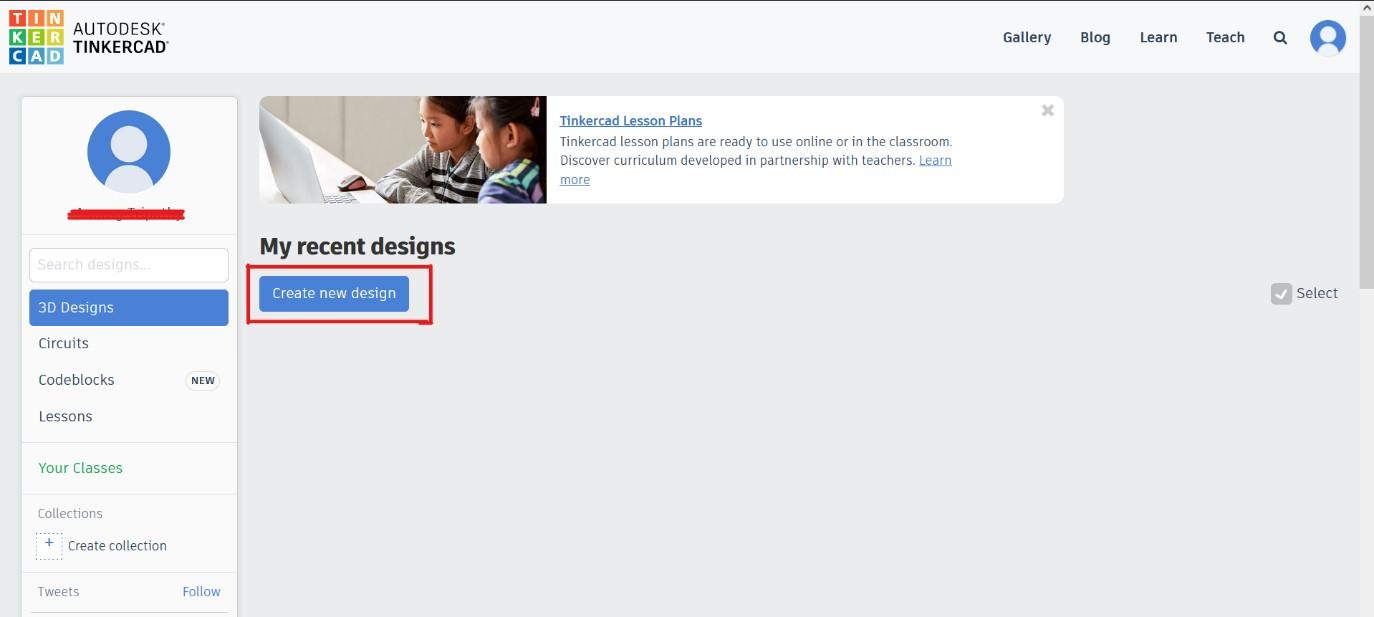
Log into your TinkerCAD account and click on the “Create New
Design” button
Step 2

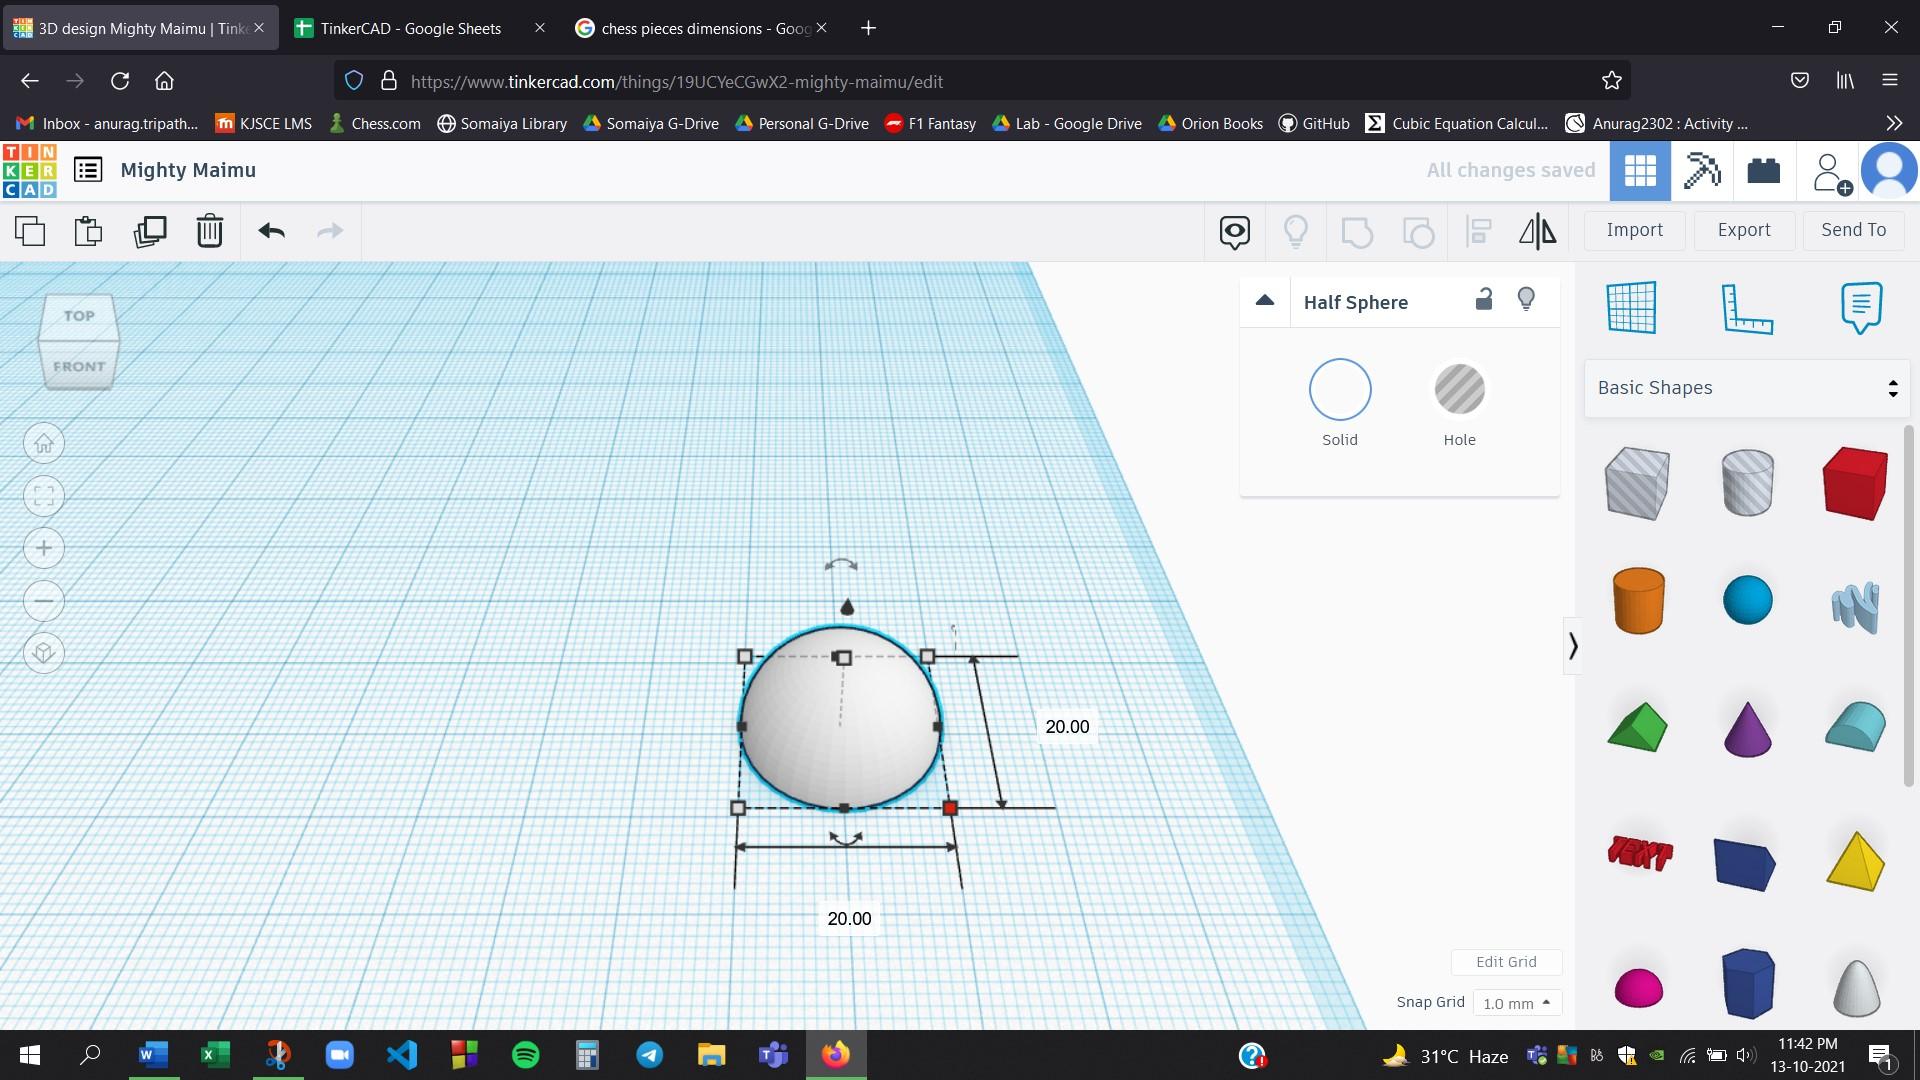
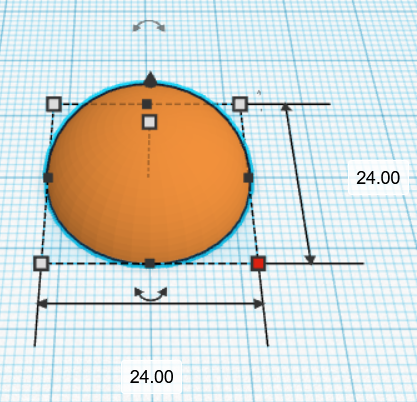
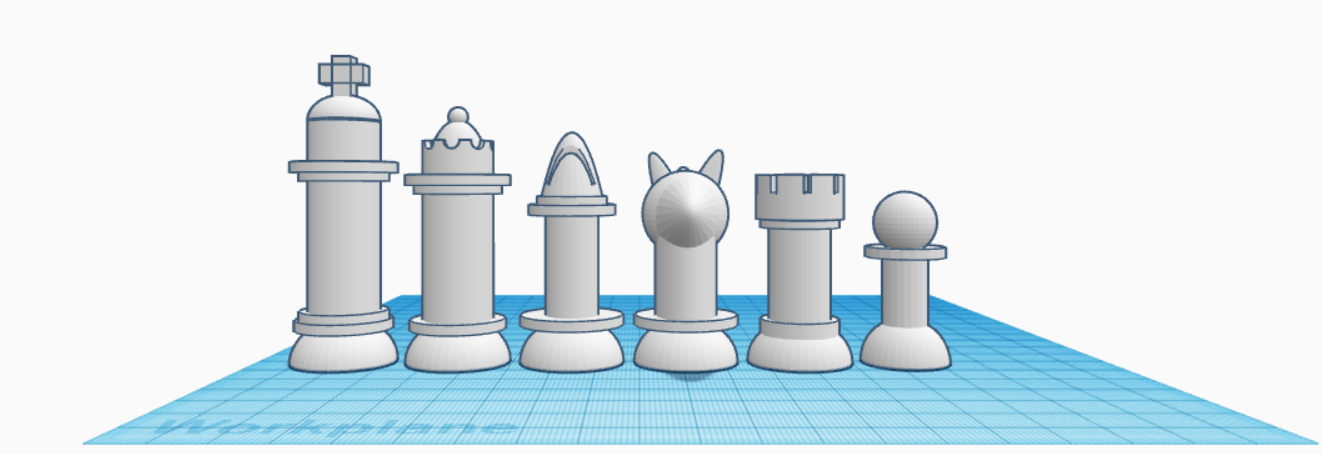
The first piece we would be modelling is the pawn.
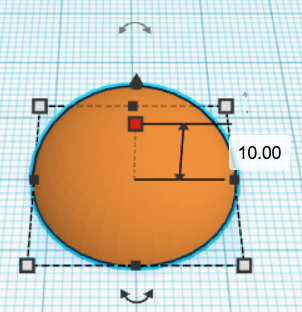
Select the half-sphere from the right-hand side menu and place it on the workplane as shown below:
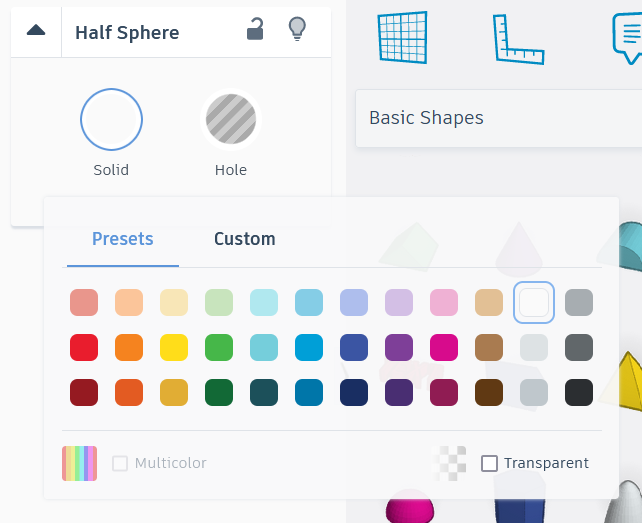
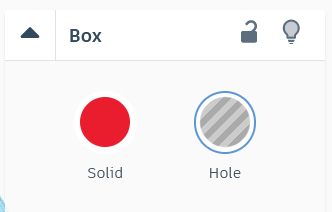
You can change the colour of any shape by selecting the shape, and then selecting the colour by clicking on the “solid” option. In our case, we would be modelling the white pieces.
Step 3
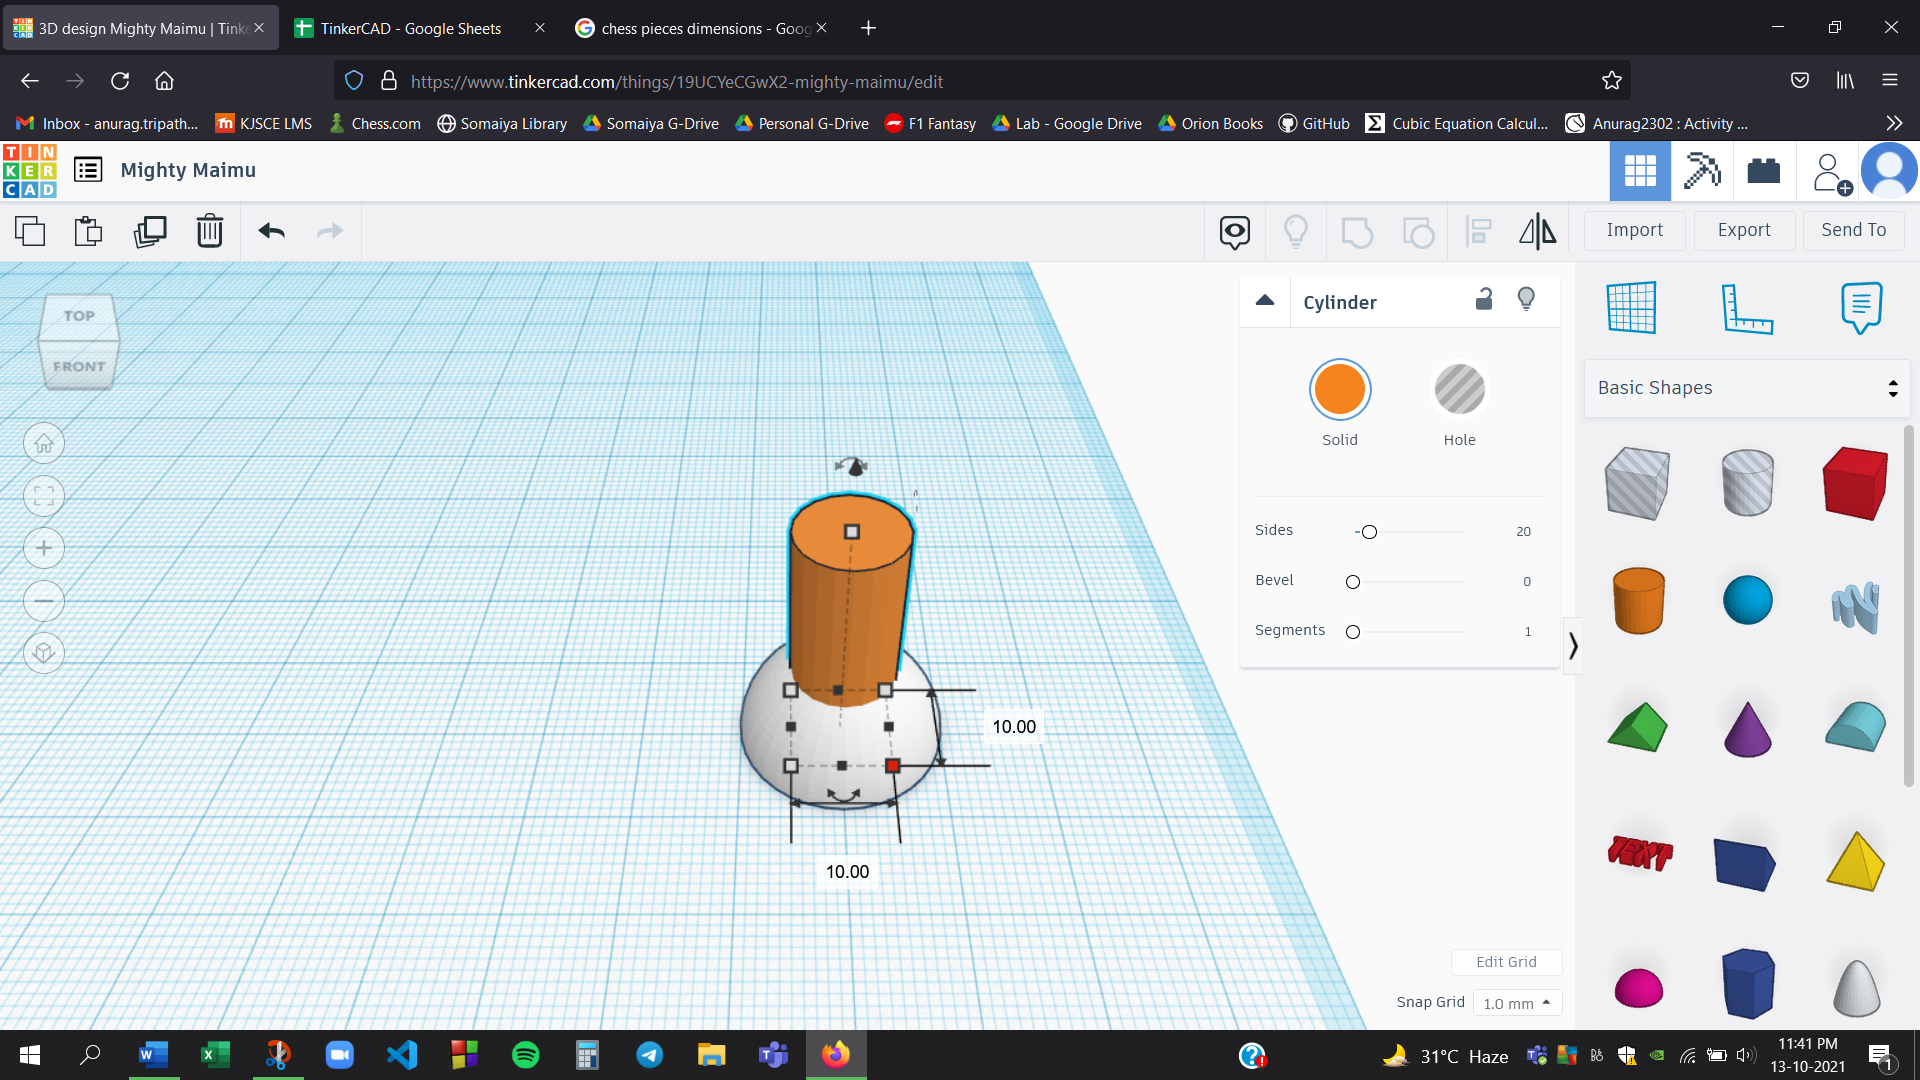
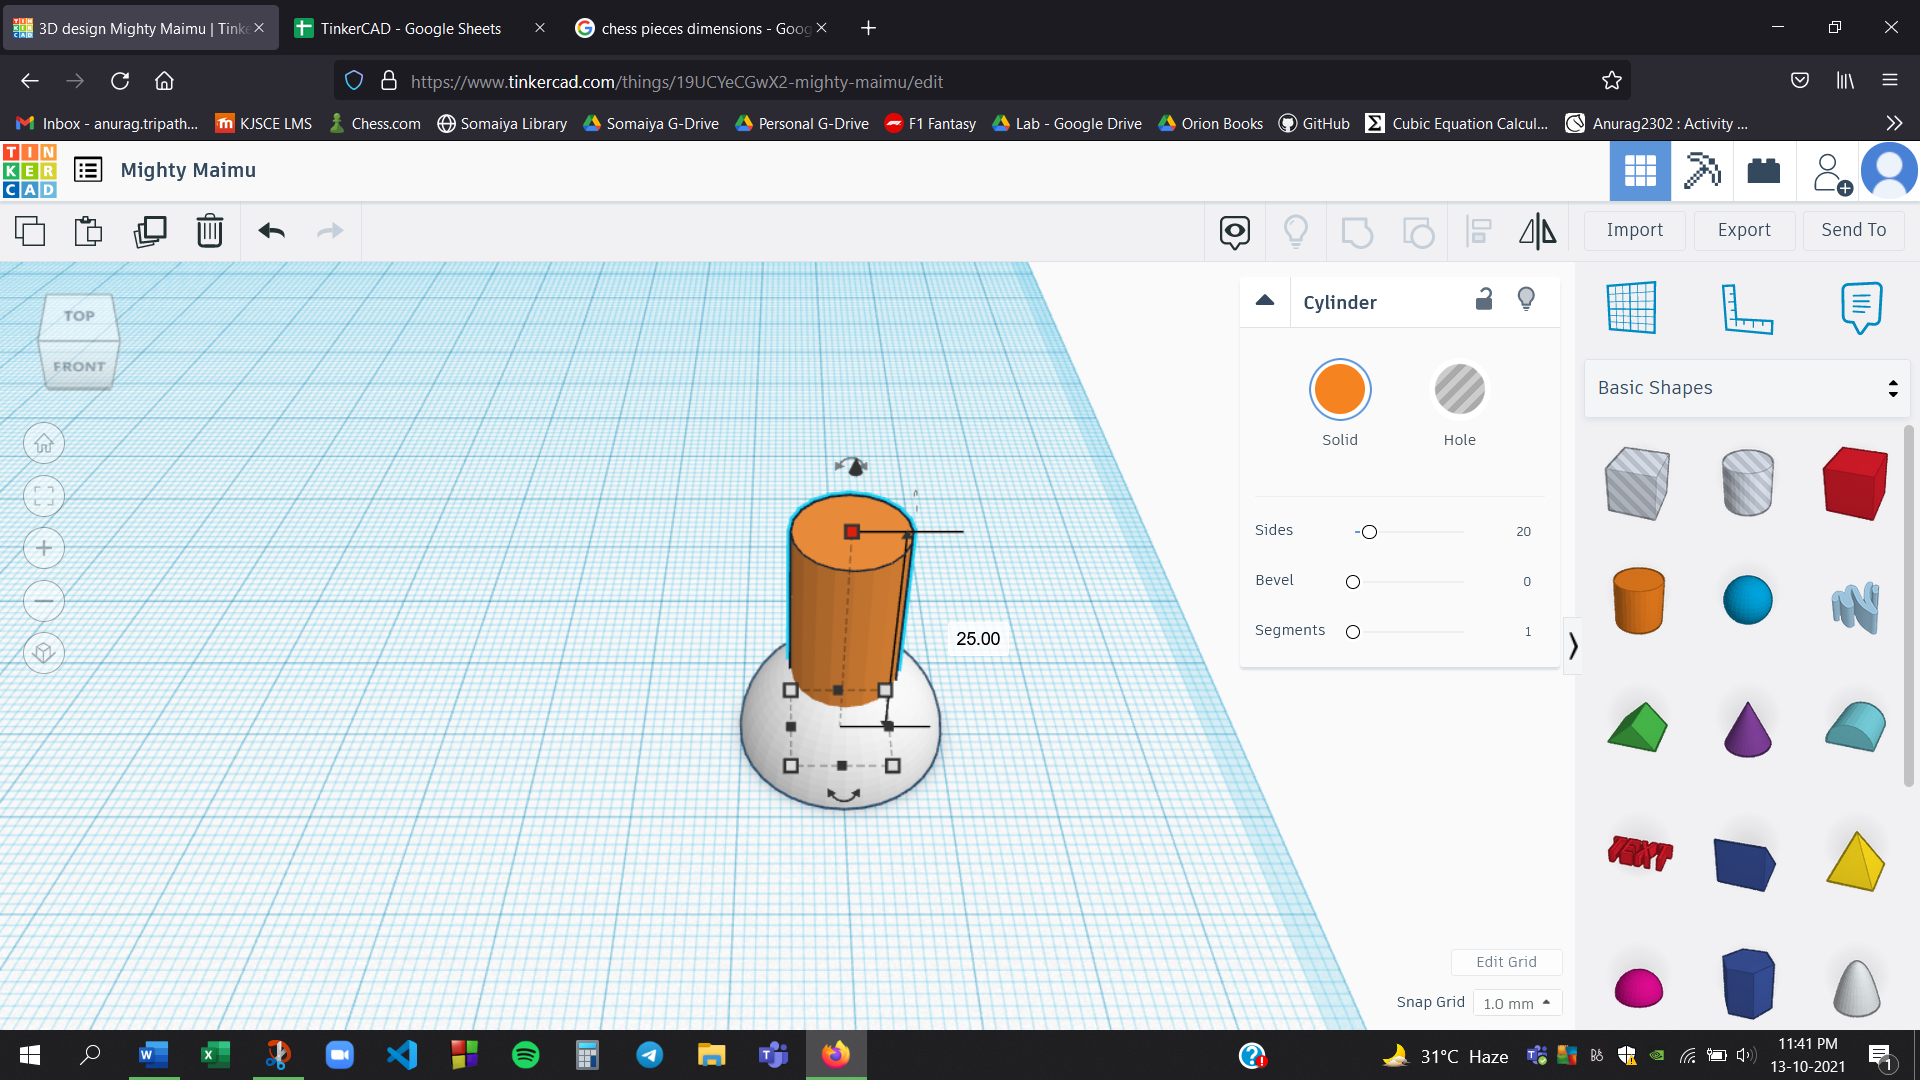
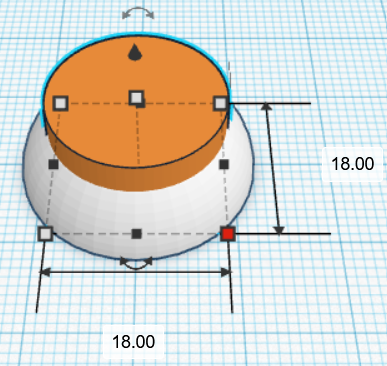
Select the cylinder from the right-hand side menu and place it over the workplane such that the centre of the upper surface of cylinder lies on the same vertical line as the centre of the base of half-sphere.
Step 4
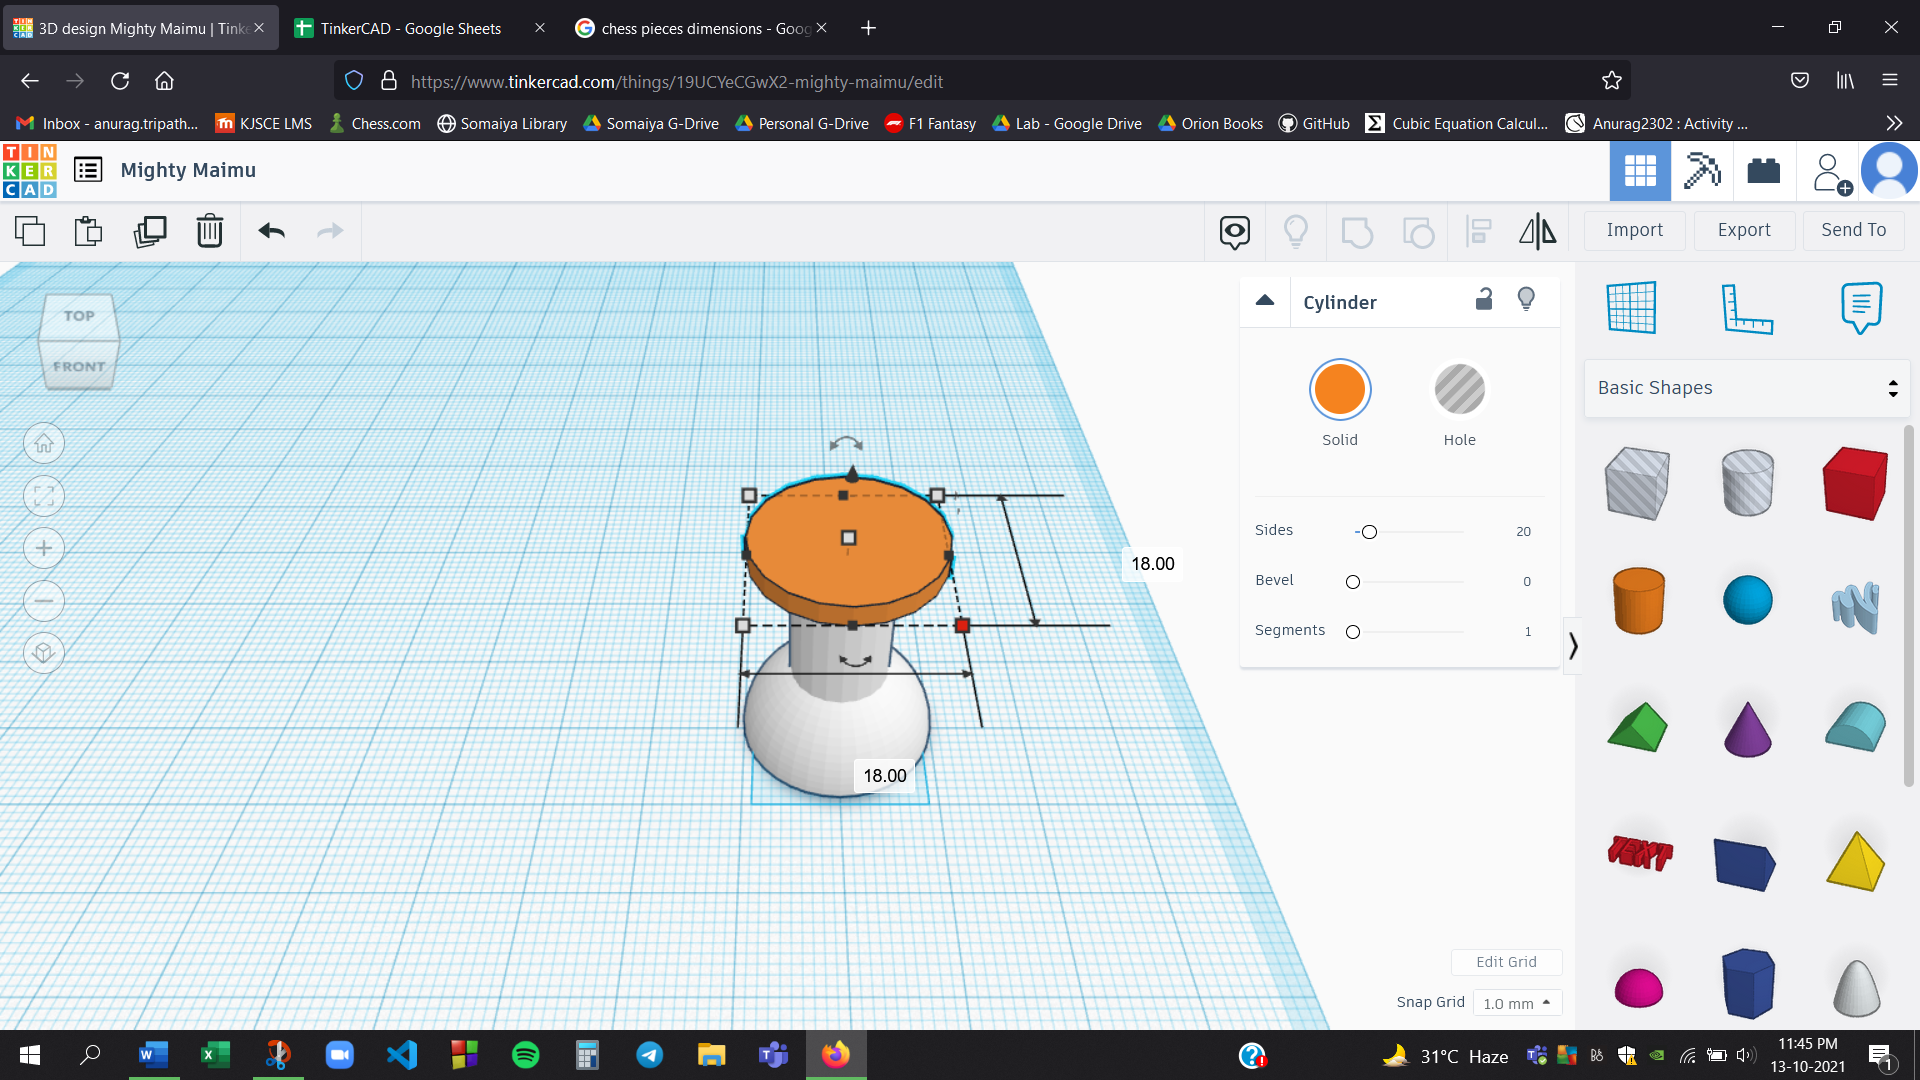
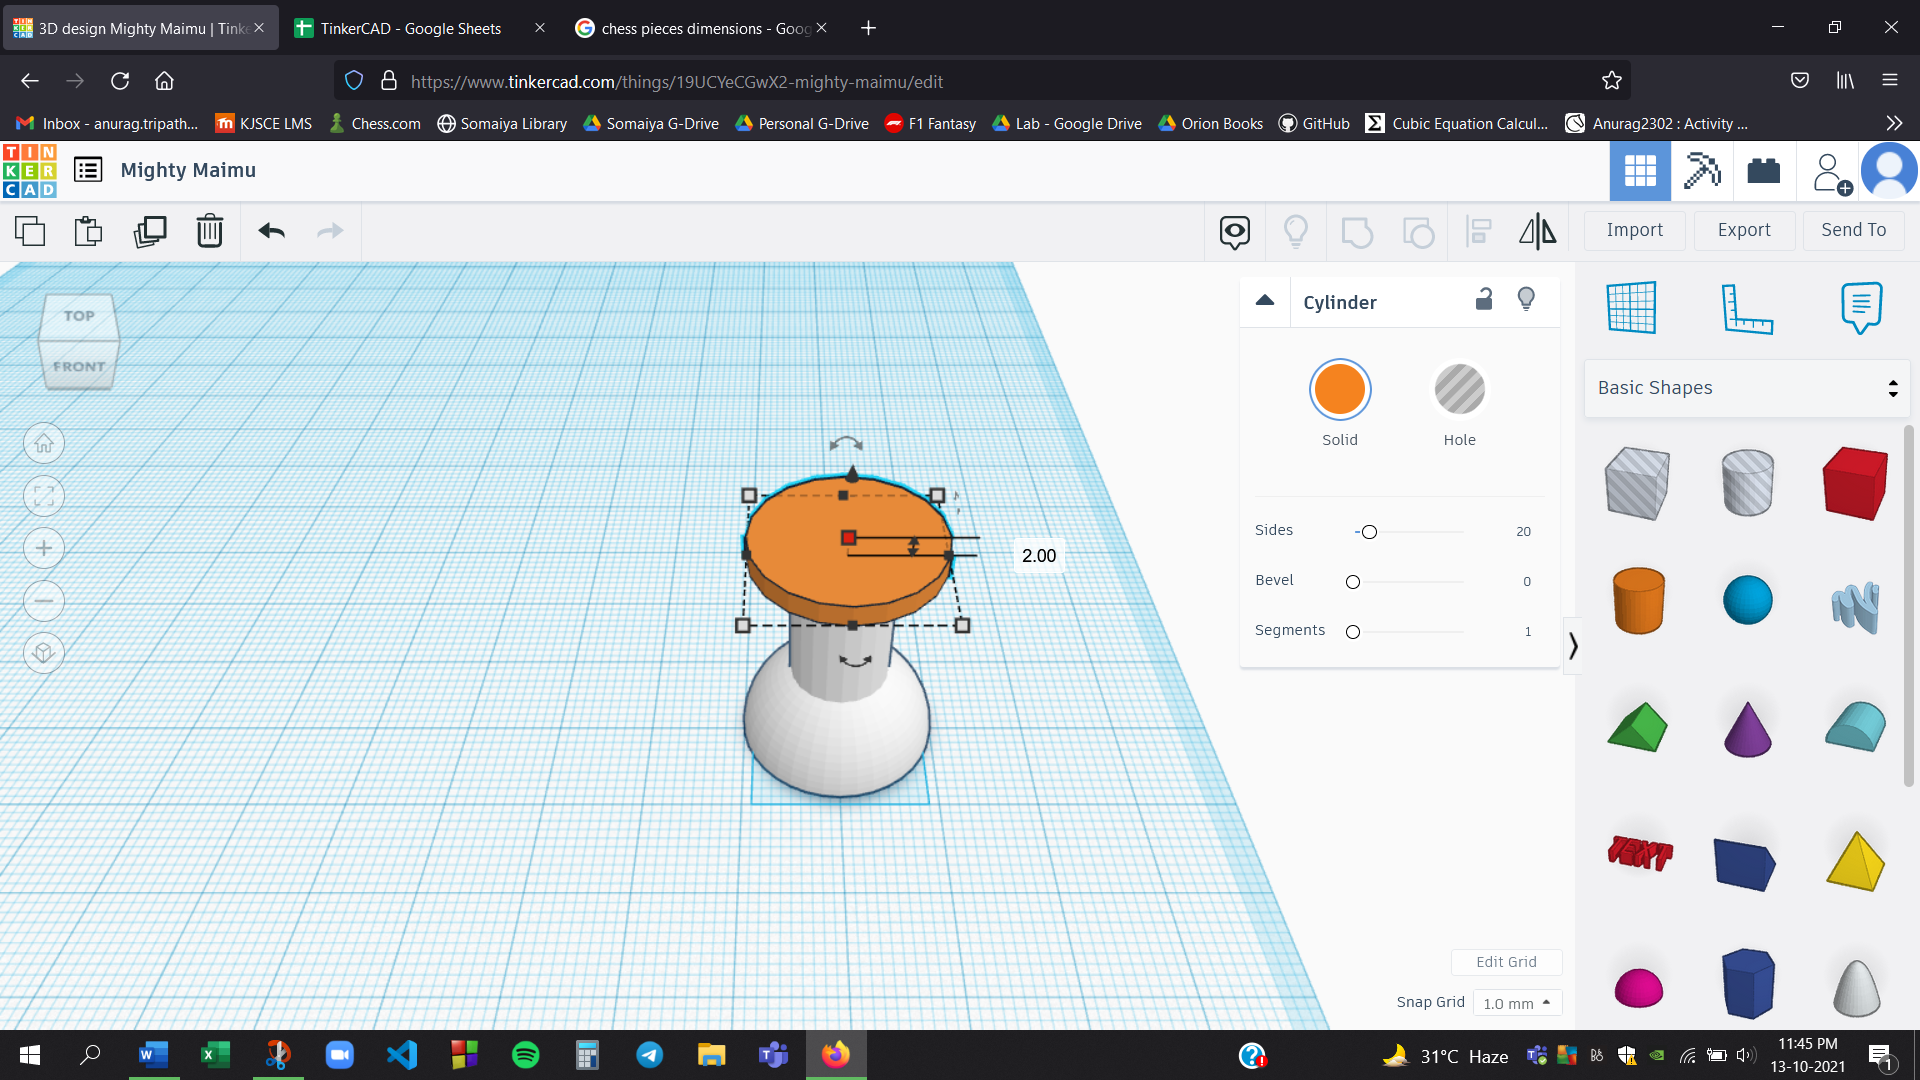
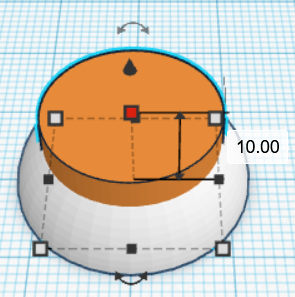
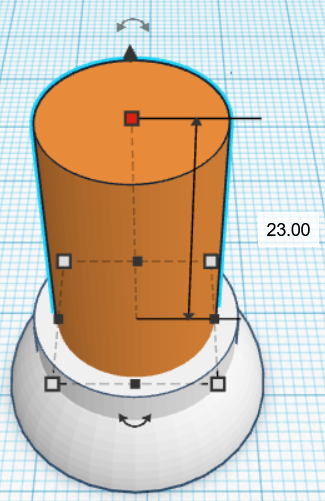
Select the cylinder option once again and place it on top of your model such that both the cylinders are concentric in nature.
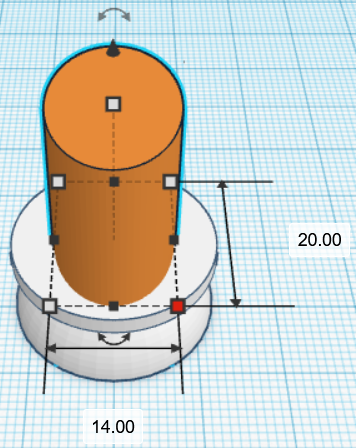
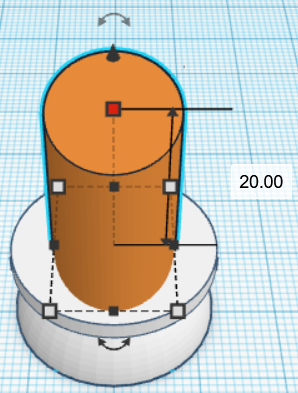
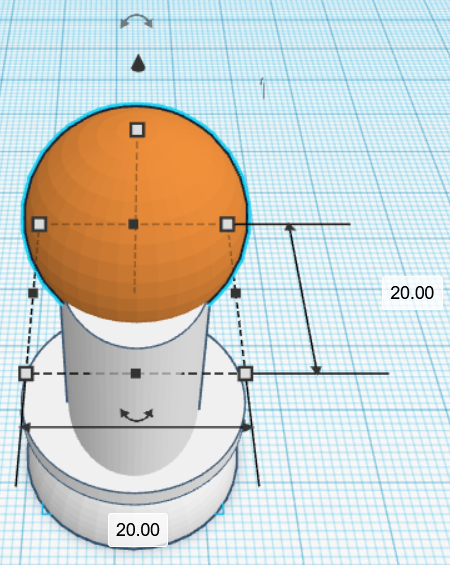
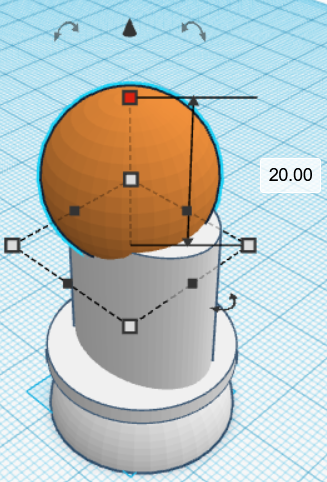
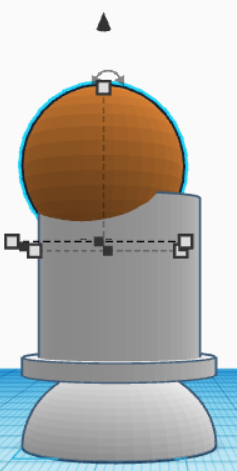
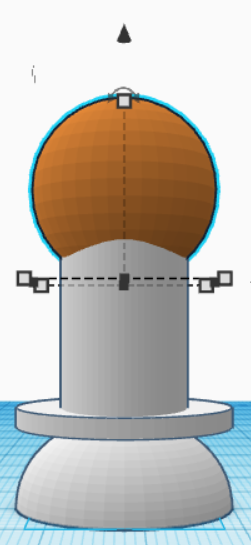
Step 5
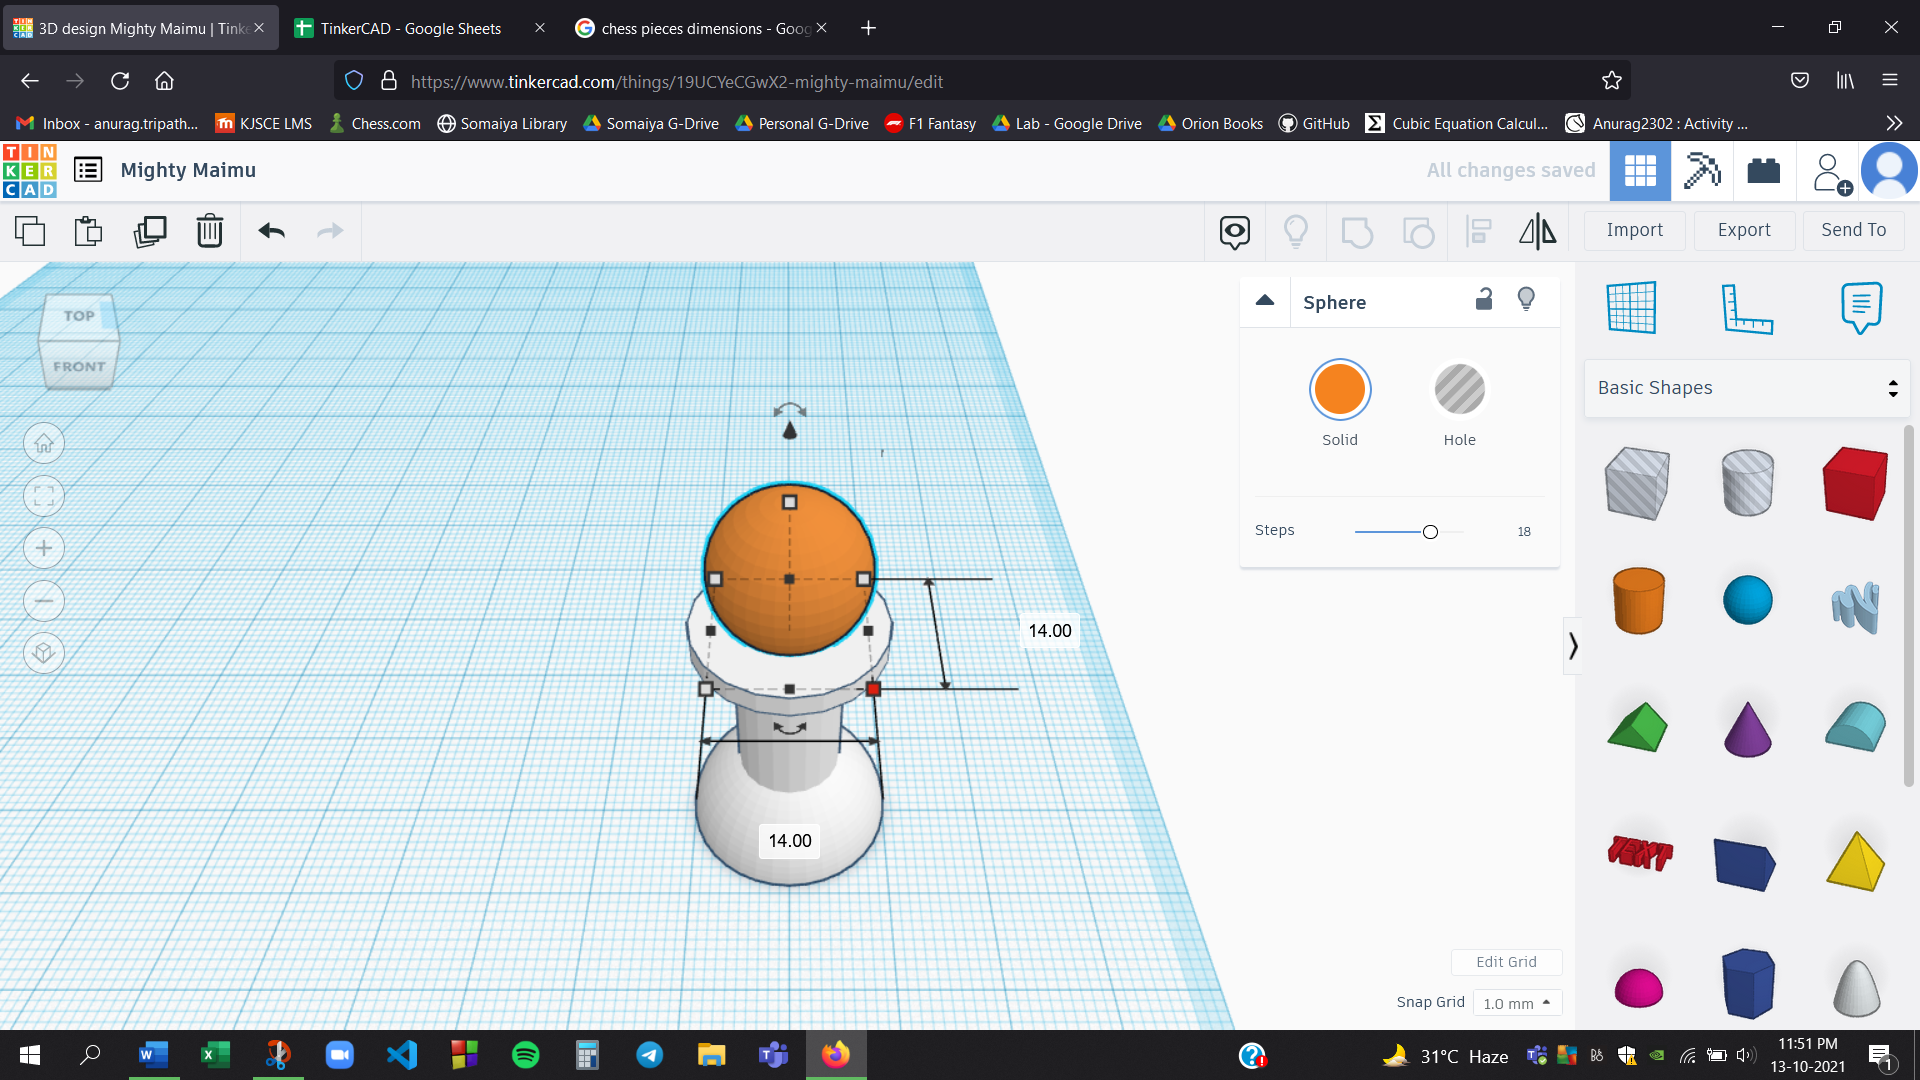
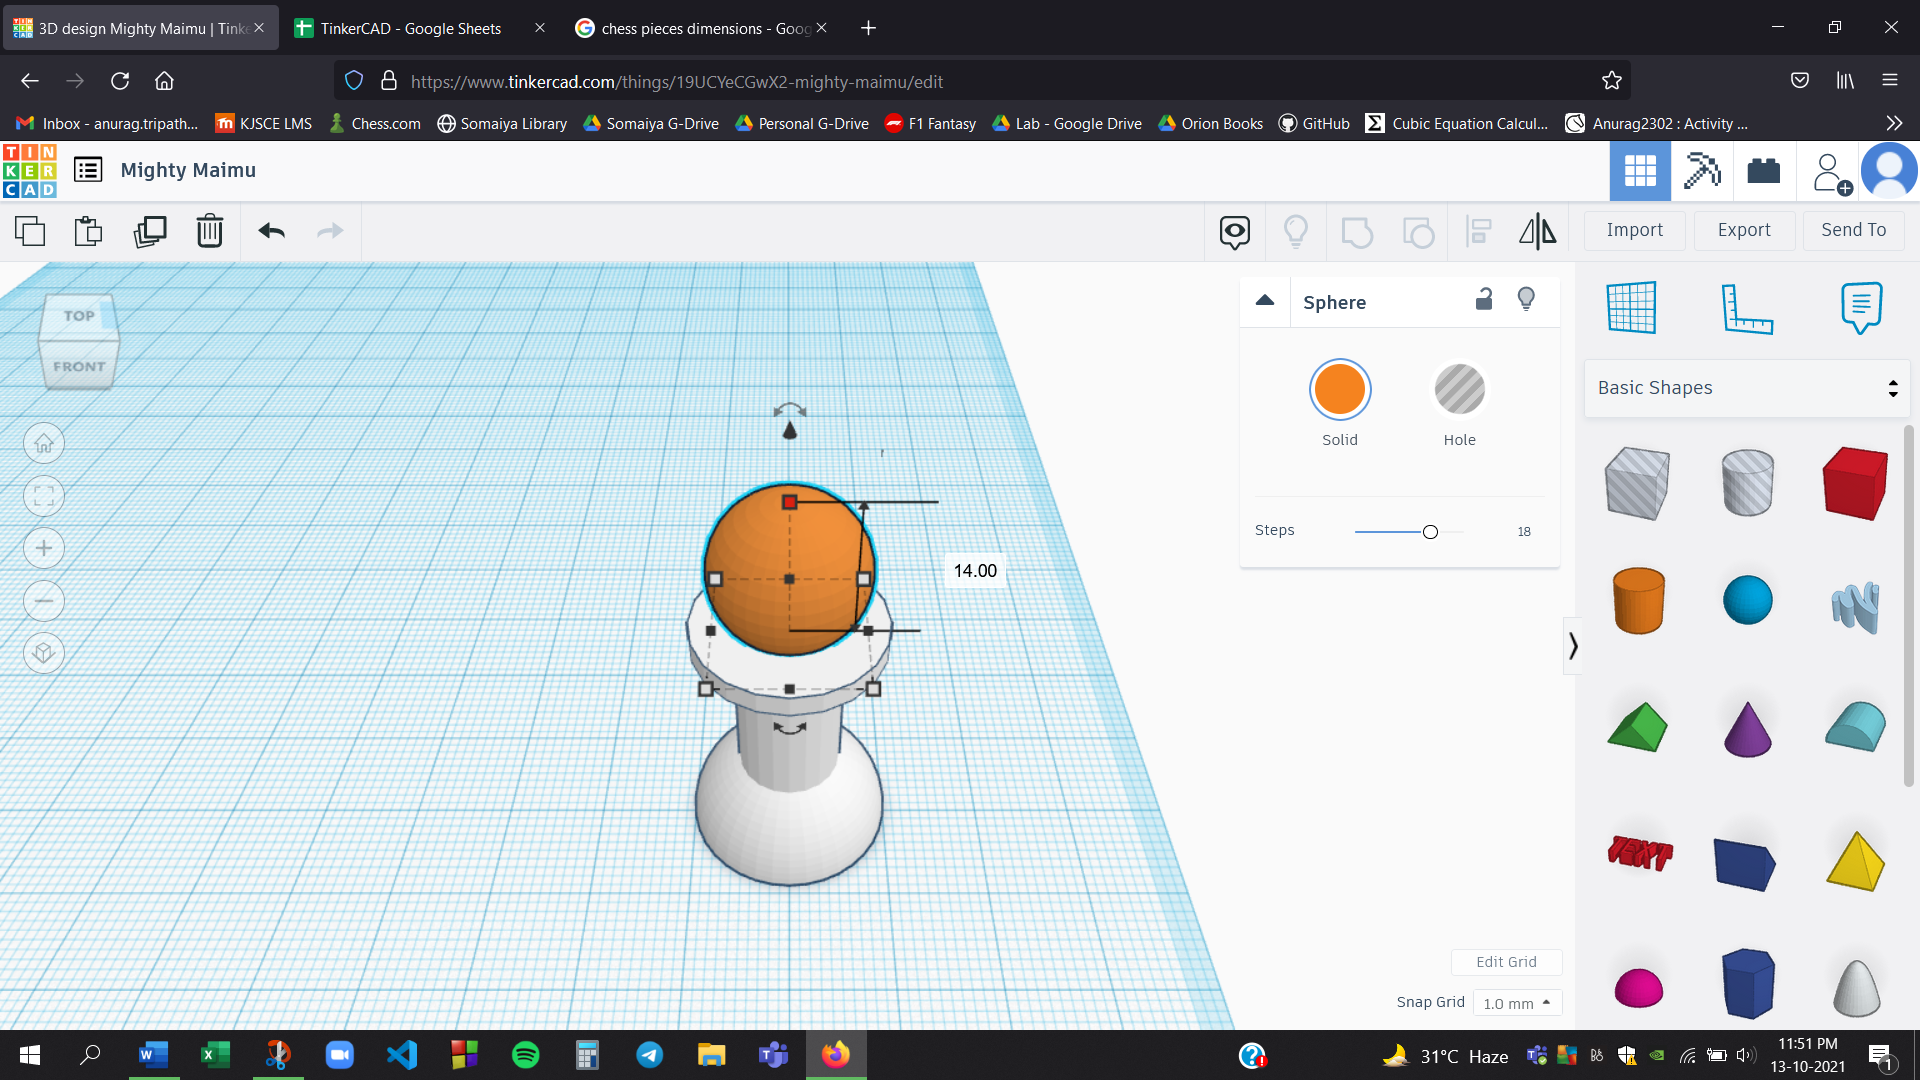
Select the sphere option from the menu and place it on top of your model as shown:
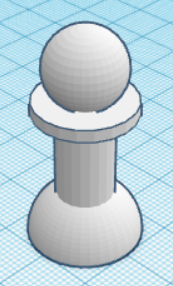
Voila! Your pawn model is ready!
Step 6


We shall now move onto making the next piece, the mighty bishop!
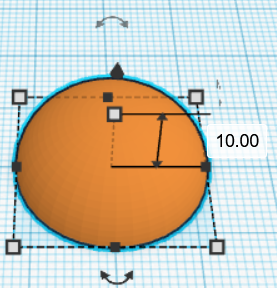
Similar to the pawn, start out with a half sphere as shown:
Step 7

Place a cylindrical plate by making use of the cylinder option as shown below:
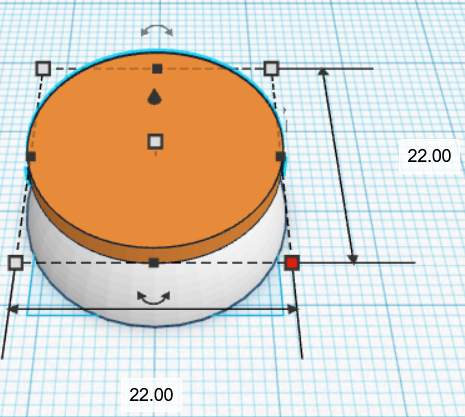
Step 8
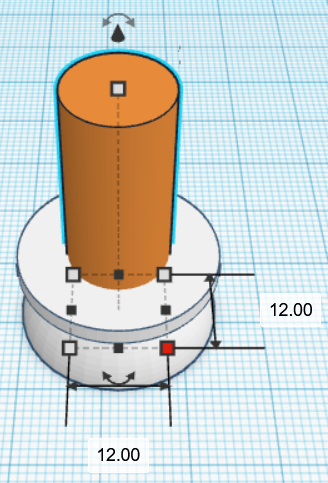
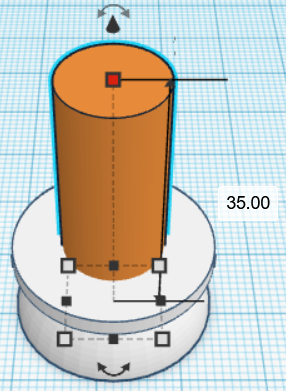
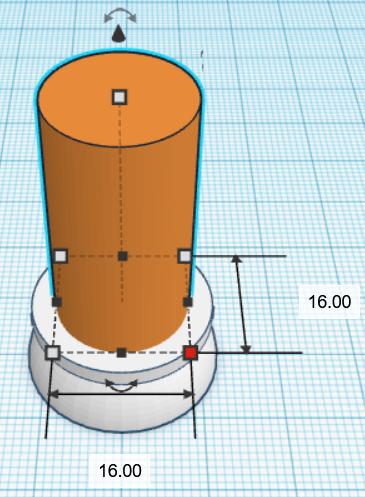
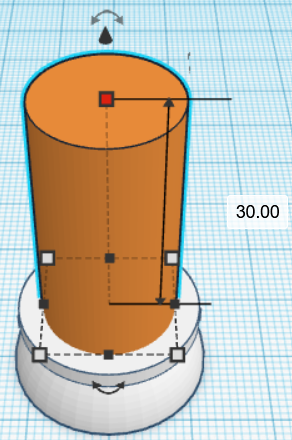
Add the body of the bishop by placing a cylinder in the middle of the plate as shown:
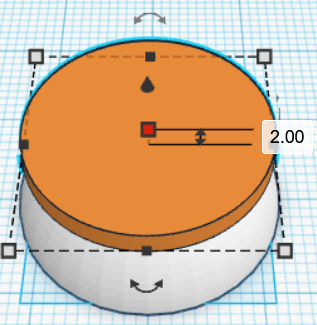
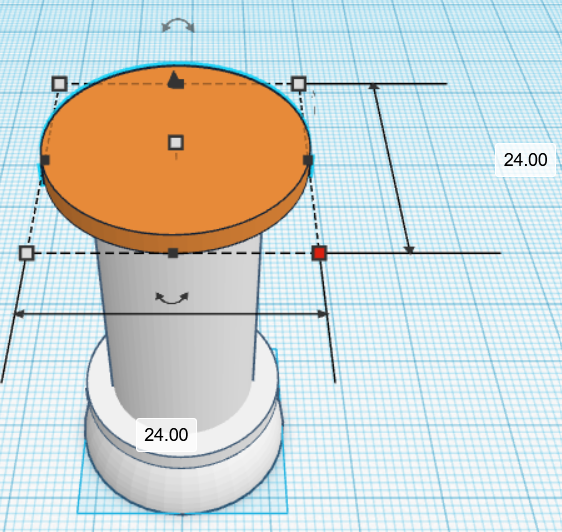
Step 9
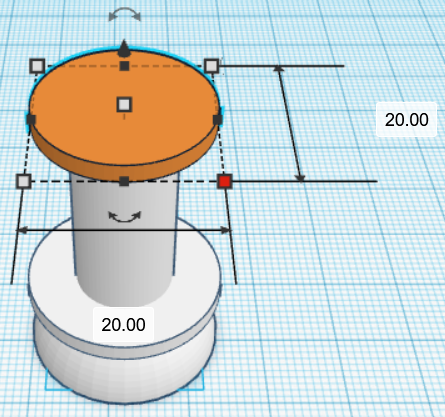
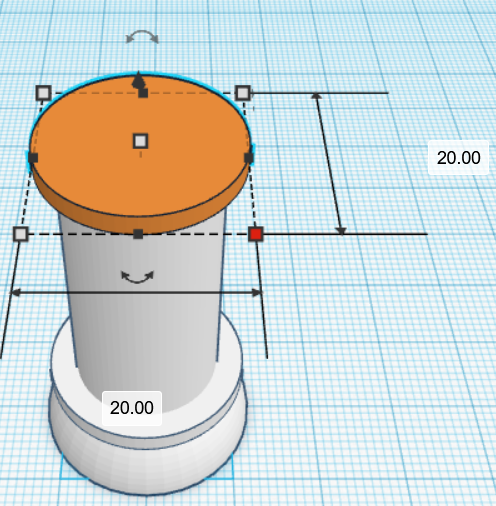
Place a similar plate as the one you placed on the base (same thickness but different radius) as shown below:
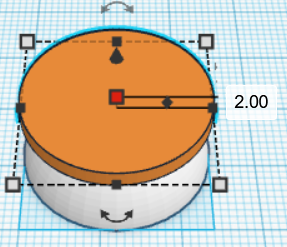
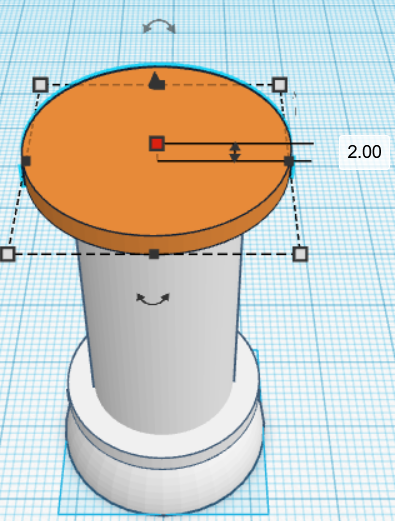
Step 10
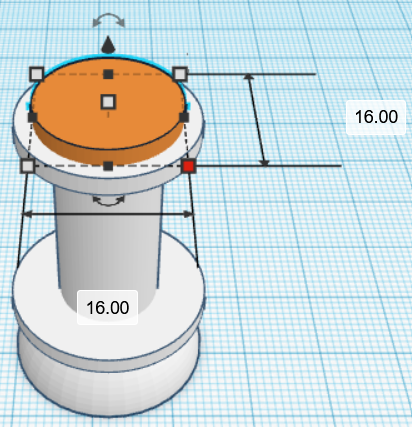
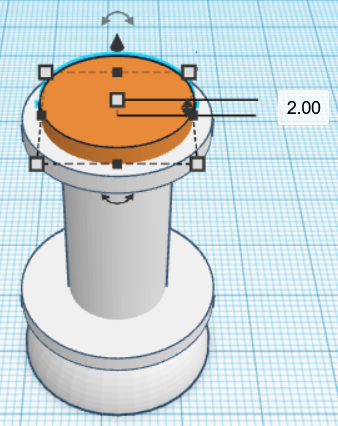
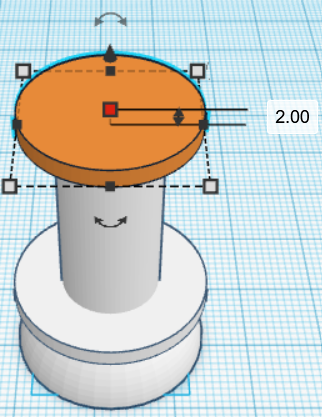
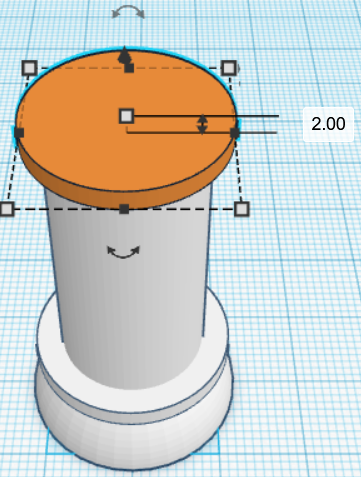
Copy and paste the cylinder (using ctrl + c and ctrl + v) ,
shift it upwards by 2 units by making use of the overhead arrow, and reduce the radius to 16 units, as shown below:
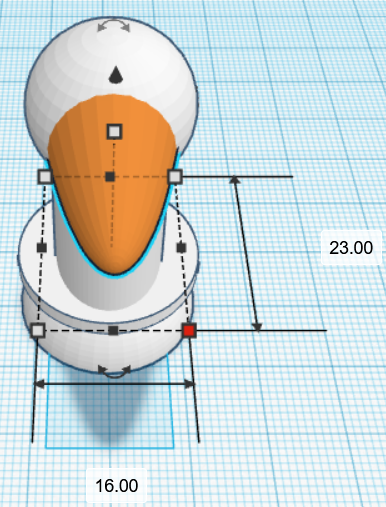
Step 11
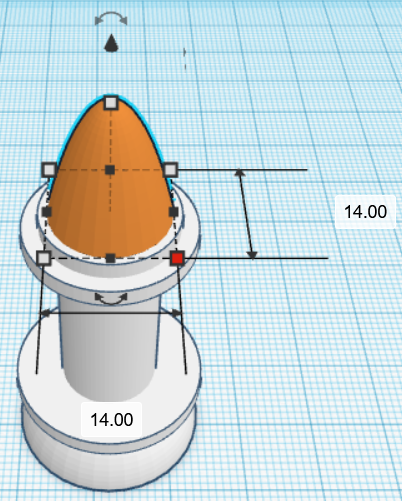
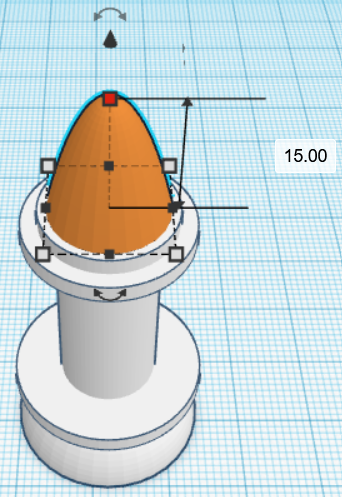
Select the paraboloid shape from the basic shapes menu and place it on top of the second plate as shown below:
Step 12
Select a cube, decrease the width as shown such that it turns into a square plate and place it on the paraboloid in the following manner to make the groove on the bishop’s head. (PS- Make sure the cube is set to “HOLE” instead of “SOLID”)
Step 13

Hold down shift and select both, the paraboloid as well as the cuboid, and press ctrl + G to group them together:
And just like that, we have the bishop ready!
Step 14
Next up on the roster, we have the knight, this one is going
to be easy……right?
As usual, place a half sphere on the workplane as shown below:
Step 15

Place a cylindrical plate by making use of the cylinder option as shown below:
Step 16
Place a cylinder on the central axis with the dimensions altered as shown (the dimensions have been altered such that the cross section is now elliptical instead of circular).
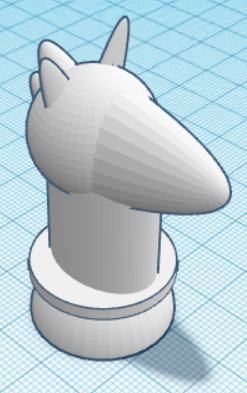
Step 17
Place a sphere on top of the elliptical tube, a bit offset from the central axis as shown below. (P.S- The bottom of the sphere is sunk into the top face of the elliptical tube).
Step 18
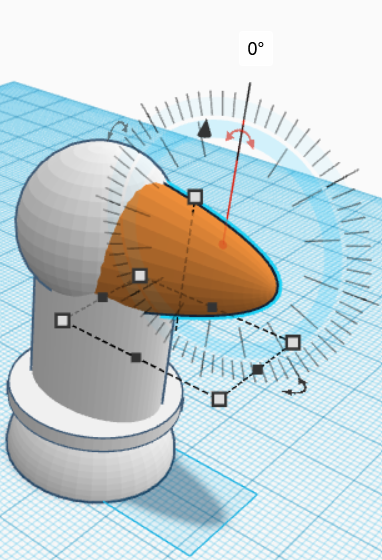

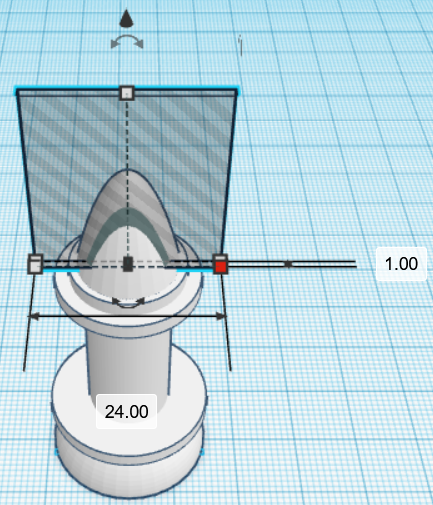
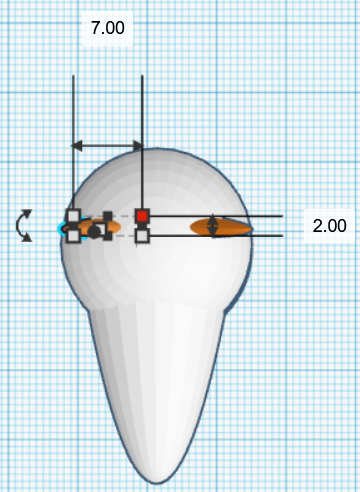
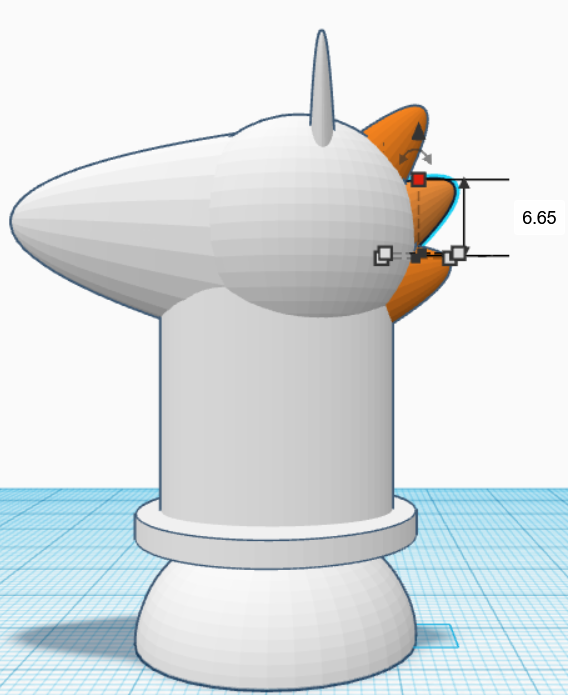
Place a paraboloid in front of the sphere as shown. The paraboloid is rotated through 90 degrees to get the required shape. The shape can be rotated by clicking on the designated button on the top and rotating by using the mouse.
Step 19
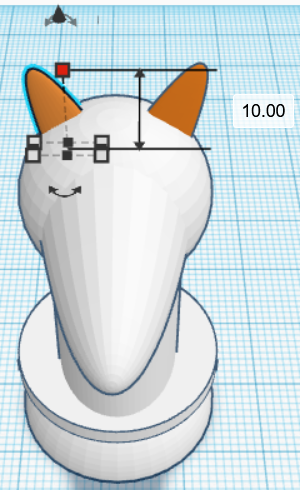
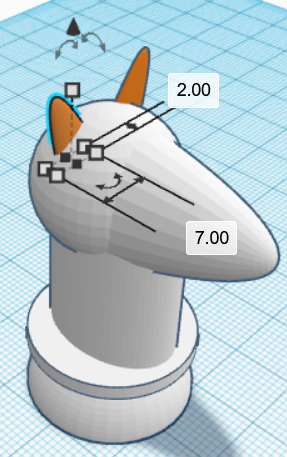
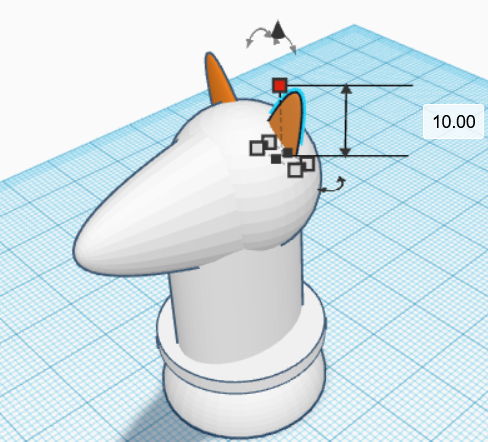
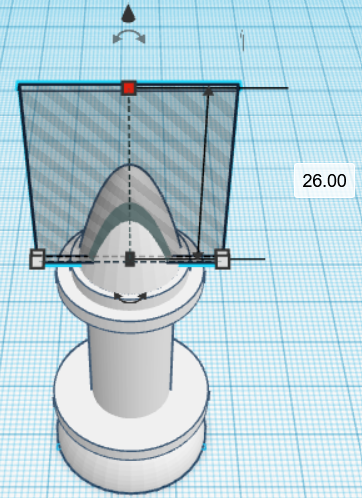
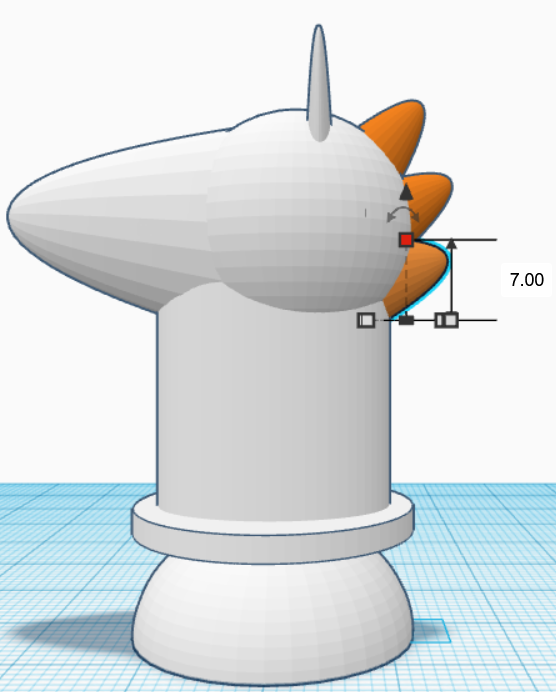
Place 2 paraboloids on top of the head in the following manner symmetrically on either side of the head to replicate the knight’s ears.
Step 20

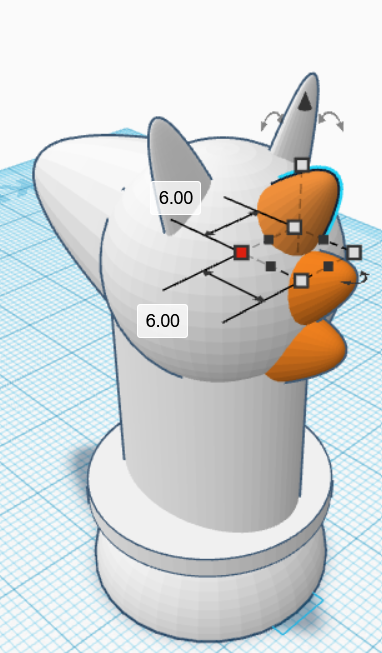

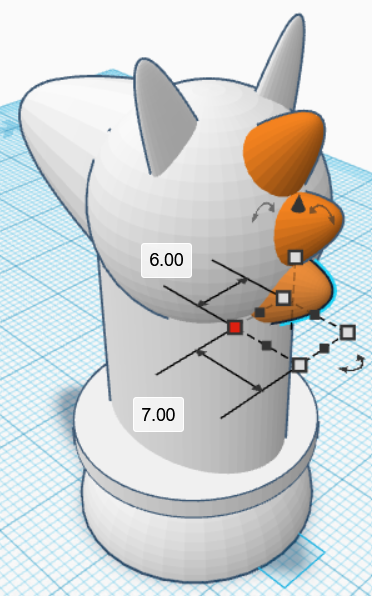
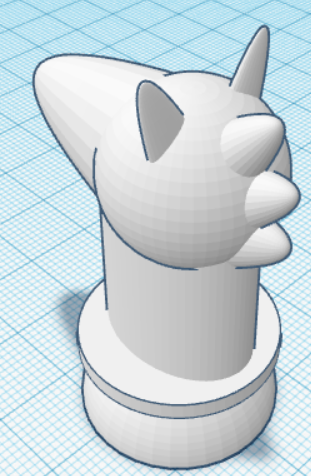
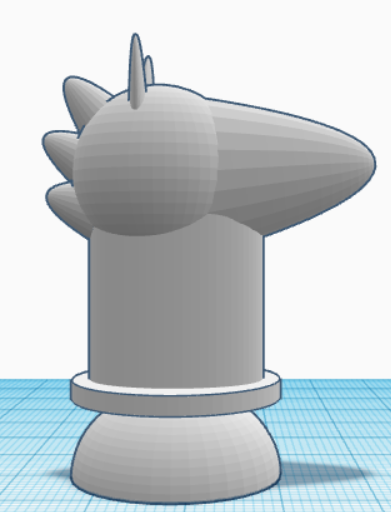
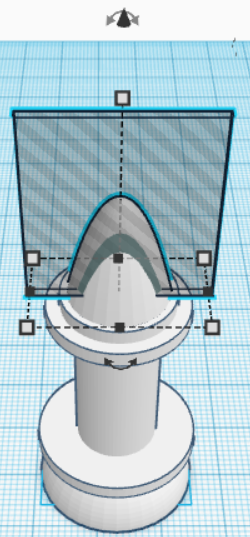
This is the difficult one. For the knight’s mane, we will arrange a series of paraboloids on the back of the head, each differing minutely from the previous. The topmost paraboloid is angles at 45 degrees with respect to the vertical axis, the second 65 degrees, and the third 85 degrees, with respect to the vertical, respectively.
Wouldn’t you believe it, our mighty knight is all ready for battle!
Step 21
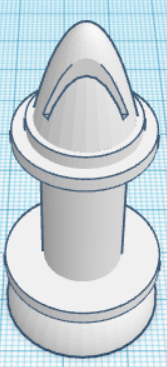
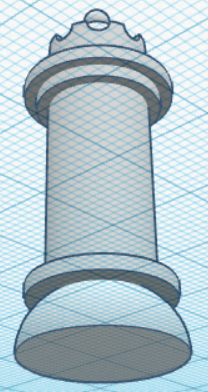
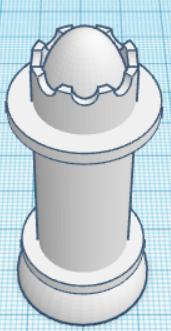
Fasten your seat-belts because things are starting to heat up. Up next we have the ruthless rook!
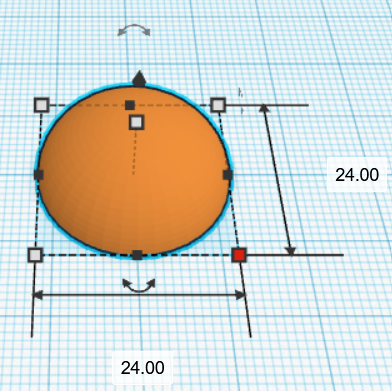
We return to the half-sphere base once again. Place it onto your workplane as shown below:
Step 22
Place a cylinder with the following dimensions on top of the half sphere as shown below:
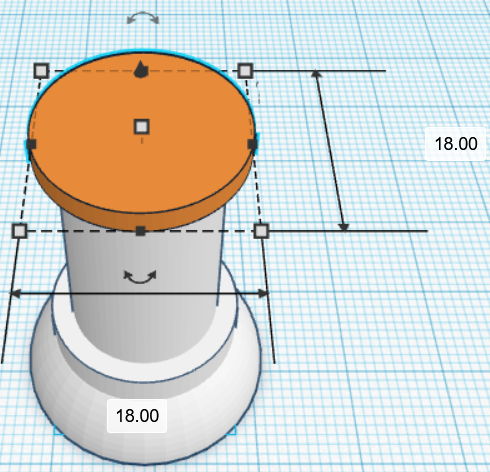
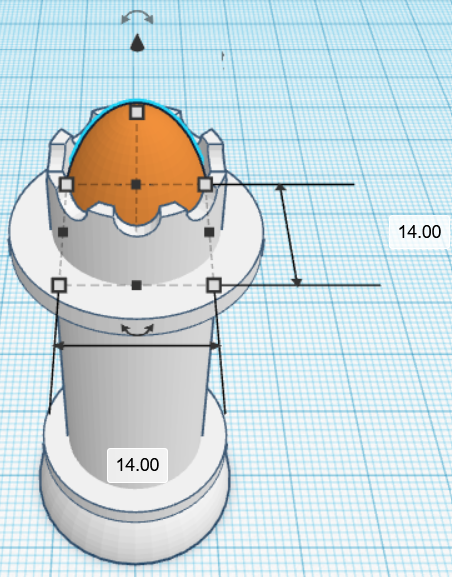
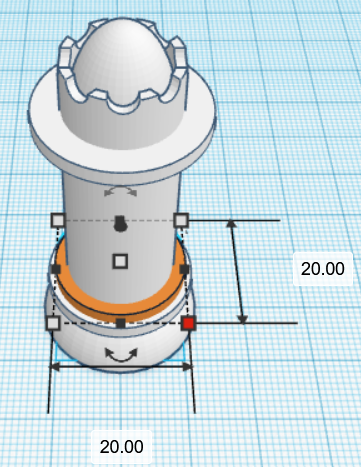
Step 23

Place another cylinder on top of this one to form the main body of the rook as shown below:
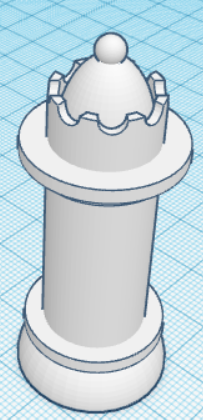
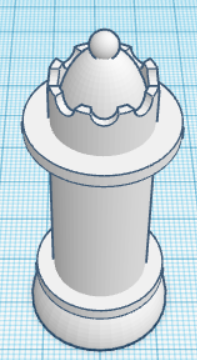
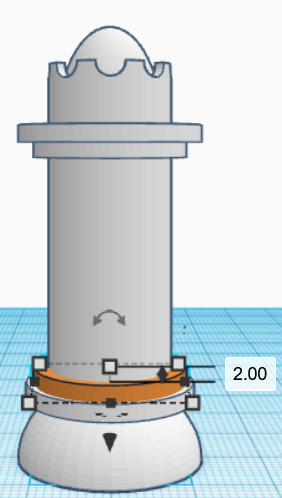
Step 24
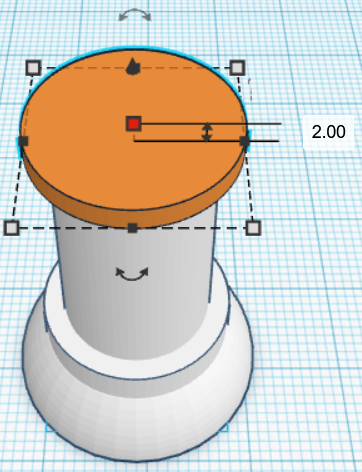
Place another similar cylindrical plate on top of the body, as shown:
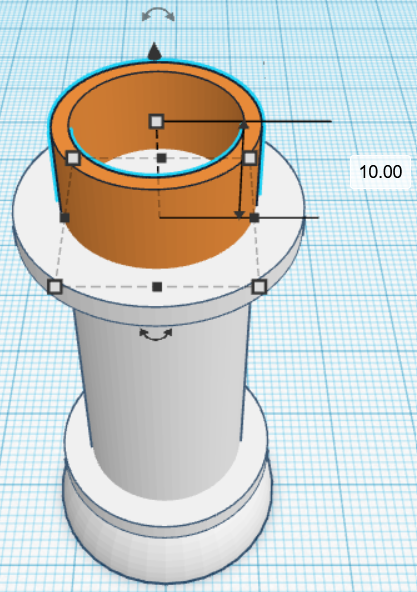
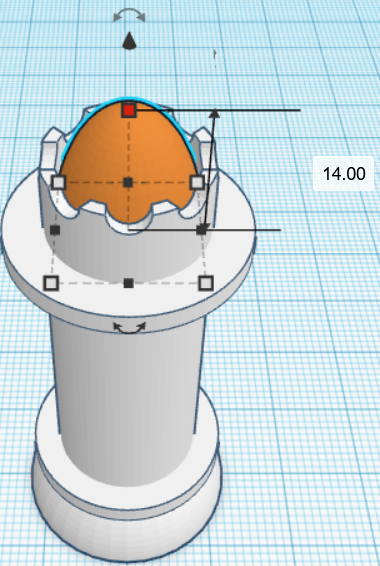
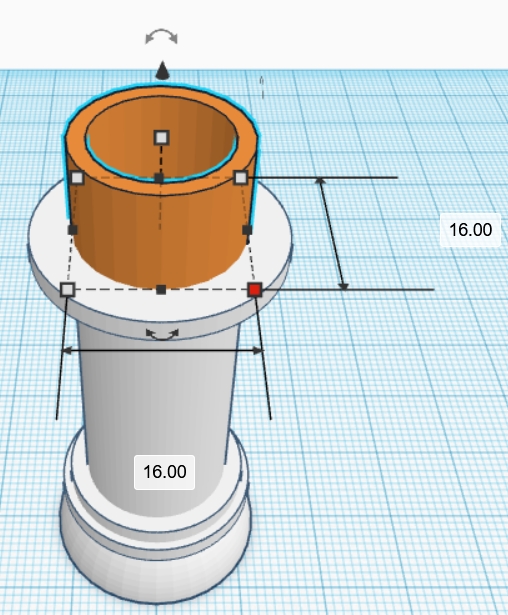
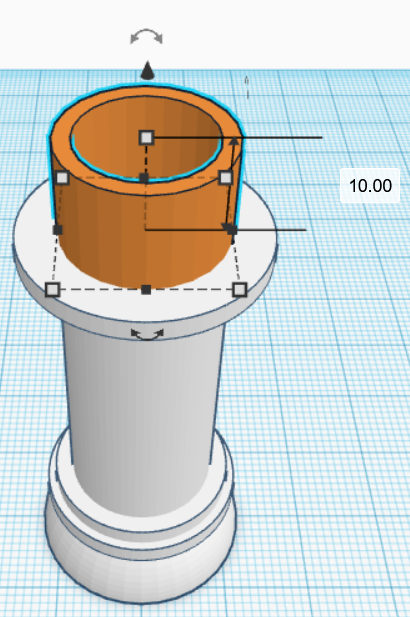
Step 25
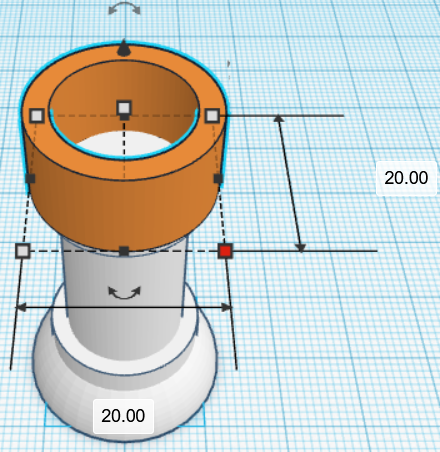
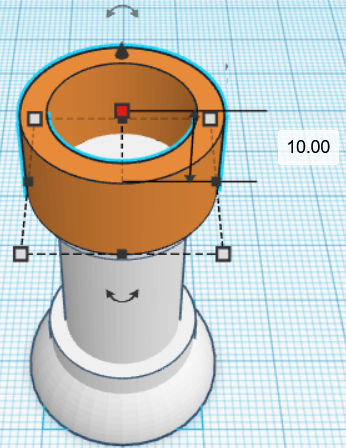
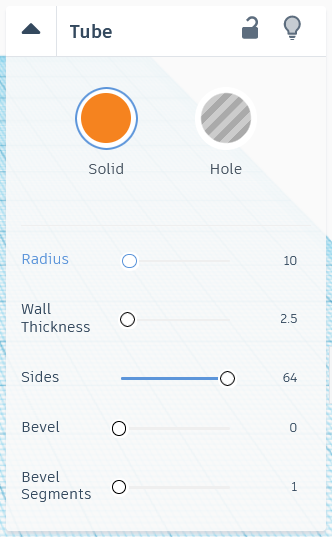
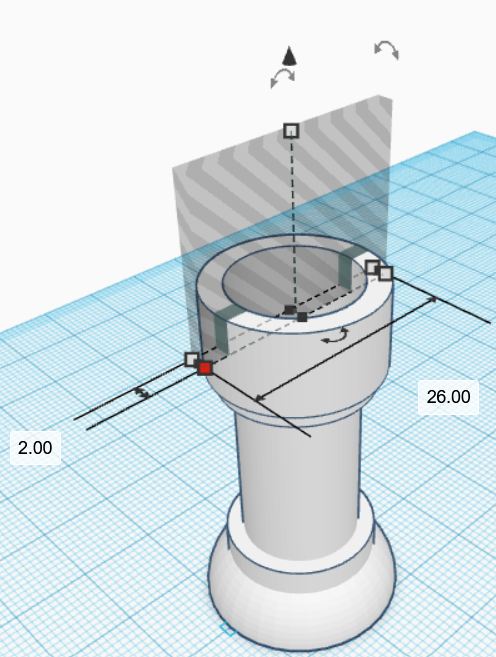
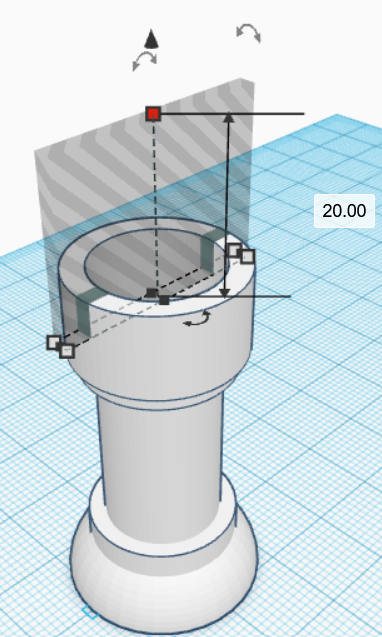
Place a tube on top of the plate in the following manner:
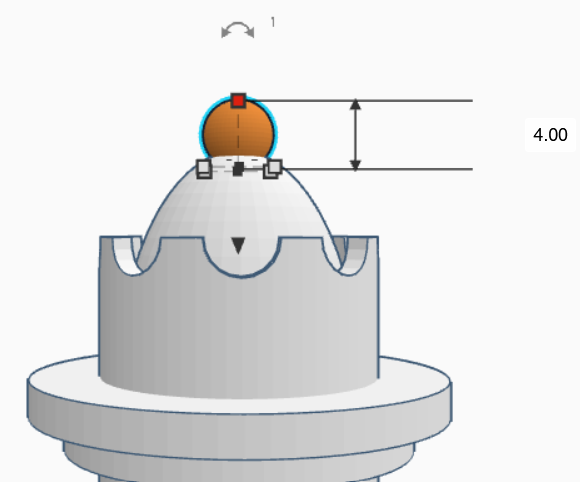
Step 26
To make the crown pattern, select the cylinder from the menu and set it to “HOLE” configuration and place it as shown:
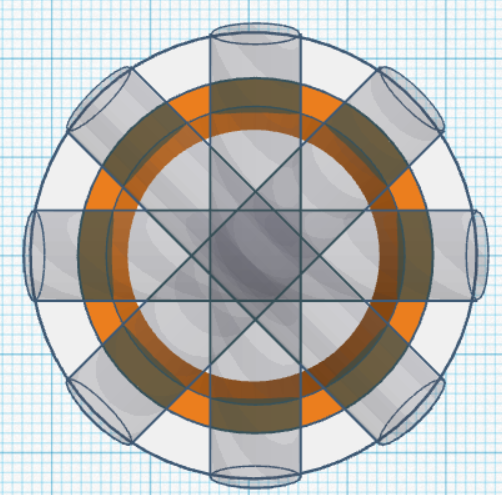
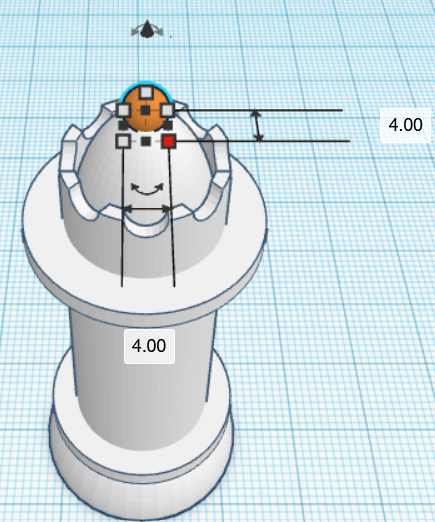
Step 27
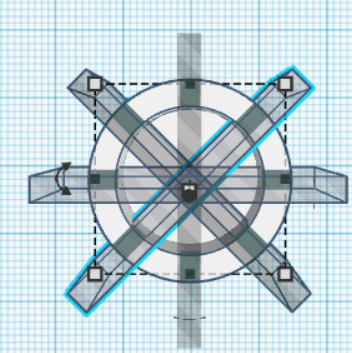
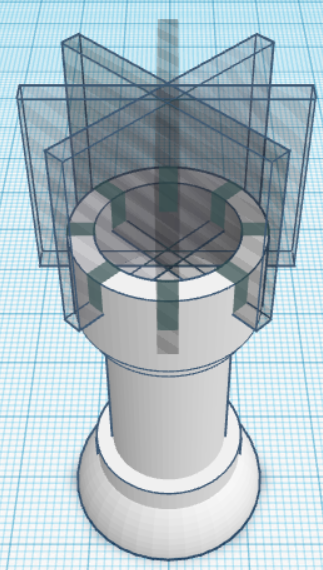

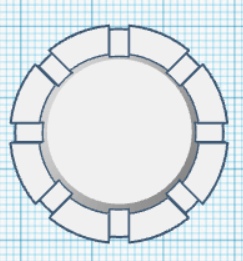
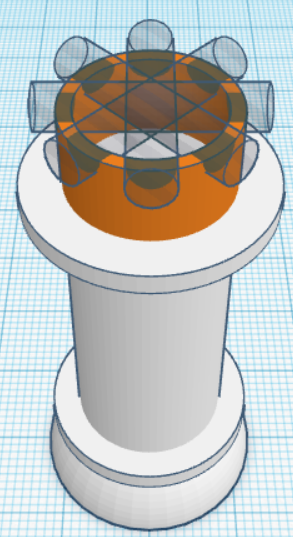
To complete the pattern around the entire head, copy and paste the hole rectangle and rotate it by 45 degrees each time, as shown:
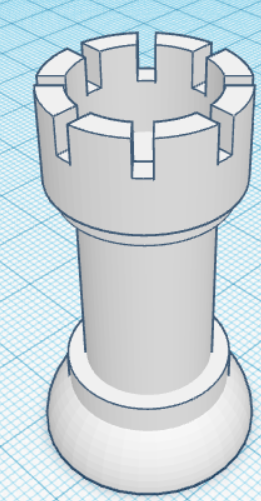
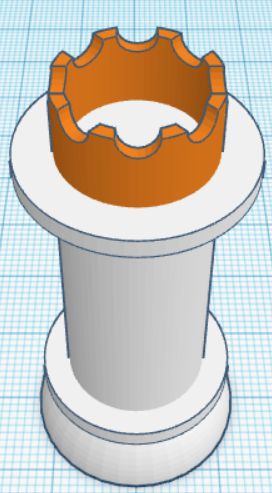
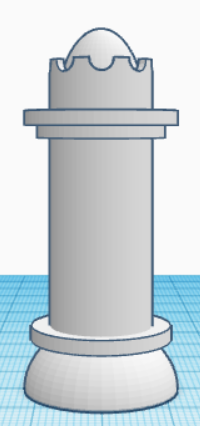
Select all the rectangles and the head of the rook by holding down shift and clicking on them and while selected, press ctrl + G to group them together. You should end up with the final rook as shown below:
Step 28
Next up on the roster, the invincible queen!
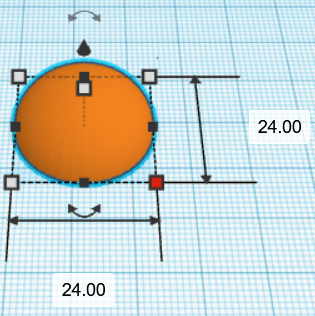
Let’s begin by placing another half sphere on the workplane as shown:
Step 29
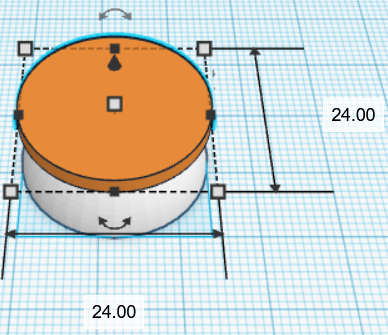
Place a circular disc on top of the half-sphere a shown:
Step 30
Place another cylinder coinciding with the central axis to serve as the body of the piece.
Step 31
Place a circular disc on the top face as shown:
Step 32
Place another circular disc on top of the previous one as shown:
Step 33
Place a tube on top of the two cylindrical plates as shown (wall thickness = 1.5):
Step 34
Similar to the rook’s crown, we shall be cutting grooves for the queen’s crown, but instead of using cuboids, we will be using cylinders, and rotating them by 45 degrees to cut the grooves throughout. Select all the tubes and the head using shift and then group them together by pressing ctrl + G, as shown below:
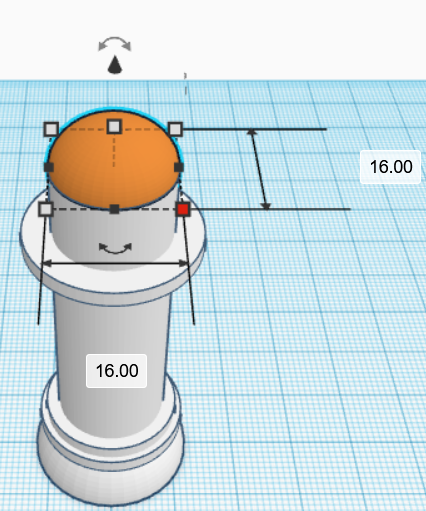
Step 35:
Place a half-sphere in the middle of the crown tube as shown below:
Step 36
Like a cherry on top, add a tiny sphere on top of the half sphere as shown:
And just like that, the queen is all ready to dominate any game!
Step 37
Last, but by no means least, we shall complete the army by making the King, the safety of whose determines the fate of the game.
To make the King, we shall be using the model of the queen we just made, but make some changes to it. Start out by making a copy of the Queen and deleting the sphere from its head such that we are left with the following model:
Step 38
Add a circular plate to the base with the following dimensions as shown:
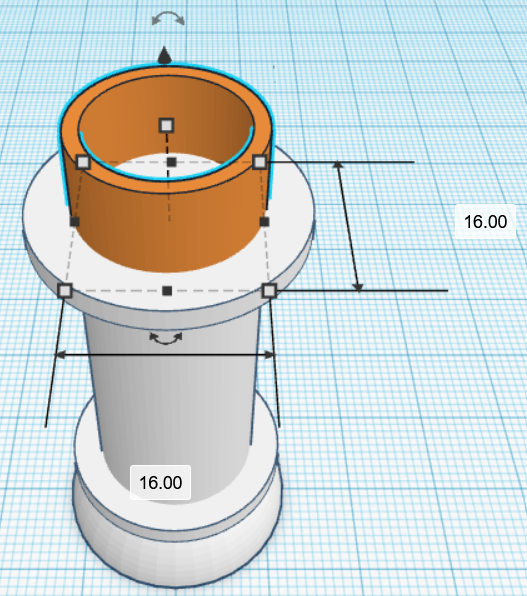
Step 39
Increase the length of the main body stalk from the pre-existing 30 to 33. Delete the half-sphere and the crown from the head of the piece and place a tube with the following dimensions as shown (wall thickness = 1.5):
Step 40
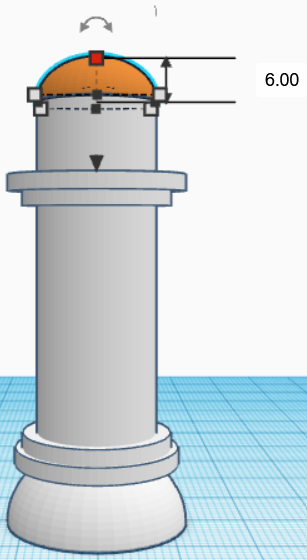
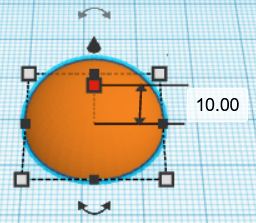
Place a half-sphere on top of the tube with the following measurements:
Step 41
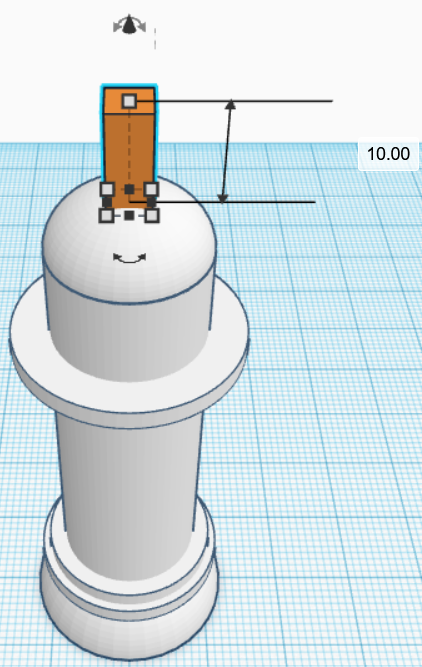
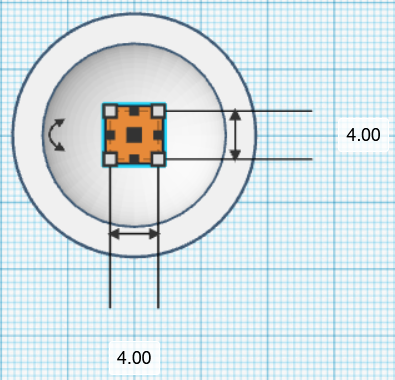
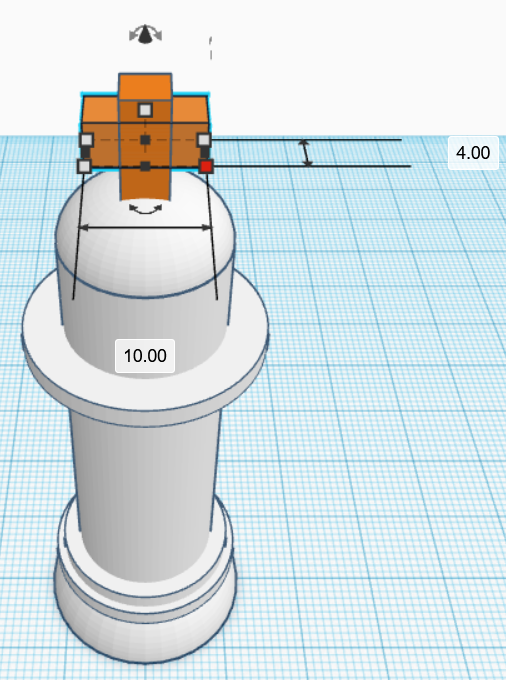
Re-shape a cube and place it on top of the head as shown below:
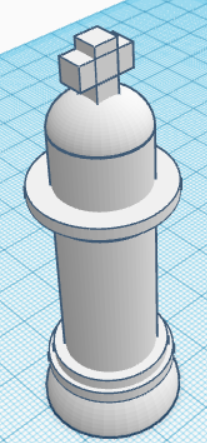
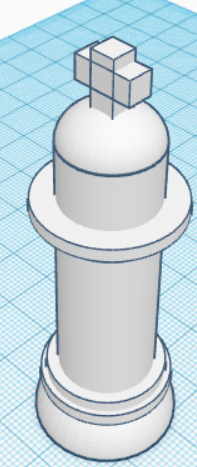
Now, copy the square tube, rotate it by 90 degrees with respect to vertical axis and place it as shown below to complete the cross on the king’s head:
And with that out of the way, our king is now ready to lead his army into battle!
With the modelling of the king done, we now have each piece of the chess set designed and modelled with us. To get the remaining 7 pawns, we can copy and paste the model of our pawn and to get the black pieces, we can copy the entire white army and change the colour to black.
Step 42
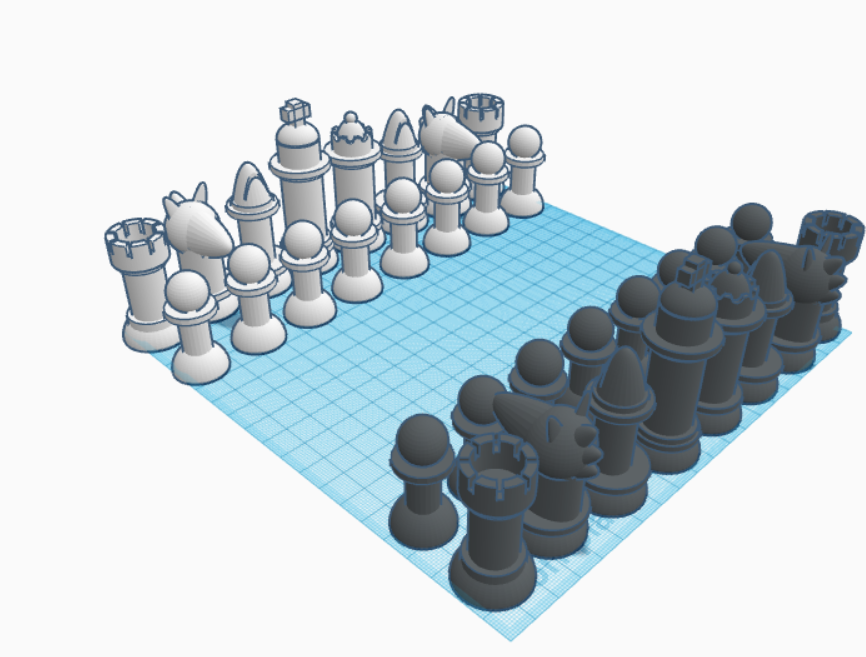
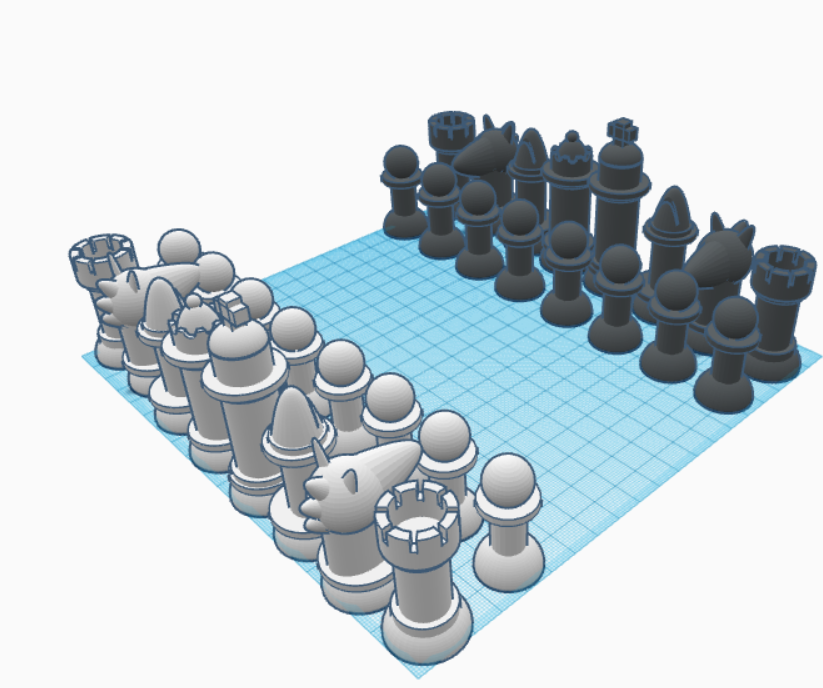
After having copied and pasted each piece as required, and copying and pasting the entire white side and changing the colour to black, we should be left with something like this:
Step 43

What use are chess pieces if we don’t have a board to play on? Lets move onto the final piece f the puzzle and make a really cool and innovative board, far from the boring, conventional, flat board.
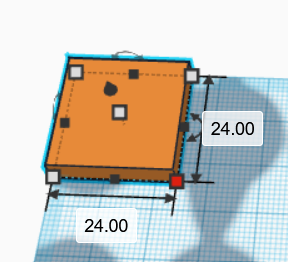
Start out by placing a cube as shown:
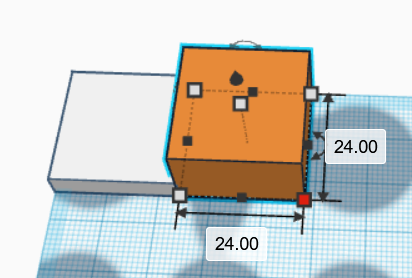
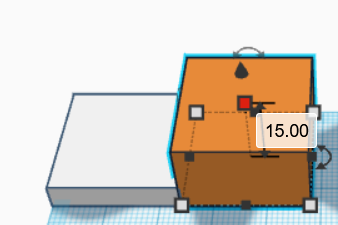
Copy and paste this cube adjacent to the previous one but change the height as shown:
Step 44
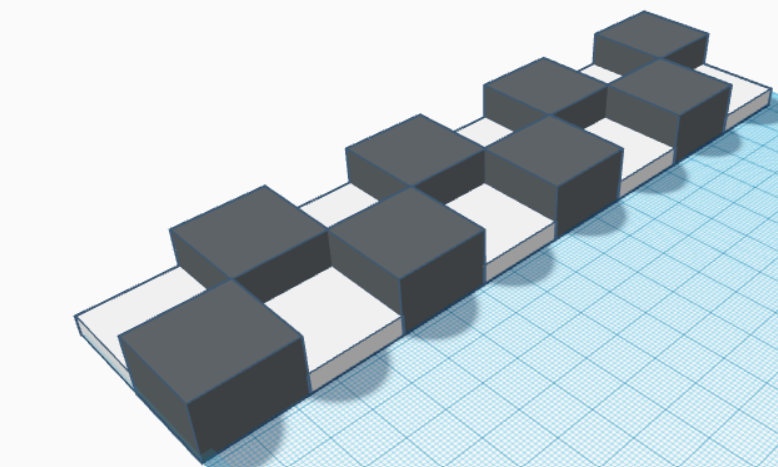
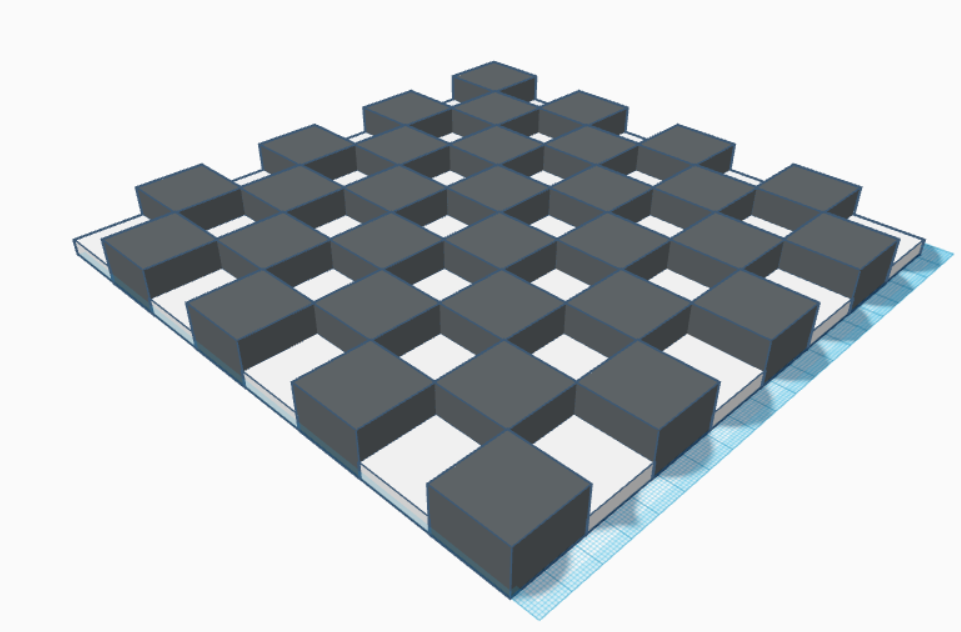
Copy and paste the above set of 2 squares such that we have a board of 8x8 squares, of alternating heights as shown:
Copy the above model 4 times over to complete the board.
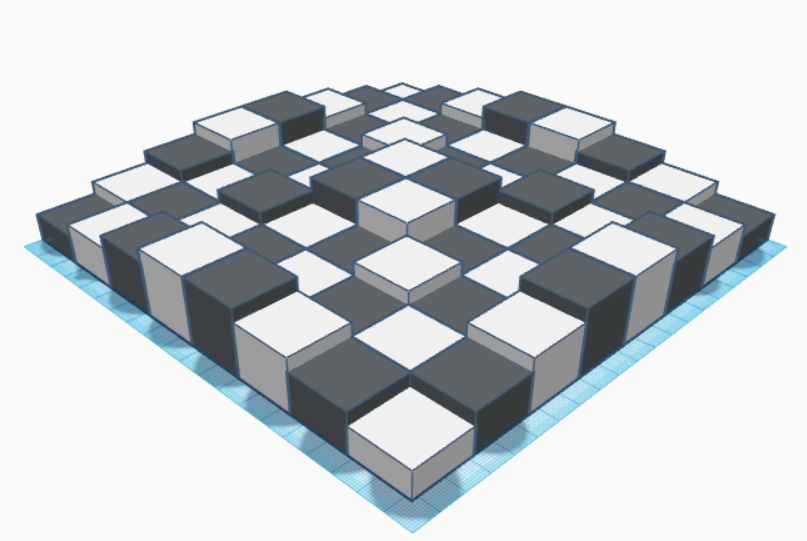
Looks kind of plain still, doesn’t it? Let’s adjust the elevations of random squares randomly to give it more of an adventurous feel.
Step 45

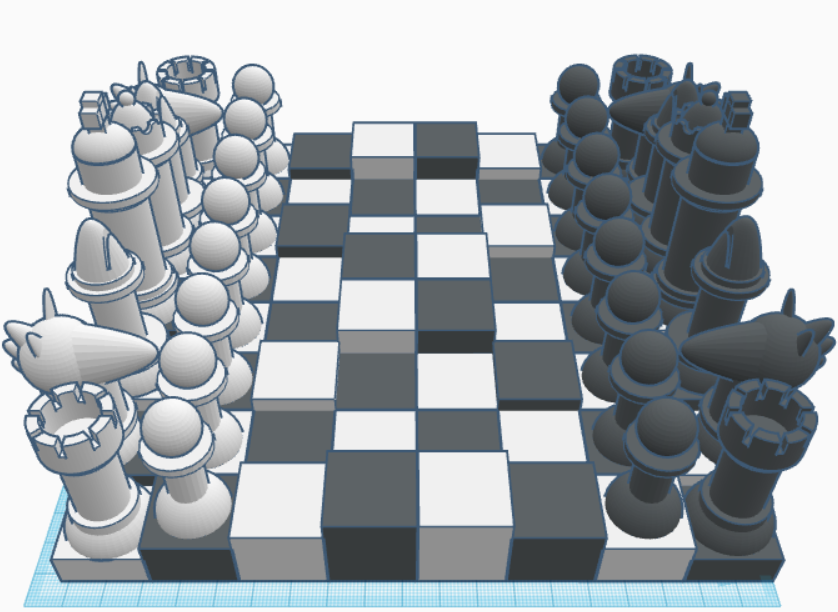
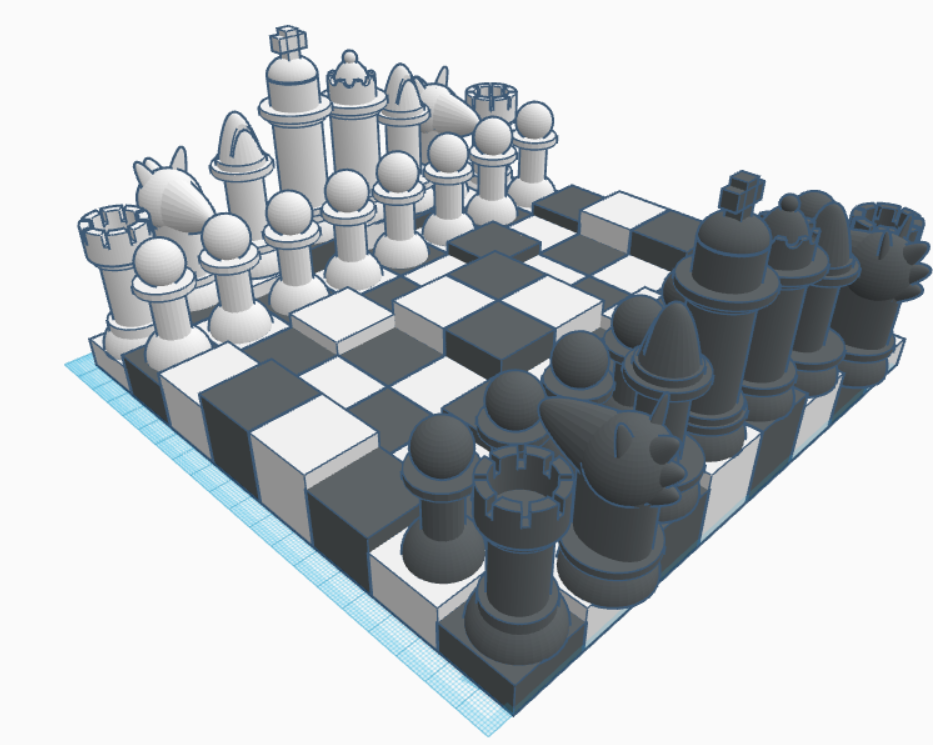
Looks neat, doesn’t it? Let us finally arrange our modelled pieces on the board to get the final product as sown below:
And that’s the end of it! Thank you for following along on this tutorial, appreciate it! Enjoy your chess set, you can now 3D print this if you would like, cheers!
3D Printing Guide
When you are ready to 3D print this model, make sure to add supports at all overhanging sections and at angles greater than 45 degree. This will not only ensure smooth printing but it will improve the over