3D Print Your Macro Photography (Part #4) Macro Tubes
by peterc591 in Workshop > 3D Printing
2330 Views, 13 Favorites, 0 Comments
3D Print Your Macro Photography (Part #4) Macro Tubes
This lesson - Macro Tubes
If you put macro tubes between your normal lens and your camera, you can capture amazing close-ups. In this Instructable, I show you how to print a complete set of macro tubes. Then, for the price of a few meters of filament, you can take photos like those from a macro lens costing hundreds if not thousands of dollars!
I'll help you by:
- Explaining how macro tubes work
- Helping you with the 3D printing
- Showing you how to set them up properly
- Guide you on how to use them
This instructable has two bonus features
- A way to make macro tubes of any length you want
- A unique box to house the macro tubes and the other attachments found in this series.
The series
This Instructable is the third in a series of four called '3D Print Your Macro Photography.'
- Part #1 An introduction to taking macro photos with adaptors
- Part #2 Reverse Lens Adaptor
- Part #3 Coupled Reverse lens adaptor
- Part #4 Macro Tubes
If you are already familiar with macro photography and 3D printing and want to know about macro tubes, you can jump right in. To learn more about macro photography and this series, click here.
I go into underlying details in parts #1 and #2, so I won't repeat them here. However, you should review these if you don't feel confident.
Supplies
For this Instructable, you will need:
- A Canon camera and lenses with EF or EF's mounts
- To have or have access to a 3D printer
- Some basic knowledge of 3D printing and photography
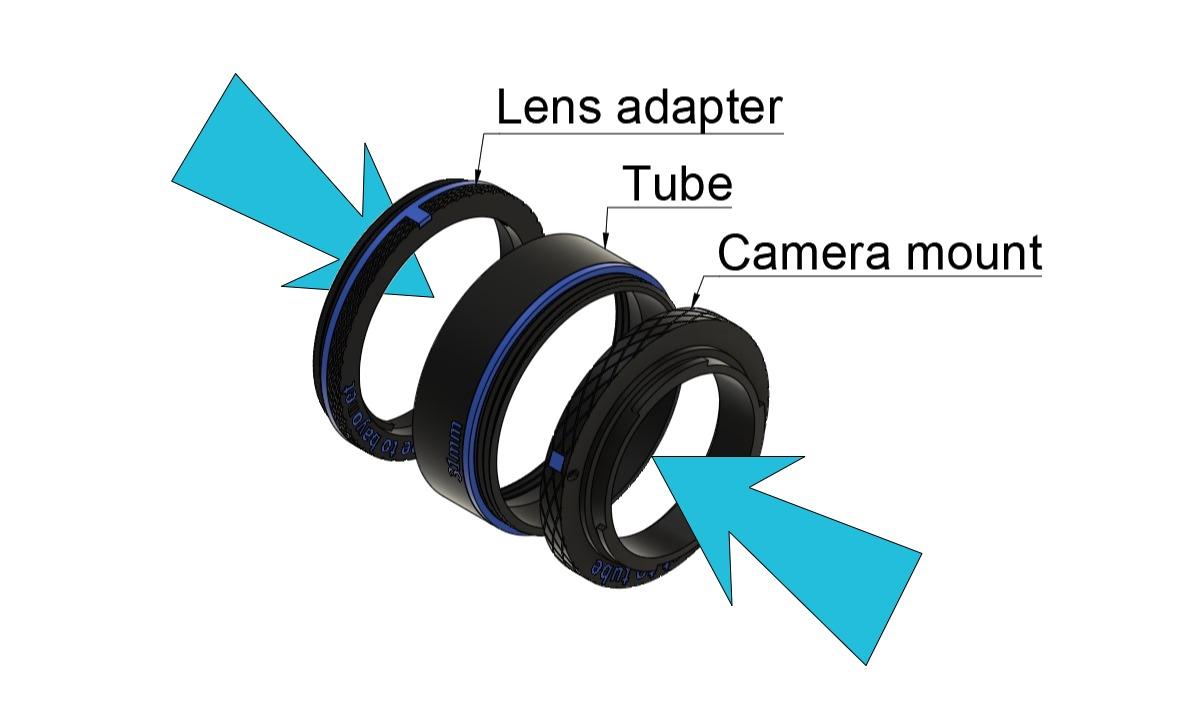
This Macro Kit
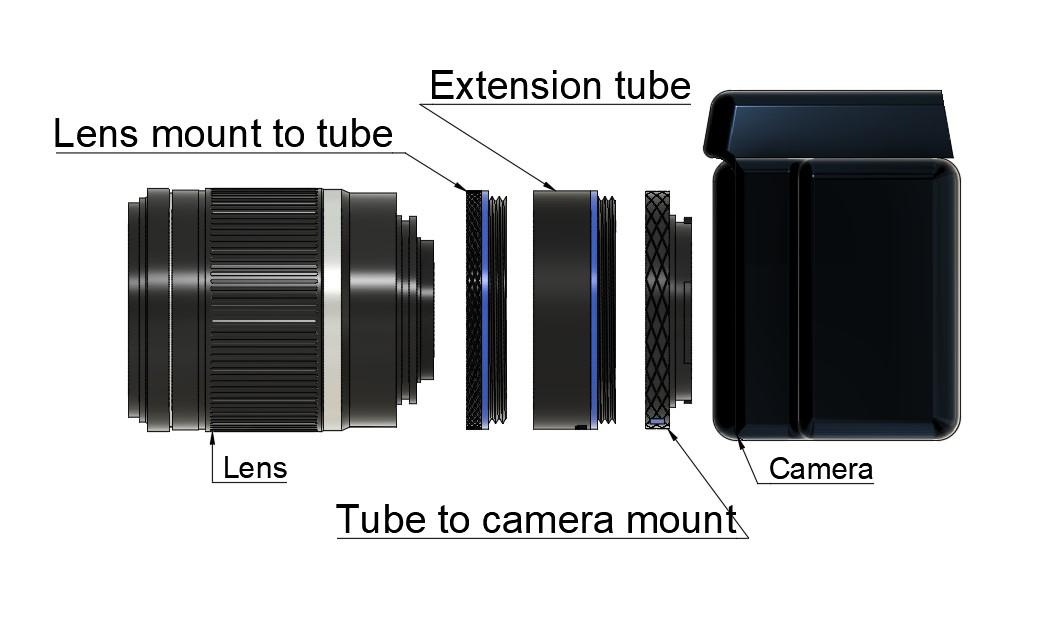
The kit has three sections that screw together. Since each section has several interchangeable options, their combination makes the kit capable of solving a large range of problems.
- Camera mount (EF and EFs lenses)
- Tubes (21mm and 31 mm)
- Lens adaptors (Forward and reverse mounted)
How Do Macro Tubes Work?
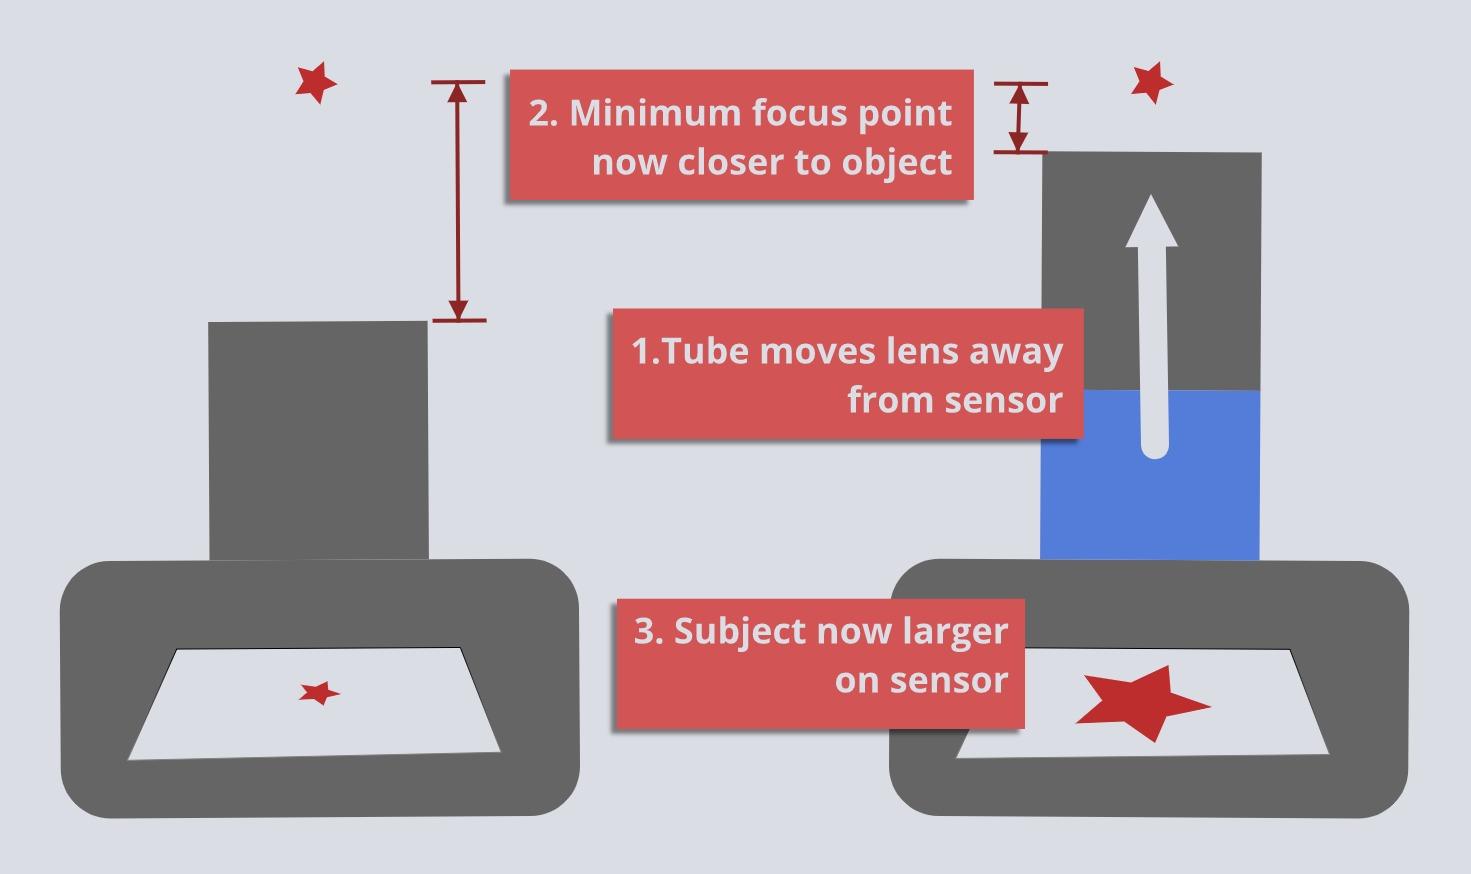
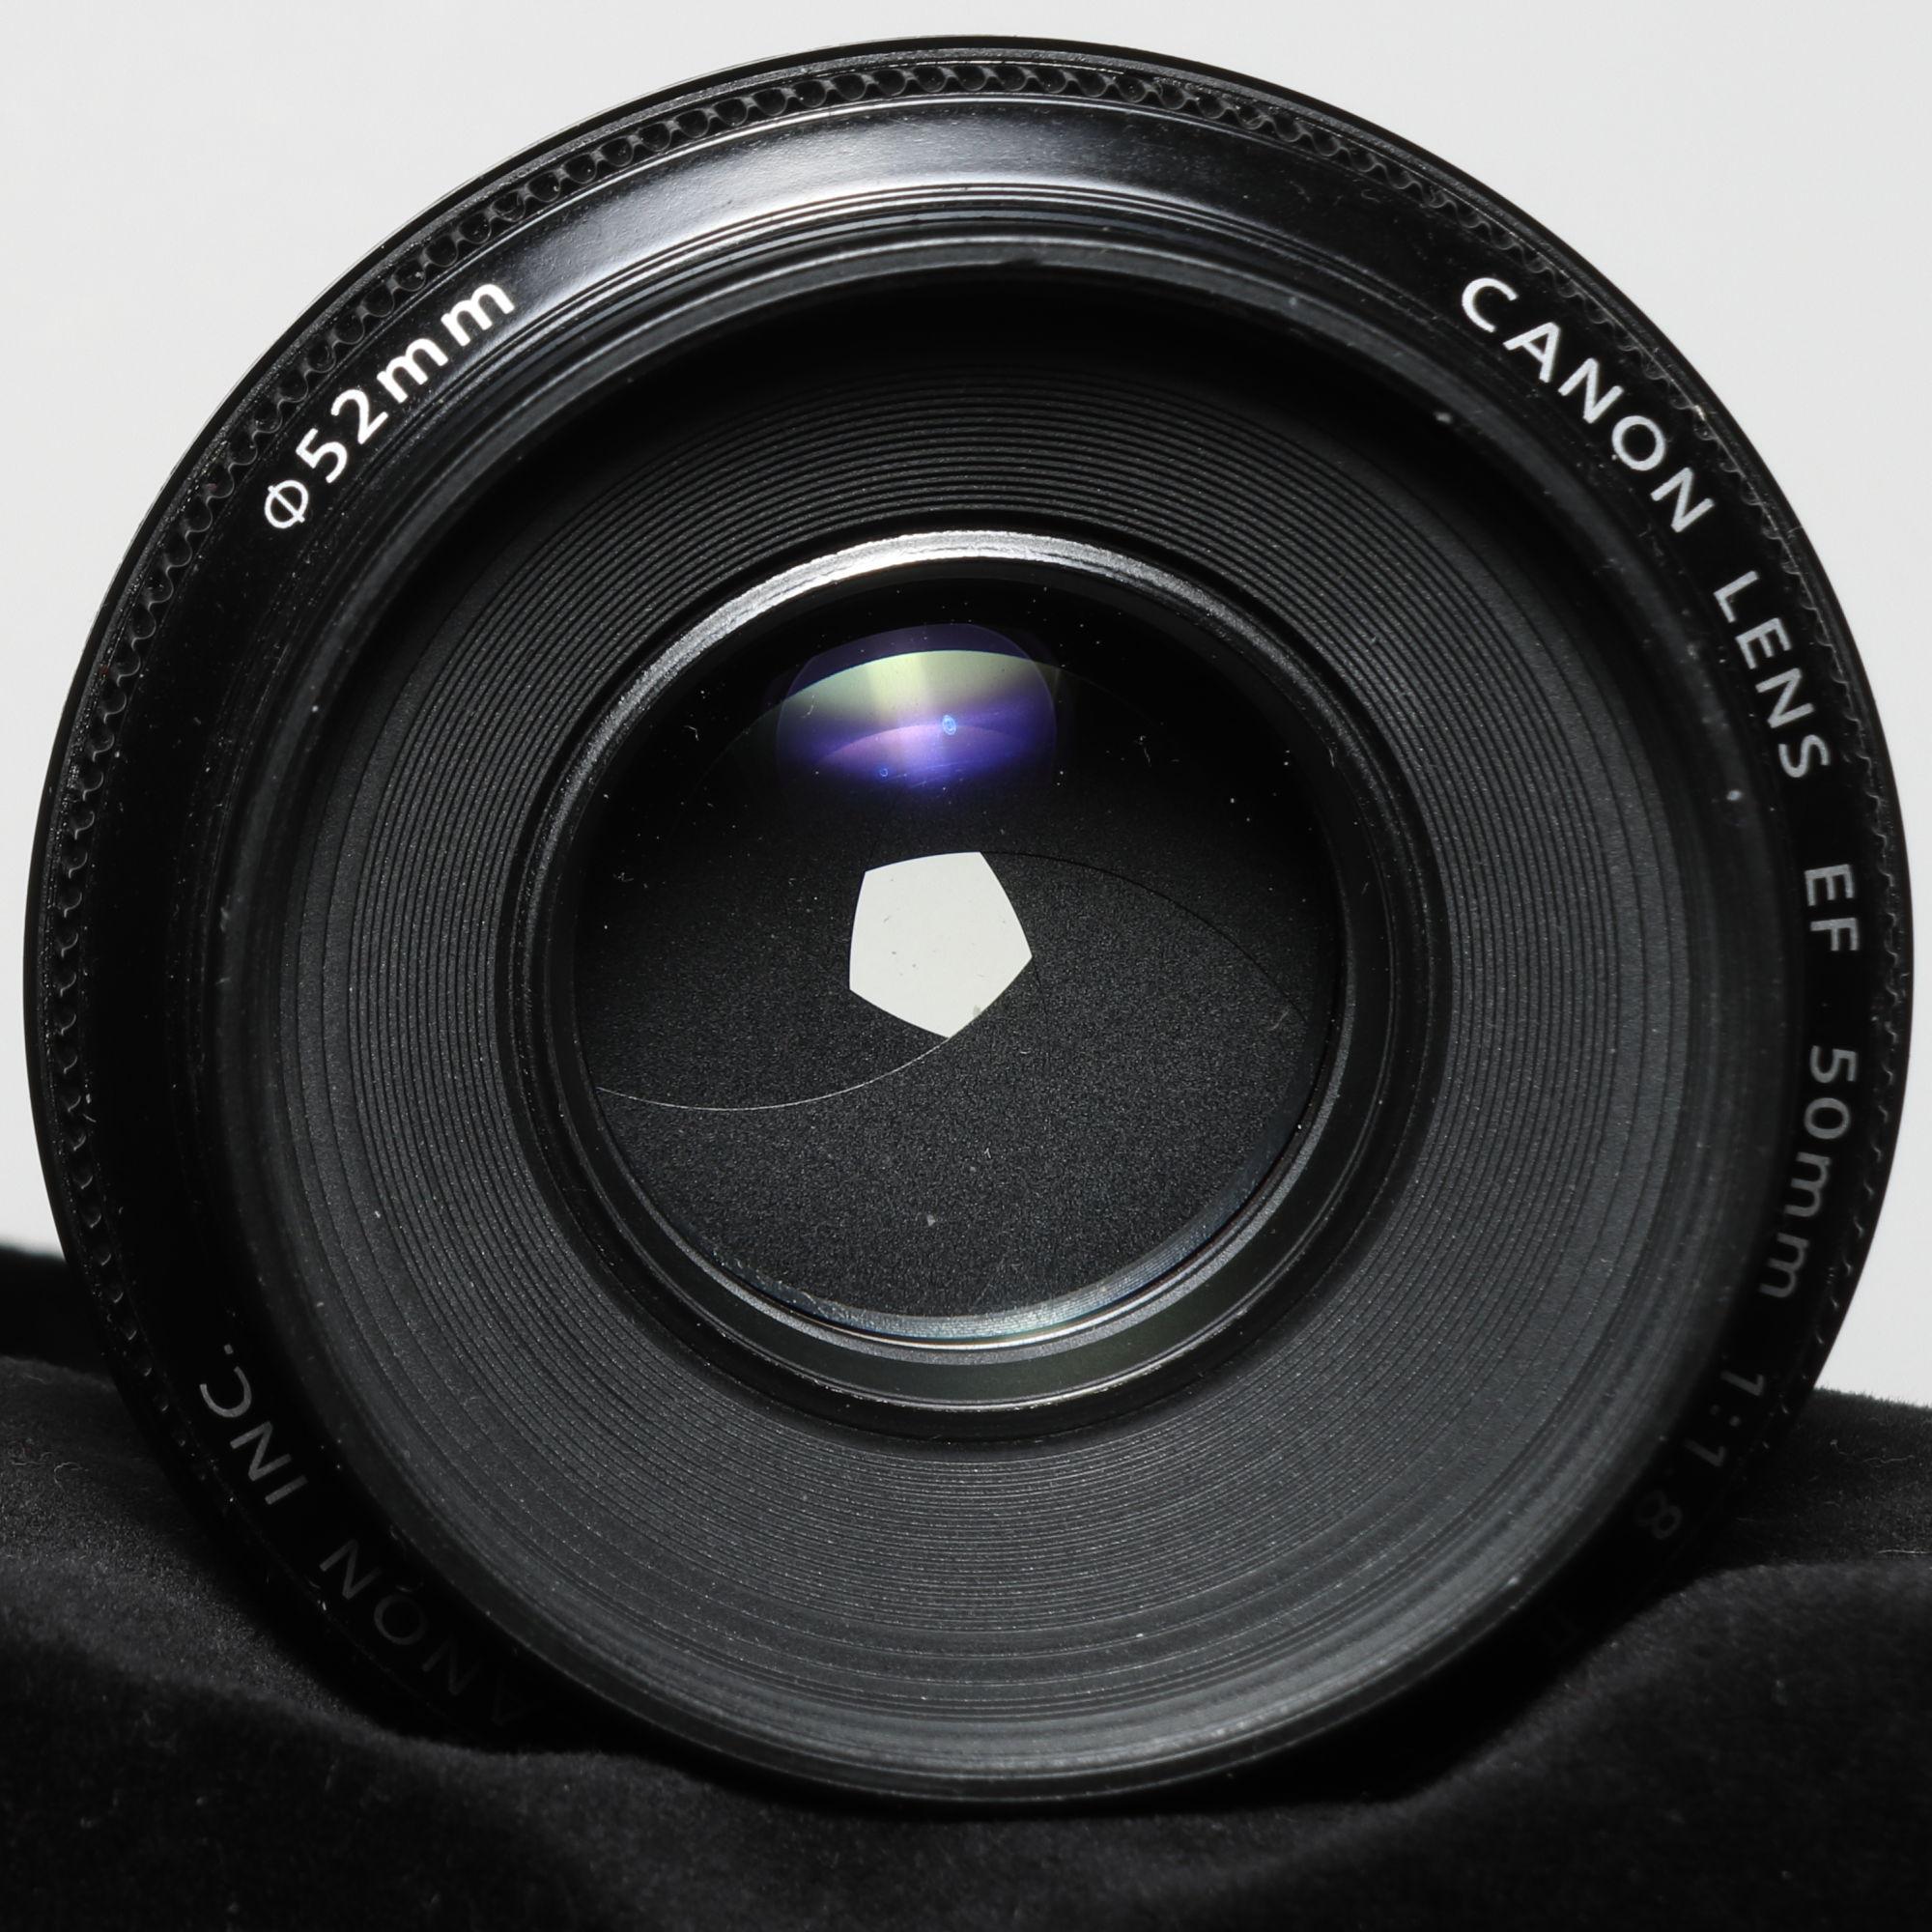
Macro tubes, sometimes called 'extension' tubes, are used to modify lenses for close-up photography. They work by moving the lens away from the focal plane, which brings the minimum focus point closer. Hence the subject becomes larger in the frame at minimum focus. (See above)
A couple of things to keep in mind with these tubes
- There is no electronic connection, so that you will lose automatic control.
- The longer the lens, the less effective the macro tube
- If the lens is wide and the tube is long, the focal point can disappear inside the lens
- The minimum useful focal length lens is about 50mm
Kit Parts: the Camera Mounts
The camera adaptor fits into your camera and accepts the tubes. Unfortunately, there is only an adaptor for Canon EF and EFs lenses. (I only have the Canon to model off and test.) If someone wants to make mounts for other cameras, it shouldn't be difficult. I'm happy to send the Fusion 360 file if it makes it easier.
Kit Parts: the Standard Tubes
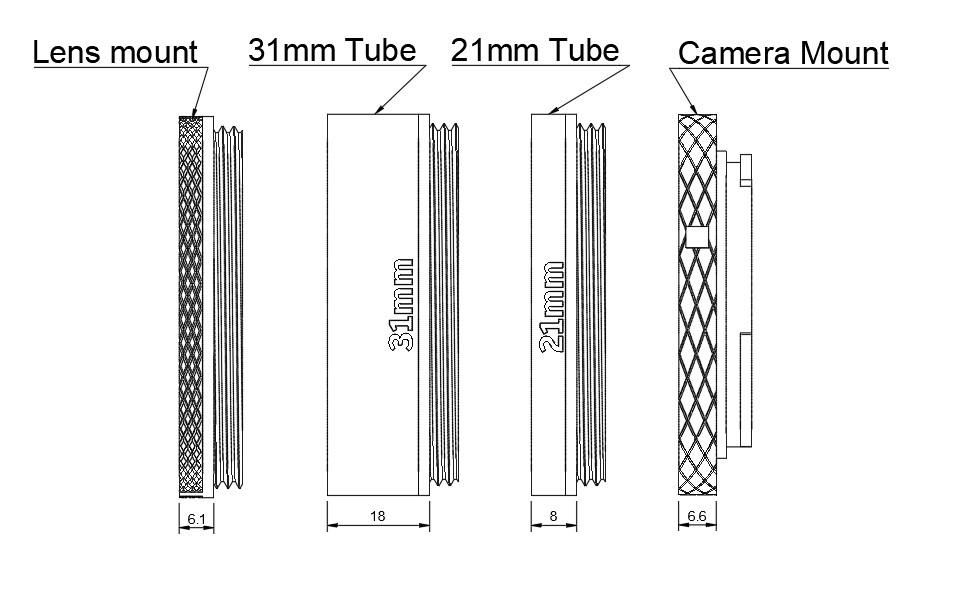
The standard tube set gives you effectively four extension choices.
| Components in addition to camera mount + lens adaptor | Effective length for calculation | |
| 1 | Nothing | 13mm |
| 2 | 21mm tube | 21mm |
| 3 | 31mm tube | 31mm |
| 4 | 21 + 31mm tubes | 39mm |
Tube lengths explained
If you screw the camera mount and lens adaptor together, they move your lens away from the camera 13mm. The tubes move the lens away from the camera the distance indicated on their label; that's why I call it the 'effective' distance, as it's not the actual length of the tube. The effective distance in the table above is what you should use in your calculations.
Kit Parts: the Tubes (customizable)
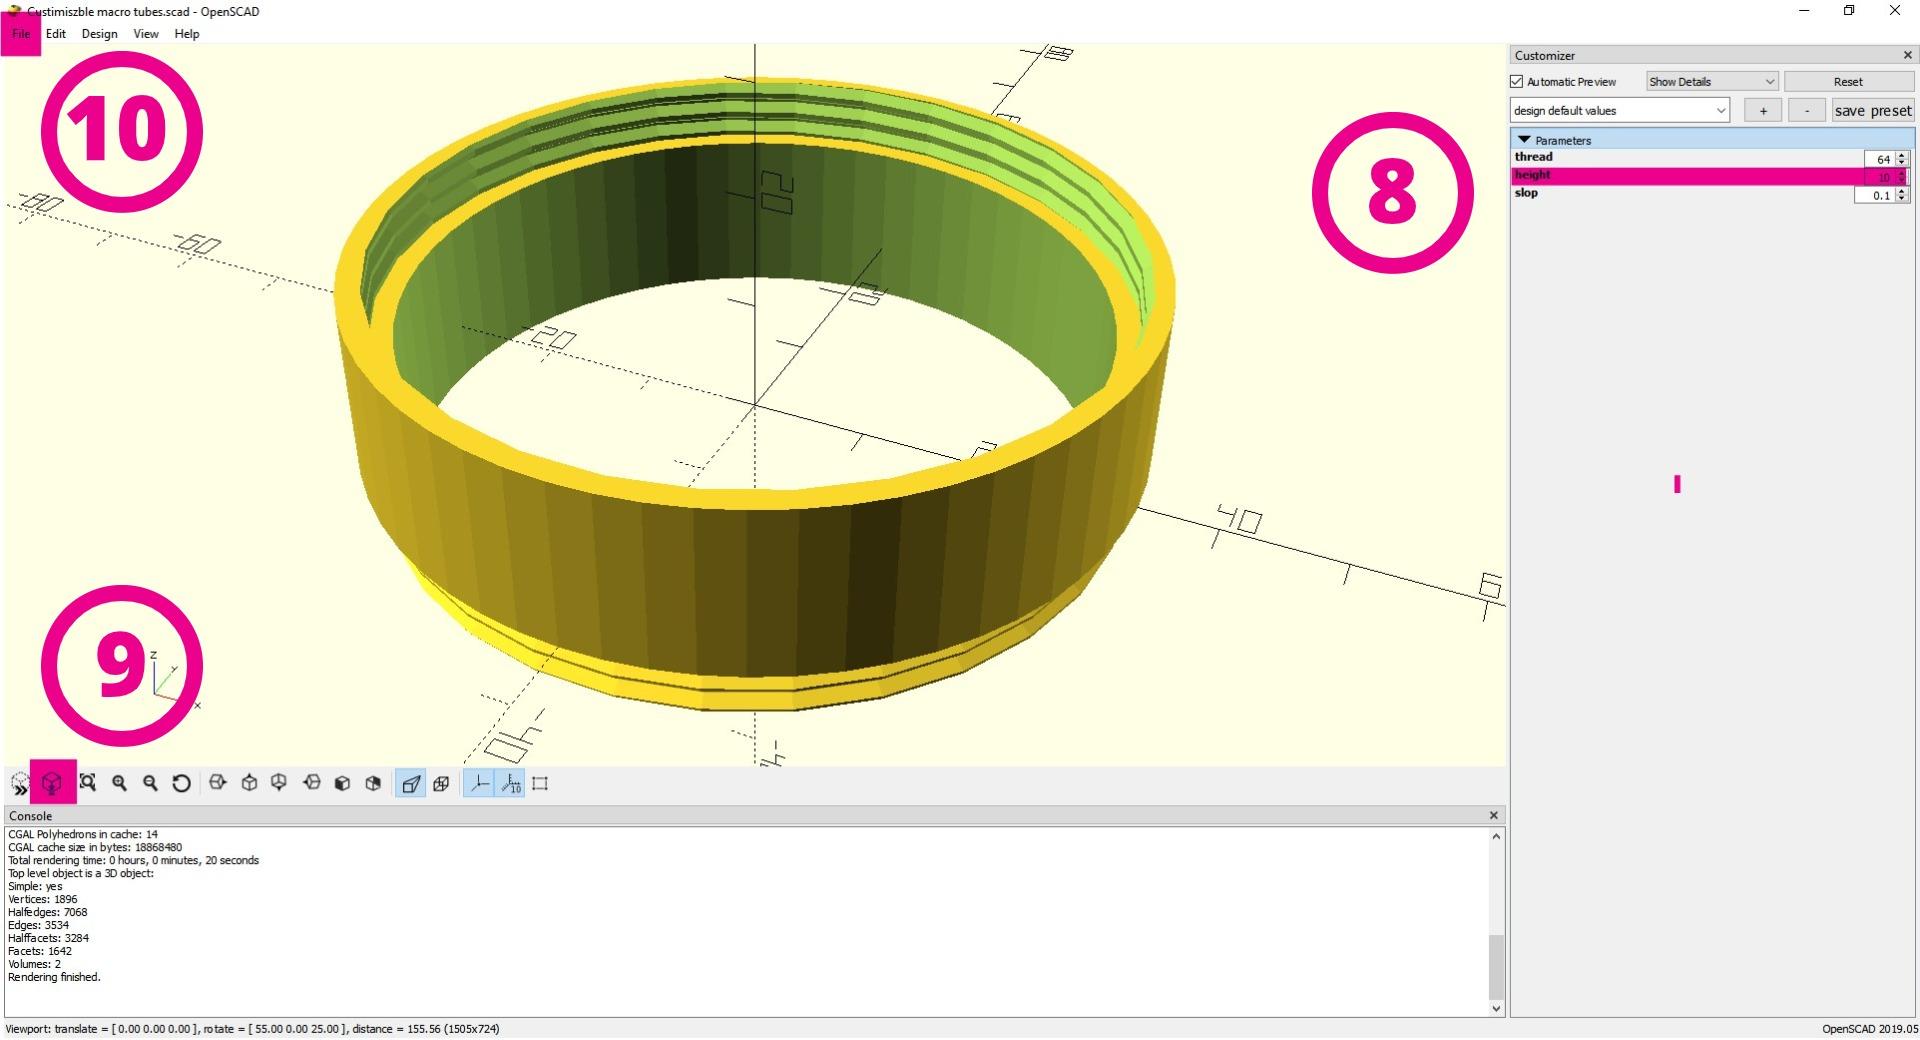
You also have the option of customising tube length. You can calculate the necessary tube length given a nominated lens and object size with a calculator like this. This option would be fantastic if you had a specific use case. Otherwise, it's not necessary.
Unfortunately, I couldn't make customisation as easy as using Thingiverse's customise function. However, I did use the software behind it. You'll have to download the software OpenScad and my file. If you are unfamiliar with OpenScad, it's CAD software for programmers. Rather than click and drag, you write lines of code. Don't worry; I've written the code. All you have to do is change a variable that is available through the interface.
To make a tube of any length:
- Download/install OpenScad
- Install this library. (Install instructions on the download page)
- Download Custimiszble_macro_tubes.scad from Thingiverse
- Run OpenScad
- Open Custimiszble_macro_tubes.scad
- Make sure the 'Customizer' is open (Bottom view menu)
- In the customiser, twirl down 'Parameters.'
- Change 'height' to the value you want
- Press 'F6' (render)
- Under 'file', Export the.STL file
- Print.STL file
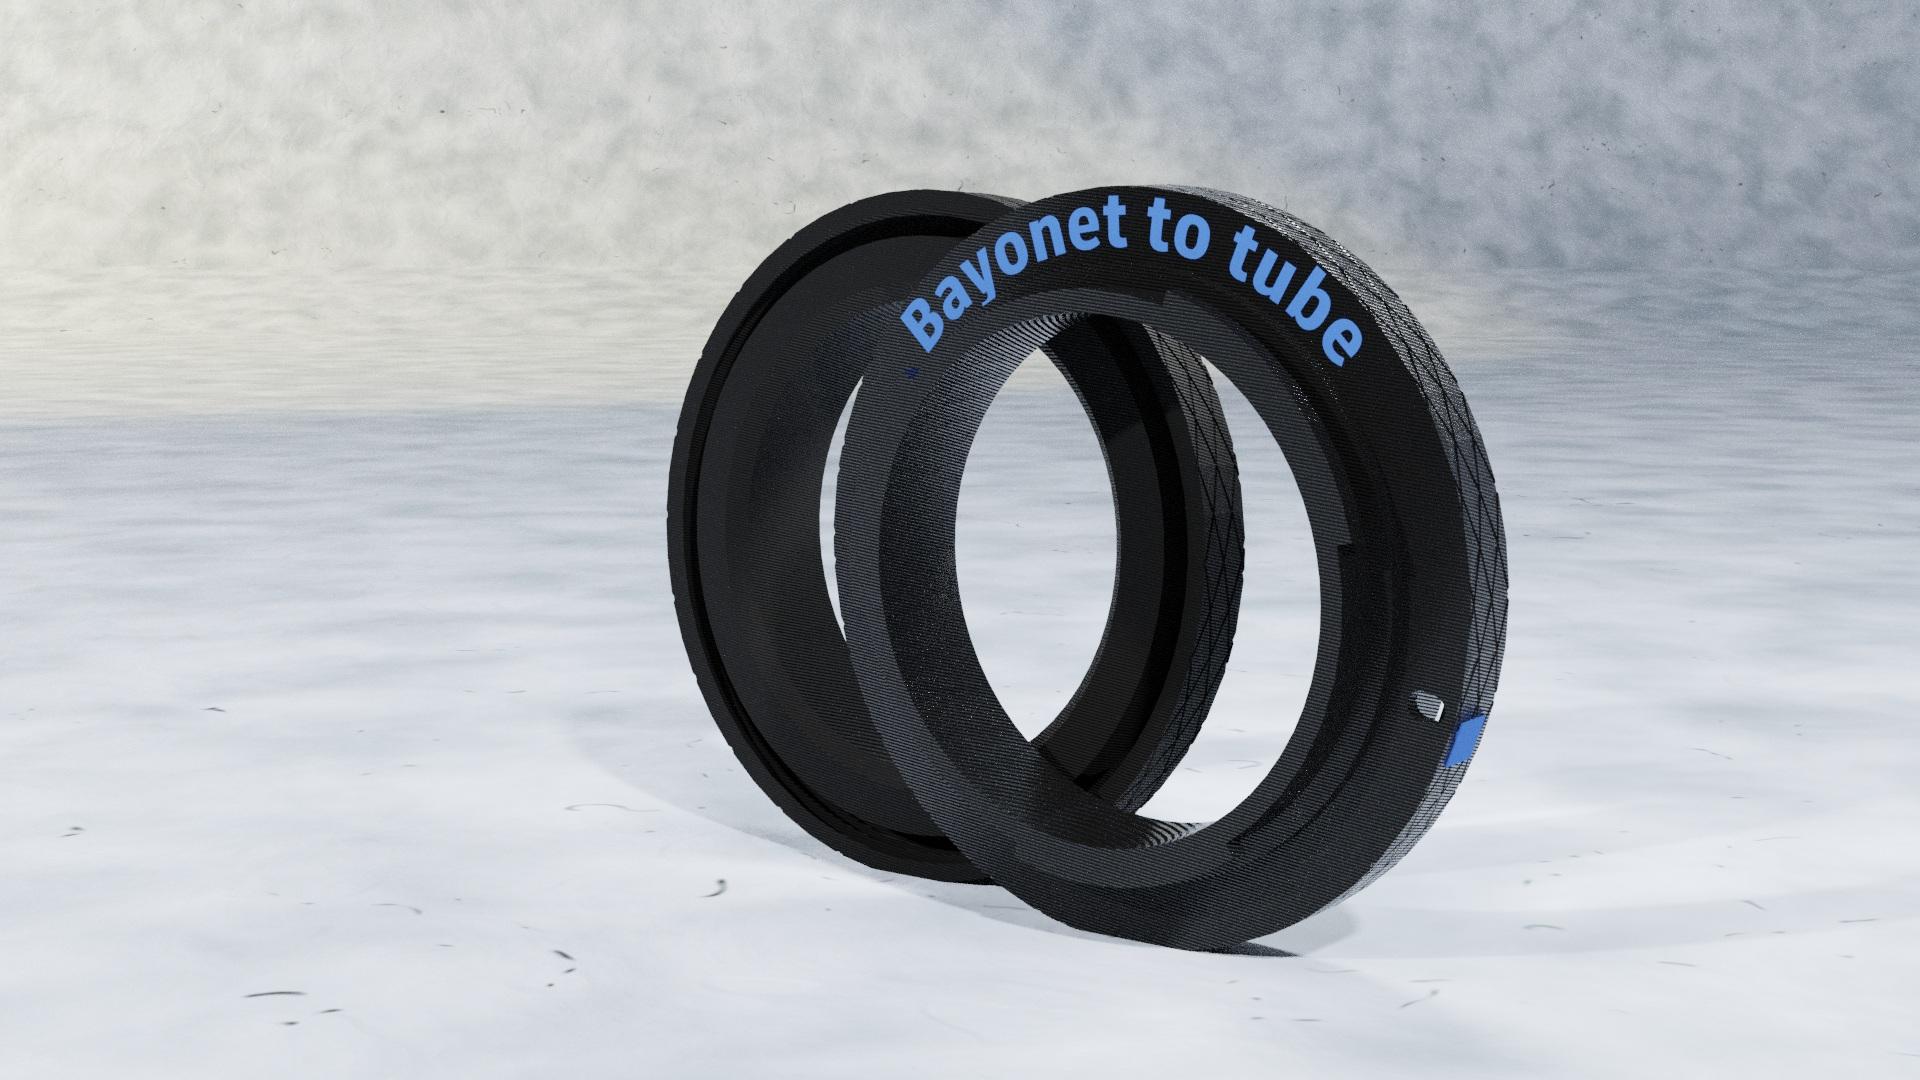
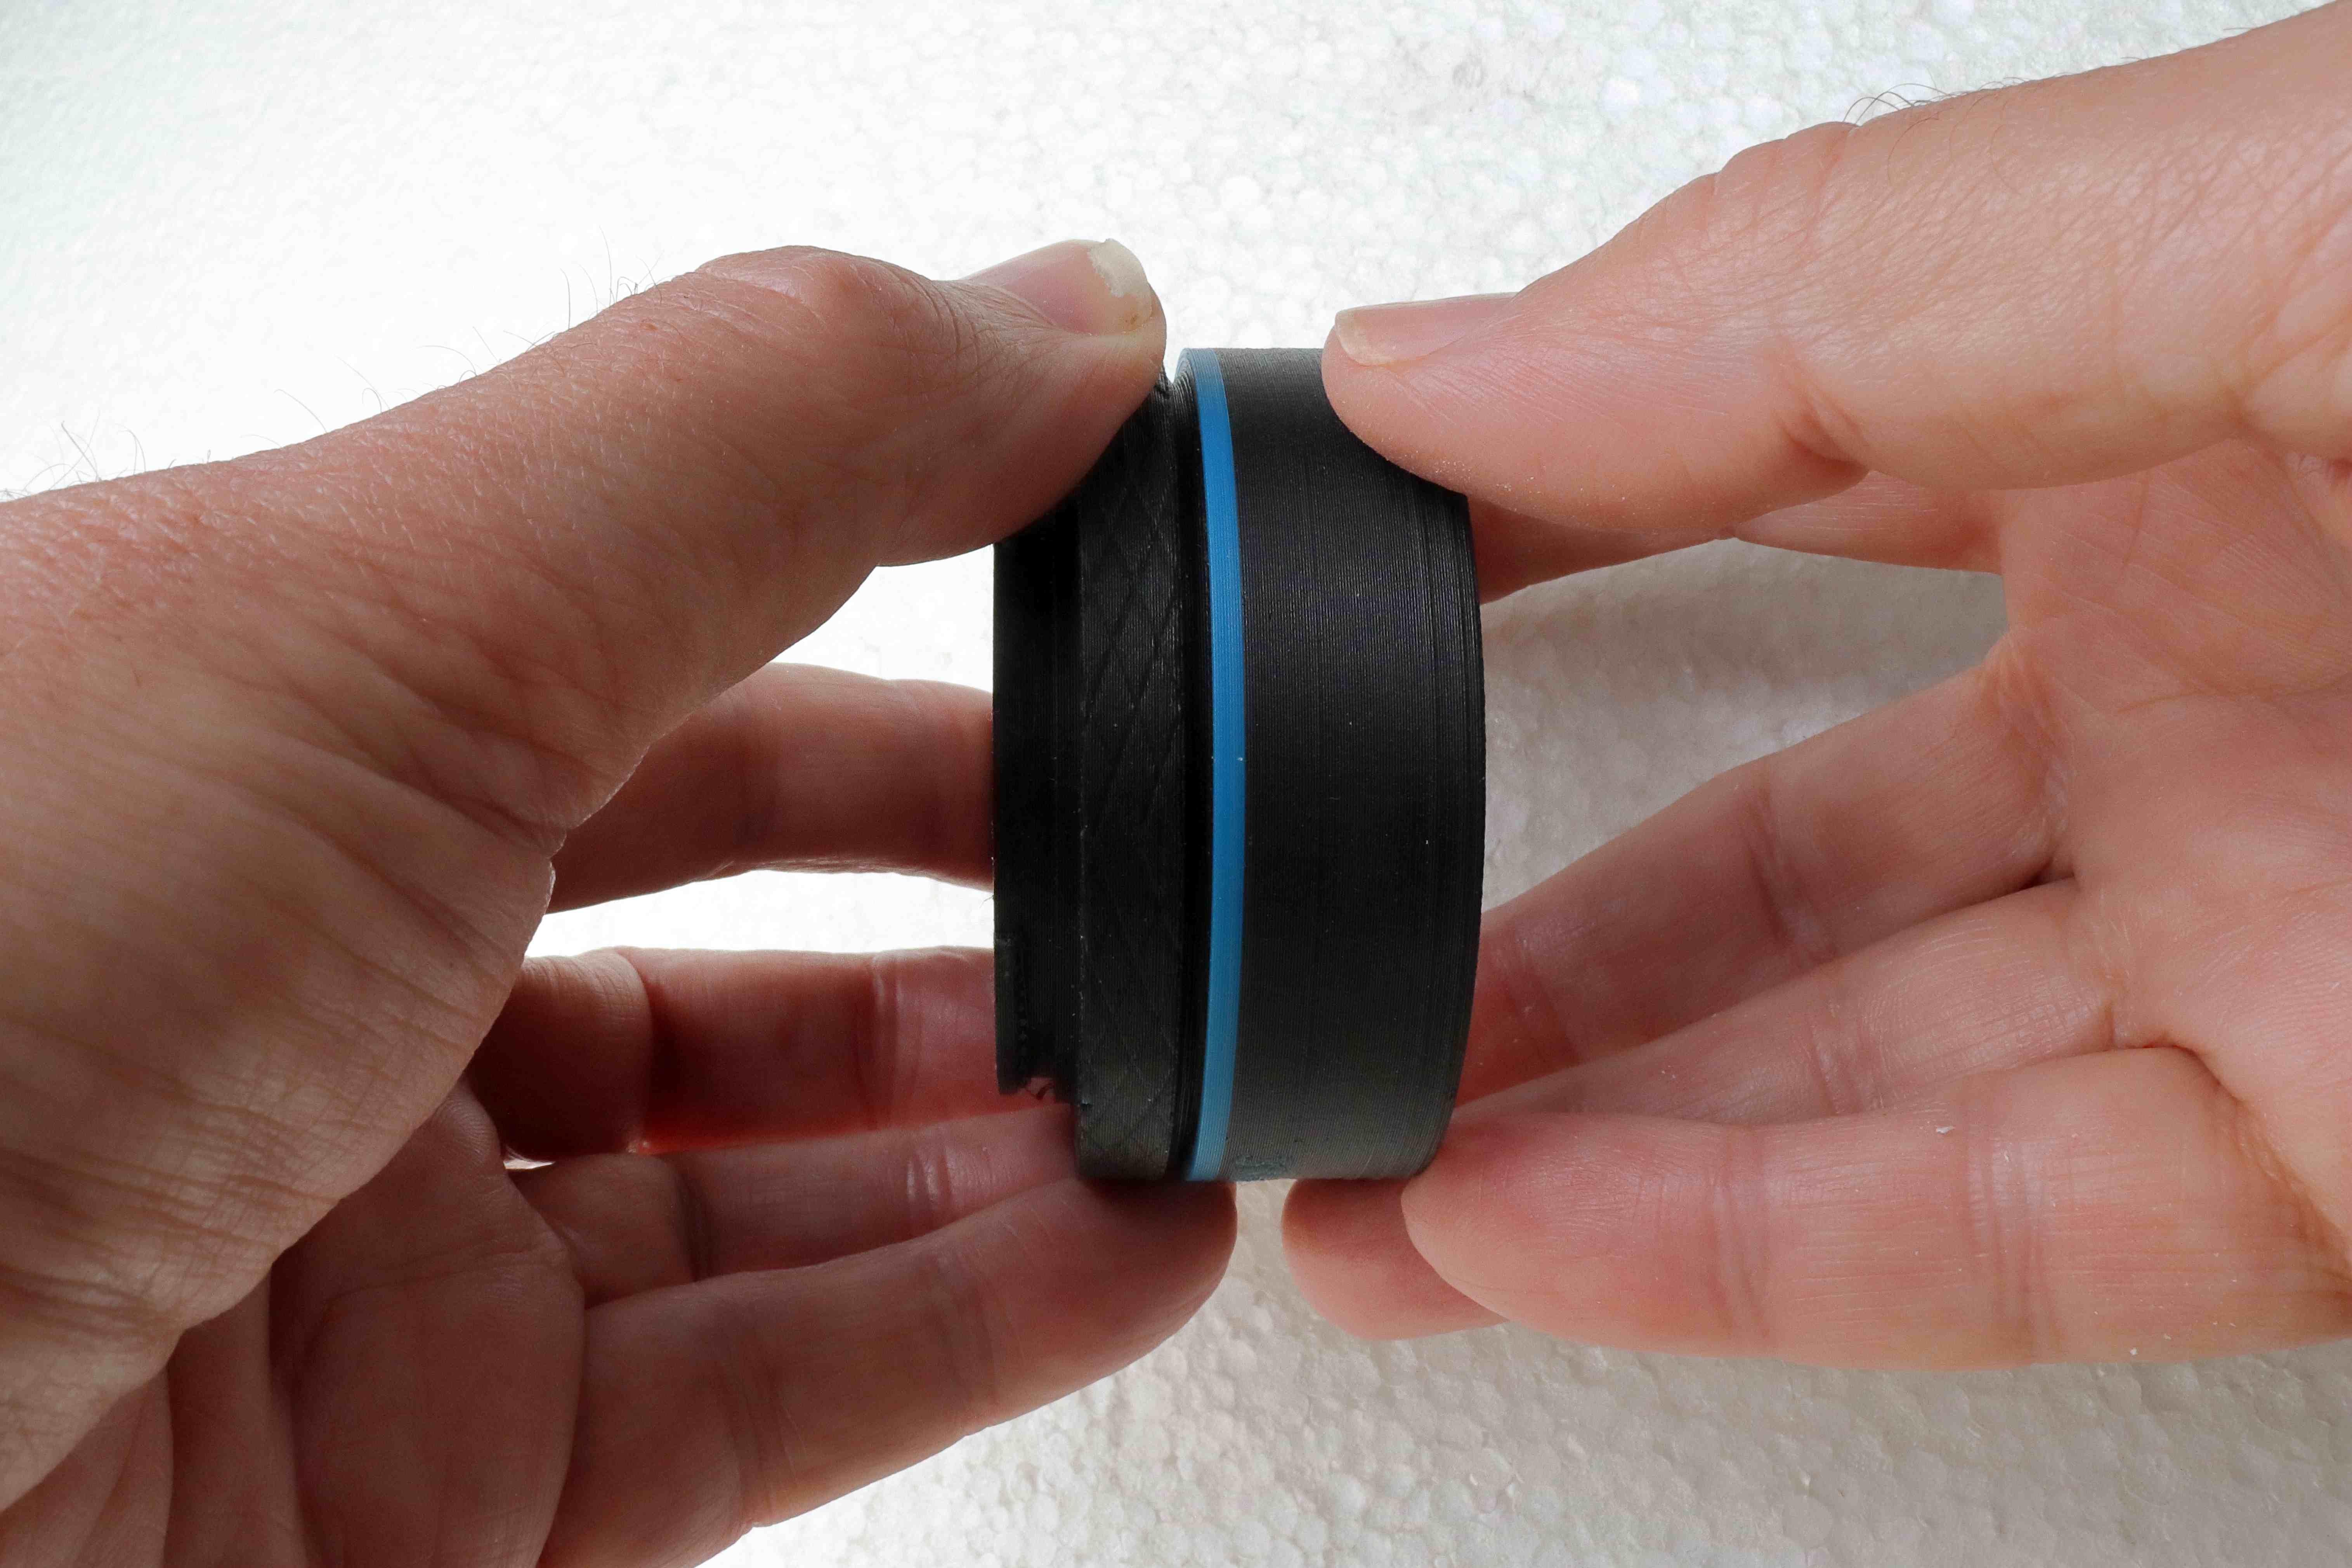
Kit Parts: the Lens Adaptors
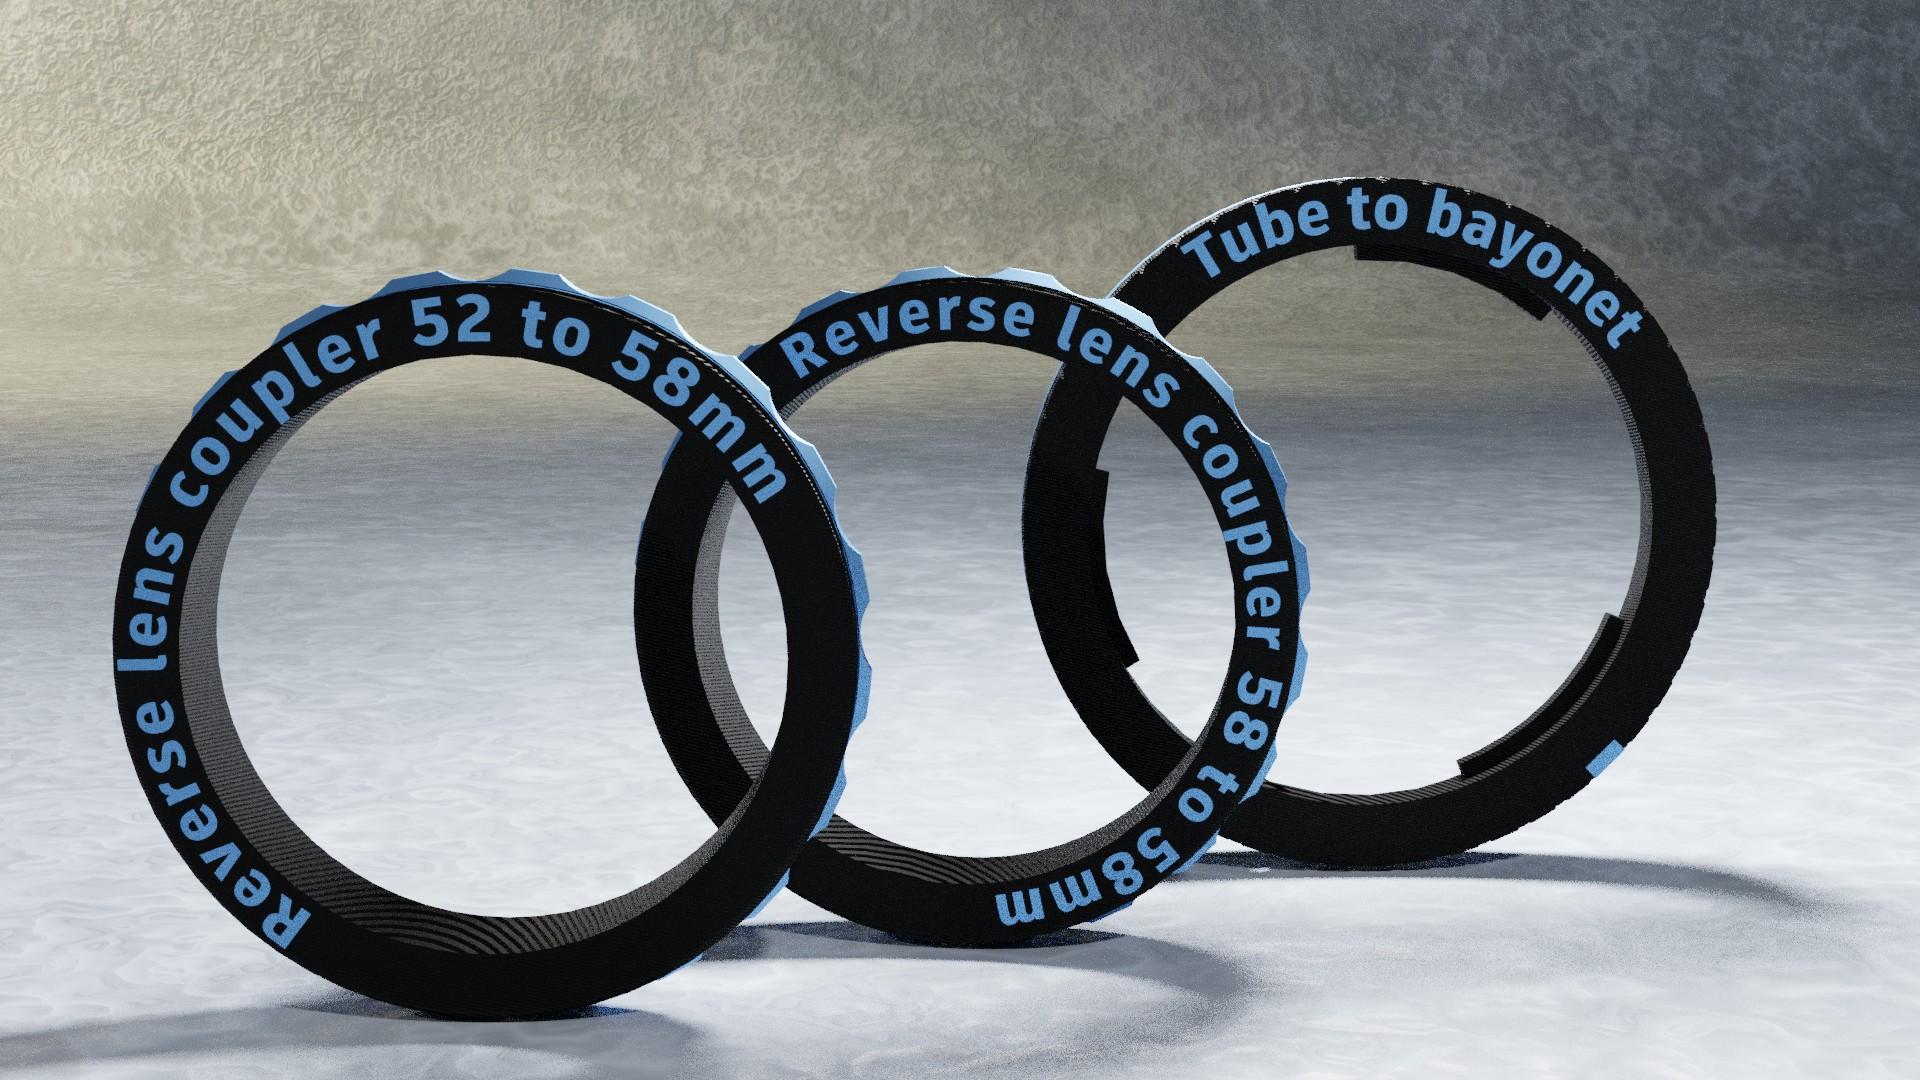
You have the choice of mounting your lenses normally or reversed.
- Standard cannon mount EF/EFs
- Reversed to fit 52mm filter
- Reversed to fit 58mm filter
When the lens is reversed you can add
- Reverse lens shade (This stops stray light from entering your lens, protects the exposed rear element and allows you to add filters and the diffuser)
- Diffuser
The 3D Print Process
Printing
- Filament: PLA, but PETG, if you have, might wear better.
- Layer height: Set to 0.2mm. 0.1mm is preferable if it is available to you. It will help define the threads.
- Support: No. Print in the orientation the file comes.
- Brim: Yes. All items have a thin edge on the build plate. A brim 5 to 7mm brim will help to secure these.
- Colours: The primary colour should be black, so it reflects the minimum light. Use clear filament if you print the diffuser.
Post-processing
You must clean up the threads carefully. Fit and check the adaptors before you shoot. Do this carefully, as the first fittings will help 'cut' the threads. If the adaptor doesn't go on easily, check the threads for any stray filament and make sure the adaptor is parallel to the front of the lens. Screw the adaptor on and off a few times till it turns easily.
Coping With Minimal Depth of Field

Minimal depth of field
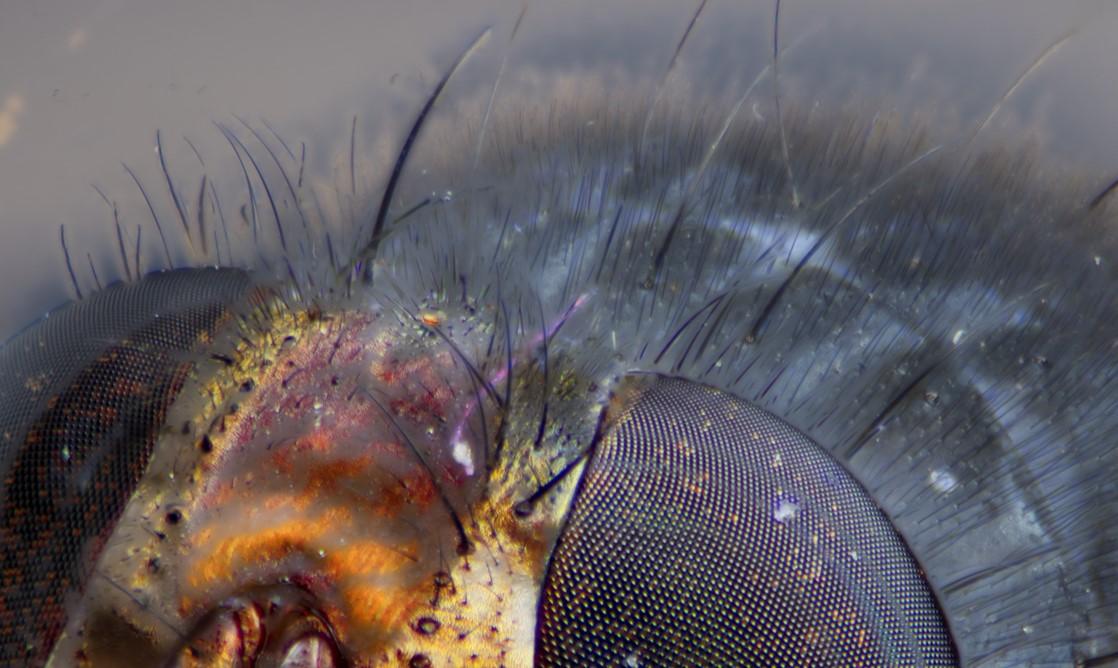
The area in focus (depth of field) depends on how far your focus (the focal point) is from the camera. The closer you focus, the smaller the area in focus. We are generally really close in macro photography, so the depth is minuscule, often fractions of a millimetre. (See left image above. Note only a few hairs behind the fly's eyes are in focus)
Stopping down to increase depth has limits.
You may know that the smaller the aperture, the larger the depth of field. However, most lenses perform their best at about one or two stops above their maximum aperture. As a result, when you stop down more than two stops, you will be trading depth of field for quality.
While this is true of any lens those mounted on extension tubes, have a higher effective f-stop. So for example, you might set your lens to 5.6 (acceptable), but with an extension tube, this may become effectively 14.7, which means less quality. Not only this, but issues like refraction become more apparent at macro levels.
This is a general principle that may explain where your problems lies, it doesn't mean you shouldn't stop down to F22 if needed. For a particular subject, under specific conditions the difference may not be noticeable, particularly by the viewer. The best approach is to take a test image and evaluate the result.
Focus Stacking
BTW: If you want more of your subject in focus, focus stacking is a fantastic method. With focus stacking, you take multiple images moving the focal point a little further ahead each time. You then use software that 'stitches' all the sharp bits together to end up with one image with everything you want pin-sharp. (See the right image above. Note: OK its not all in focus, I'm still learning)
This method is difficult because you have to move the camera in small precise steps. A helpful tool is called a 'Macro slider' or 'Slider rails'. The camera sits on rails and is moved by an exact mechanism like a lead screw. If this sounds scary, don't worry; I've designed one that you can 3D print. More of this later.
Ten Tips to Get Sharp Macro Images
Depth of field in macro photography is small so achieving sharp focus is difficult. Patience is key, but the following ten tips help to ensure your patience doesn't get too stretched.
Move the camera, not the focus ring.
In macro photography, minute movements can make a big to your framing and focus. The act of focusing can put your framing out of wack, and reframing can put your focus out of wack. The solution is to set your lens on minimum focus. Then move the camera back and forward till the subject is both in the frame and in focus; this still takes patience and practice.
Take lots of Images
Since onboard image storage is relatively cheap and your motor skills imprecise, you may have to play a numbers game. The more images you take, the greater your chances are that one is sharp and reasonably well framed. From my experience, you may take fifty images before you get an acceptable one.
Use 'Burst' Mode
Burst mode takes a rapid series of images with one press on the shutter button. Burst mode automates the previous suggestion.
Give your camera and subject solid support.
If you can, then support the camera and subject with something heavy. (Heavy will create inertia that helps stability). Focus is relative, which means you can move the camera or the object carefully back and forward until the subject is sharp.
Use the magnify function on your camera.
The small monitor on your camera can be deceiving, the subject will appear to be in focus, but when you get the image back for review, you may see that it's soft. Most digital DSLR's have a function where you can magnify part of the screen 5X or 10X. The magnification helps a lot. The same function is available when you review your shot through the camera. It's advisable to use the function again to ensure that you have nailed focus before packing up a setup.
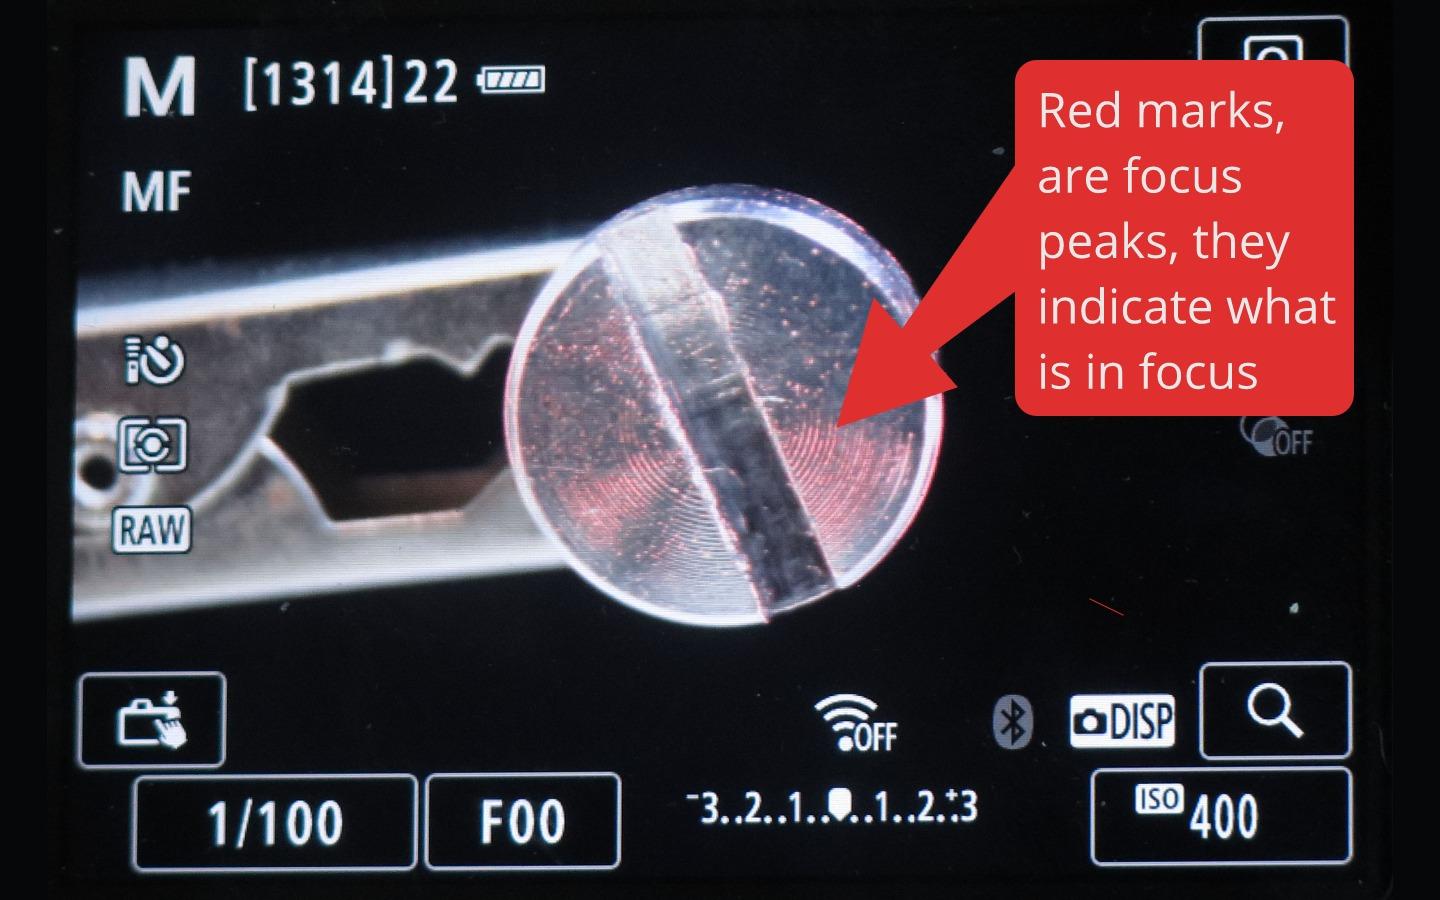
Use focus peaking (See image above)
If your camera has a focus 'peaking function,' turn it on. When 'focus peaking' is on, the area's in focus is highlighted by red lines. (See your camera manual)
BTW: If you own an older Canon without focus peaking, you might be able to add it with Magic Lantern, a software addon for your camera that includes focus peaking.
Use a separate monitor.
This method can be as simple as connecting your Ipad or laptop via USB or wireless. Check what free software came with your camera, alternatively freeware like Digicamcontrol does a great job. The larger monitor makes focusing easier.
Use a work light
It won't be easy to see well enough to focus if you are set up for flash. An additional light just for focusing may help. A home, I use a desk lamp and sometimes a bright LED.
The Artistic Focus
Not everything has to be in focus. However, you can direct the viewer's attention to where you want by leaving the subject in focus and the rest out of focus. If this is done well, your viewer won't notice soft focus because all of their attention is on the subject, which is where you want it.
Eyes must be in focus (even bug eyes)
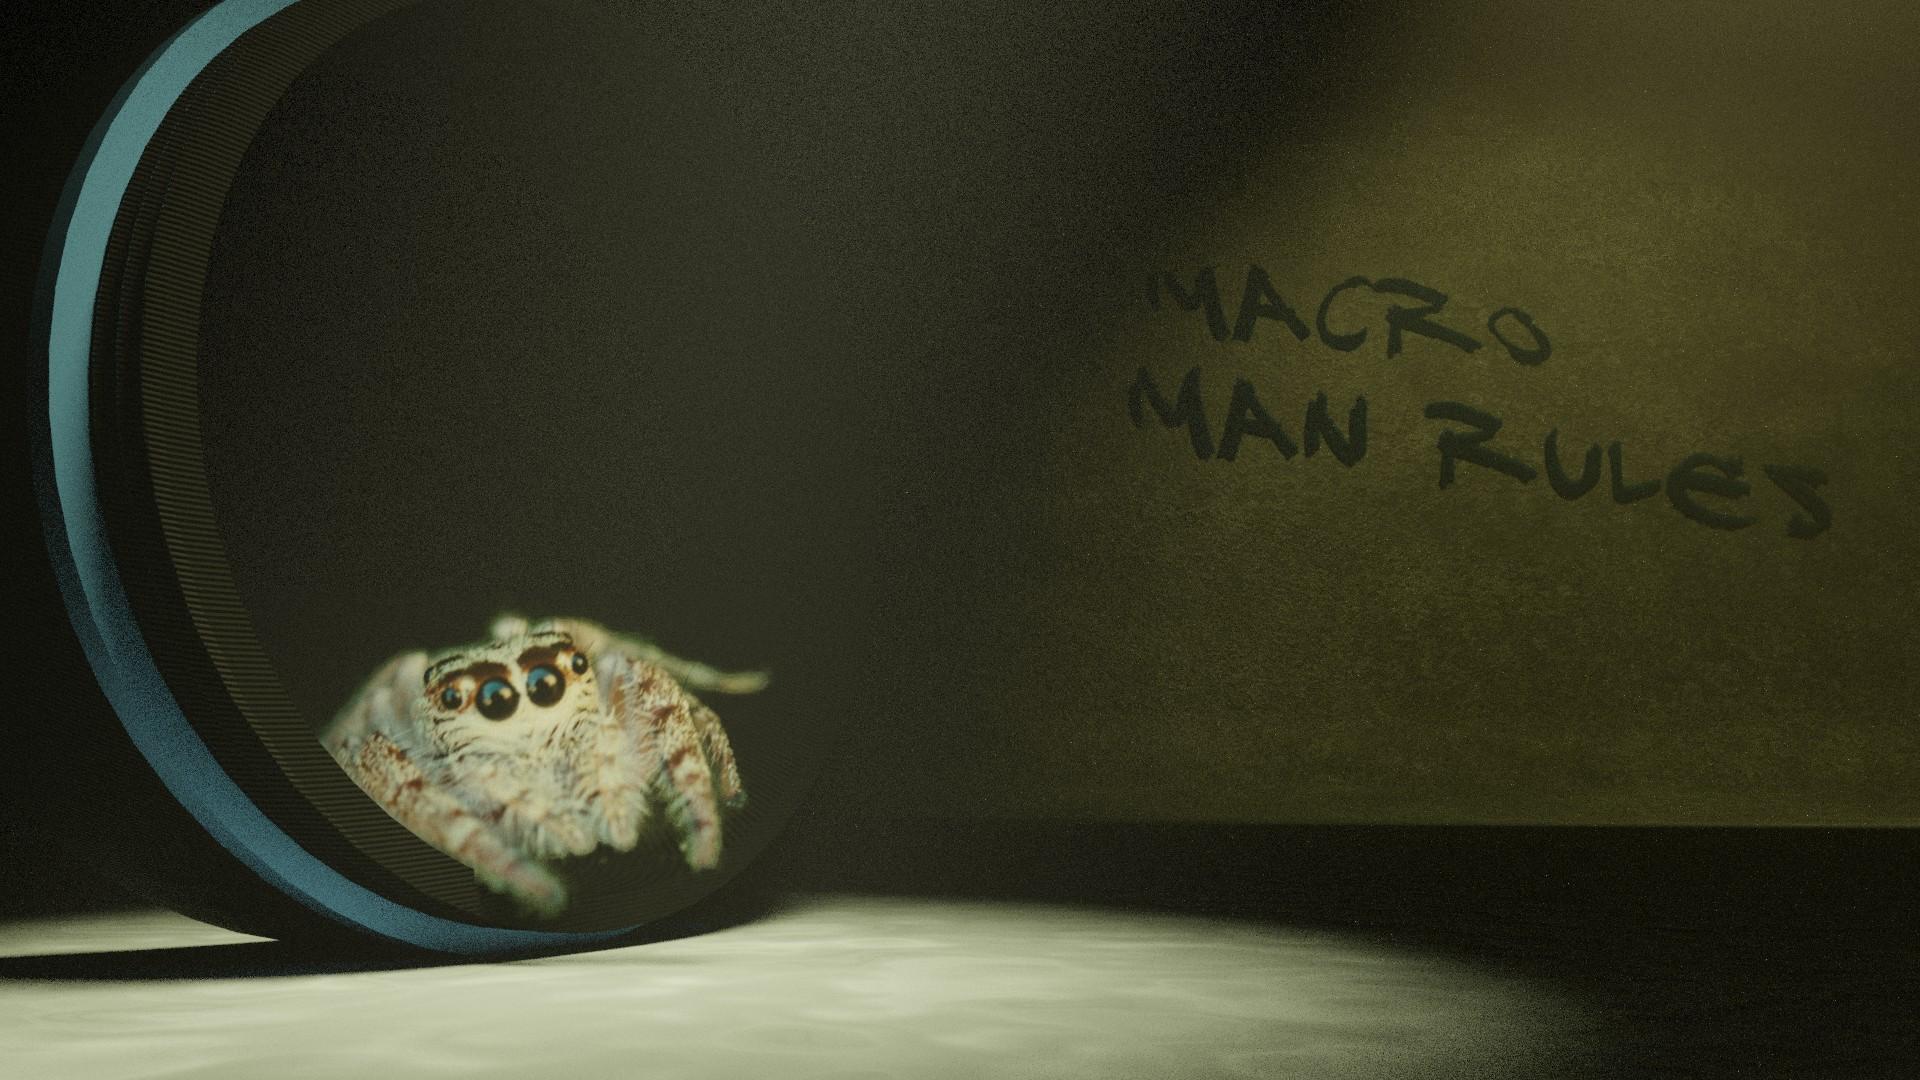
Viewers will notice if 'eyes' are out of focus. If nothing else, get the eyes in focus. If you look closely at the image of the Jumping Spider, which is used repeatedly in this series, you'll notice the only things in sharp focus are the eyes; the chances are that you never noticed this.
How to Set Aperture When Using Extension Tubes.
When a lens sits on your camera, the aperture usually is wide open to let in as much light while you set up your shot. The aperture only shuts down when you take the photo. As a result, when you remove a lens, it will be wide open.
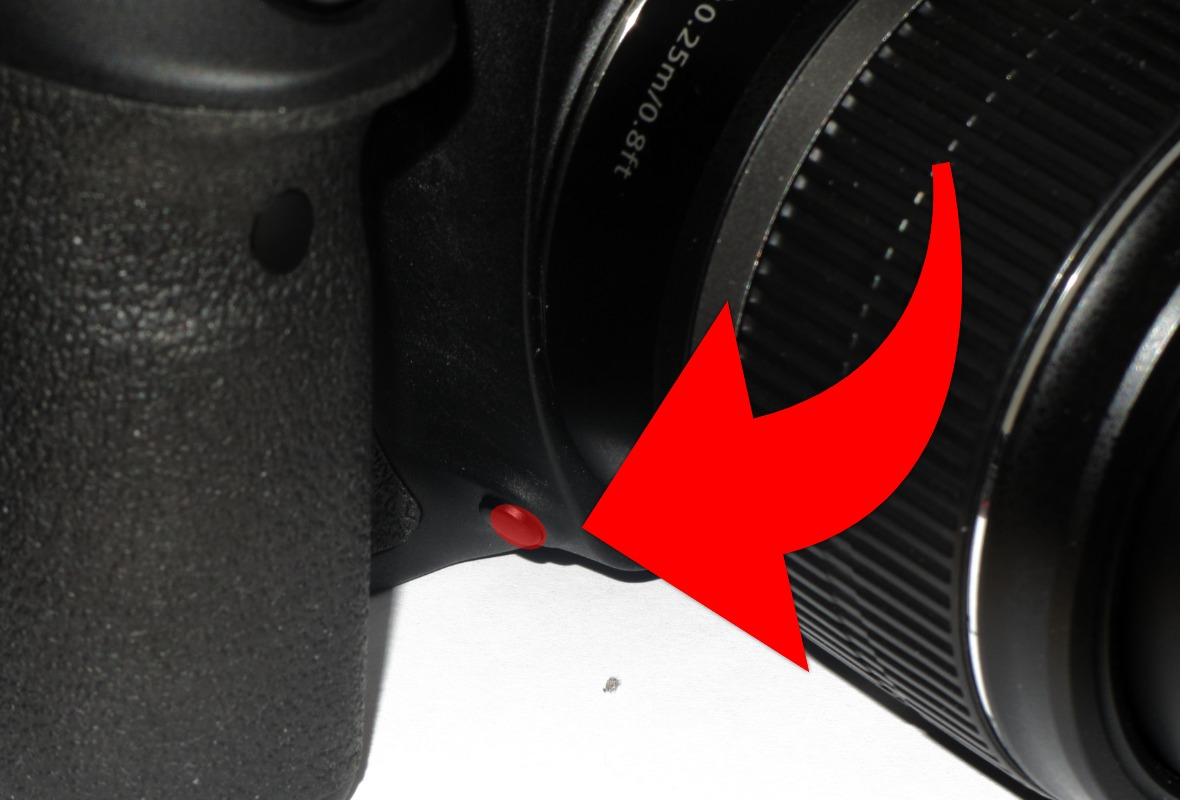
There is, however, a small button on the front of the camera just next to the lens barrel. If you press this, the aperture will close to the value set by the camera, allowing you to 'preview' the depth of field. We can take advantage of this to 'set' the aperture before we remove the lens.
Procedure
- Set the aperture to the desired f-stop using the camera's control
- Push in and hold the 'Depth of Field Button.'
- At the same time, press and hold the lens release button, usually located on the other side of the lens.
- Still, at the same time (it's not easy,) hold and twist the lens to remove it.
- Check that the aperture is partially closed. (Above right upper aperture fully open, right down closed down)
You can now mount your lens on the extension tubes. The only way to change the aperture is to repeat this procedure.
What Tubes and Adaptor Should I Use

Calculators like this show you precisely what tube length you need to get the shot you want. There are also smartphone apps that do the same thing, but I can't see myself whipping out my smartphone every time I take a macro shot. We need a 'rule of thumb' that will get us close to what we need.
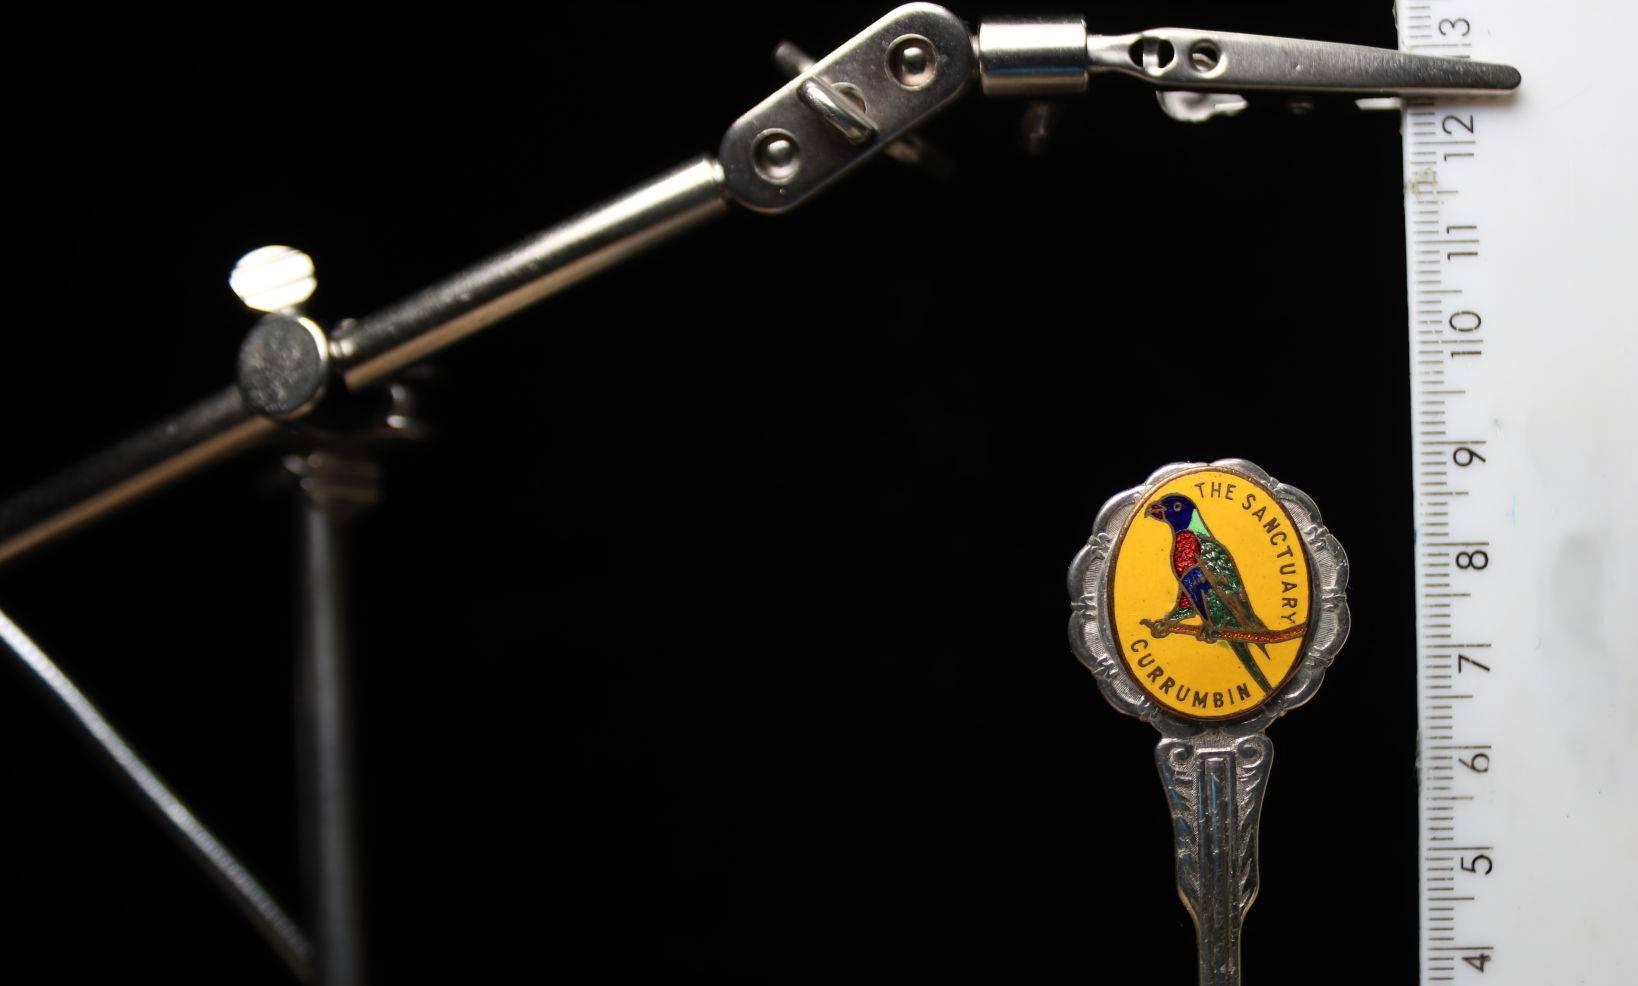
Think of it this way. If you held up a tiny picture frame immediately in front of your subject, how big would it have to be to include what you want to see? (see above)
I shot some tests tind out, and the results are here.
So what were the conclusion from this test and my reading?
Tubes with forward-facing lenses
- Best for larger objects, 15mm and up.
- Don't go wider than a 50mm lens.
- A 50mm lens will cover objects 100mm down to 15mm high.
- See the table for the steps
Tubes with reversed lenses
- Best for smaller objects
- Use lenses below 50mm
- An 18mm lens will cover objects 3.5mm down to 3mm hight
- See the table below for the steps
Notes:
- I Used a 50mm lens because it's the fastest and sharpest I have, and the 18mm because that's the widest I have
- I did a test with a forward-facing lens at 18mm but found that at even 13mm tube length, the minimum focus was almost touching the lens.
- I did another at 25mm and found very little difference compared to the 50mm, and it got too close to properly light with39mm of the tube.
Assembly Procedure
- Assemble tube system first (See above)
- Attach tube system to the camera
- Add a lens to the tube system
What Sort of Images Can You Expect to Take?
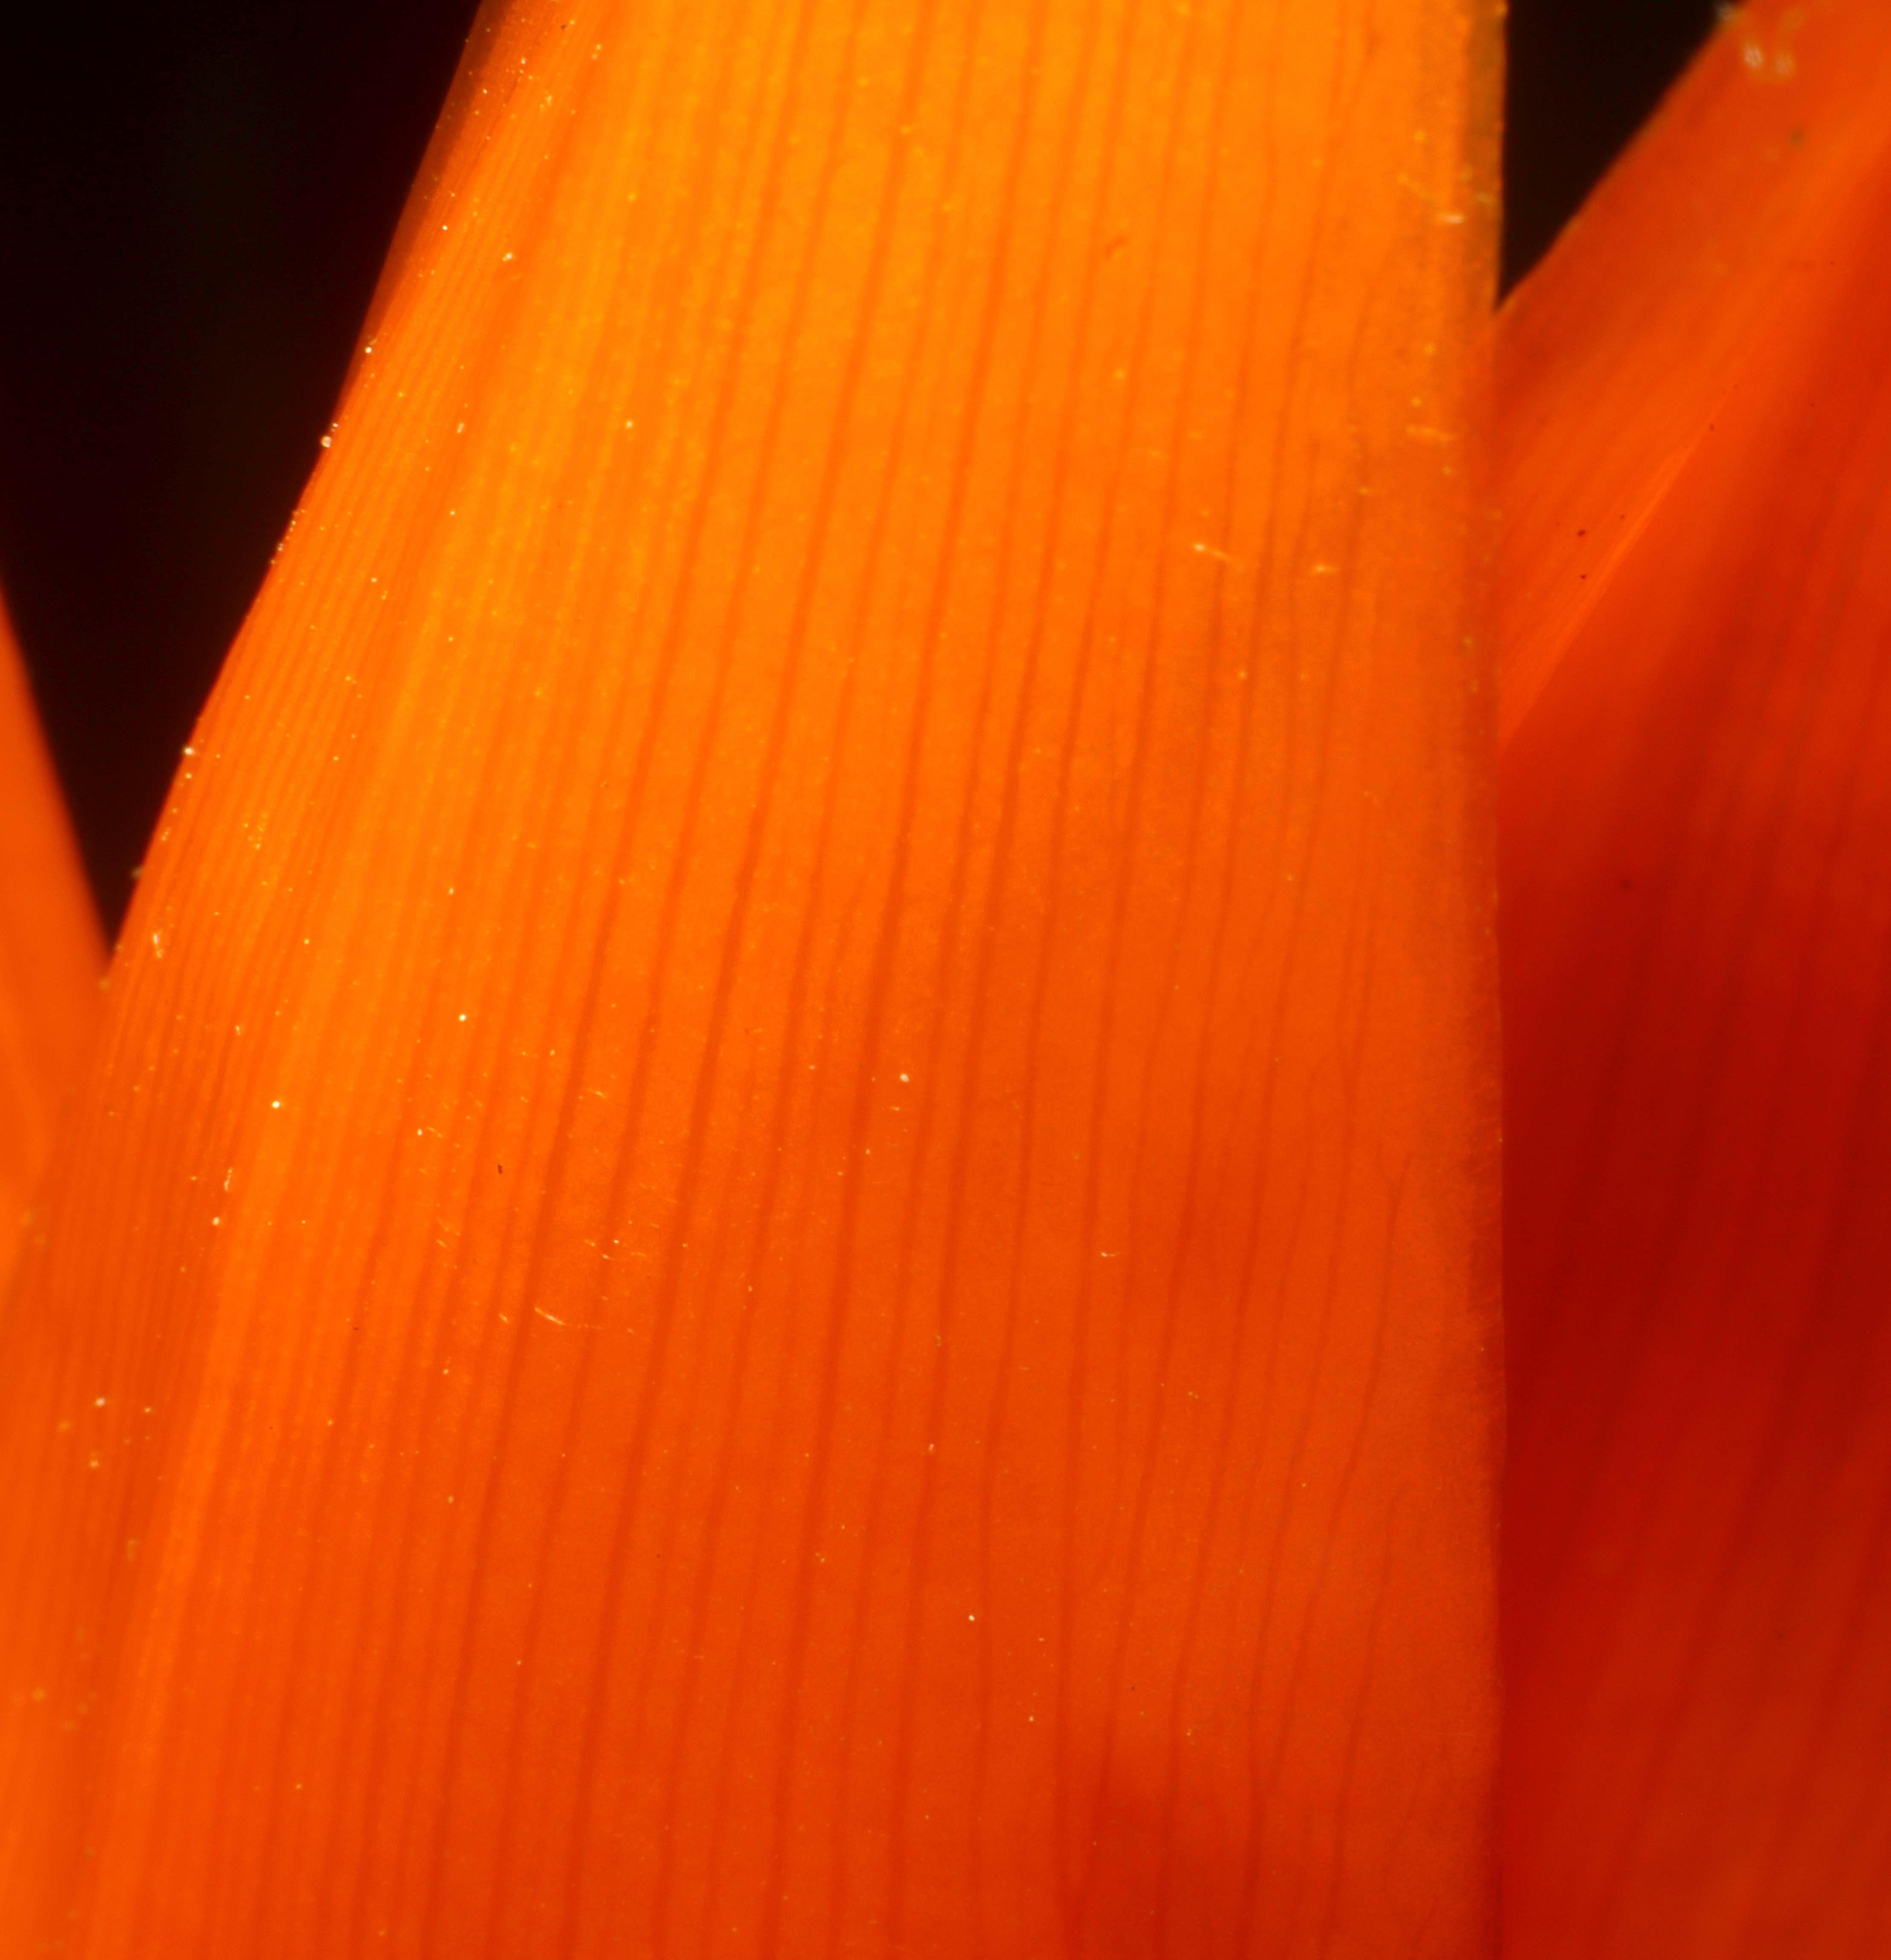
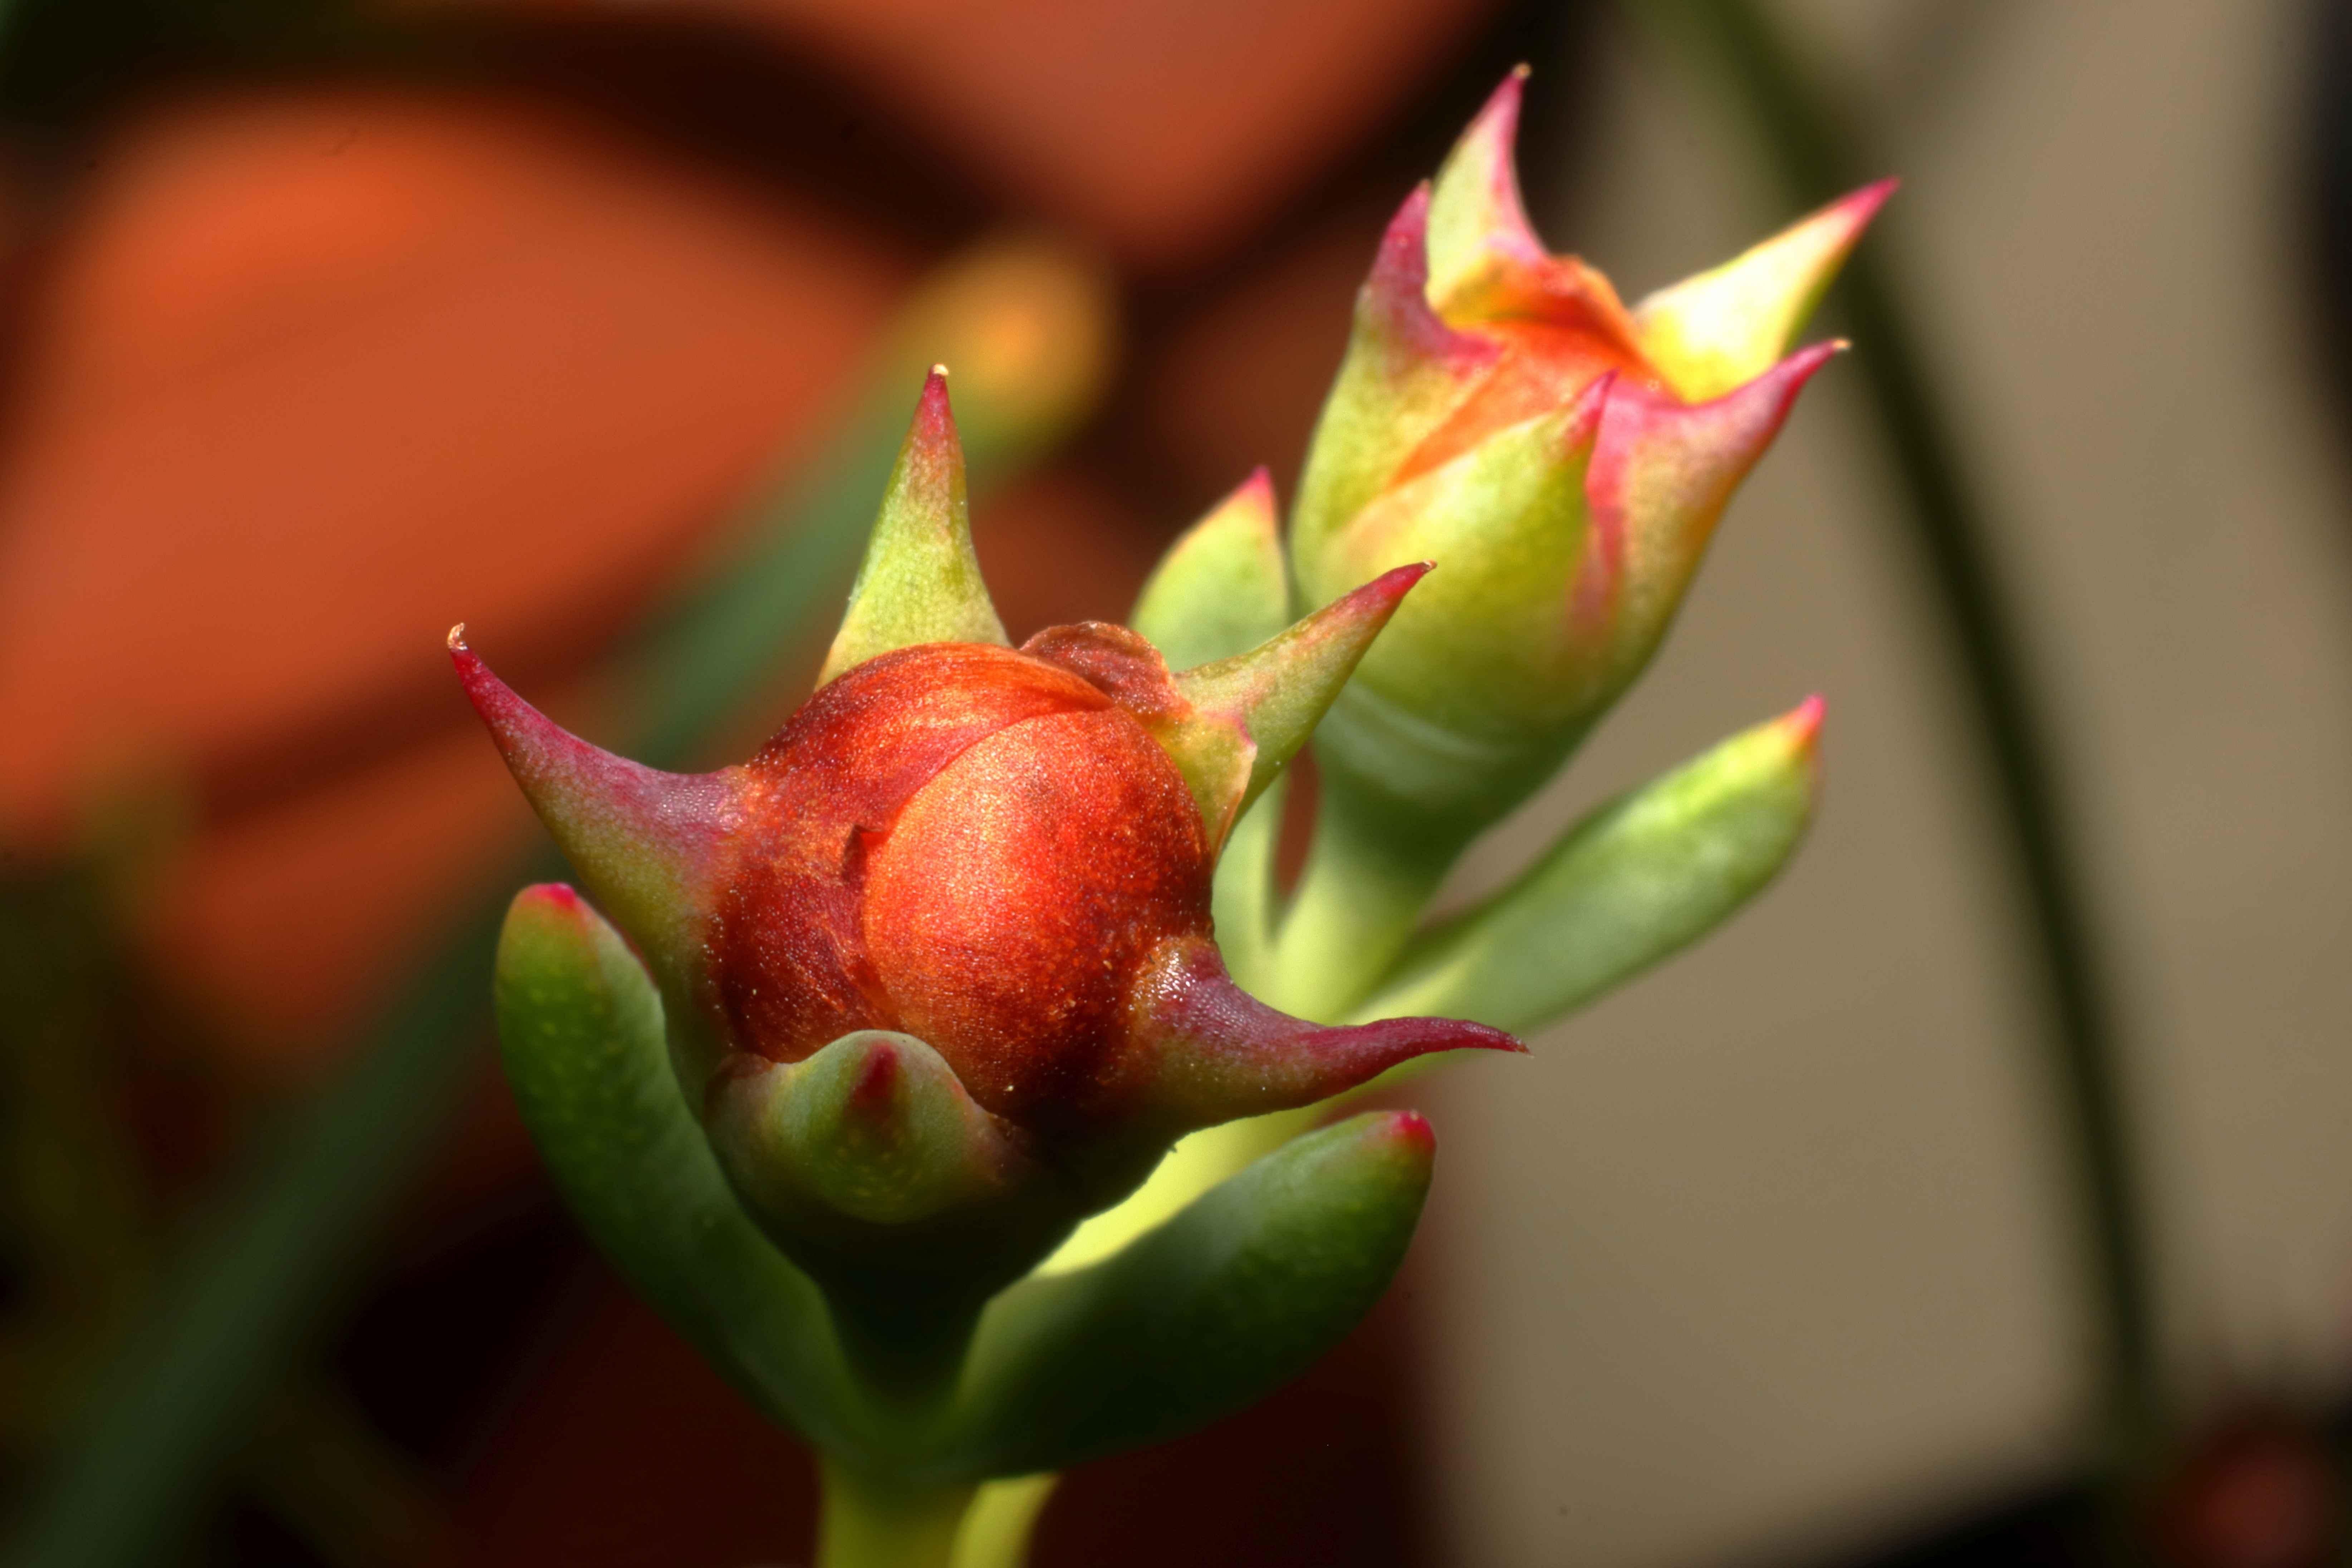

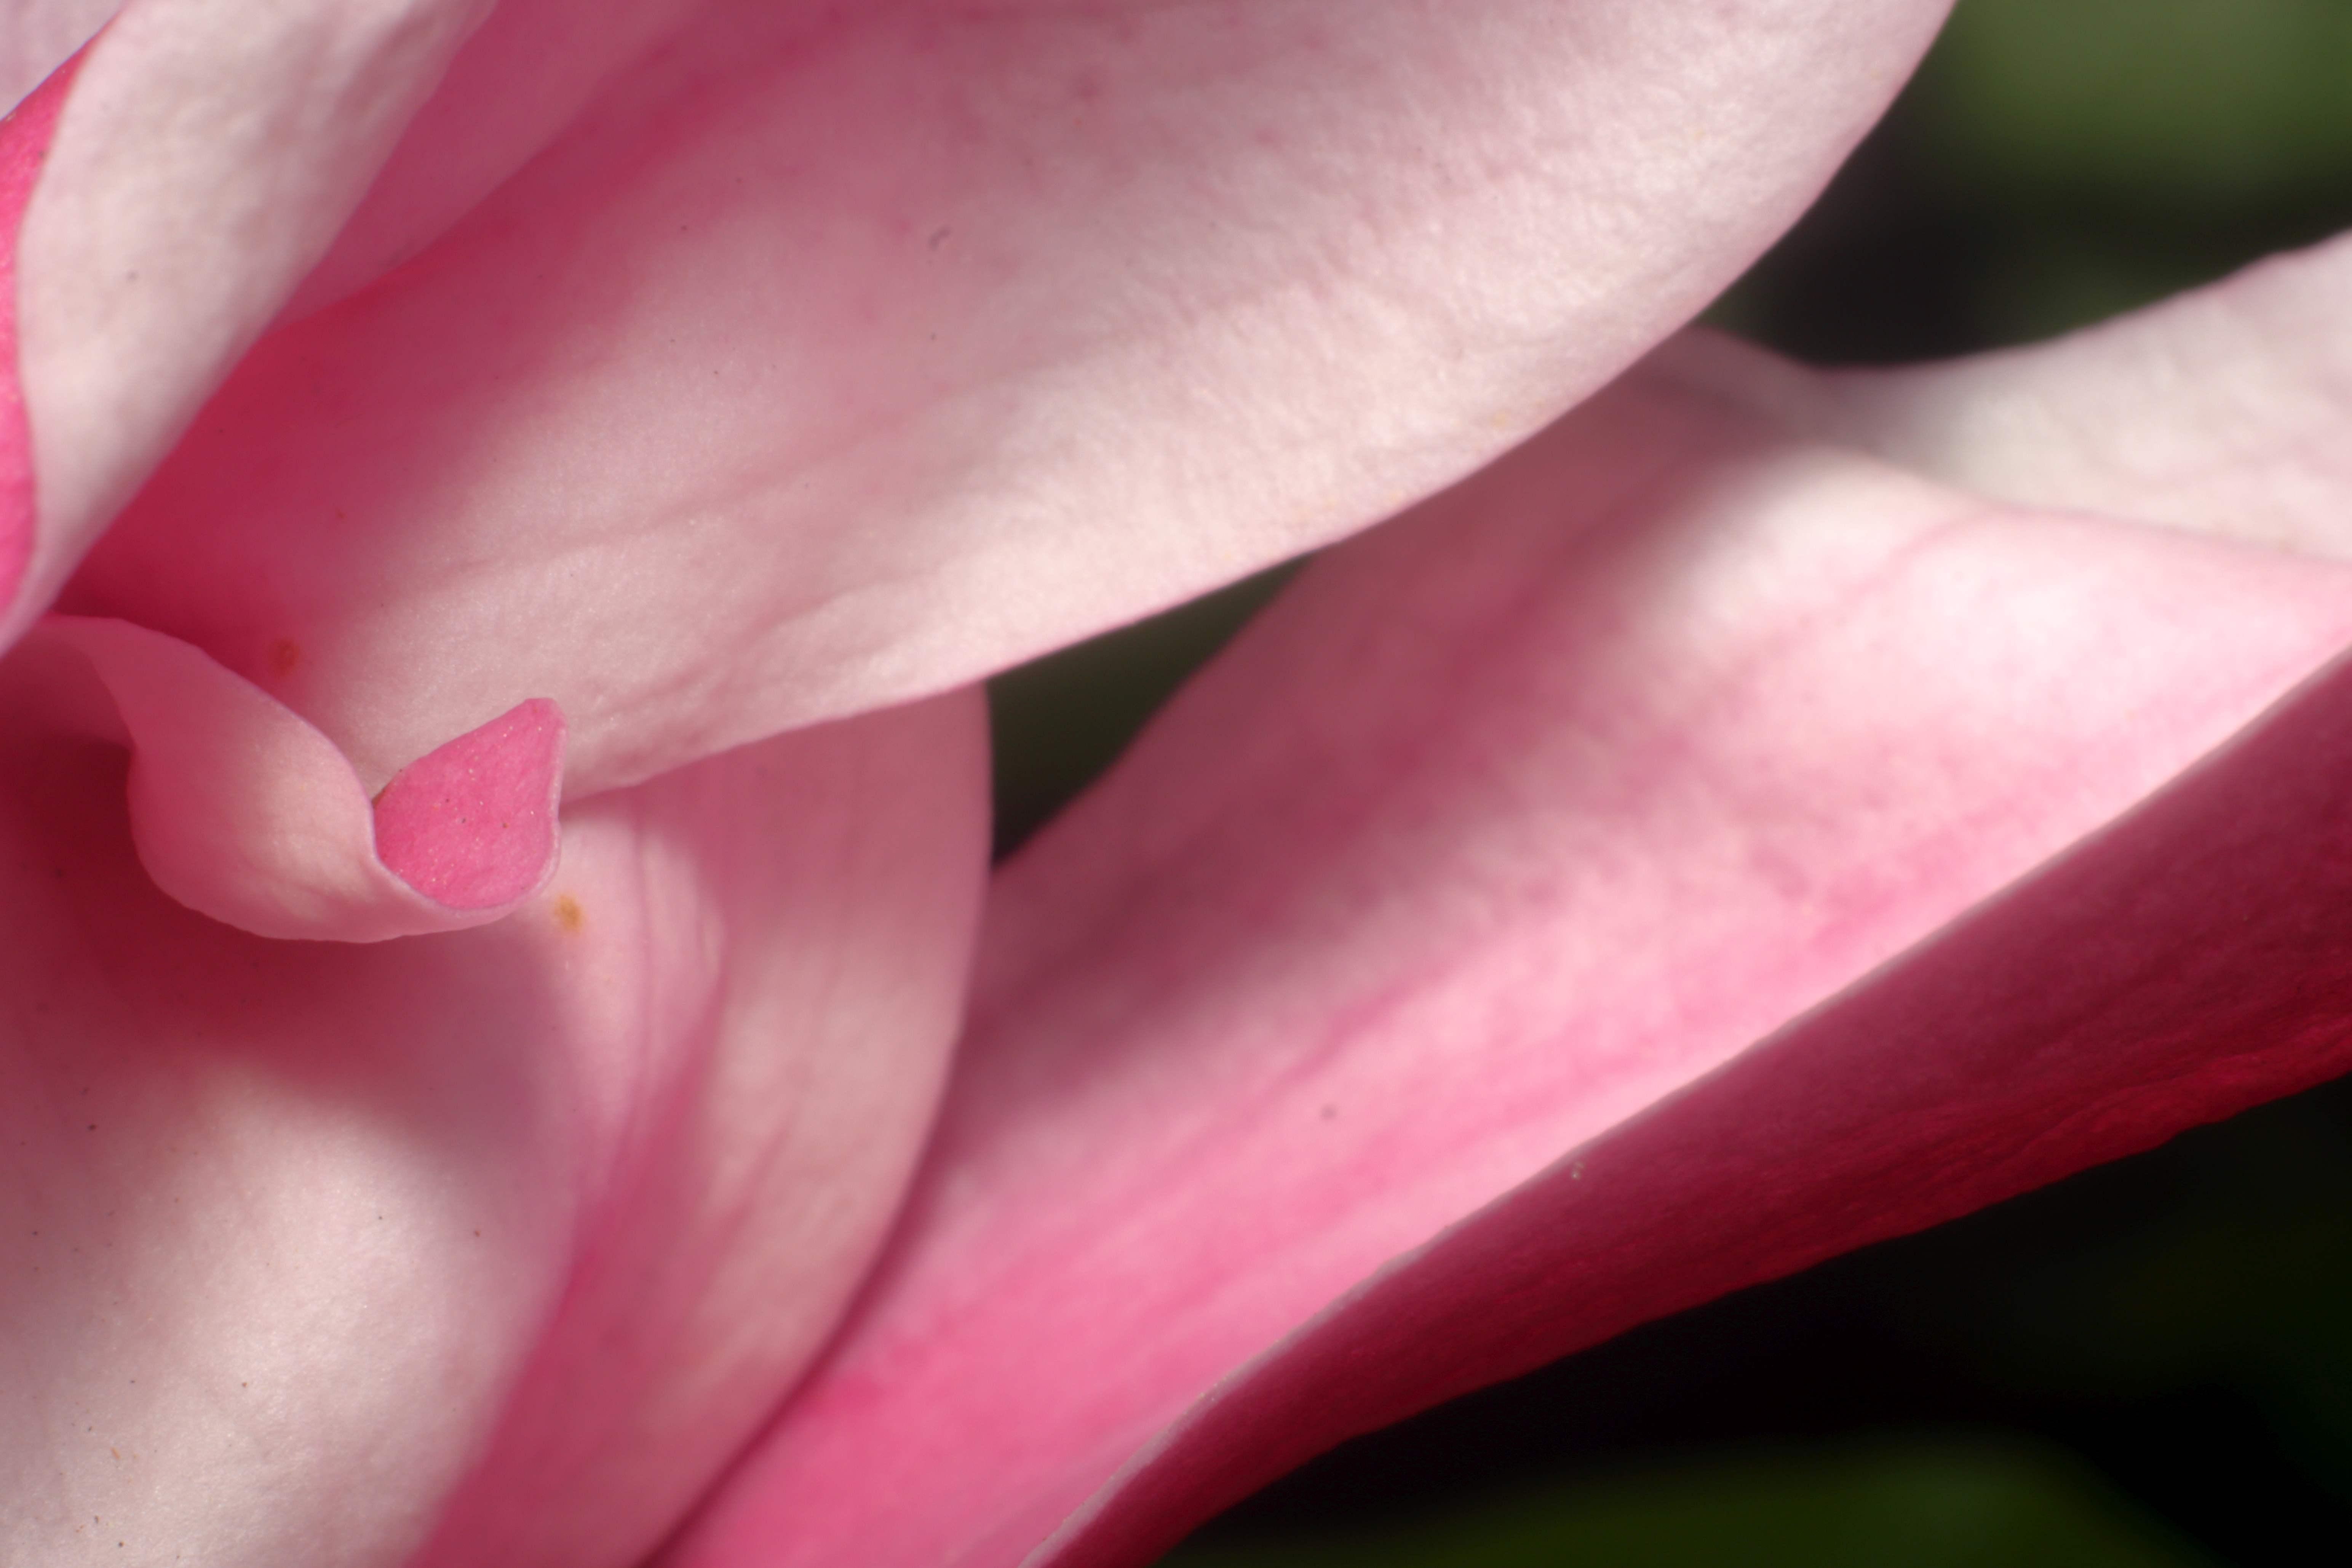
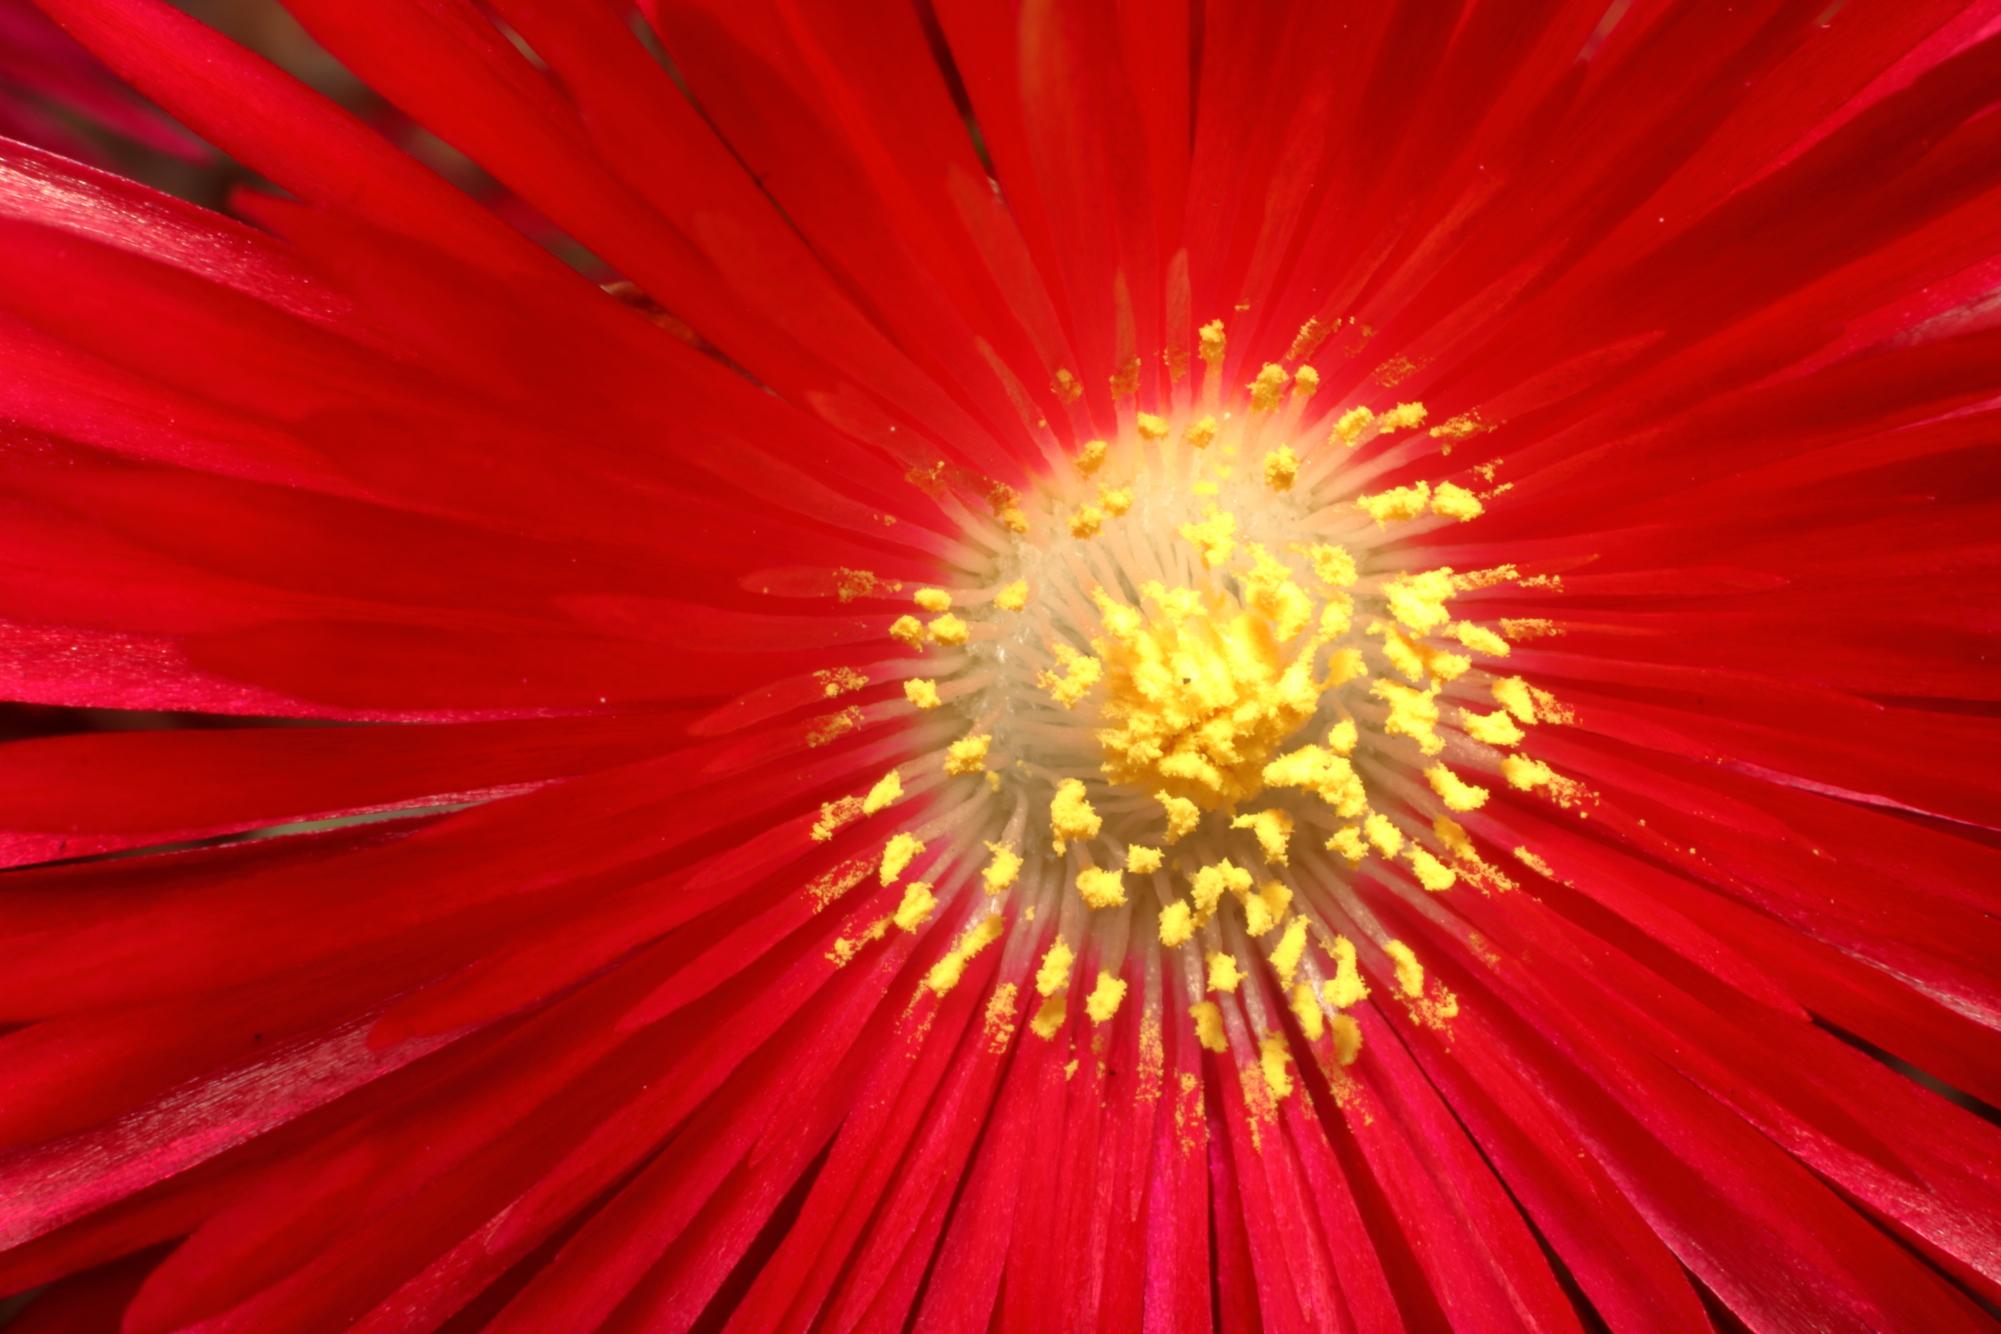

It took me less than an hour wandering about my garden to capture these images, then another half hour to sort, choose and clean them up. Not bad for half an afternoons work
The Box
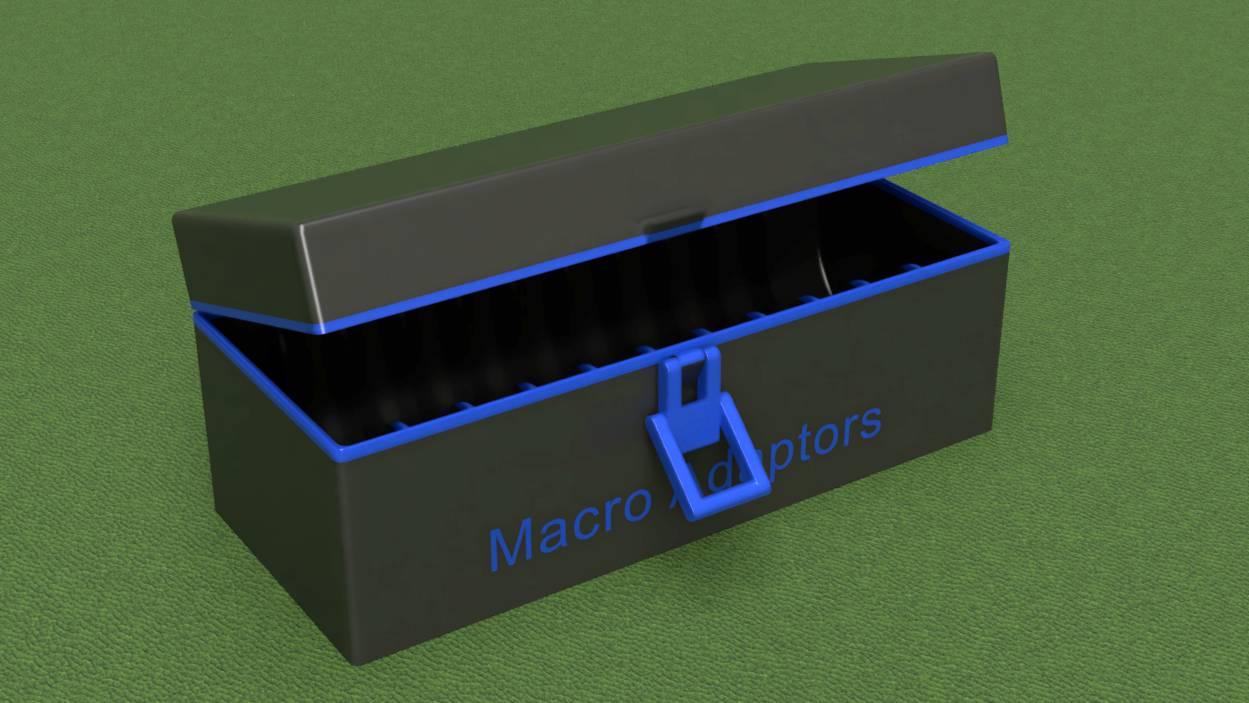
Big Beautiful Bonus Box
You can get great use from any single adaptor in this series, but they are designed to be part of a kit that will solve just about any closeup/macro problem. But for it to take on this role, you need to keep all the bits together. To help with this, I've designed a box that will store and allow you to transport your collection safely.
3D Printing
All files are here on Thingiverse
Print files in the orientation they come
The single colour version uses these files
- box.stl
- lid.stl
- lever.stl (Use supports)
- catch.stl (Use supports)
The multicolour version uses these files
- box_MMU.stl
- lid.stl
- lever.stl (Use supports)
- catch.stl (Use supports)
This Brings Us to the End
So which system is best?
- Macro tubes are best for larger subjects 15mm up to about 30mm
- Reverse lenses adaptors are better for those below 15mm
- Coupled reverse adaptors were the best quality and can go down to objects just a few millimetres. Though the quality starts to deteriorate.
What are your conclusions? Please let me know.
The thing now is to practice and develop your skills; I'd love to see the results. Would you please send images you create
This brings us to the end of not only this part but also the series.
The thing I struggled most with was the small depth of field. Particularly at the higher magnifications. Even things I consider flat had enough curve in them to make overall focus impossible; this means, at least for me, focus stacking is essential.
My next project is to finish my almost complete focus rail systems. After that, I'll publish both the manual and automated versions on Instructables.
Sources and Resources

Video
- An Introduction to Macro Photography, Tim Cooper, Straightforward and comprehensive Introduction to Macro Photography (Long 1& 3/4 hours)
- Close-Up and Macro Photography | Lester Lefkowitz is also straightforward and comprehensive; though they both cover the same territory, their approach is different. (Long just under 2 hours)
Alternative Instructable
- DSLR Macro Photography a Comprehensive Overview/ Exactly what it says on the pack, no project but goes into much more detail
Links
- Extreme Macro, The most comprehensive reference site I came across. Best place to go if you have a specific question. Also, have comprehensive calculators.
- Wikipedia Good starting point
- The Ultimate Guide Macro Photography Digital Photo Mentor,
- How to Use Extension Tubes for Macro Photography Digital Photo Mentor
- Lens ReviewsImageing Resources. Comprehensive details about any lens, needed for things like magnification ratios used on Extreme Macro
- Free tether
- Convert a Lens to Macro Petapixel. Discusses a method to change an old lens to a macro