3D Picture With Lenticular Paper #phablabs
by PHABLABS in Workshop > Science
2988 Views, 15 Favorites, 0 Comments
3D Picture With Lenticular Paper #phablabs
Properties of this workshop:
Timeplanning: Total: 1h
1. Understanding 'lenses' and introduction: 10 minutes
2. Making pictures: 15 minutes
3. Digital processing per picture set of three: 15 minutes
4. Assembling the frame: 10 minutes
Target audience: Young students (10-14 years old)
Estimated cost: € 5
DISCLAIMER: By using this information you agree to be legally bound by these terms, which shall take effect immediately on your first use of the information. PHABLABS 4.0 consortium and its member organizations give no warranty that the provided information is accurate, up-to-date or complete. You are responsible for independently verifying the information. VUB cannot be held liable for any loss or damage that may arise directly or indirectly from the use of or reliance on the information and/or products provided. PHABLABS 4.0 consortium and its member organizations disclaim all responsibility to the maximum extent possible under applicable laws: All express or implied warranties in relation to the information and your use of it are excluded. All liability, including for negligence, to you arising directly or indirectly in connection with the information or from your use of it is excluded. This instruction is published under the Creative Commons licence CC-BY-NC.
Lenticular Paper?
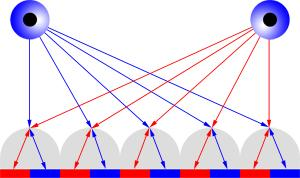

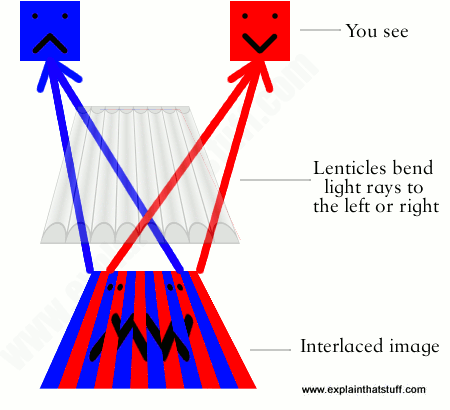
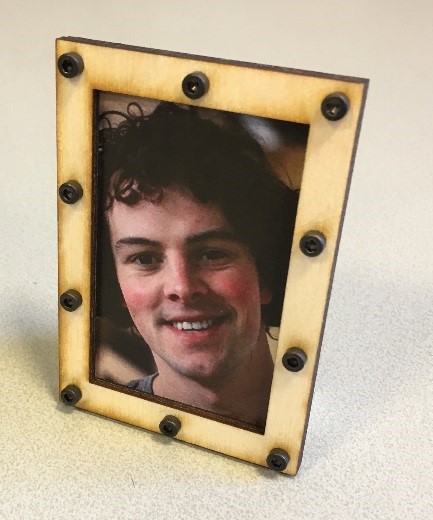
The concept of this workshop is to make a 3D portrait using a lenticular paper in a frame. Lenticular printing is a technology in which lenticular lenses (a technology that is also used for 3D displays) are used to produce printed images with an illusion of depth, or the ability to change or move as the image is viewed from different angles.
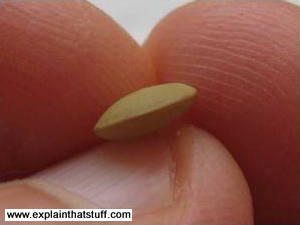
Photo 1: A lenticular image is an image which has more than one image hidden in it. It consists of a printed picture as basis layer and on top of it, a lenticular sheet. It is called a lenticular sheet because the sheet has a lentil kind of shape.
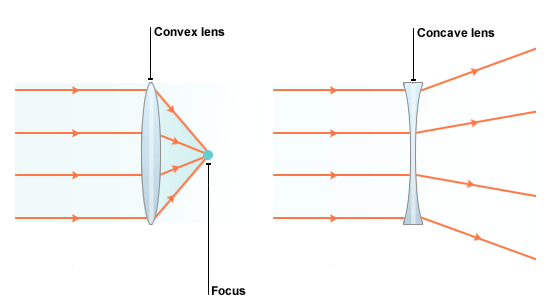
Photo 2: Convex lenses bulge out in the middle like lentils, while concave lenses "cave in" in the middle and bulge out at the edges.
Photo 3: This lenticular sheet is made up out of a lot of tiny convex lenses, which distort your vision on the basis layer. Because the light is refracted, at one time you see one image and at another time a new one!
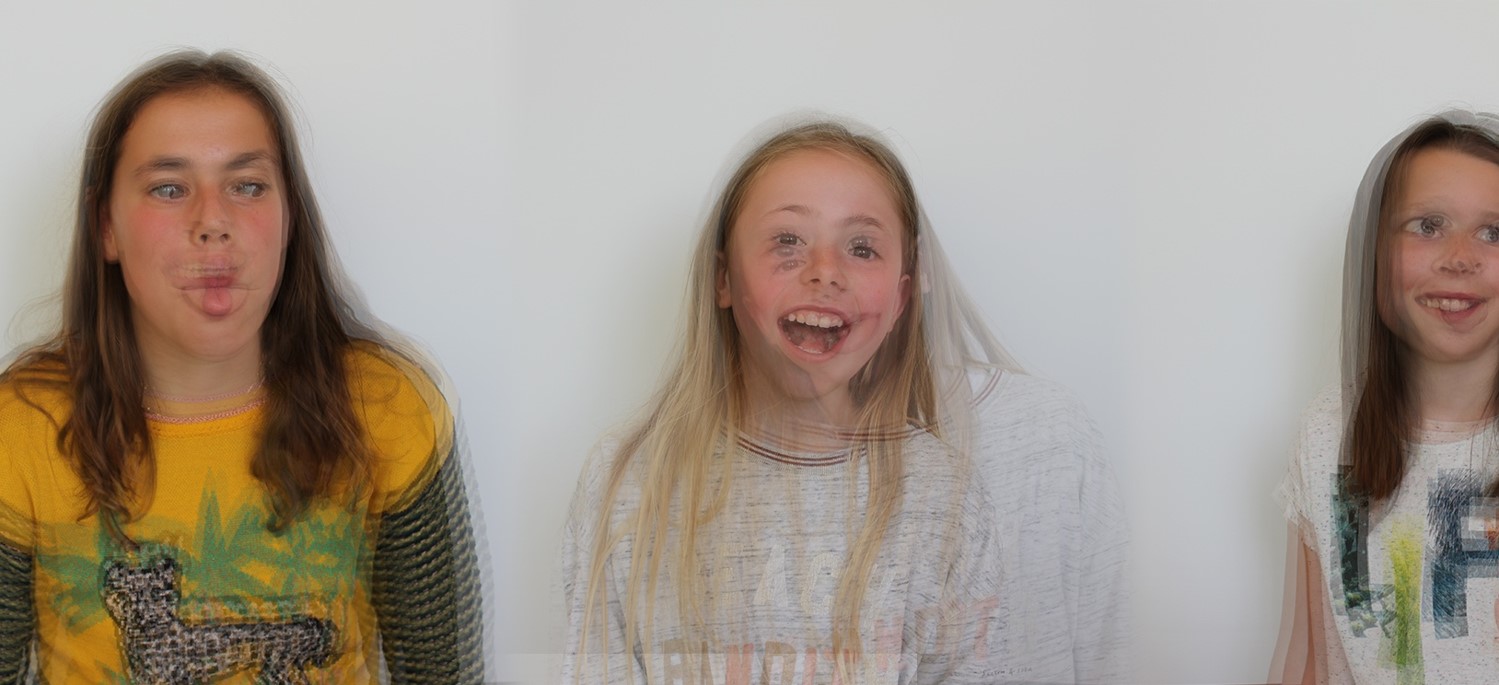
Photo 4 and file attached: To get a similar effect in real life, print an interlaced image (like the one attached). Make the pupils fold the paper at the edges between the two pictures. Let them make folds of about 90 degrees, so they can only see one picture when looking at it from the side.
The lenses create a similar effect on your picture, as illustrated in photo 5.
More information about lenticular paper:
Downloads
Part List
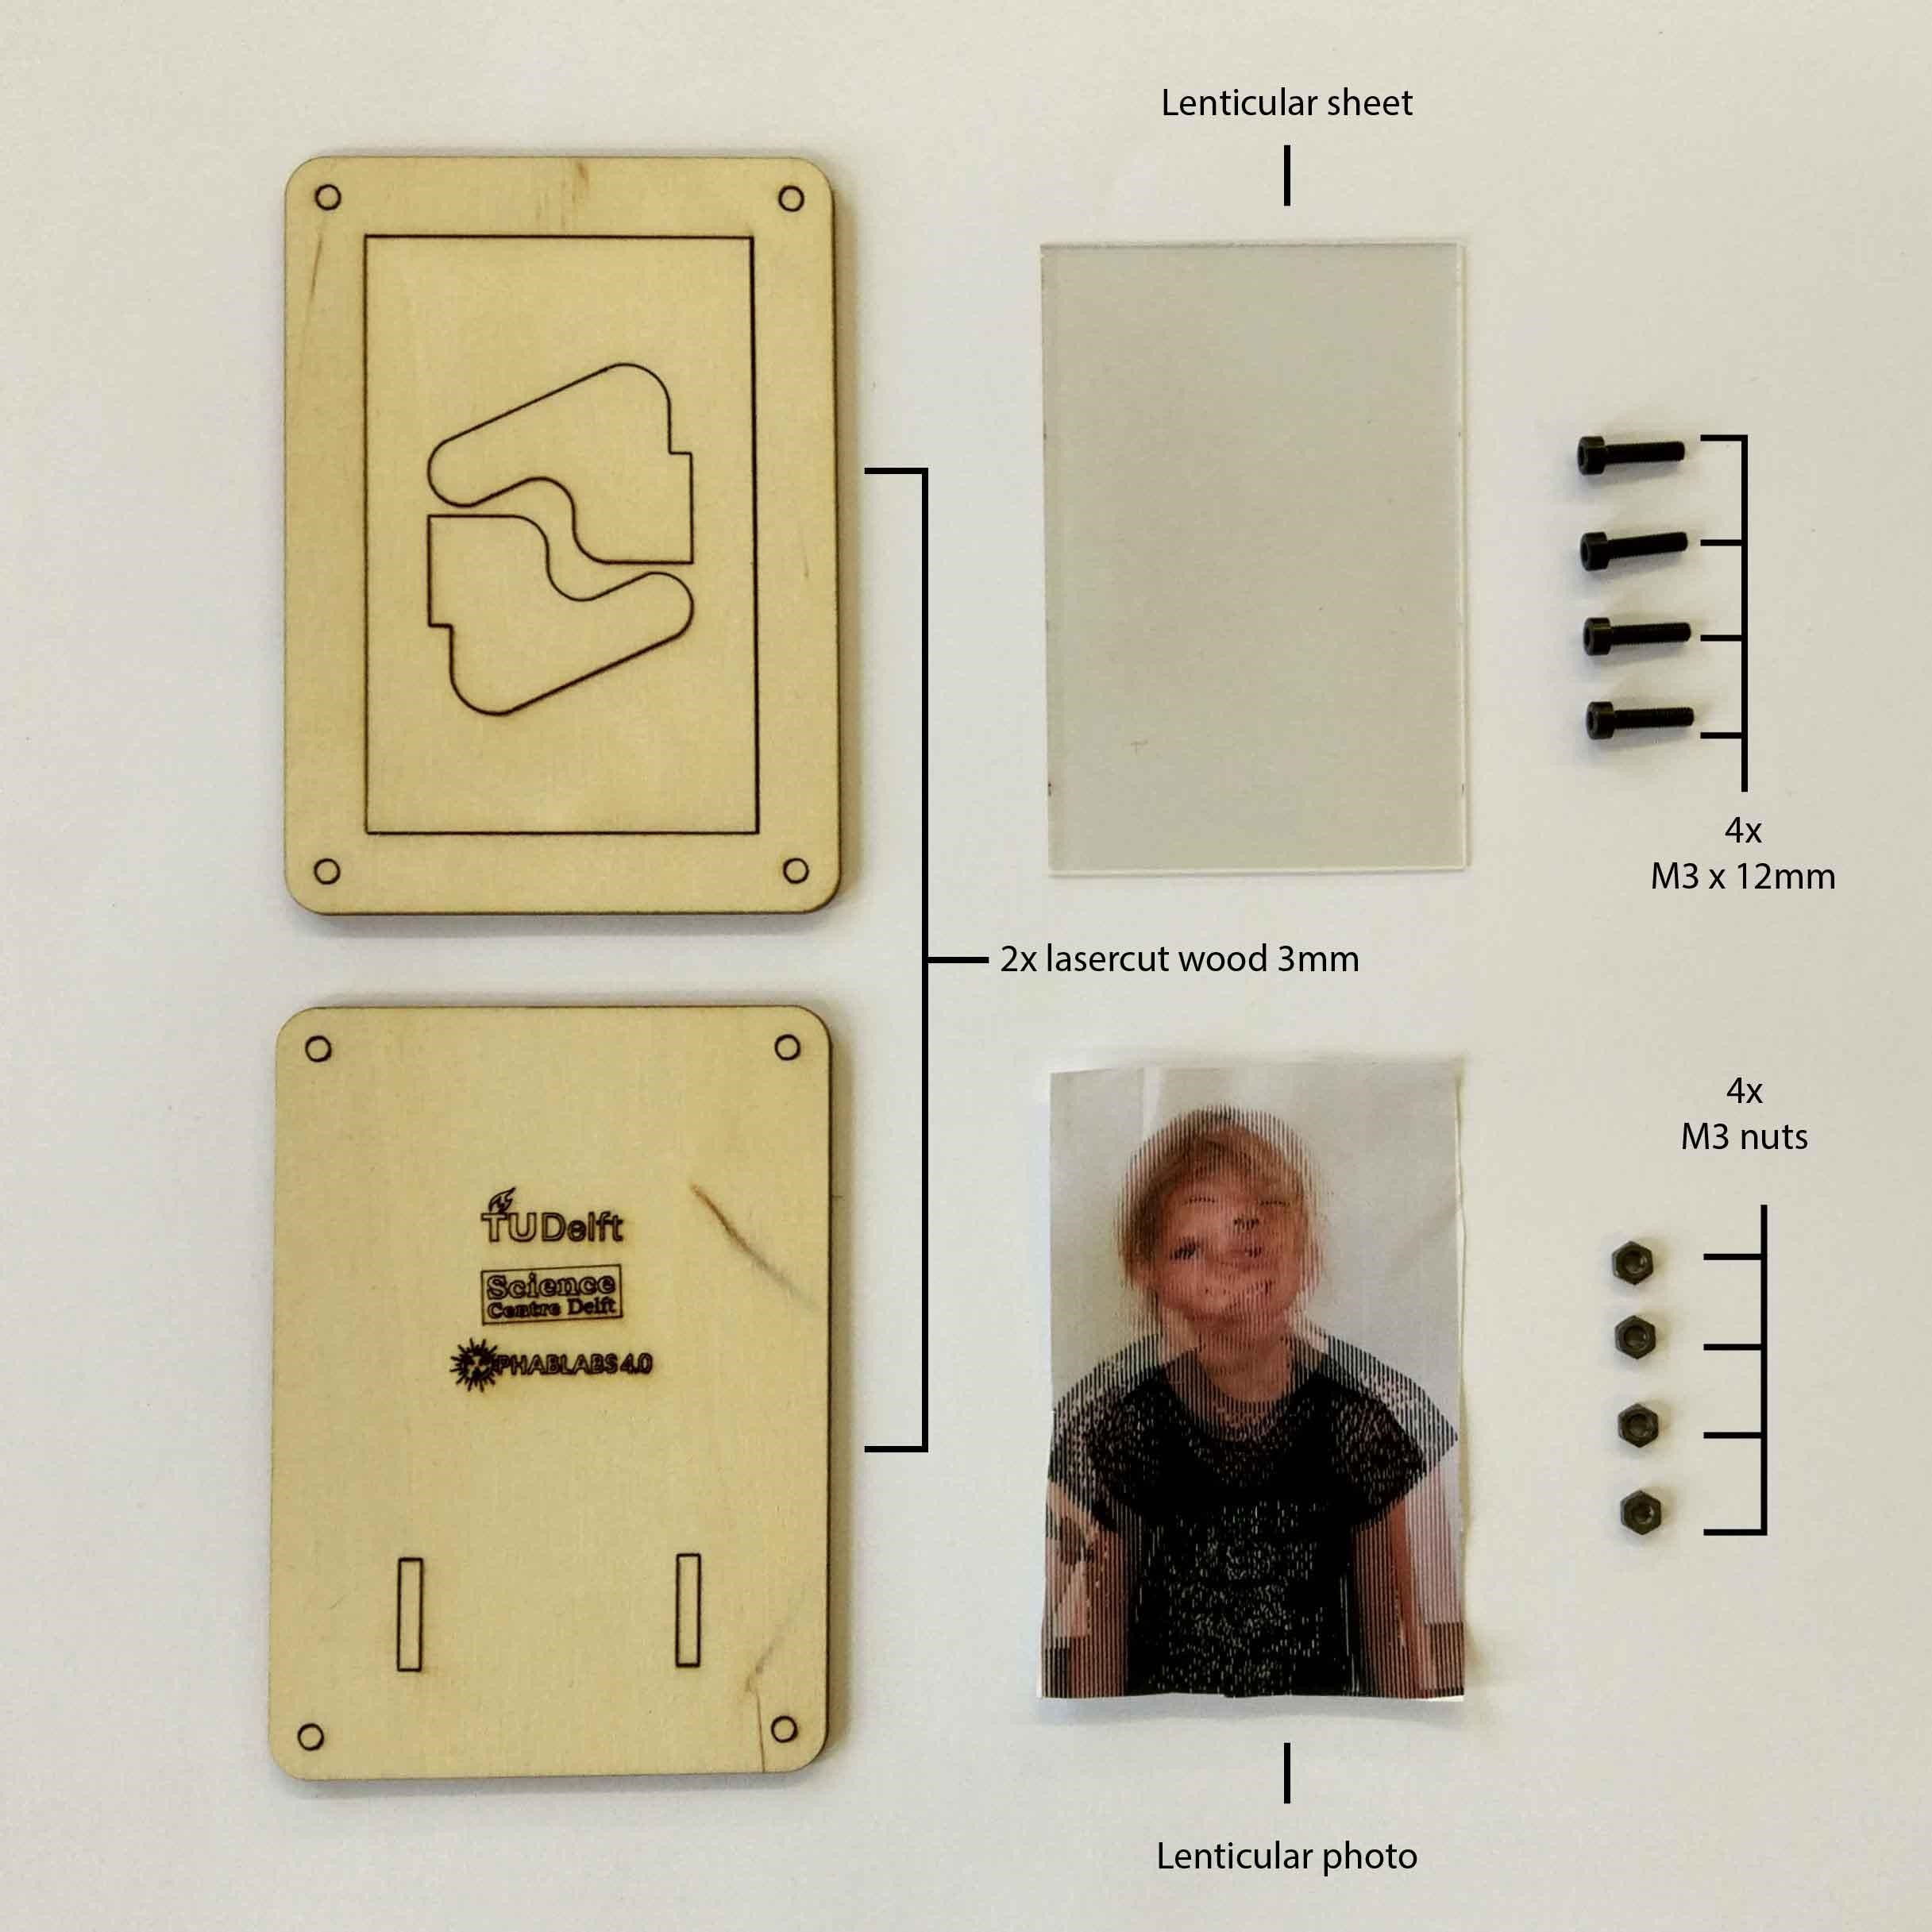
Photonics parts:
*Lenticular sheet (60mm x 90mm): 40 LPI (Lines per Inch)
(This can be bought for example via: http://b-photonics.eu/en/photonics-toolkit/general-photonics-toolkit)
Other parts:
*Lasercutted wooden frame
*4 screws: M3 x12mm
*4 nuts: M3
*Lenticular photo (explained in this instructable)
Tools (for example in Fab Labs):
*Laser cutter
*Printer
*(Phone) camera to take pictures
*A computer with Inkscape installed to edit the pictures
Making Pictures
There are different fun ways to explore lenticular sheets. We have outlined three ideas, but feel free to come up with your own ideas!
3D picture
Get a 3D like picture of your face:
1. Stand in front of the photographed and go backwards two steps (2 meter)
2. Go one step (10 centimeter) to the right and take picture #1 horizontally and with the shoulders visible for a safe editing margin
3. Go one step (10 centimeter) to the left and take picture #2 horizontally and with the shoulders visible for a safe editing margin
4. Go one step (10 centimeter) to the left and take picture #3 horizontally and with the shoulders visible for a safe editing margin
Blood, sweat and tears
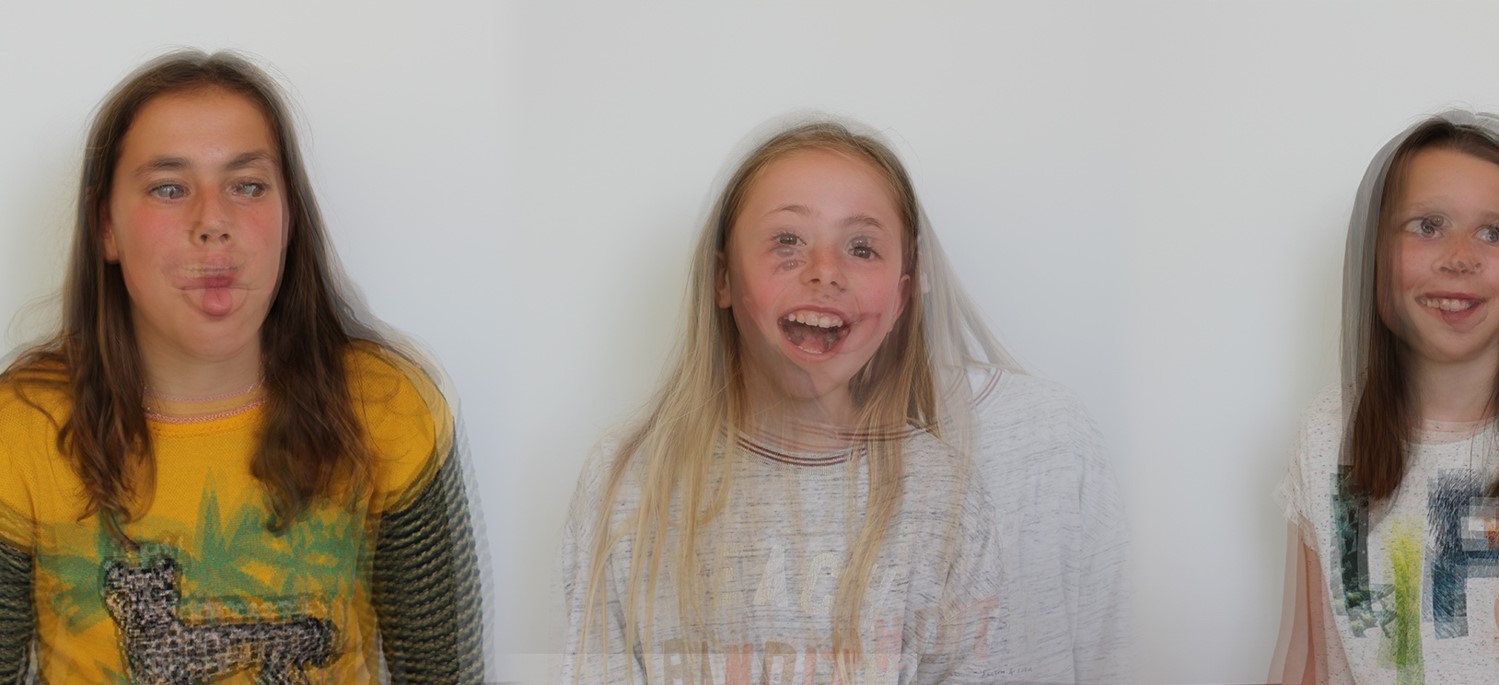
Take three different pictures of different facial expressions. Take the three pictures from the exact same location and make sure it is taken horizontally and with the shoulders visible for a safe editing margin.
Fashion show
Take three different pictures wearing different outfits. Take the three pictures from the exact same location and make sure it is taken horizontally and with the shoulders visible for a safe editing margin.
Digital Processing
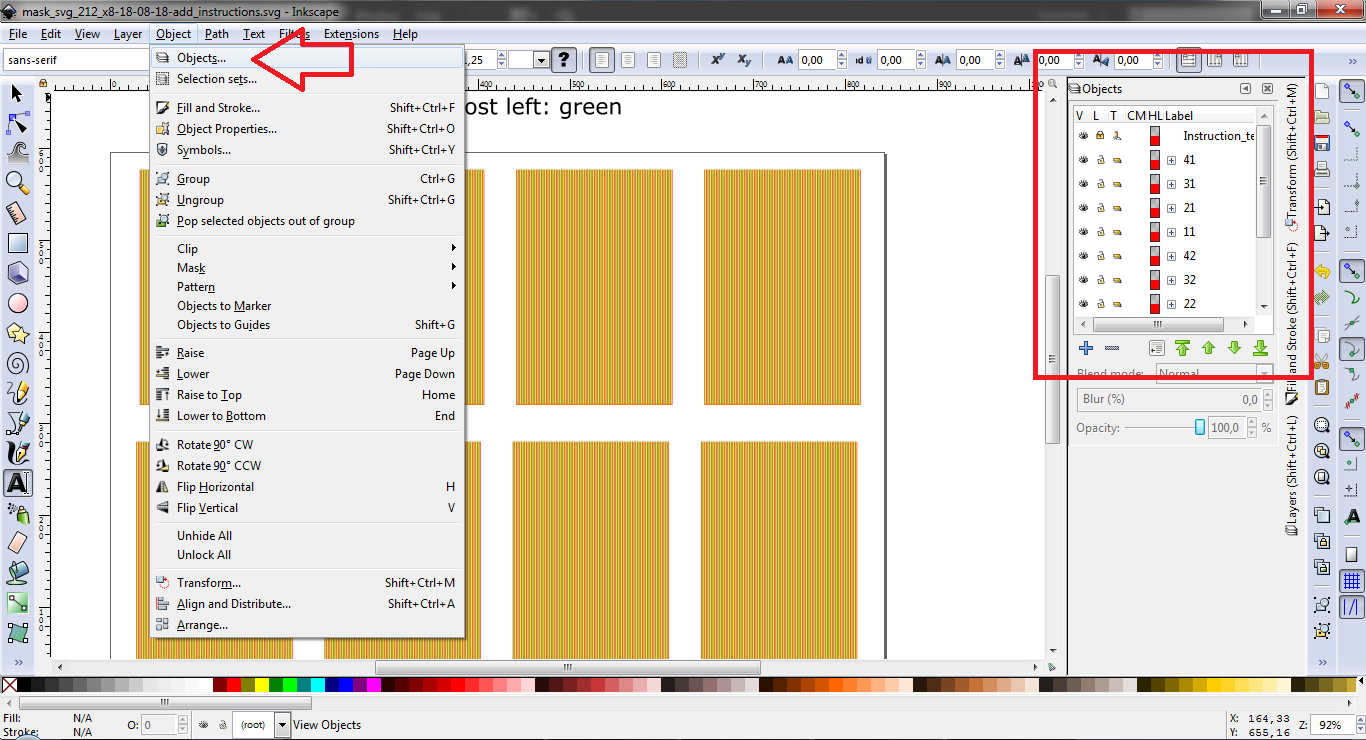
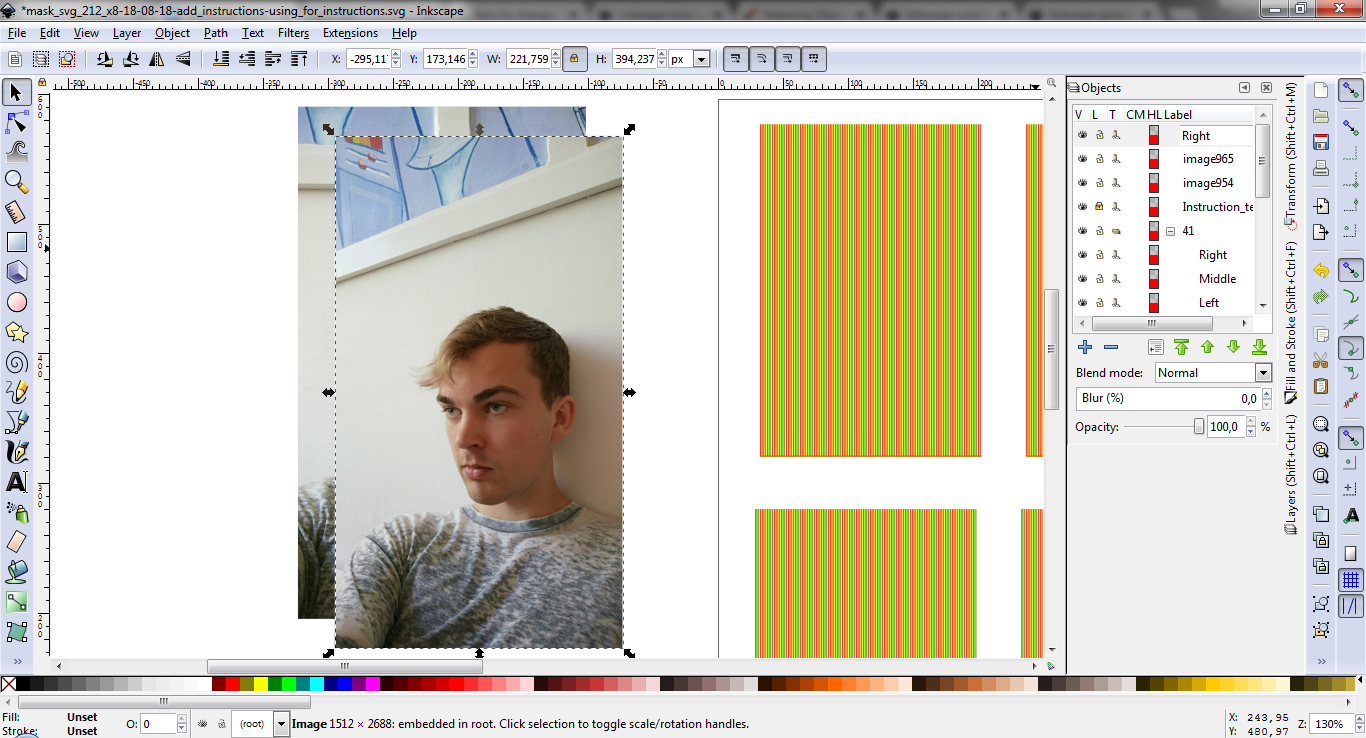
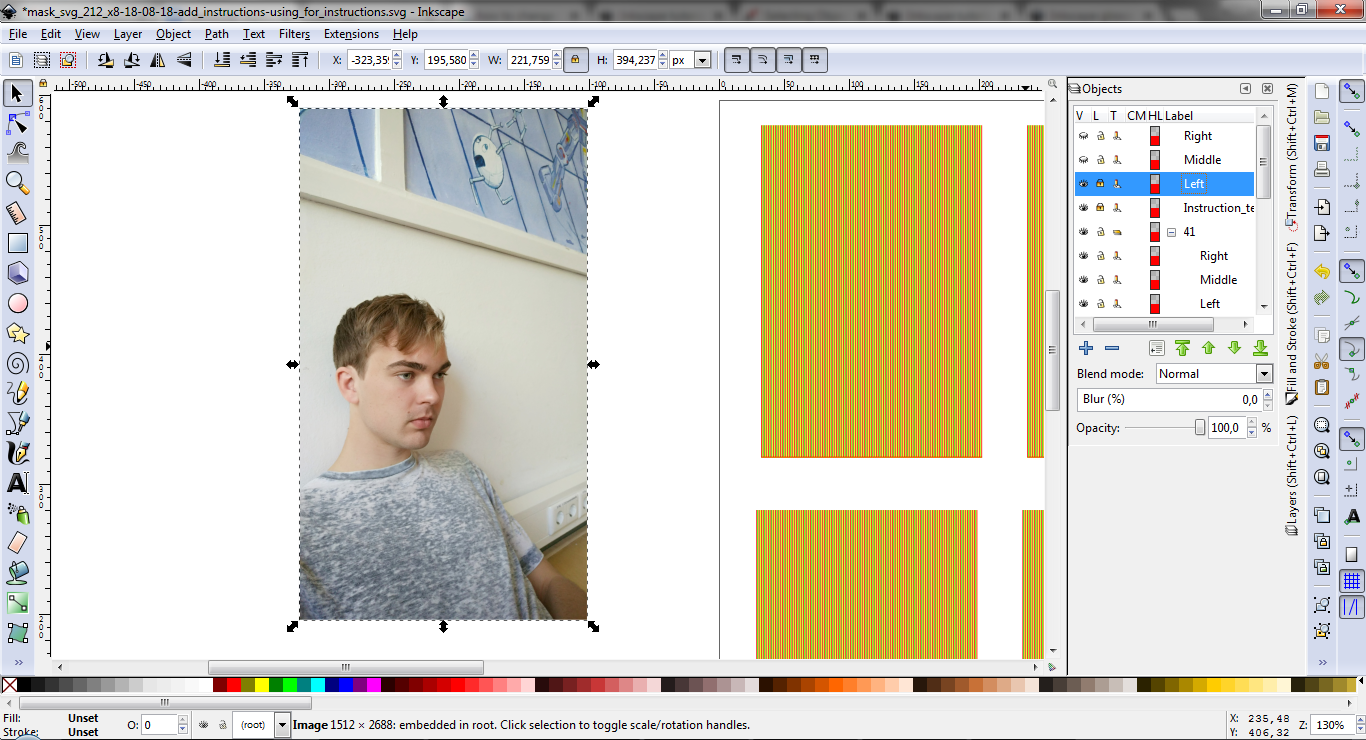
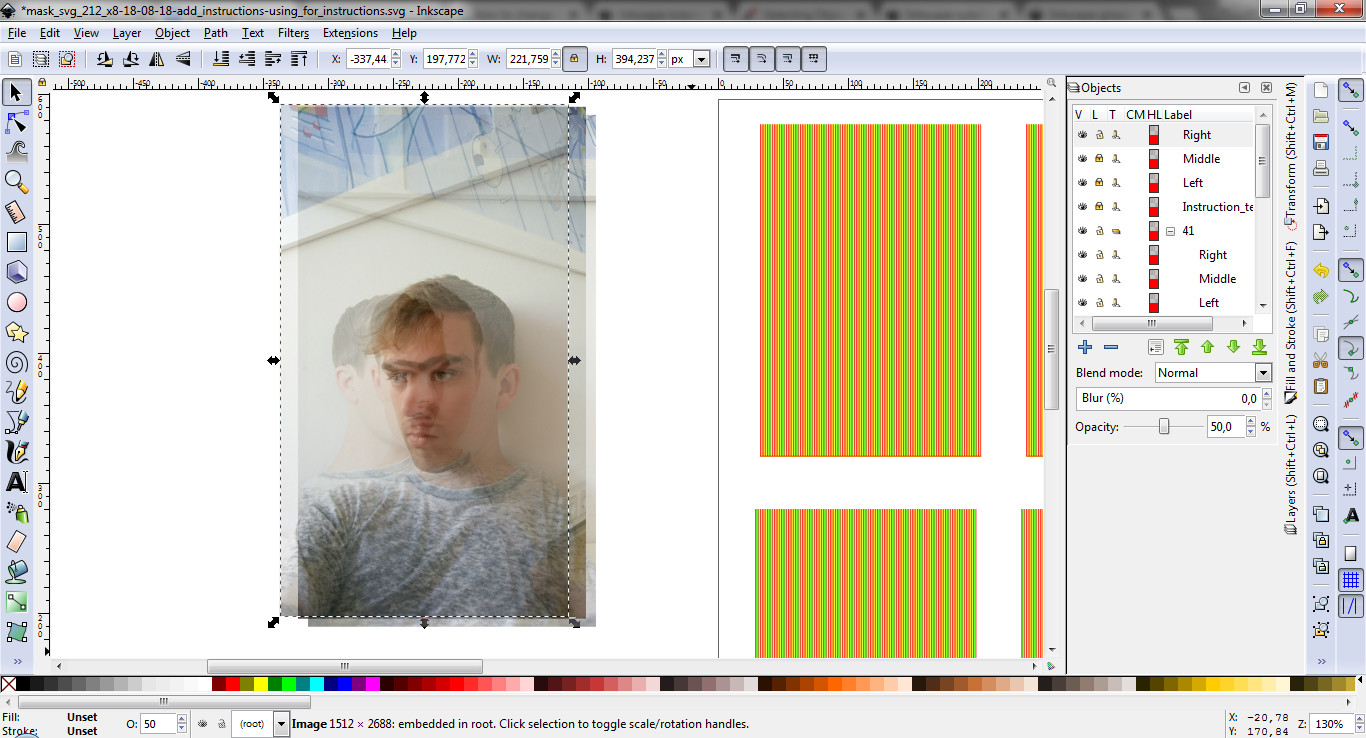
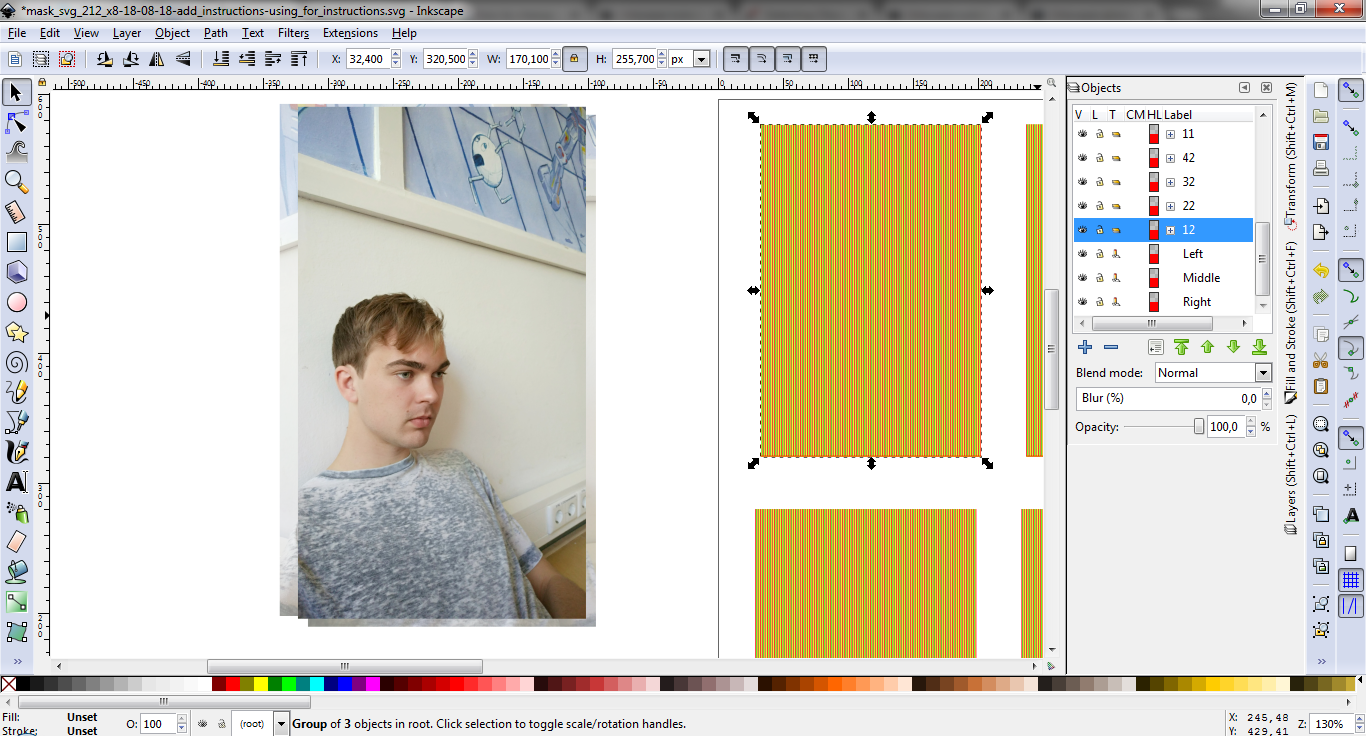
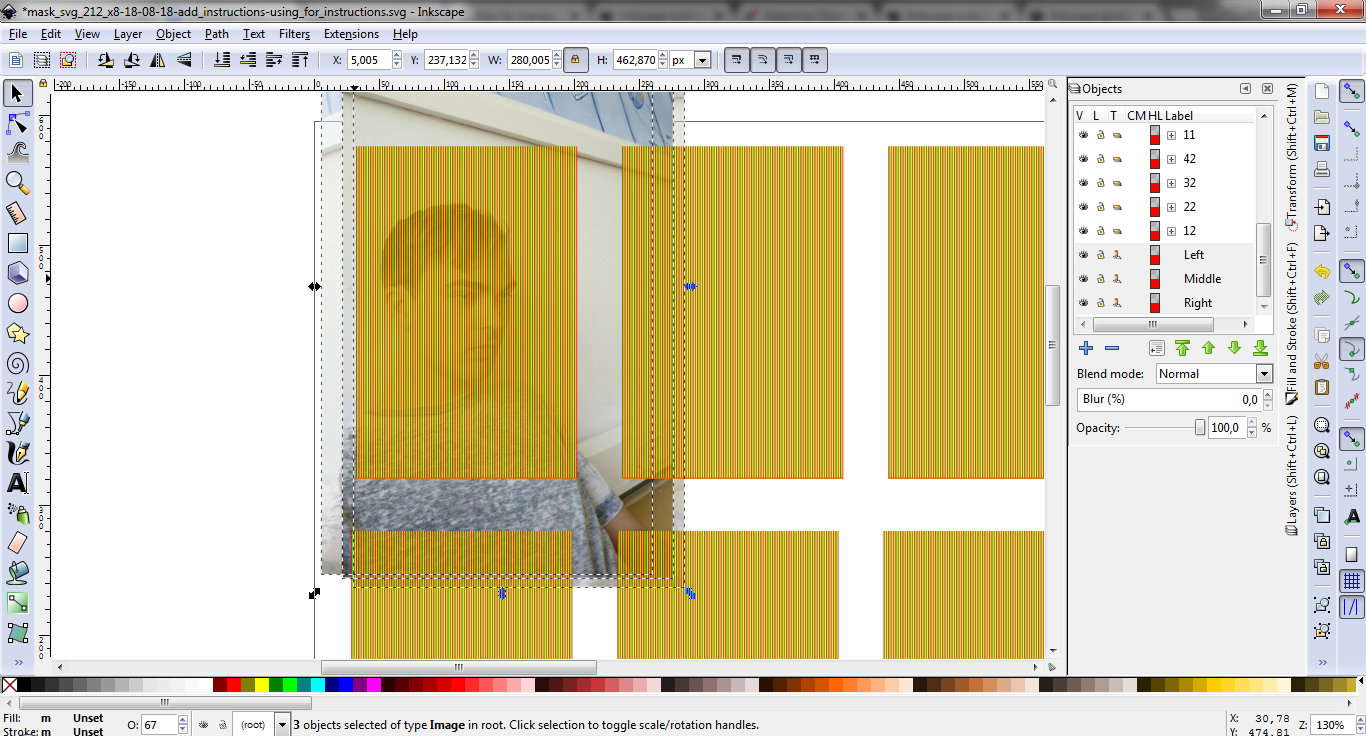
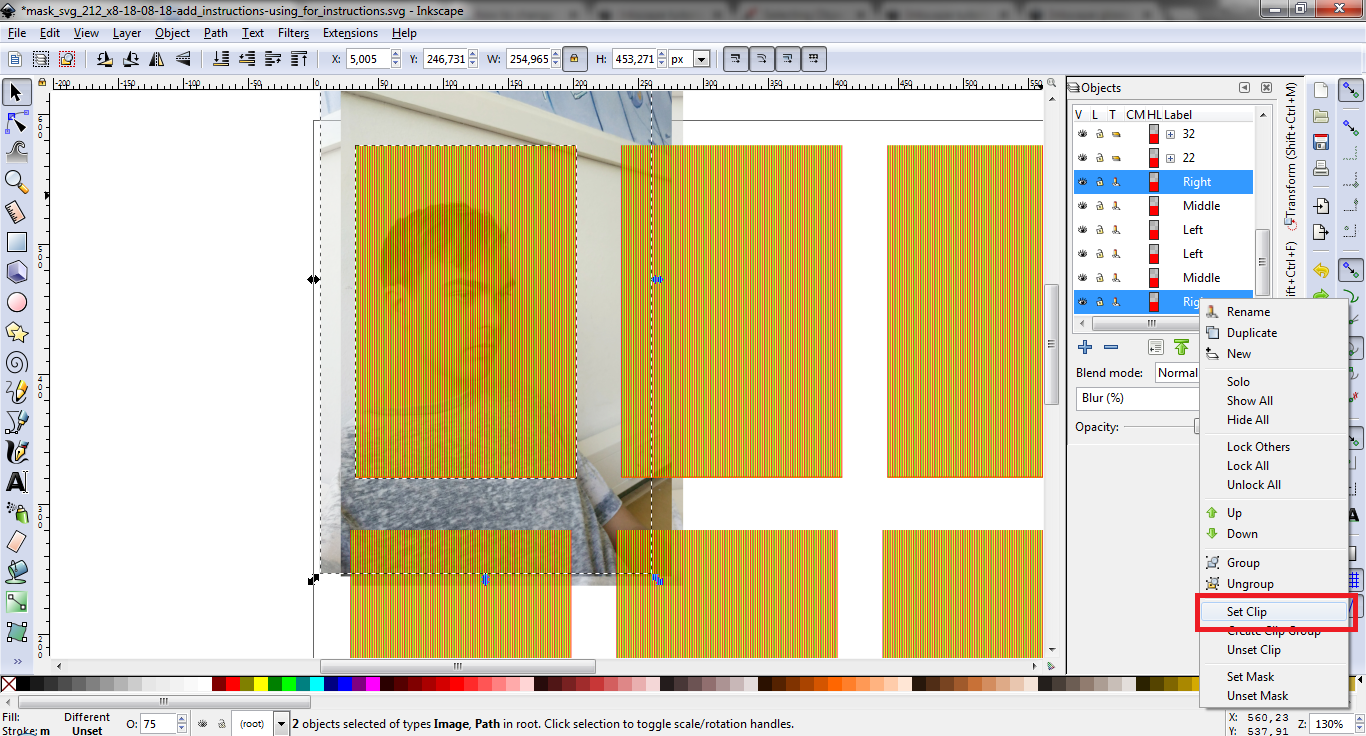
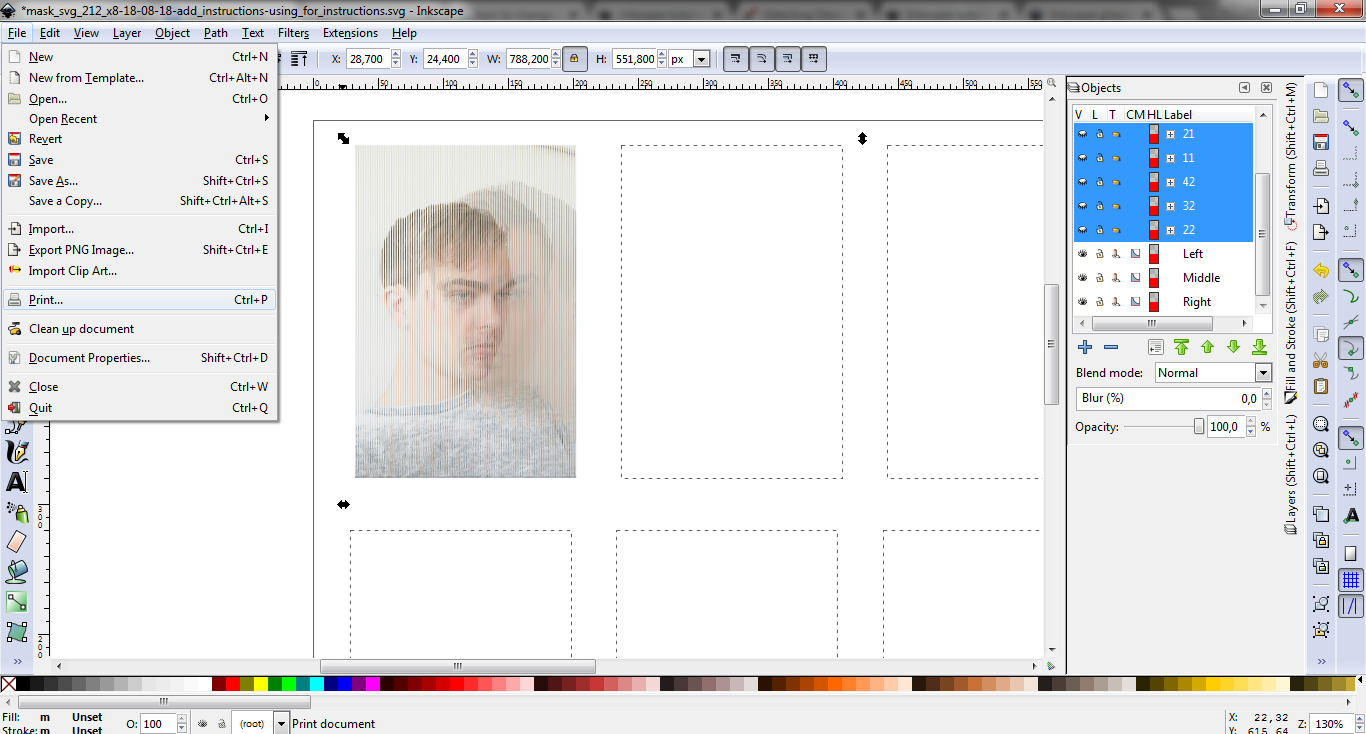
Download the pictures to your computer and put three pictures per person in a local folder. Open Inkscape and open the WorkshopsTemplate file. Save it as a new file so you don’t overwrite the template.
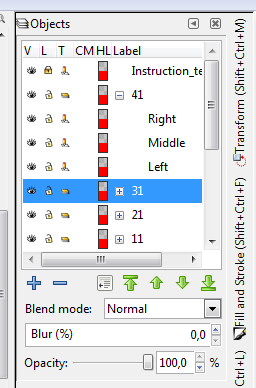
Photo 1: Make sure you have the objects option opened. Do this by pressing the ‘Object’ menu and then opening ‘Objects…‘, the menu will appear on the right.
Photo 2: In the objects menu you can find all objects currently in the file. Of this menu we will use the eye-icon (View) to show and hide objects. Next to the eye-icon is a Lock-icon. When it is locked (like the first object), the object can not be changed. These functions can be handy when positioning pictures over each other.
On the right you see the labels of the pictures, or picture ‘groups’. Groups are objects that undergo changes together. To view all objects in a group, click the plus icon in the middle. Now the group will expand like visible for group 41. Group 41 has three objects containing Right, Middle and Left.
Lastly there is one more function in objects we will like to use. Opacity is situated on the lower end of the menu and is used to change pictures’ transparency. We will use it to position our pictures over each other.
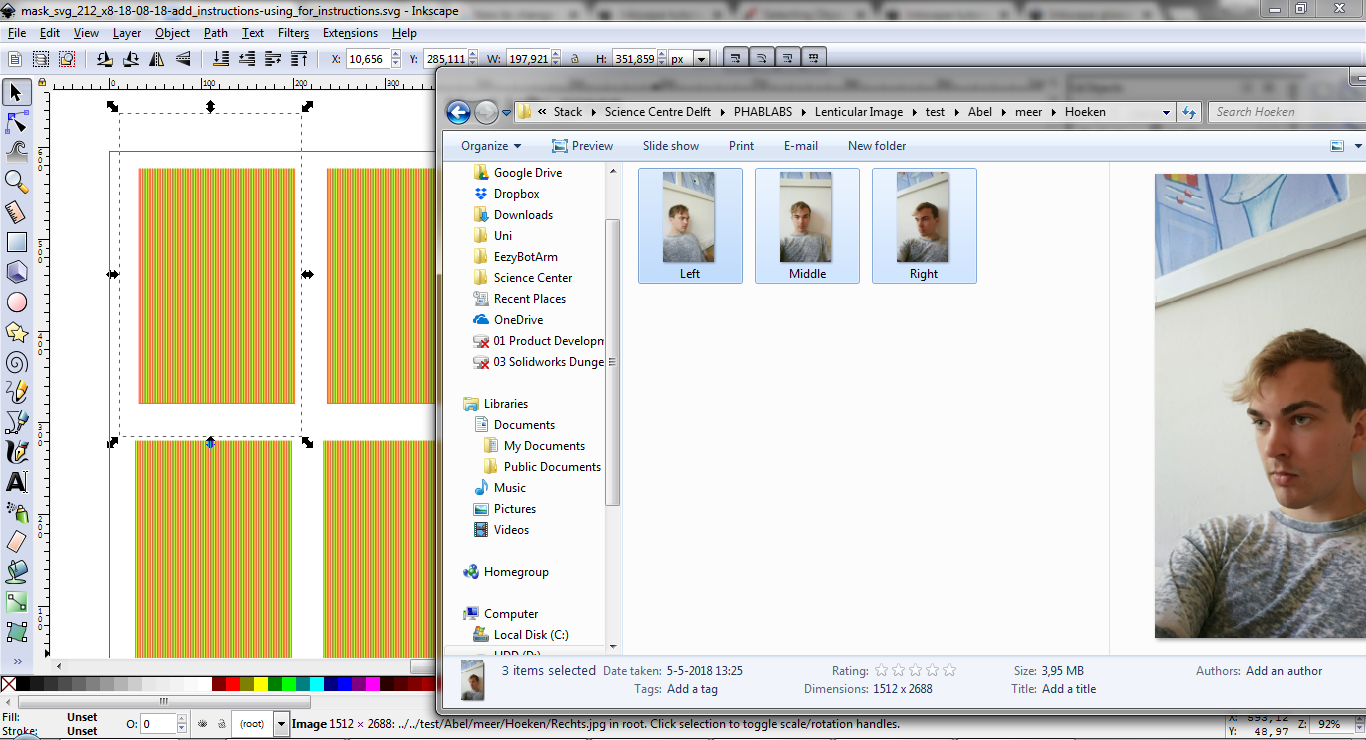
Photo 3: To actually get starting with the editing open the folder containing your three pictures and drag them on a whitespace in the Inkscape window.
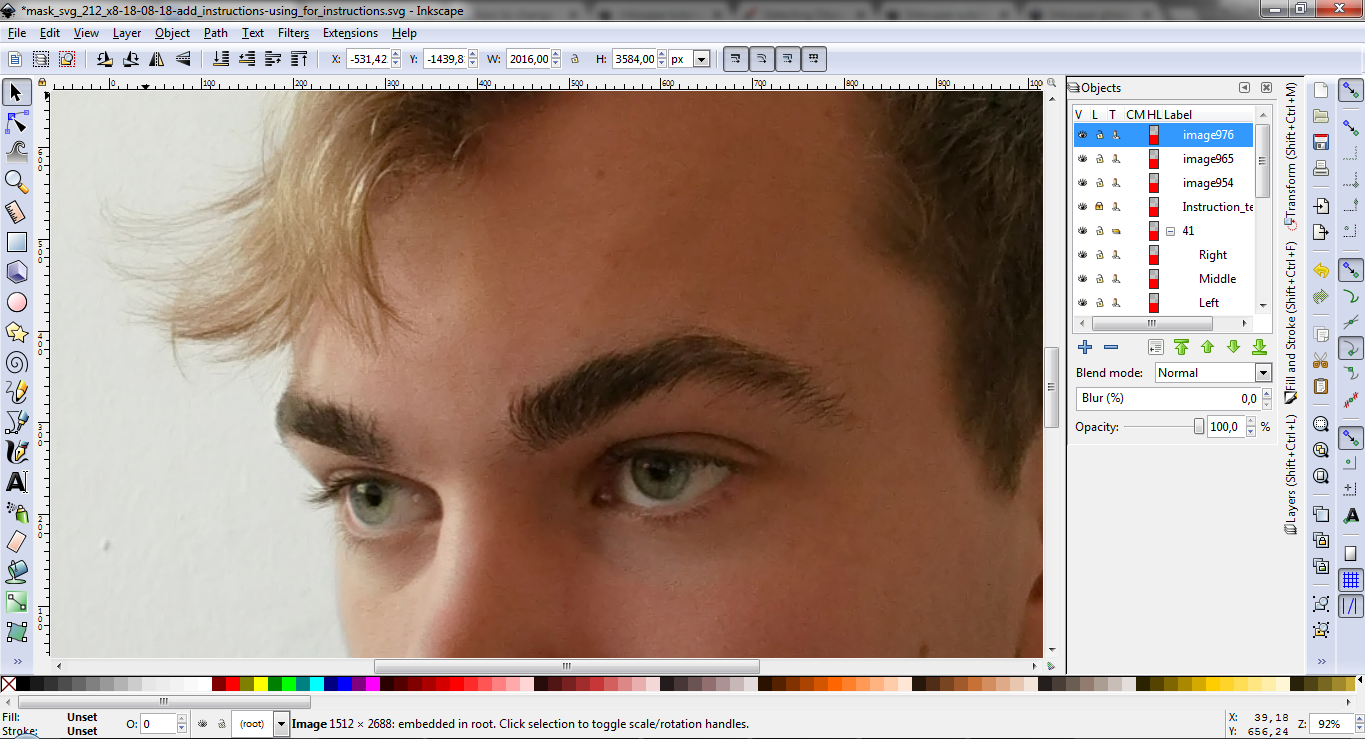
Photo 4: The pictures will probably fill the whole screen. To zoom out press CTRL and use the scroll wheel on your mouse.
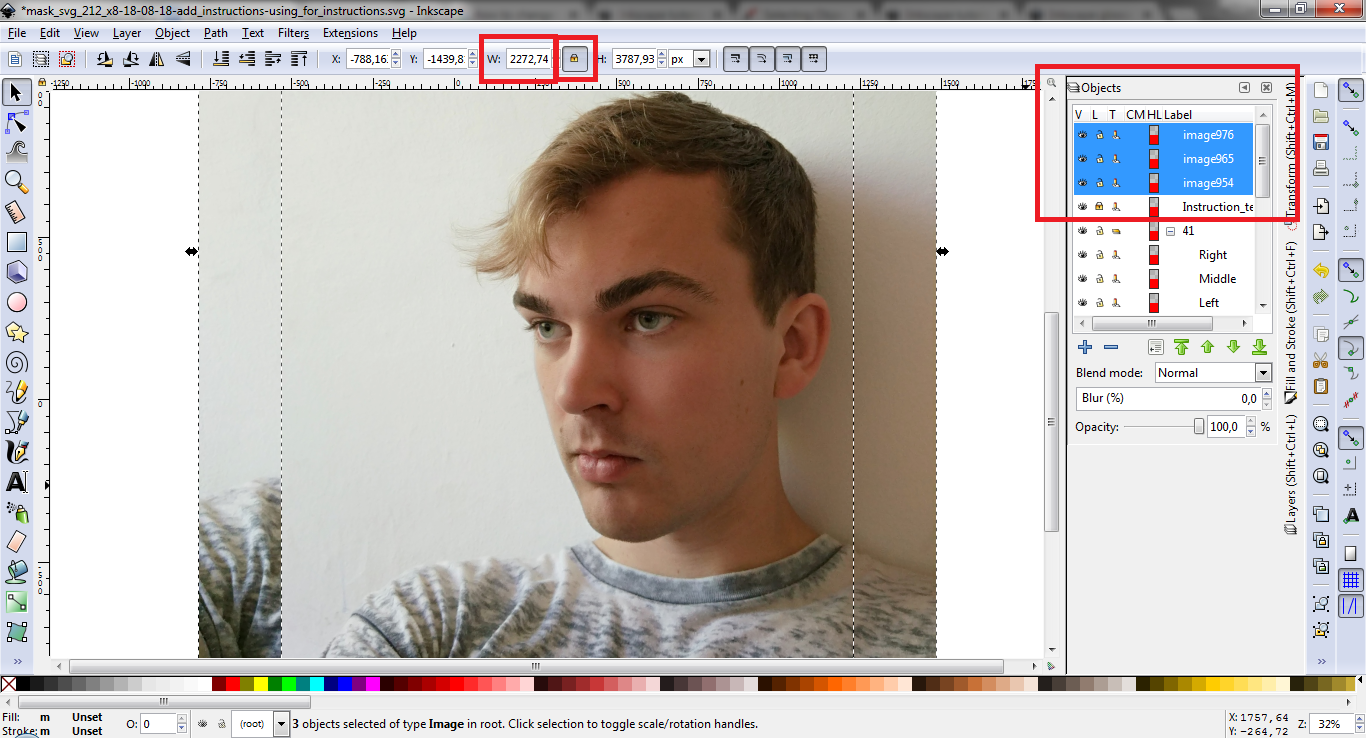
Photo 5: When zoomed out, select the three pictures by clicking on them in the ‘Objects’ menu while holding CTRL. Next, click on the lock icon, which keeps the height and width of the pictures in the same ratio. Now change the width by changing the number next to the lock icon to 250. The pictures will now get smaller and possibly disappear from your screen. If this is the case try scrolling around the canvas and moving the pictures near the masks again.
Photo 6: Next we will rename the pictures. The picture lying on top will be the object highest in the ‘Objects’ menu. Double click on the label to rename it. I renamed mine ‘Right’ because it is taken from the right. This process will make editing easier later. The two underlying pictures can be seen by ‘hiding’ the upper picture by pressing the eye-icon next to it. Rename them as well.
Photo 7: When you have renamed them all, only the lower picture will remain visible. Lock it by pressing the lock icon. Next select the two overlying pictures and change the opacity to 50%. We do this so we lay the pictures over each other.
Photo 8: Now view the second picture and position (move and scale) it over the underlying picture so they match as much as possible. I like to use the eyes or the nose as a reference.
Photo 9: Next, make sure the three pictures are unlocked and make their opacity 100% again. Now select all three and drag them down in the ‘Object’ menu. Now select a group to view where it is situated. Group ‘12’ corresponds with the picture on the first column, on the second row.
Photo 10: Next drag and position your three pictures behind a group. Make sure all three pictures edges are outside the mask. Next ungroup the selected group by right-mouse-clicking the group and selecting ‘Ungroup’.
Photo 11: Next, we are going to clip the pictures. CTRL + click two matching objects, then right-click them and select set clip. Repeat this process for the two remaining pictures.
Photo 12: Congratulations, the editing is done! To print the picture hide the groups you have not used and select ‘Print’ in the ‘File’ menu. When printed, use scissors so the picture is trimmed and fits in the frame.
Downloads
Assembling the Case
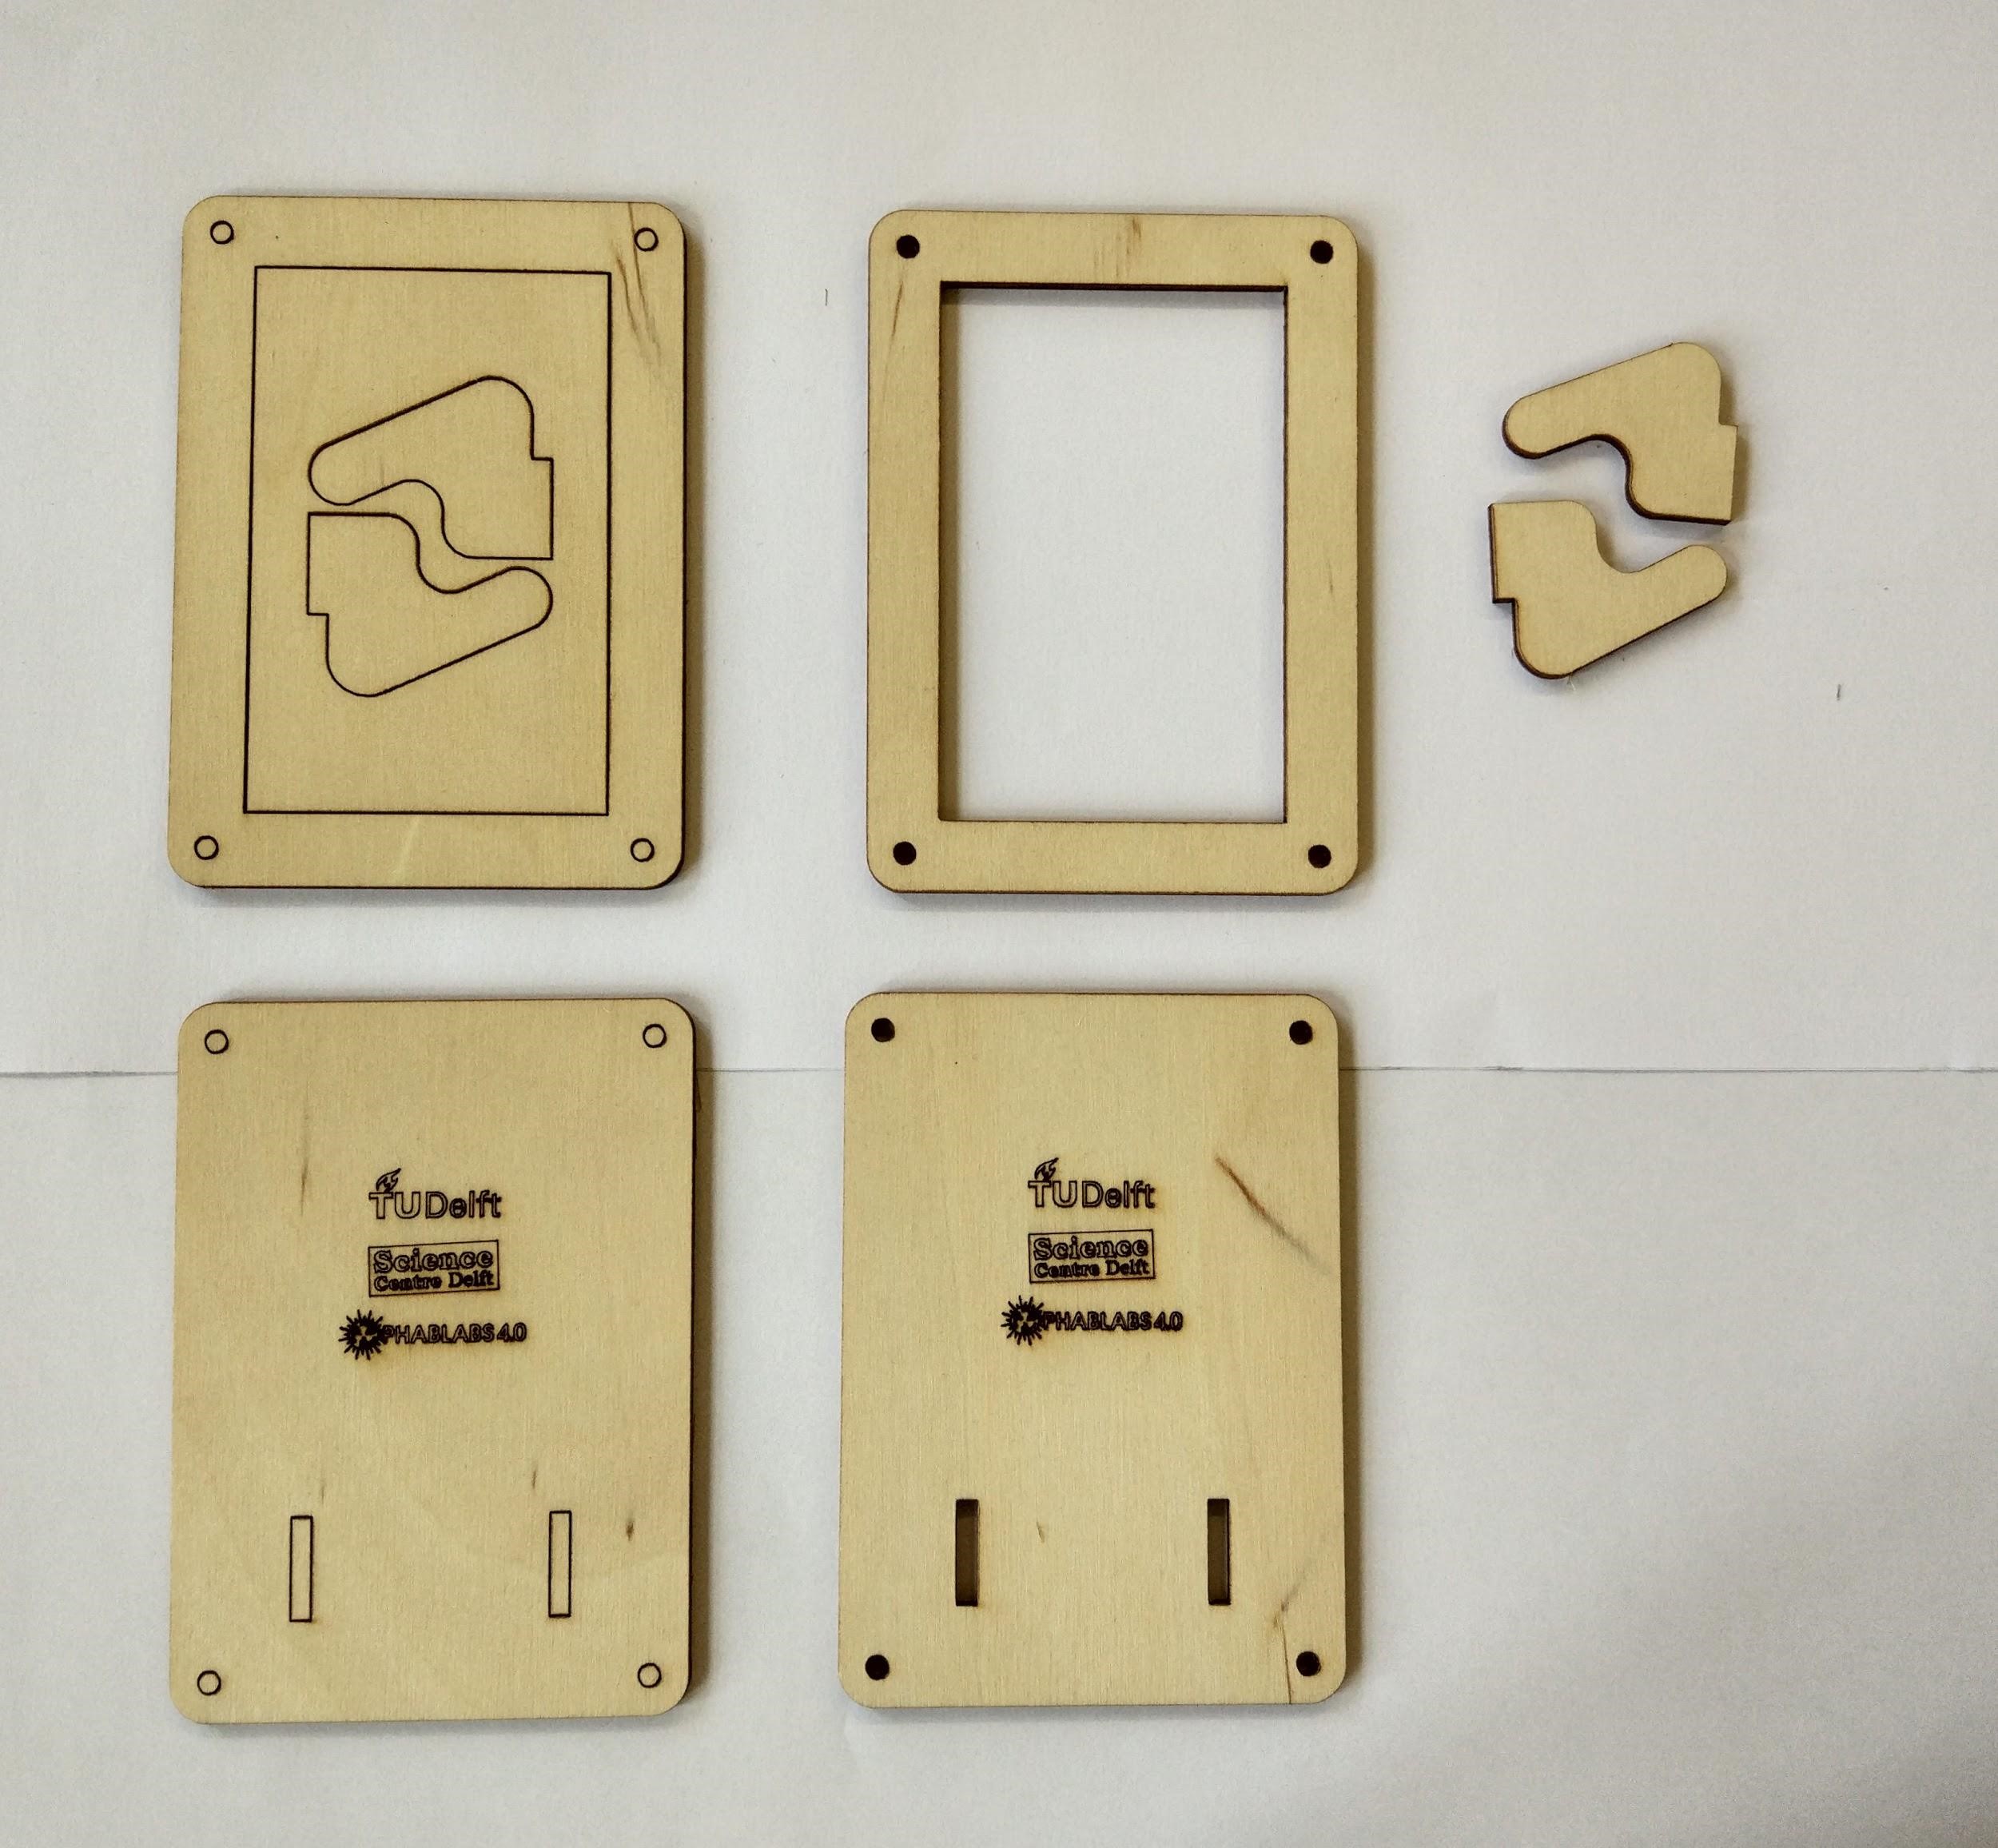
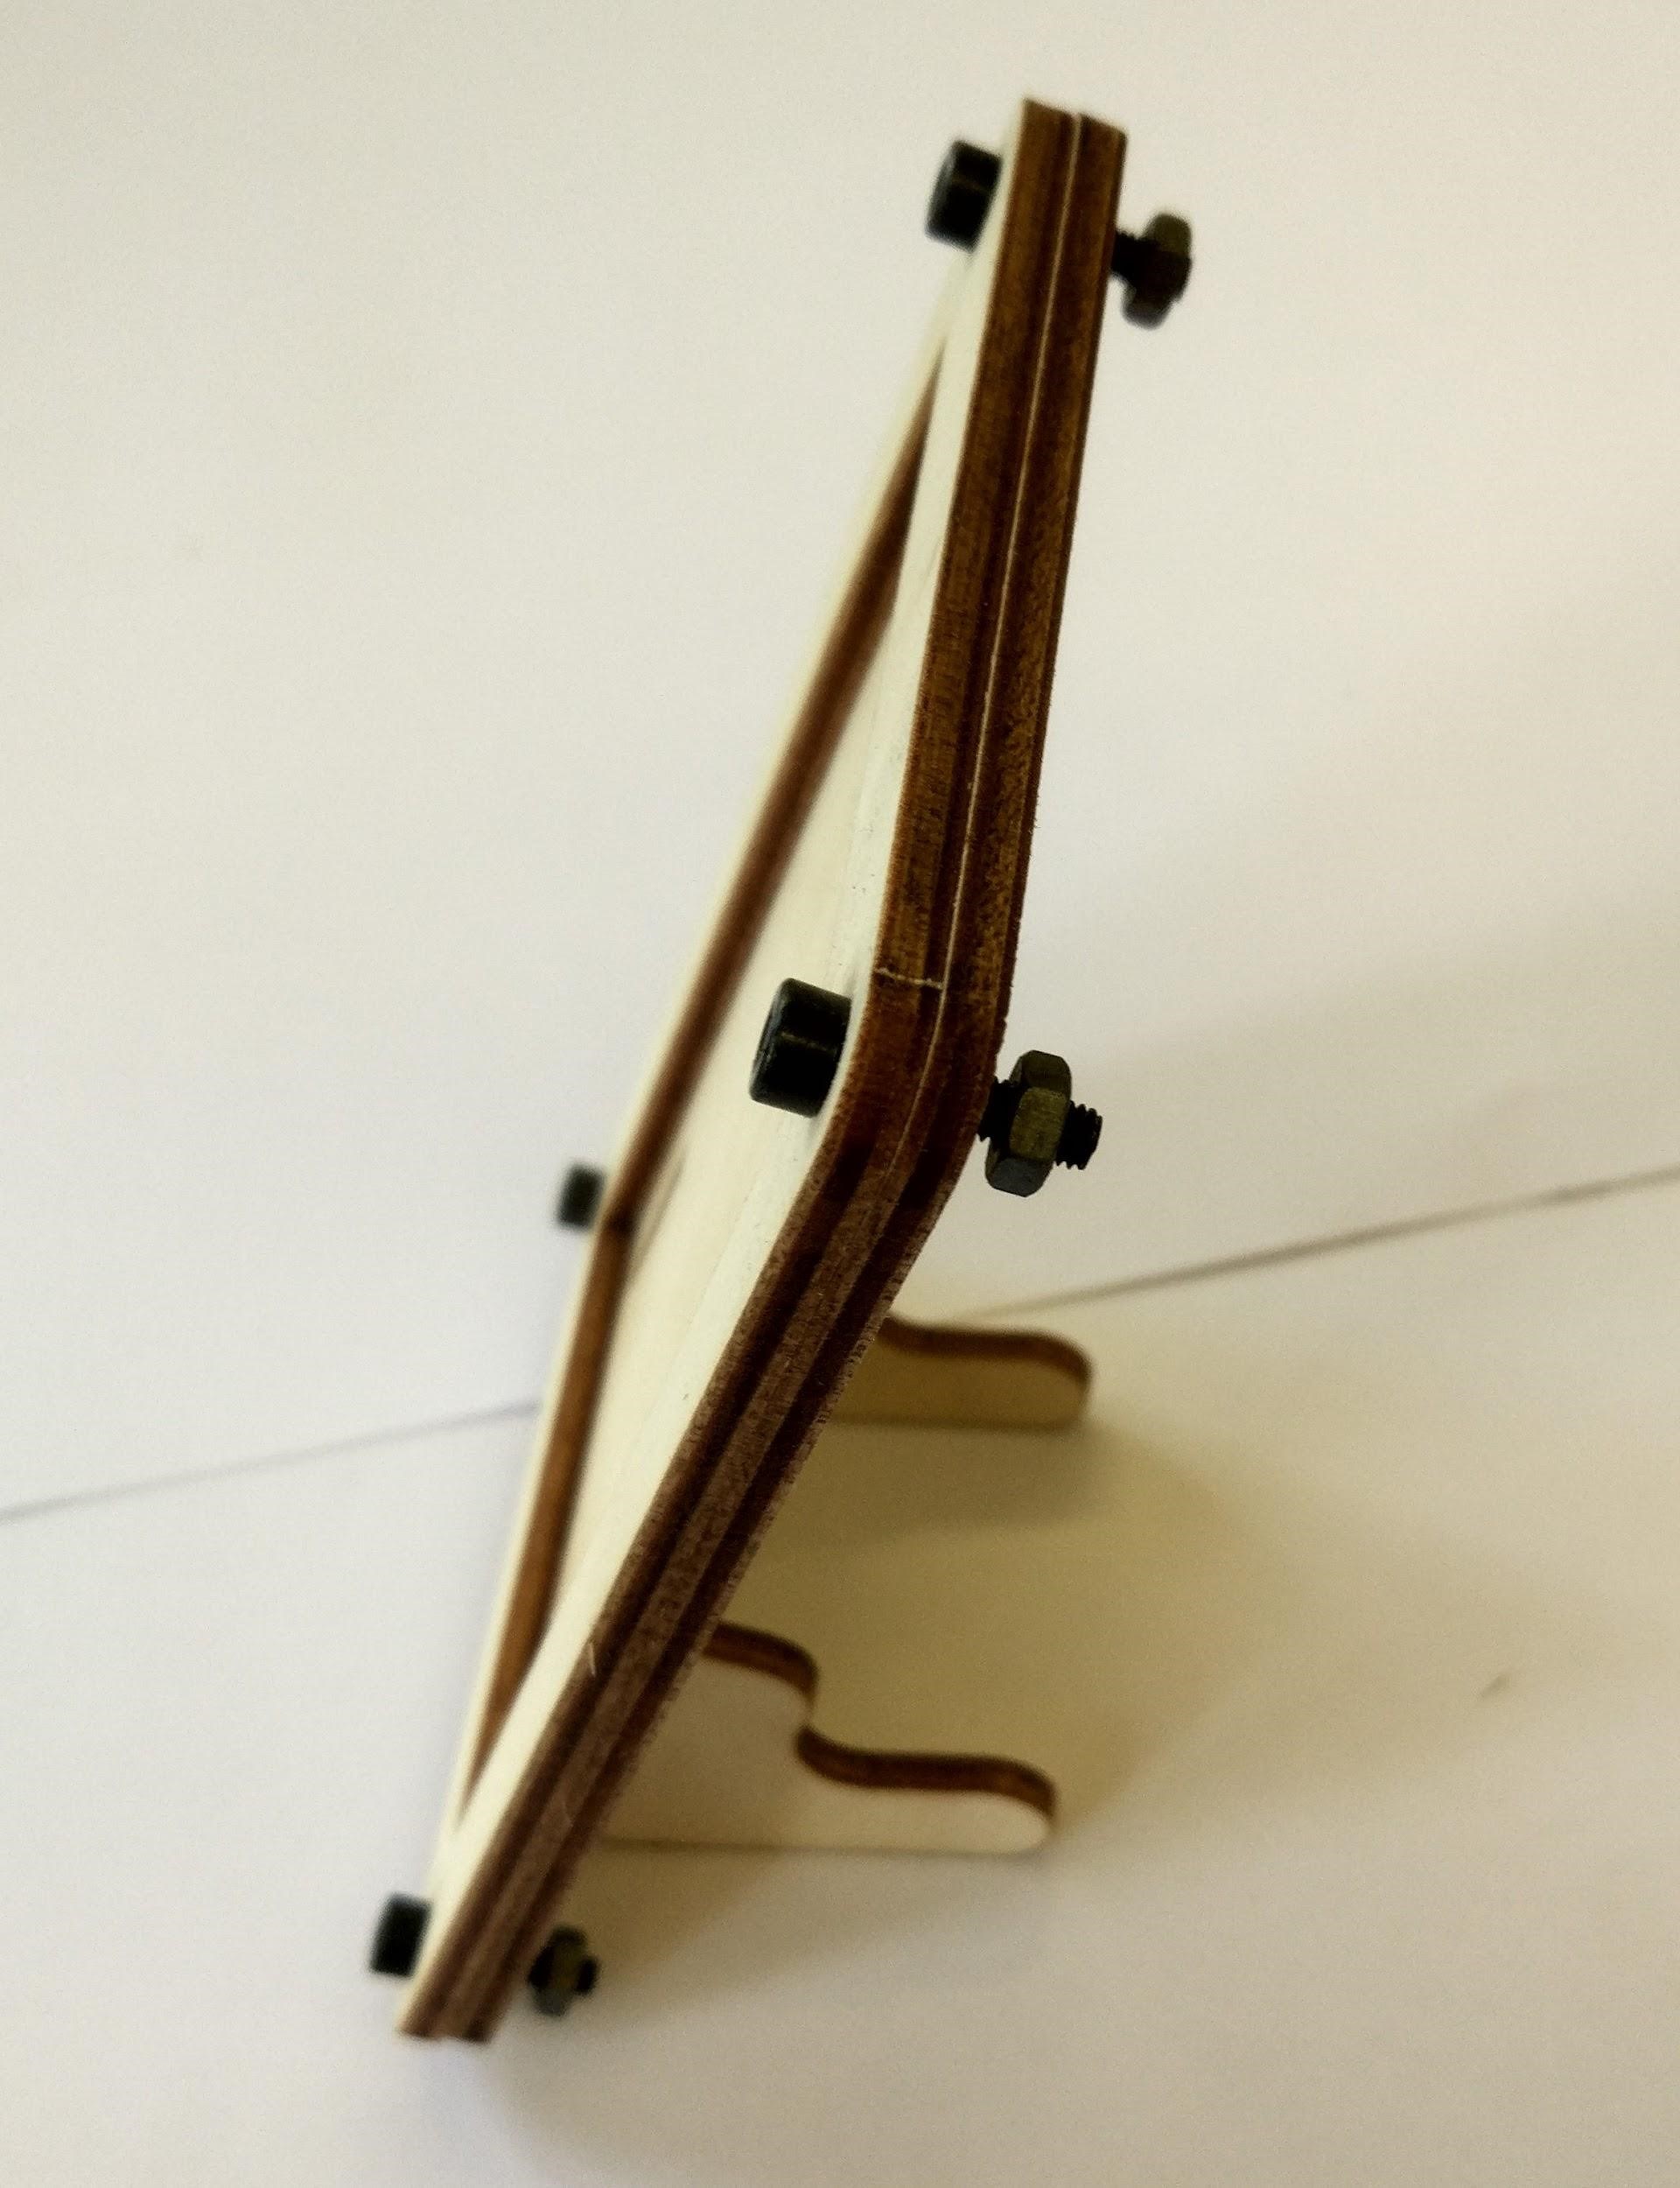
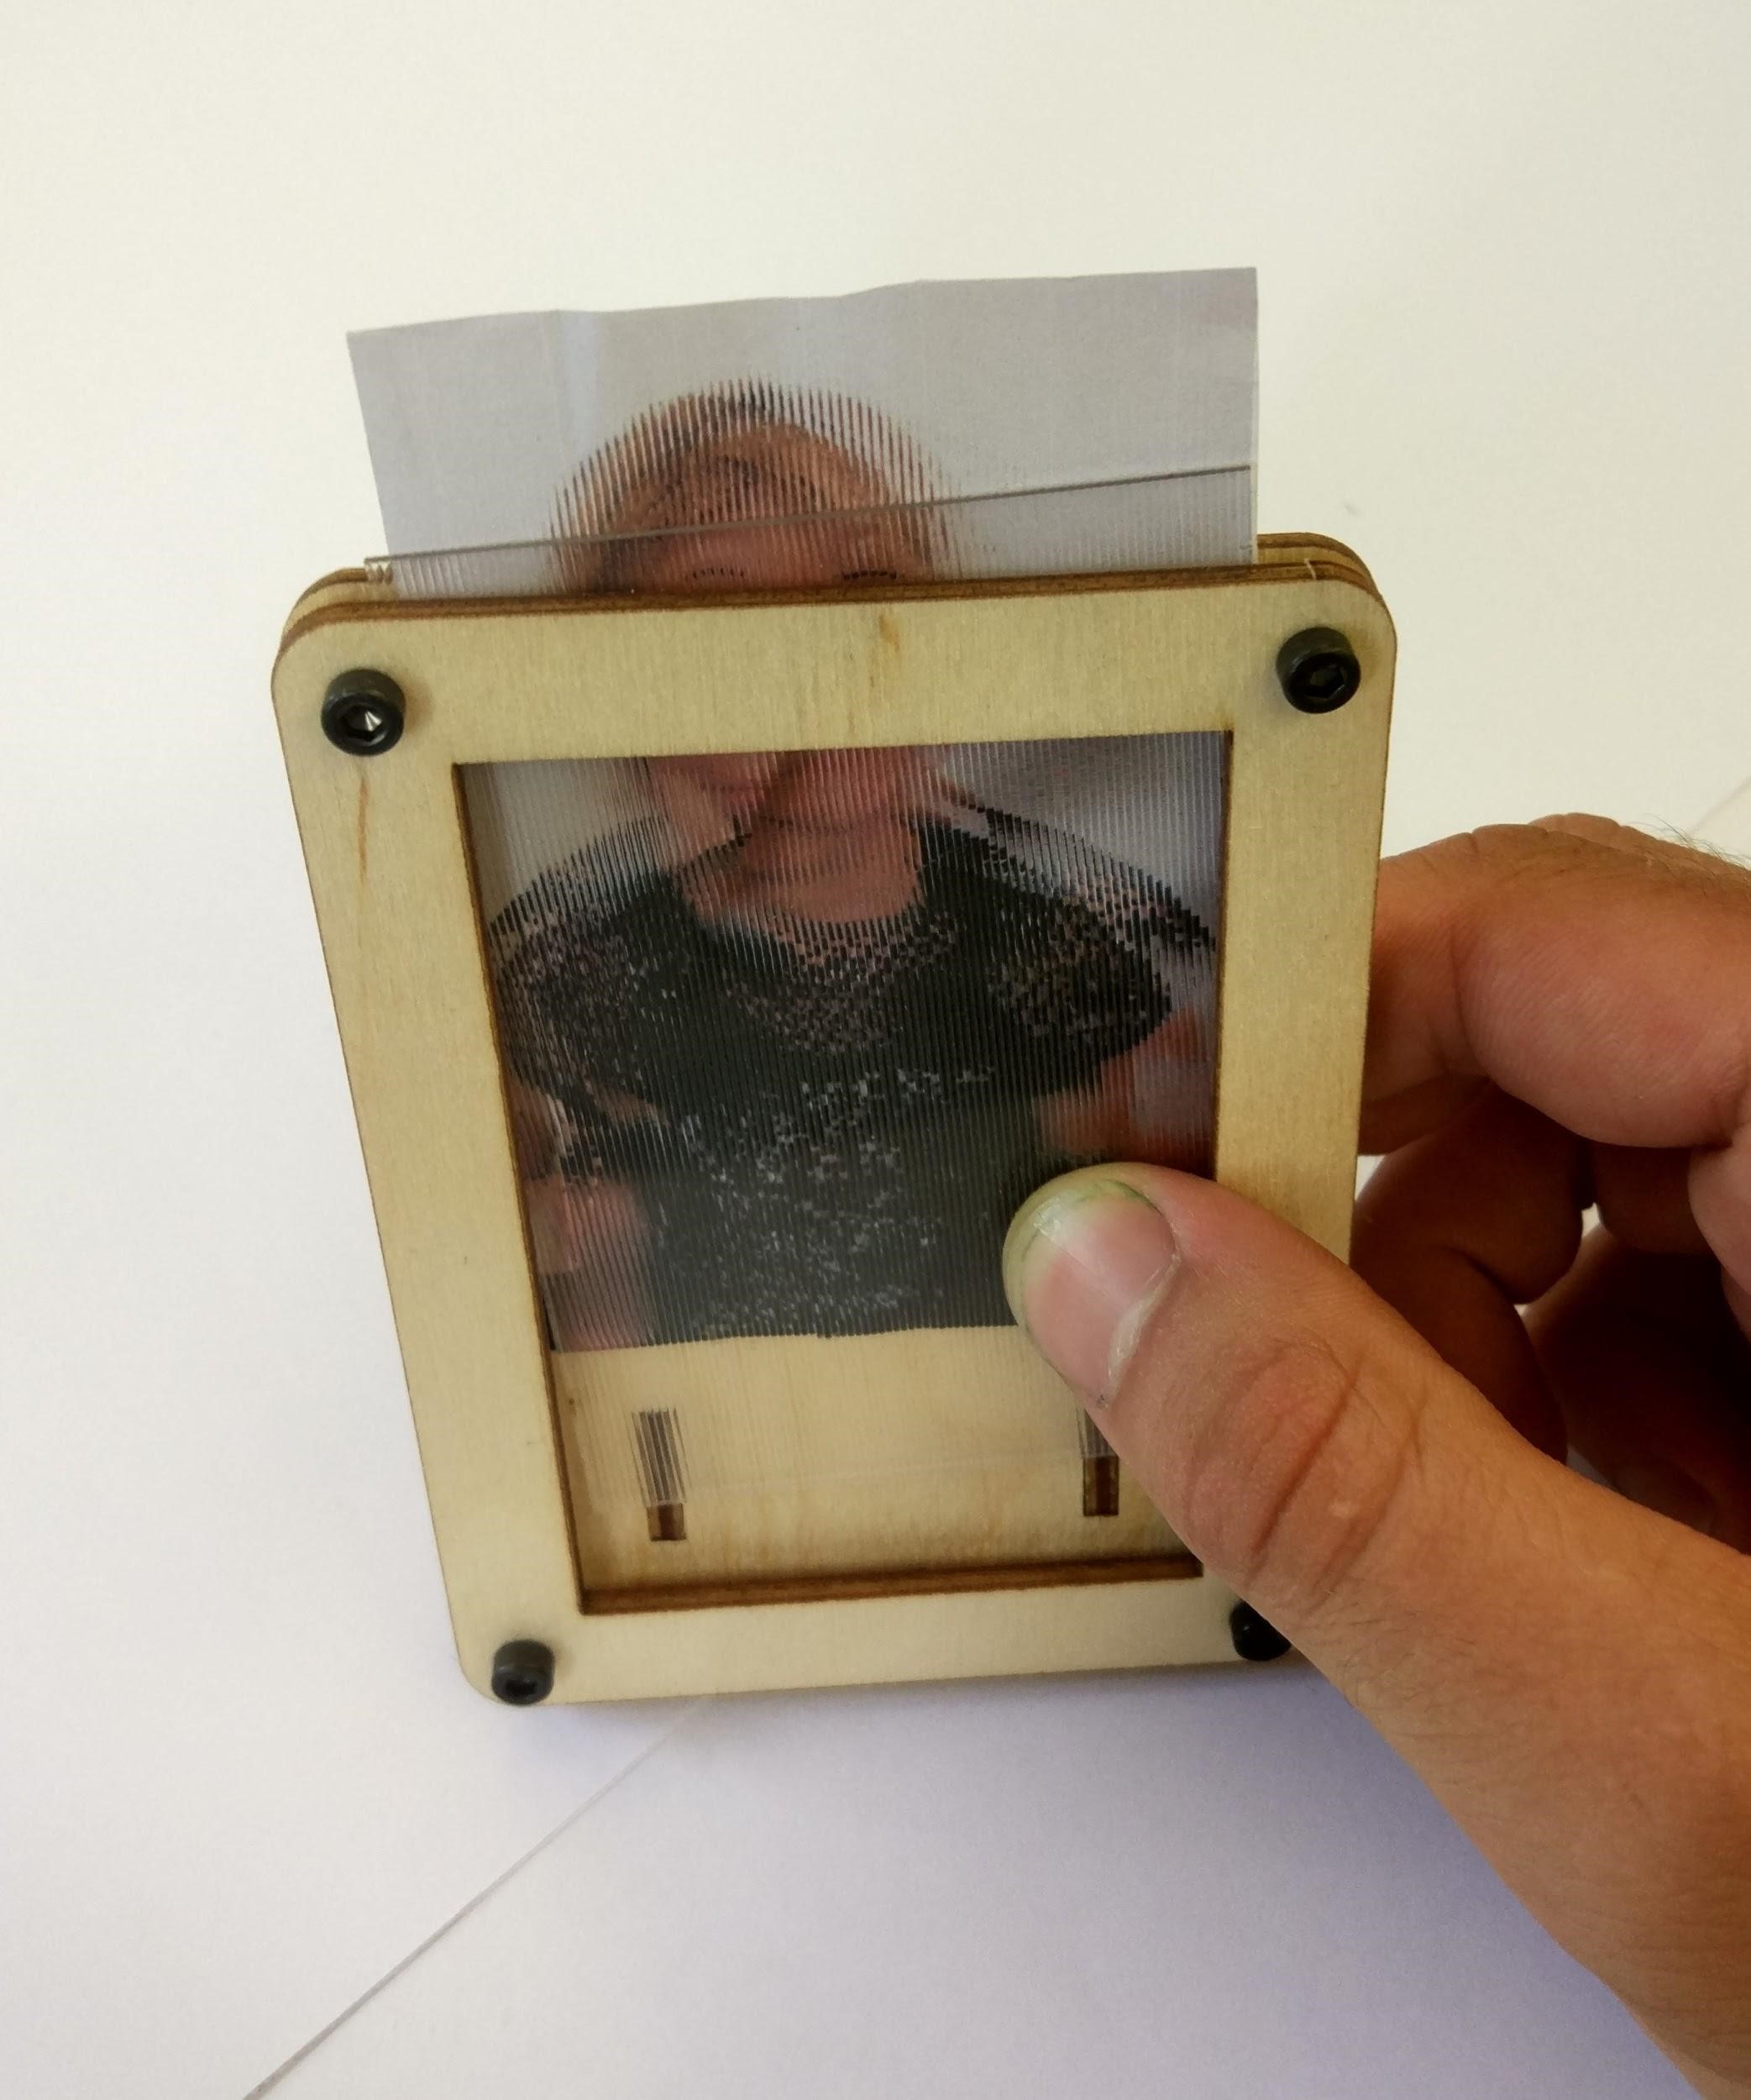
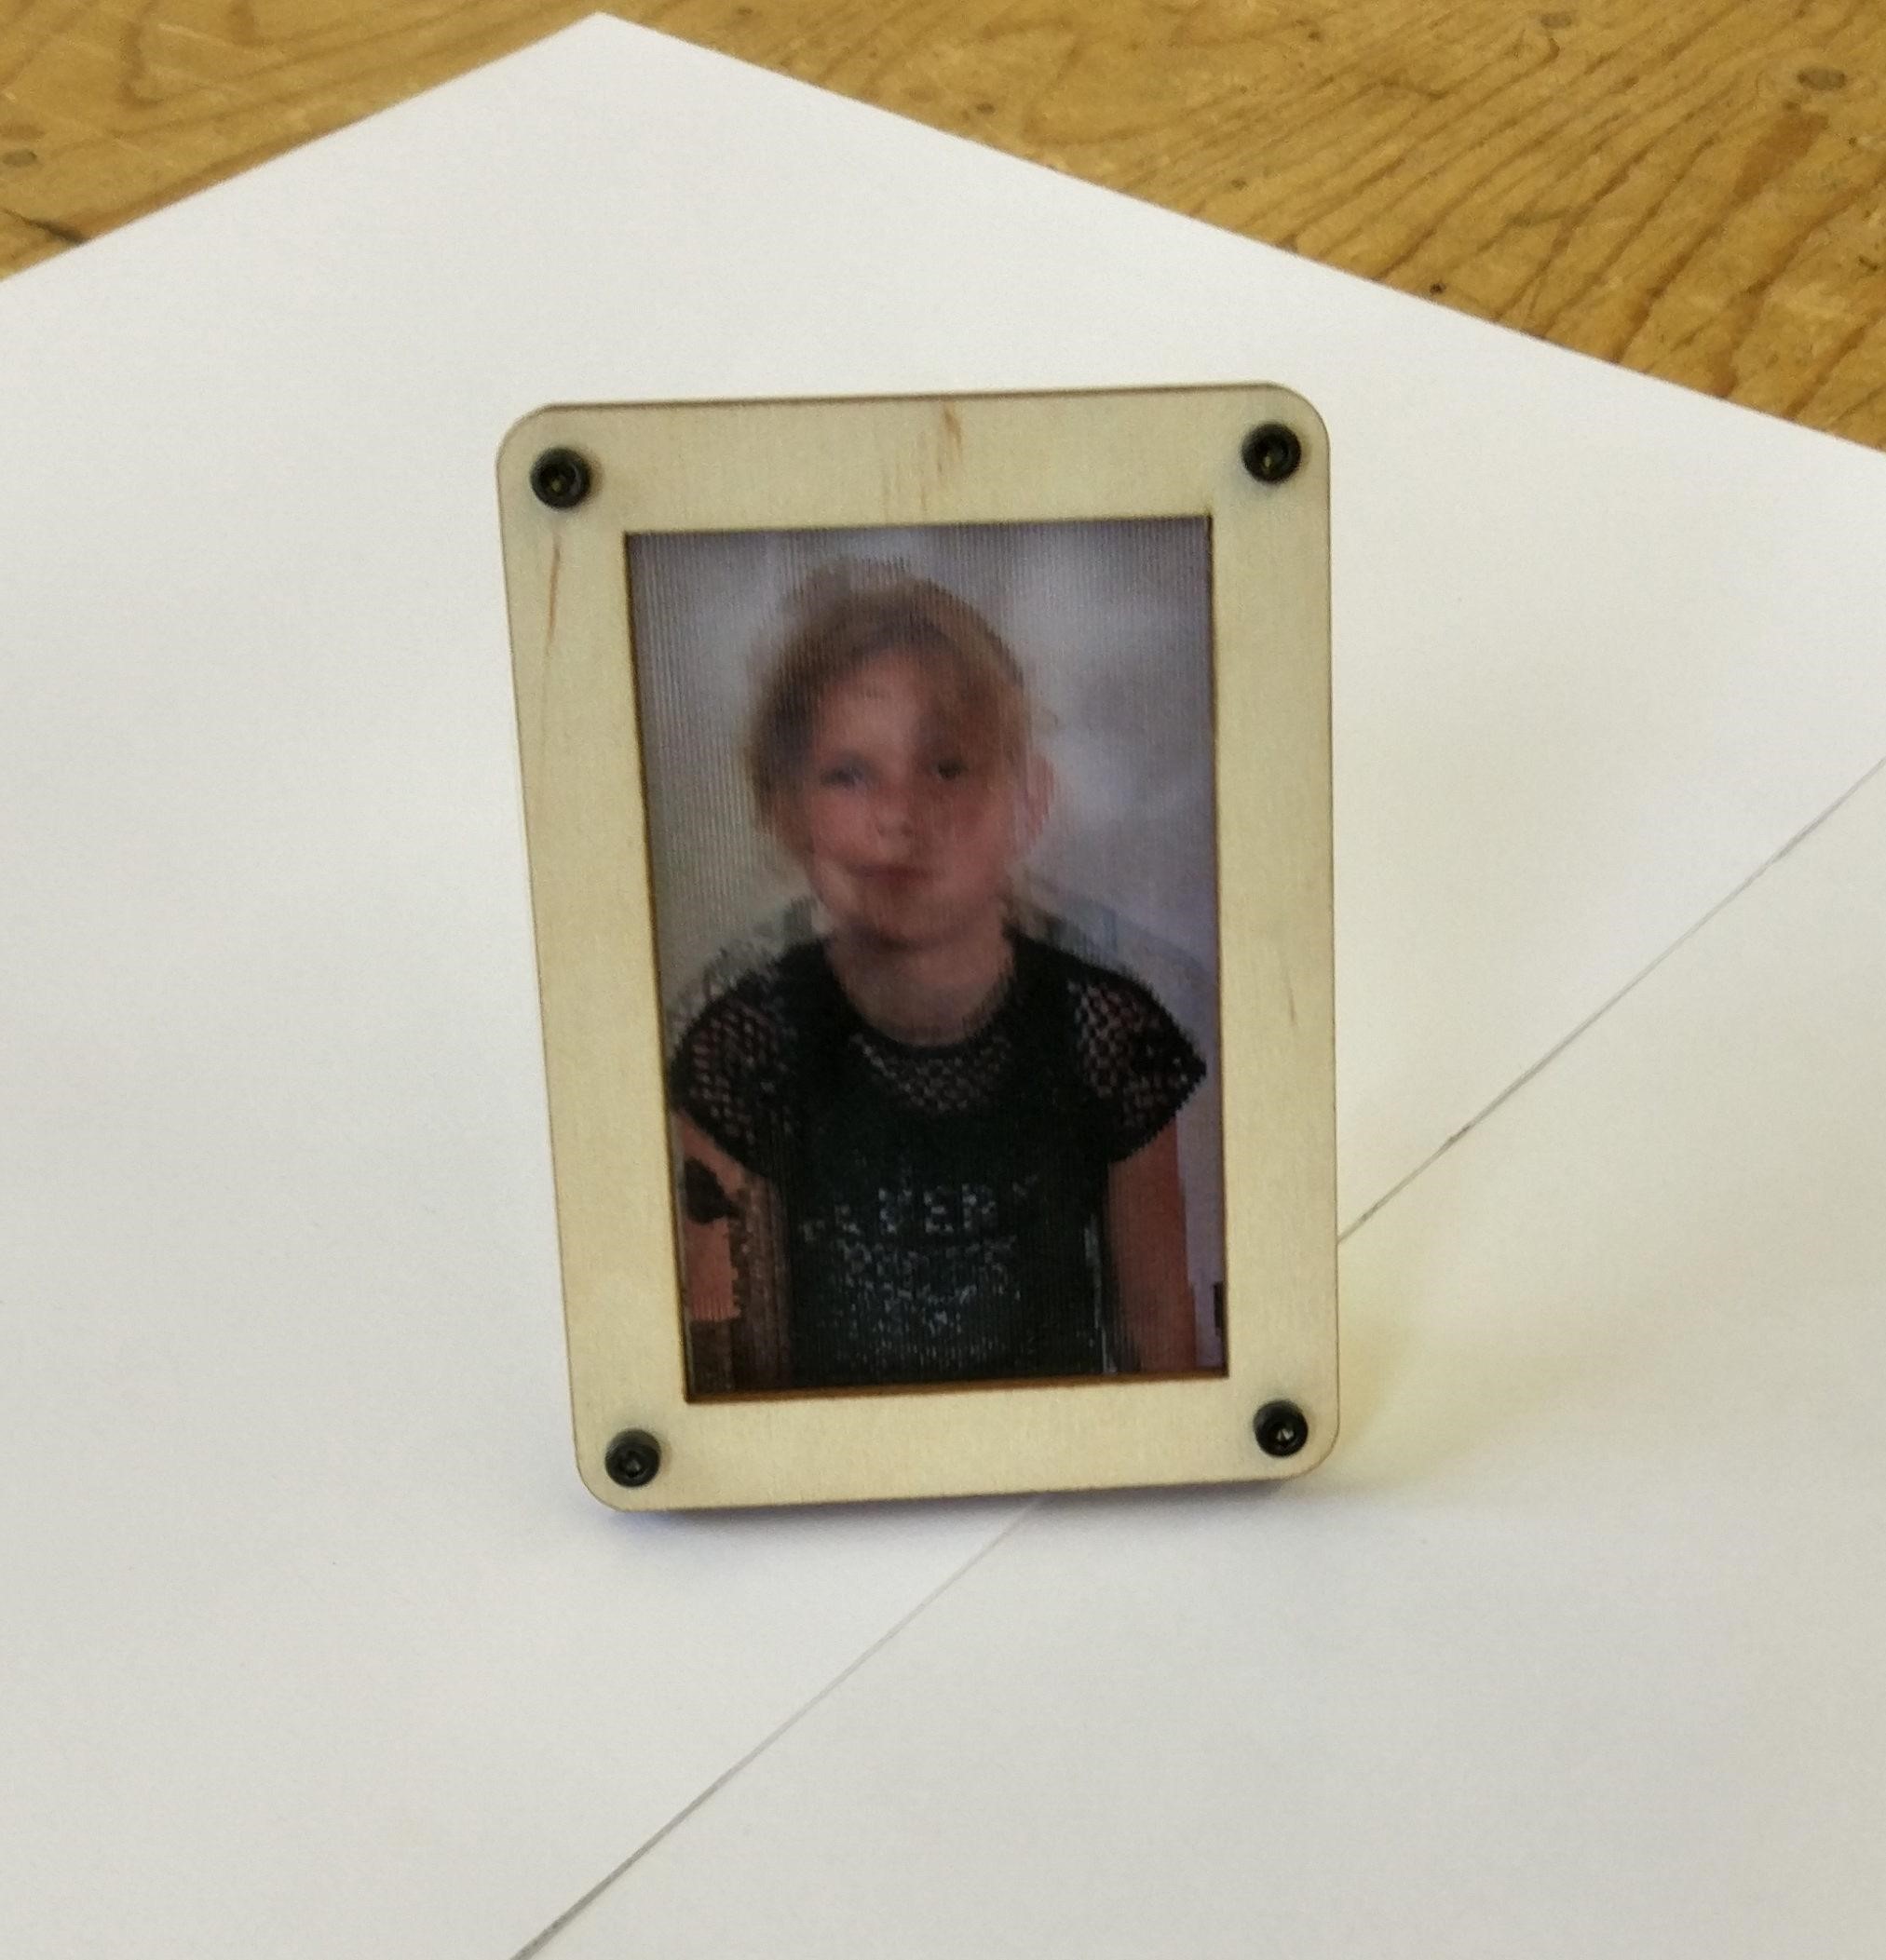
Cut out the pieces for the frame with a lasercutter. The files for the lasercutter are included.
Use a lasercutter (or another cutting device) to cut the lenticular sheets. They have the dimensions 60mm x 90mm. Make sure the lenticular grooves are parallel to the vertical axis.
Before you start assembling, make sure you have all the parts. You can check with the picture above.
Photo 1: Take the laser cutted parts out of the frame.
Photo 2: Put in the 4 bolts and loosely tighten the nuts.
Photo 3: Slide the photograph and the lenticular sheet in. The lenticular sheet should have its rough surface facing out for it to work.
Photo 4: Before tightening the screws properly, align the picture and the lenticular sheet. Make sure the lenticular sheets are parallel to the picture. Enjoy!
End Result and Conclusions
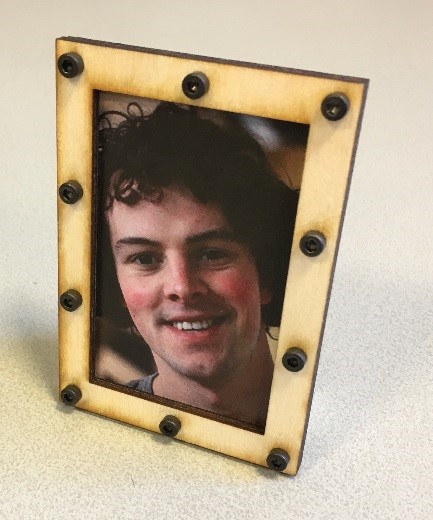
.jpg)

What we learned?
You learned how light refracts through lenticular paper to mimic a 3D image. In addition, you gained some hands-on skills assembling a picture and positioning the picture perfectly underneath the sheet.
Concluding thoughts
To put this in perspective with the world
around us, we can look at 3D TV’s. Currently 3D TV’s (or virtual reality!) mostly work by putting on glasses, which makes both eyes see different angles of the screen, to mimic 3D. But at one point manufacturers tried to make 3D TV’s which could create 3D without needing glasses. The basis of this concept were lenticular lenses.
ABOUT PHABLABS 4.0 EUROPEAN PROJECT
PHABLABS 4.0 is a European project where two major trends are combined into one powerful and ambitious innovation pathway for digitization of European industry: On the one hand the growing awareness of photonics as an important innovation driver and a key enabling technology towards a better society, and on the other hand the exploding network of vibrant Fab Labs where next-generation practical skills-based learning using KETs is core but where photonics is currently lacking.
This workshop was set up by the TUD in close collaboration with ScienceCenterDelft.