3D Paper Folding Heads
Sometimes you just wish there was a little more room in your head. Or that you could swap yours with somebody else. We used smartphone cameras and freely available software to create a 3D head-scan, convert it to a foldable model, and tape it together.
The project takes about 1 hour for software downloads, 2 hours to scan and convert your first head, and 3-4 hours to fold. The scanning, conversion, and folding get much faster with practice.
This is an updated version of https://www.instructables.com/Twinsies-Head-Swapping/ using currently available tools.
Supplies
- A plotter (large-format printer). Ours used A1 size paper.
- Scissors
- Exacto knife
- Double sided tape
- Optional (but very helpful) extras
- A straight edge for upwards folding - e.g. a thin ruler or a cut-off chunk of a vanilla folder
- A table (or puzzle box, or block of wood, or...) with a sharp edge for downwards folding
- Various software downloads, described below. I believe some of these are Windows-only, so you'll need a Windows PC.
Download Software
As of this writing, all of the below are either free or have free 30-day trials.
- Agisoft Metashape: https://www.agisoft.com/downloads/installer/
- 3D Studio Max: https://www.autodesk.com/products/3ds-max/free-trial
- You have to create an account and jump through various hoops to get this one. Students at some institutions can get real licenses, otherwise just fake it like we did - pretend you're a new company trying out software. It requires a lot of clicking, but in the end the download will happen without any real verification required.
- Pepakura Designer: https://tamasoft.co.jp/pepakura-en/
Take Photos and Generate a Model
Modern 3D point cloud extraction is shockingly good. The steps below are pretty detailed, and worked well for us. I imagine there's some flexibility here, but we did find that properly situating the subject is important.
- Have the subject sit in a solid chair, leaning against the back rest so it's easy to stay still. Folding chairs work well. If you have long hair, pull it back into a pony tail or otherwise keep it away from your shoulders. The point extraction struggles with large, uniformly colored masses.
- Take ~70 photos from all around, with the head centered in each. Don't move! We took photos at 12 o'clock, 1 o'clock, etc. In each spot, we took 5 pictures from different vertical angles - one from a bit below the plain looking slightly upwards, all the way to one almost on top of the head and looking down.
- Load the photos onto a folder on your PC - we used a USB cable and file transfer, but your favorite cloud storage service can do the job as well.
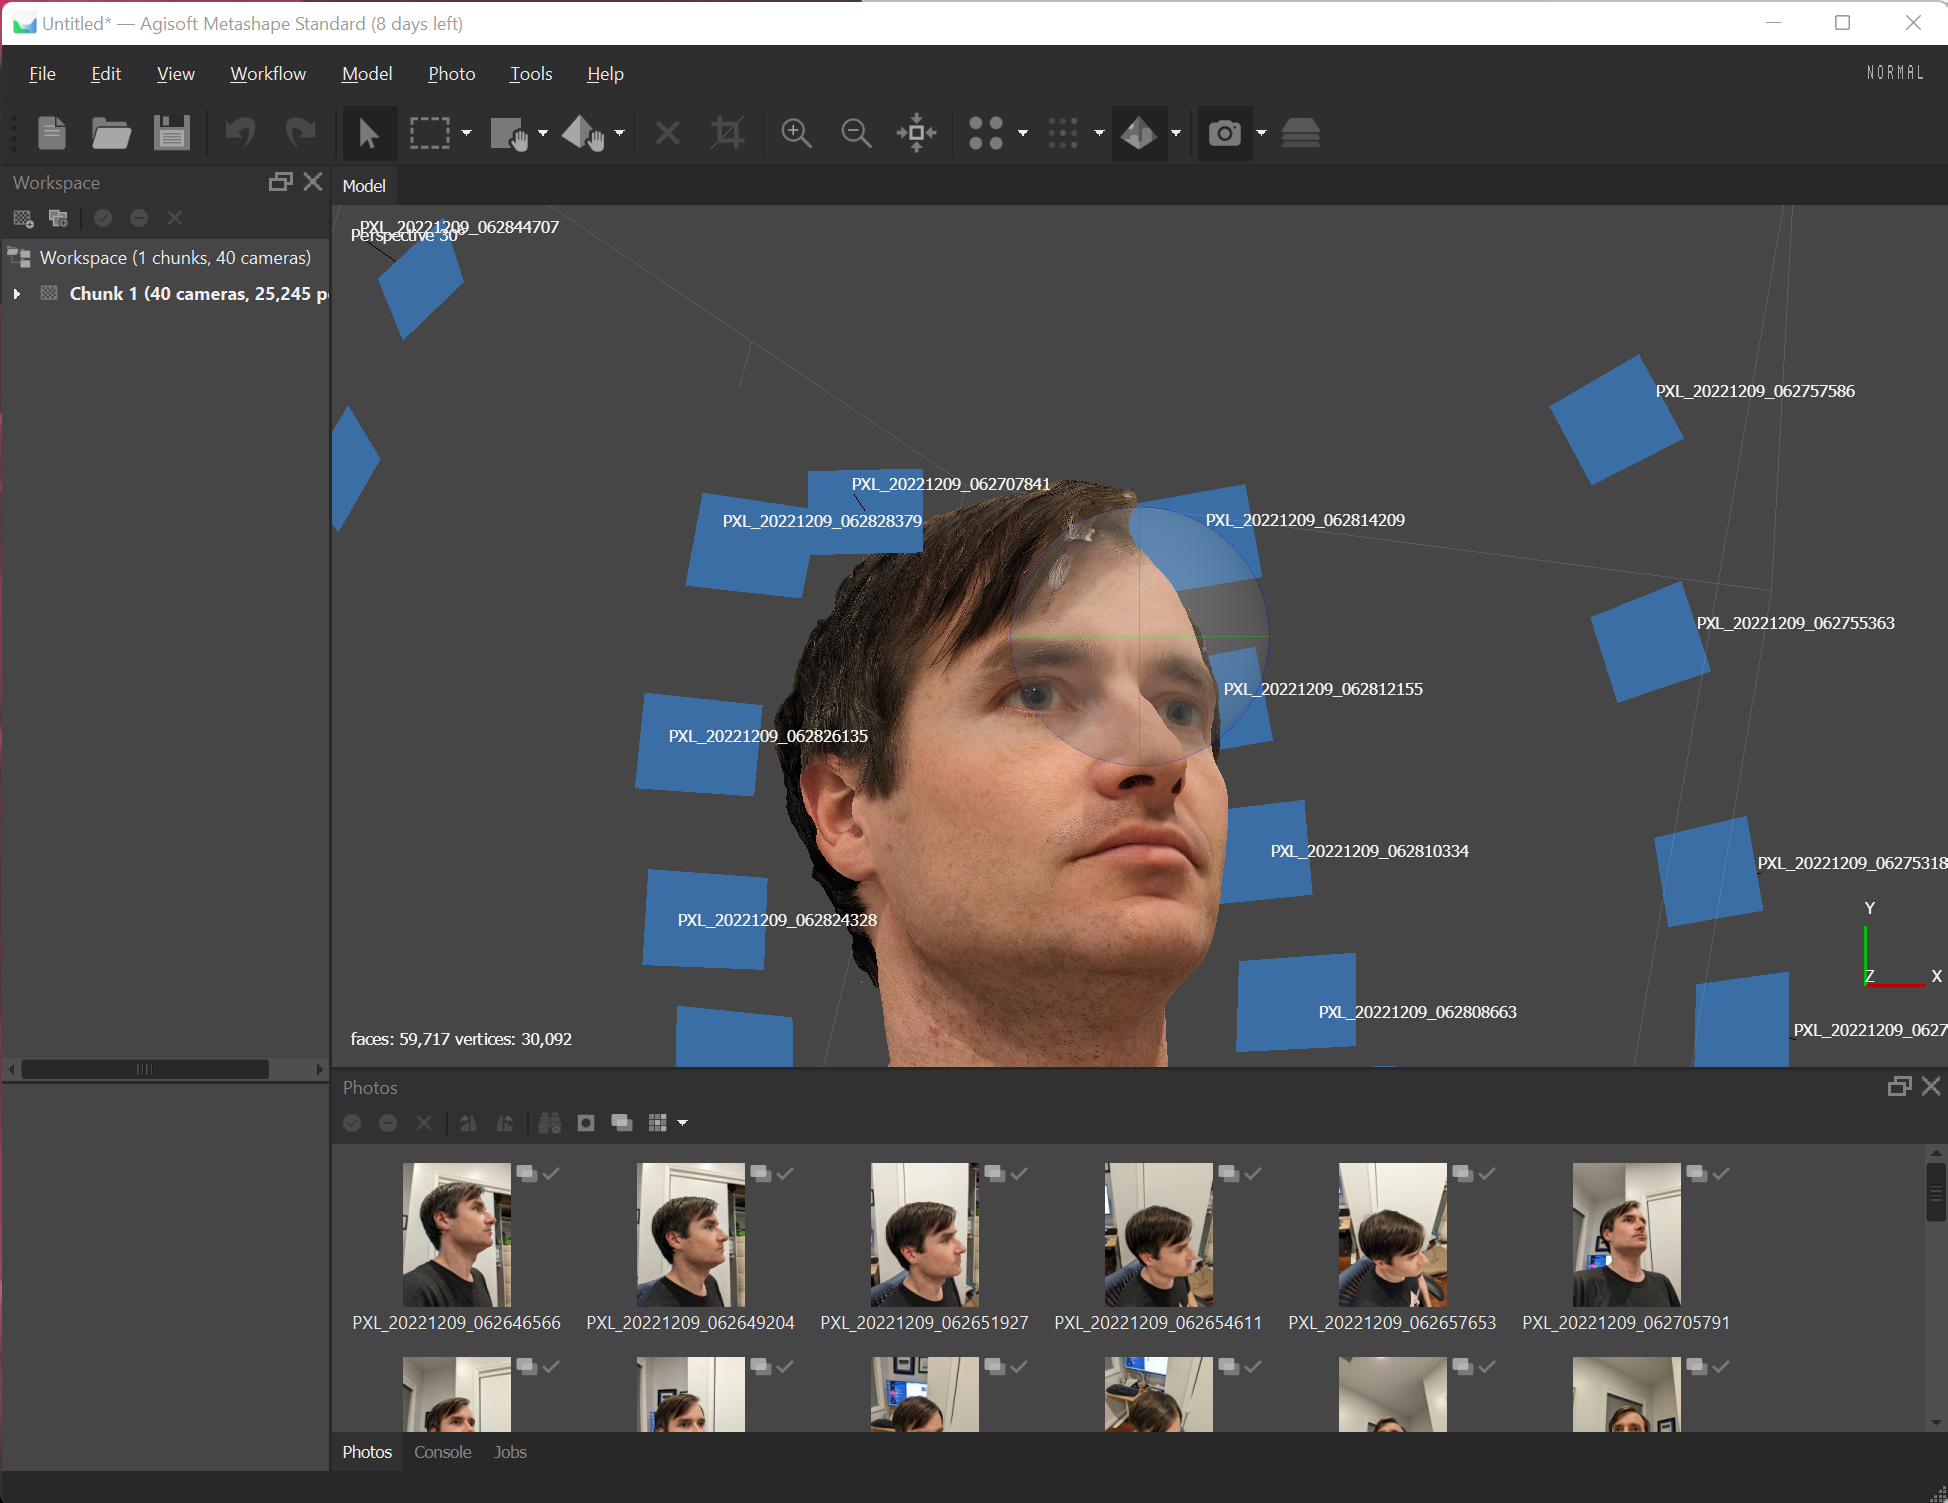
- Open up Agisoft Metashape and run through all of the "workflow" steps:
- Workflow > Add photos : Load your photos into the application.
- Workflow > Align photos: Figures out where the photos were taken from and builds a basic point cloud.
- Workflow > Build mesh: Converts the point cloud to a set of triangles.
- Workflow > Build texture: Creates a texture that maps to the mesh.
- If you don't like the result, start over at step 1. A bad model at this point is going to make everything else harder. Out of four heads we only restarted once, so hopefully you're unlikely to have issues :)
- Write out the model via File > Export Model. Use the "Wavefront OBJ" format, and make sure the "Export texture" option is enabled.
Convert to Low-Poly-Count Model

This is by far the fiddliest bit. You might want to watch an intro video to get some sense for how 3DSMax works - perhaps https://www.youtube.com/watch?v=9i8xbaIcU9w ? The first half of that (selecting, moving, rotating) looks relevant, although I didn't use it myself.
In the below, we're aiming for around 200 faces. You can use more aggressive settings to get down to around 160, and the folding will go substantially faster.
Anyway, the somewhat arduous process:
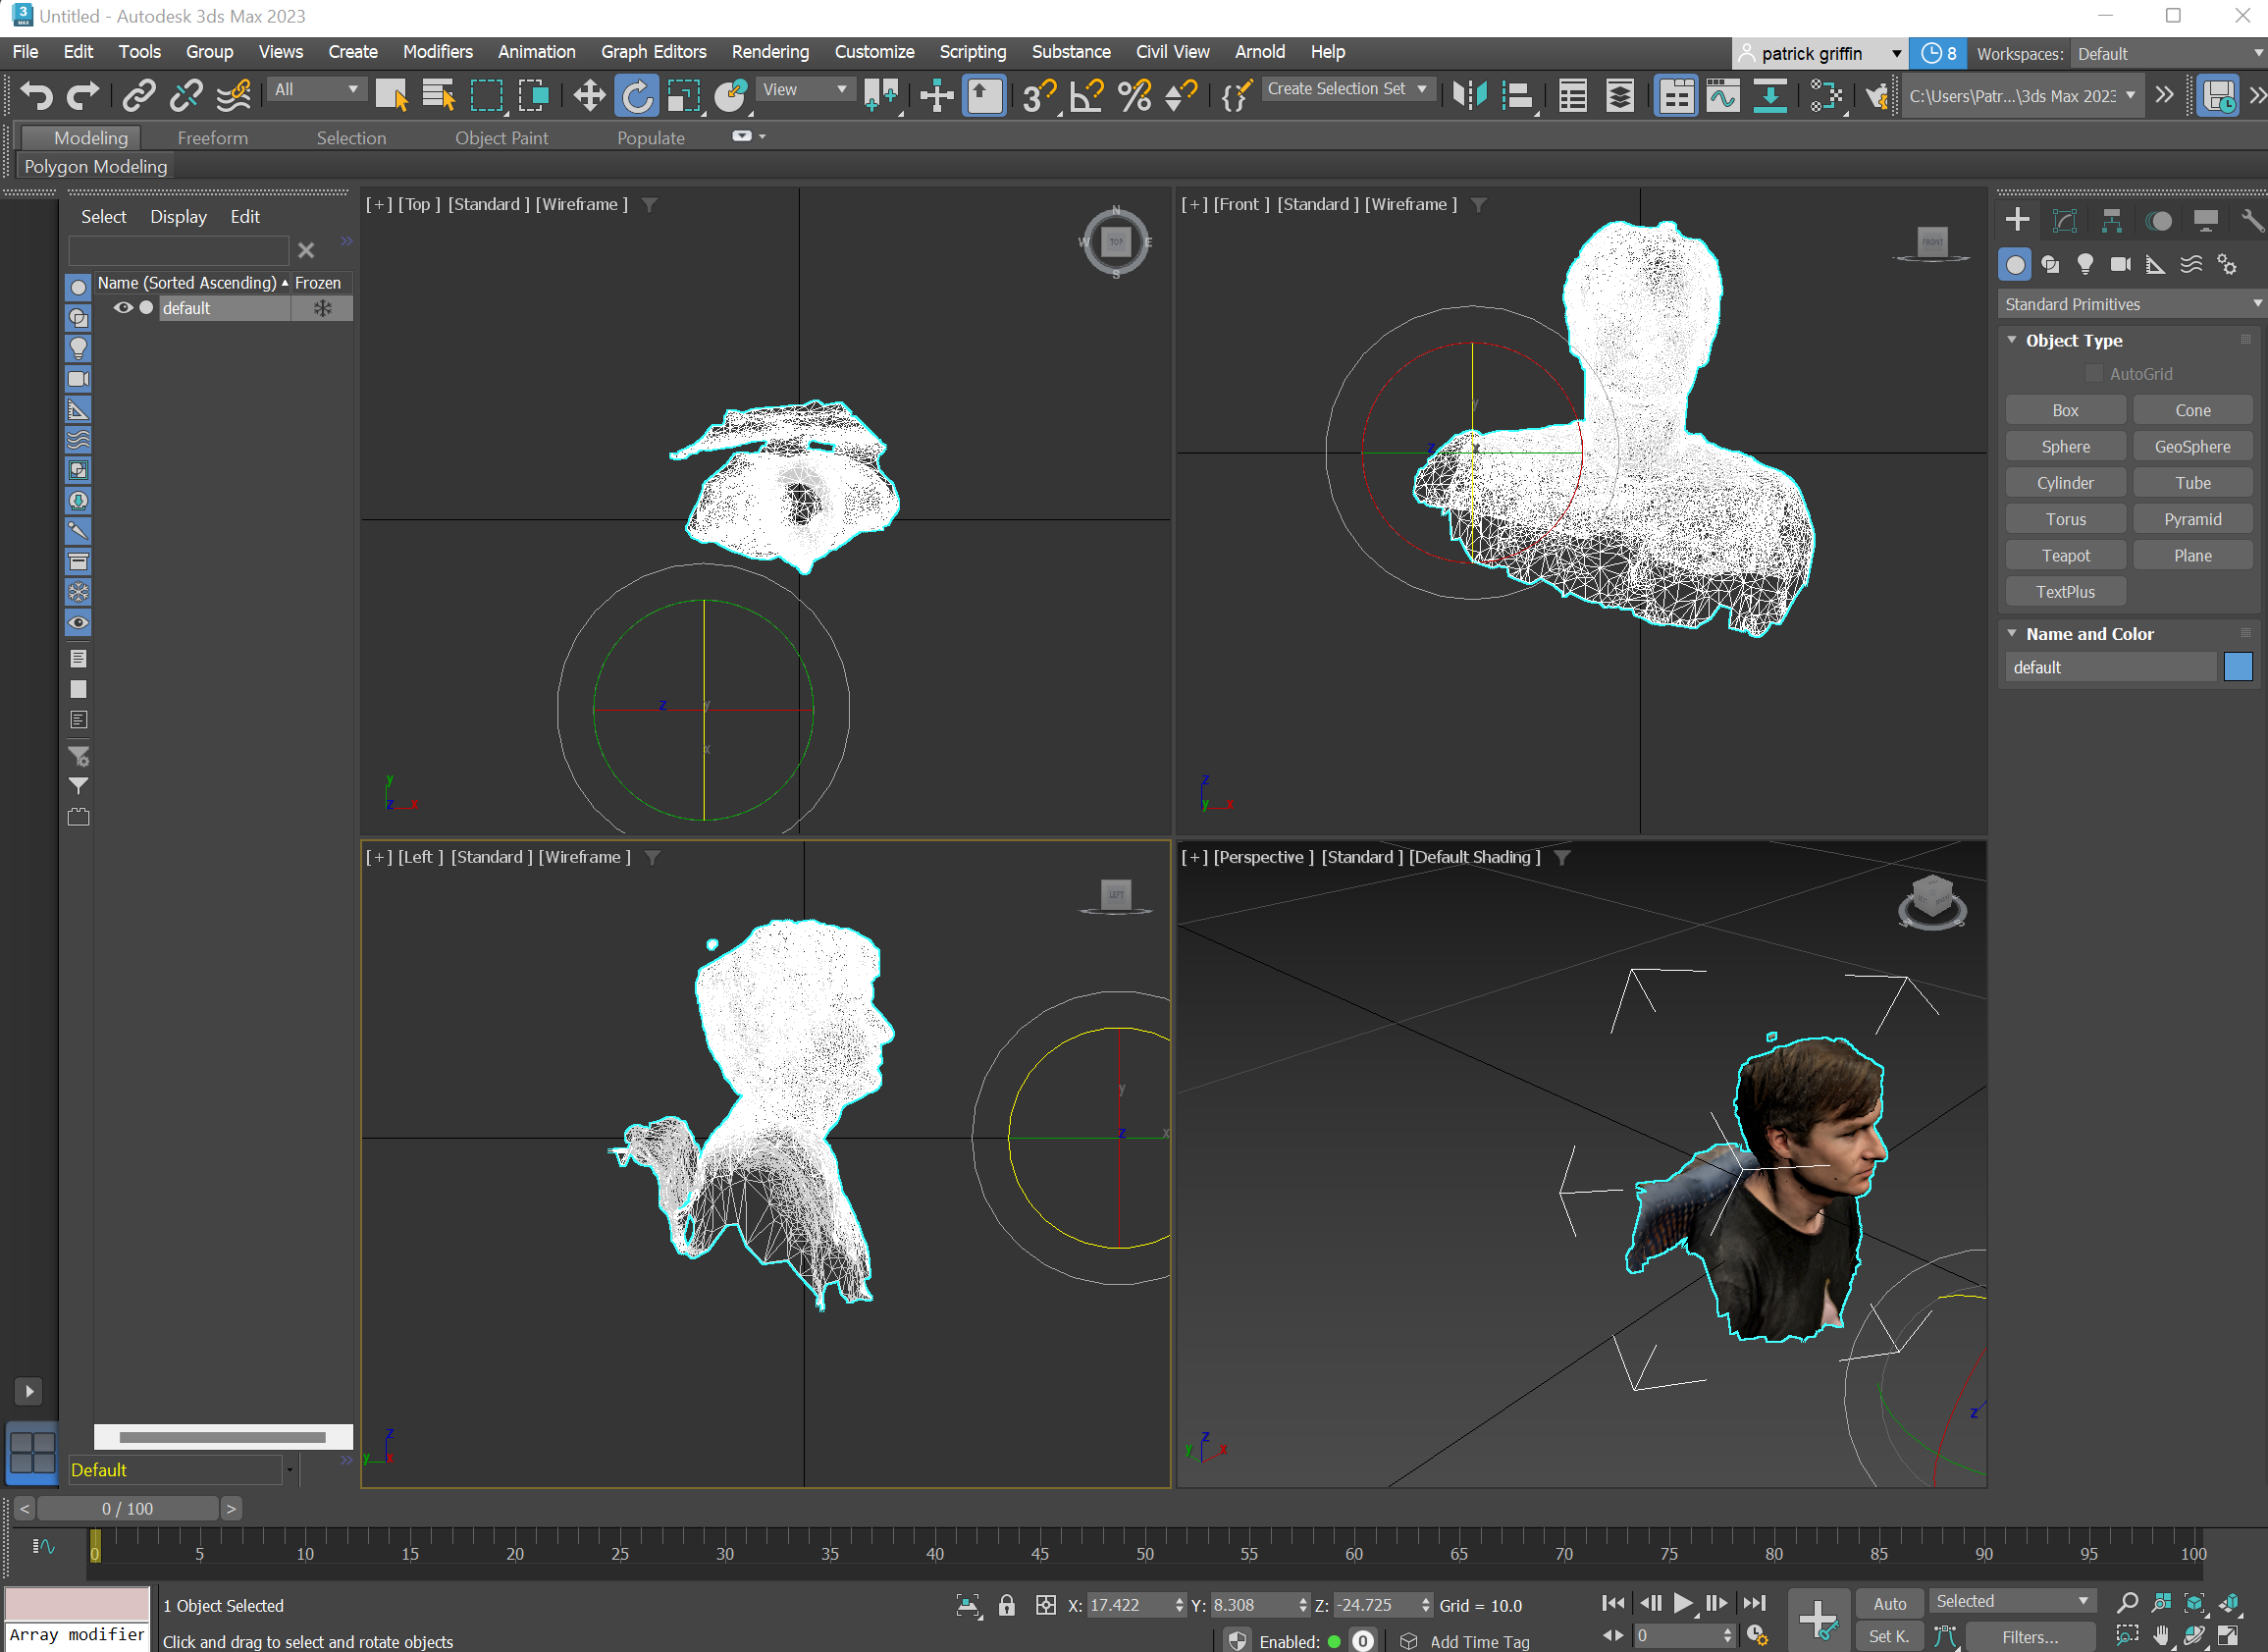
- File > Import to import the model. You should see your scan, with texture applied.
- Select the model, and use the move / rotation tools to center it and get the head facing forward and flat.
- Remove everything but the head
- Modeling > Polygon Modeling > Convert to Poly
- Use vertex selection mode to select everything from the chin down, then delete all that. Having the head oriented as per the previous step is very helpful here - you can select below a nice horizontal line and just press delete. If you can quite get the cut you want, go back to the object level and try rotating a bit.
- Check for any floating, disconnected bits of head you might want to clean up as well.
- Save a file here - the next steps are finicky and you may want to start over again.
- Reduce polygon count [easy version]
- Try this approach once just to learn the tool. You'll get better results by using the "harder version" below, but perhaps this will work well enough.
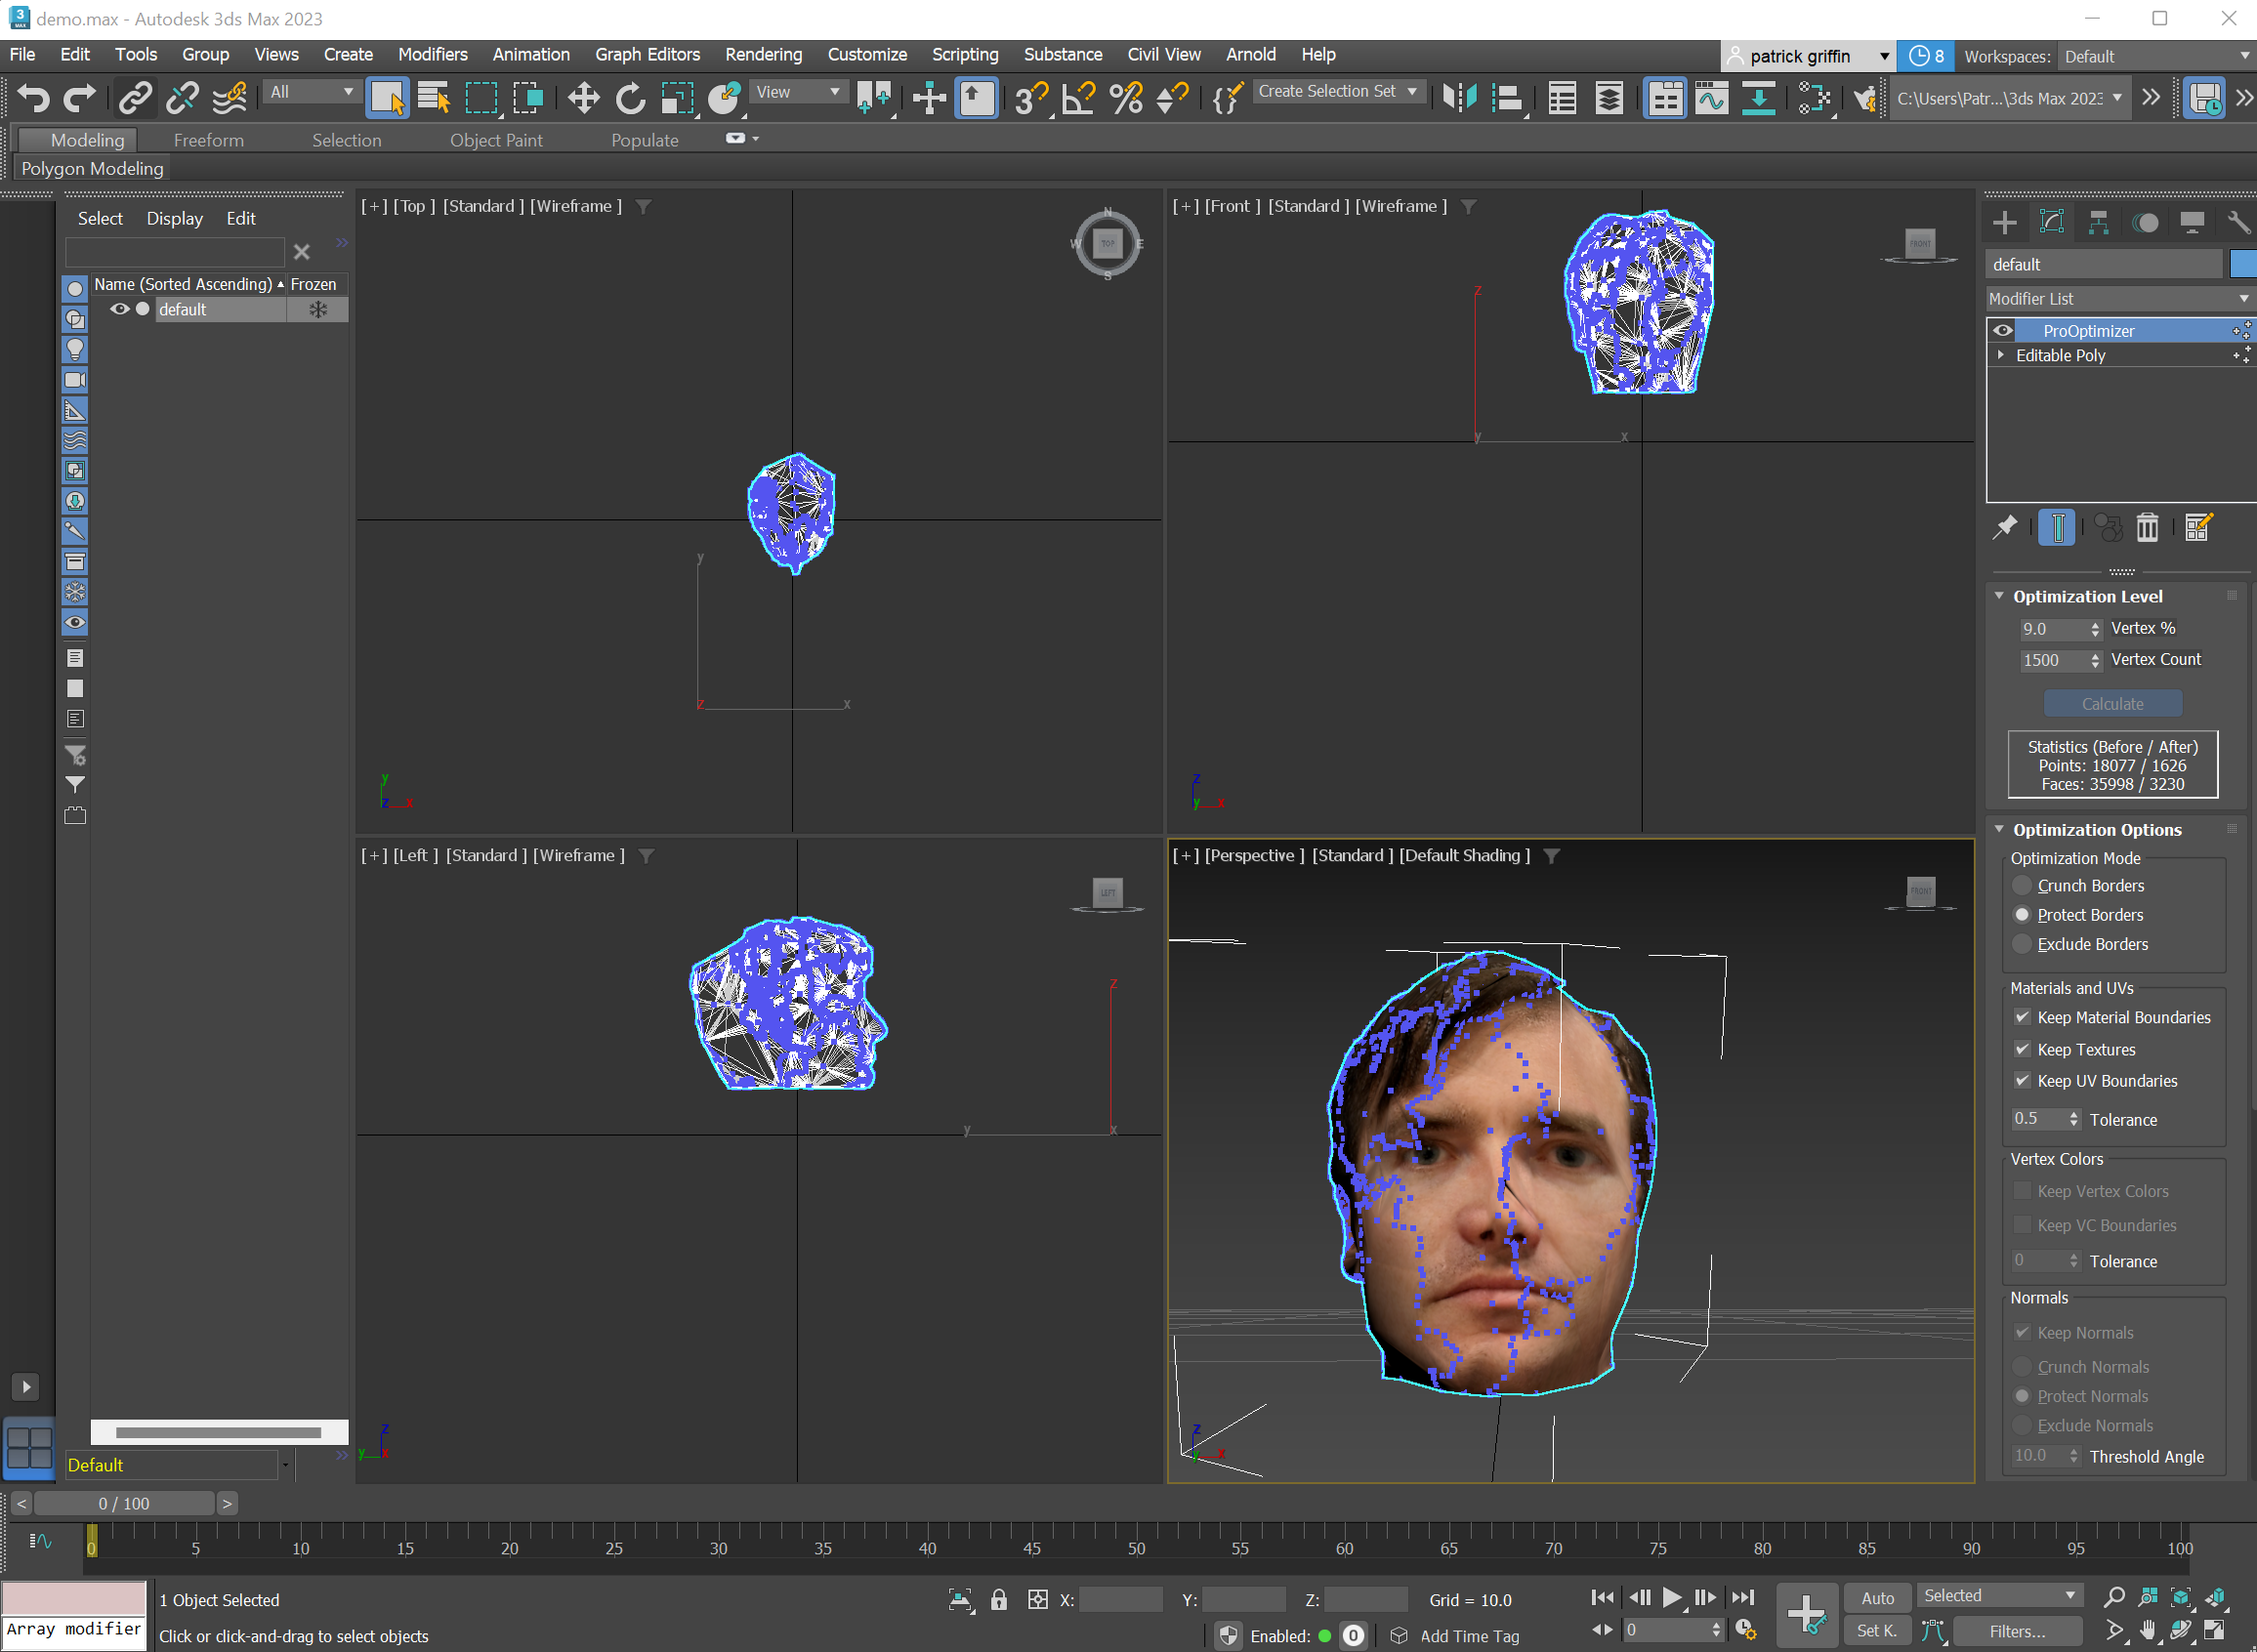
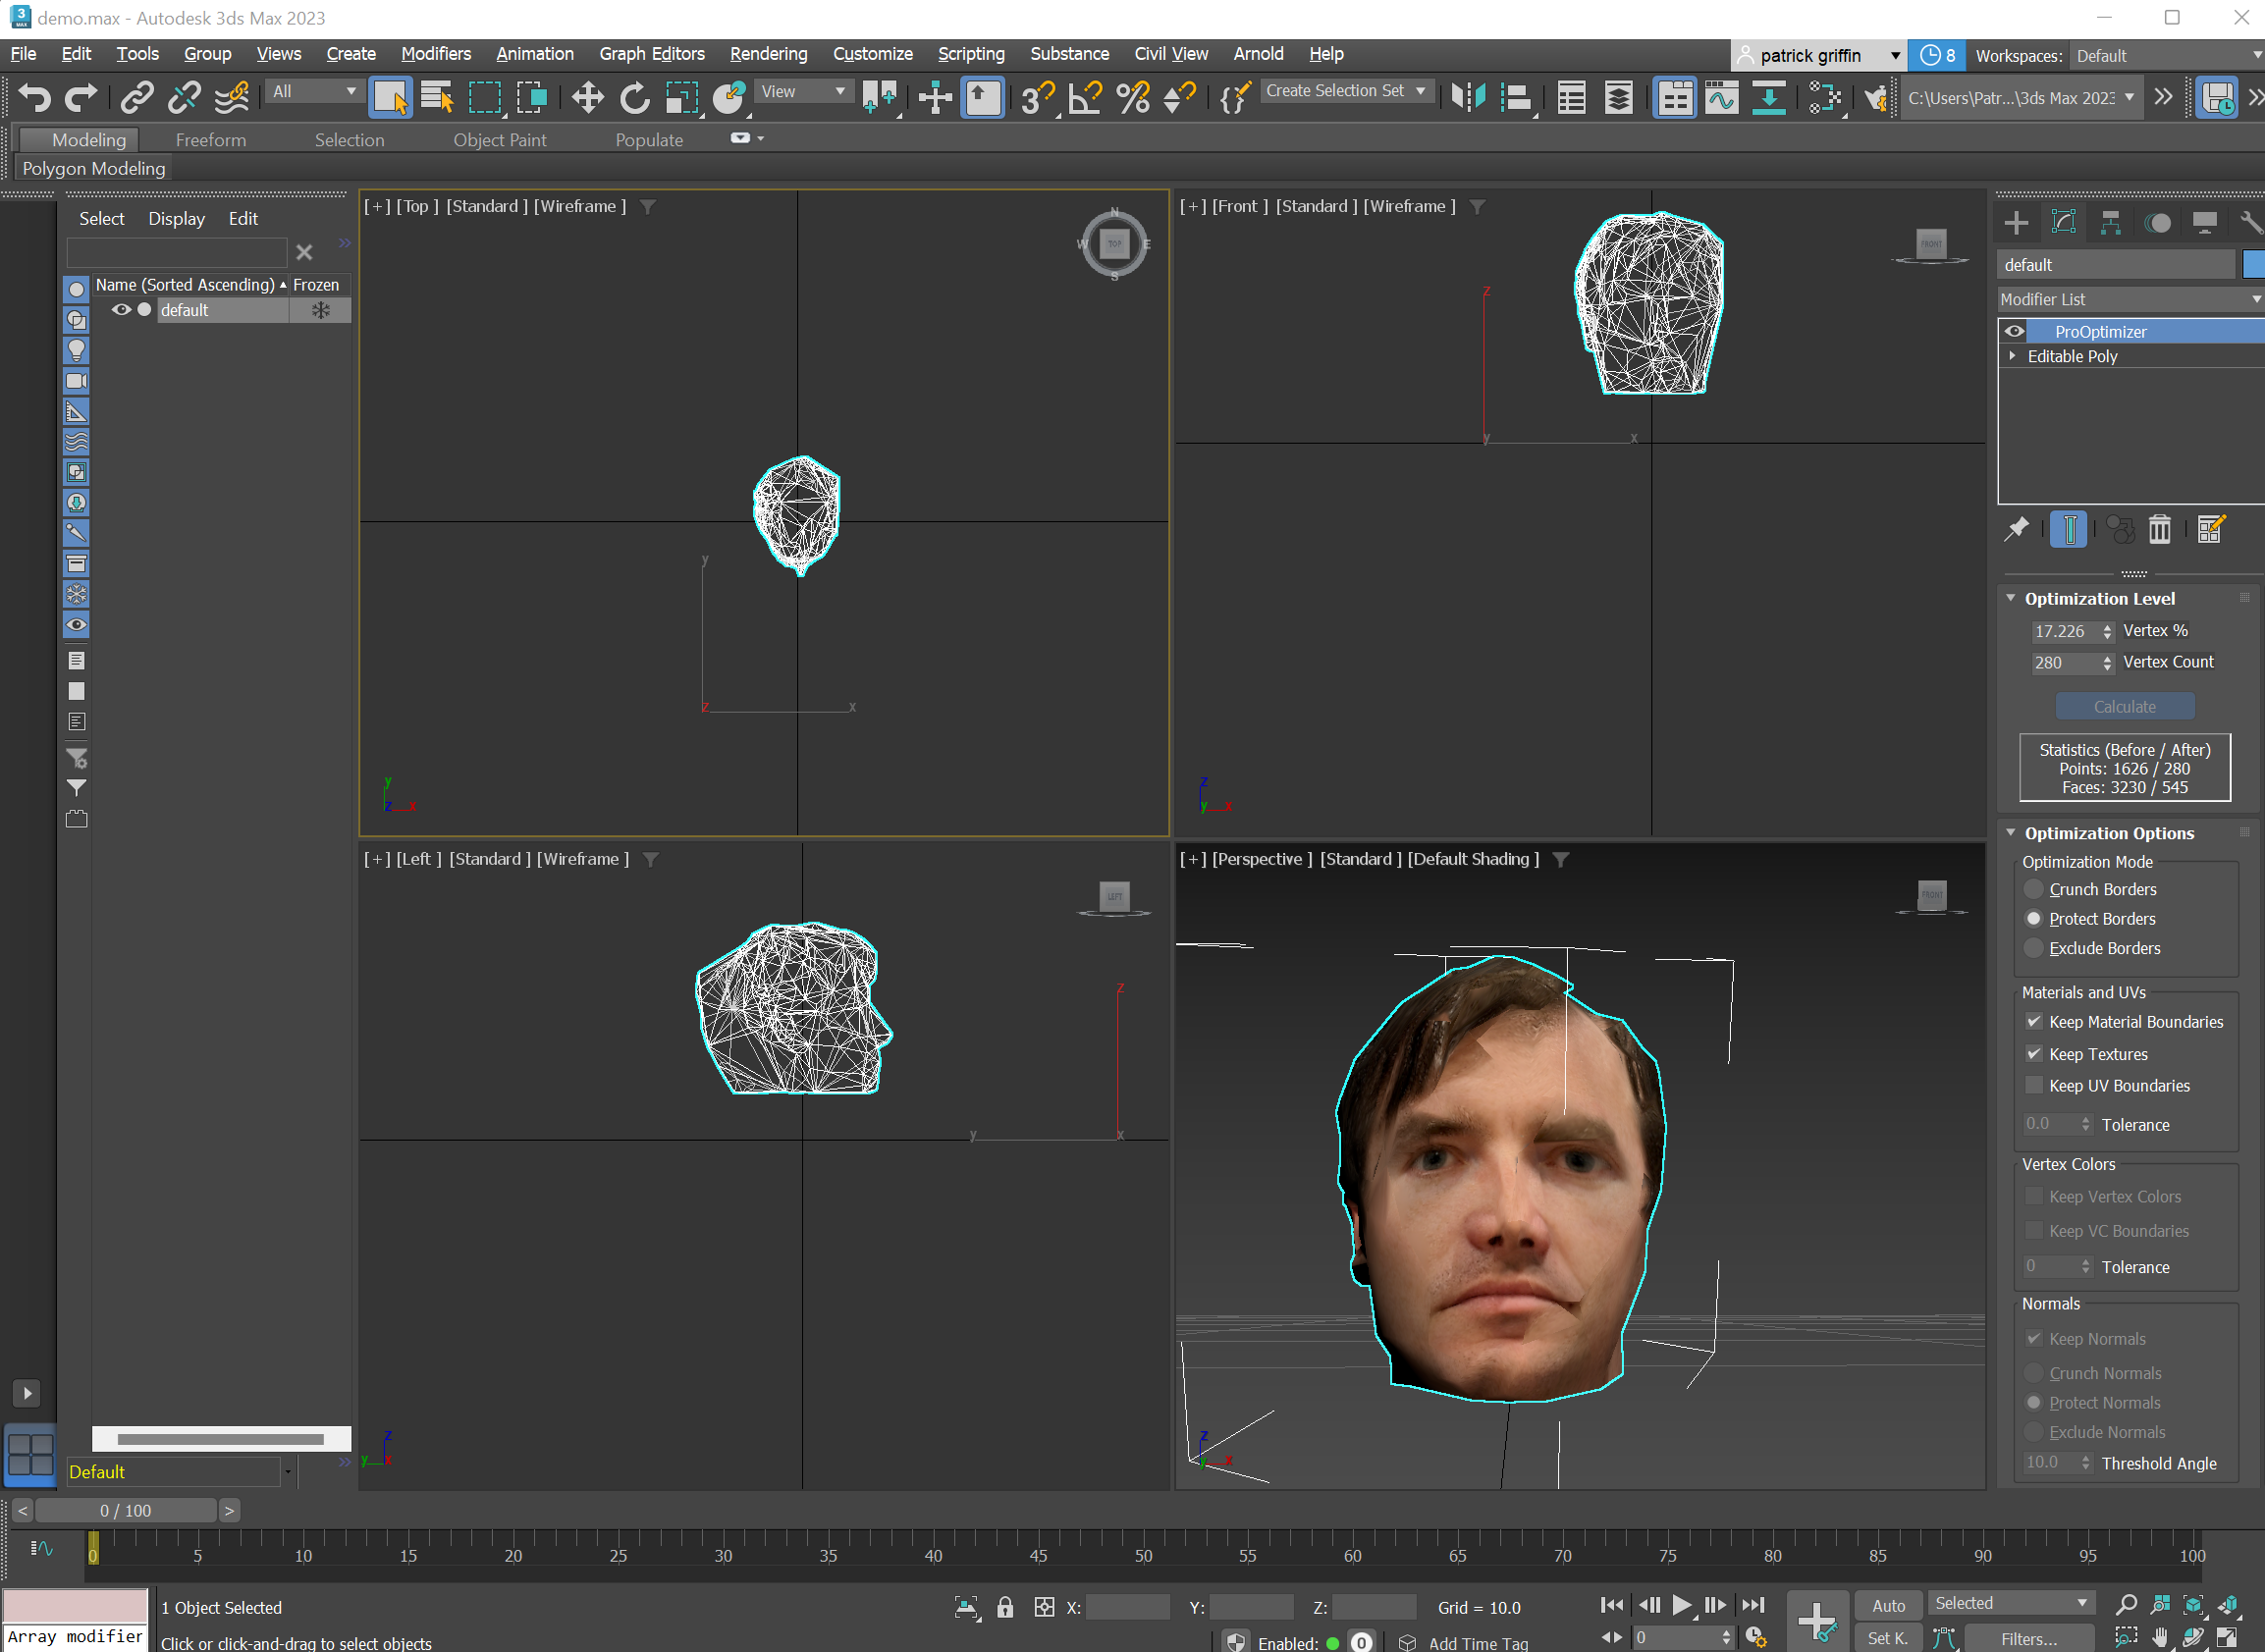
- Modifiers > Mesh Editing > ProOptimizer
- Click the "keep textures" option
- Click "calculate"
- Enter a number of vertexes that get you to around 200 faces. 120 vertexes worked for me. Higher numbers look better, but get way harder to cut and fold.
- Examine the head and see how egregiously warped the textures look. If you're not satisfied, try the harder version below.
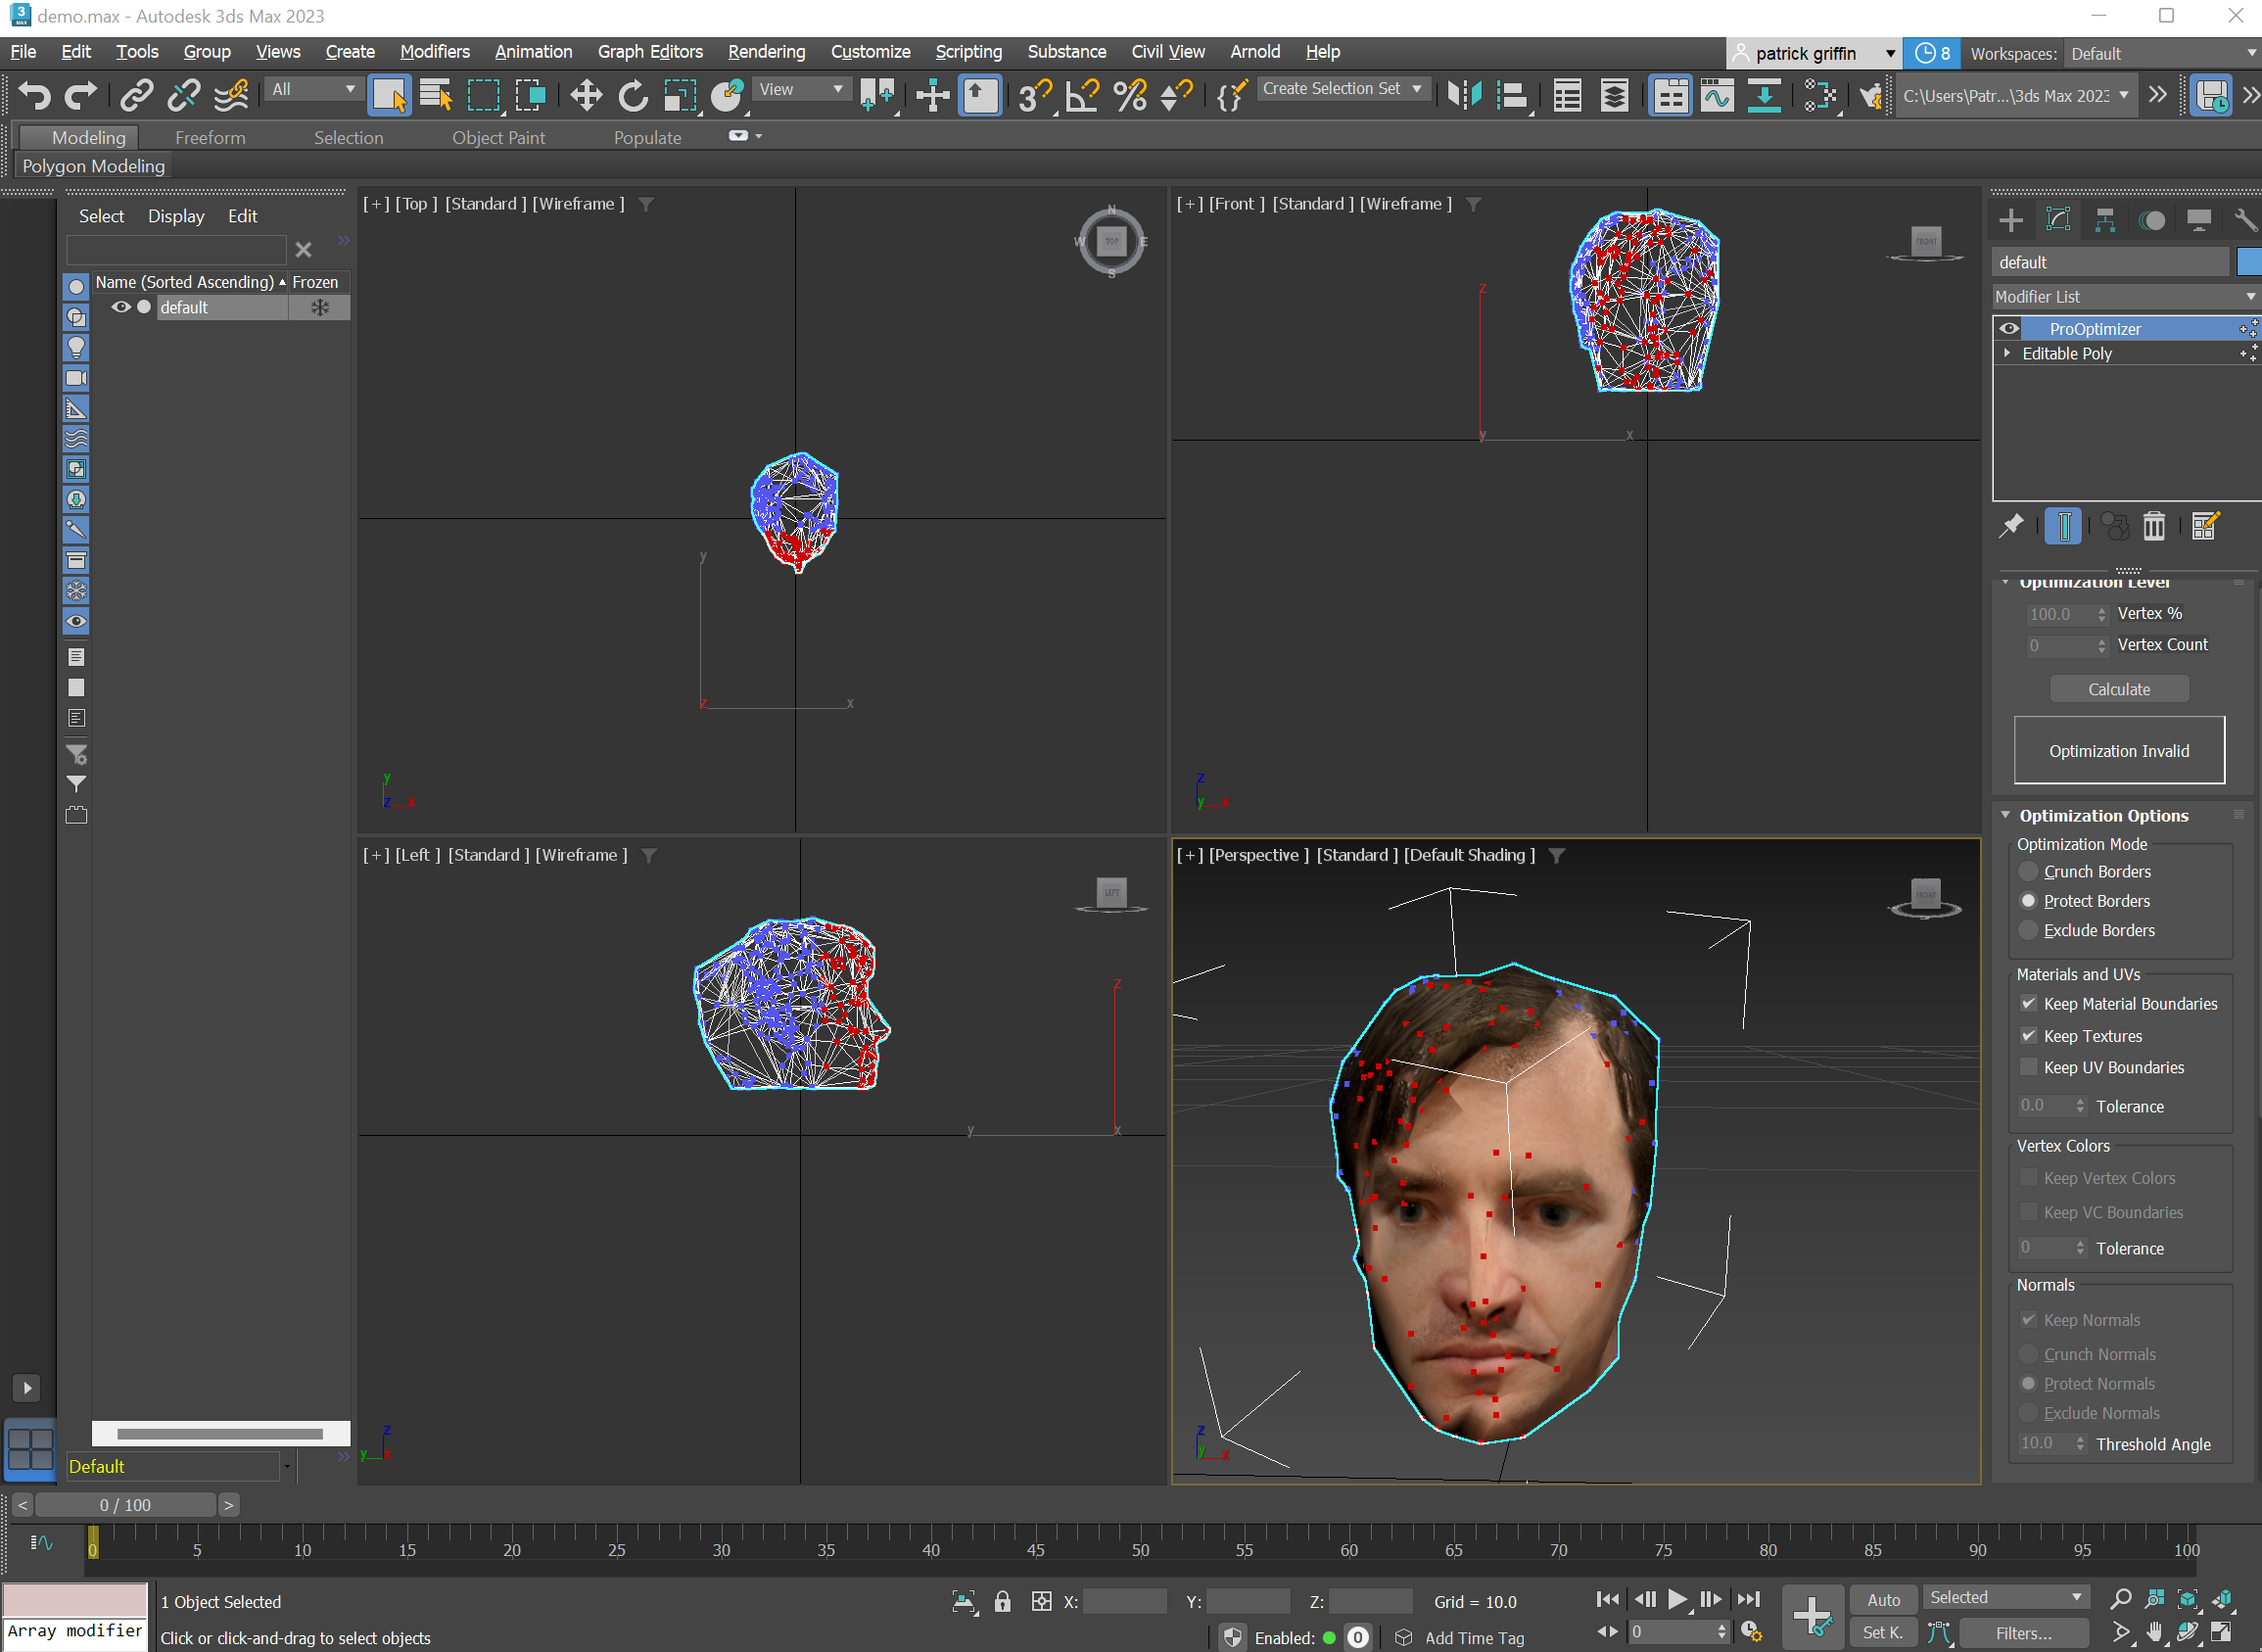
- Reduce polygon count [harder version]
- Run the same ProOptimizer process as above, but select "keep textures", "keep UV Boundaries", and set tolerance to 0.5. Then reduce to a number of vertices that is largely free of artifacts - I used 9 percent, but different models might need a little more of a little less.
- Modeling > Polygon Modeling > Convert to Poly to bake that in.
- Run ProOptimizer again, but this time with only "keep textures" and not "keep UV Boundaries". Reduce to around 600 faces - you're trying to avoid many artifacts in the face while getting to around 100 polys in the face (notice that most of the polygons are in the hair that you care much less about!)
- Modeling > Polygon Modeling > Convert to Poly again.
- Using the same vertex selection mode we used to remove everything but the head, select the front third of the head (the part with your face). Make sure you grab enough to have all the skin selected, and having some hair is fine.
- One last run of ProOptimizer. Select "keep textures", and now add "preserve vertices" (towards the bottom of the scrollable pane). Reduce to around 200 faces / 110 vertexes.
- File > Export, with format "gw::OBJ-Exporter"
Create Printable PDF and Print It Out
Okay, you made it past the annoying part. Congratulations! Open up Pepakura Designer and get ready to print.
- Setting > Page Settings: Set to the size of the paper in your plotter, we used A1.
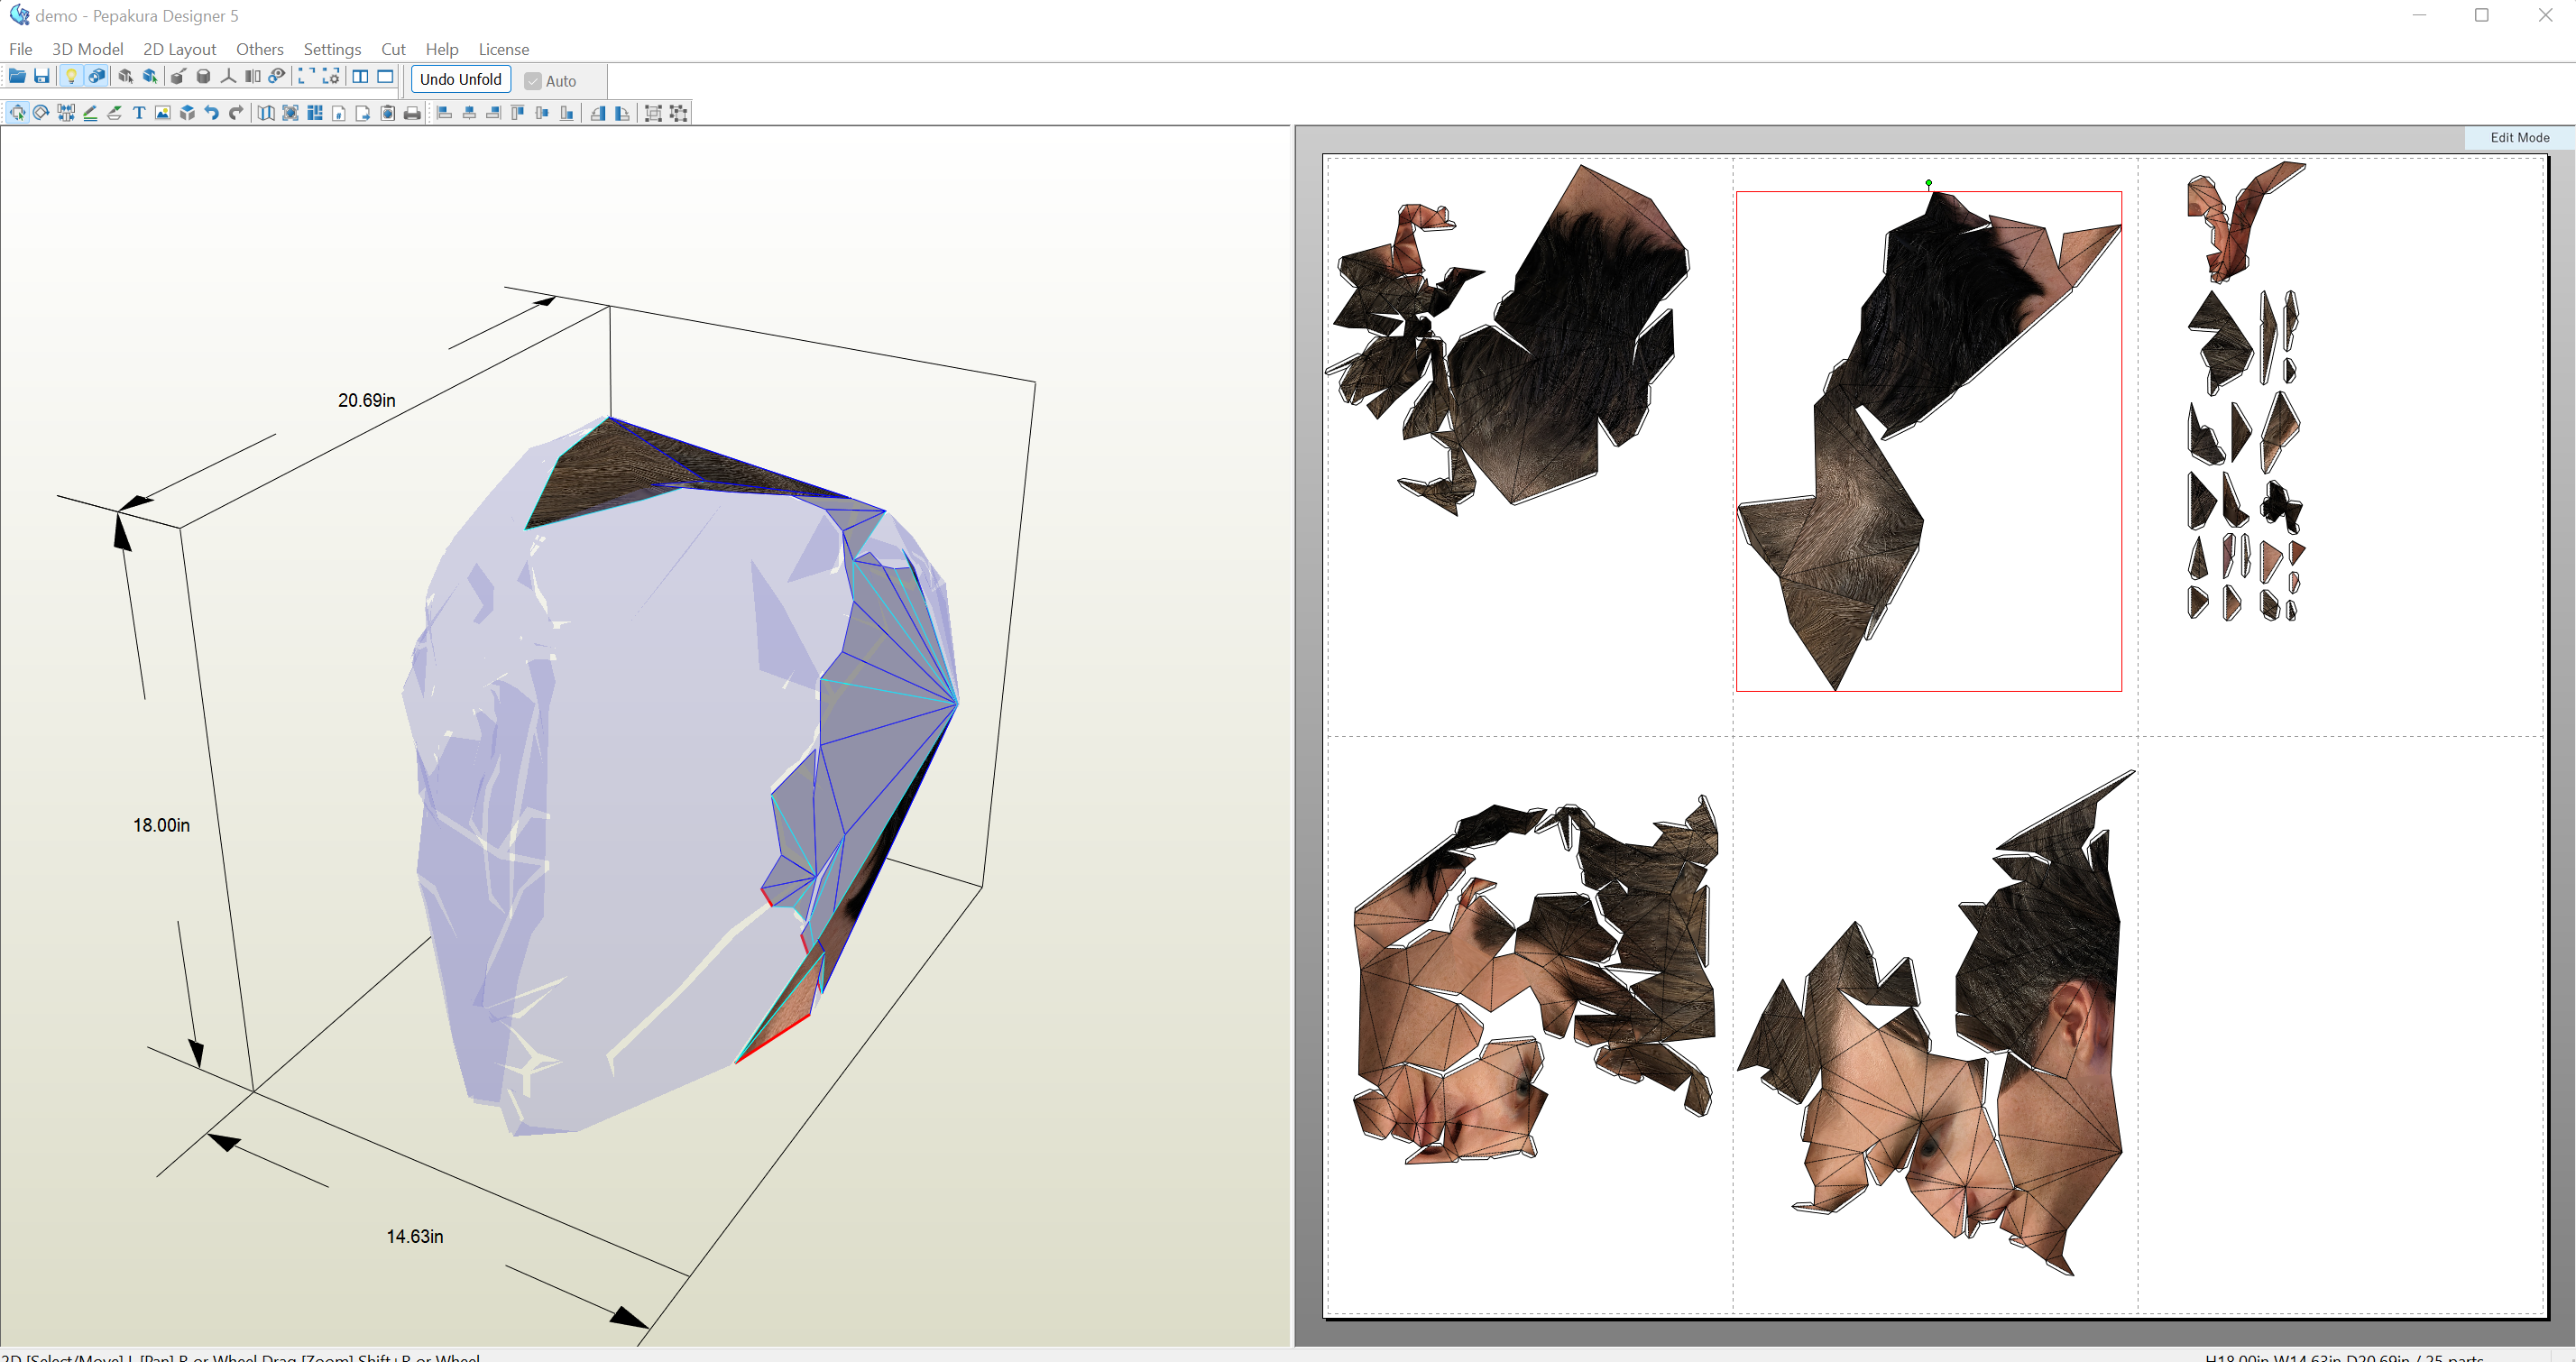
- File > Open, and load in the .obj file you saved in the previous step. You'll get a few different questions, which you can largely click through. When it asks for dimensions, start with a 20 inch height.
- Click "Unfold" to lay it out on the paper.
- Use "2D Layout > Edit Mode" to split into multiple pieces and rotate the pieces to fit on individual pages.
- If it's not fitting well, use "2D Layout > Scale" to scale down a bit smaller. 18 inches?
- If you end up with a bunch of isolated segments, like in the screenshot here, go back to 3DS Max and make a lower poly-count model. In particular, you might need to sacrifice a bit more detail in the face in order to avoid having lots of awkward concave bits. The models we actually used usually had 2-6 random little bits, not the 18 or so in this demo.
- When you're ready, "File > Print to PDF"
- Send that to your plotter.
Fold!
Hooray, no more software!
Cut out the paper pieces, then fold along all the creases before you tape anything. Then, use double-sided tape to gradually put it all together. Some tips:
- Exacto knives are handy for very thin pieces.
- Pay attention to the dash pattern on each edge - you want to be careful about mountain folds vs valley folds.
- Use a straight edge to fold valleys.
- Use the edge of a table to fold mountains.
Remember to take frequent breaks - we alternated folding with hot chocolate.
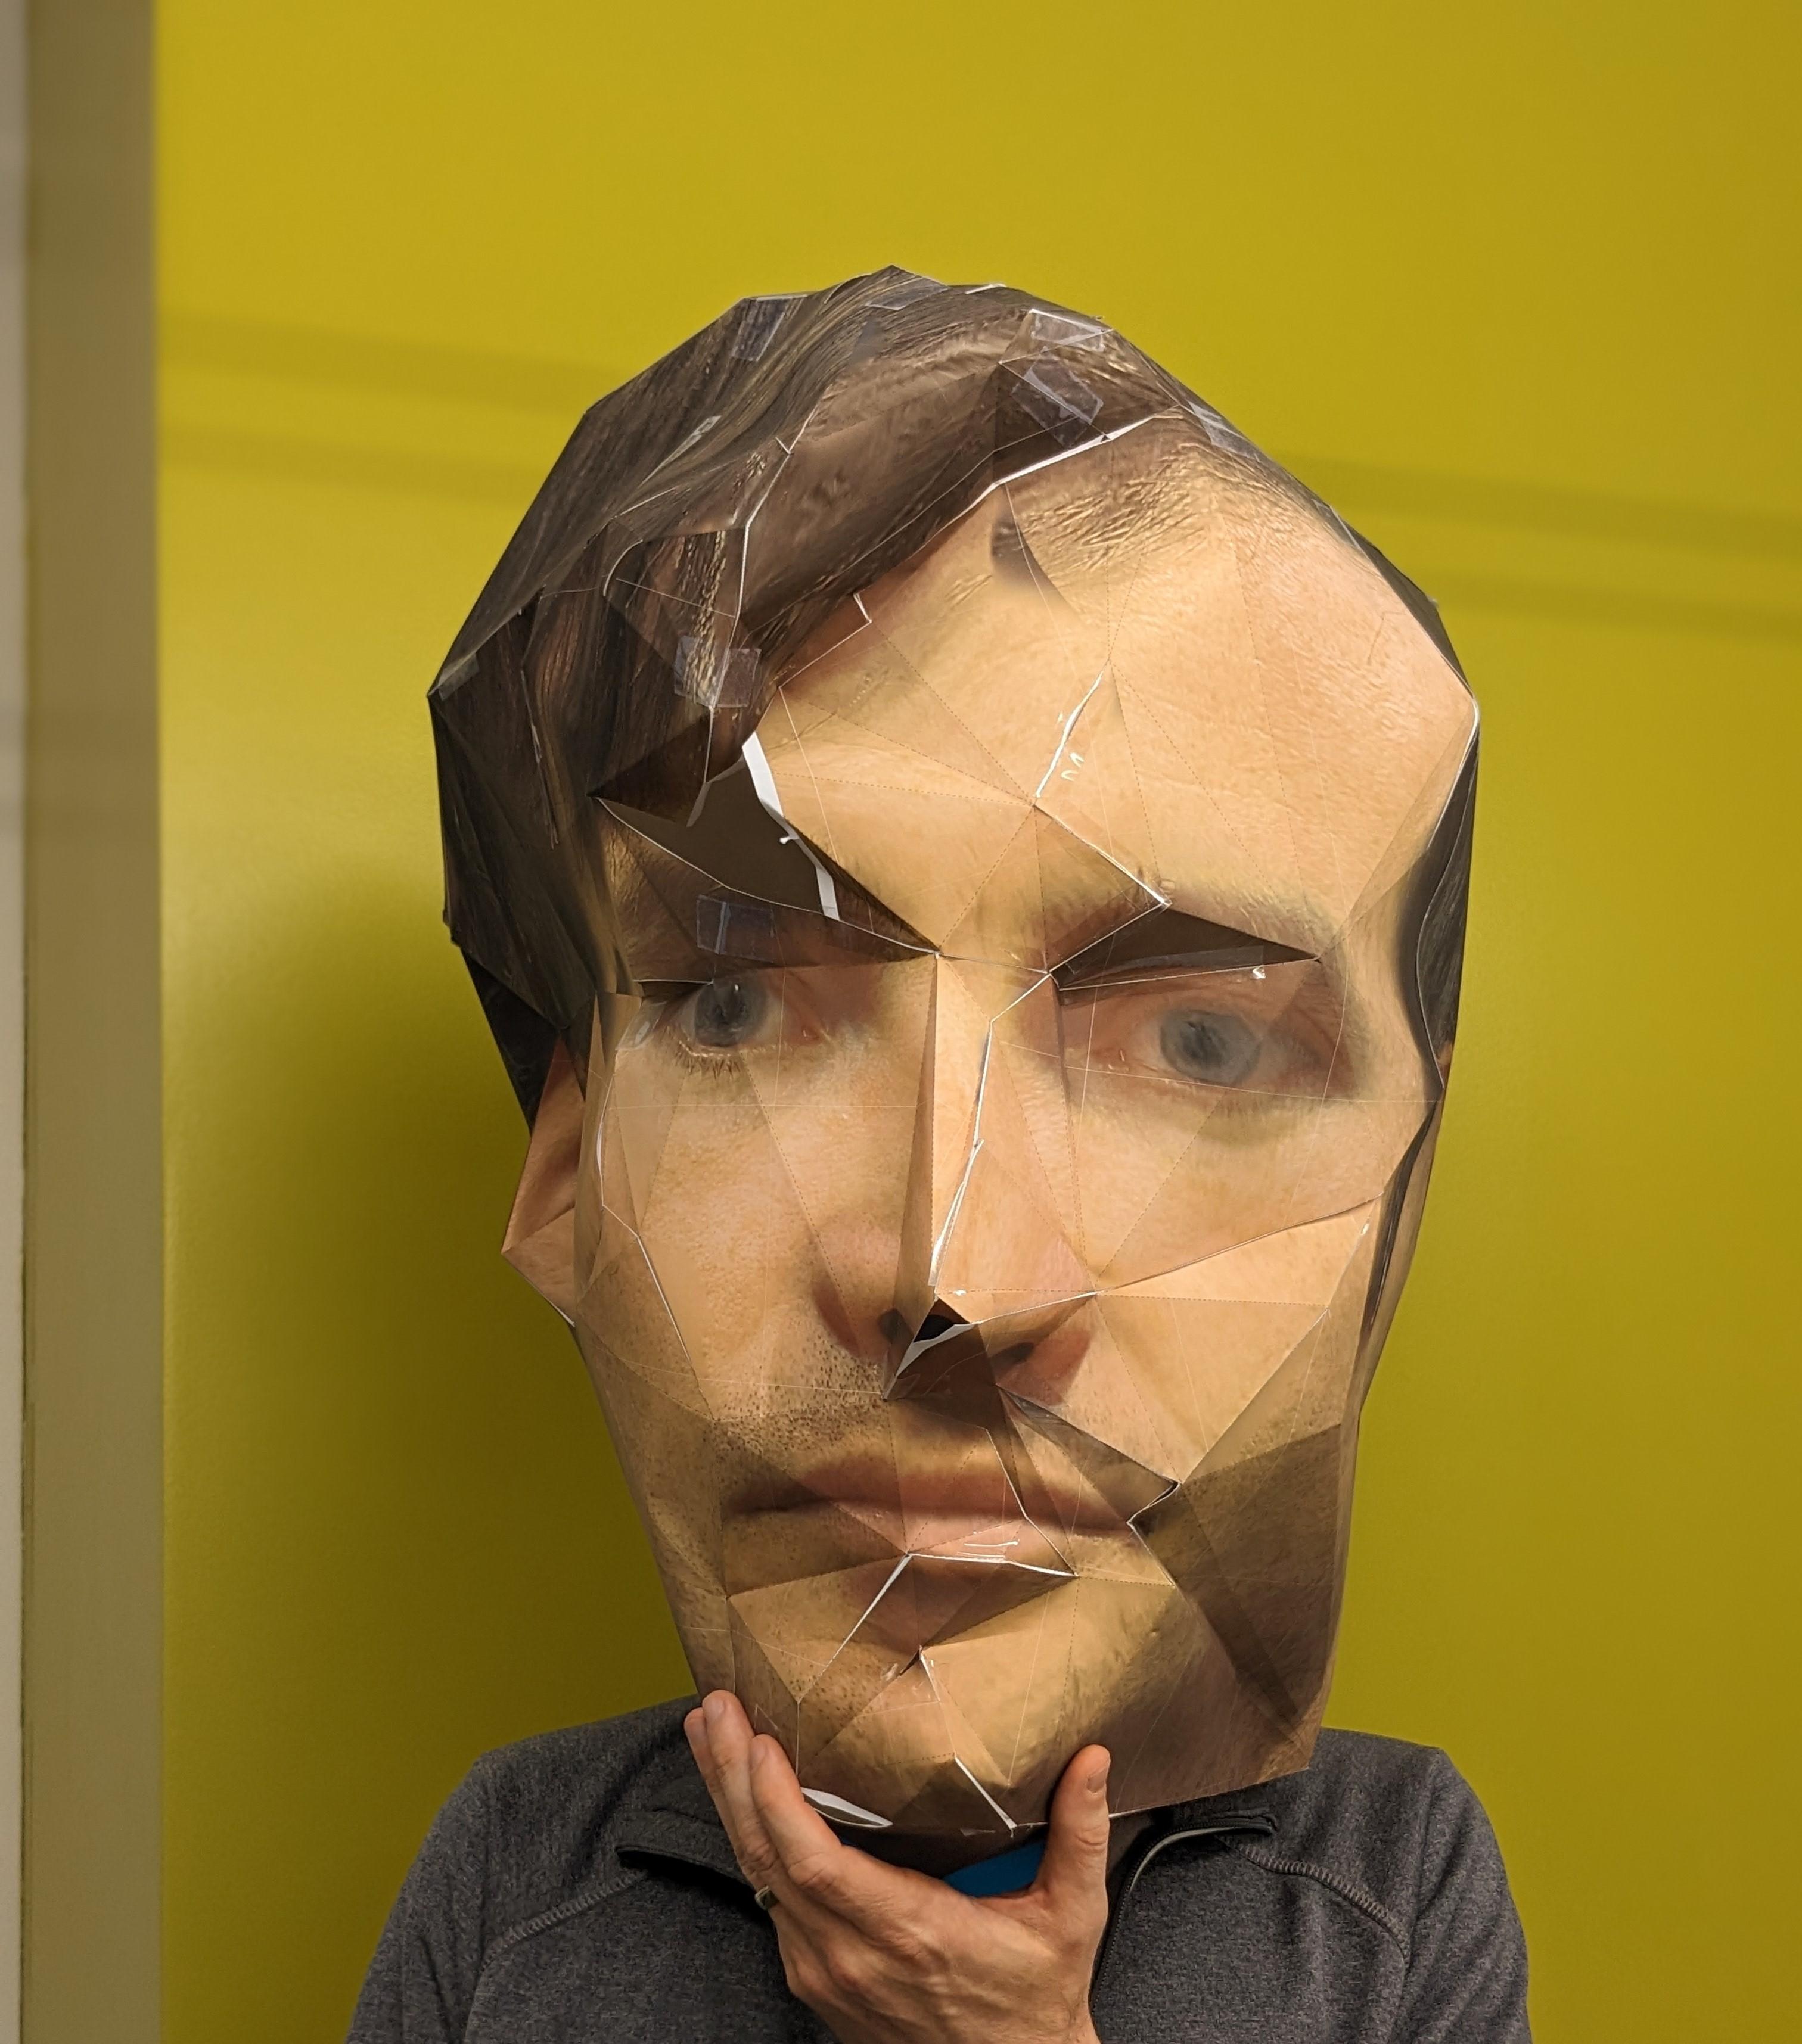
Enjoy!
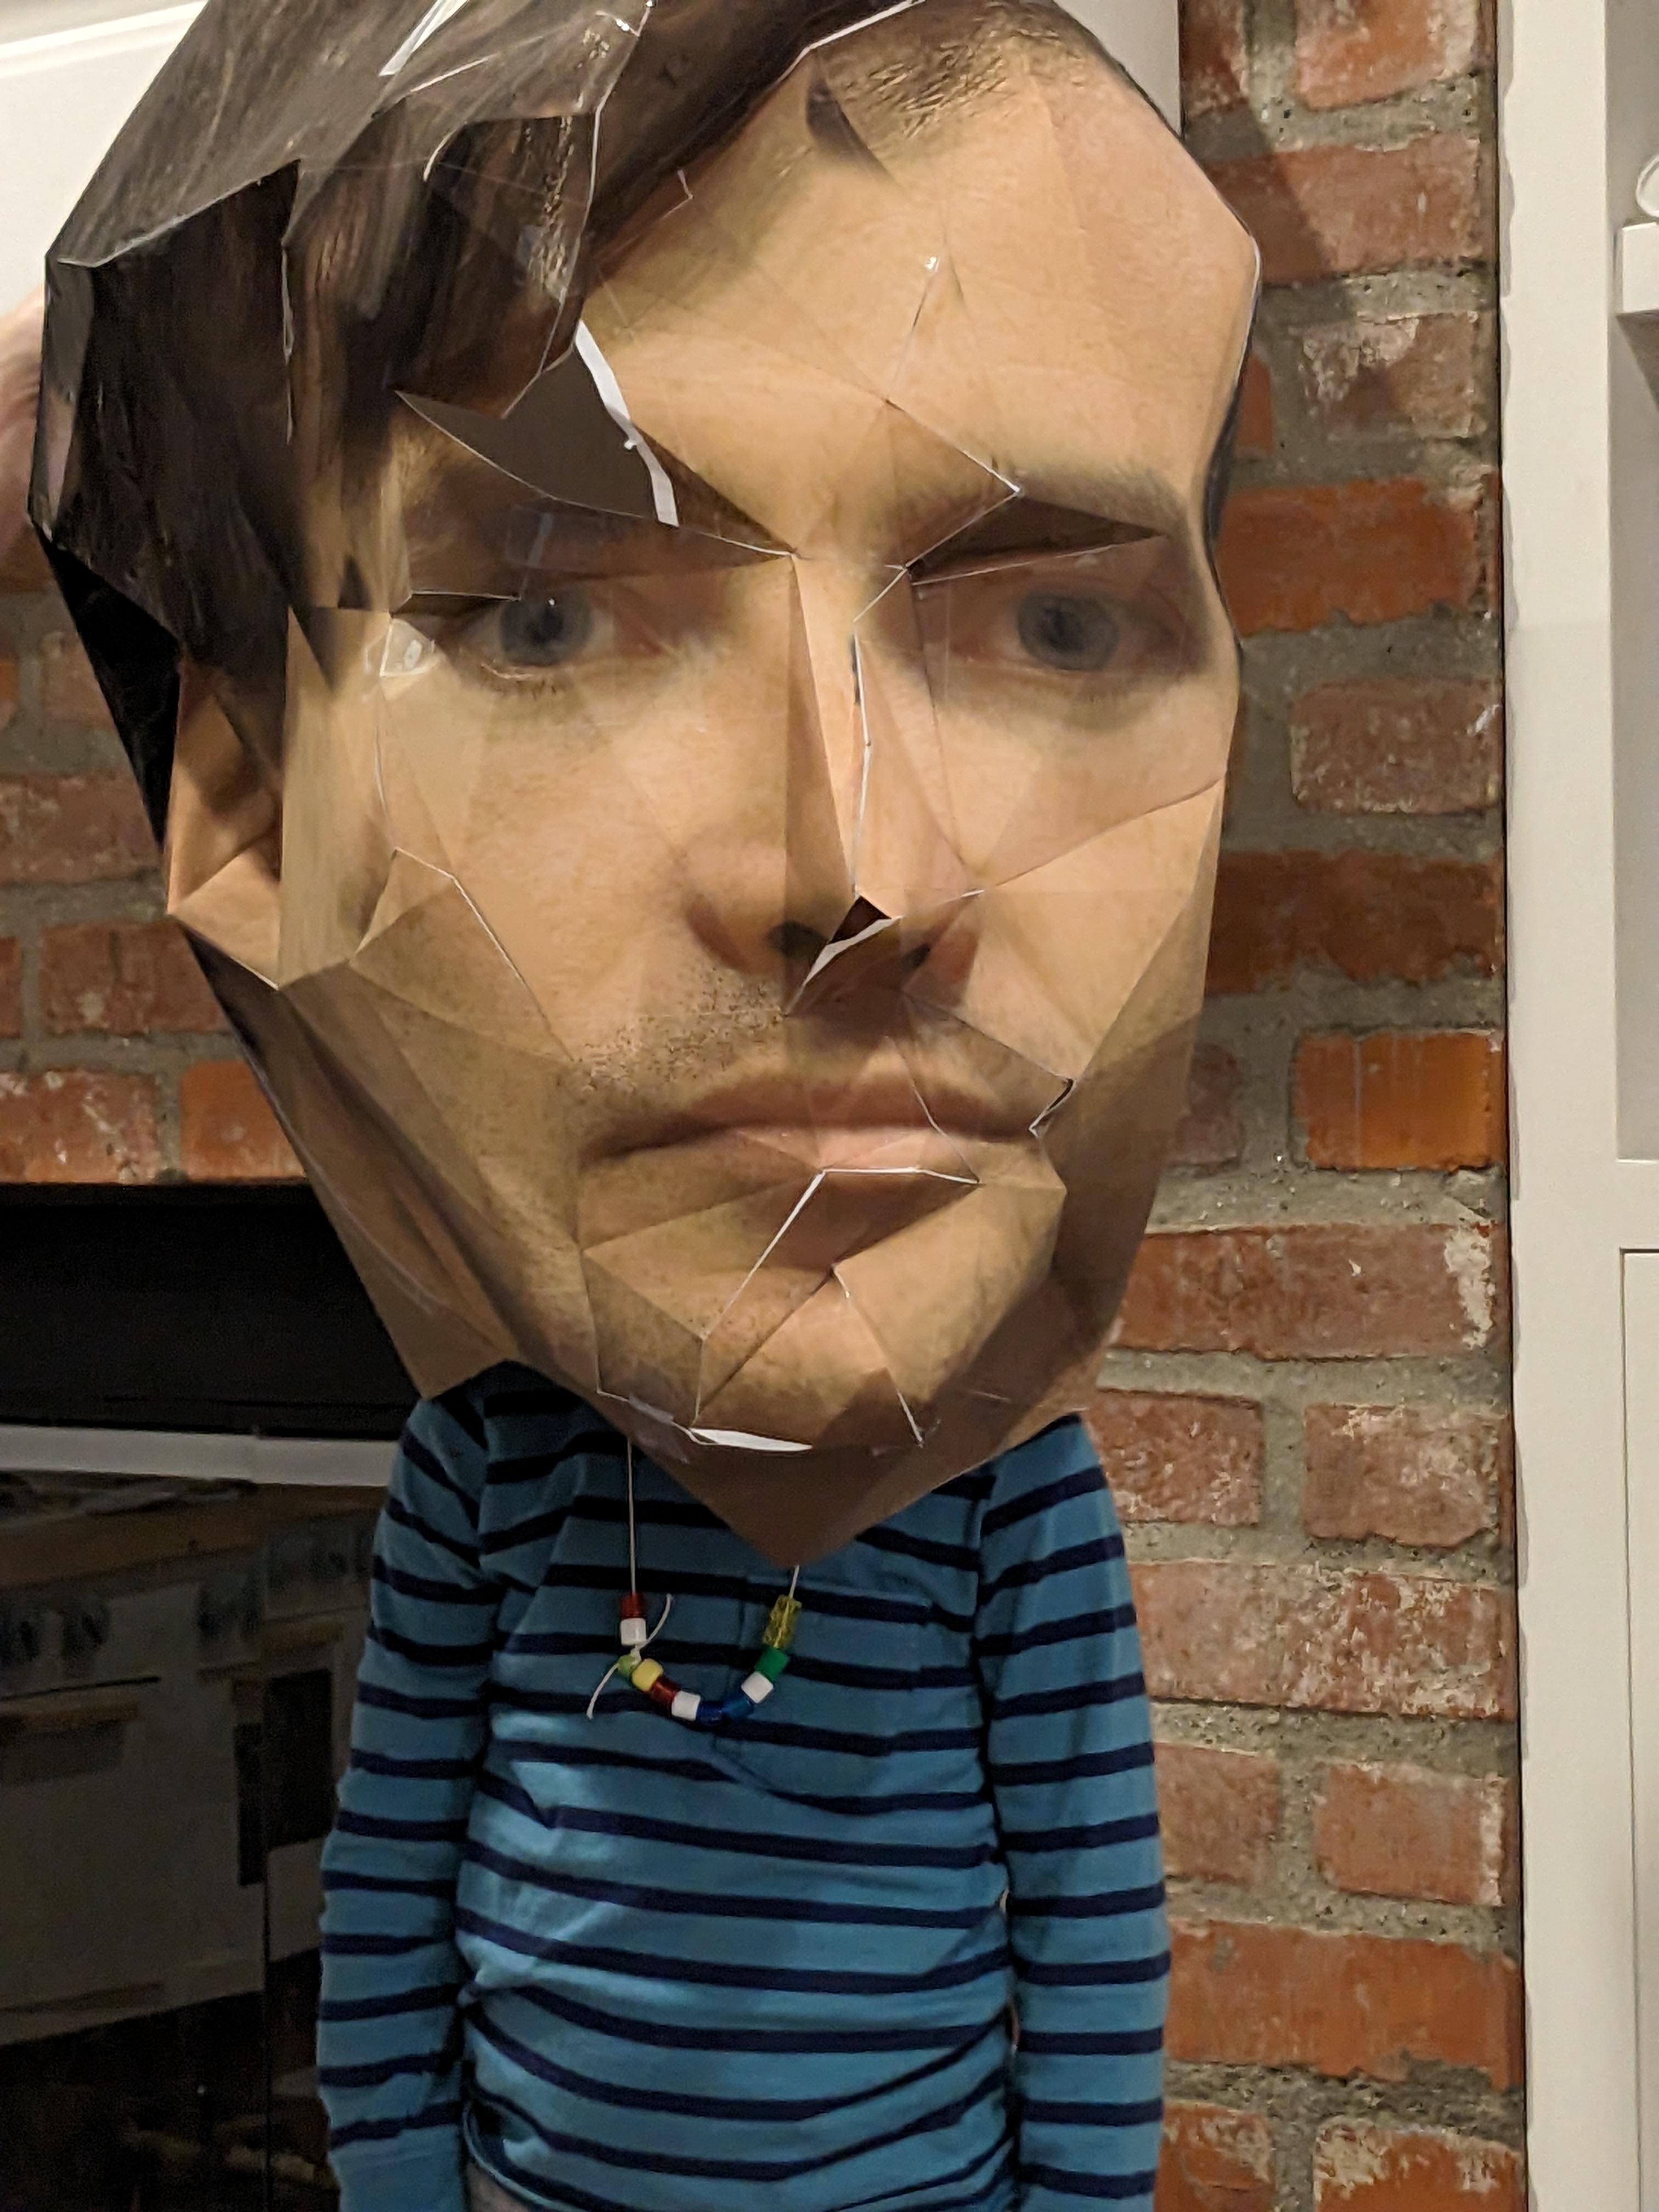
Wear your head, or put it on somebody else! Small children are especially funny.