3D Modeling a Spark Diffuser
by BarbMakesThings in Workshop > 3D Printing
11782 Views, 72 Favorites, 0 Comments
3D Modeling a Spark Diffuser
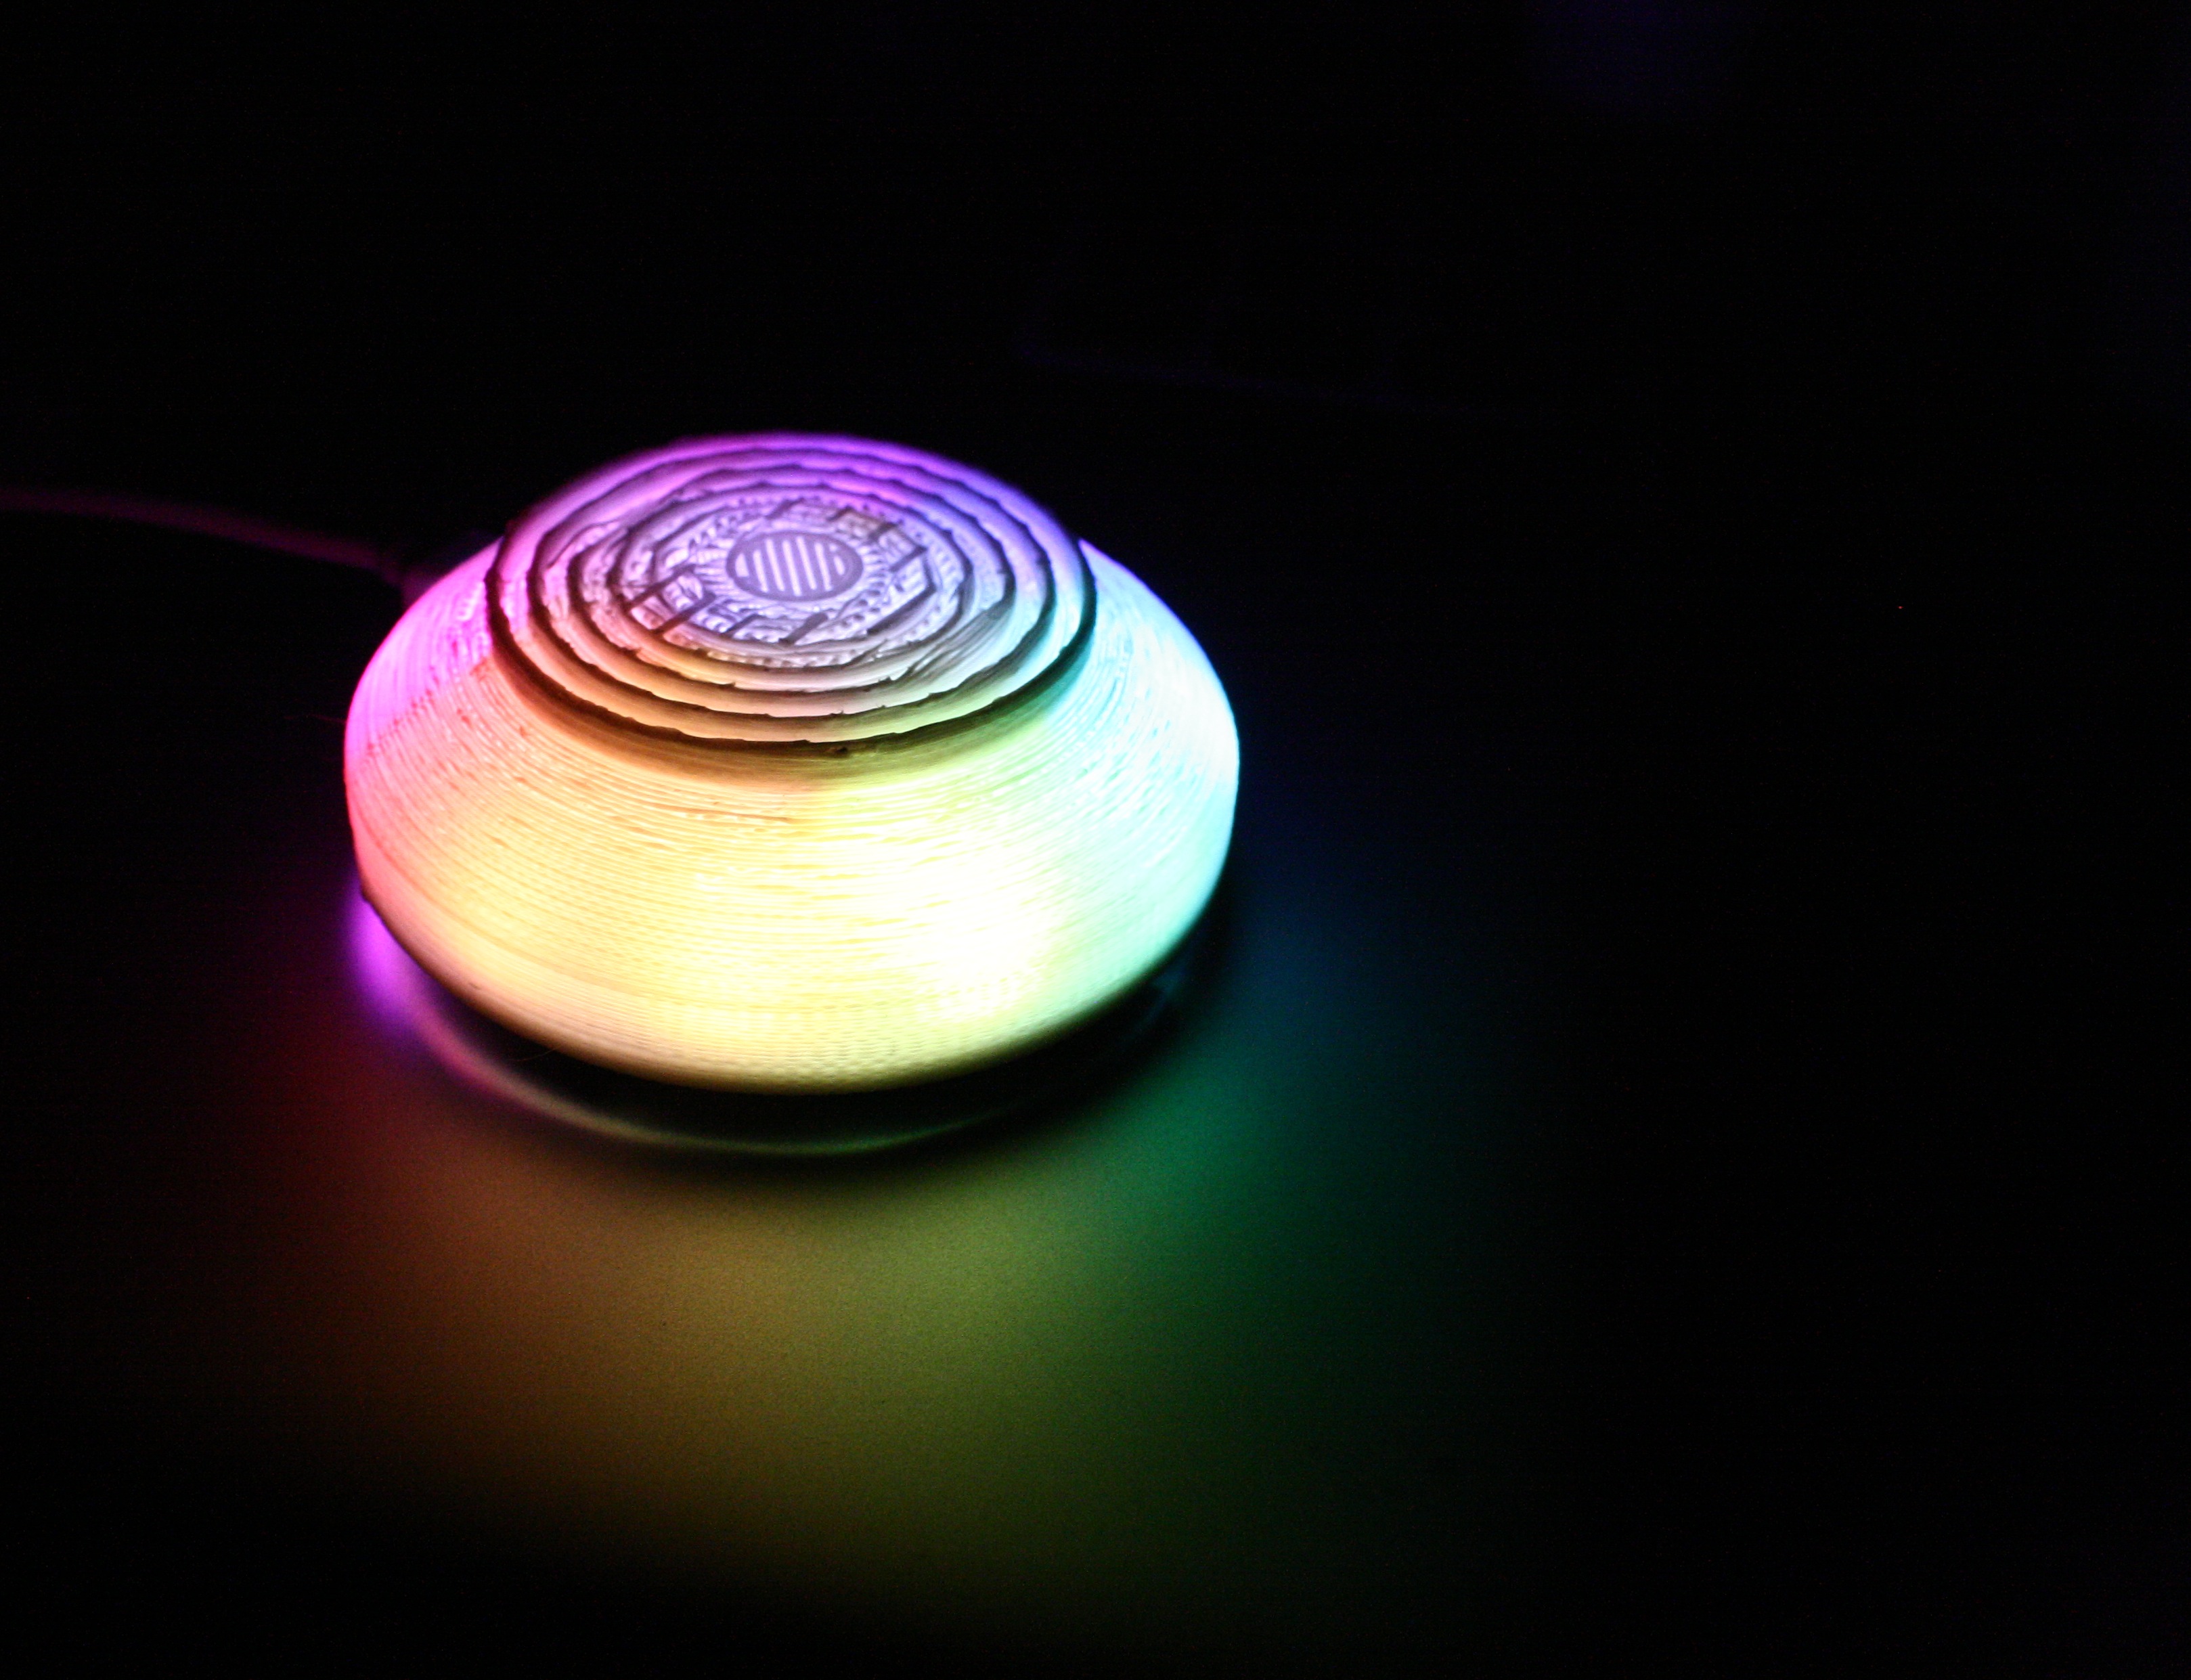
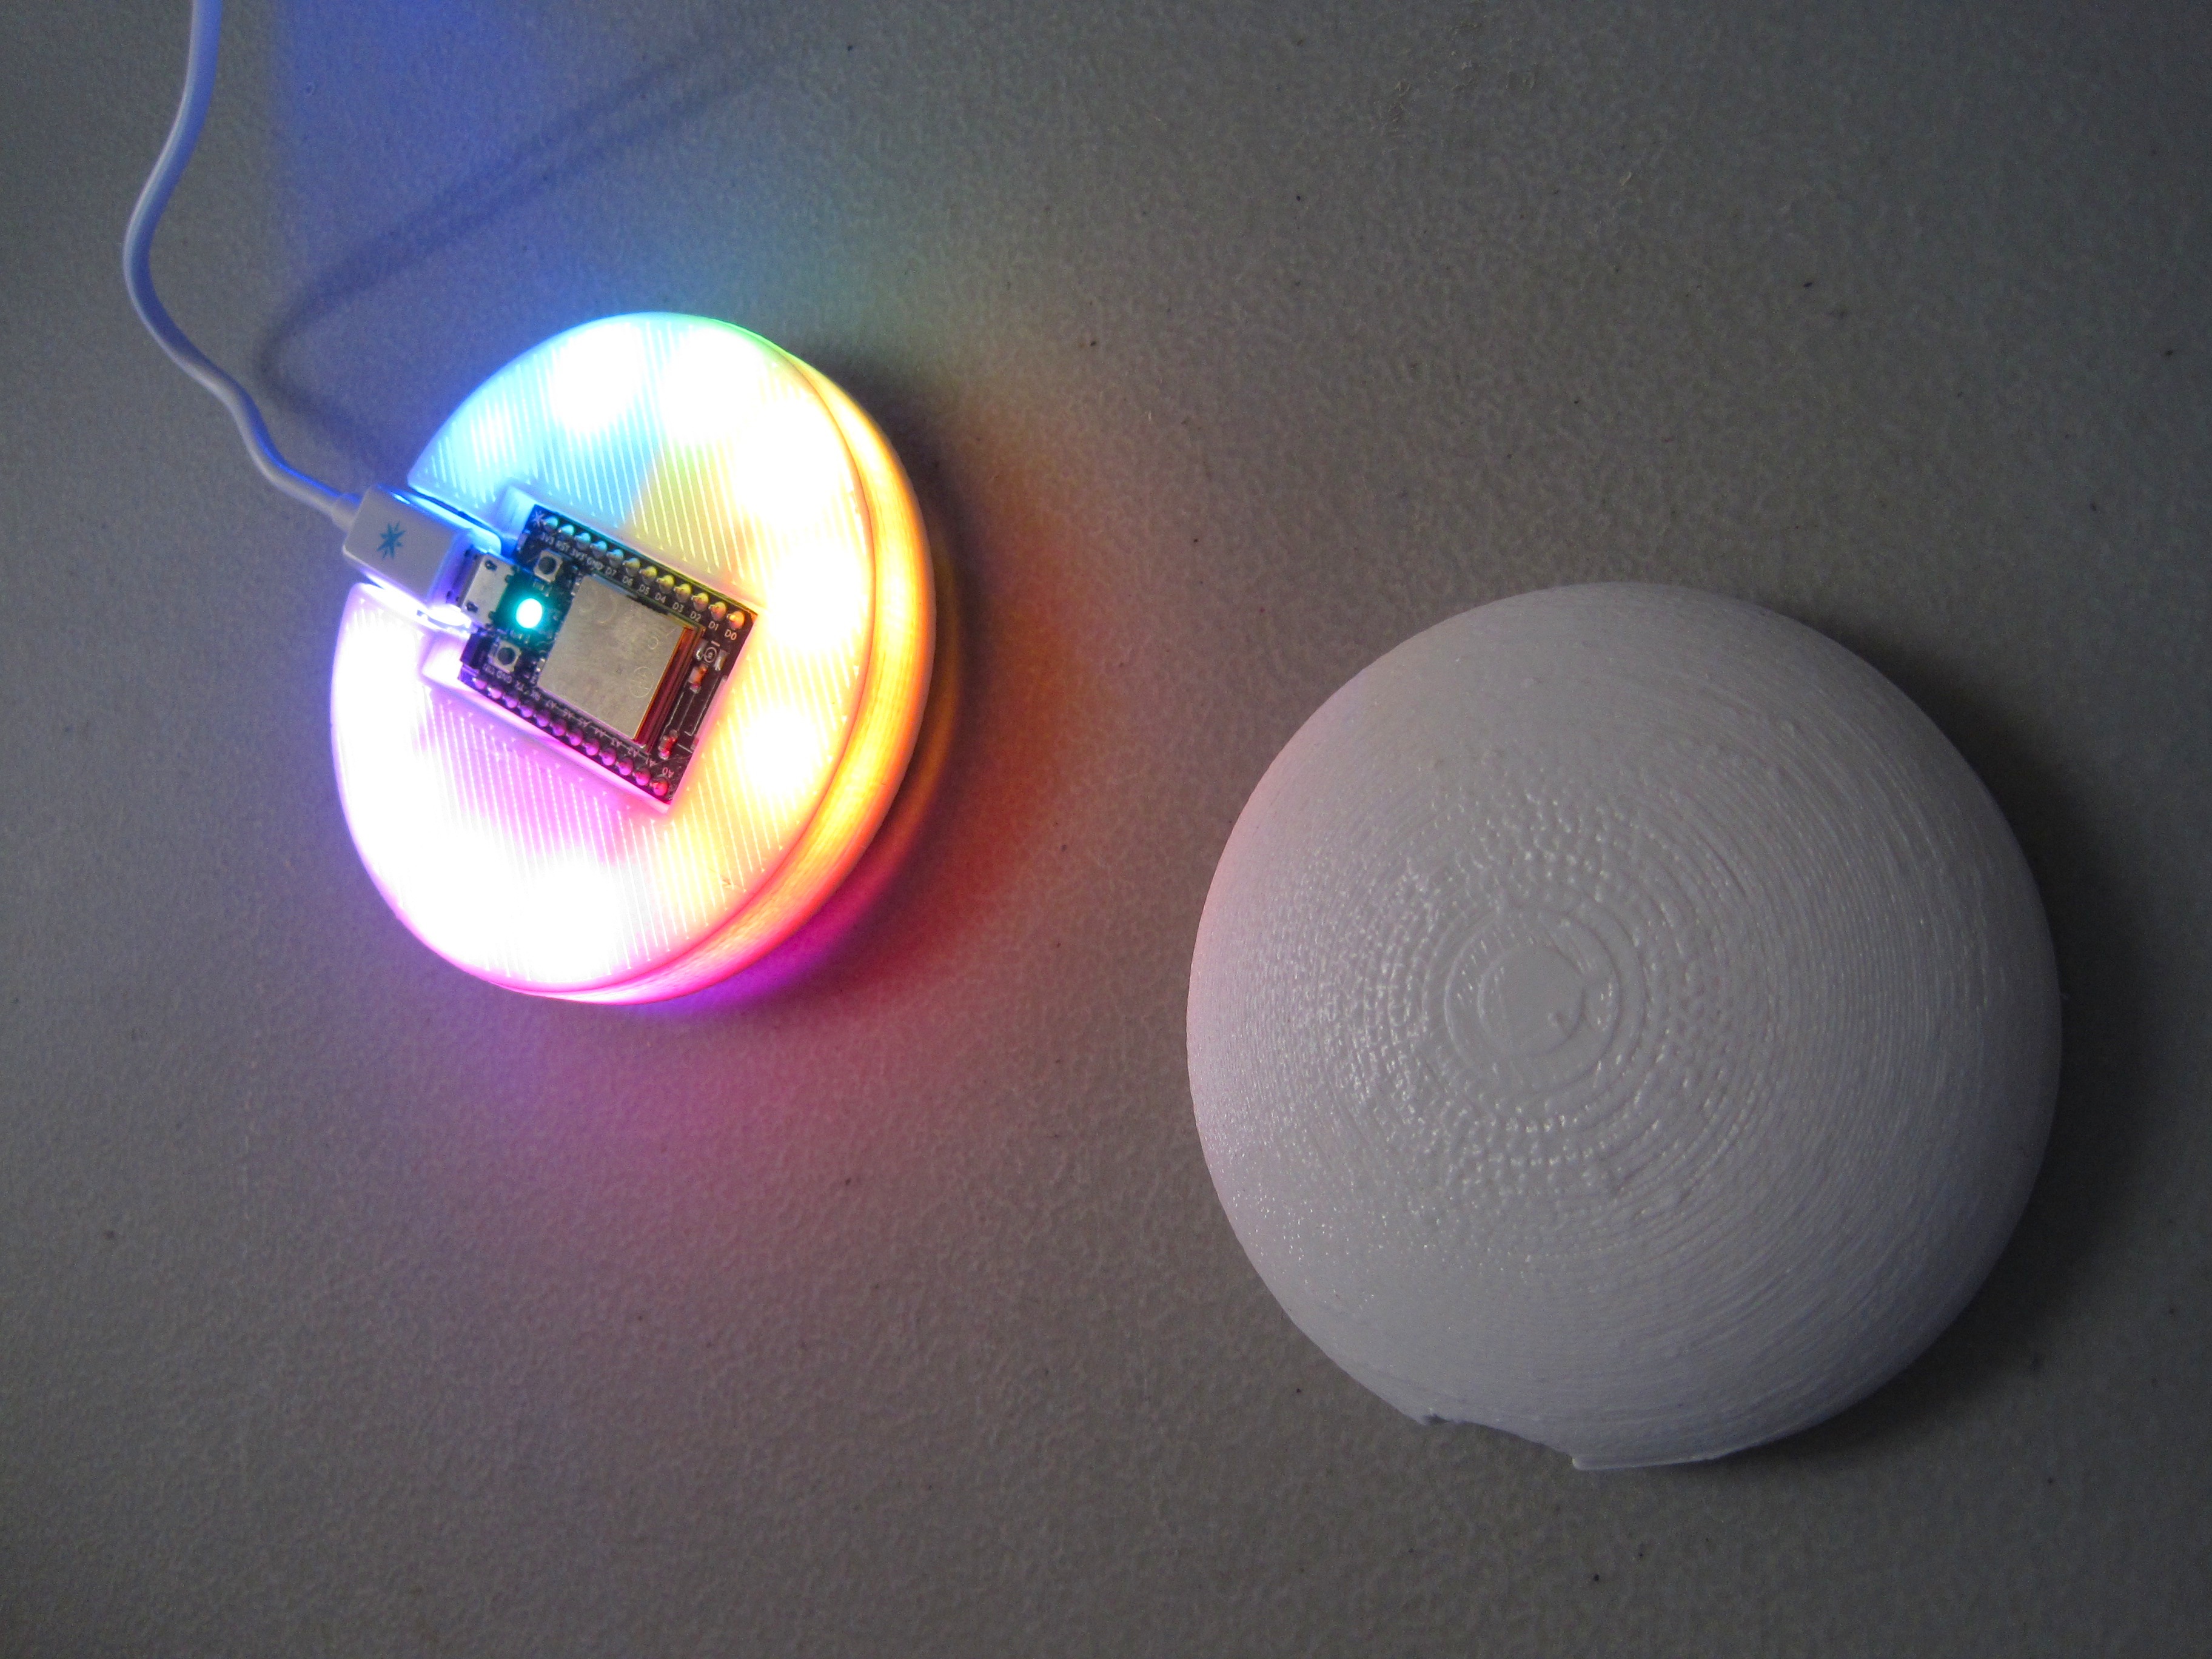
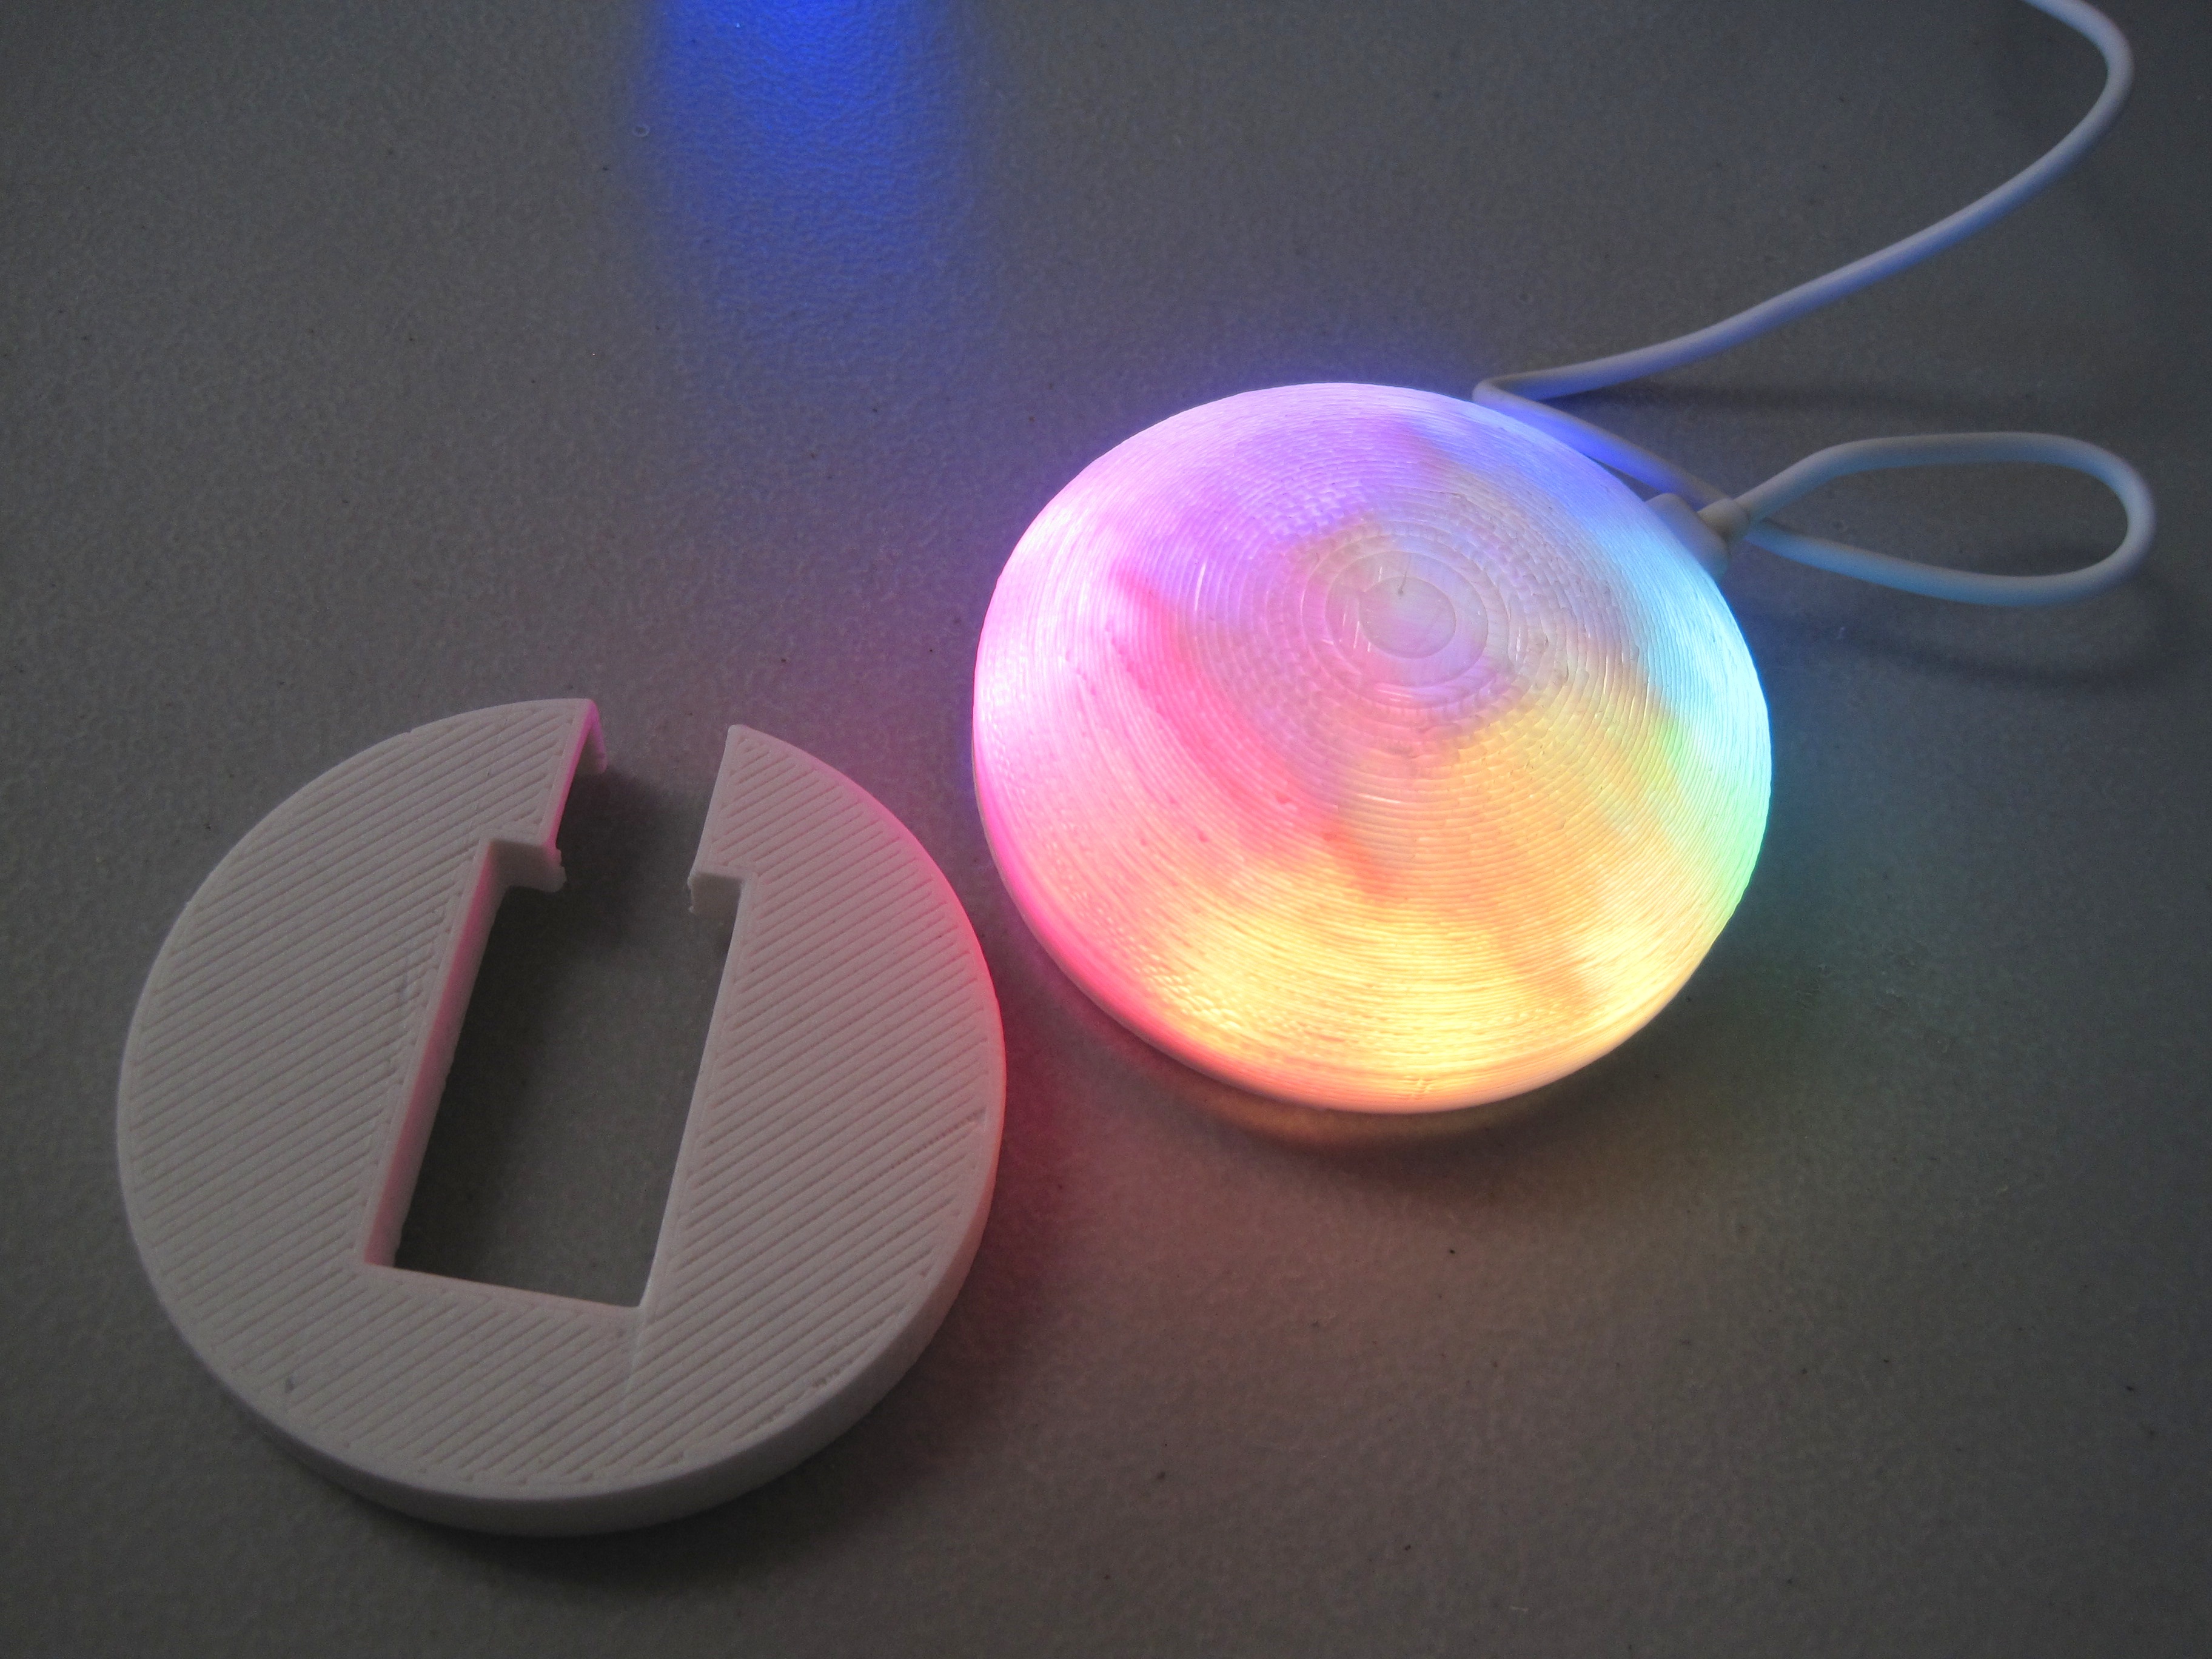
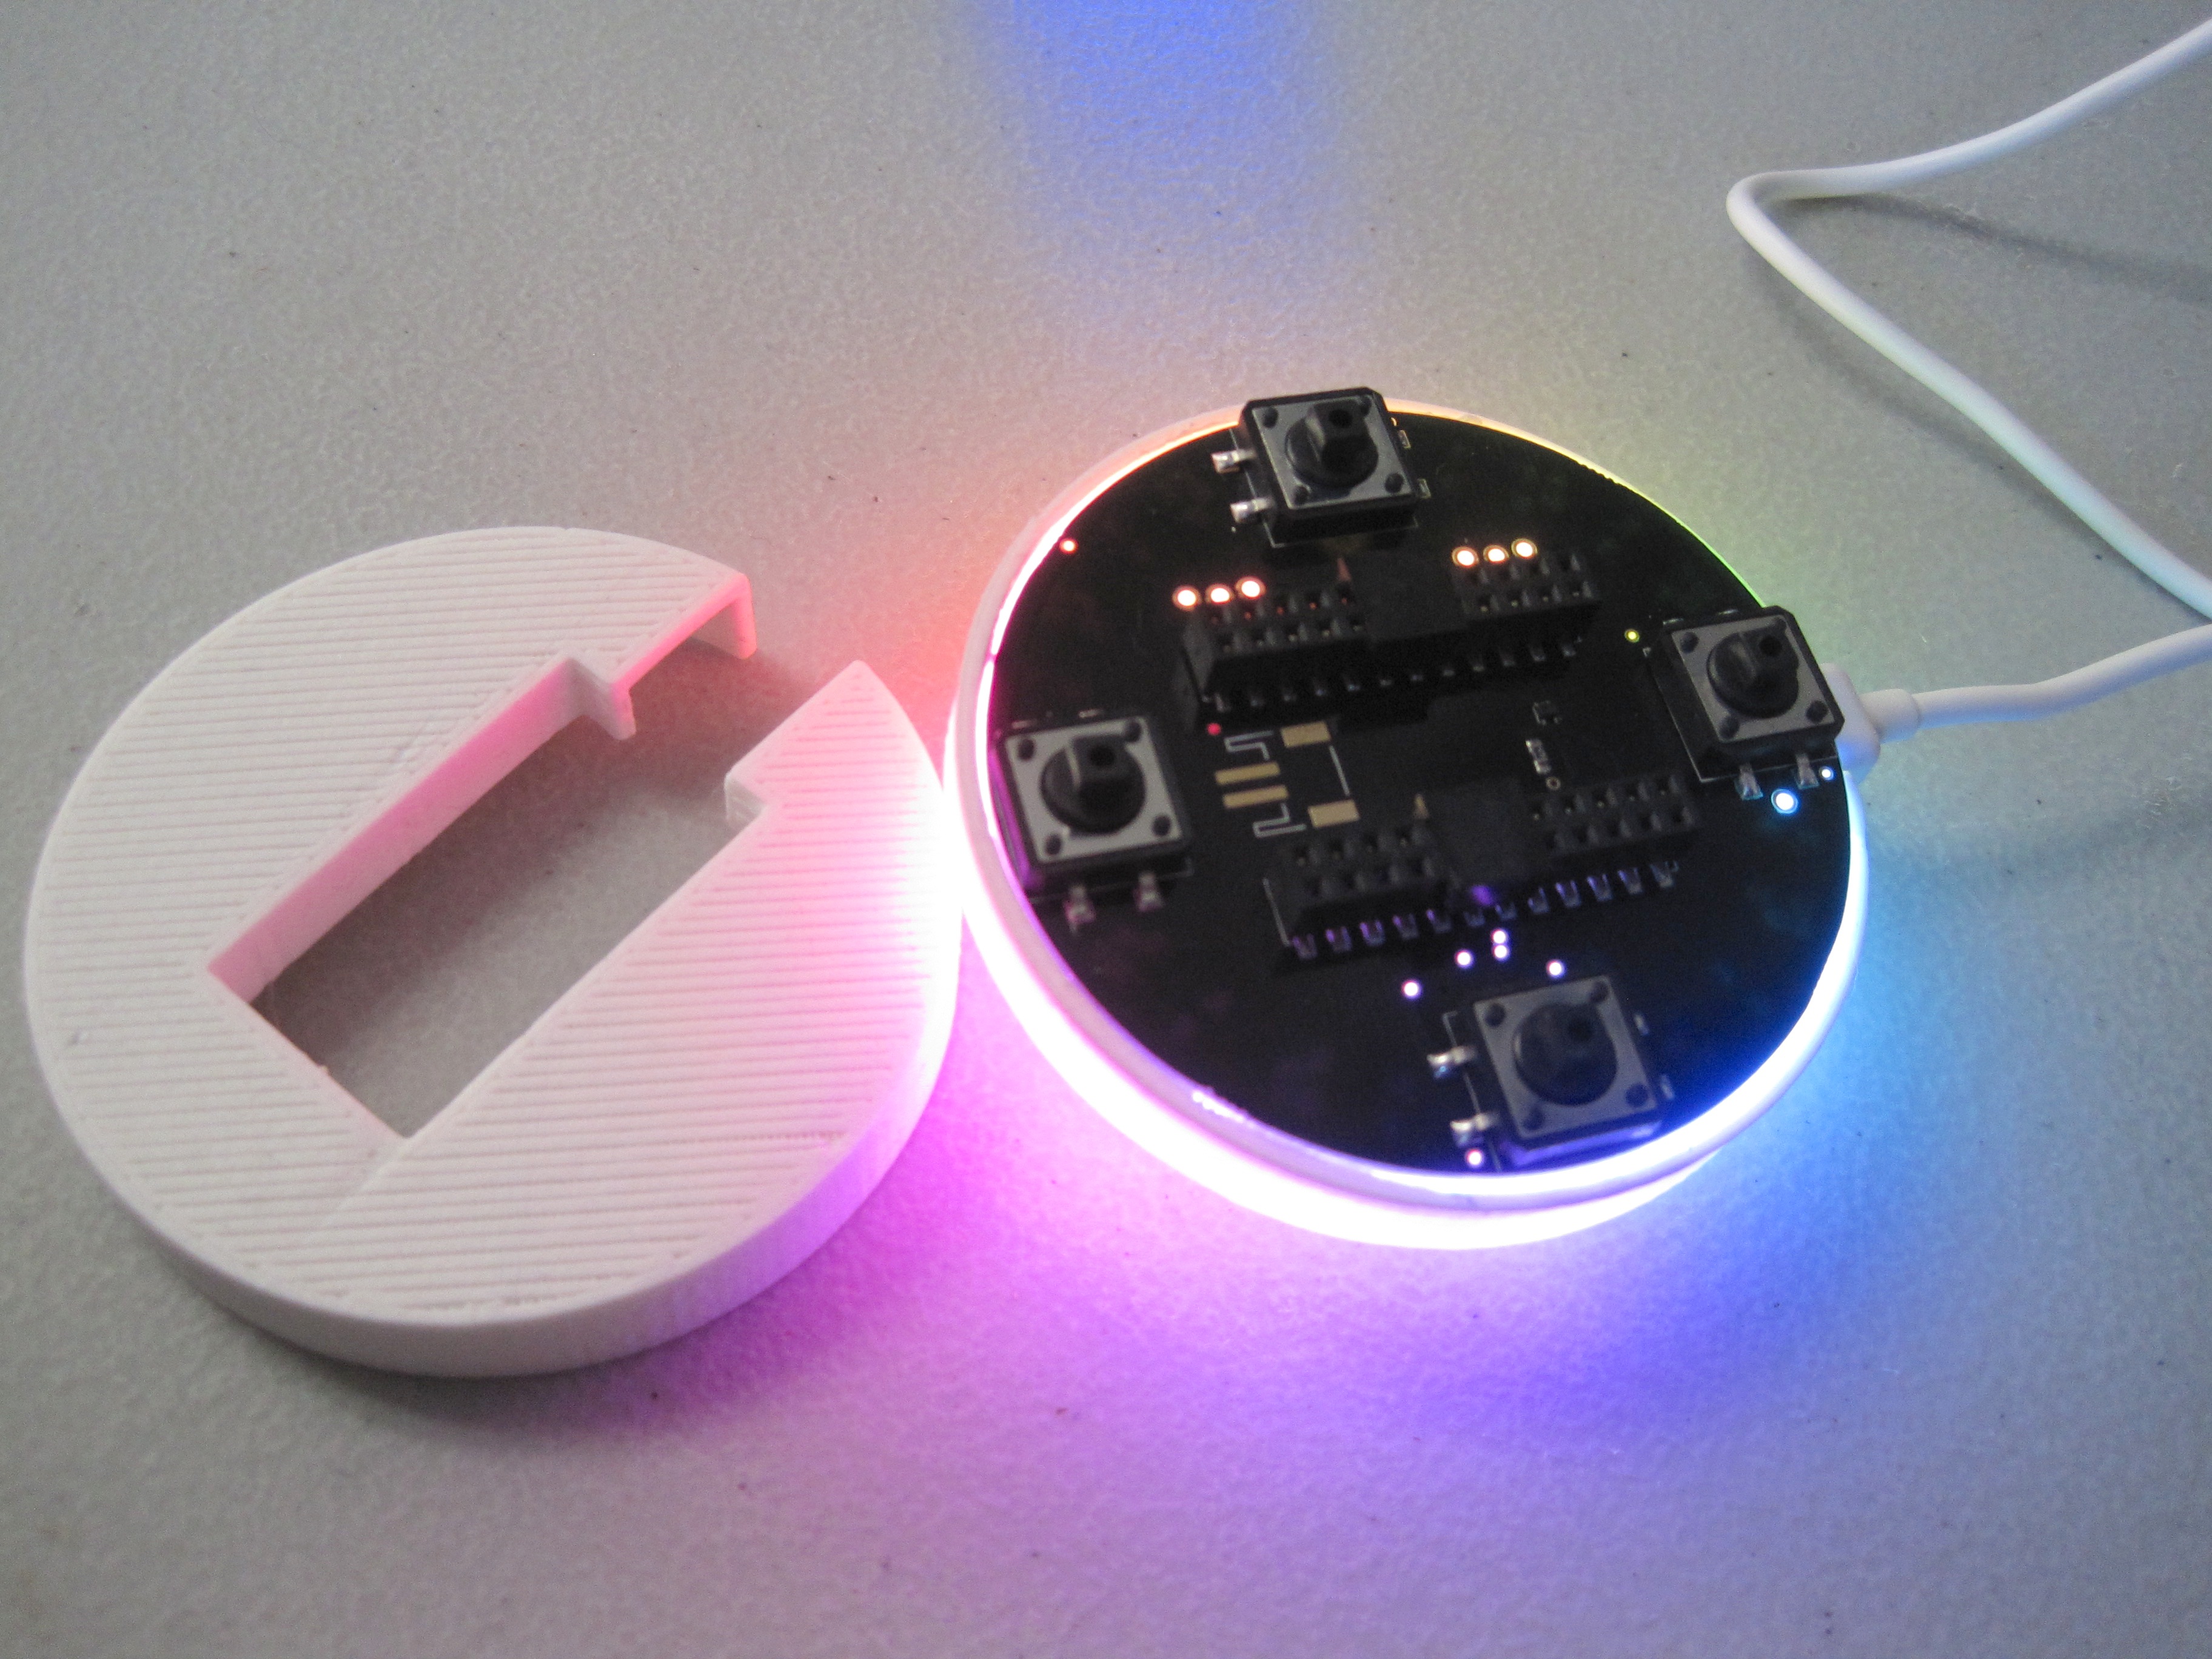
You can find a lot of cool cases and diffusers for different devices, but what if you want something custom? Or what if it's a new device without a ton of existing material? Wait no longer! Make your own.
For the November Instructables Build Night, Crashspace received a bunch of Spark Cores and Internet Button Shields to play with. There are several other Instructables that we're working on, including one with better instructions for setting up your Spark Core. Since the Internet Button shield has a bunch of very pretty, very bright neopixels, I decided to design 3D-printed diffusers for the event. I'm providing both the STL files I created (Step 9), and showing you how I designed them in Autodesk's 123D Design, so you can do the same for other devices.
Note: At time of writing, it doesn't appear that Internet Buttons are readily available for public consumption, only in developer kits that went out for special events, but it does seem to be similar to Adafruit's upcoming Spark Neopixel Ring. (Do correct me if I'm wrong, or if this changes and I'll update.) Conveniently, I'm more interested in showing you the techniques for making your own similar design for other devices.
Materials
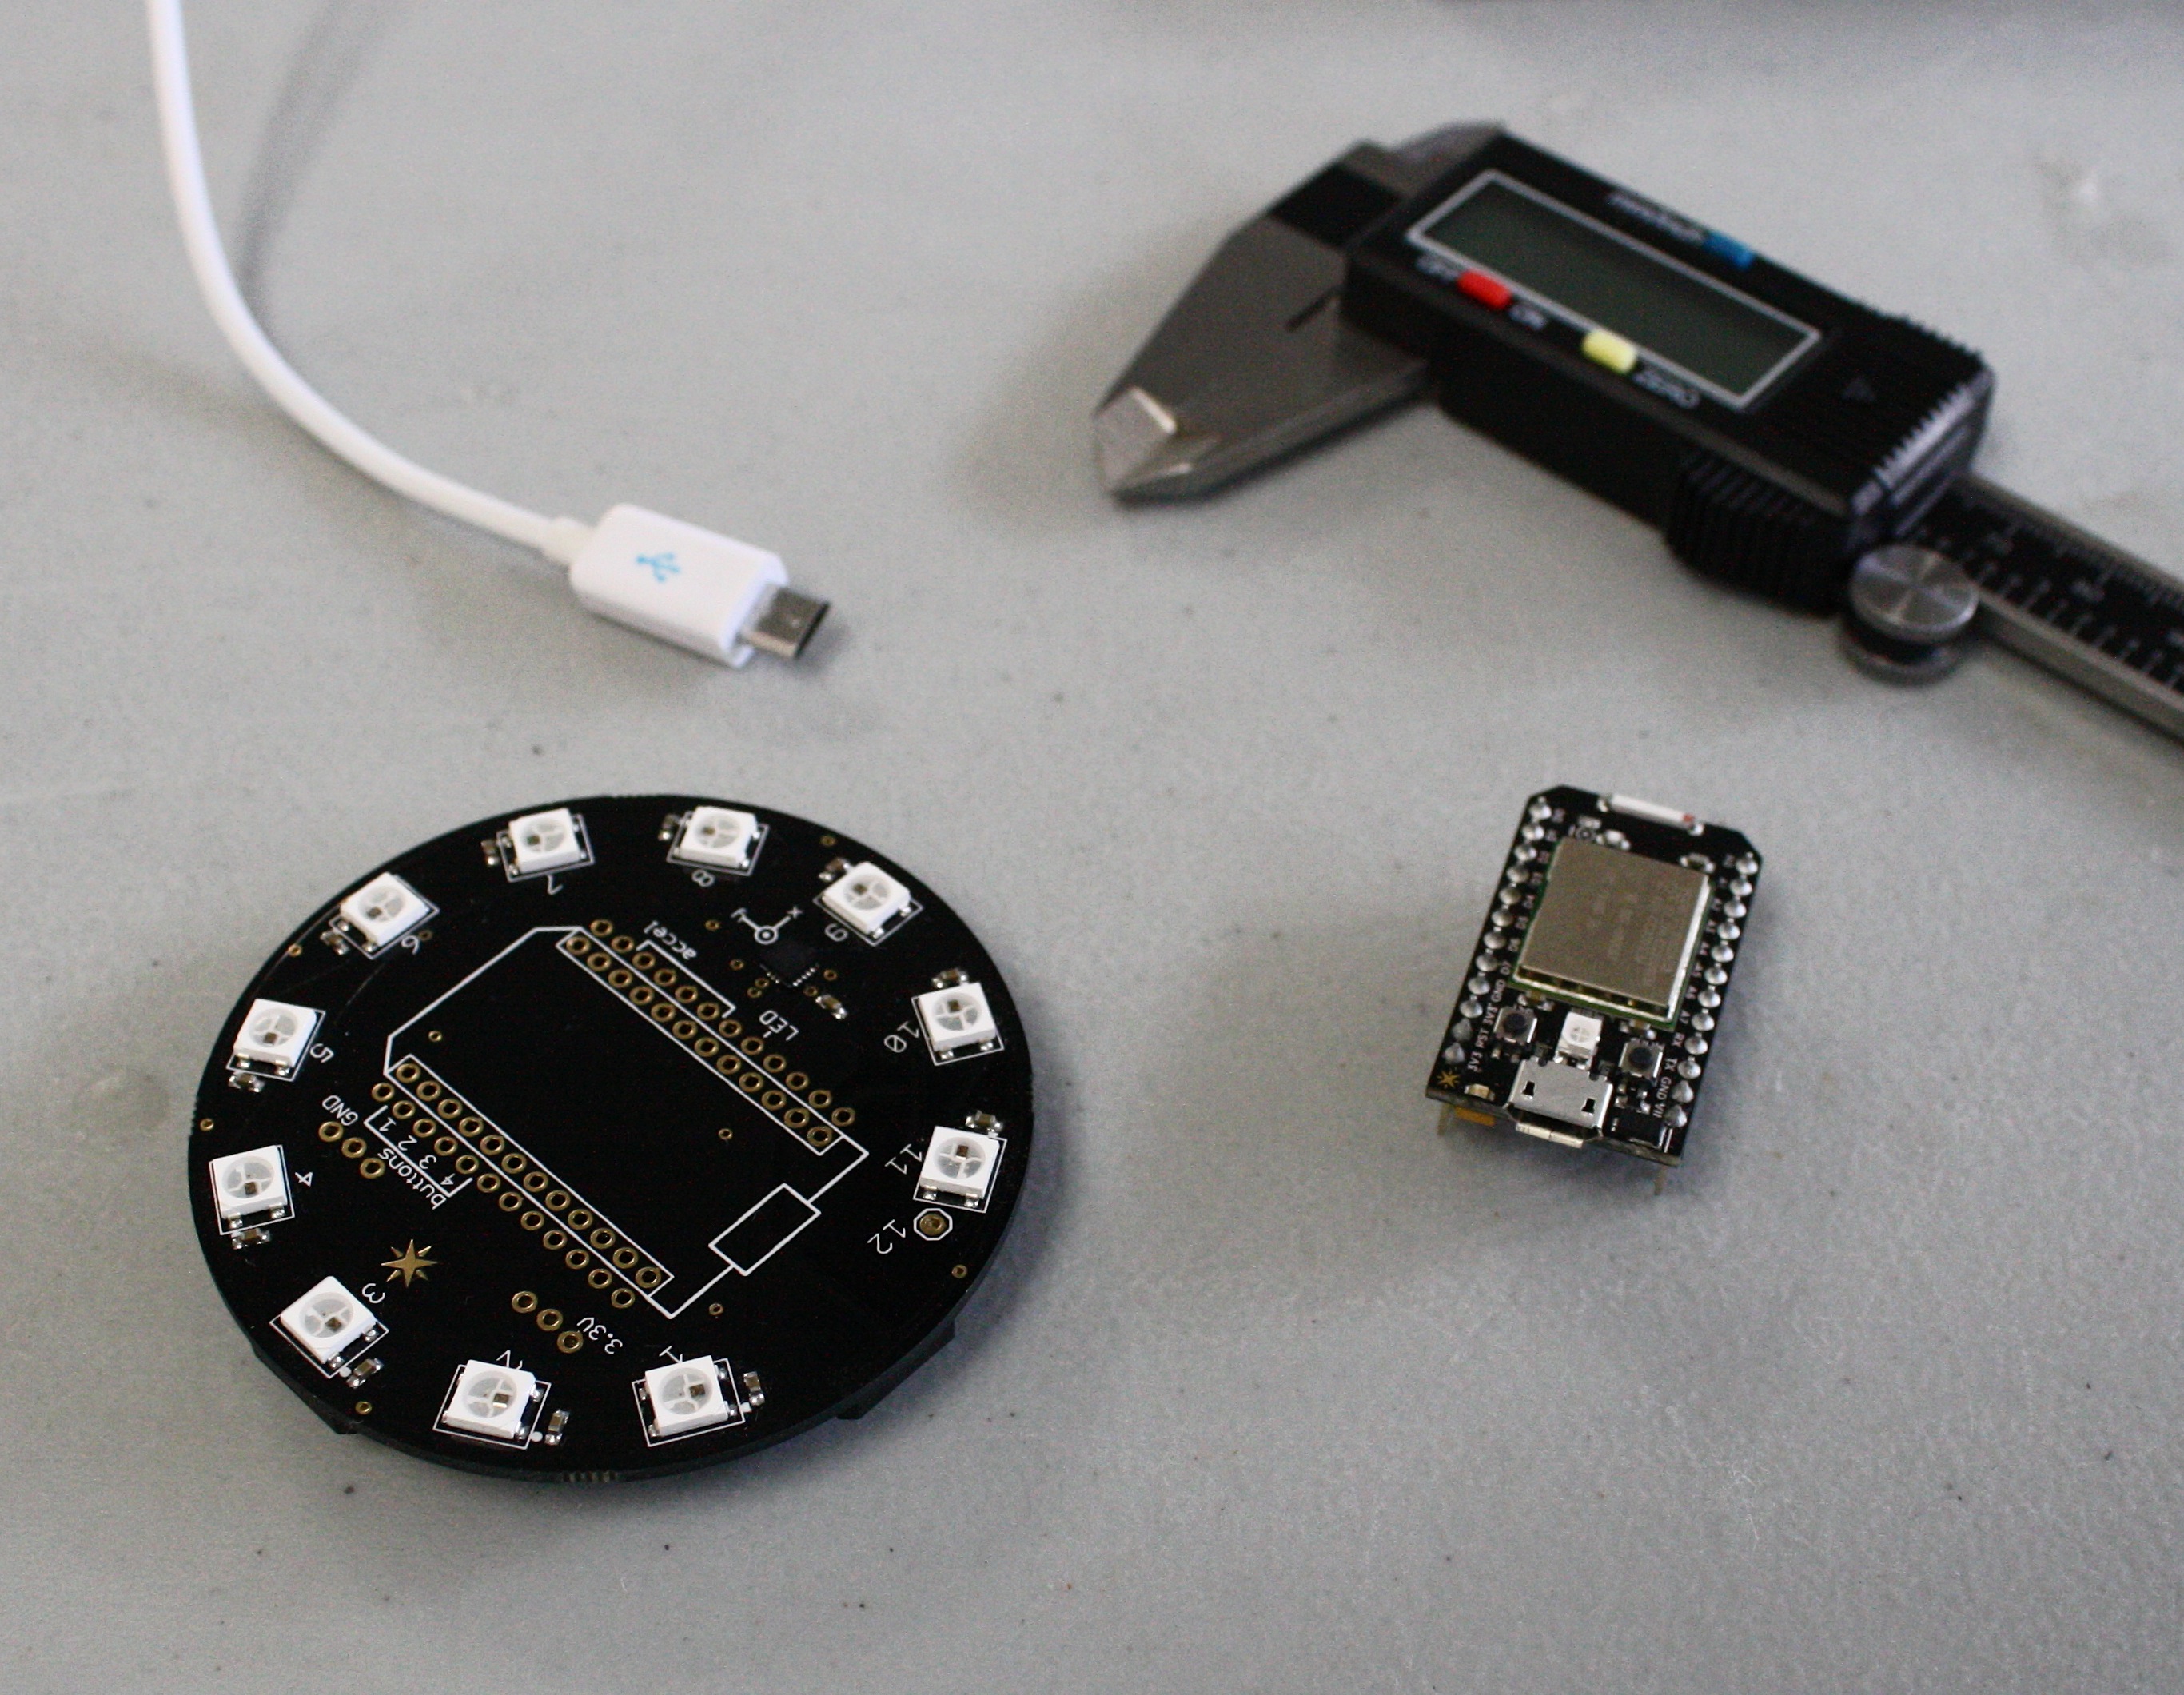
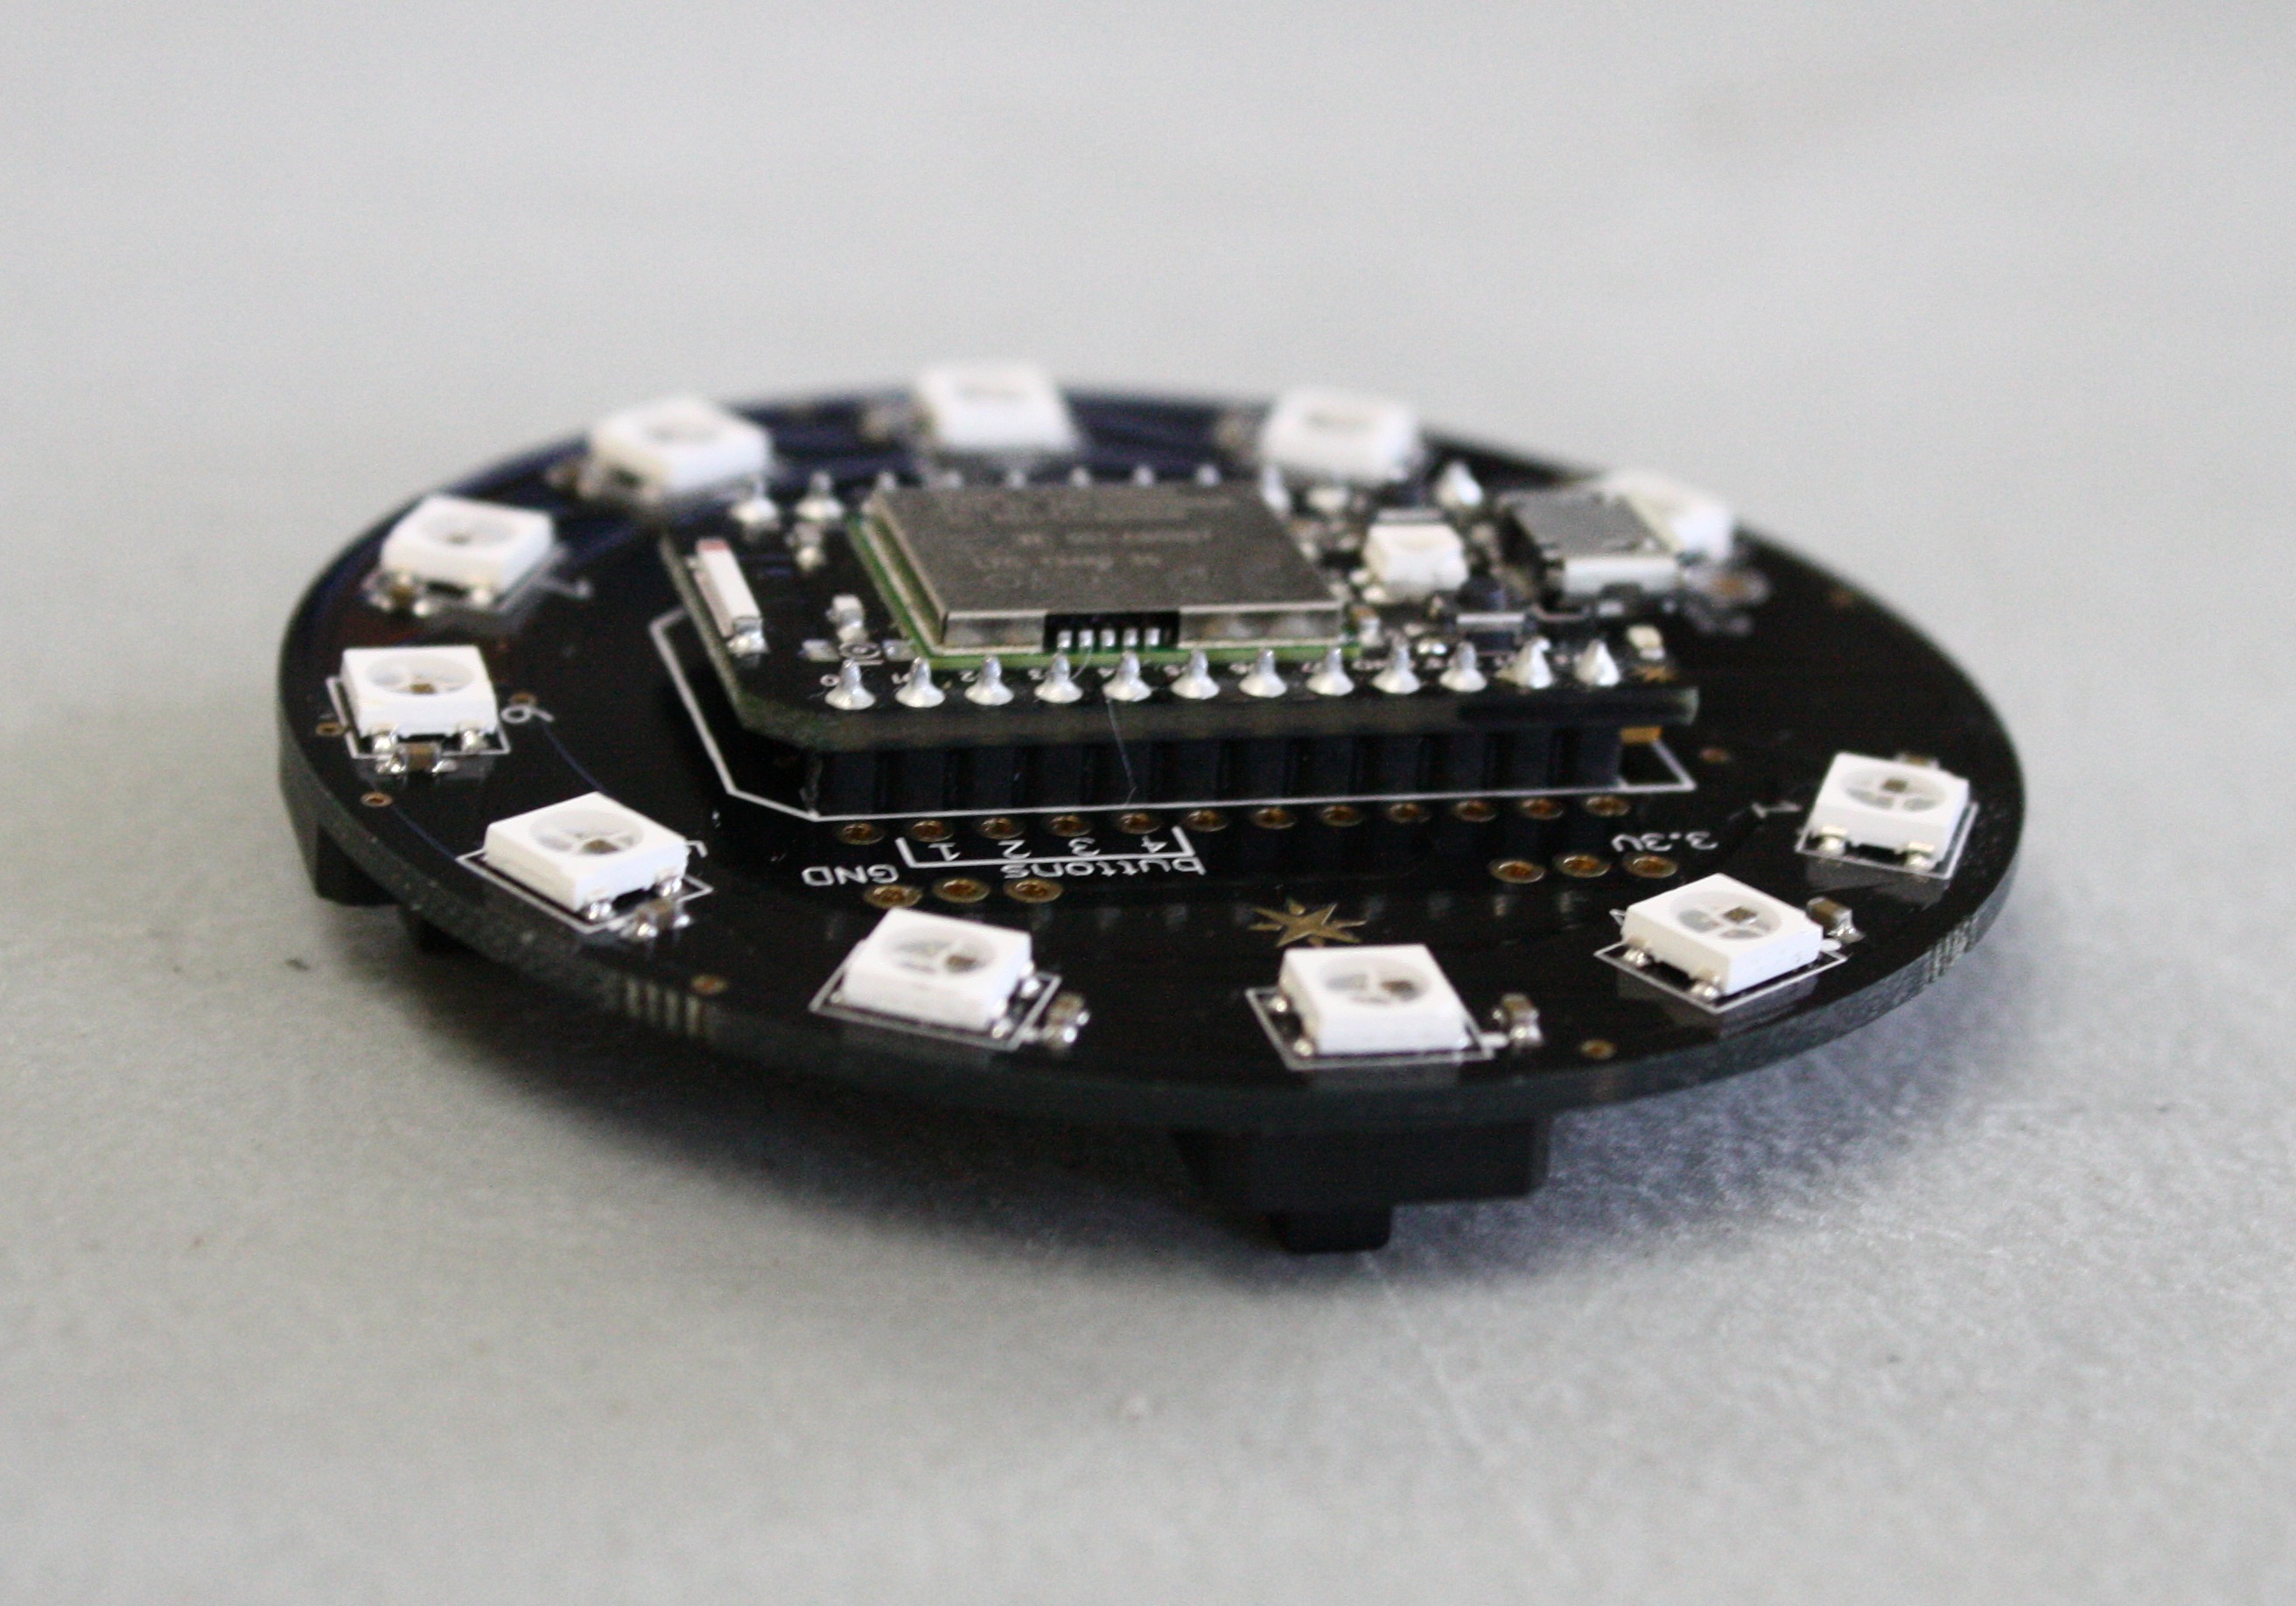
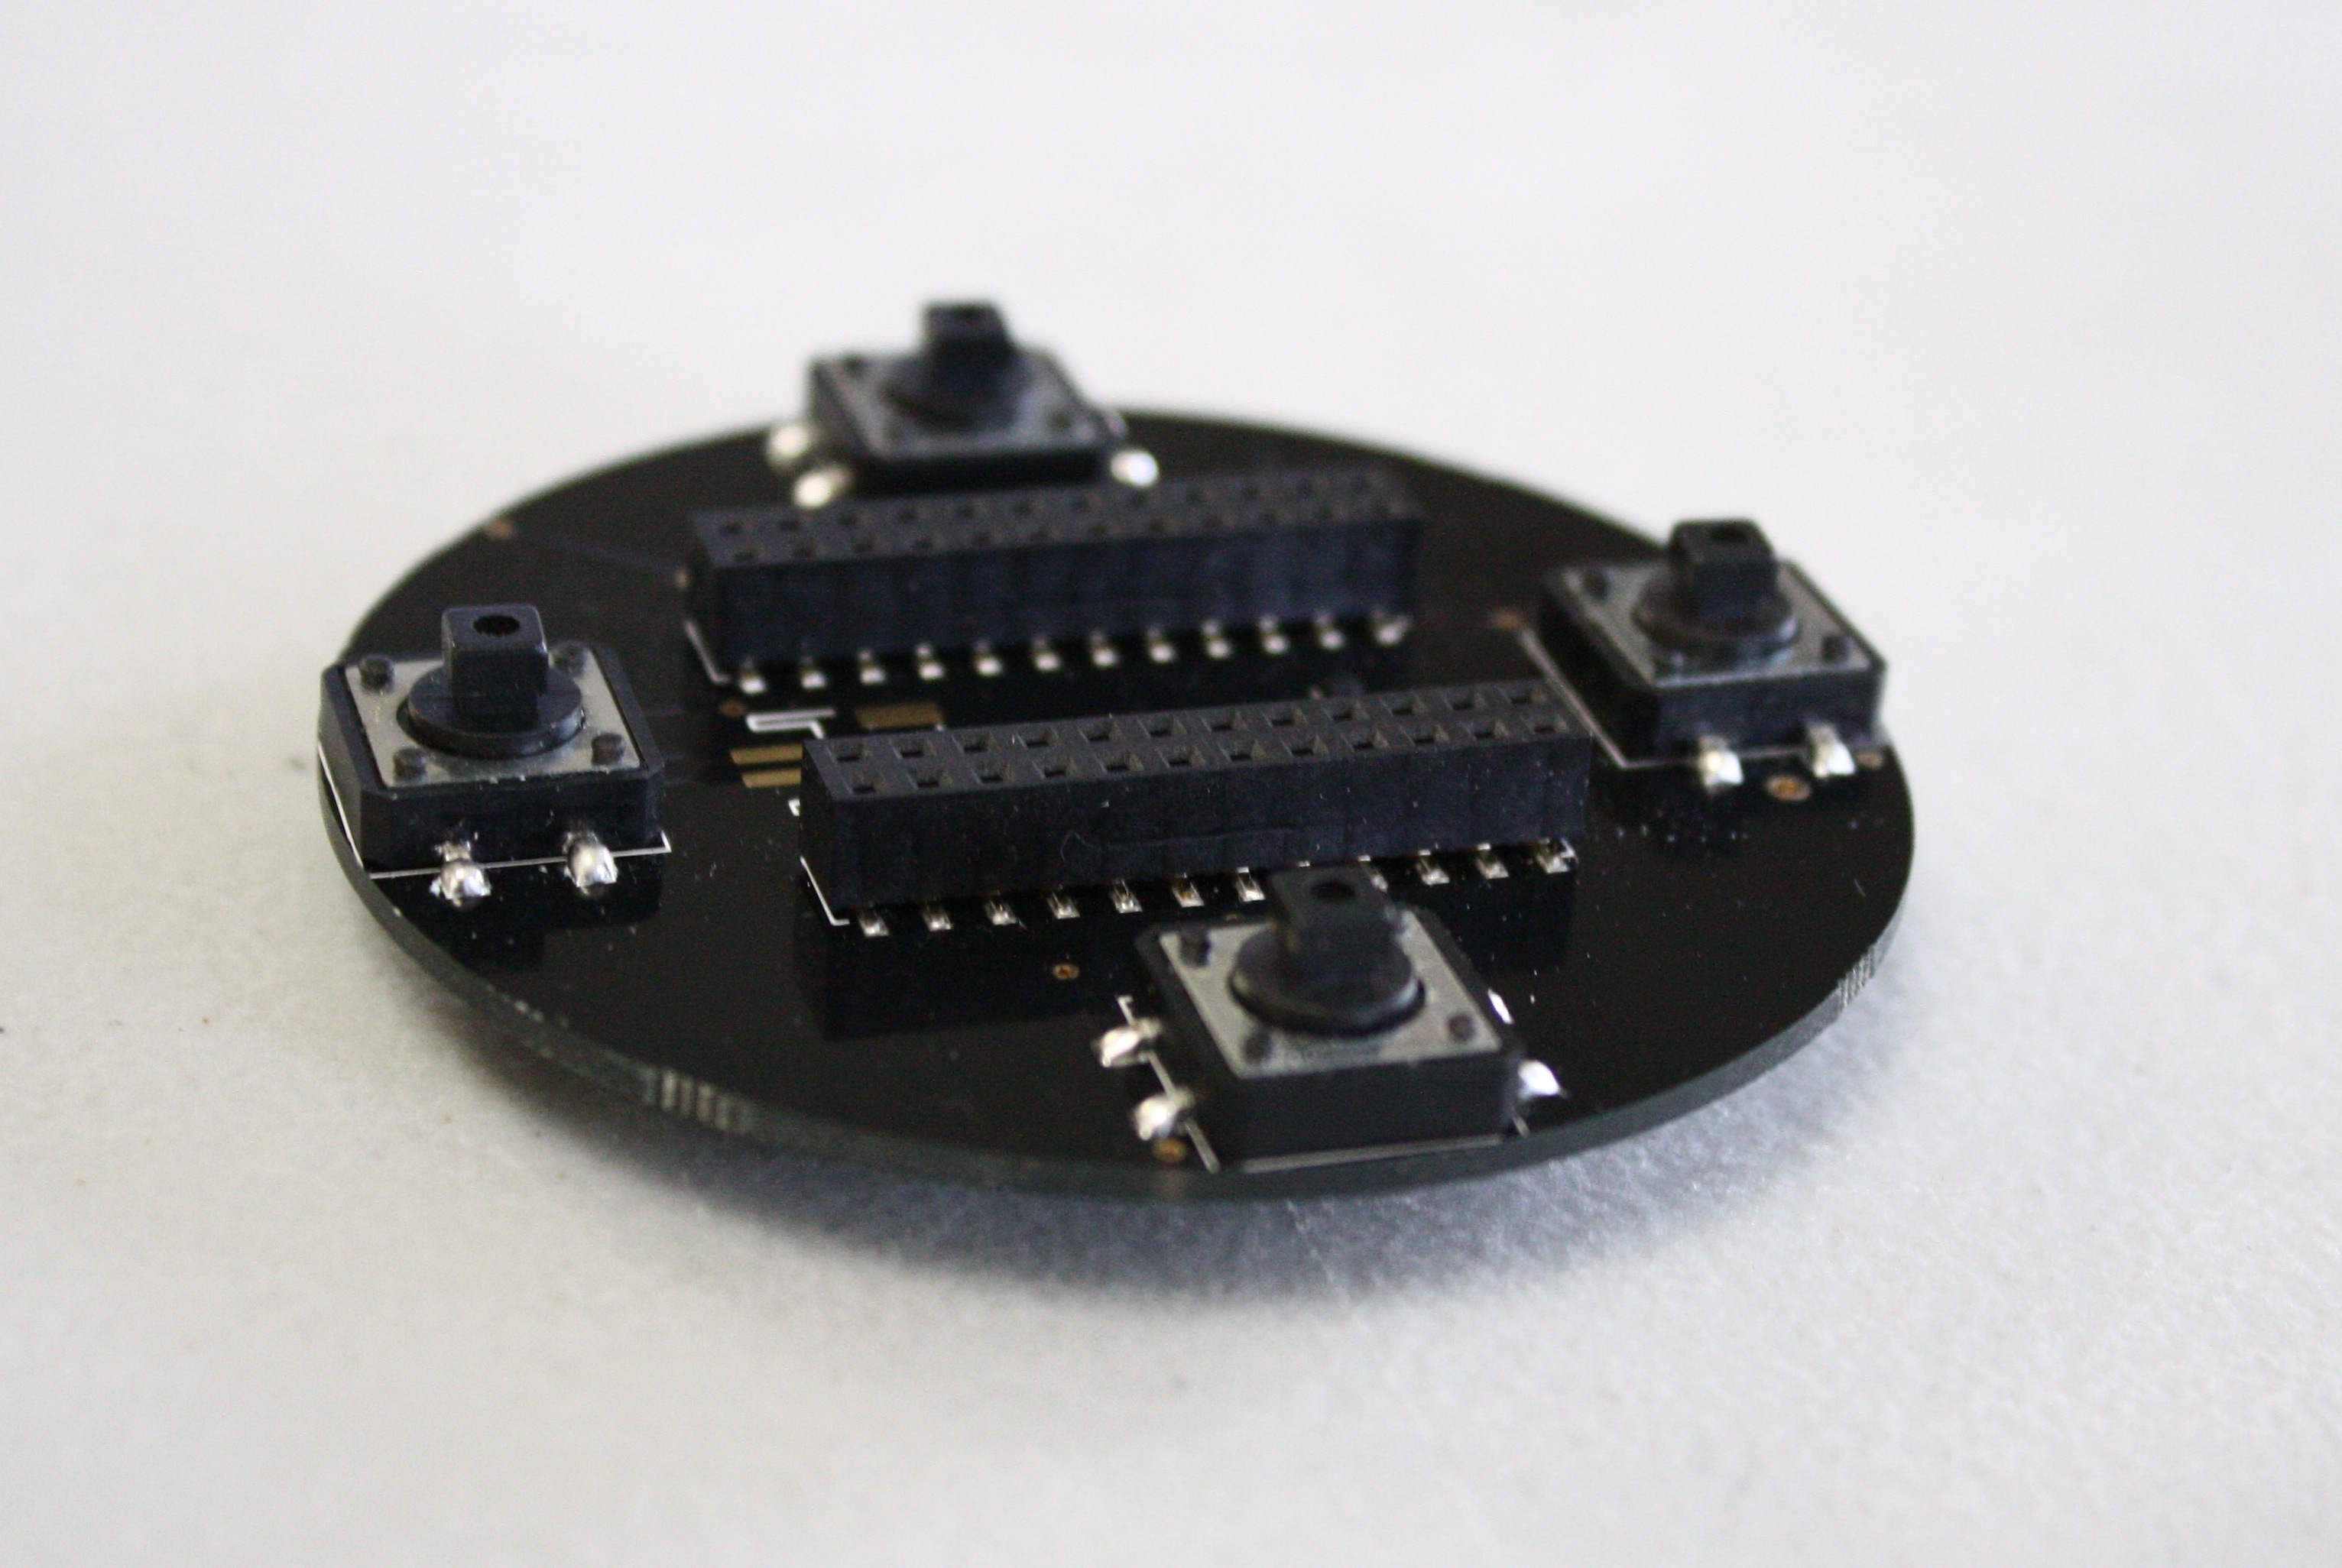
Spark Core / Internet Button
(or whatever device you'd like to create a case for)
Light-Colored Filament
I used white PLA for diffusion (and PLA is a better fit for this project than ABS, considering the flexibility of PLA can give you a more secure fit), but you could use another light color, or clear filament like T-Glase PETT. I made the diffusers rather thin so that plenty of light will show through. Try different kinds of filament and let me know what you discover. (If you're just doing a non-diffusing case, obviously you can use whatever color you like.) My favorite brand is Prototype Supply.
3D Printer
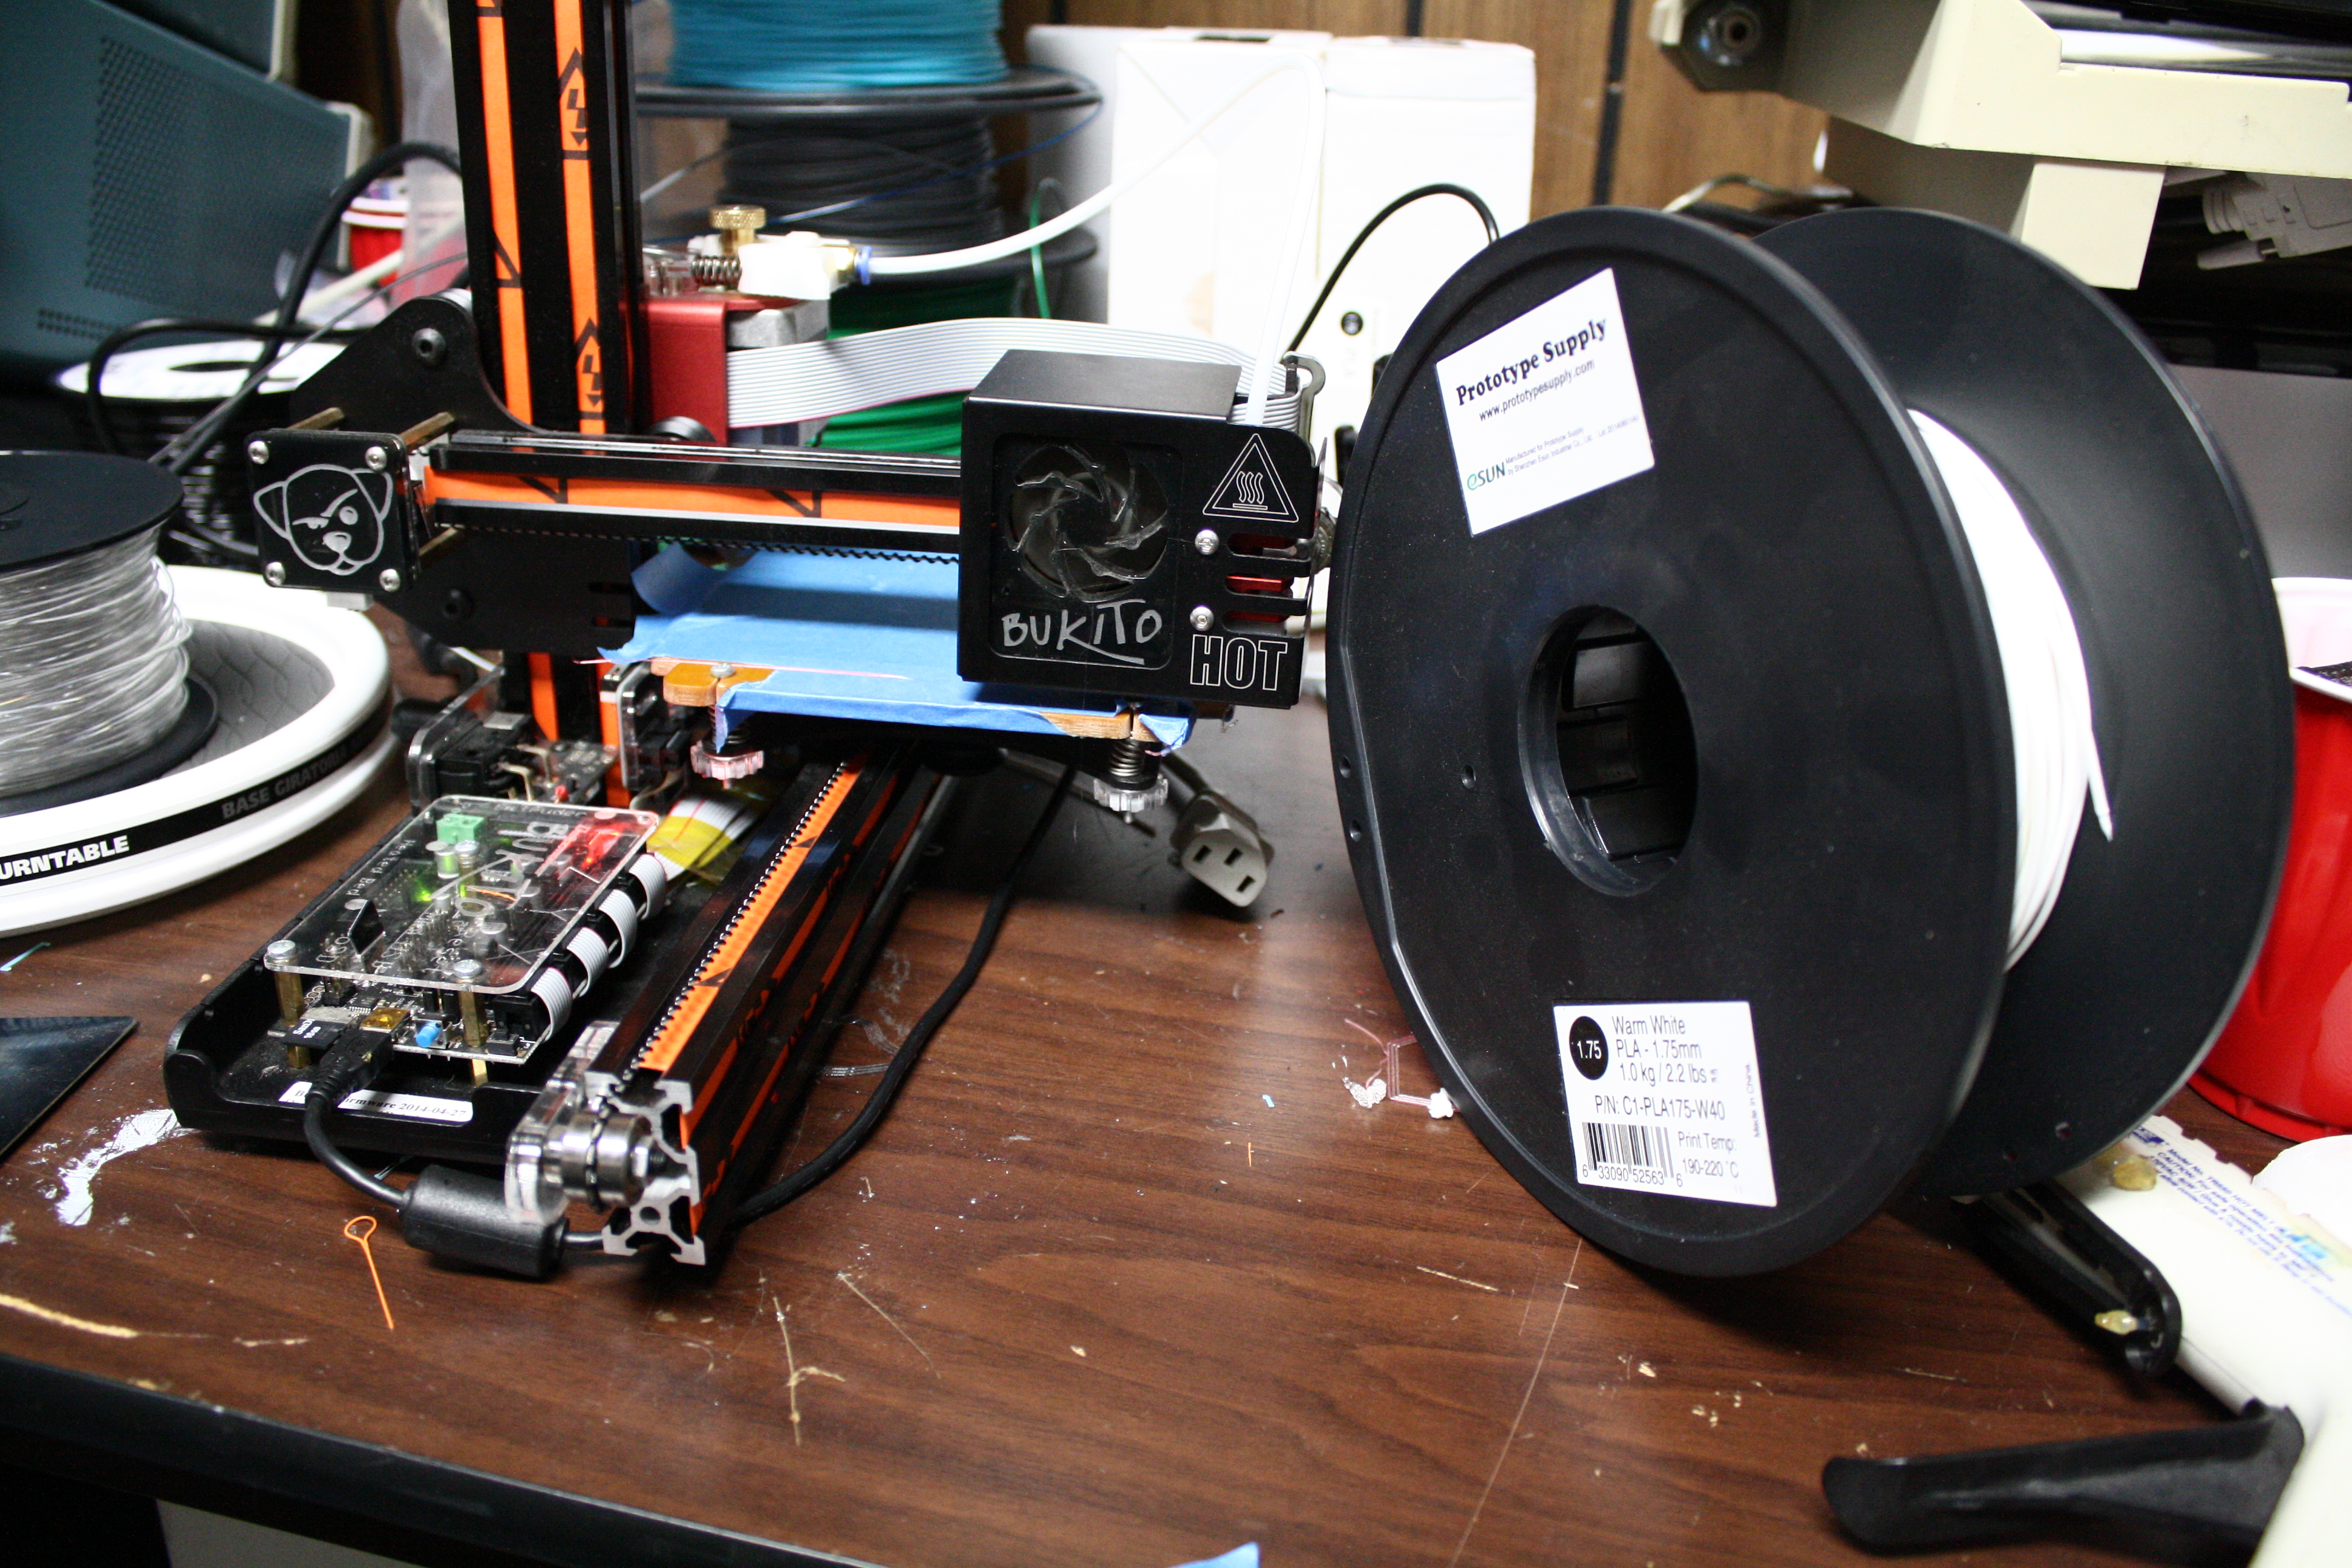
I used a Bukito for this cuz we love the Deezmaker guys and their printers.
Digital Calipers
You'll need some precision measuring device. You can use a fine ruler if that's all you have, but small, precise measurements like these are exactly what calipers are for.
Snips/Knife/Pliers
For removing supports you might make. My dome requires supports, the flat diffuser doesn't. It all depends on the design.
Measuring
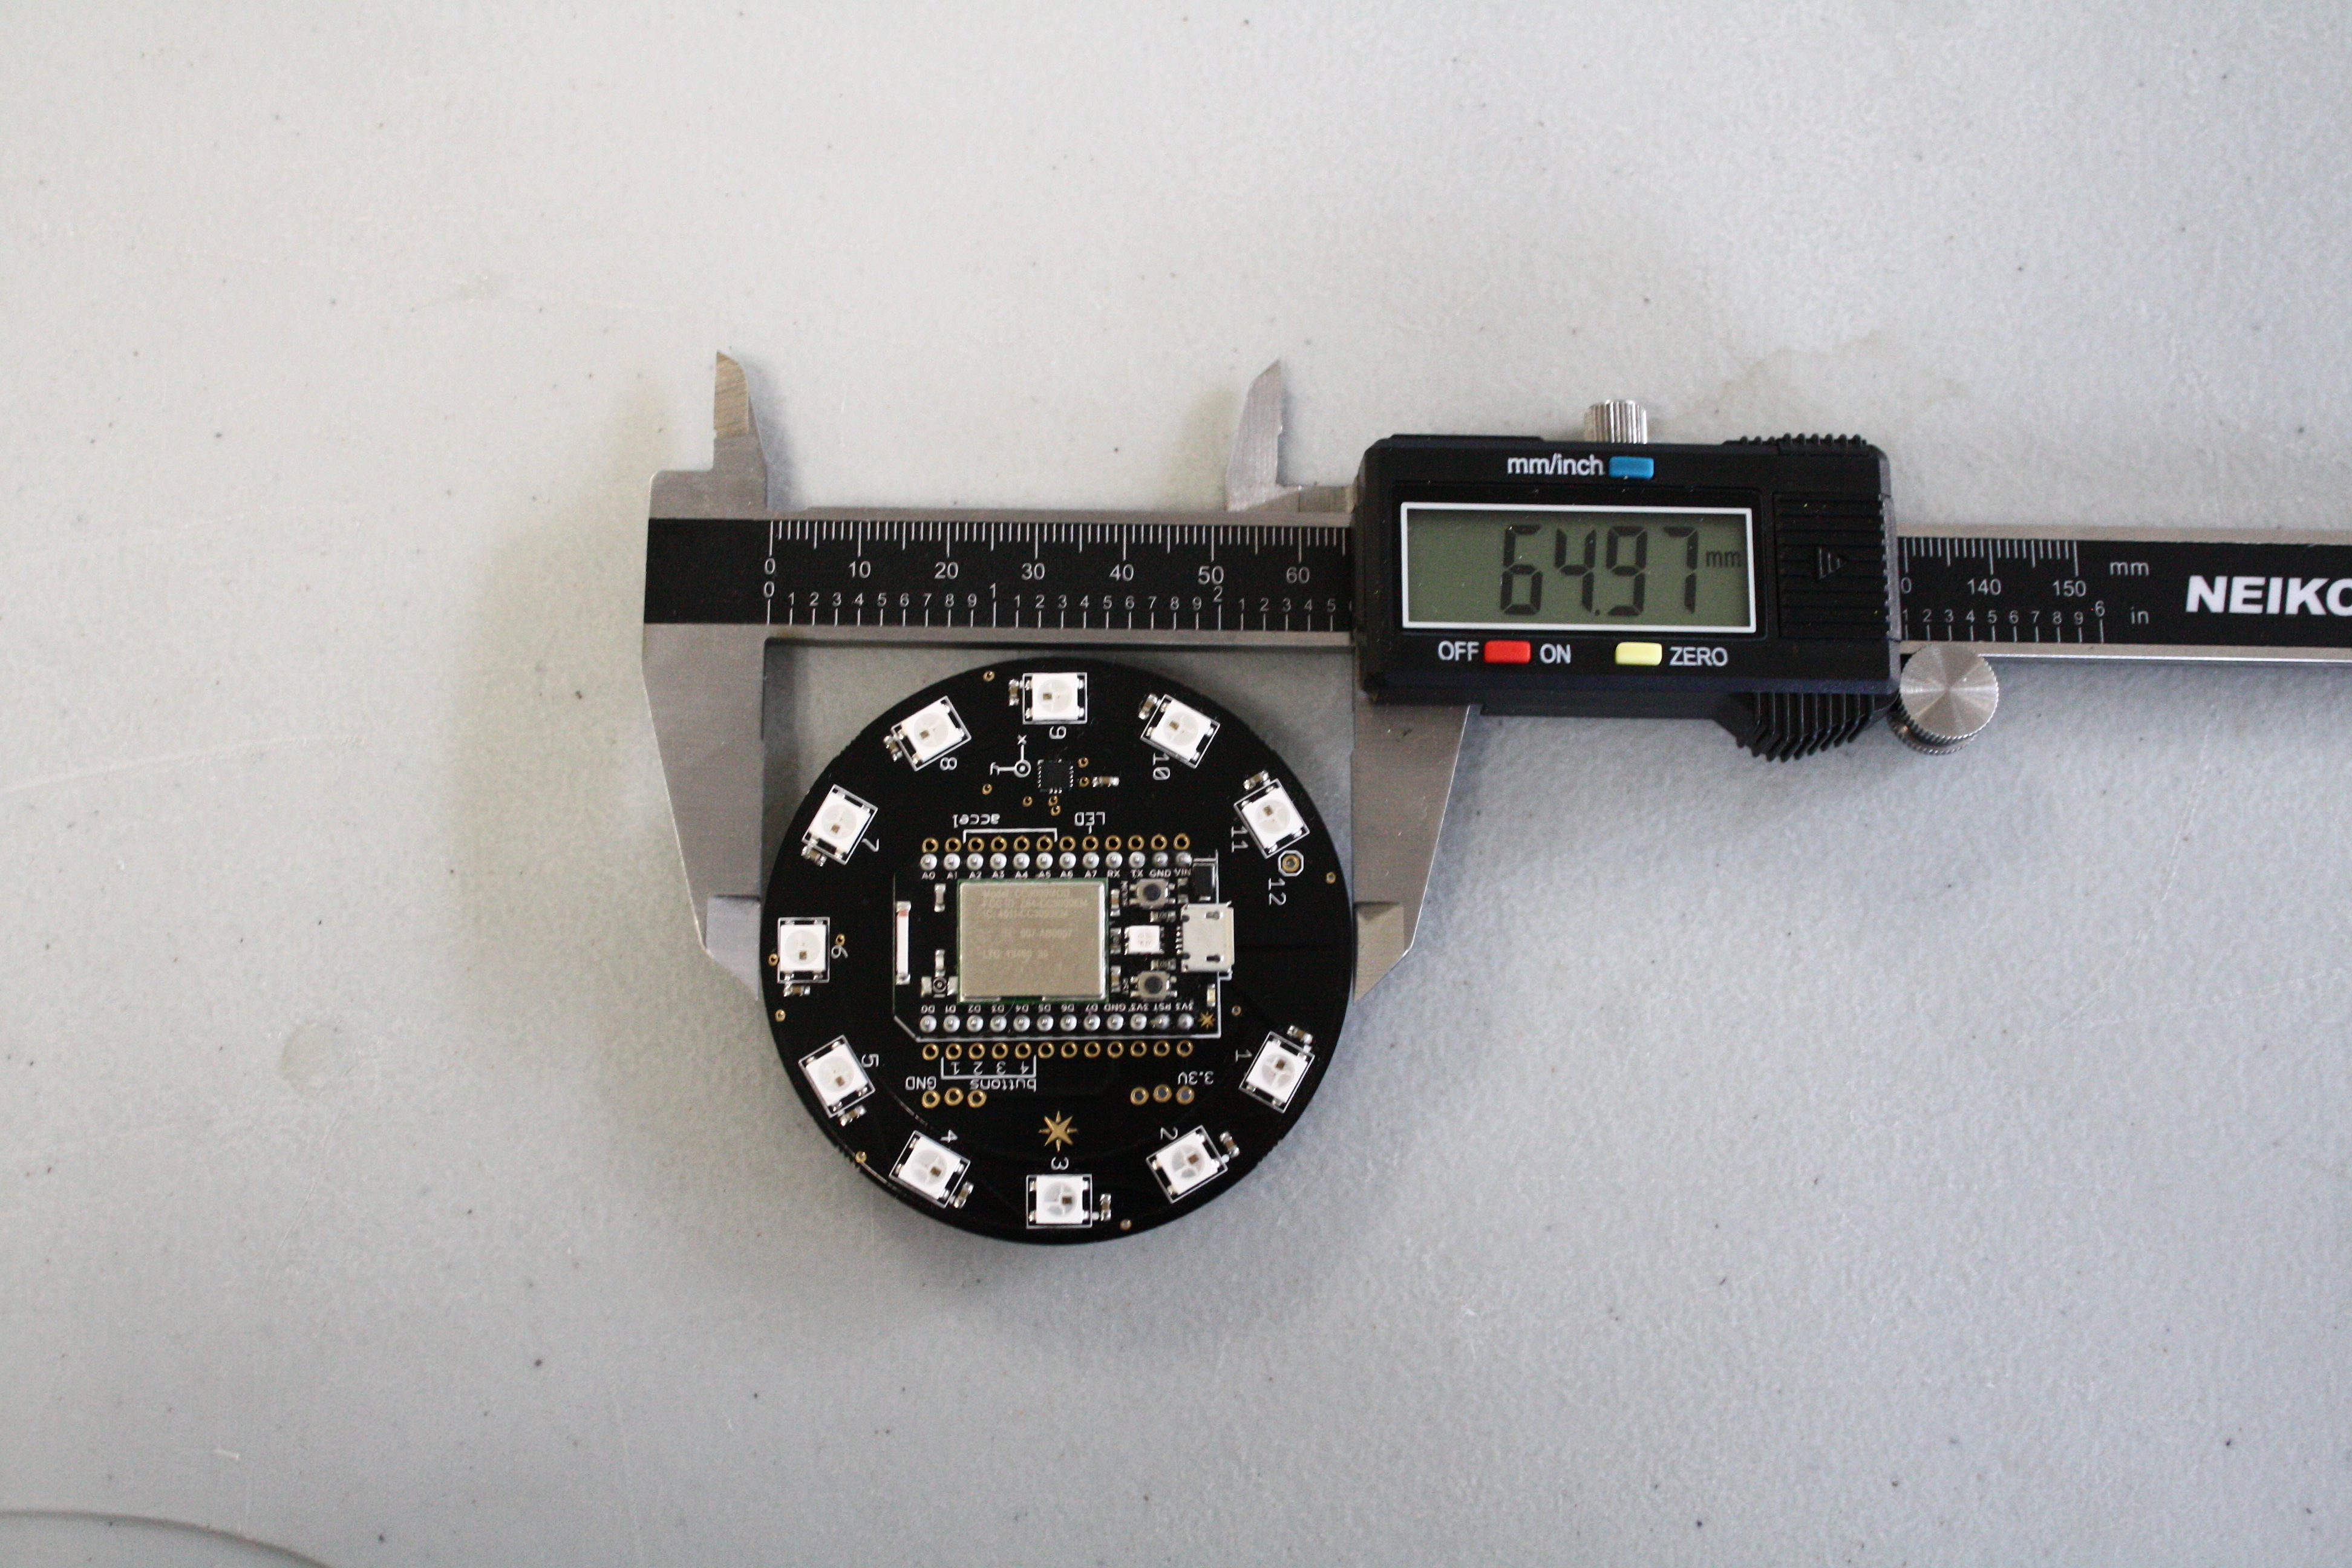
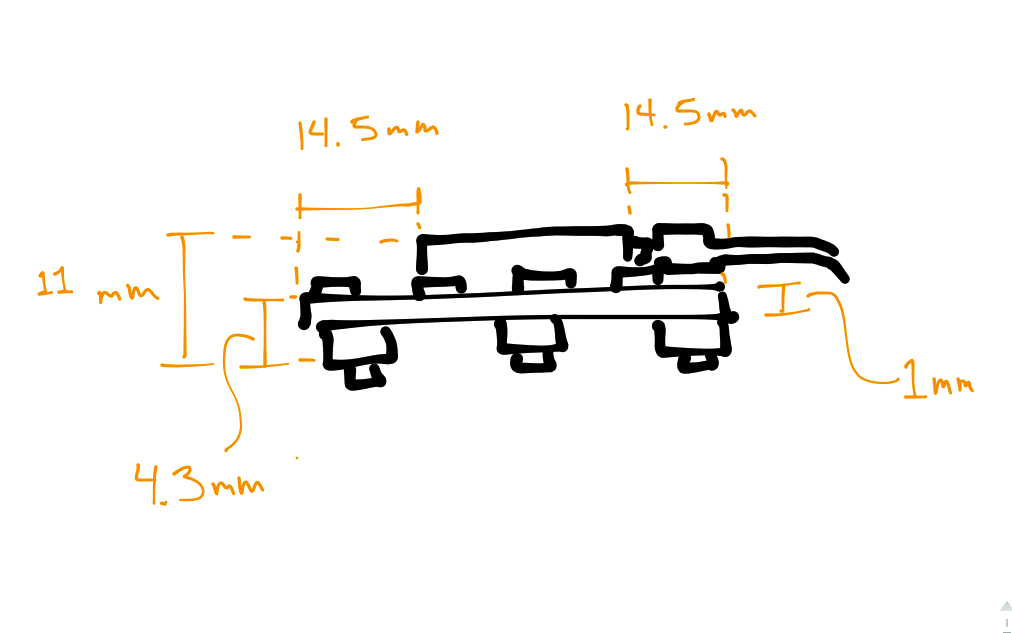
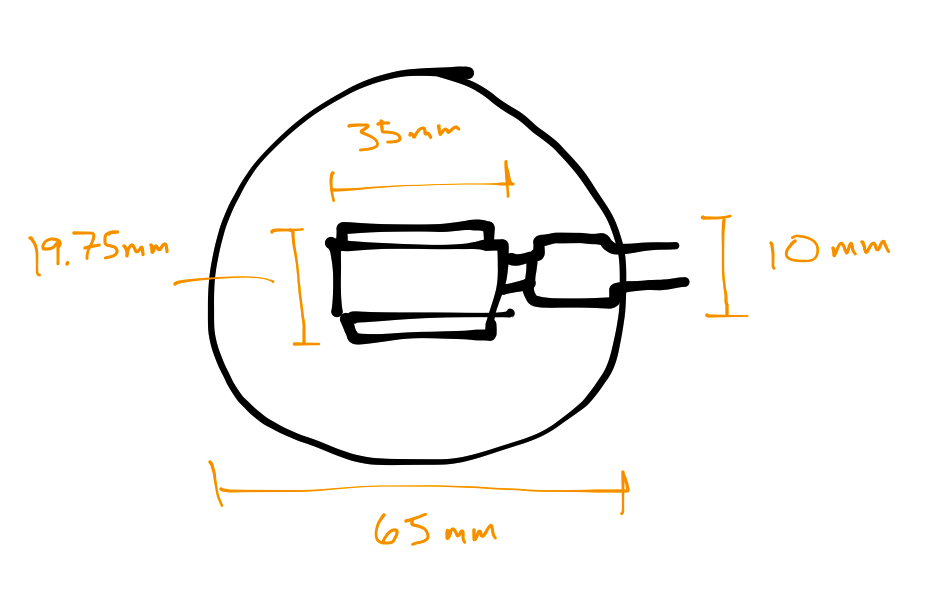
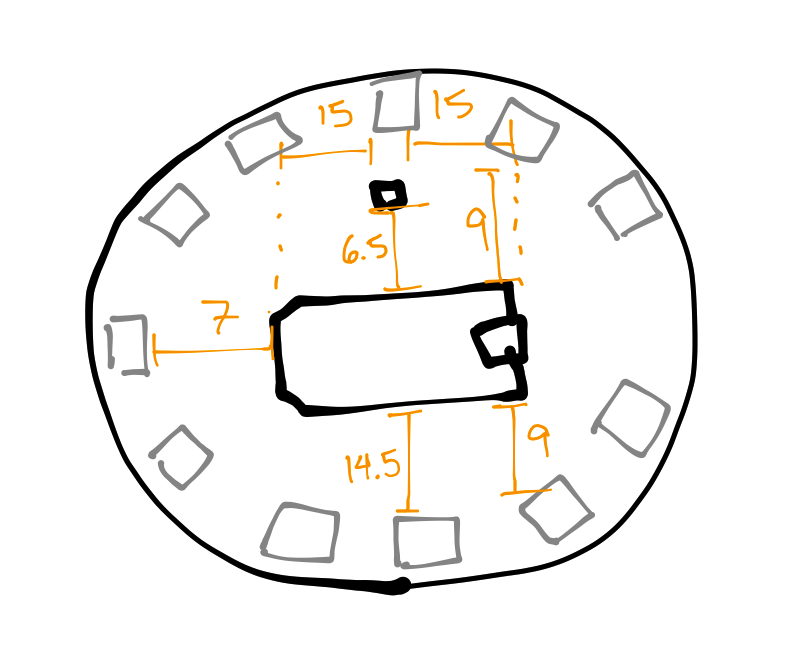
Hello calipers!
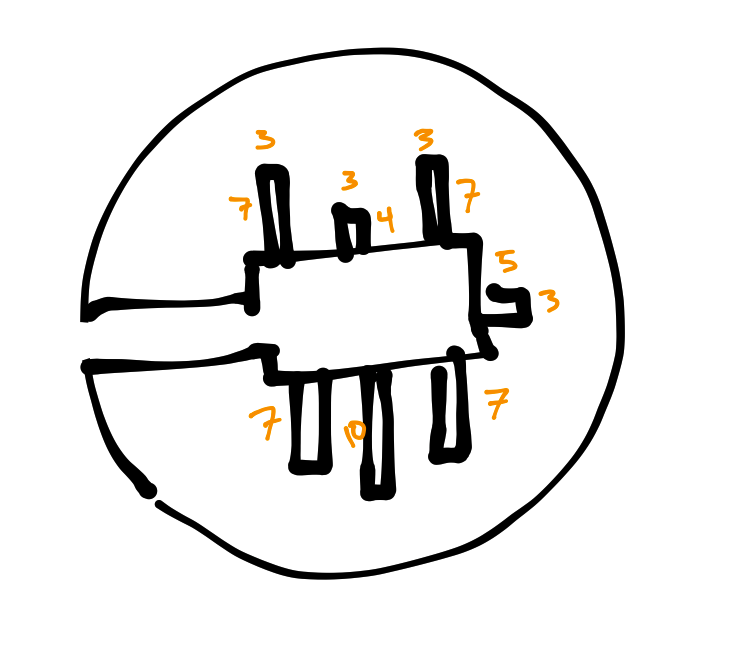
First thing to do is take some very precise measurements and find out all of the dimensions of your device, in this case the Spark Core with Internet Button shield. Check the diagrams to see what I measured.
I made two different kinds of diffusers: one that is simple, flat, and allows you to see the Spark Core, and one with a nice big dome. For both, I wanted the case to extend a smidge beneath the board, to just above the action part of the buttons so they would be easily accessed, so you'll see those measurements in there.
The diffuser grabs the Internet Button around the outside of the circle, and around the Spark Core itself. My initial design only had contact in those areas. After some testing, I discovered that it would snap on just fine, but pushing the buttons on the back would make the diffuser shift around. To account for this, I added some very specific braces that extend from the Core holder. Since there are elements on the shield surrounding it, and since I wanted to keep supports as far from the Neopixels as I could (so as not to interrupt the light), I had to do some careful, precise measurements that made use only of blank space on the shield.
Hi again, calipers!
Modeling the Case - Main Body
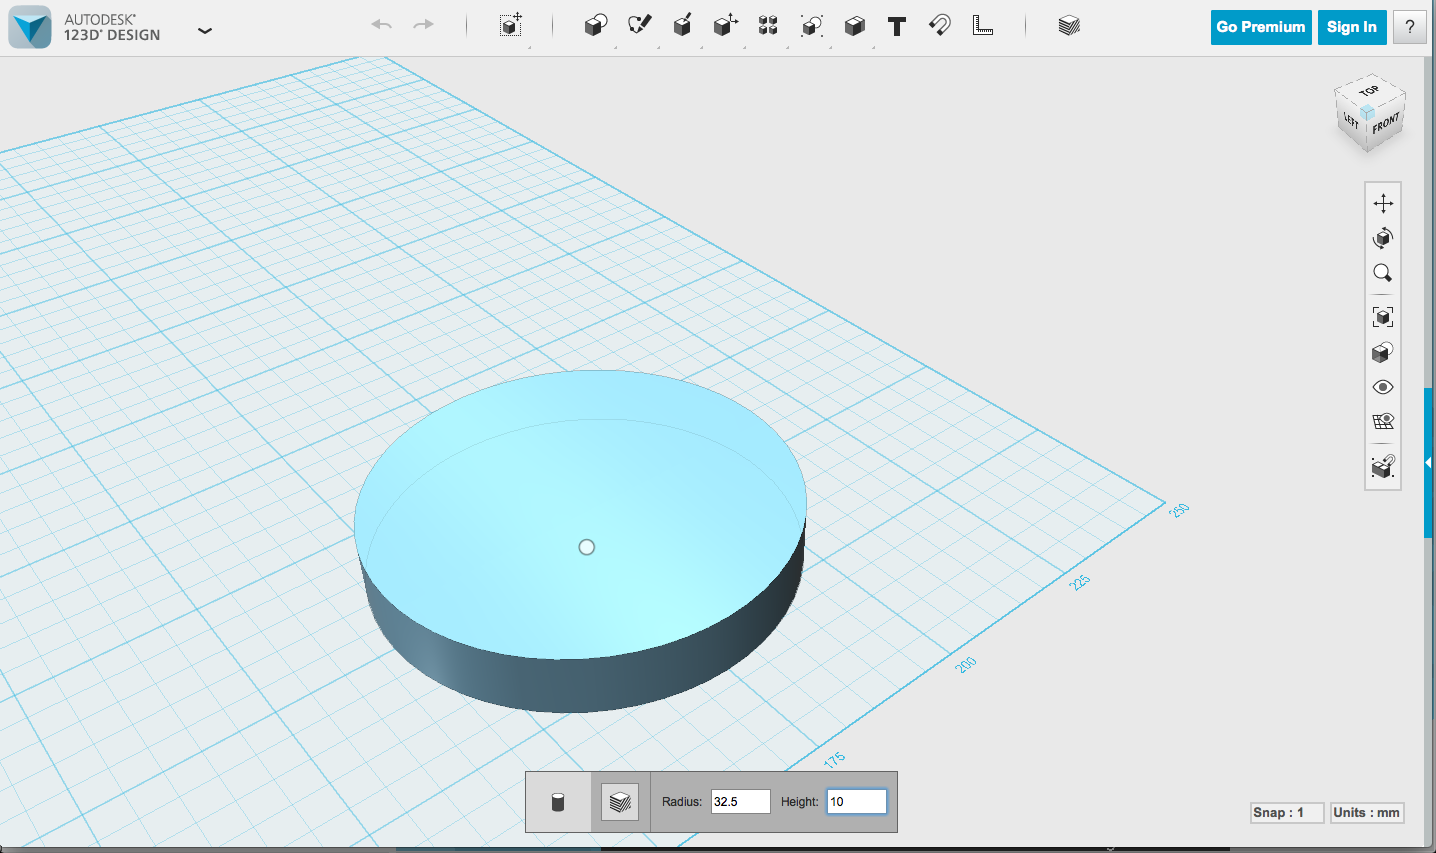
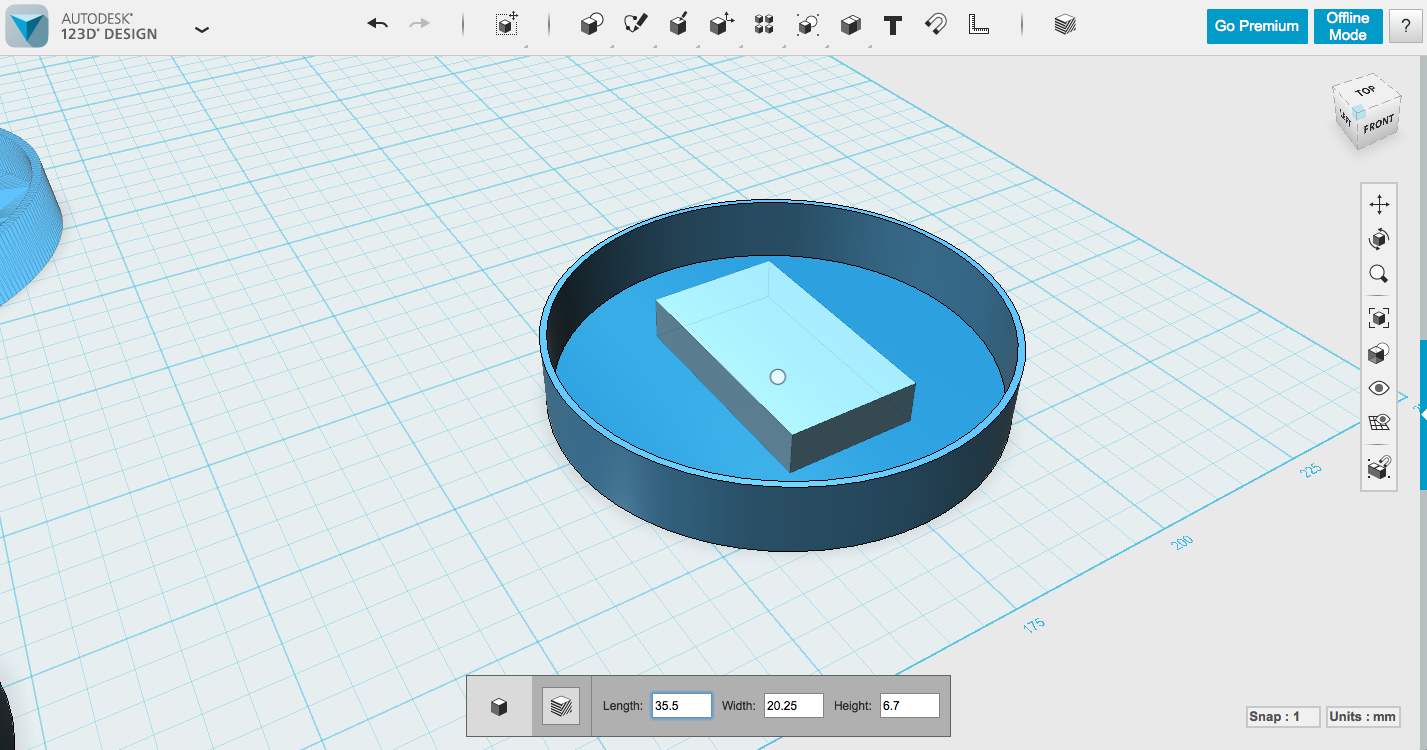
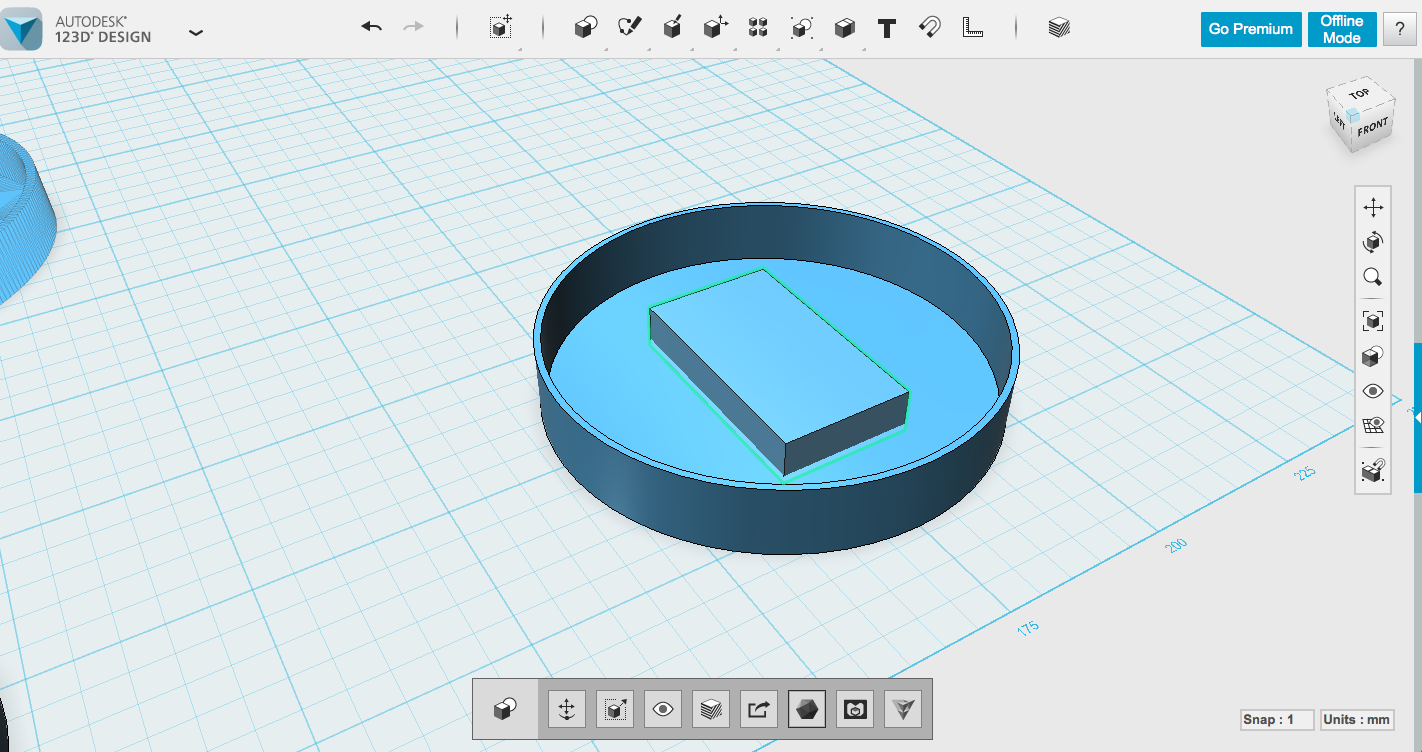
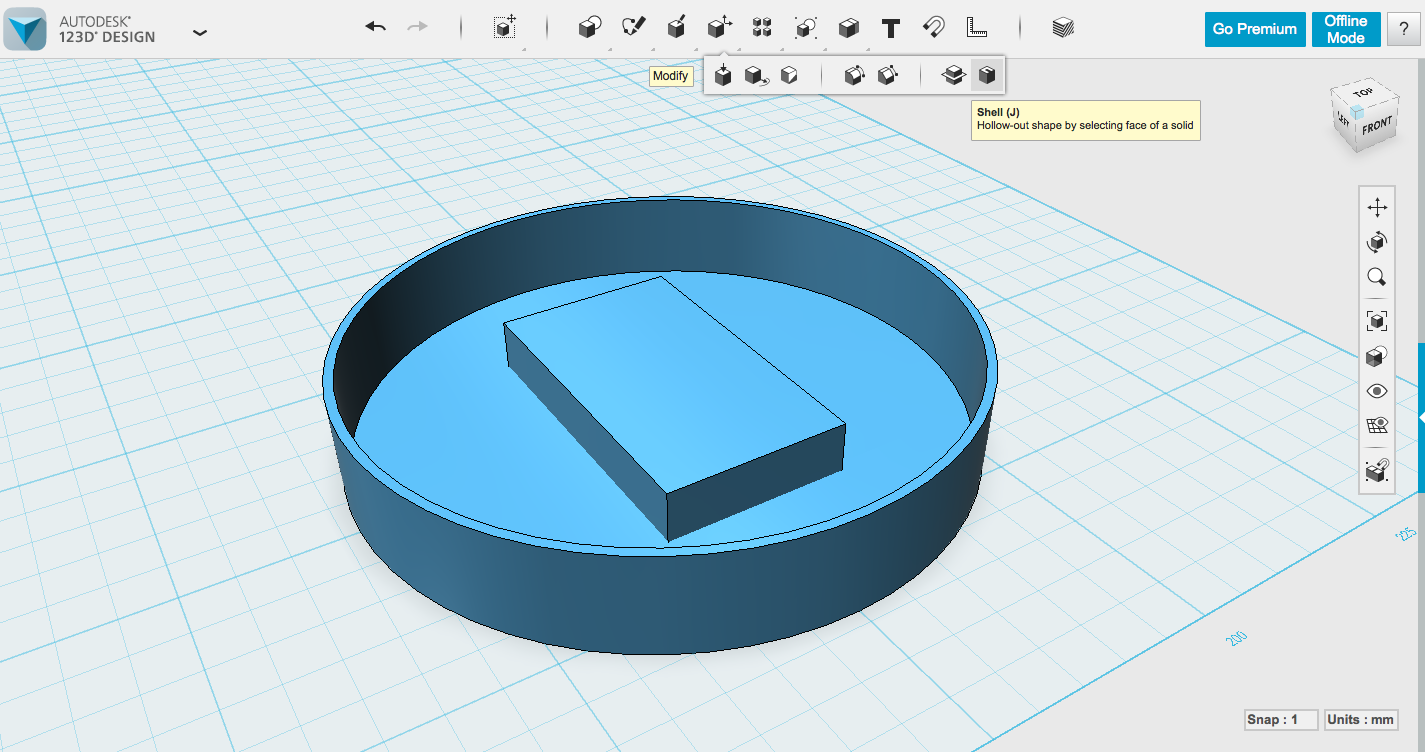
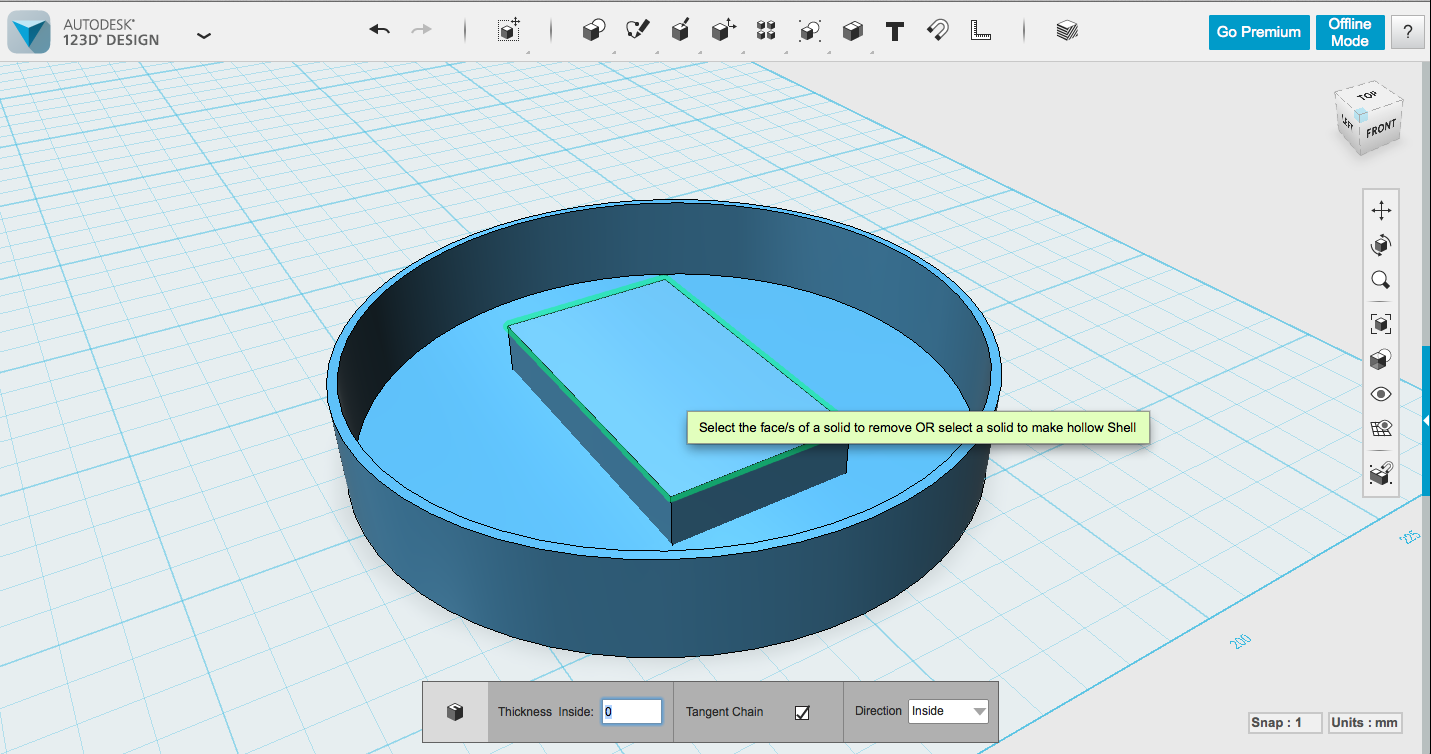
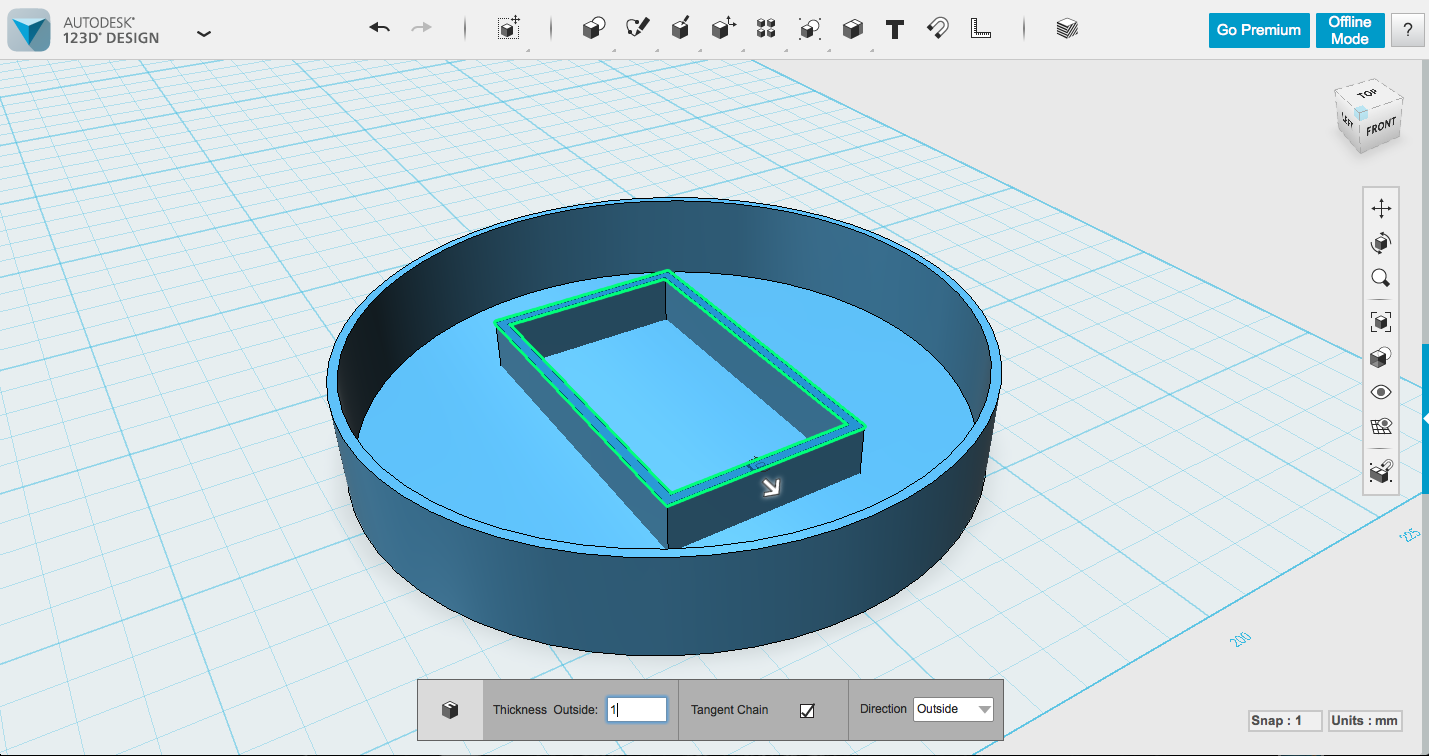
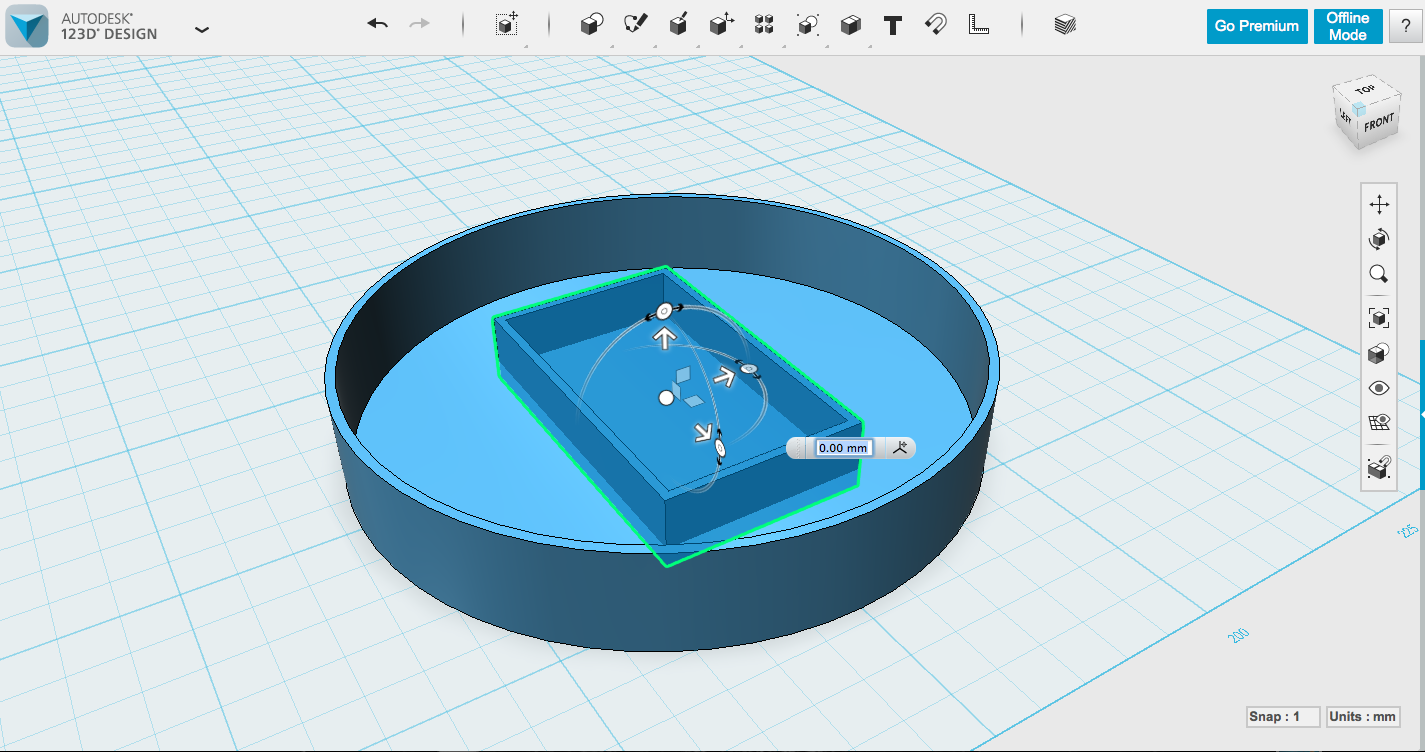
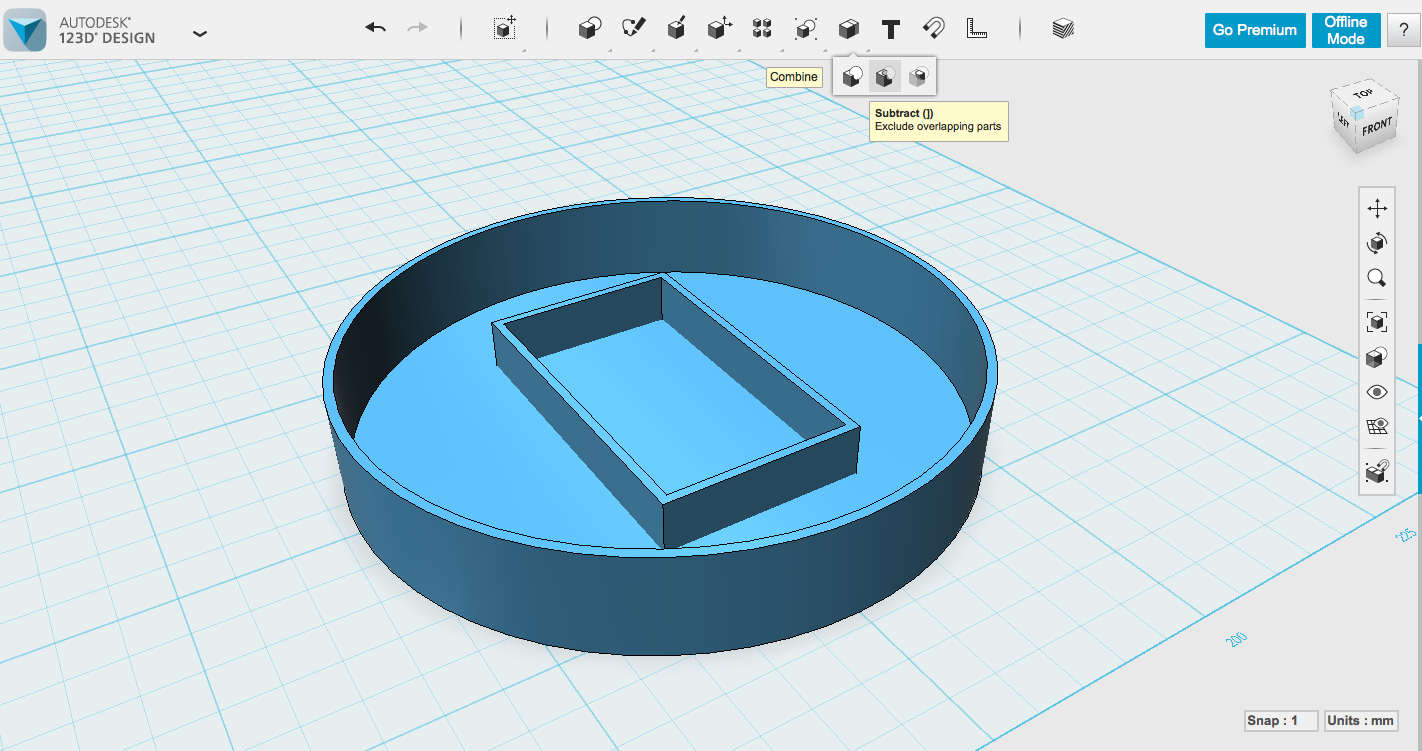
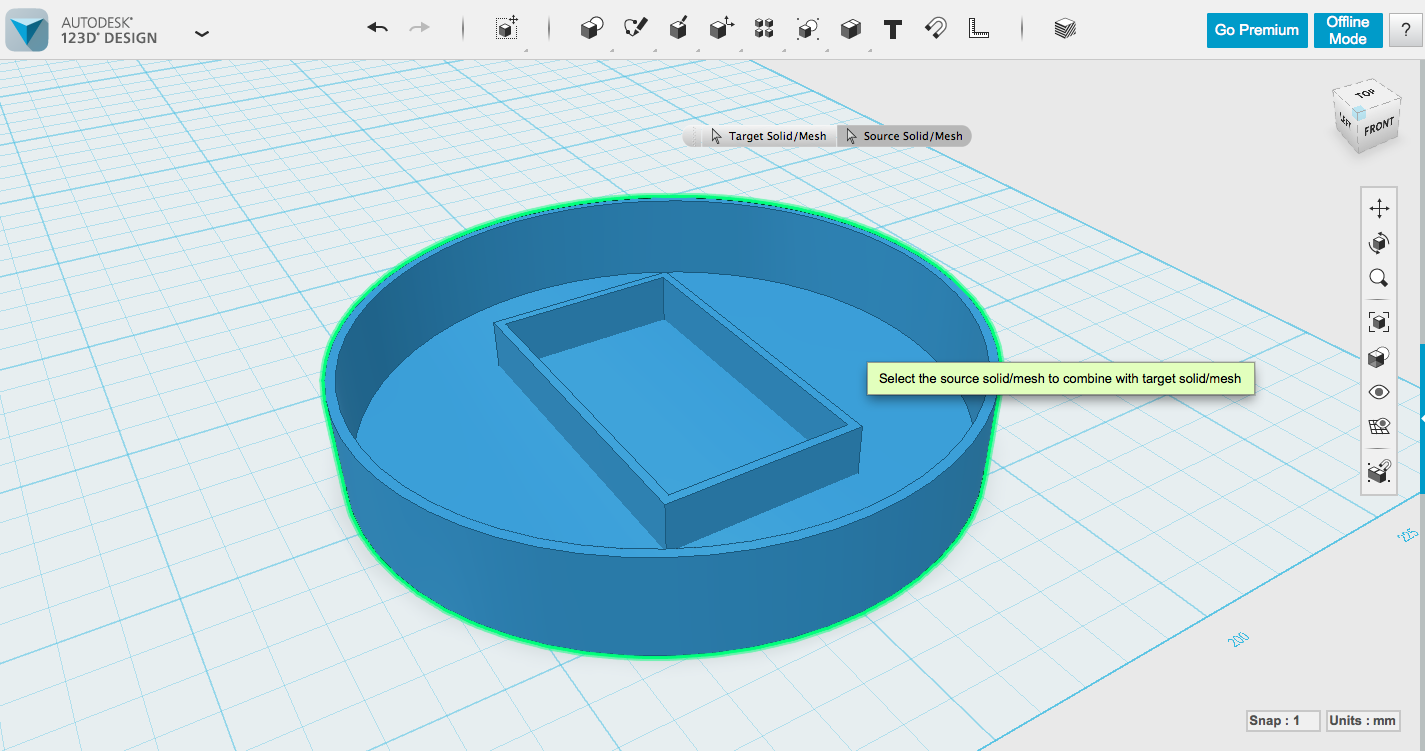
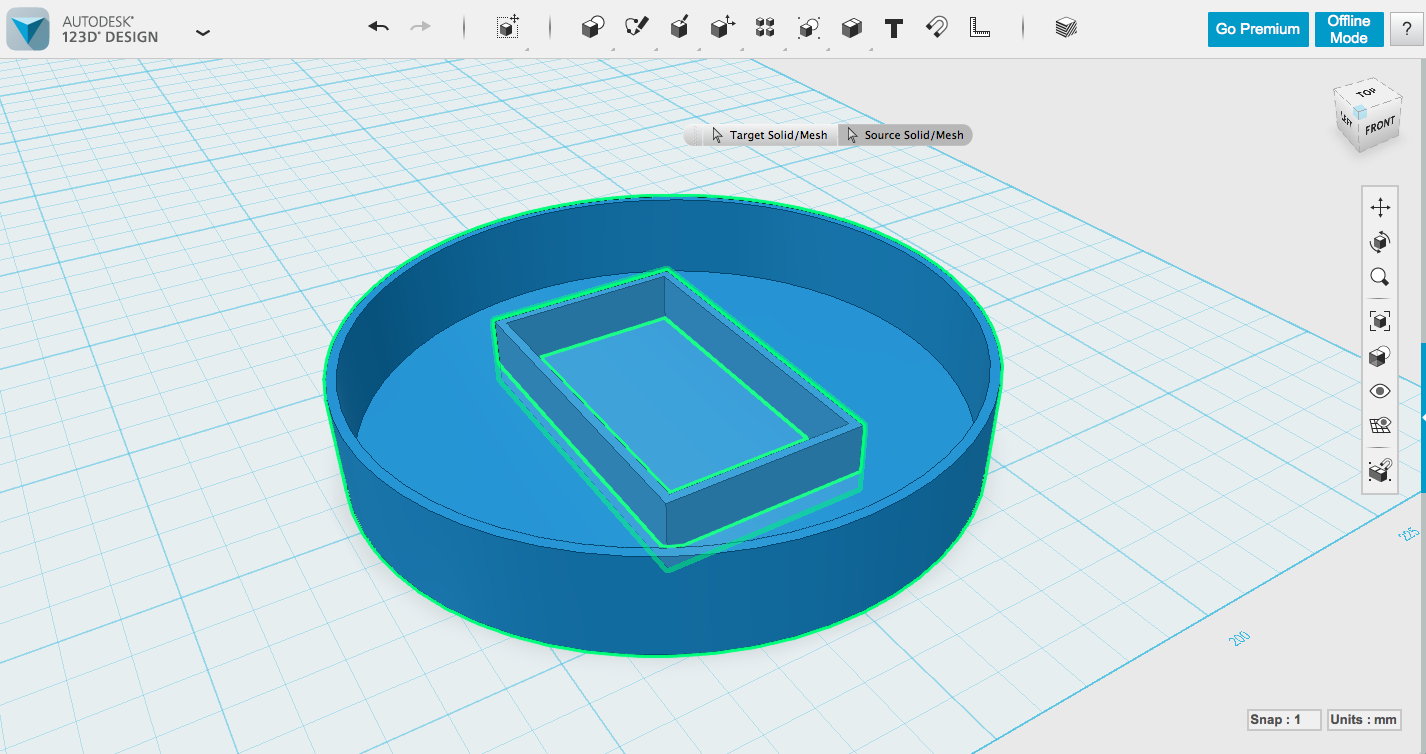
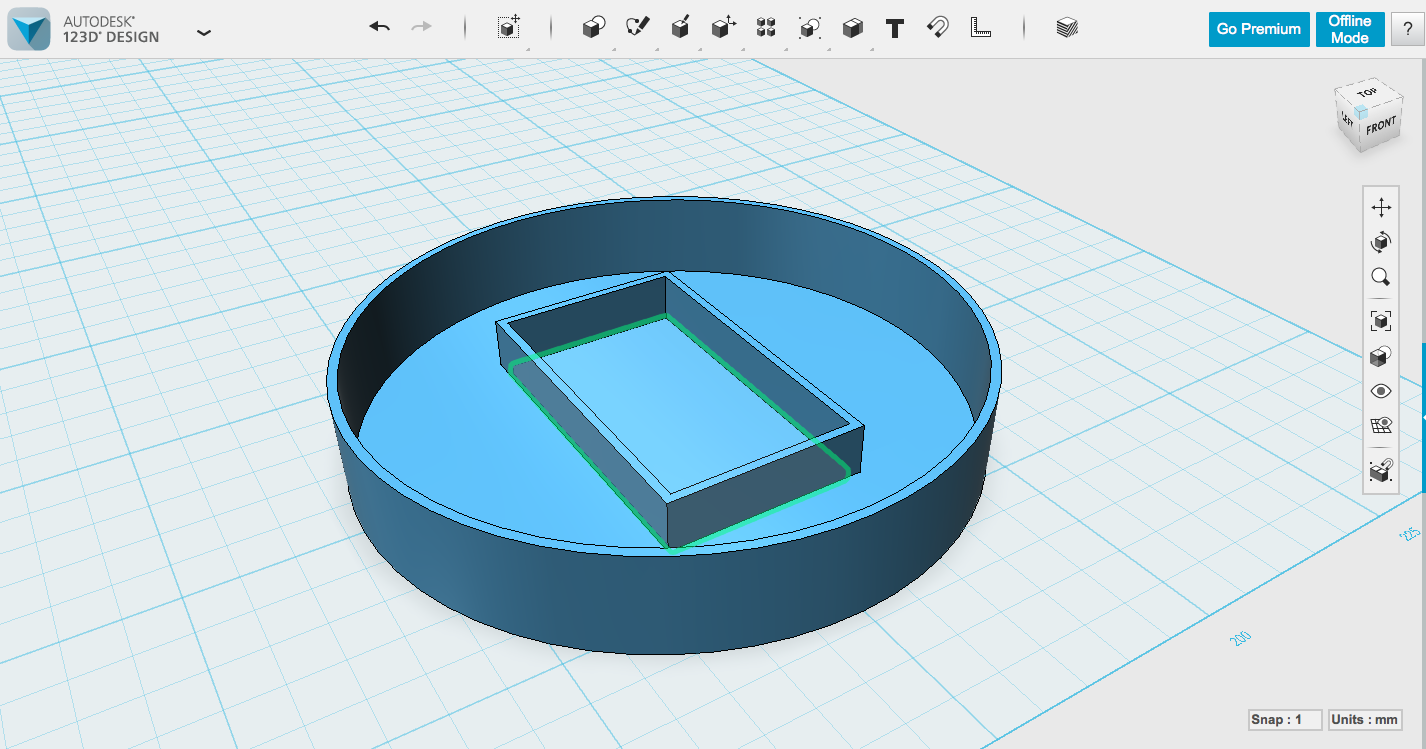
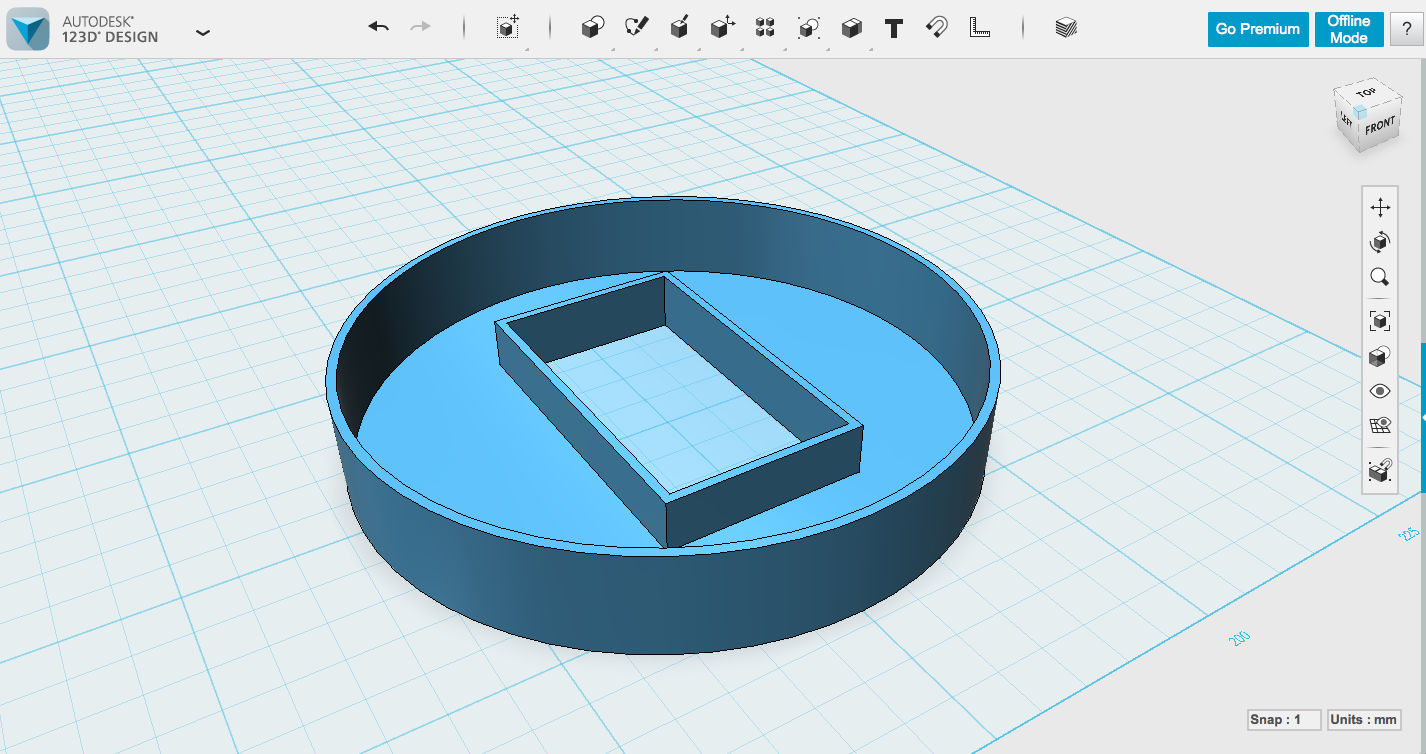
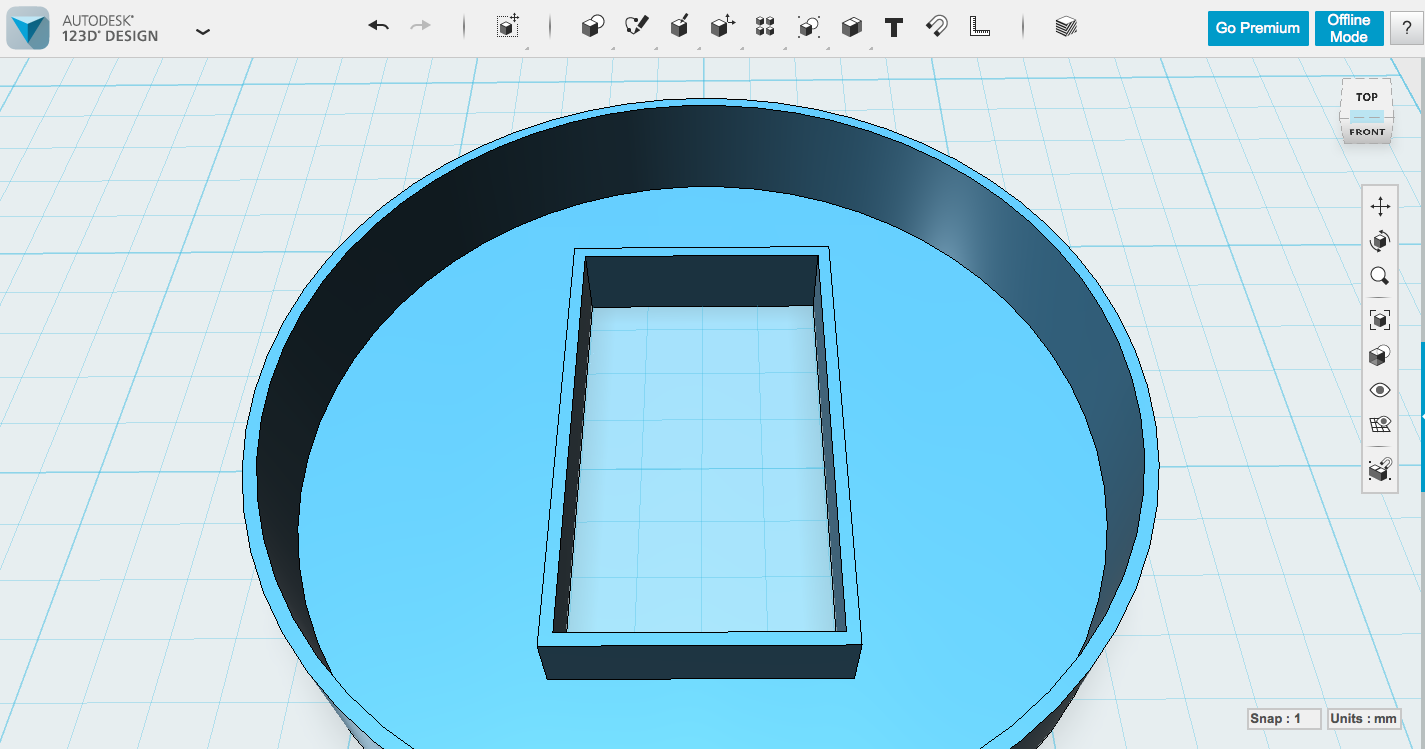
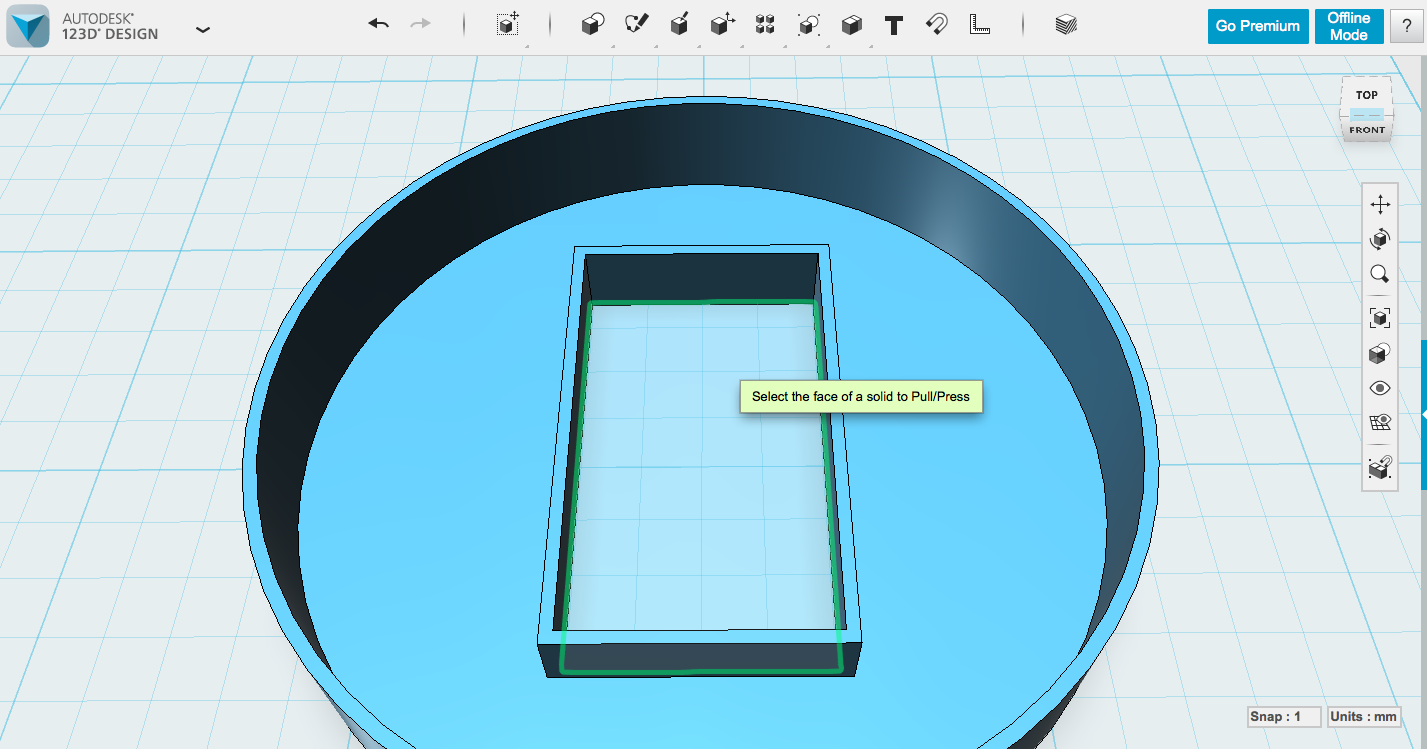
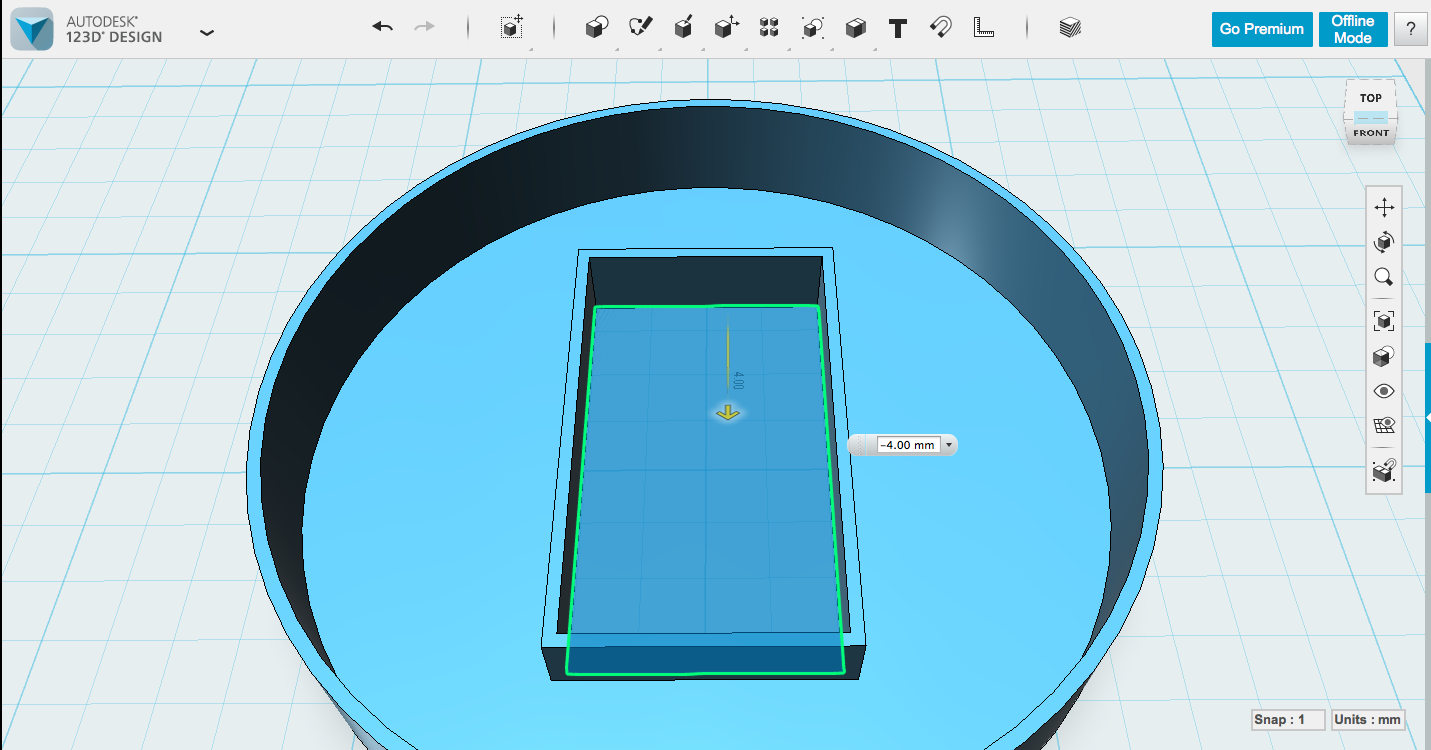
There are many ways of doing this, which you're welcome to explore. A straightforward way is to evaluate the basic shapes involved and then use them to modify each other. For a flat diffuser, I created a cylinder the size of the Internet Button Shield, a box the size of the Spark Core, and a couple other boxes for supports and the cord opening.
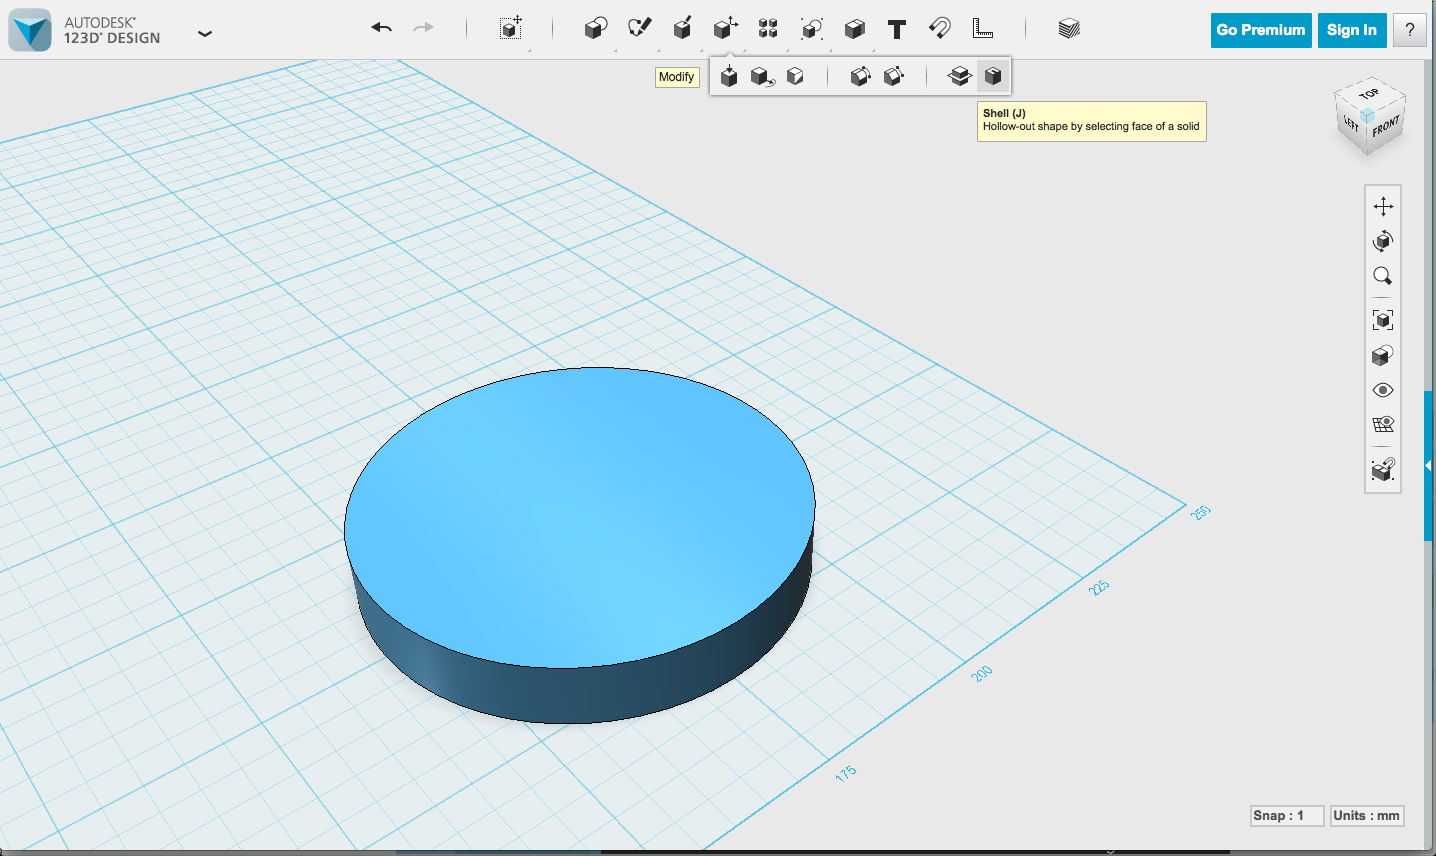
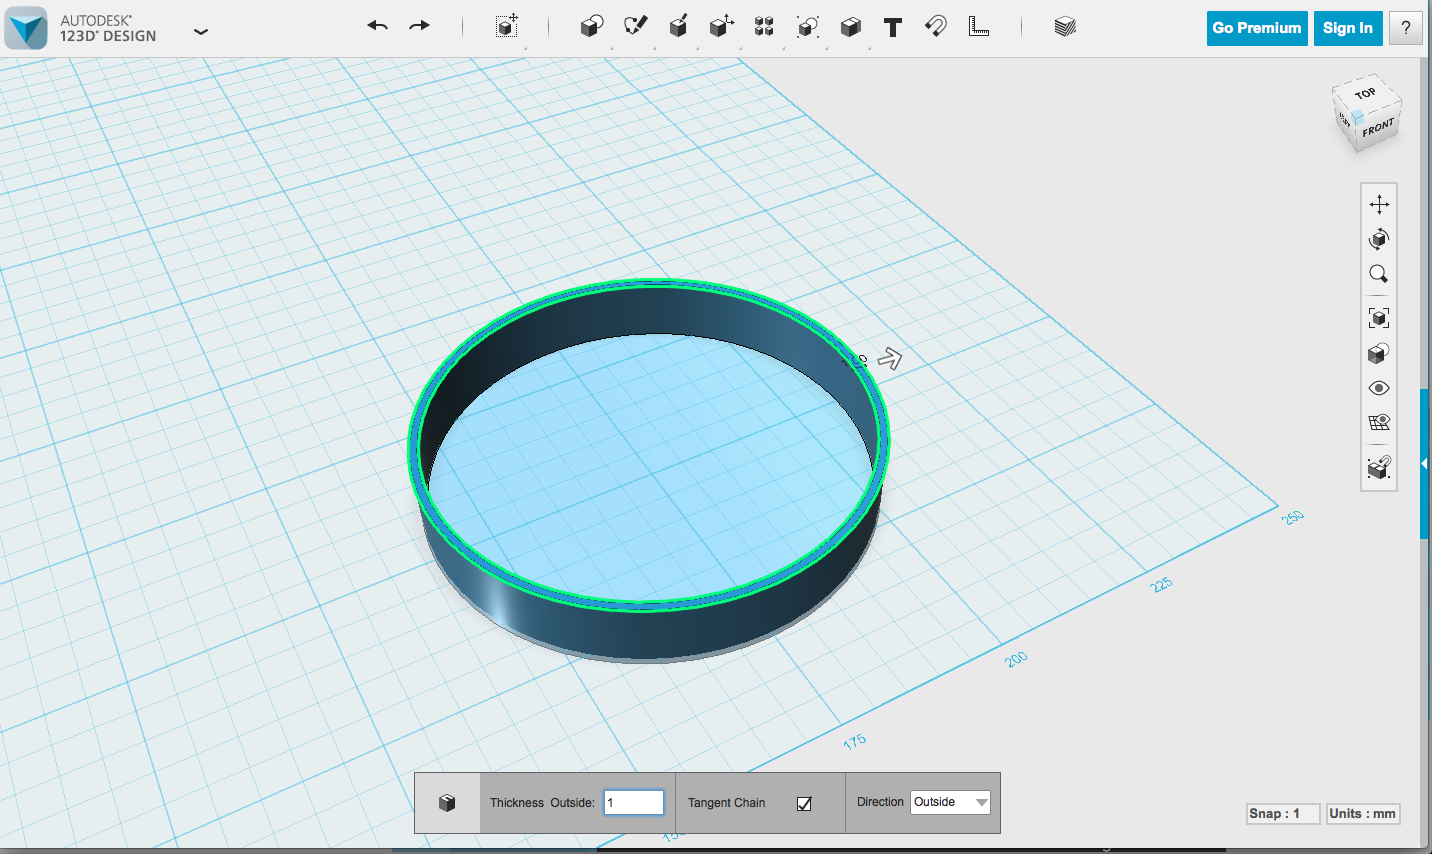
My main cylinder has the same radius as the Internet Button Shield (32.5mm), and goes from the top of the Spark Core to just above the button action on the underside of the shield (11mm). I want this diffuser to let as much light as possible through, so I used the Modify -> Shell command to hollow it out. A millimeter is a good thickness for the walls to let enough light through. Make sure to change the Direction to Outside so that the wall goes around your 32.5mm radius. You need all that space inside.
To create the bracket for the Spark Core at the center, I made a box with the measurements I took in the previous step (35 x 19.25 x 6.7mm). This part is located directly in the center of the Internet Button, which makes things easy. The easiest way is to create the box in the center of the cylinder by mousing over until you find where the cursor snaps to the center and entering your dimensions there. You can also create it elsewhere and use the Magnet tool to snap it to the center of that surface (and then ungroup them to make it a separate object again). I dropped it to the bed (press 'd'), and hollowed it out the same way I did the cylinder.
Now we have two hollowed-out shapes. One of the fun parts of modeling is using objects to modify other objects. Combine -> Subtract will take one object and cut away from it the overlapping area from the second object you select. (Important note: this process removes the second shape you select, so make a copy if you still want it afterward.) So, to clear out that space in the center, I duplicated the box in place (select, copy, paste, return), then Subtracted the box from the cylinder (select cylinder first, then the box - order is important here). Since there were two there, you won't see a difference at first, but you've made the cylinder into two pieces, one of them that center section in the middle of the box. Click it and hit delete.
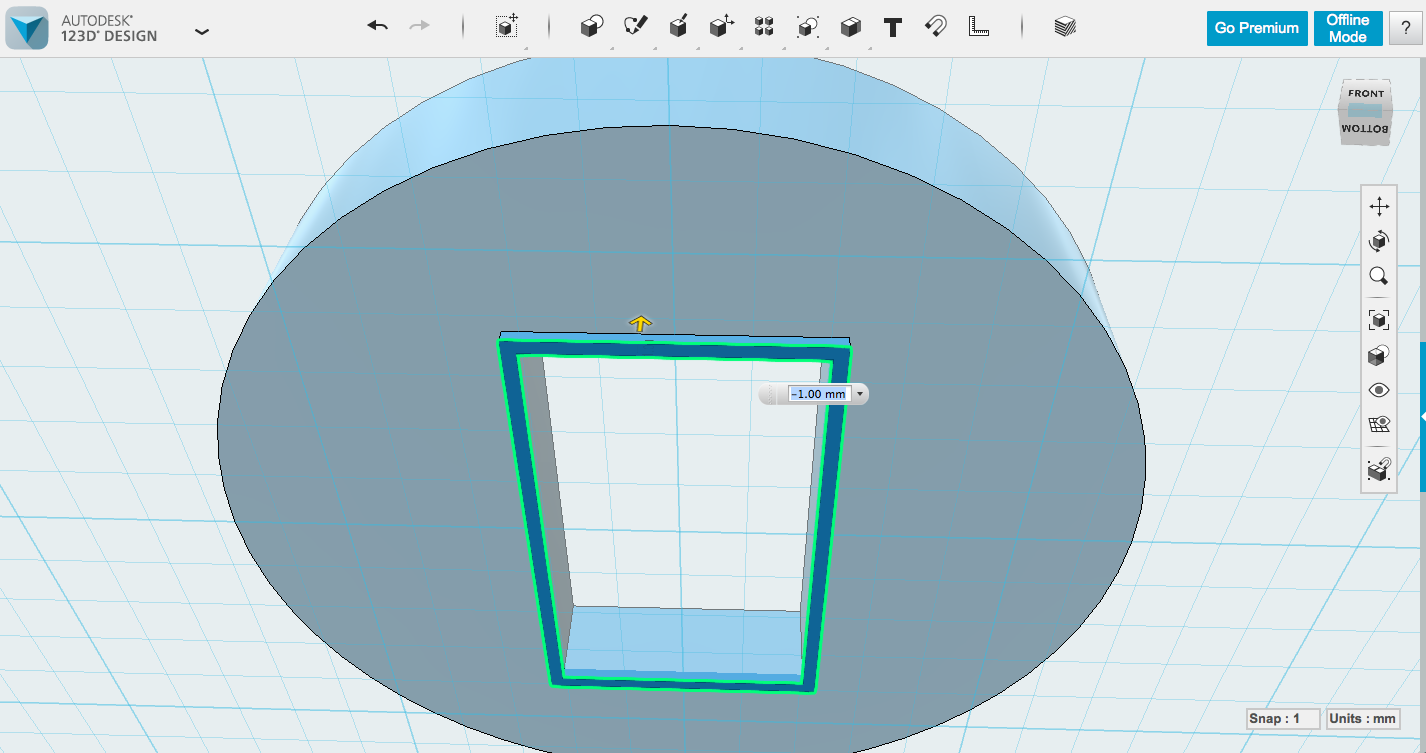
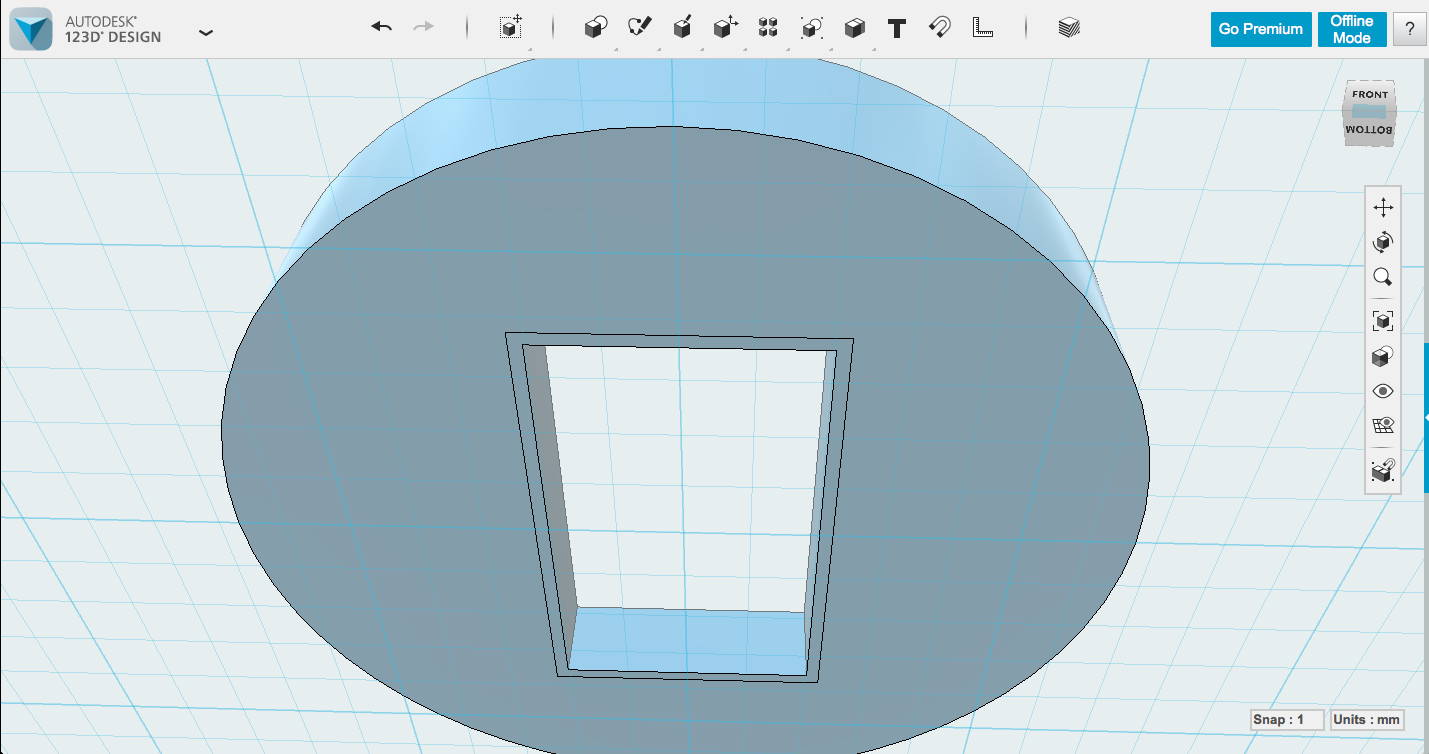
The box still has three sides though, alas, alack! Press/Pull to the rescue. Shift your view until you're looking at the underside of the model, click Modify -> Press Pull, then select the face of the box that's poking out down there. If you've made the walls of your hollowed box 1mm, you should only need to move the arrow up 1mm to come flush with the bottom of the cylinder and remove that wall. Try playing around with Press Pull; it's handy and I use it a lot to manipulate shapes. It's convenient that you can remove part of an object just by moving a wall beyond where the other border is.
Now we have the base shape with an opening for the Spark Core to poke out.
Modeling the Case - Cord Opening, Simple Version
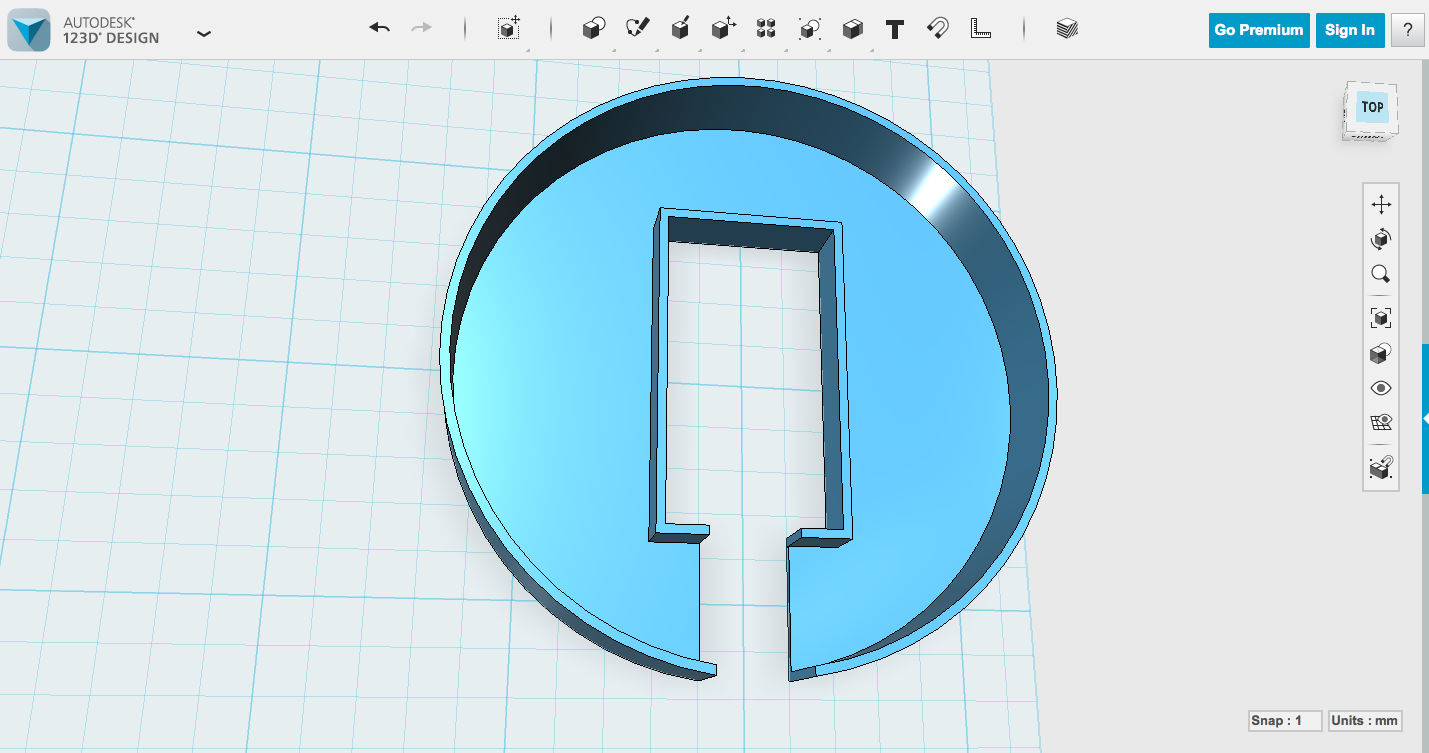
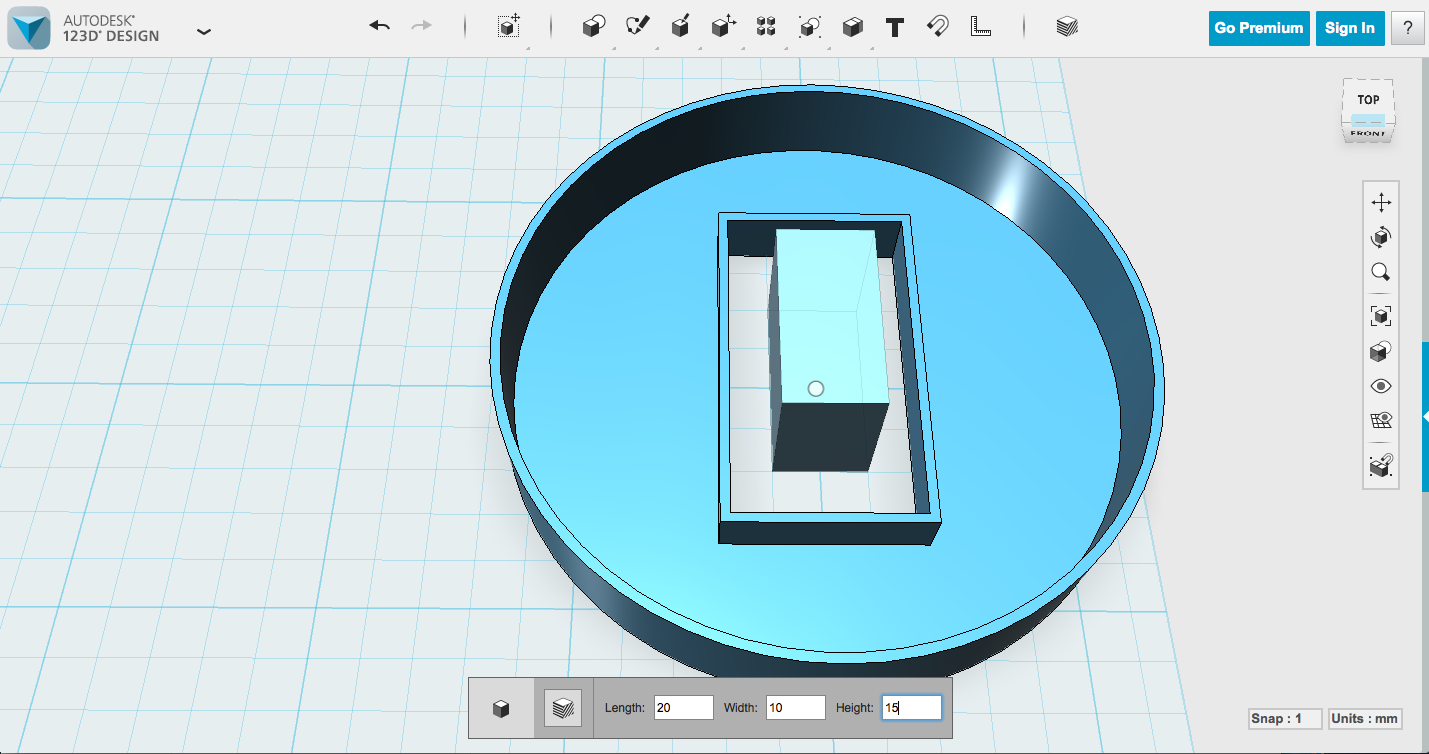
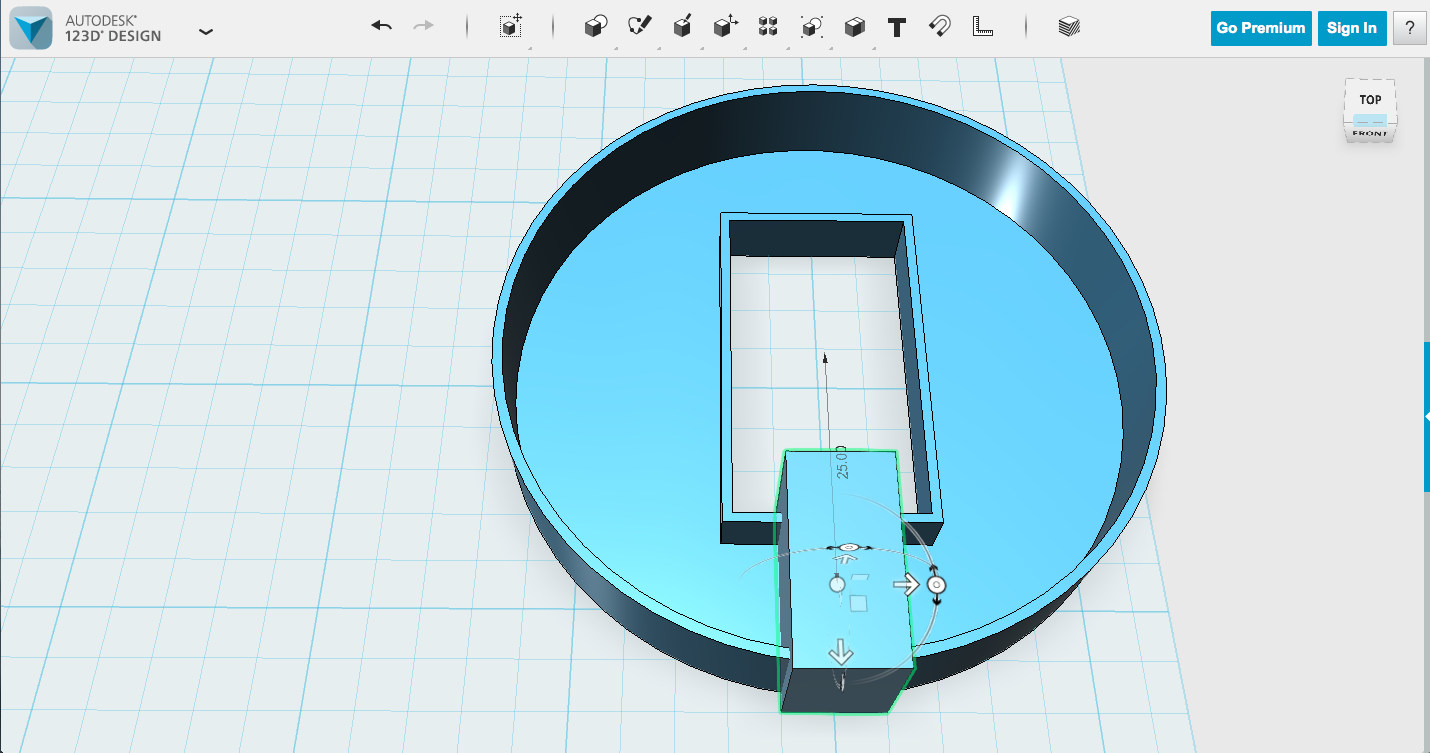
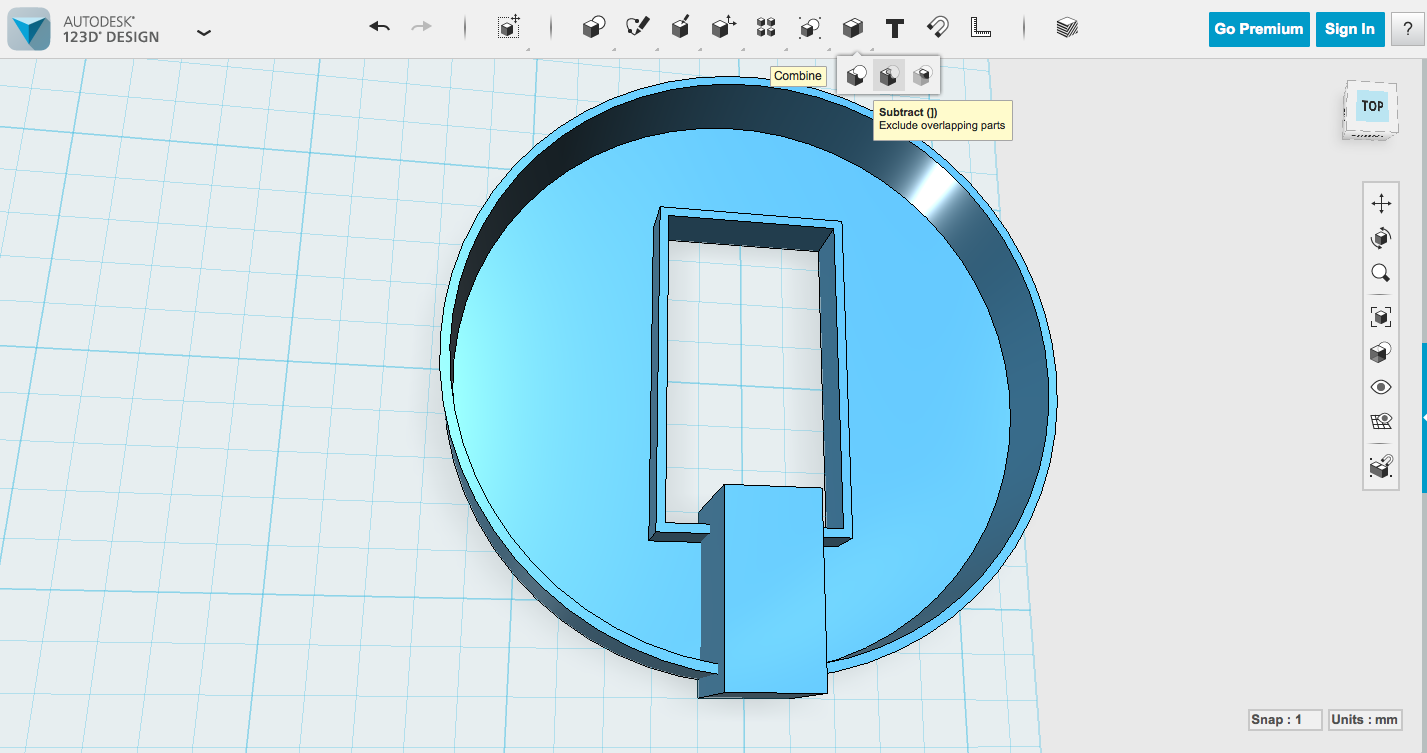
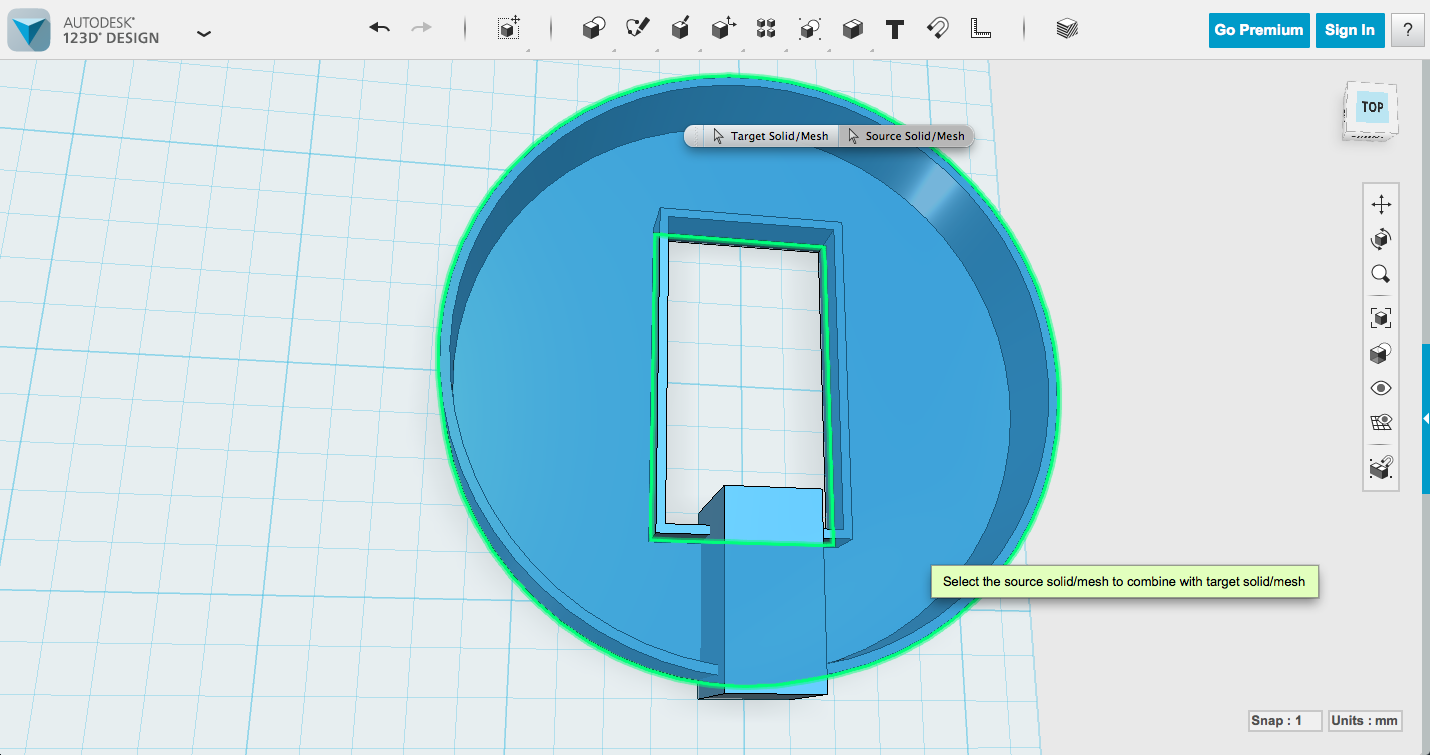
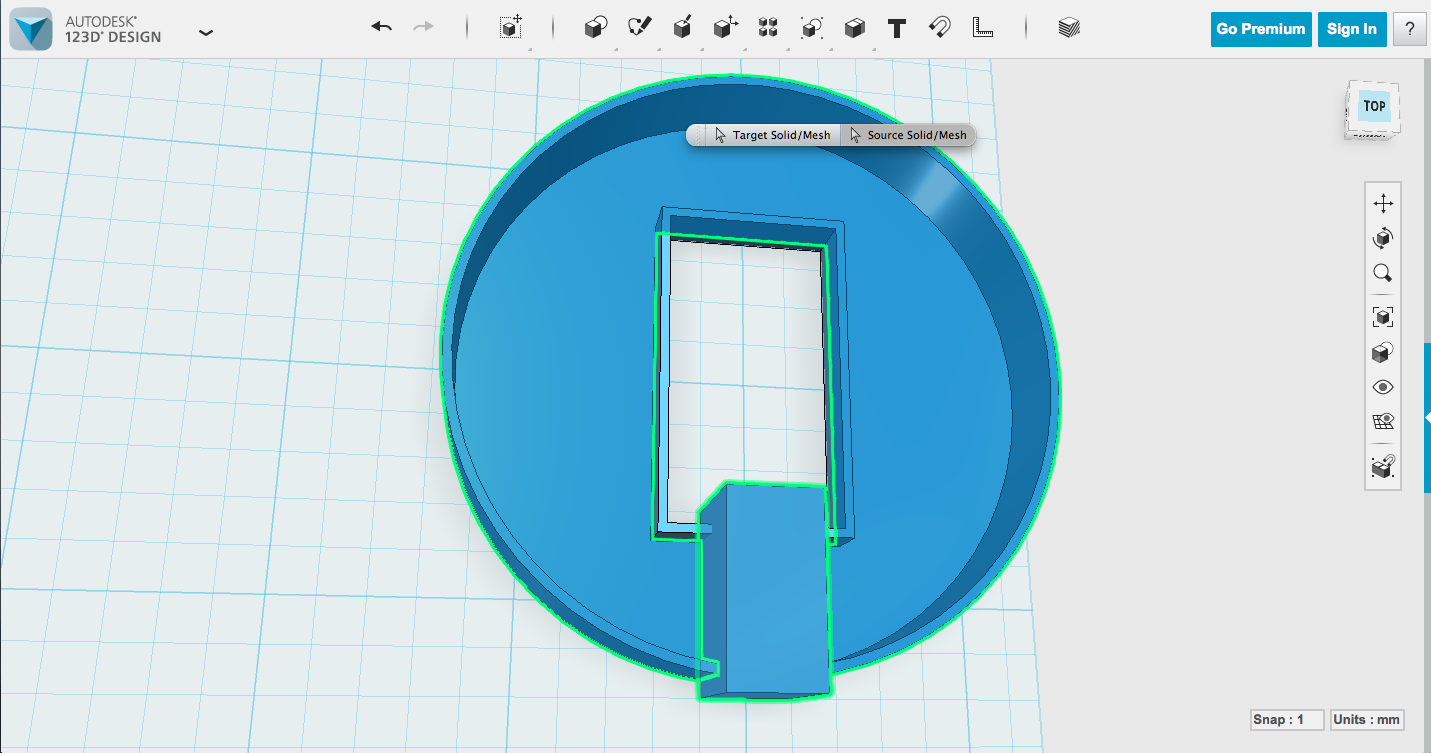
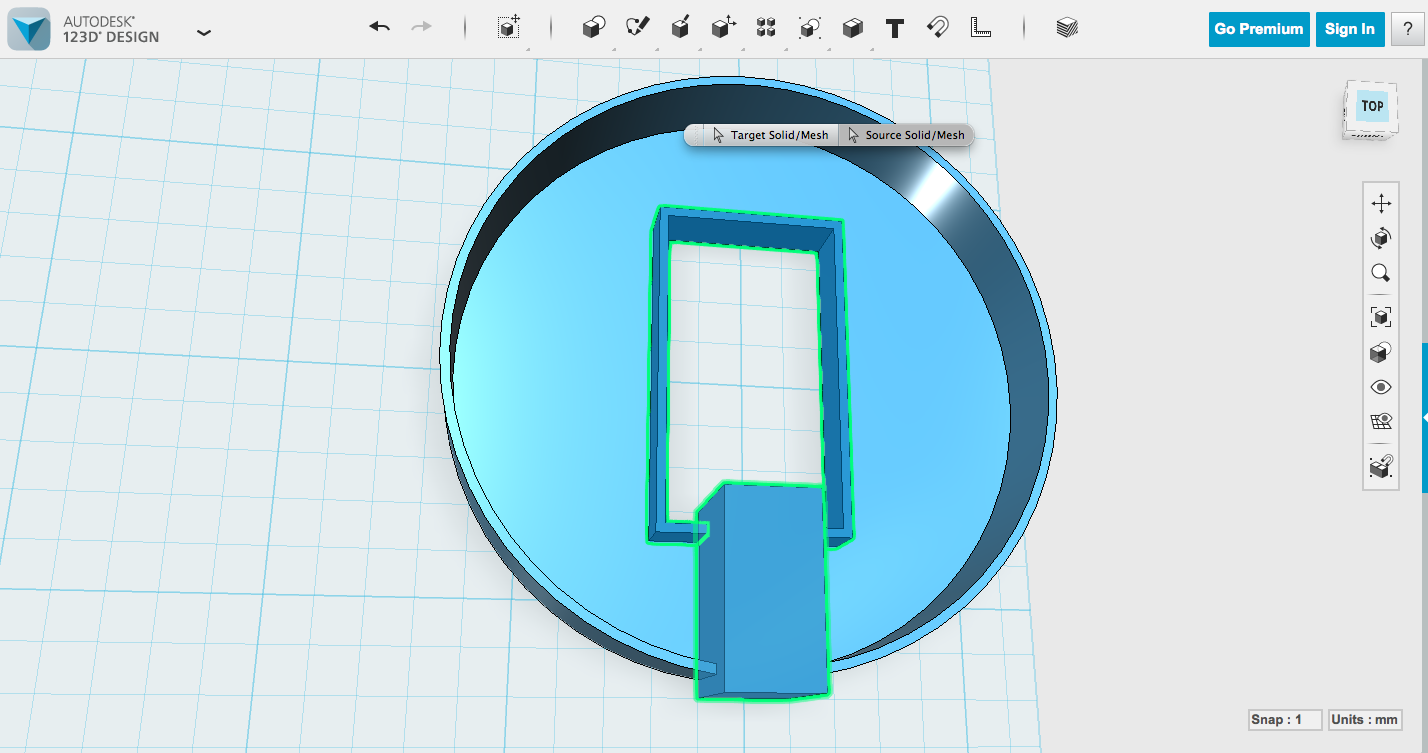
Next thing we need to do is make that cord opening so you can plug in your Spark Core. If you just want a plain opening to the side for your cord, you can do this step very very simply, by making a 20 x 10 x 15mm box and subtracting it from the edge of the main cylinder.
I'm doing this tutorial to show you some more techniques that you can incorporate in different designs. If you want the Spark Internet Button case I designed, you can download and print it. The next step will show you a more complicated version that teaches other ways to have shapes interact.
Modeling the Case - Cord Opening, Cooler Version
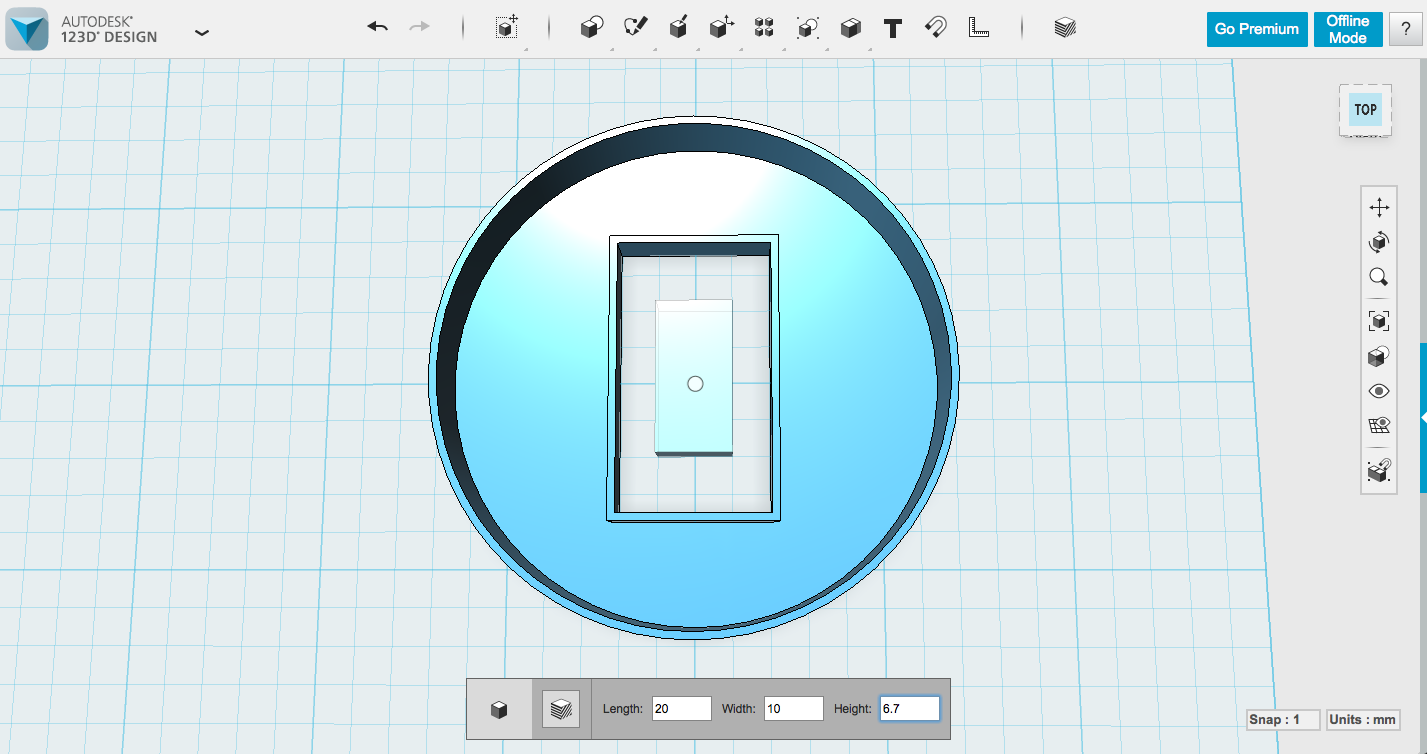
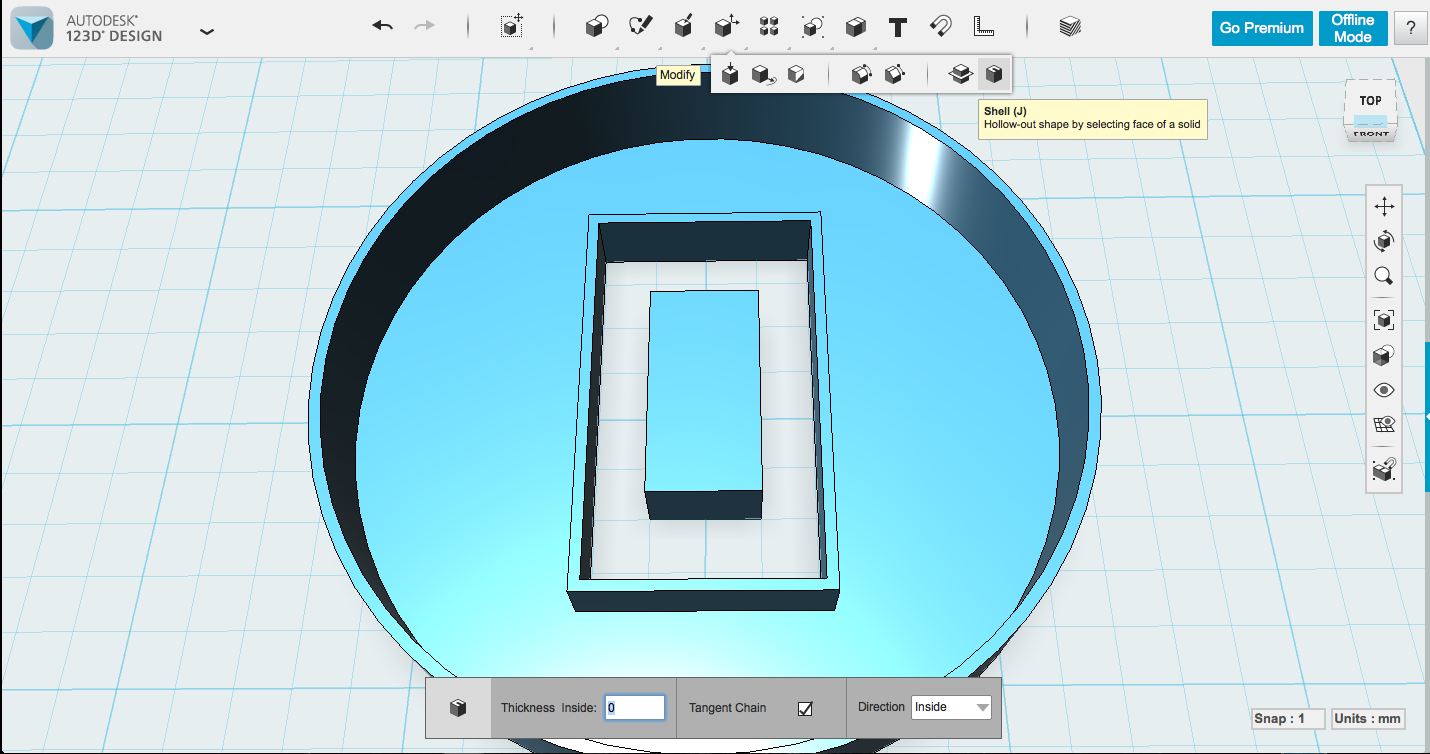
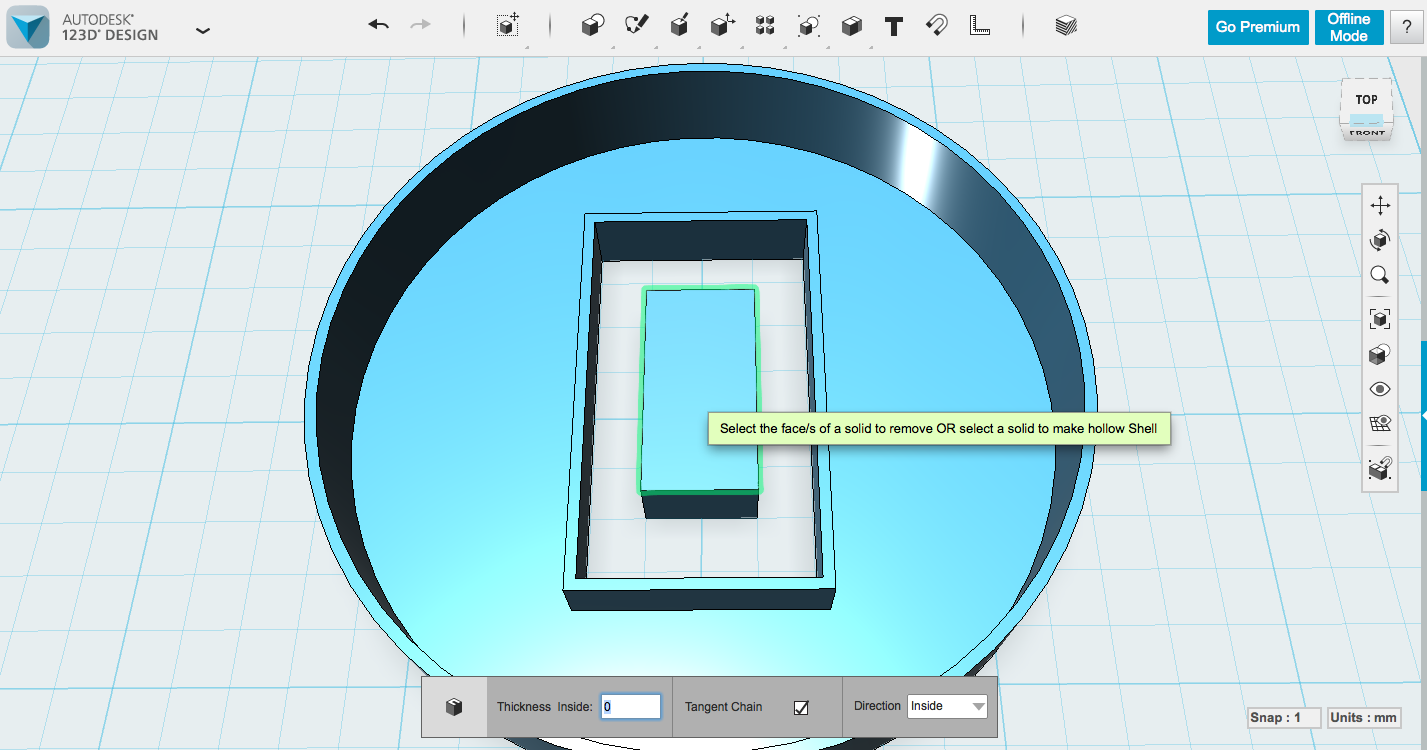
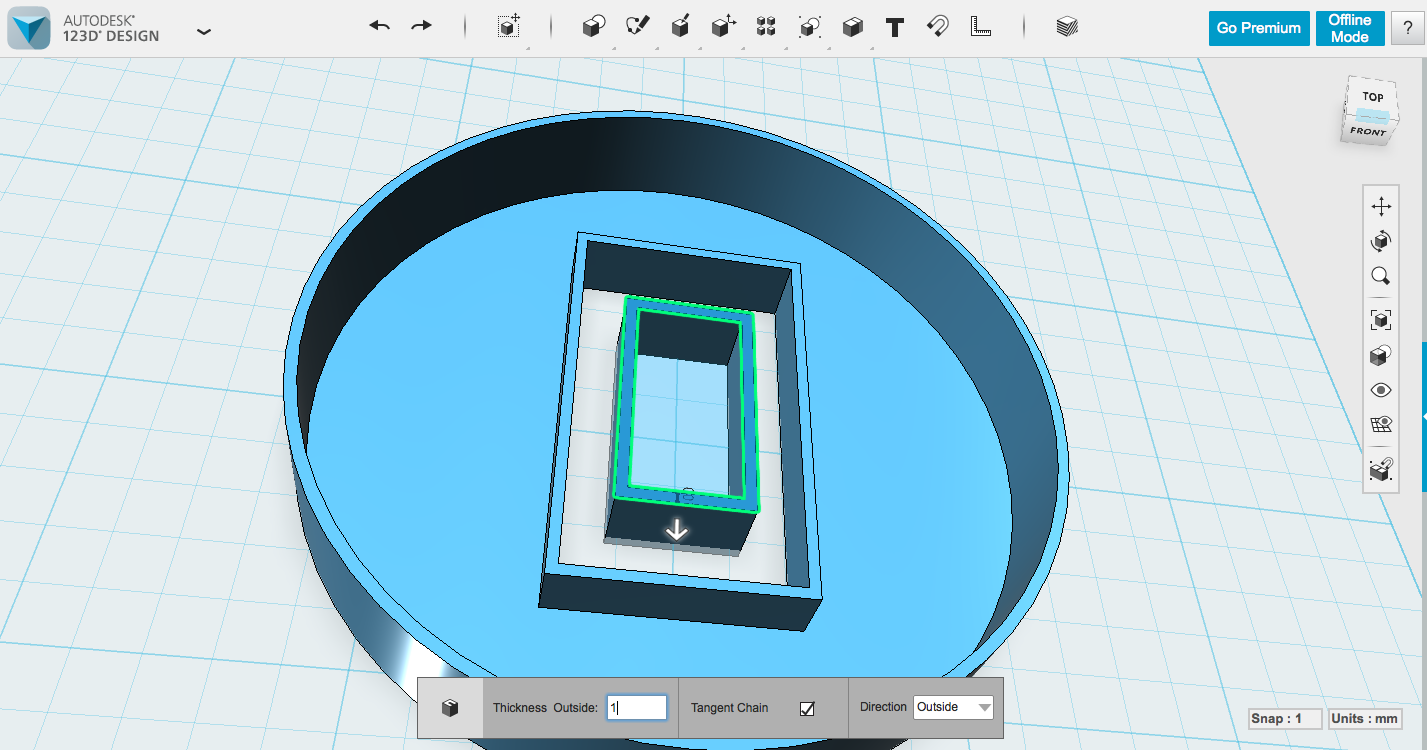
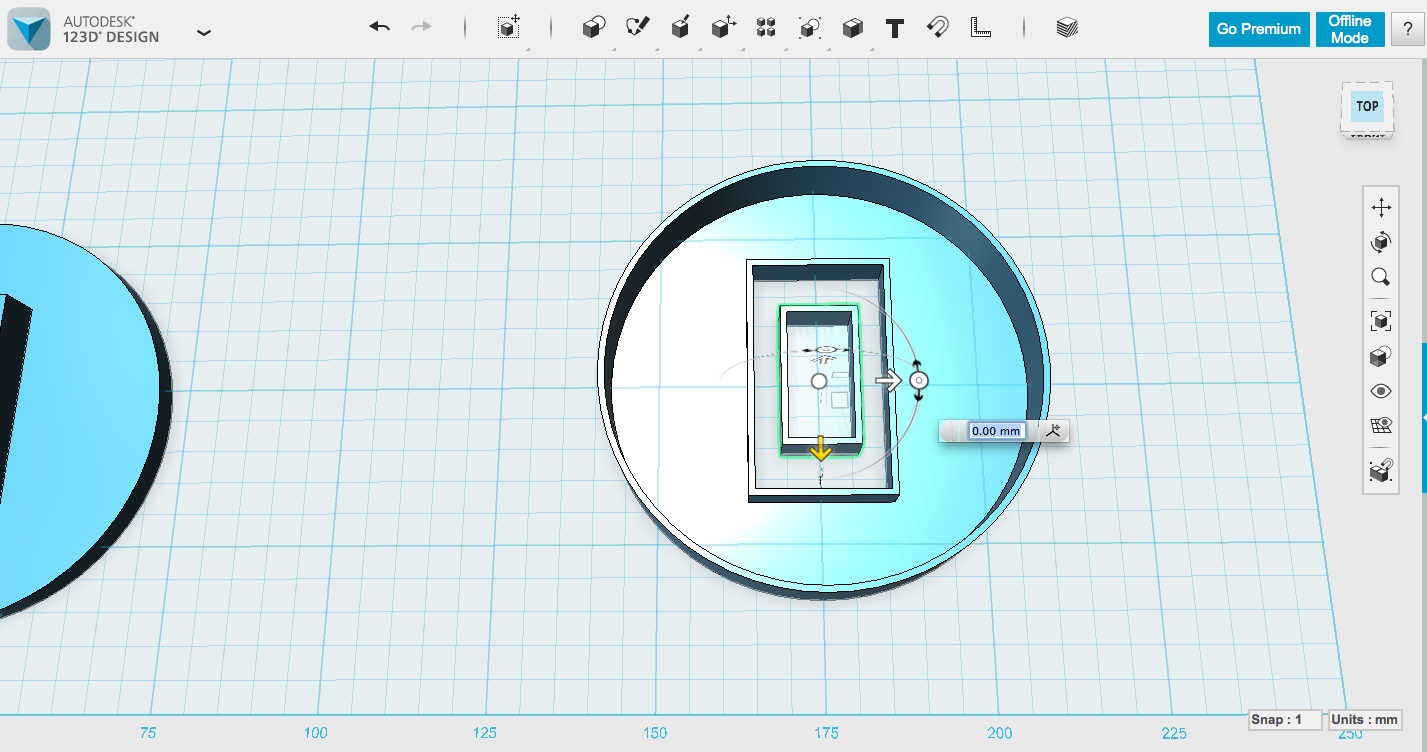
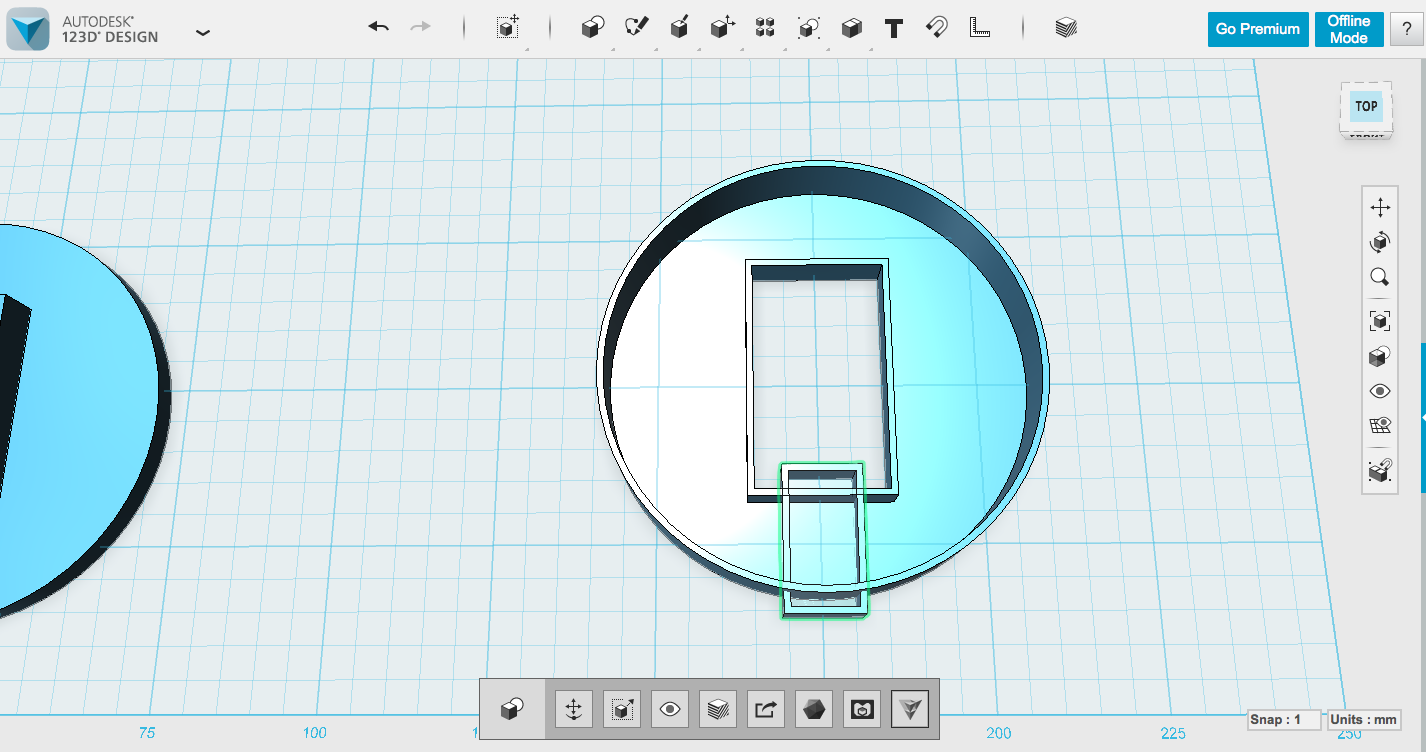
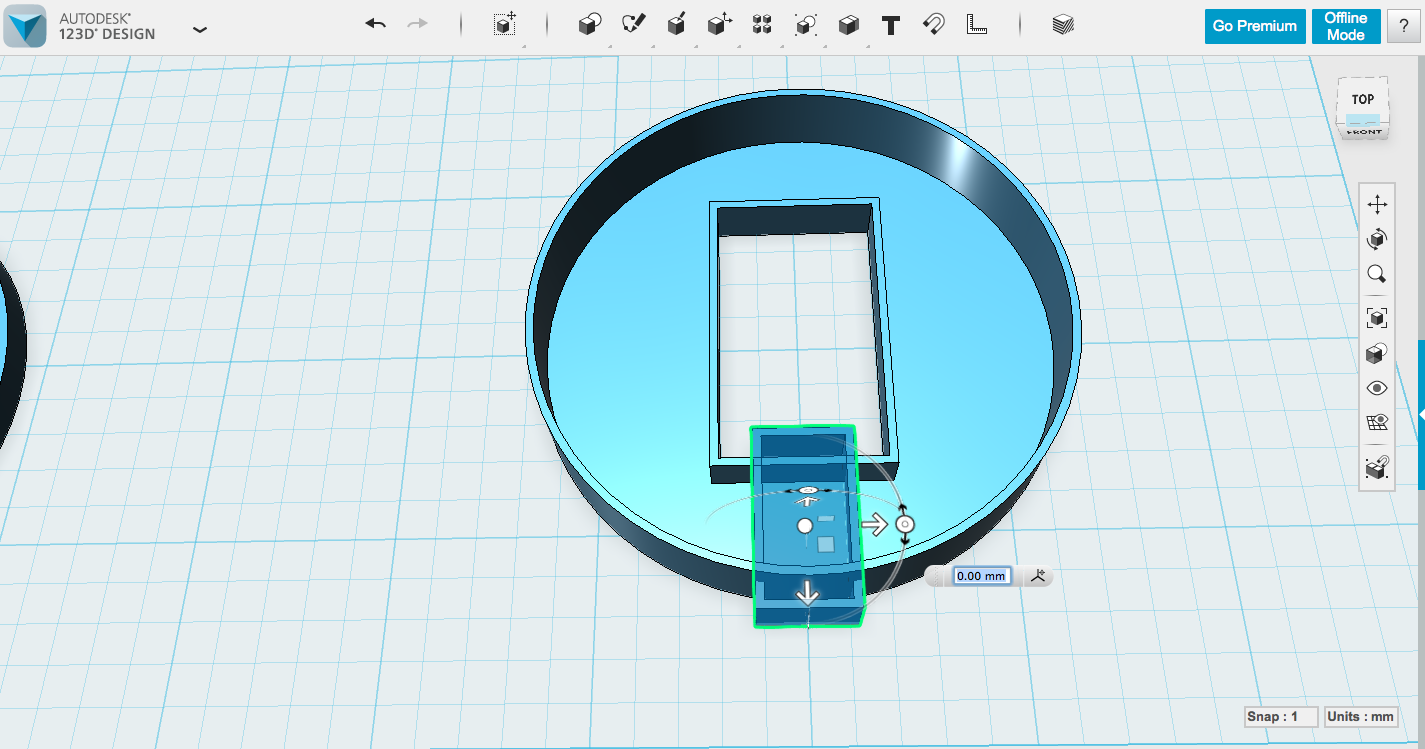
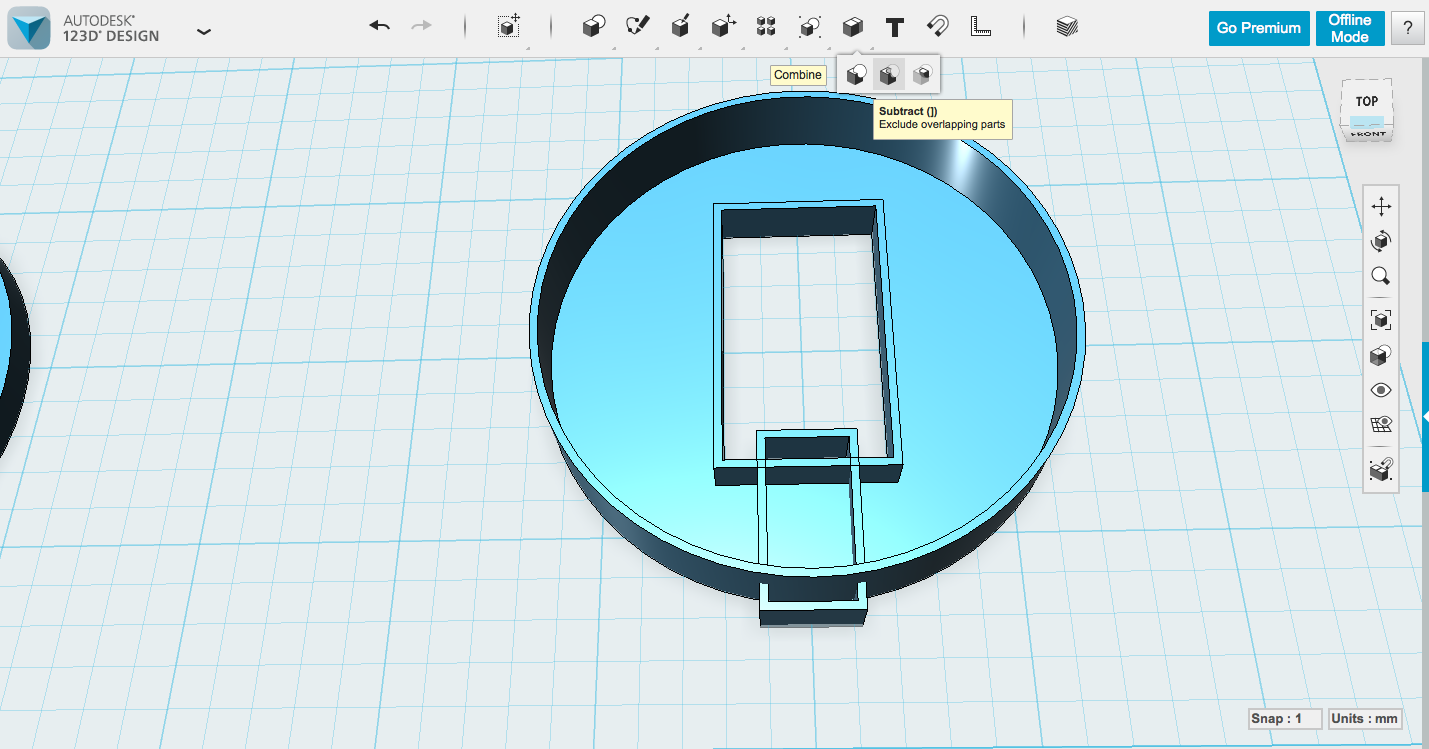
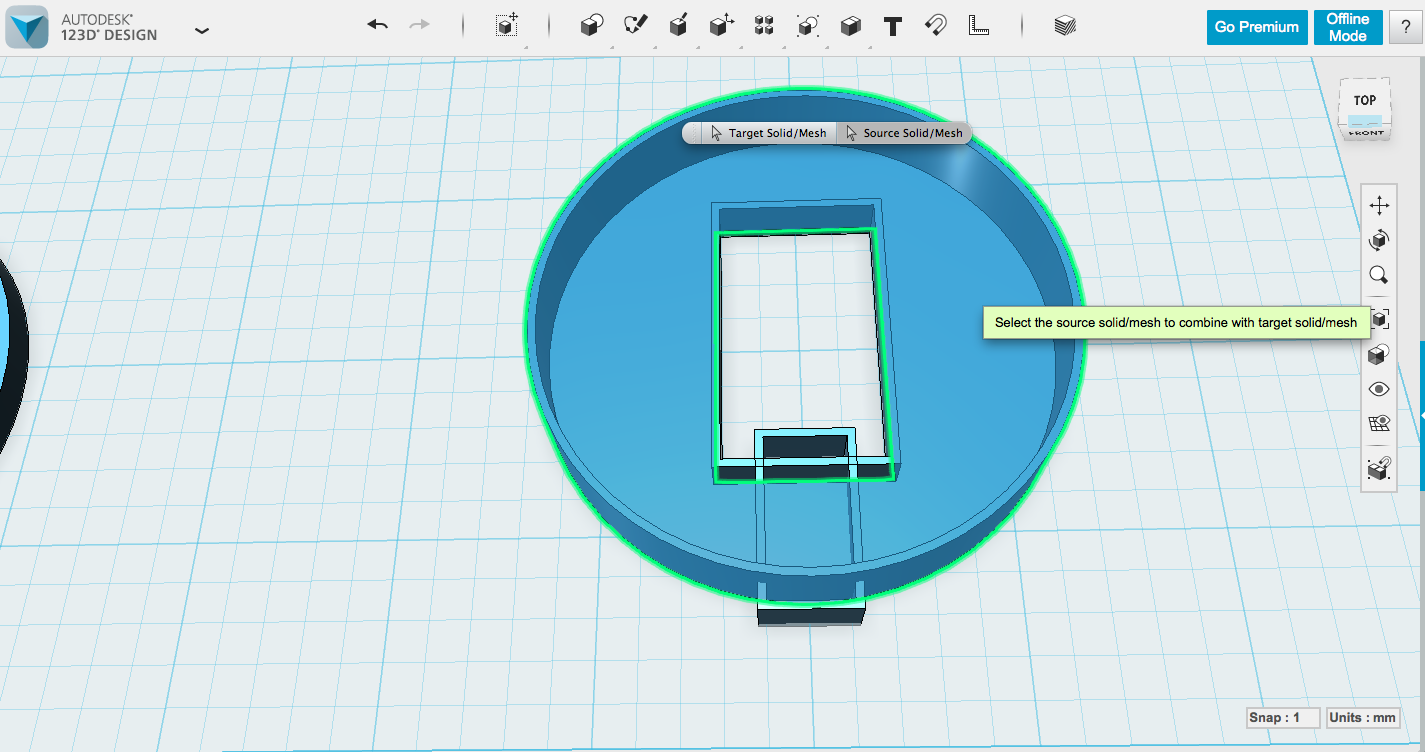
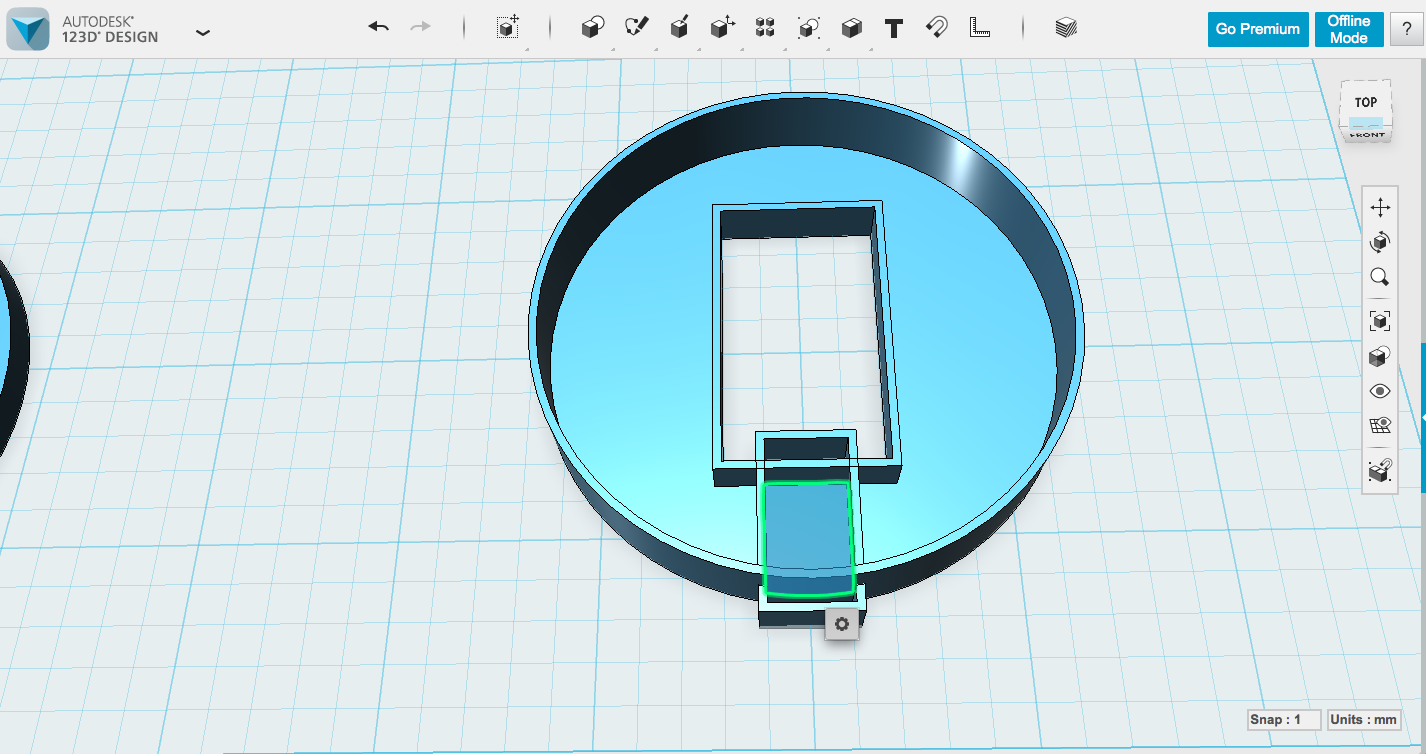
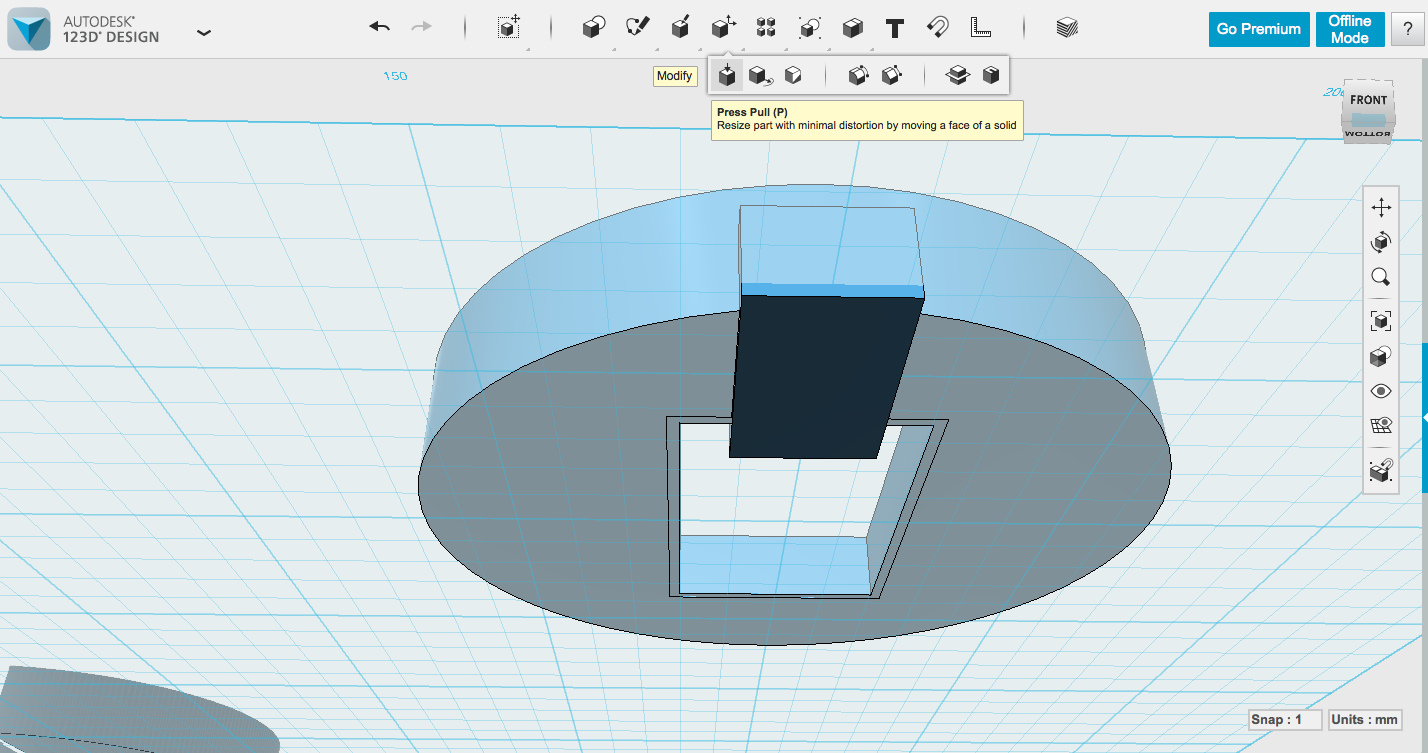
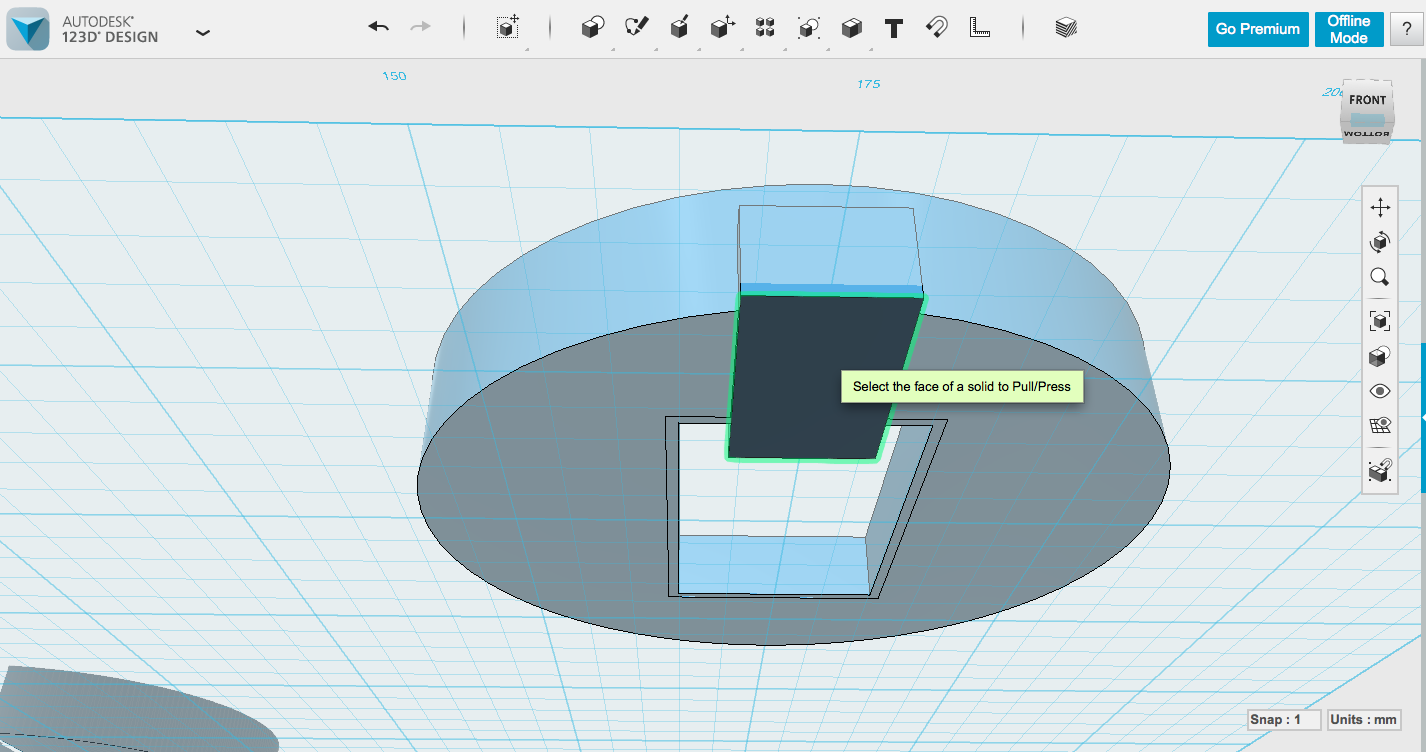
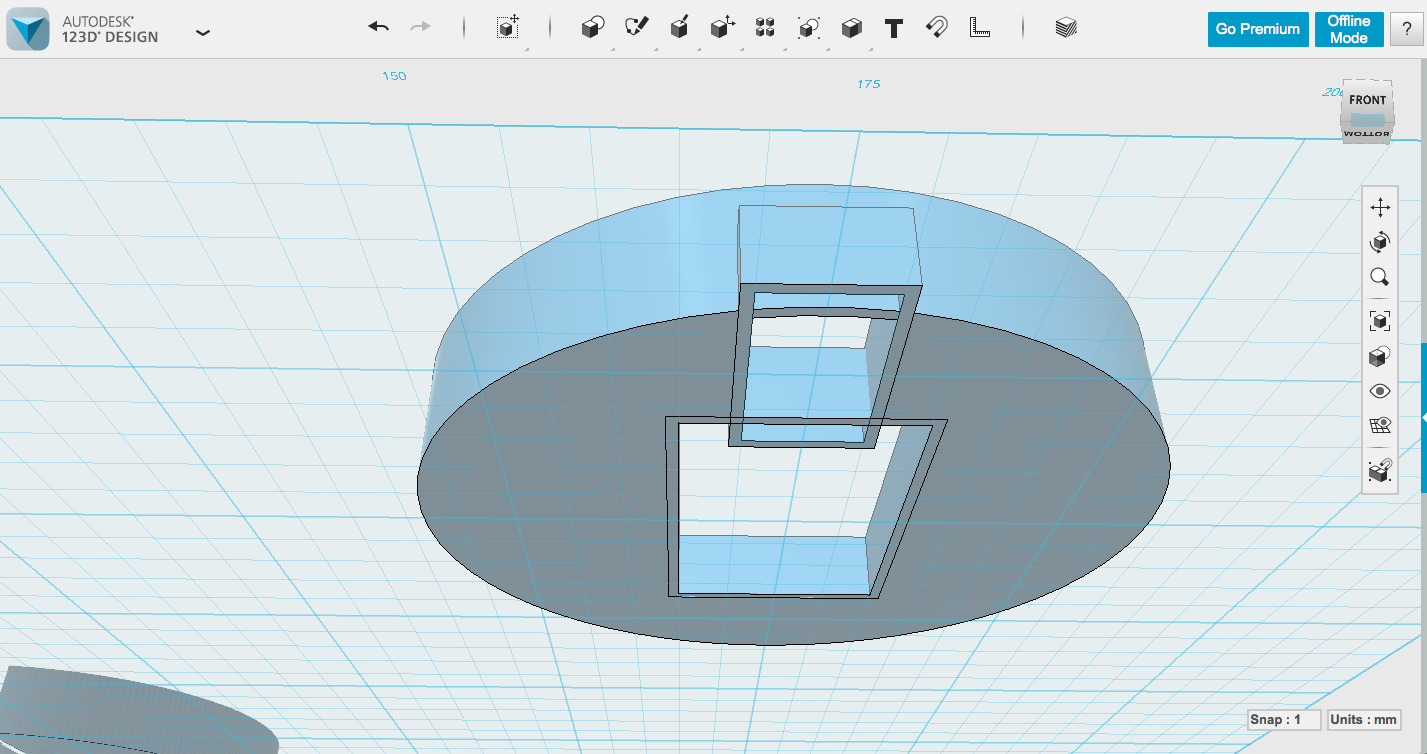
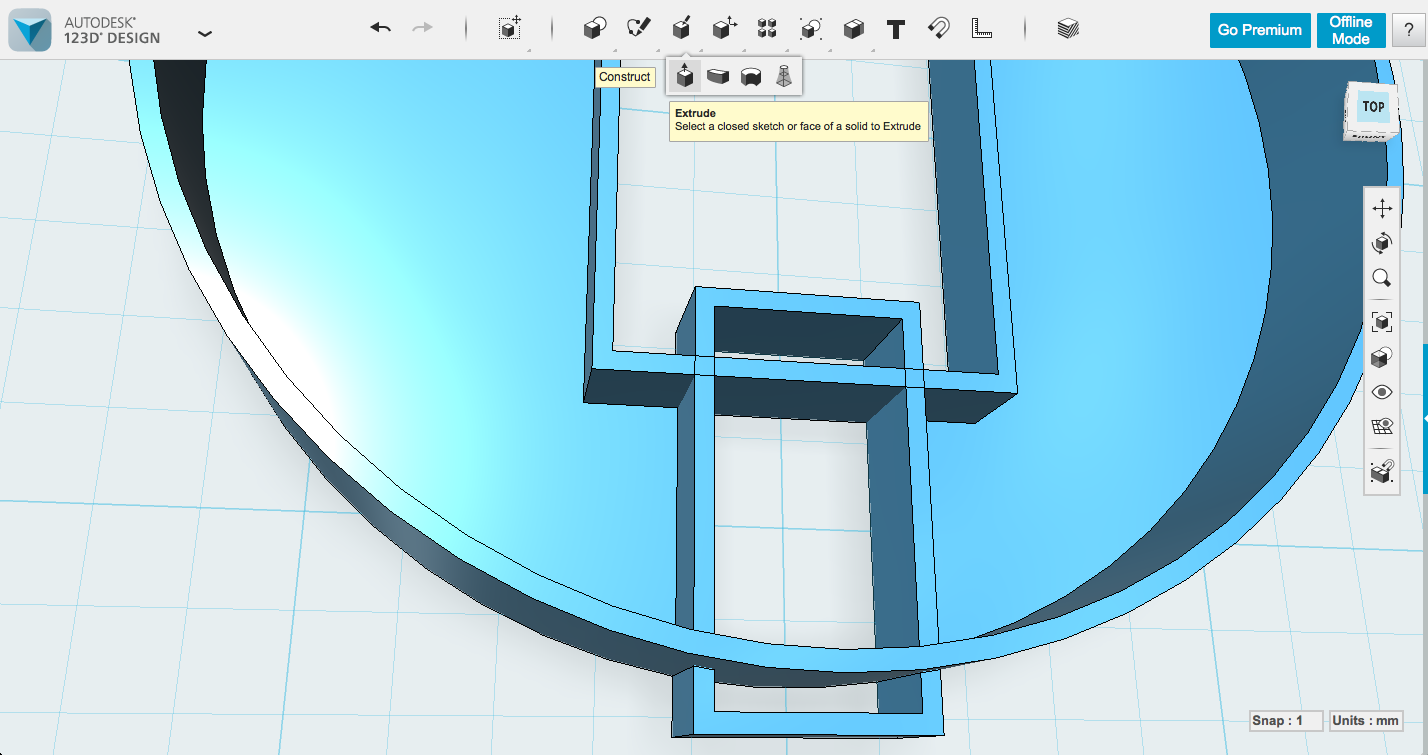
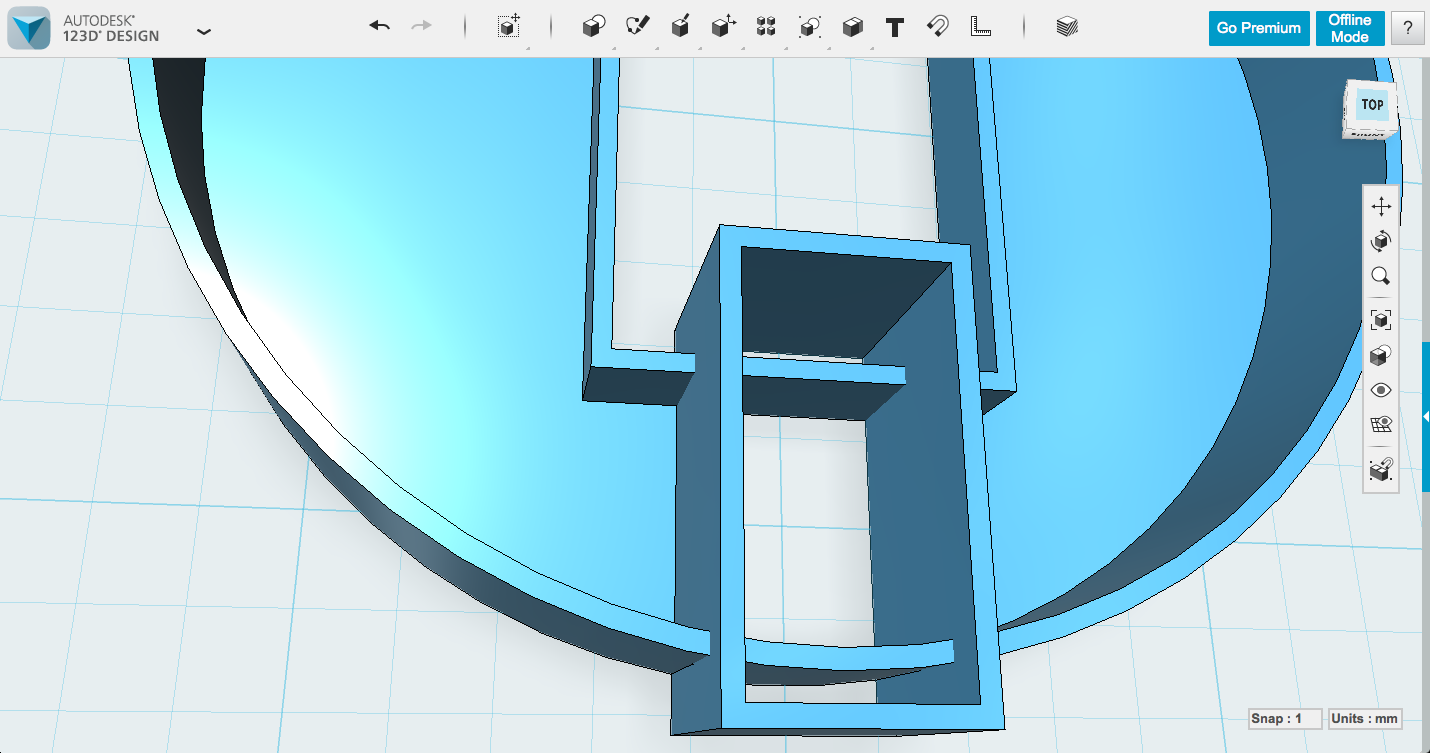
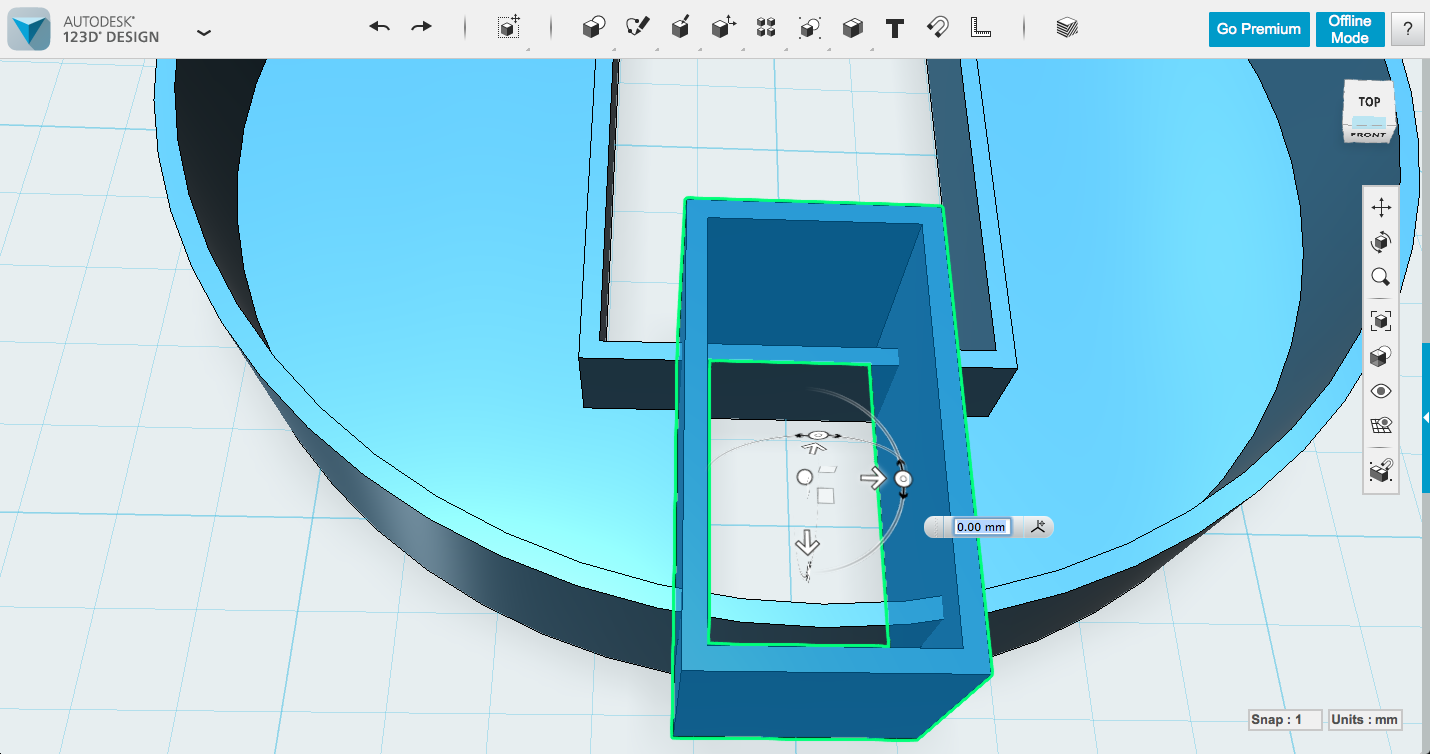
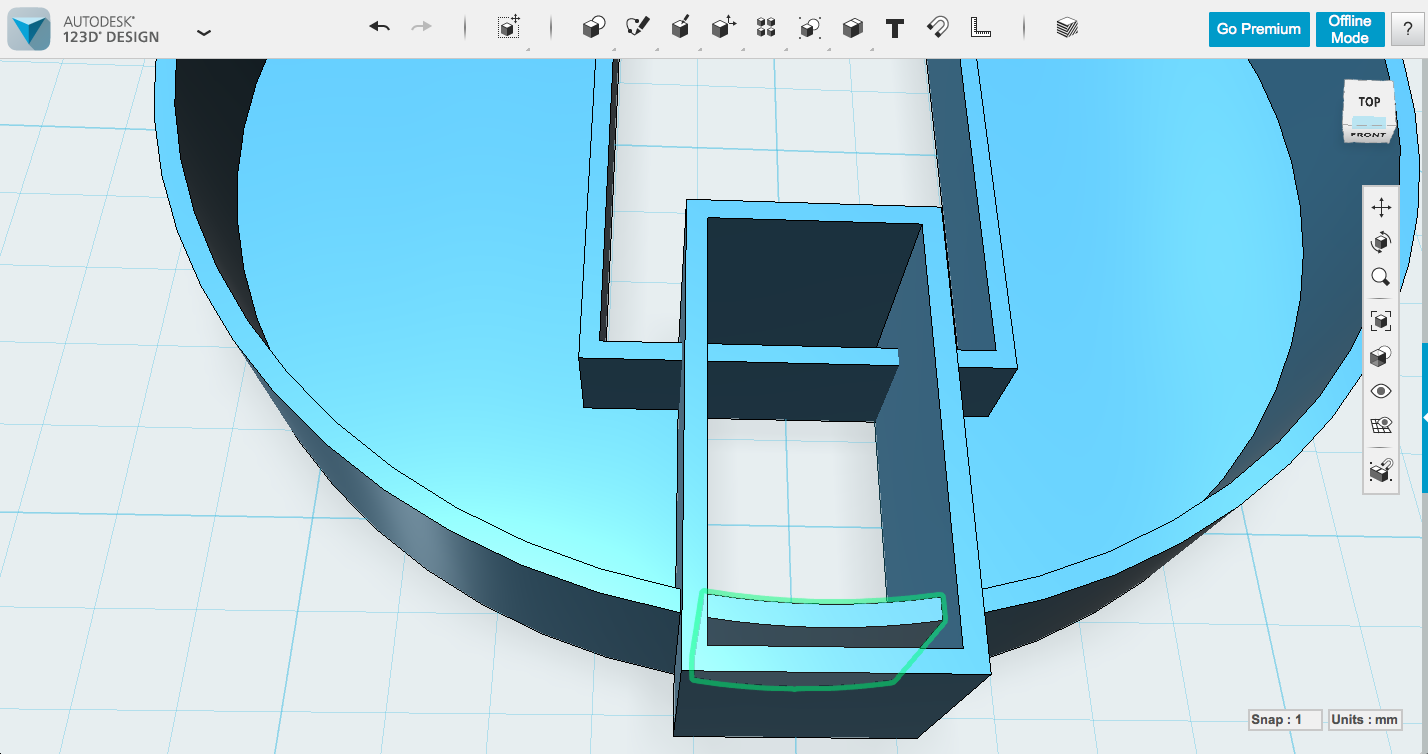
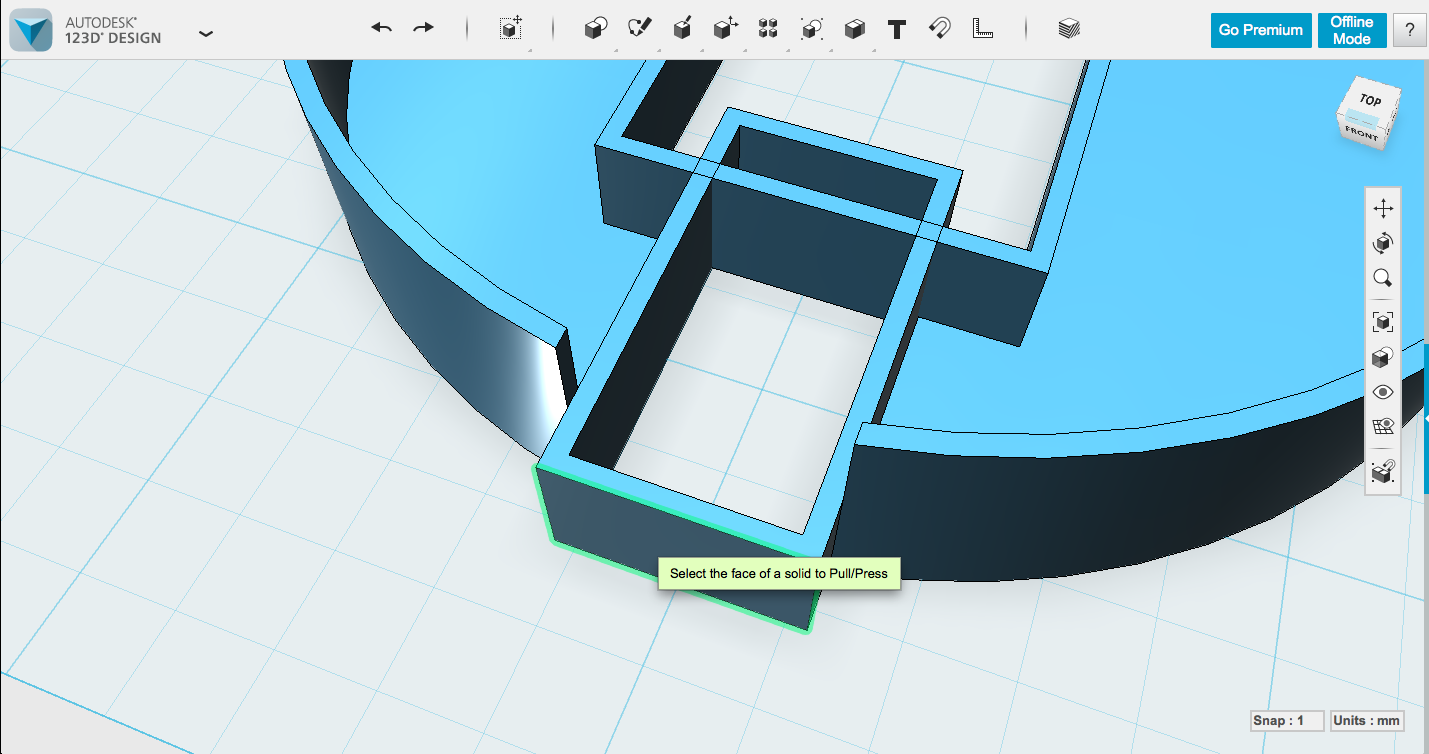
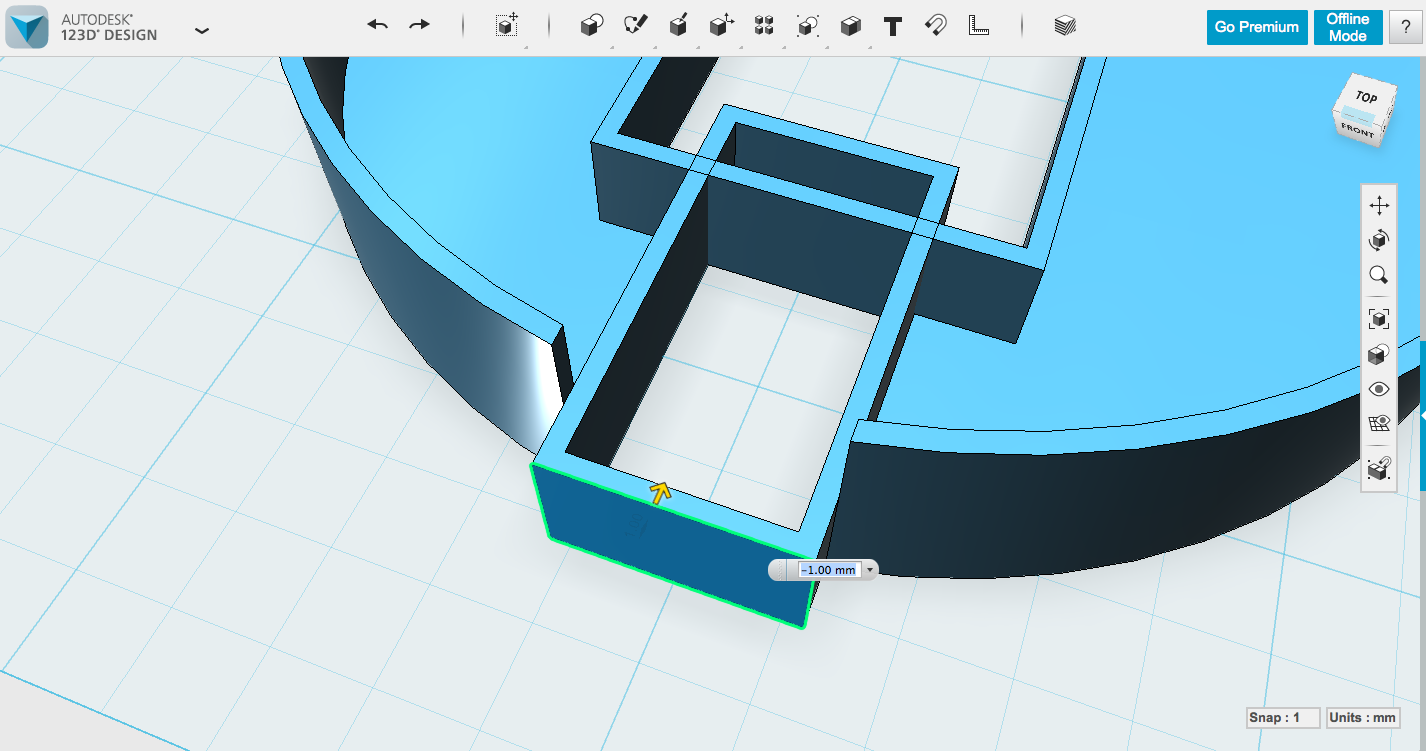
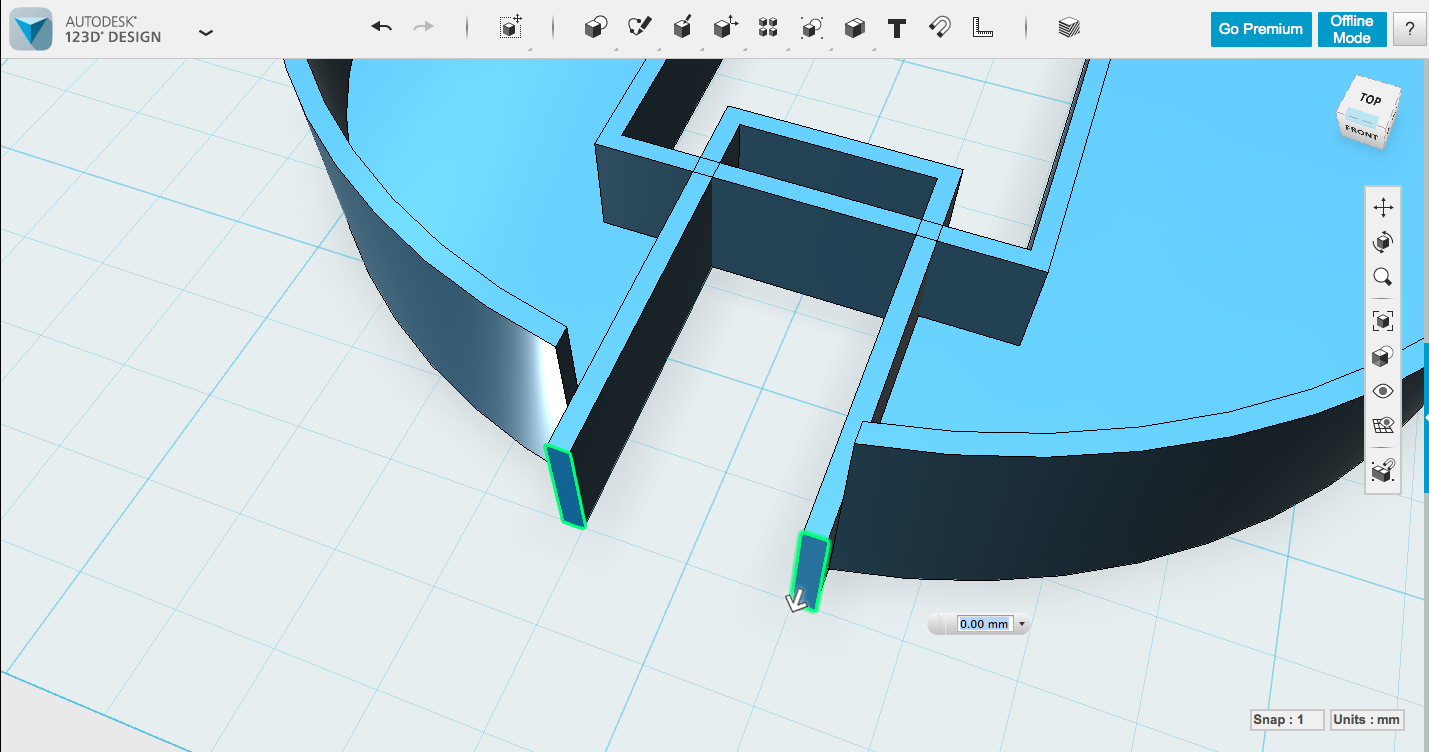
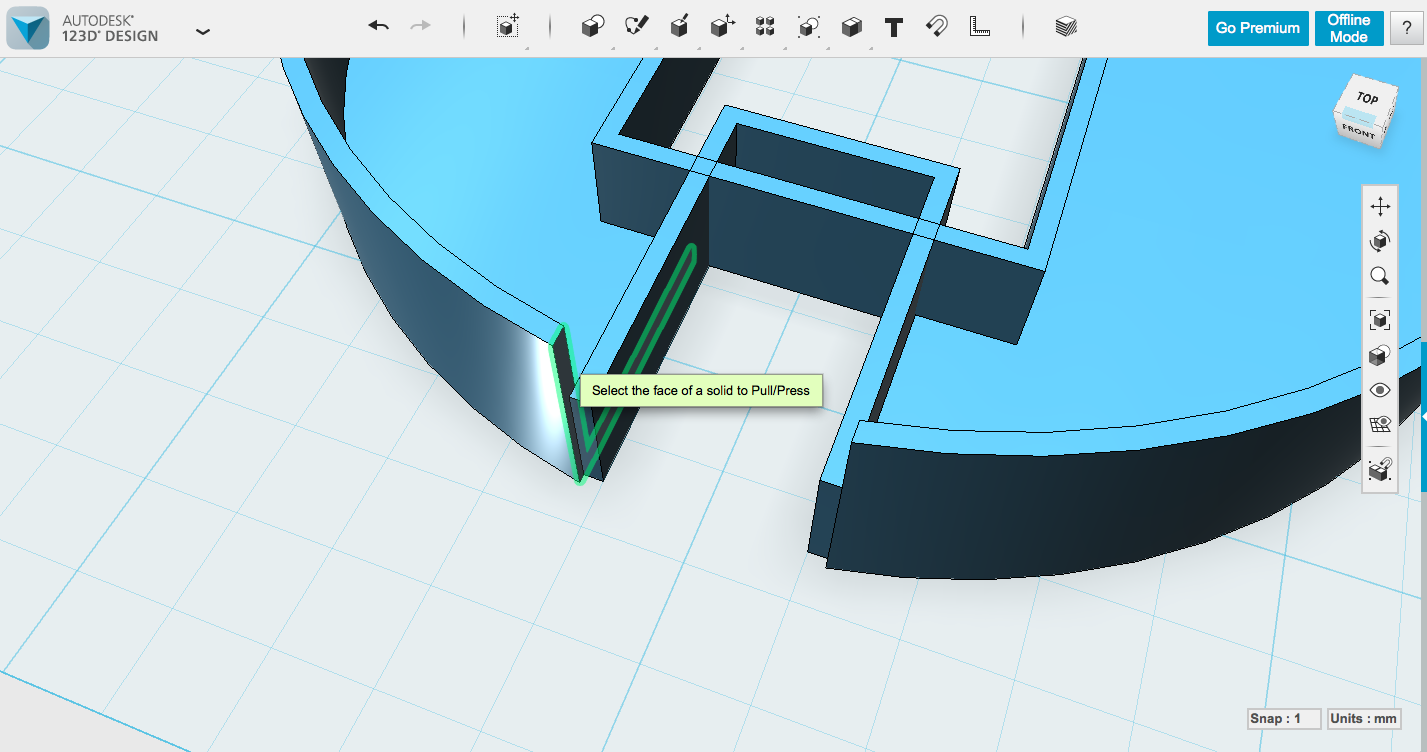
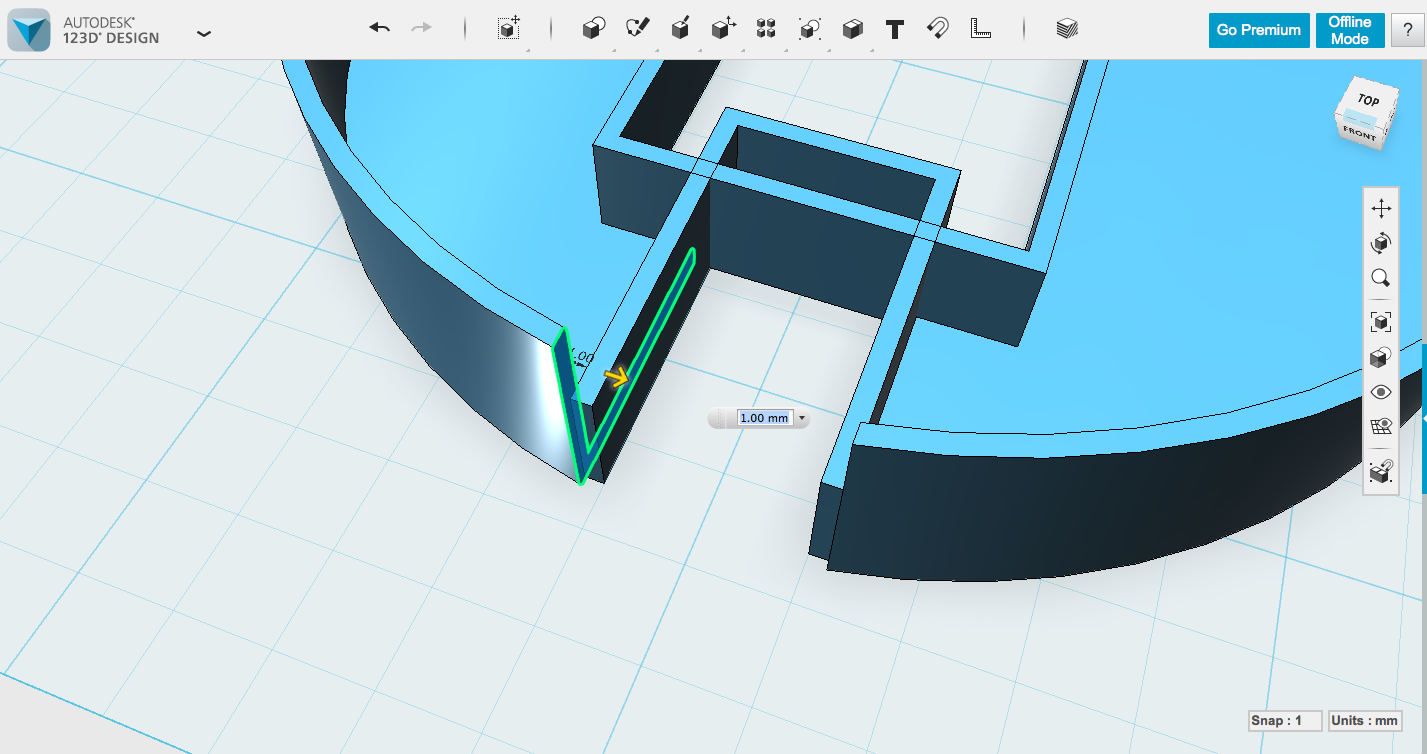
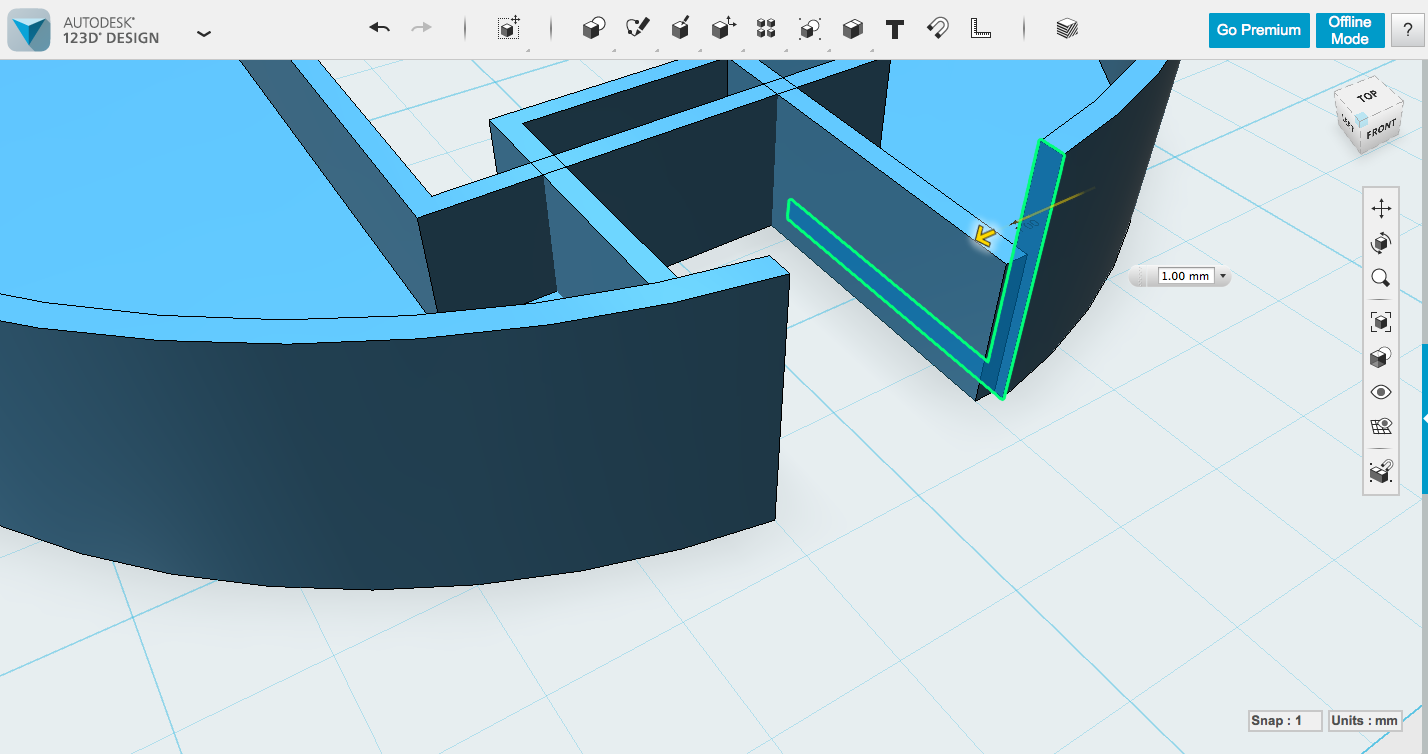
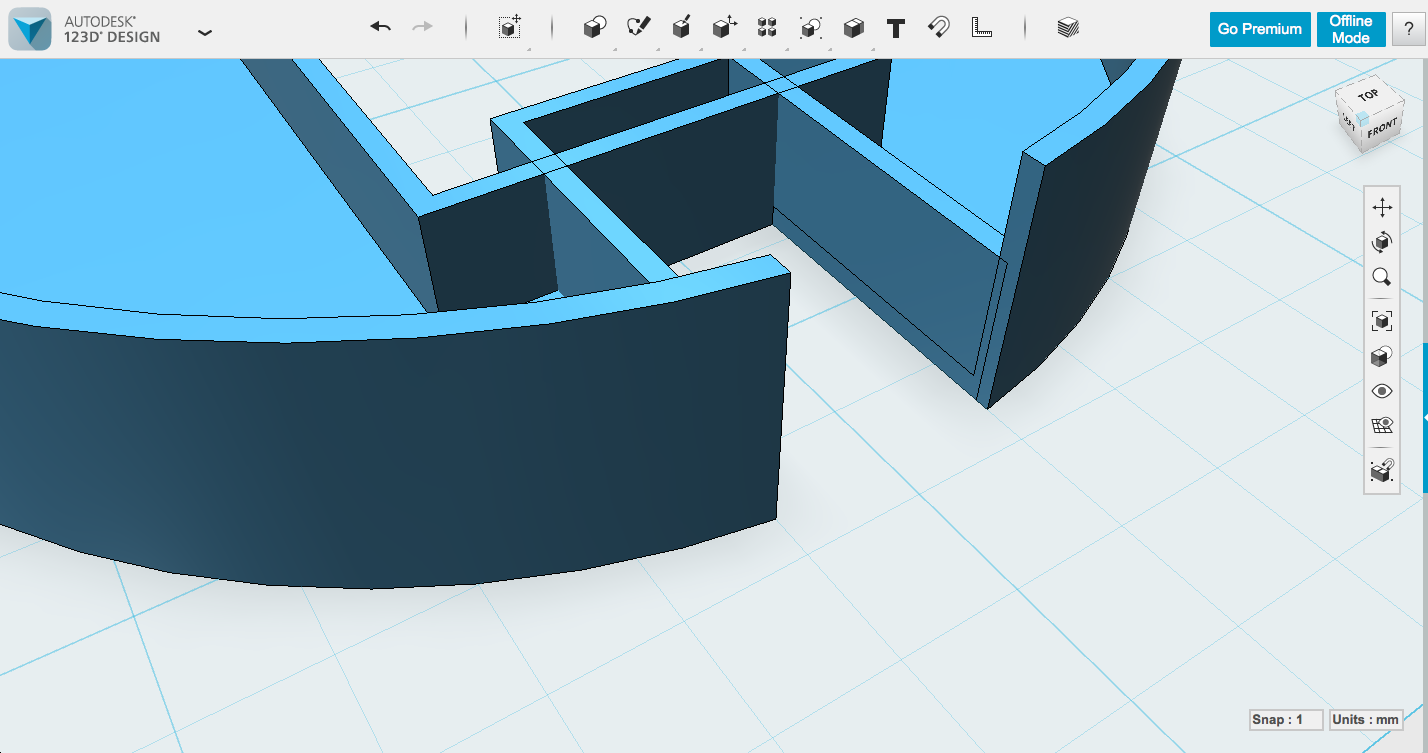
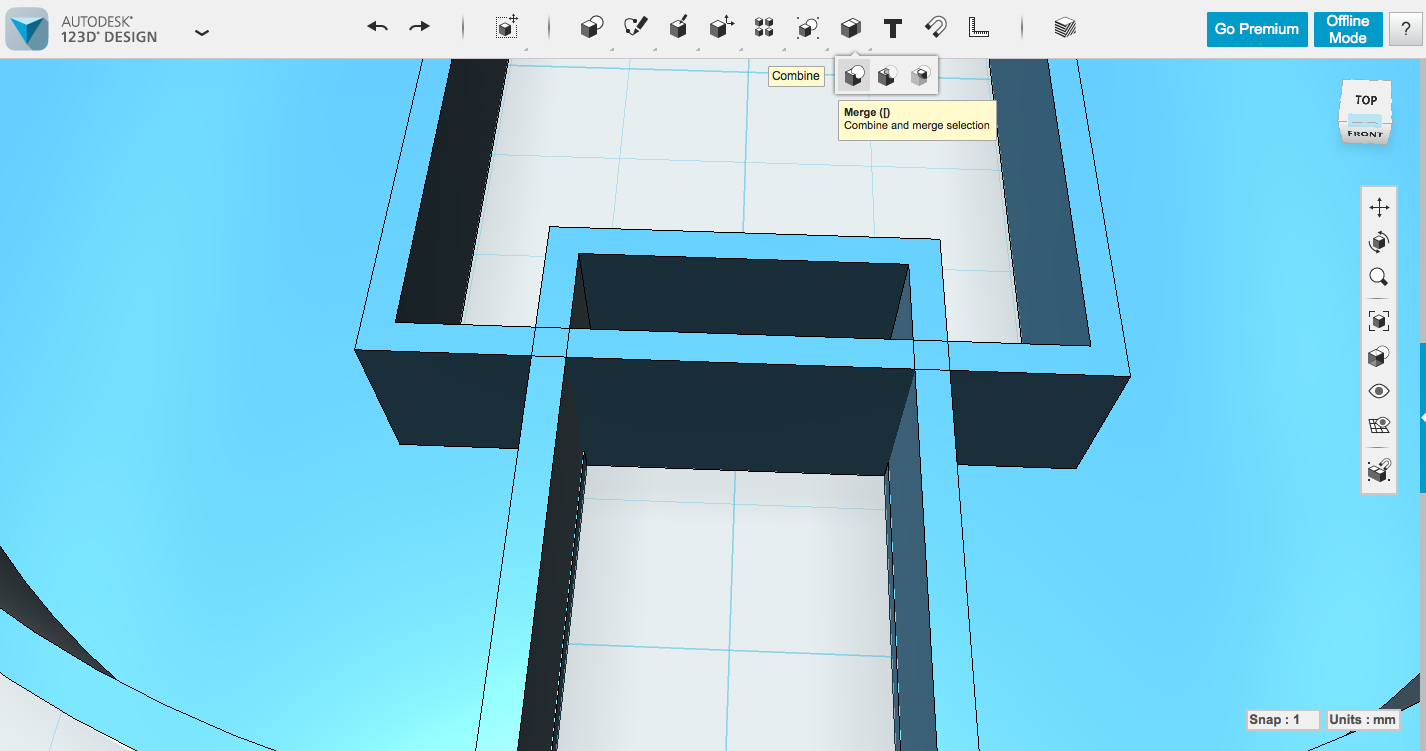
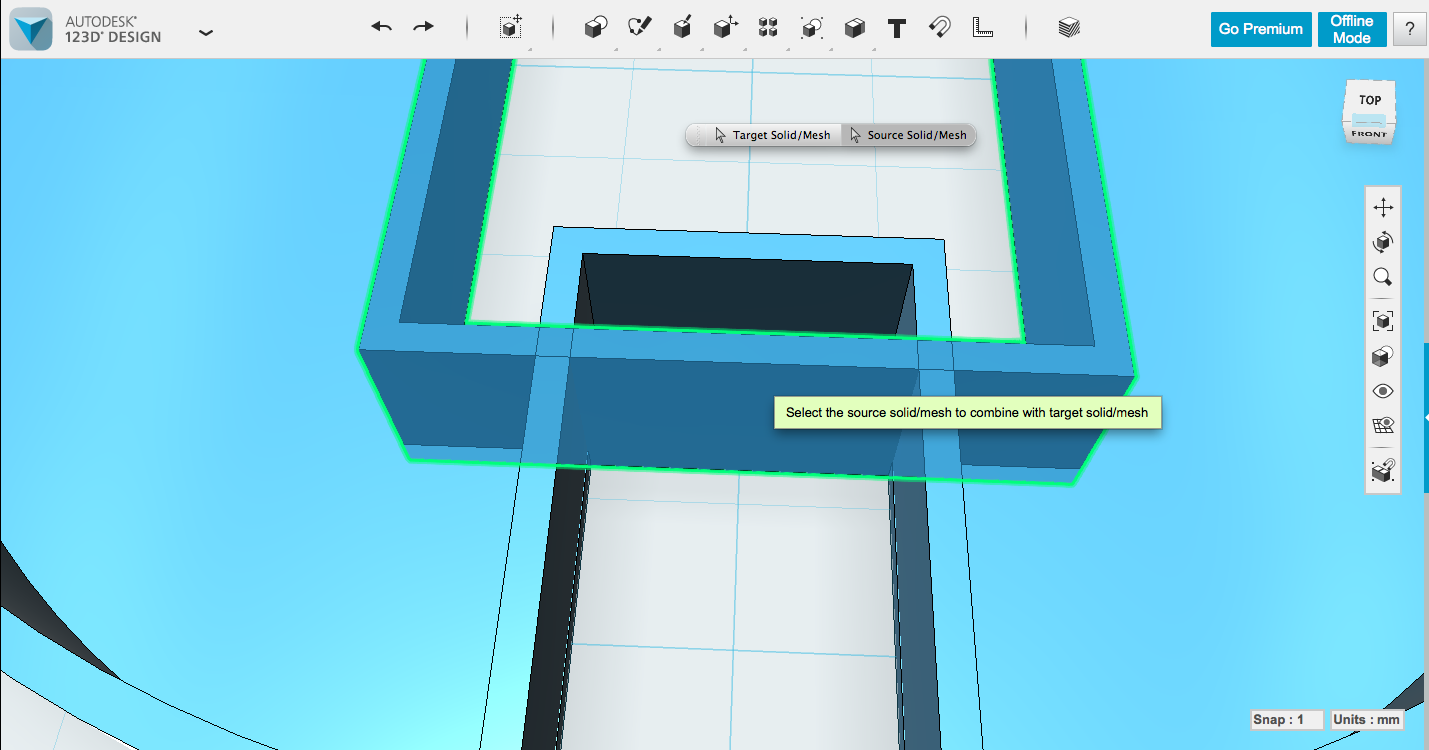
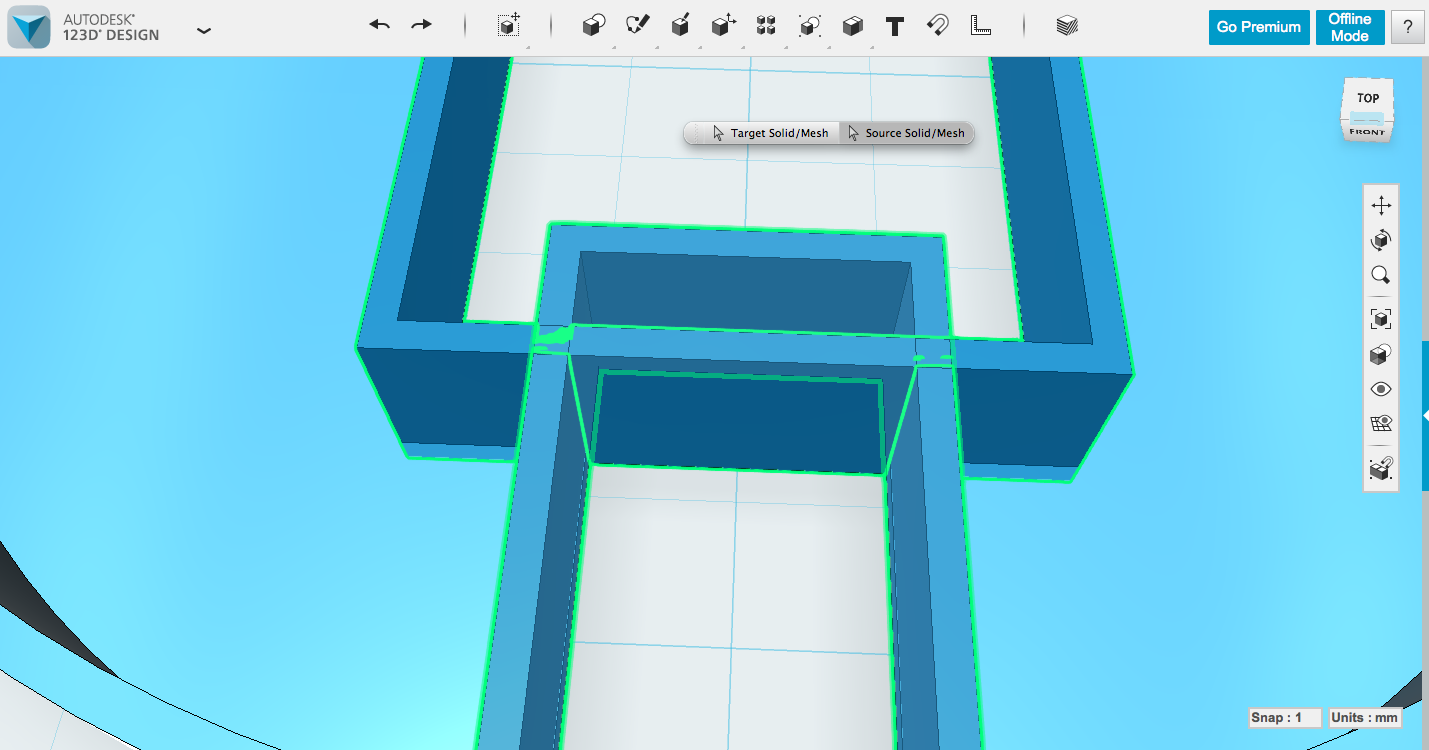
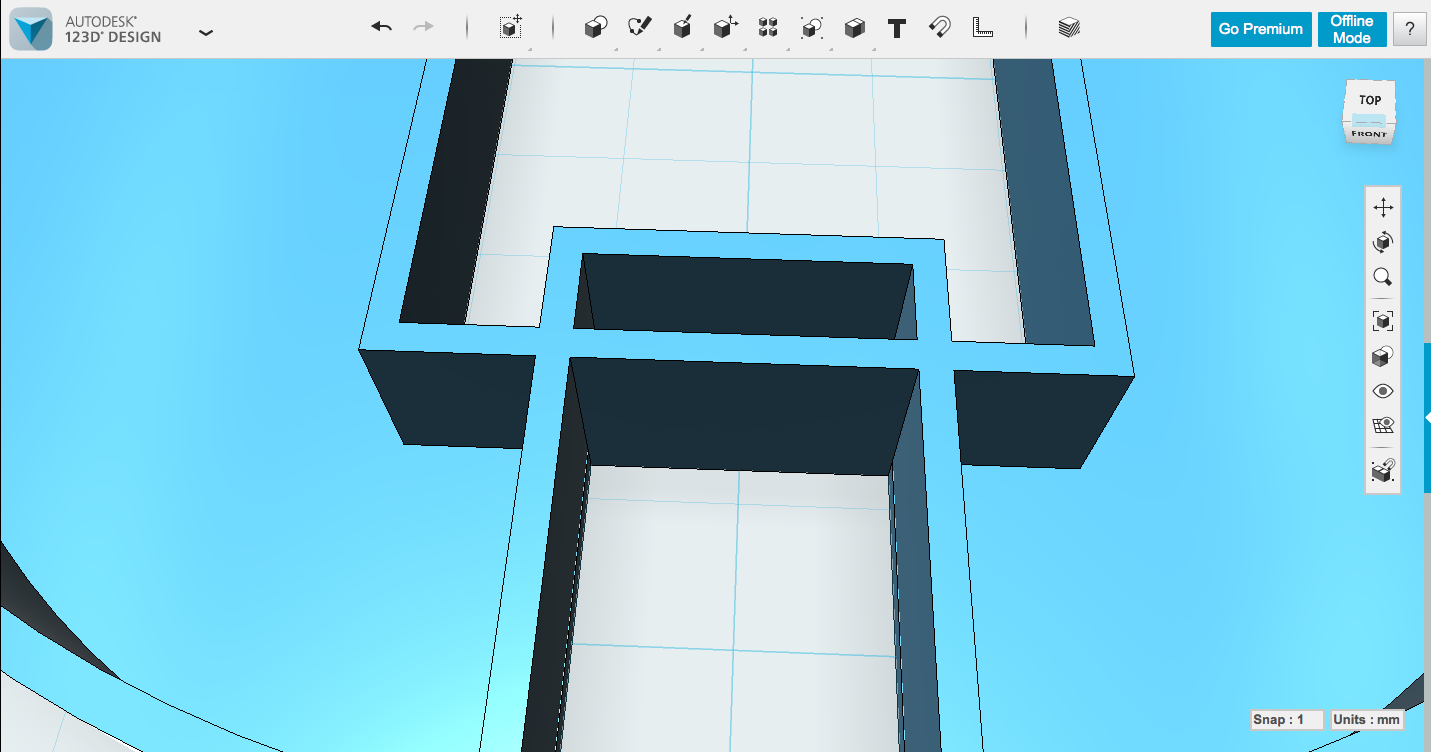
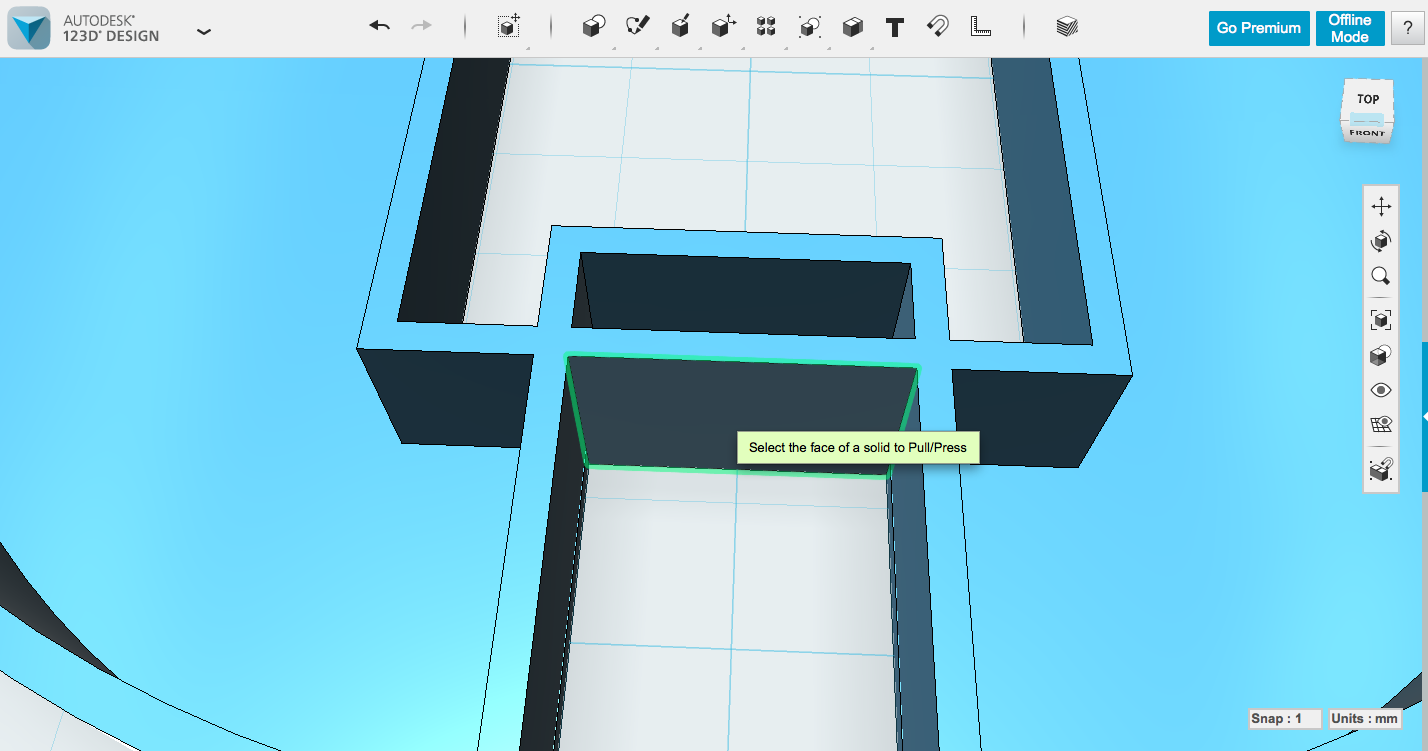
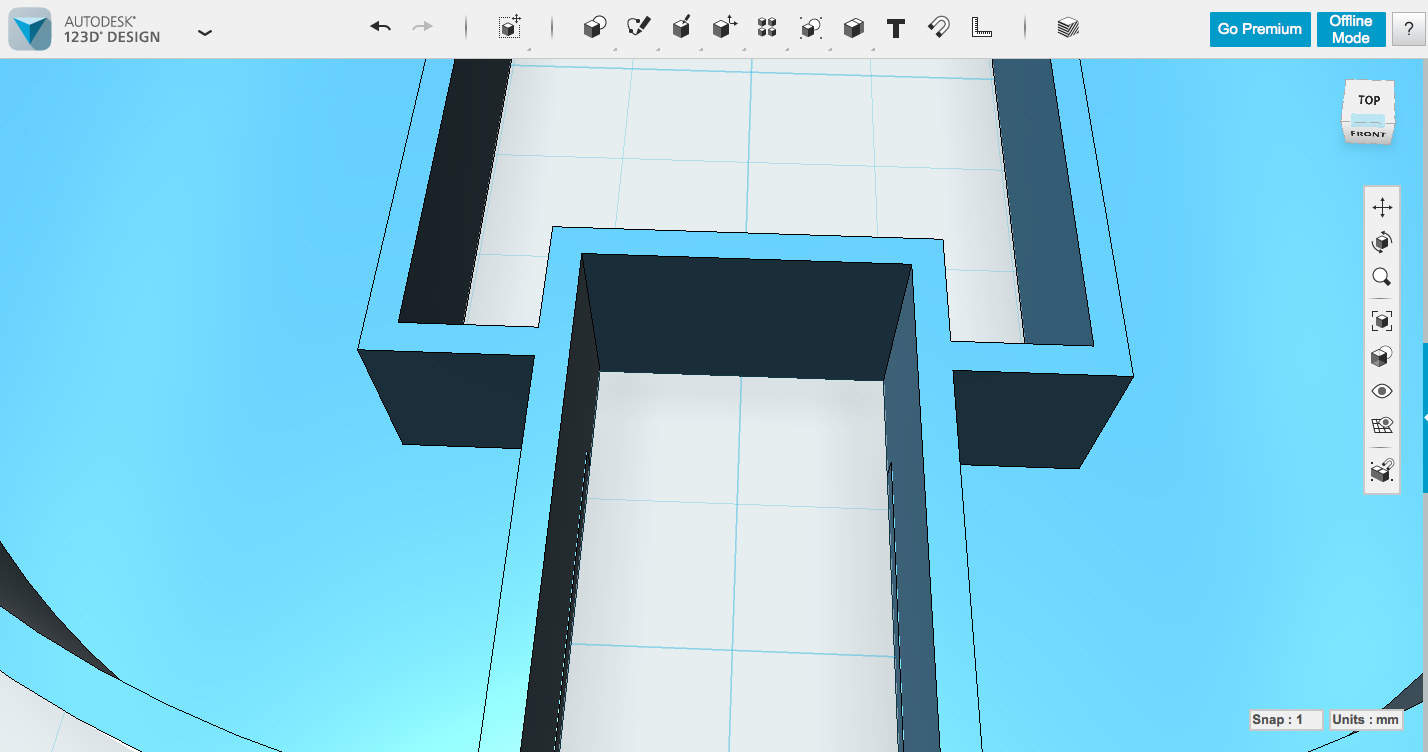
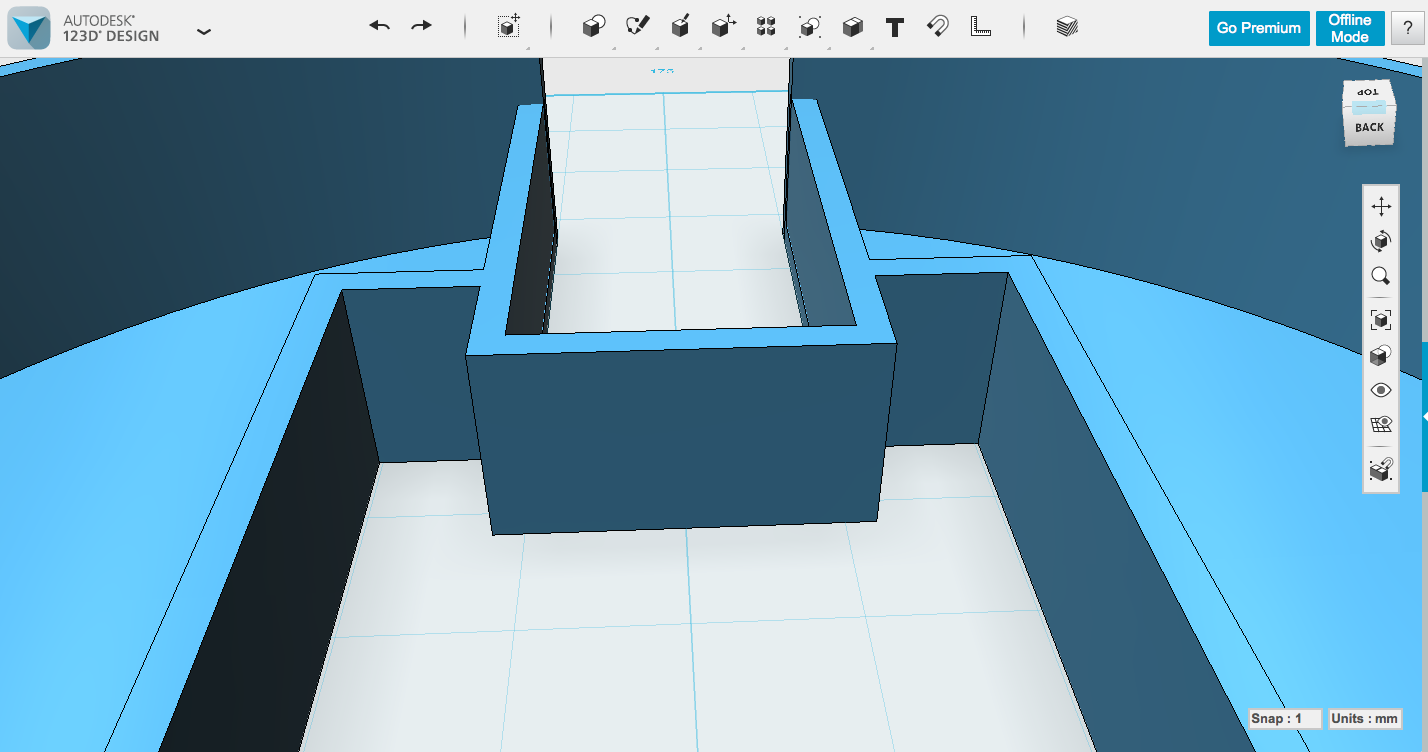
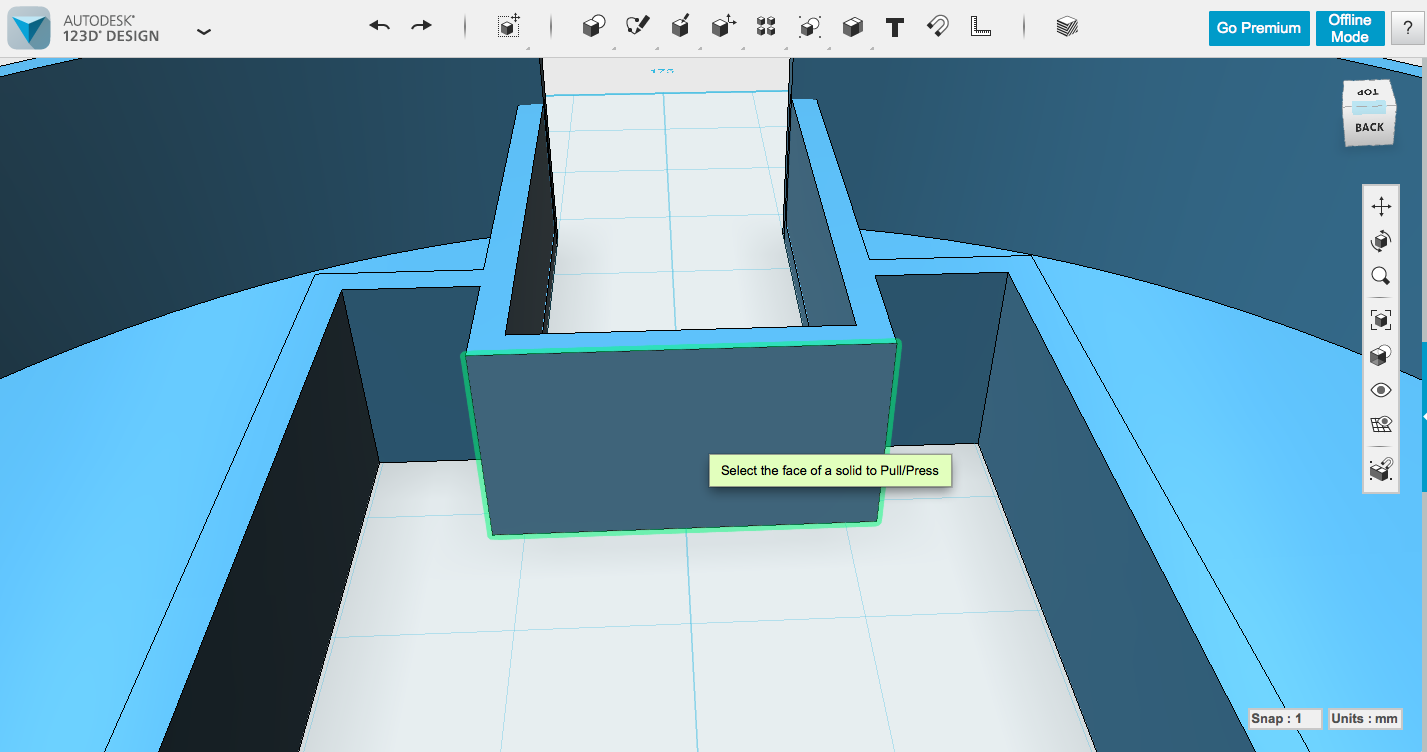
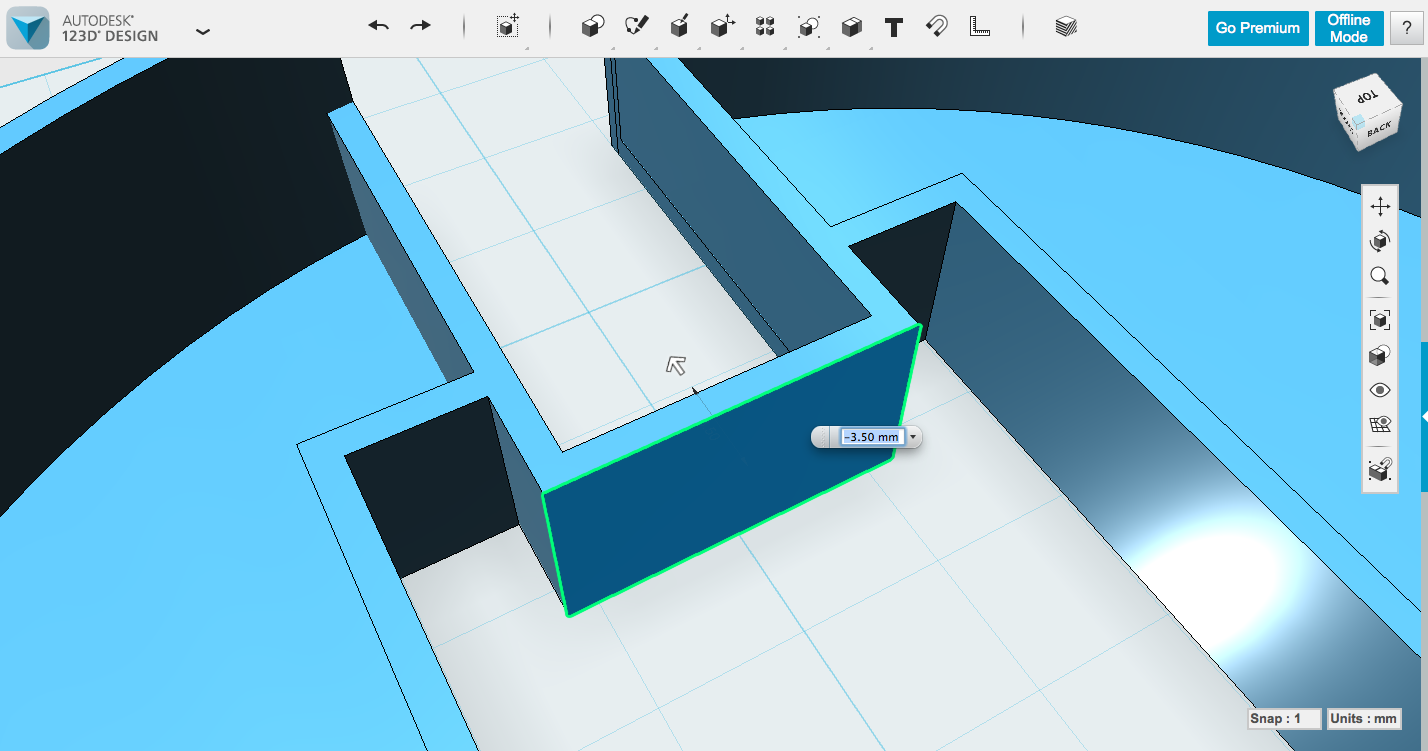
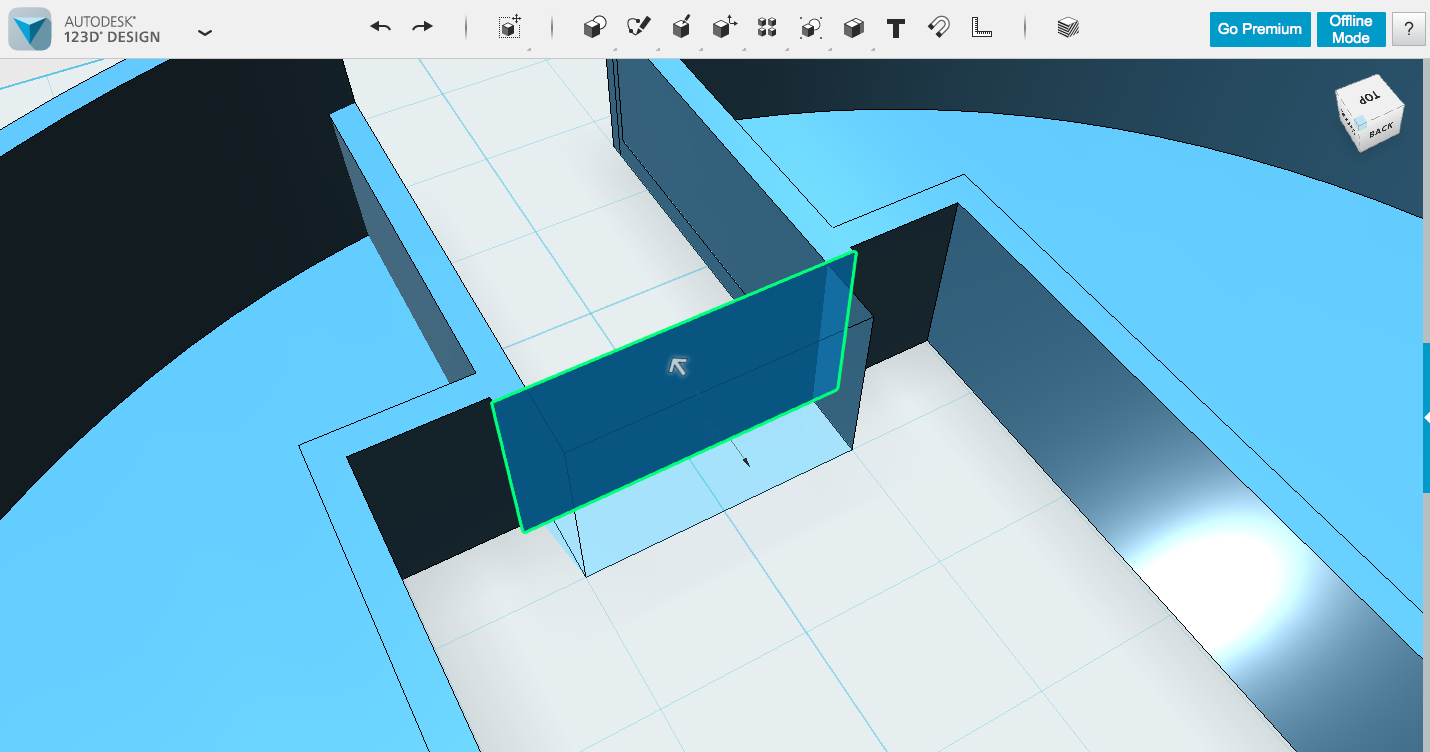
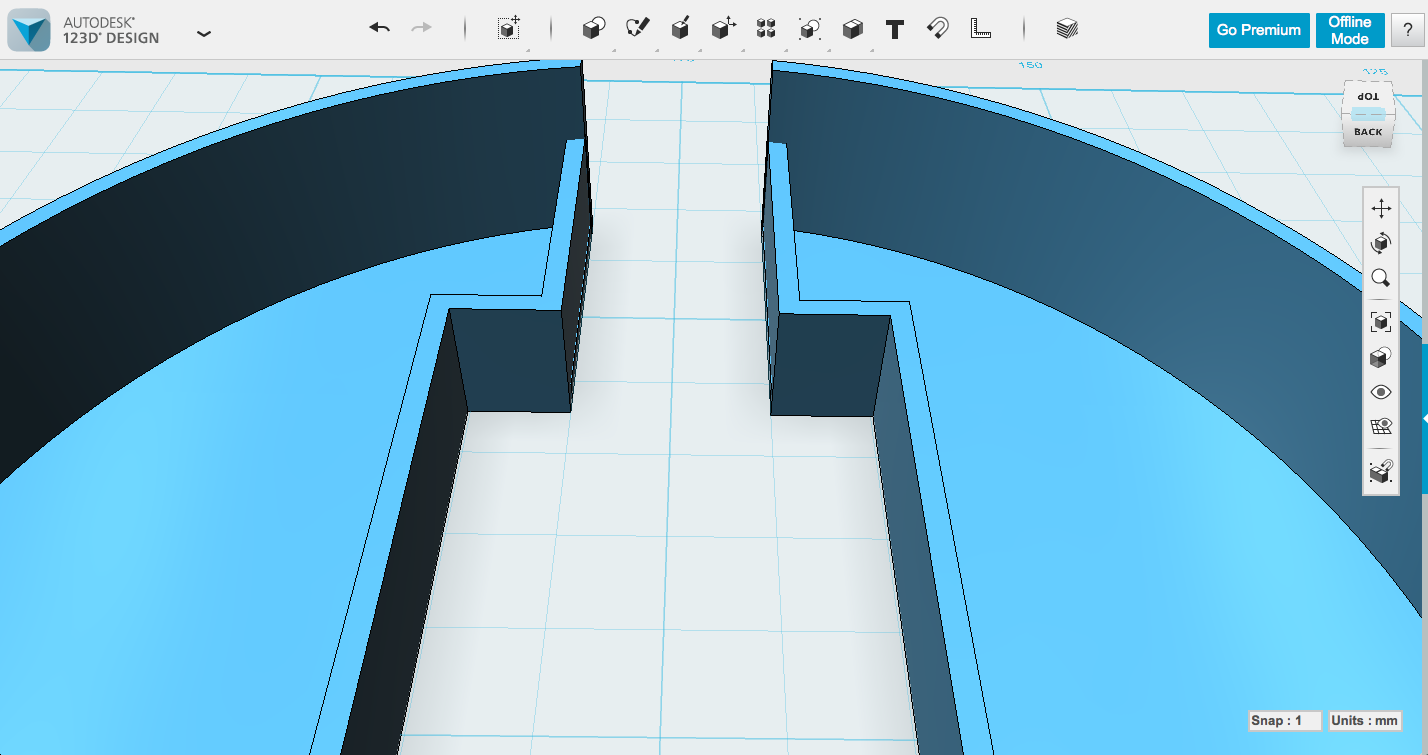
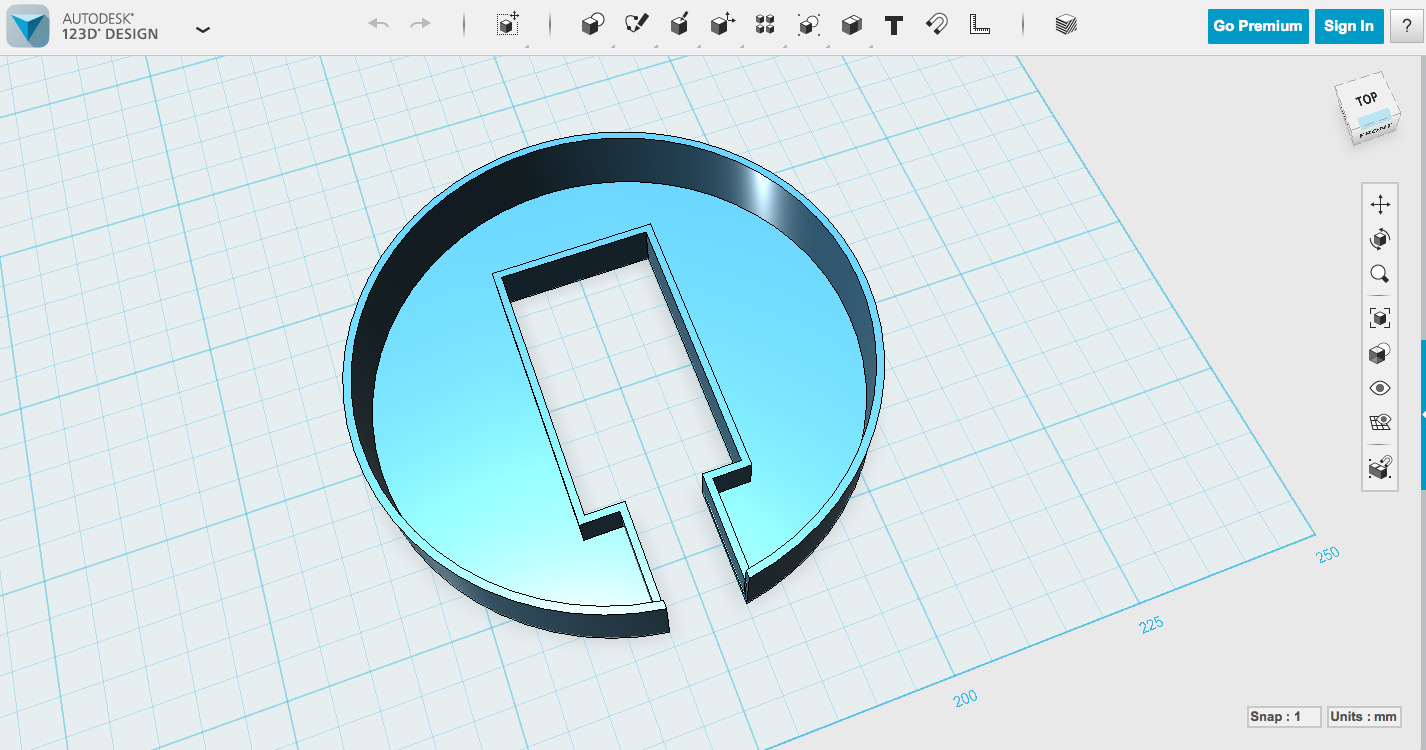
This method will give you a lovely wall all the way to the sides (which isn't really necessary for the flat diffuser, but is very helpful for the domed one).
Same story as the earlier box, make a box for the cord opening at the center (~20 x 10 x 6.7mm, you can find from my measurements), and hollow it out. I made that box 20mm long, it doesn't matter exactly how long it is (the ends are going away), it just needs to reach from the center box to the edge of the cylinder. Do the same duplicate and Subtract to separate the cylinder shape and clear the center out, then perform the same Press Pull to the bottom of the box so the space is all open.
You'll notice that the side of the cylinder where the cord needs to exit is still there. This is where Construct -> Extrude comes into play. Extrude works very much like Press Pull, except that it destroys parts of whatever other shapes are in its way. If you click Extrude, select the top face of the box shape/s, drag it up above the edge of the cylinder, hit return and then Extrude or Press Pull it back down, those portions of the cylinder will have disappeared, and you can delete the newly separated edge section.
Now you just have those pesky box edges, some of which you want, and some of which you don't. Press Pull is the hero, once again. If you Combine -> Merge the center Spark Core box and the side cord box, they become one object, and all overlapping intersections will behave as if they belong to the same object. This is an easy way to be able to Press Pull the pieces of wall you don't want into oblivion. Check out the pictures to see the process.
Modeling the Case - Supports
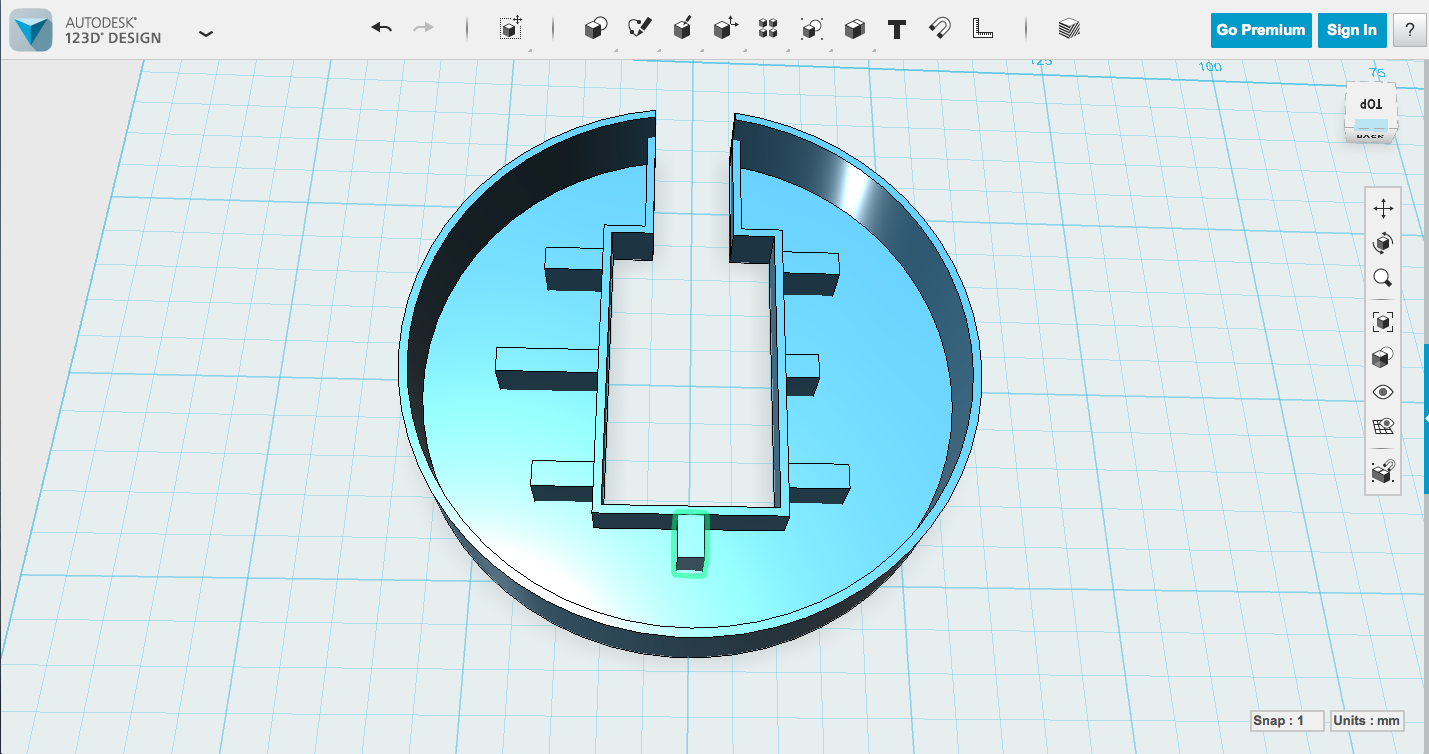
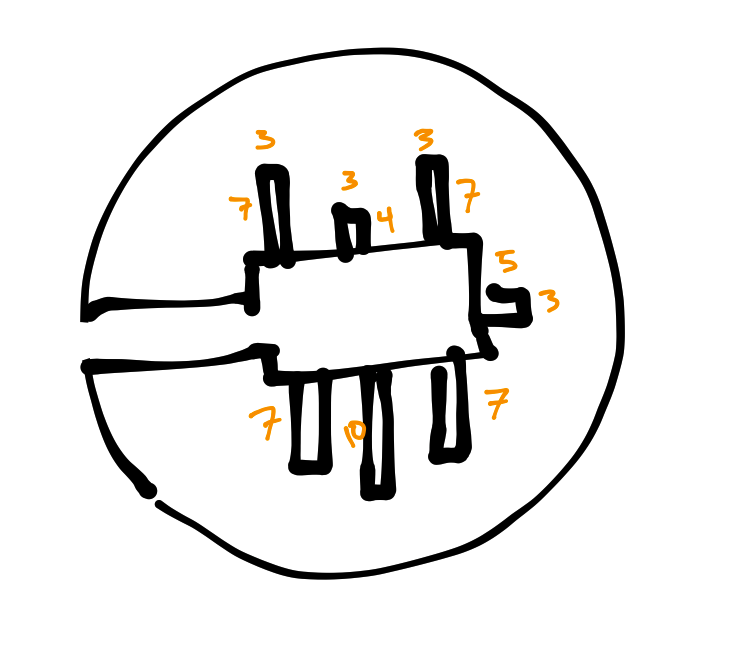
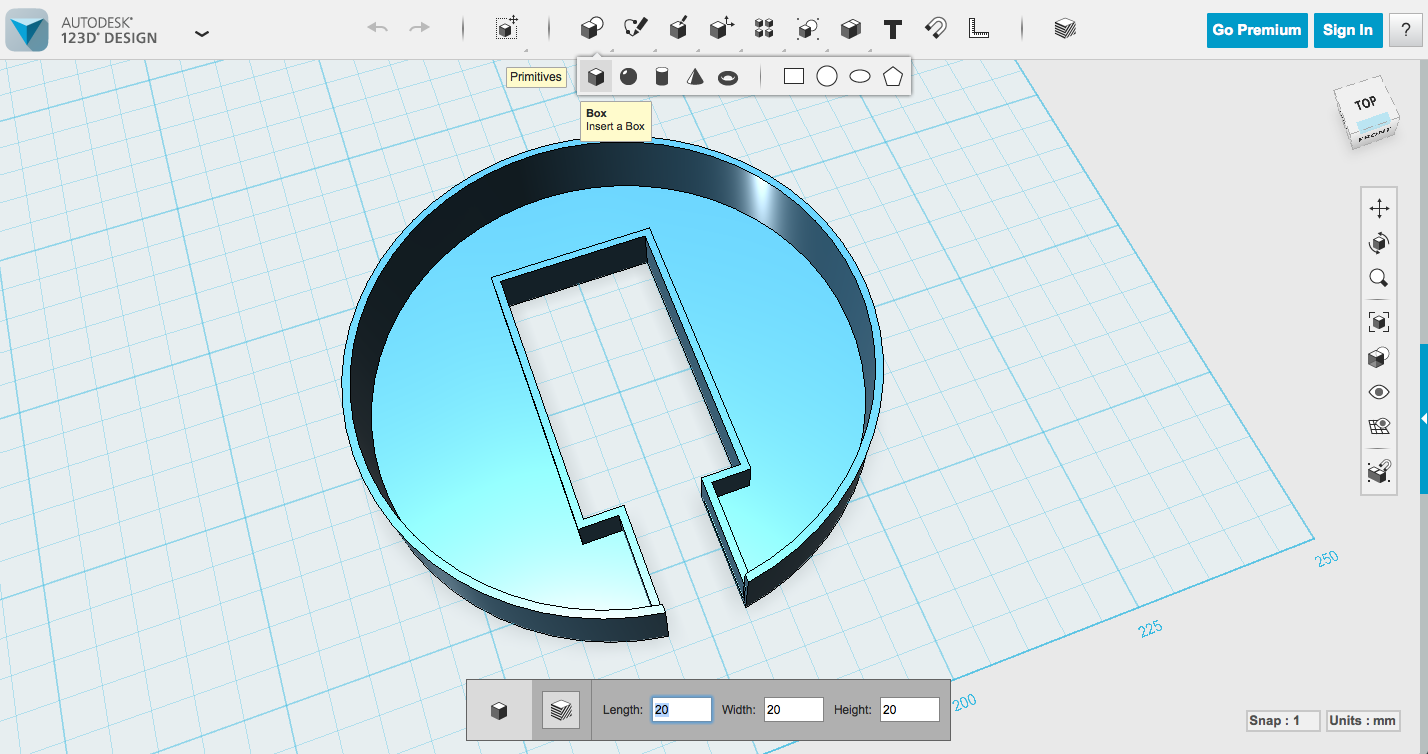
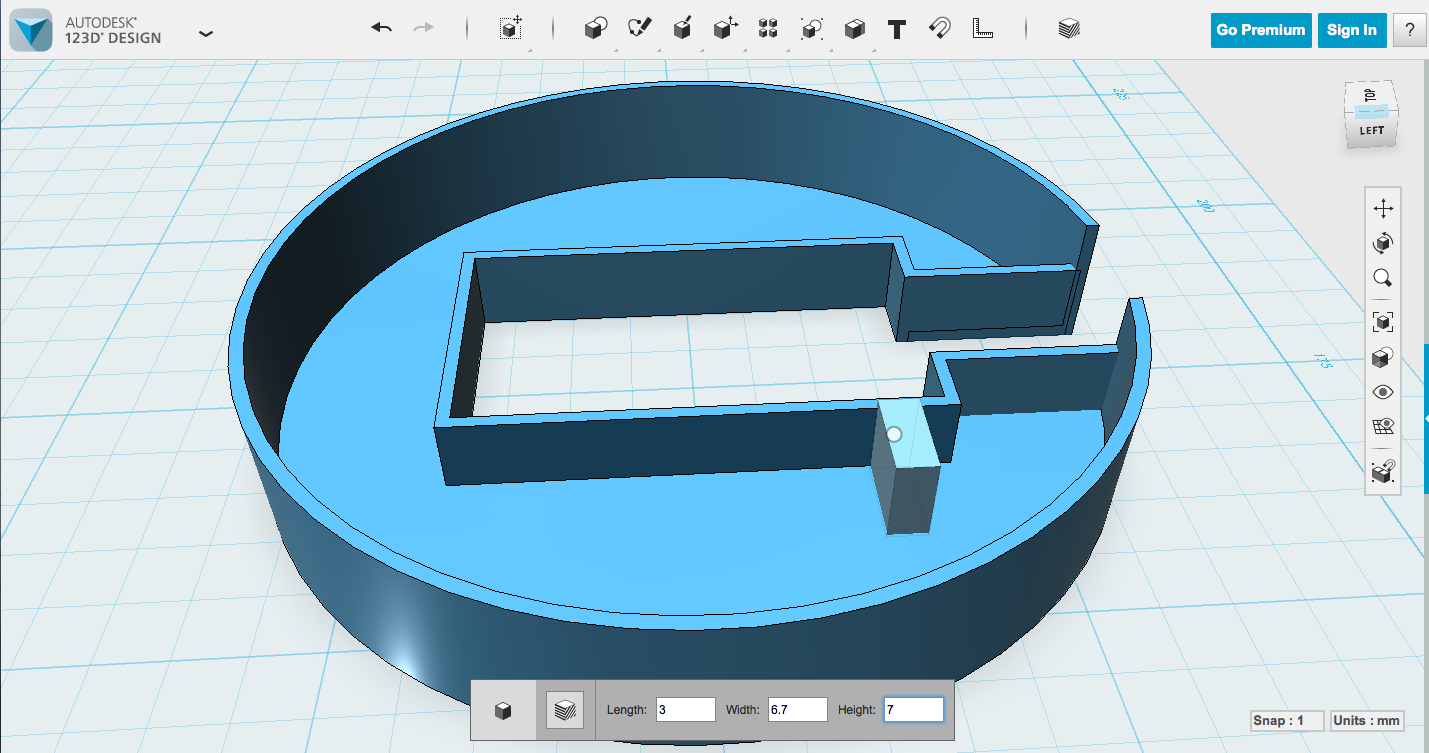
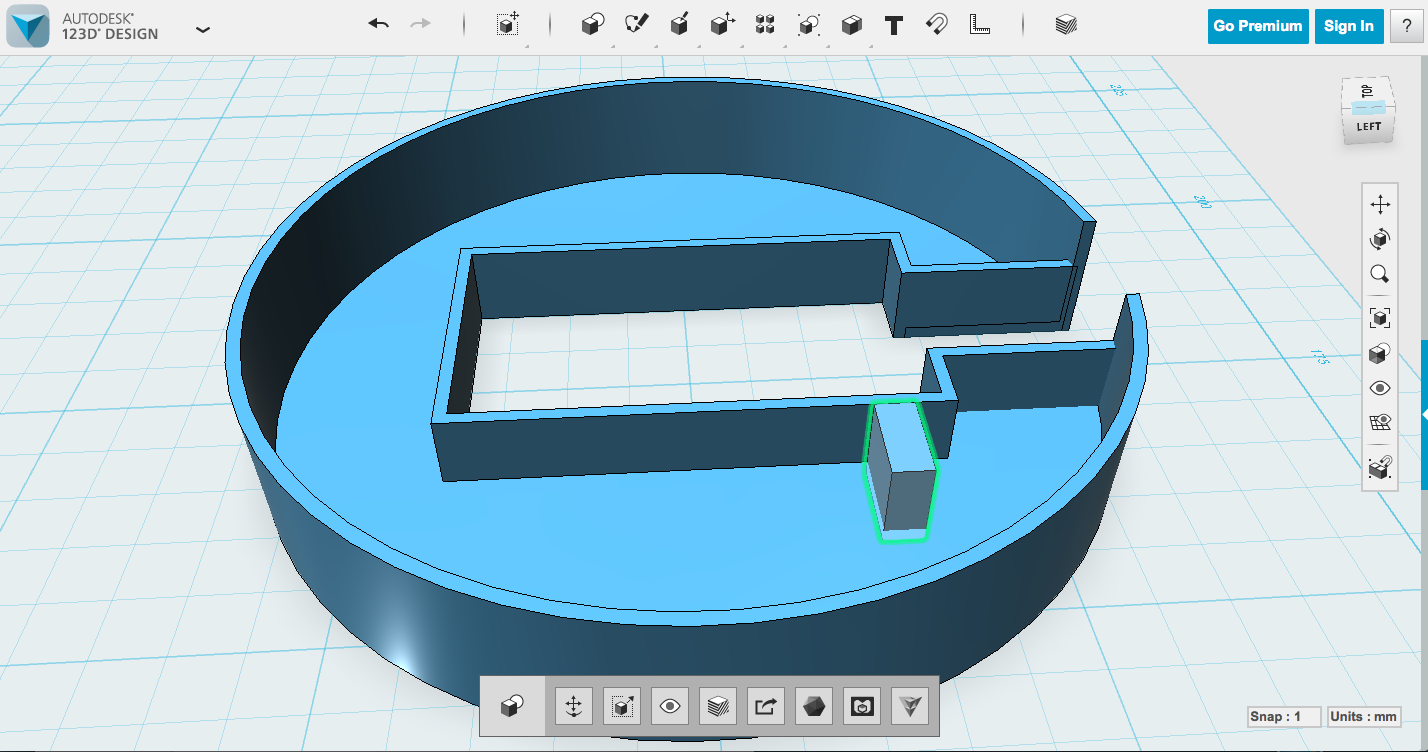
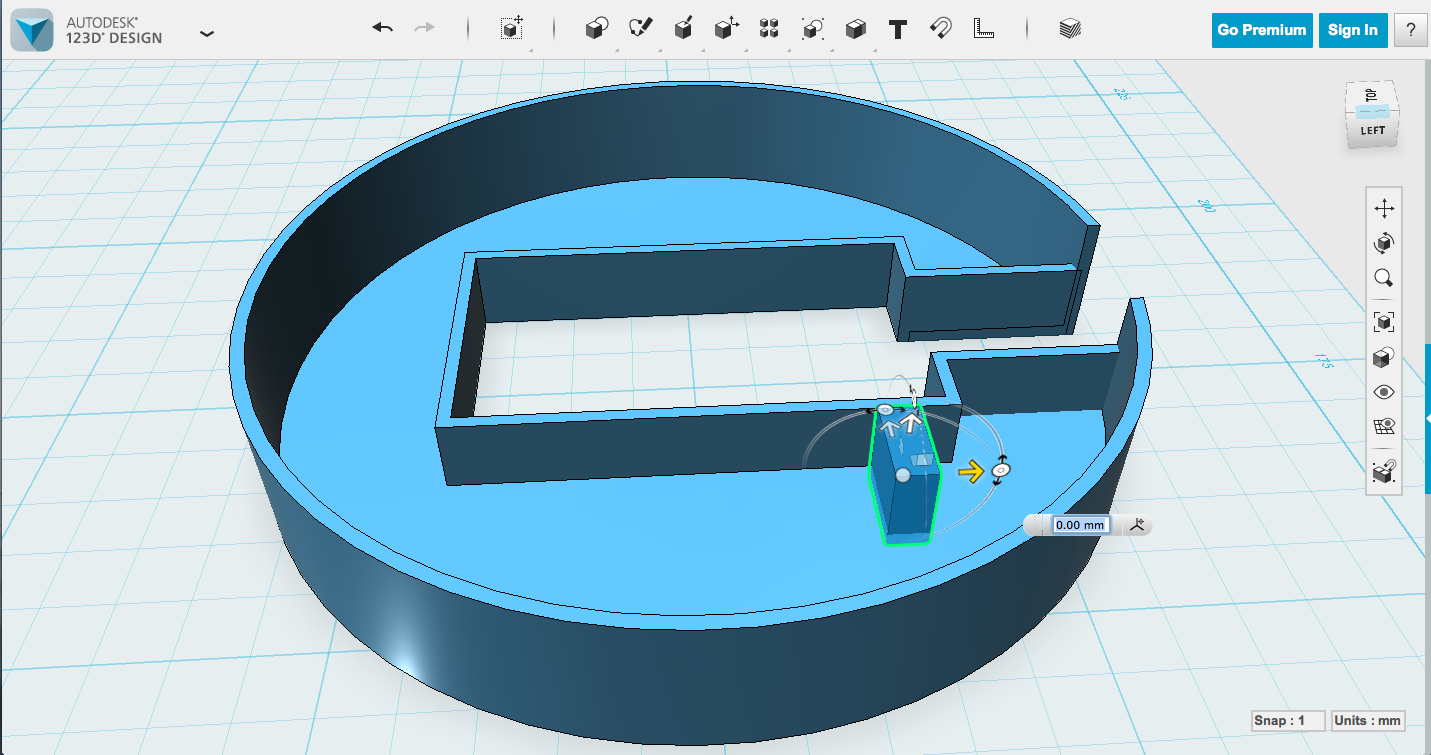
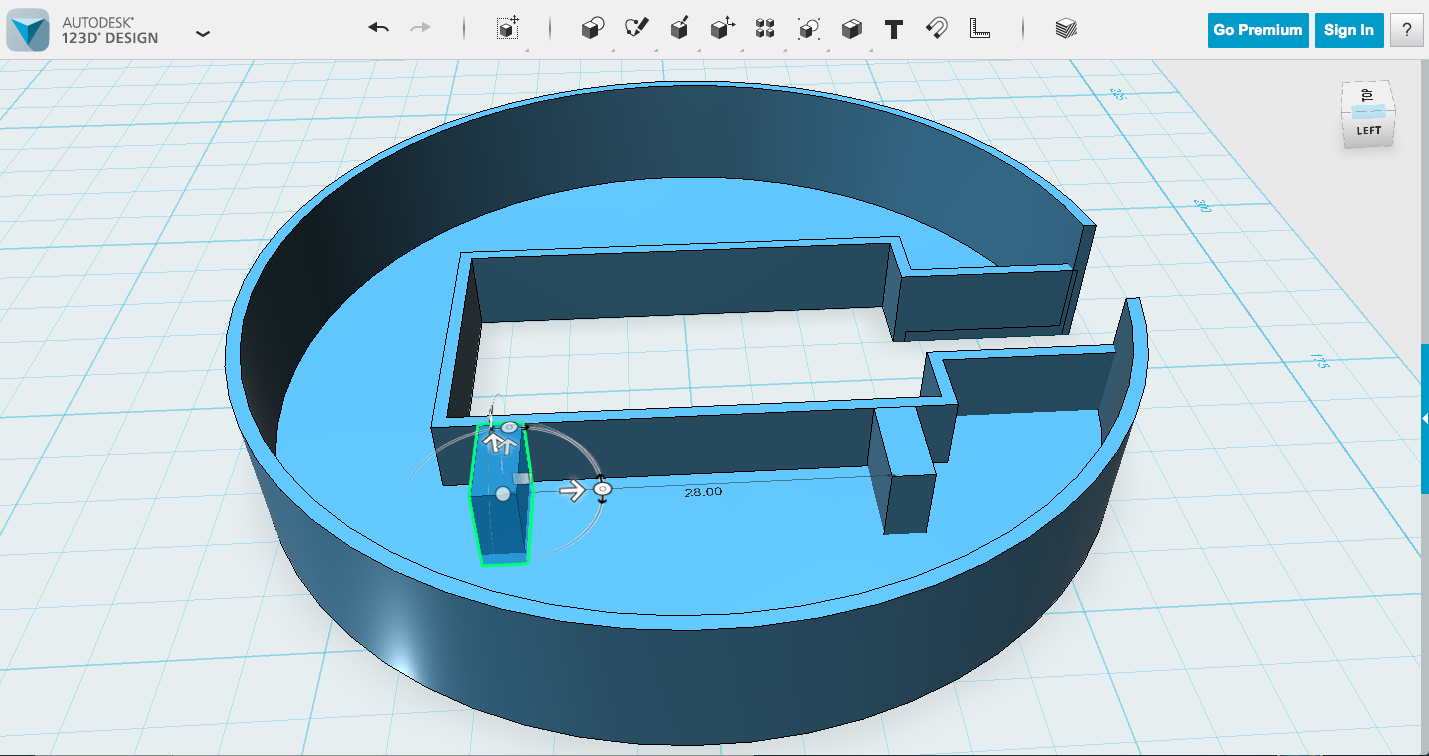
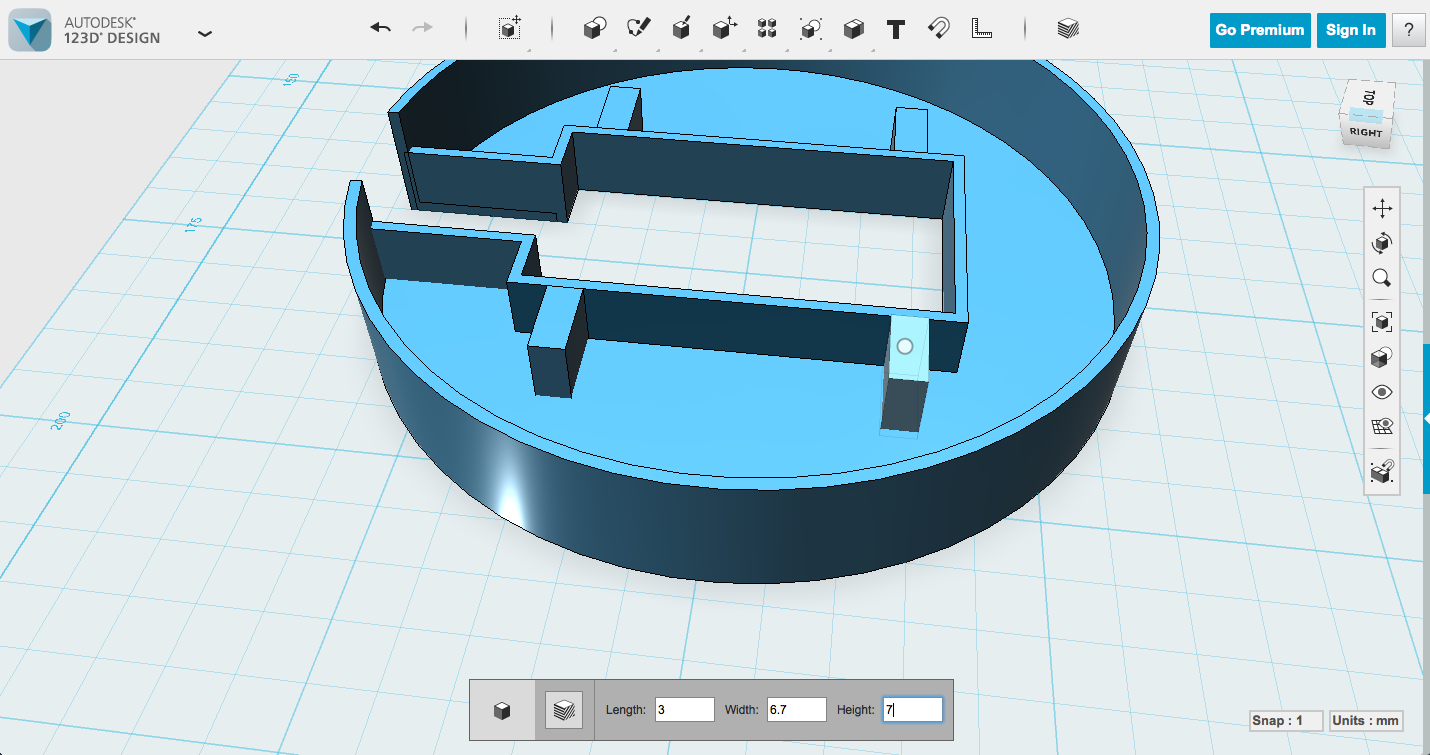
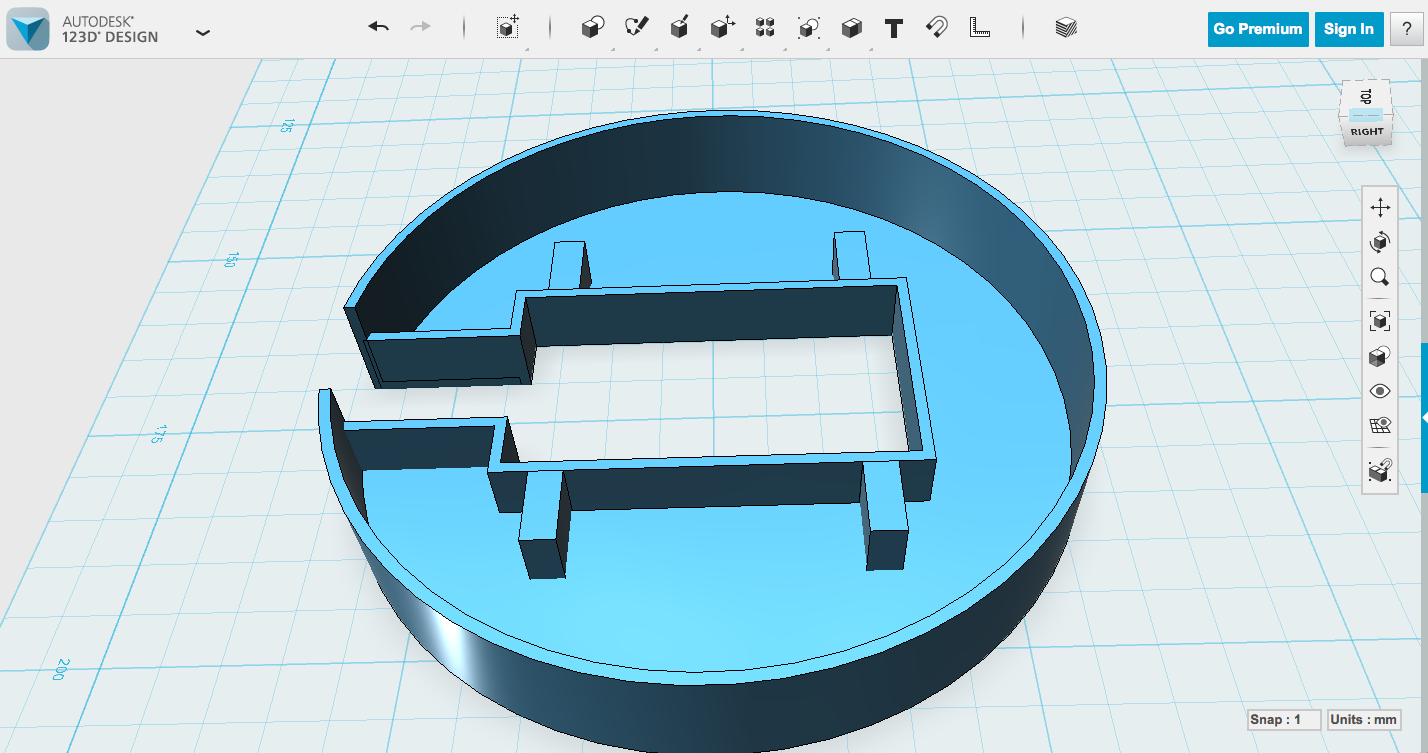
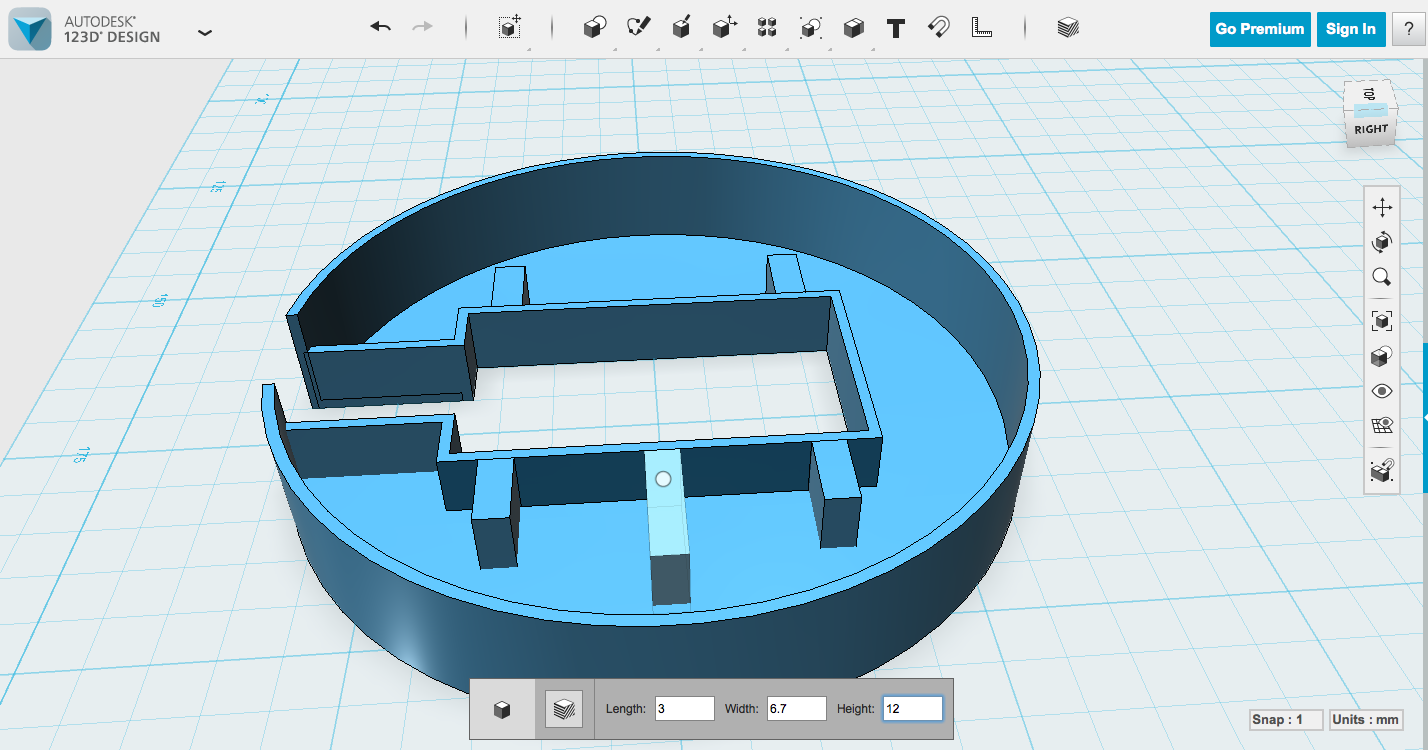
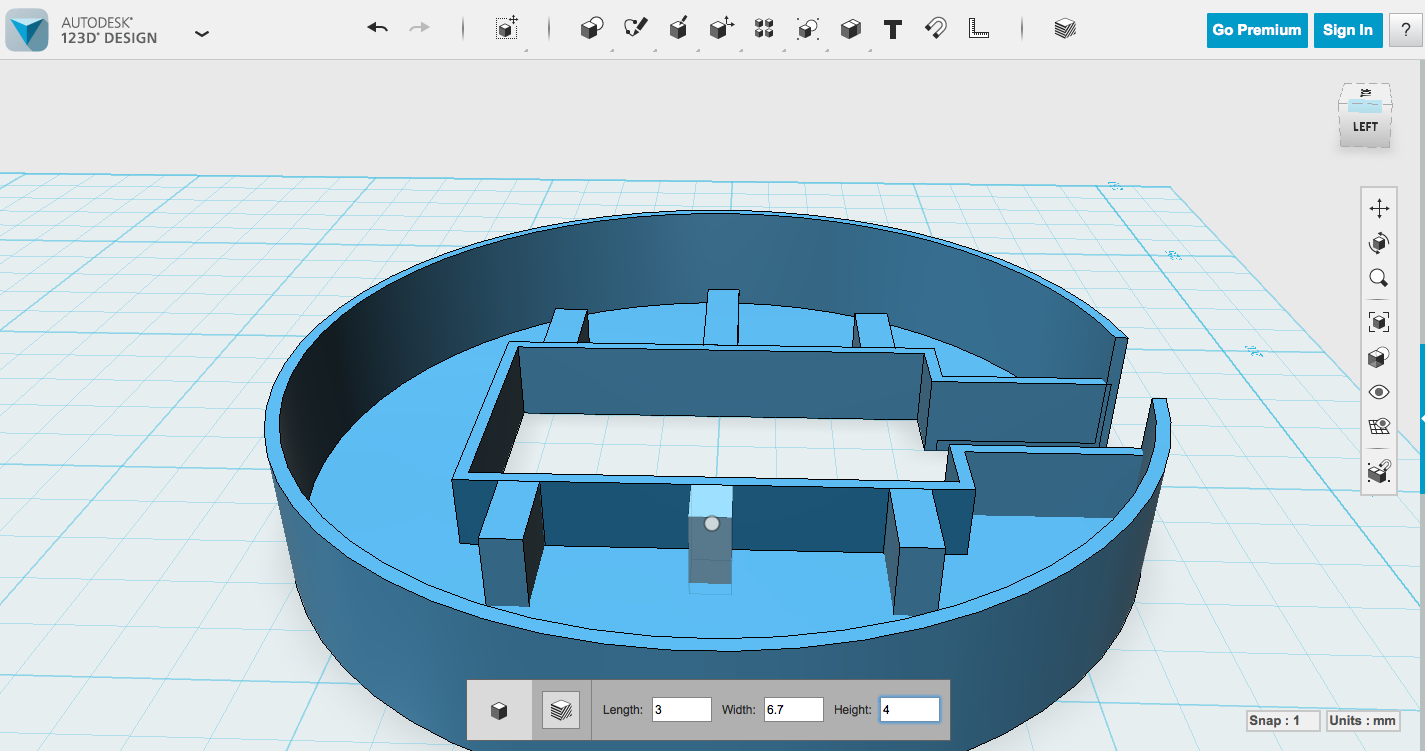
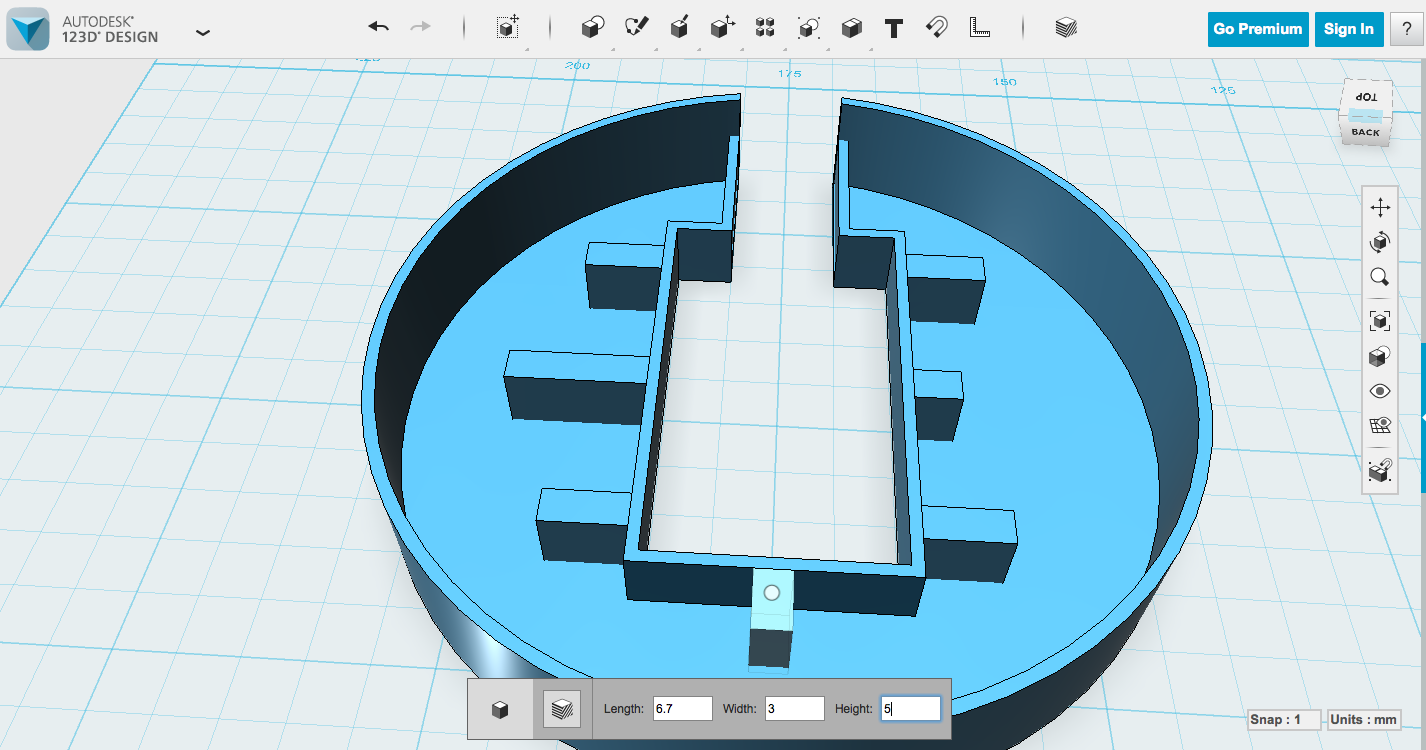
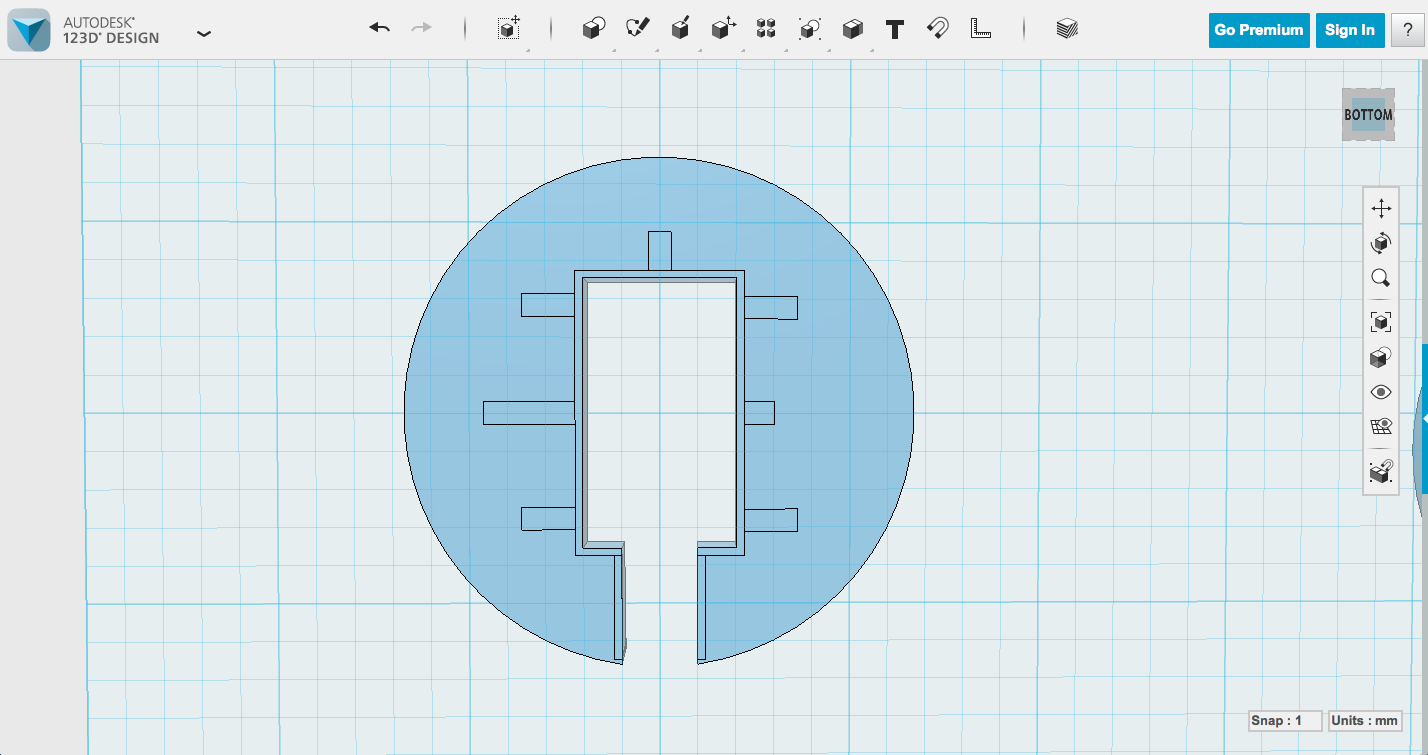
As I mentioned before, the diffuser case fits fine without these, but won't stay in place with any real manipulation, and there are buttons on the back of this thing. It's meant to be manipulated. Fortunately, adding the supports is simple, once you have the measurements. Which we do.
Remember though, that those measurements go from the very edge of the Spark Core to the very edge of the surface mount components, so you'll want to subtract at least 2mm from the length. My diagram shows those modified numbers.
Pay attention to where you put the different supports if they aren't all symmetrical. The diffuser is upside down right now, so the diagram I'm working from is flipped.
I made my supports 3mm wide, because 3 is a nice number and it doesn't get enough credit. Snapping objects in place is one of the things you have to be conscious of in 123D Design as you're building, because while you're creating the objects is the easiest time to do it. If you click Primitaves -> Box and then mouse over a surface, the new shape is created on that surface. This applies to sideways surfaces too. So I created my supports on the outside of the center Spark Core box, making them 3mm wide, and 6.7mm tall (note the dimensions will change to match the surface you're placing your box on, technically that reads 3mm long and 6.7mm wide while you're creating it). If you make them the same height as the Spark Core box (6.7mm), you can click 'd' and have them drop to the bed, where they will be perfectly in line with the rest of that hollowed box.
See the pictures. I took a lot of them and they can help clear up confusion.
Modeling the Case - Tweaking
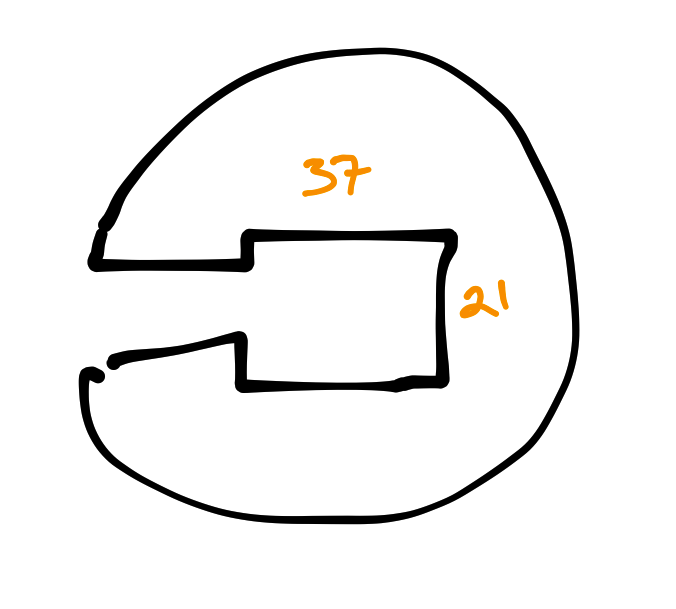
We've created this model that is designed to the exact size of the Spark Internet Button. Of course, when you 3d print, the extrusion of the filament can take the edges a bit further than intended. This will vary based on your printer and filament. I did a couple test prints where I fiddled with dimensions, and came out with inner dimensions of 37 x 21 (where it was originally 35 x 19.25). I like to tweak these in the model using Press Pull on both the inside and outside of the Spark Core bracket box.
Could I have told you these dimensions back at the beginning? Sure, but it might be different for you, and this way, you've created those side supports in the right place and you won't need to worry about recalculating them.
Alternate Version: Dome Diffuser
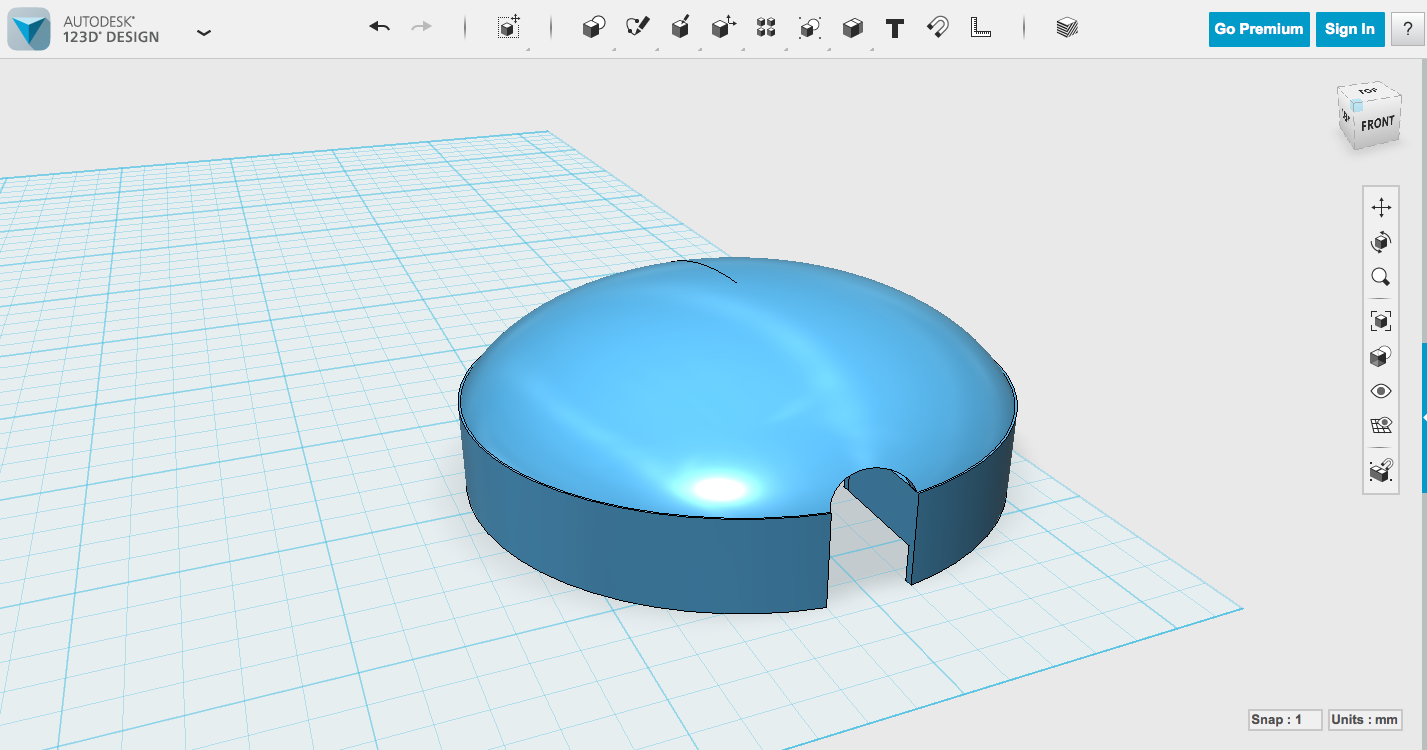
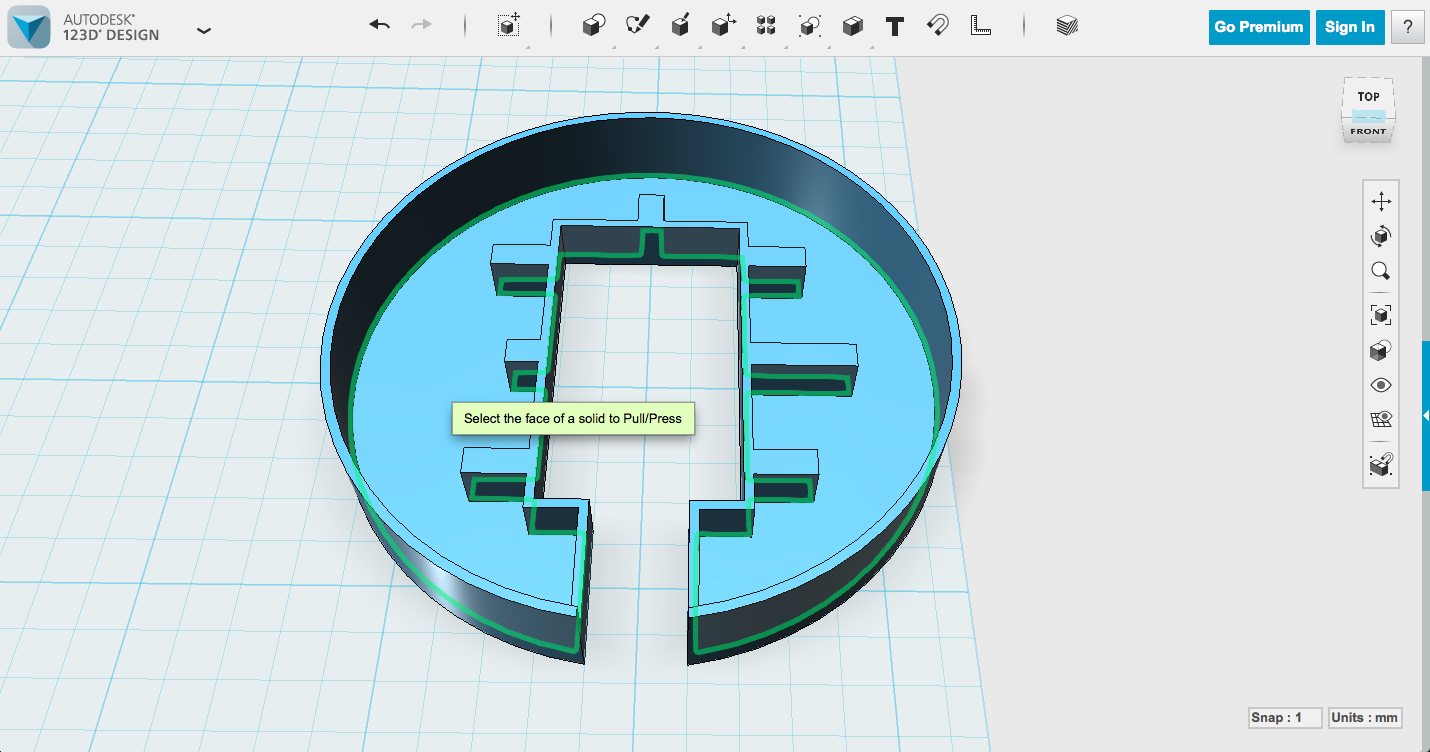
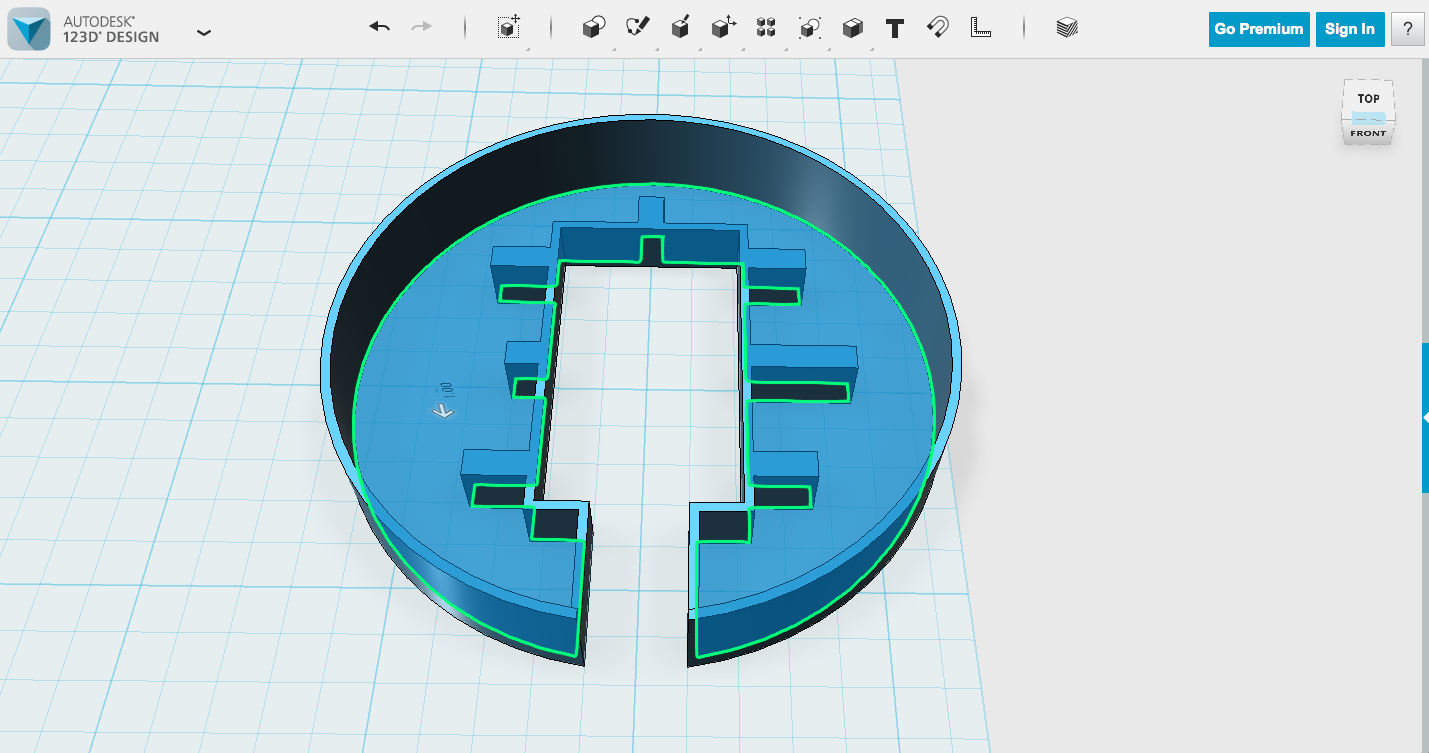
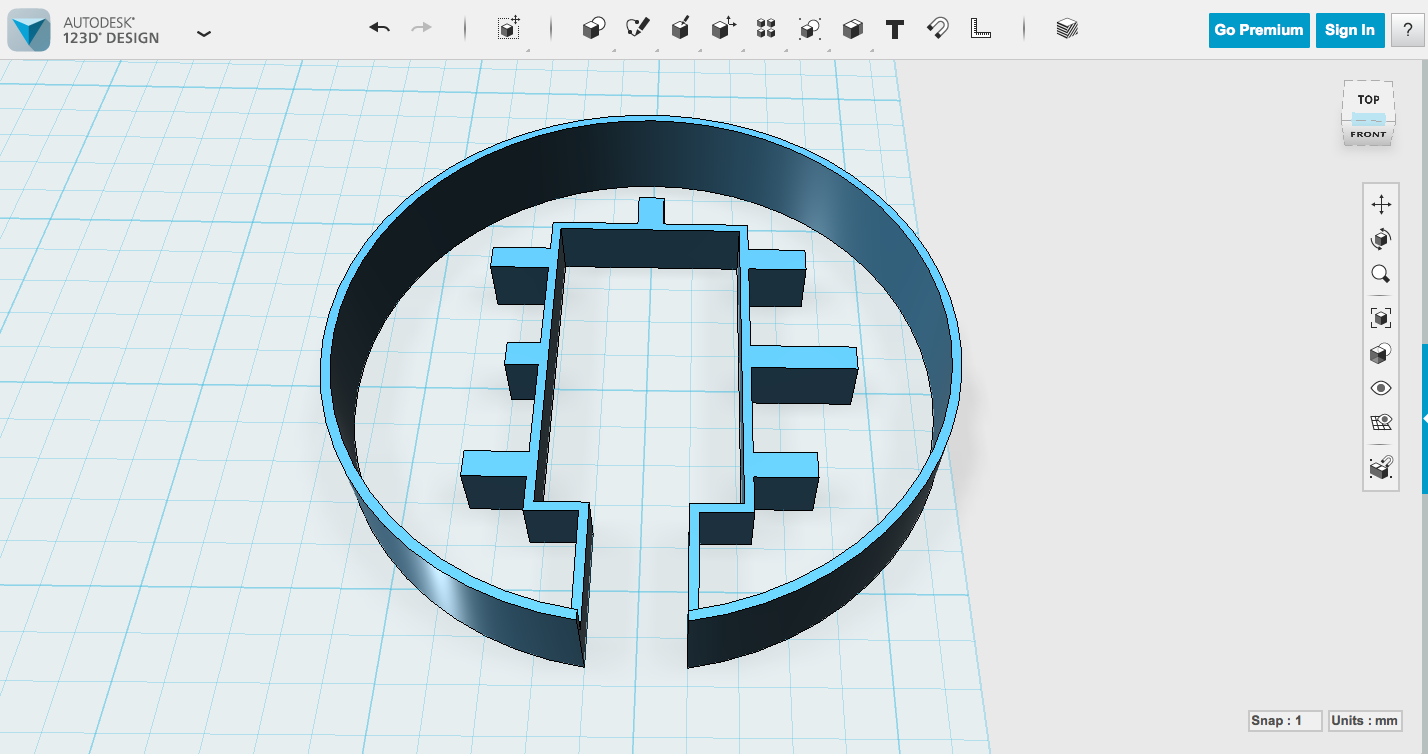
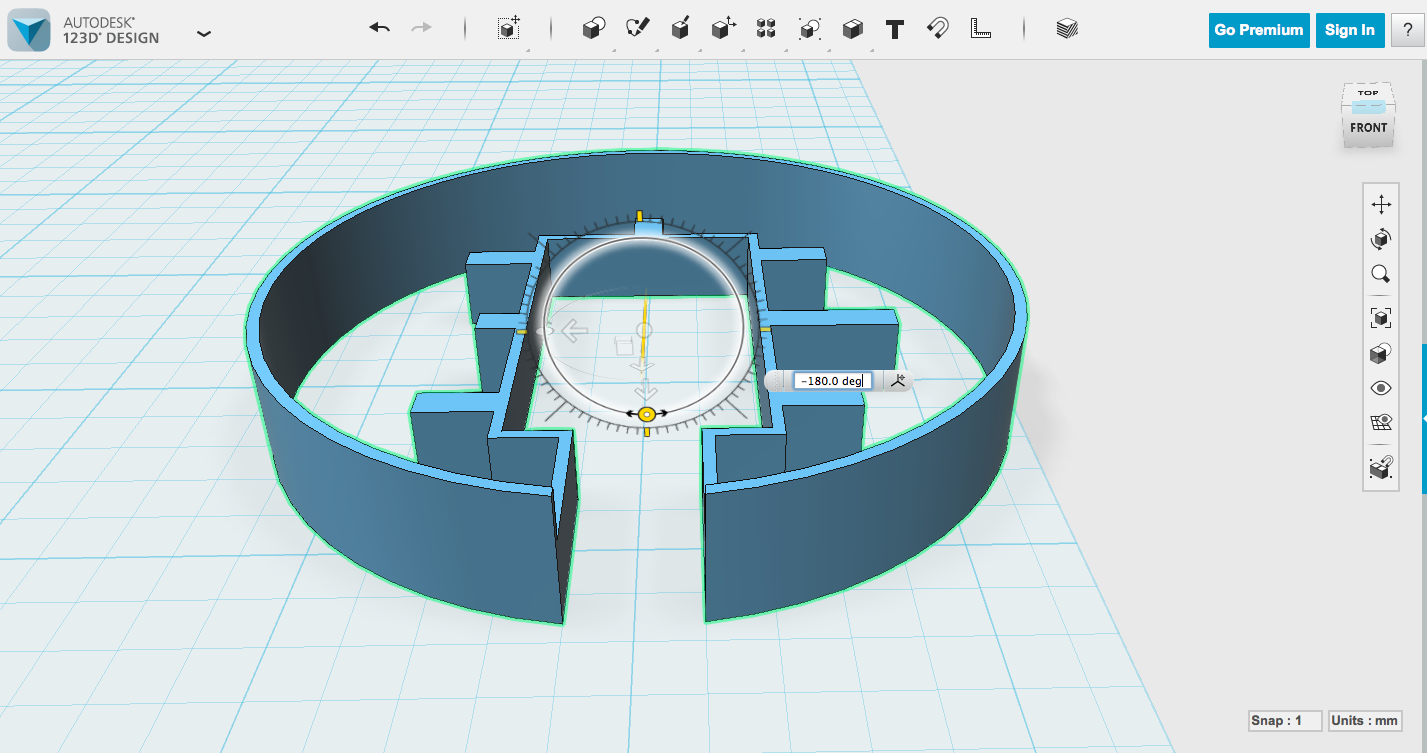
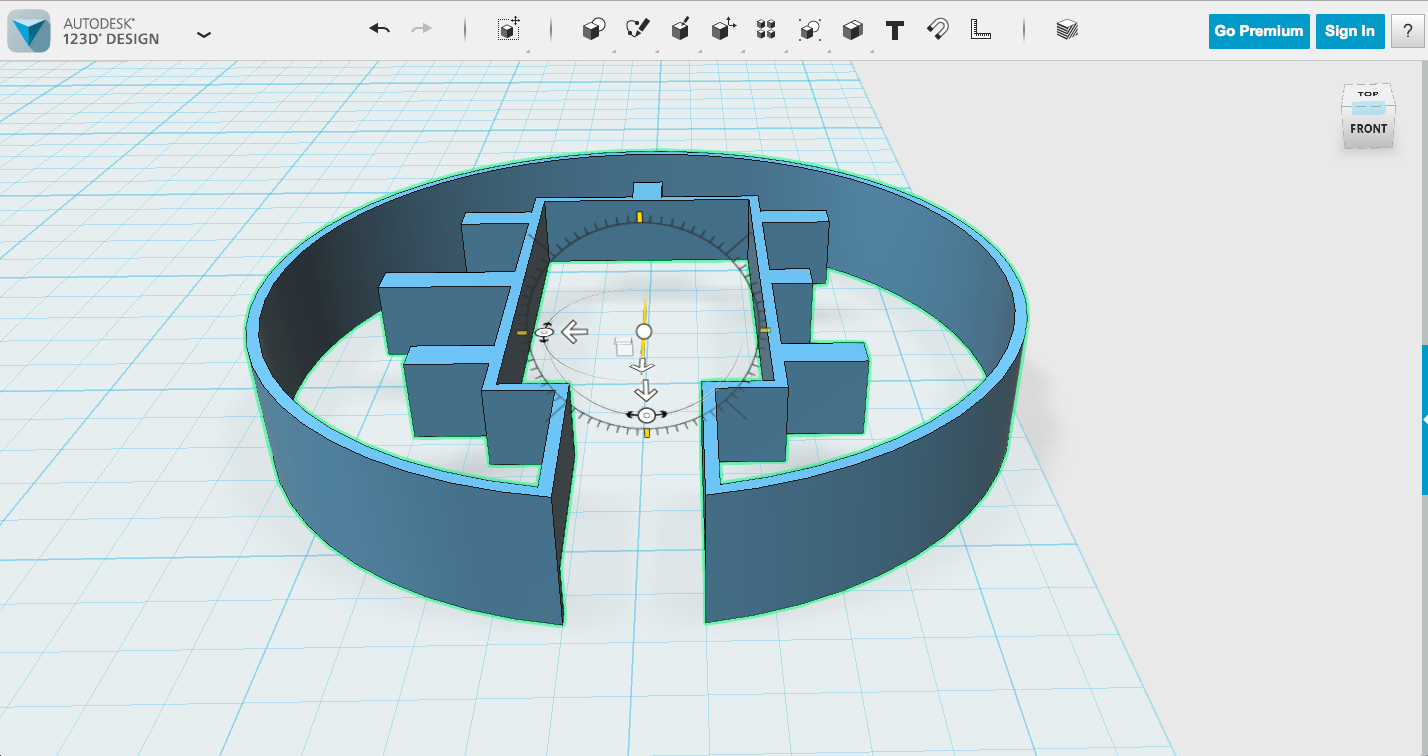
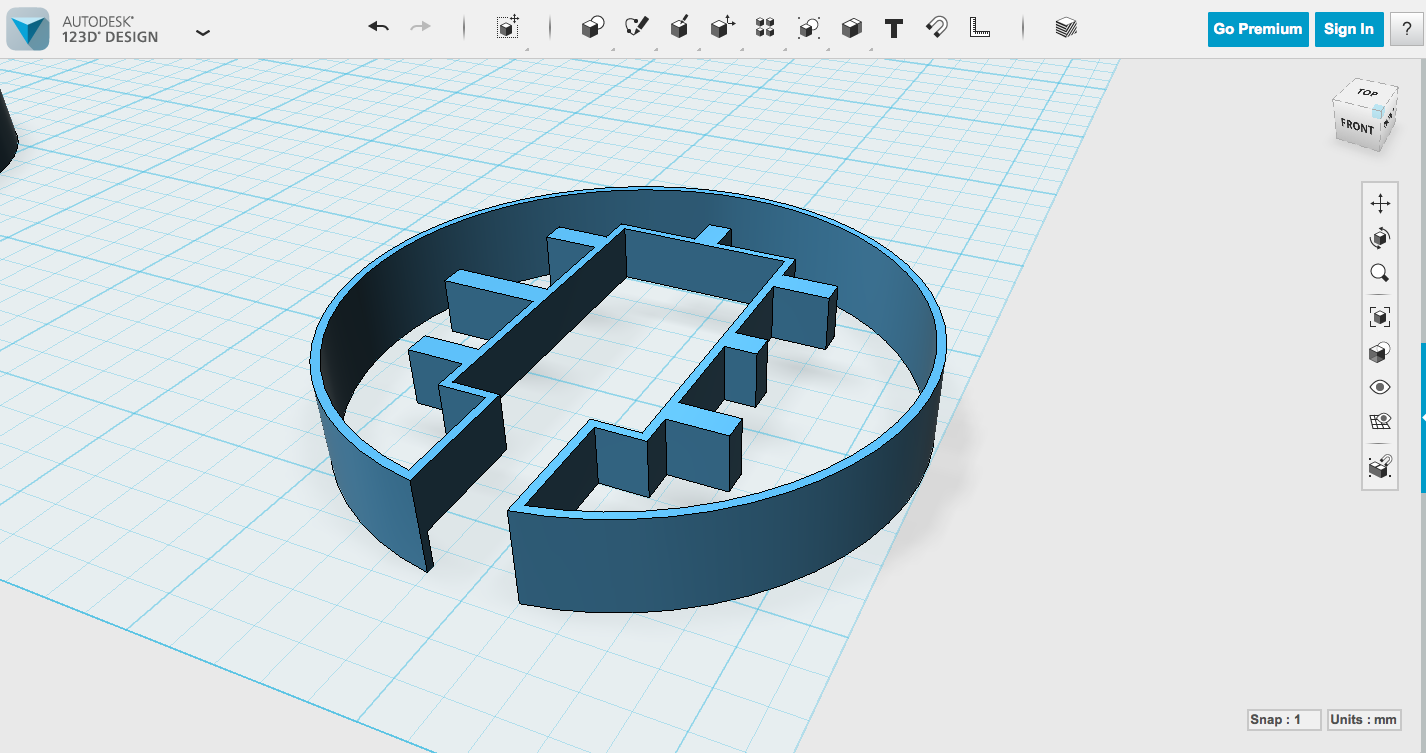
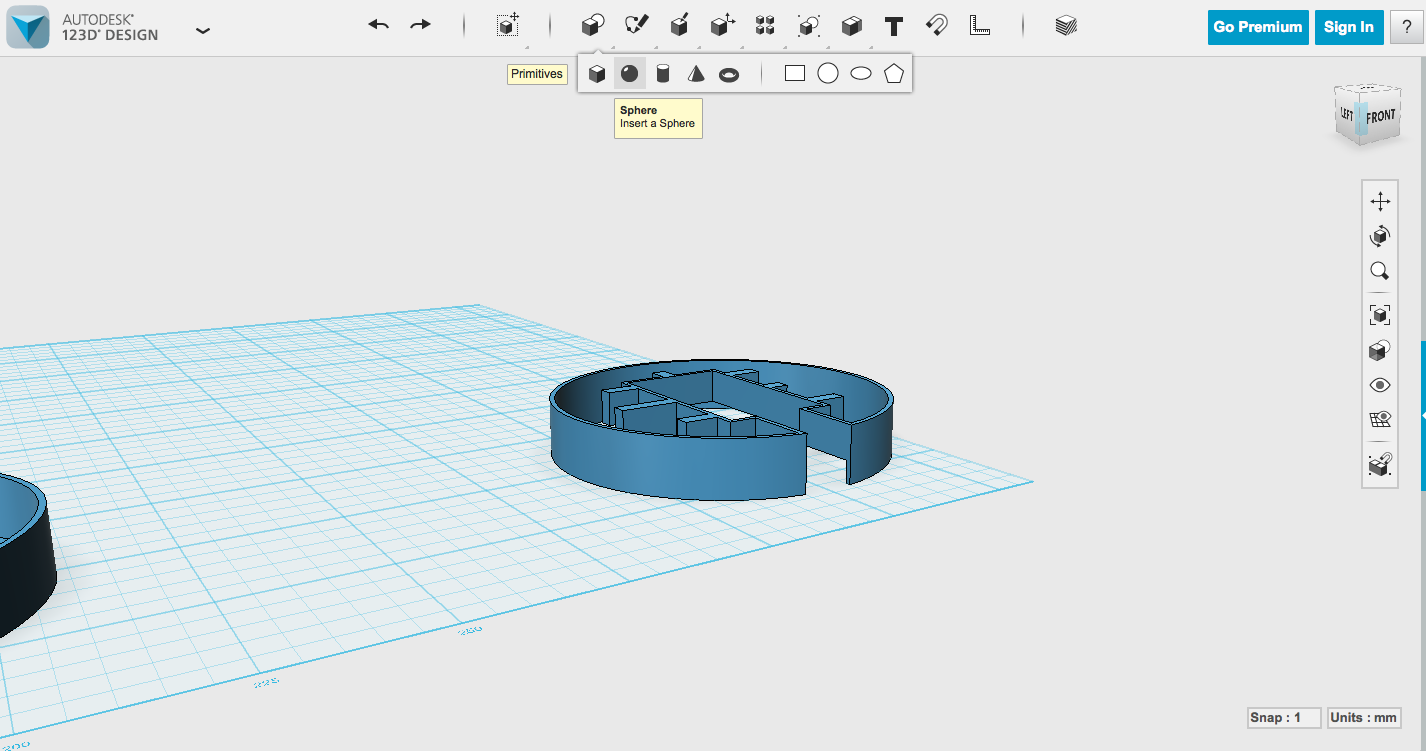
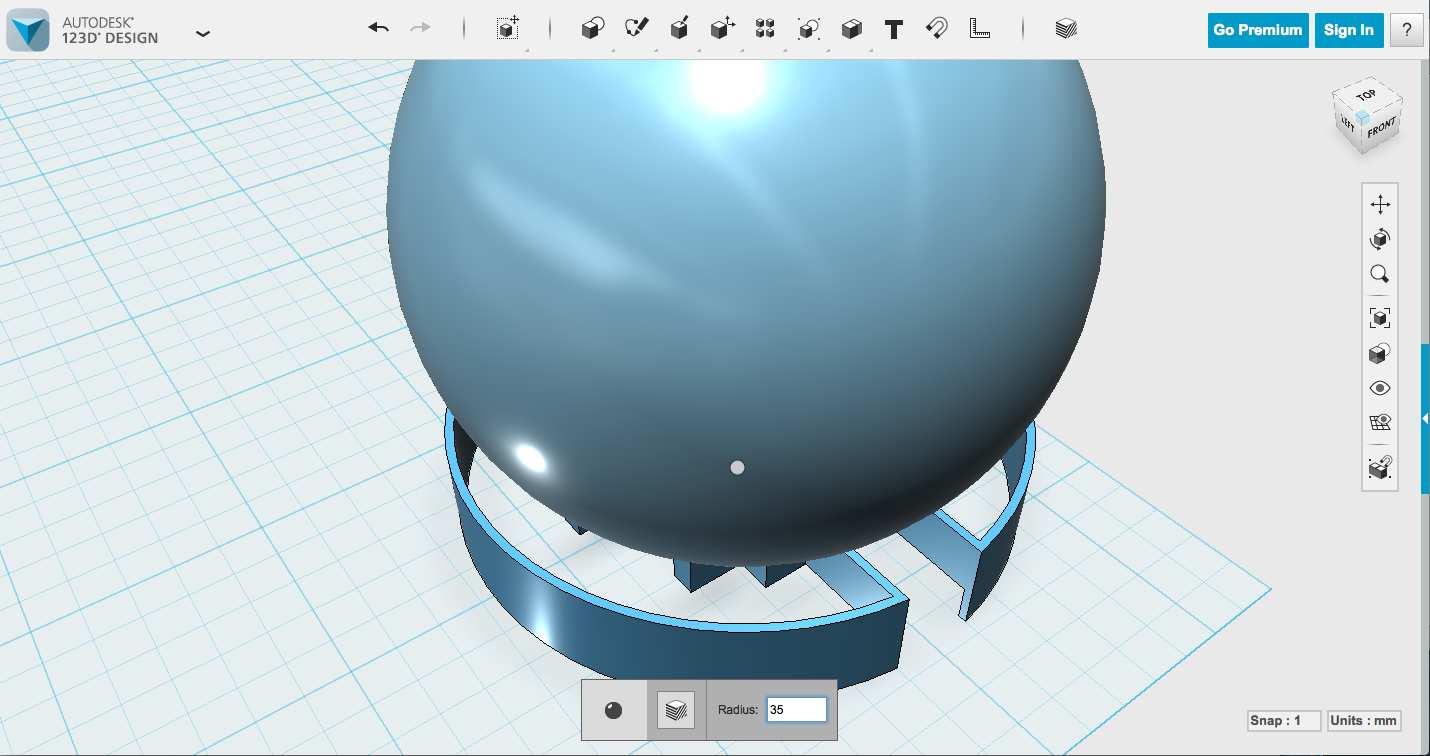
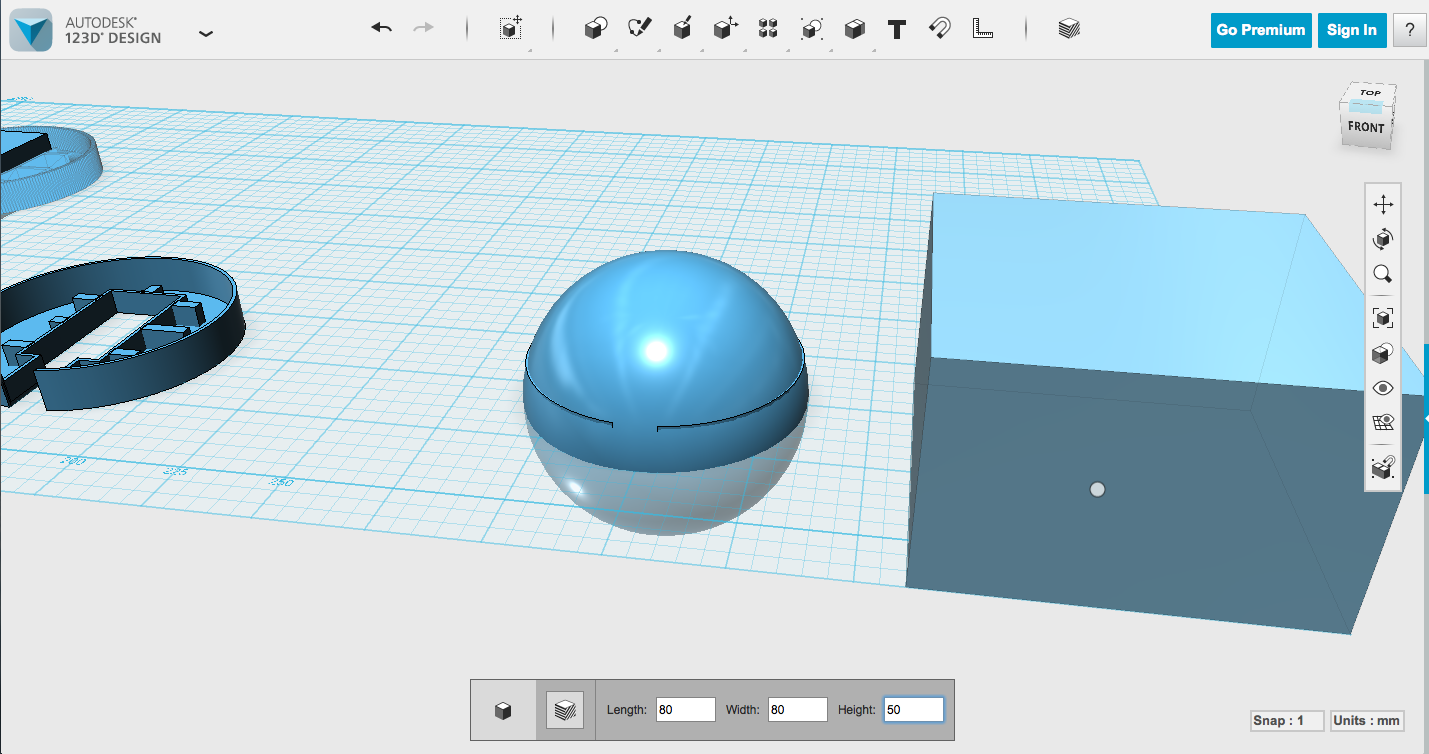
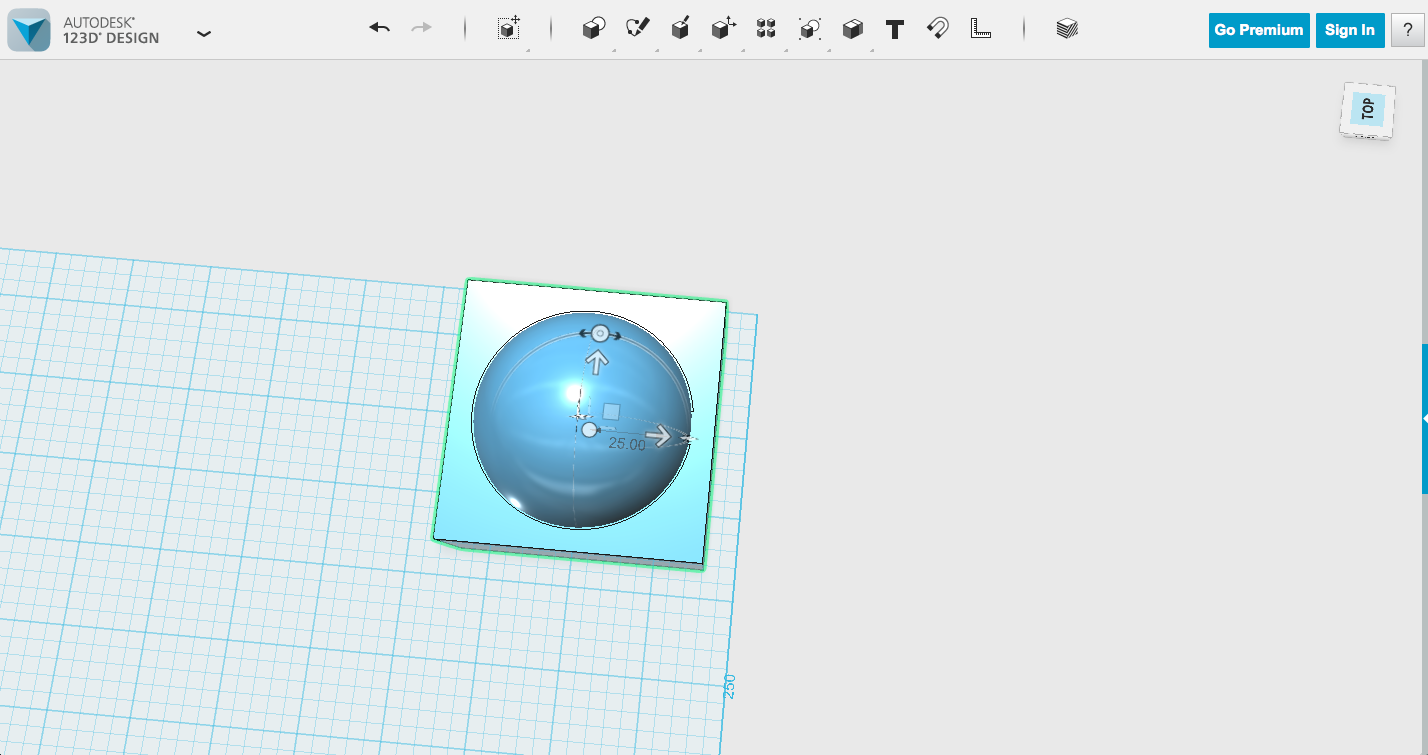
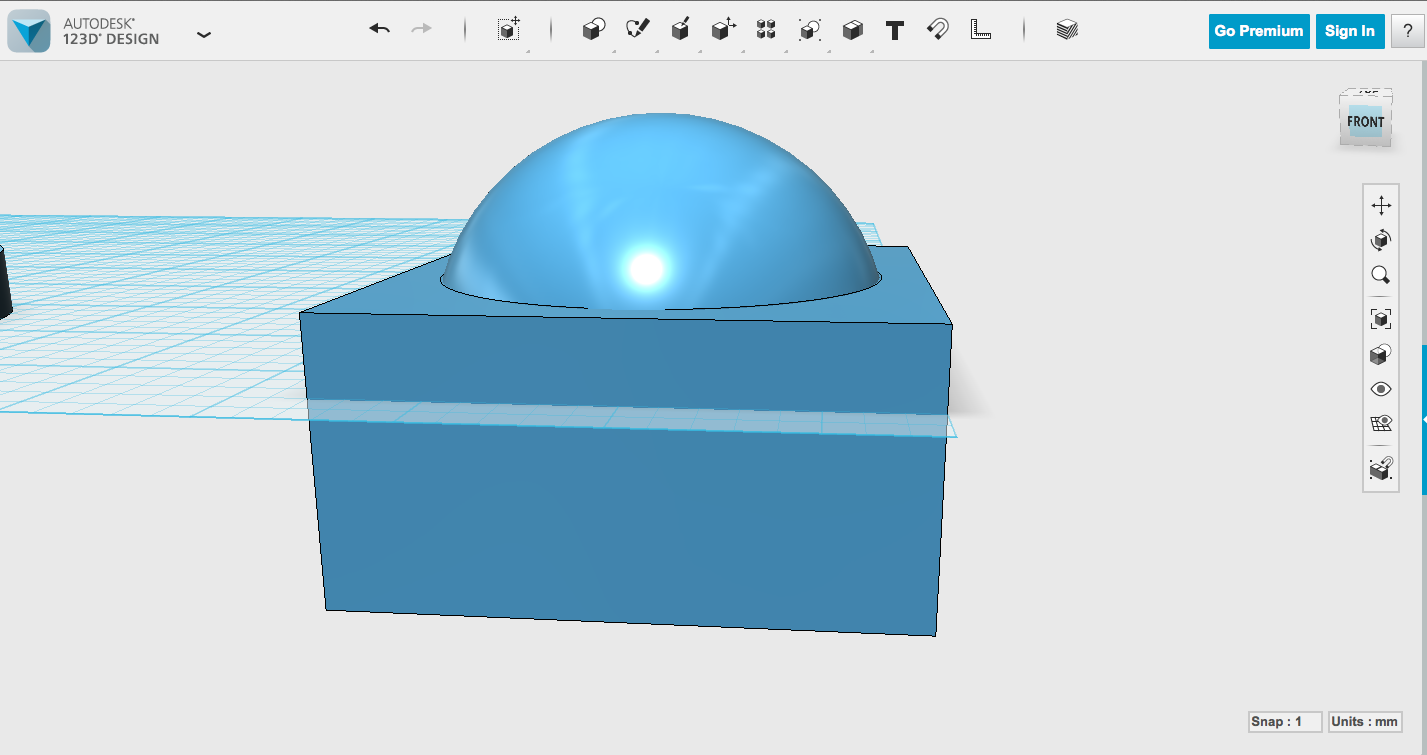
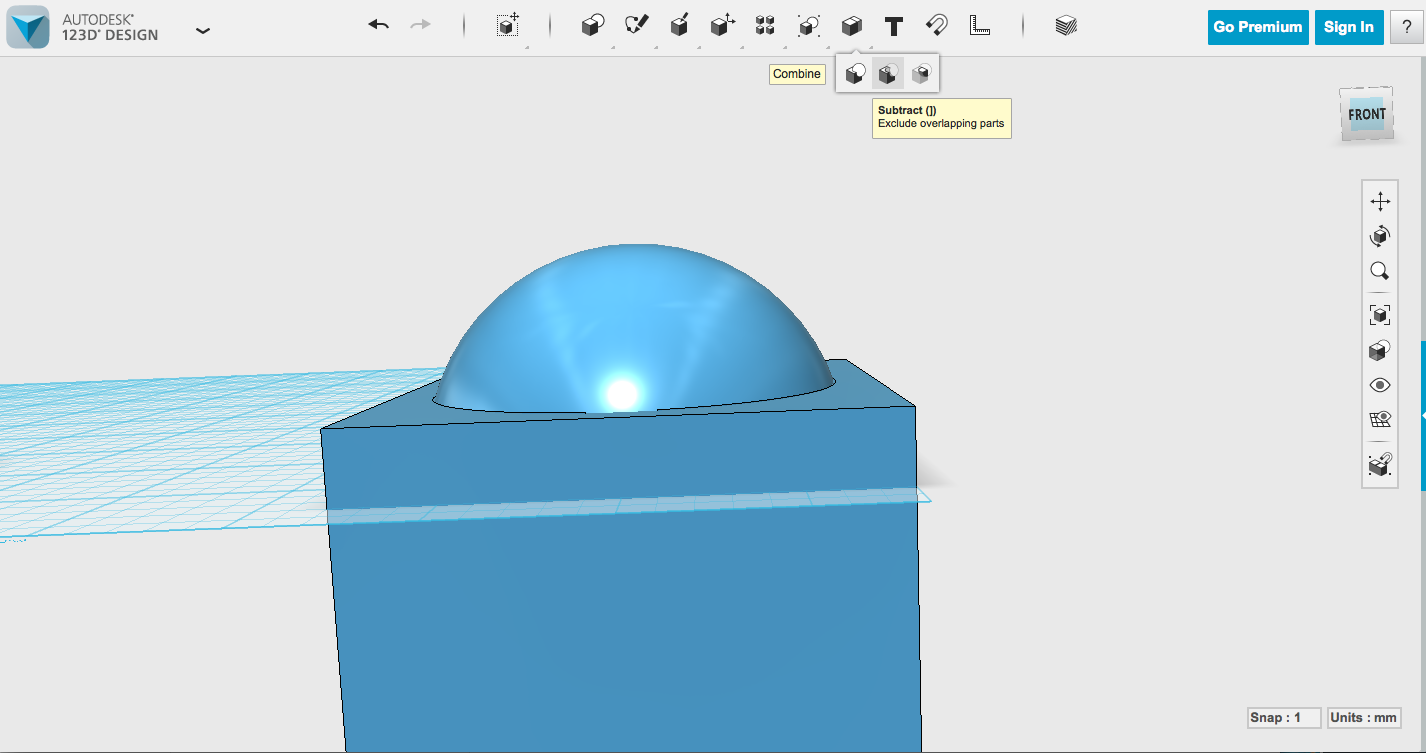
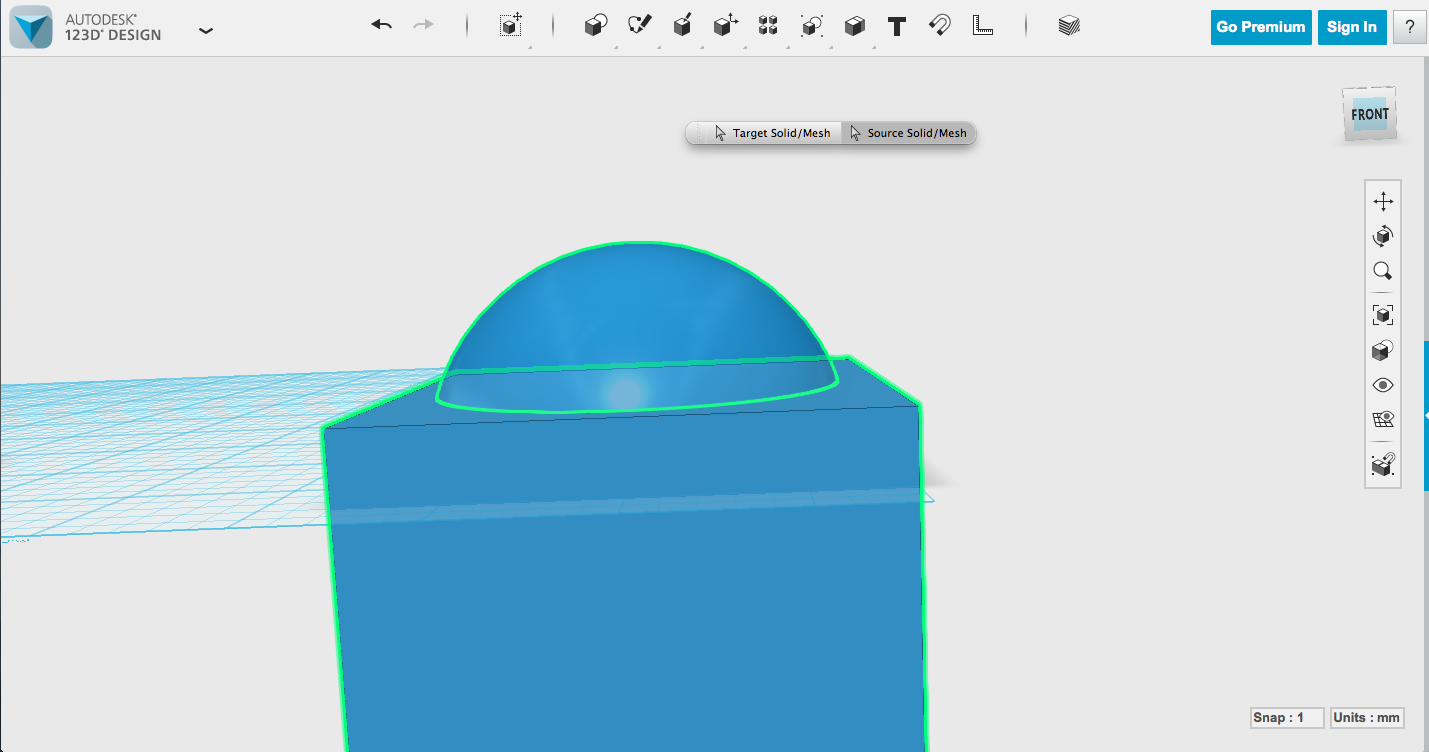
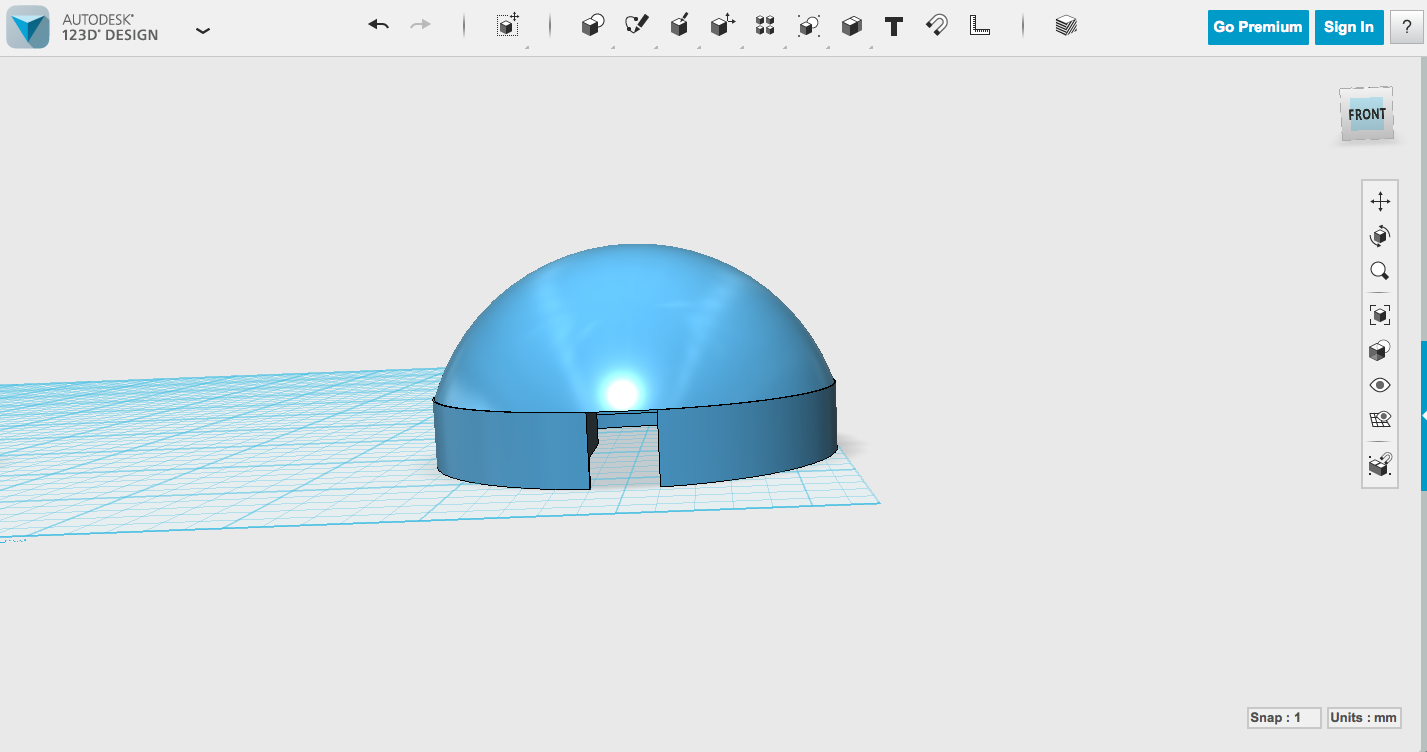
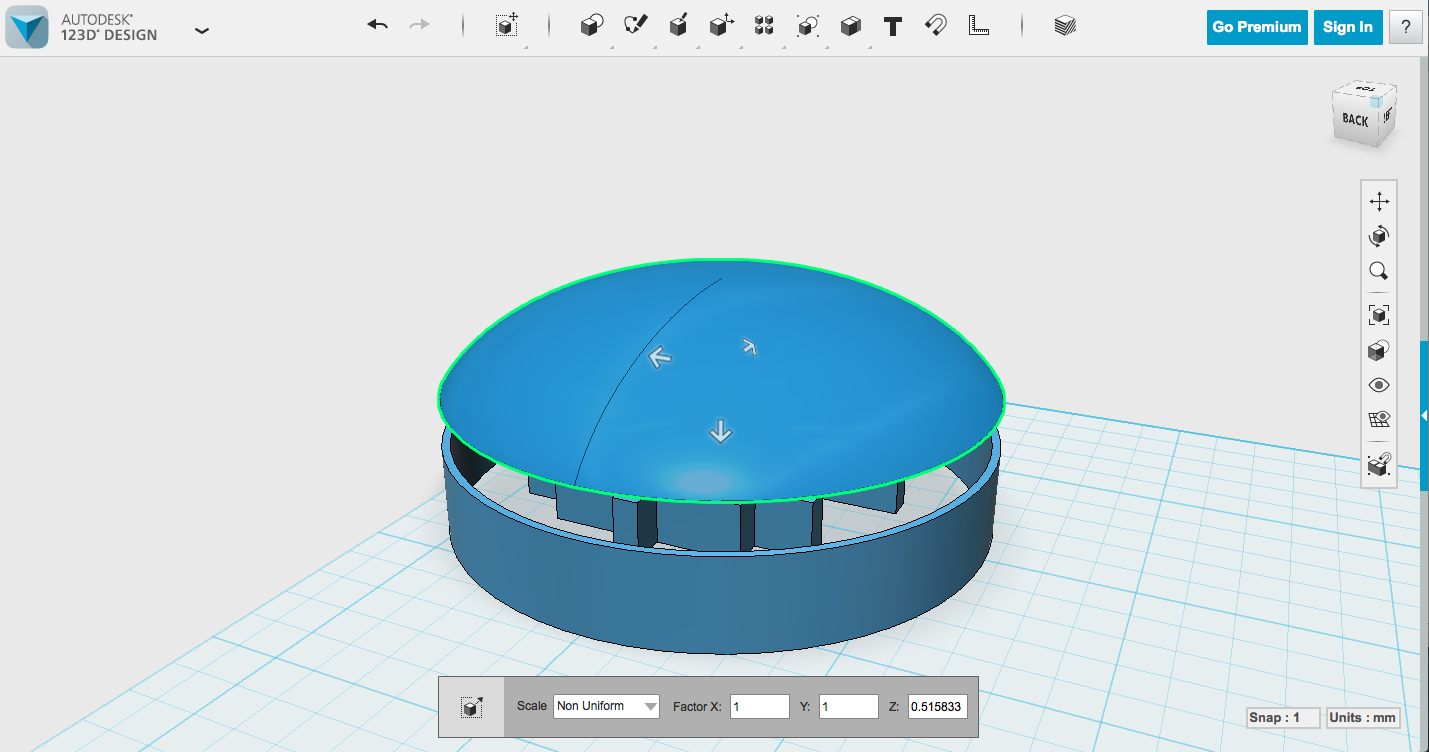
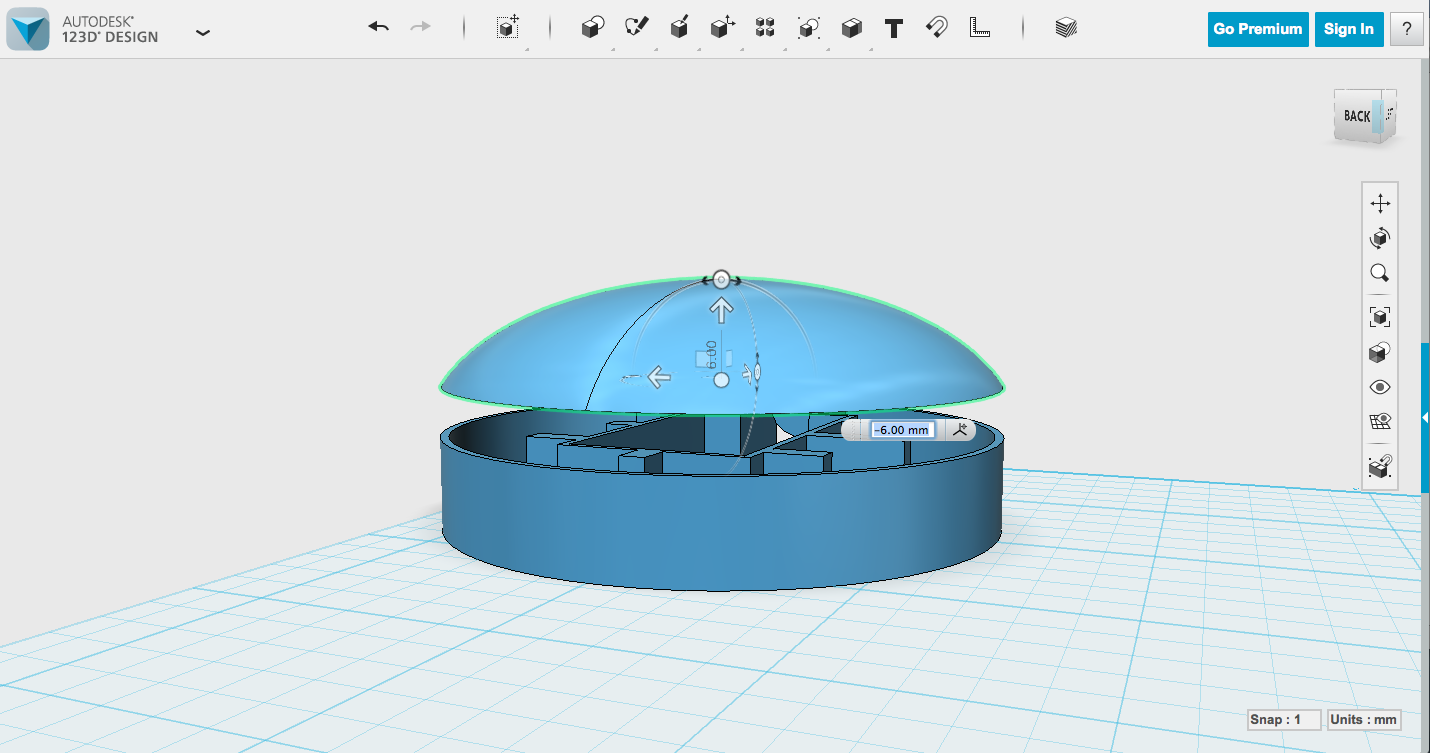
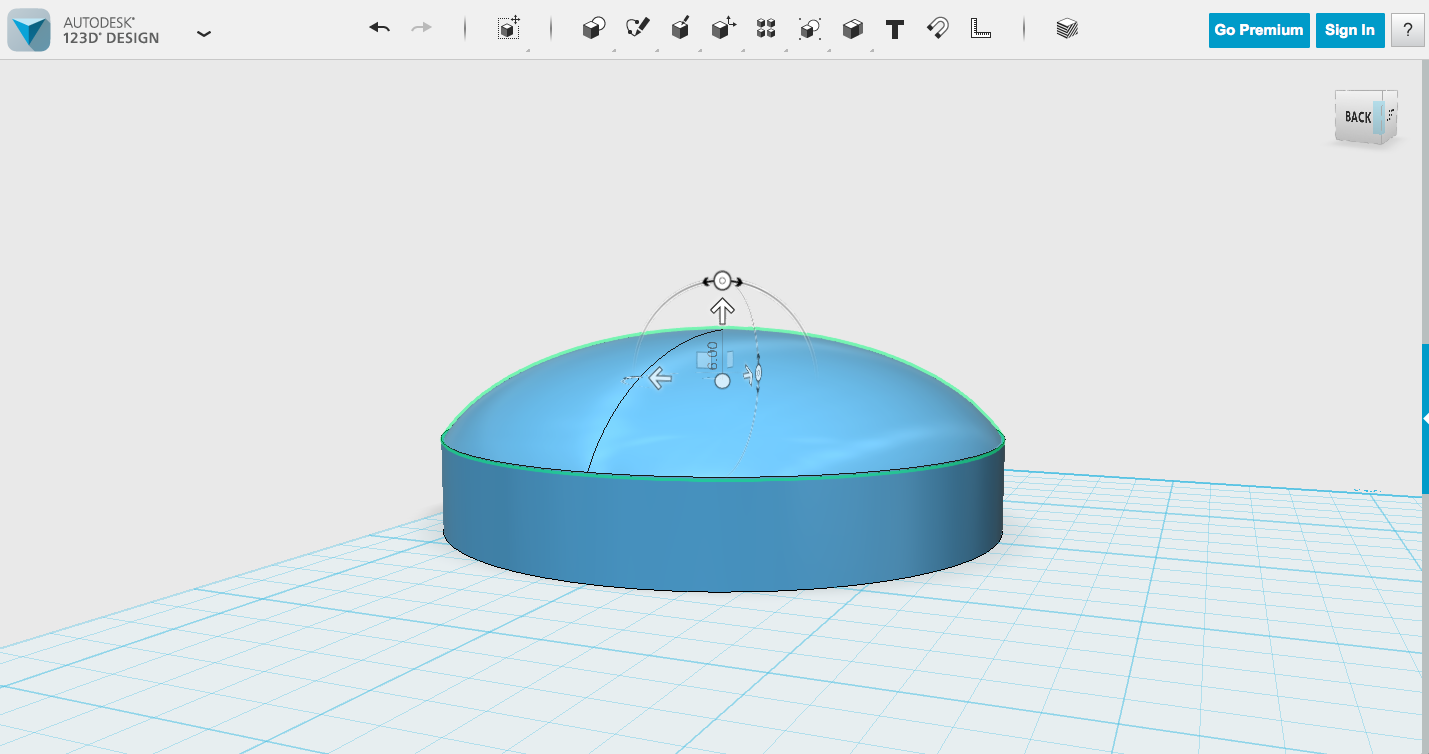
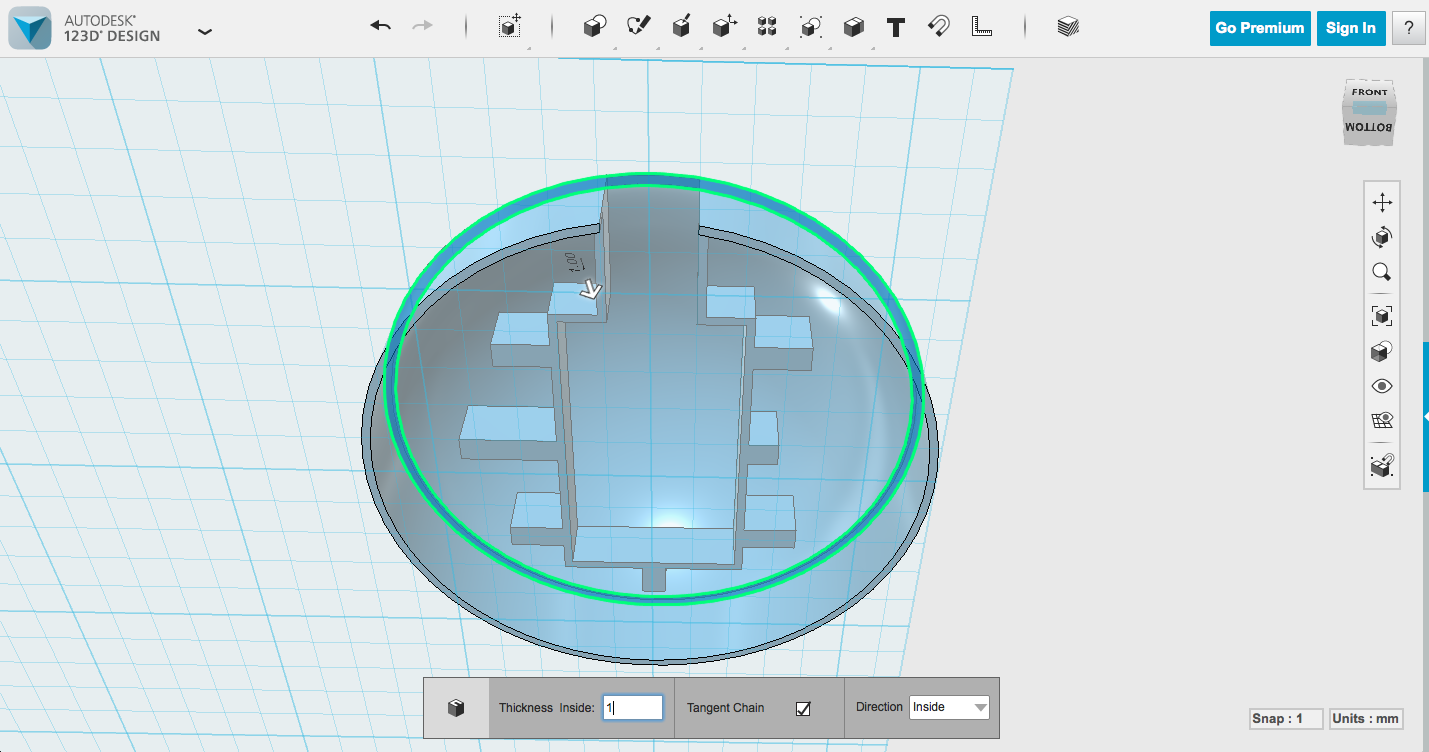
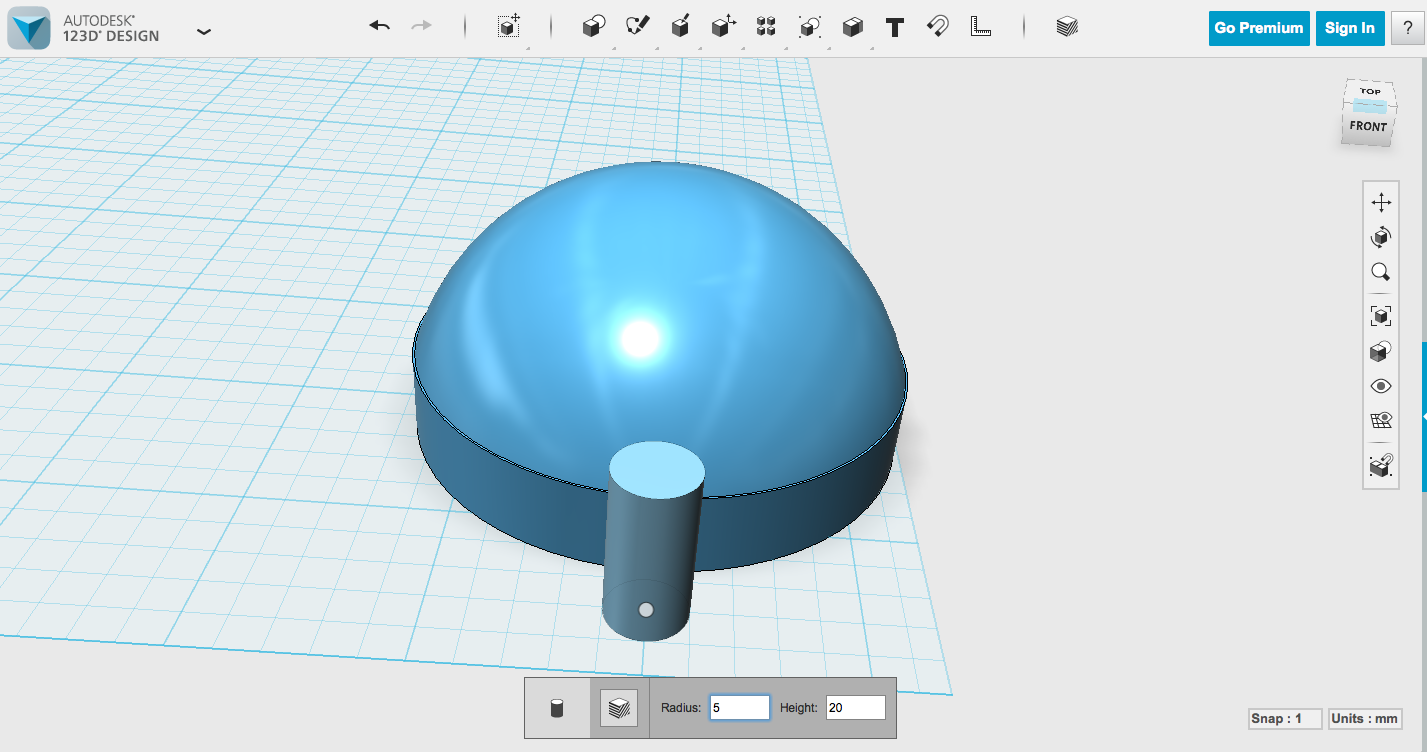
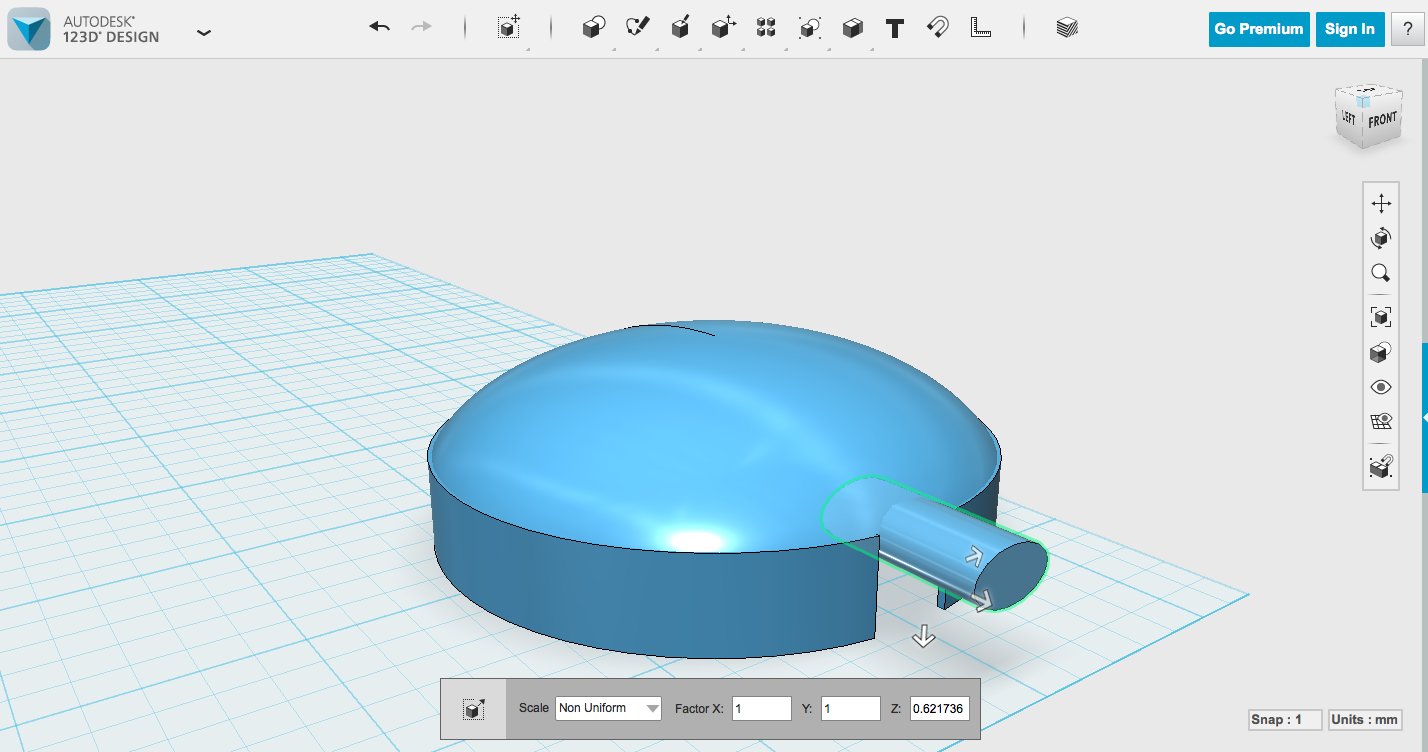
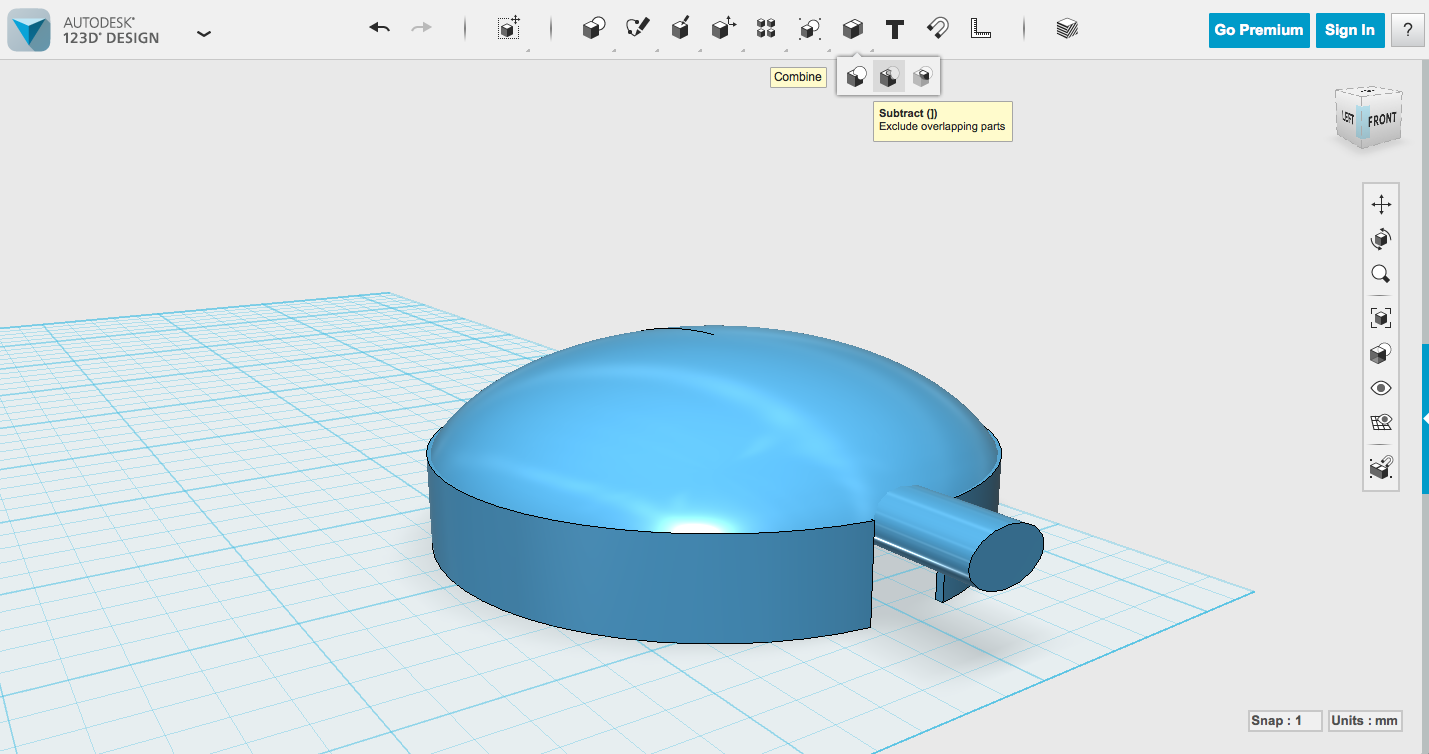
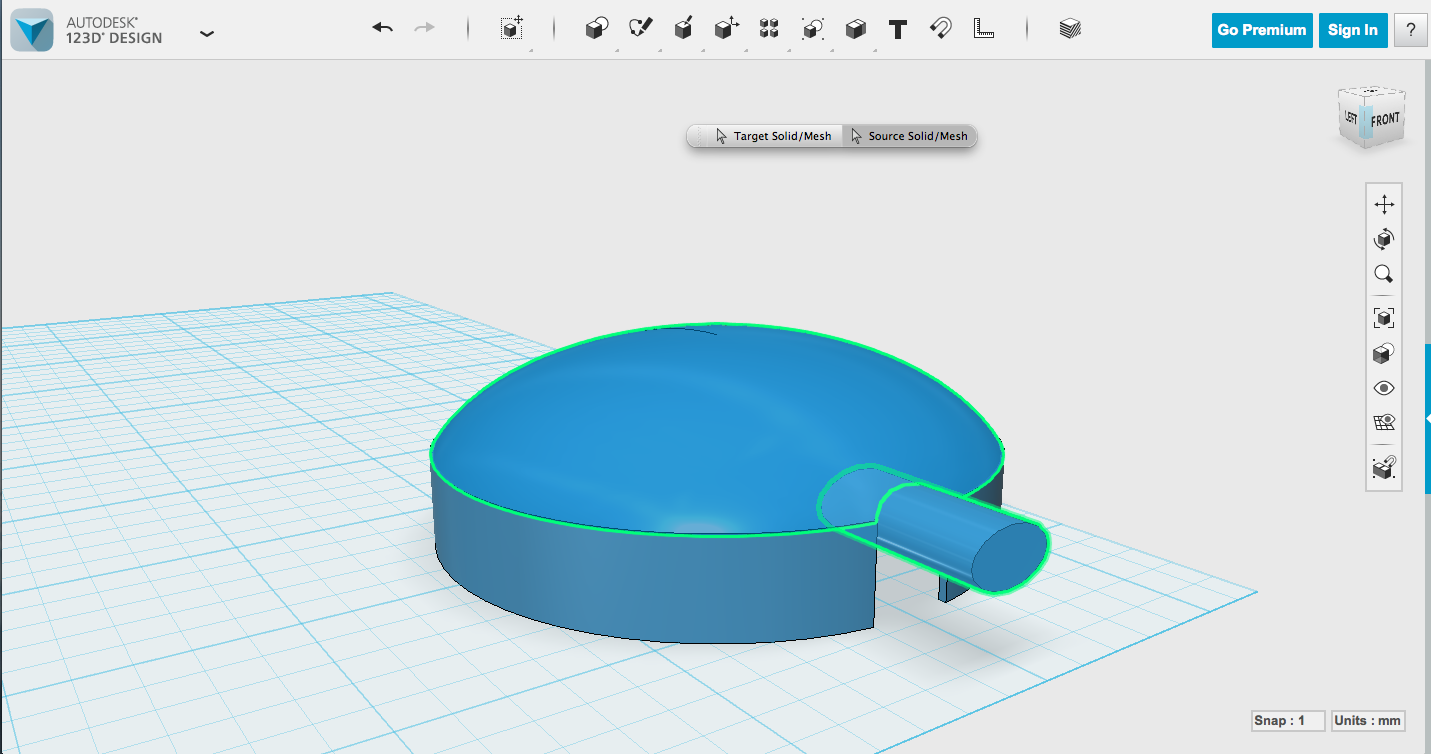
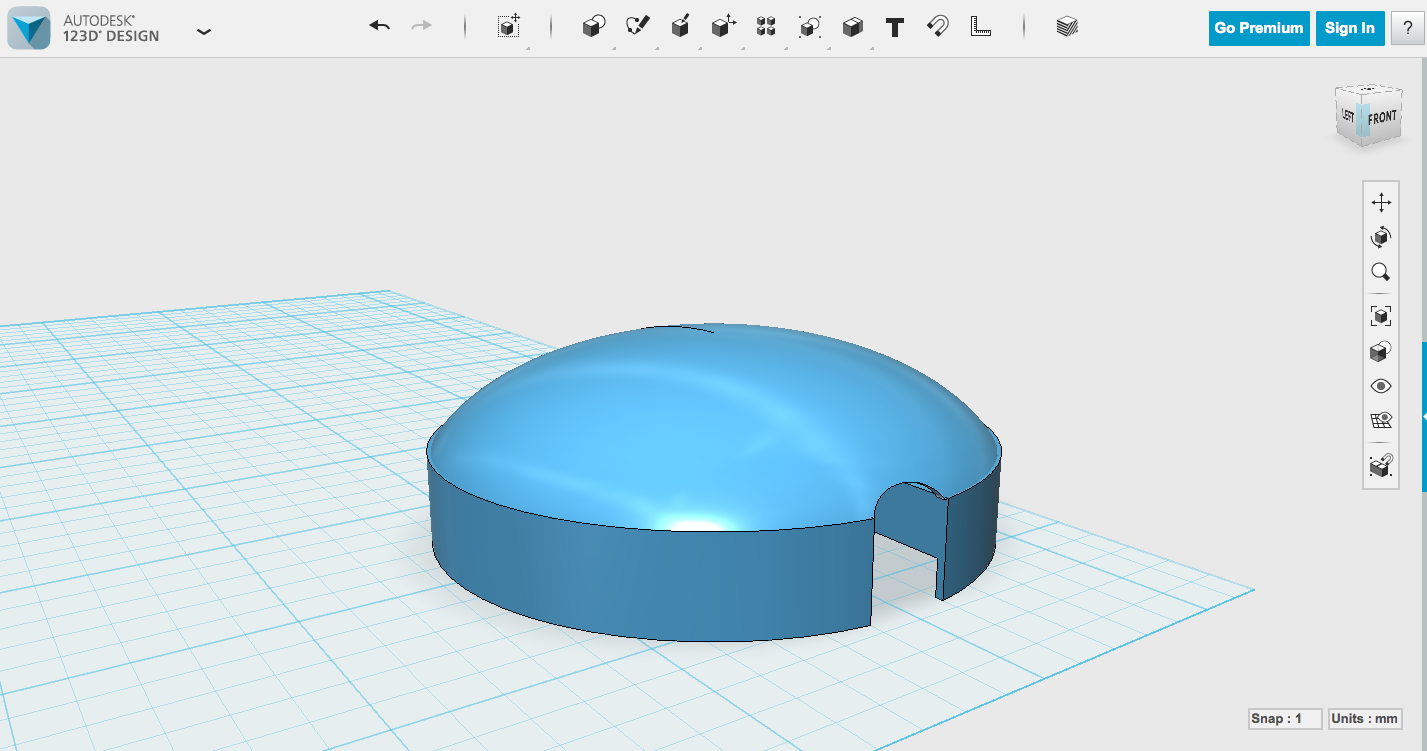
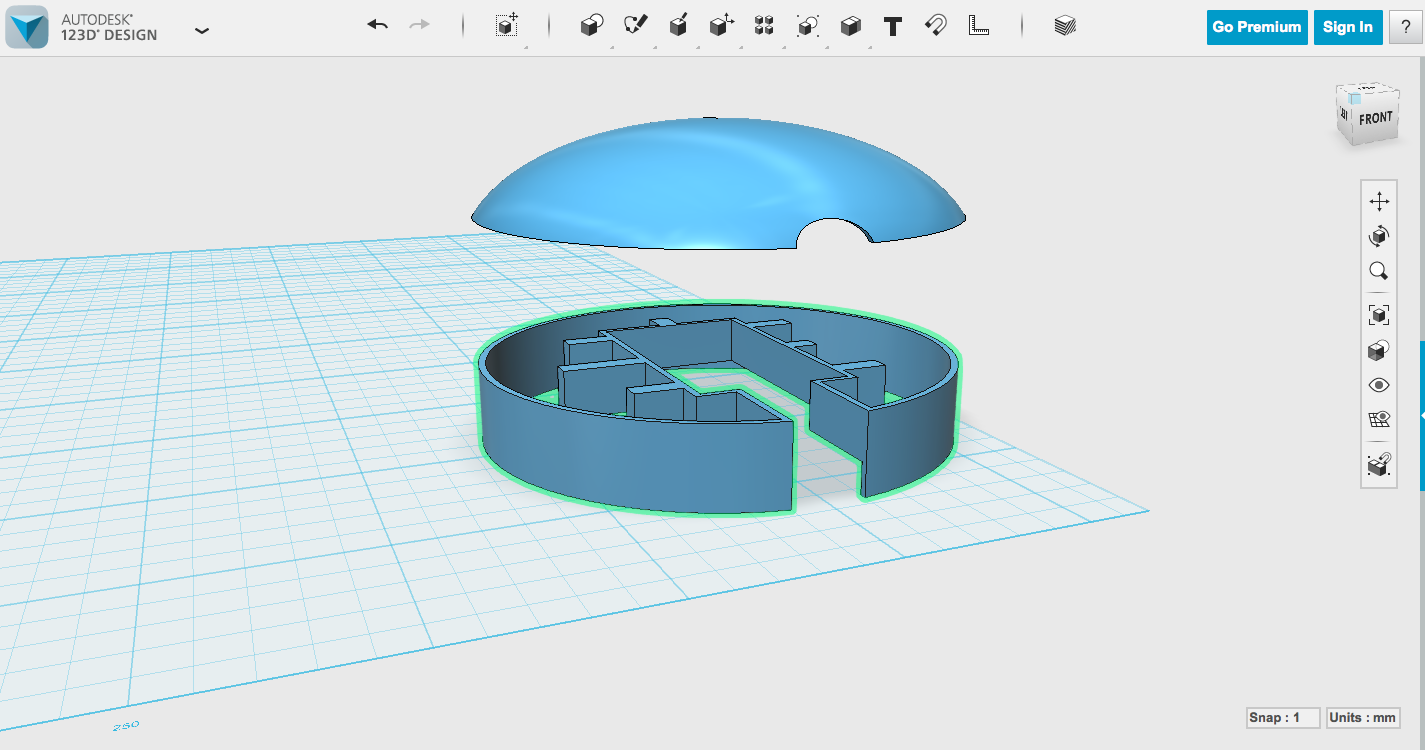
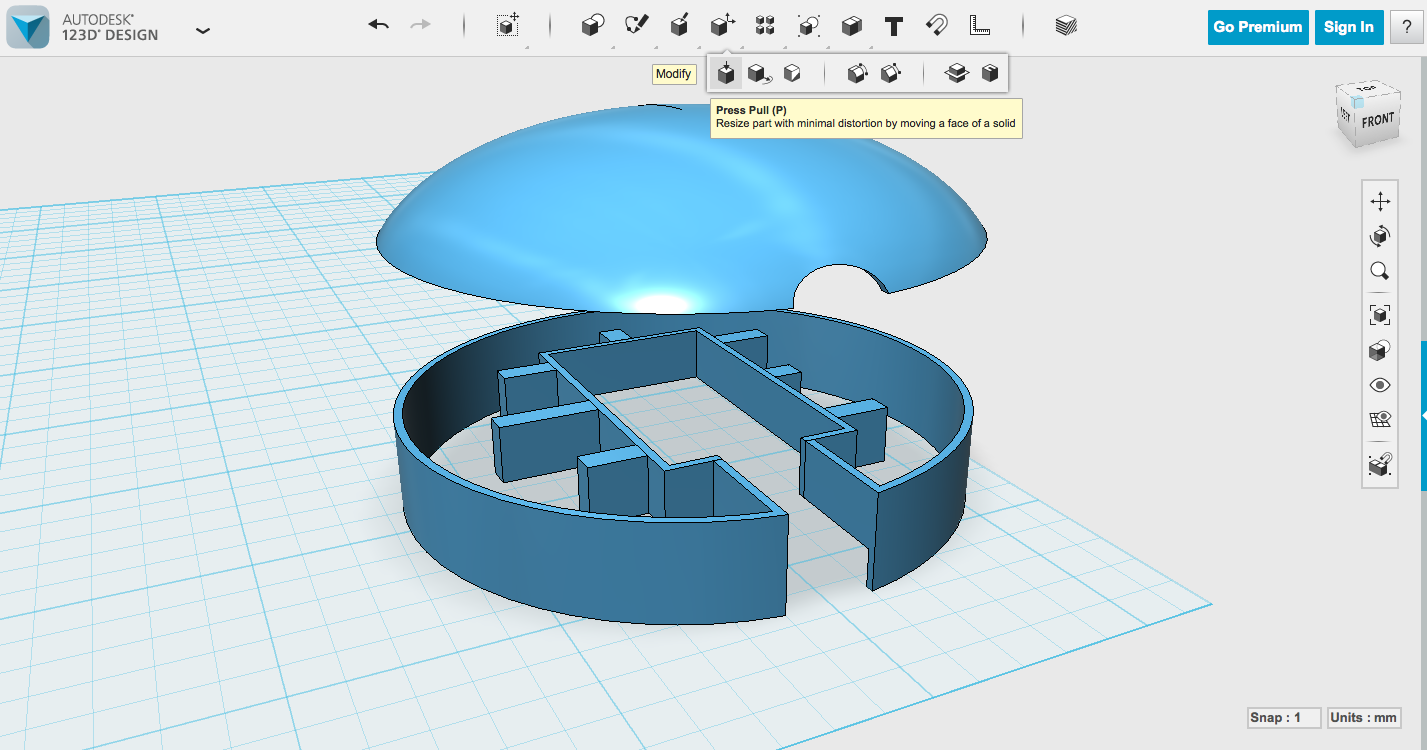
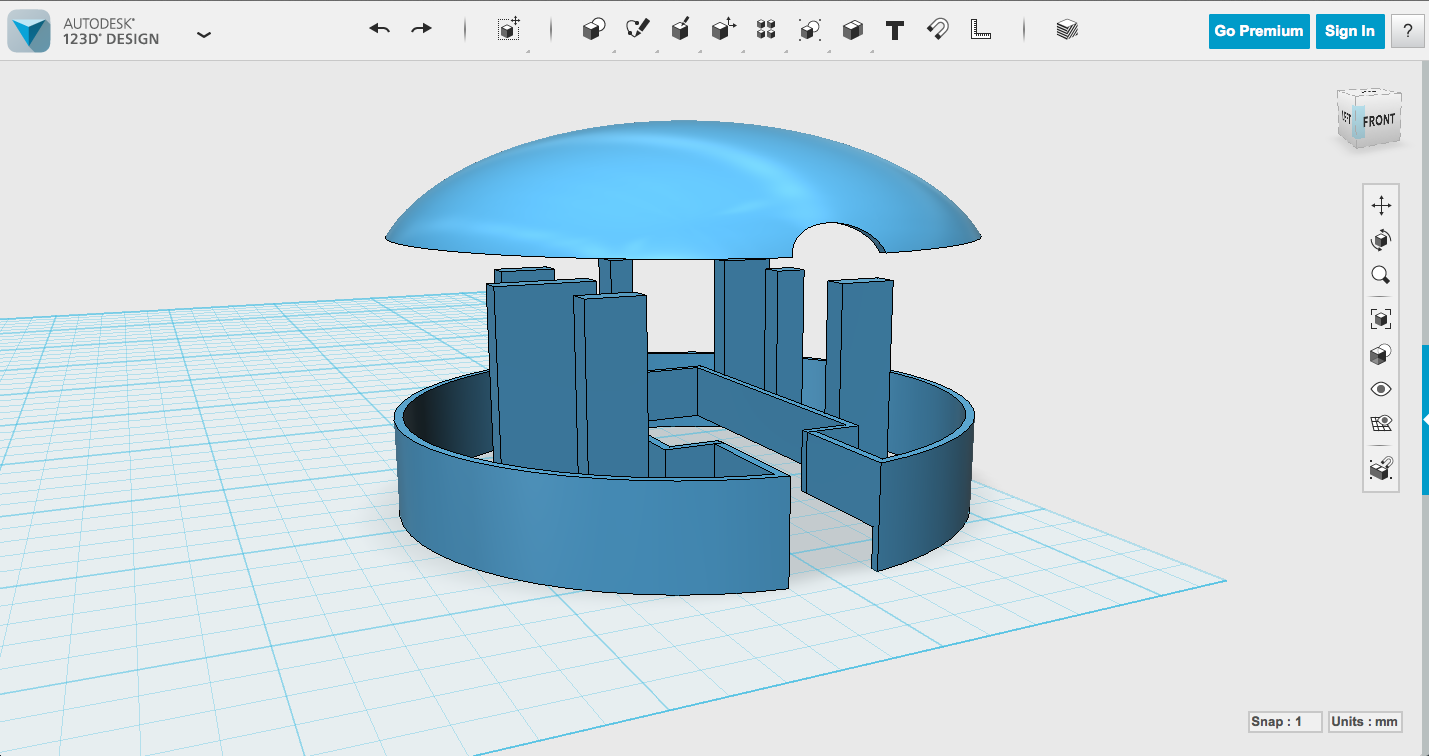
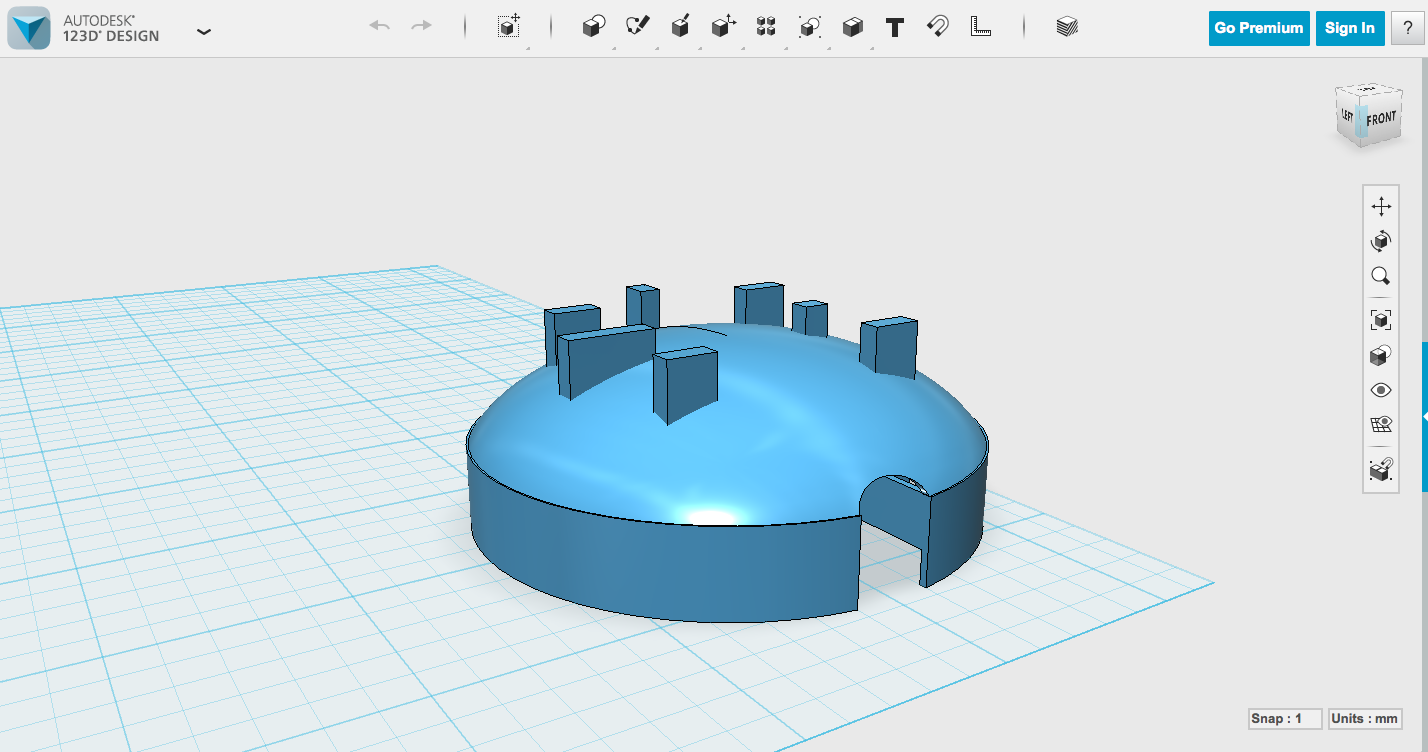
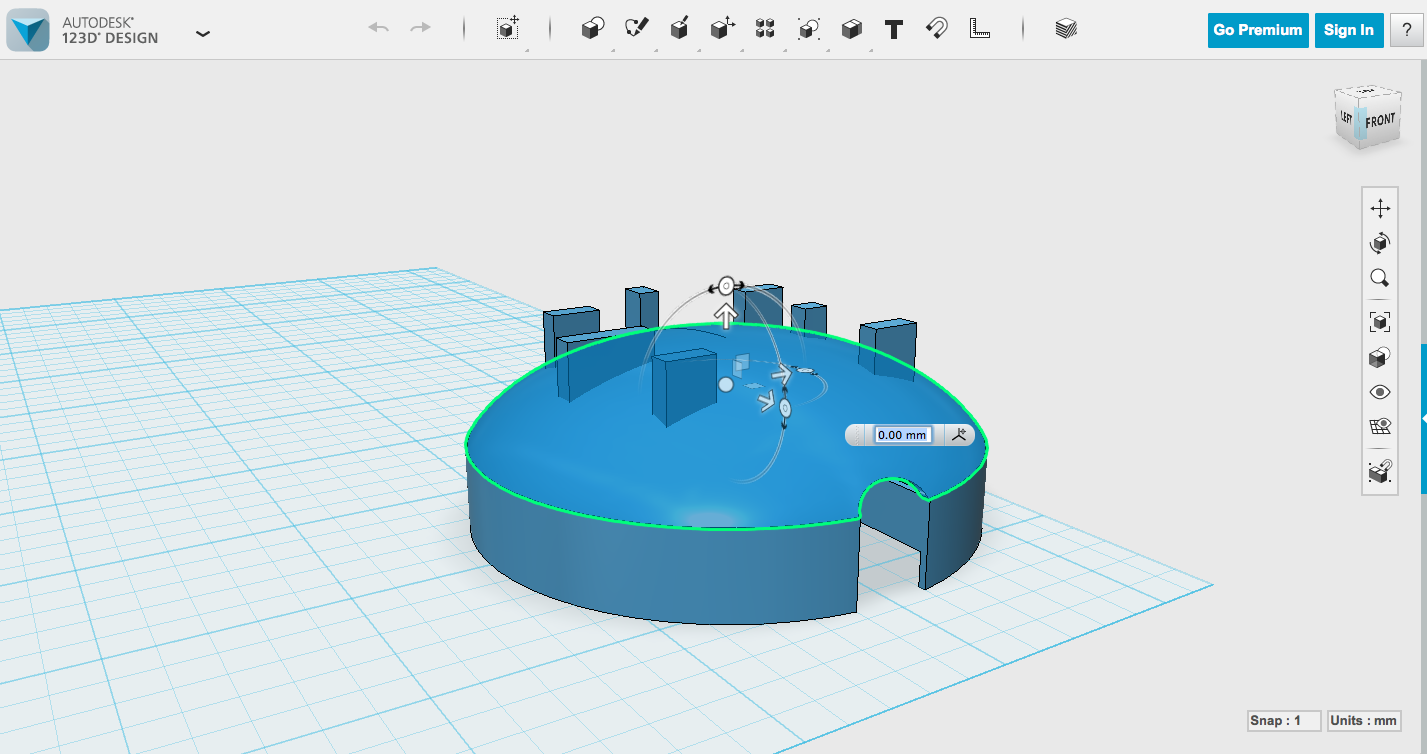
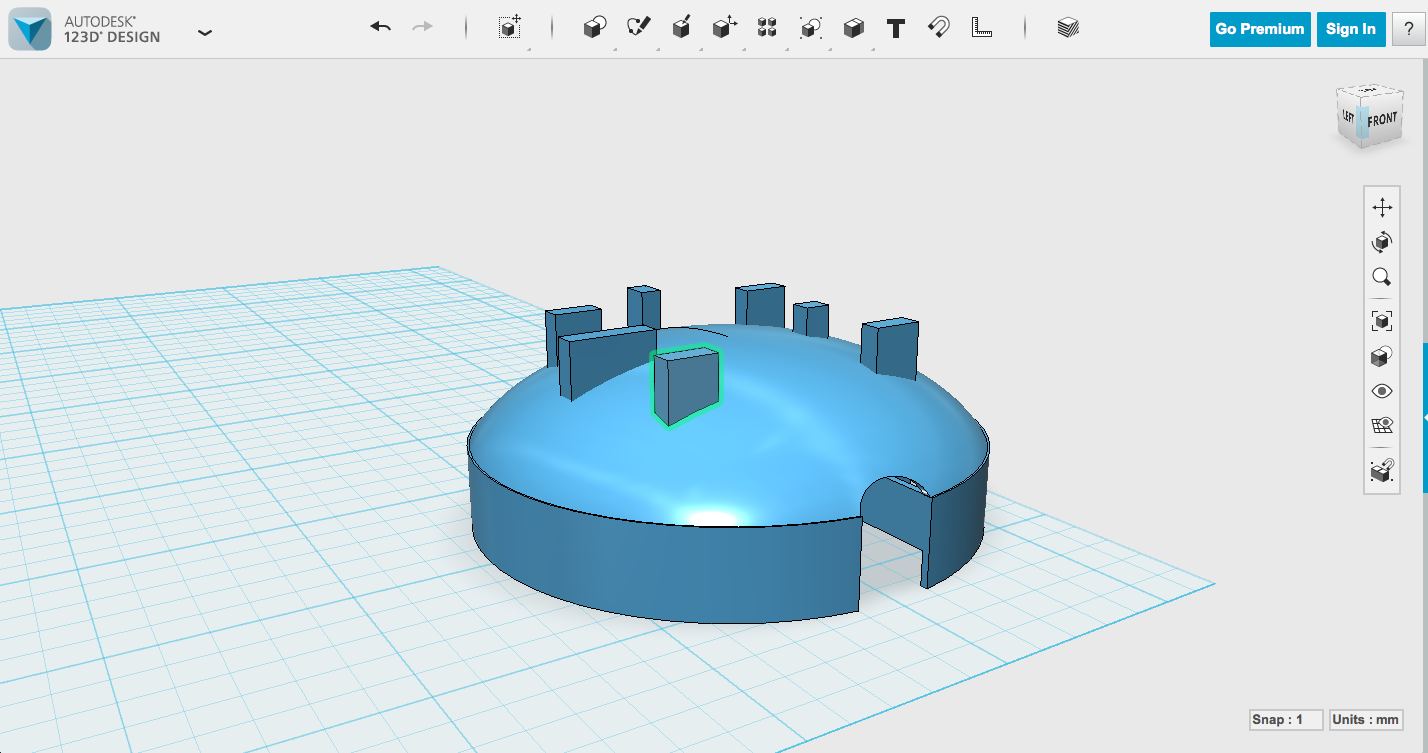
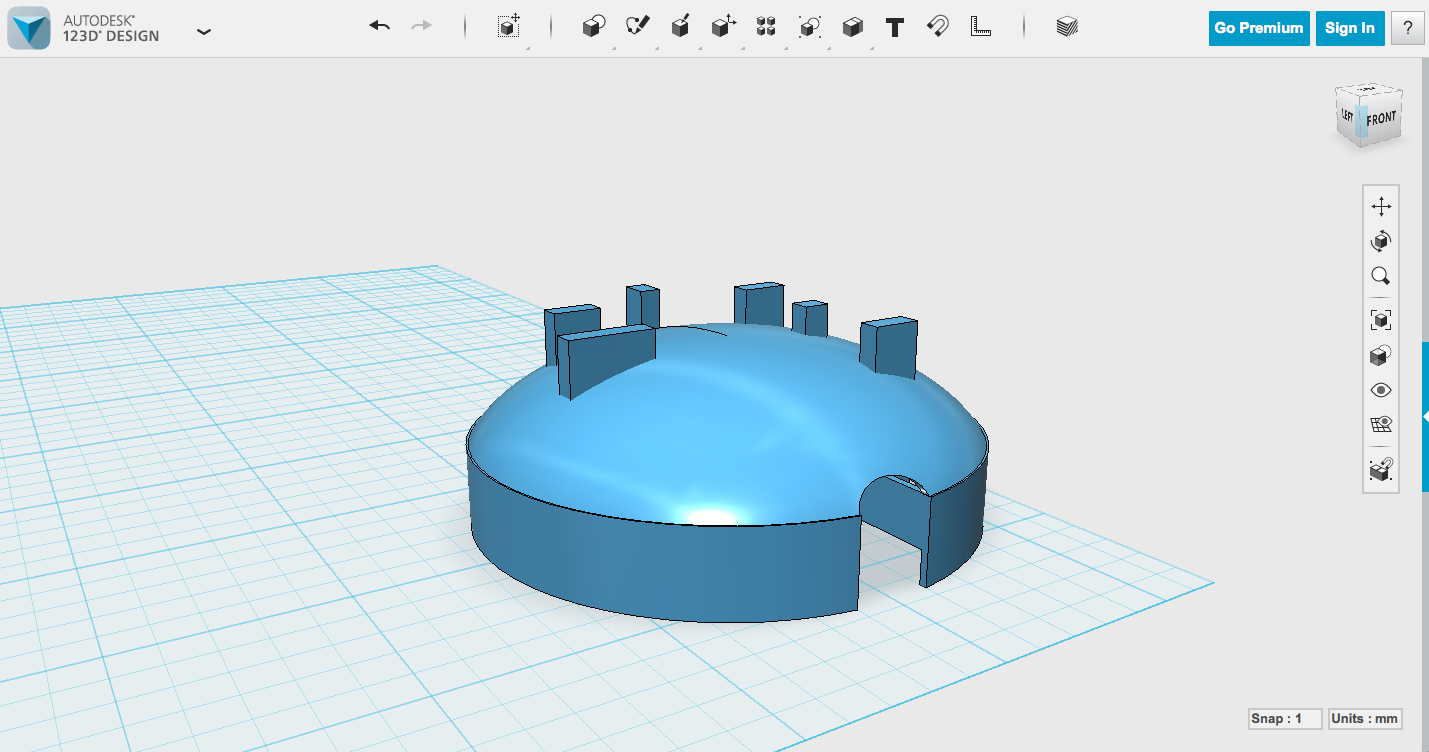
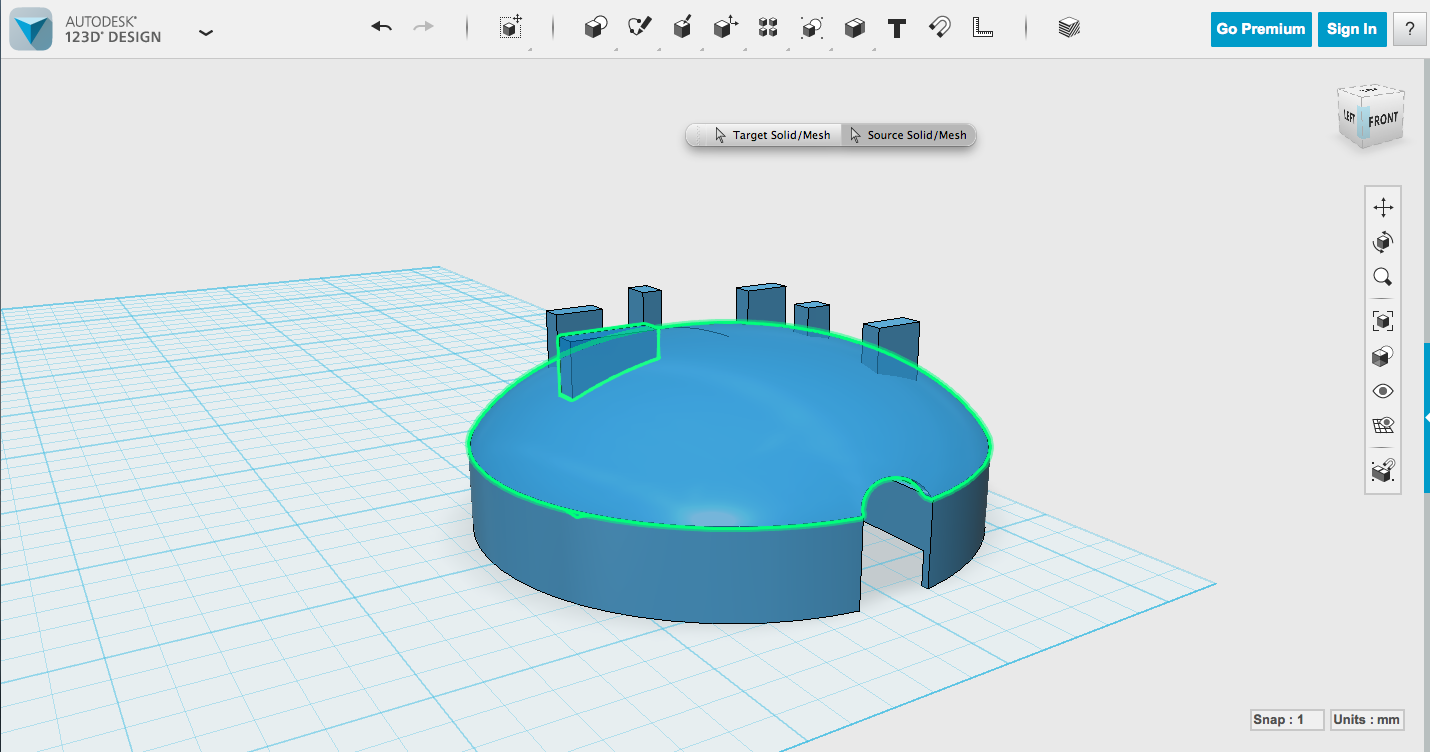
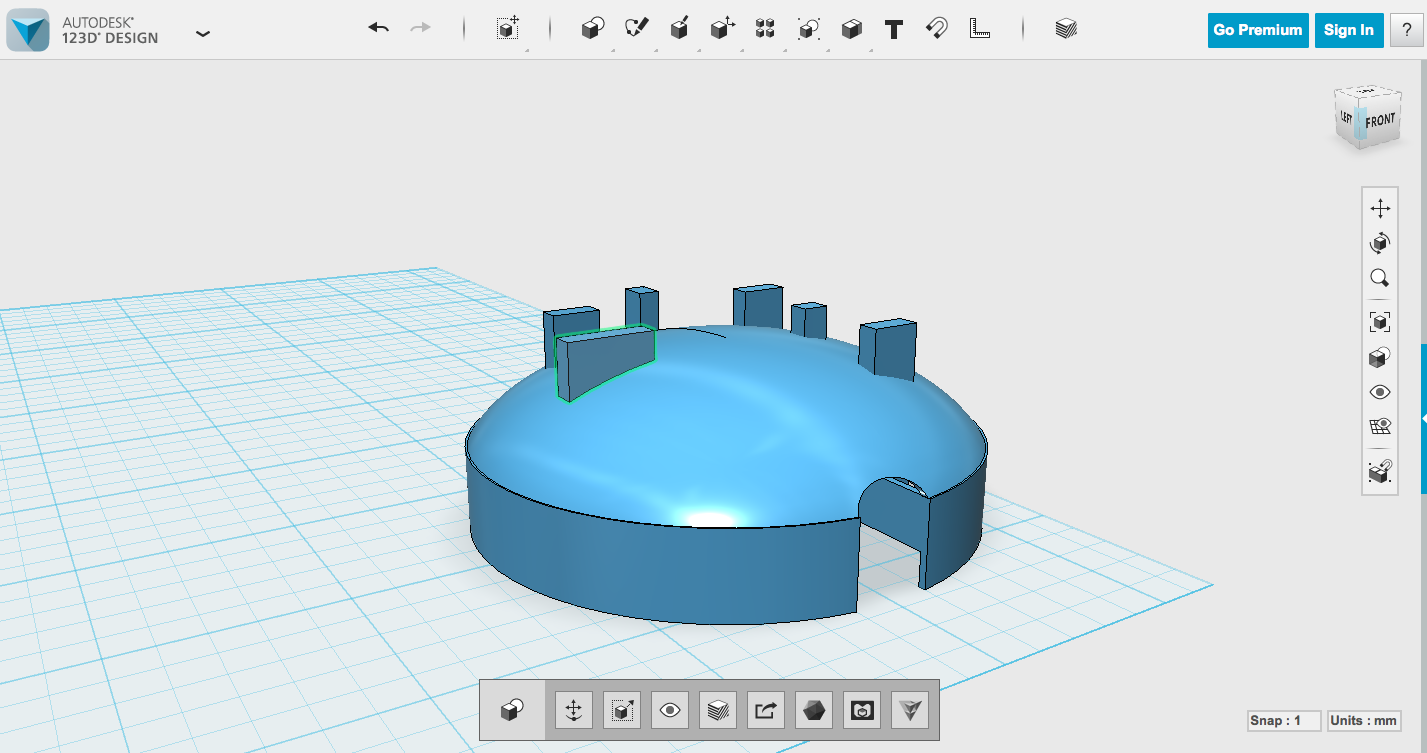
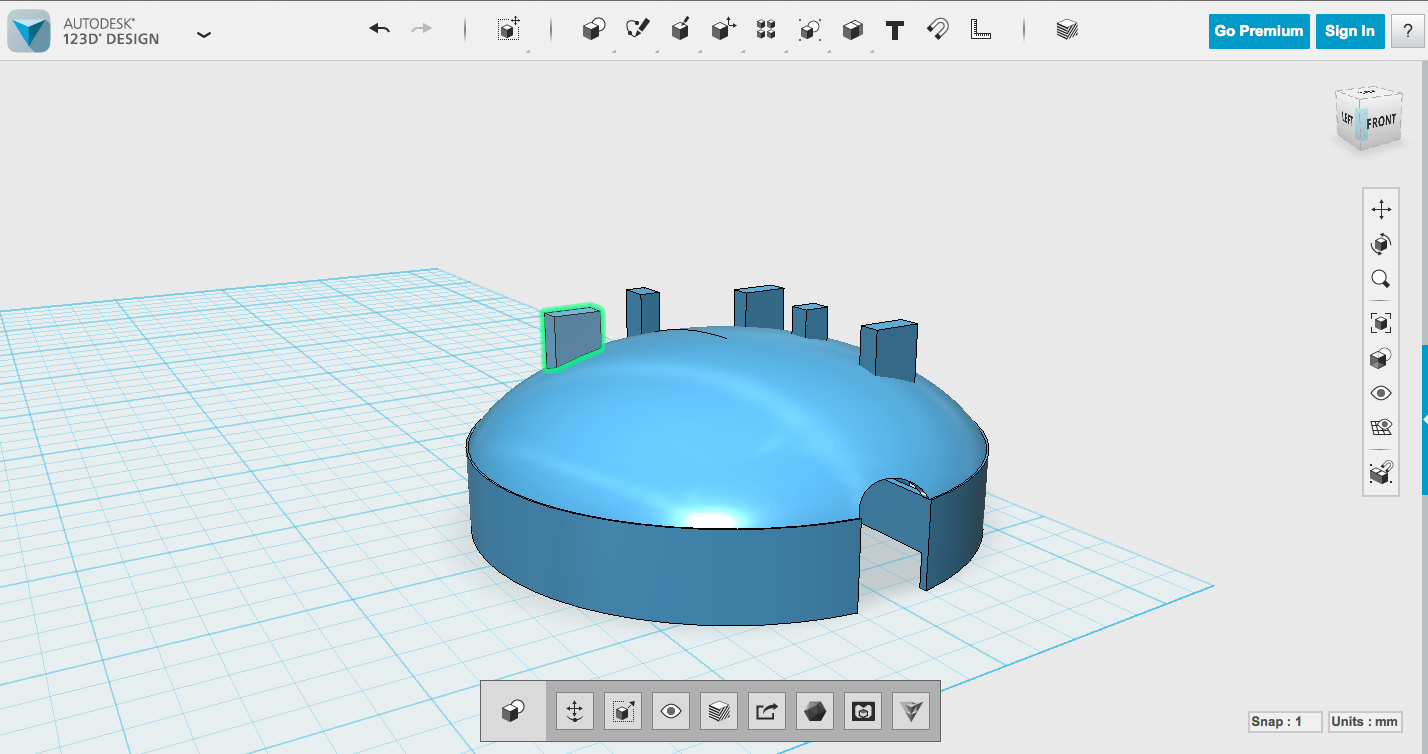
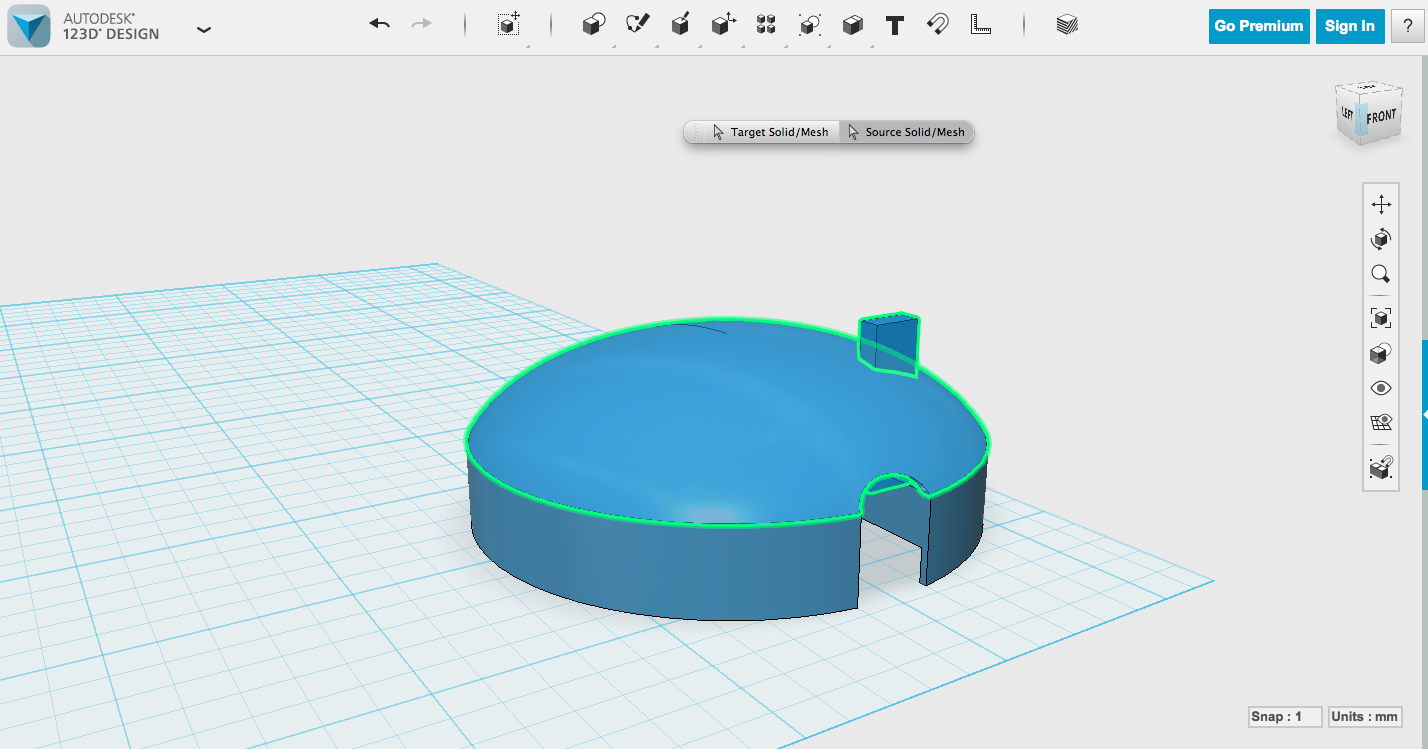
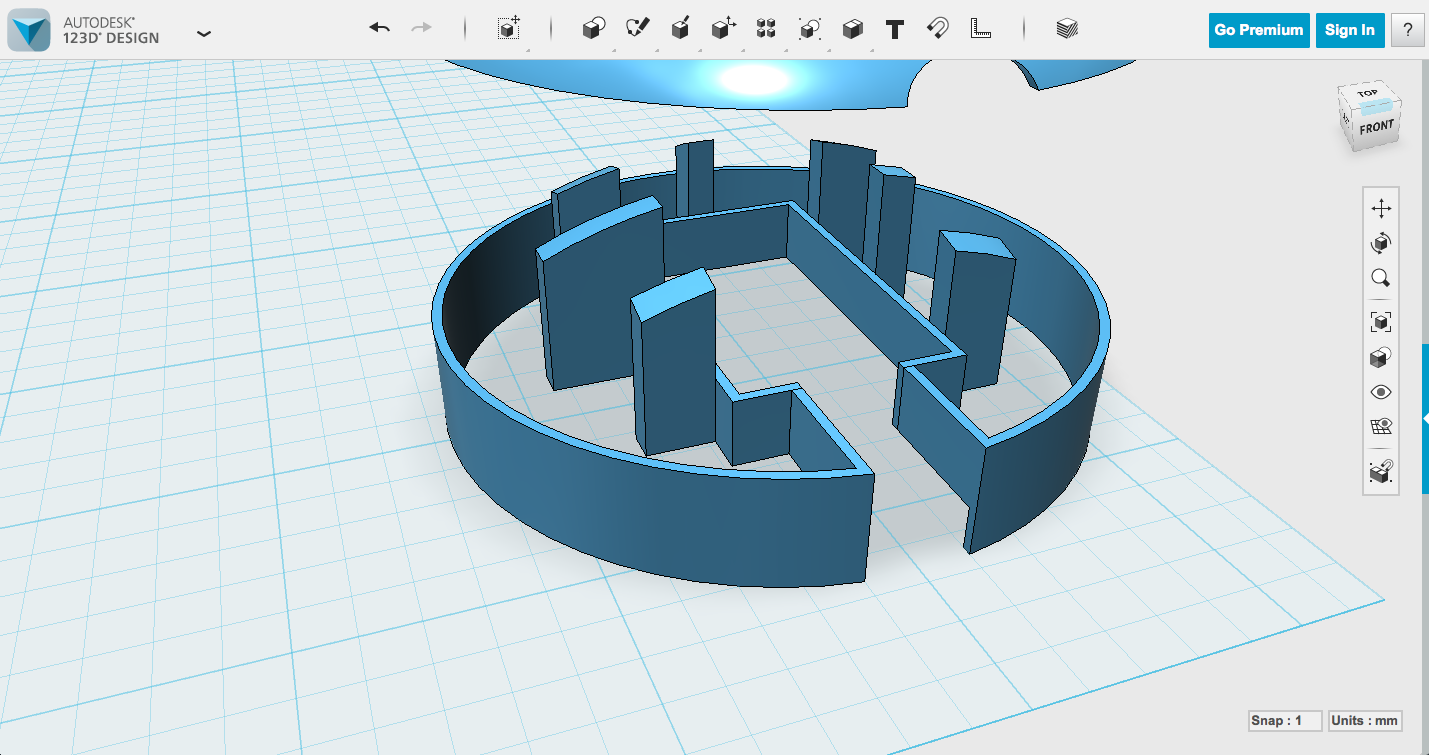
For a dome, I took the flat diffuser and made a few changes. First thing is to remove the lid, a simple enough task if you use press/pull to move the bottom of the lid beyond the top edge. Then flip it over so it's upright.
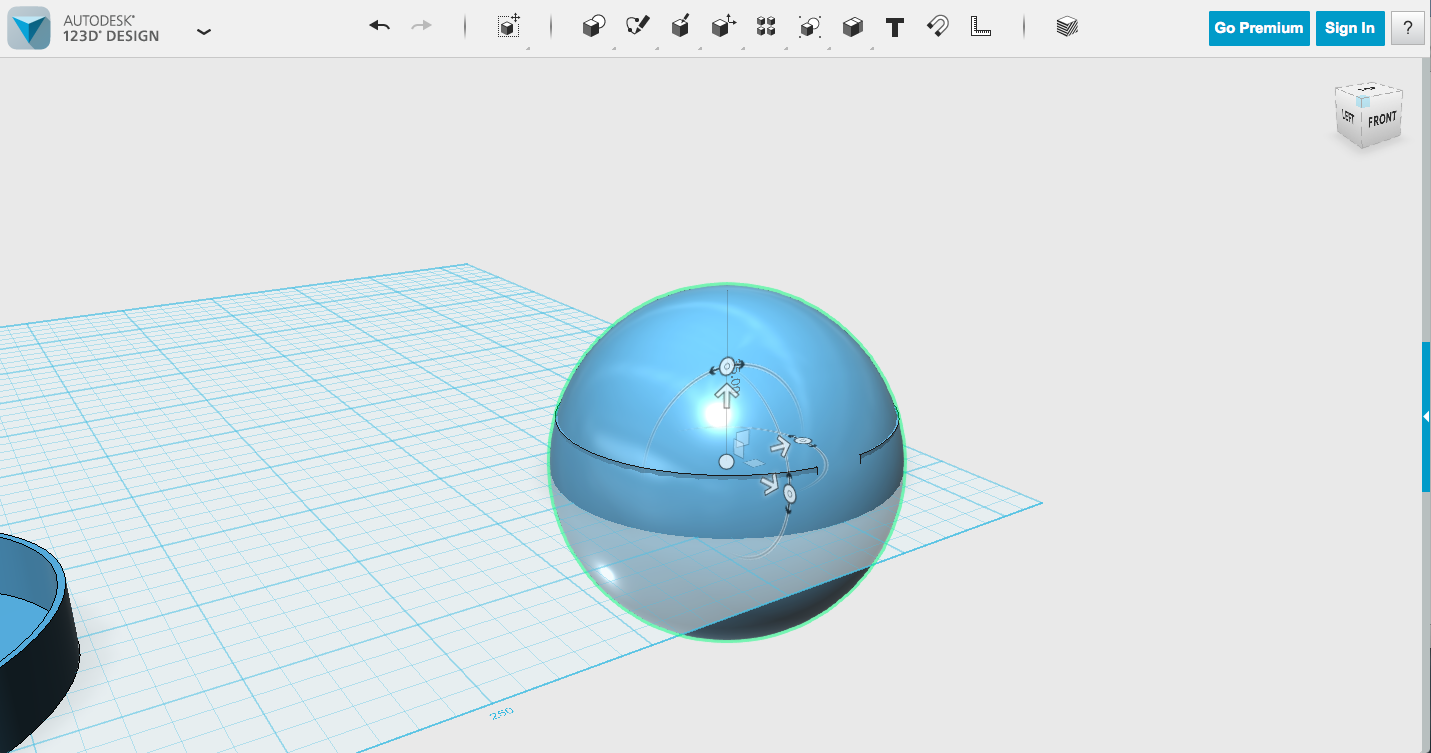
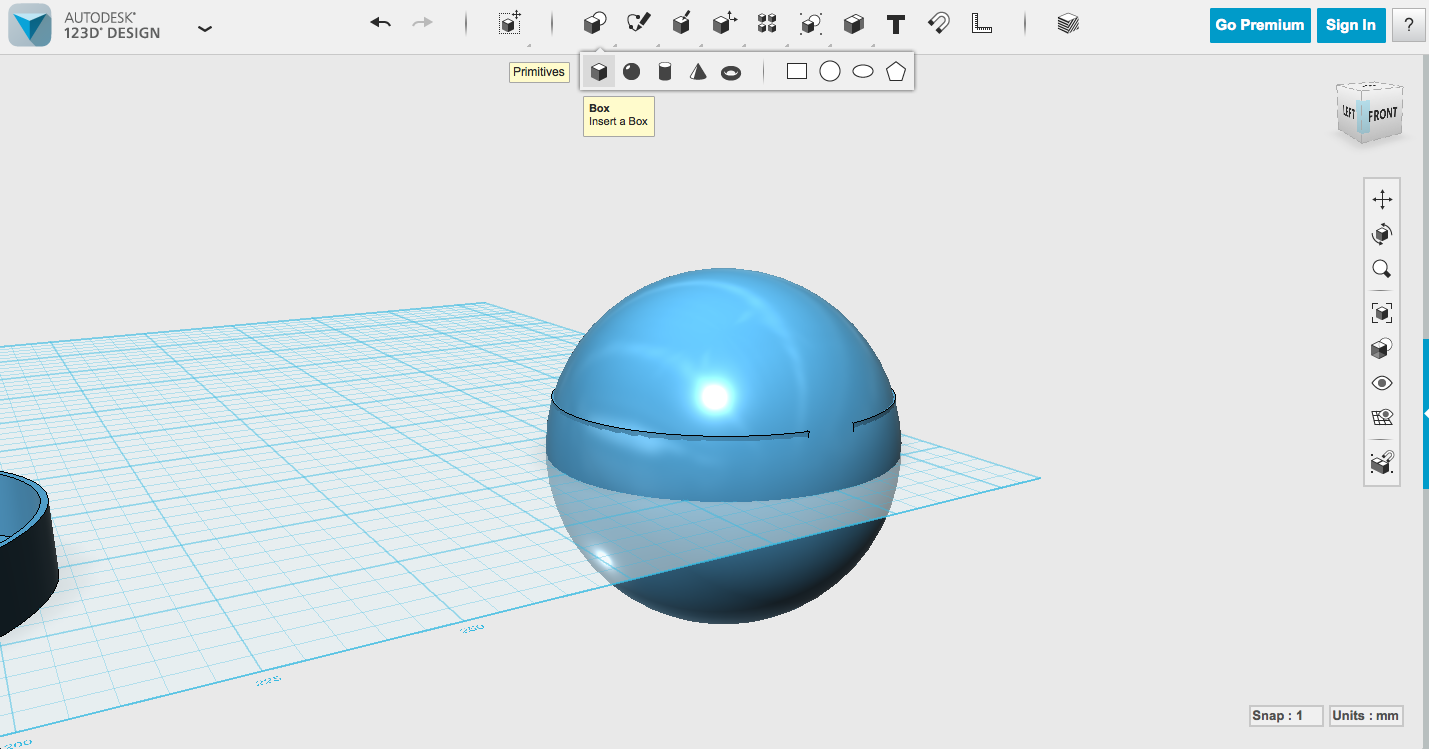
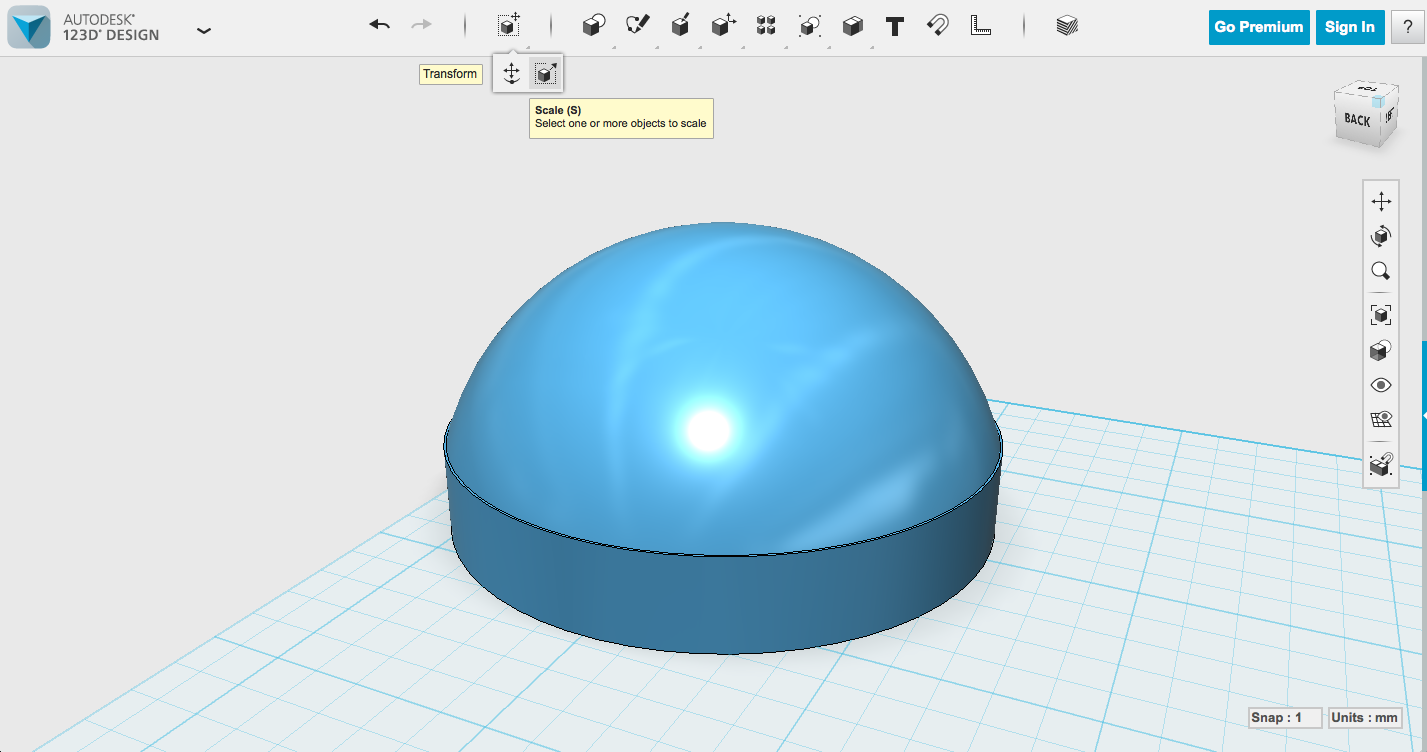
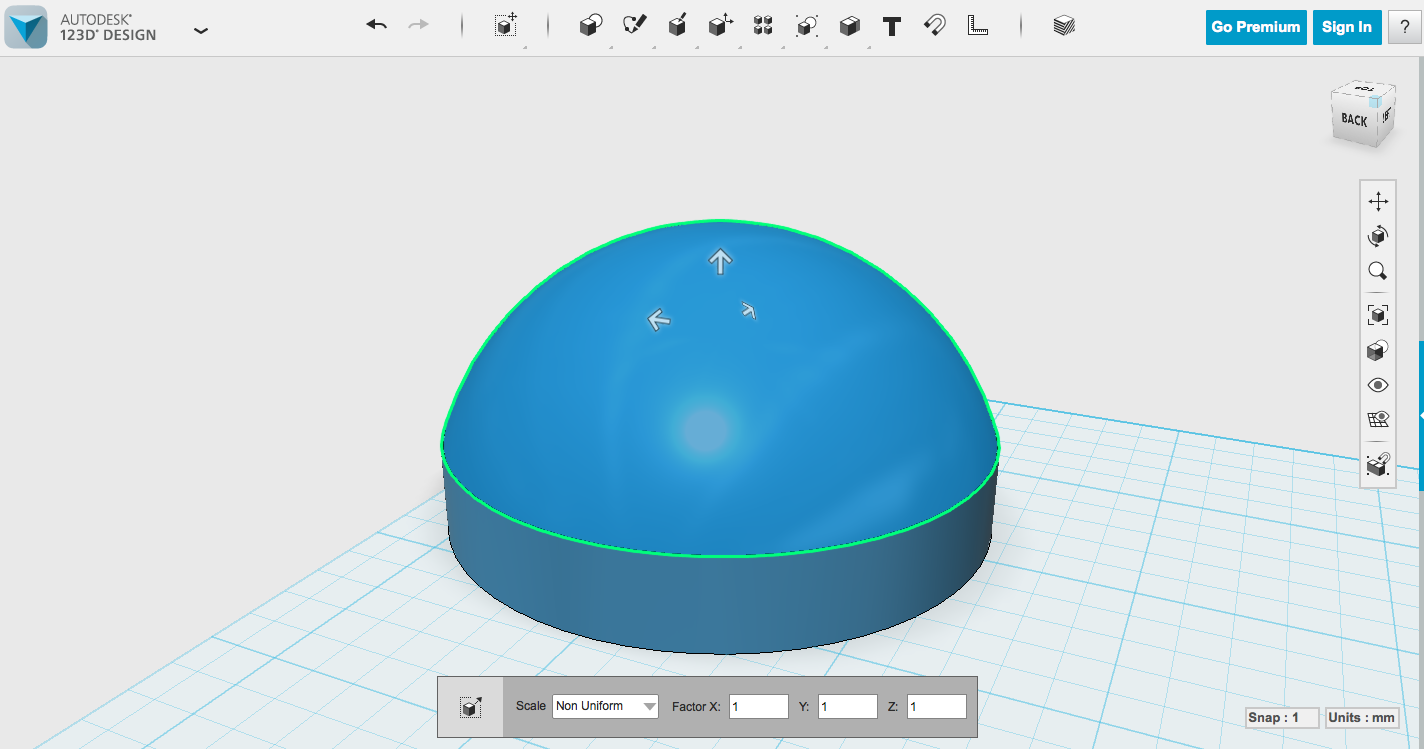
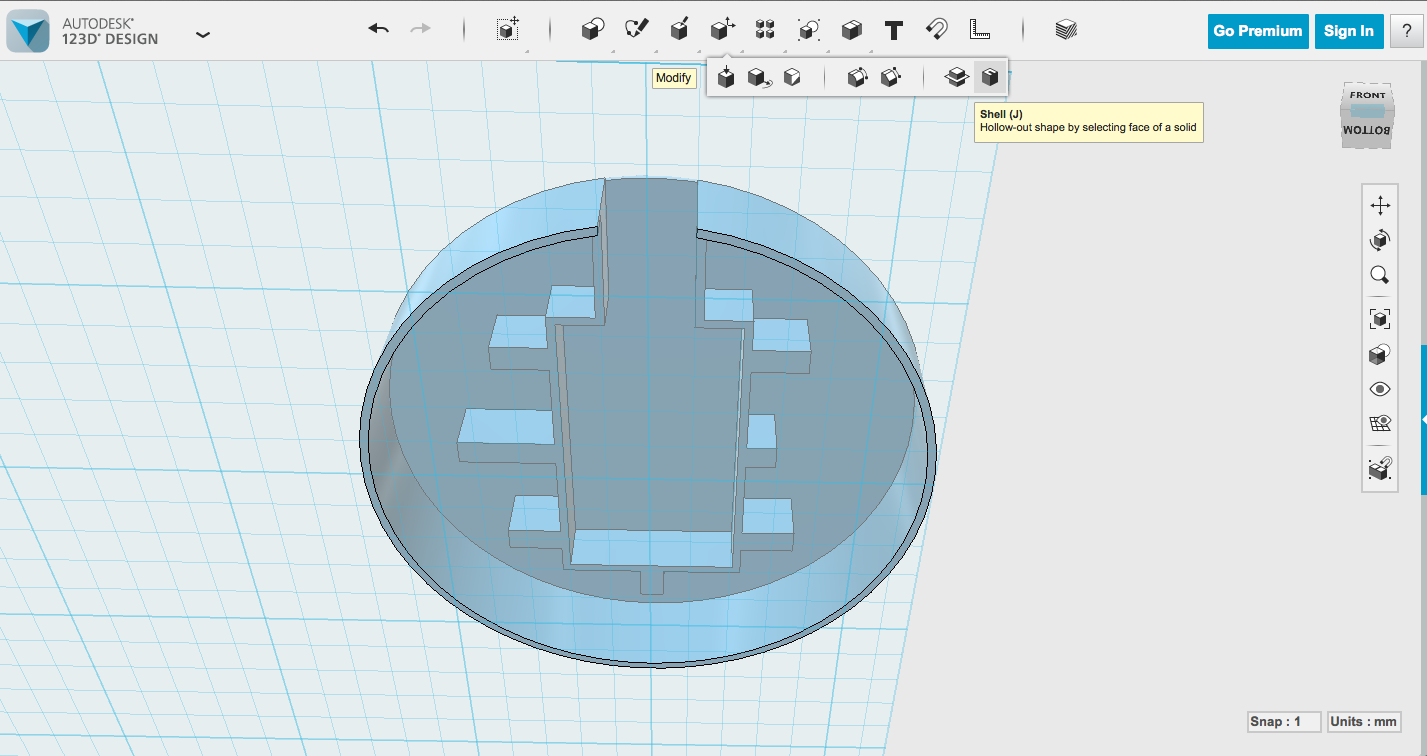
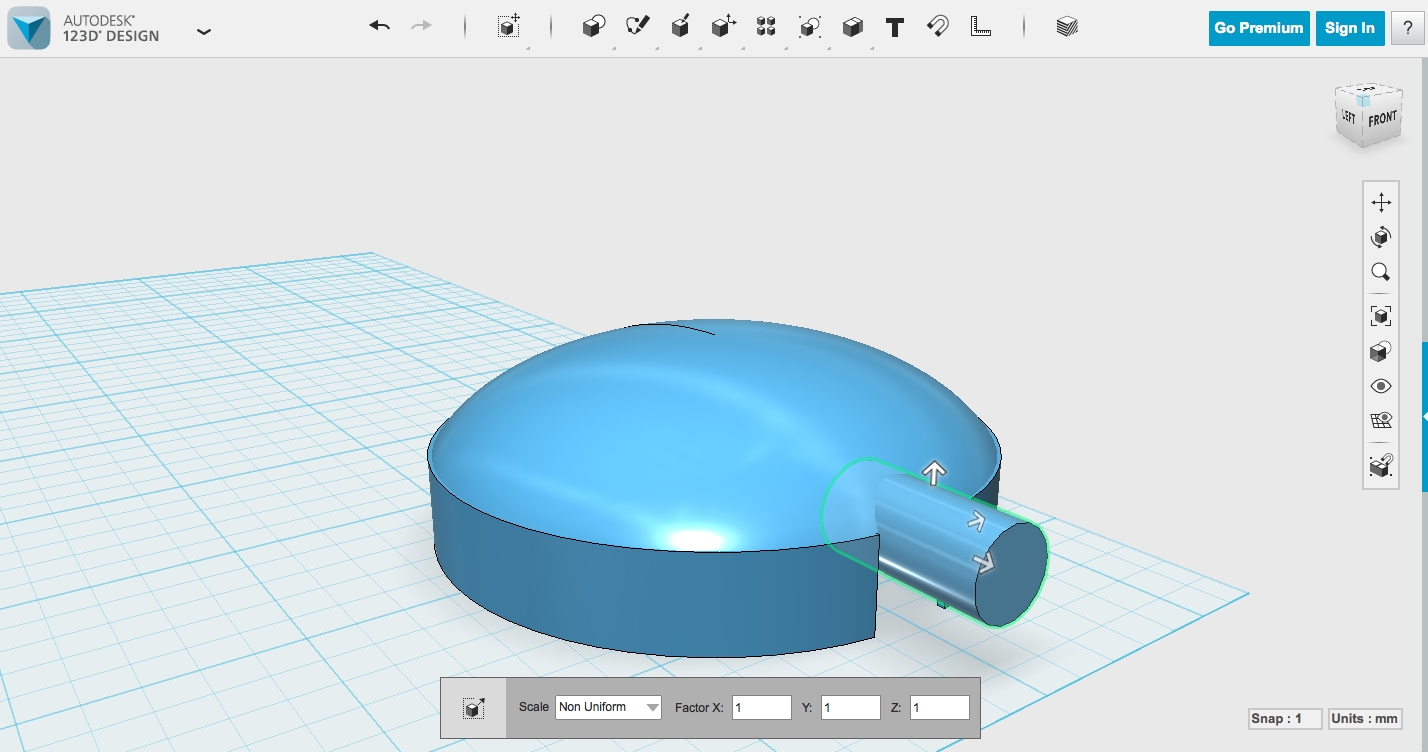
Make a big sphere, resize it til it fits your base. You can make a big box, shift it to overlap with the bottom of the sphere, then Subtract it from the sphere to leave yourself just the top. If you want your dome to be completely round, leave it. If not, you can use Scale (set to Non-Uniform) to squish it. Then use Shell to hollow it out like before (select the bottom face, and make sure the Direction is set to Inside).
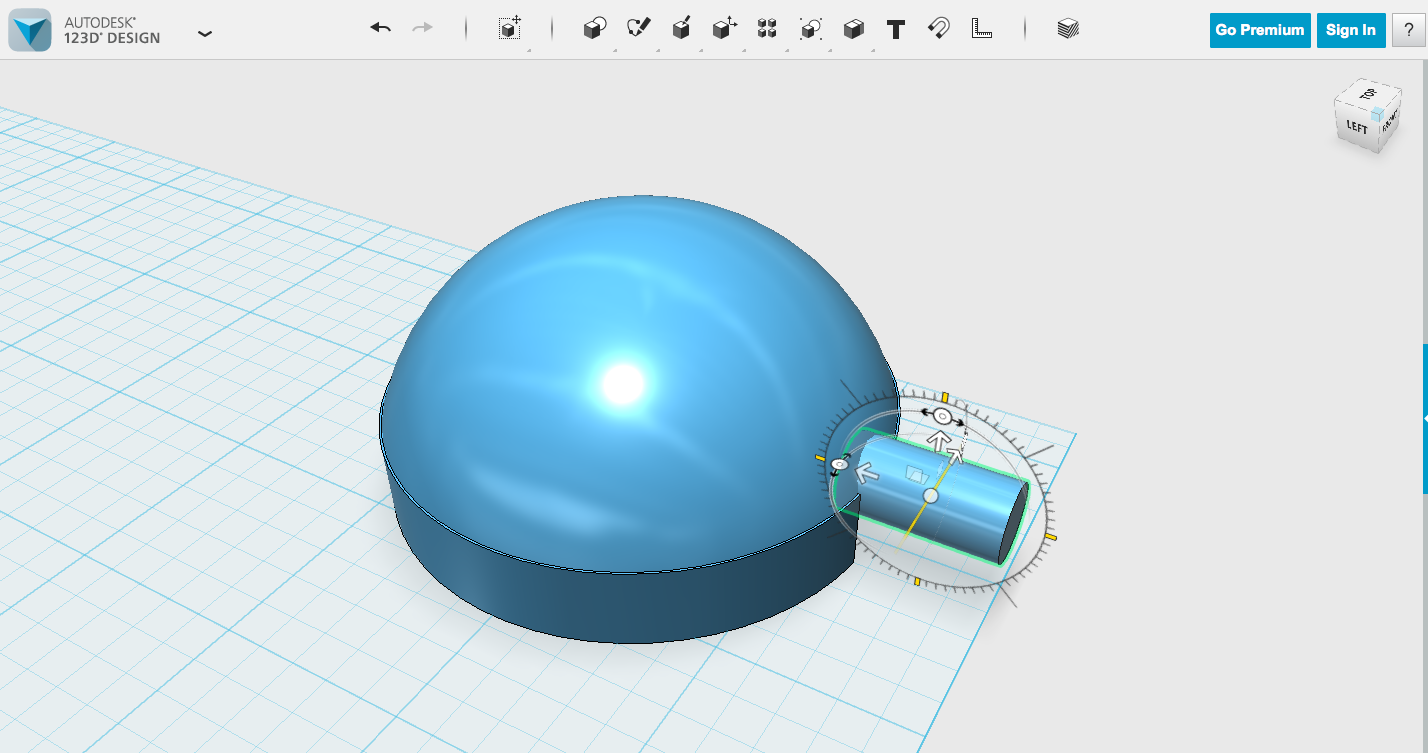
I wanted to give the cable a little more space on the top, so I created a cylinder, flipped it sideways and squished it (Non-Uniform Scale again), then Subtracted it from the top dome.
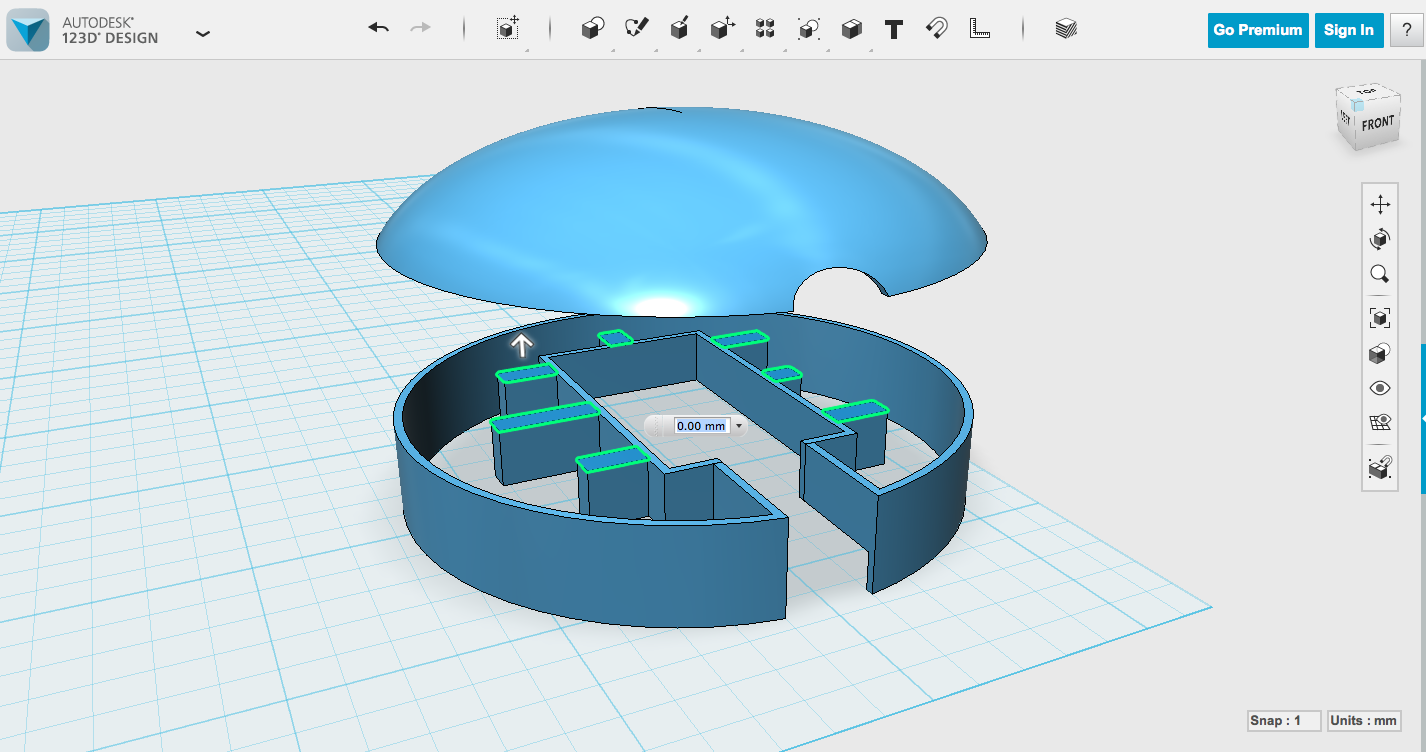
If you want to make your dome a little more sturdy, you can use Press Pull to extend the tops of your supports to intersect with the top of the dome.
My STLs
Print and Play!
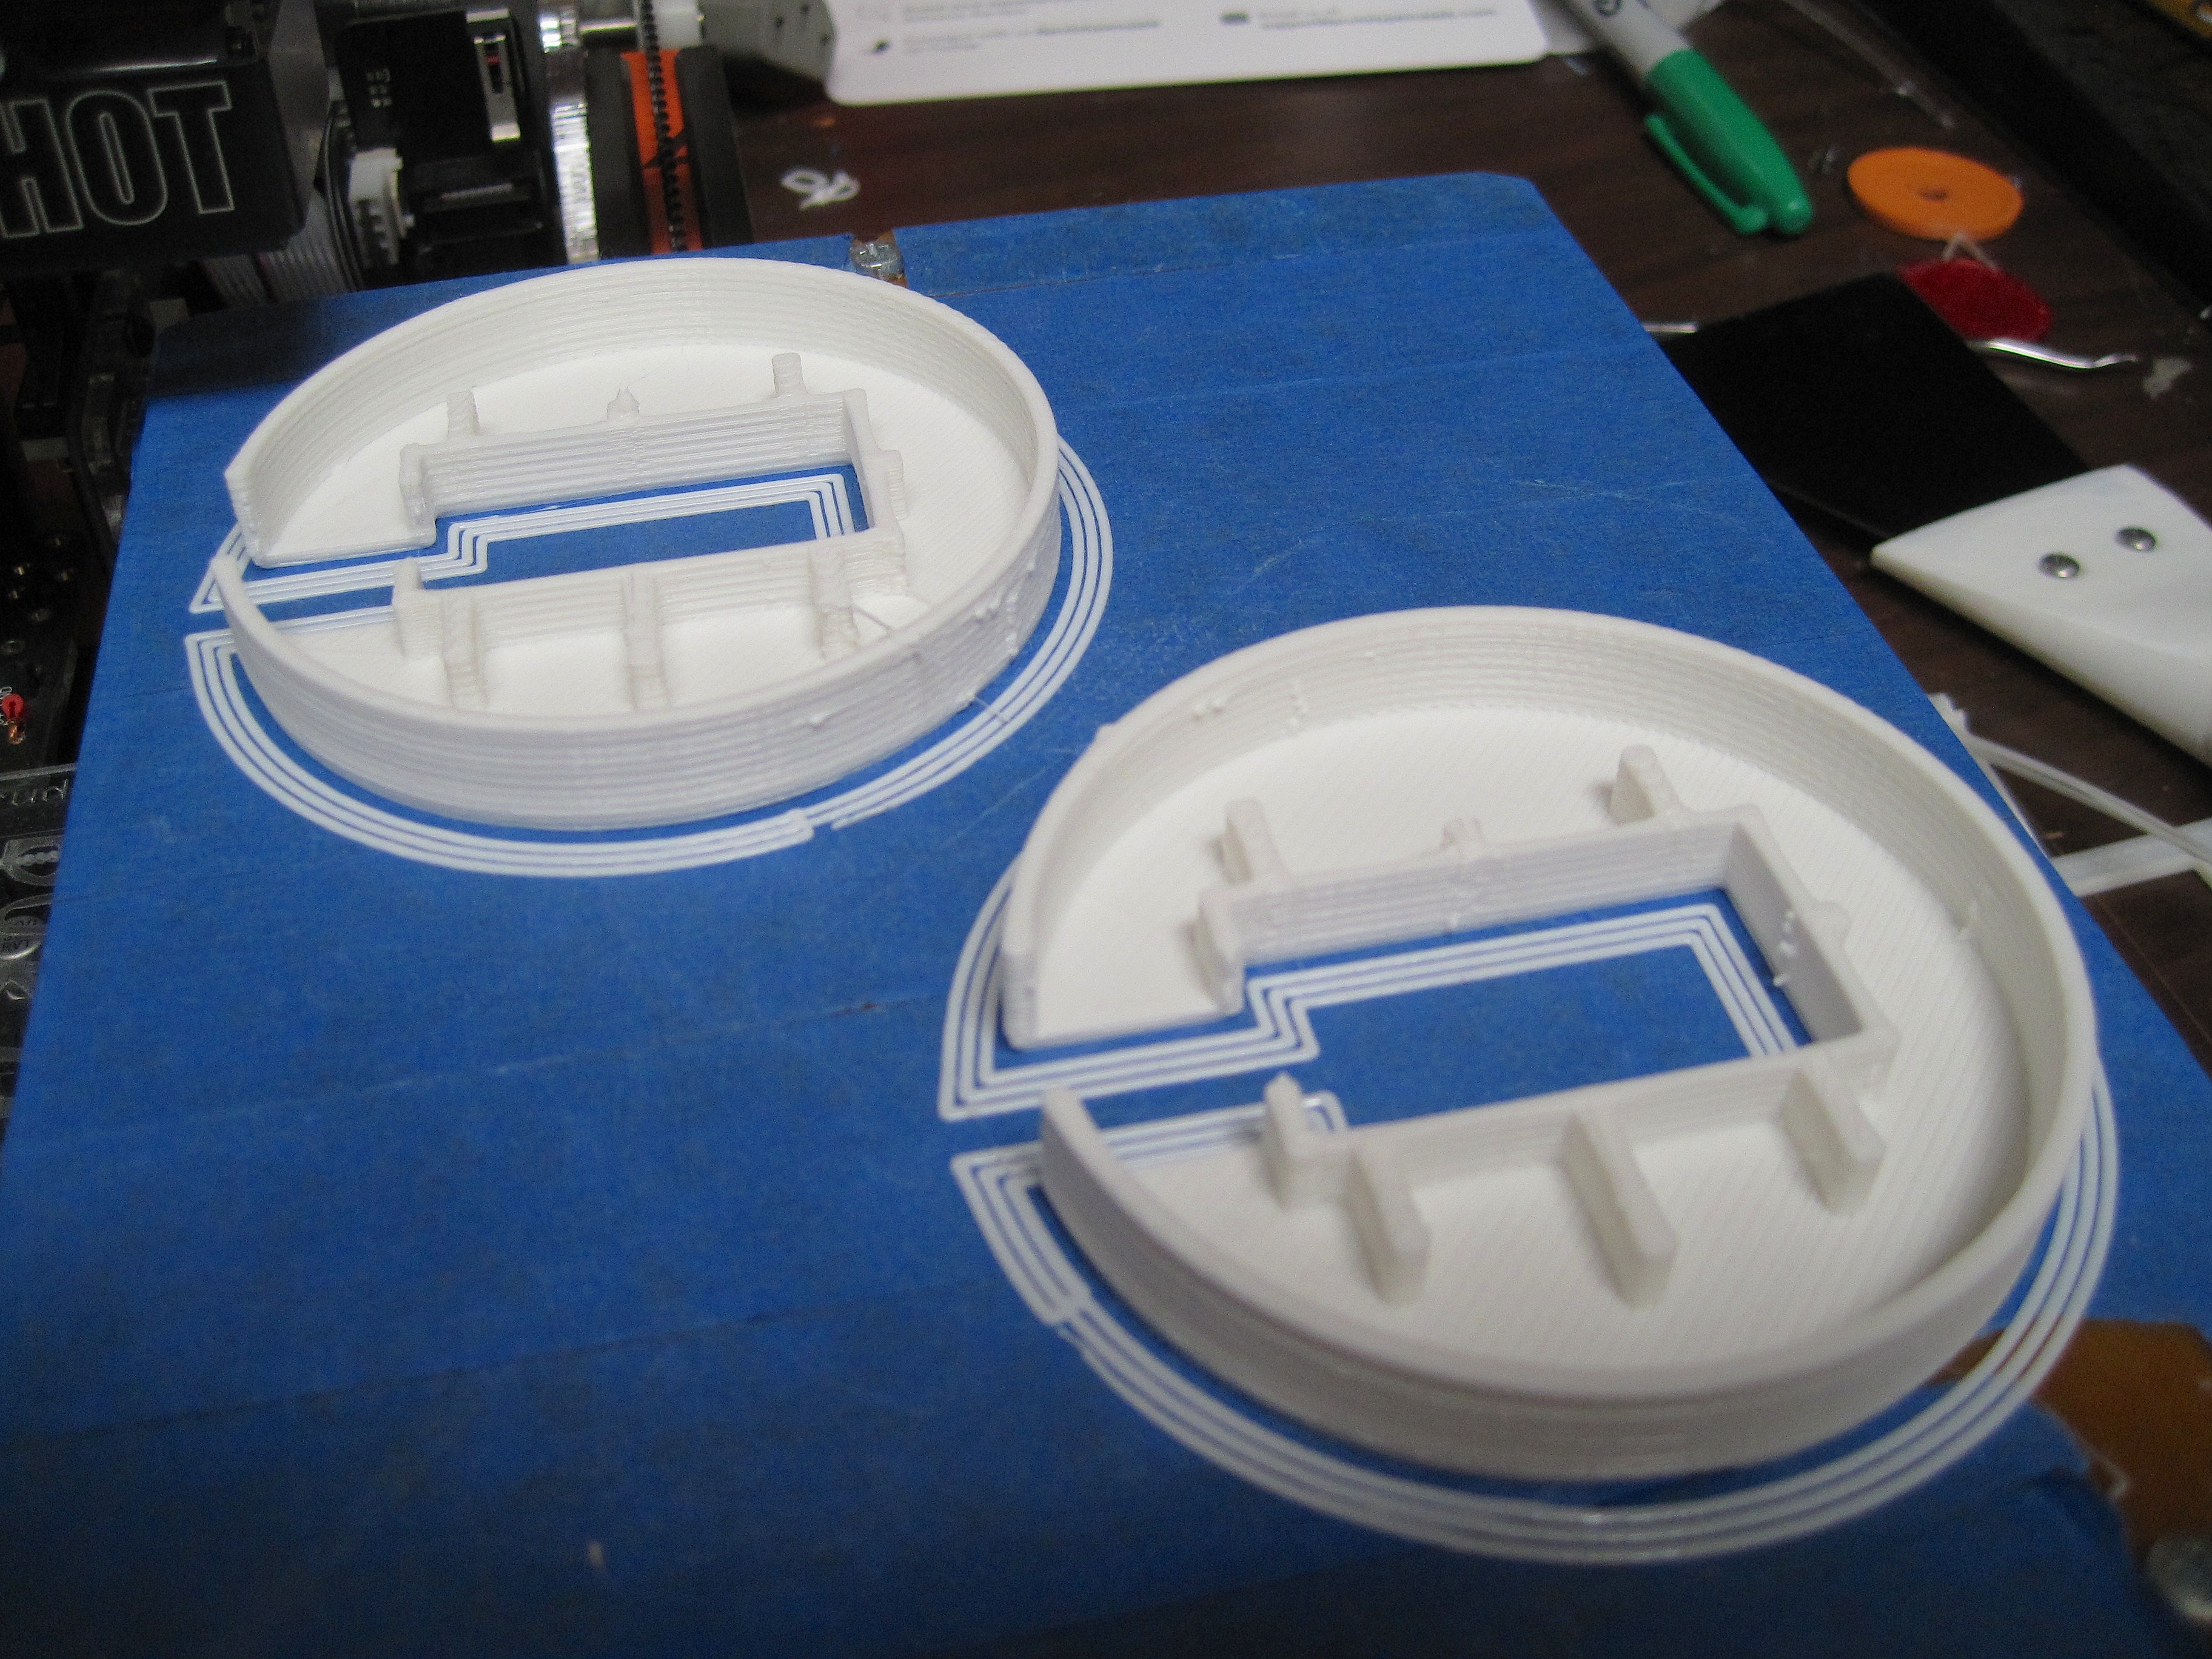
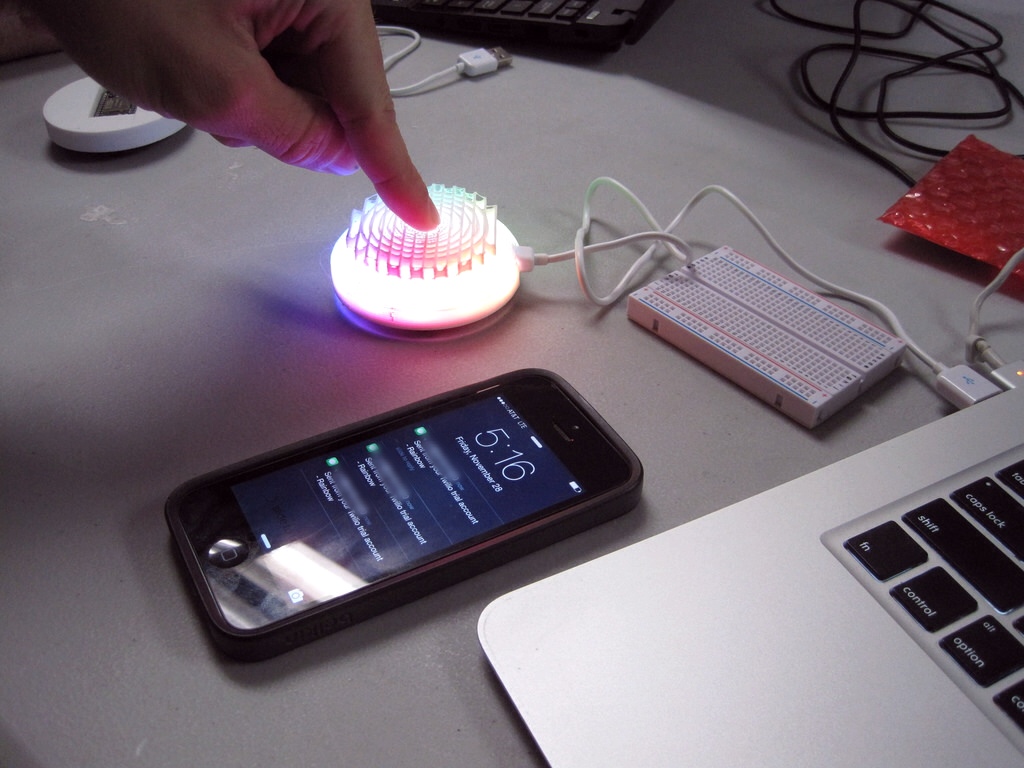
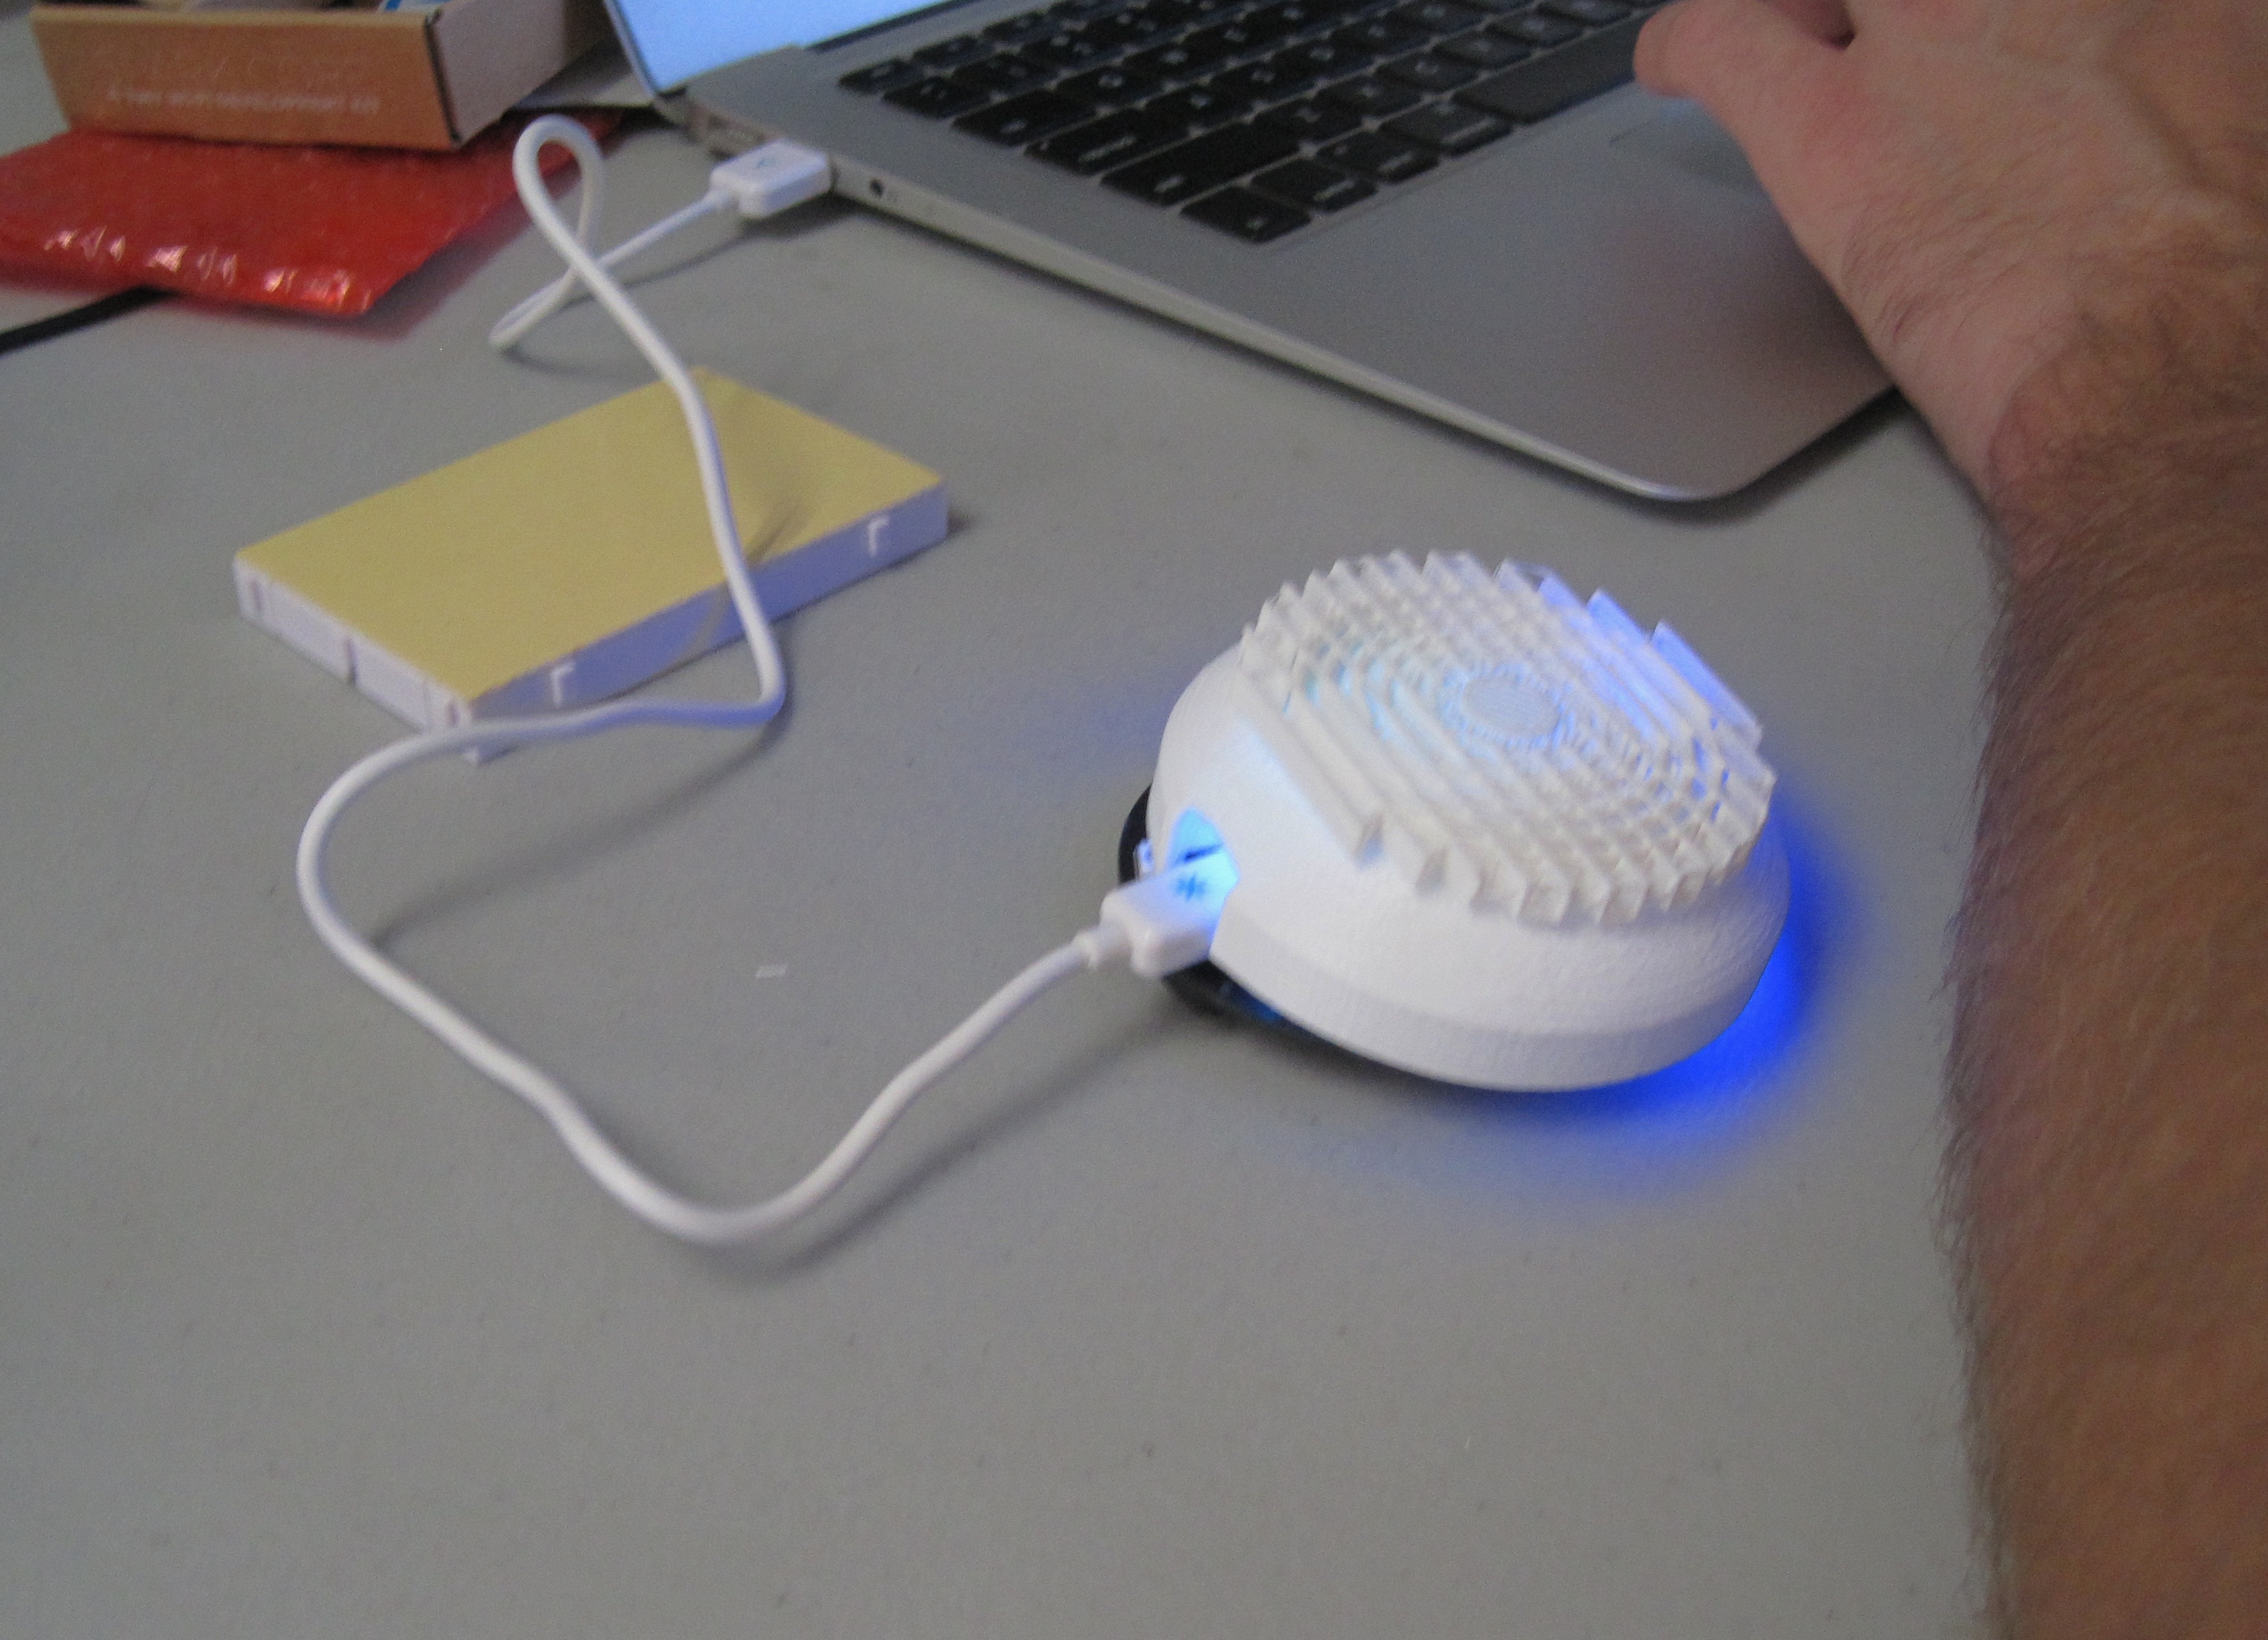
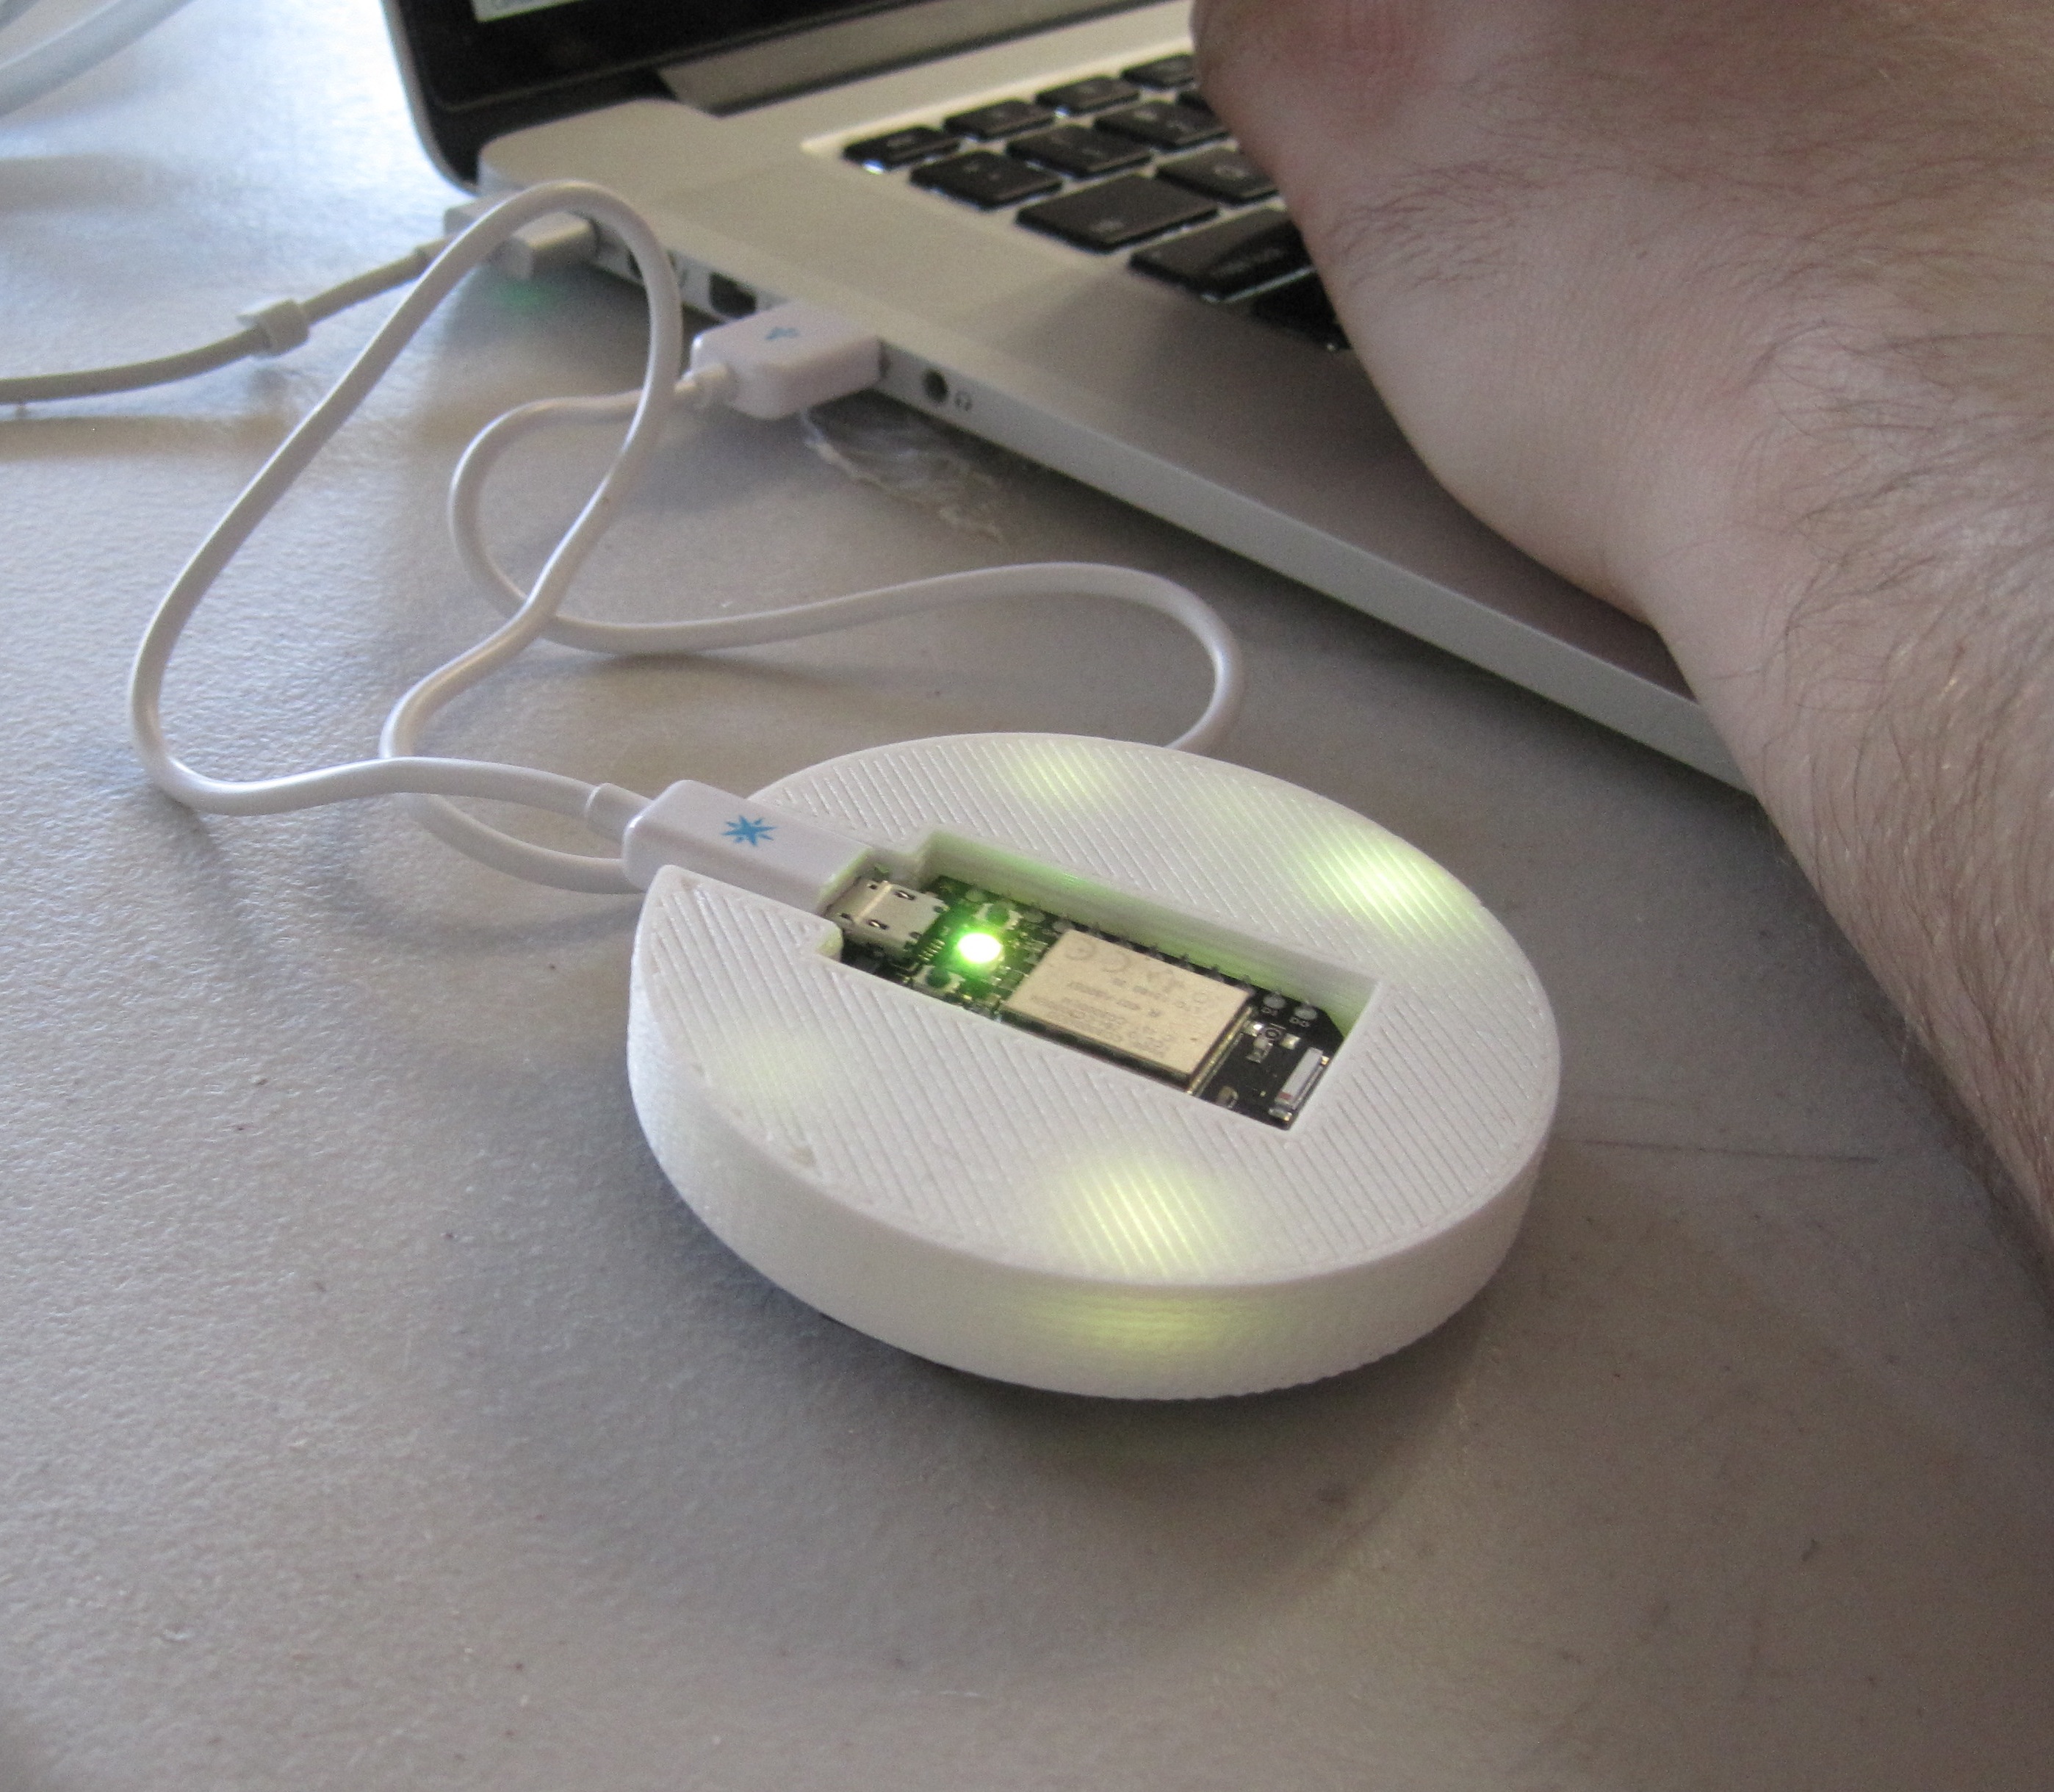
Even with very precise measurements, it's entirely possible to need multiple prints and tweaks to get your design right. It just takes practice. Different printers, different filaments can give you different results, and when you're trying to be this precise, it can take some fiddling. Oh, but the joy when you get it just right and it snaps into place.
If you're making a part that needs printed supports, such as the dome, you can remove them, or you can get creative about them and make them part of the design. You'll see in the pictures for this step that there are a few domes I printed upside down with circular/line supports on top that people decided to leave in place rather than removing at our Spark.io Build Night.
Have fun, and post pictures of any cases you make! Thanks for reading!