3D Model of Kidney Ft.Tinkercad
by godtrinav in Teachers > Science
16364 Views, 14 Favorites, 0 Comments
3D Model of Kidney Ft.Tinkercad
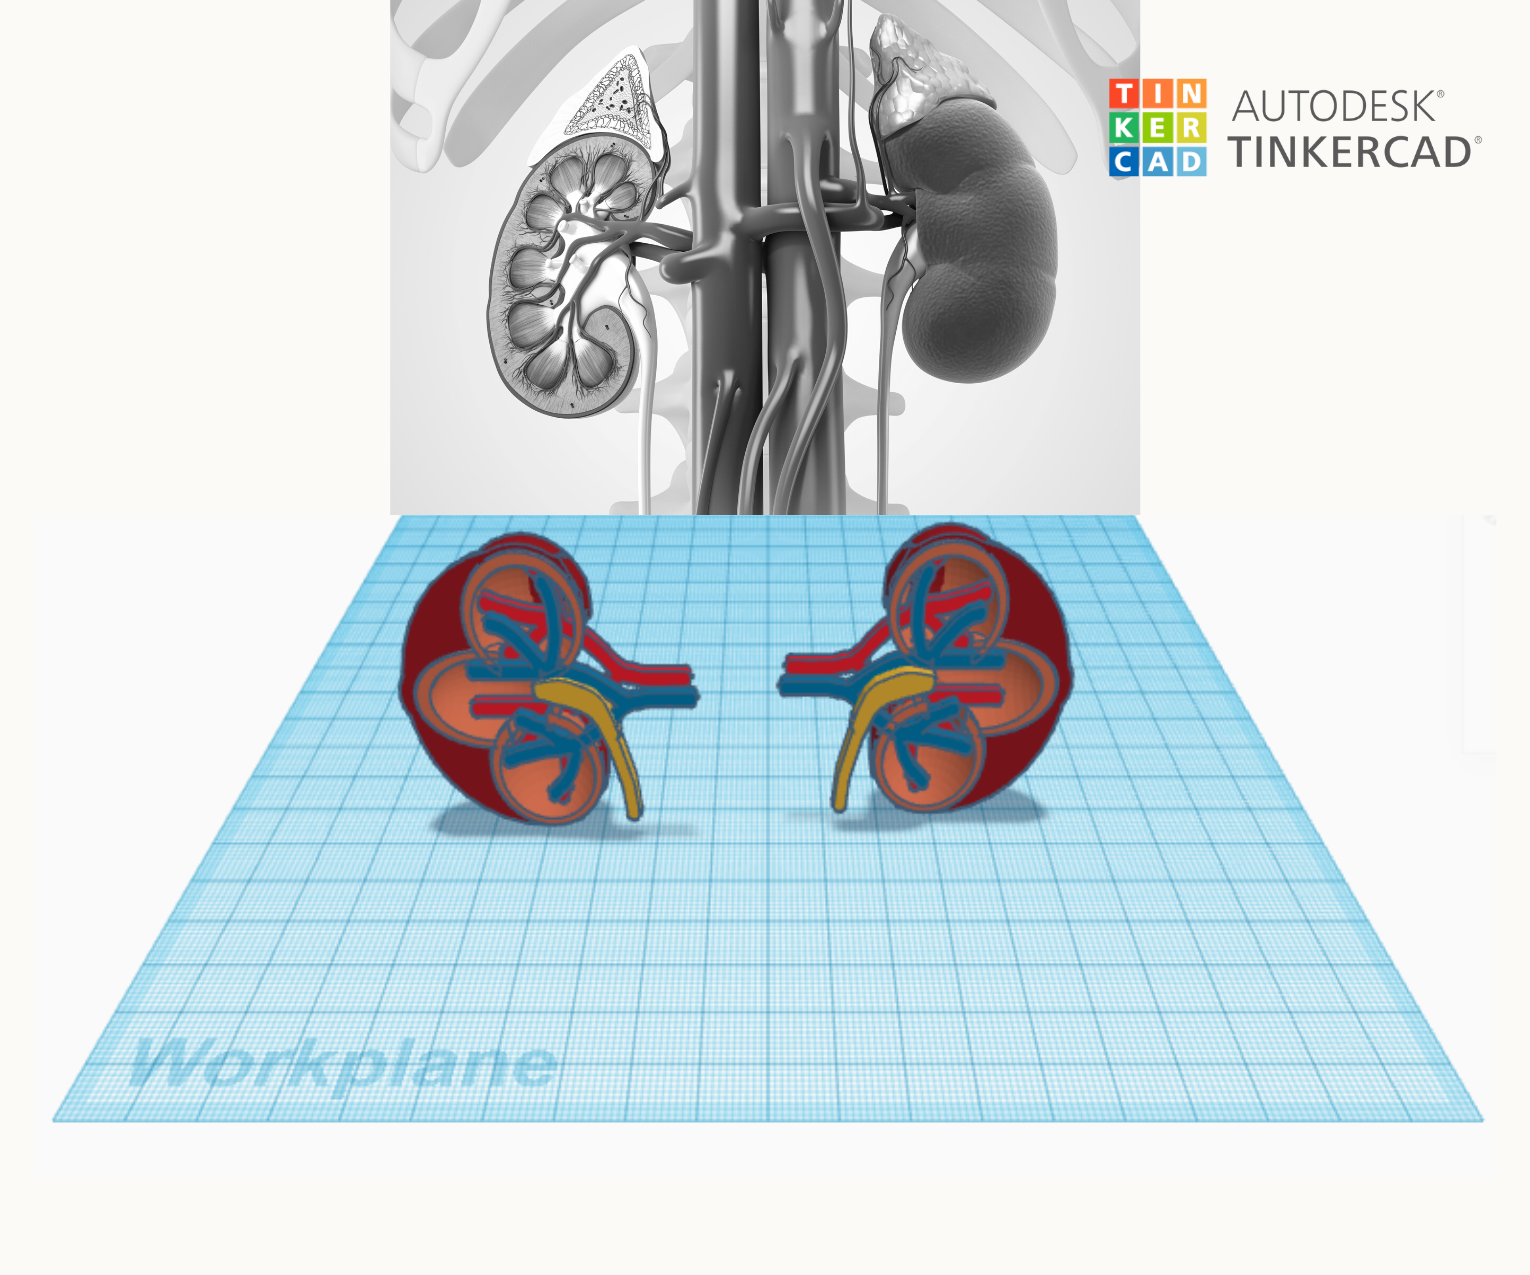
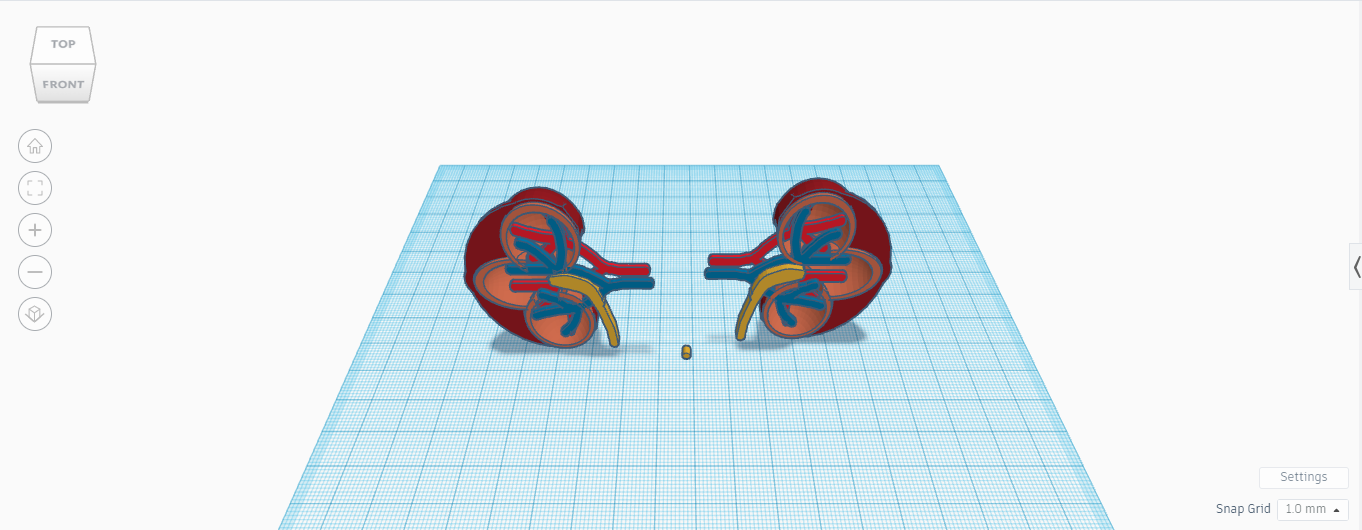
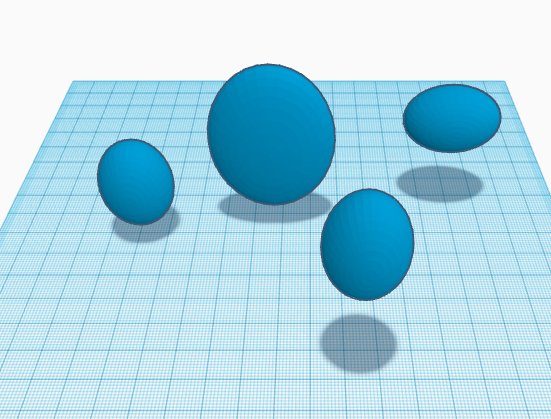
Kidneys play a vital role in the human body. The primary function of the kidneys is to remove waste and excess fluids from the body. So, in this instructable, we will start from a basic shape(sphere) with a complex structure that plays an important role in the human body. I, being a teacher, know how important it is for kids to visualize the internal structure of organs to understand them better.
So before we start on this tutorial, I would prefer everyone to go through the beginners' guide to 3D modeling. so that you have a clear idea of the basics of Tinkercad, which we are going to use today to build the 3D models of kidneys.
So let's get started!
Supplies

- Tinkercad
- Computer with internet
Crafting the Kidney
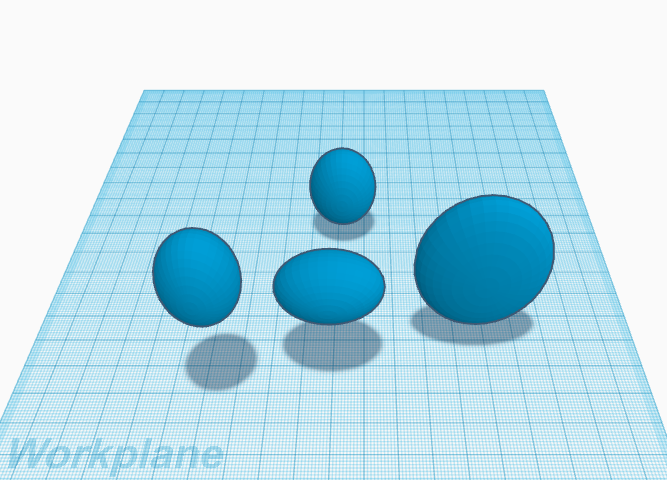
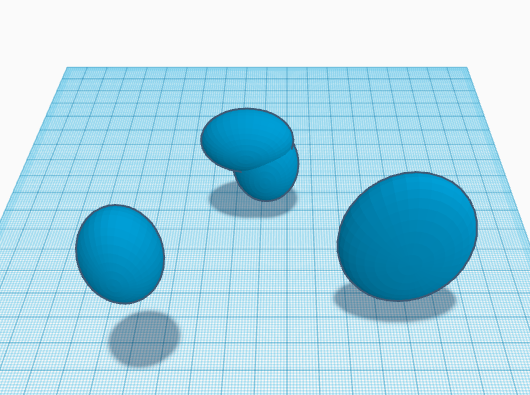
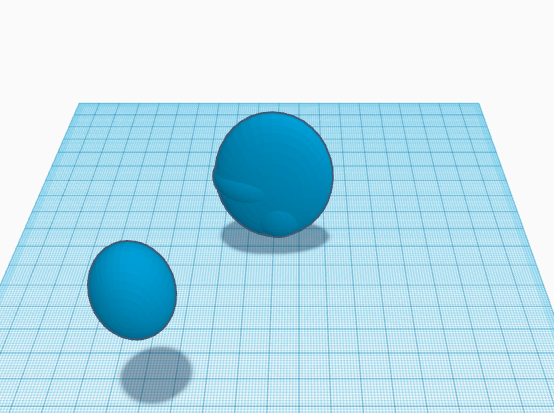
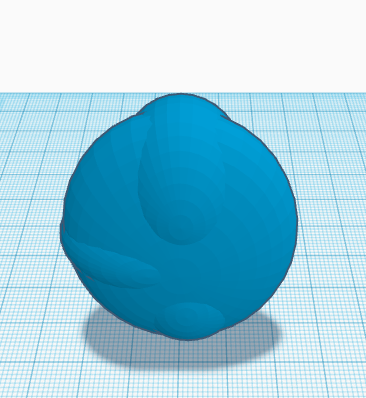
We start by making the kidney using the spheres from the Canva library. So I took 3 small ovals and 1 big one. Rotate one of the three small ovals by 90 degrees and attach them to each other. Do the same thing with the third oval. Lift it a little bit upward and place it on top of the first oval to form a cool design(leaf sideways). Position the big oval over the small ones as shown in the image. Now make sure that your model matches the one attached above! Woohoo! We just completed our first step, so we are a step closer to making our own 3D model of kidneys.
Shaping the Kidneys
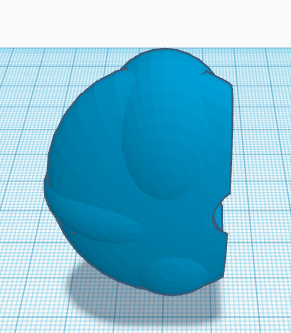
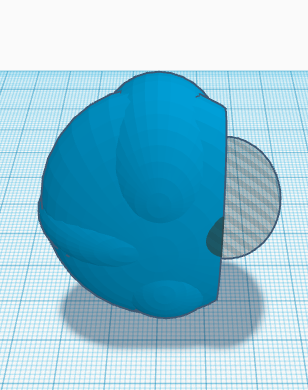
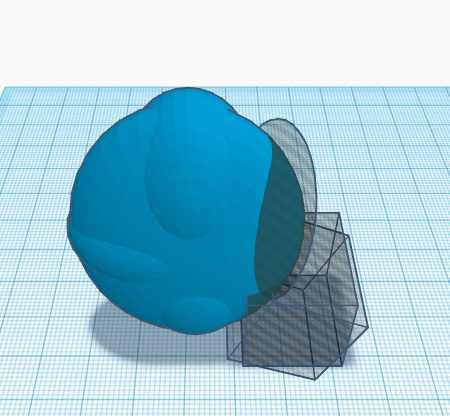
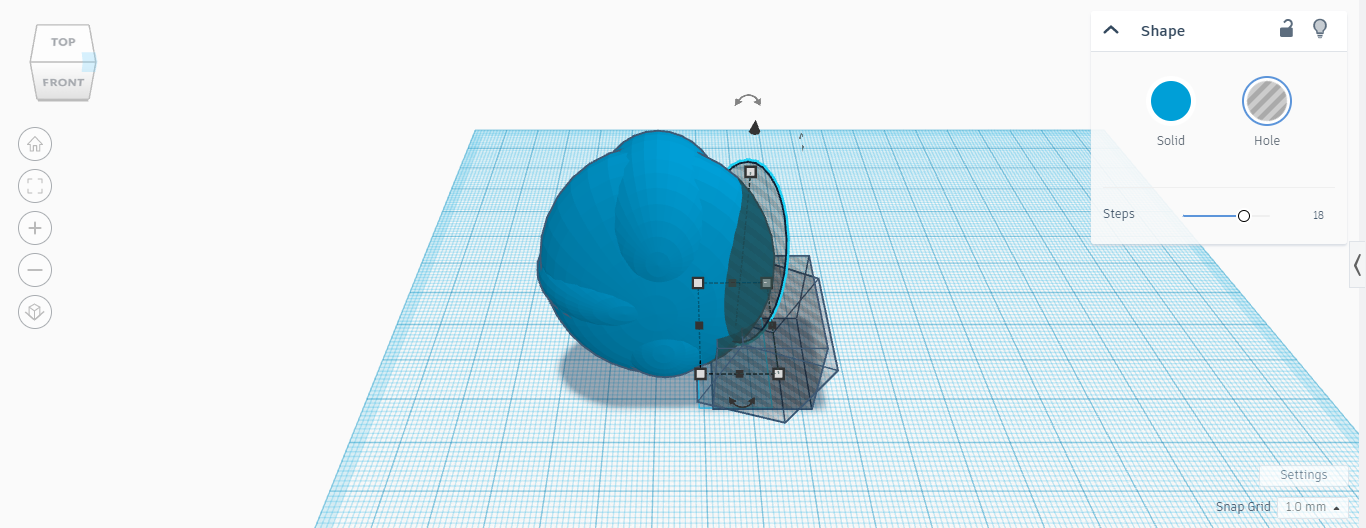
In the previous step, we were able to give shape to our kidneys. But, in order for it to look more realistic, it's important that we shape it precisely and make it even more alike. So to do this, we start by using hollow shapes from the Tinkercad library and placing them on the model. So position the hollow objects as shown in the above images. I started by using a rectangle to slice the object first and then used an oval to create the curve at the center.
For the curves on the top and bottom, I used plenty of cubes to get that curved effect. I would say this is one of the most complex steps in this instructable. If you are able to ace it, then the rest of the journey is going to be a cakewalk for you. This step requires patience and practice. So, if you are unable to do it on the first try, it's okay! Go slow, be calm.
Chopping the Kidney
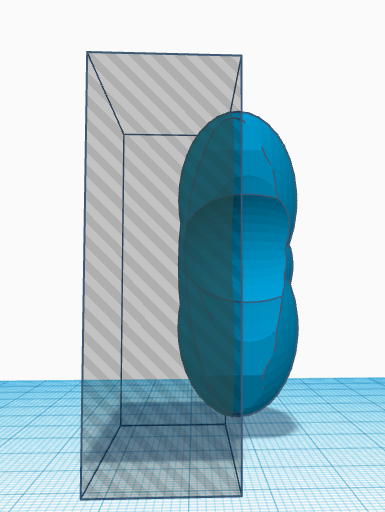
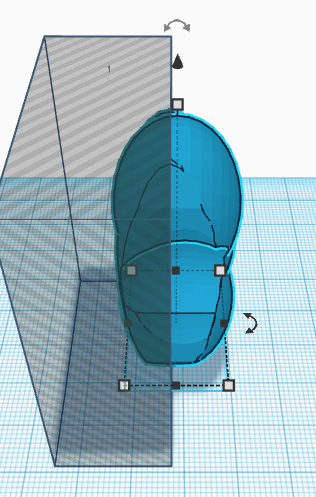
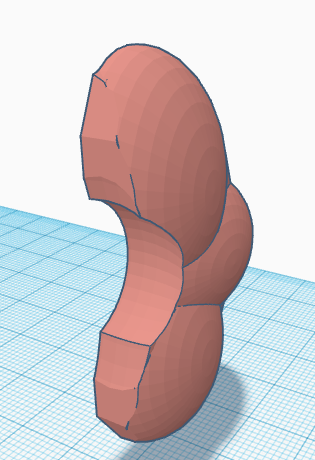
Yesh! You read it right. We are going to chop the kidney. As we know, the kidney might look simple from the outside(just like kidney beans), but it's a very complex structure from the inside. That's where the real stuff happens. So in order to chop the kidney off, we are going to repeat a step similar to the first one. We are going to take a hollow cube and place it on half of the kidney and group them.
And there we go, we have our kidneys chopped(I know that was a PJ). Now we are going to change the color of the kidney in order for it to look more realistic.
Duplicating the Kidney
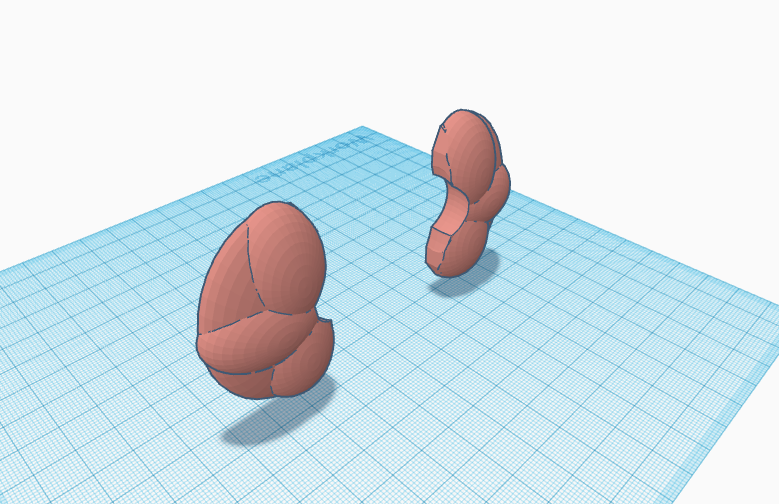
As we know, every human has a pair of kidneys (2), so we are also going to add one more. I would say this is the most simple step of all. In this one, we are going to duplicate the kidney and flip it to make it a pair of kidneys. Make sure they are positioned symmetrically and on the same line.
As I told you guys, this is the easiest step of all!
Starting With the Anatomy
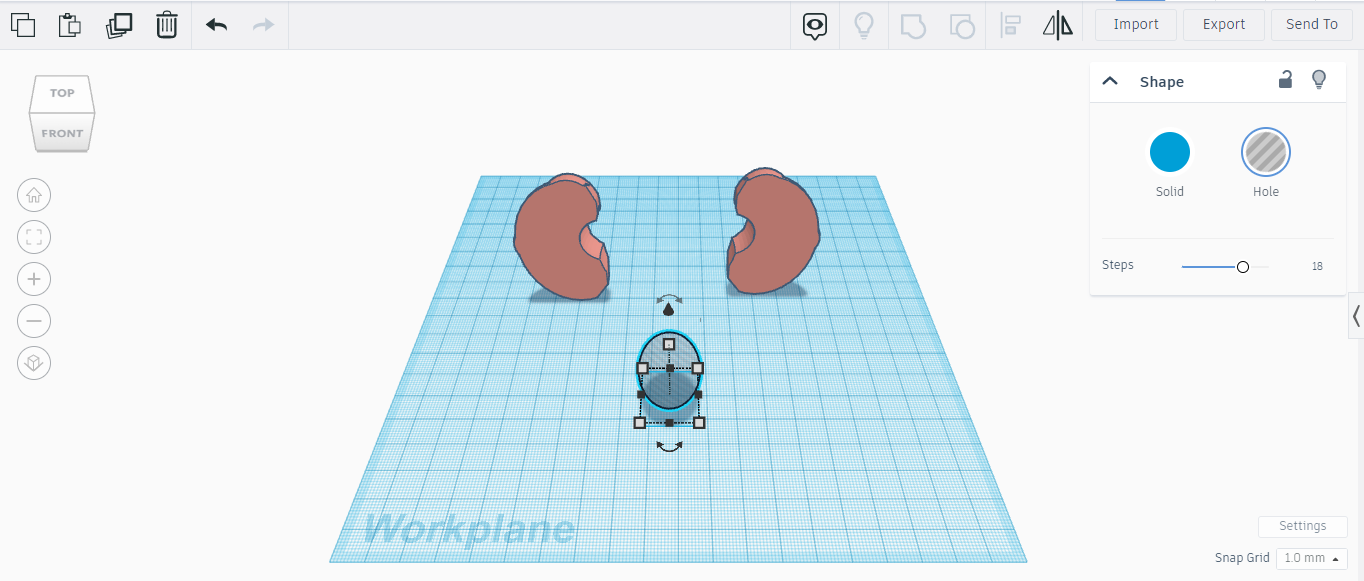
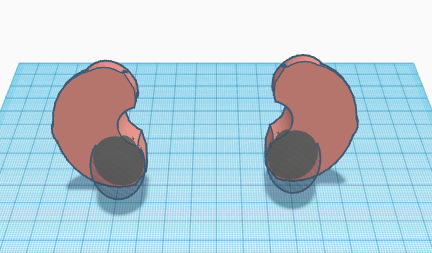
Now that we have beautifully shaped our kidneys, let's get started with the internal parts of the kidney. As everyone knows, the internal part of the kidney houses the arteries, veins, and various other parts. We need to make some space for them. So, as I told you guys before, if you were good with step 2, the rest of the thing is going to be a cakewalk. This step is similar and much easier compared to the first one.
Take a hollow sphere and place it on the kidney as shown in the above image. Make sure that you duplicate it and do it for both the kidneys, and make sure that it's symmetrical. If you are not comfortable with this, complete all the steps and then duplicate your kidney and make it a kidney (again a PJ).
Sculpting the Kidneys
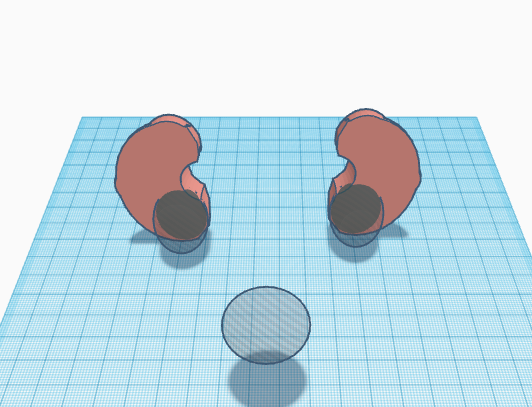
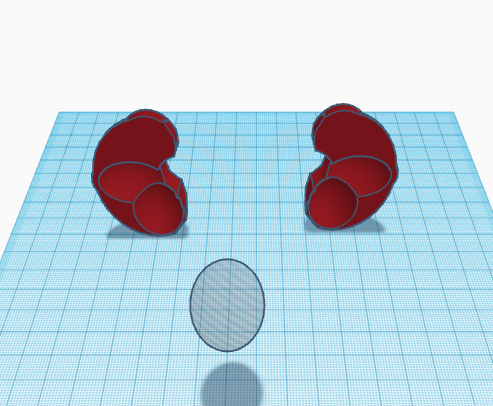
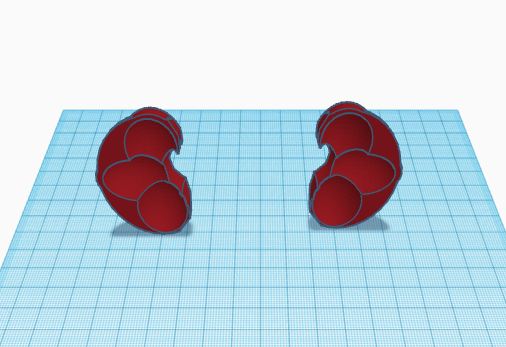
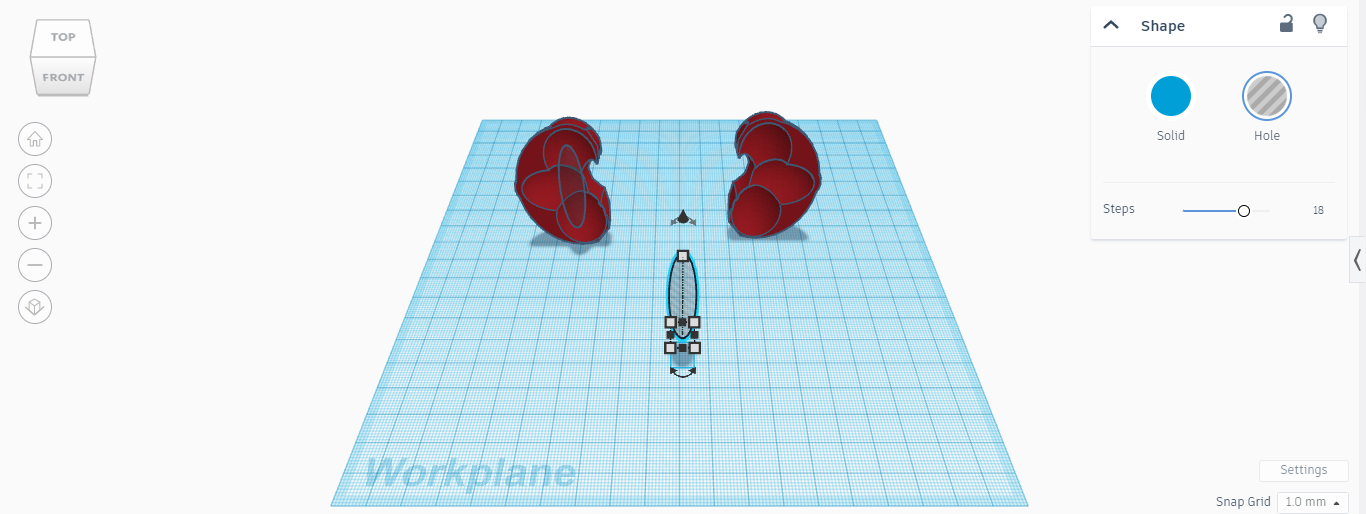
Repeat the above step 2 more times till your model looks like the one in the above image. Remember that there are 2 spheres (on top and bottom) and 1 oval (in the middle). Make sure you group the objects together as soon as you are done with this step. The kidney is becoming lively step by step.
Adding Medulla
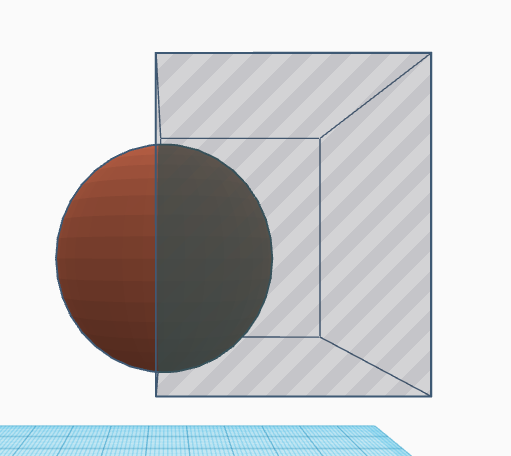
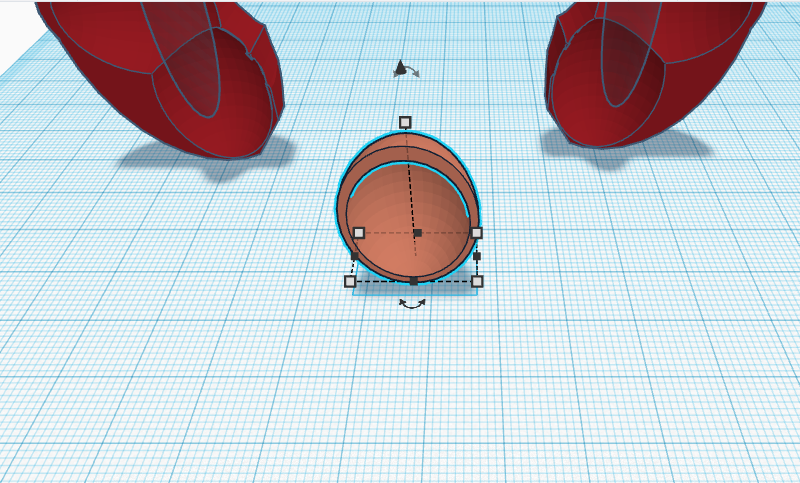
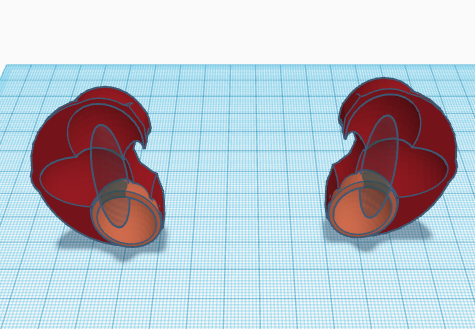
Take a hollow sphere and chop it in half (like a broken eggshell). Now place it in the hole that we created earlier in the kidney. This shell represents the medulla of a kidney. Use the above images for reference and make sure that they are positioned properly and that they are symmetrical.
Give a pat to yourself, you are halfway done!
Adding More Medulla
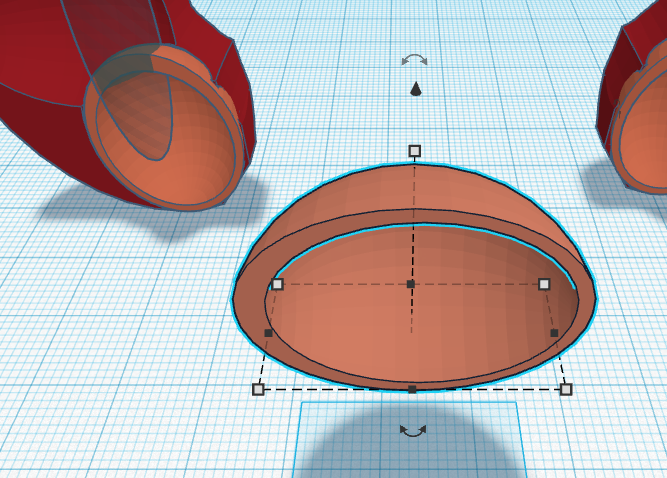
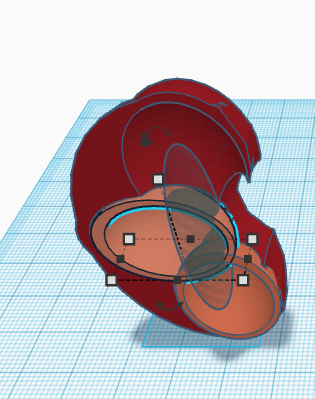
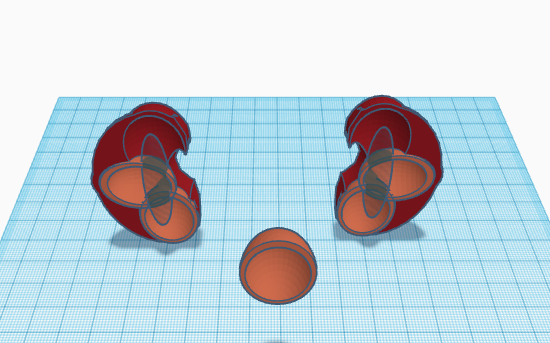
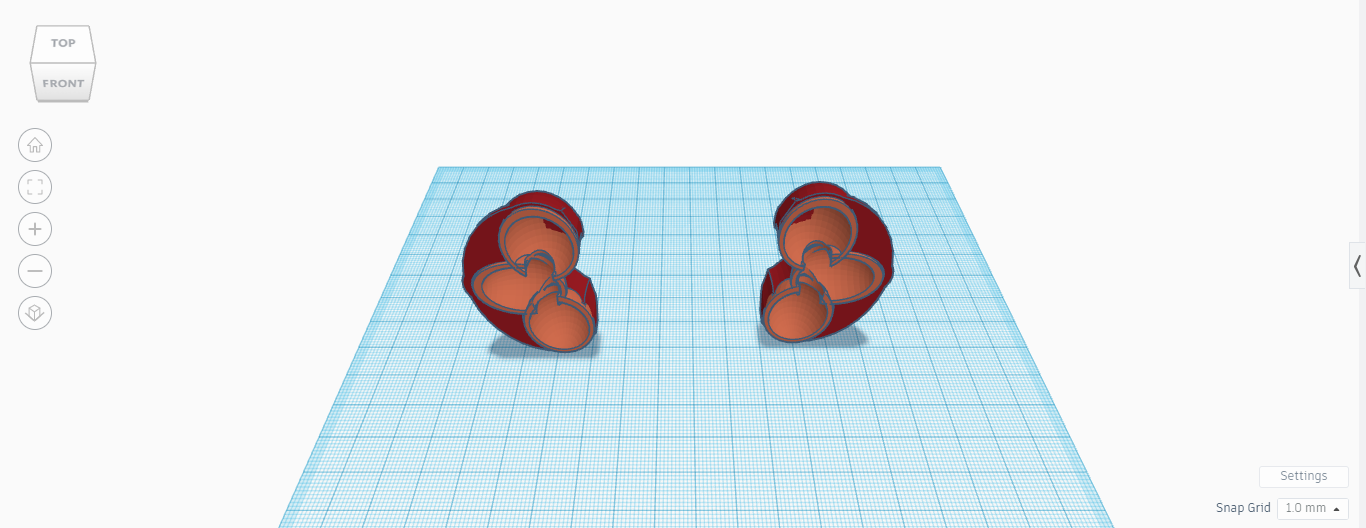
Yeah, I just ran out of names for the steps. So this step is going to be the same one as earlier. We are going to repeat this process two more times as shown above. As specified before, 2 spheres (duplicate the one we did before) and 1 oval.
Adding Artery
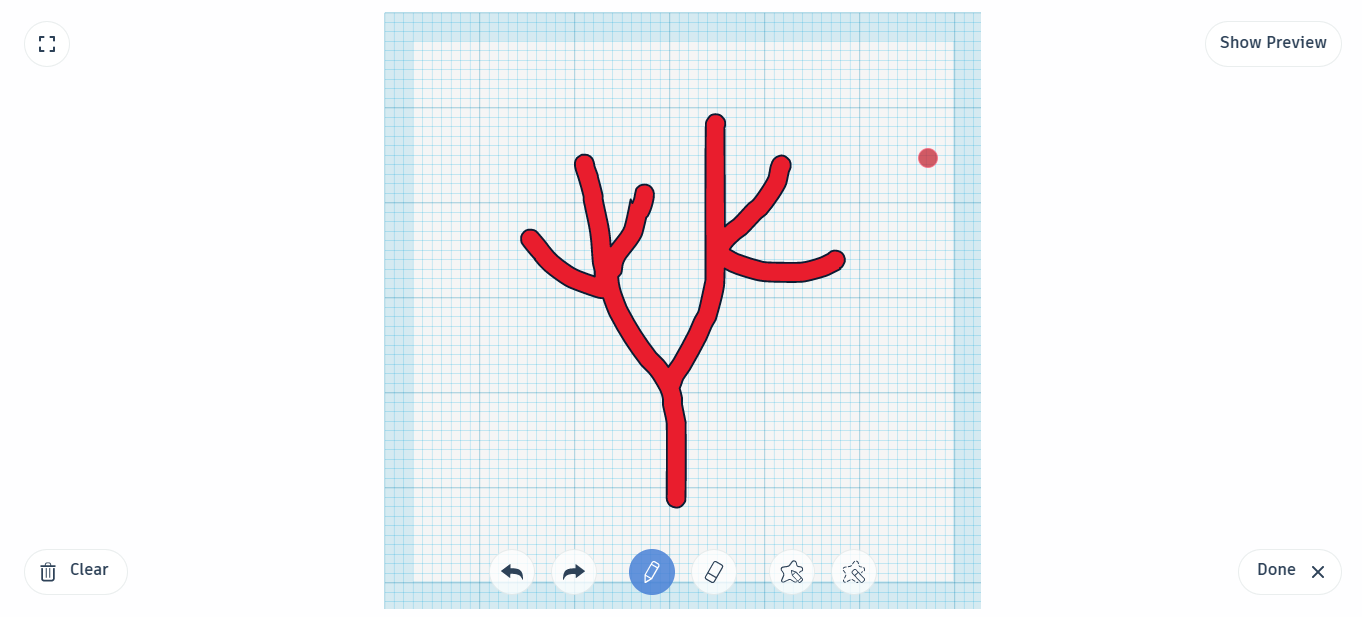
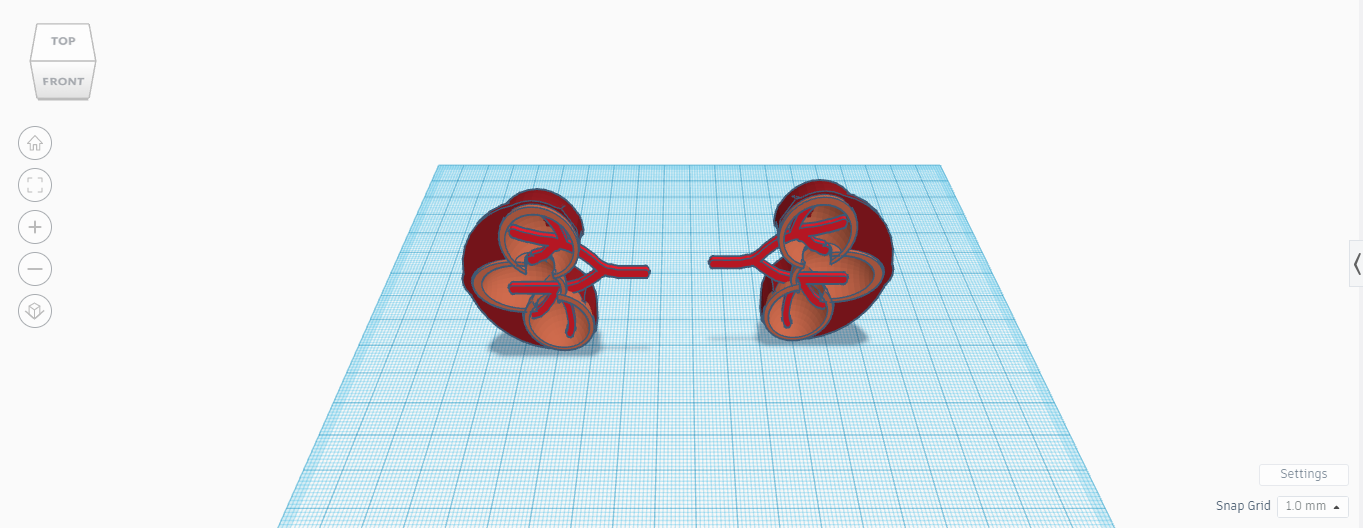
We are now going to add arteries to our kidneys. Arteries supply oxygen-rich blood to the body. To make this step simple and easy, we are going to use the scribble feature in the Tinkercad software to draw the artery. I did my own freehand. You can also try the same. Be patient and go slow. Try to use the image above as a reference.
As soon as we are done with the scribble, we can now place the artery in the kidney. Duplicate it and repeat the process for the other one too.
We just started filling our kidneys. A long way to go ppl.
Adding Veins
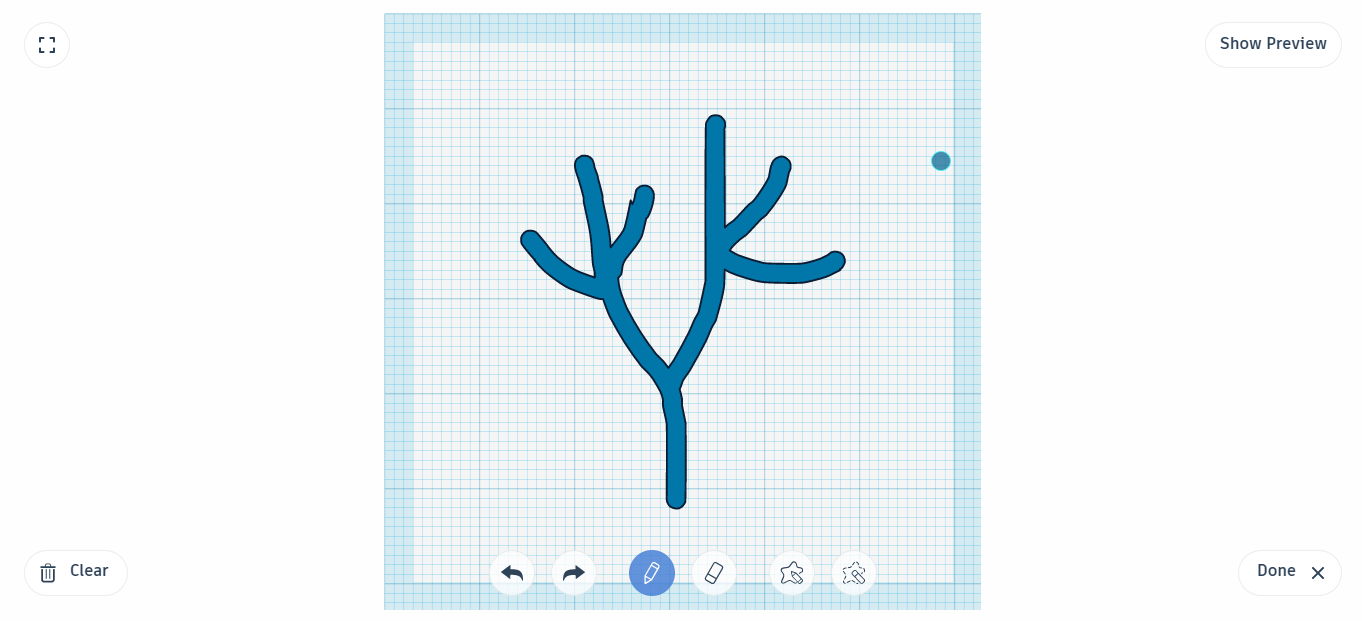
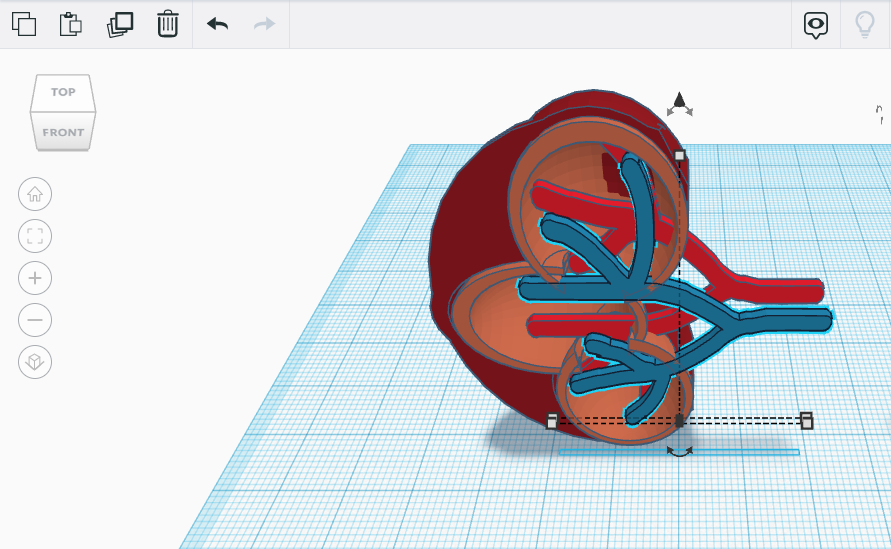
This step is similar to the one that we just did; use the scribble feature to draw the vein and place it in the kidney. These veins take the oxygen-poor blood from our bodies back to the heart.
Adding Ureter #laststep
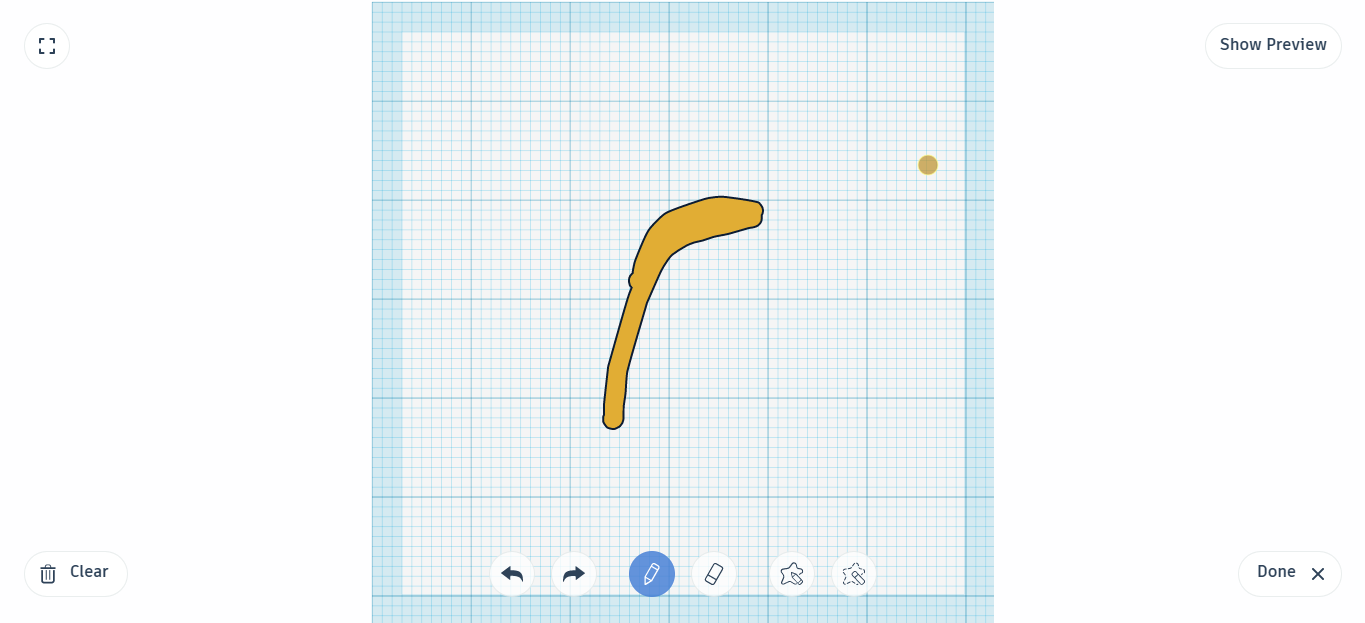
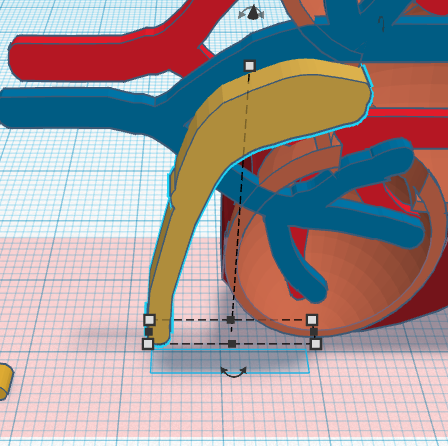
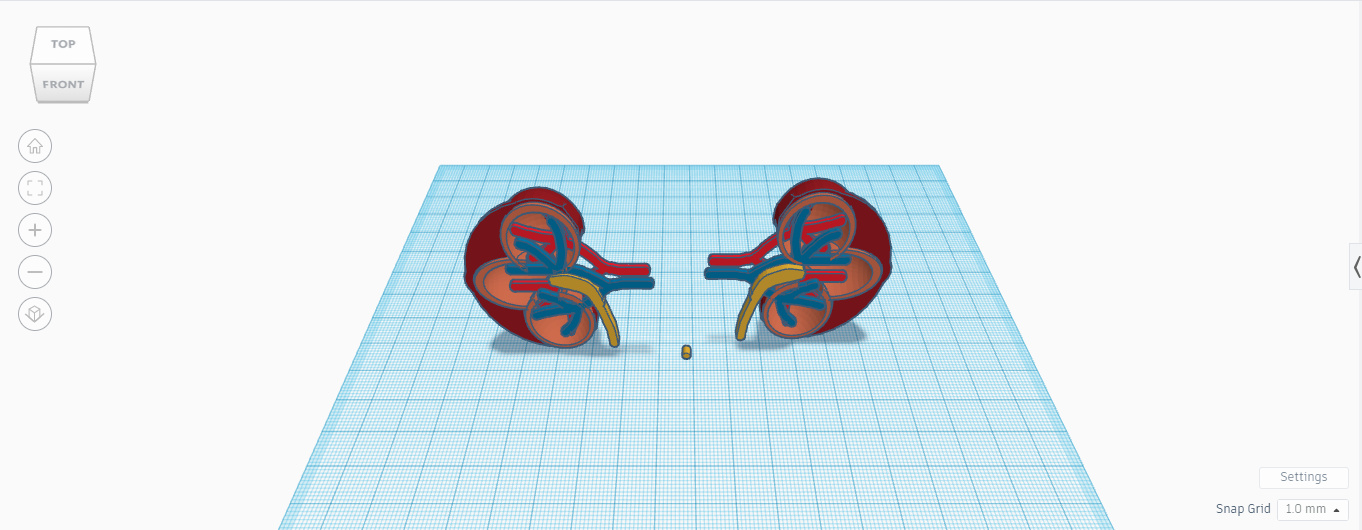
Woohoo! Finally, we've reached the last and final step of today's instructable. In this one, we are going to add a ureter to the kidney model. Similar to the last 2 steps, this step follows the same flow. Scribble It-Duplicate It-Place It.
I've used the generally represented colors for all the parts, like red for arteries, blue for veins, and yellow for the Uterer. I suggest you guys follow the same ones.
So, guys, that's it for the day, hope you liked this instructable. Please let me know if you have any suggestions or doubts in the comment section. Tinkercad is one of the reasons why this process is as simple as it is. It made CAD easier, simpler, and user-friendly. If you made a similar one, click on the "I Made It!" button below and share your work with this amazing community.