Heart in a Piece of Solid Oak Flooring Off-cut With Fusion 360
6138 Views, 85 Favorites, 0 Comments
Heart in a Piece of Solid Oak Flooring Off-cut With Fusion 360
![IMG_E9421[1].JPG](/proxy/?url=https://content.instructables.com/FE1/1FHS/KOSMAEO9/FE11FHSKOSMAEO9.jpg&filename=IMG_E9421[1].JPG)
Welcome to my first Instructable.
This Instructable is all about taking something which could have been thrown out and making something simple and beautiful out of it.
I design the piece in Fusion 360 and then go on to cut the hearts out on my Ox CNC machine.
Disclaimer: I'm not an expert with Fusion 360 by any means, I've picked up things along the way and this is an interpretation of how I make these Hearts in Wood, it works for me and this Instructable may give you some pointers along the way.
For this Instructable I am going to be using a piece of Solid oak flooring off-cut, any wood can be used I guess, I've used a piece of decking and the outcome was ok, but works best with a Hardwood in my opinion.
And of course you need to have a CNC machine.
Before starting out ensure you have all the necessary Health and Safety equipment needed to carry out the Tasks.
CNC Machines can be noisy and dangerous.
As a minimum during the cutting operations you will need.
Safety Glasses.
Ear Defenders.
Dust Mask(Rated for the work you are carrying out)
Supplies
1 x 6mm Ball end Router bit.
Medium Grit Sandpaper
Boiled Linseed oil
Fusion 360
.png)
In the making of this Instructable we will be using many of the disciplines in Fusion 360.
In the early design stages we will be importing a Mesh into Fusion 360 and turning it into a solid so we can manipulate it and use it in our design.
We will also be using Extrude, Draft, Fillet,Split body and Combine as well as using cam for generating the toolpath G-code for cutting out the piece, and in Cam we will be using a 3D Adaptive clearing pass and a 2D contour pass.
The Design Process

.png)
.png)
.png)
.png)
First off we need to download an STL of a 3D heart, later we will import this into Fusion 360.
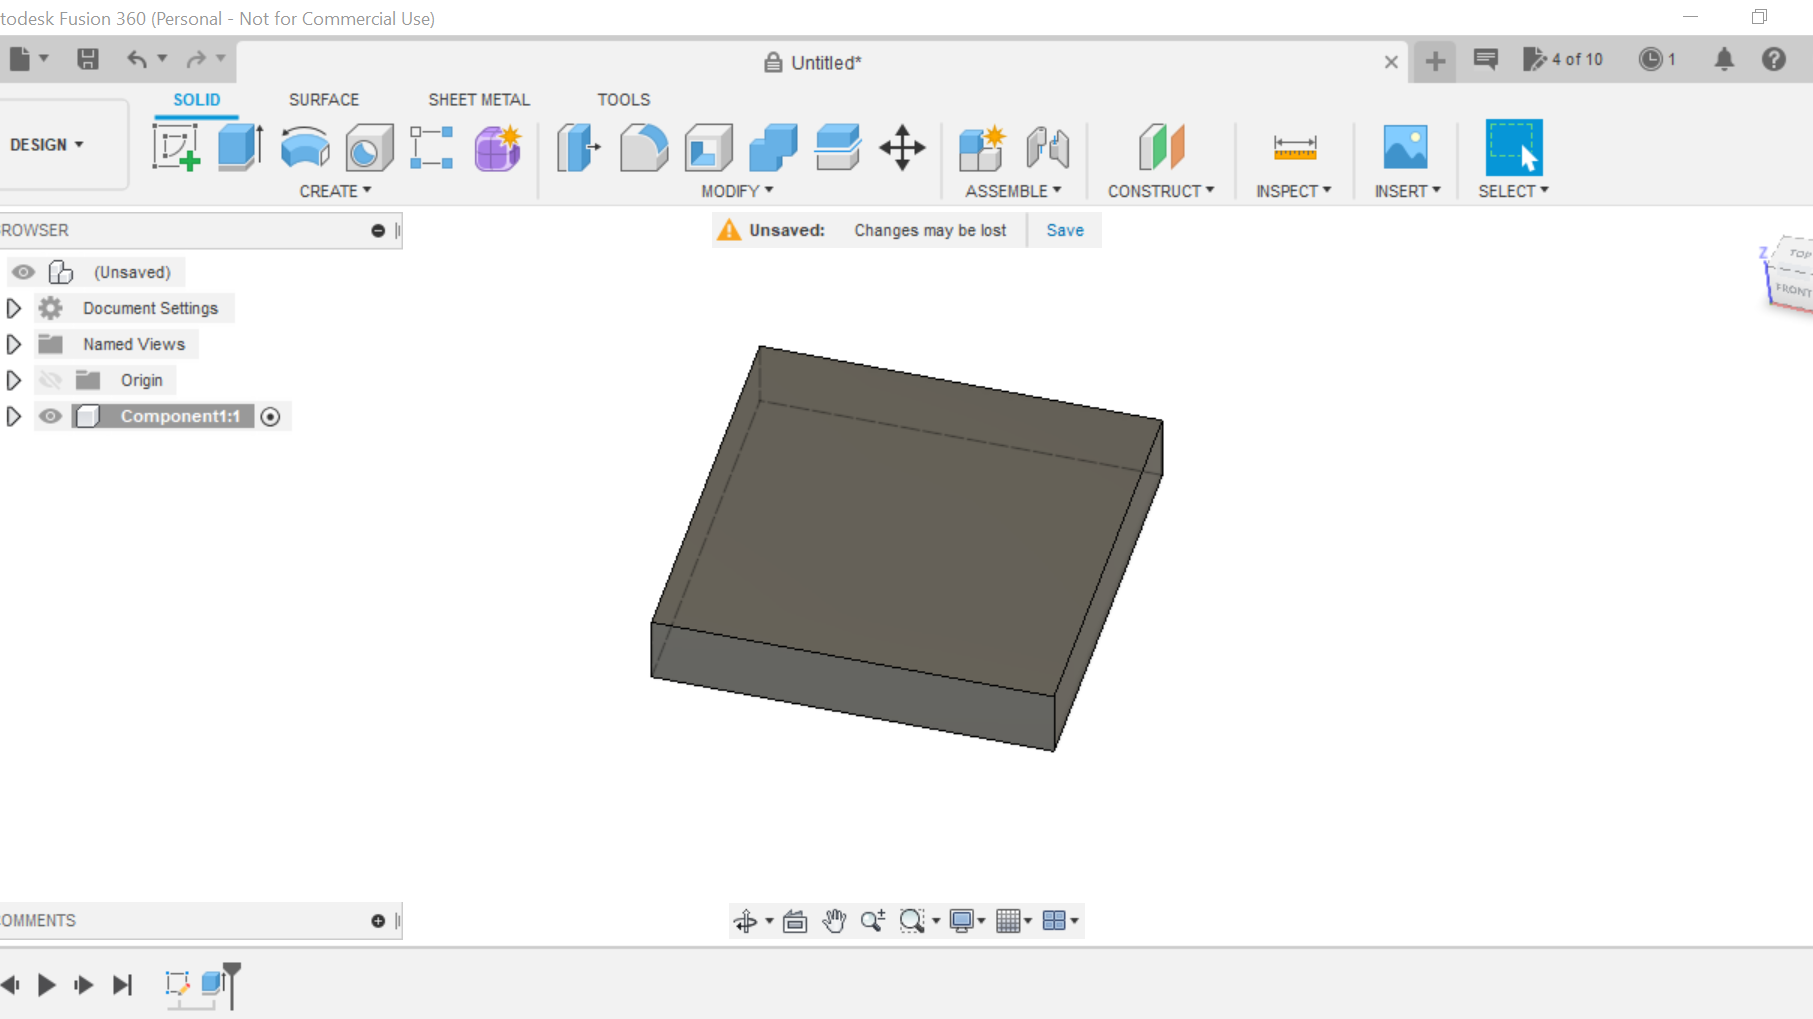
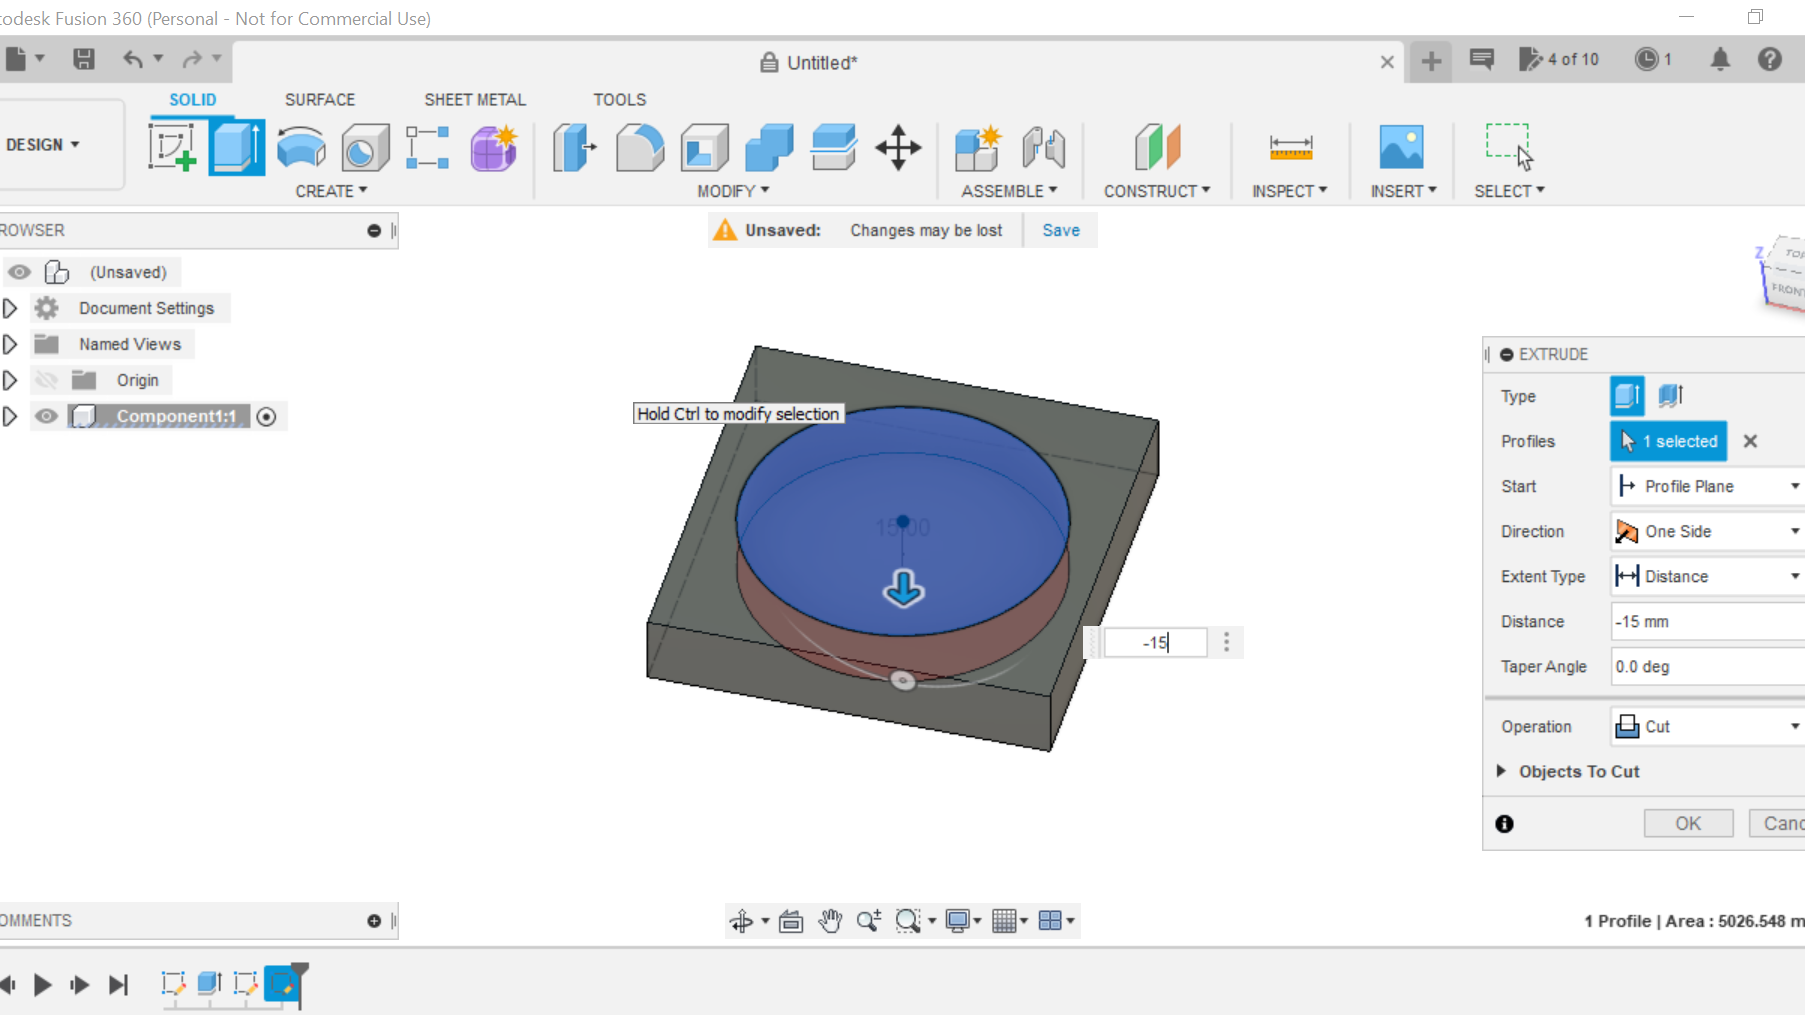
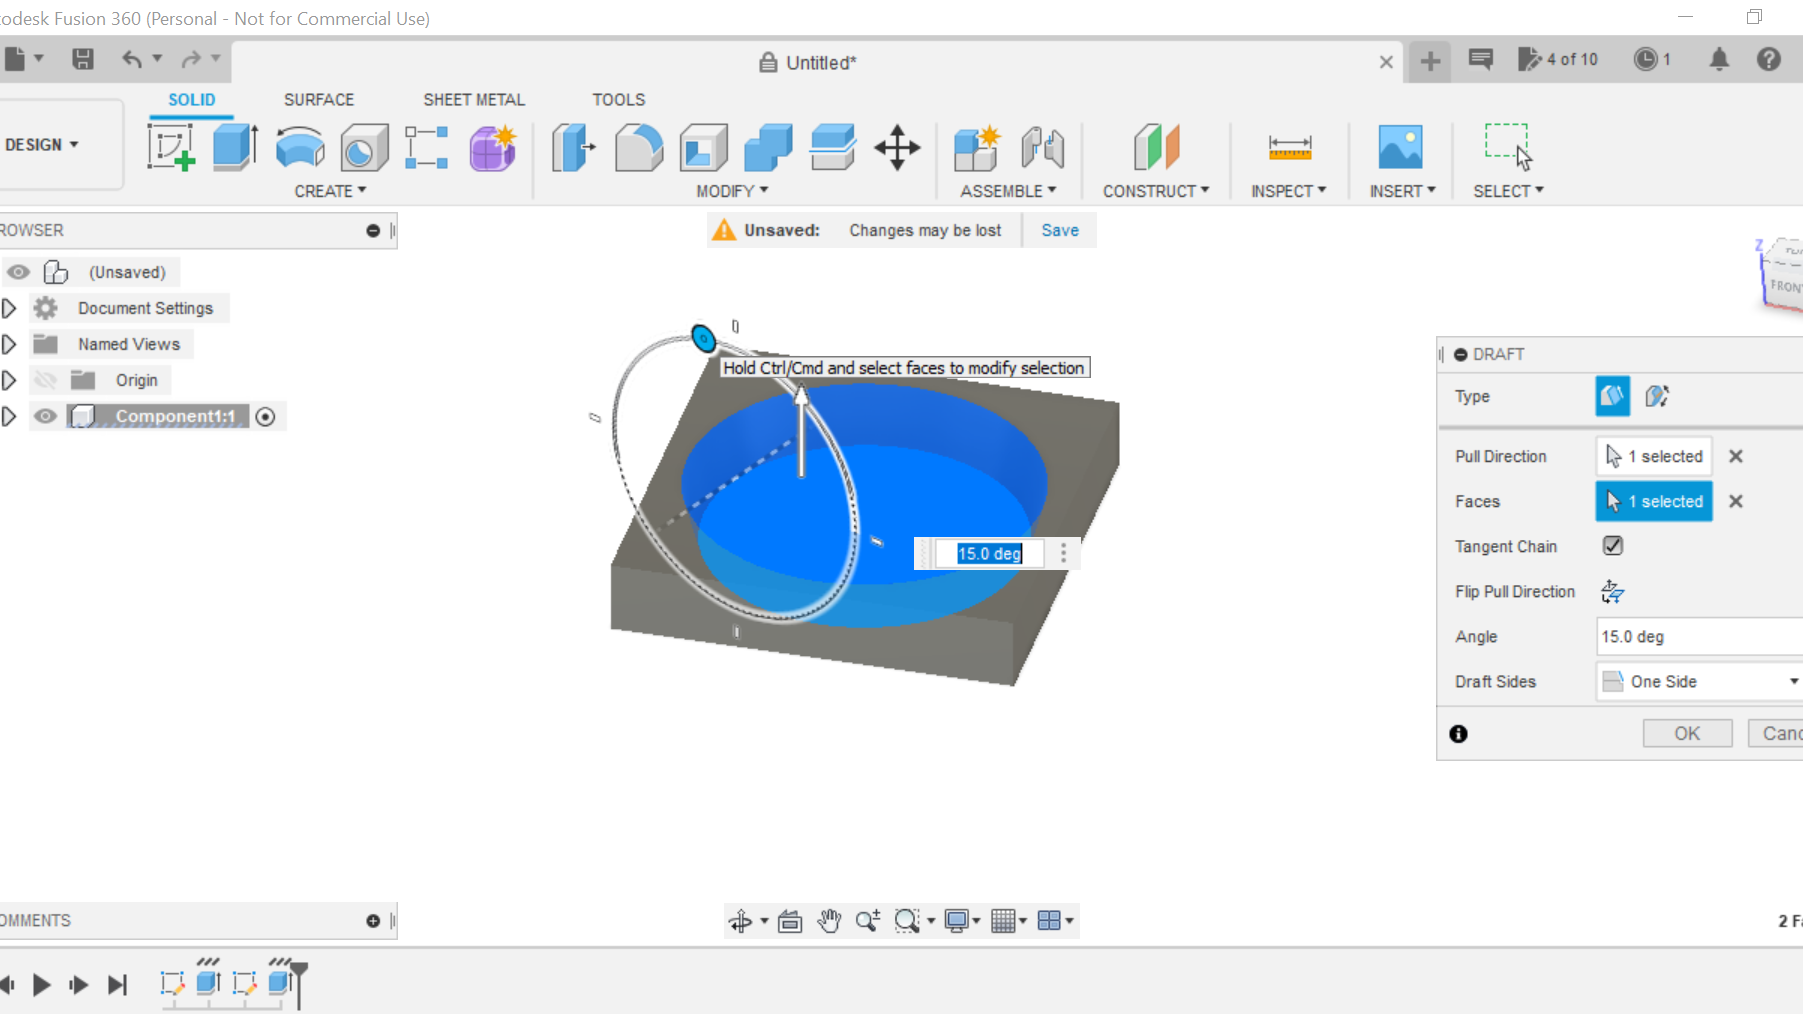
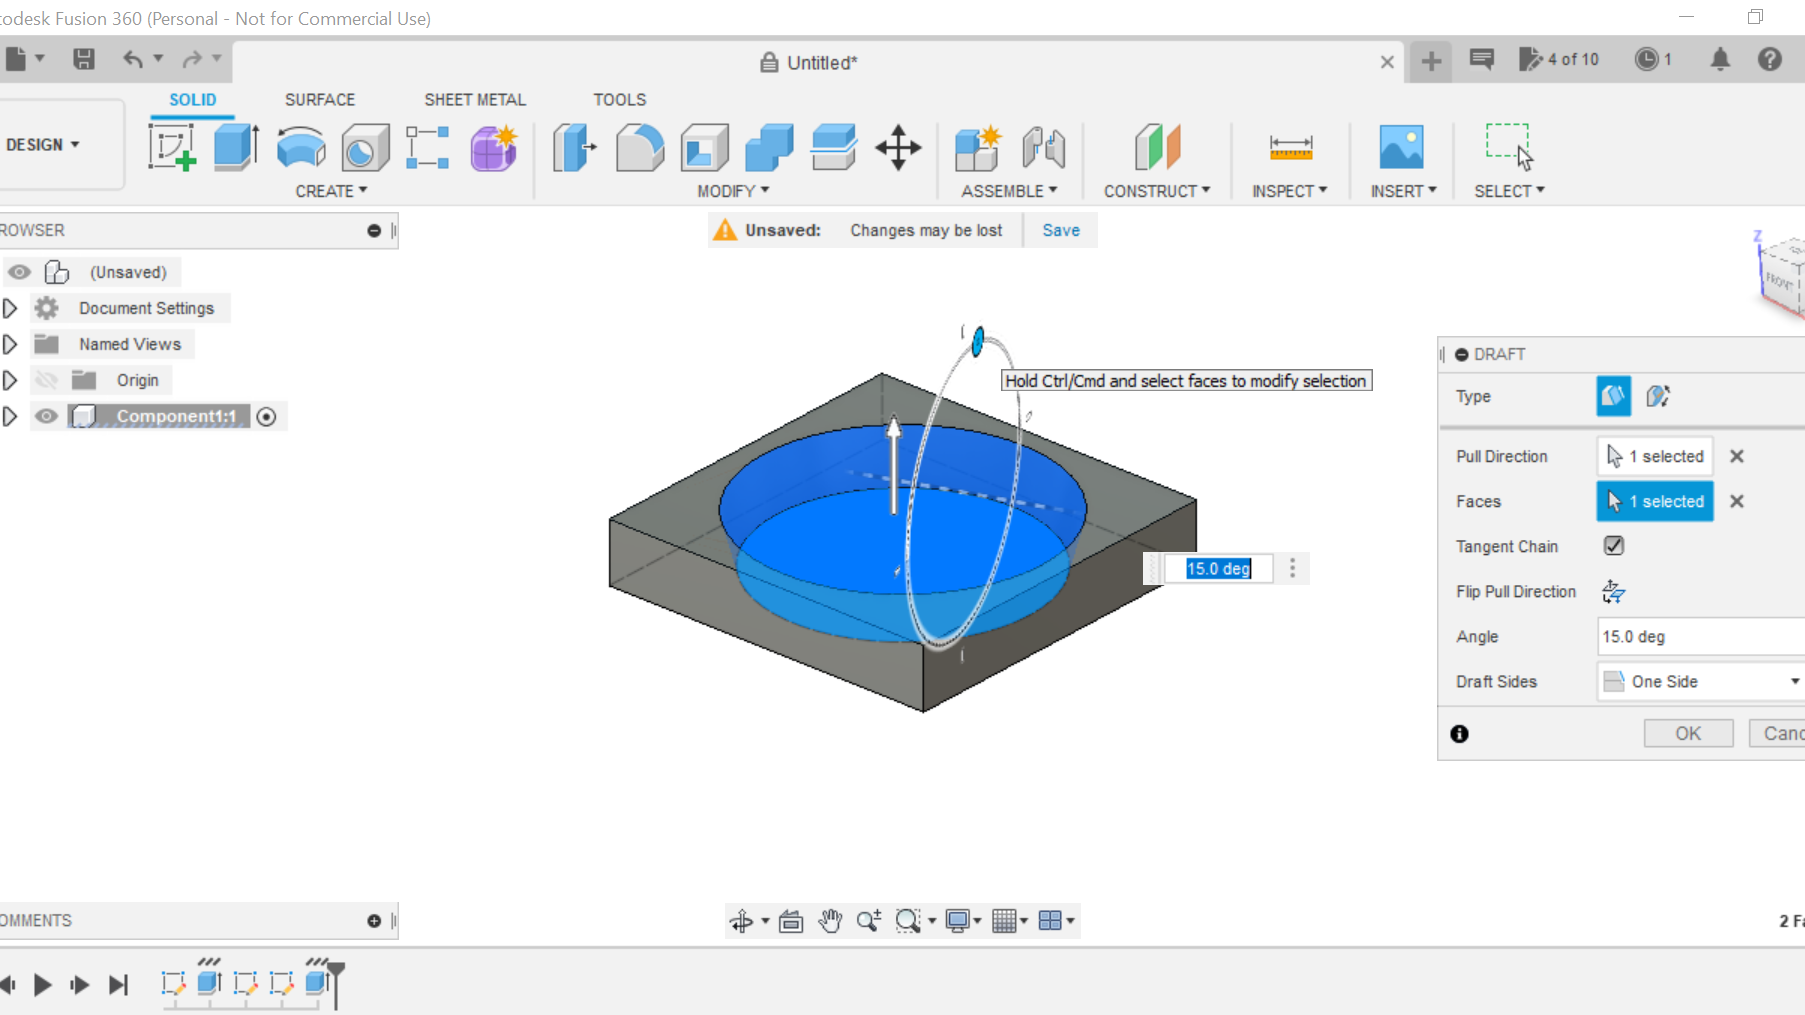
Start a new Fusion 360 project and name it and save it. Create a new sketch and choose the Top plane, then draw a centre square, my dimensions are 100mm x 100mm but could be any measurement, then I extruded to 18mm which is the depth of my wood, again, yours could be any dimension. Now draw a centre circle, mine will be 80mm and extrude to -15 we are now going to create a draft to the circle. Click on modify and select draft. Once draft is open click on the bottom of the circle to highlight it, then the outer ring of the circle, then rotate 15 Degrees to create the draft. That is the circle now created for the heart, now we need to insert the Heart.stl.
Inserting the 3D STL Heart Into the Design
.png)
.png)
.png)
.png)
.png)
.png)
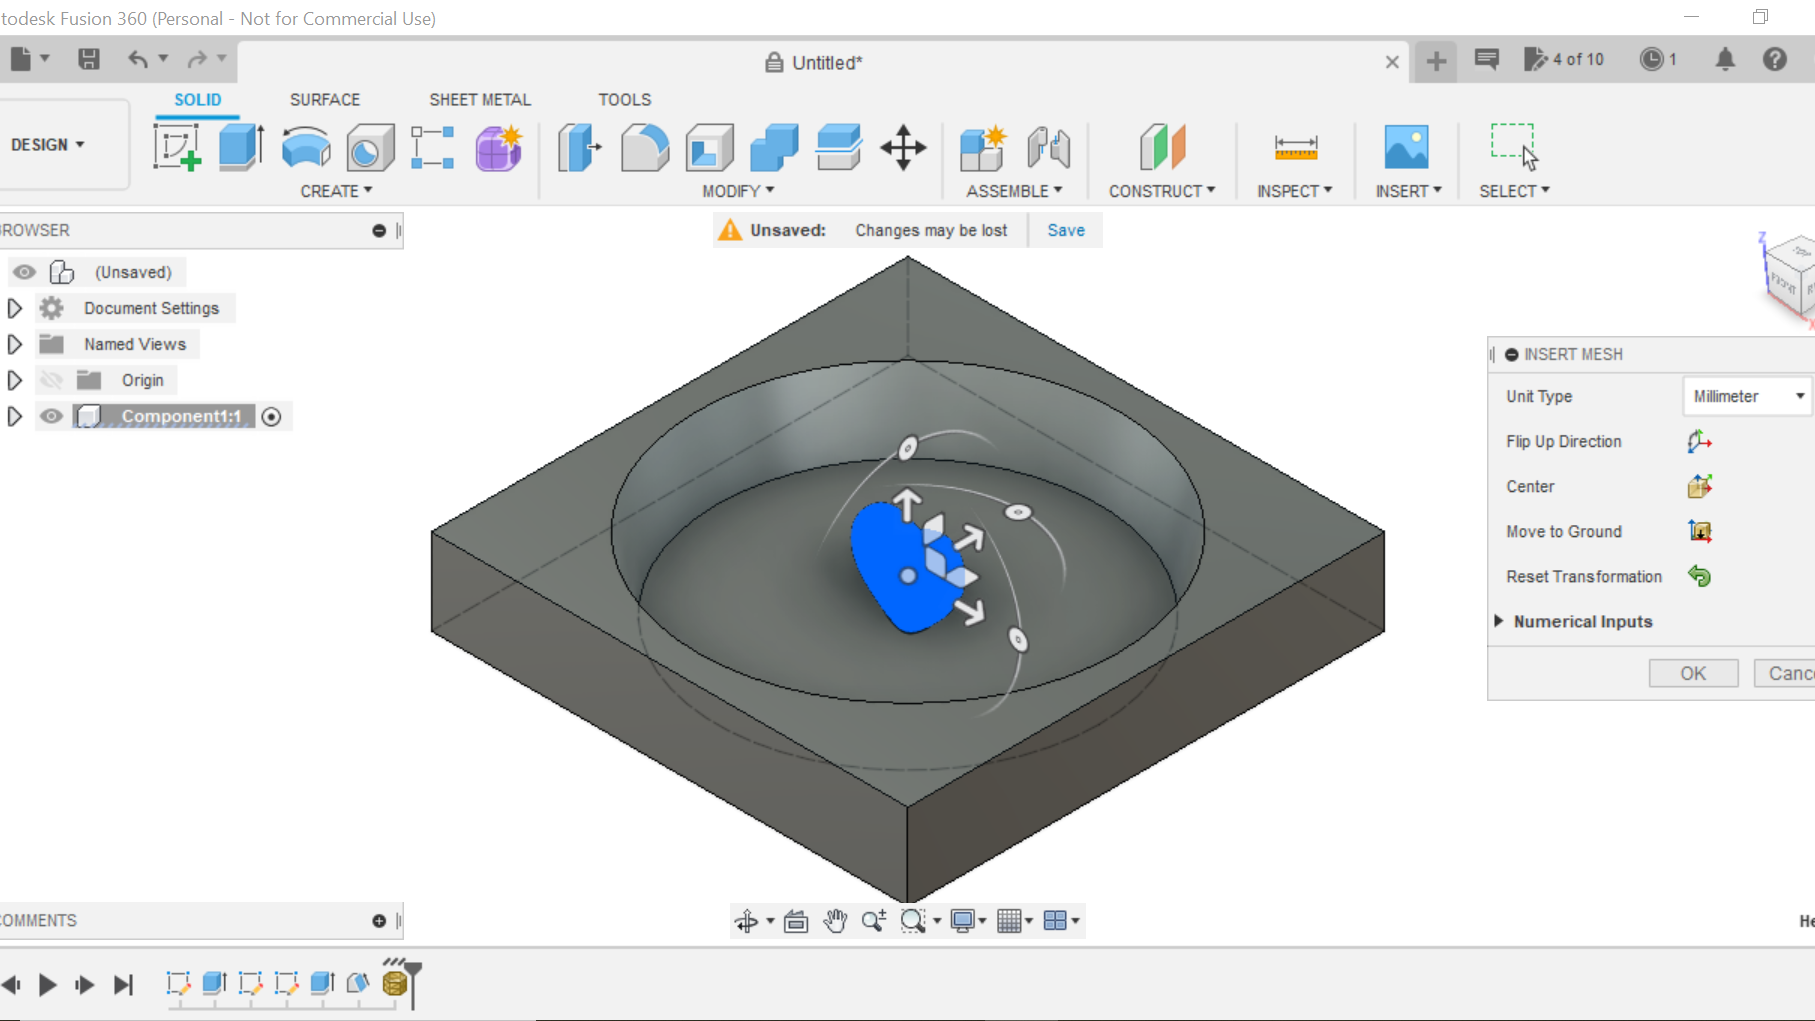
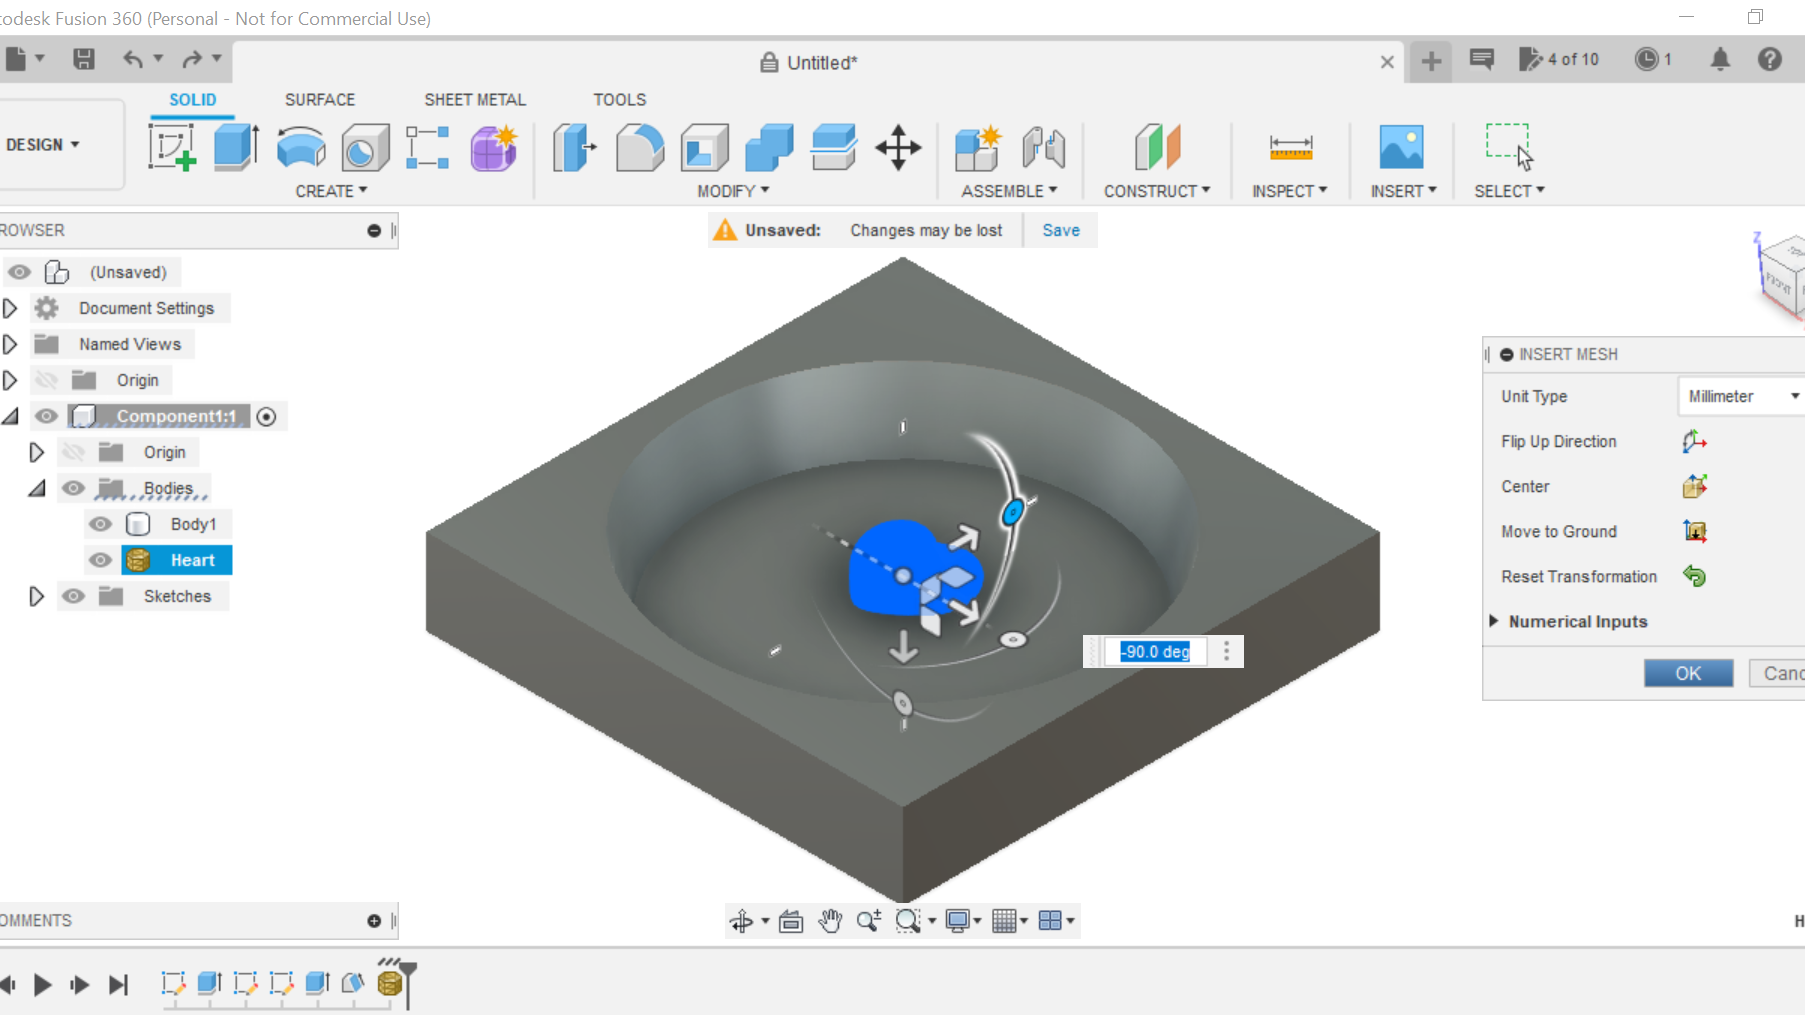
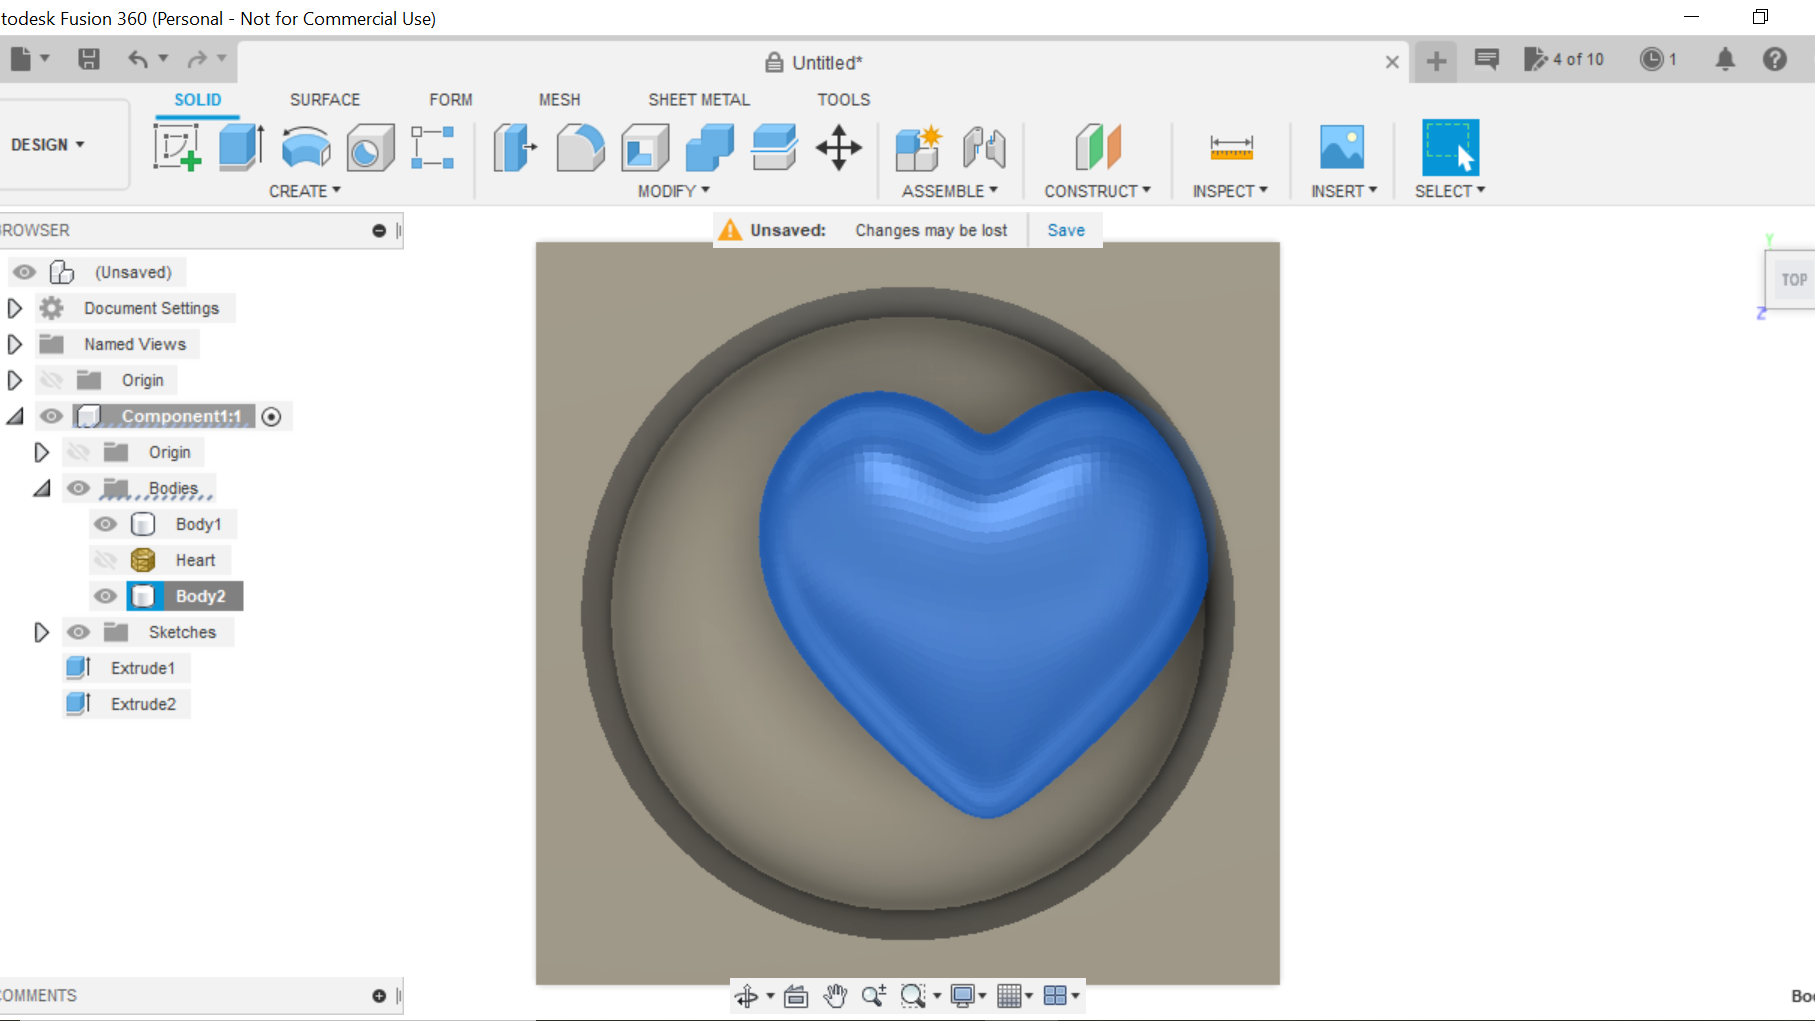
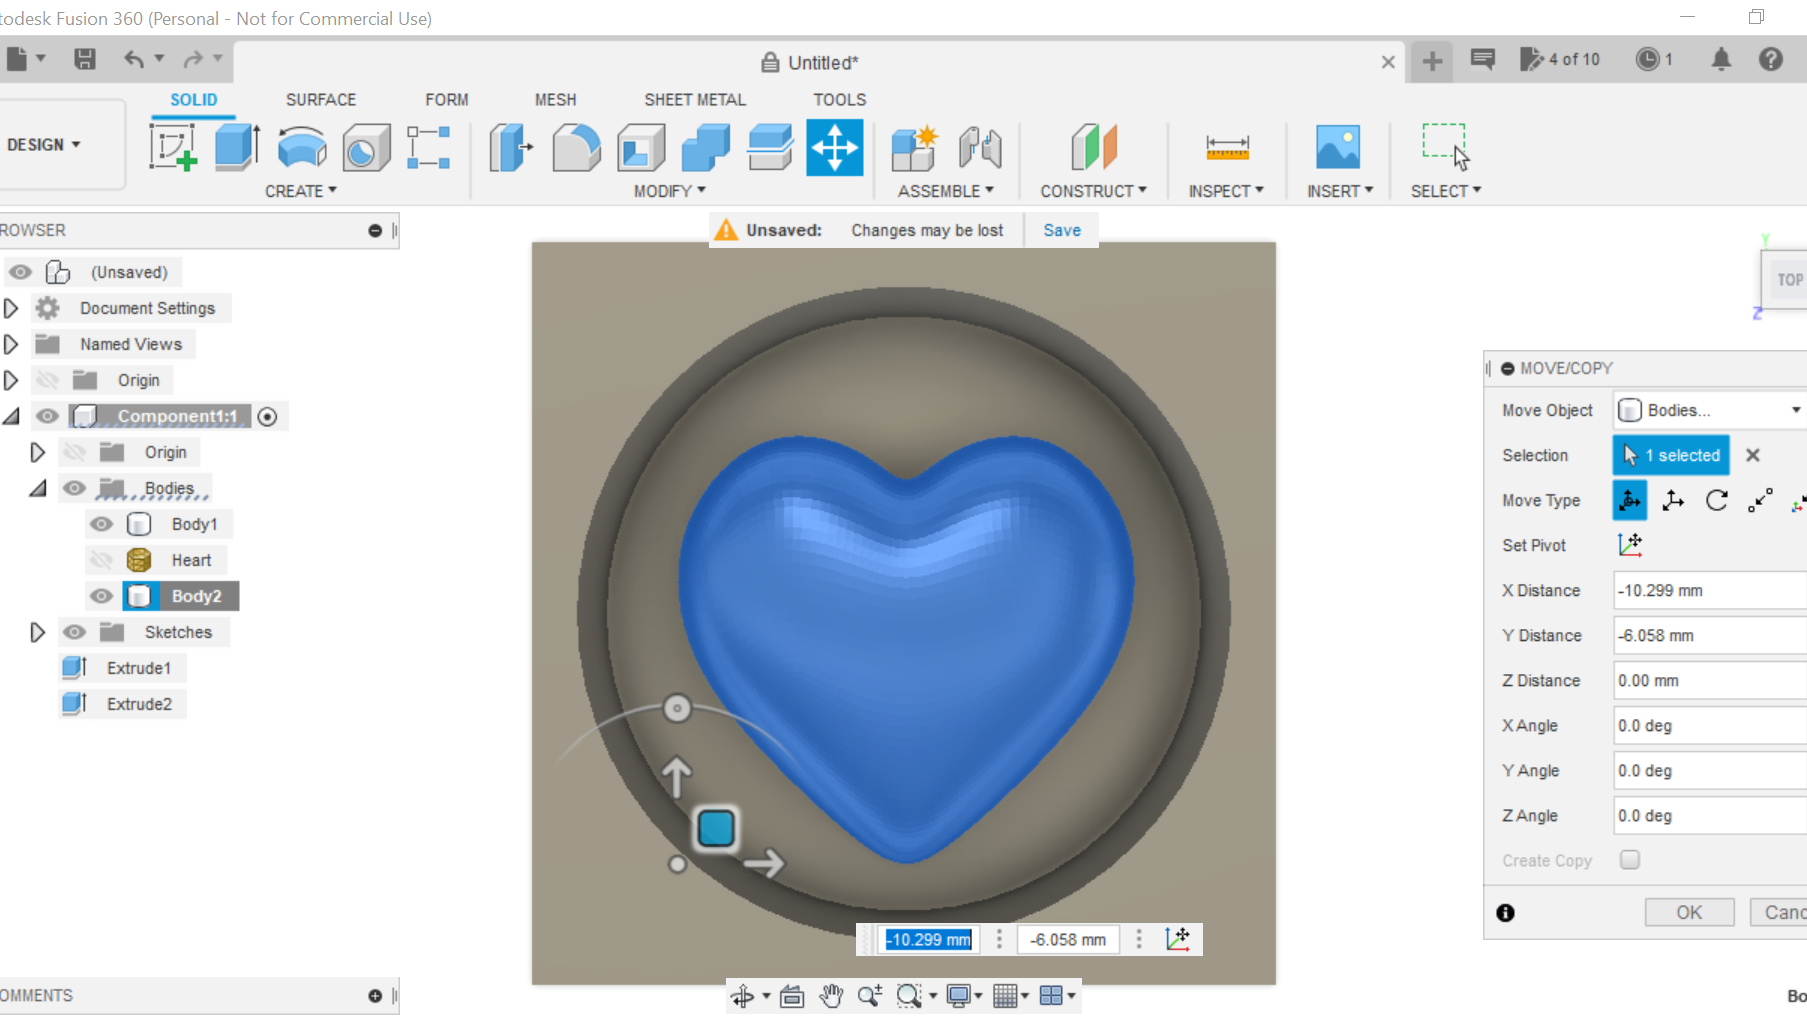
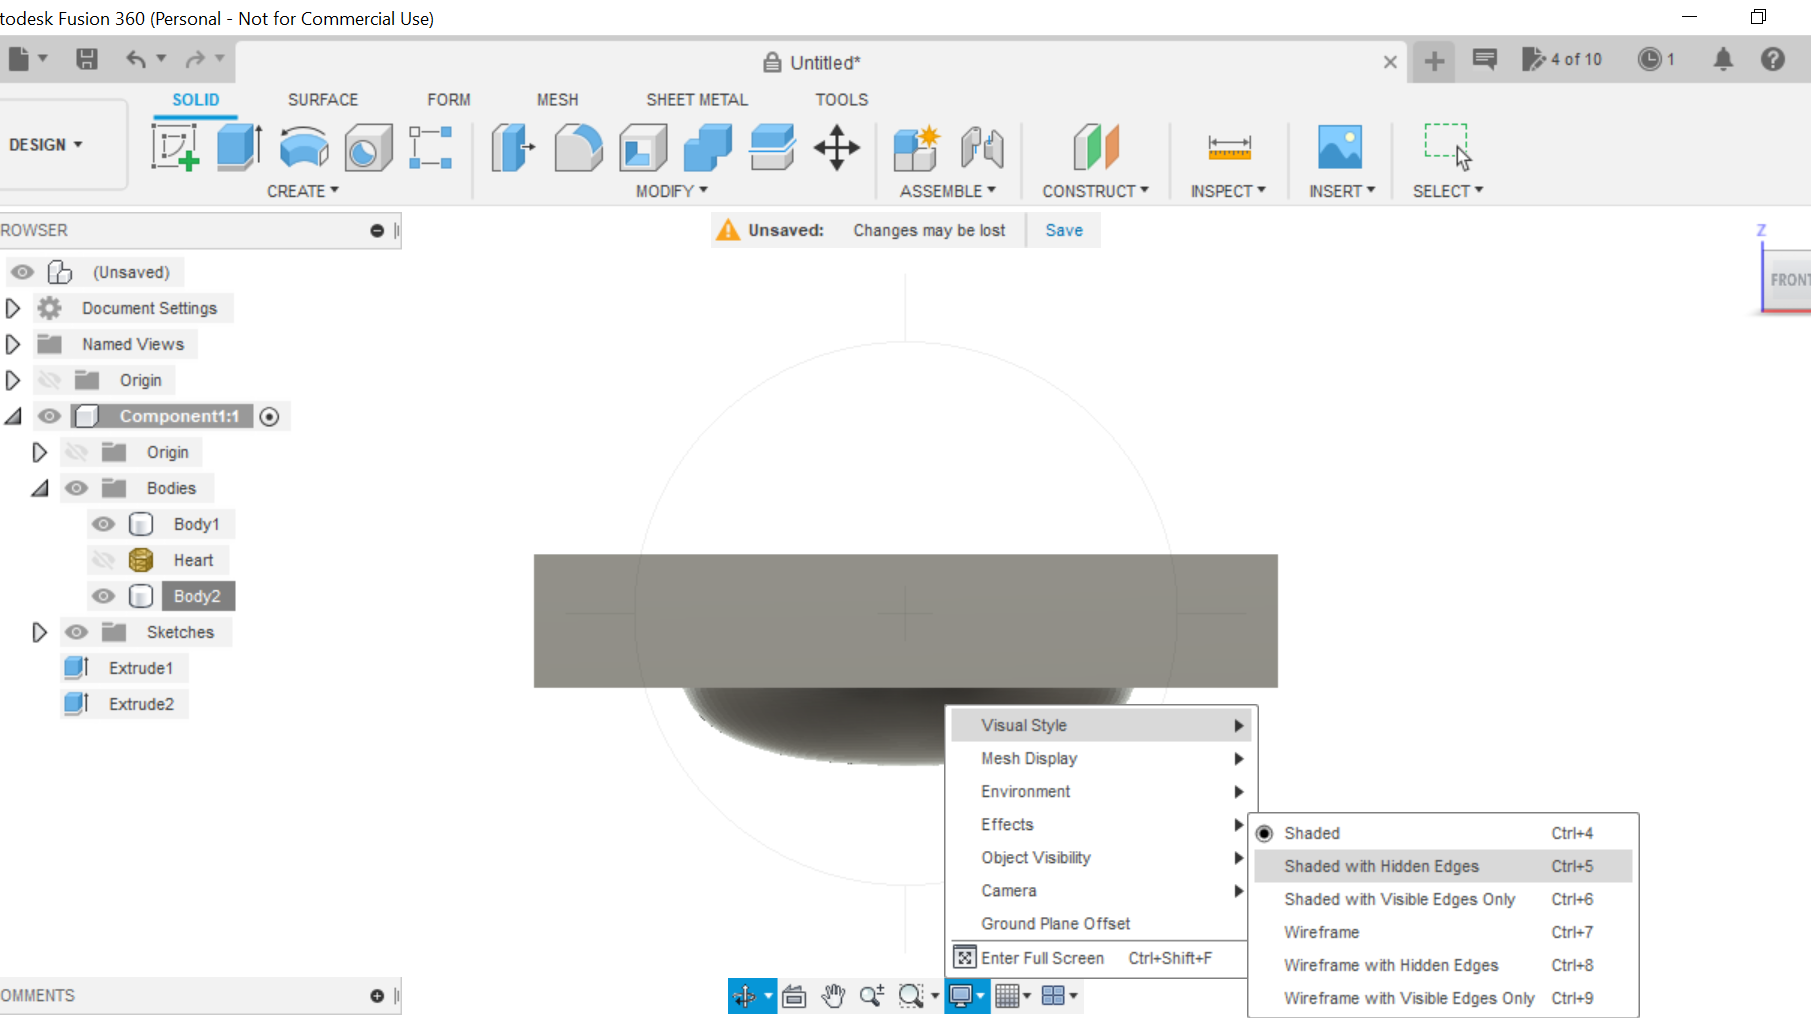
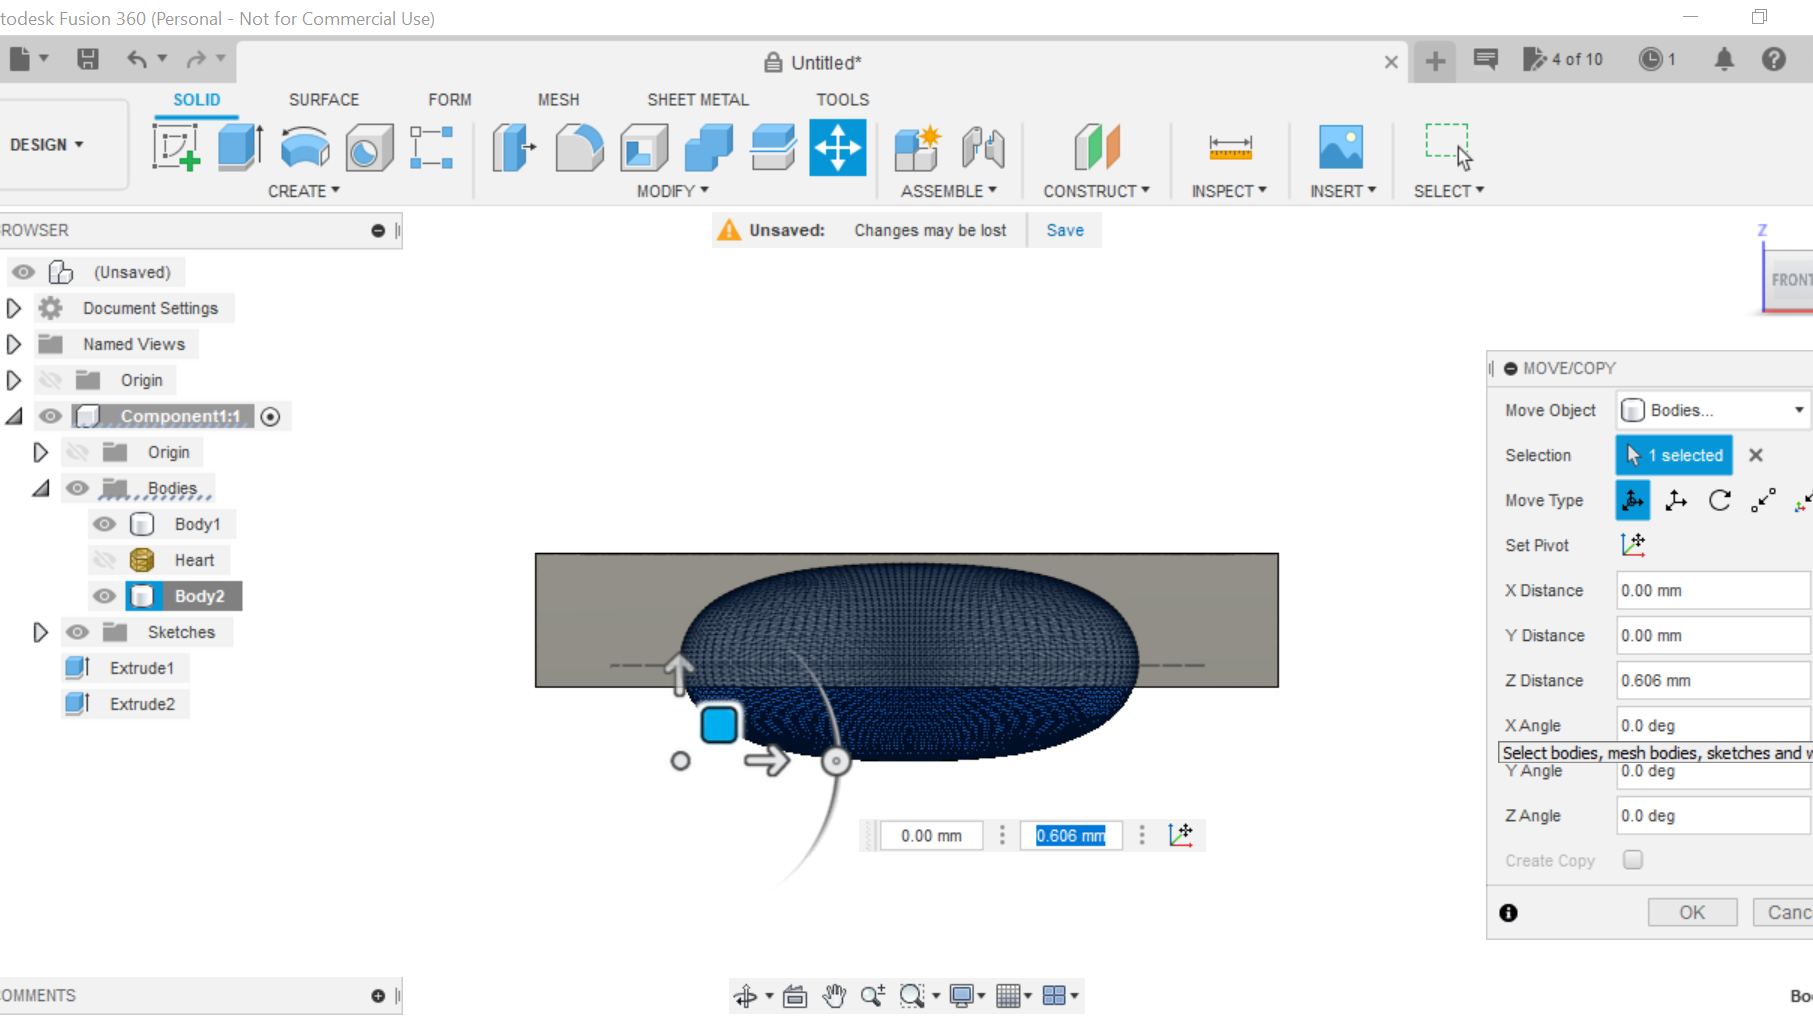
Go to the heading, insert and select 'Insert Mesh', now choose the heart STL you downloaded earlier, it will drop into the centre of the circle, now rotate to 90 degrees to lay it flat. Now we need to turn off the design history, right click where it says' Your saved design' on the left column, go down to the bottom of the list and turn off design history. Now we go to the imported heart and select 'Mesh to Brep' and select ok in the box. Now we can go ahead and scale the heart to suit our purpose. Select 'Modify' and then scale and click on the Heart to highlight it. Once we have scaled the Heart, (and bear in mind to leave enough room around the edges of the heart for the cutting bit) in my case it will be a 6mm Ball end bit. Position the heart by right clicking on 'Body 2' and select move, centre the heart from the top plane, then we will need to centre it in the centre of the work piece, to do this go through the same process only this time from the front plane to view the movement. Go to Display settings box, open and select 'Shaded with hidden edges' to see where to place the heart. We now have the Heart where we want it so we now have to split the body, this process is as follows.
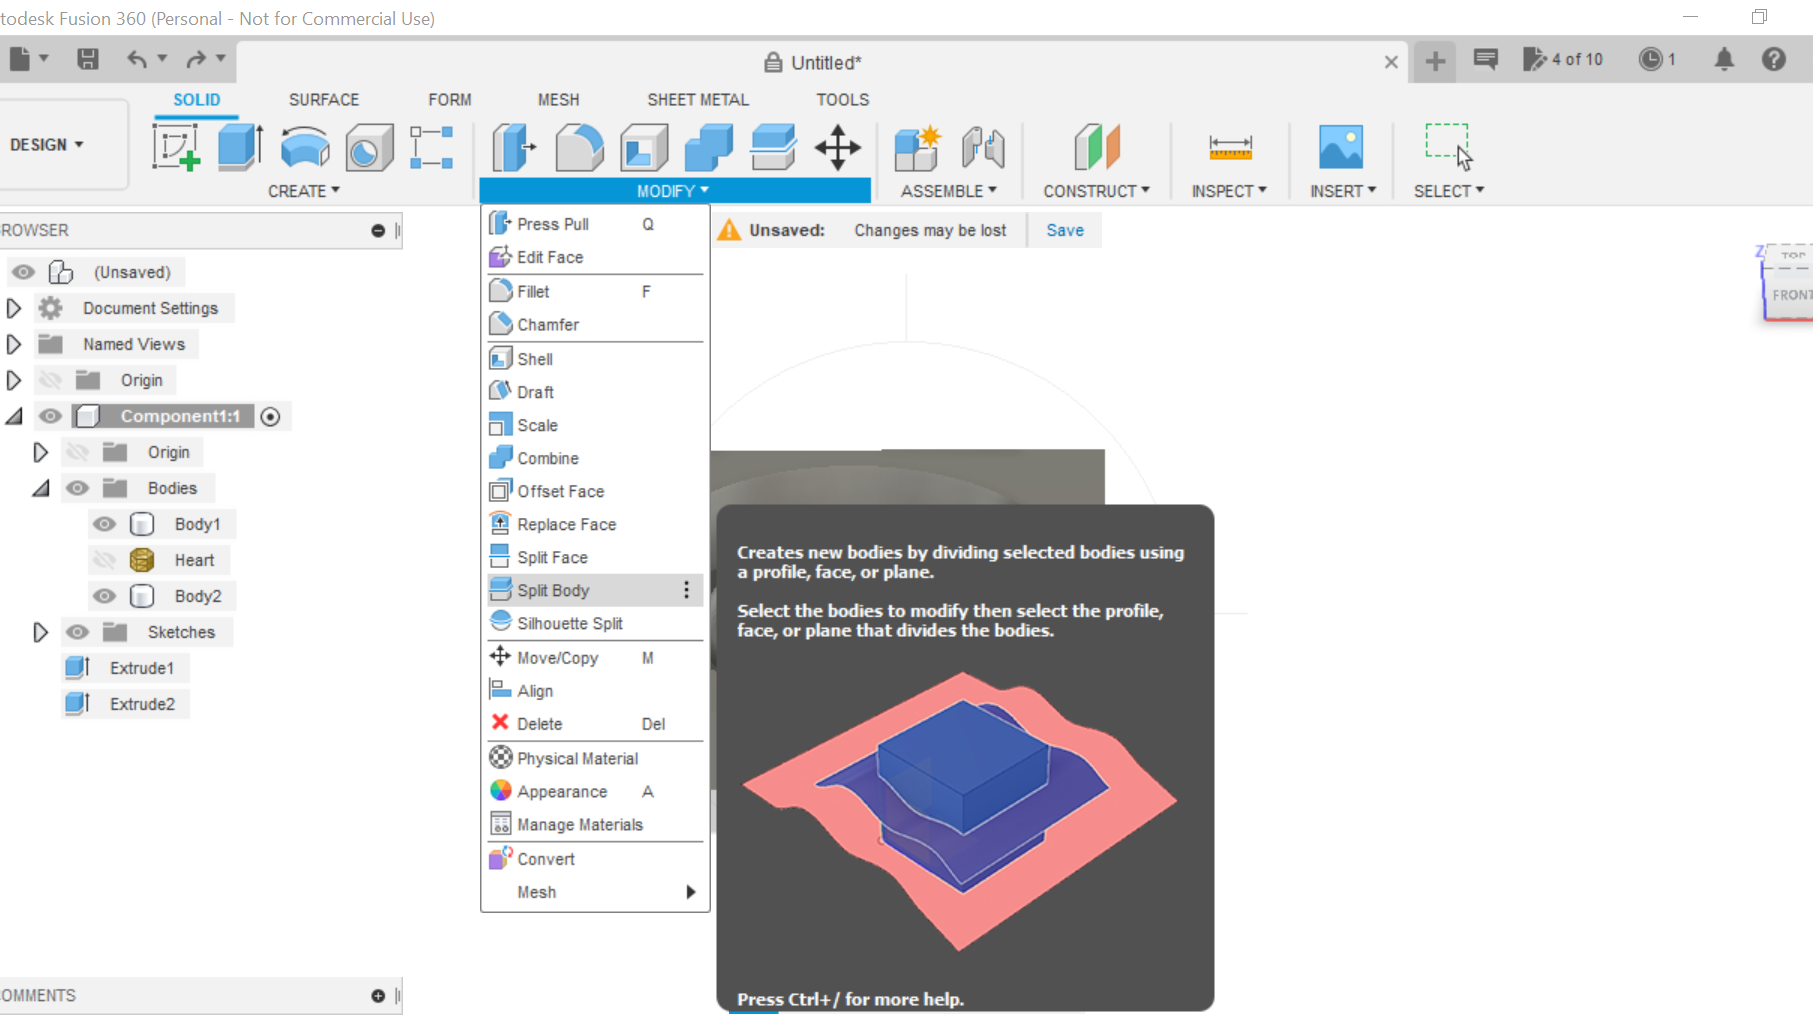
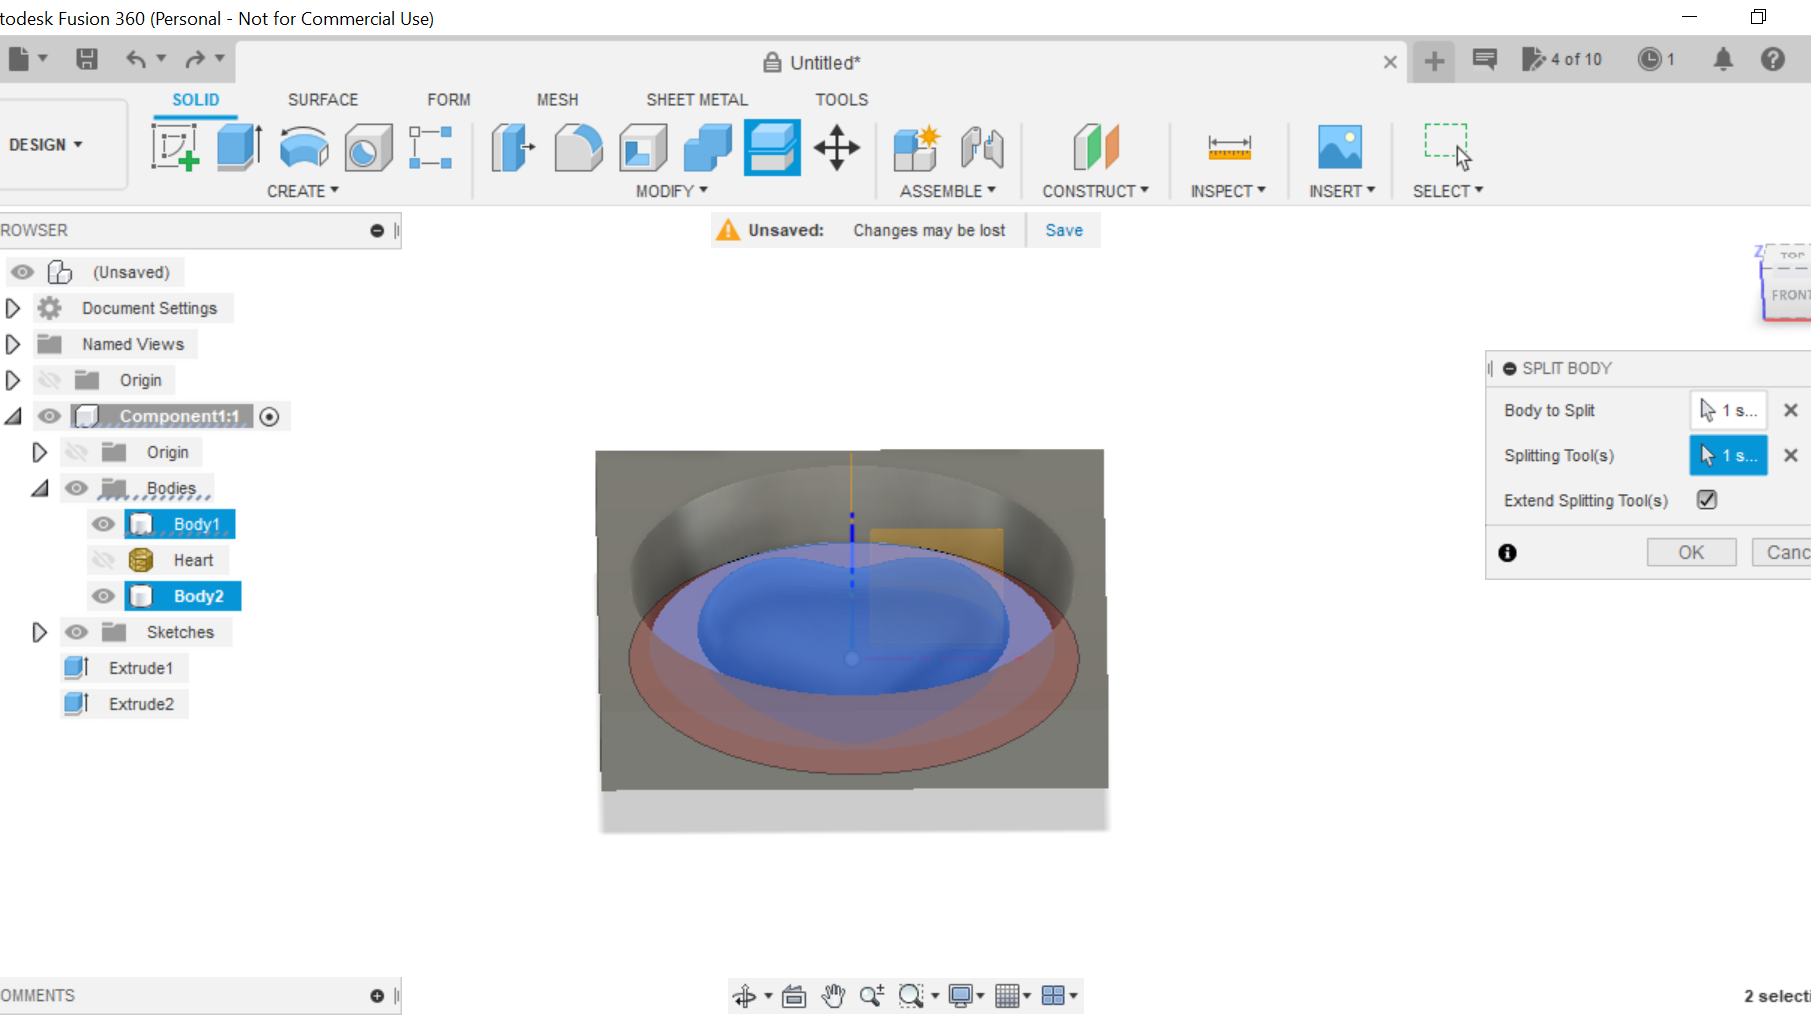
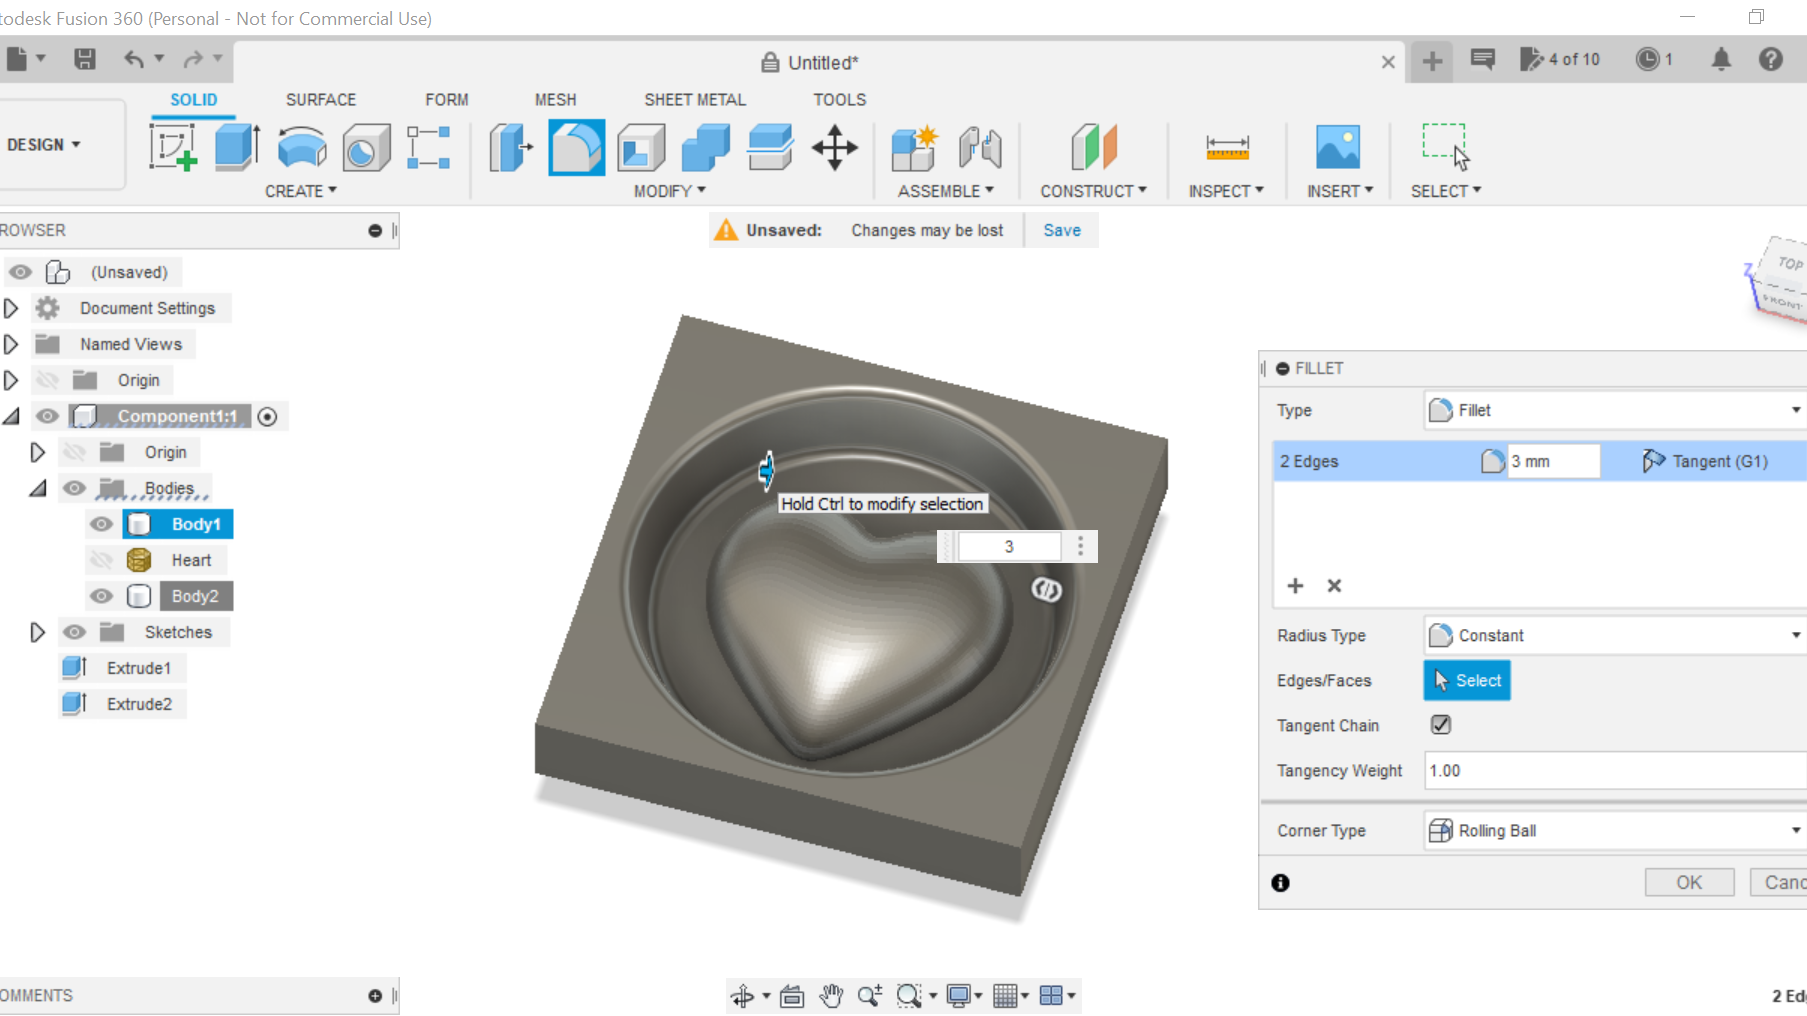
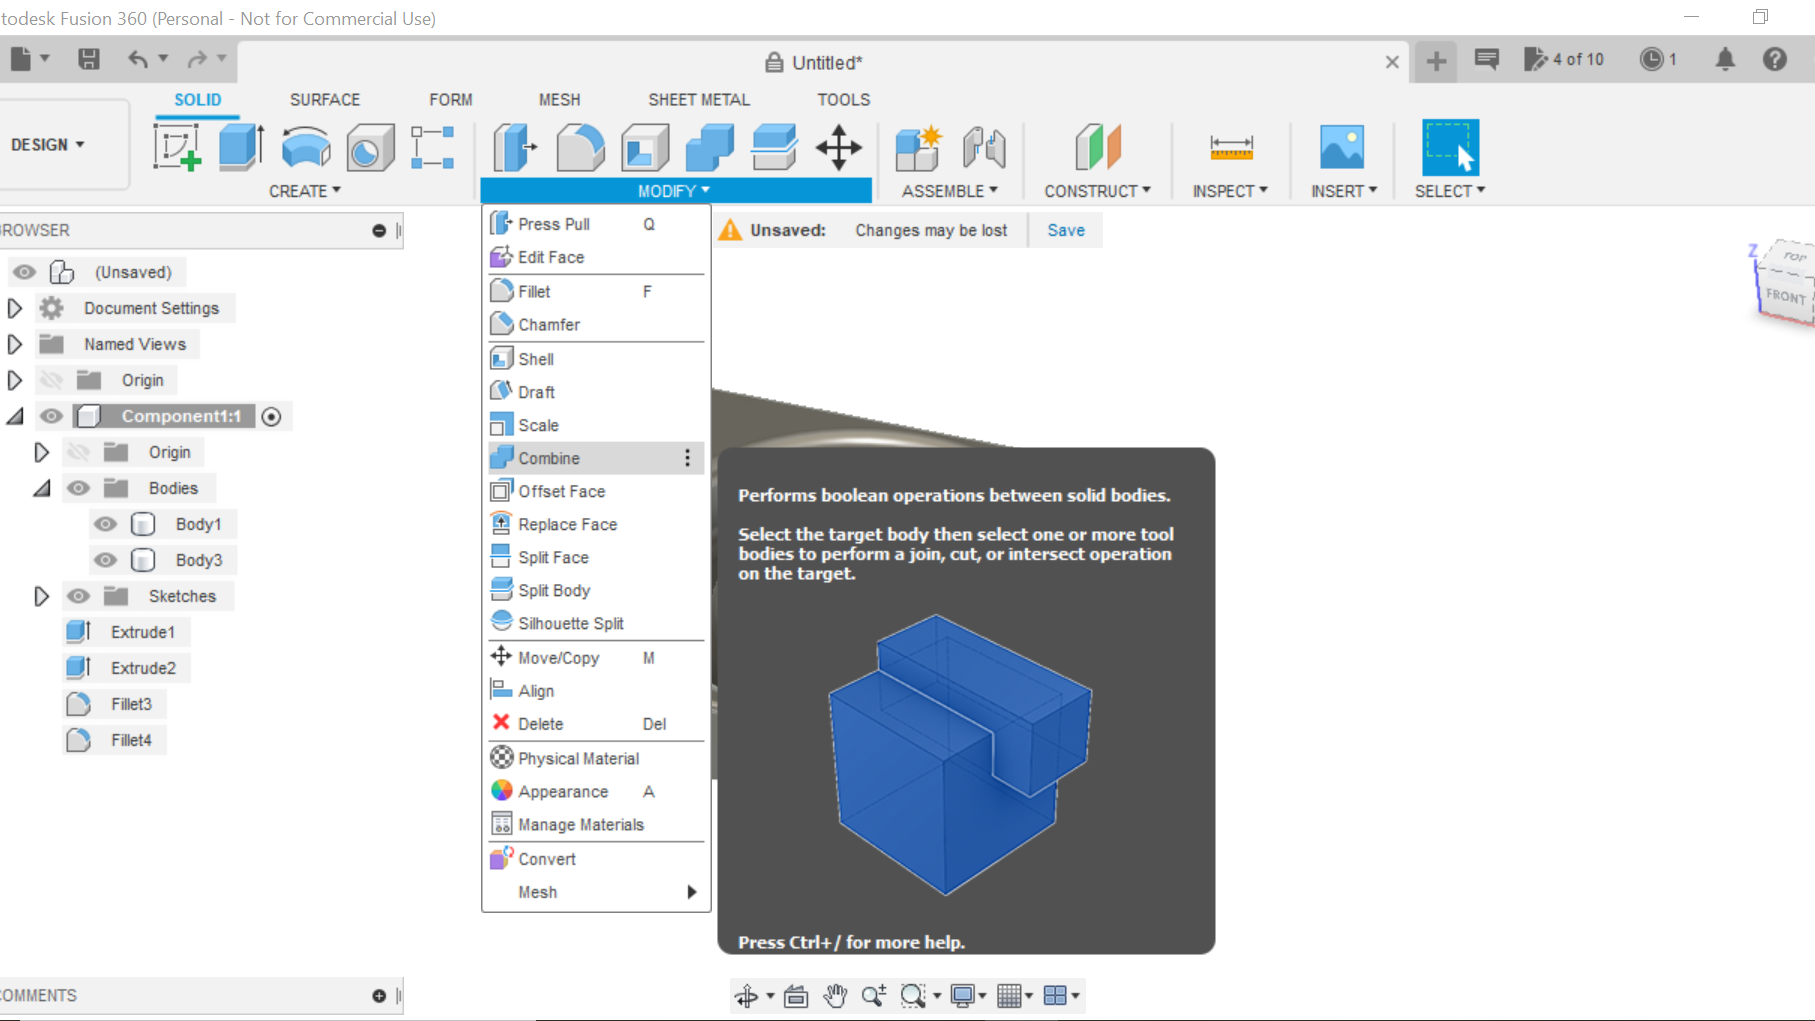
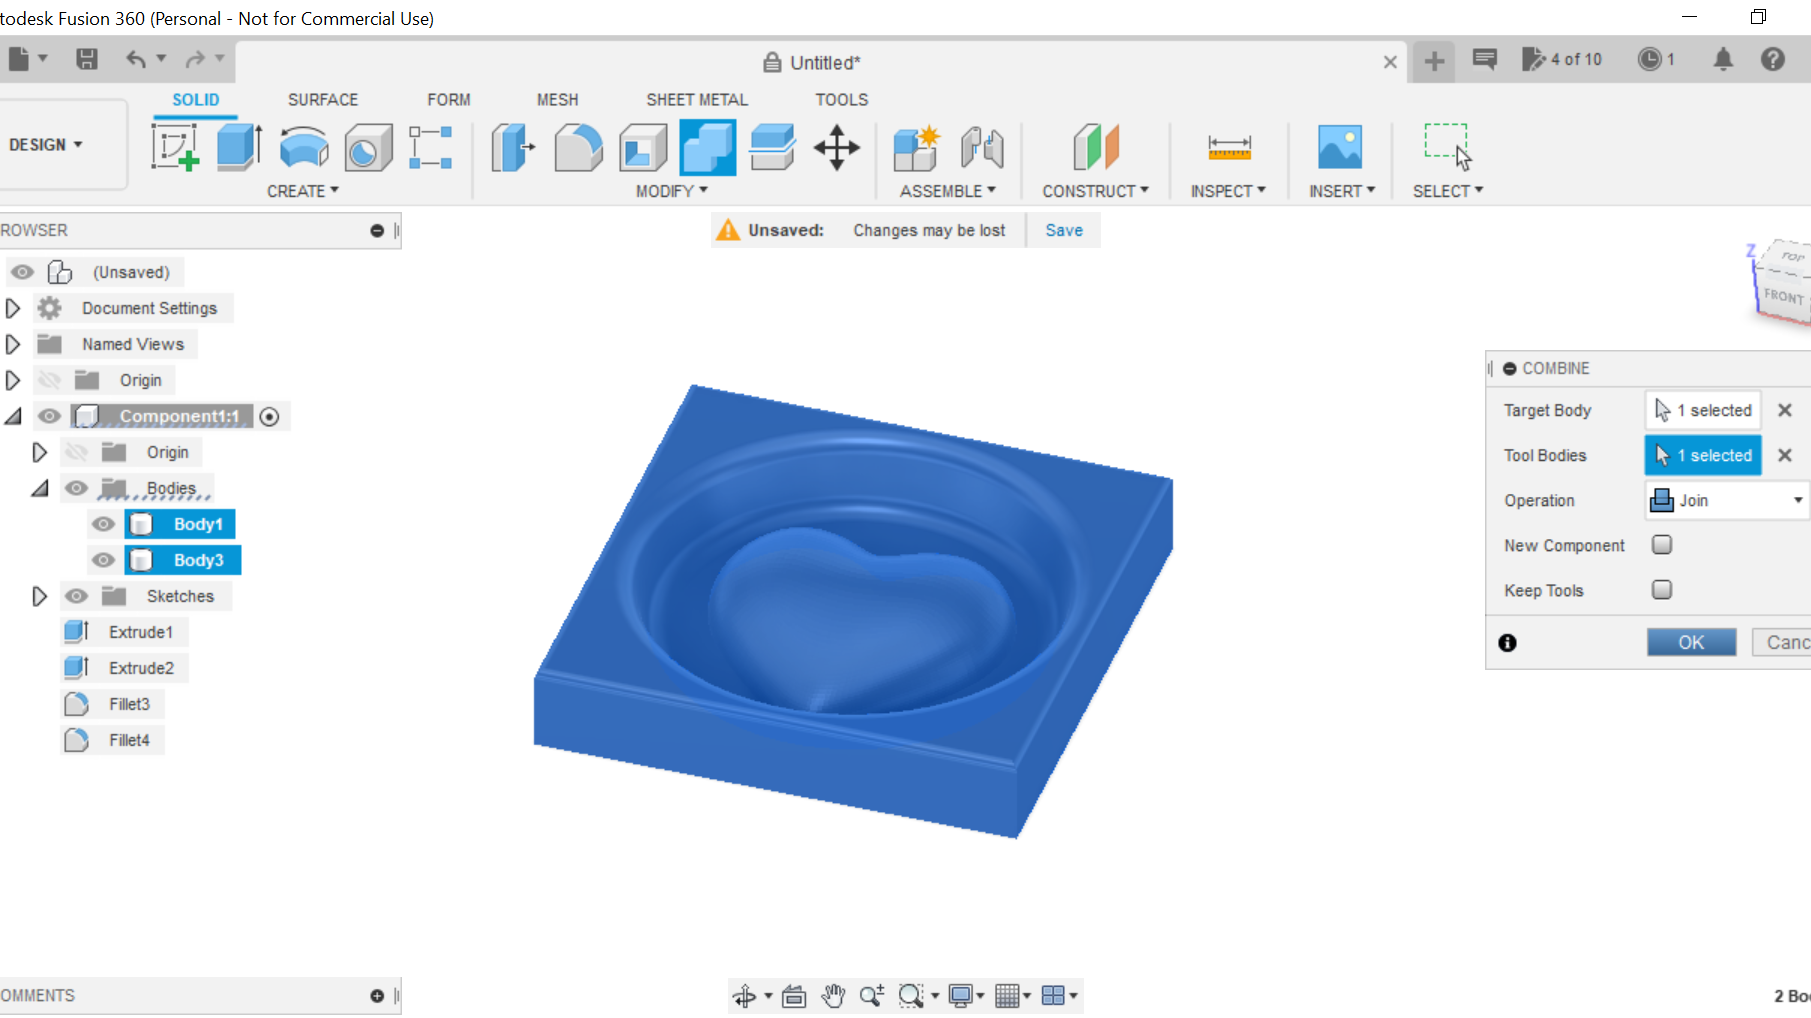
Splitting the Body/Combining and Finalising the Design
.png)
.png)
.png)
.png)
.png)
.png)
Go to Modify, then split body. Now click on the heart to highlight it, then click on 'splitting tool', this will be the base of the circle, now click on 'body 2' and the heart mesh, and delete, we no longer need these. We can now add a couple of fillets to enhance our design, top of the circle and the bottom of the circle. click modify, then fillet and highlight top and bottom of the circle, 5mm will suffice on this occasion but to suit as required. I did 5mm on the circle and 2mm to the edge of the work piece. We now need to combine our heart to our workpiece, to do this we select modify then combine, highlight the whole of the workpiece by left clicking and drag over the whole area, then in the dialogue box, ensure 'Join' is selected in the drop down box, then click ok, our design is now finished, we are ready for the next stage in the process.
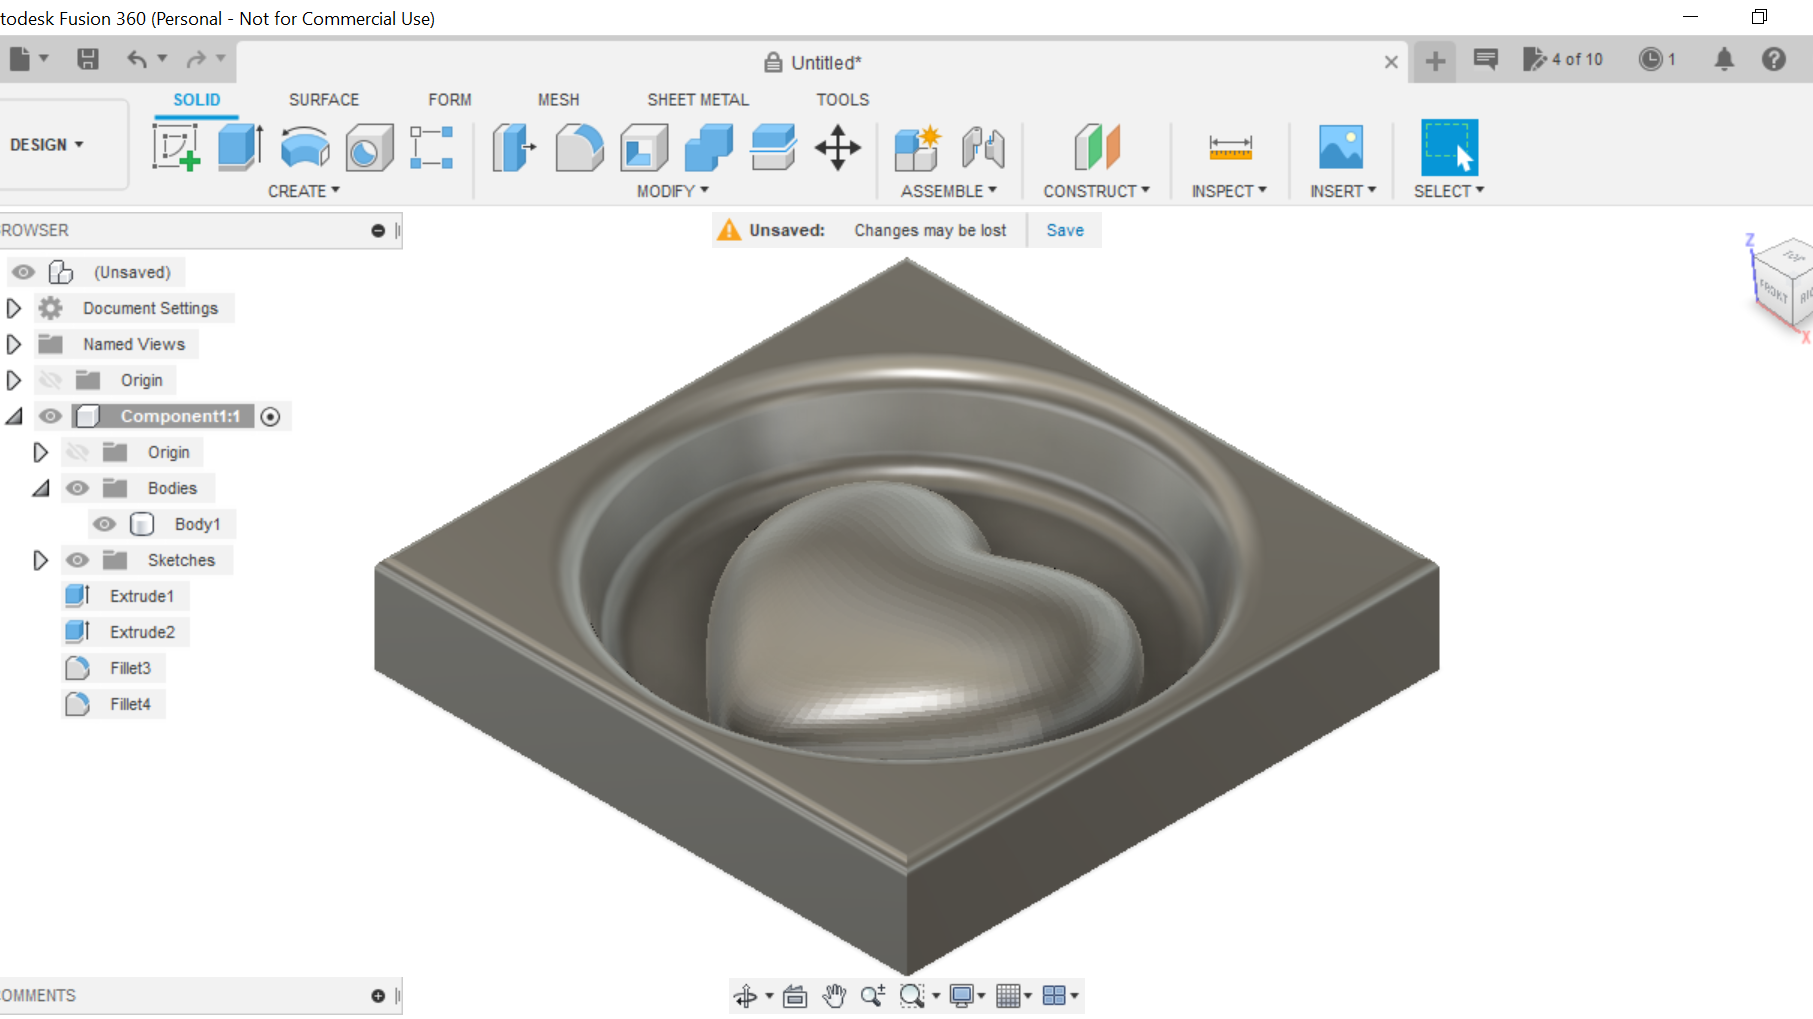
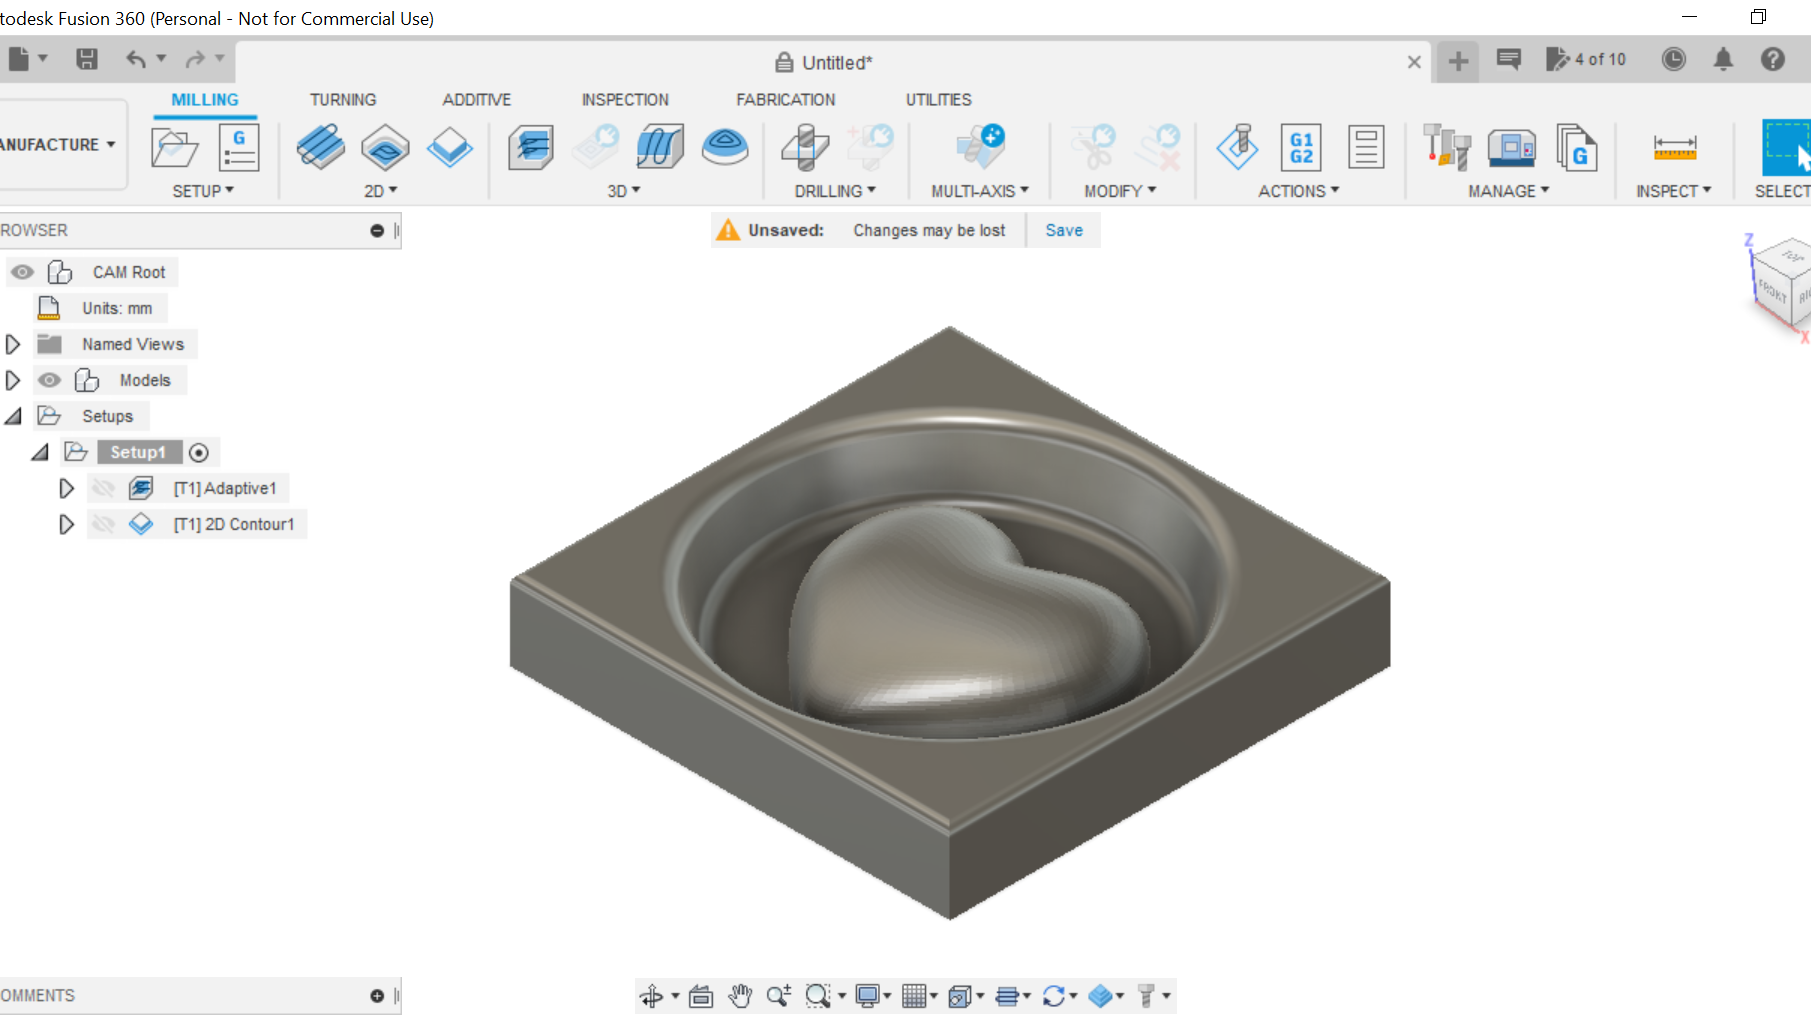
Cutting Out the Design Using Fusion 360
.png)
.png)
.png)
.png)
.png)
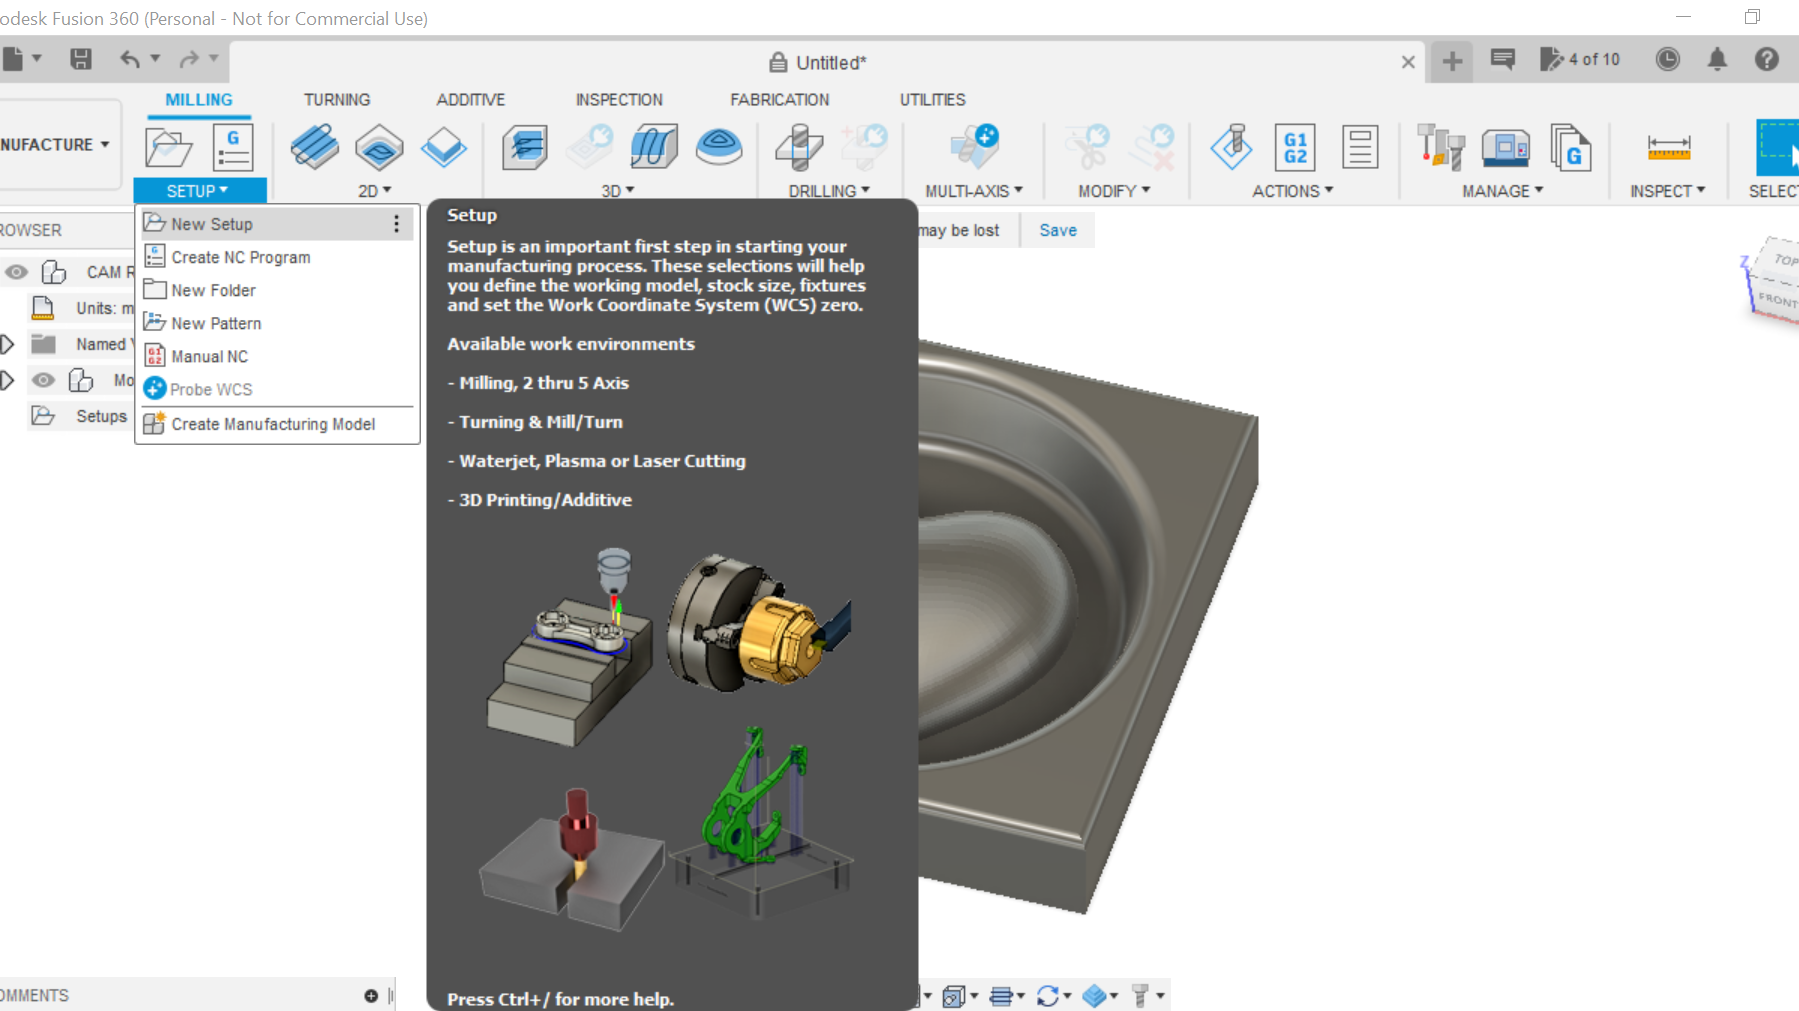
We are now at the stage where we can go into the Manufacturing side of Fusion 360.
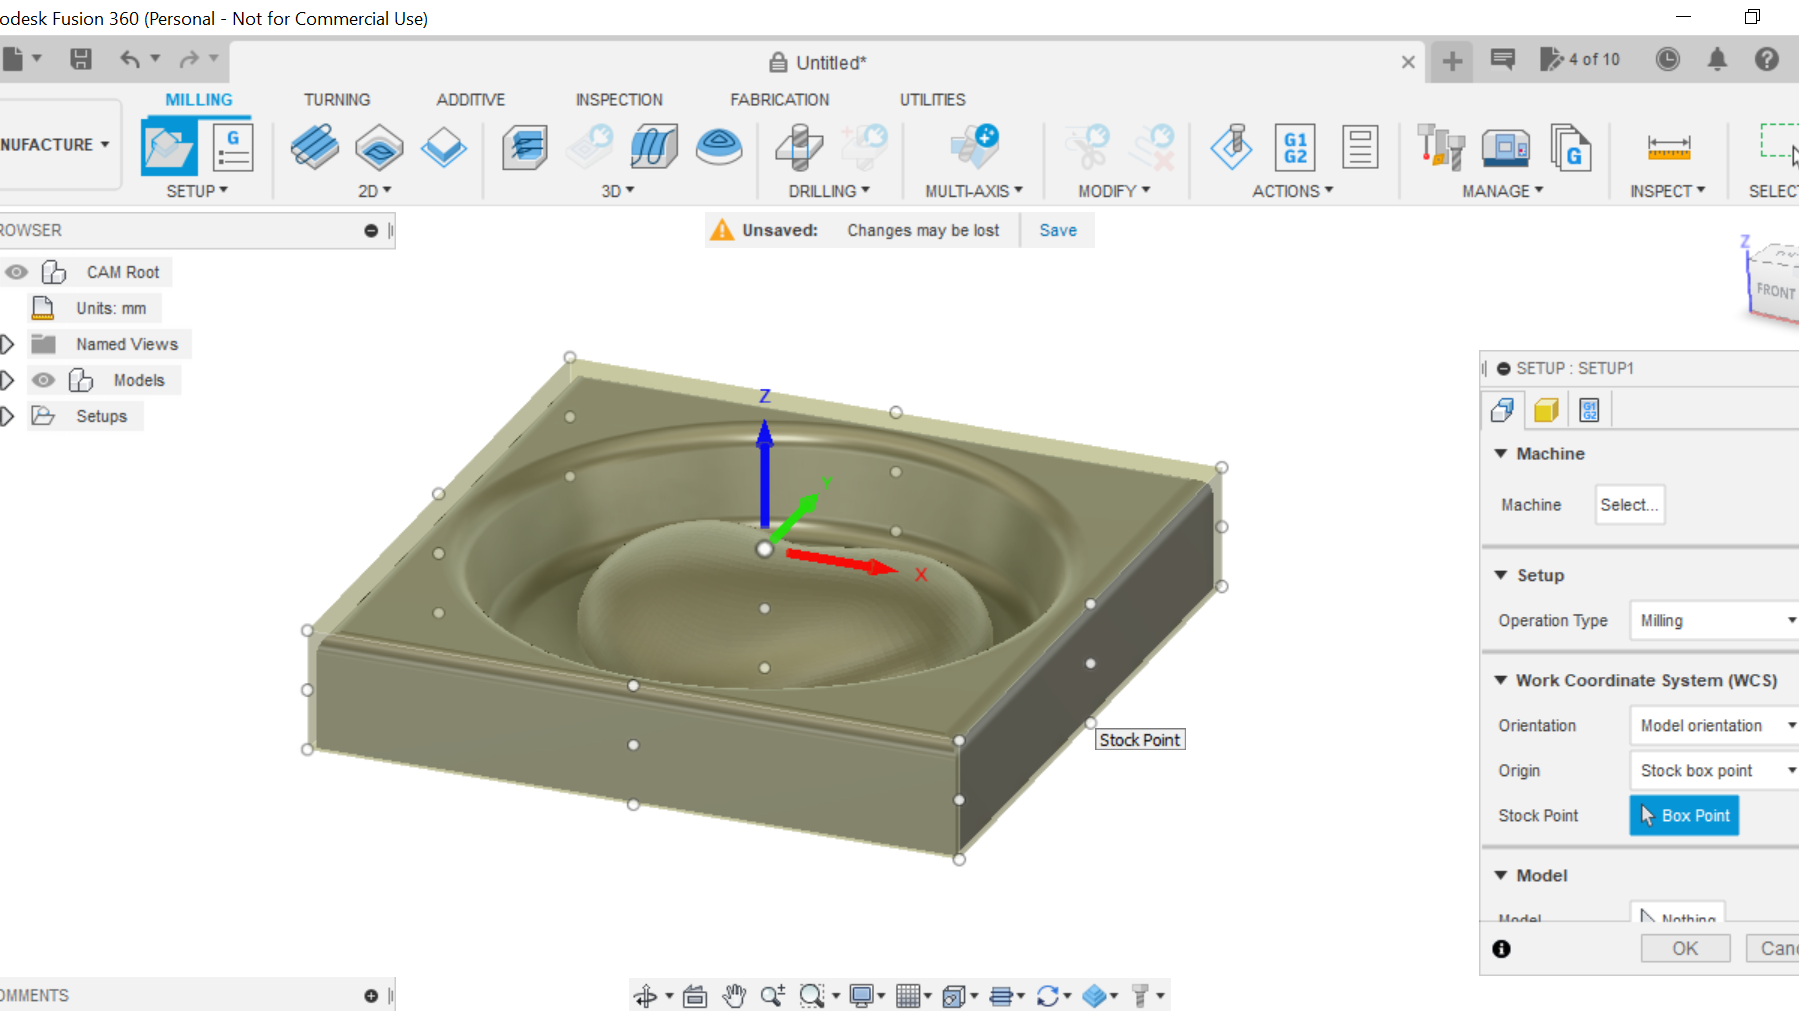
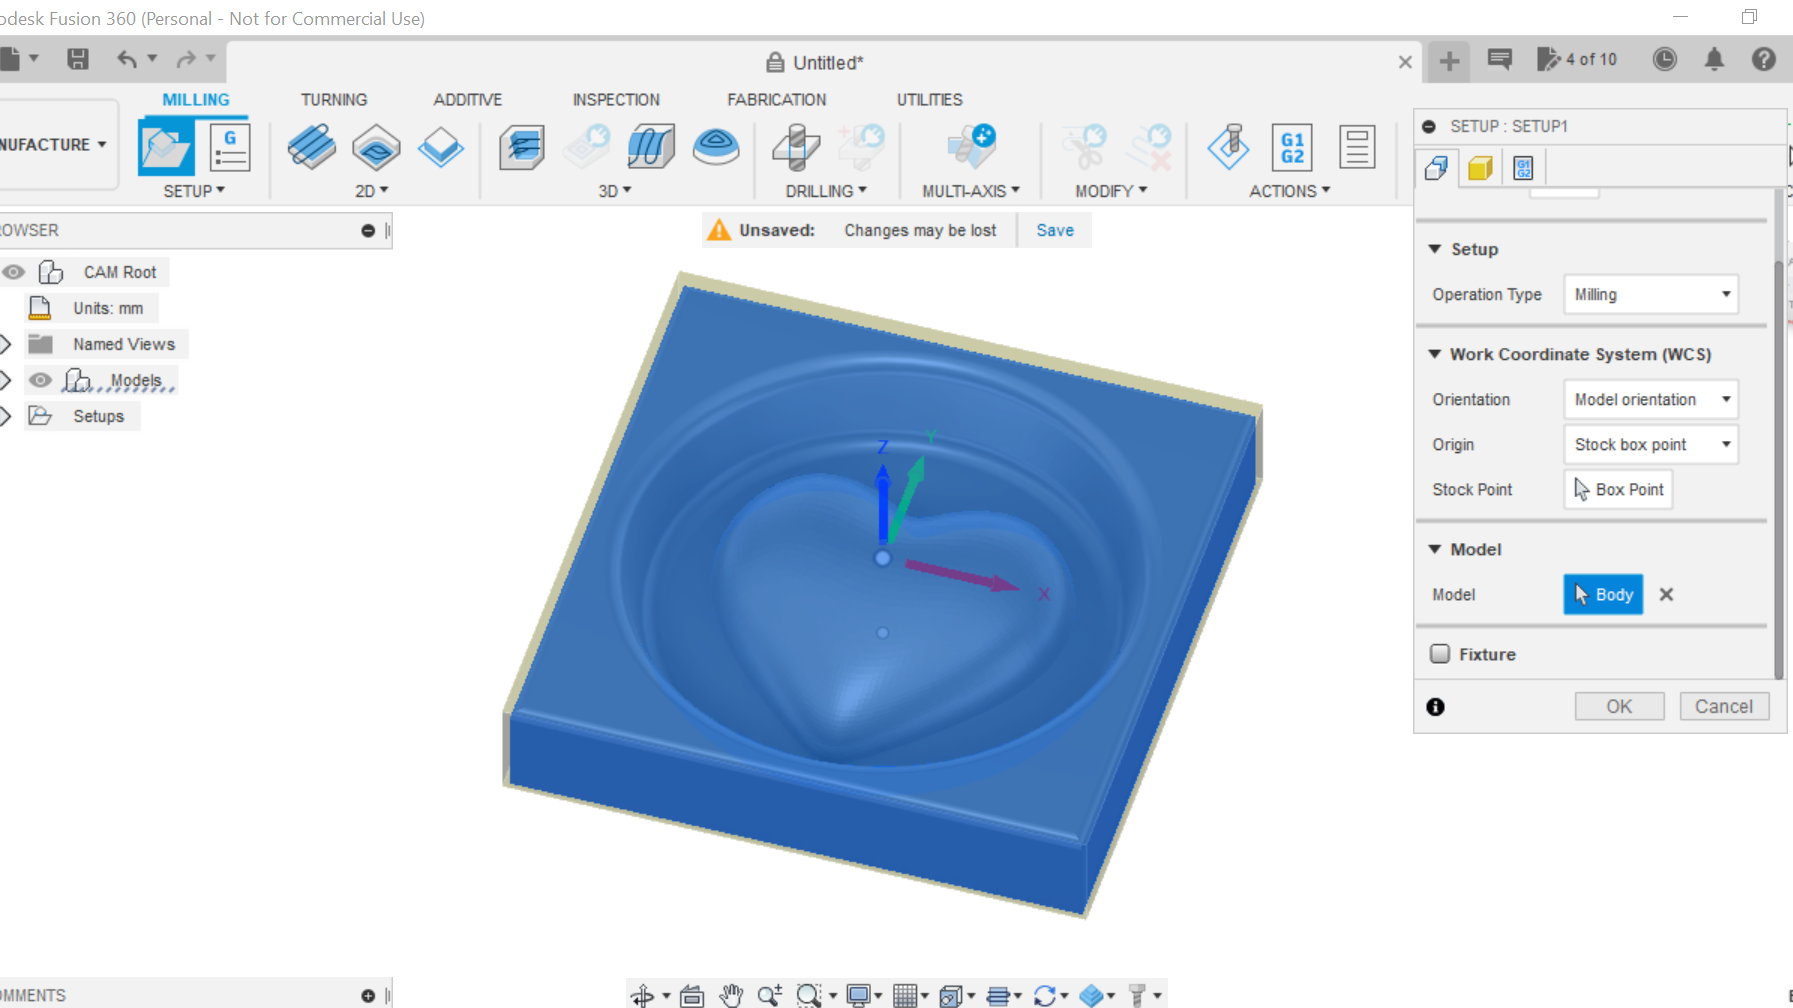
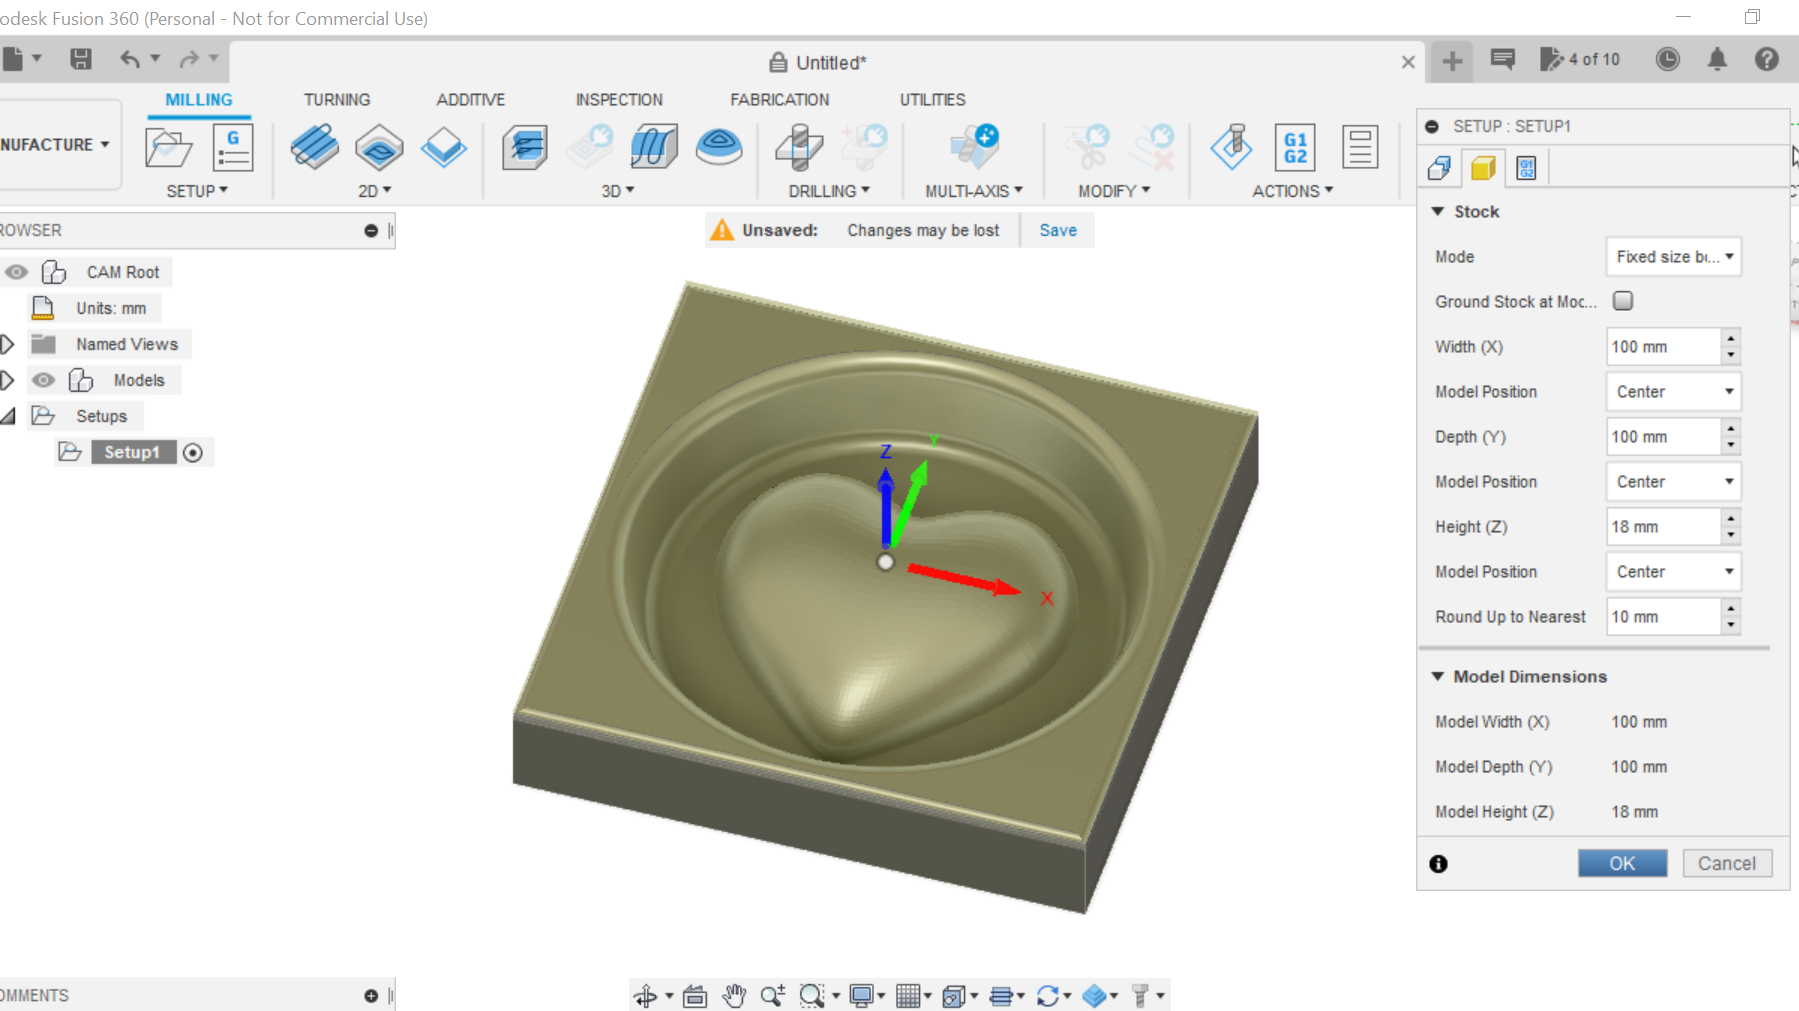
We first need to start a new setup, this places our design initially in a relative size box. I change this to a fixed size box, as my floorboard (as far as Fusion is concerned) is 100mm x 100 x 18mm no offset. Clicking on body at the bottom of the first stage highlights our body to be cut in blue. At this stage you also select where your starting point is, in this case its the centre of the workpiece, clicking on a point will change the starting point.
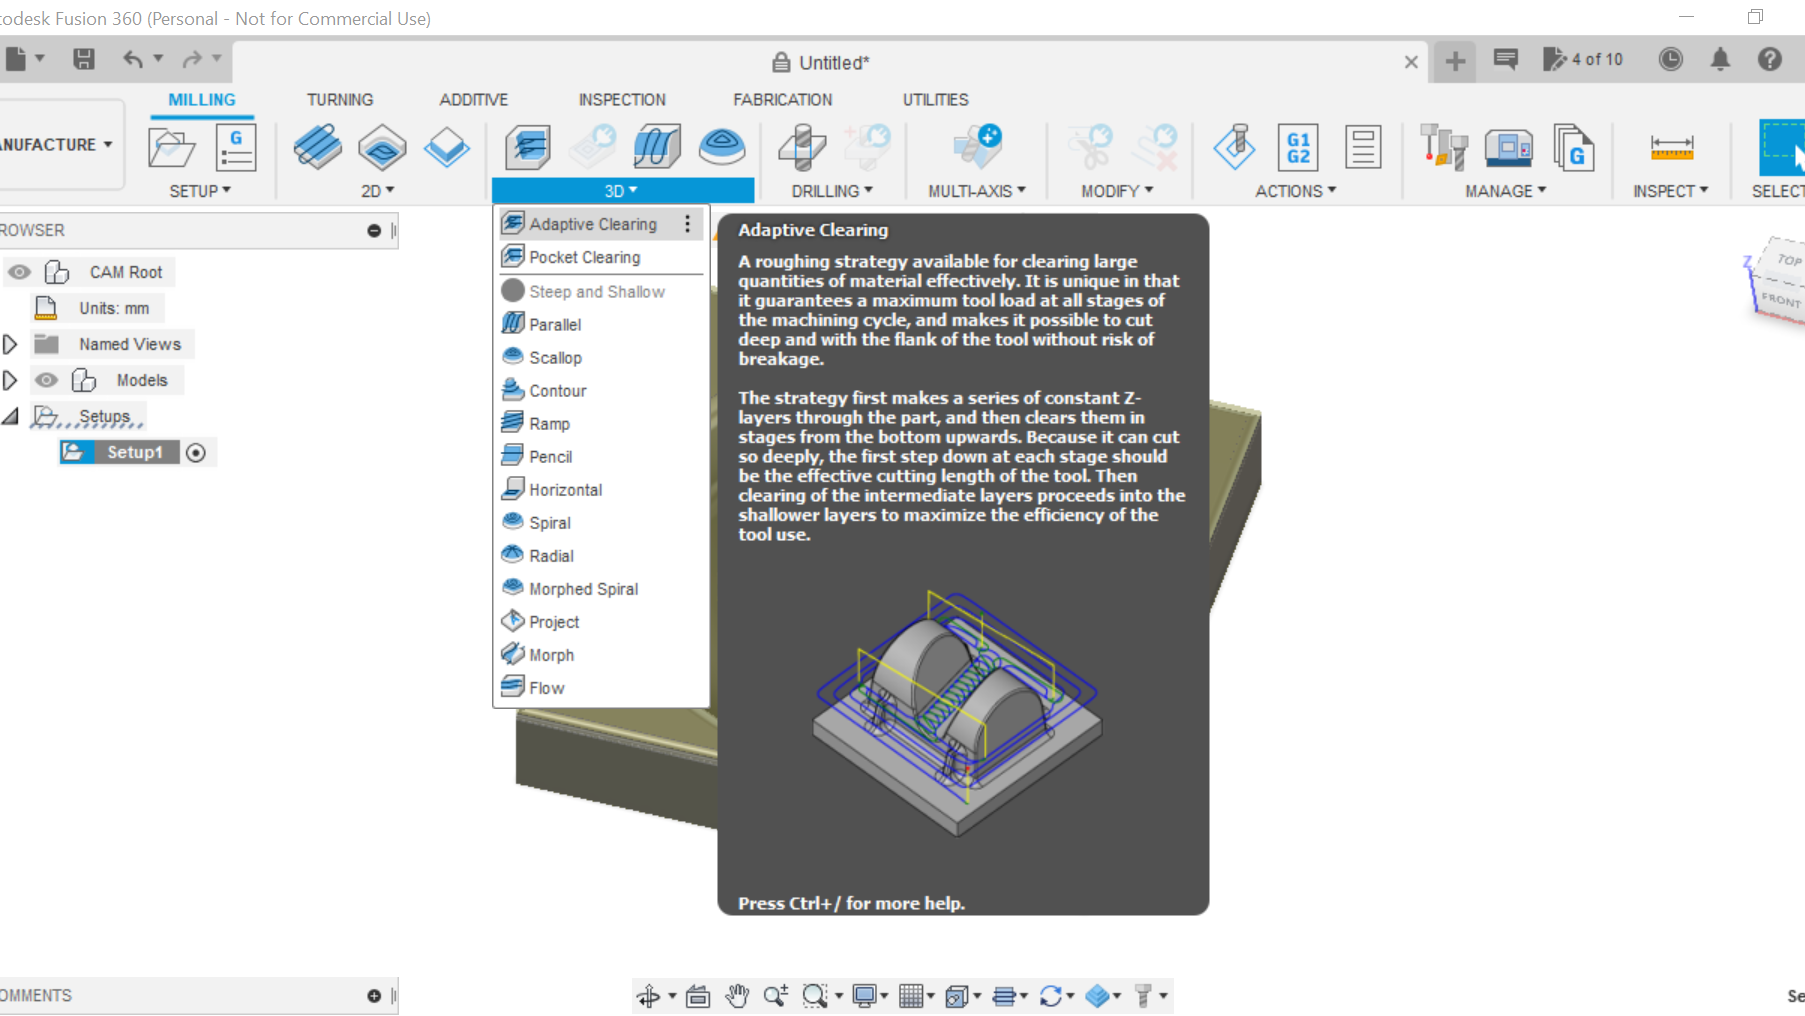
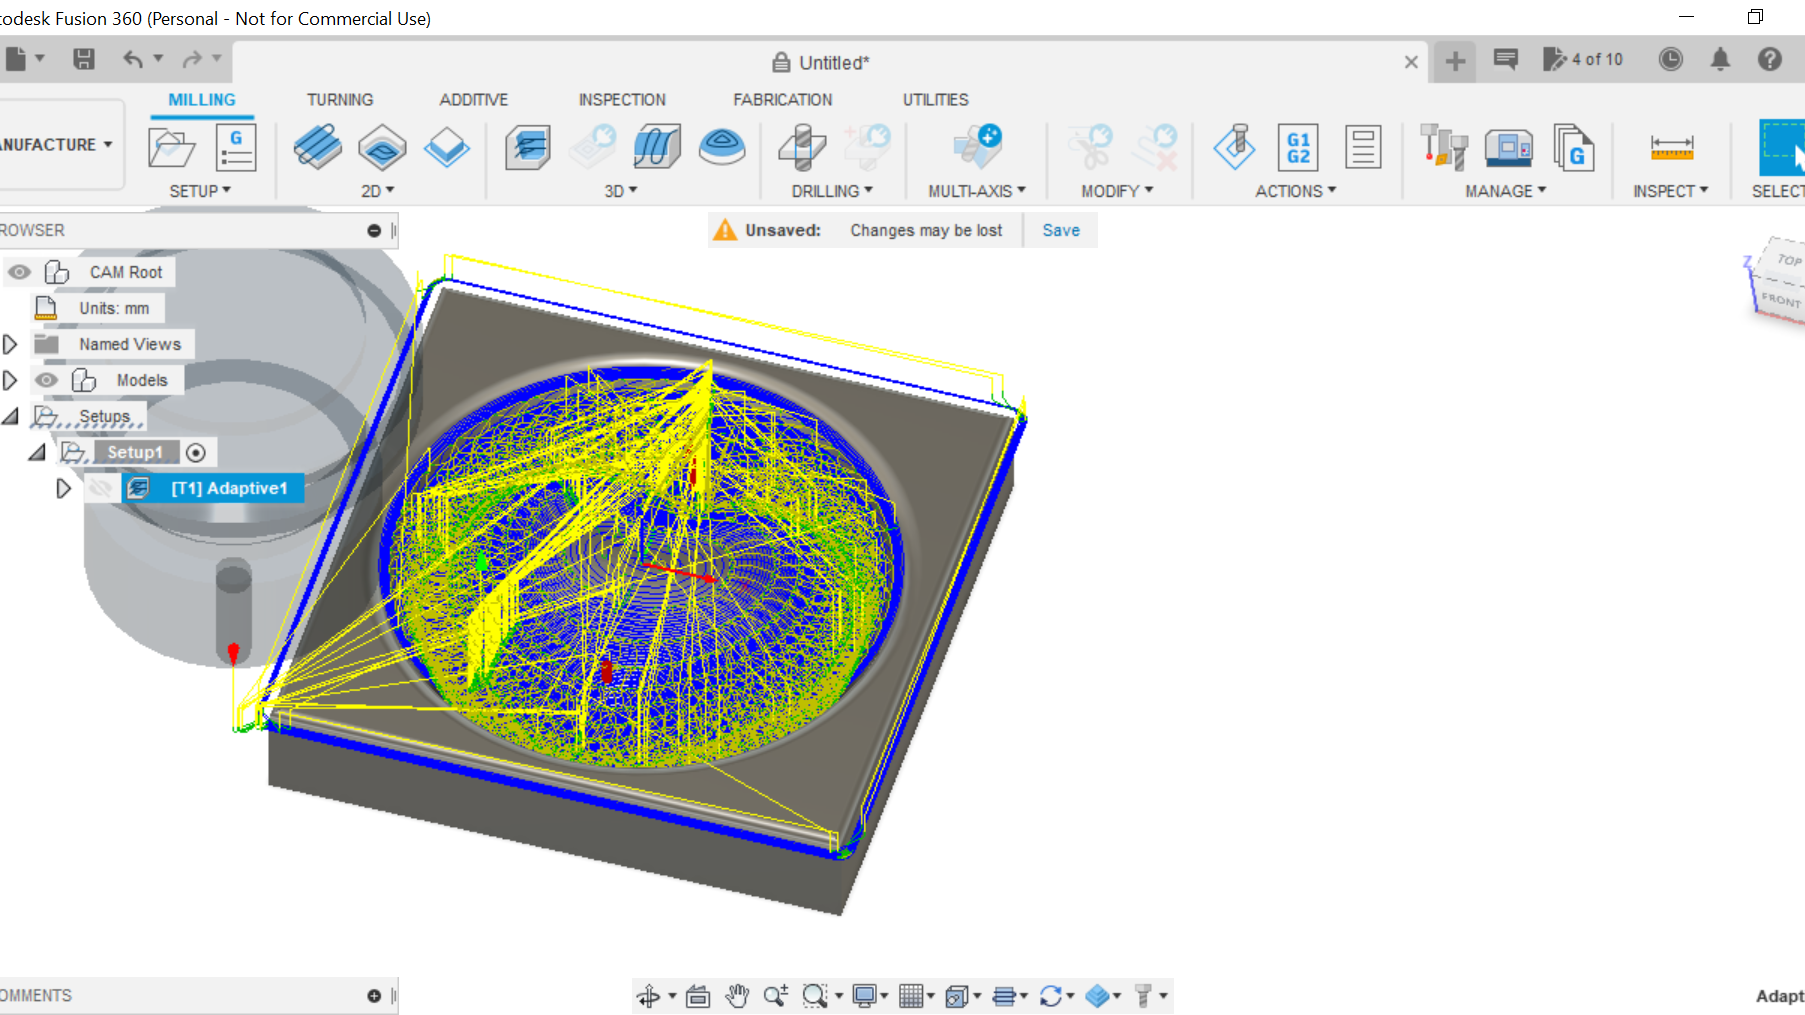
That basically all it is for the set up, we can now go into the Adaptive clearing.
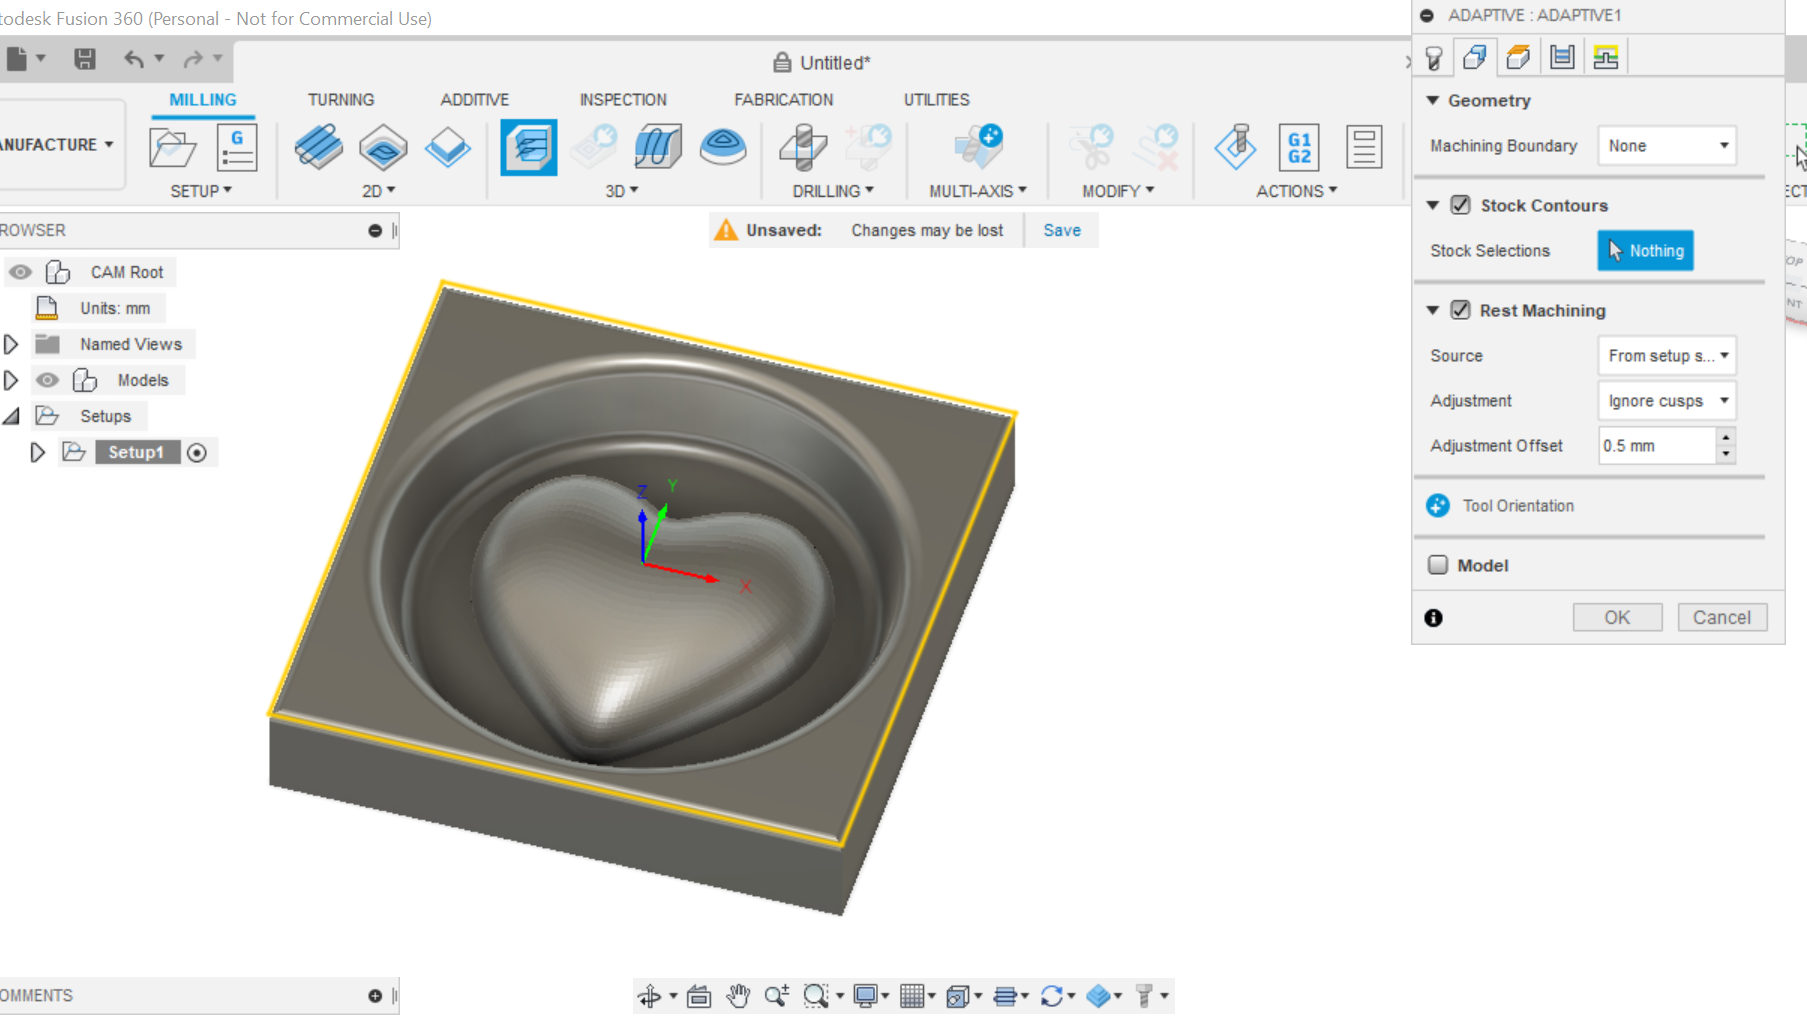
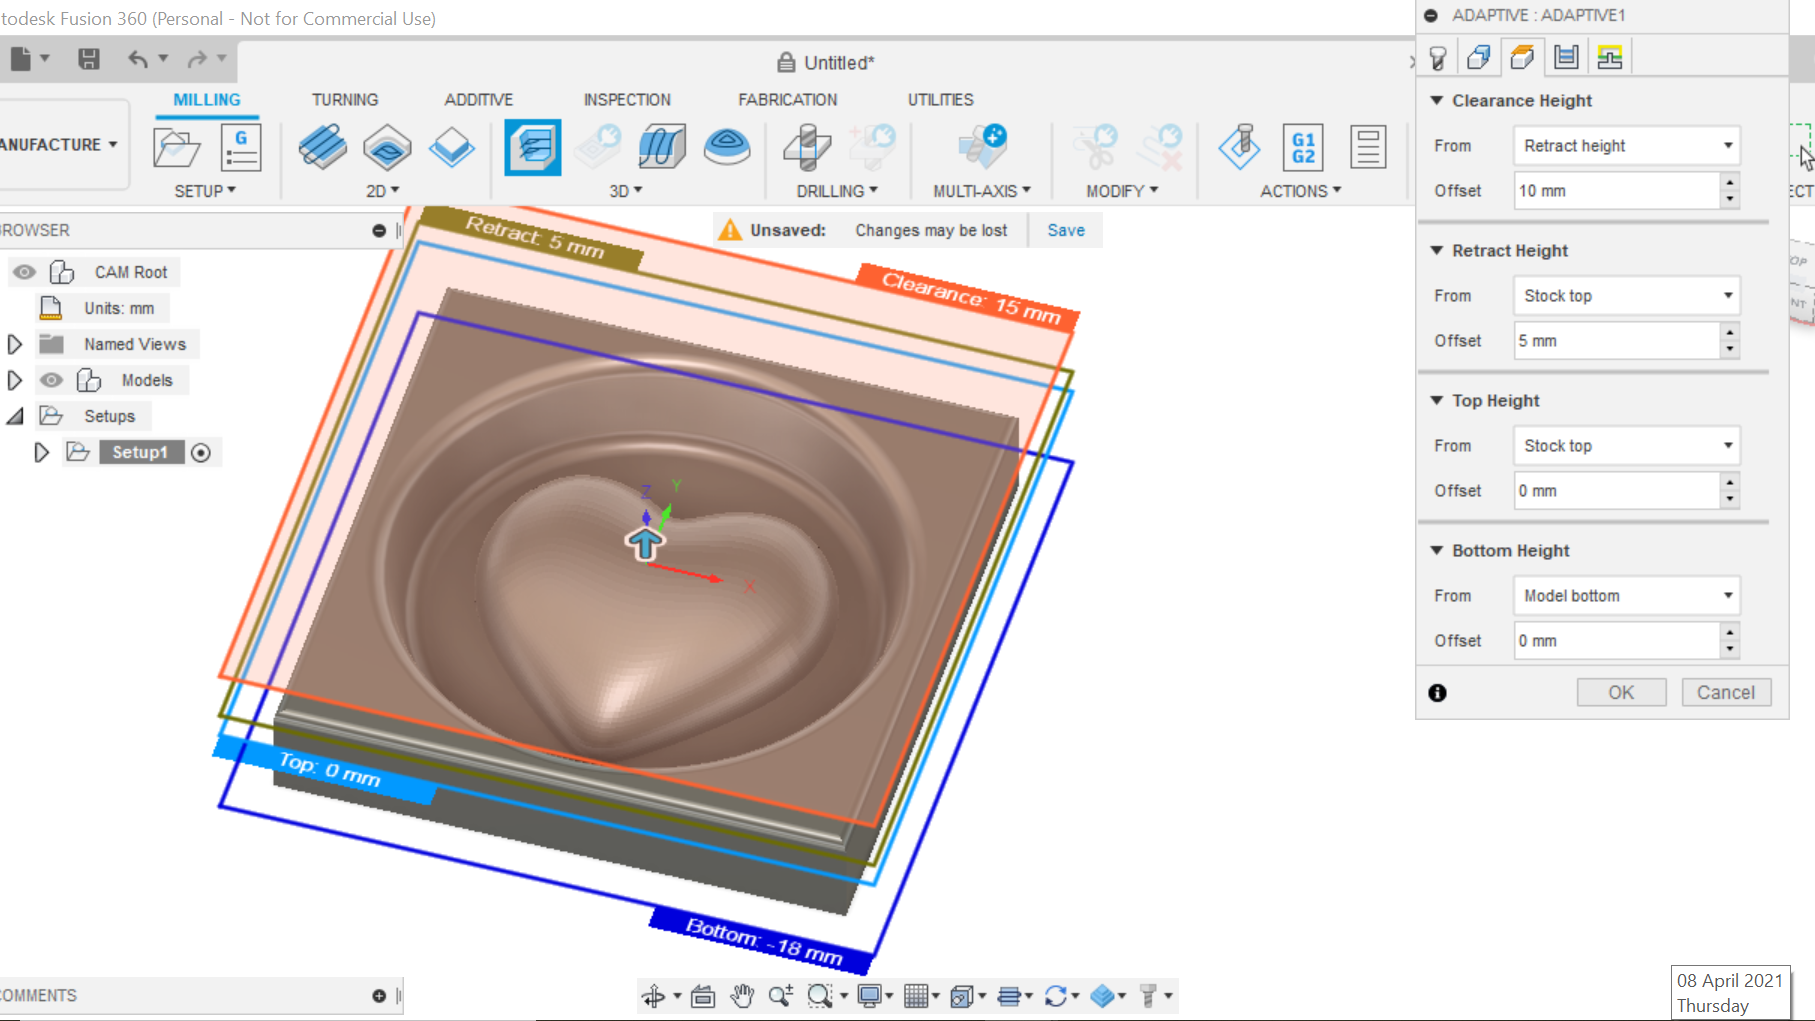
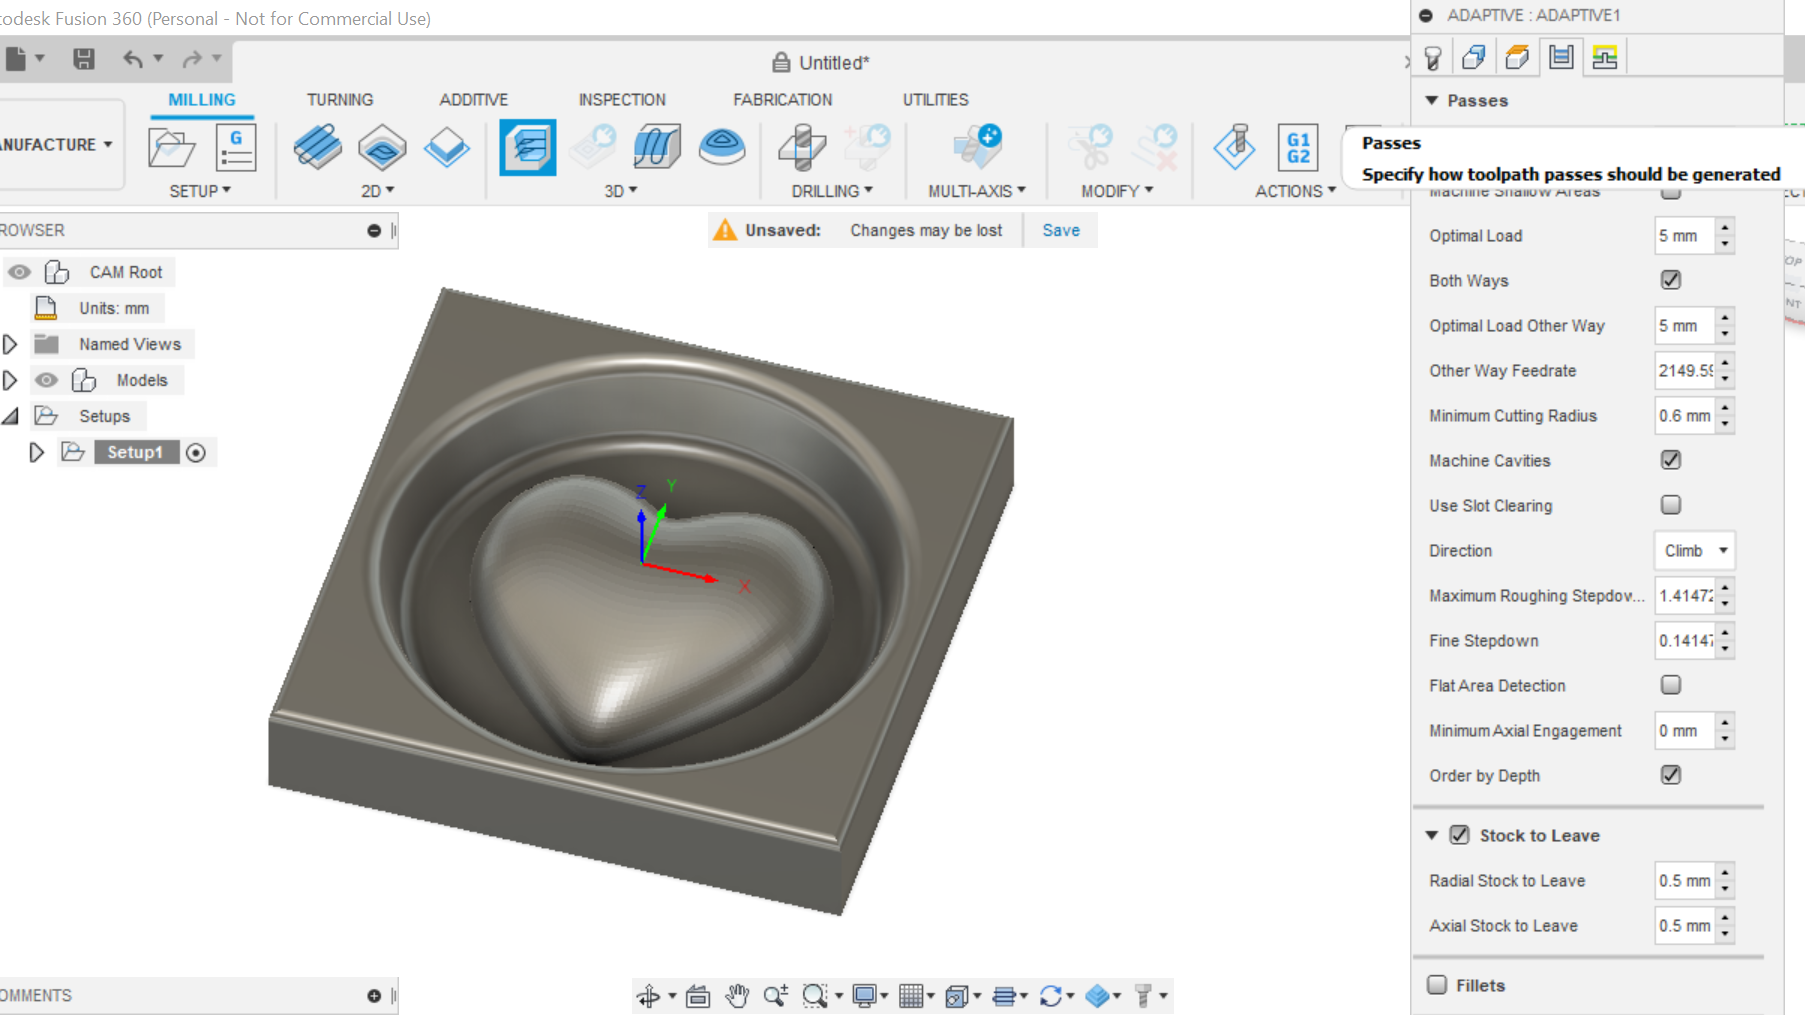
3D Adaptive Clearing.
.png)
.png)
.png)
.png)
.png)
.png)
.png)
.png)
.png)
.png)
.png)
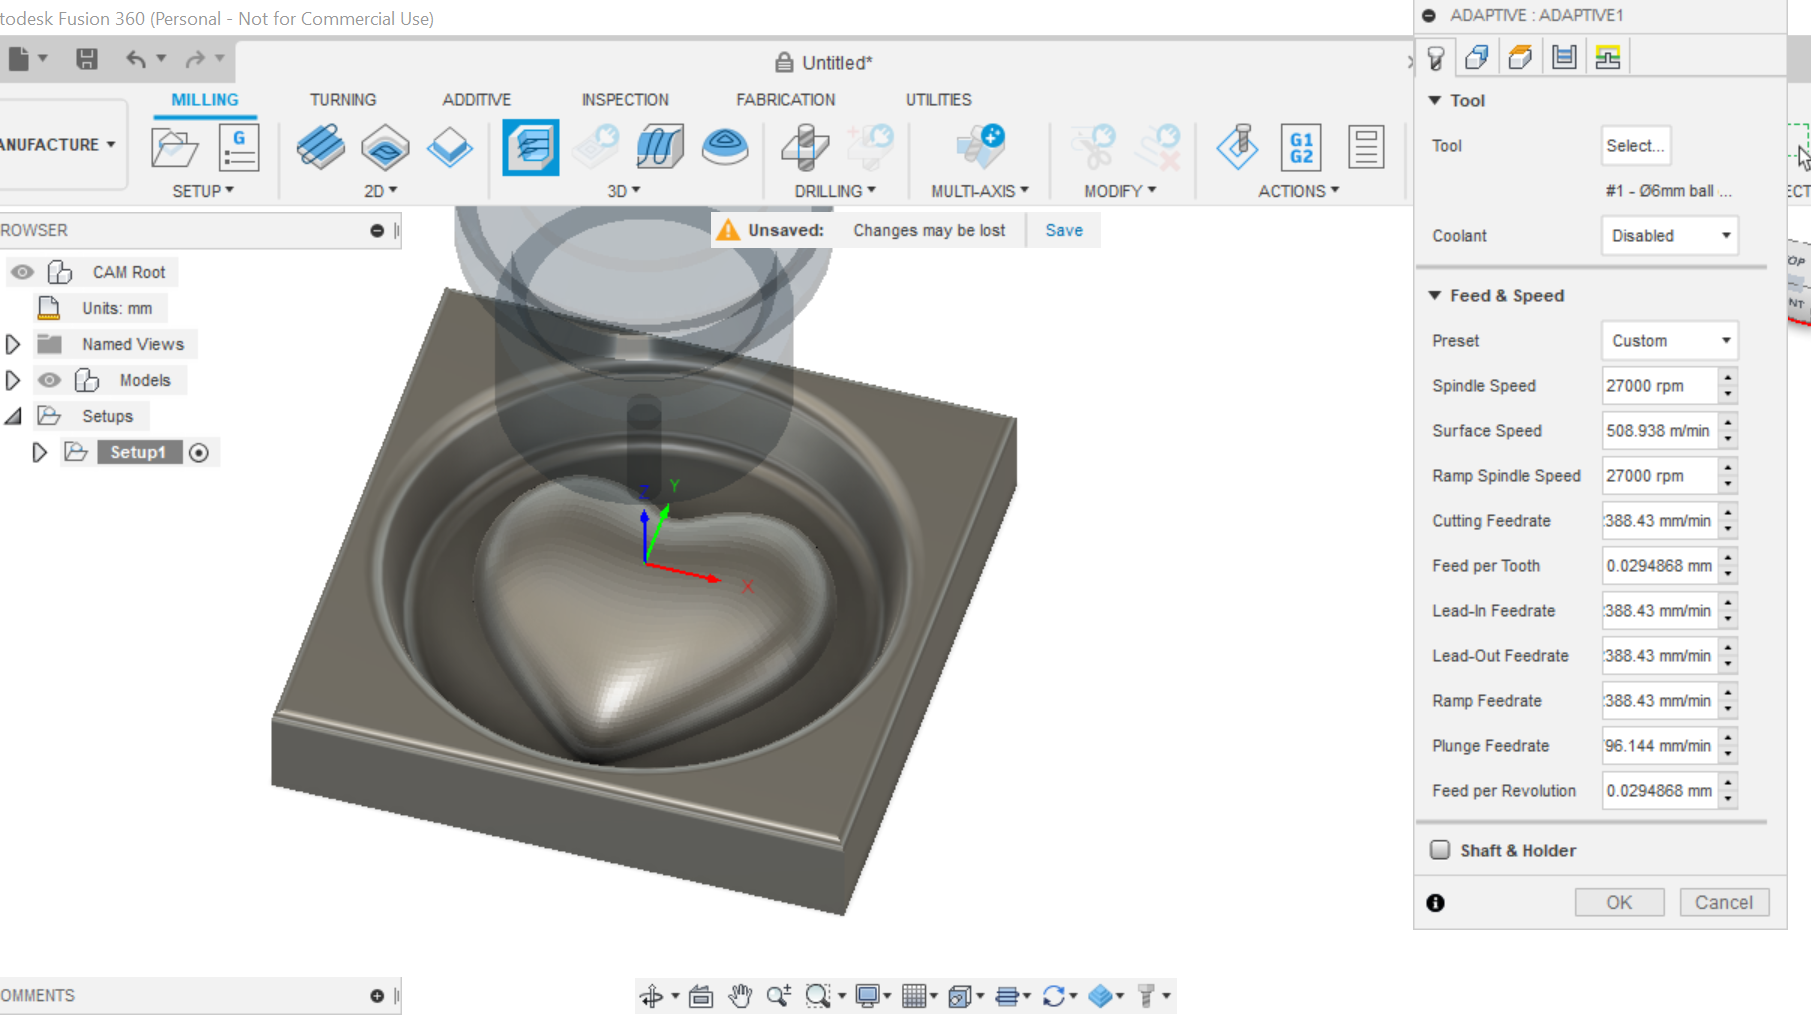
We select 3D adaptive clearing as our first cut, this in turn brings up a box with Tabs. We shall go from left to right with the Tabs, the first Tab which is already open is where we choose our Tool/bit size. (coolant is disabled) Then we go on to change feeds and speeds to suit your machine, of course.
2nd Tab is Geometry, I leave as is with default settings, Fusion 360 is clever enough to know what and where to cut.
3rd Tab is Heights, again at this stage I leave as is.
4th Tab is Passes etc, I make a few changes here, Optimal load I reduce, to 5mm, select both ways. Order by depth is selected.
Stock to leave 0.5mm
Select Smoothing.
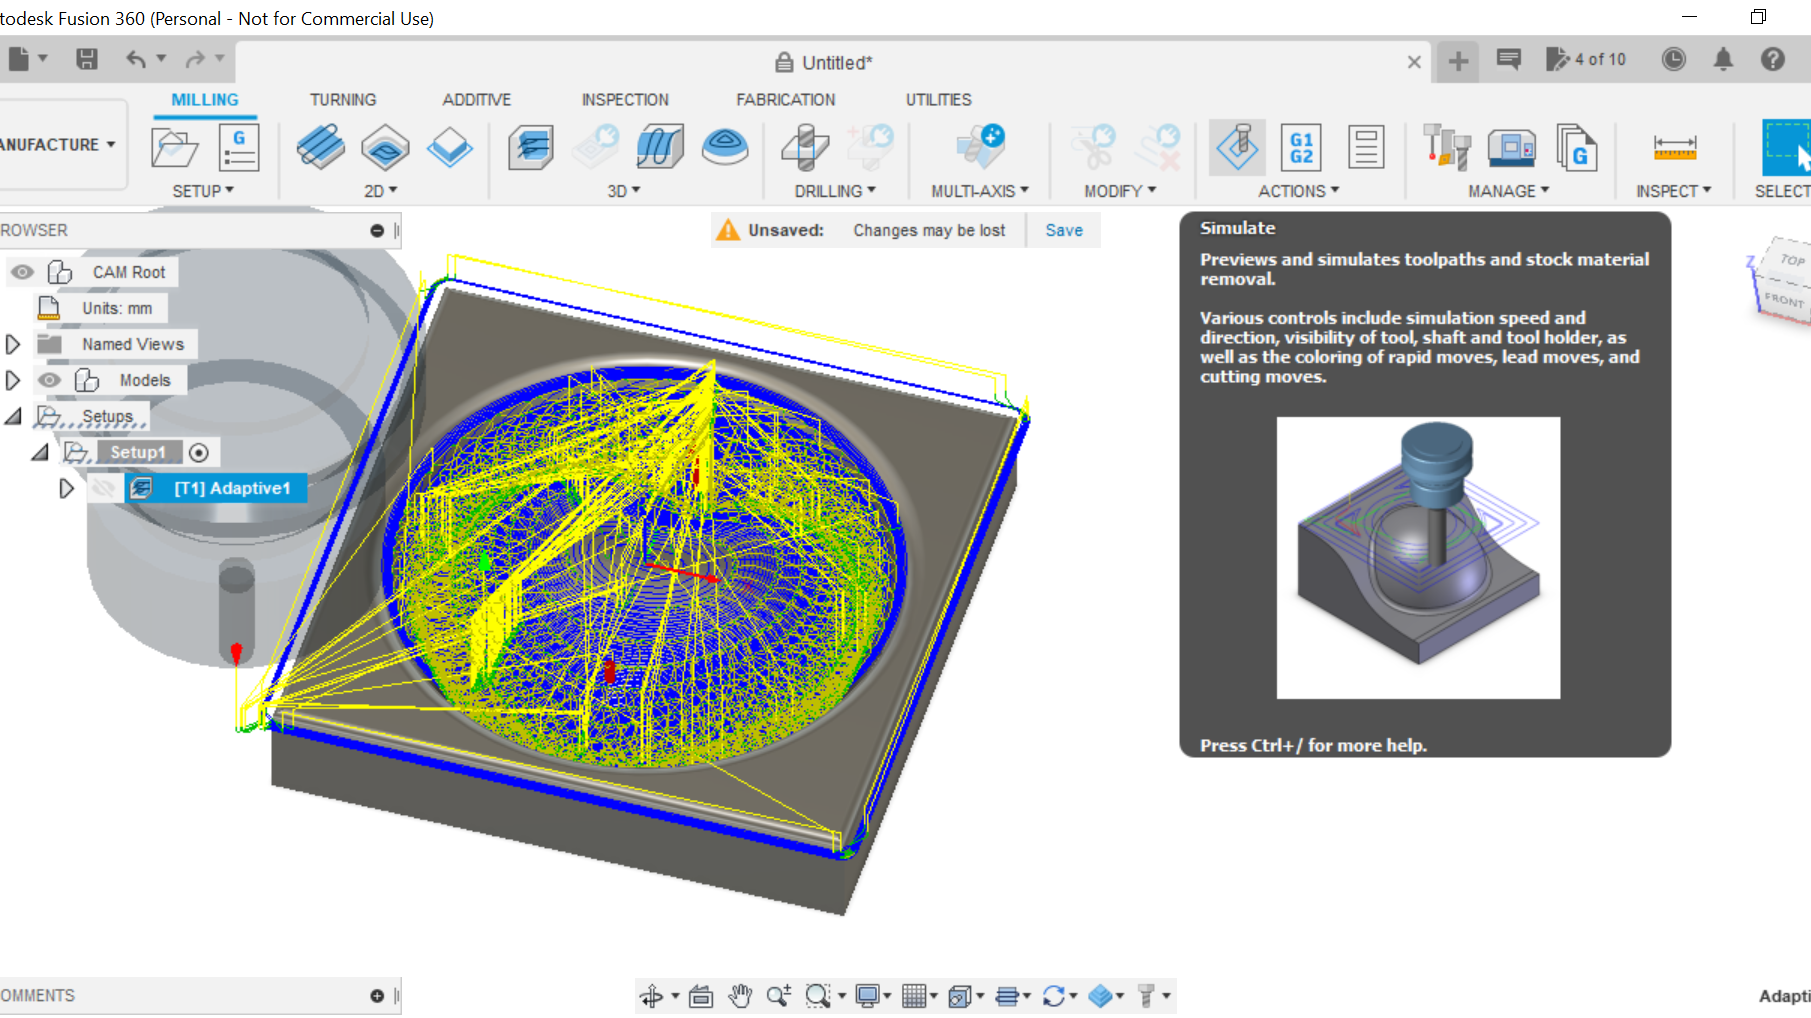
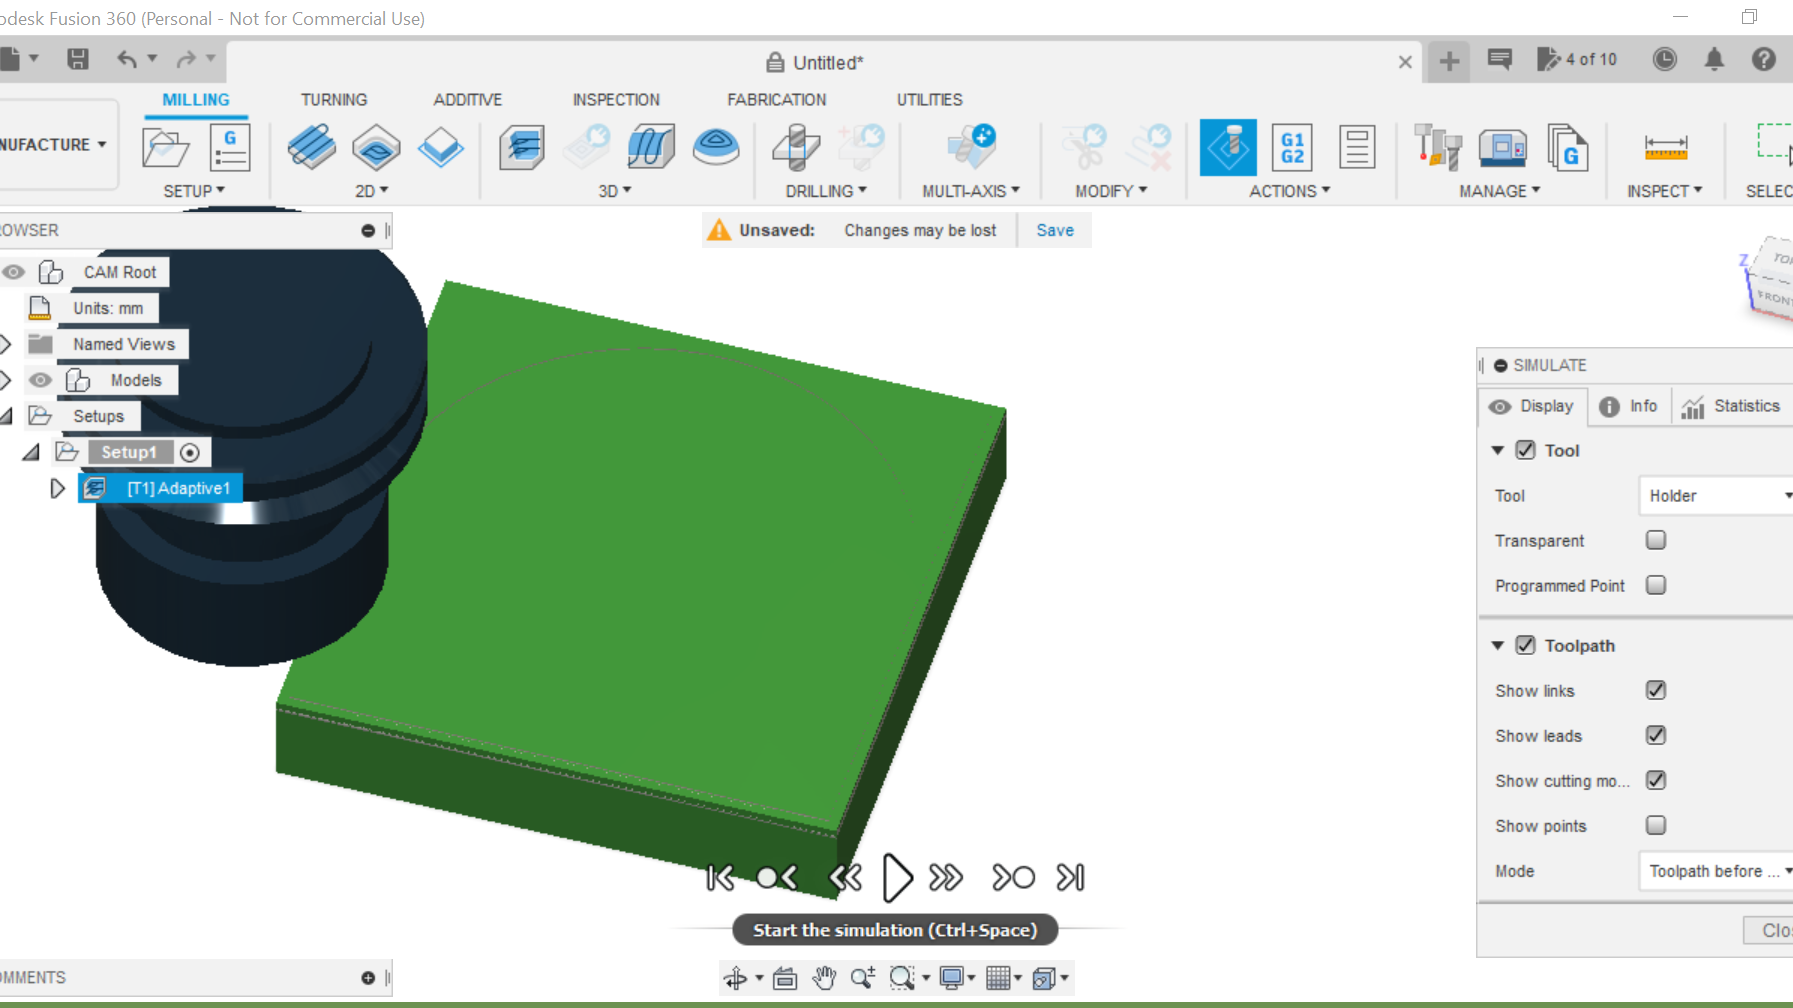
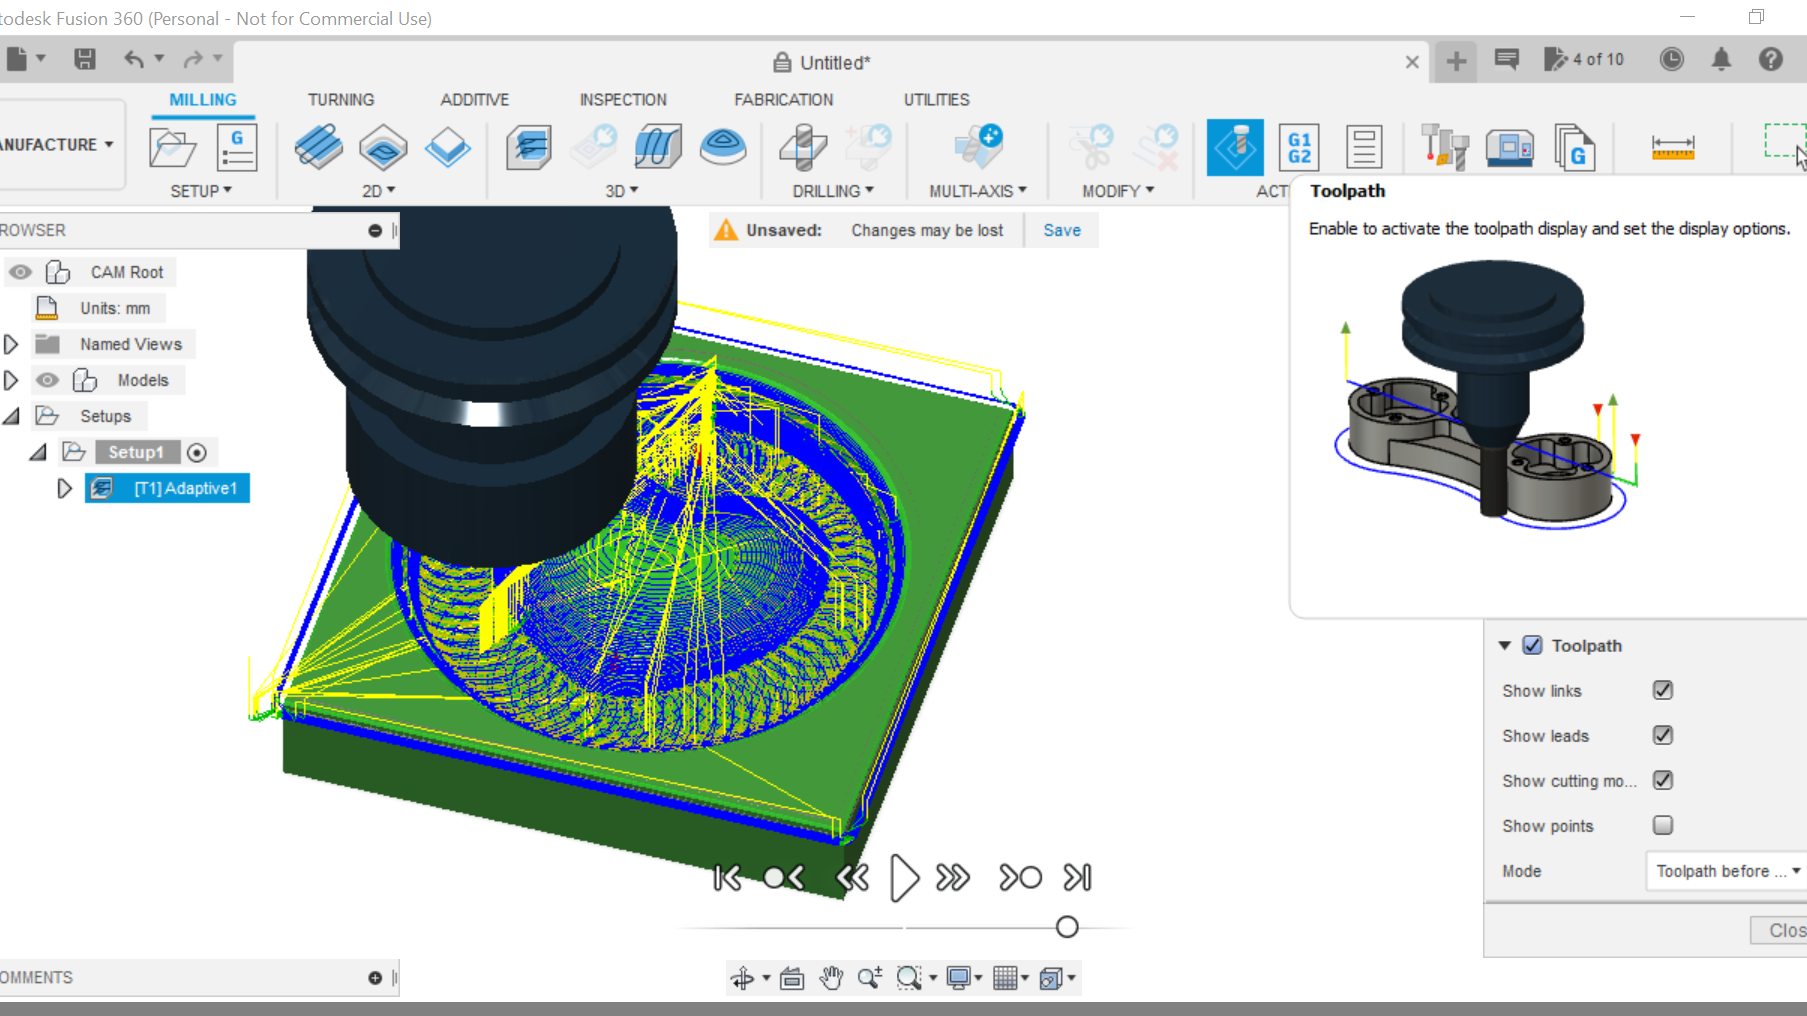
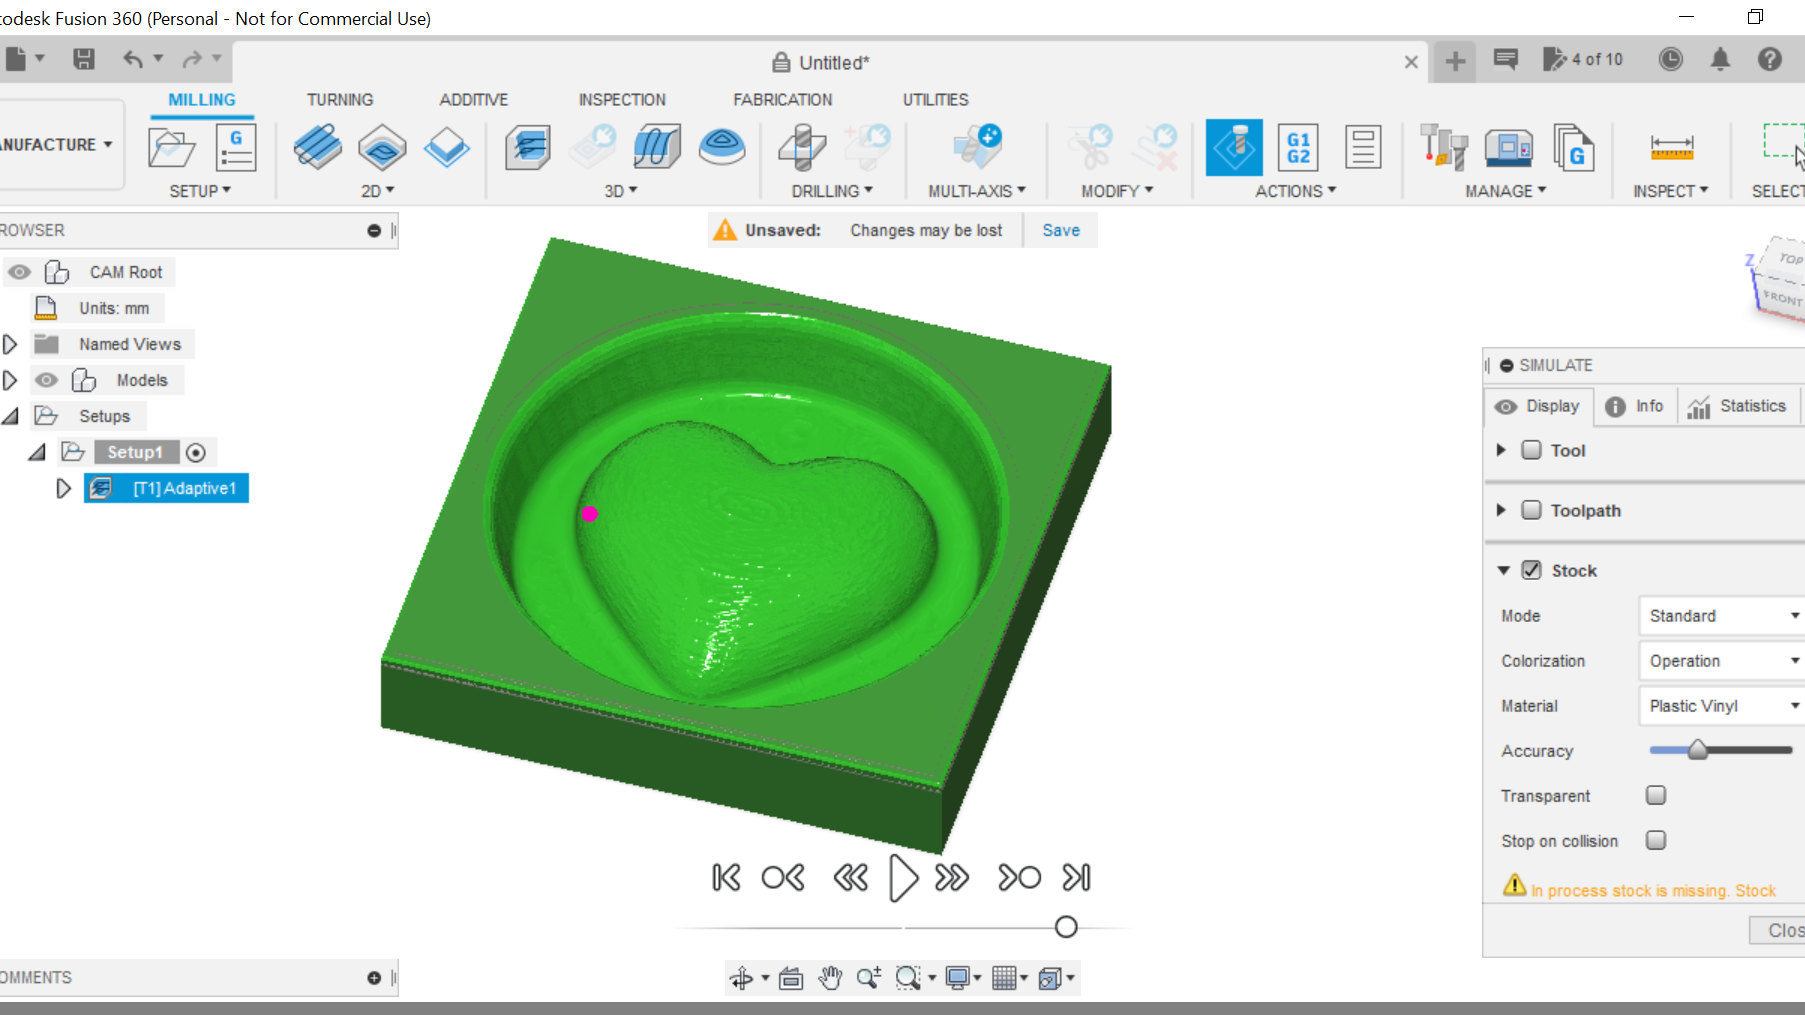
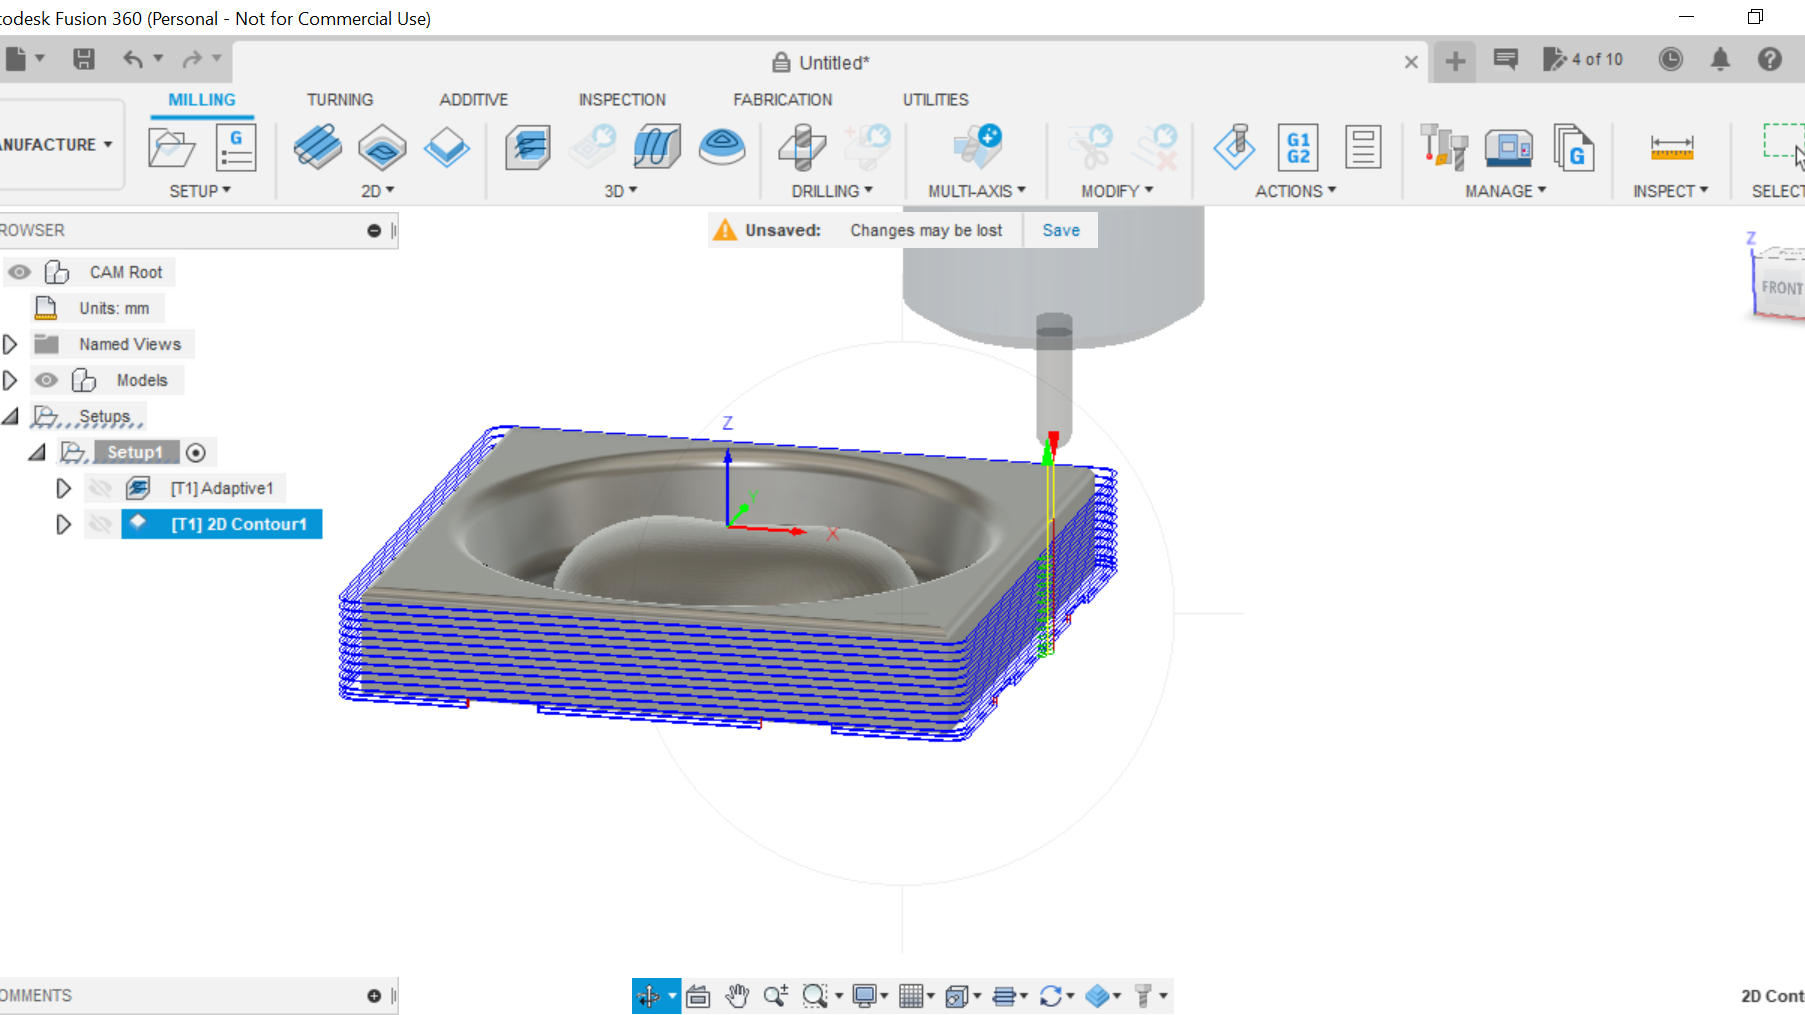
Now press ok and the software creates a toolpath, we can then go on to simulate the cut and check everything is in order.
This is the adaptive clearing complete.
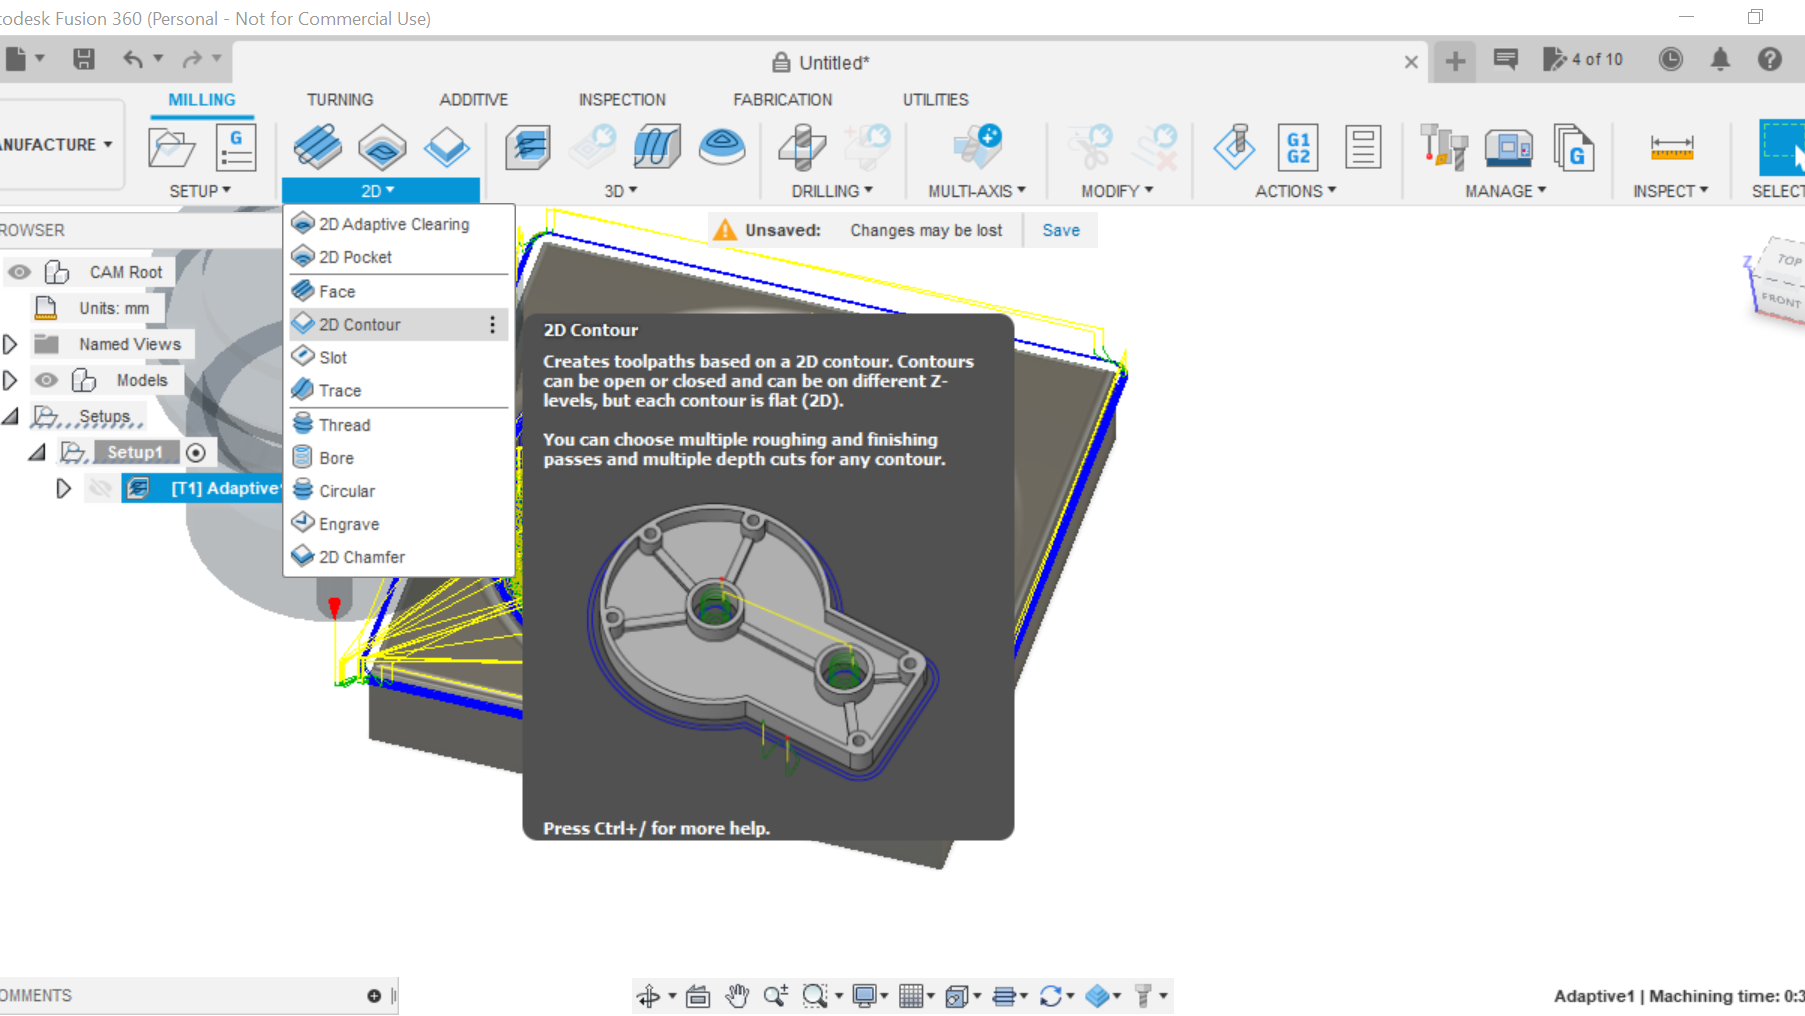
2D Contour Cut
.png)
.png)
.png)
.png)
.png)
.png)
This is the part where we cut the Heart from the stock piece of flooring.
Ideally we should change the bit to a flat end mill rather than the Ball end bit we used for the 3D Adaptive clearing, but using the same bit allows to do the clearing and cutting out in a single operation. The contour process leaves Tabs ensuring the Heart doesn't leave the stock piece during the cutting operation.
We select the 2D contour Tab, the Tool remains the same and will still be there form the clearing cut.
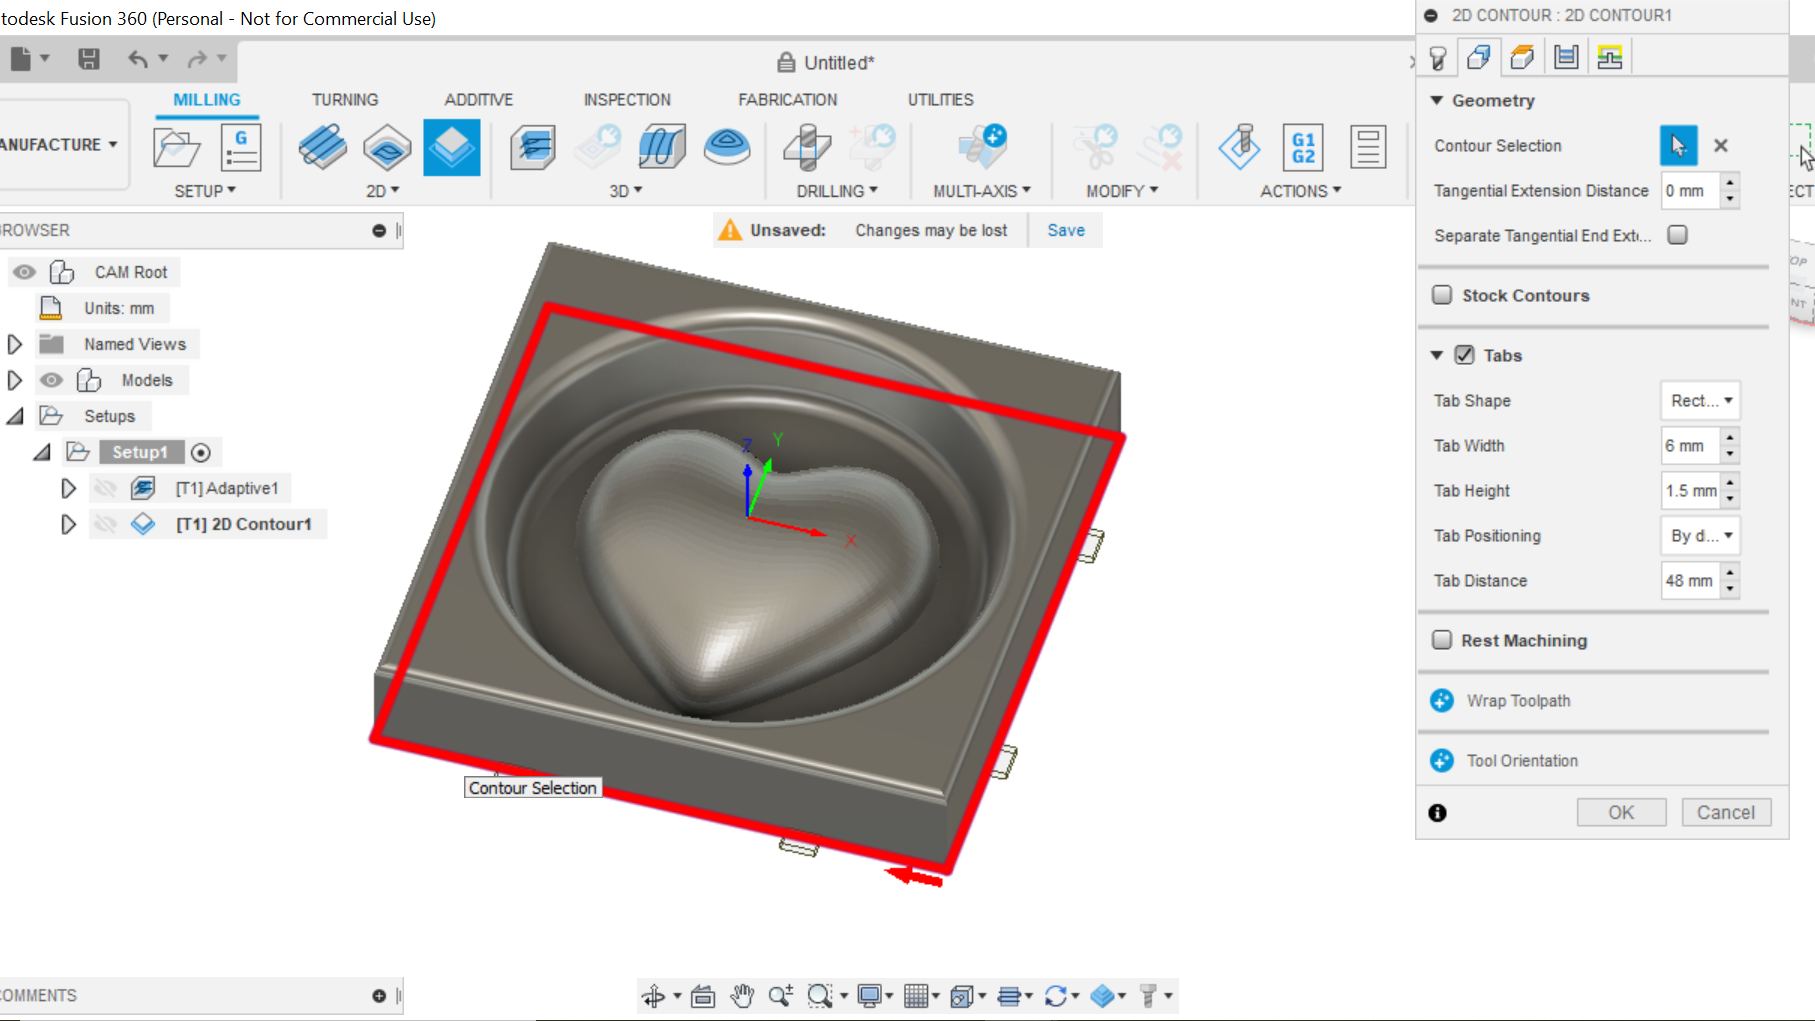
For Geometry we click on the bottom of the heart, doing so highlights it, we also select Tabs Input what size tabs you would like at this point.
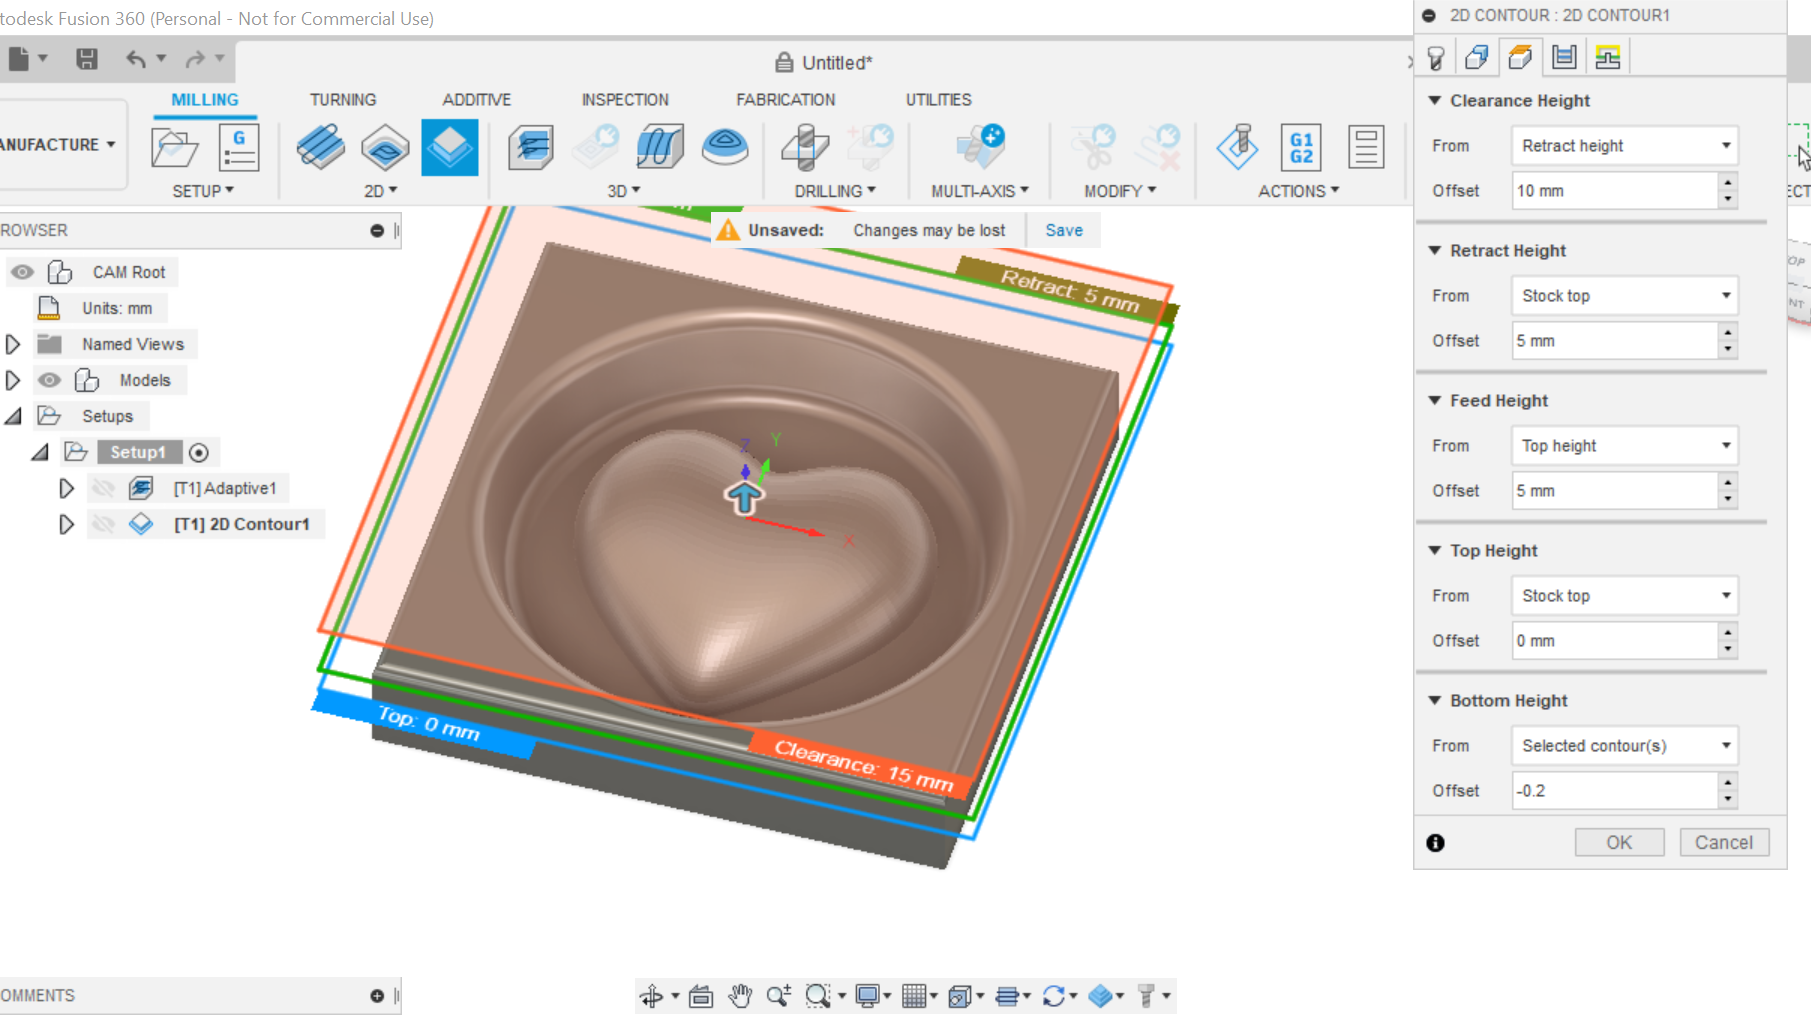
Within the Heights Tab we change the Bottom height to -0.2 leaving enough to hold the piece in situ.
Within the passes tab are the options to alter stepovers etc, and Maximum roughing. I leave most things at default apart from step downs which I set at around 1.5 Millimeters.
That concludes the Contour cut.
The Finishing Stage.
![IMG_9583[1].JPG](/proxy/?url=https://content.instructables.com/F5W/4UWF/KN6191ZE/F5W4UWFKN6191ZE.jpg&filename=IMG_9583[1].JPG)
![IMG_9590[1].JPG](/proxy/?url=https://content.instructables.com/F9H/38M6/KN8W4ING/F9H38M6KN8W4ING.jpg&filename=IMG_9590[1].JPG)
![IMG_E9423[1].JPG](/proxy/?url=https://content.instructables.com/FW2/7TY4/KN8W4ILB/FW27TY4KN8W4ILB.jpg&filename=IMG_E9423[1].JPG)
We are now at the stage where we can finish the Heart.
First of all we need to sand the front of the Heart, it has a Laquer on the wood as its for flooring originally. I'm using a belt sander to achieve this, and then just a light sanding will suffice, Clicking the Smoothing box in the 3D Adaptive clearing ensures a decent finish after cutting which saves a lot of time rubbing down. Once we are happy with our sanding we then finish off the piece with either Boiled Linseed oil or a Danish oil, or no oil, or just waxing will bring a lustre.
It takes around 1hr 20mins to complete each heart on the CNC Machine.
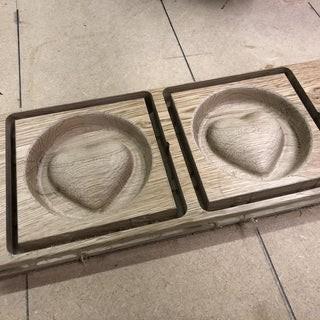
Another heart can be added into the design as well so you have one on top of the other, 2 hearts beat as one etc.(See Photo)
They make excellent gifts i:e Valentines, Mothers day or just a gift for a loved one.
They can be used purely as a decorative ornament or a Trinket tray for earrings etc.
That ends this Instructable, thanks for looking and I hope it gives you some pointers with Fusion 360.