3D Alien Ship Animation in Blender
by jacob77Seven in Design > Animation
807 Views, 4 Favorites, 0 Comments
3D Alien Ship Animation in Blender
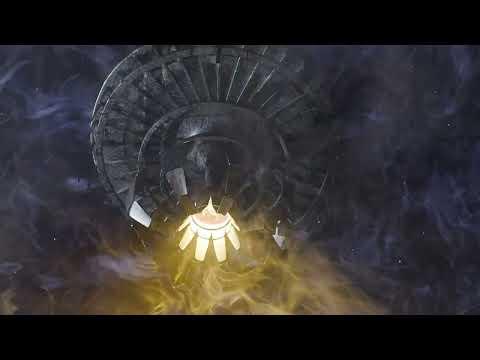
I created an animated 3D alien spaceship cinematic from scratch in Blender. In this Instructible, I'll show you my process including ship design, modeling, texturing, rigging, sound design, and more.
Supplies
You'll need the following
- Beefy Computer (60 hours render-time on RTX 3080ti)
- Blender 4.2.0 or comprable
- Some free, public domain texture images and sound effects (links provided later).
- FL Studio
- Premiere Pro
Brainstorming and Designing
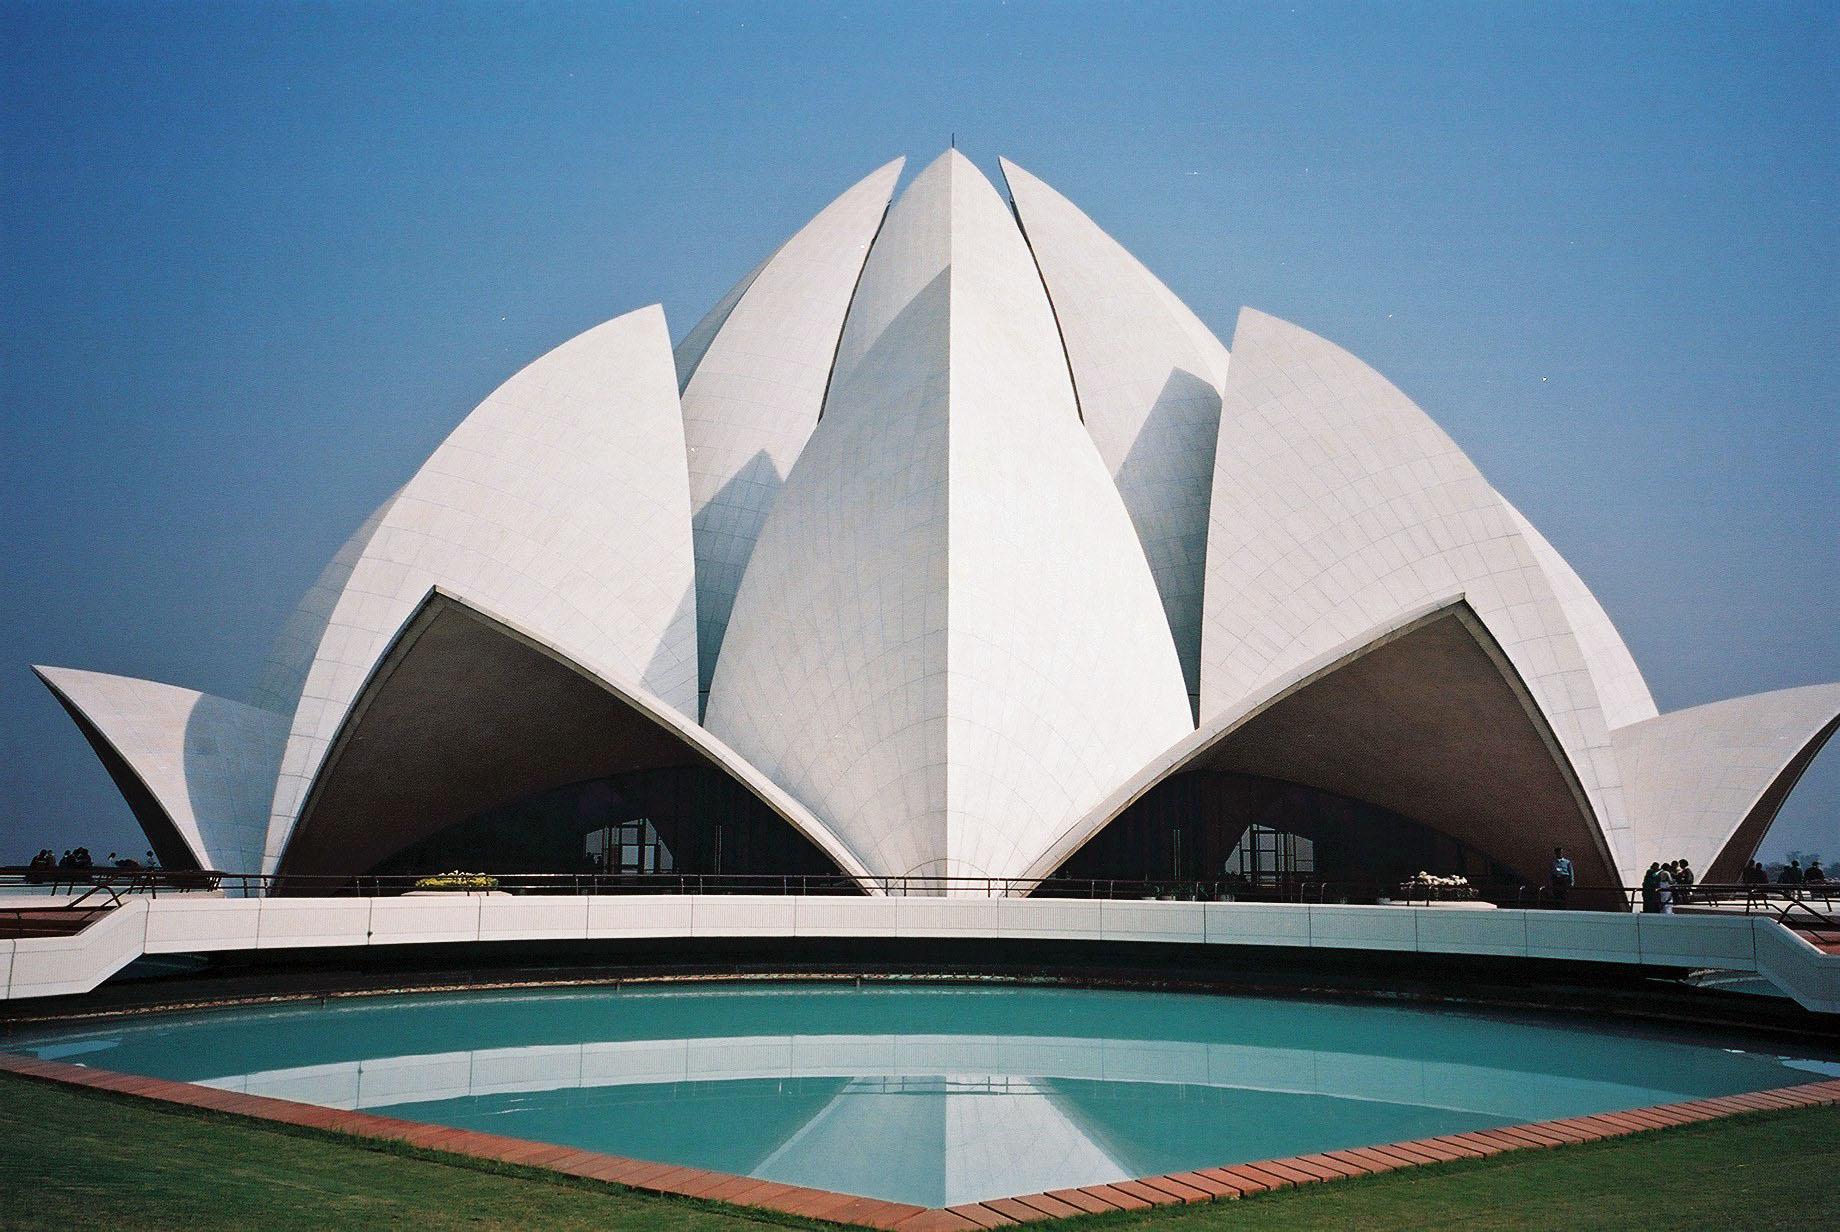
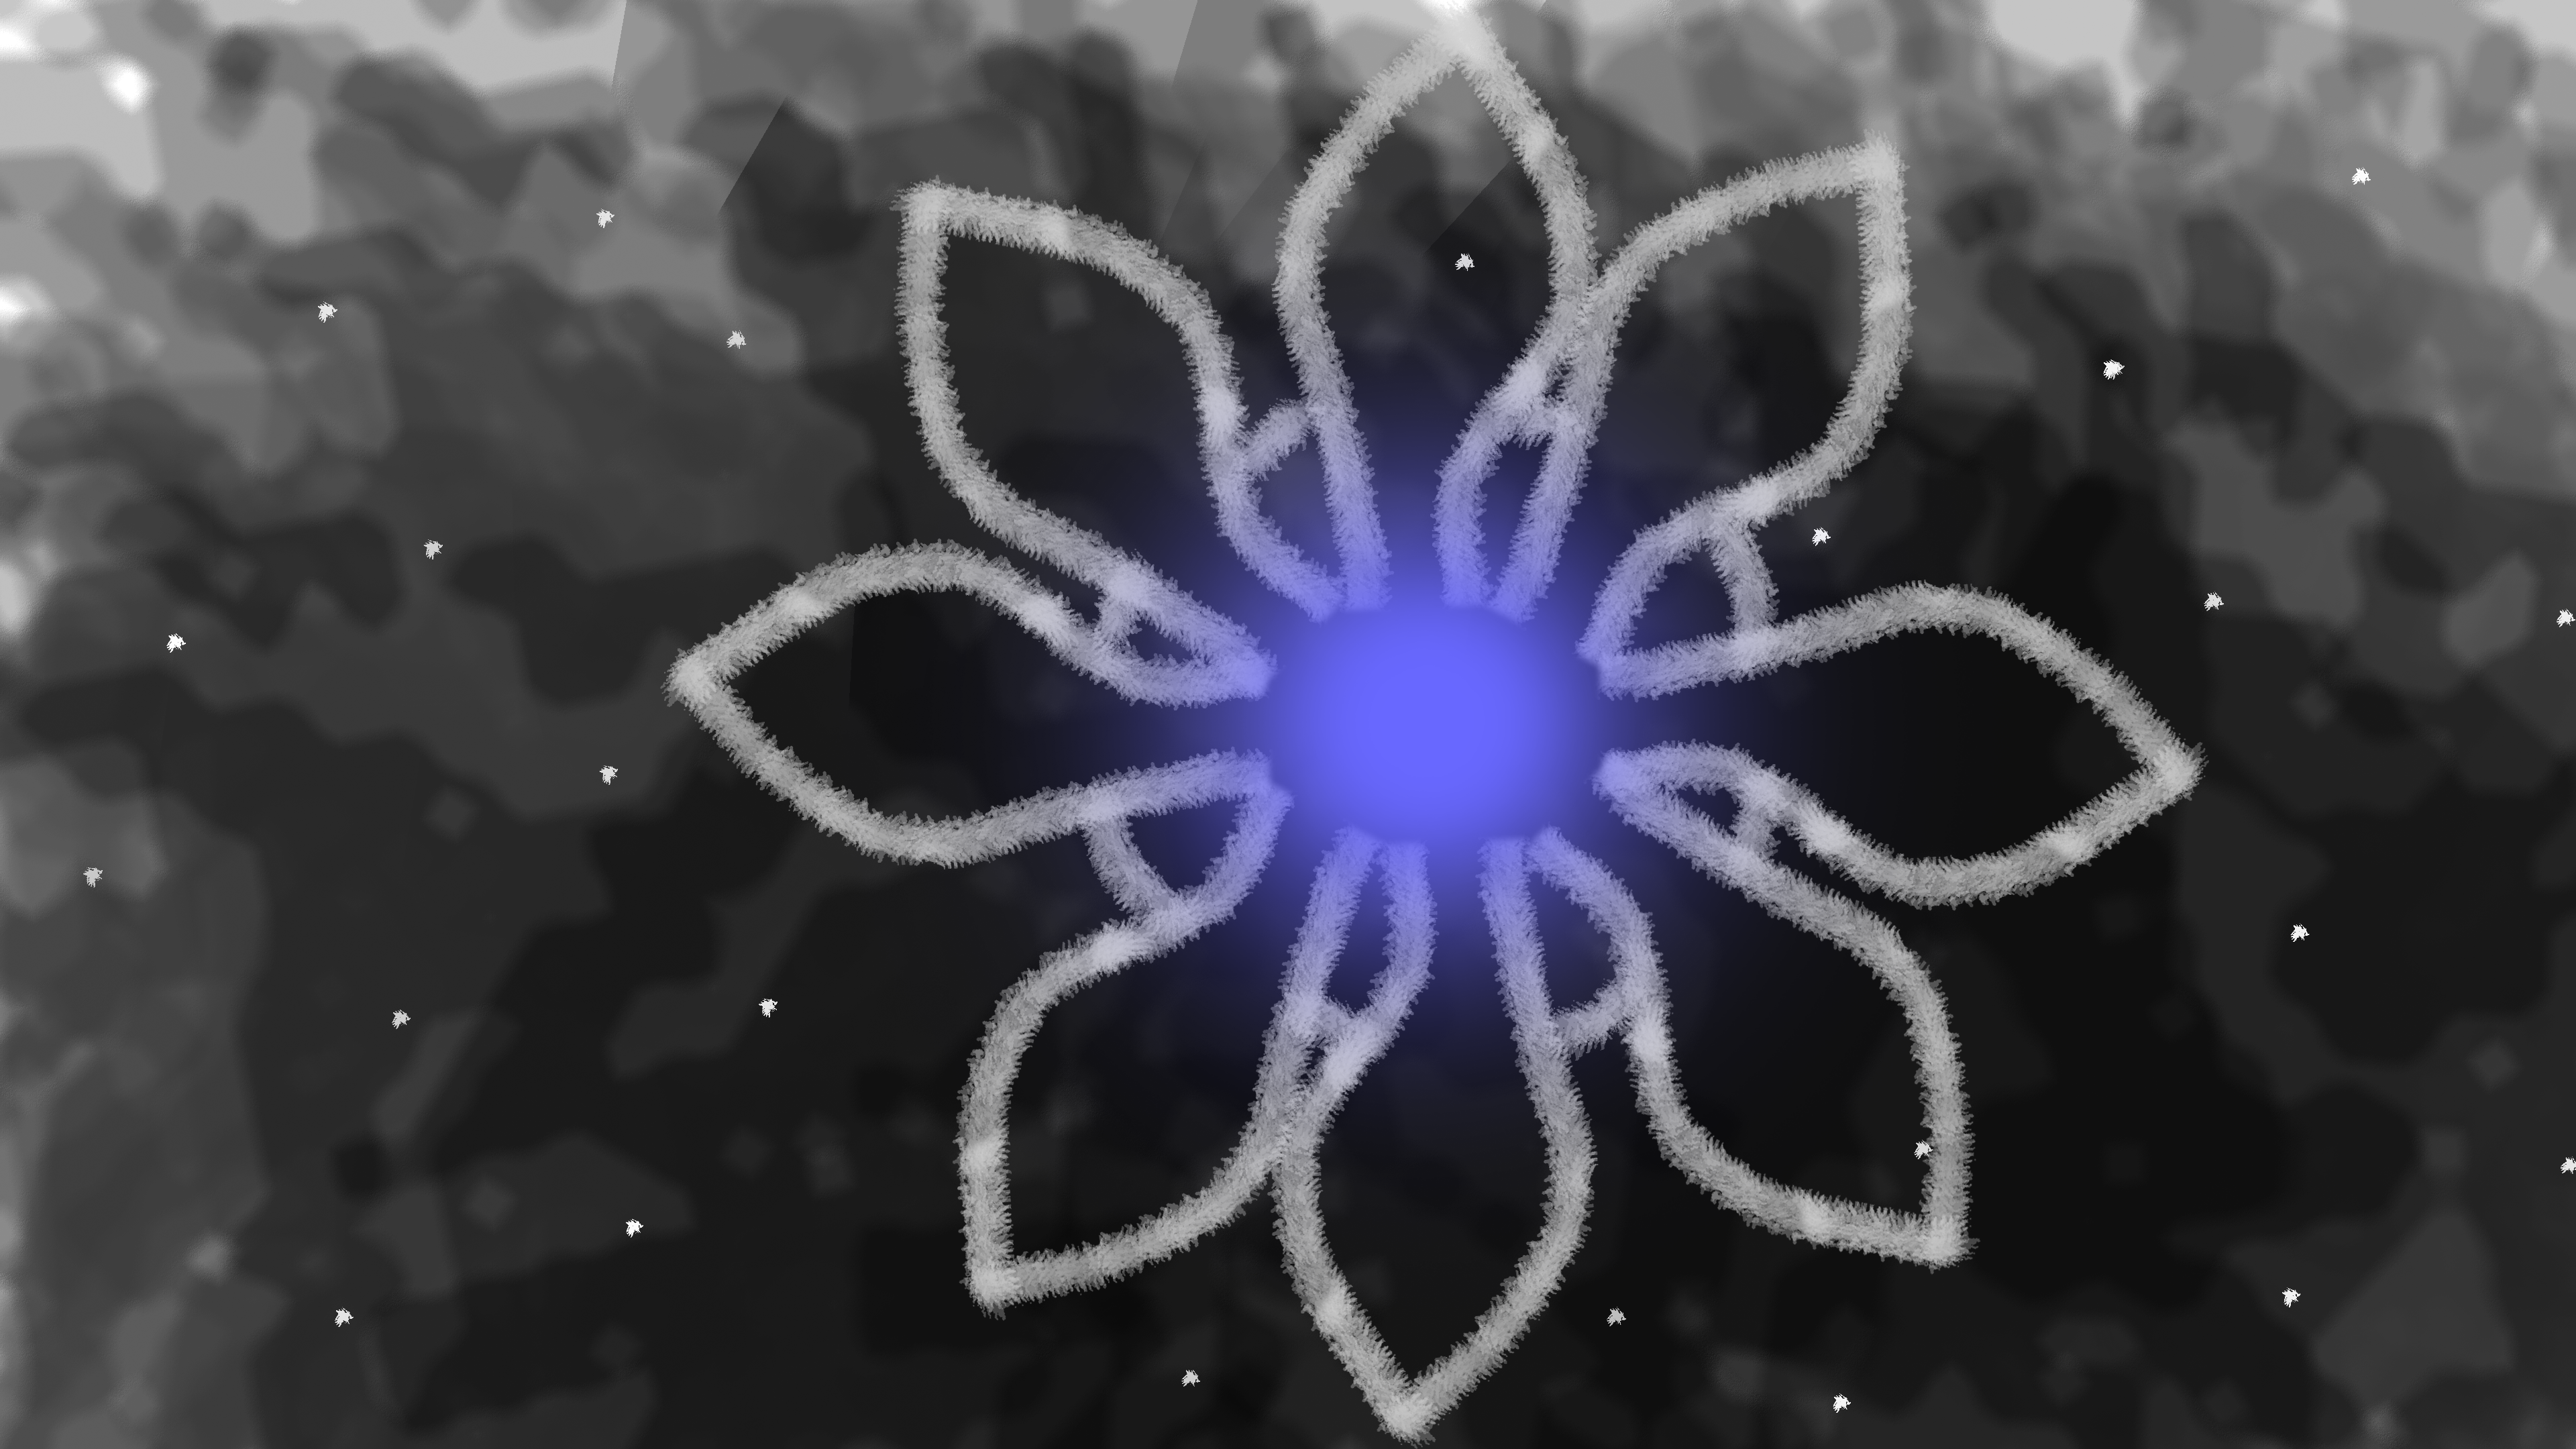
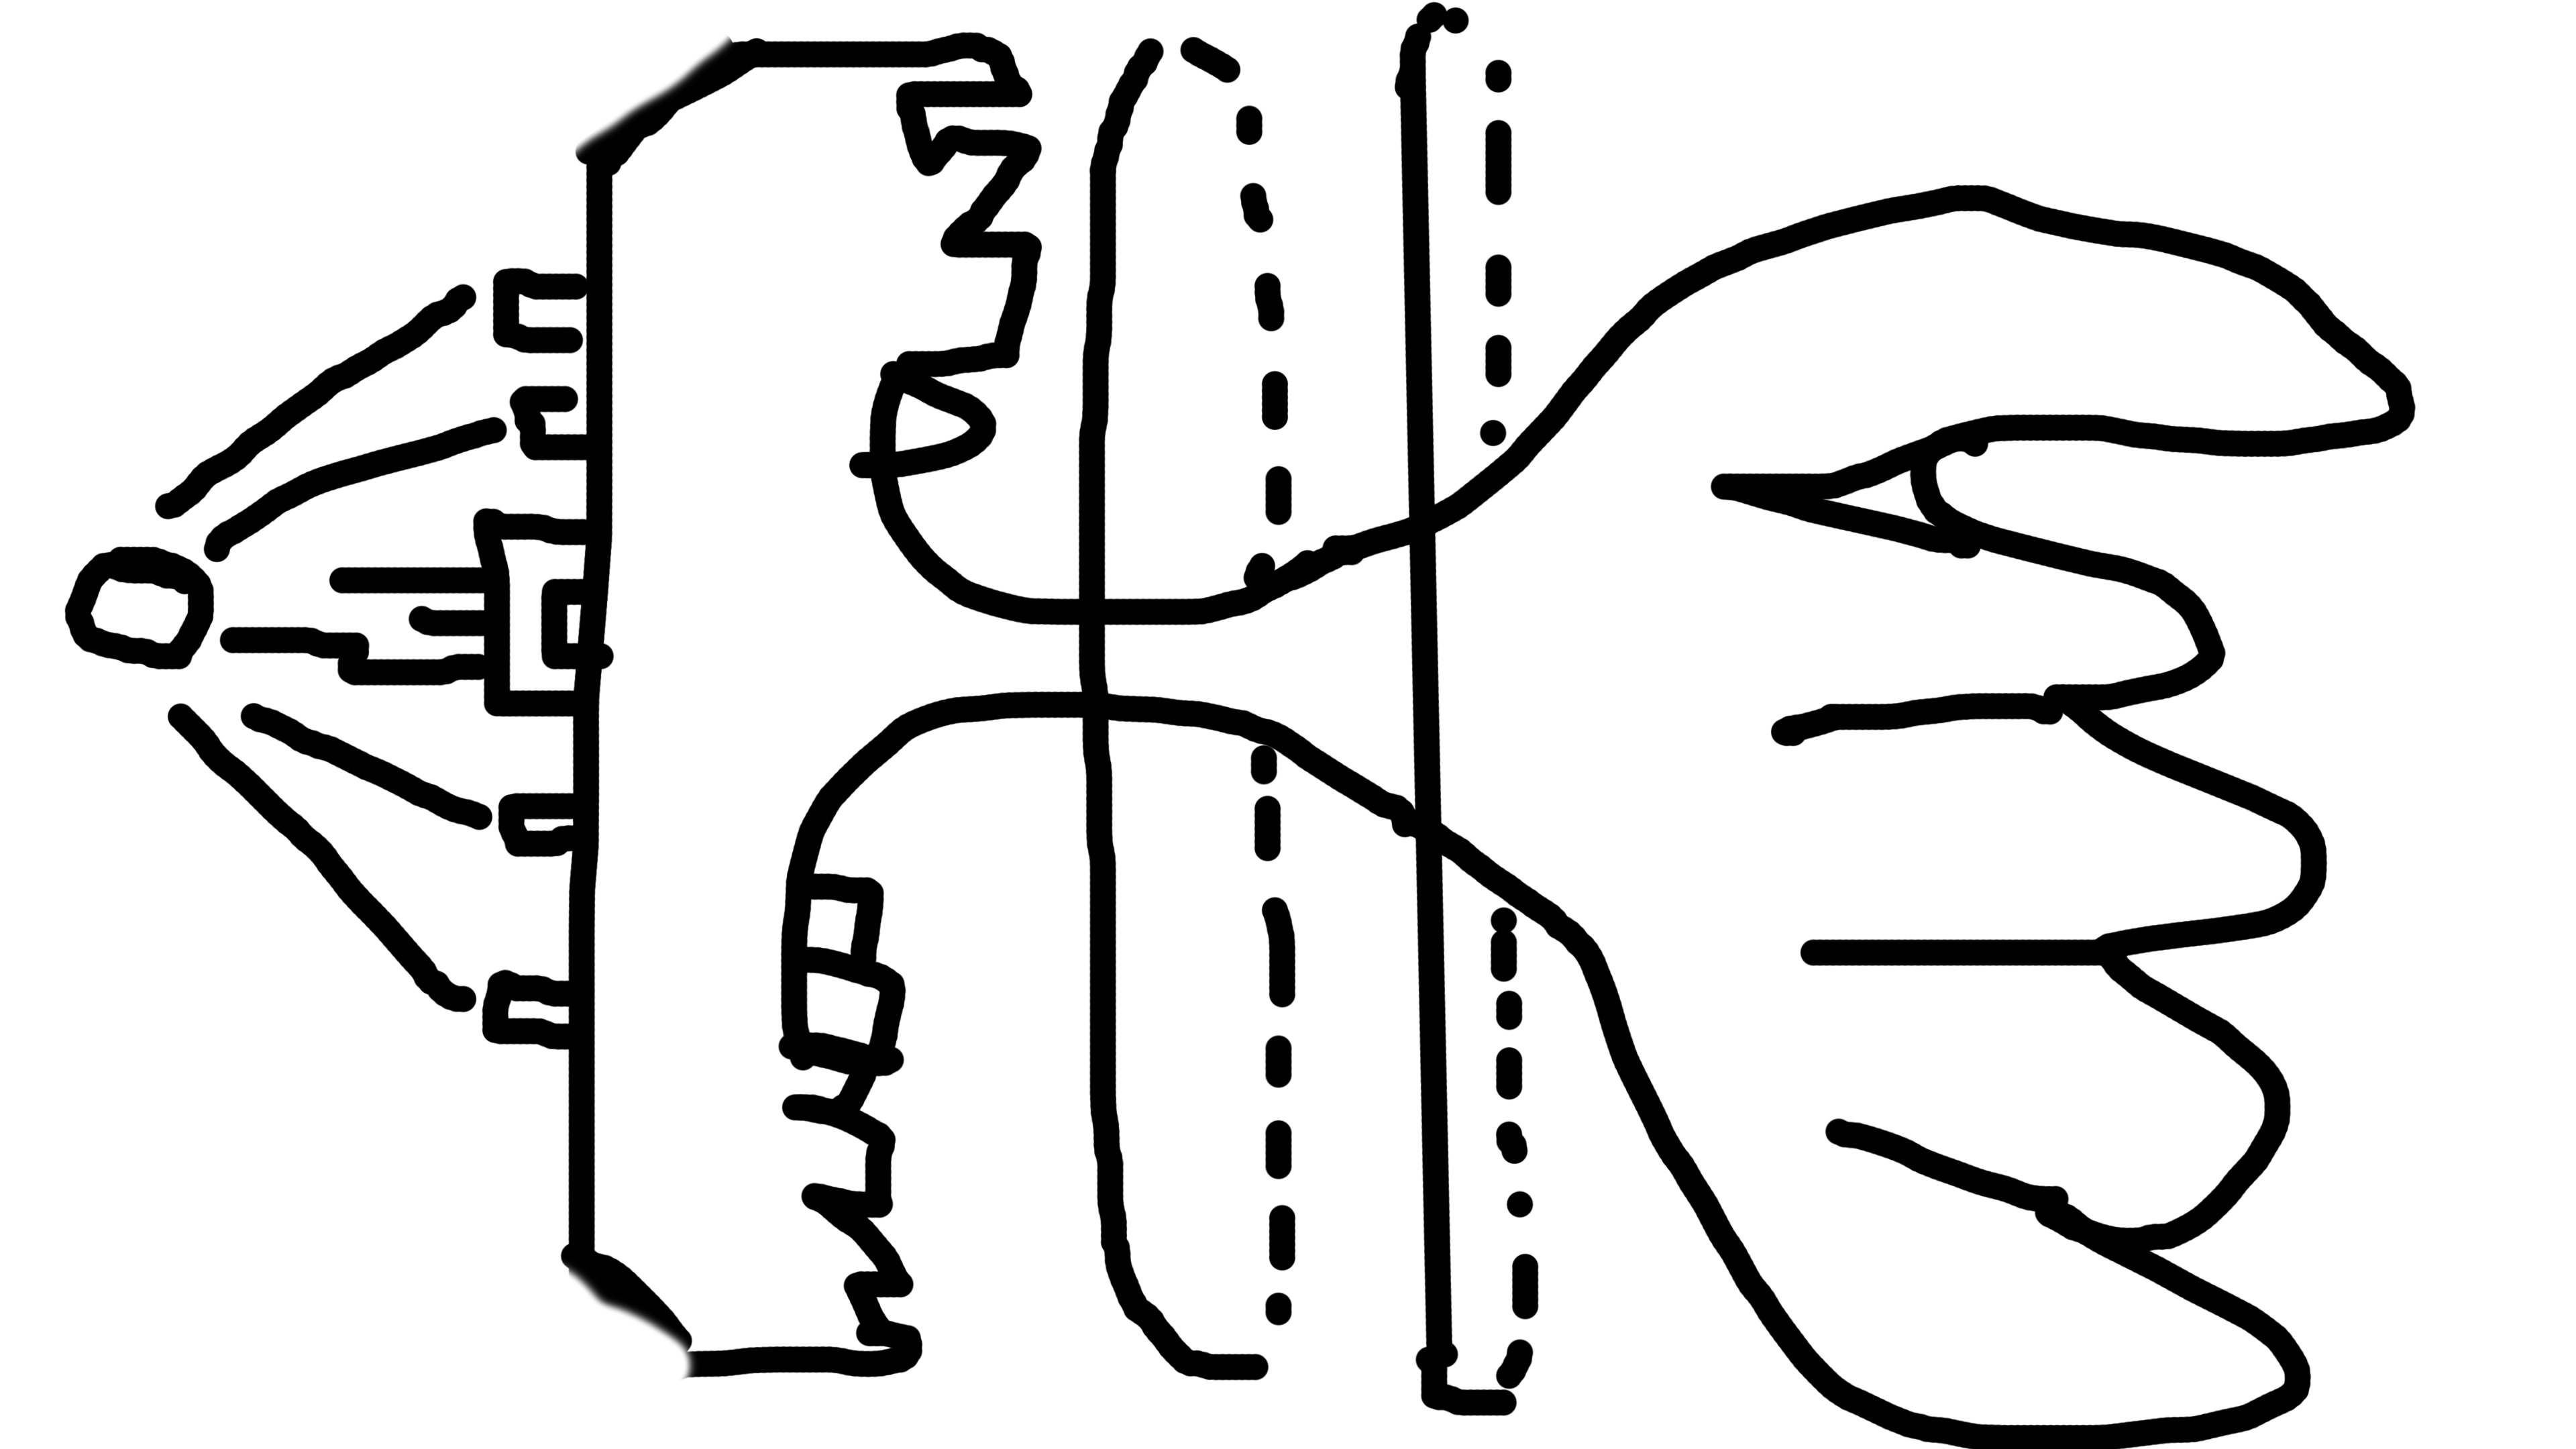
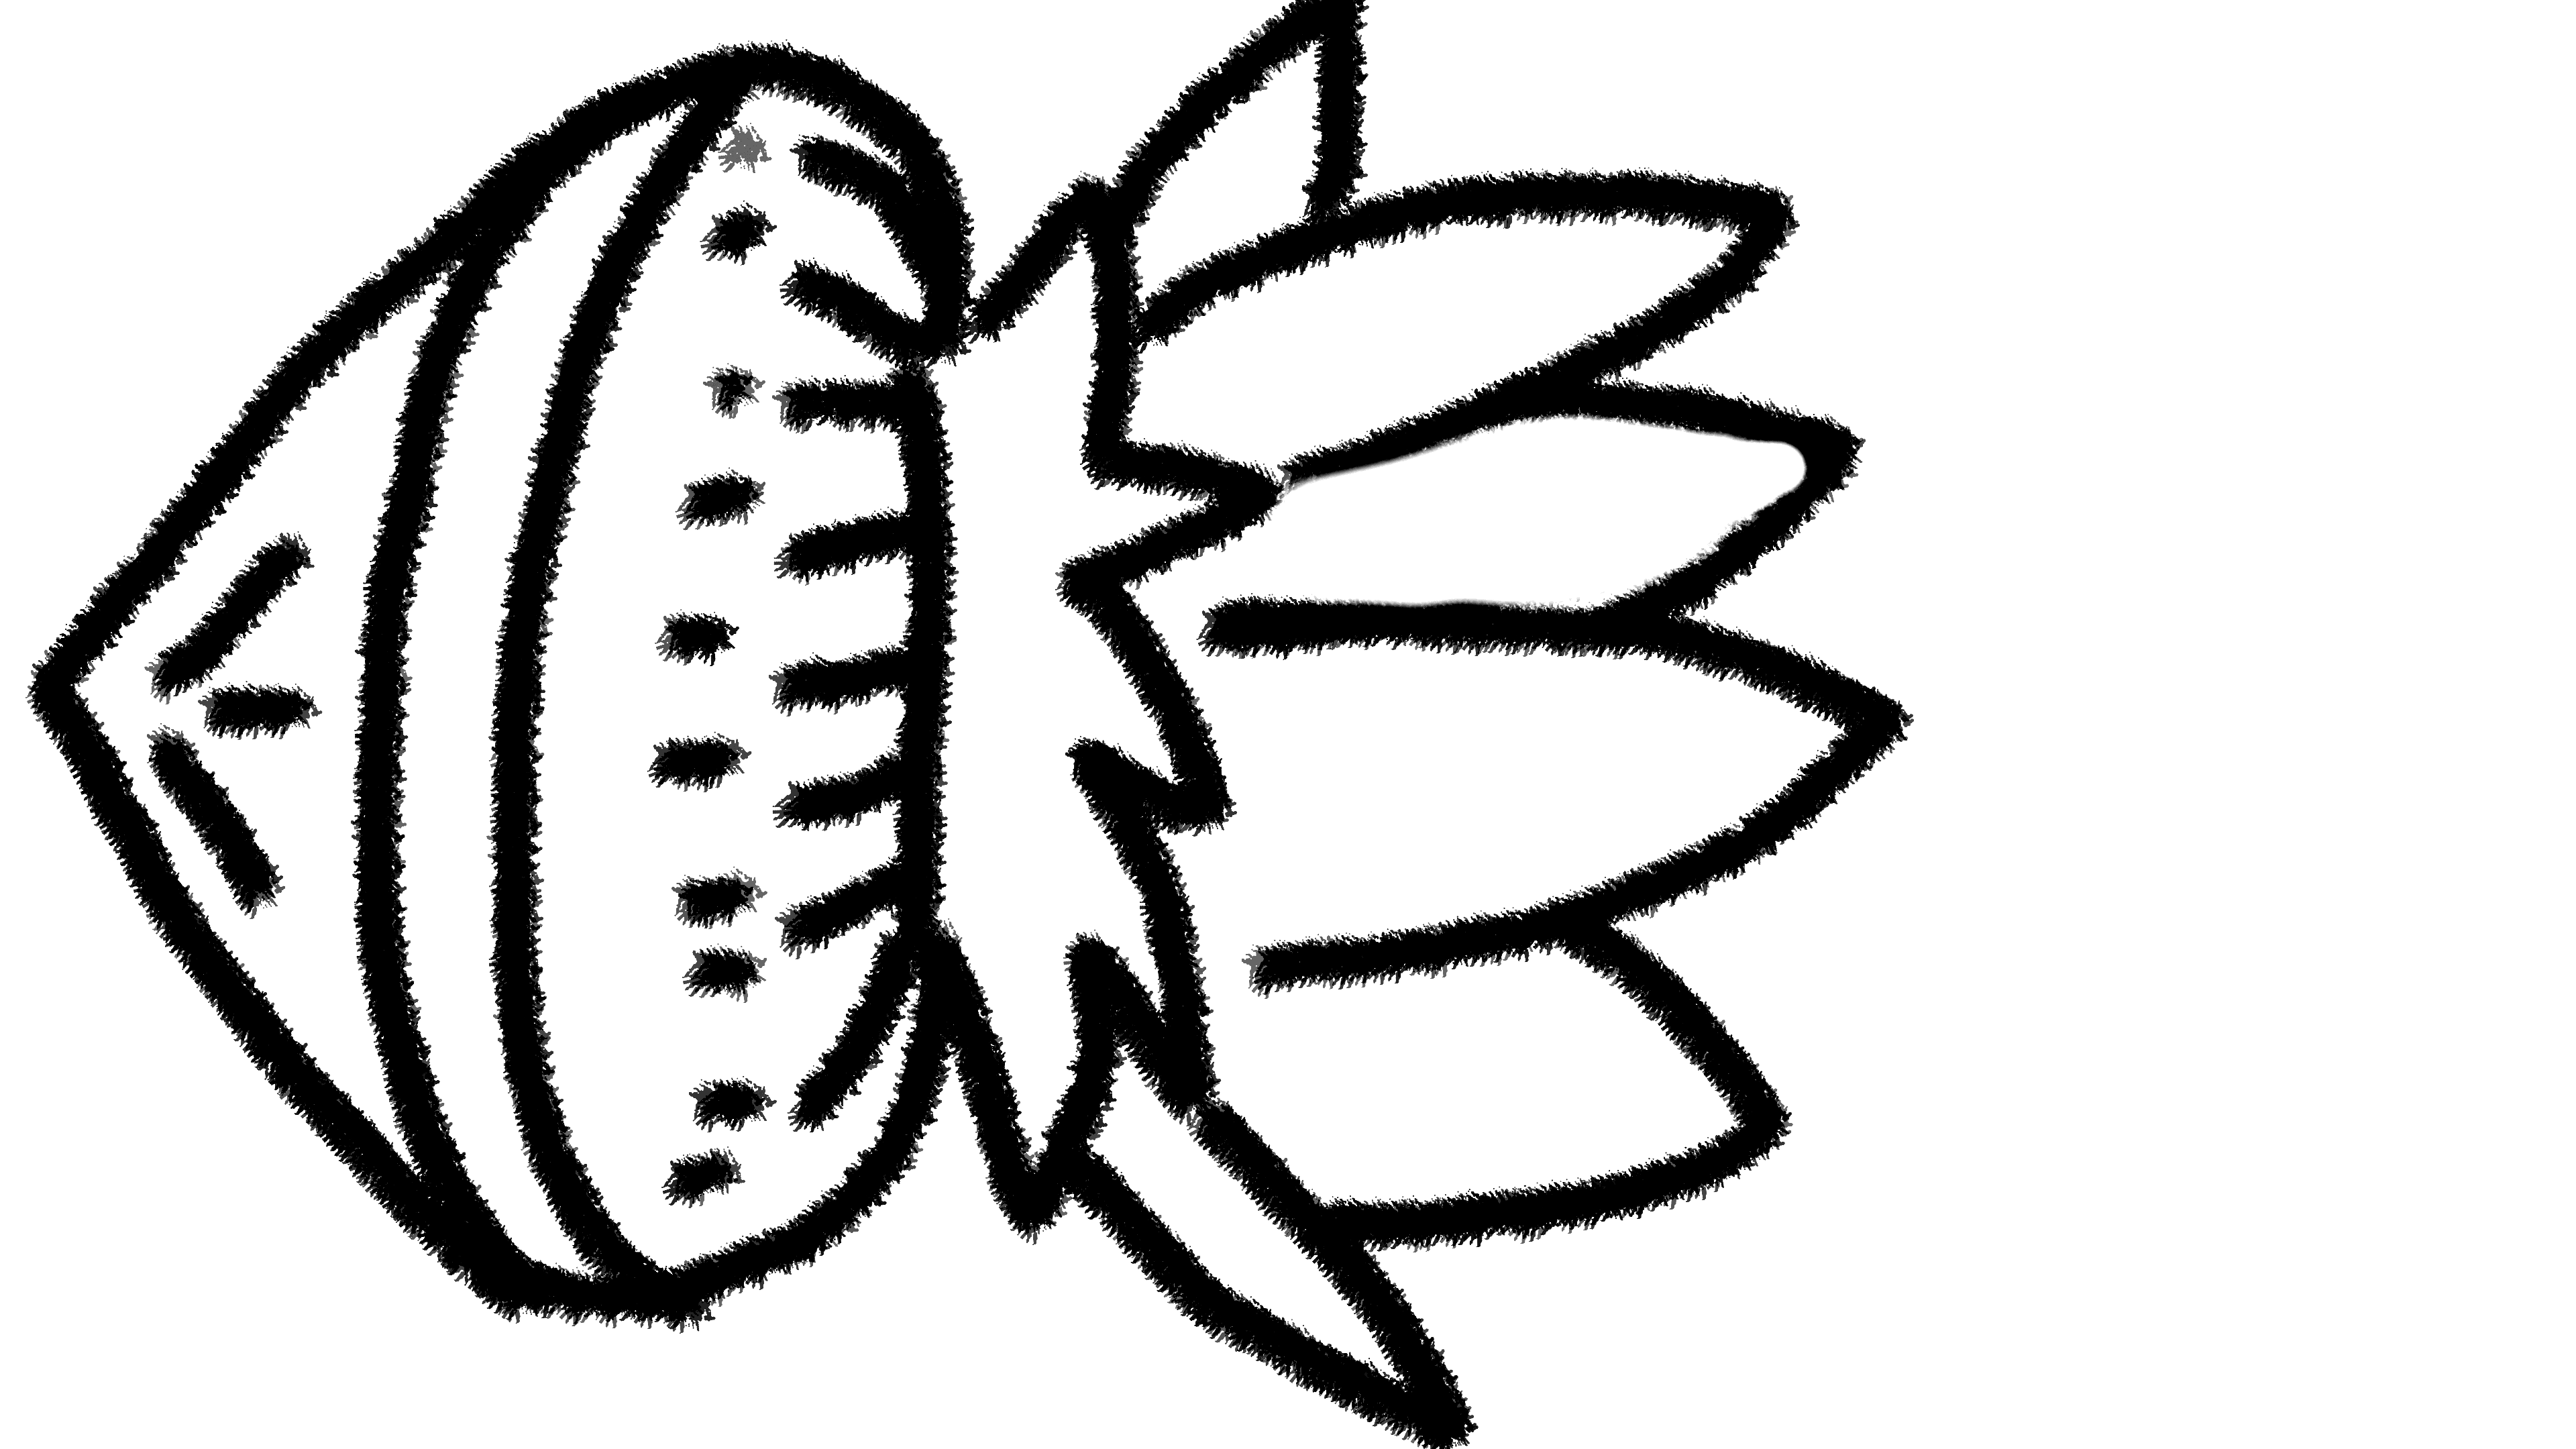
Find inspiration and begin designing an alien ship. I liked the architecture of the Lotus Temple in New Delhi and the motion of tentacled sea creatures, so I incorporated elements of those into my concept design.
Storyboarding
Draw some images to visualize the major beats of the animation. This served as a helpful guide for me, though I stayed flexible and departed from it in some ways during pre-viz. For more complex scenes, I recommend fleshing out your storyboard and sticking to it more.
3D Modeling
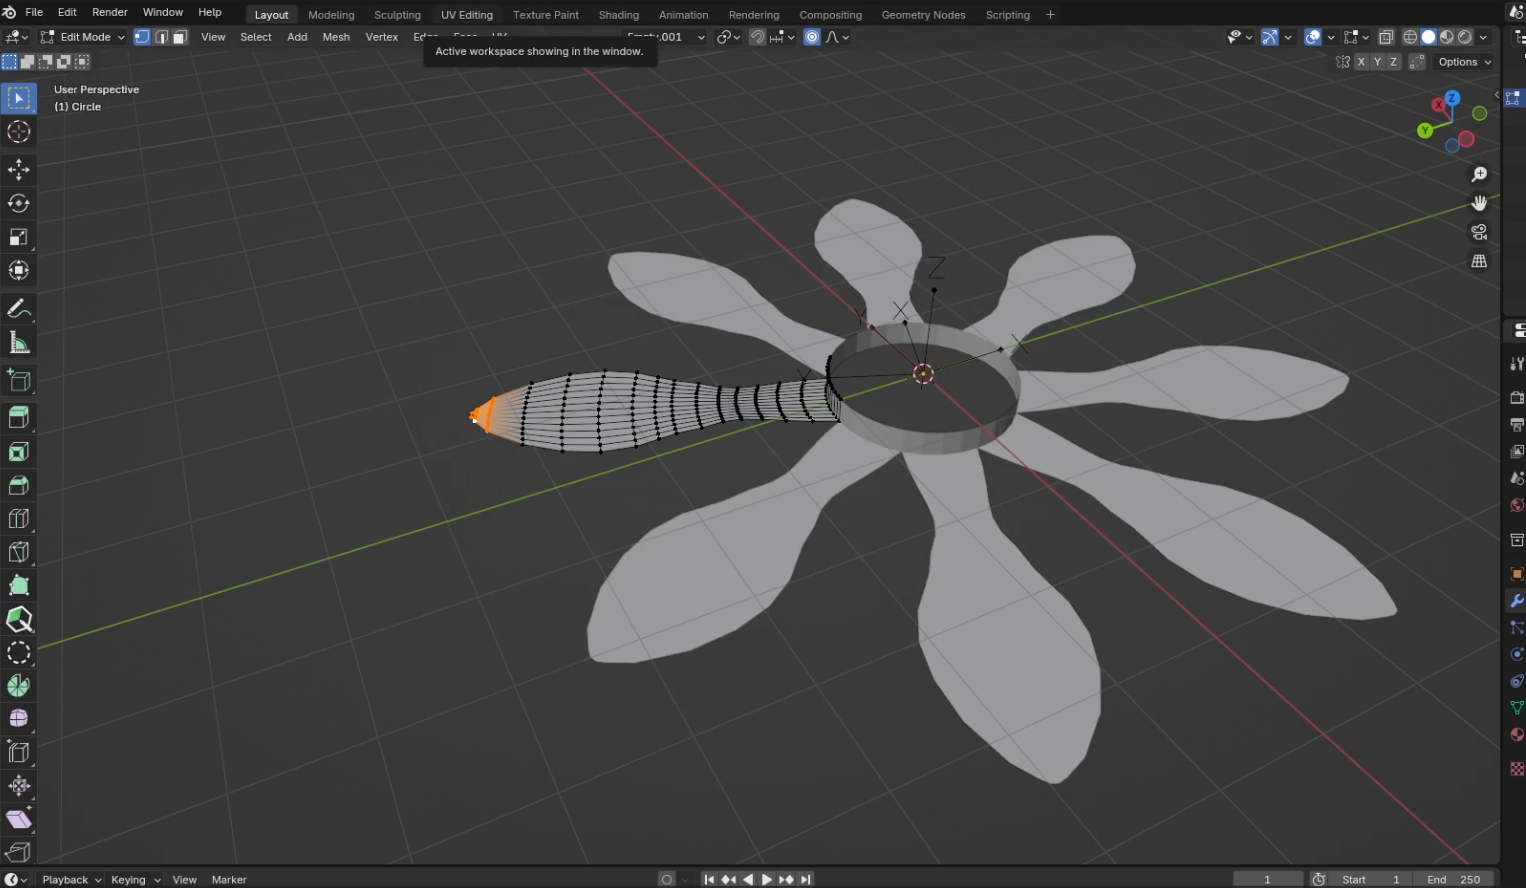
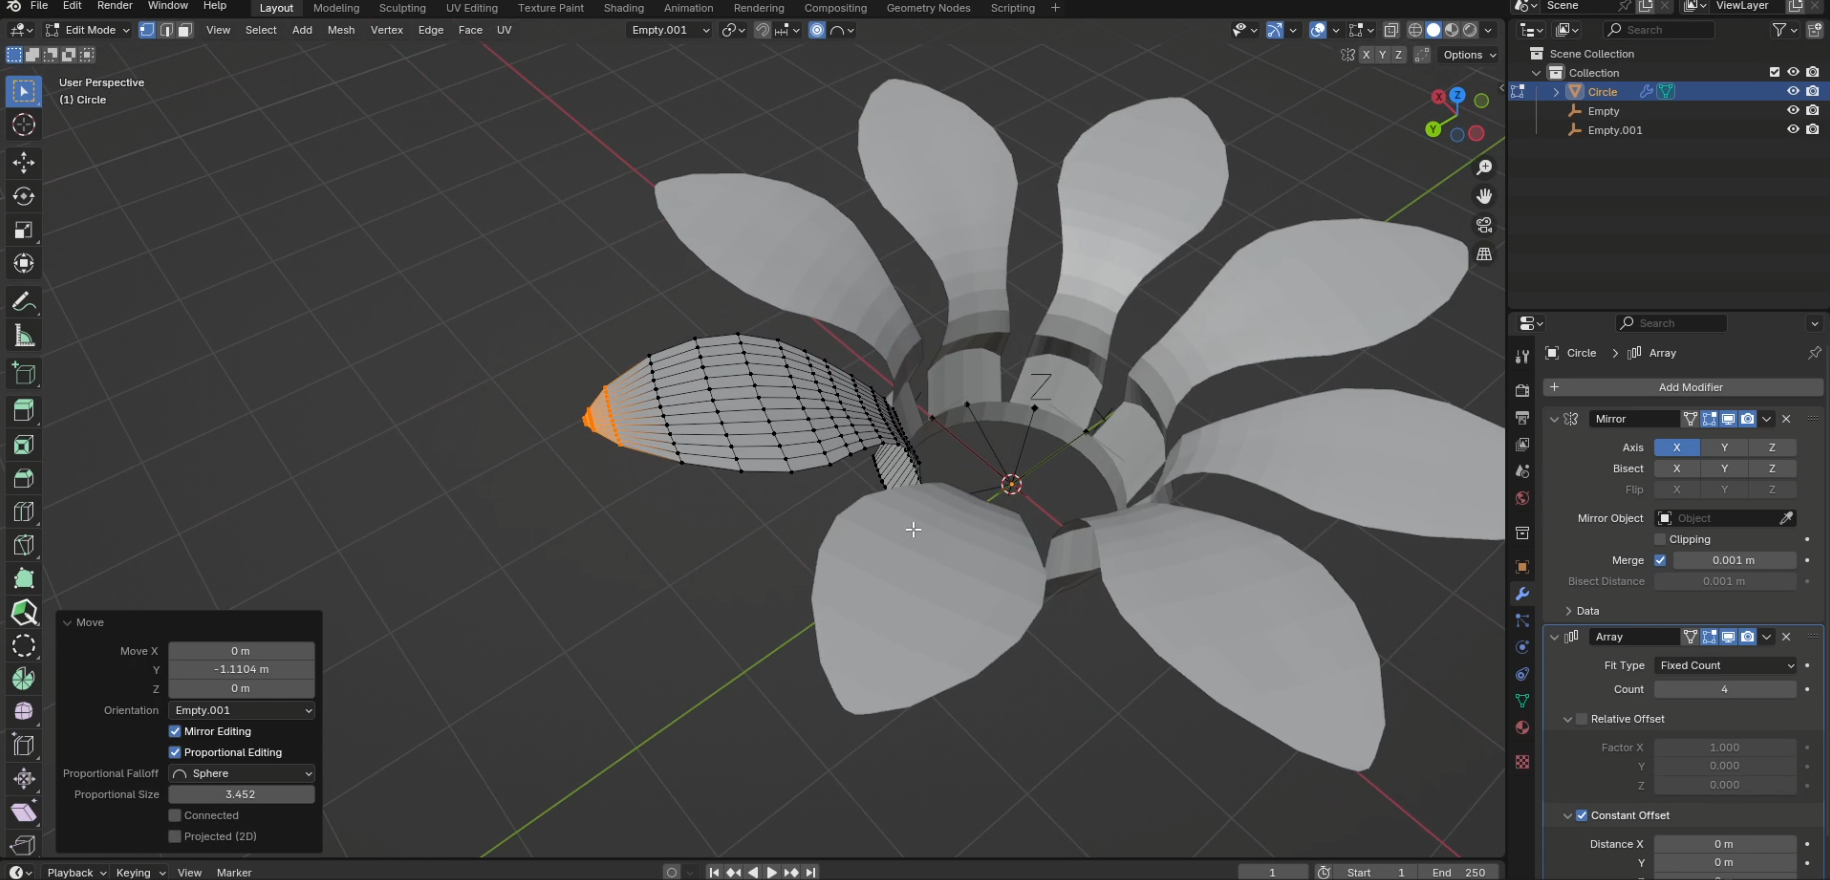
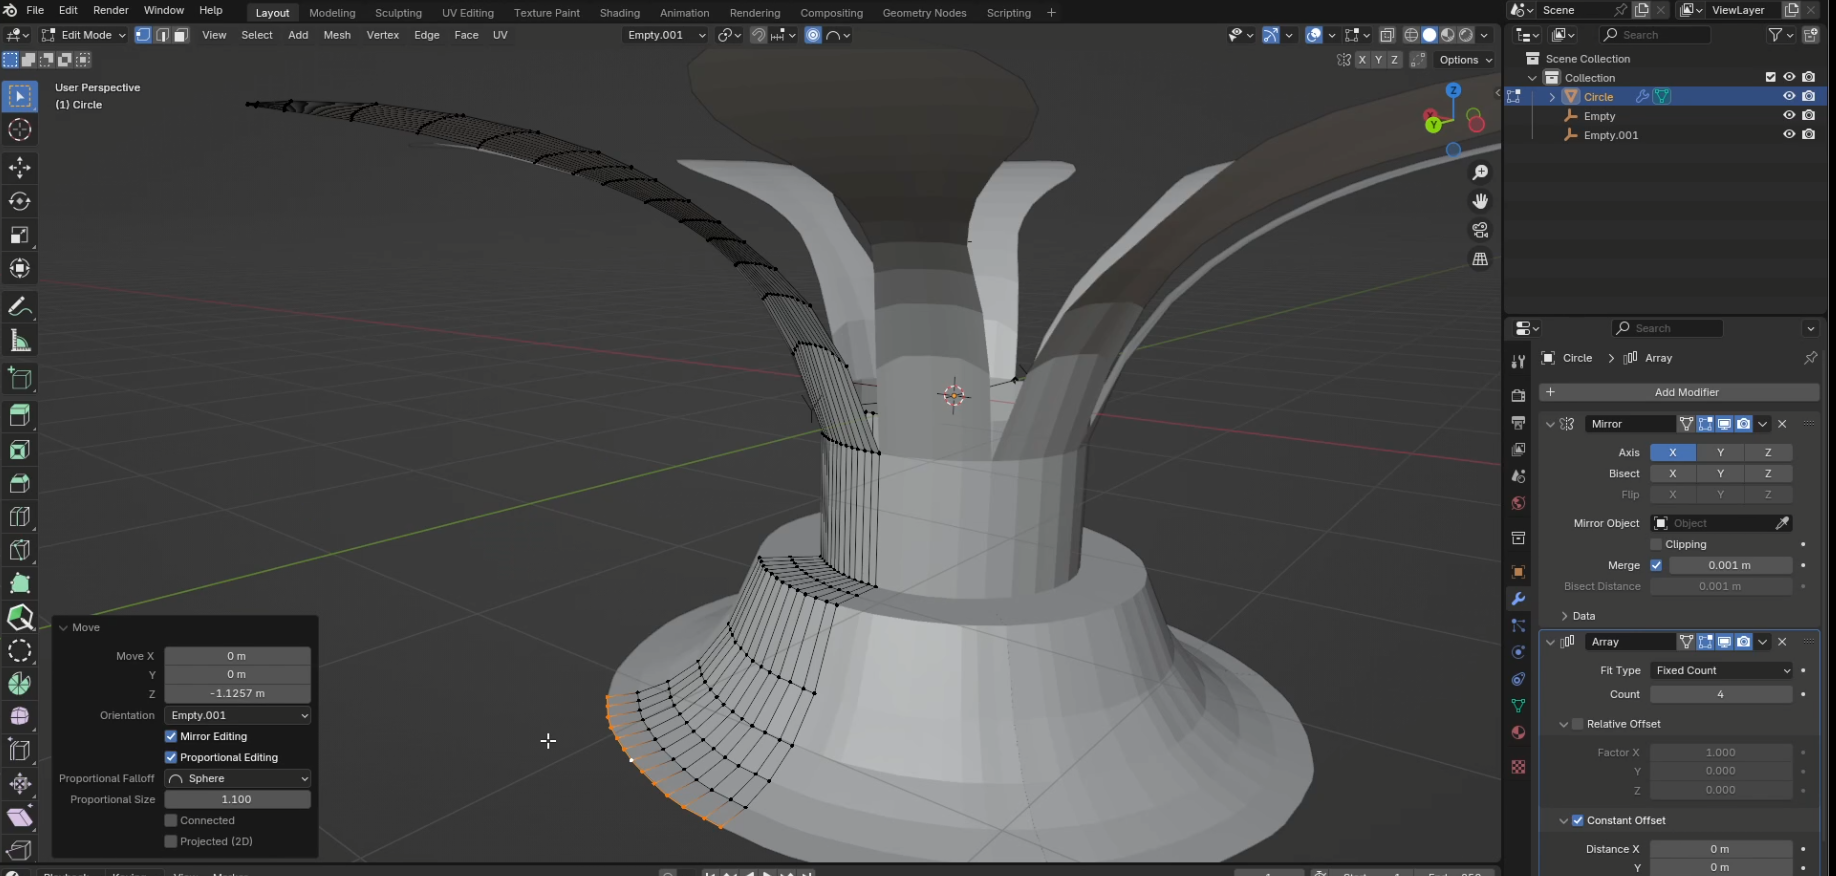
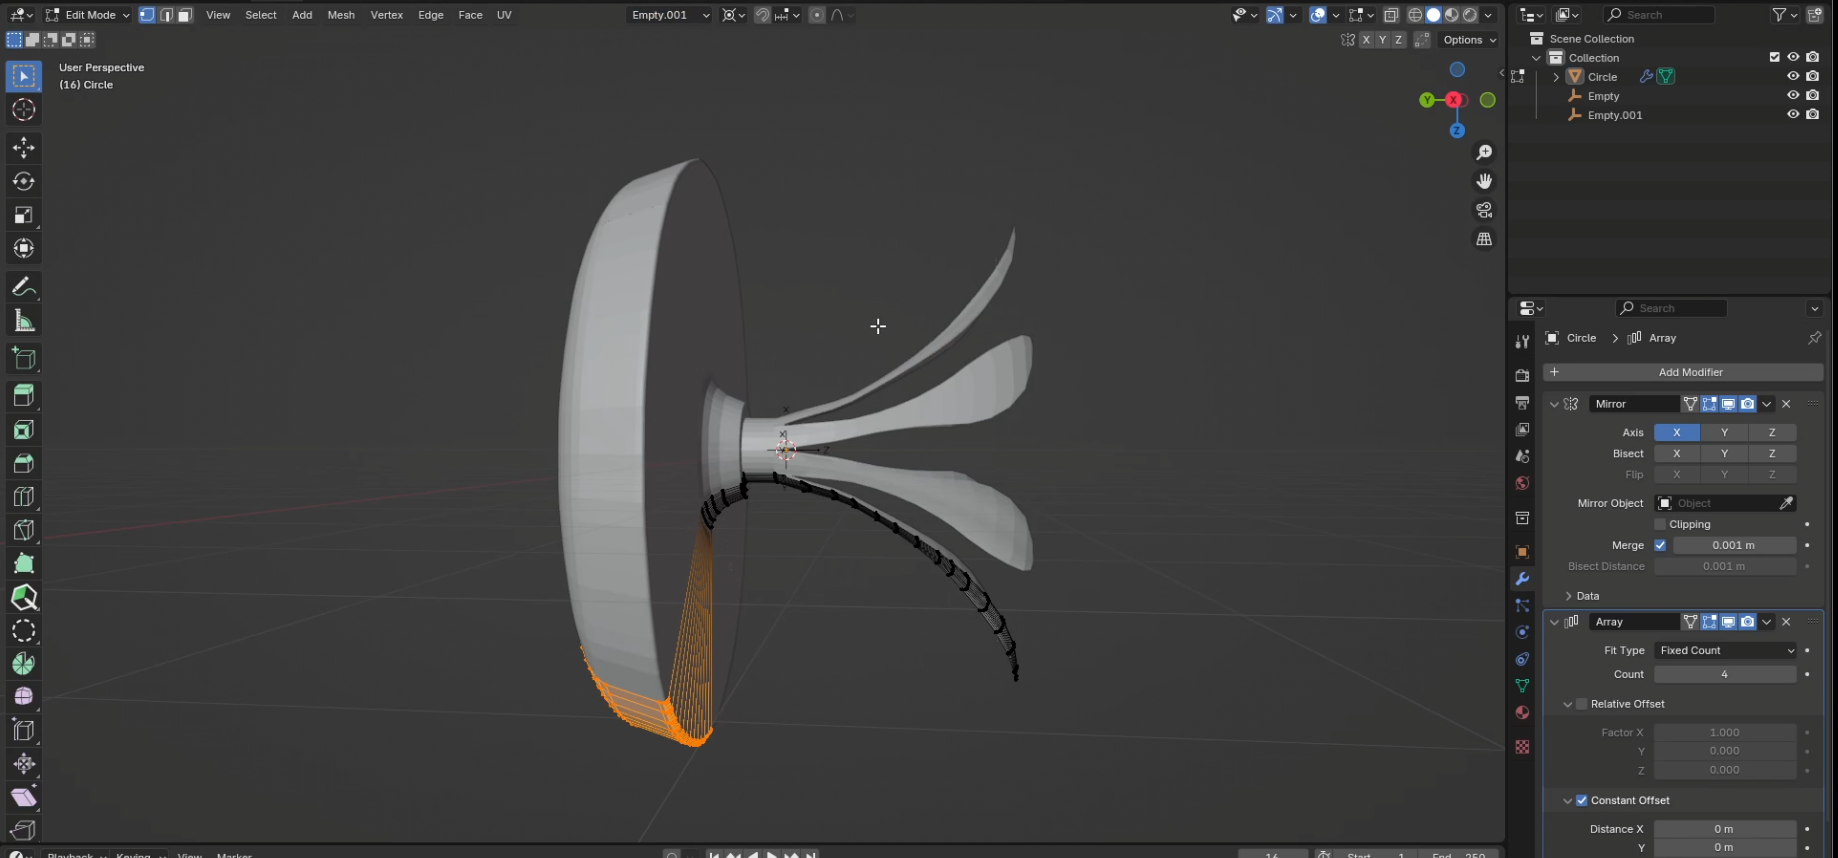
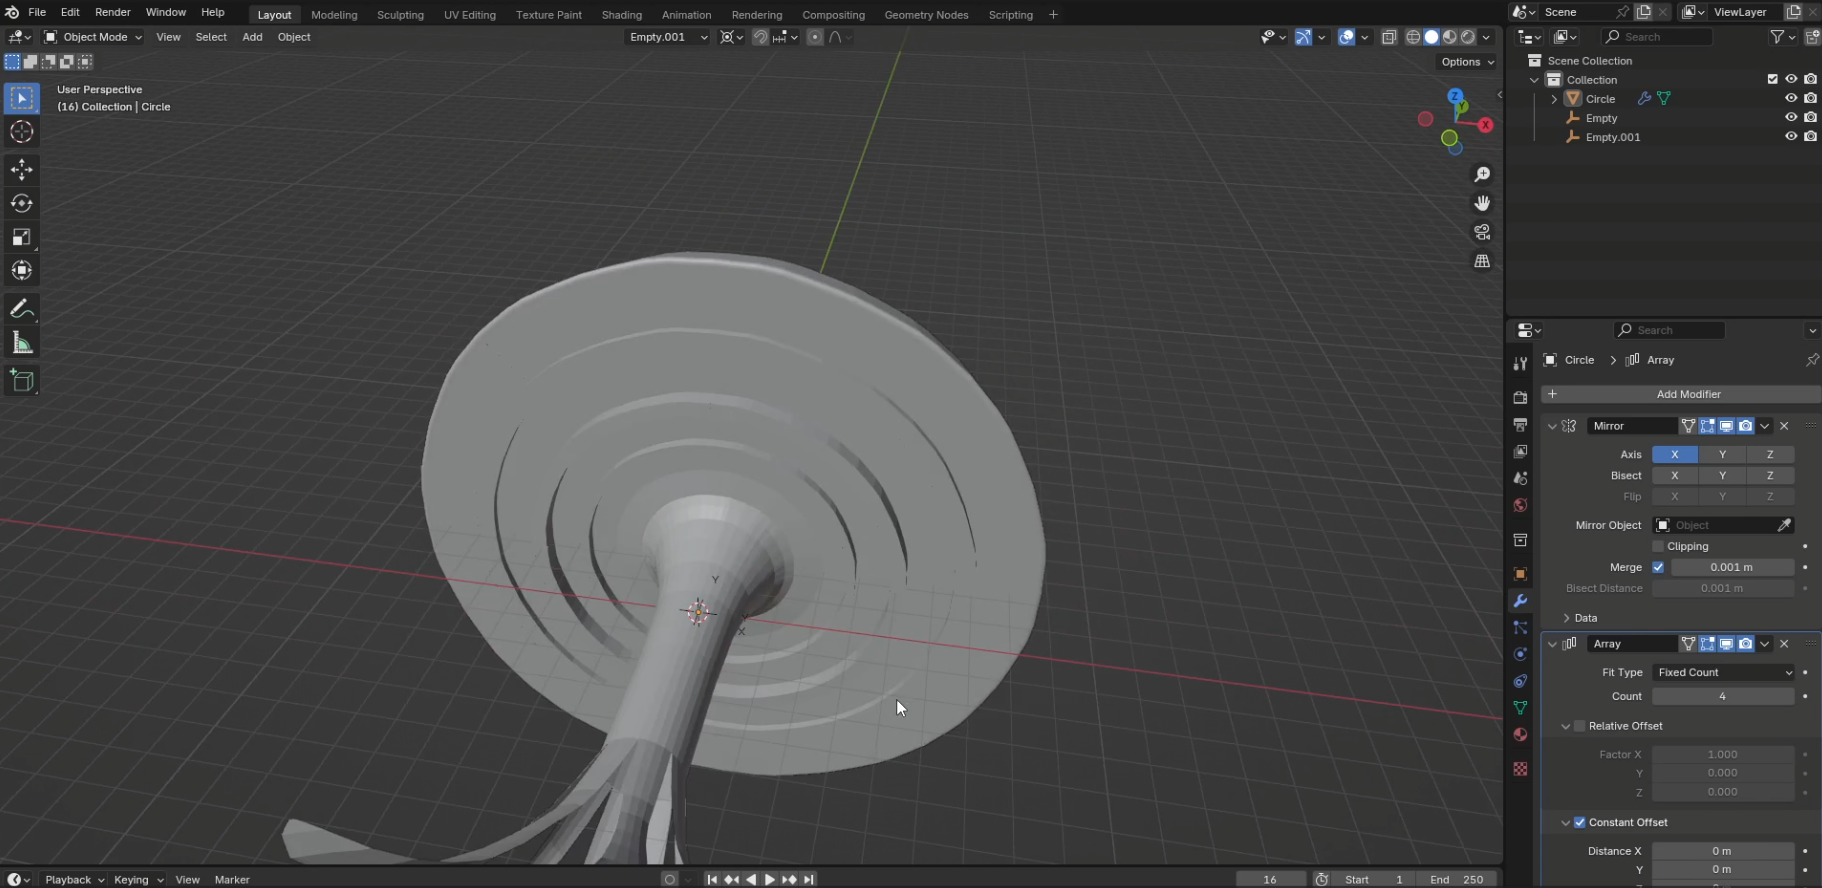
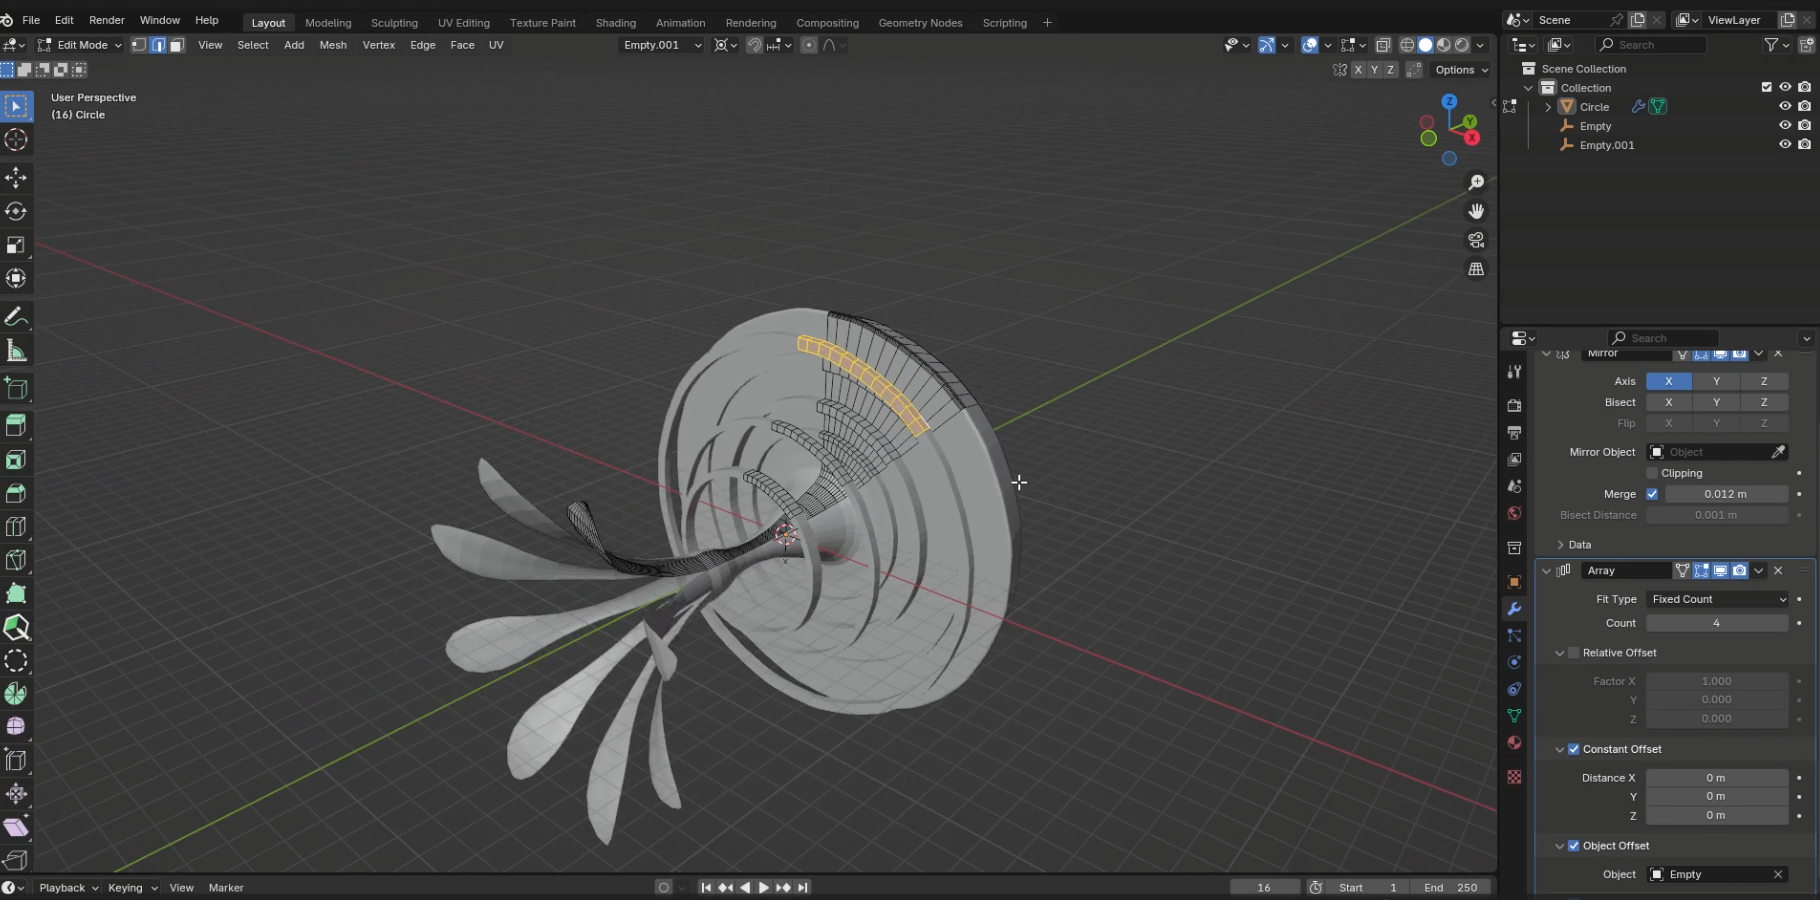
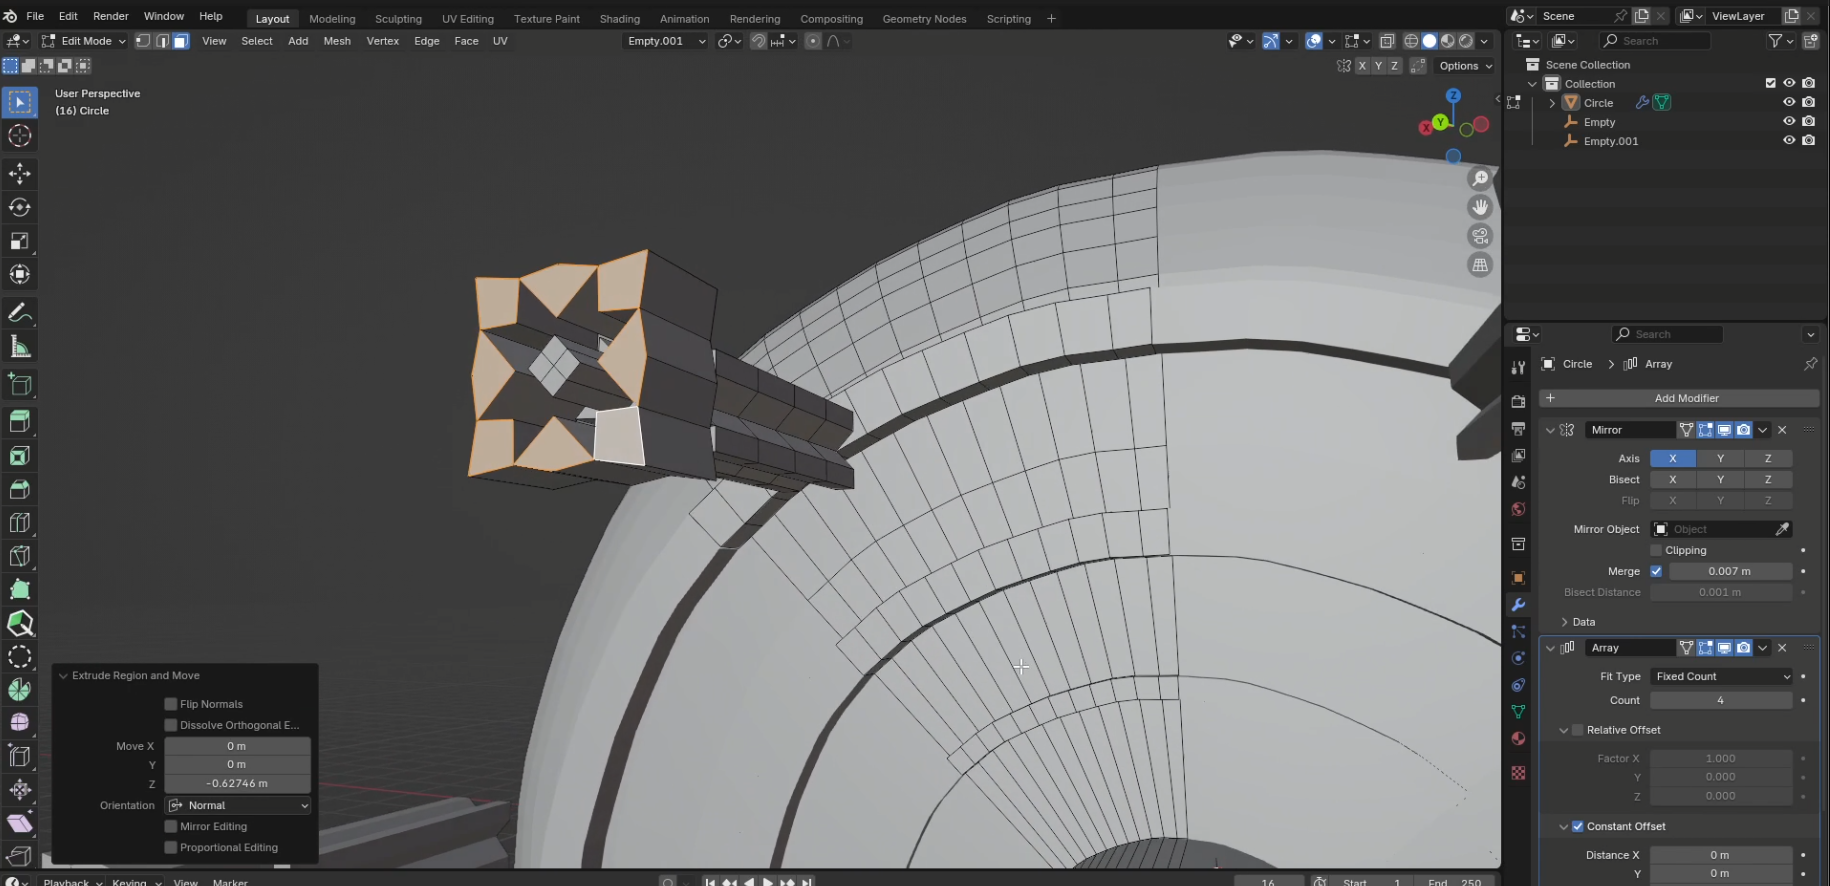
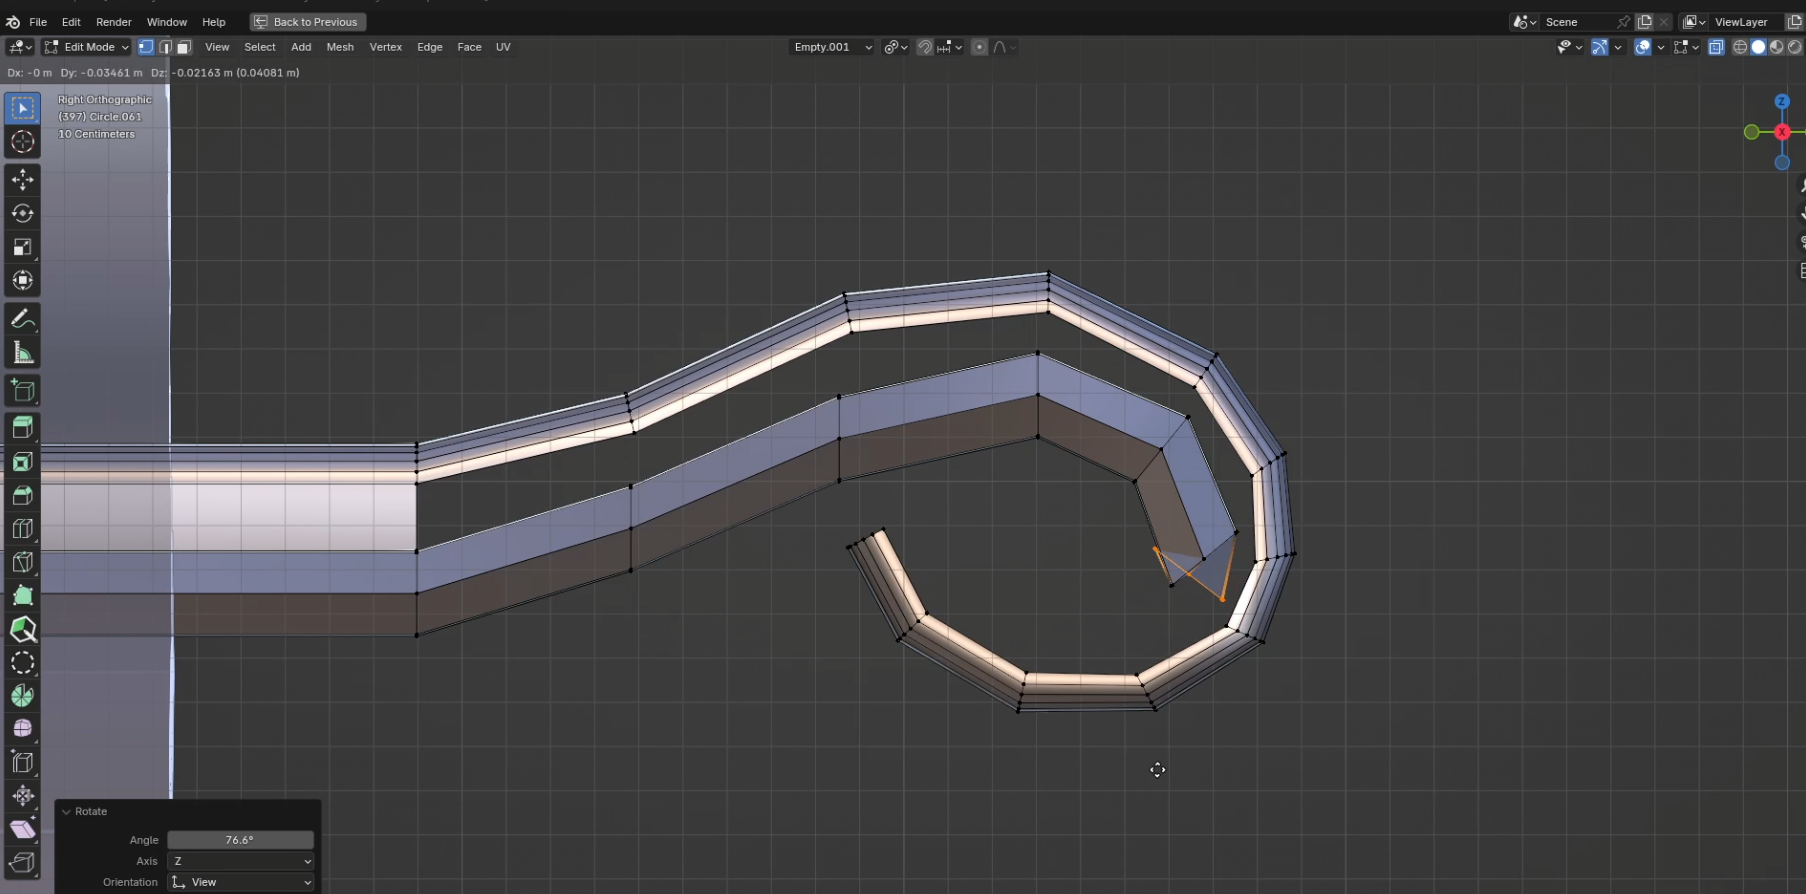
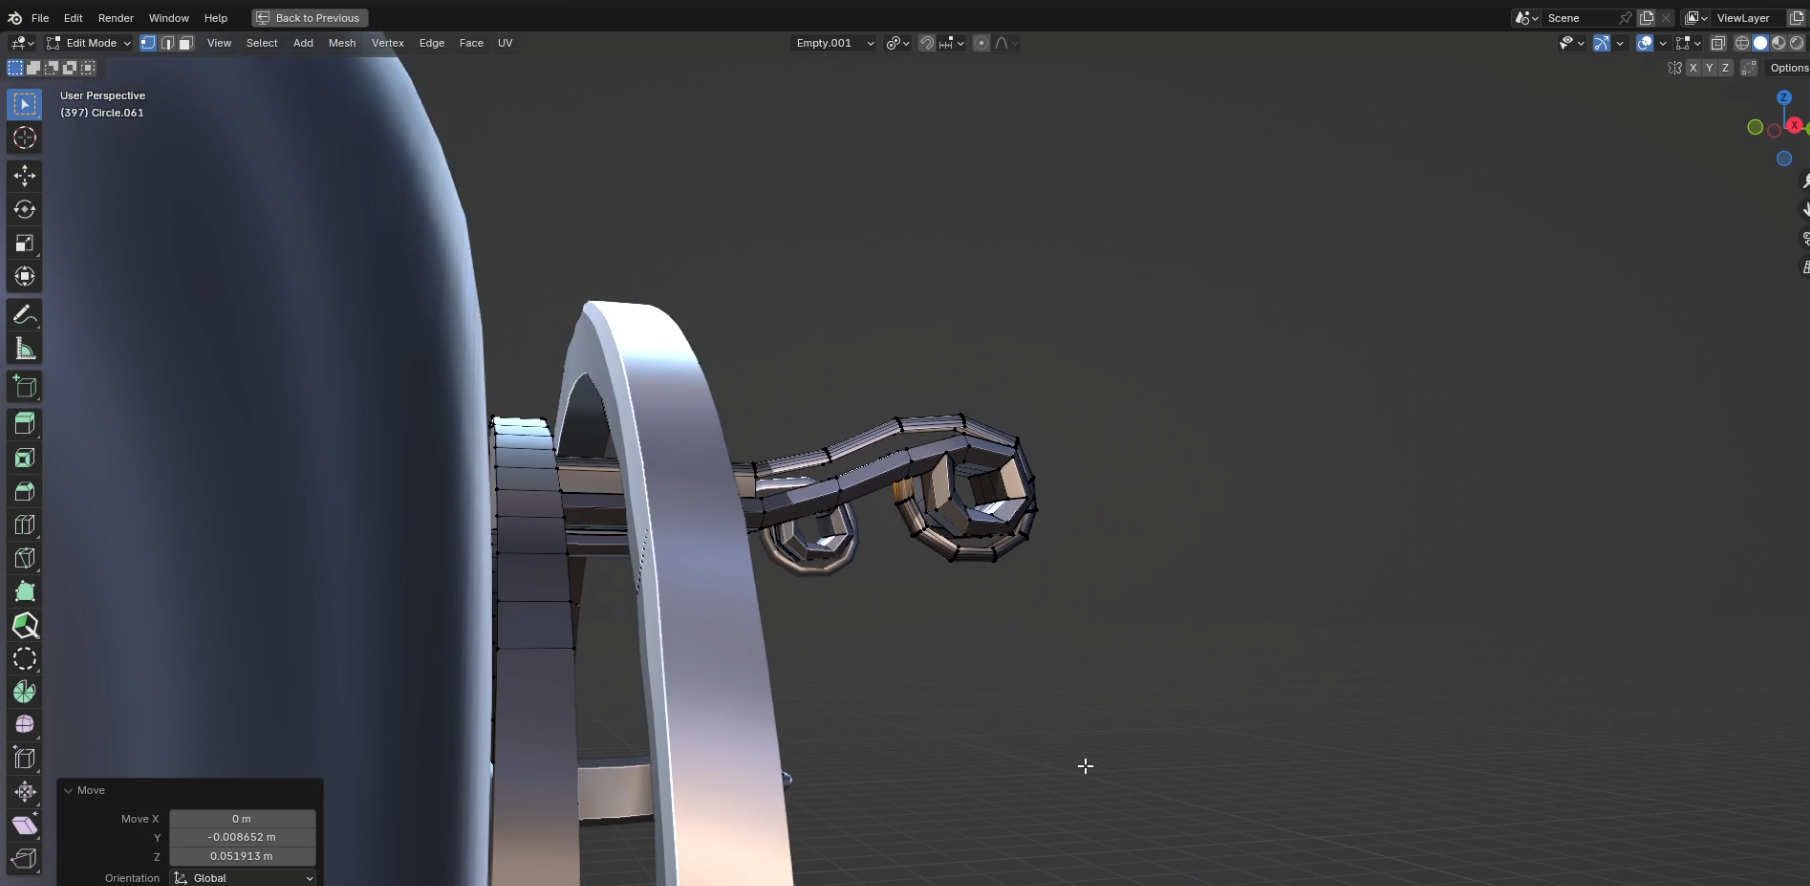
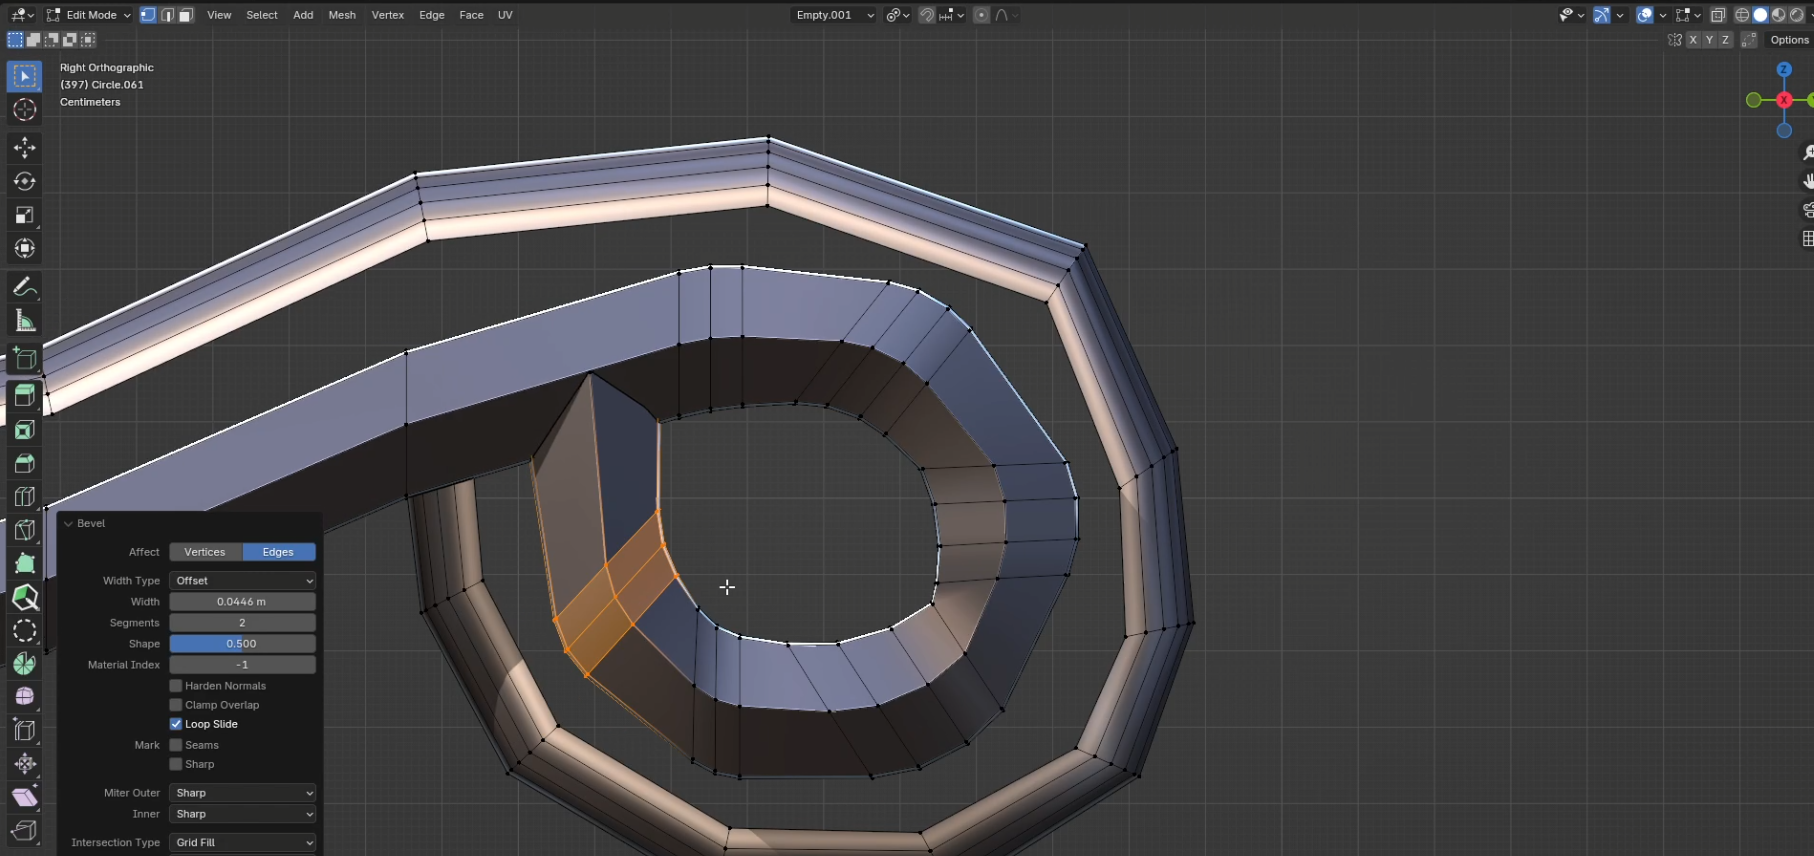
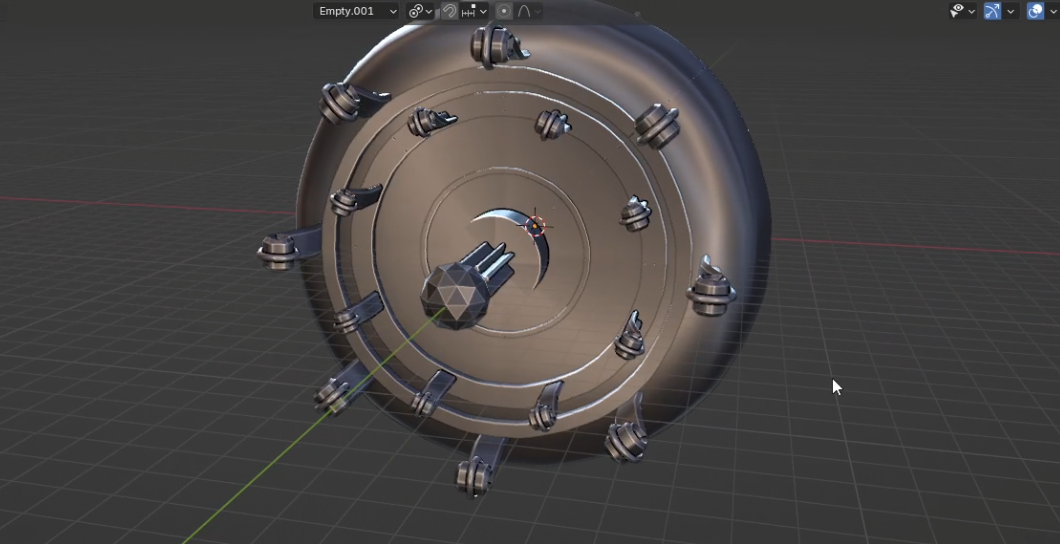
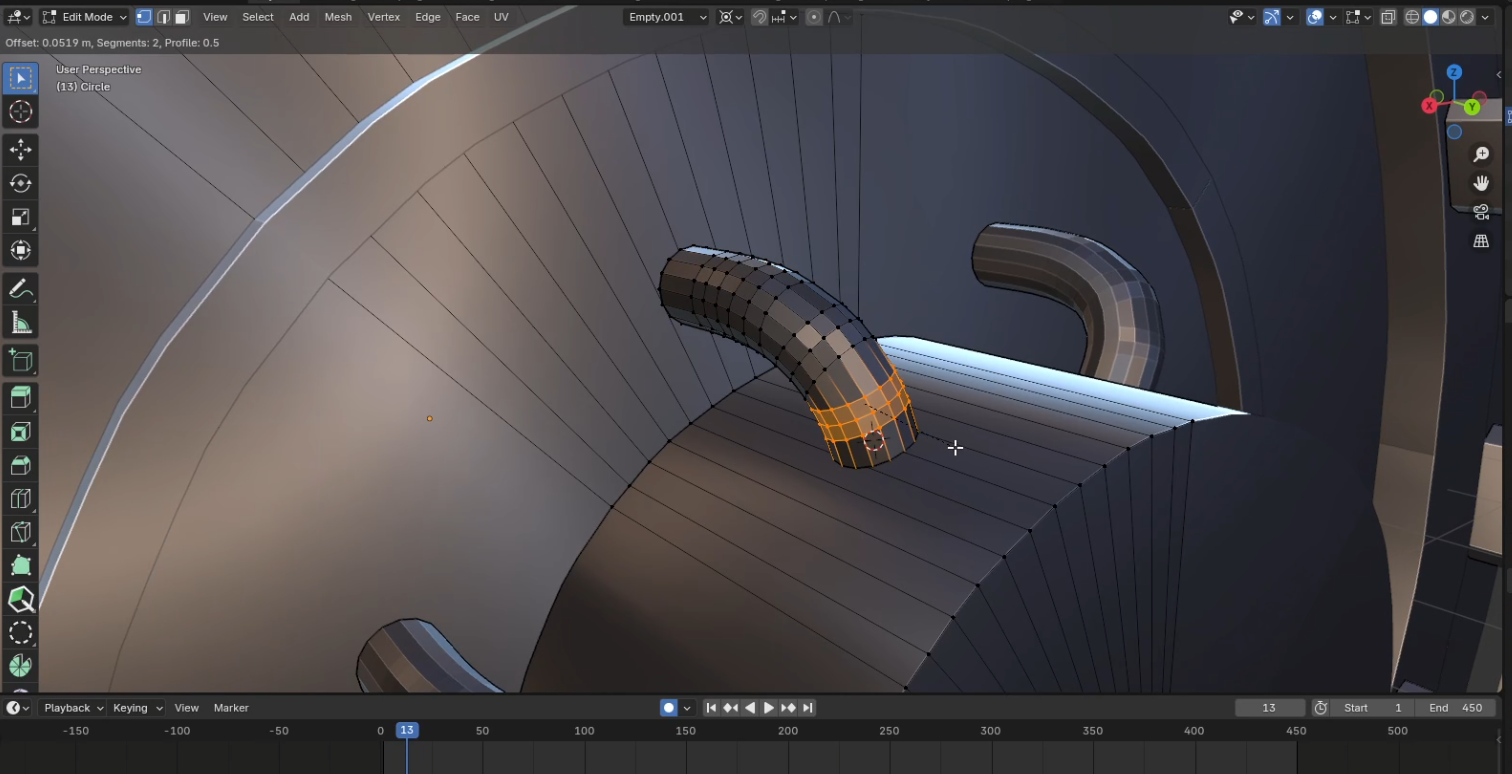
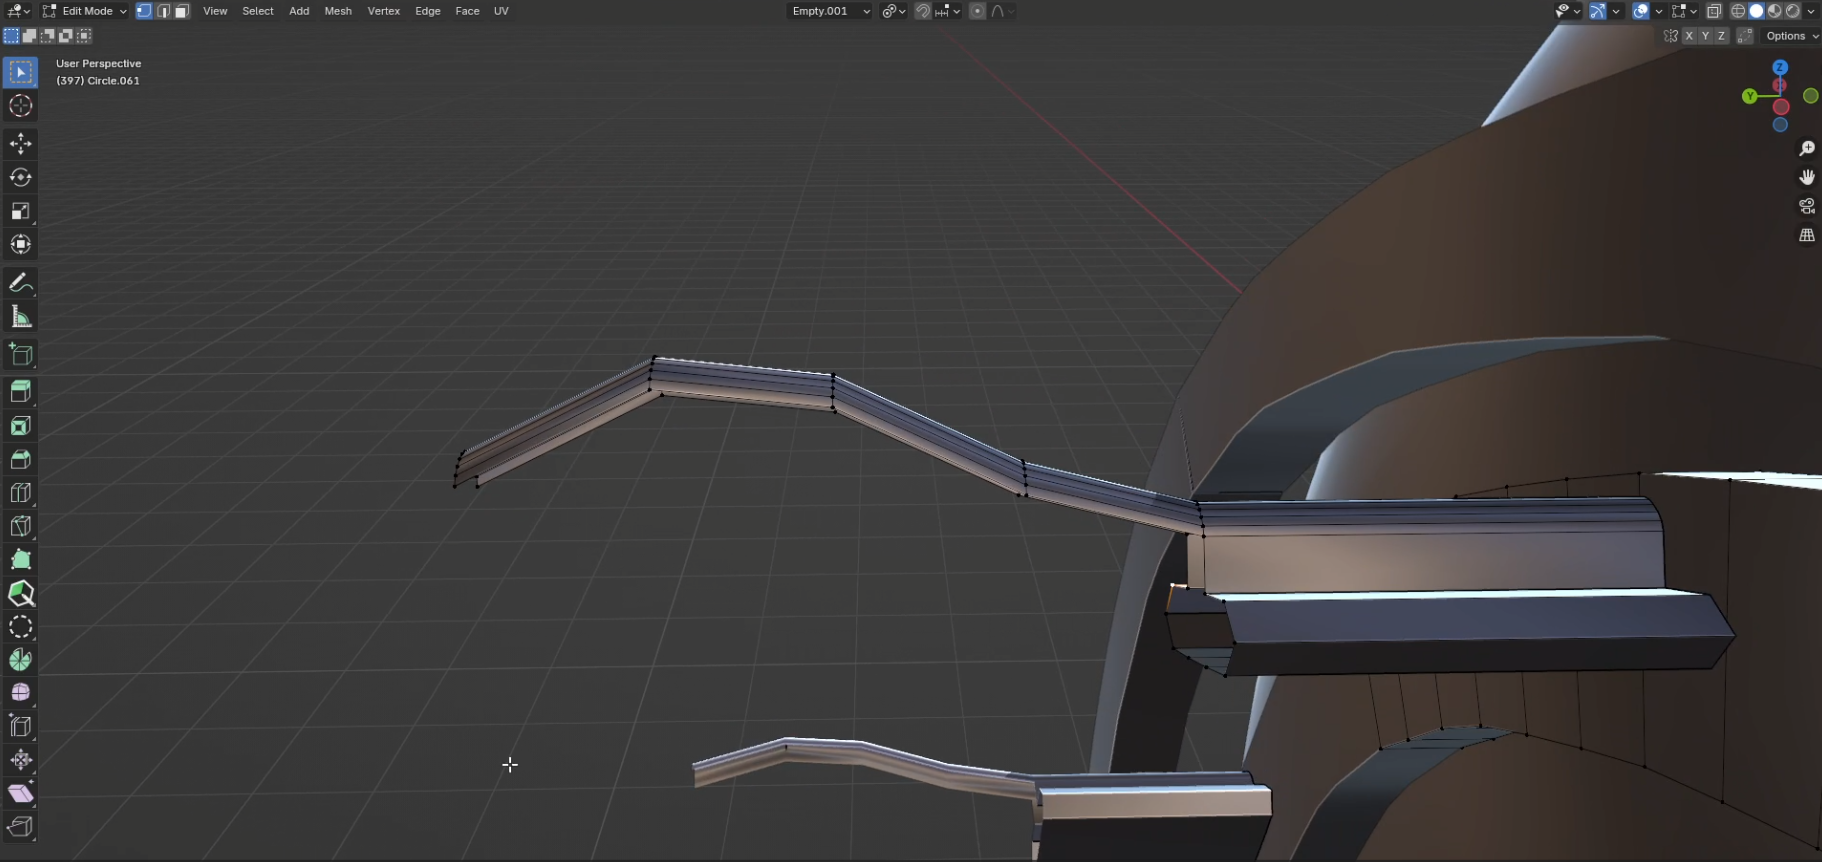
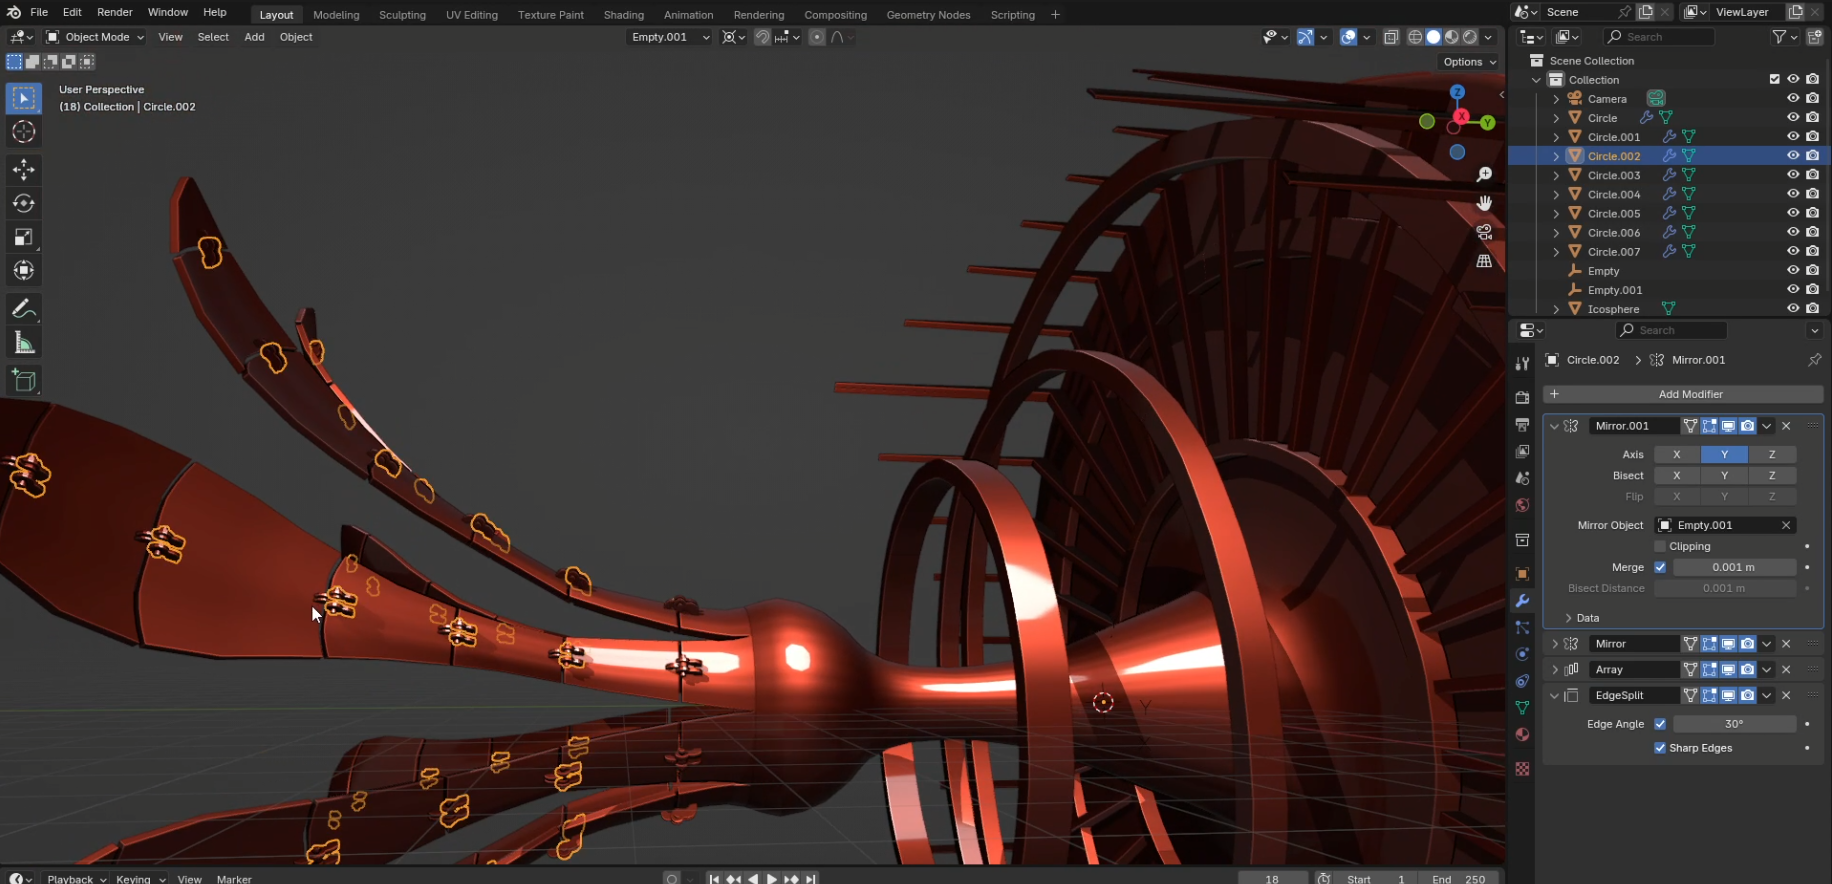
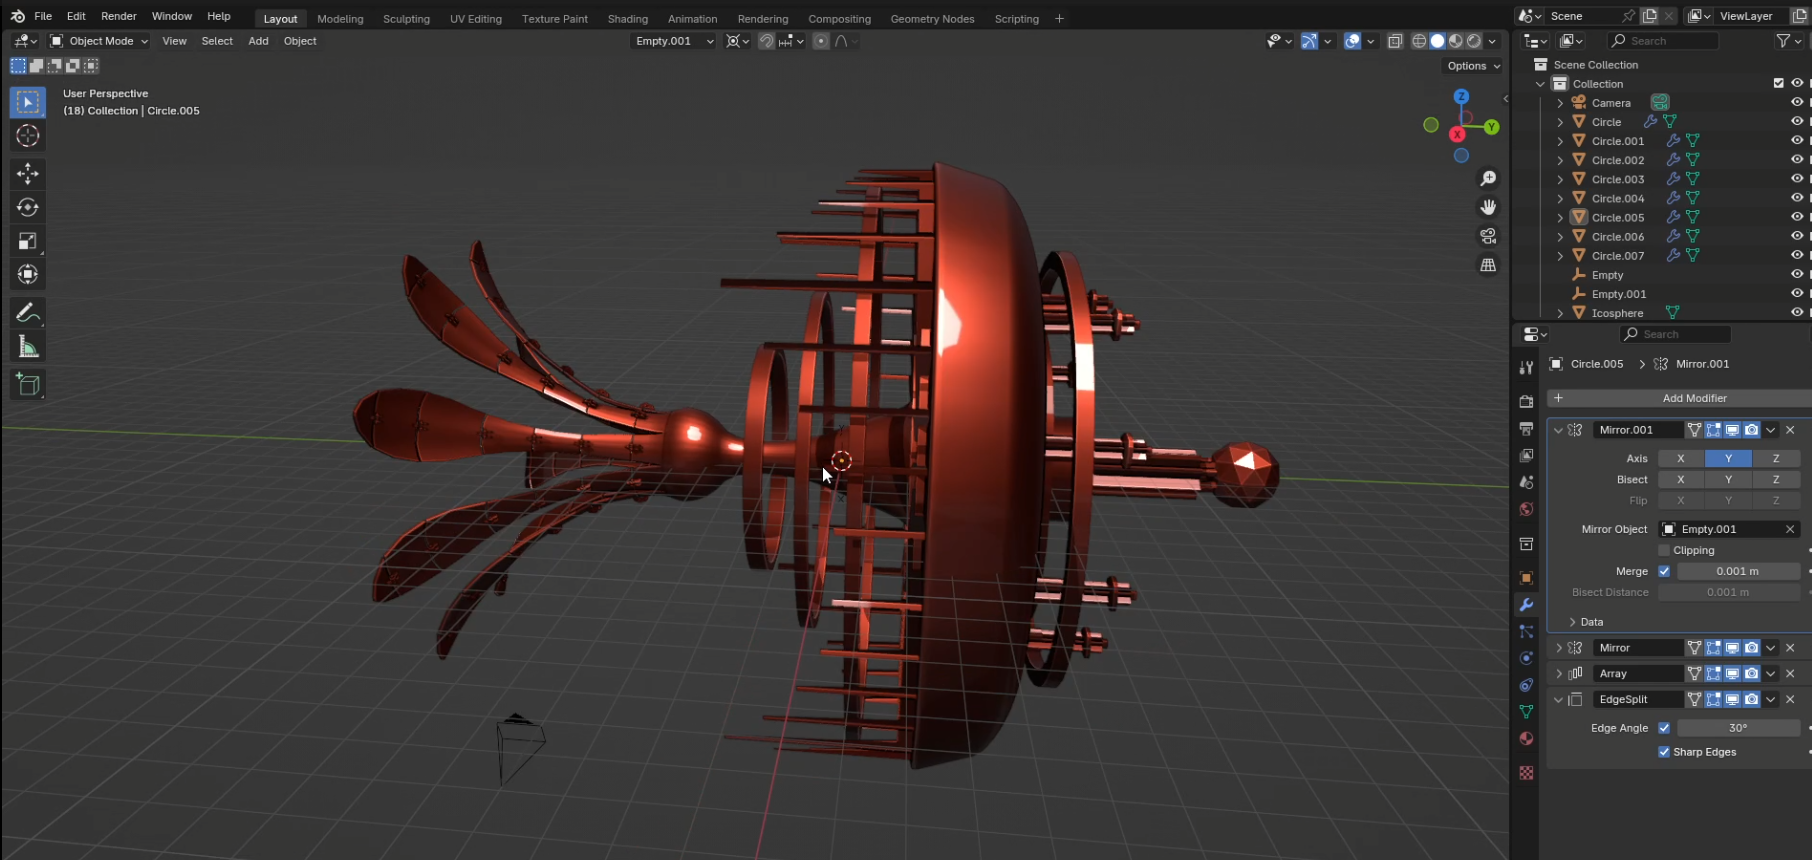
To model the ship, create a circle and an empty arrows object. Add an array modifier and a mirror modifier to the circle. Check object offset in the array modifier and increase it's count to 4, and for the object, select the empty. At this point, you'll see multiple circles forming a ring, but if you delete the parts of the original circle, you get a new circle that is mirrored 8 times radially. This will let you create the tentacles/petals and pylons all at once.
At this point, it's just a matter of extruding and proportional editing. Add more edge loops with control R and select one of the loops with alt+click the edge. Then experiment with different proportional editing falloff values to get the smooth warping ship body. When you scale be sure to set your transform pivot point to the origin and only scale along the two axis other than the one along the length of the ship. You can add pipes, and strange curling structures that all mirror radially along the ship. To move points along the axis of the radius, you'll want to add another empty and rotate it 22.5 degrees along the axis of the ship's length. Now, set your transform orientation to your new empty and when you press g and an axis (x, y, or z. for me it's z because I started out vertical), one of them will now be aligned with your ship's radial mirroring.
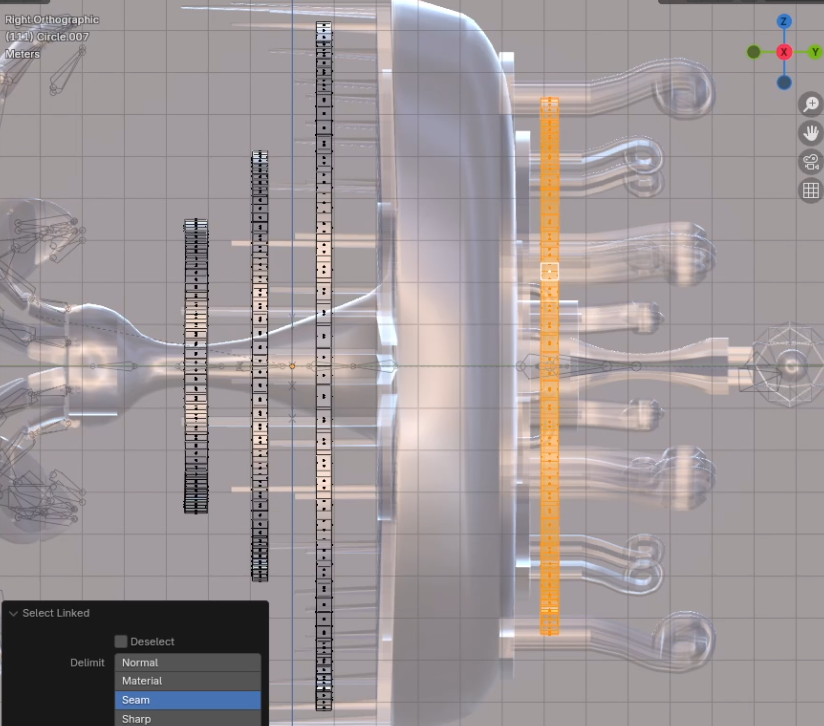
You can also separate some of the objects such as the tentacle/petal segments and floating rings by pressing control R to add edge loops and then deleting faces along an edge loop, then pressing 'L' to select attached, and finally separating from the original mesh by pressing 'P'. The separation is really helpful later when rigging the tentacles/petals since we'll be using a Blender addon to attach individual meshes to bones.
For the cage around the sphere at the front of the ship, create an icosphere, and add a wireframe modifier.
Also, for the tentacles/petals, it's easiest to work with a non-manifold or flat geometry and to add a solidify modifier to thicken it after modeling.
Texturing and Shading
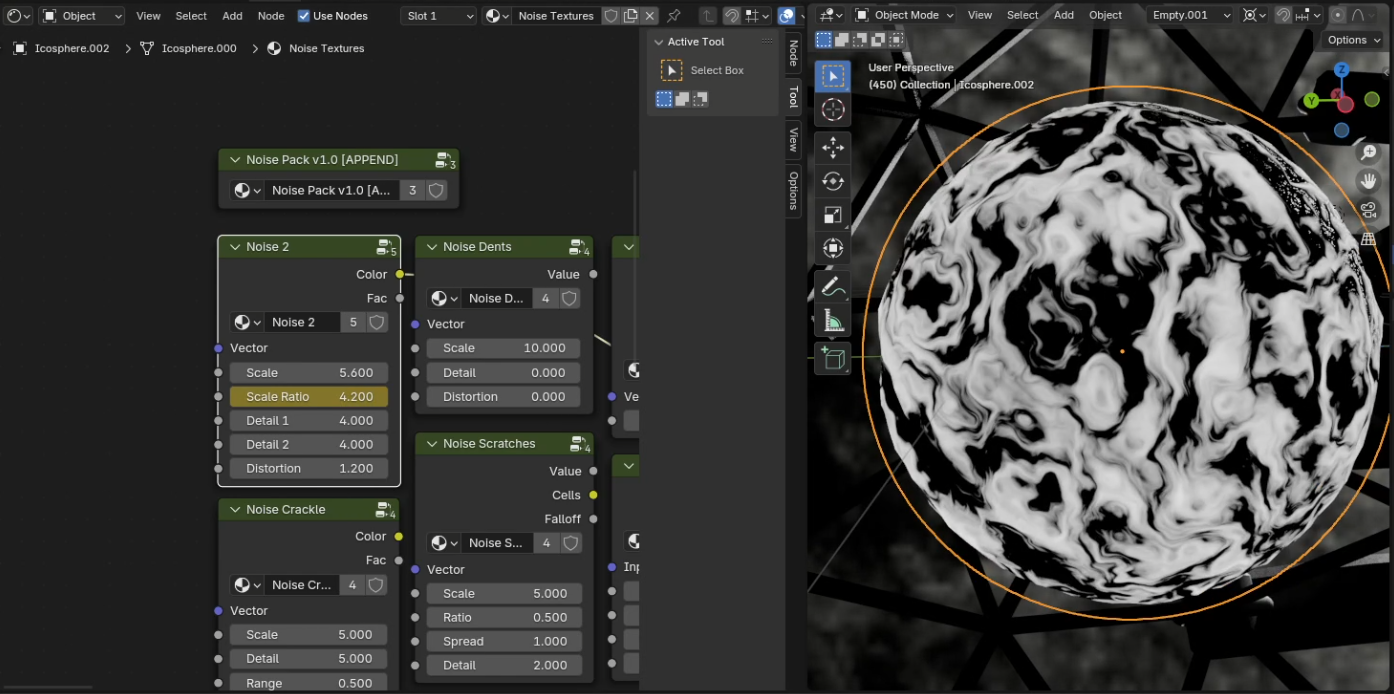
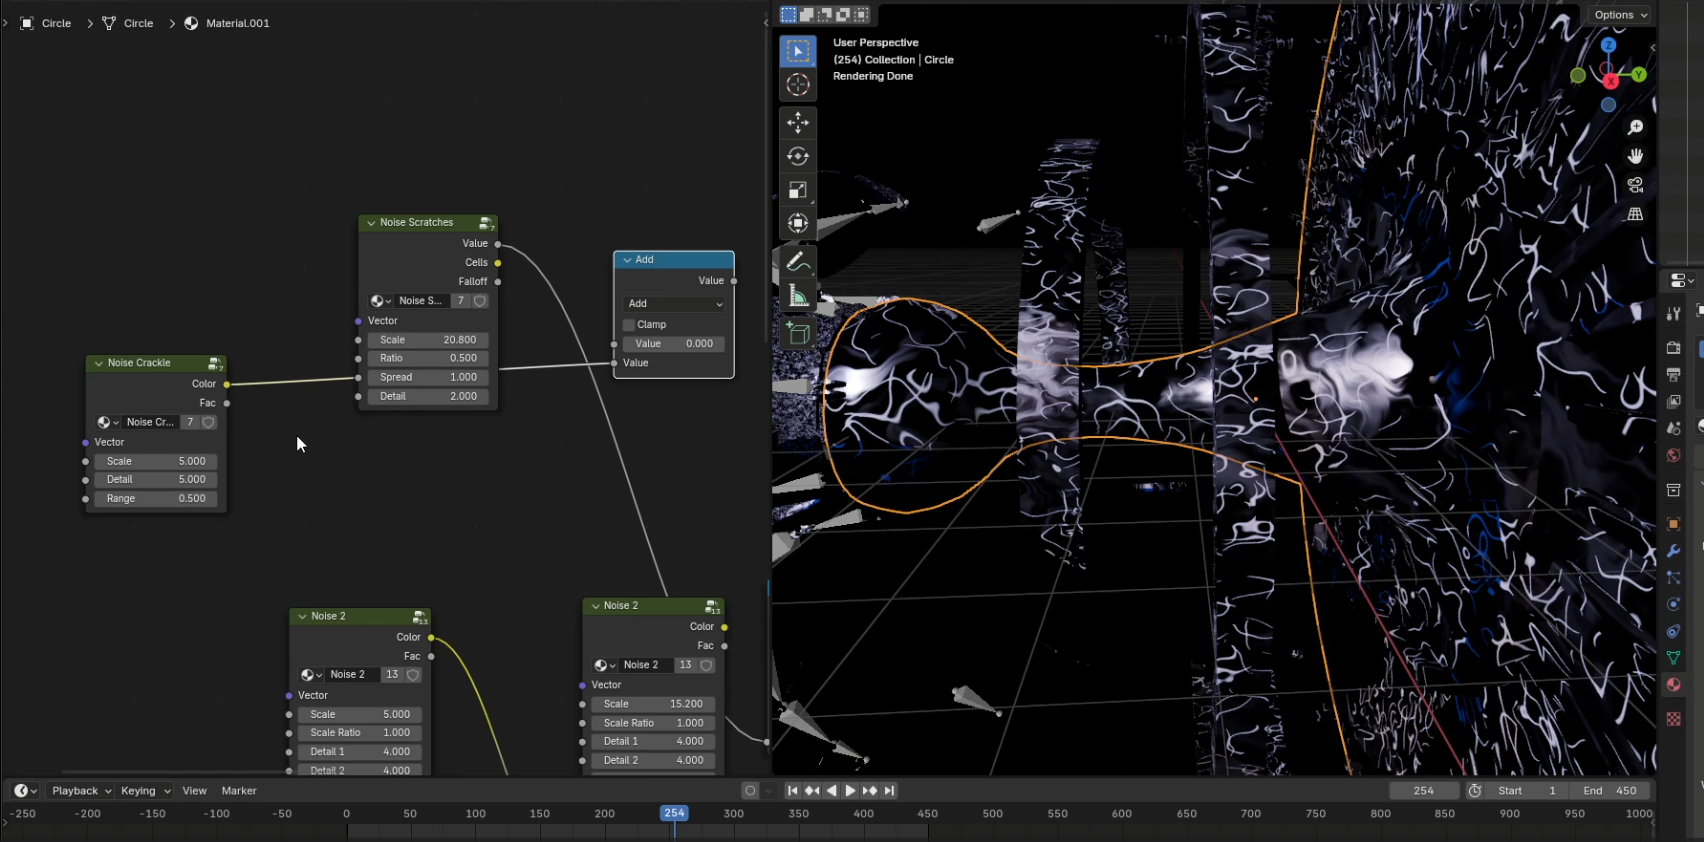
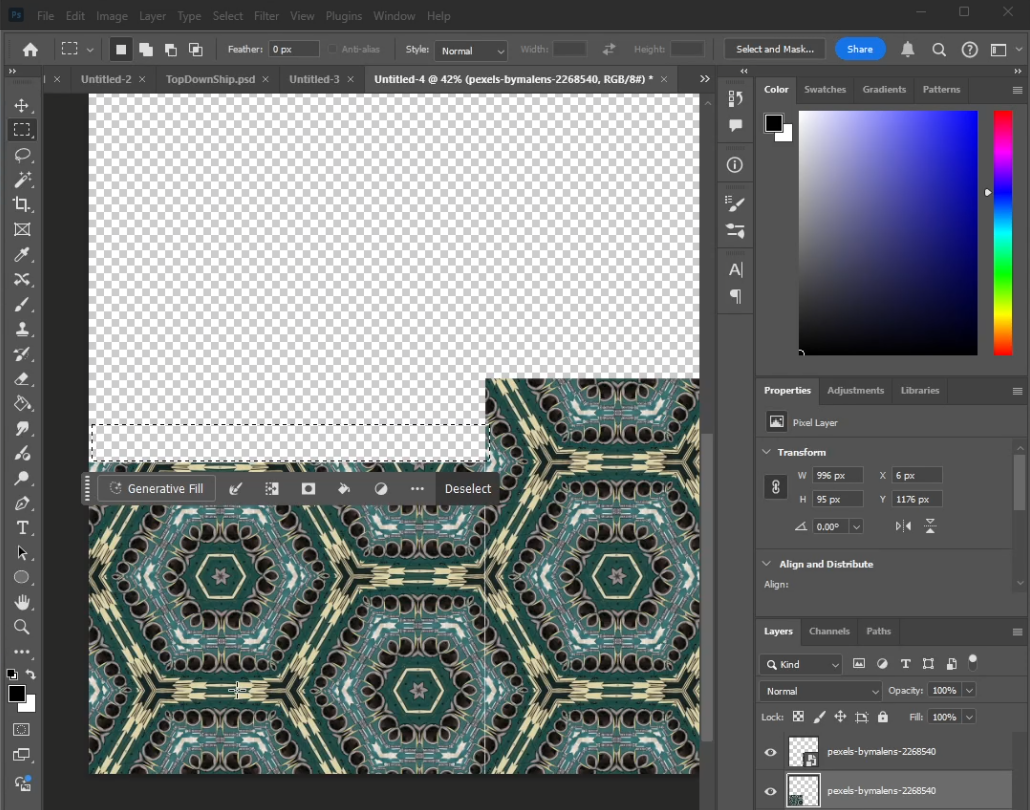
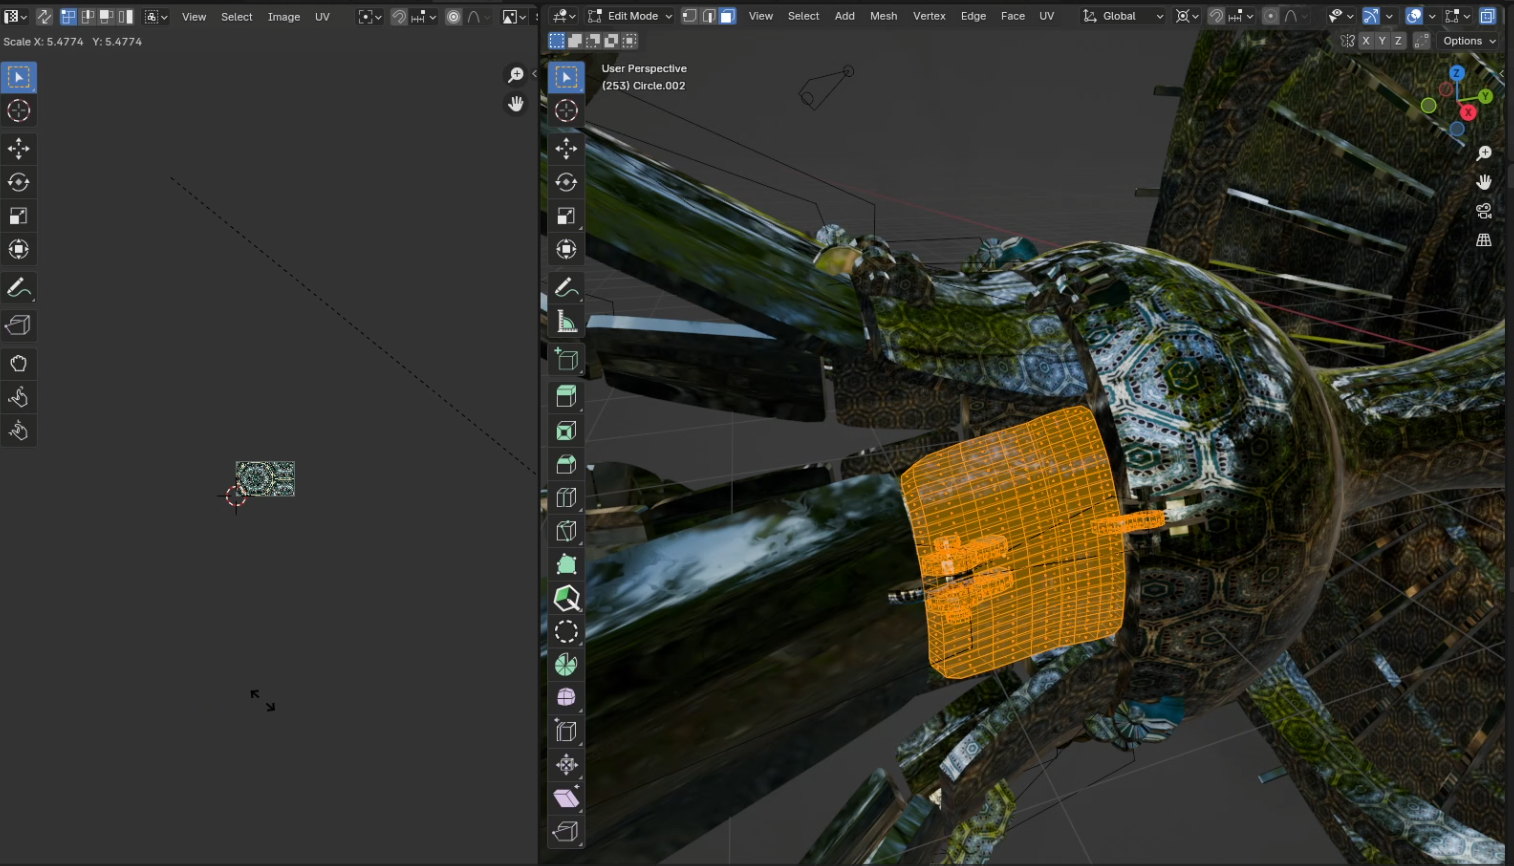
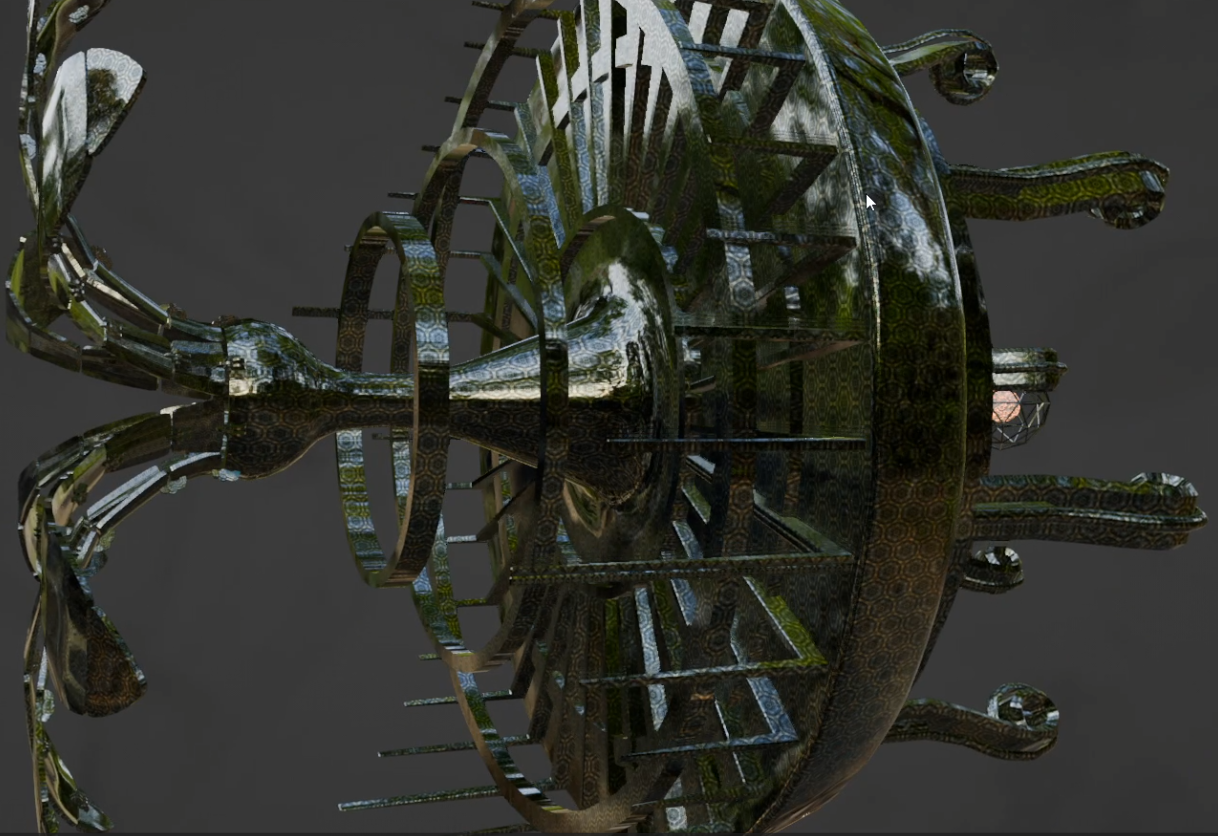
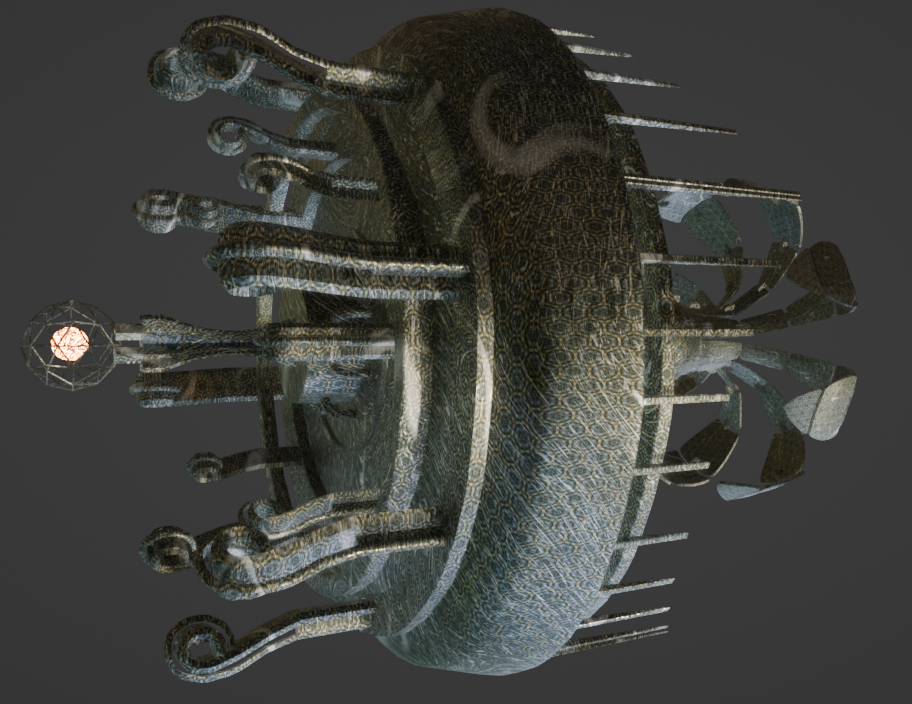
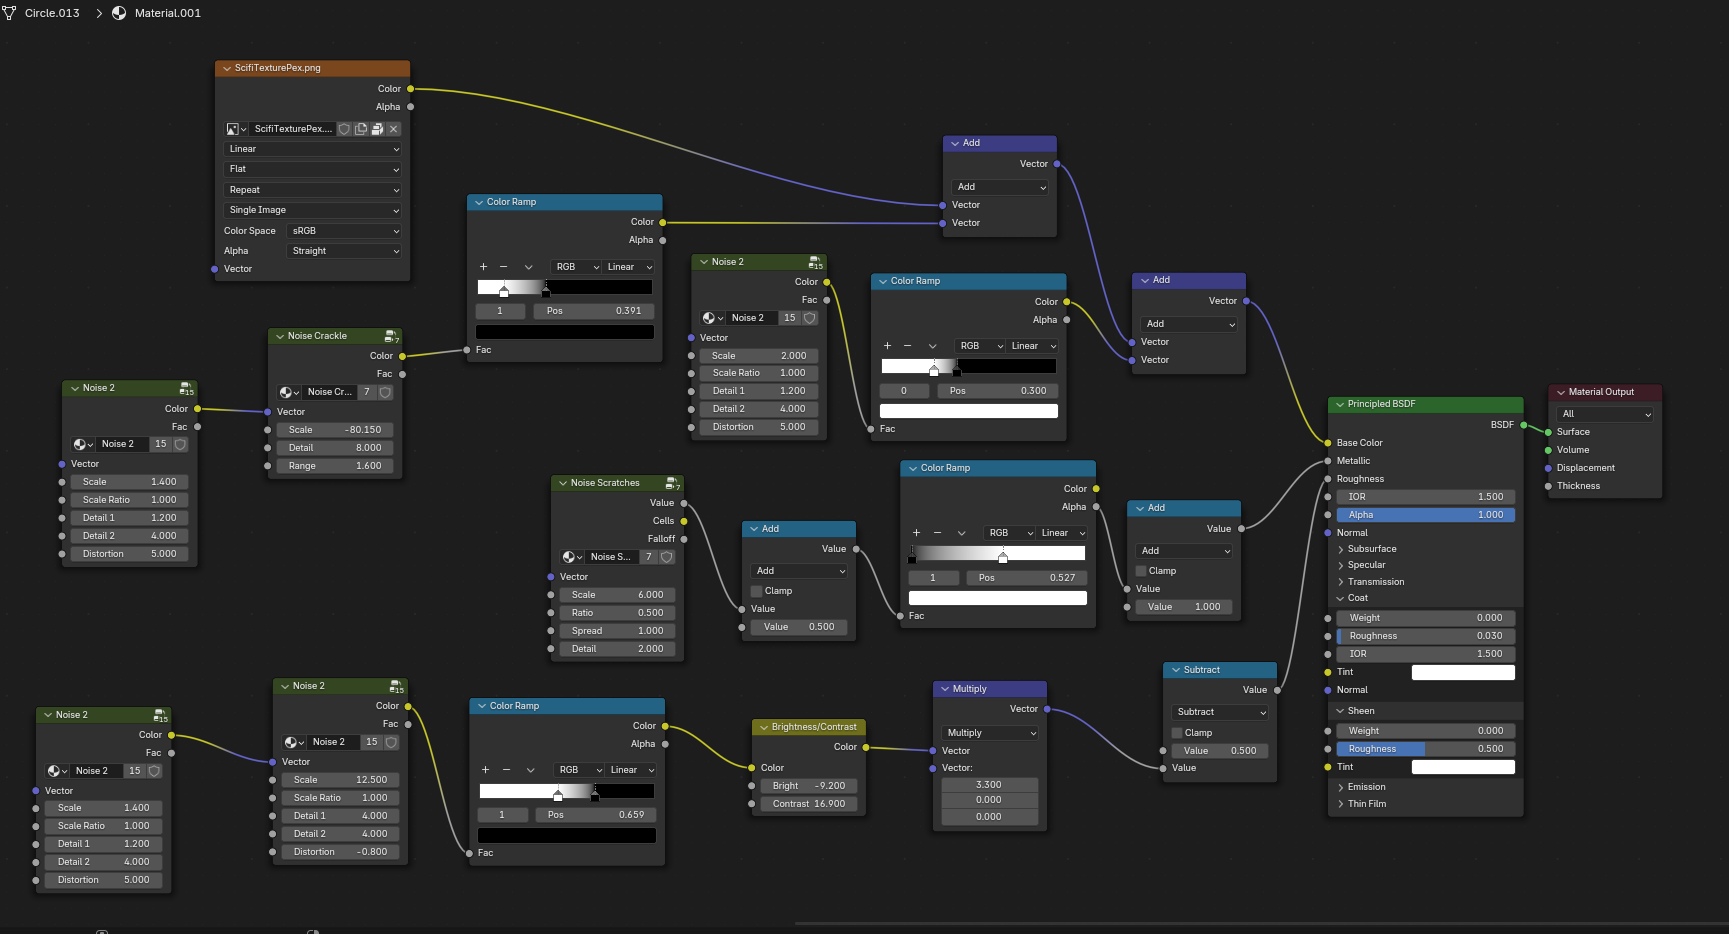
Create a material, then UV unwrap each object using cube projection and assign the material to them. Then open the material in the shader editor and apply this public domain texture I found on Pexels after cropping the image to make it tile. To add some interest, use these public domain parametrized noise textures. By plugging the output of one into the vector input of another, you can achieve an interesting, layered distortion effect that you can use for both the base color and the roughness.
Assign a second material to the sphere in the front of the ship and the engine area, then you can add a noise texture and change its output to emission. Animate the scale ratio of the noise node to simulate some kind of energy orb and a warp engine.
Rigging
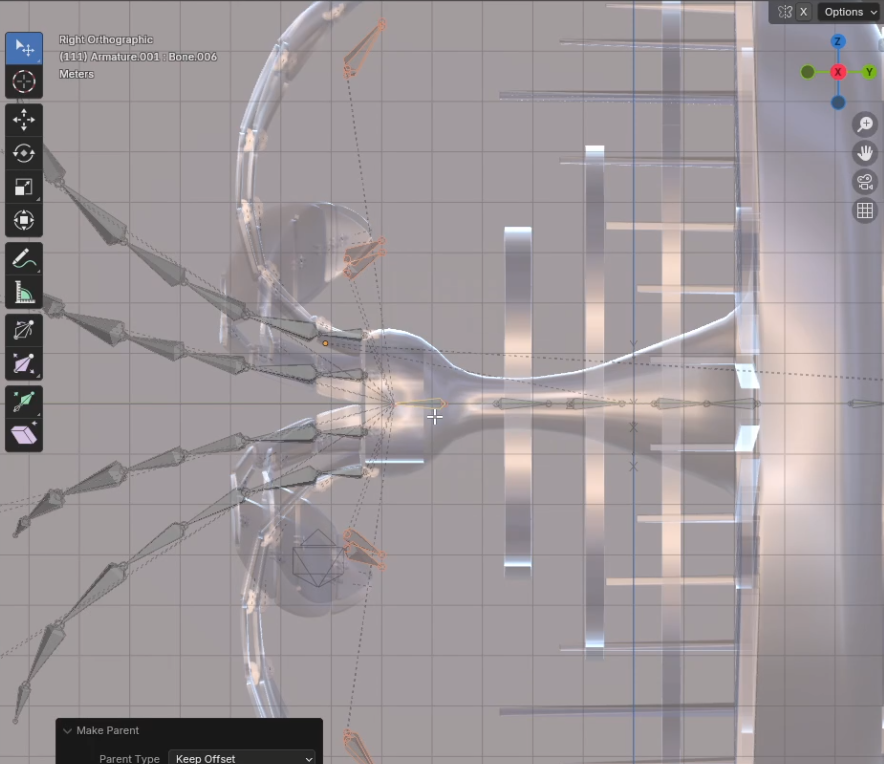
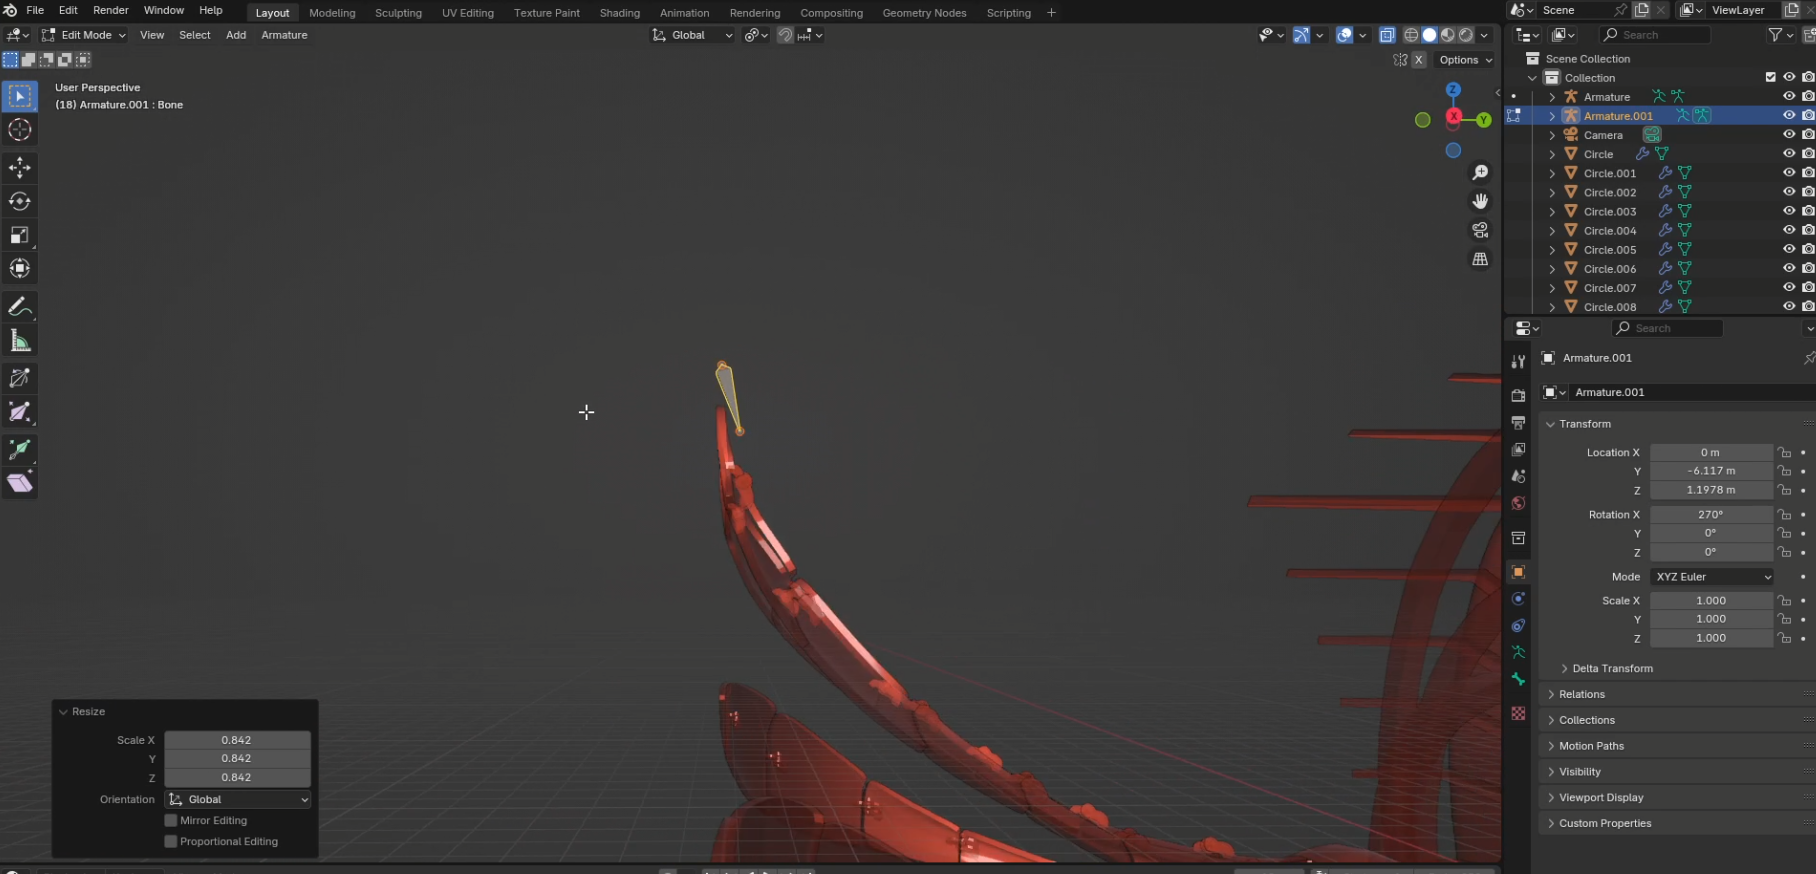
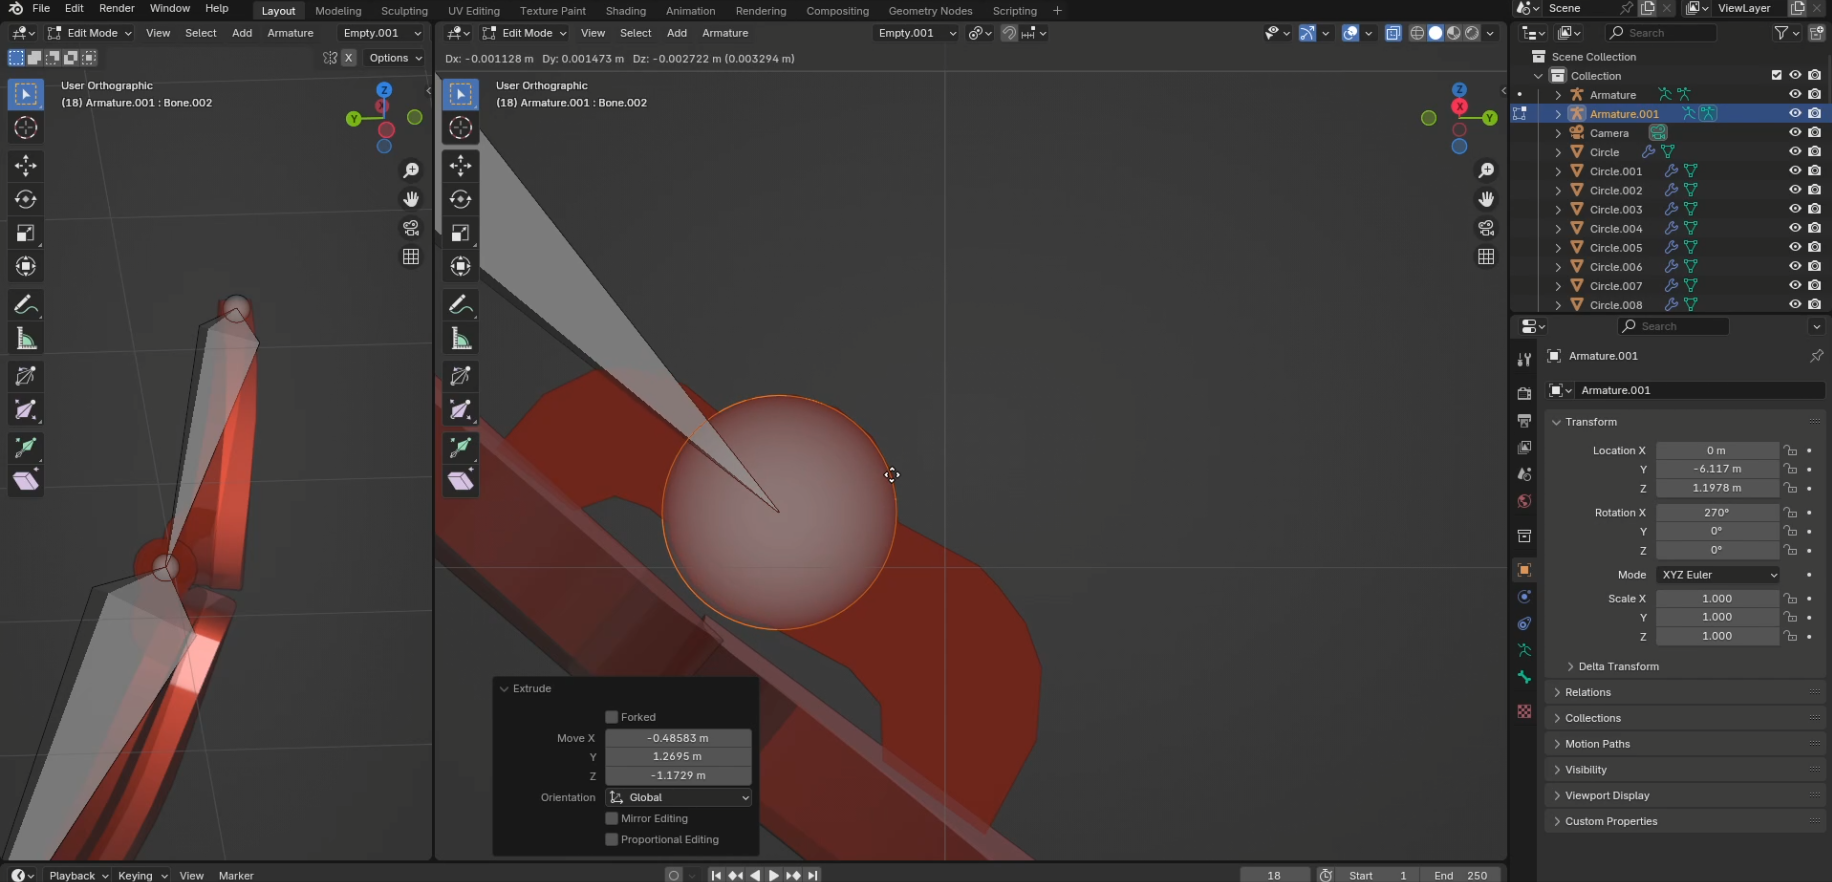
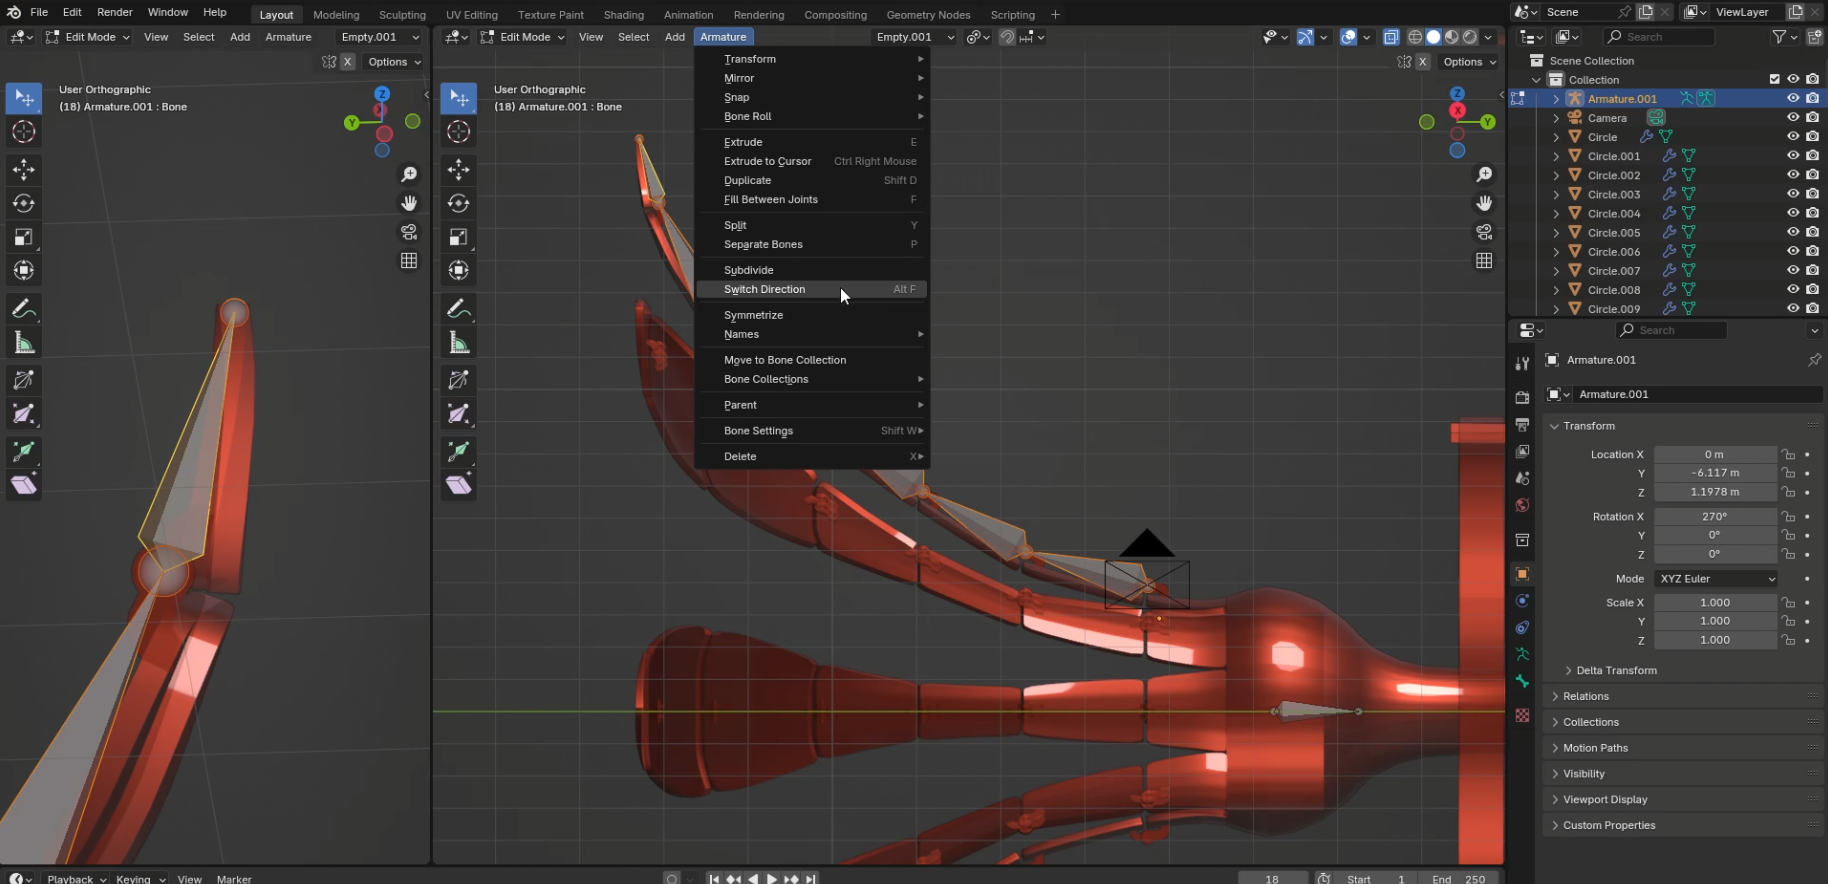
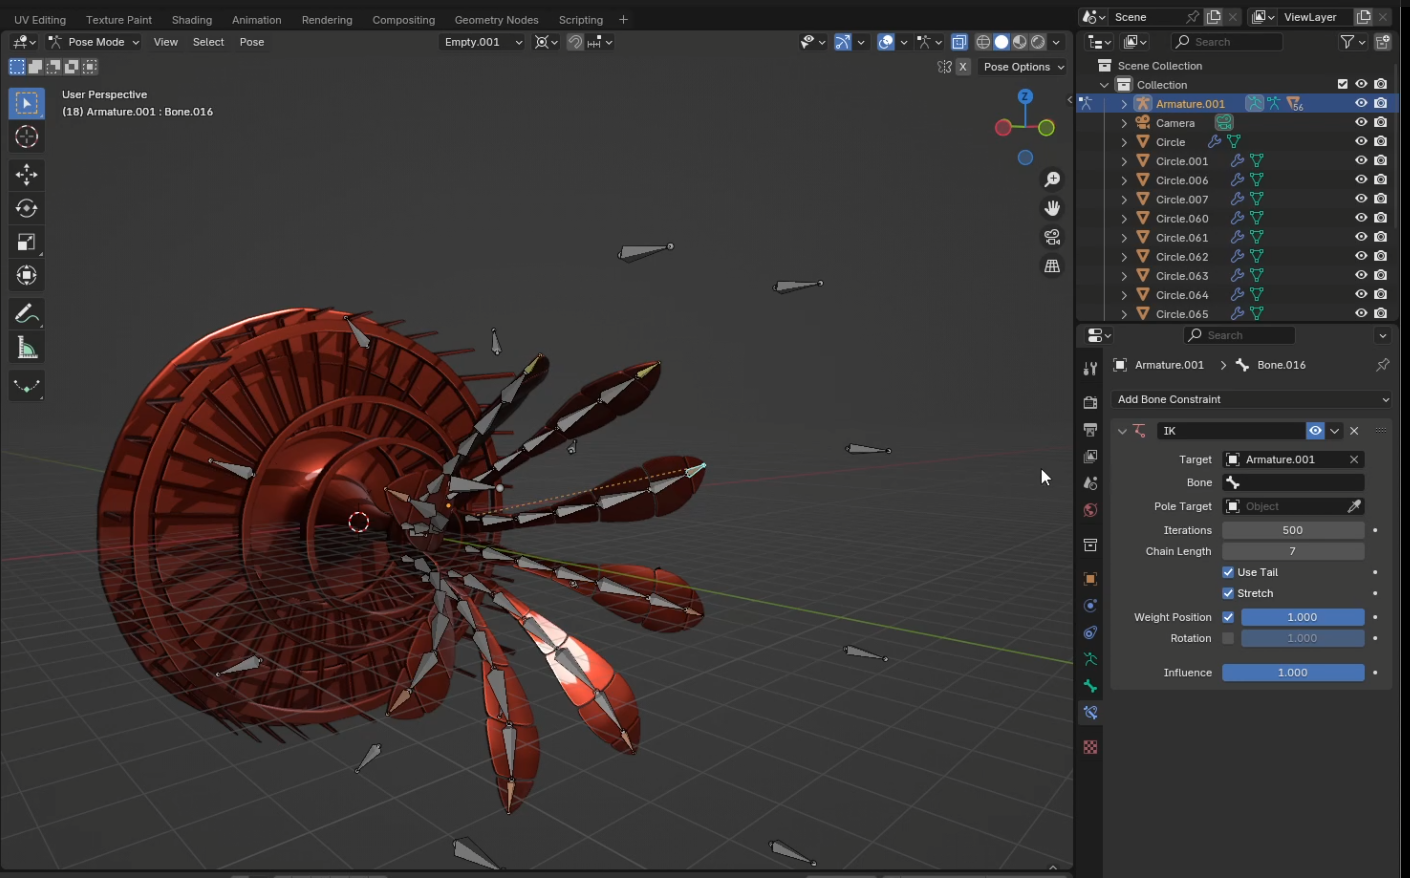
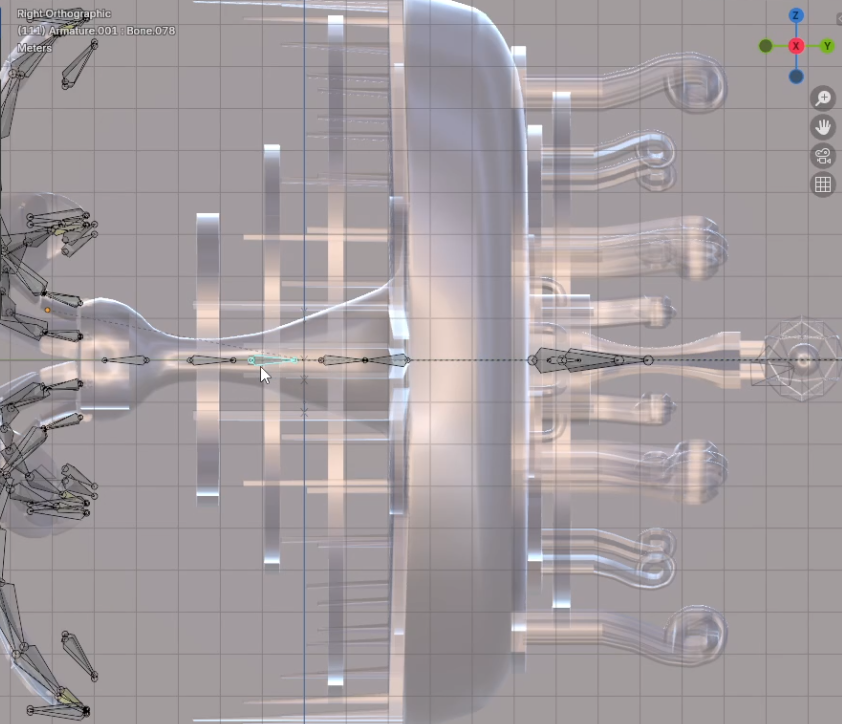
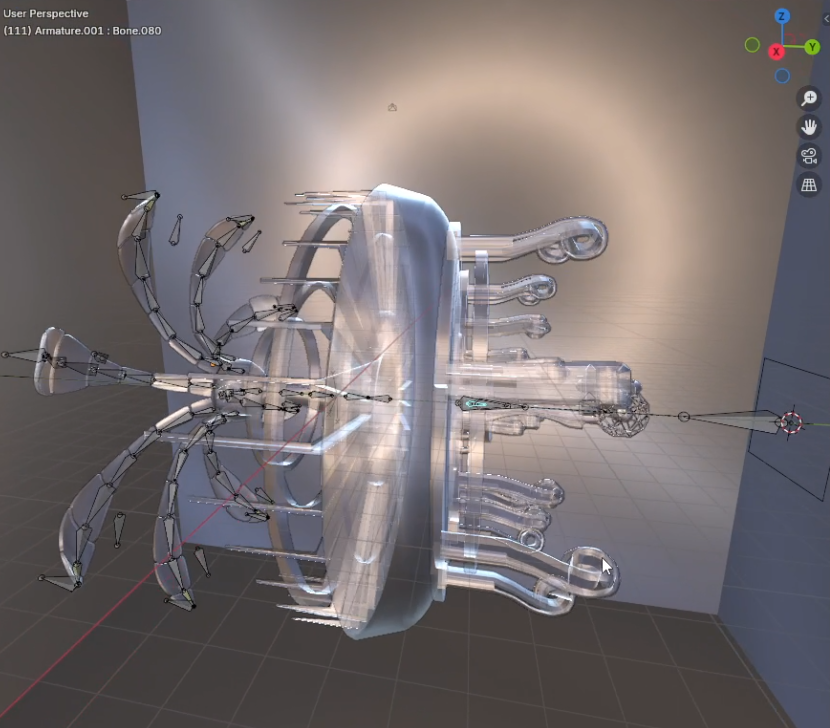
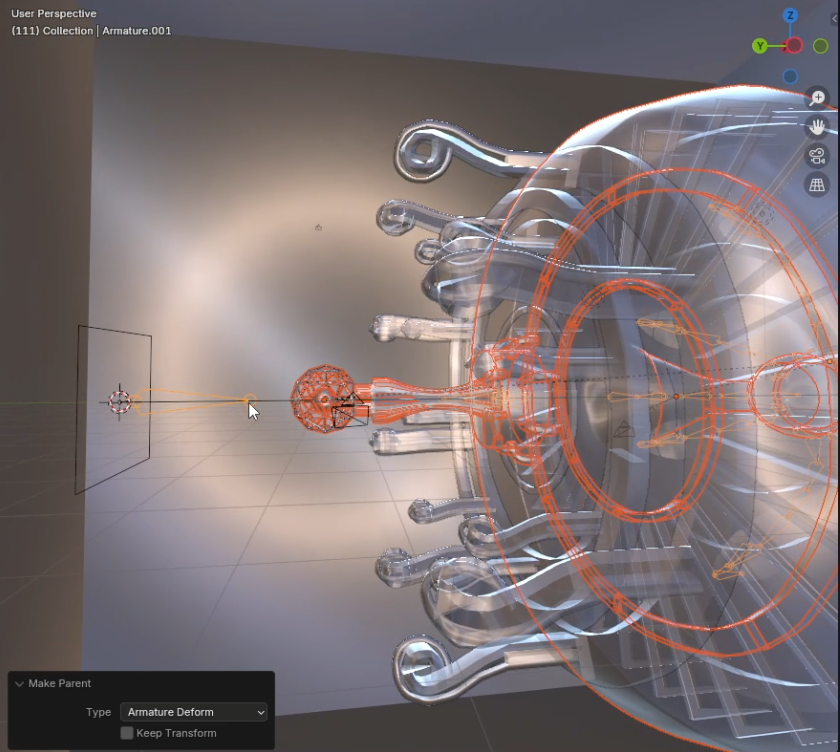
Create an armature and place the bone near the front of the ship. This will act as your root bone. Every other bone needs to be either connected to the root directly, or connected to chain that eventually connects to the root bone. This way, you can move the whole ship with one bone. Add a new bone to act as the subroot for the tentacles, and a new bone for the first segment of the tentacle. Note, up to this point, all of these should be parented FirstTentacleSegment>TentacleRoot>Root, and they should be disconnected. Now, start extruding the bone as many times as you have segments so that each segment has one. Make sure that the joint lines up with the bending apparatus for each segment. Also, make sure that the segments are individual objects with the part of the bending apparatus attached to it included in the object. You should be able to rotate one object with the pivot point at the joint and it should look right.
Now, once you have all the bones created, add one more bone that is disconnected from any of the others, and put it near the end of the chain. This will be the inverse kinematics control bone. This will make animating much easier later when we want to bring all the tentacles together without deformation. Add an inverse kinematics constraint while in pose mode to the last segment’s bone, and set the length to the number of segments in your model (mine is 7). Set the target to the armature, and the bone parameter to the kinematic control bone from earlier. Don’t worry about the pole target.
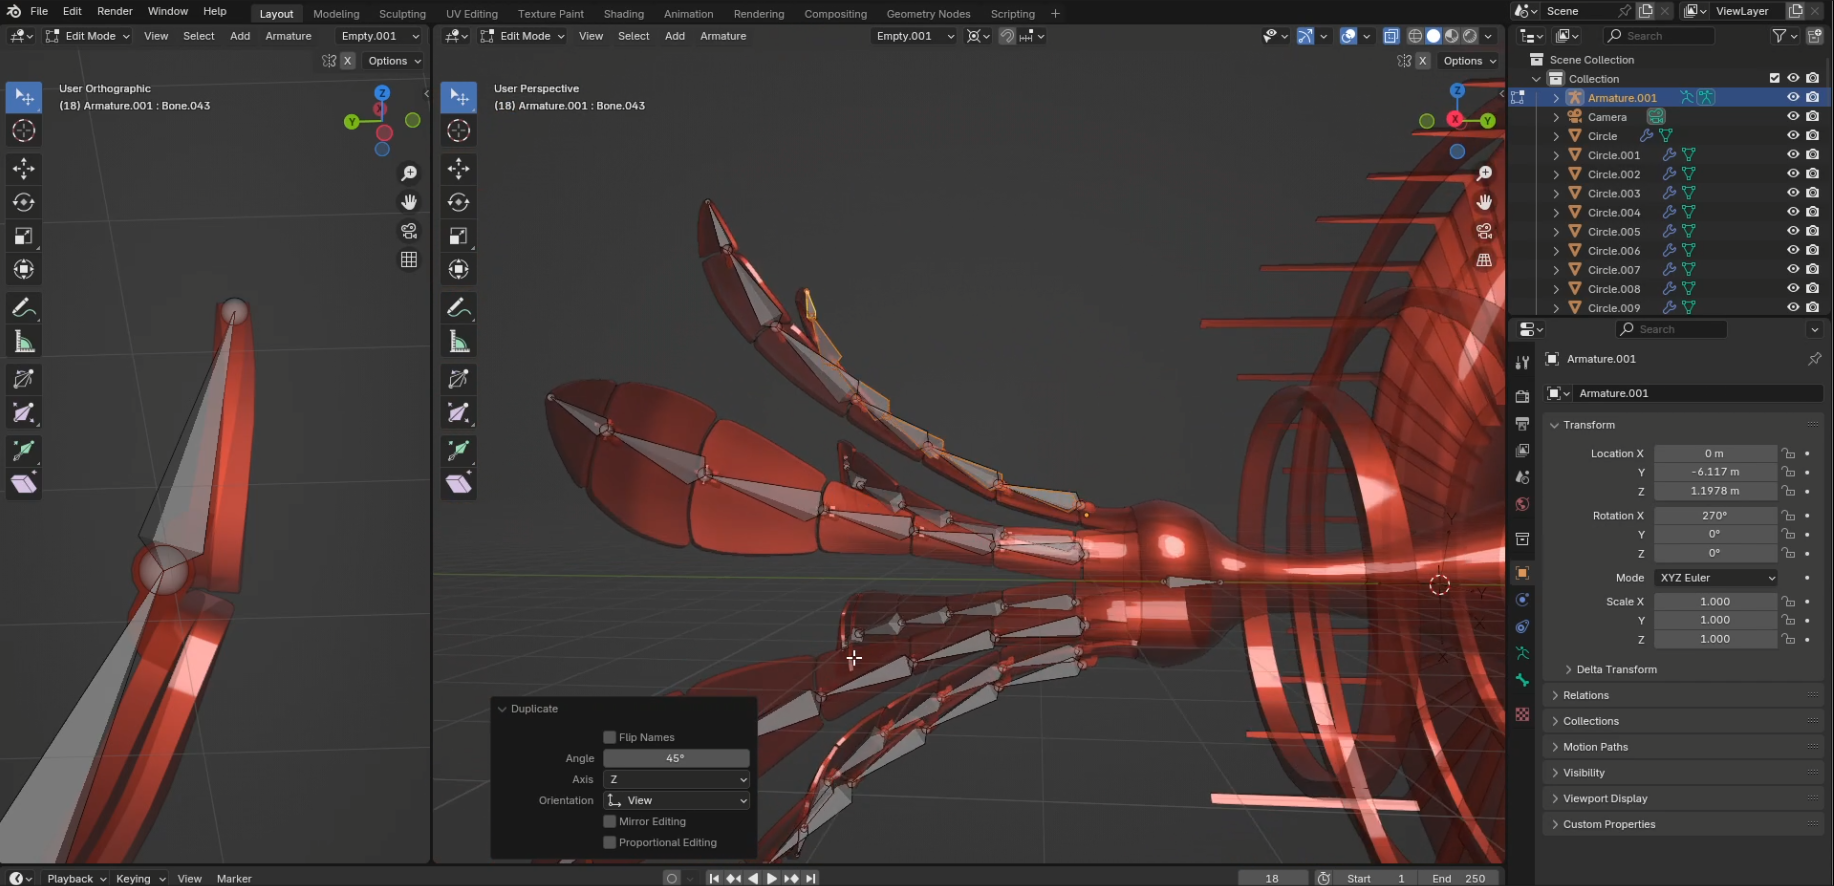
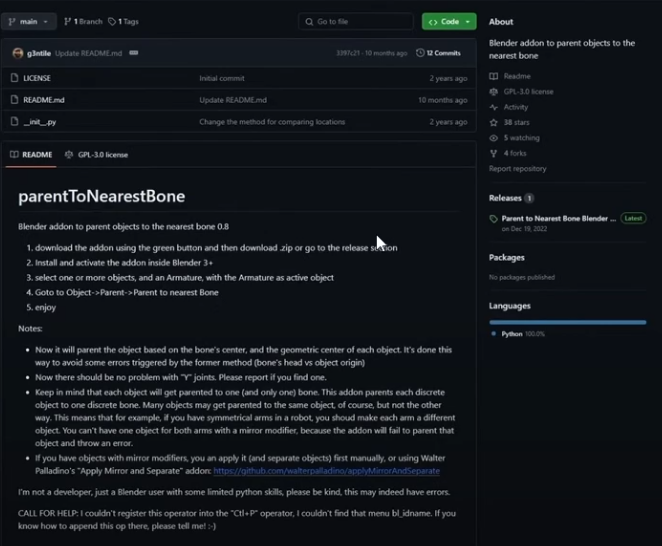
Now, when you grab the control bone and move it around, the whole tentacle should warp to reach that location. Next, go back into edit mode, select all the tentacle bones other than the tentacle root, but including the control bone, duplicate them, and type R, then the axis of your ship’s length (mine is Z when using the empty coordinate system), and type 45. Make sure the origin is set to world origin. It should snap the copy to the next tentacle. Then simply input shift-R 6 times and that will repeat the operation so you have all 8. Finally, download this free, opensource addon to assign each of the segments to the nearest bone. Before proceeding, it’s good to save your project in case it assigns to the wrong object so you can go back and tweak it if need be. After you’ve added the addon, go to object mode, and select all the segments and lastly the armature. Then go to object->parent->parentToNearestBone. This should attach each segment to the bone associated with it. For it to work, the origin of each object needs to be close to the bone you want it to attach to. The easiest way to do this is to right click on the object and press setOrigin>originToGeometry. The last things to rig are the rotating grill, moving rings, and the rotating pylons. I did this by just parenting these objects to the armature, adding new bones for them, and going into the data->Vertex Groups settings in the details pannel and adding a group with the exact name of the corresponding bone, then selecting all the geometry in edit mode and adding it to the vertex group. Whew! Now, you’re finally done rigging!
Animation
When animating, we want to keep two things in mind, style and scale.
For style, I went with a very smooth motion with no jittering or stutters. And the scale of the ship is supposed to be massive, which means it has a lot of mass, which means it has a lot of inertia, which means it moves slowly.
Since the style is also informed by scifi-meaning there’s some level of believability, I wanted it to look plausible. So I wanted the tentacles to look like they were propelling it through the nebula by whooshing back in an open way and curling up closer together when drawing back in. I also sped up the ship each time the tentacles whooshed back.
The rings propel back as well to give it a sense of impact, and the pylons and scaffolding rotate because it just looks cool. When keyframing the rotations, be sure to use linear interpolation so it doesn’t slow down near the beginning and end of the animation.
For the tentacles, choose a frame to be fully expanded back, and another frame for them to be fully retracted back in keeping the framerate in mind, then to pose using the rig, just select all the IK controller bones and move them along the axis of the ship’s length. To bring the tentacles in or away from eachother, scale the controllers with the scaling rule “Median point”. Only their location is driving geometry, so it doesn’t matter that they change size as you do this.
Refine the animation in the curves editor by changing interpolations, tracking the smoothness of the curves, and adding additional keyframes as necessary. Generally, do what you can with curves since too many keyframes increase the complexity of your animation and make it harder to retime.
To get the ship to look like it jumps to warp-speed, create the final pose for it to jump, then add a null object at the back of the ship. Parent the ship’s armature to the null object and animate the scale of the null object so it stretches off into the distance and animate it’s location to shoot off a moment later. Again, you can change the curves and interpolation to achieve different effects. Mine was linearly timed.
Lastly, add and animate the camera to orbit around the ship and direct its angle to focus on different aspects of it throughout the animation to showcase what you made! I found that a sort of “over the shoulder” angle worked best for it flying away at the end, so put it behind and to the side.
The Nebula
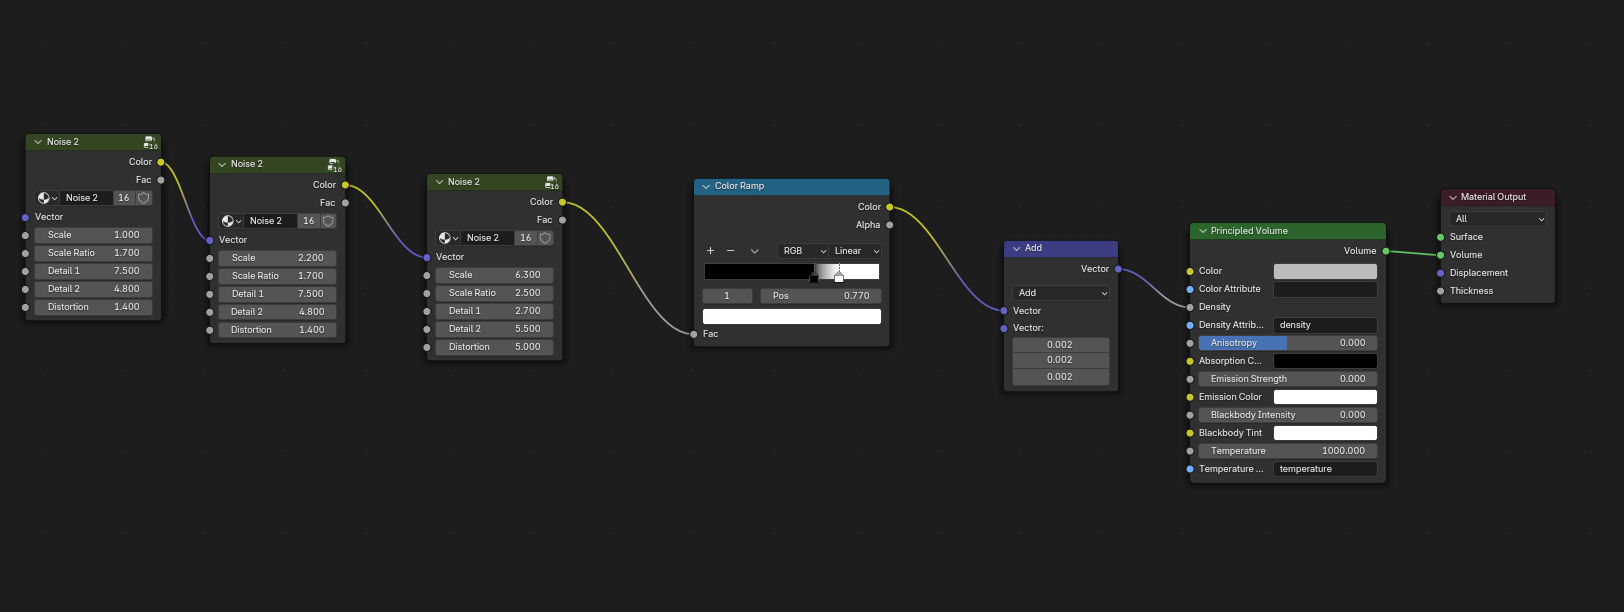
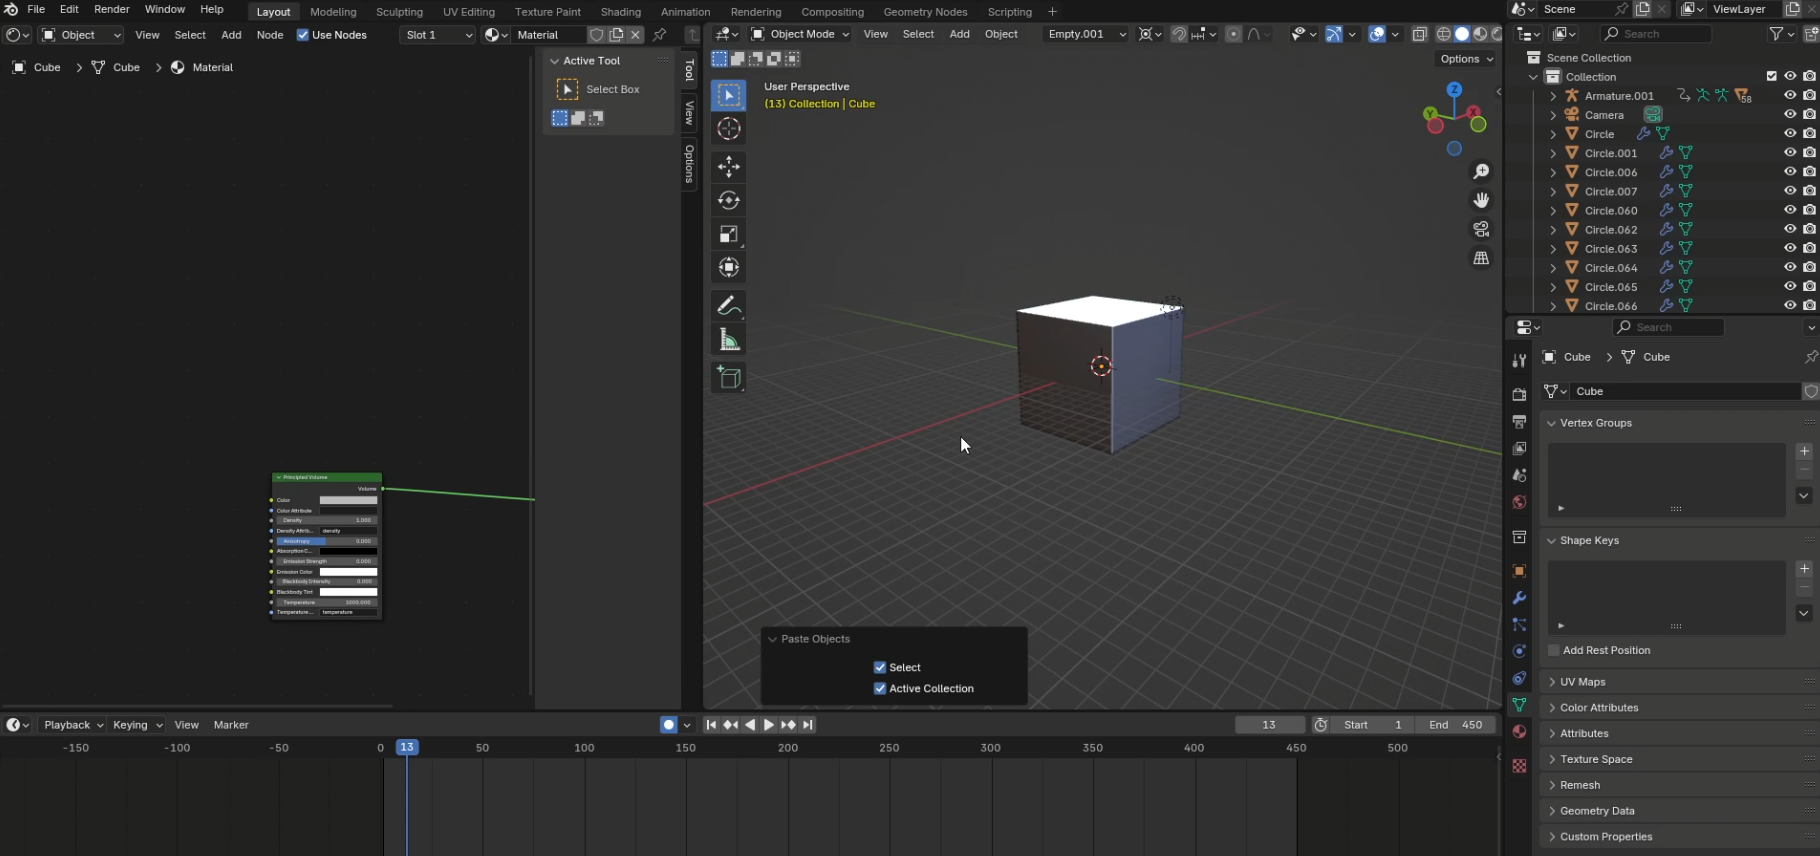
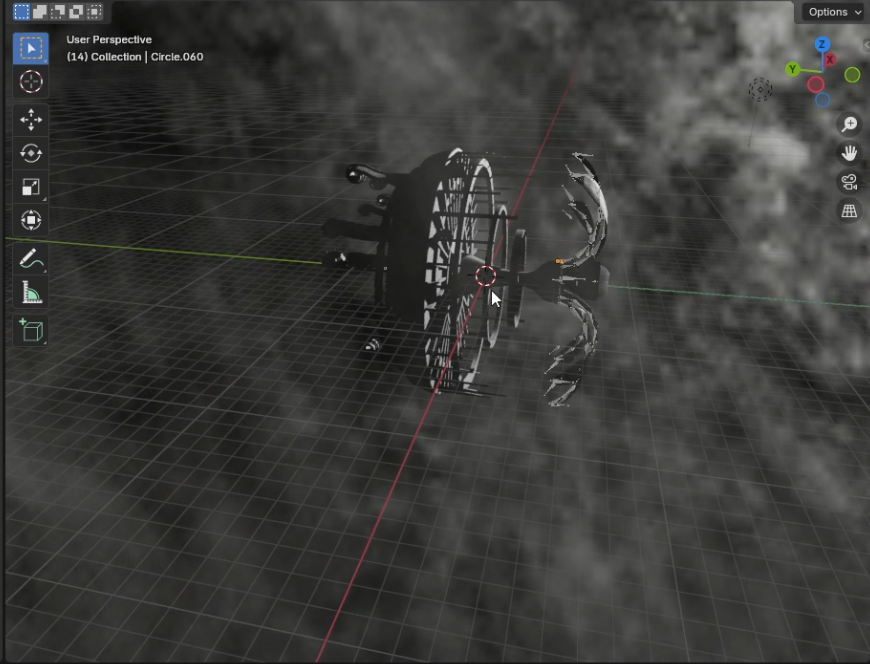
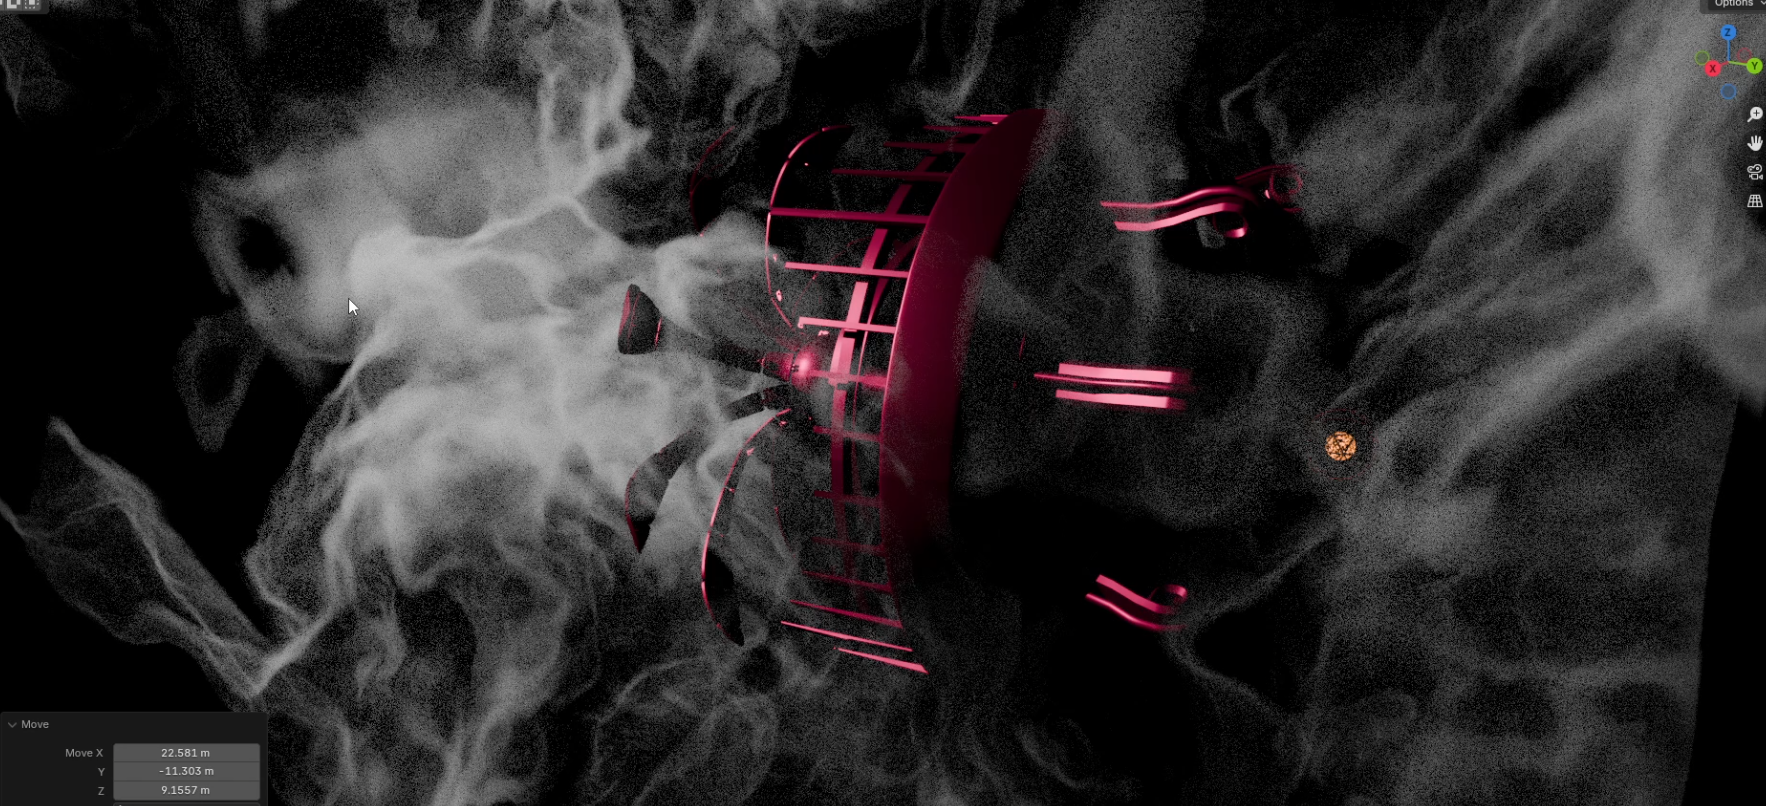
Create the nebula by adding a cube to the scene and giving it a noisy volumetric shader. You can change the cube’s viewport settings so it doesn’t obscure your scene by going to object settings->viewportDisplay->display as and set it to bounds. Next, map a new material to the box’s material->volume setting. Give it a neutral color so you can color it later using the lights. Use these public domain parametrized noise textures and use a color ramp to add contrast resulting in a crisper nebula. By chaining the noise textures through the vector input, you can get a very distorted, nebula. Finally, use an “add” node to give it a little bit of fog to add depth to the scene.
Background
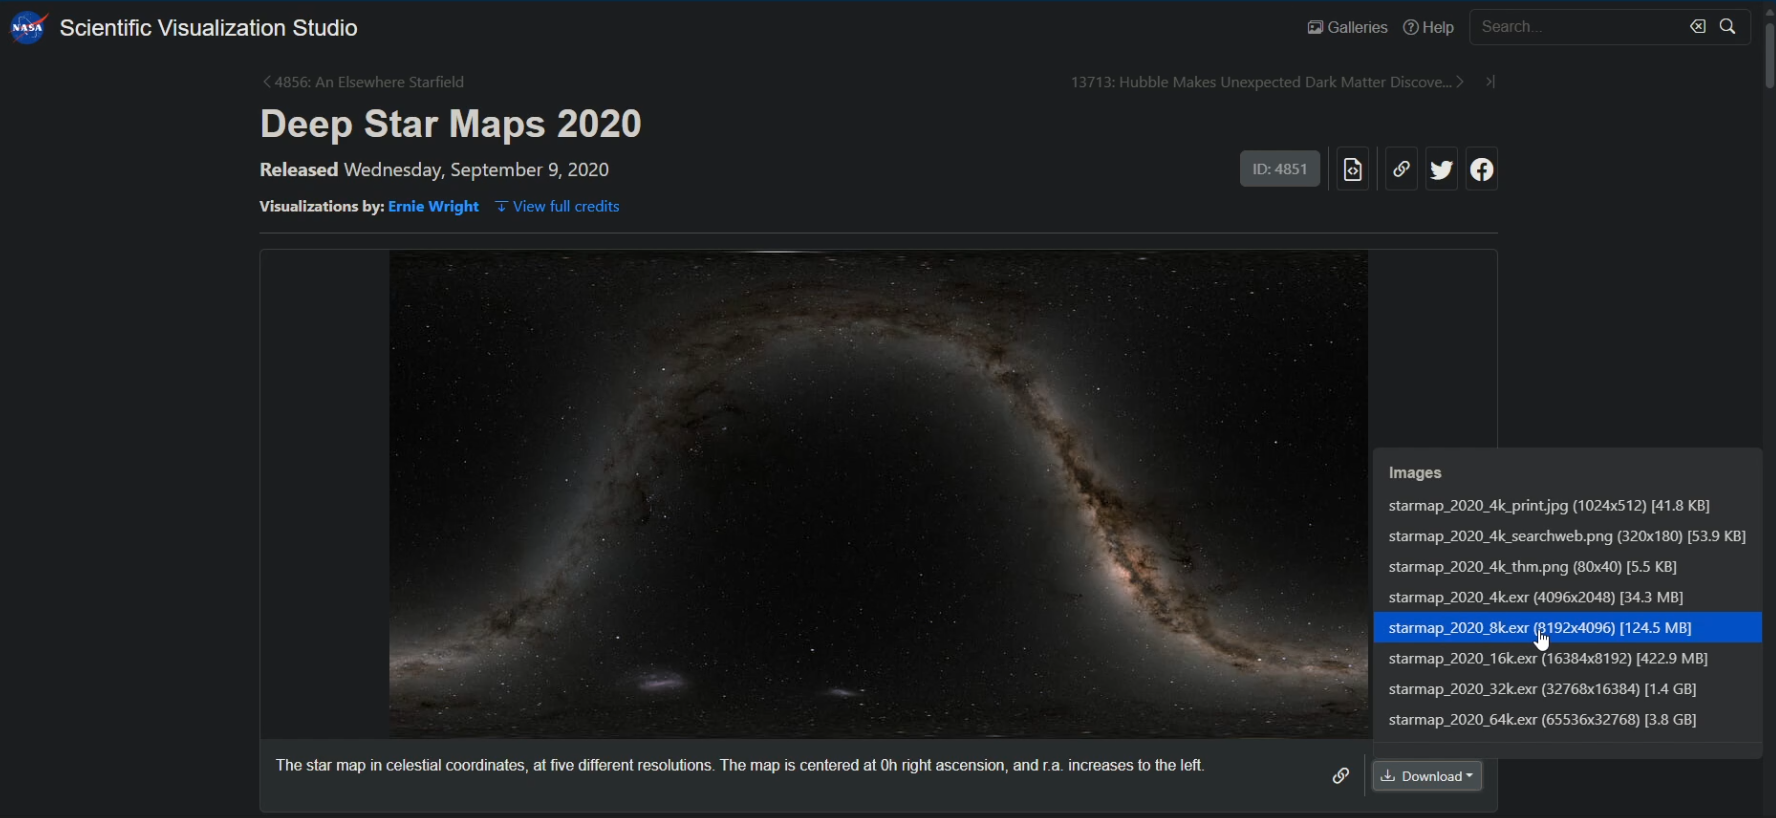
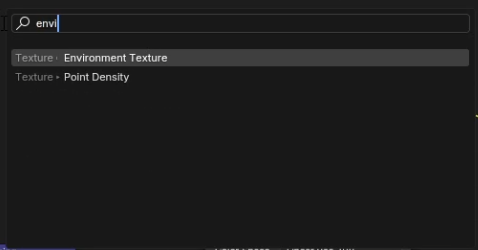
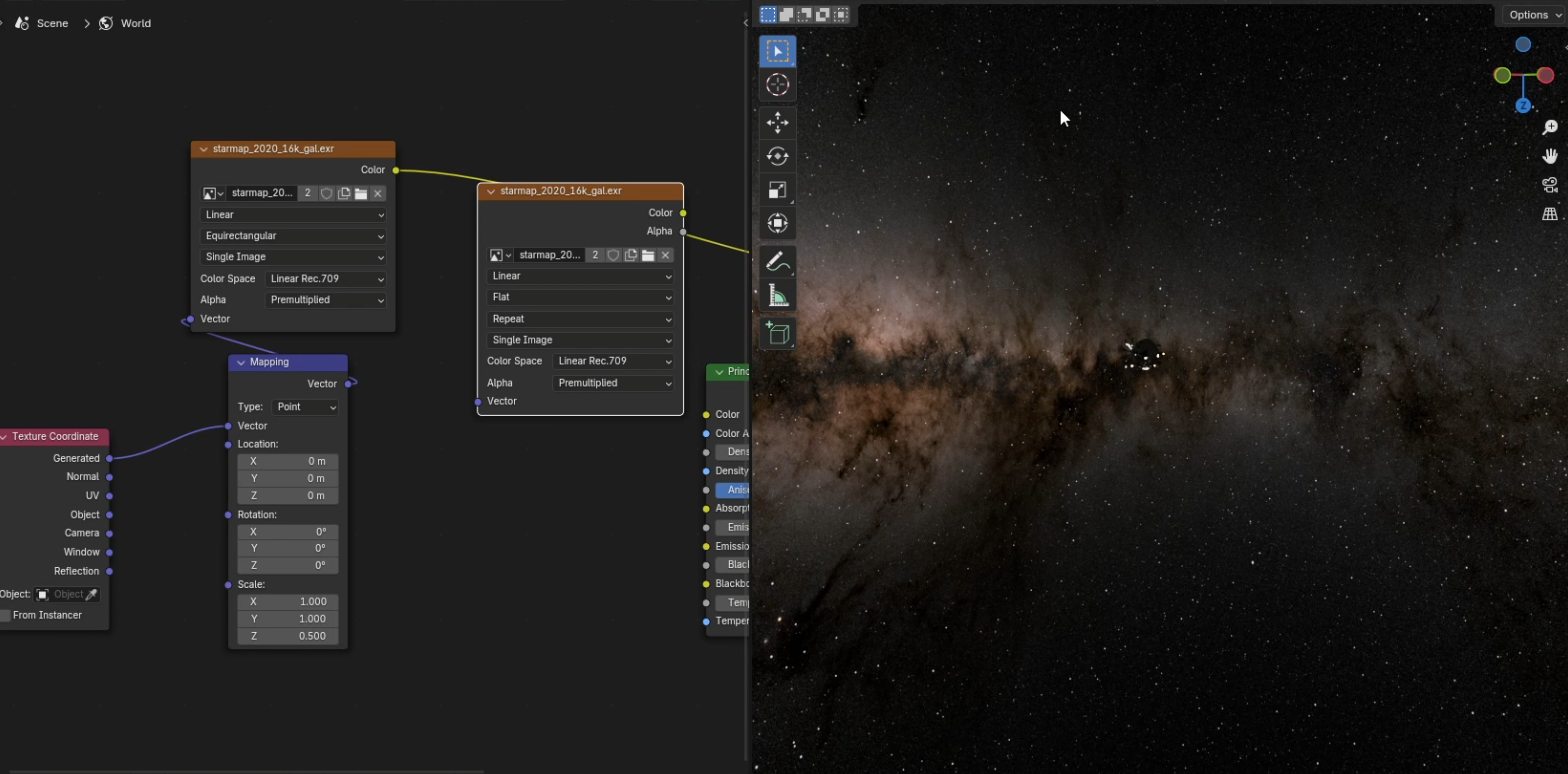
For the background stars, use the 16k version of this public domain HDR 360 image of space from NASA. Switch to the world shader in the top left of the shader editor. Then map it to the world output surface using the Environment Texture node piped through a "background" node. You can control the rotation of the environment using texture coordinate and mapping nodes piped into the environment texture vector. The X, Y, Z rotation values in the mapping node changes where the stars are in the sky. To control the intensity, change the strength in the background node.
Lighting
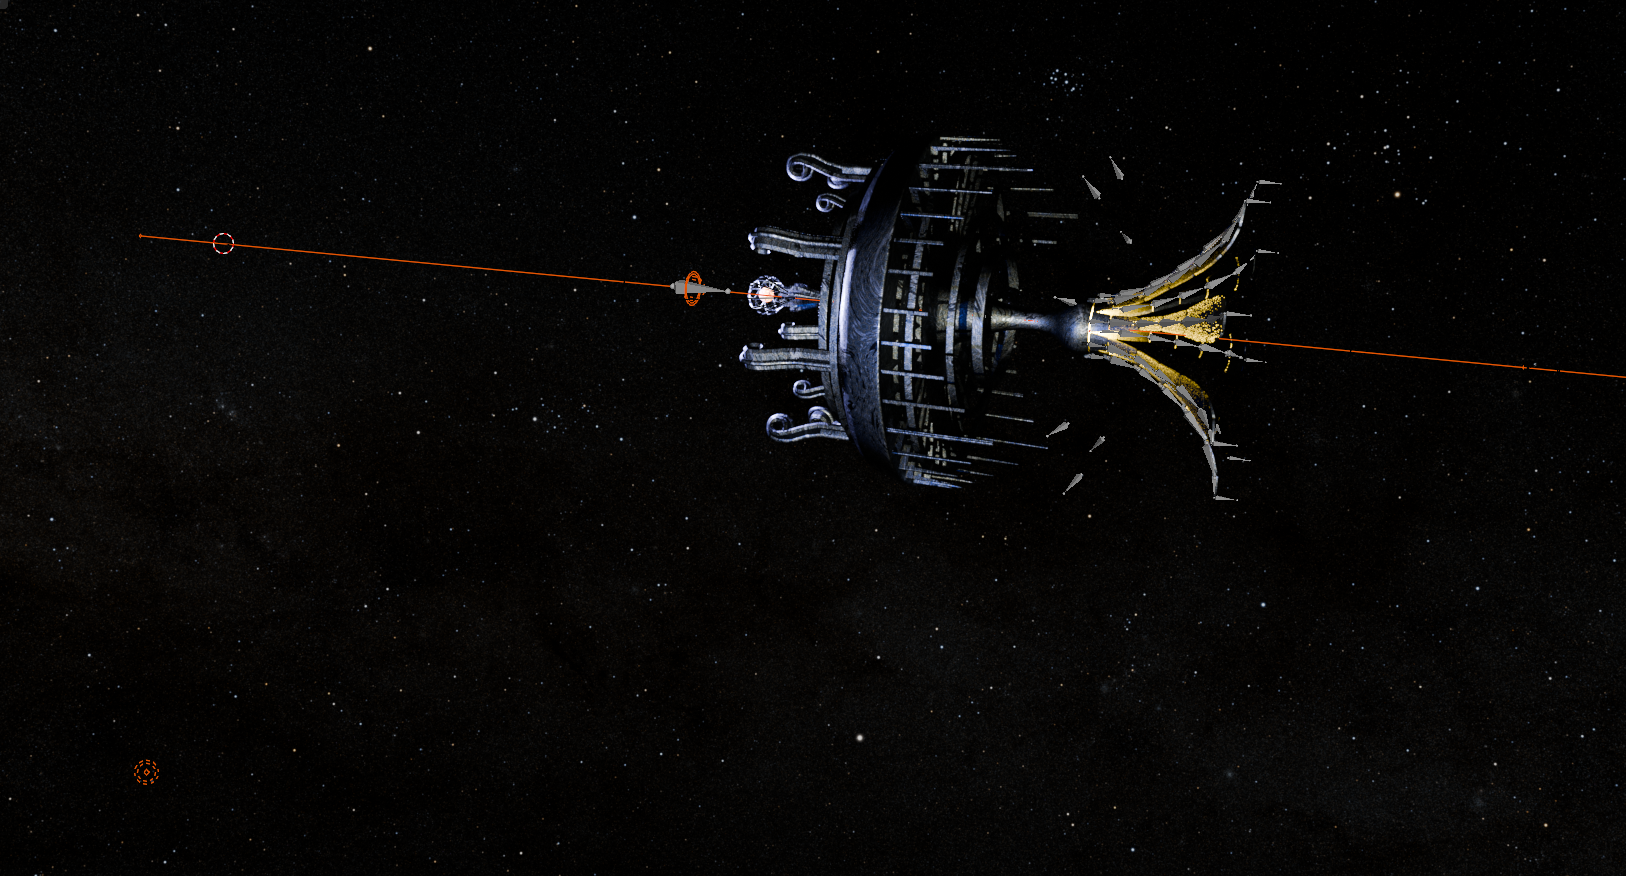
Parent area lights to the ship rig's root bone using the parent to modifier. These will work for the power source in front of the ship and the engines in the back. Place two point lights in the nebula to give some directional light to the ship and to light up the nebula itself. Add a rim light behind and slightly to the side to produce a strong silhouette of your model. Render the scene in EEVEE, Blender's real-time rendering pipeline, to get a good idea of how the lighting will look without waiting ages for renders. Change your viewport render settings to have less sampling and more denoising in Cycles if you want to quickly see it in the same rendering engine used in the end.
Rendering
When rendering, your settings will drastically change the time, so depending on what kind of system you have, the best settings will vary. Set the render engine to Cycles. If you have a good gpu, you’ll want to select GPU compute for the device setting. If it’s greyed out, go to your project settings and enable your GPU under system->Cycles Render Devices.
You will want a low global step rate under the volume tab to get detail in your nebula, but note that the lower it is, the longer it will take to render. Set it to 0.6 for the same results as me. I rendered 4096 samples, but 2048 works well too. The number of samples has diminishing returns.
I recommend rendering still images to get an idea of how it will look and how long it will take before rendering the entire animation.
For the output settings, select an output folder and set the file format to PNG. This way, you will render individual images that you can stitch together into a video later, and you can pause the render before it is complete without losing what’s been rendered and not encoded.
Keep in mind that the setting, overwrite, which is good for when you want to re-render something, discards your old render in the specified folder, so if you want to keep what was previously rendered, I recommend moving it to another folder immediately after it’s done.
This is a little confusing, but both “Render” and “Output” have independent color management options. I recommend sRGB, AgX, with the “look” none since we’ll be postprocessing it externally later.
When you’ve configured everything, go to Render->Render Animation.
Sound Design
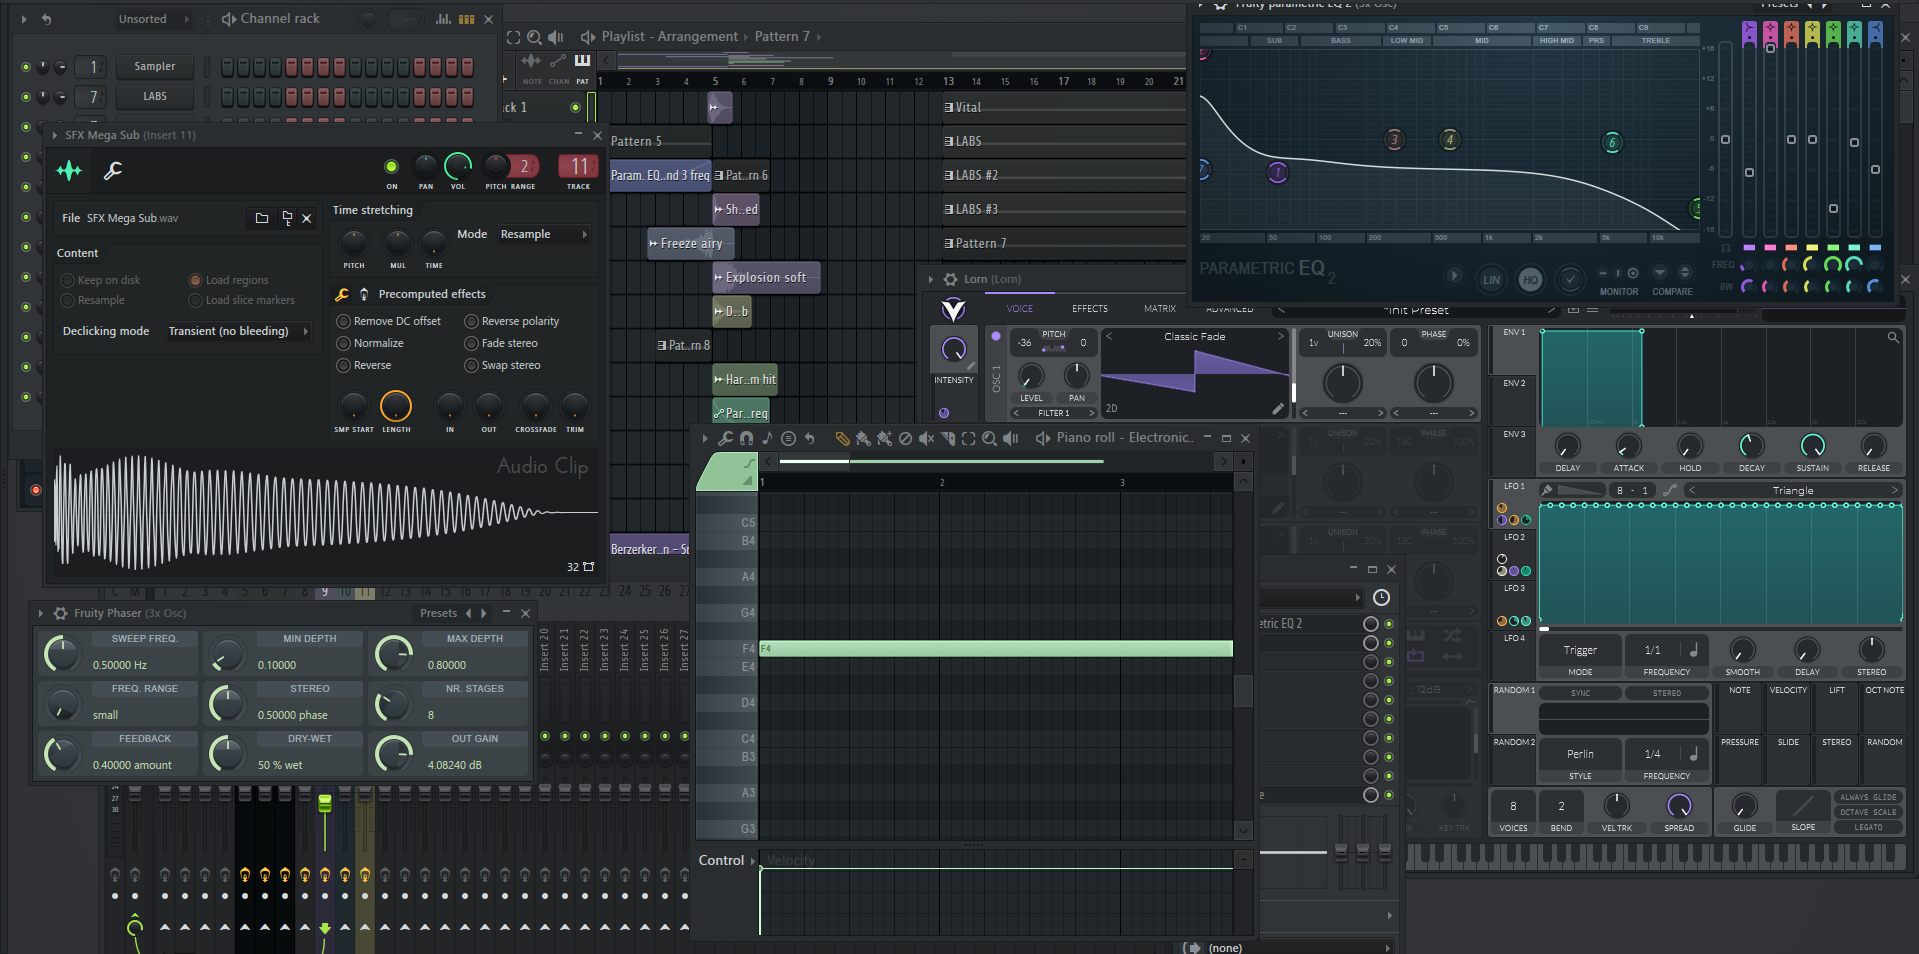
There’s no sound in space, but nobody cares! So, it’s time to make it really come to life with some epic sound design. To do this, we’ll use a mix of real sounds and those synthesized in FL Studio. We’ll need 3 major layers. Engine, tentacles, and warp speed sound.
To make the warp speed sound really pop, we can lead up to it using increasing pitch and rate of transient sounds. Generate white noise using 3x osc in FL Studio and creating a sweeping sound by automating a bandpass within a parametric equalizer. Next, add some additional movement to it using a phaser. For the transients I mentioned, you can either use the SeamlessR Monster’s Flex library or add a bass note in Sytrus and chop it up in gross beat then automate the tempo if you’re using FL Studio’s demo. Use this free plugin, Vital, to create a high-end speeding up sweep transient sound, (I started with the included preset “LORN lead”), and add “Electronic Chatter” for an alien sounding series of beeps that make the ship sound technologically advanced.
For when it punches into warp-speed, add some low-end with a kickdrum included in FL Studio’s installation in the left panel. If you want to sound tonal, give it a reverberating note (I used the key F). And add some more samples from FL Studio’s SFX library with some distortion and phasing effects to keep it sounding alien.
For the engines, use several layered foghorn samples from Spitfire’s free library LABS It’s not really an engine sound, but it gives the ship a menacing presence.
For the tentacles, we want metallic, reverberating sounds, and a whoosh for the propelling motion. I found some great public domain sounds on freesound.org here, here, and here. Put those in Premiere Pro to better see how it lines up with the animation. When the tentacles are occluded, add a low-pass filter to the sounds and decrease their volume to make them sound like they fit better in the scene.
Post-processing
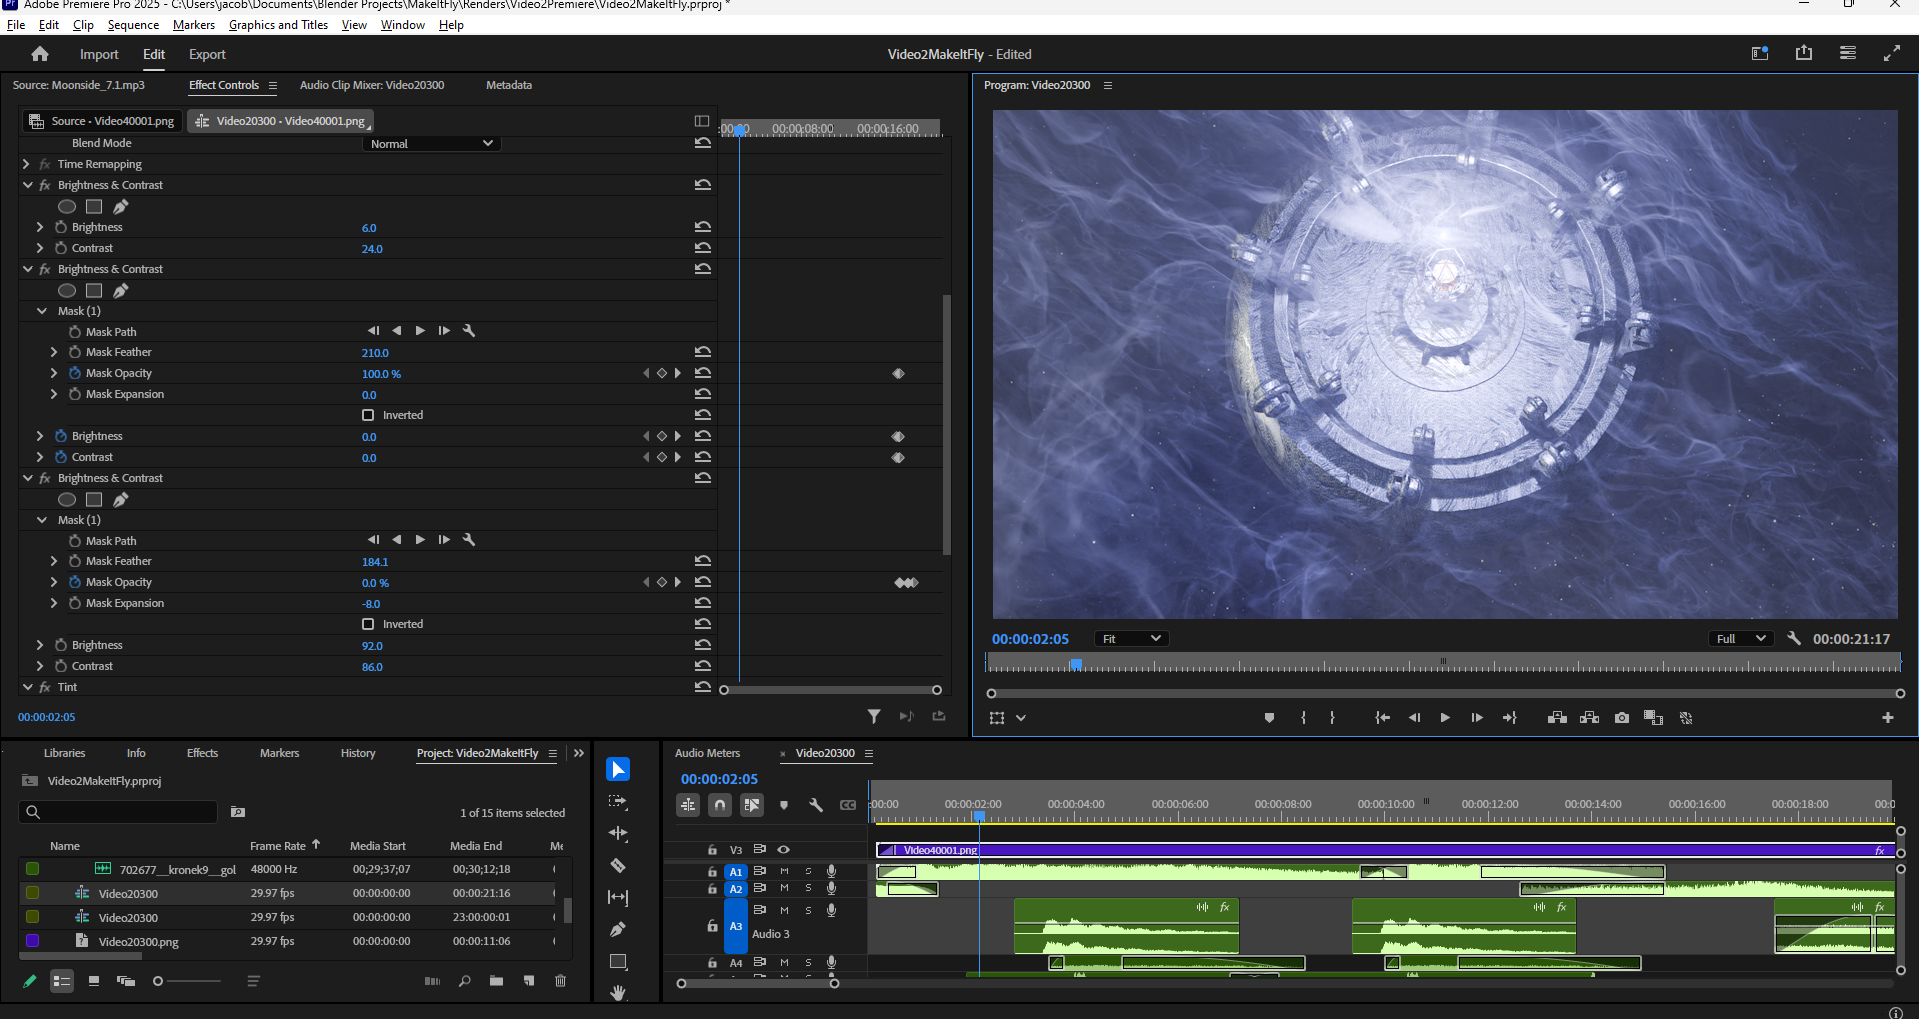
We’ll need to get our image sequence into Adobe Premiere, then increase the contrast and add any final visual touches. Create a new Premiere project and go to file->import, then navigate to your directory with the rendered image sequence and select the first image. Check “image sequence” before pressing import. Now, you’ll have a new clip in your bin. Drag it to the timeline and you’ll see your animation in its full glory, except without good contrast! Slap a brightness and contrast filter on the video and tweak them until it looks punchy, but so you can still see the details in shadows and highlights.
Now for something that would have been cooler in 3D, but we can still fake – engine charging and a trail behind the ship when it goes into warp speed.
Simply add another brightness and contrast effect along with a tinting effect, and tint it to the same color as the engine, and brighten it significantly. Next, create a mask around where the trail should go, and animate the mask opacity to match the timing of the ship’s jump to warp. Once you do this for either the tint or brightness, copy the effect to the other, and it will preserve your animation.