2.5D Printing - Block Printing With a 3D-Printer
by Wanjun in Workshop > 3D Printing
17185 Views, 105 Favorites, 0 Comments
2.5D Printing - Block Printing With a 3D-Printer
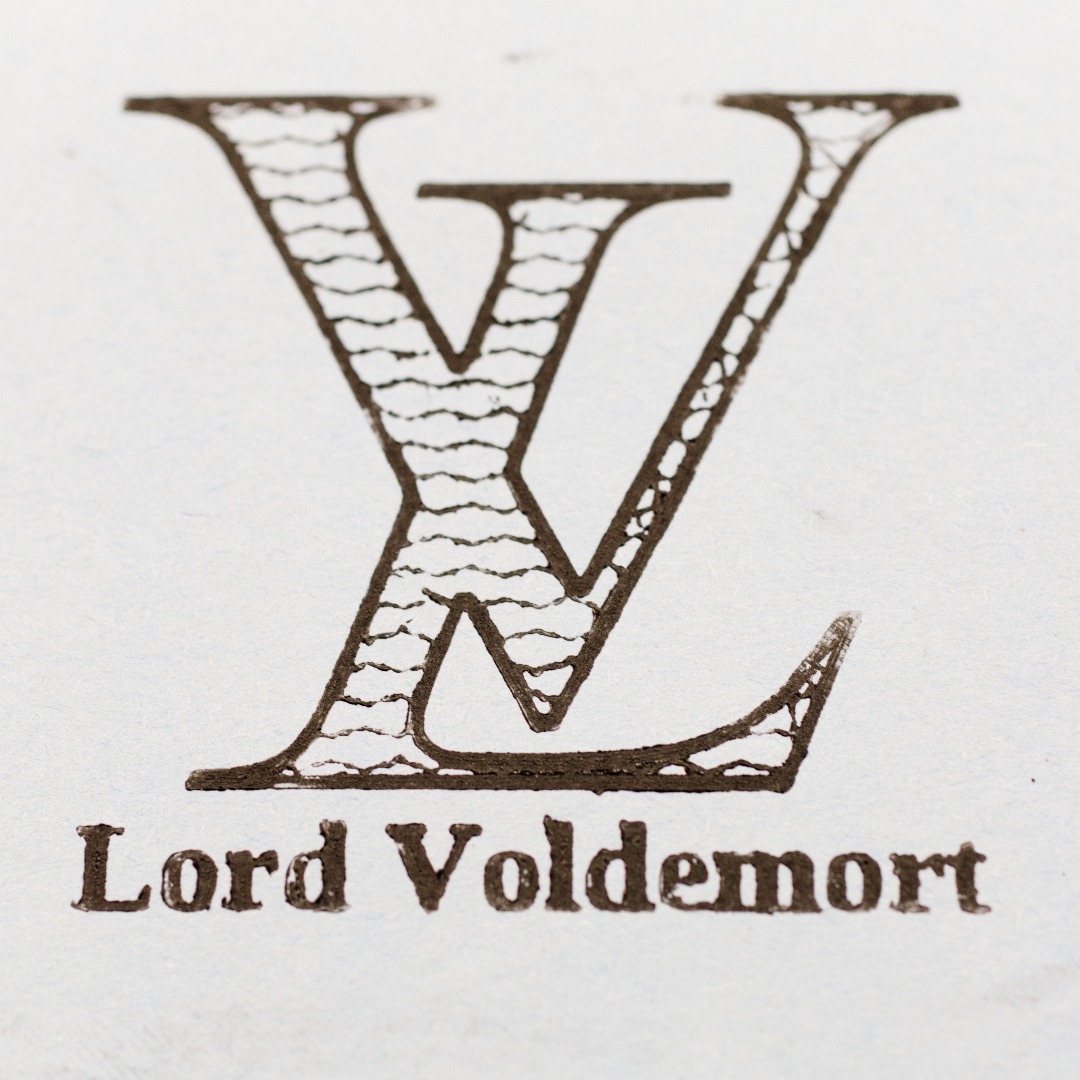
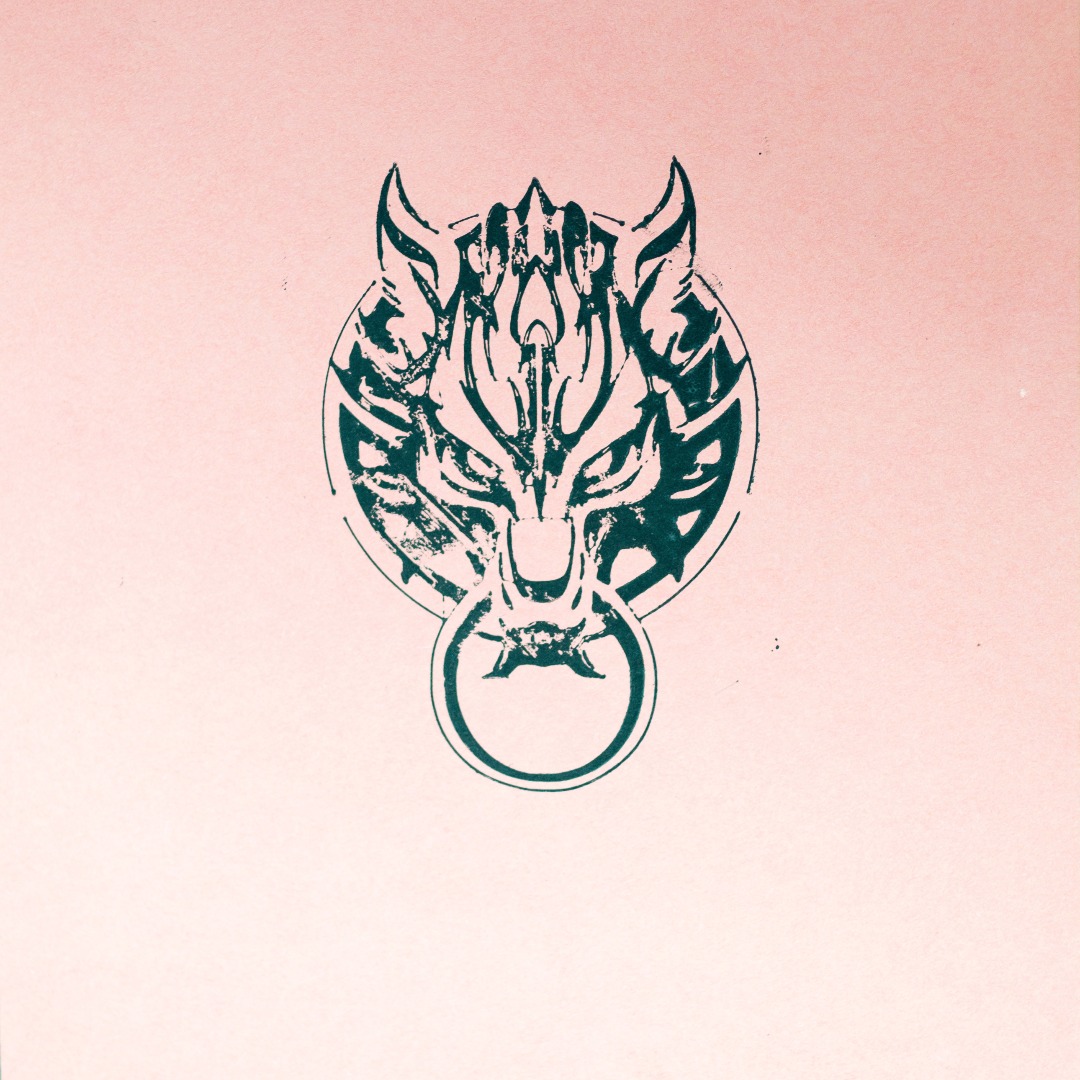
In traditional block-printing, a skilled printmaker carves a wooden or linoleum block by hand and runs it through a printing press. With 3D-Printing, we are able to bypass all the labor-intensive hand engraving and manufacture the printing block directly.
I will go over designing a custom printing block, 3D-Printing it, then running it through an etching press.
With what I like to call 2.5D Printing (haha get it), we can make beautiful and unique prints on paper, fabric, even wood without block carving skills and tools. We just let our 3D printers do all the hard work!
A word about skill level: I wrote this such that any beginner with little to no experience in vector and 3D design can follow along. 3D Printing is however a lot more dependent on your particular machine so you should either already know how to 3D Print or get it printed by a service.
Tools, Consumables, and Software
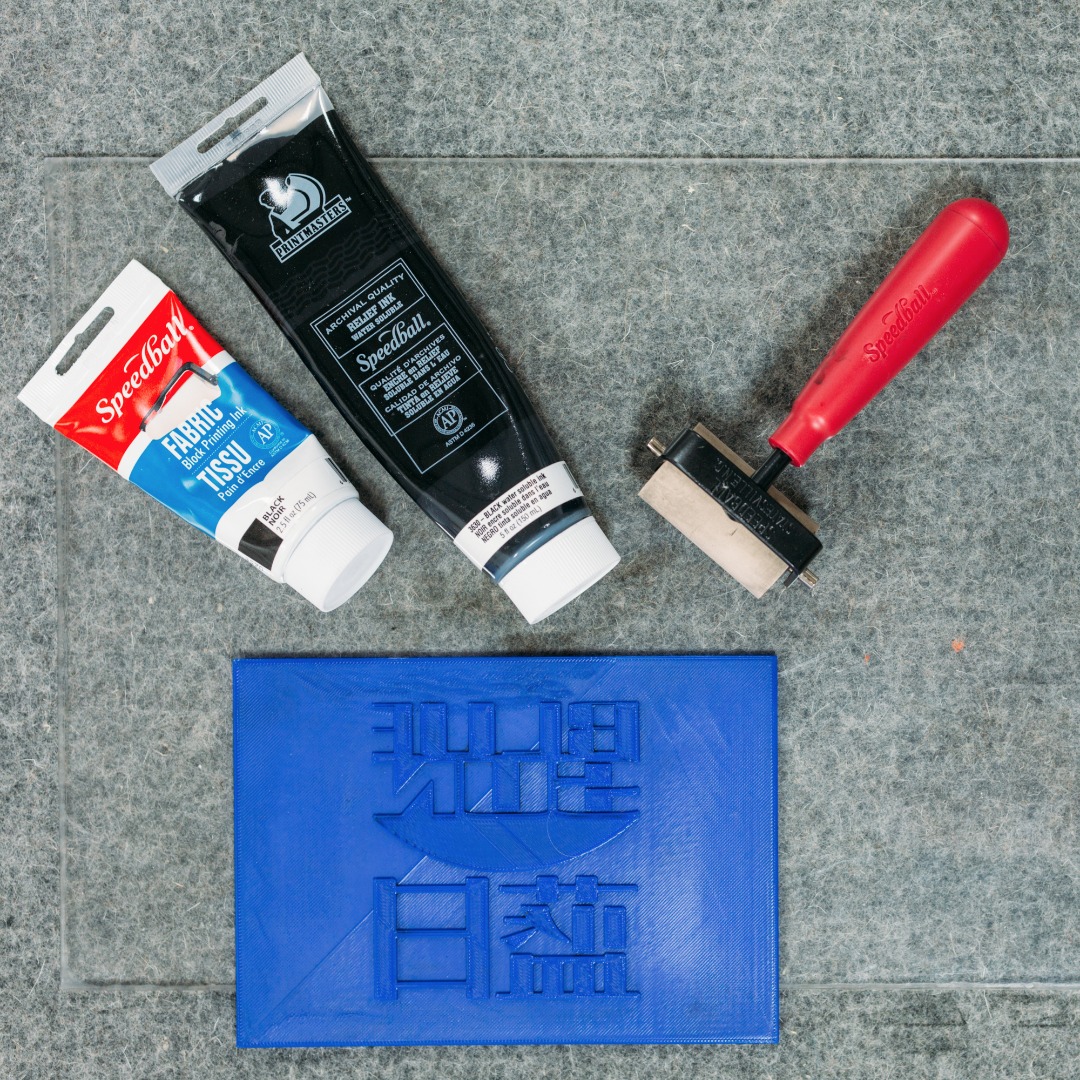
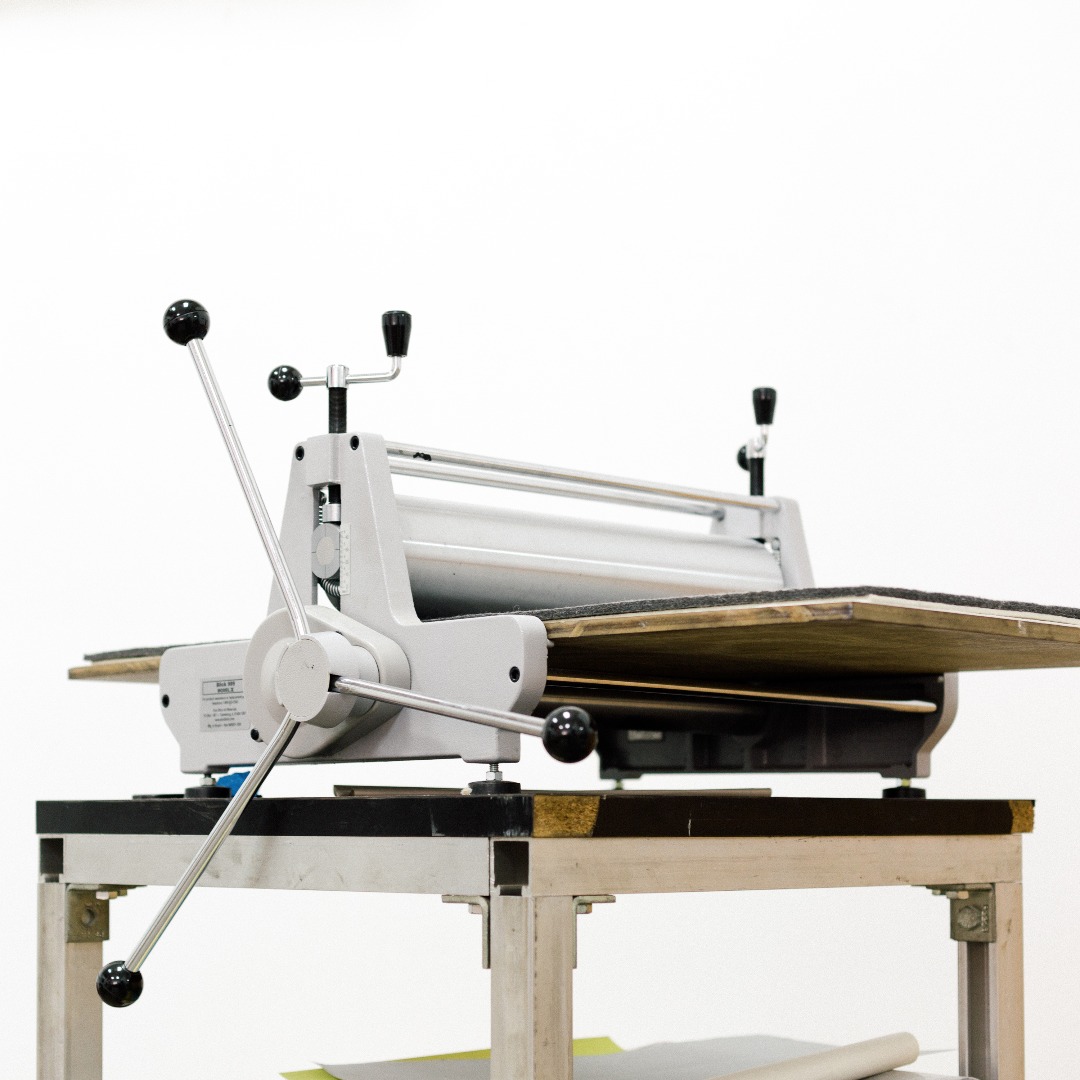
Tools:
- Etching Press - My hackerspace has a Blick 999. But smaller ones like this also work.
- 3D-Printer - I used a Makerbot Replicator 2. Any FDM printer works, no heated bed required.
- Brayer - Mine is the speedball 2-inch wide soft rubber.
- Plexiglass - For ink transfer. Should be about printer paper sized.
- Small Paintbrush - only required for fabric printing
Consumables:
- PLA filament - I chose PLA since it's more rigid. You can also use ABS.
- Block printing ink - Speedball's water based relief ink for paper, and their oil based fabric ink for fabrics.
- Paper - I mostly use construction paper and cardstock. But specialty printmaking or watercolor paper is ideal. They're absorbent, heavy weight, and pleasantly textured. Just avoid glossy non-absorbent paper. I designed all the plates to perfectly line up with 5 by 7 prints but you can easily use larger paper.
- Paper Towels
- Blank shirt or blank whatever fabric. I'd like to eventually block print on tote bags, napkins, pillow covers, pencil cases, skirts, and couch throws.
Software:
- TinkerCad - for 3D Modelling of custom design. Tinkercad is super easy to learn and free but you do need to sign up for an account. If you're a pro 3D modeller you can use anything that can generate a surface from a vector then a thickness. You can also simply download my collection of pre-made plates and skip to the 3D-Printing step.
- Slicer Software for your 3D printer - I used Makerware, but the settings also apply to other slicers such as Slic3r and Simplify3D and Cura.
- Adobe Illustrator - To generate custom designs. You can use a free alternative, Inkscape, but my instructions will be for Illustrator.
I purchased the brayer, ink, and paper from my local art supply store.
Note: none of the product links are affiliates. Amazon links are however switched to Amazon Smile which donates a portion of the proceeds to a charity of your choice. more about Amazon Smile.
Preparing a Type Design in Illustrator
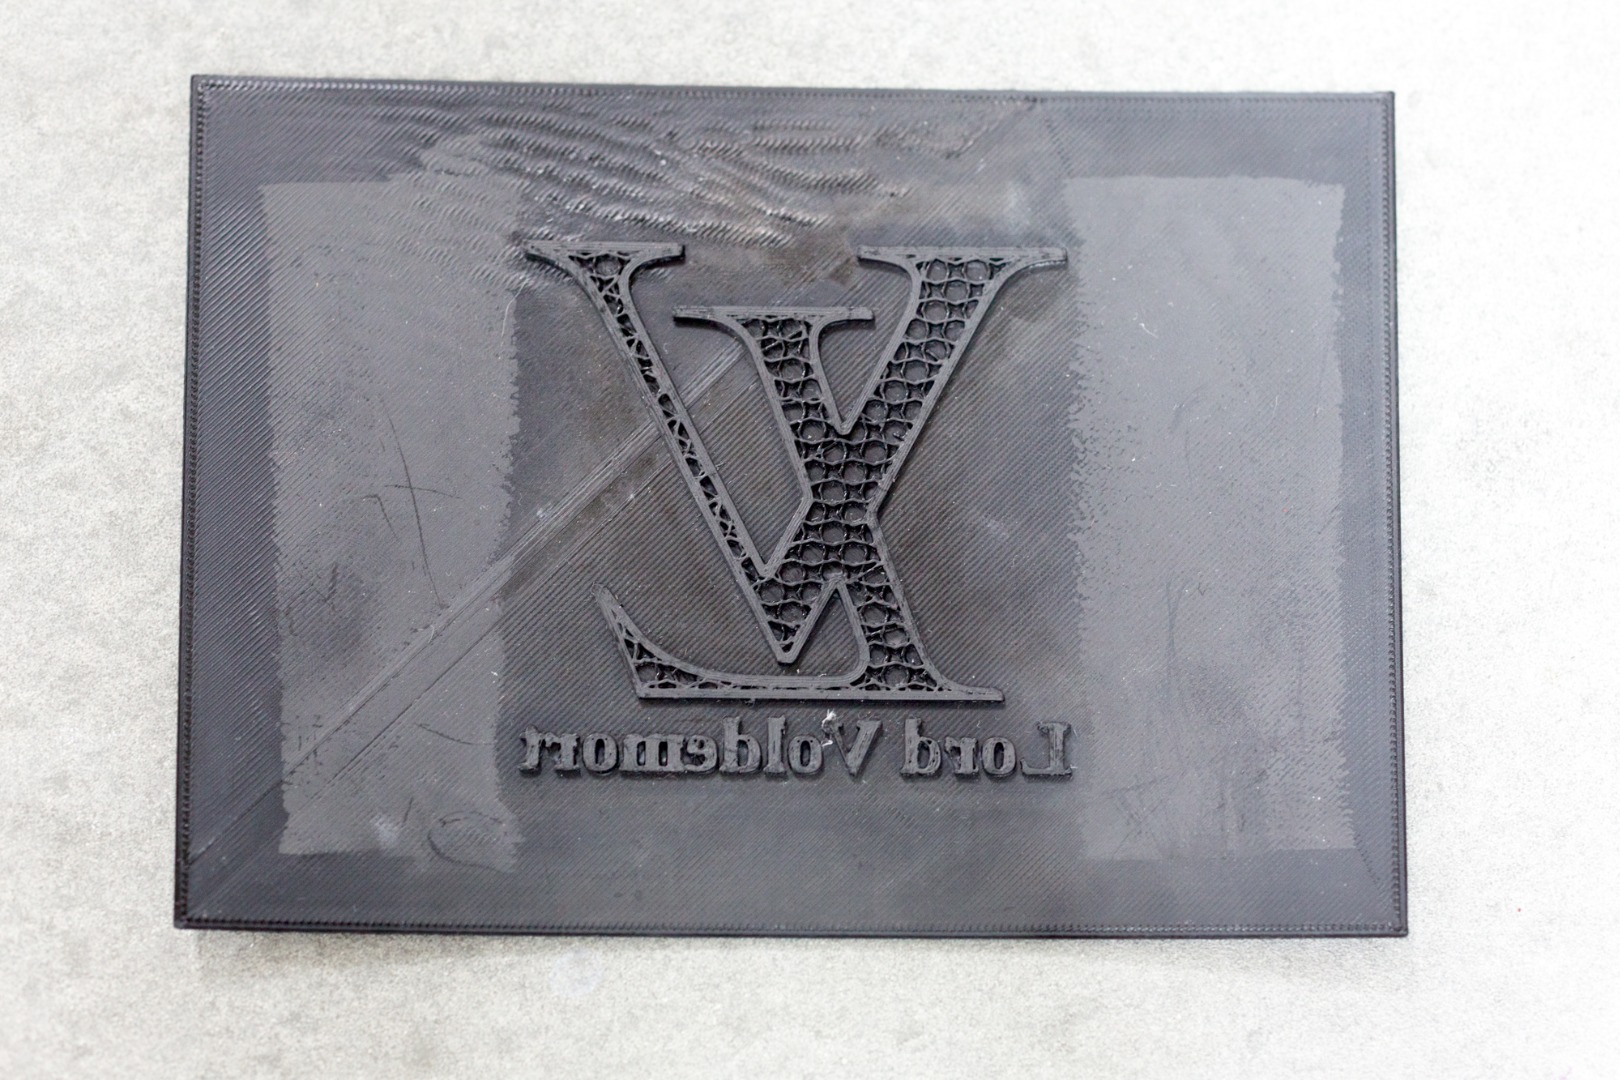
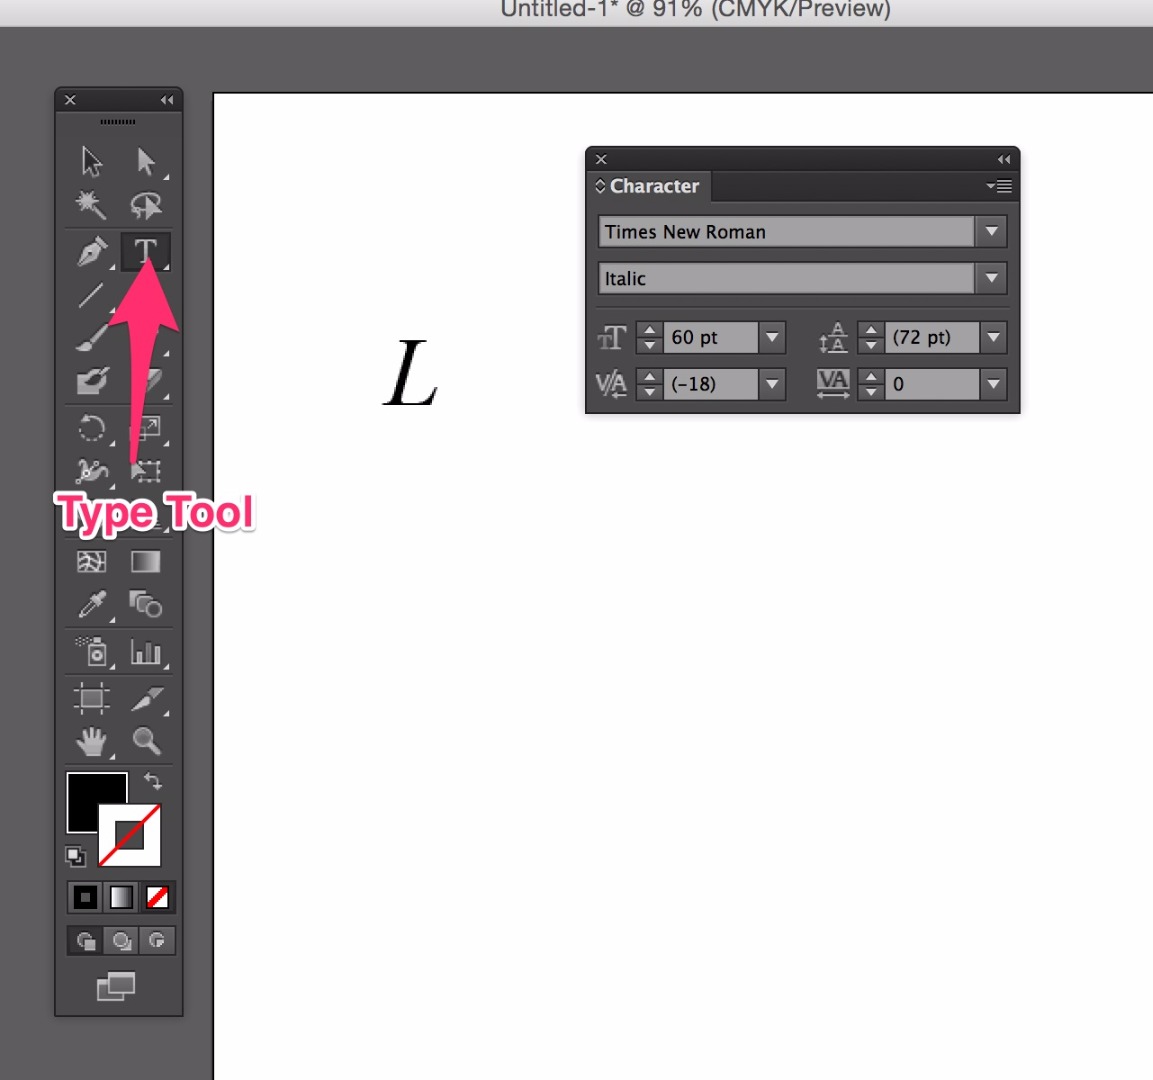
The goal of this and next step is to generate a clean SVG that we can import into Tinkercad. We need to save the plain outline of our text vector in .SVG format.
I'm using my Lord Voldemort plate as an example. But this should work for any type and text you do in Illustrator. The LV (which stands for You-Know-Who DUH) logo is simply an Italicized L and a regular V crossing each other. So we are going to create the individual letters and then arrange them in tinkercad.
- Create a new Illustrator file. Click on the Type Tool and enter L. Change the font to Times New Roman, size to 60, and italic.
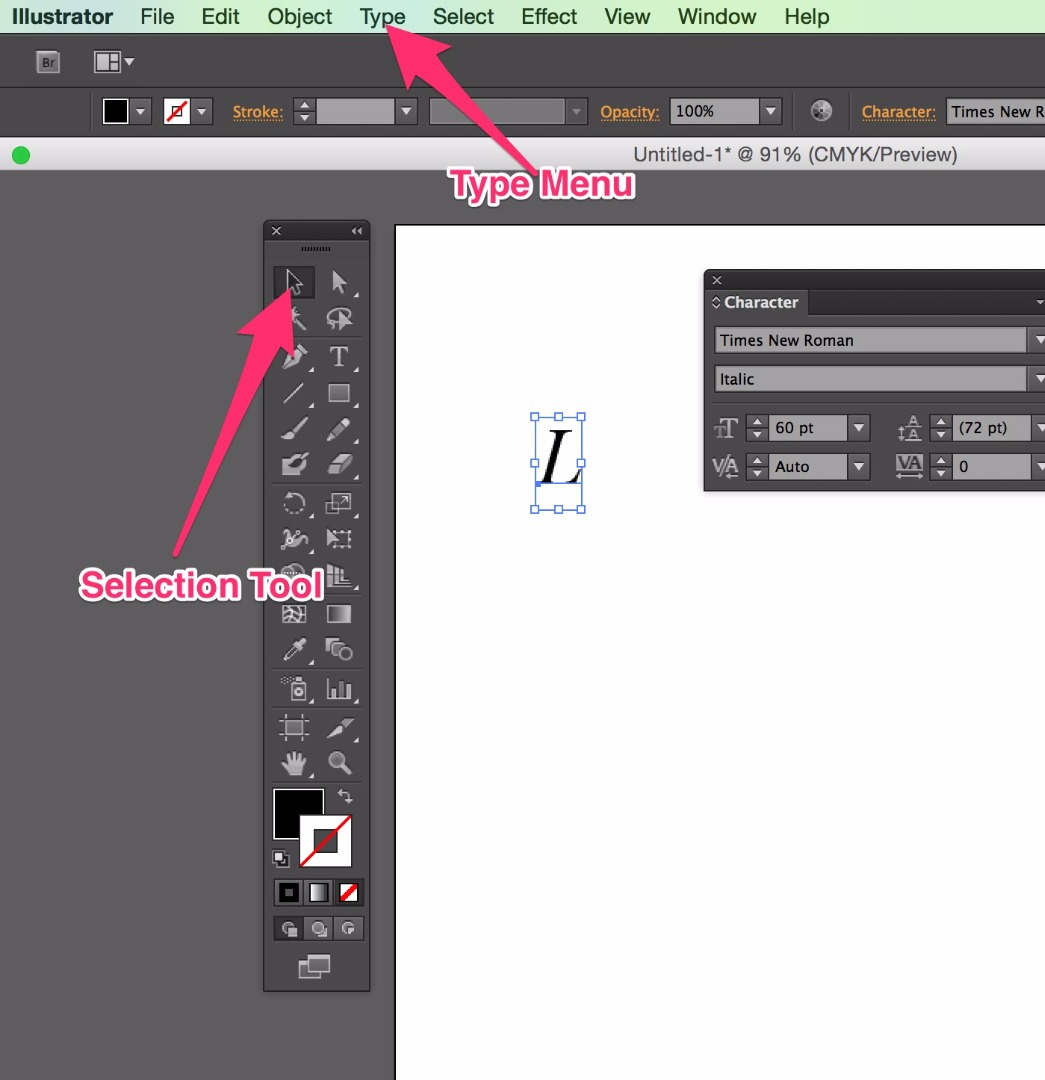
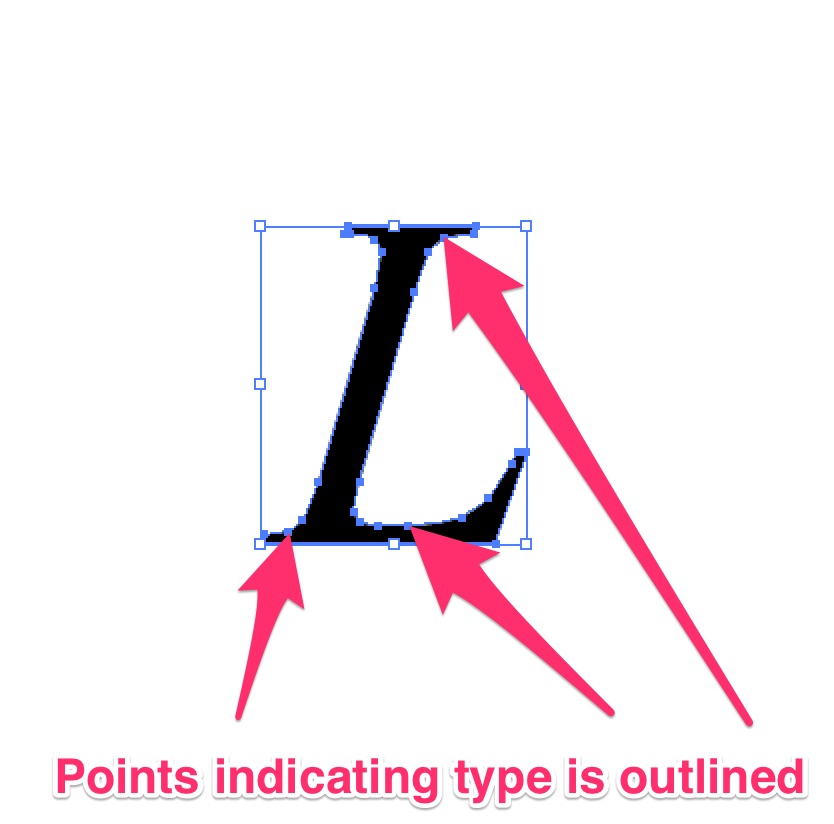
- Click on the selection tool, then click onType in the menu bar and select create outlines from the dropdown. Your letter should end up with a bunch of points on it.
- Go to File, and choose Save As, and choose the .SVG format to save your file.
- Repeat the above steps for the Letter V but not italicized.
Preparing a Vector Design in Illustrator
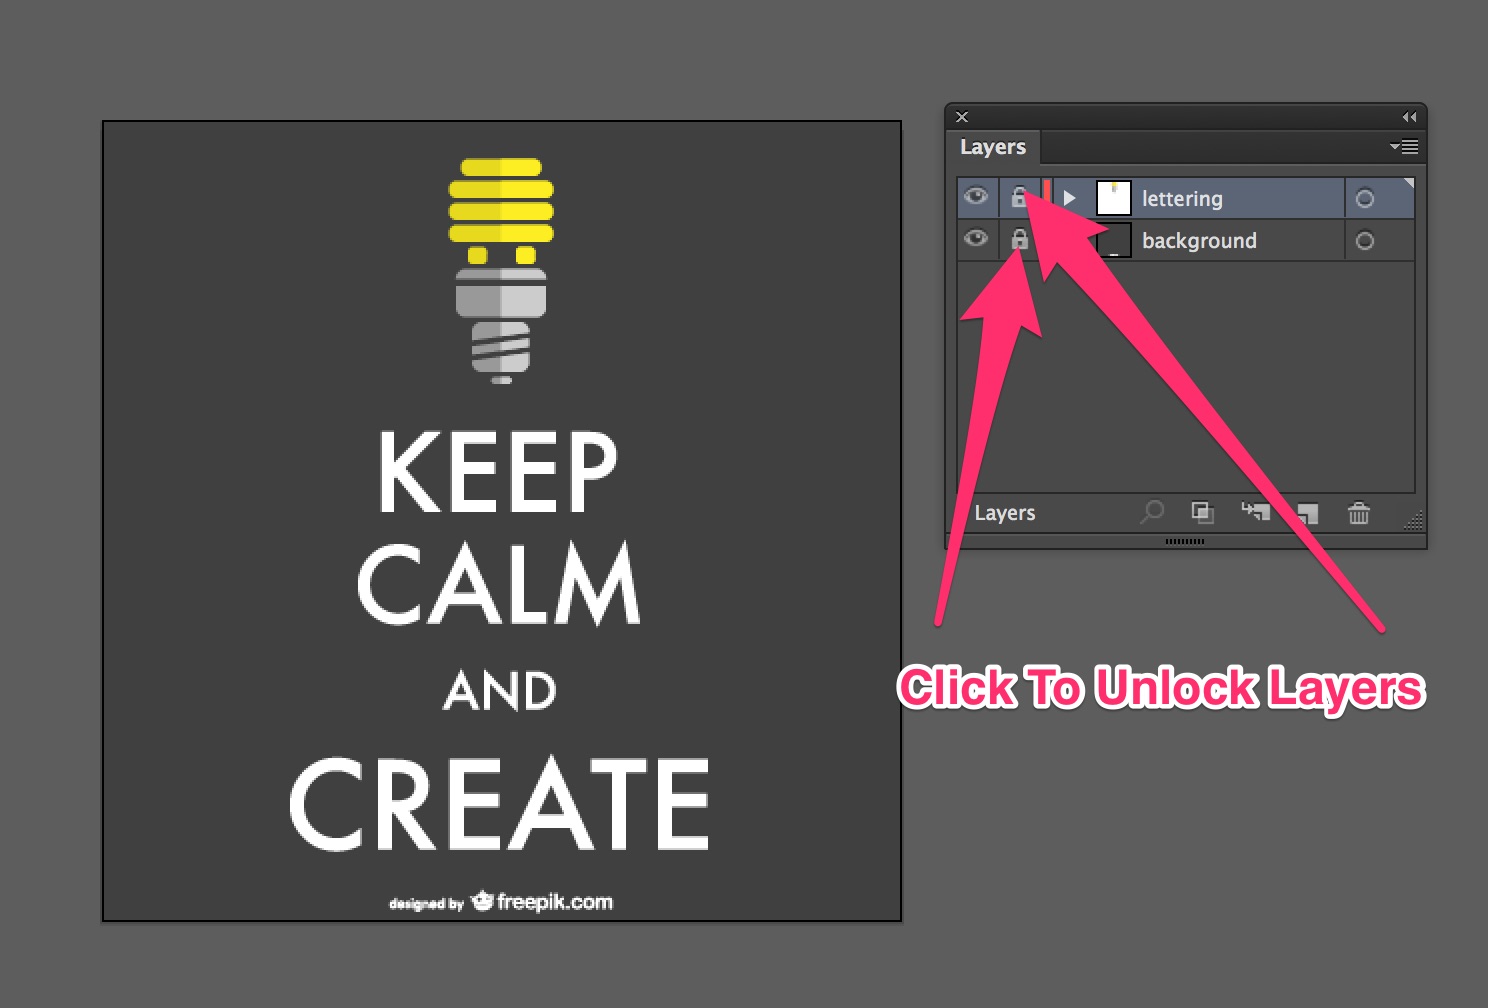
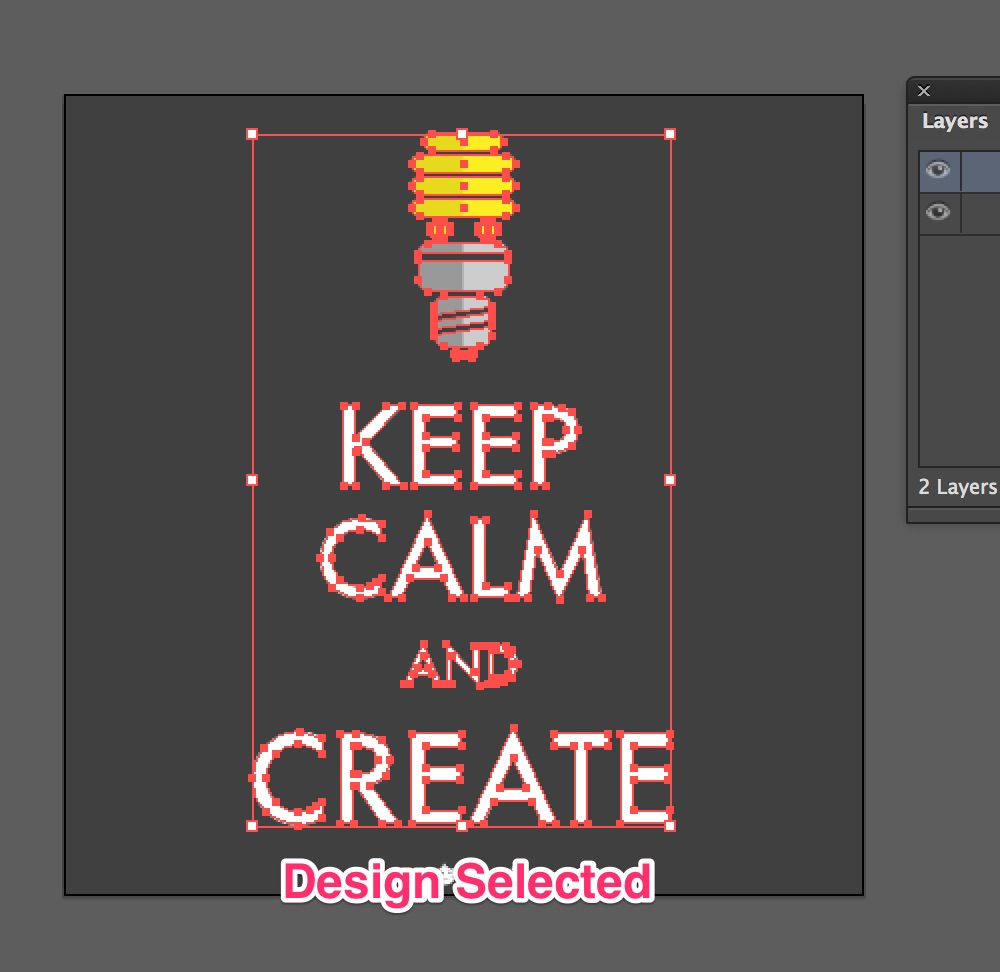
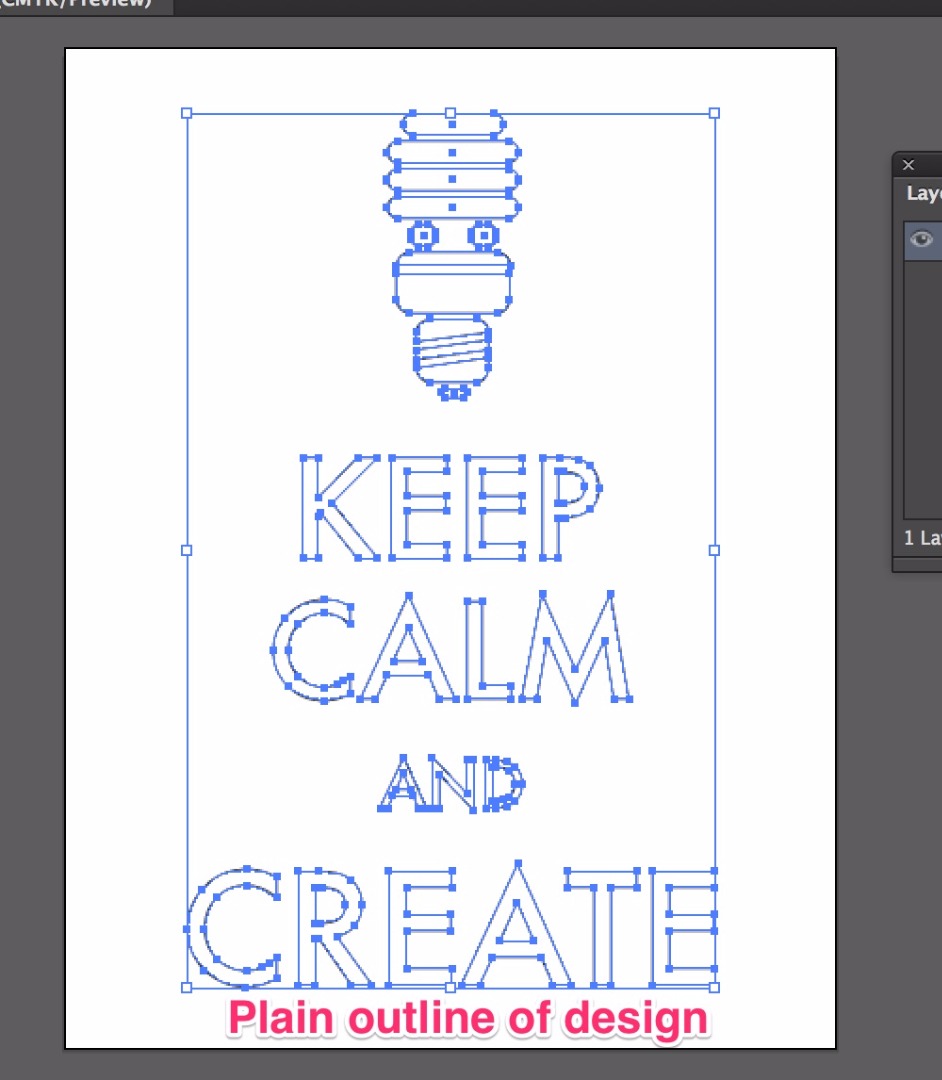
You can design something in Illustrator, or simply extract the vector from a pre made design. For instance, I downloaded the Keep Calm and Create vector from freepik.com. The site is full of free vectors and other goodies but you do need to properly accredit.
Also check out https://creativemarket.com/free-goods for design elements however you need to create an account to download.
Preparing vector design:
- This particular design has locked layers. click on the Lock icon to unlock the layers so we can begin selection. If the design doesn't have locked layers skip this step.
- Select the design elements desired by holding down shift key while clicking on it.
- control(command if you're on a mac)-c to copy, control/command-n to create new file, then control/command-v to paste.
- press "d" key to give it the default stroke with white infill. You should end up with a plain outline of the design.
- go to File, then save as a .SVG.
3D-Model the Printing Block
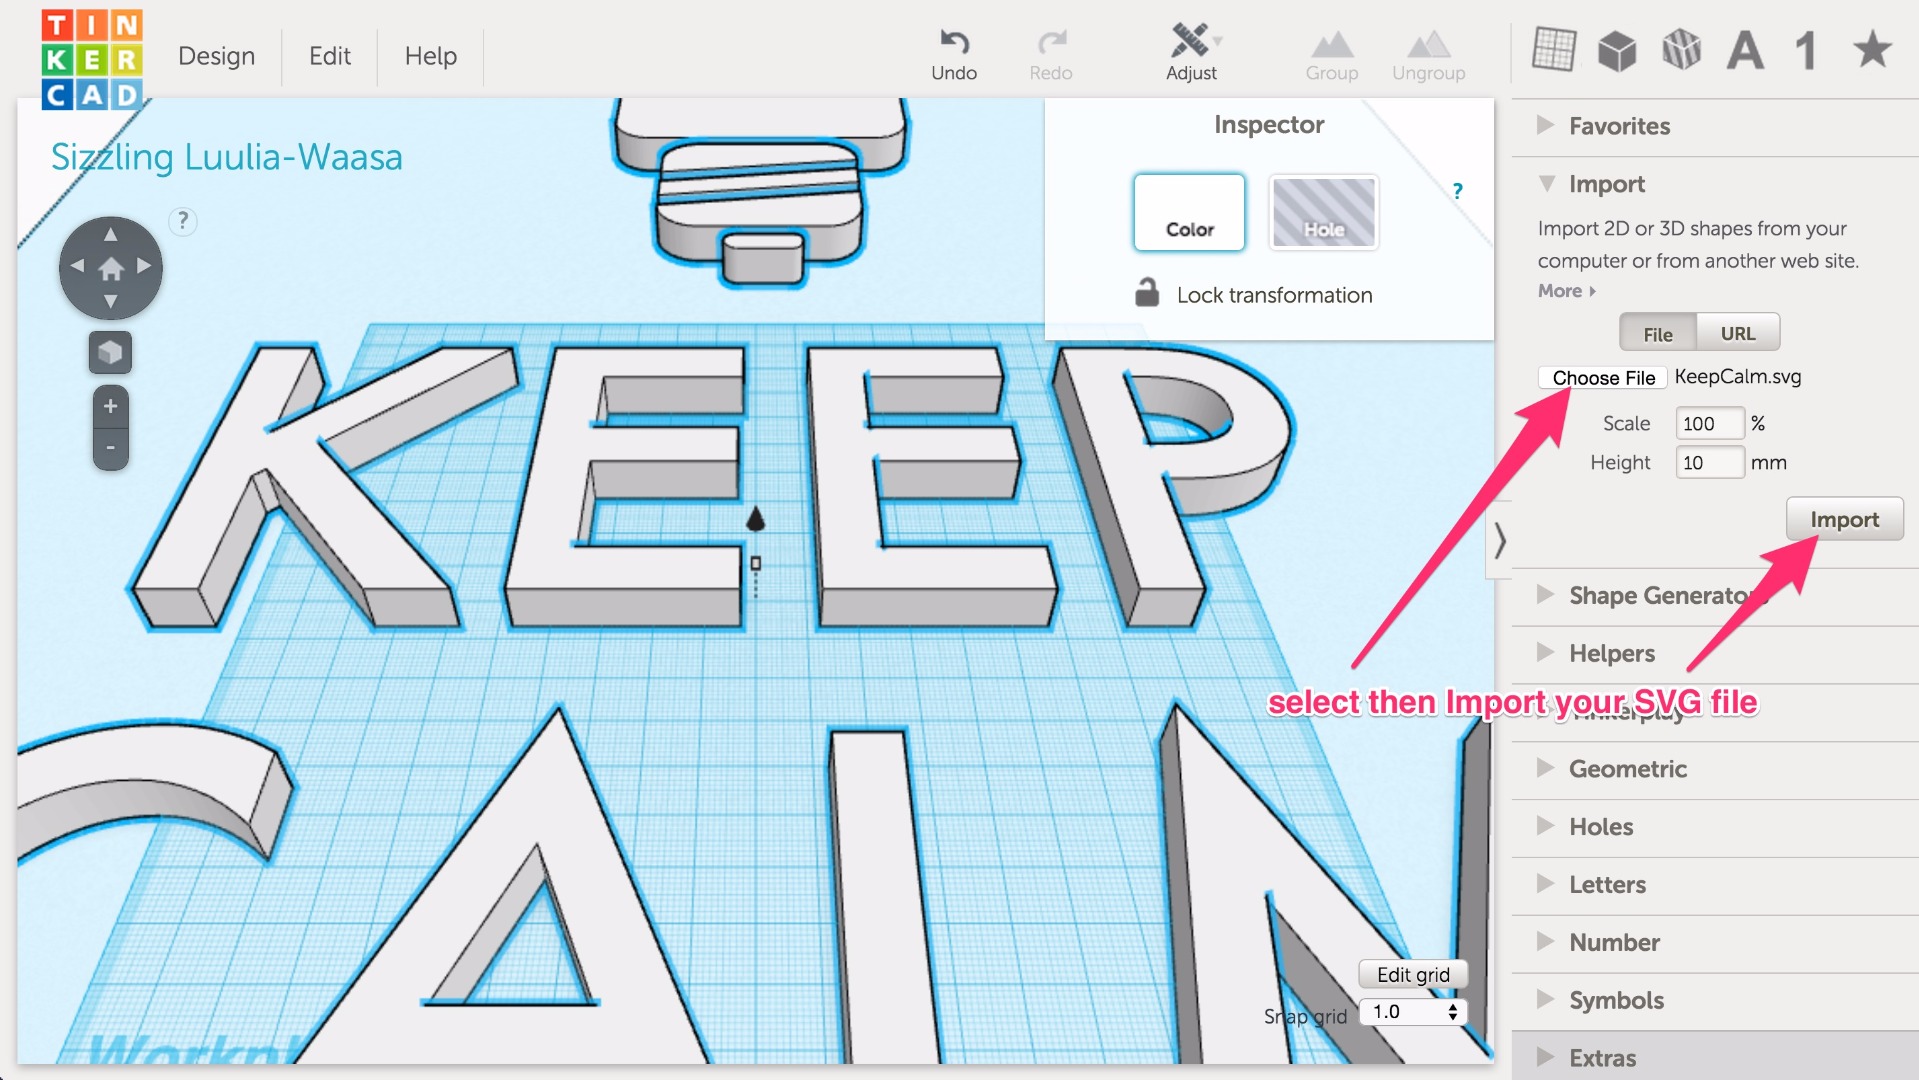
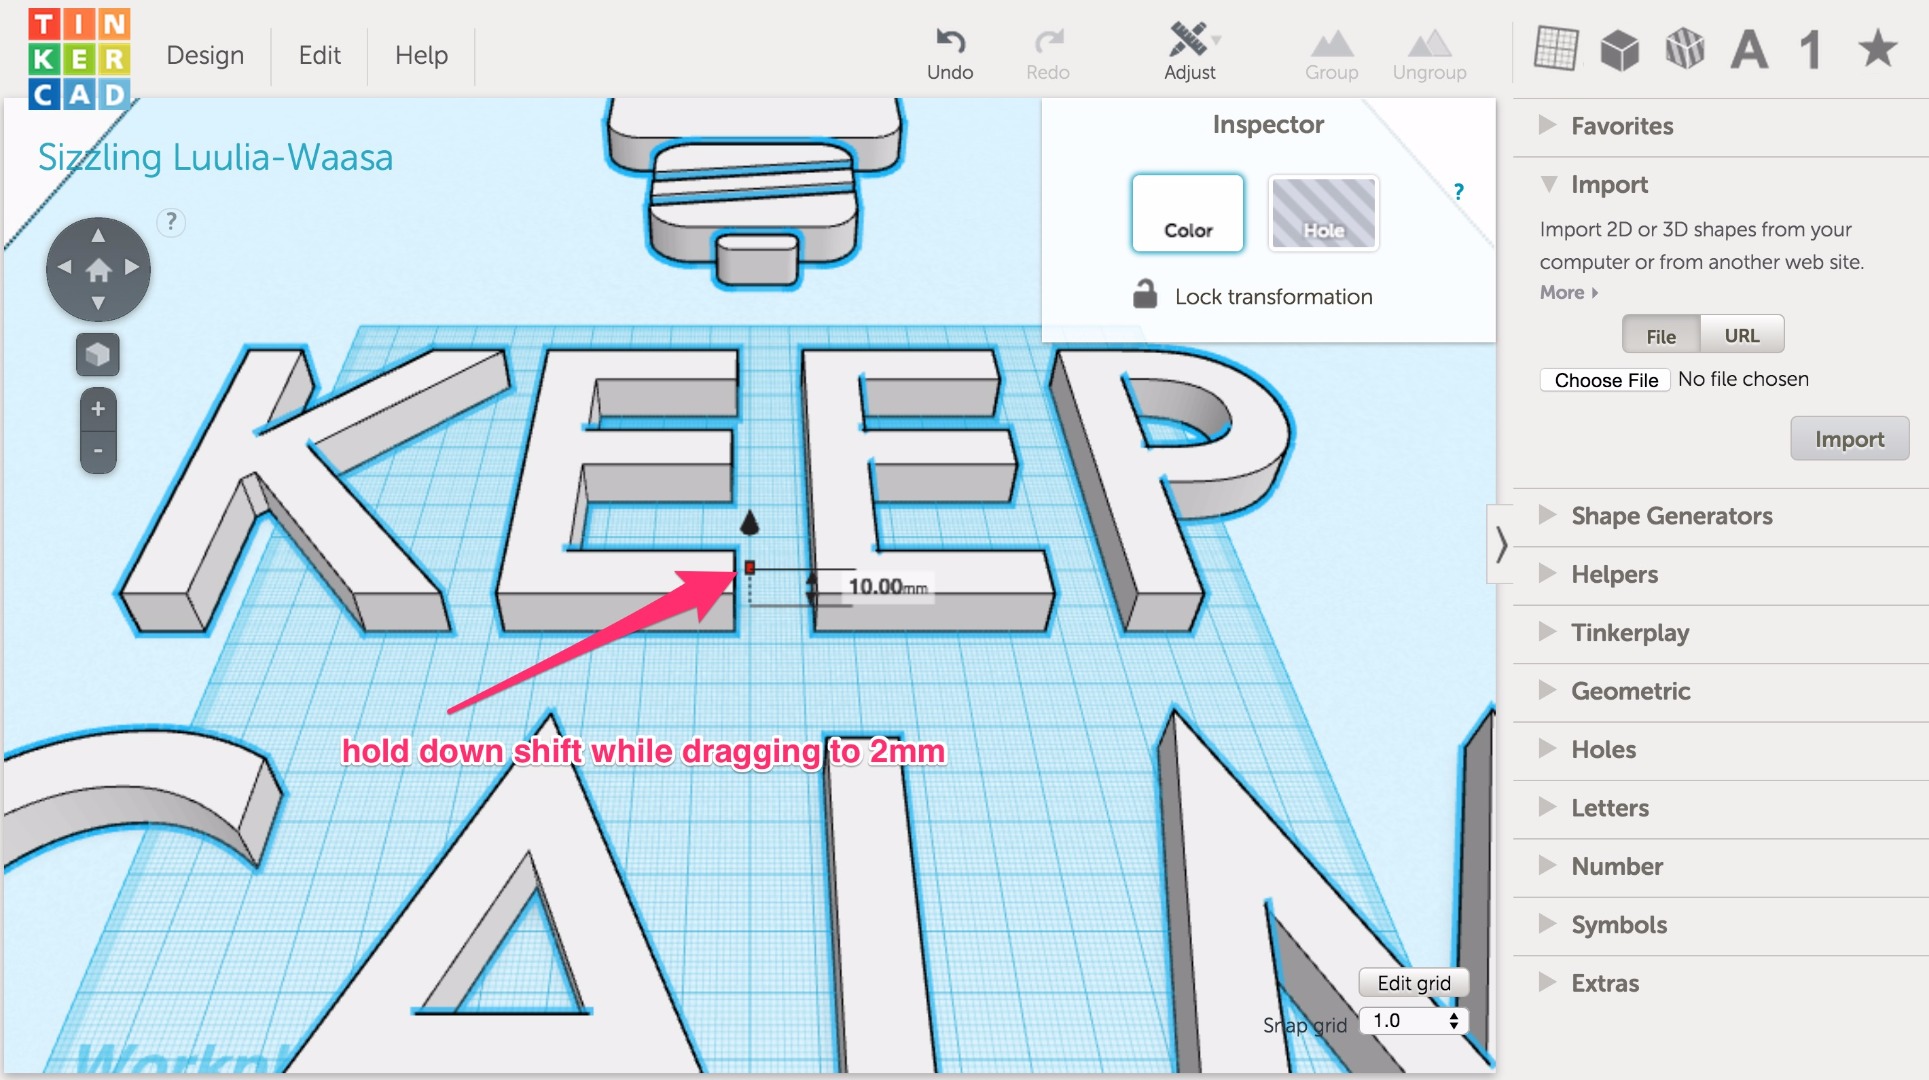
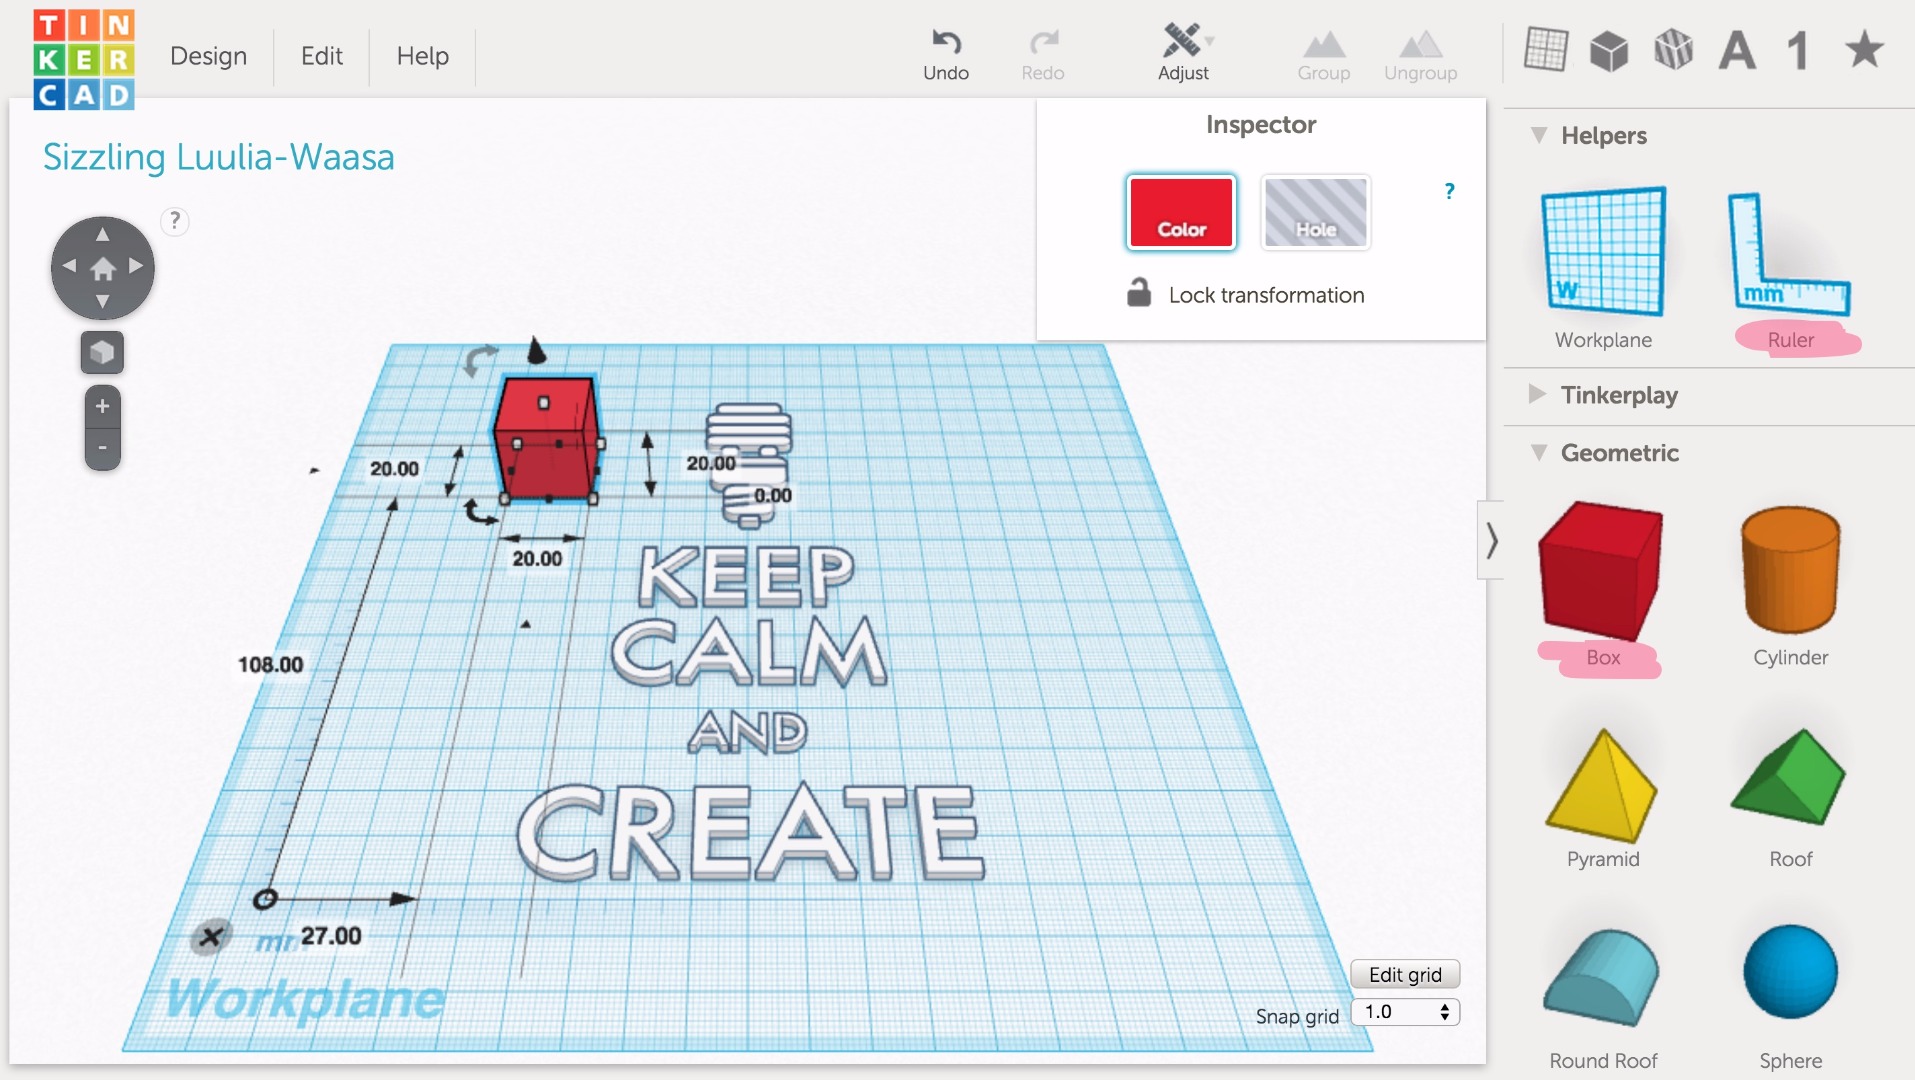
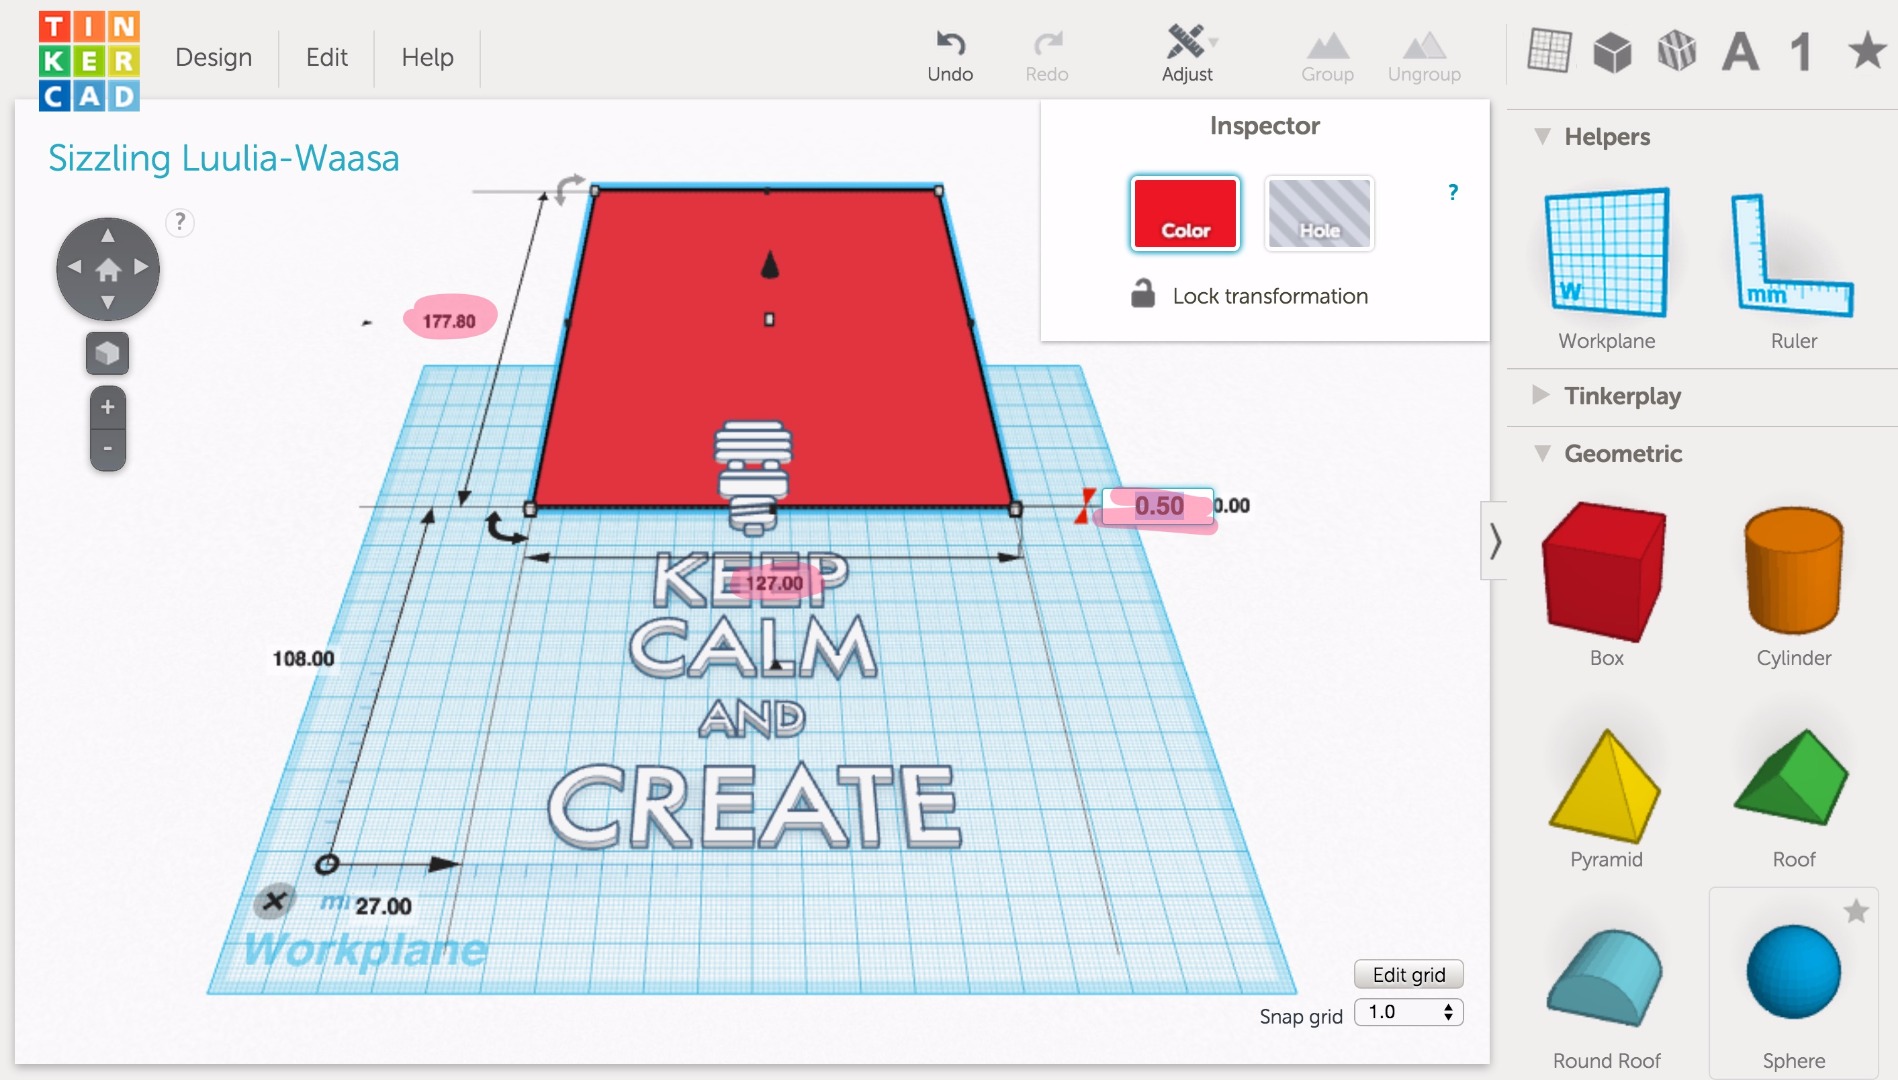
In Tinkercad we are going to import our vector design, give it a thickness of 2mm, then put it on a plate of 0.5mm. I settled on these dimensions after testing. If it's printed thick like traditional blocks the force from the press will actually compromise the 3D Print's structural integrity and destroy the block. I found a sweet spot of 2mm for the design and .5 mm for the plate. It's thick enough to perfectly transfer ink and still stand up against multiple pressings. It's also overall thin enough to glue onto a wooden block backing if you absolutely want a thick block.
- Find the import tab. Select the .SVG you generated, then click on Import. If your design doesn't show up on your workplane or if the 3D design doesn't match your vector design check out Troubleshooting.
- If you've followed everything I've done so far then the design is way too big. Hover your mouse over the white height button. The white button should turn to red and indicate that the height is 10mm. While holding down the shift key, click and drag the red height button until it's at 2mm. Holding down shift while scaling ensures that the model scales uniformly.
- Drag a Ruler (under Helpers tab) onto the work plane. Then drag a Box(under Geometric tab) onto the workplane.
- Change the dimensions of the box to 127mm(5 inches) wide, 177.8mm(7 inches) long, and 0.5mm thick.
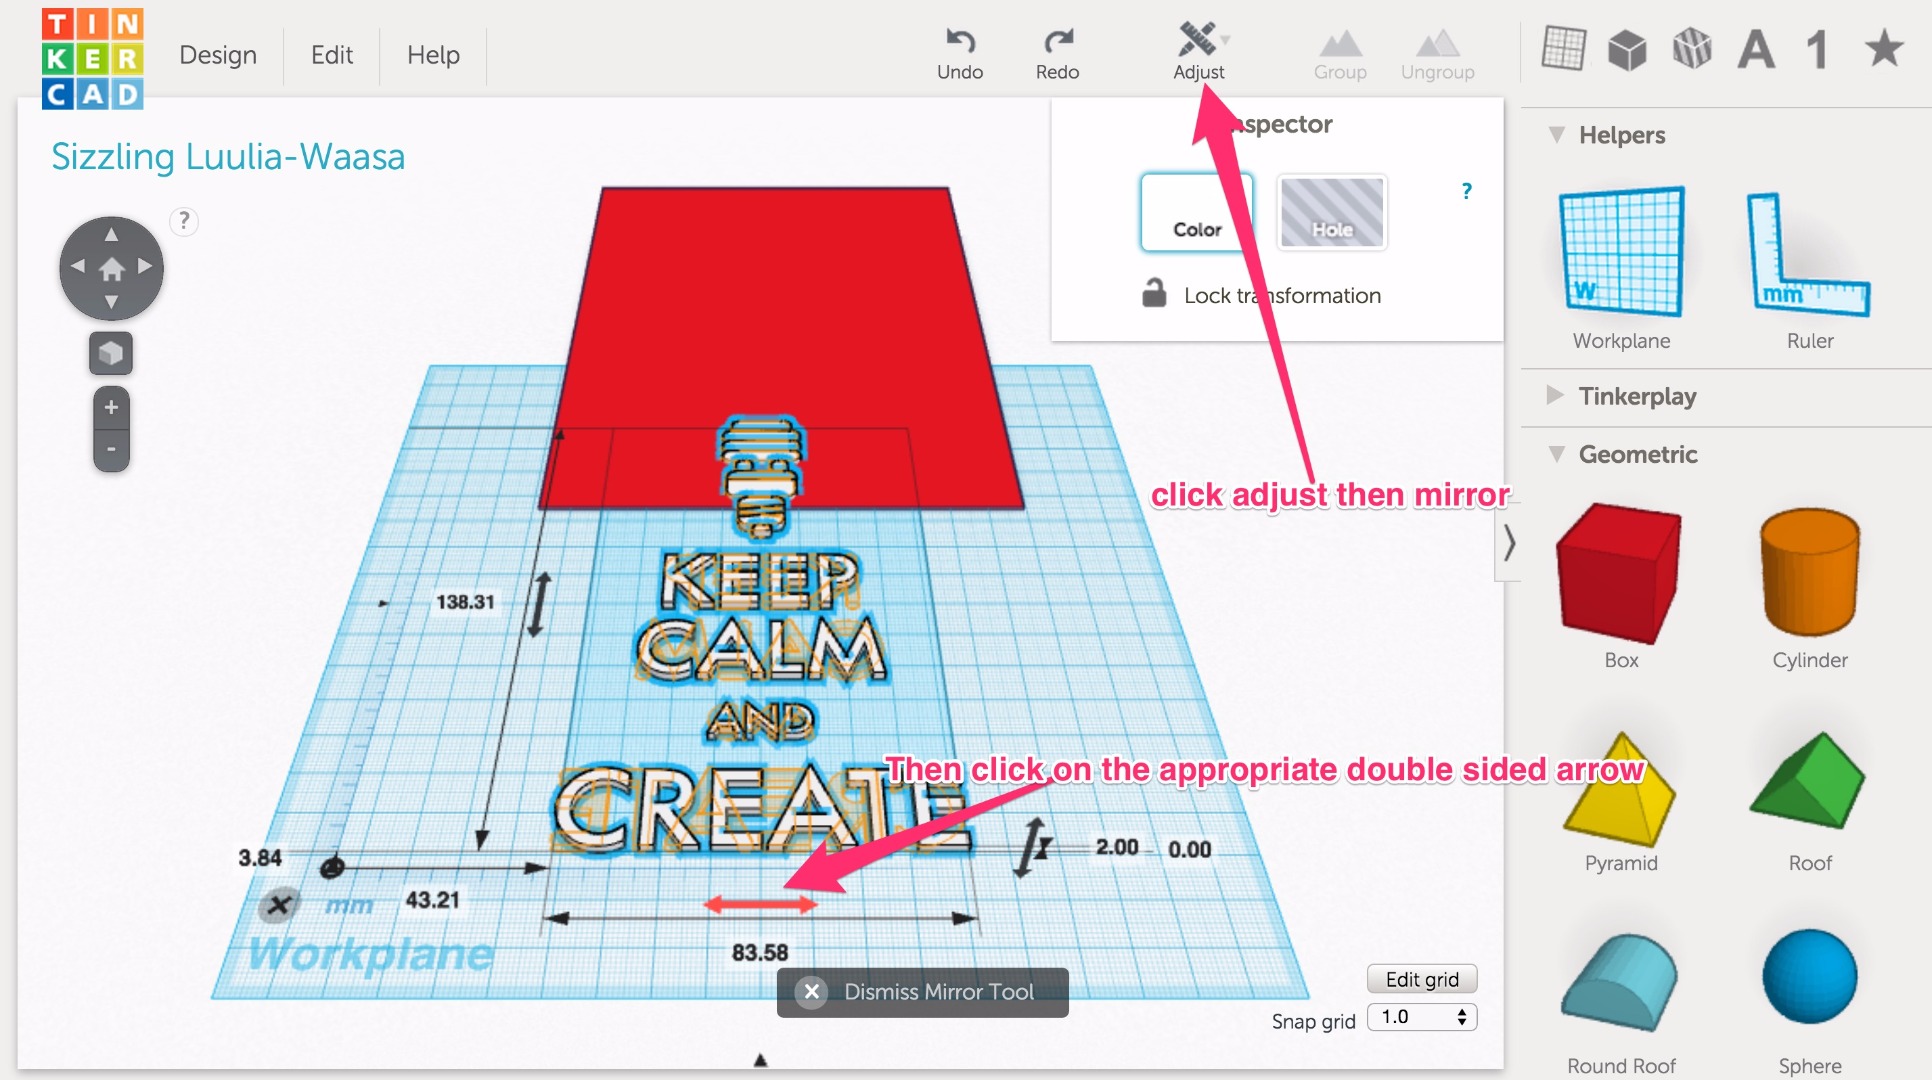
- Mirror the model if it has text. First select the model(a blue outline indicates a particular model is selected), then click Adjust, Mirror, and click on the double sided arrow on the bottom. Dismiss mirror tool.
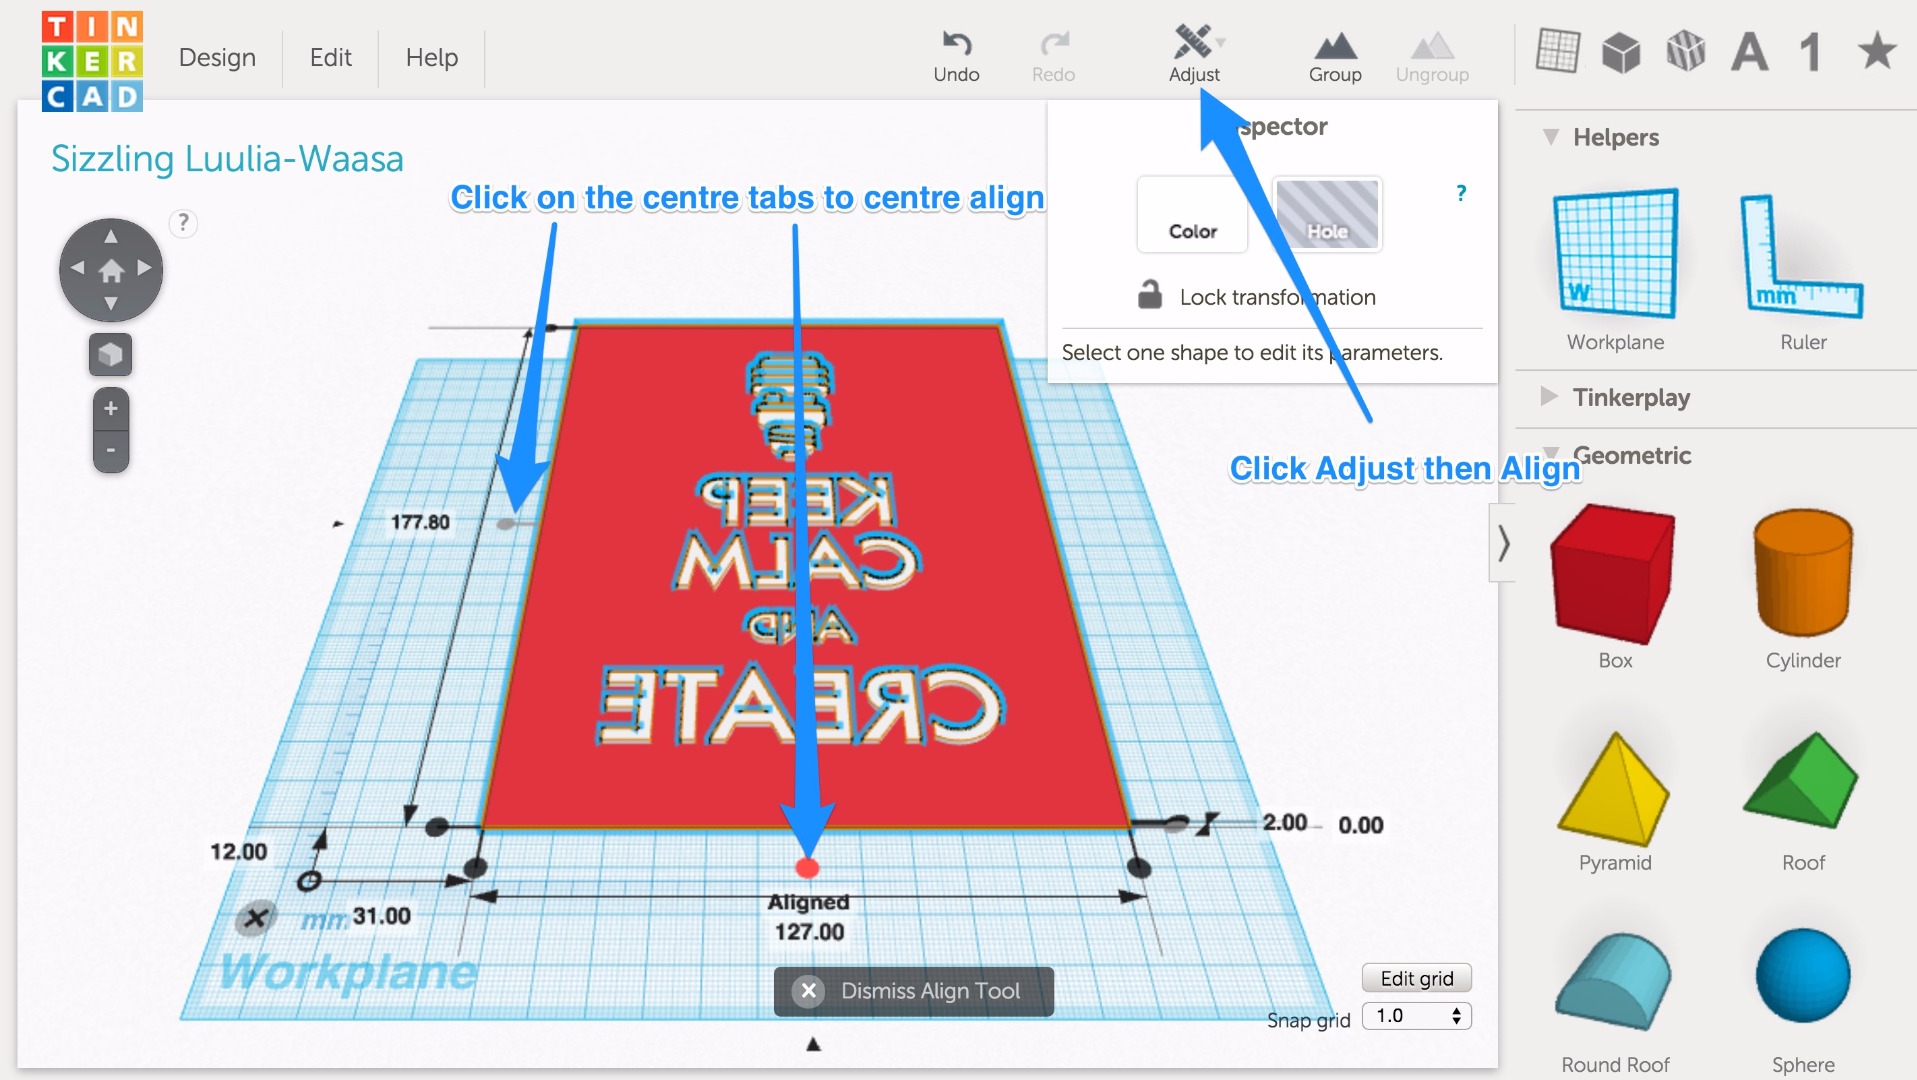
- Align the plate with the model. Both models must be selected, which can be done by clicking and dragging over both of them. Then click on Adjust then Align. Select the center tabs for the X and Y axes to center align your design with the plate. Then click Group.
- Finally click on Design then Download for 3D Printing. Choose the STL format.
The process for the LV LordeVoldemort plate is the same. I imported the L and V .SVG files in tinkercad and dragged them around until it looks like the LV logo. I then added the LordVoldemort text with tinkercad's text generator, mirrored the texts, added a plate, then aligned and grouped everything. With this method you can import any vector design you desire - sports team logos, fan art, illustrations, whatever. Just make sure the thicknesses are 2mm and .5mm and that you mirror texts. I highly recommend tinkercad's set of lessons on simple operations and scaling if what I did doesn't make sense to you. It only takes about 15 minutes.
This method of importing 2D vector designs into Tinkercad is also extremely useful for other things. You can make cookie cutters or regular stamps or an iPhone case. I won't go into it here just food for thought.
Troubleshooting:
If nothing happens when you import, make sure you converted your vector file to an outline then saved as a .SVG. Also sometimes it takes a little while for tinkercad to convert your vector to a solid so wait a minute or two.
The tinkercad import SVG algorithm works like what I like to call the "Island Principle". It means whatever is in your vector SVG file can't be a single line, it needs to be an "island". It also means that the vector can't have any duplicate strokes inside. If you successfully imported into tinkercad but there are weird jagged solids where holes are supposed to be go back to Illustrator, ungroup everything, and select and delete any duplicate outline strokes and single lines. Save as SVG and import into tinkercad again.
3D-Printing
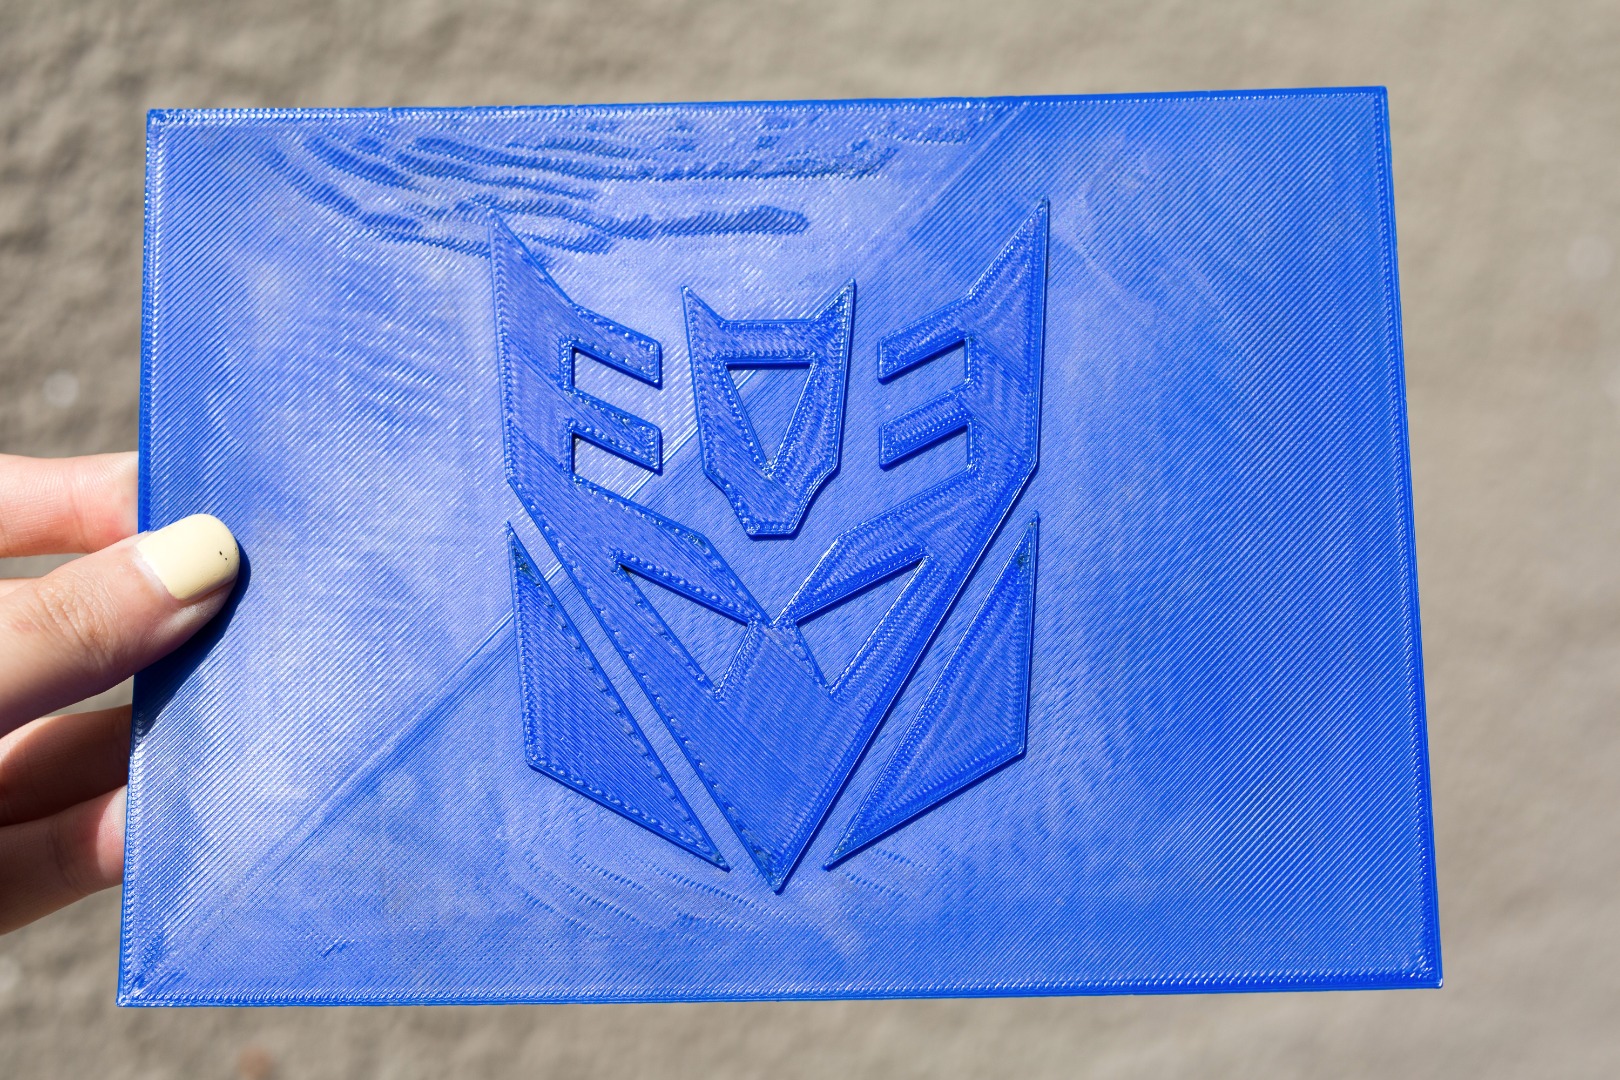
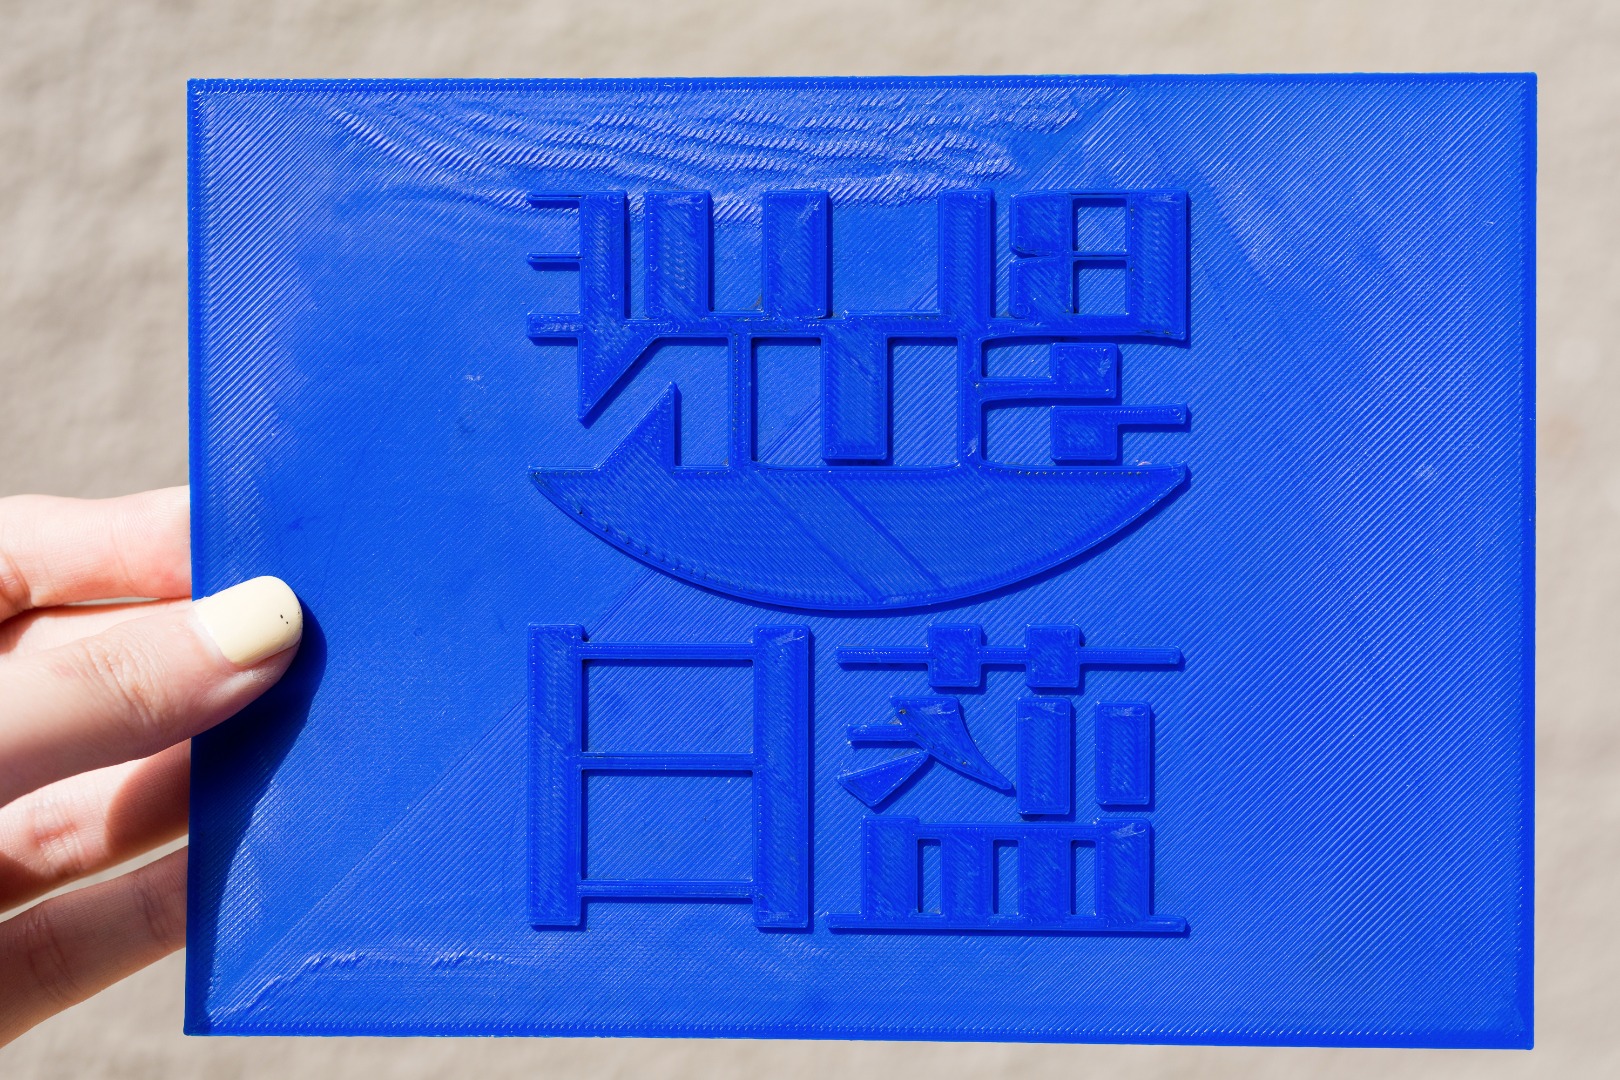
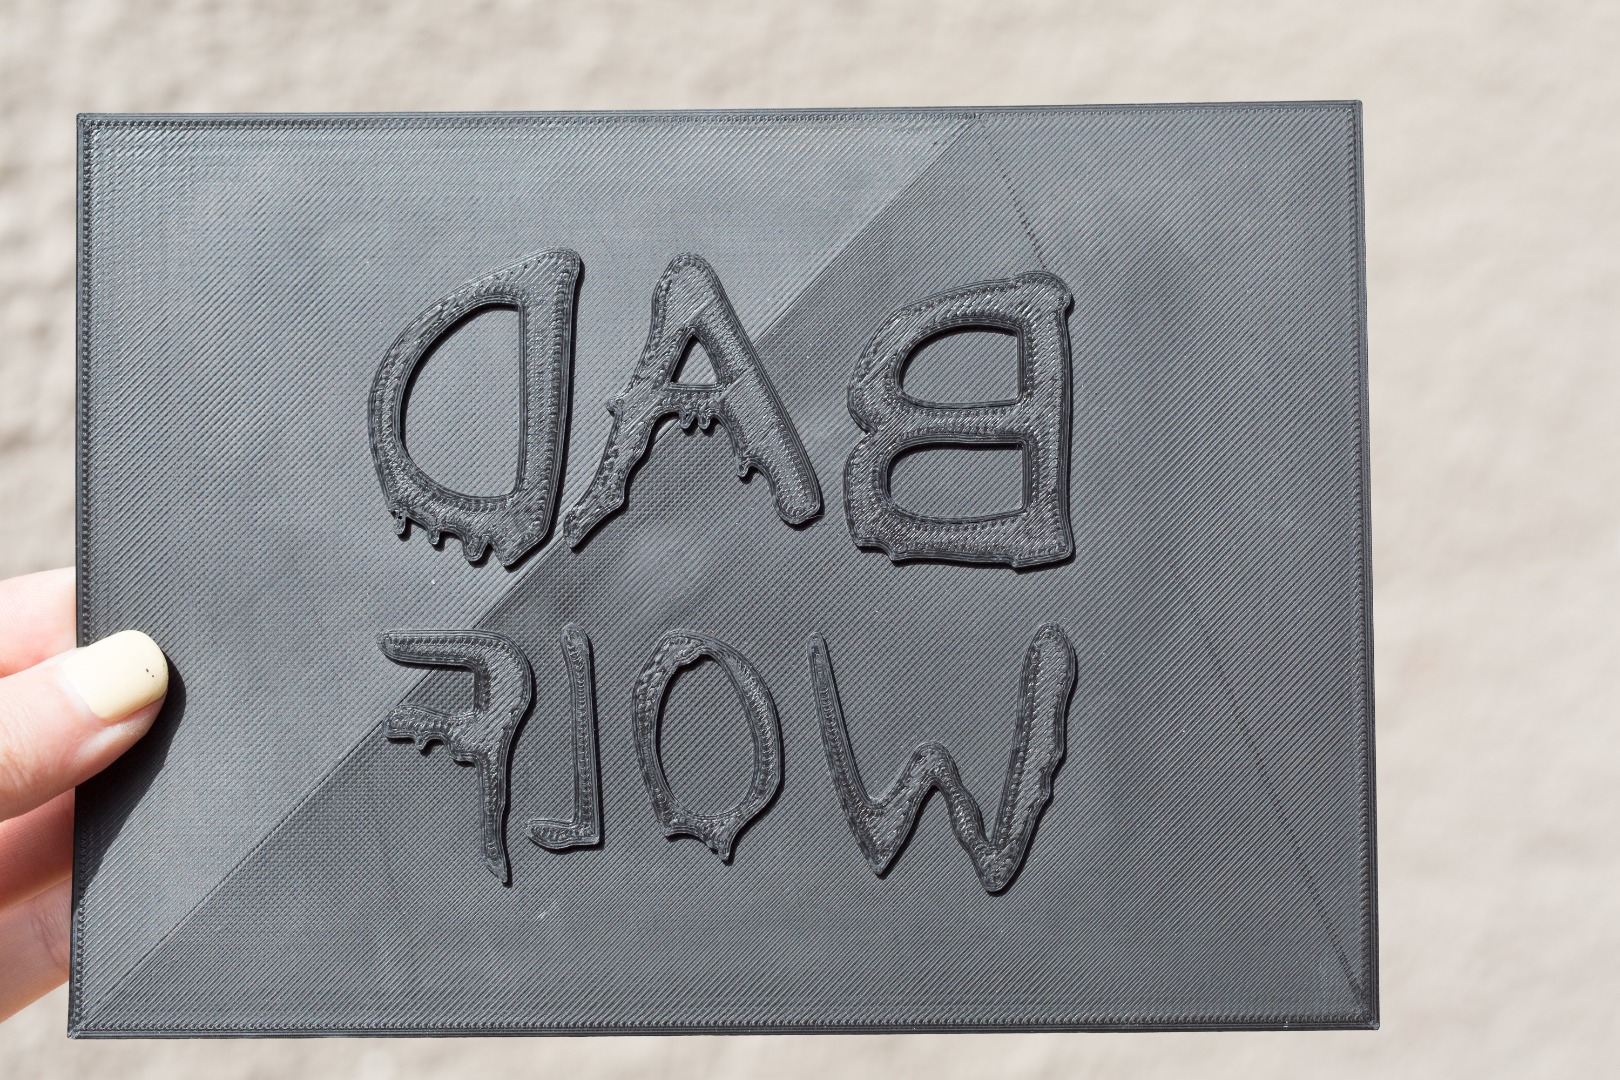
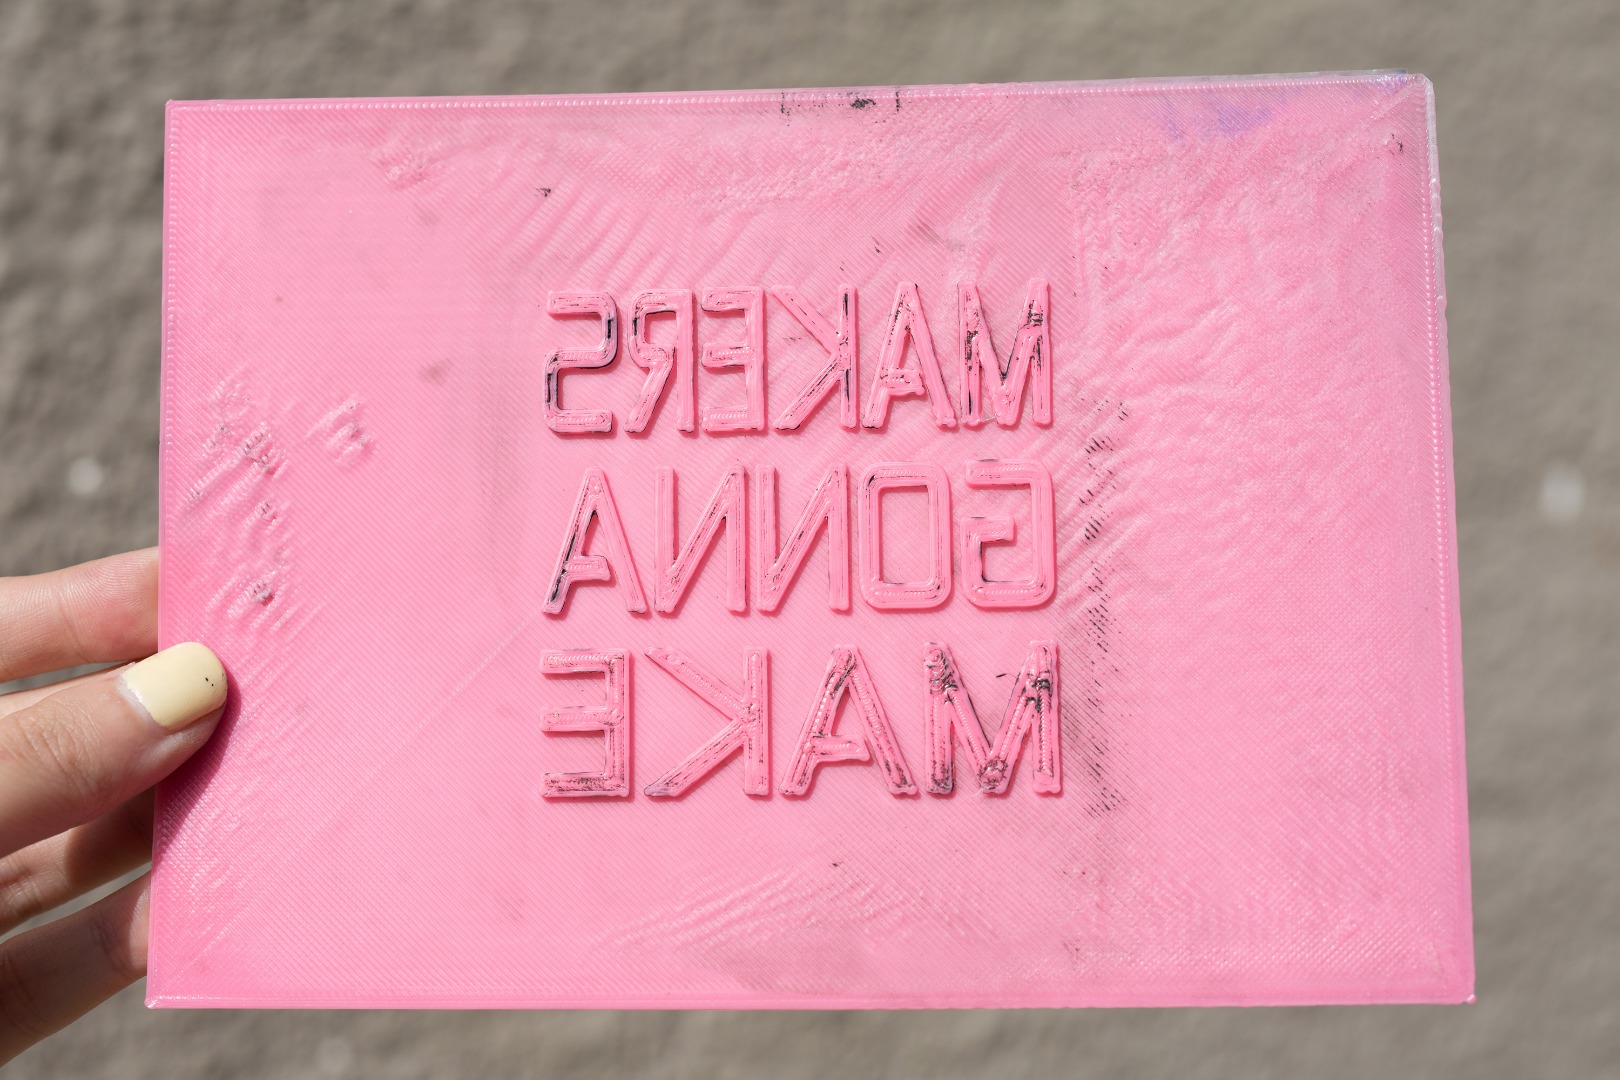
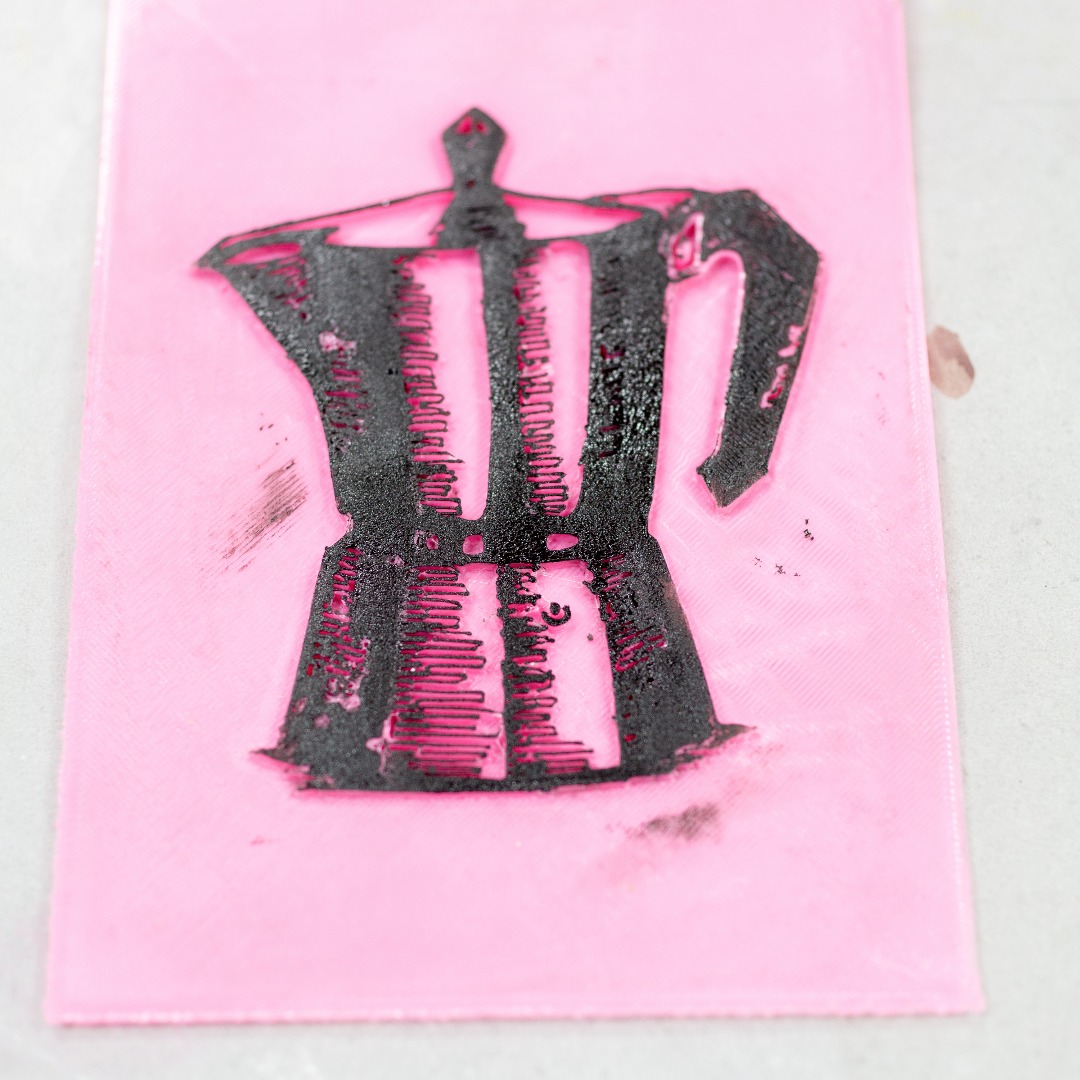
The challenge here is printing a large flat plate so make sure your bed is level. For instance, for my maker's gonna make plate the print bed wasn't perfectly level and the print quality suffered.
My slicer settings are:
- 3 shells/outlines - I increased perimeter count for part strength.
- 15% infill - you could use more.
- 0.2mm height. 0.3 is also okay.
- no raft - but raft if you must. it'll probably be annoying to peel off though.
- whatever temperature for your PLA. mine was 205C.
- I didn't mess with Makerware's default layer fan speeds which I think are 0 for the 1st layer and 100% from then on.
The plate itself is only 3 layers thick so you shouldn't encounter any edge lifting. Since they are completely solid you may need to adjust your flowrate. I have small cosmetic imperfections on my plates.
If I were to print the plates again I would NOT use black filament. I would use a light color so when the design is inked I can actually see it -_-
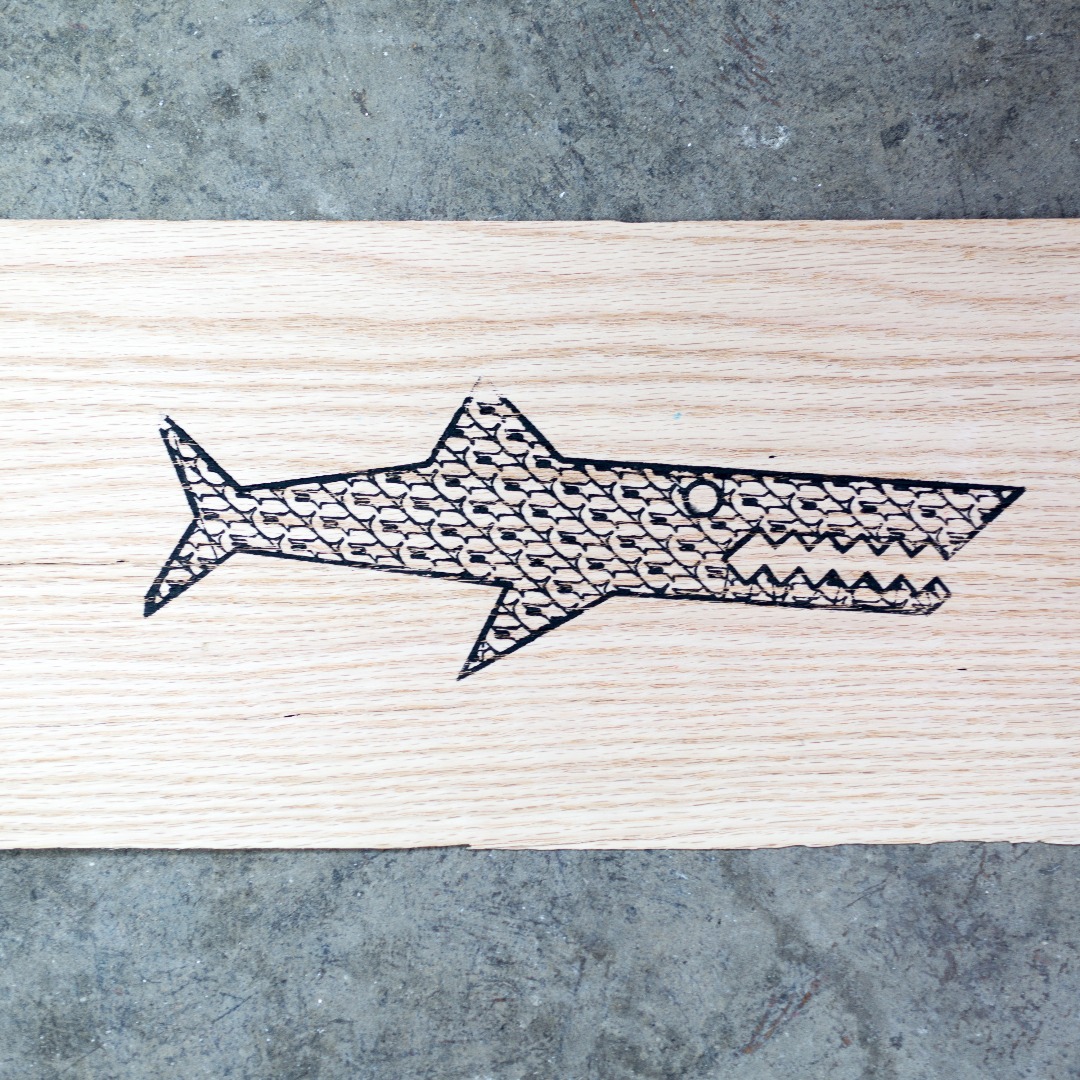
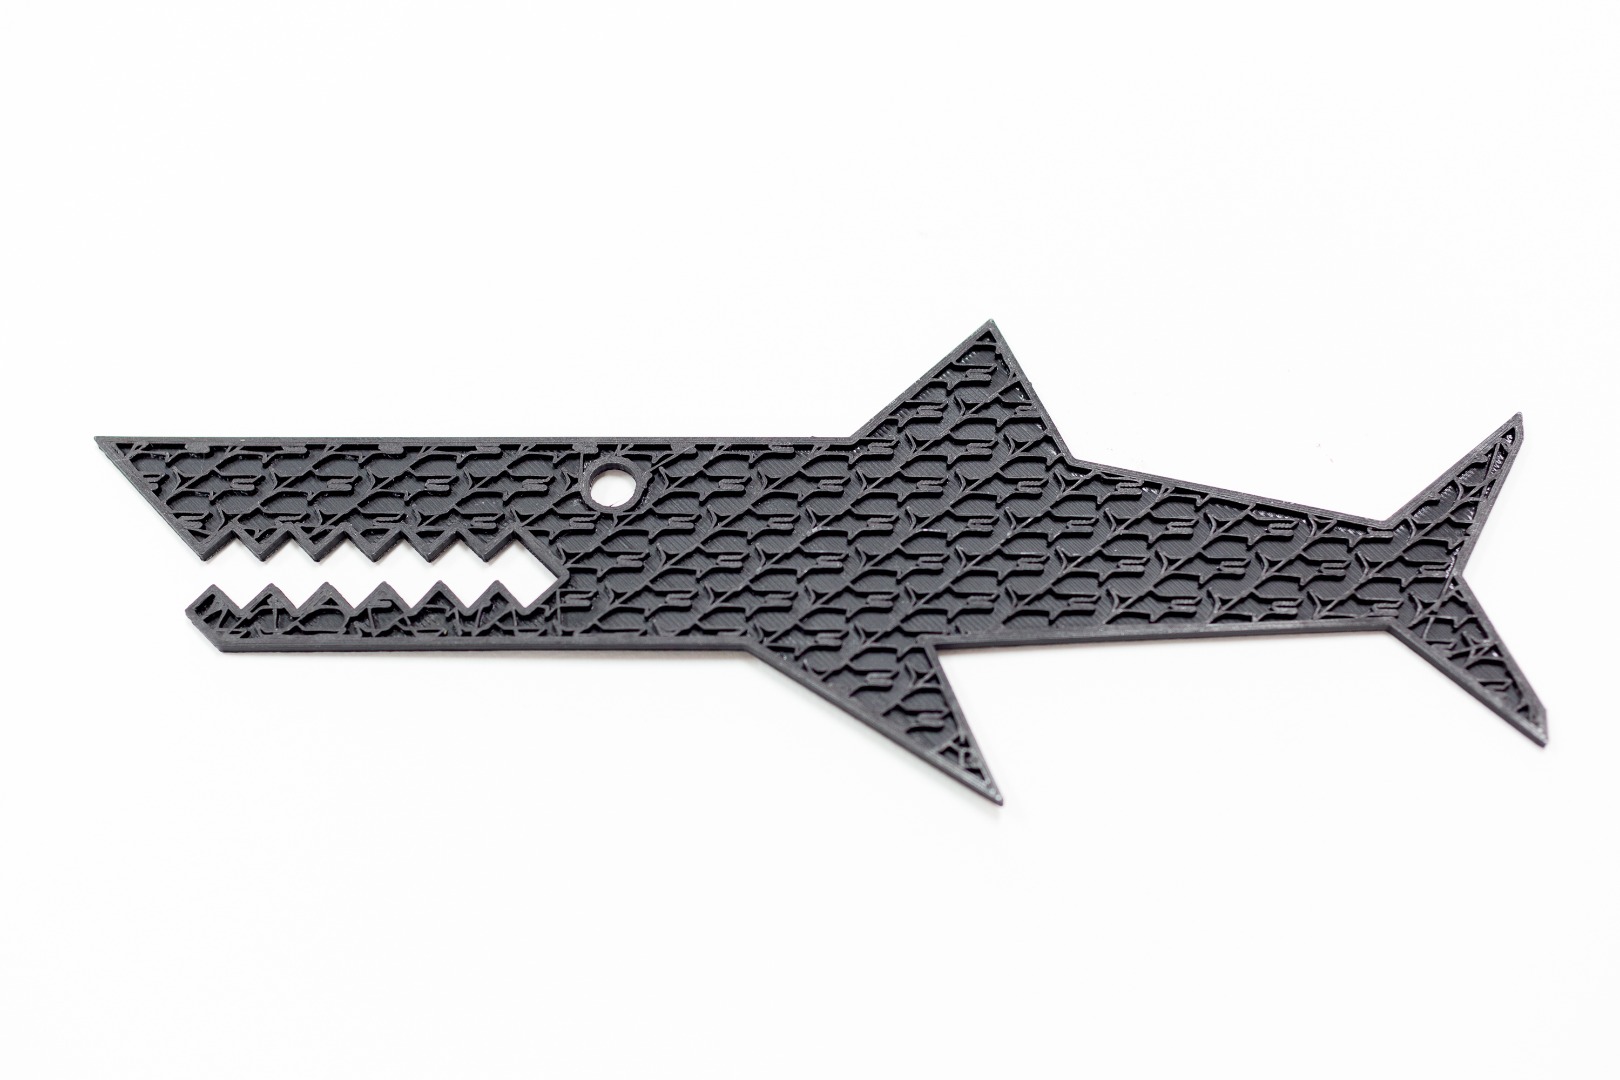
You can also choose to not print top layers for the fun infill patterns. Create a custom Makerware profile and change the “sparseInfillPattern” setting from “hexagonal” to “catfill", "moroccanstar", "linear" or "sharkfill". My LV plate has the moroccanstar infill pattern. And I printed Mr. Jaws at 2mm thickness with sharkfill. Change "roofThickness" setting to "0". In other slicers the roofThickness might be called TopSolidLayers or something similar.
2.5D Print!
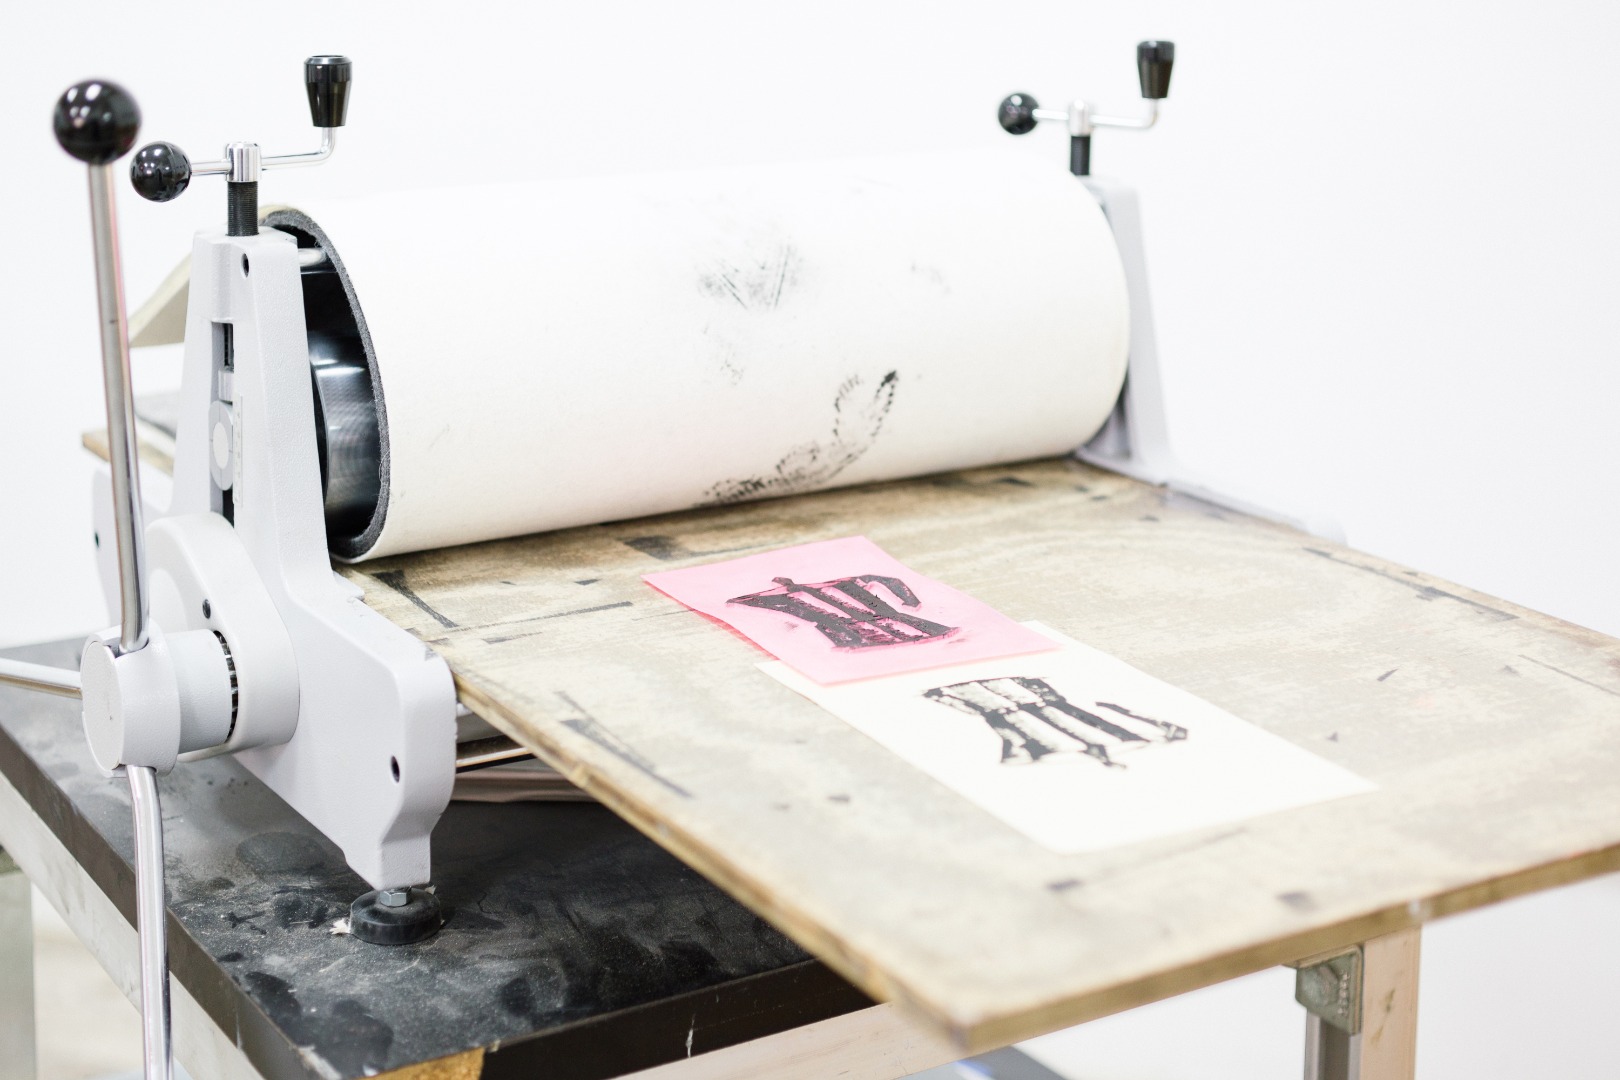
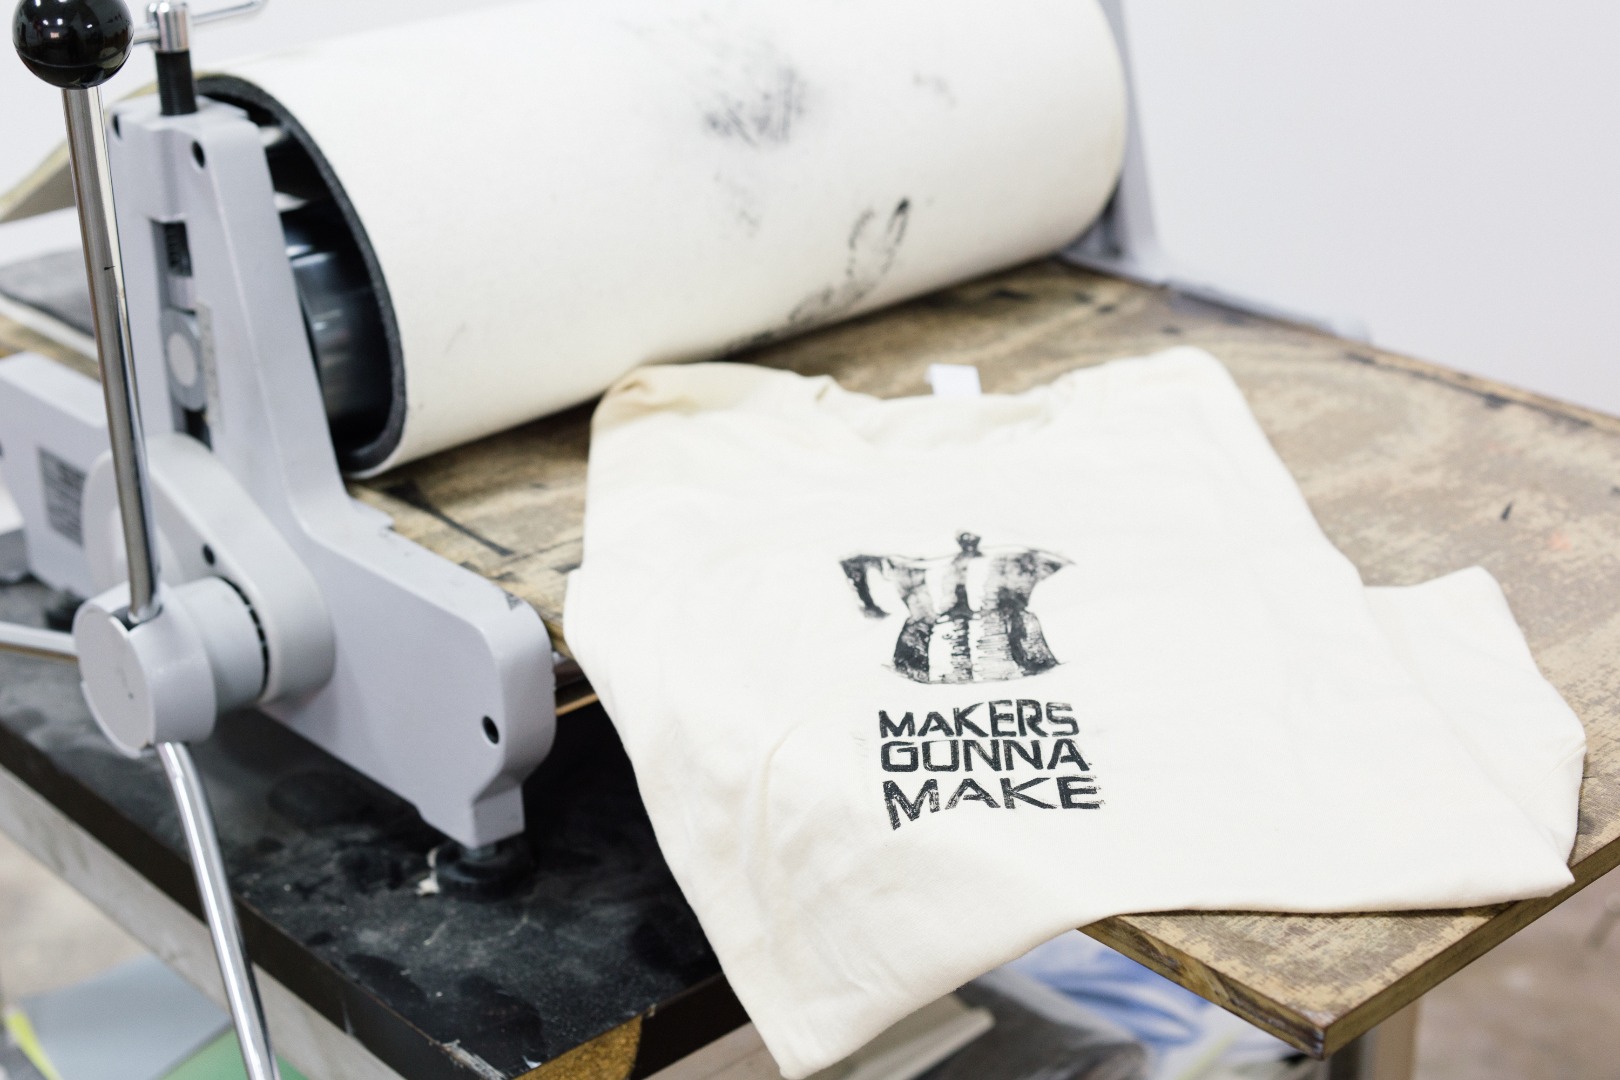
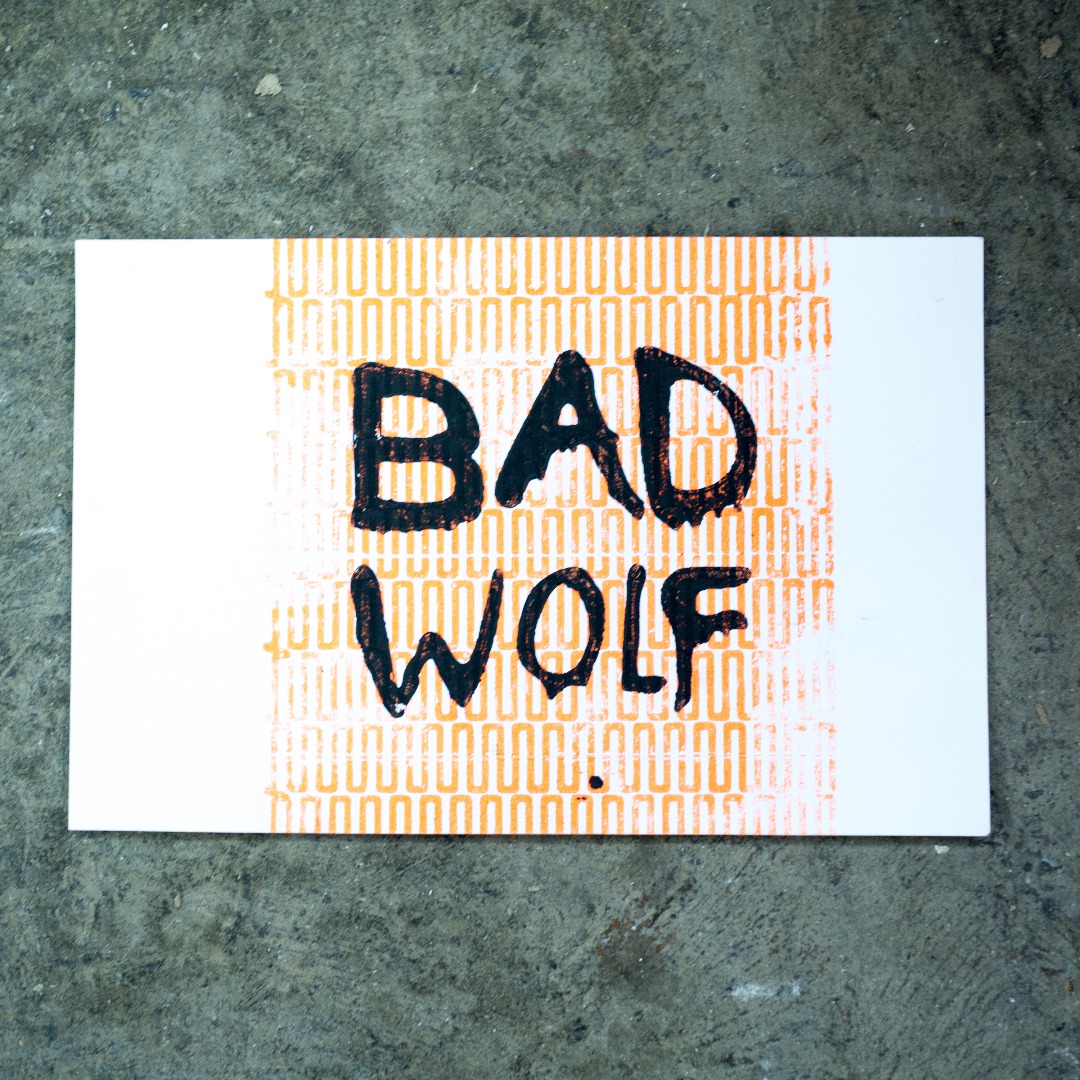
We are ready to 2.5D Print!
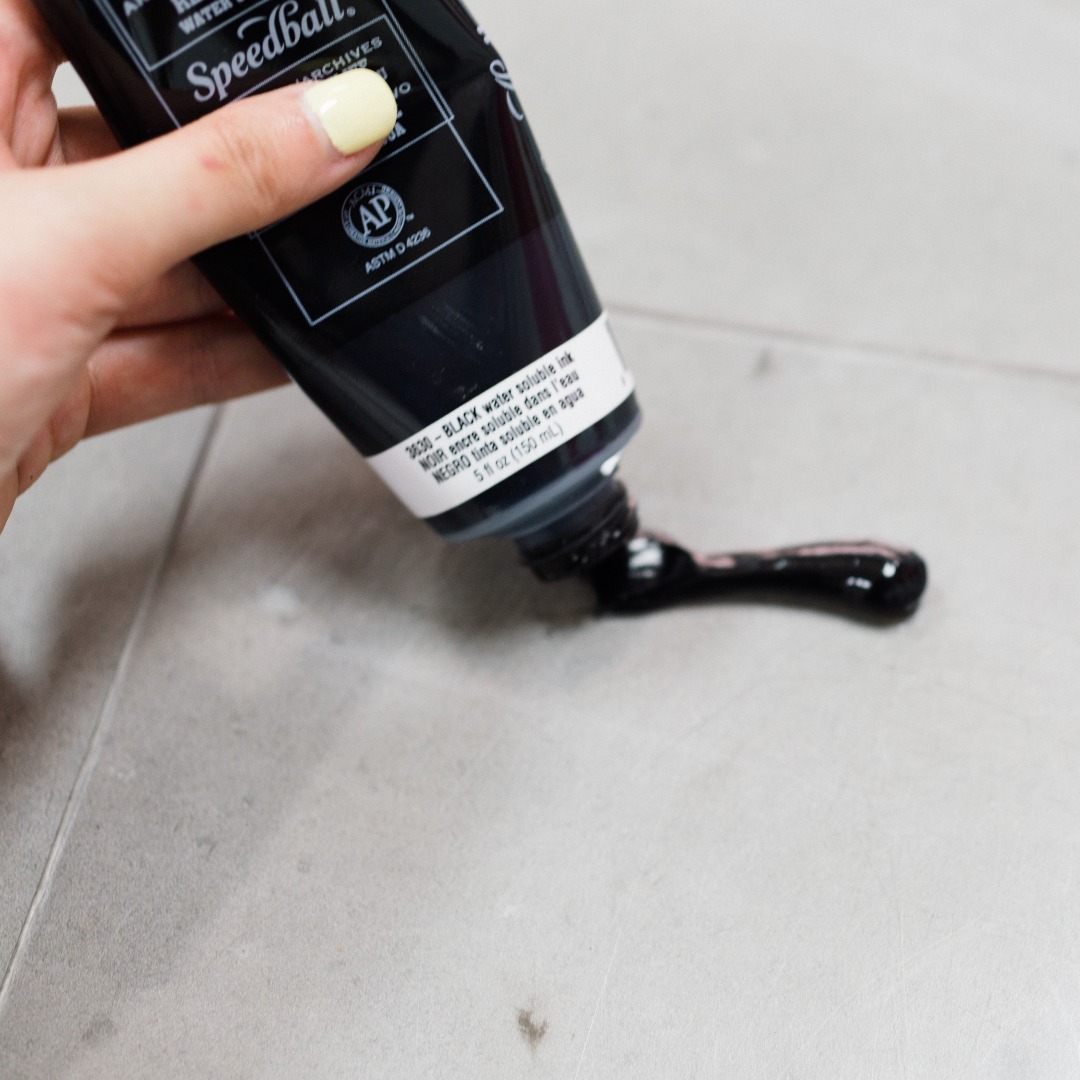
- Squeeze a line of block printing ink onto your plexiglass.
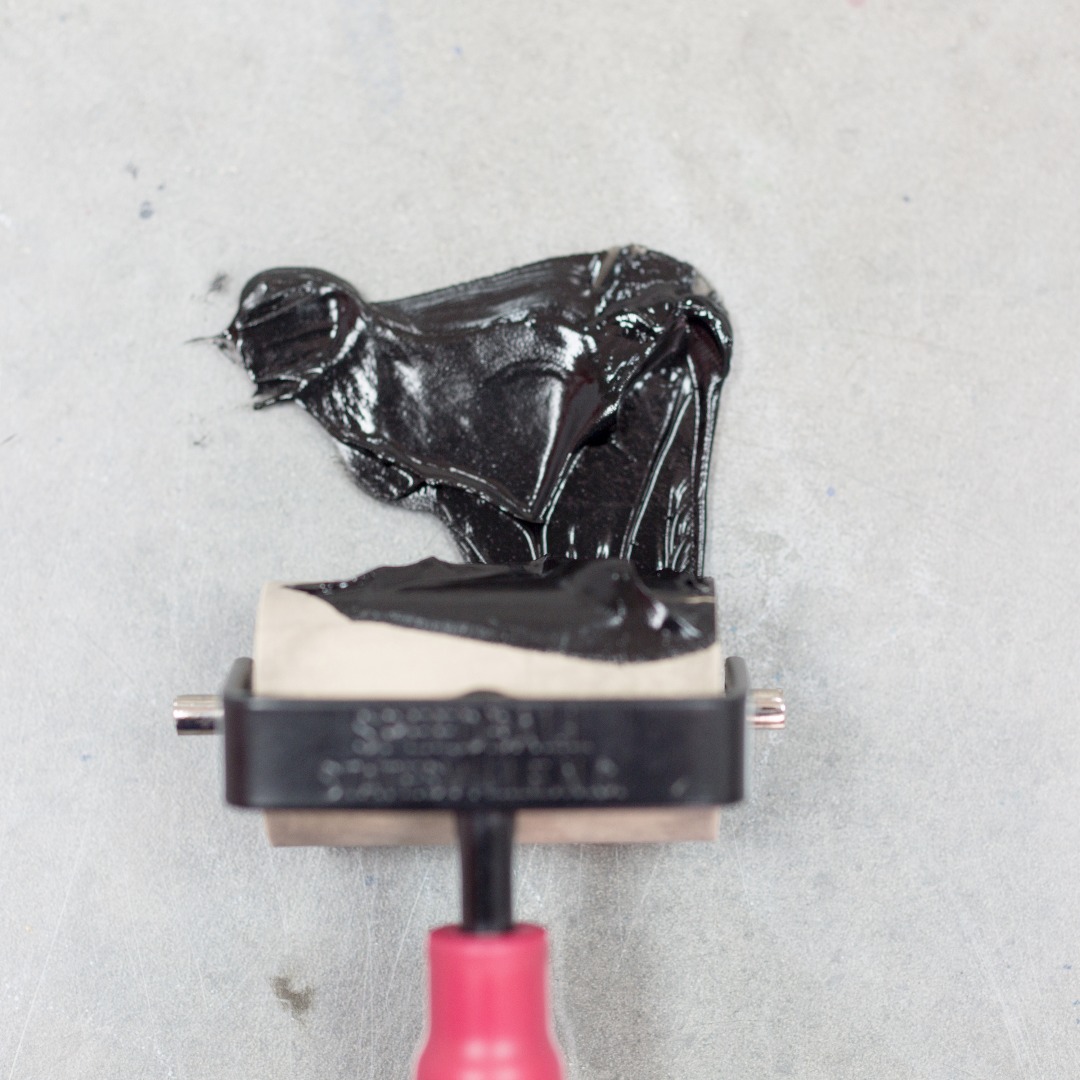
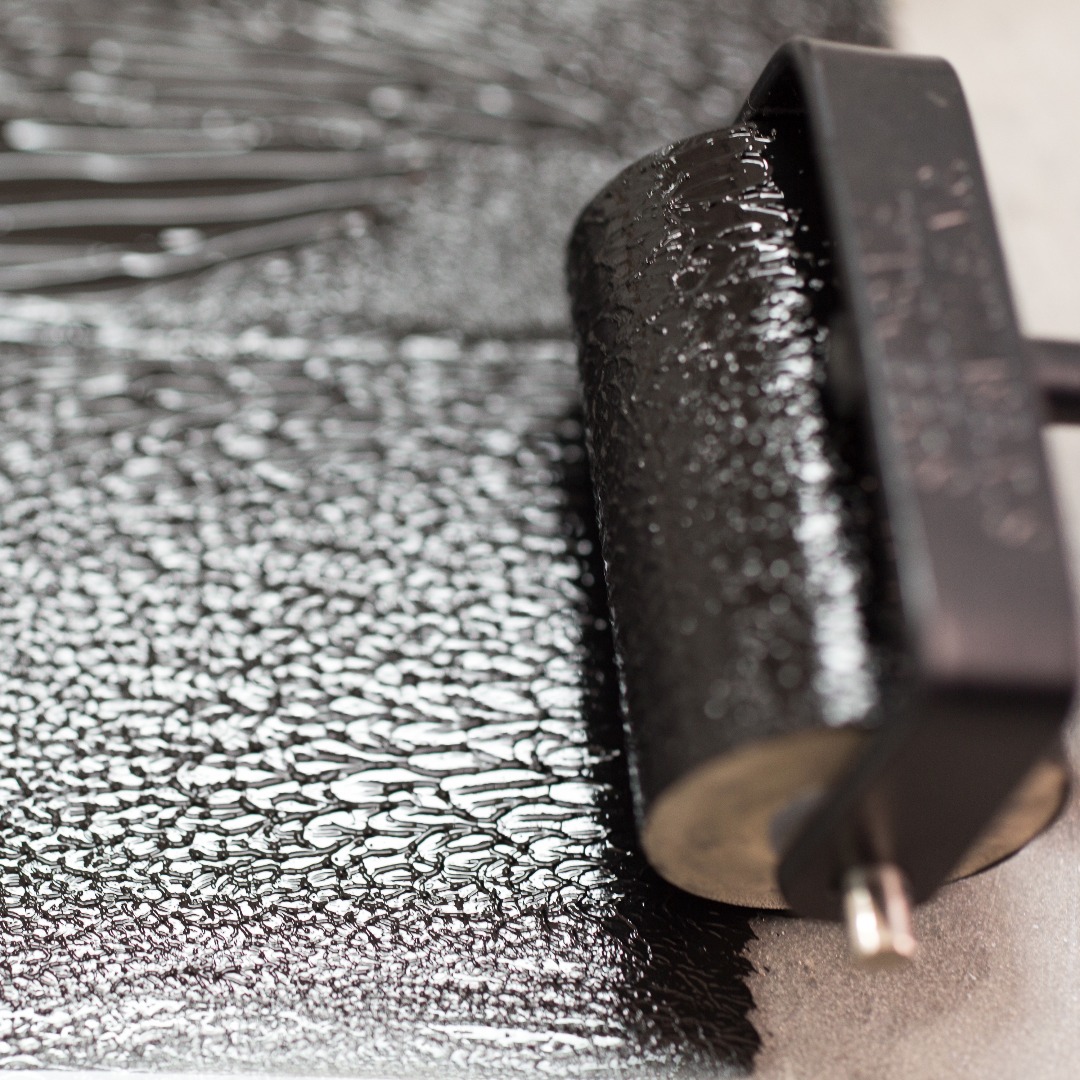
- Roll the brayer in the ink and keep rolling it up and down until the ink is tacky and small peaks form(see photo).
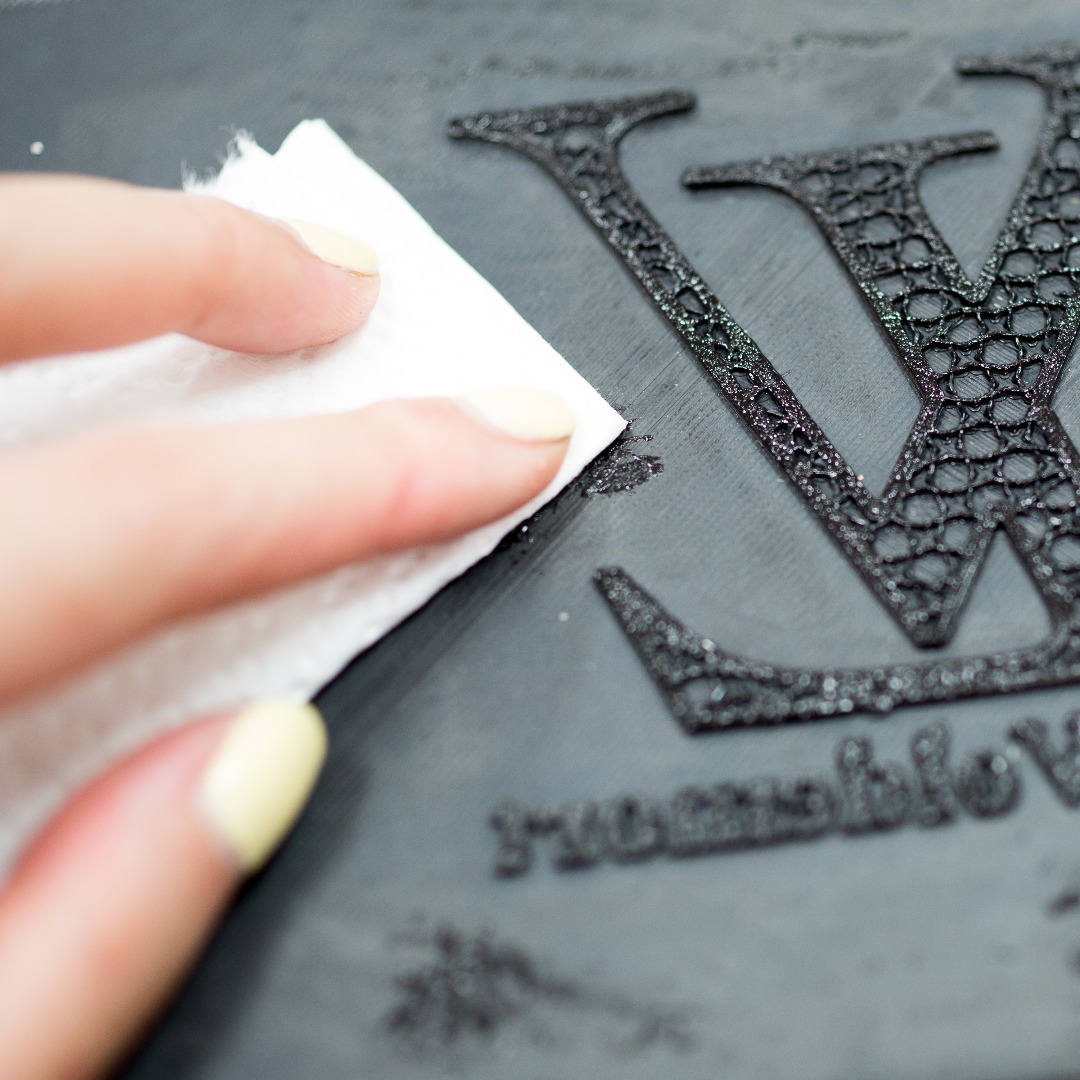
- Now roll the brayer onto your block to transfer the ink. Do not push down too hard. If you get ink where there isn't supposed to be simply rub it off with dry paper towels.
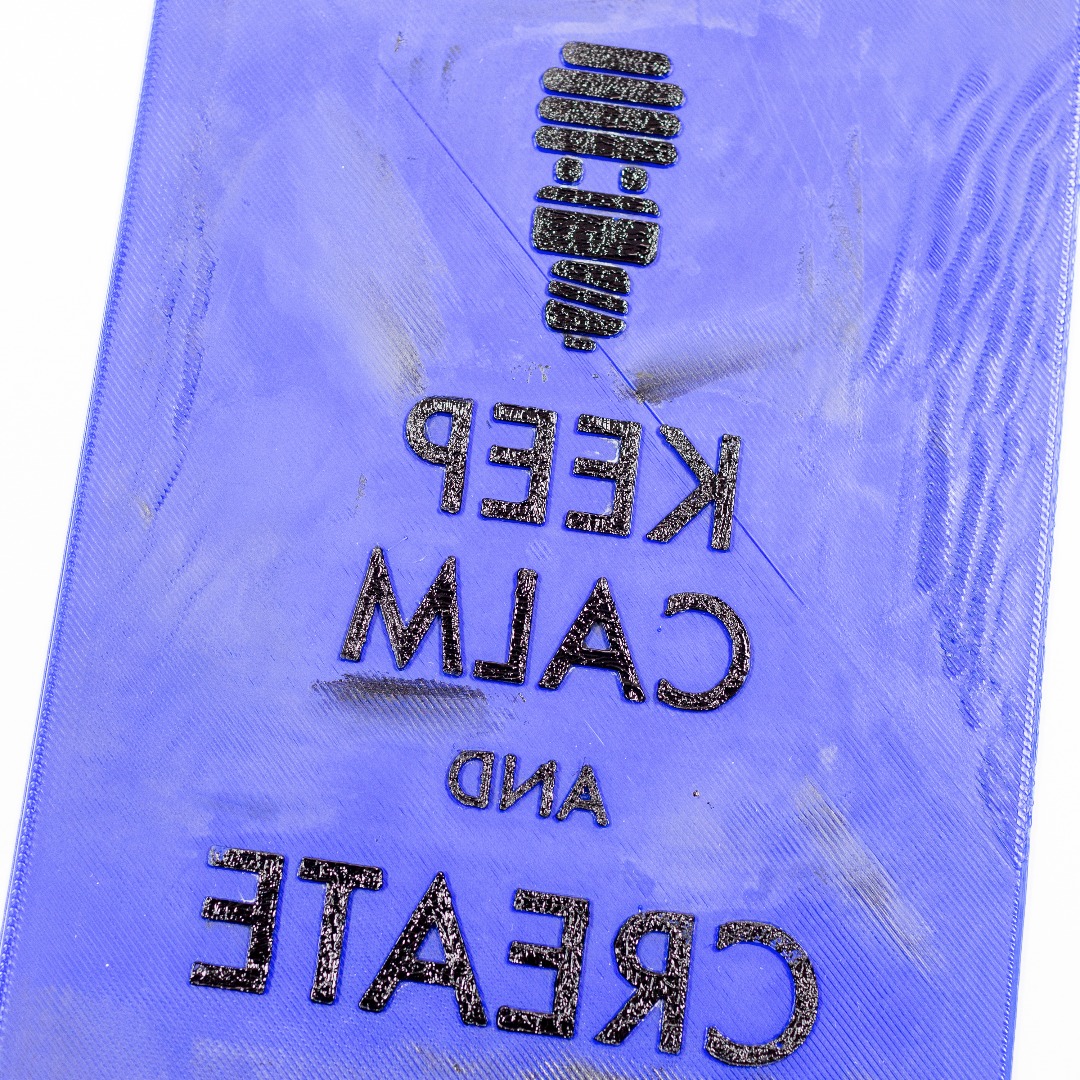
- The ink should cover all of your design and appear opaque and glossy. See the Keep Calm and Create Plate for an example.
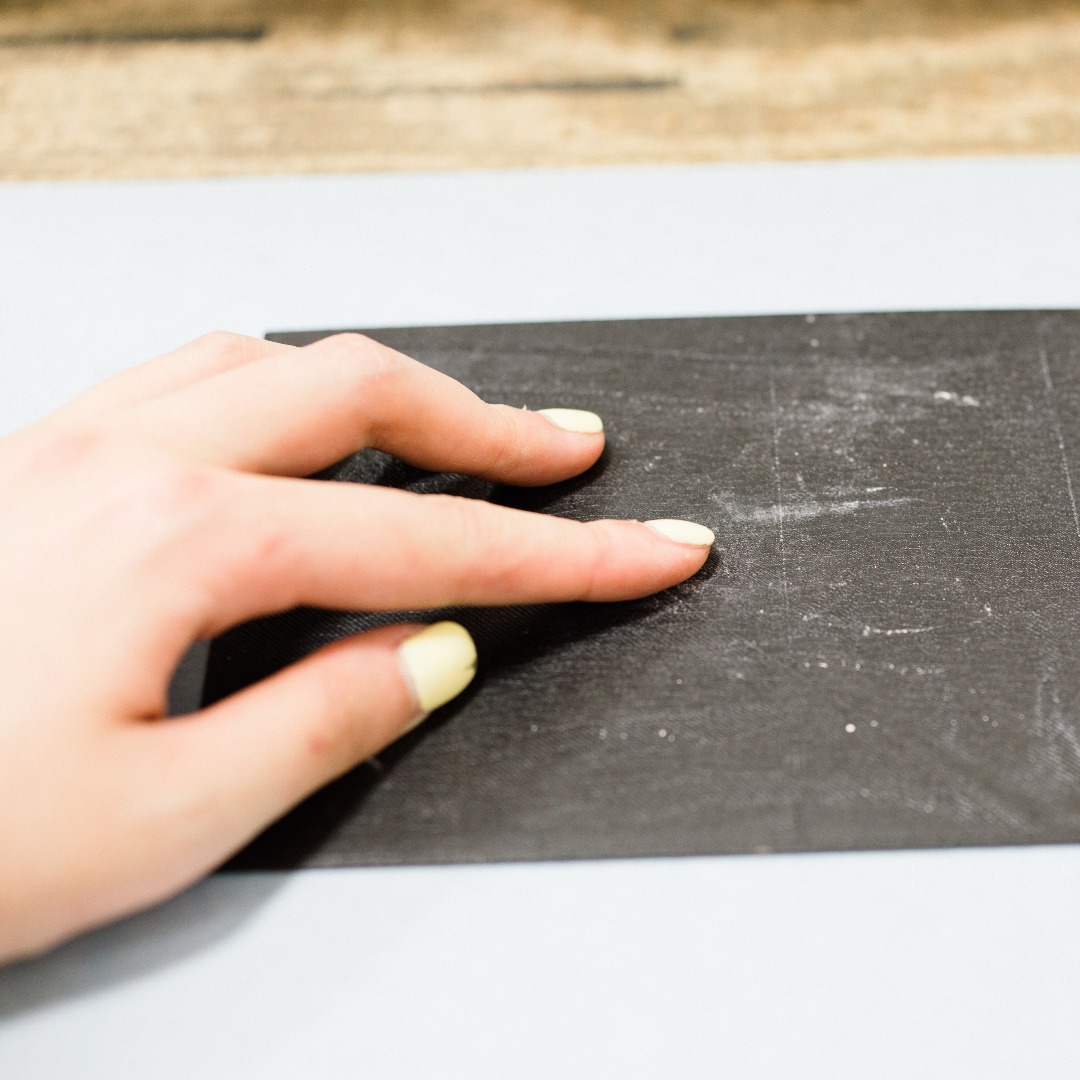
- Carefully align your printing block onto your paper.
- Run the press! I set the Blick at 19 height. If you use a different press adjust the pressure accordingly.
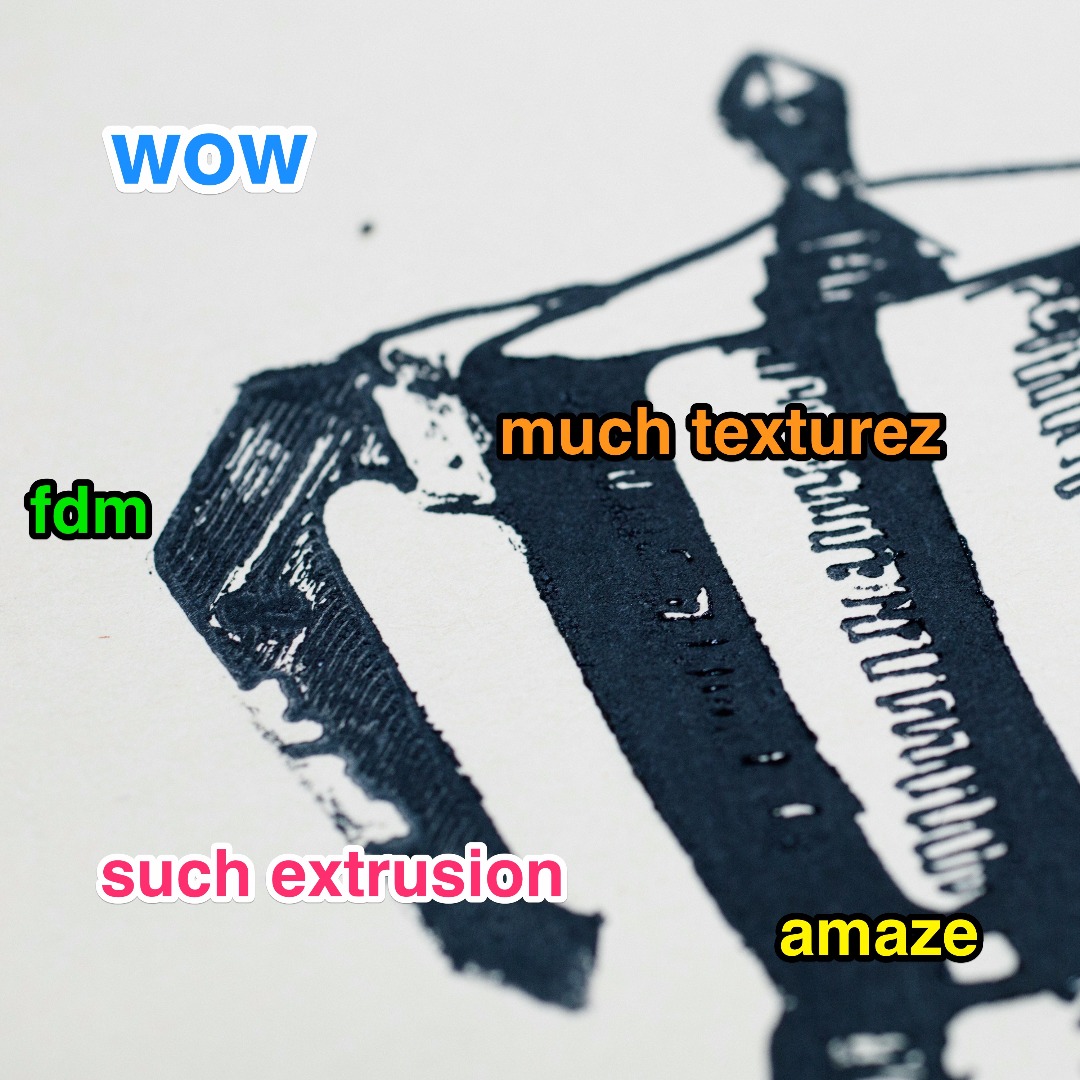
- Peel off your plate and voila! Unique piece of art. In all seriousness though each print is slightly different and the FDM extrusion line patterns are really cool.
- You can either repeat the process for more prints or rinse ink off with water to clean. The blocks are reusable.
For fabrics:
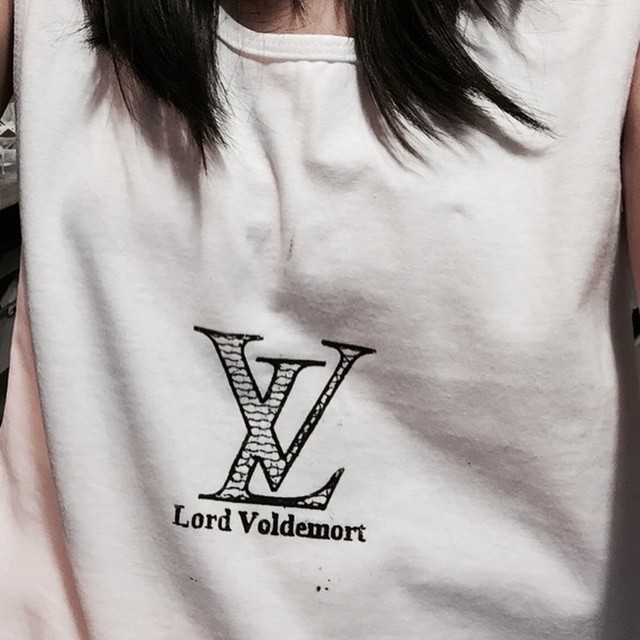
- The process is the same but I find that oil based inks are harder to work with. The oil based ink also dries faster so keep that in mind while working. I have to use a brayer in conjunction with a small paintbrush in order to transfer the ink to highly detailed areas.
- also make sure to put a piece of scrap paper inside your shirt before you print. The ink can go through both front and back.
You can also combine multiple plates for a more complicated design. And save the rafts from your prints! It's the pattern in the Bad Wolf print.
So what will you 2.5D block print? So far I've used this technique for business cards, envelopes, holiday cards, t-shirts, and fan art prints.
Do share your tips, questions, constructive criticisms, etc.